|
|

|
Porsche, and the Porsche crest are registered trademarks of Dr. Ing. h.c. F. Porsche AG.
This site is not affiliated with Porsche in any way. Its only purpose is to provide an online forum for car enthusiasts. All other trademarks are property of their respective owners. |
|
|
  |
| Puebloswatcop |
 Mar 16 2021, 07:50 AM Mar 16 2021, 07:50 AM
Post
#2441
|
|
Senior Member    Group: Members Posts: 1,403 Joined: 27-December 14 From: Mineola, Texas Member No.: 18,258 Region Association: Southwest Region |
Now I know I am getting old. I got tired of climbing into the frunk for better access, so I got out my ladder. Love those t-shirt fender guards (IMG:style_emoticons/default/biggrin.gif) |
| barefoot |
 Mar 16 2021, 08:07 AM Mar 16 2021, 08:07 AM
Post
#2442
|
|
Senior Member    Group: Members Posts: 1,327 Joined: 19-March 13 From: Charleston SC Member No.: 15,673 Region Association: South East States 
|
|
| iankarr |
 Mar 16 2021, 08:27 AM Mar 16 2021, 08:27 AM
Post
#2443
|
|
The wrencher formerly known as Cuddy_K     Group: Members Posts: 2,522 Joined: 22-May 15 From: Heber City, UT Member No.: 18,749 Region Association: Intermountain Region 
|
Nice work, as always! Your airbox method is similar to mine...only I used rubber bands and squeeze clamps instead of zip ties and a 2 x 4. The knowledge you're sharing in your build thread is fantastic.
https://www.youtube.com/watch?v=Uhs6pedBOXM |
| bkrantz |
 Mar 16 2021, 07:24 PM Mar 16 2021, 07:24 PM
Post
#2444
|
|
914 Guru      Group: Members Posts: 8,154 Joined: 3-August 19 From: SW Colorado Member No.: 23,343 Region Association: Rocky Mountains 
|
Had to chuckle a bit when I saw the step ladder. Thank goodness I've got long arms and did this all while leaning over the fenders. Ha Yeah, that 2 by 4 brought back some memories. And the dreaded screen on the top of the airbox. Now if you just don't have to remove the airbox 2 more times like I did for various stupid reasons. Looking good there Bob. And for one of the extra holes in the dash....might I suggest a rear fog light. (IMG:style_emoticons/default/wink.gif) For the other, you could add one of those slick dual USB charging ports. My arms are pretty long, but with the car still up on the dolly, I needed to stand in the frunk for leverage. I fought with the box for a good ten minutes before I got the 2x4. I don't want to hear about removing the damned thing. And we think alike about more switches. I tracked down a rear fog light switch and a rear window defrost switch on Ebay. As for USB ports, I have a different plan. |
| bkrantz |
 Mar 16 2021, 07:25 PM Mar 16 2021, 07:25 PM
Post
#2445
|
|
914 Guru      Group: Members Posts: 8,154 Joined: 3-August 19 From: SW Colorado Member No.: 23,343 Region Association: Rocky Mountains 
|
Now I know I am getting old. I got tired of climbing into the frunk for better access, so I got out my ladder. Love those t-shirt fender guards (IMG:style_emoticons/default/biggrin.gif) The shirts are a bonus from my powder coat shop. They use them to wrap the parts after coating. |
| bkrantz |
 Mar 16 2021, 07:26 PM Mar 16 2021, 07:26 PM
Post
#2446
|
|
914 Guru      Group: Members Posts: 8,154 Joined: 3-August 19 From: SW Colorado Member No.: 23,343 Region Association: Rocky Mountains 
|
Do you have a link for where to buy one of these? That looks ideal to fix 2 issues I'm having. Voltage display and USB charging. Got mine on Amazon I'd deleted the cigar lighter Barefoot No lighter? Then where to plug in the period accessories? |
| bkrantz |
 Mar 16 2021, 07:28 PM Mar 16 2021, 07:28 PM
Post
#2447
|
|
914 Guru      Group: Members Posts: 8,154 Joined: 3-August 19 From: SW Colorado Member No.: 23,343 Region Association: Rocky Mountains 
|
Nice work, as always! Your airbox method is similar to mine...only I used rubber bands and squeeze clamps instead of zip ties and a 2 x 4. The knowledge you're sharing in your build thread is fantastic. https://www.youtube.com/watch?v=Uhs6pedBOXM Thanks, Ian. I did watch your video and the clamps wound have been next. I was a bit worried about pressing against the cowl, so tried the 2x4 first. |
| bkrantz |
 Mar 16 2021, 07:31 PM Mar 16 2021, 07:31 PM
Post
#2448
|
|
914 Guru      Group: Members Posts: 8,154 Joined: 3-August 19 From: SW Colorado Member No.: 23,343 Region Association: Rocky Mountains 
|
Trying to get the air system finished up. Here is the left control box, with the cables from the control panel connected. I did an initial adjustment to make sure the baffles went from full open to full closed as the control left went left-right.
Attached thumbnail(s) 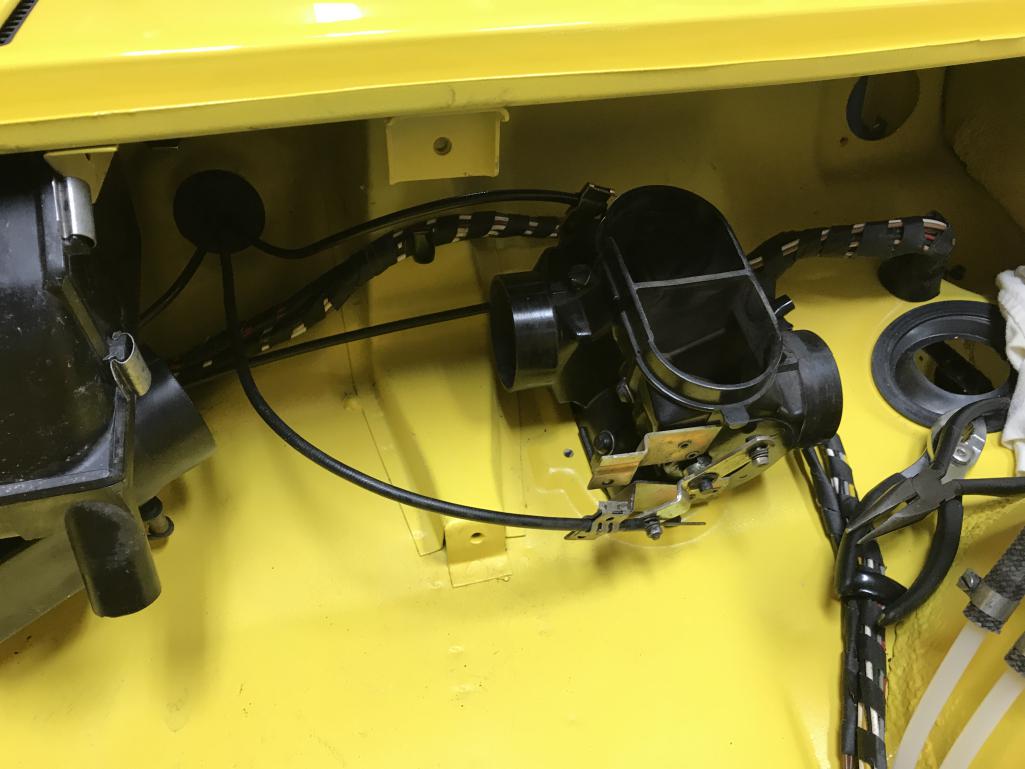
|
| bkrantz |
 Mar 16 2021, 07:32 PM Mar 16 2021, 07:32 PM
Post
#2449
|
|
914 Guru      Group: Members Posts: 8,154 Joined: 3-August 19 From: SW Colorado Member No.: 23,343 Region Association: Rocky Mountains 
|
I got out the new gaskets for the defroster vents.
Attached thumbnail(s) 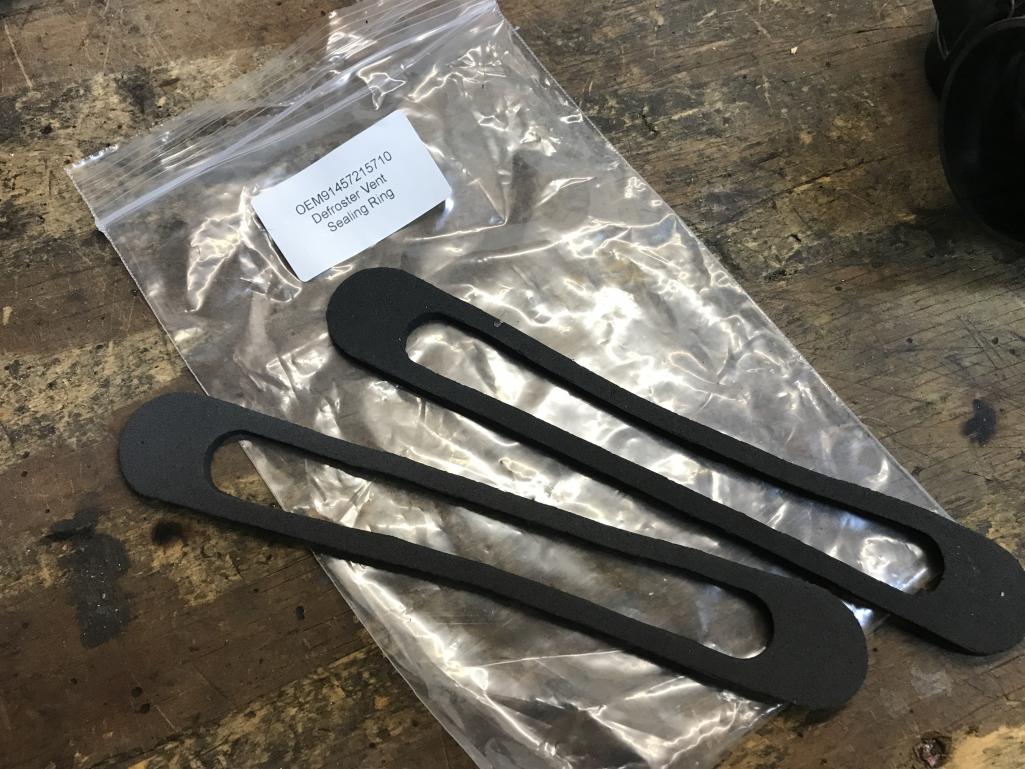
|
| bkrantz |
 Mar 16 2021, 07:33 PM Mar 16 2021, 07:33 PM
Post
#2450
|
|
914 Guru      Group: Members Posts: 8,154 Joined: 3-August 19 From: SW Colorado Member No.: 23,343 Region Association: Rocky Mountains 
|
Then attached the left side vent.
Attached thumbnail(s) 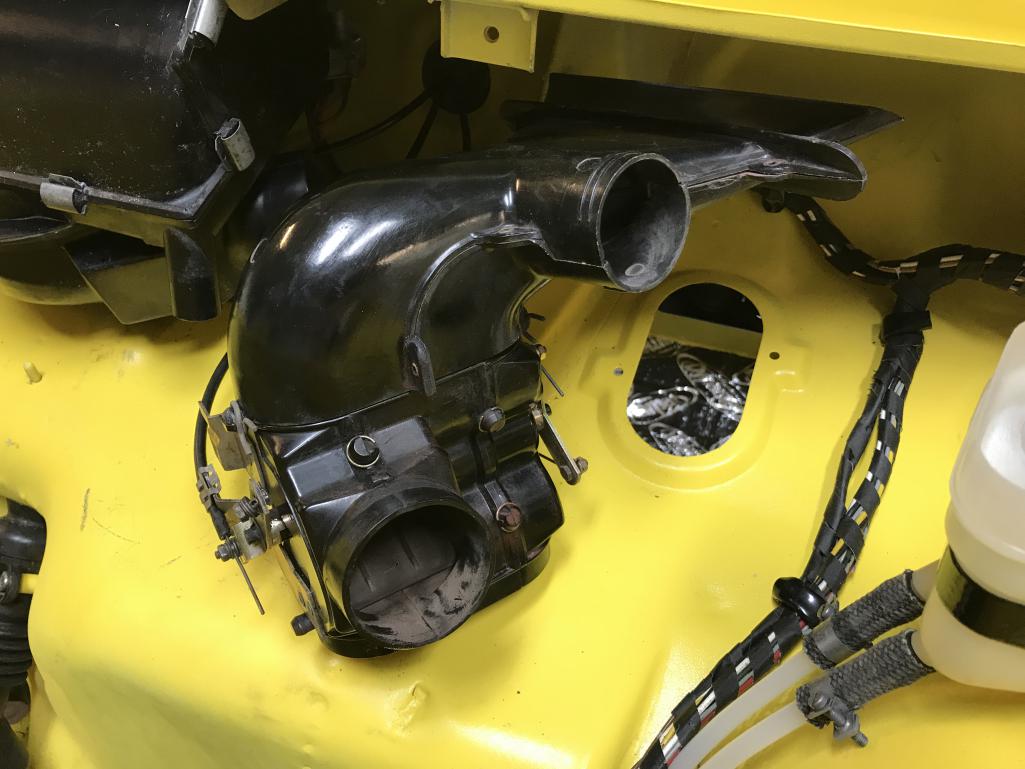
|
| bkrantz |
 Mar 16 2021, 07:34 PM Mar 16 2021, 07:34 PM
Post
#2451
|
|
914 Guru      Group: Members Posts: 8,154 Joined: 3-August 19 From: SW Colorado Member No.: 23,343 Region Association: Rocky Mountains 
|
And worked the control box plus vent into place. Another tight fit.
Attached thumbnail(s) 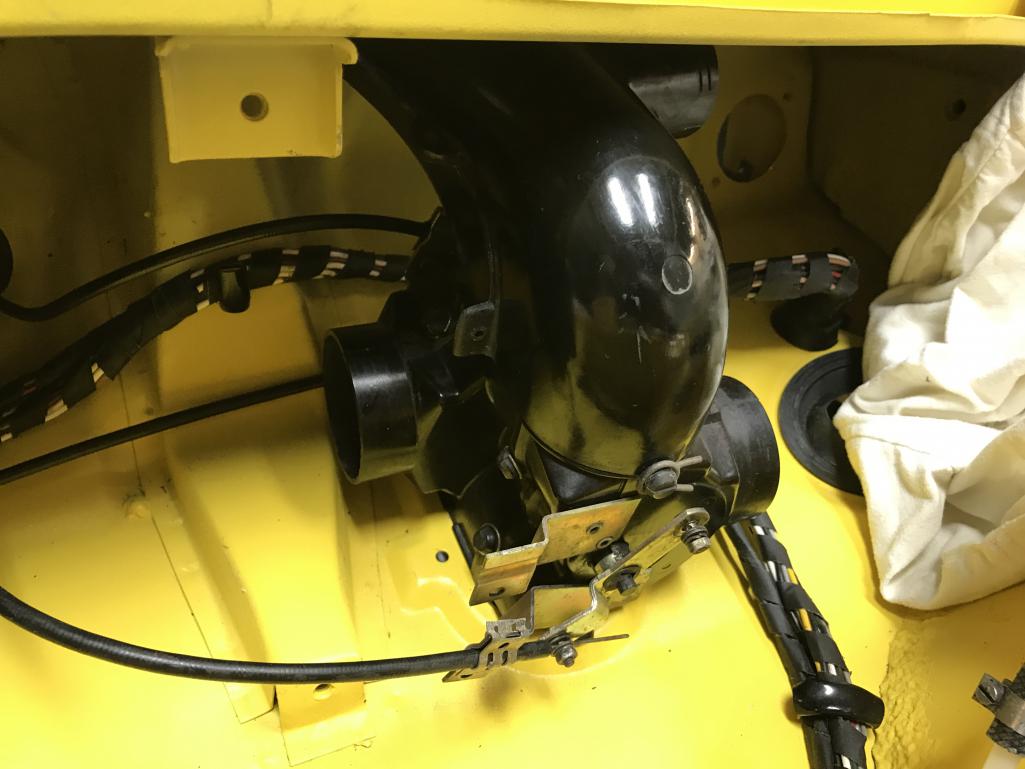
|
| bkrantz |
 Mar 16 2021, 07:38 PM Mar 16 2021, 07:38 PM
Post
#2452
|
|
914 Guru      Group: Members Posts: 8,154 Joined: 3-August 19 From: SW Colorado Member No.: 23,343 Region Association: Rocky Mountains 
|
With the special retaining bolt (flat-plate head with a rolled edge on one side--sorry, I did not get a picture) inserted from above, I slipped the distributor baffle on, from under the dash, and nutted it in place. My car had only one retaining nut per side, so I will need to track down two more.
Attached thumbnail(s) 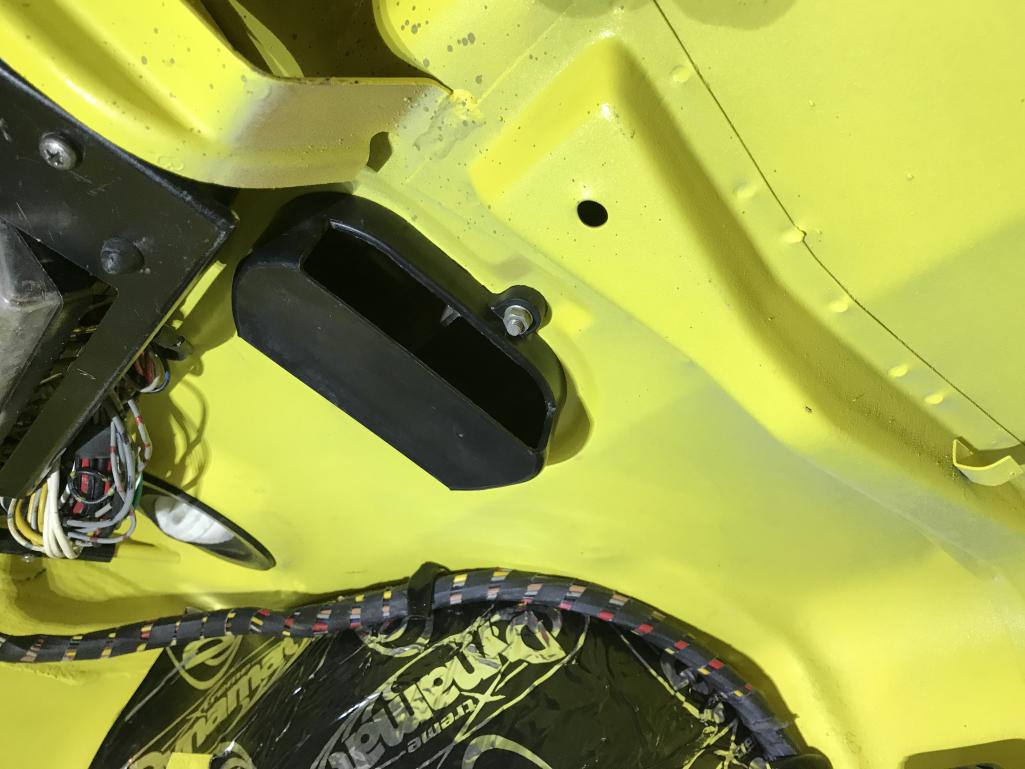
|
| bkrantz |
 Mar 16 2021, 07:42 PM Mar 16 2021, 07:42 PM
Post
#2453
|
|
914 Guru      Group: Members Posts: 8,154 Joined: 3-August 19 From: SW Colorado Member No.: 23,343 Region Association: Rocky Mountains 
|
I then started on the right side control box, and connected the cables that sync it with the left box. Note: in my first attempt I installed the box reversed front to back--THIS PHOTO SHOWS THE BOX WRONG.
Attached thumbnail(s) 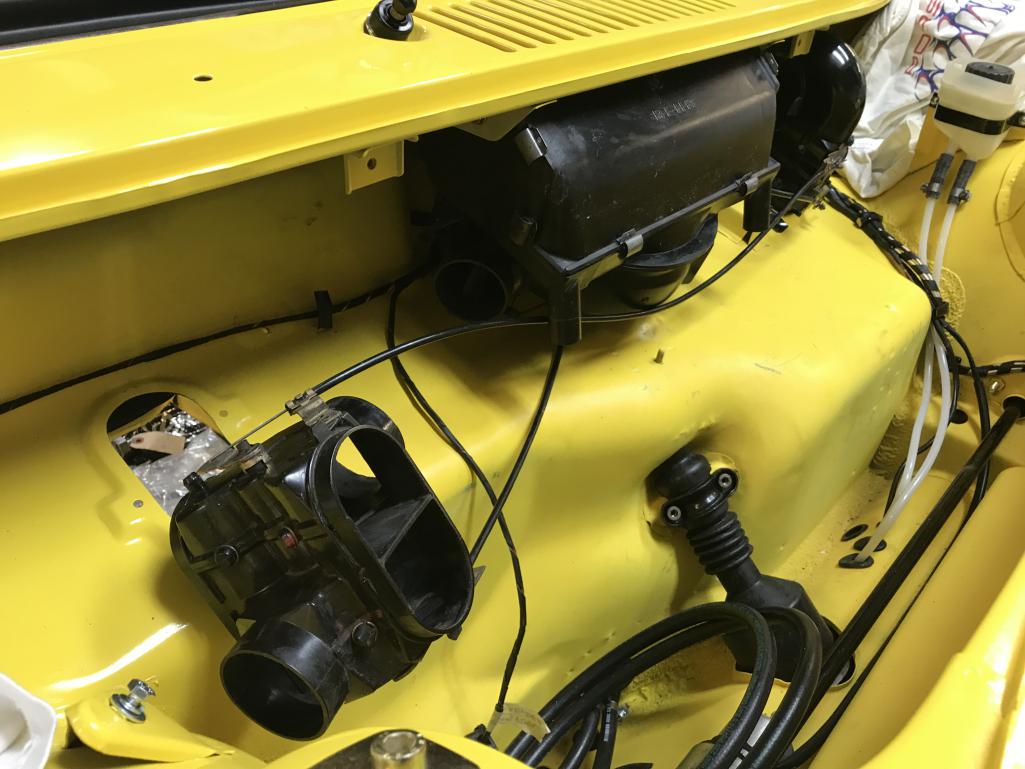
|
| bkrantz |
 Mar 16 2021, 07:44 PM Mar 16 2021, 07:44 PM
Post
#2454
|
|
914 Guru      Group: Members Posts: 8,154 Joined: 3-August 19 From: SW Colorado Member No.: 23,343 Region Association: Rocky Mountains 
|
While attaching the right vent with the spring clips, one got away from me and magically fell into this hole. (IMG:style_emoticons/default/headbang.gif)
Attached thumbnail(s) 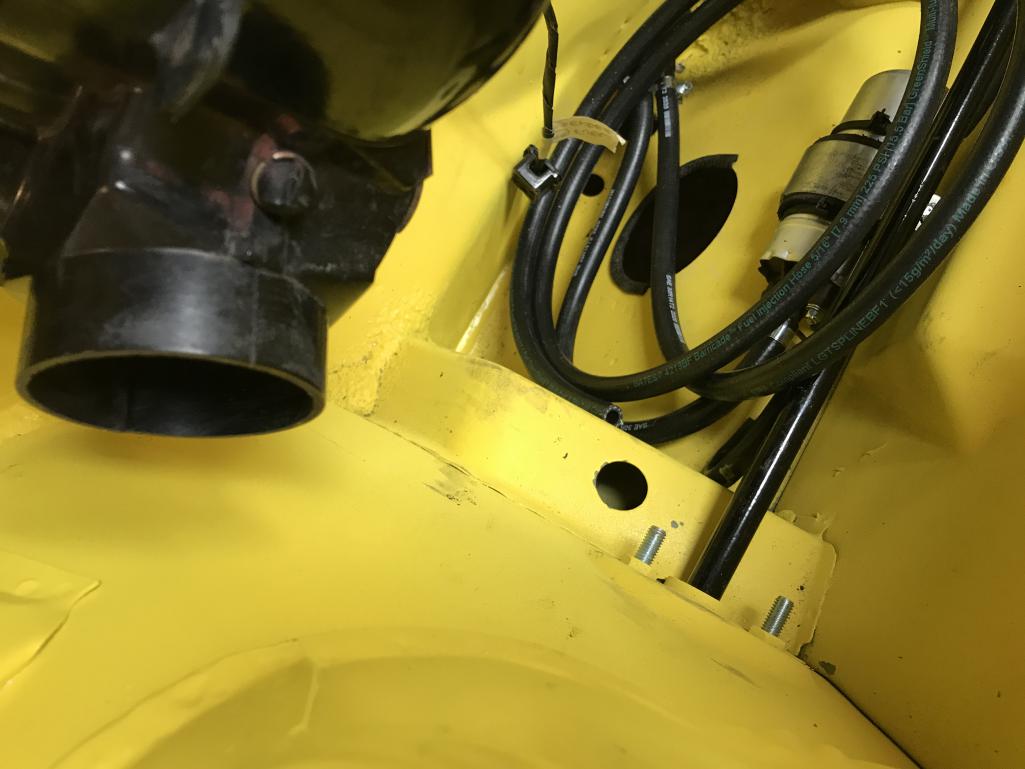
|
| bkrantz |
 Mar 16 2021, 07:46 PM Mar 16 2021, 07:46 PM
Post
#2455
|
|
914 Guru      Group: Members Posts: 8,154 Joined: 3-August 19 From: SW Colorado Member No.: 23,343 Region Association: Rocky Mountains 
|
After a brief bit of swearing, I was able to fish it out with my magnet probe.
Attached thumbnail(s) 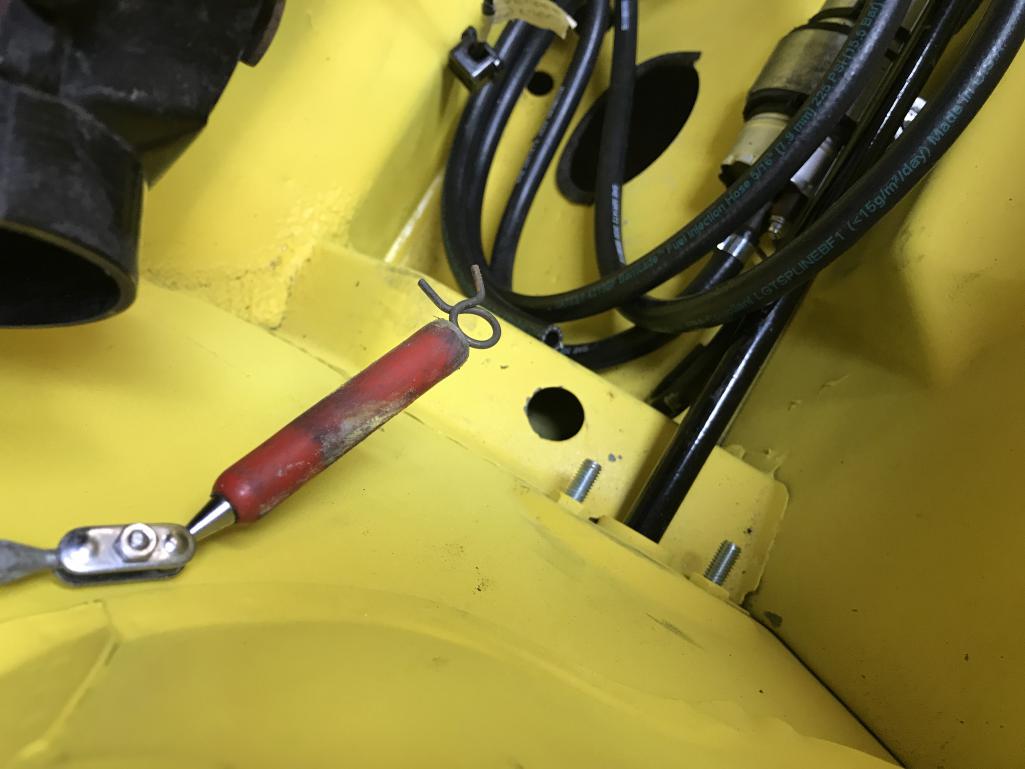
|
| bkrantz |
 Mar 16 2021, 07:47 PM Mar 16 2021, 07:47 PM
Post
#2456
|
|
914 Guru      Group: Members Posts: 8,154 Joined: 3-August 19 From: SW Colorado Member No.: 23,343 Region Association: Rocky Mountains 
|
Then I attached the vent and got the box plus vent into place. This side was even tighter.
Attached thumbnail(s) 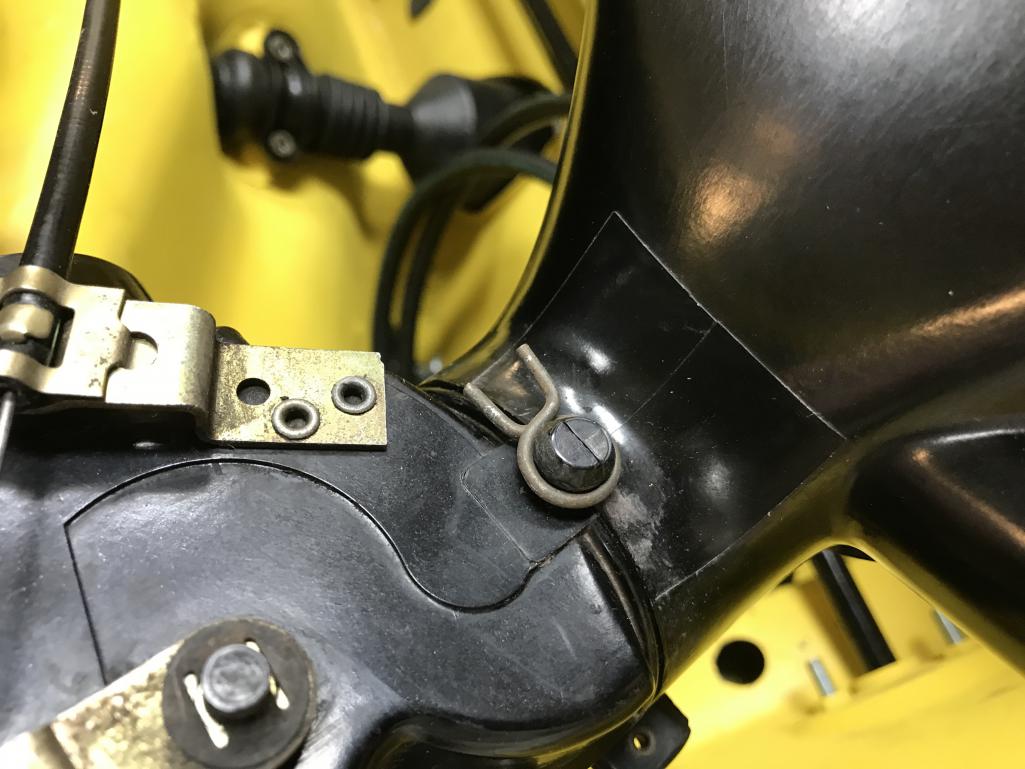
|
| bkrantz |
 Mar 16 2021, 07:51 PM Mar 16 2021, 07:51 PM
Post
#2457
|
|
914 Guru      Group: Members Posts: 8,154 Joined: 3-August 19 From: SW Colorado Member No.: 23,343 Region Association: Rocky Mountains 
|
About here I figured out I had the right control box reversed front to rear, and had to undo the vent and cable connections, and start over. After that I got it reconnected and then installed. I adjusted all the cable settings on the left control box so all the baffles fully opened and closed. Eventually I will see if I did it right.
Note in this photo the right box is correct. Attached thumbnail(s) 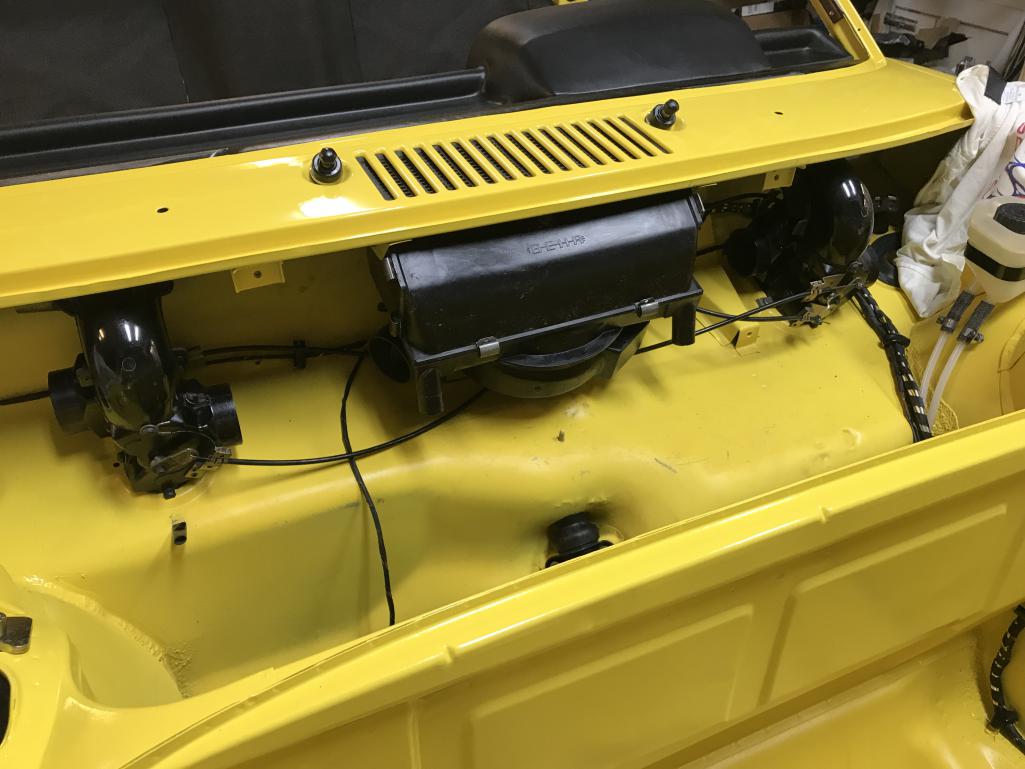
|
| Puebloswatcop |
 Mar 17 2021, 10:31 AM Mar 17 2021, 10:31 AM
Post
#2458
|
|
Senior Member    Group: Members Posts: 1,403 Joined: 27-December 14 From: Mineola, Texas Member No.: 18,258 Region Association: Southwest Region |
Bob,
You could try to drop that clip into that hole 100 times and you would miss 99...lol. Glad to know I'm not the only one that has those brief swearing moments. |
| ElCee |
 Mar 17 2021, 01:54 PM Mar 17 2021, 01:54 PM
Post
#2459
|
|
Newbie  Group: Members Posts: 6 Joined: 30-September 16 From: the Netherlands Member No.: 20,449 Region Association: None |
QUOTE(ElCee @ Mar 12 2021, 01:20 AM) *
You better paint these two spots black. Aren't there a couple of plastic vent outlets that fit in there? confused24.gif In my 1970 orange 914, I can look at the body color through some holes near the air vents. In the case of my car, the factory had already painted these two places black, so that the body color was not discernable in the black dashboard. I reckon this would be particularly noticeable with a yellow body. I attached a photo of one of an other members and added a circle where the opening is what I am referring to. 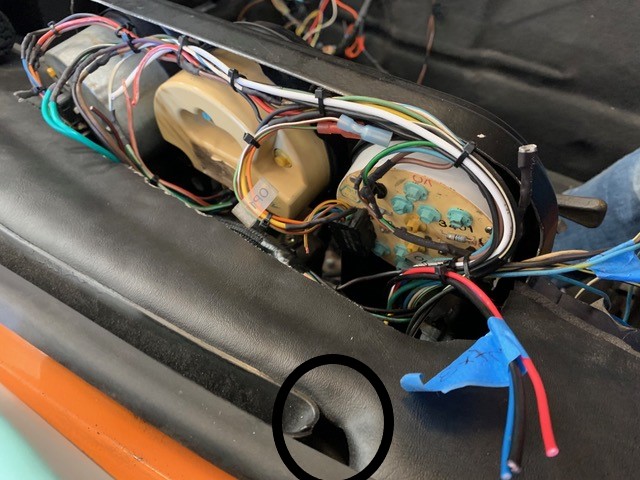 Groet, ElCee |
| bkrantz |
 Mar 17 2021, 06:19 PM Mar 17 2021, 06:19 PM
Post
#2460
|
|
914 Guru      Group: Members Posts: 8,154 Joined: 3-August 19 From: SW Colorado Member No.: 23,343 Region Association: Rocky Mountains 
|
QUOTE(ElCee @ Mar 12 2021, 01:20 AM) * You better paint these two spots black. Aren't there a couple of plastic vent outlets that fit in there? confused24.gif In my 1970 orange 914, I can look at the body color through some holes near the air vents. In the case of my car, the factory had already painted these two places black, so that the body color was not discernable in the black dashboard. I reckon this would be particularly noticeable with a yellow body. I attached a photo of one of an other members and added a circle where the opening is what I am referring to.  Groet, ElCee I do like the idea, but it probably will not happen on my car. The transition from test fitting the dash to final (I hope) installation went quickly, as did the vent installation. Maybe next time! |
  |
2 User(s) are reading this topic (2 Guests and 0 Anonymous Users)
0 Members:

|
Lo-Fi Version | Time is now: 29th November 2024 - 07:40 PM |
Invision Power Board
v9.1.4 © 2024 IPS, Inc.


