|
|
|
Porsche, and the Porsche crest are registered trademarks of Dr. Ing. h.c. F. Porsche AG.
This site is not affiliated with Porsche in any way. Its only purpose is to provide an online forum for car enthusiasts. All other trademarks are property of their respective owners. |
|
|

  |

| bkrantz |
 Apr 24 2021, 08:16 PM Apr 24 2021, 08:16 PM
Post
#2621
|
|
914 Guru  Group: Members Posts: 8,154 Joined: 3-August 19 From: SW Colorado Member No.: 23,343 Region Association: Rocky Mountains |
Meanwhile, I got out the windshield washer plumbing.
Attached thumbnail(s) 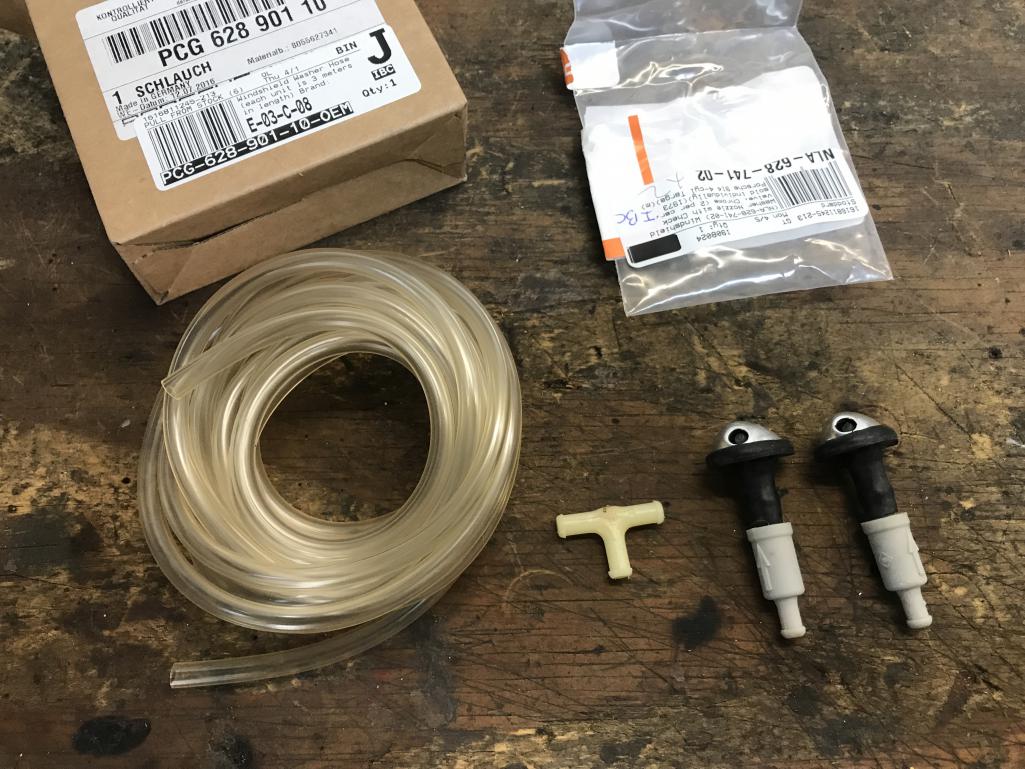
|
   |

 
|
| bkrantz |
Apr 24 2021, 08:17 PM
Post
#2622
|
|
914 Guru Group: Members Posts: 8,154 Joined: 3-August 19 From: SW Colorado Member No.: 23,343 Region Association: Rocky Mountains |
To install the squirters, the check valves have to come off.
Attached thumbnail(s) 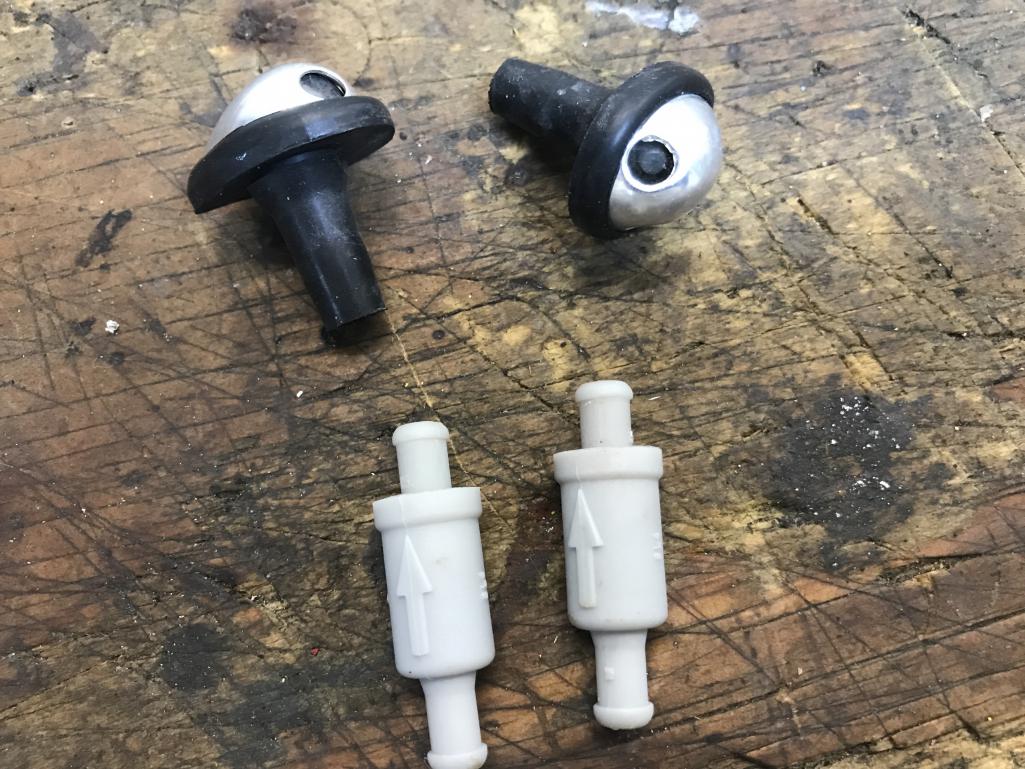
|
|
|
|
| bkrantz |
Apr 24 2021, 08:19 PM
Post
#2623
|
|
914 Guru Group: Members Posts: 8,154 Joined: 3-August 19 From: SW Colorado Member No.: 23,343 Region Association: Rocky Mountains |
Then the squirters get inserted, and wiggled about to seat the rubber flange.
Attached thumbnail(s) 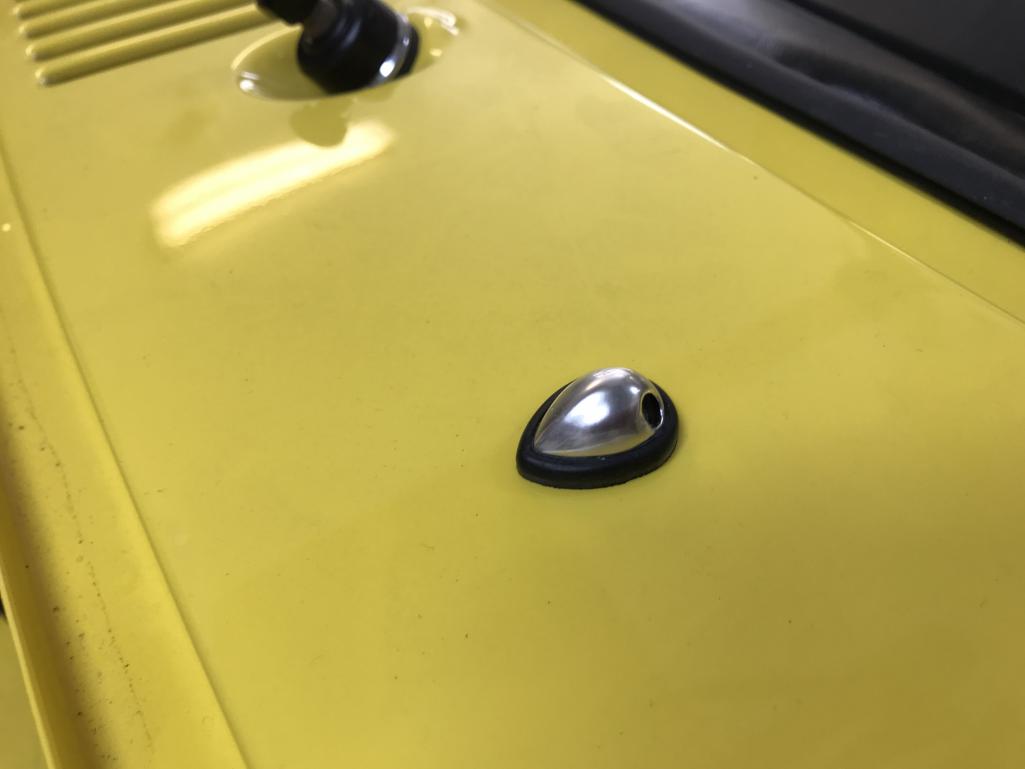
|
|
|
|
| bkrantz |
Apr 24 2021, 08:19 PM
Post
#2624
|
|
914 Guru Group: Members Posts: 8,154 Joined: 3-August 19 From: SW Colorado Member No.: 23,343 Region Association: Rocky Mountains |
From below. I had to wiggle this one a bit more. Note this also has the check valve re-installed.
Attached thumbnail(s) 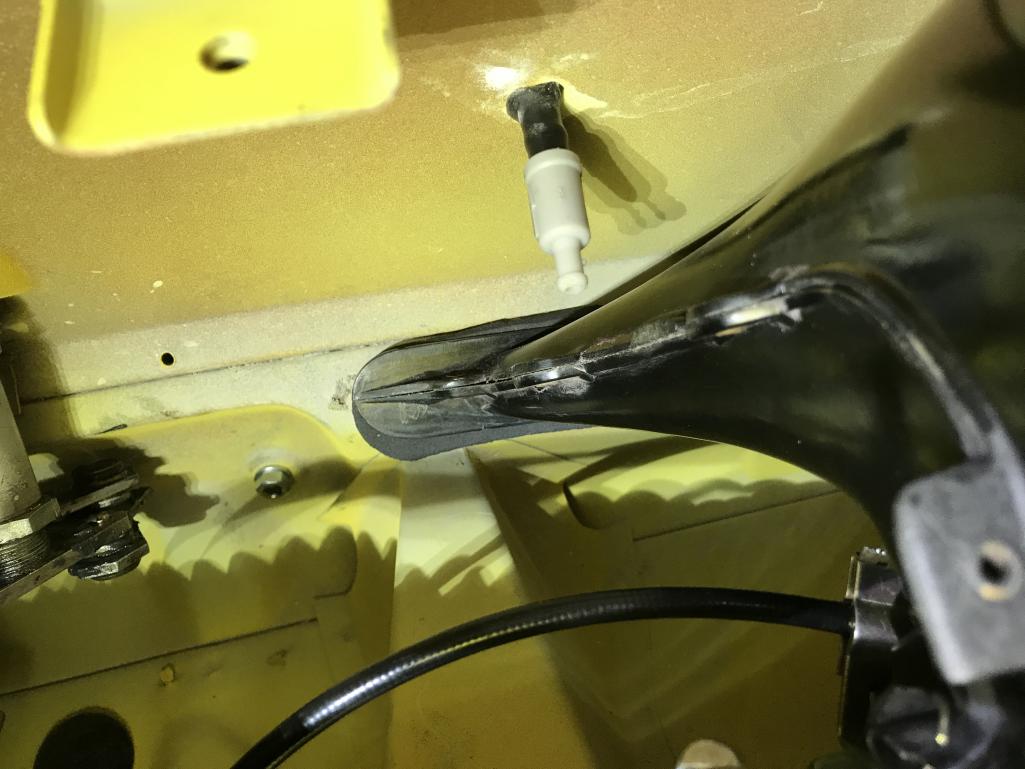
|
|
|
|
| bkrantz |
Apr 24 2021, 08:22 PM
Post
#2625
|
|
914 Guru Group: Members Posts: 8,154 Joined: 3-August 19 From: SW Colorado Member No.: 23,343 Region Association: Rocky Mountains |
I then ran the tubing, mostly following the wiring harness behind the air box. Hidden under the vent hose is the T-fitting that supplies the right side squirter.
Attached thumbnail(s) 
|
|
|
|
| bkrantz |
Apr 24 2021, 08:24 PM
Post
#2626
|
|
914 Guru Group: Members Posts: 8,154 Joined: 3-August 19 From: SW Colorado Member No.: 23,343 Region Association: Rocky Mountains |
Plumbing under the reservoir.
Attached thumbnail(s) 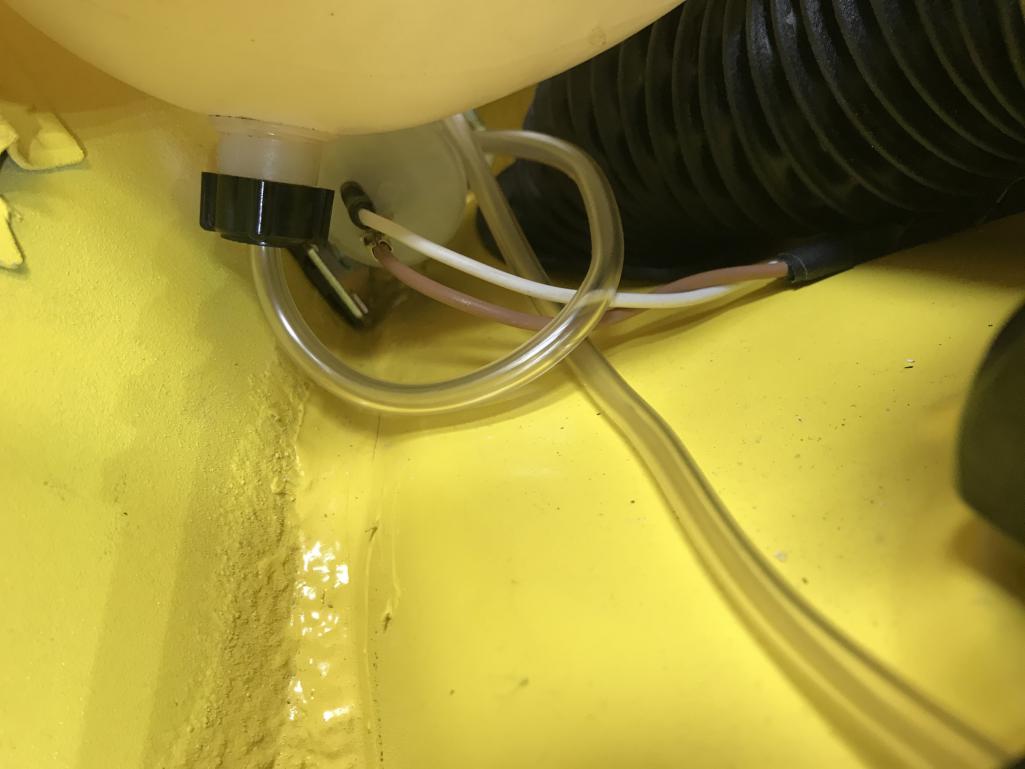
|
|
|
|
| bkrantz |
Apr 24 2021, 08:25 PM
Post
#2627
|
|
914 Guru Group: Members Posts: 8,154 Joined: 3-August 19 From: SW Colorado Member No.: 23,343 Region Association: Rocky Mountains |
And with the reservoir removed.
Attached thumbnail(s) 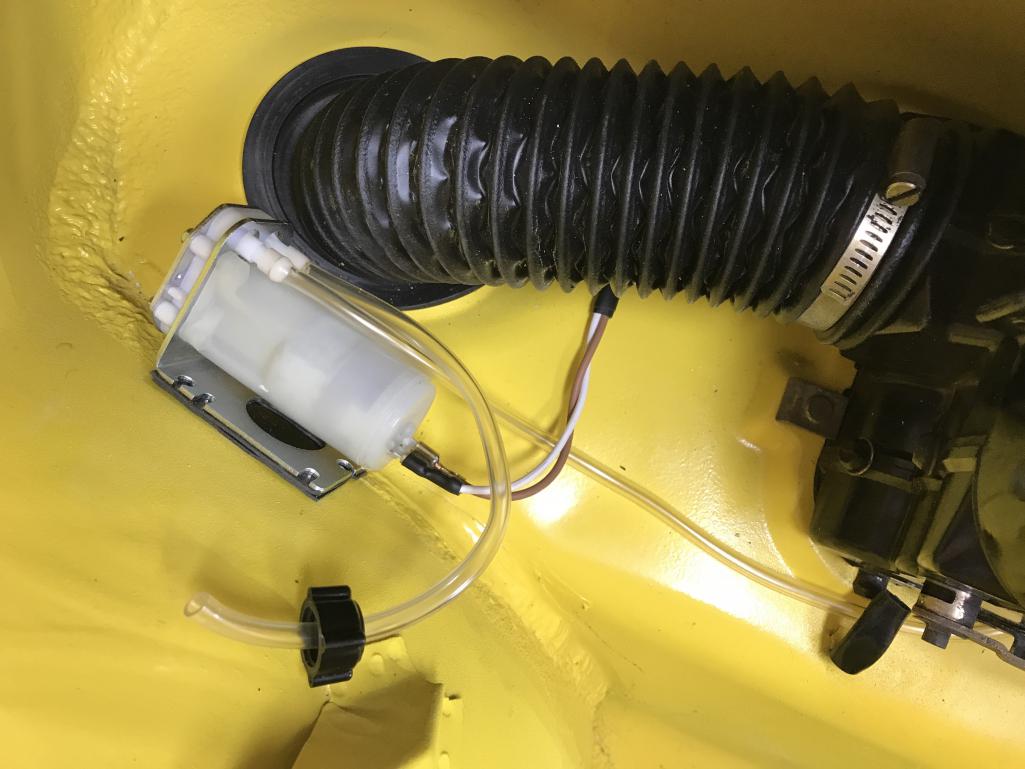
|
|
|
|
| bkrantz |
Apr 24 2021, 08:26 PM
Post
#2628
|
|
914 Guru Group: Members Posts: 8,154 Joined: 3-August 19 From: SW Colorado Member No.: 23,343 Region Association: Rocky Mountains |
Now for the reservoir cap. Of course, this was originally set up to feed air pressure from the spare tire. Now I need it to vent to the atmosphere, but not allow fluid to slosh out.
Attached thumbnail(s) 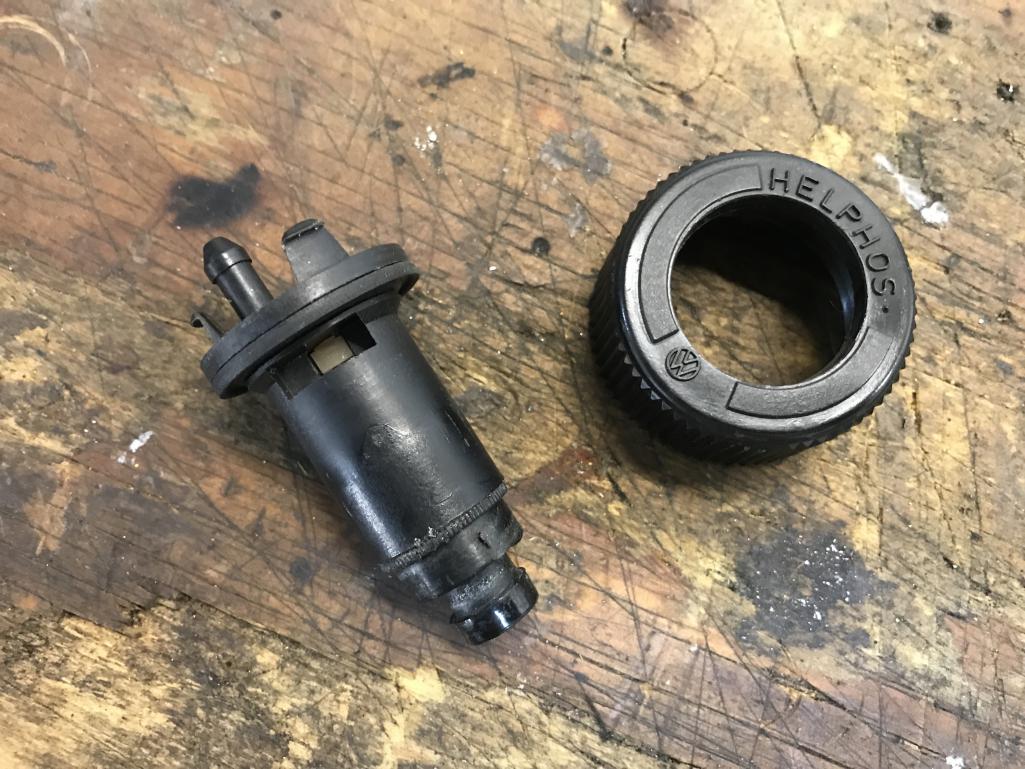
|
|
|
|
| bkrantz |
Apr 24 2021, 08:28 PM
Post
#2629
|
|
914 Guru Group: Members Posts: 8,154 Joined: 3-August 19 From: SW Colorado Member No.: 23,343 Region Association: Rocky Mountains |
Nothing to lose, so I cut the valve in half.
Attached thumbnail(s) 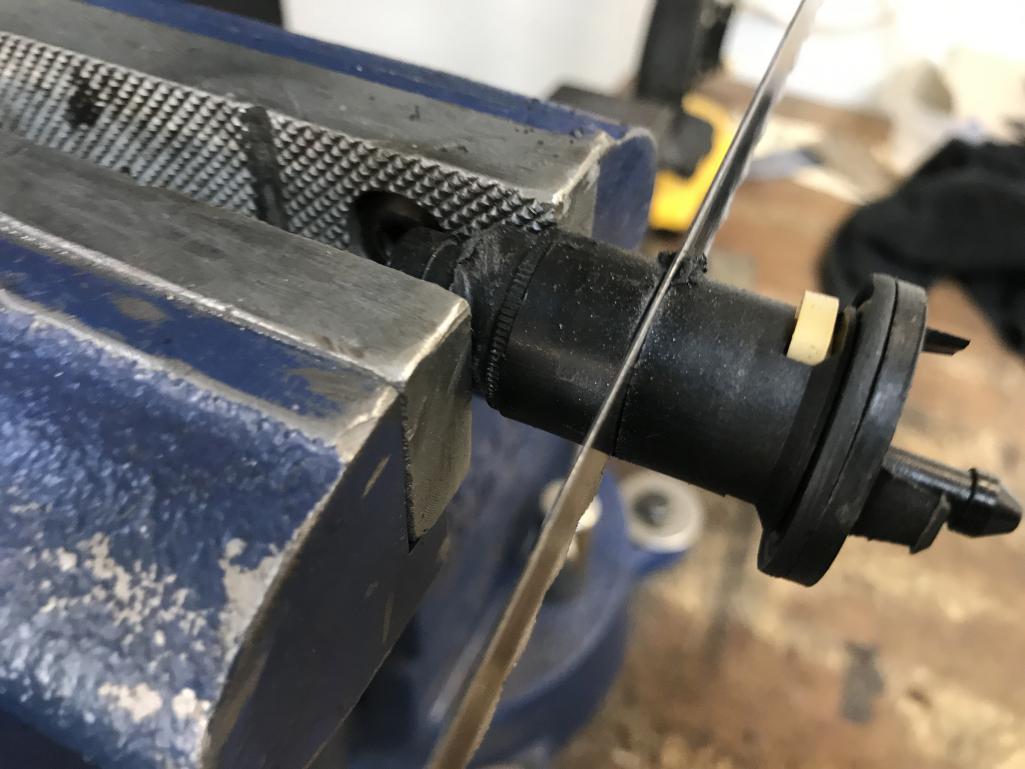
|
|
|
|
| bkrantz |
Apr 24 2021, 08:29 PM
Post
#2630
|
|
914 Guru Group: Members Posts: 8,154 Joined: 3-August 19 From: SW Colorado Member No.: 23,343 Region Association: Rocky Mountains |
That reveals the internal valve--that I don't need.
Attached thumbnail(s) 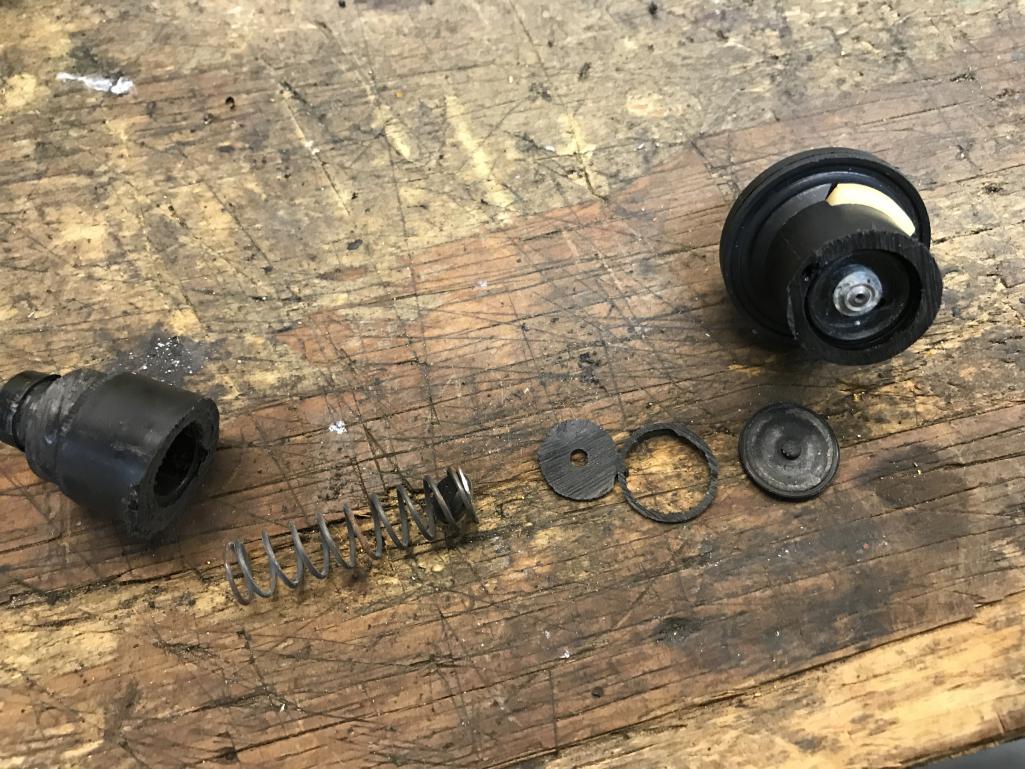
|
|
|
|
| bkrantz |
Apr 24 2021, 08:34 PM
Post
#2631
|
|
914 Guru Group: Members Posts: 8,154 Joined: 3-August 19 From: SW Colorado Member No.: 23,343 Region Association: Rocky Mountains |
Here's the top. Both the barbed fitting and the open hole pass air.
Attached thumbnail(s) 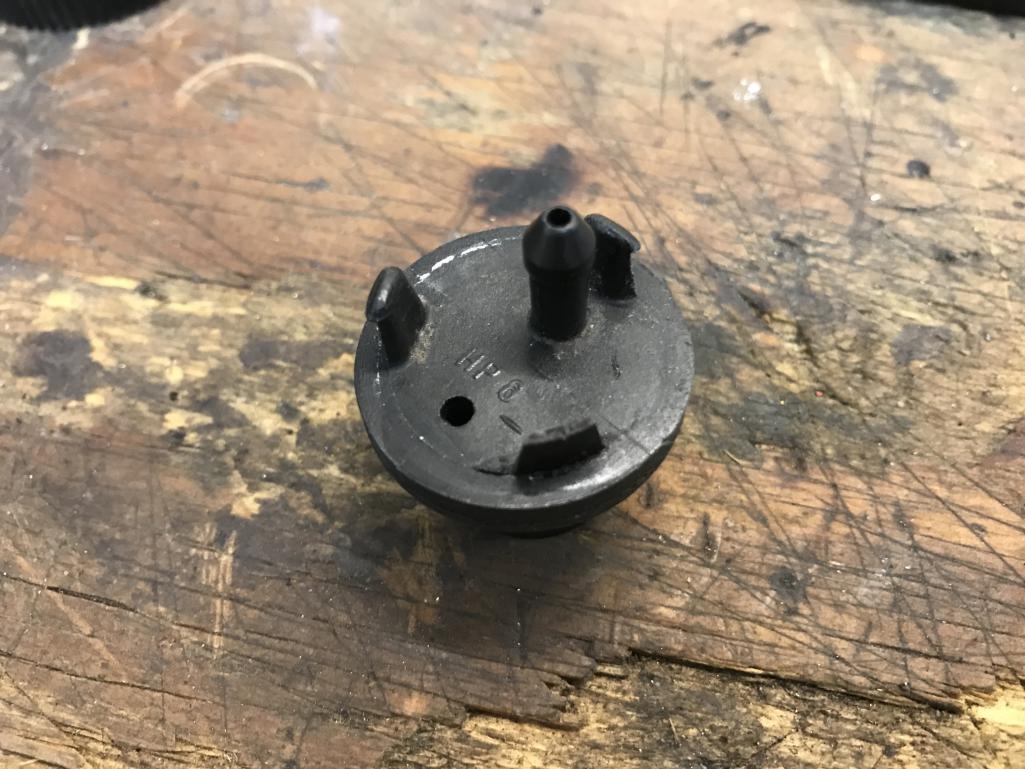
|
|
|
|
| bkrantz |
Apr 24 2021, 08:37 PM
Post
#2632
|
|
914 Guru Group: Members Posts: 8,154 Joined: 3-August 19 From: SW Colorado Member No.: 23,343 Region Association: Rocky Mountains |
For now, I am not sure, but I think I will plug the hole and route a bit of tubing from the barbed fitting to prevent any fluid coming out, especially under braking.
Attached thumbnail(s) 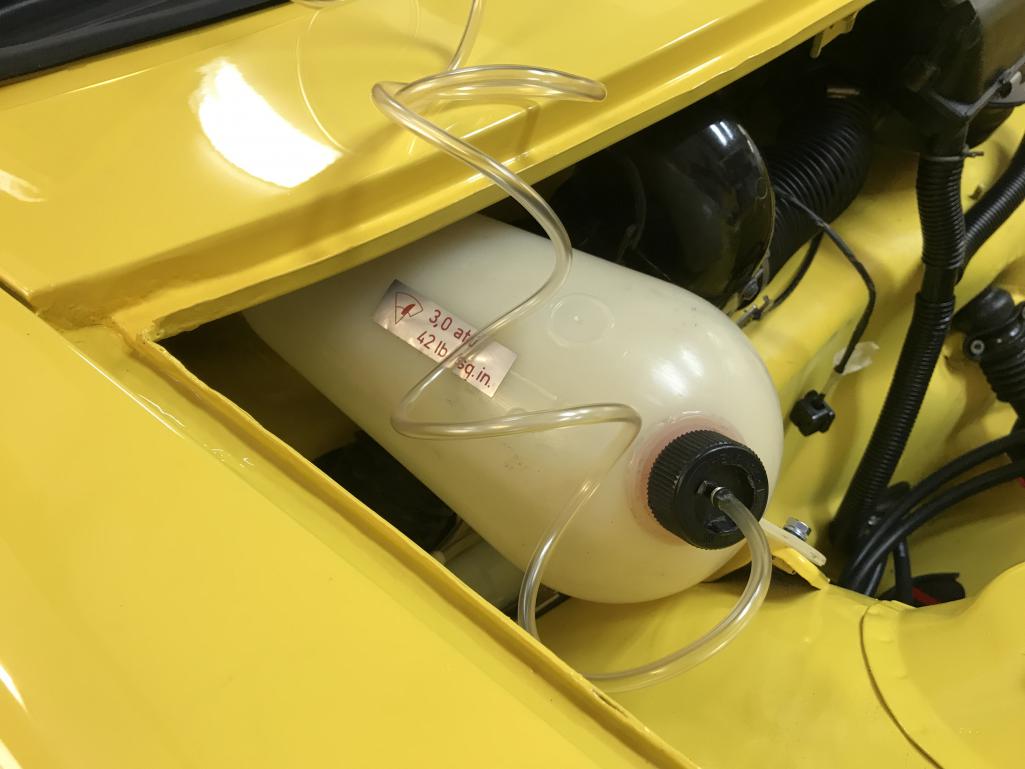
|
|
|
|
| bbrock |
Apr 25 2021, 09:35 AM
Post
#2633
|
|
914 Guru Group: Members Posts: 5,269 Joined: 17-February 17 From: Montana Member No.: 20,845 Region Association: Rocky Mountains |
What about installing one of these in that vent tubing? https://www.amazon.com/1-4-Barbed-Check-Valve/dp/B01EMCPG2I
(IMG:http://www.914world.com/bbs2/uploads_offsite/images-na.ssl-images-amazon.com-20845-1619364933.1.jpg) You could even use black rubber tubing and route it to look like stock if you are CW like me. (IMG:style_emoticons/default/beer.gif) |
|
|
|
| euro911 |
Apr 25 2021, 12:27 PM
Post
#2634
|
|
Retired & living the dream. God help me if I wake up! Group: Members Posts: 8,858 Joined: 2-December 06 From: So.Cal. & No.AZ (USA) Member No.: 7,300 Region Association: Southern California |
That's what I was thinking, but I wonder how much vacuum pressure in the tank will allow it to open? (IMG:style_emoticons/default/idea.gif)
Maybe tying a loop in the vent tubing would work better - less resistance (IMG:style_emoticons/default/unsure.gif) |
|
|
|
| DRPHIL914 |
Apr 25 2021, 01:19 PM
Post
#2635
|
|
Dr. Phil Group: Members Posts: 5,810 Joined: 9-December 09 From: Bluffton, SC Member No.: 11,106 Region Association: South East States |
i am getting ready to do the exact same thing. nice detailed pics. i had not thought about cutting the valve body open. i ordered a 911 bottle supply so i could use the top opening for both vent and supply, and just cap off the bottom supply feed . but now i am rethinking that as the top cap for a 911 bottle used a slightly different size and threading
Attached thumbnail(s) 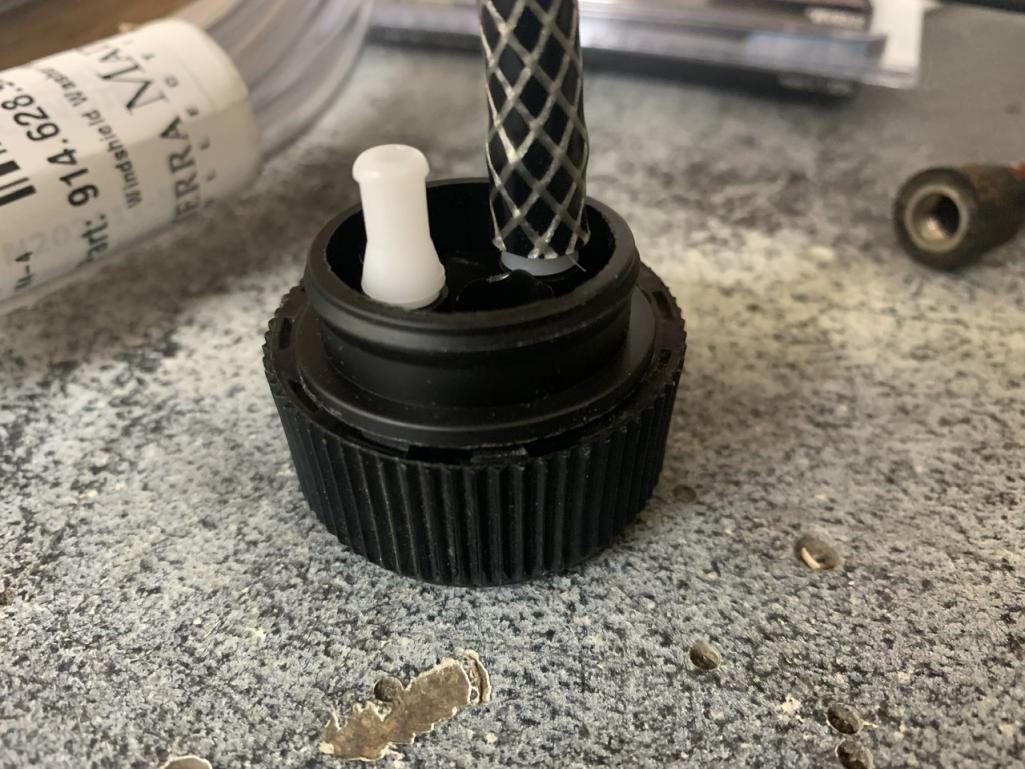 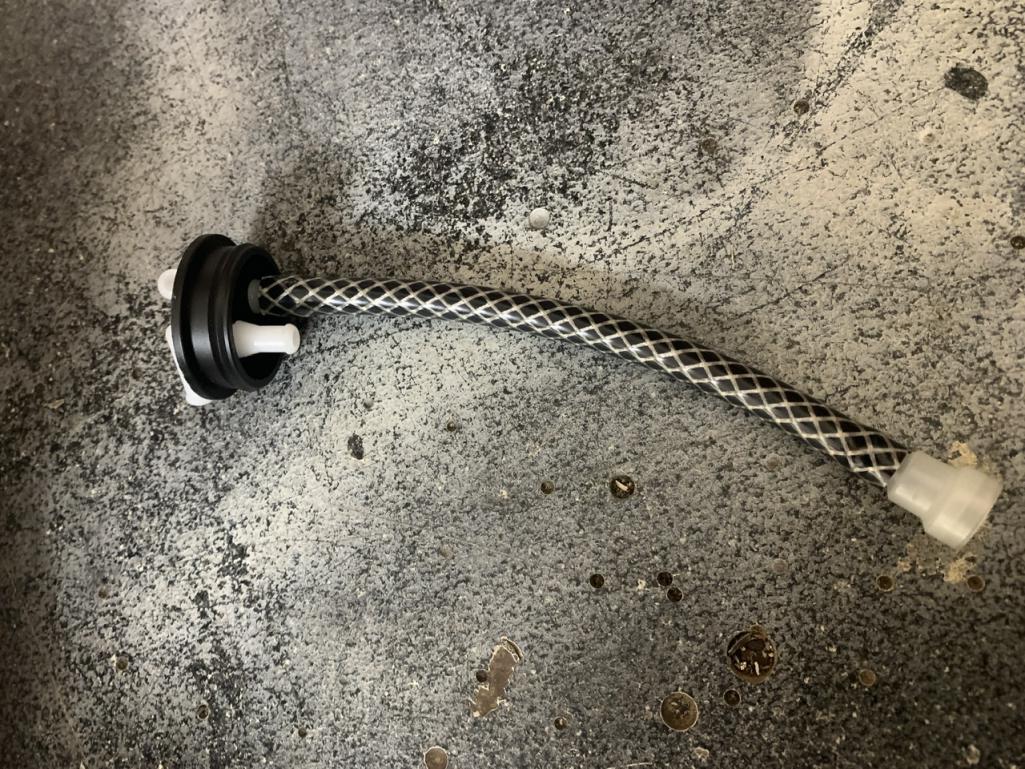 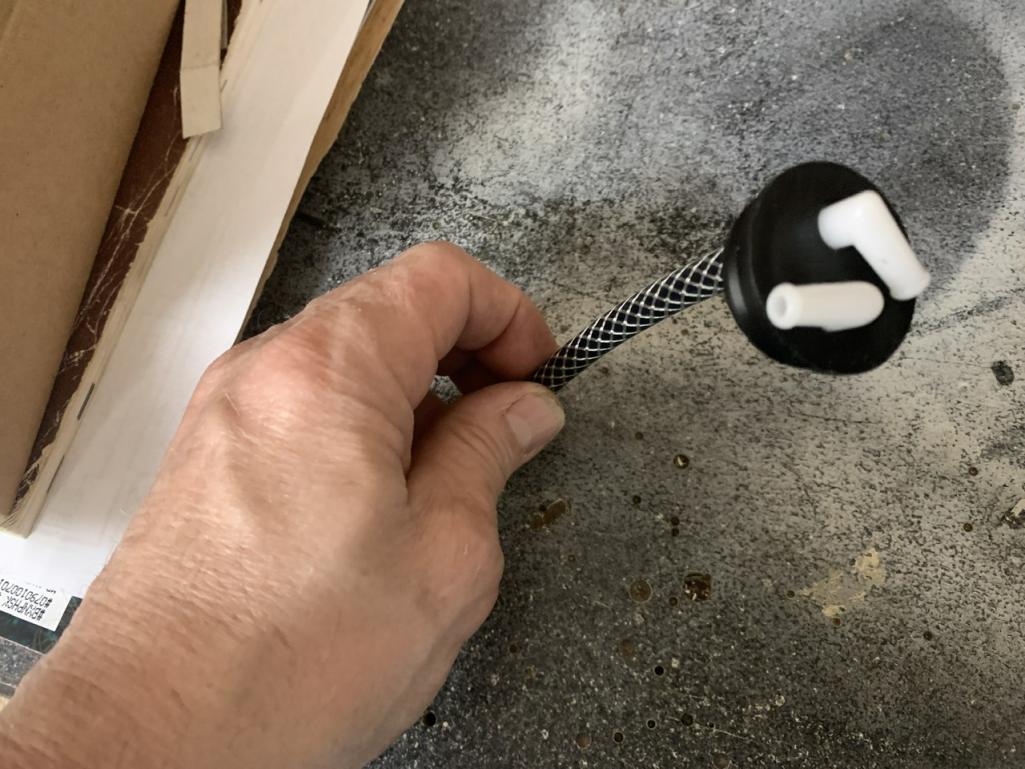
|
|
|
|
| bkrantz |
Apr 25 2021, 08:04 PM
Post
#2636
|
|
914 Guru Group: Members Posts: 8,154 Joined: 3-August 19 From: SW Colorado Member No.: 23,343 Region Association: Rocky Mountains |
Well, it probably had to happen, but I found a body issue that I forgot to address before getting the paint work done.
When I re-installed the right front fender, I made sure the seam between the fender and the cowl was open at the bottom so that water that gets under the seal can drain out. I meant to do the same thing on the left side but forgot. When I was thinking about installing the seal today, I remembered. I inspected the bottom of the left seam and found some light rust. So that launched a recovery project. Attached thumbnail(s) 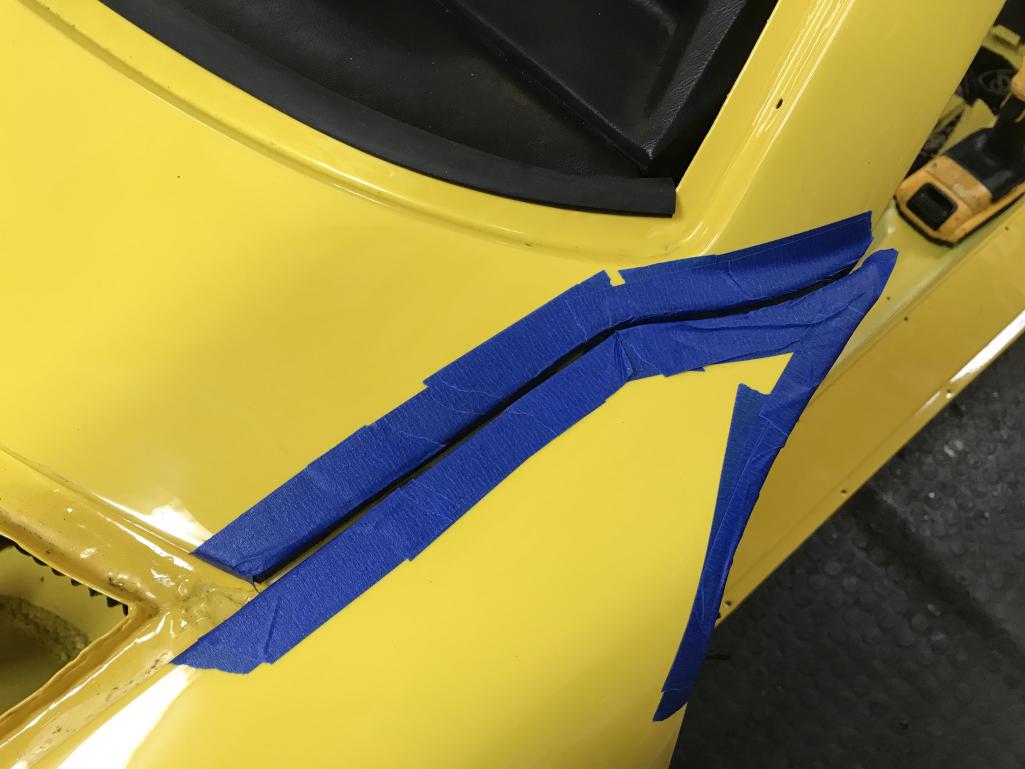
|
|
|
|
| bkrantz |
Apr 25 2021, 08:05 PM
Post
#2637
|
|
914 Guru Group: Members Posts: 8,154 Joined: 3-August 19 From: SW Colorado Member No.: 23,343 Region Association: Rocky Mountains |
Right now, any water would be trapped, and will add to the visible rust.
Attached thumbnail(s) 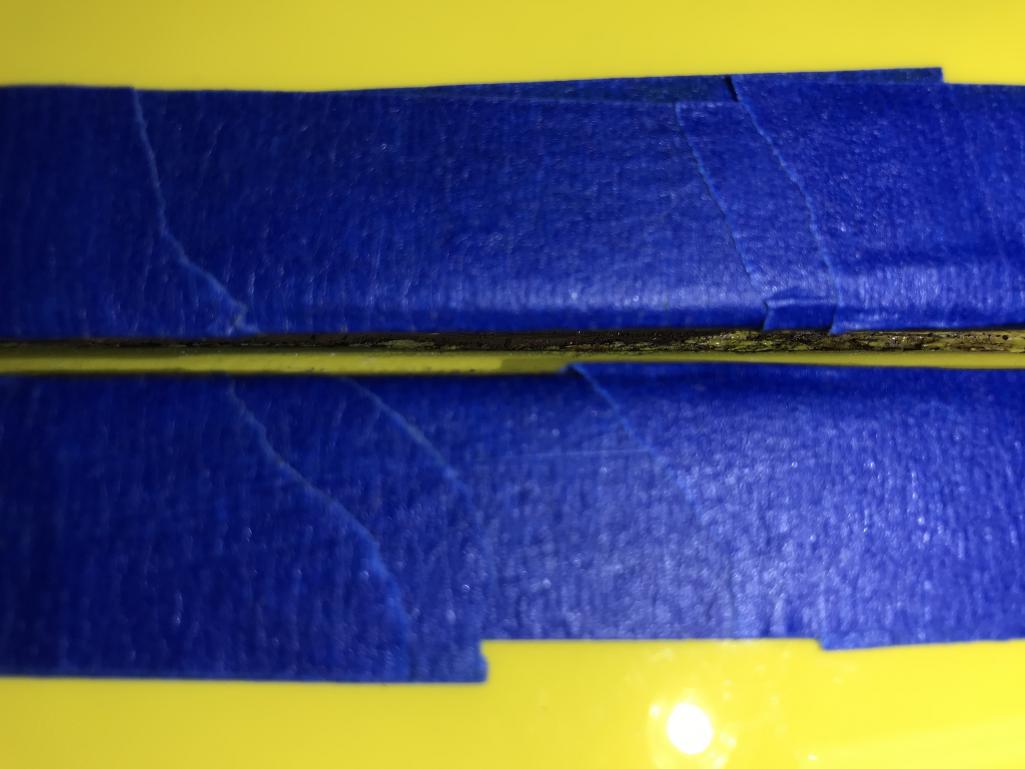
|
|
|
|
| bkrantz |
Apr 25 2021, 08:07 PM
Post
#2638
|
|
914 Guru Group: Members Posts: 8,154 Joined: 3-August 19 From: SW Colorado Member No.: 23,343 Region Association: Rocky Mountains |
I removed the original seam sealer on the bottom side, and used some mini tools to scrape open the seam from the top.
Attached thumbnail(s) 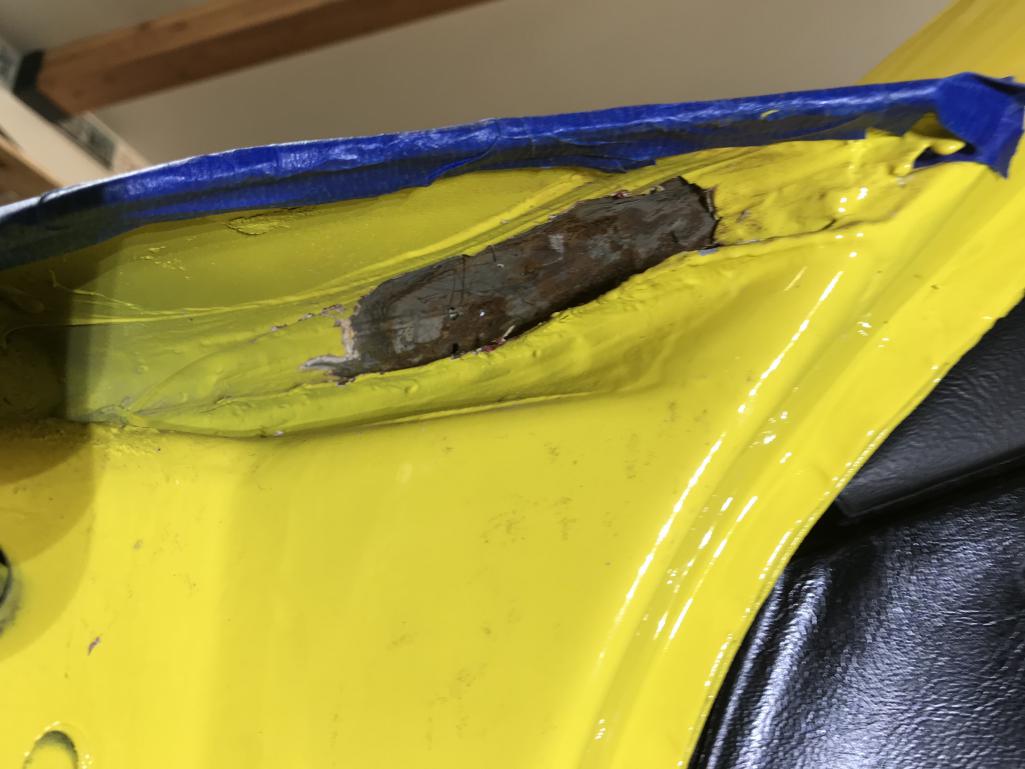
|
|
|
|
| bkrantz |
Apr 25 2021, 08:08 PM
Post
#2639
|
|
914 Guru Group: Members Posts: 8,154 Joined: 3-August 19 From: SW Colorado Member No.: 23,343 Region Association: Rocky Mountains |
Eventually I got most of the seam open. Here's light showing from below.
Attached thumbnail(s) 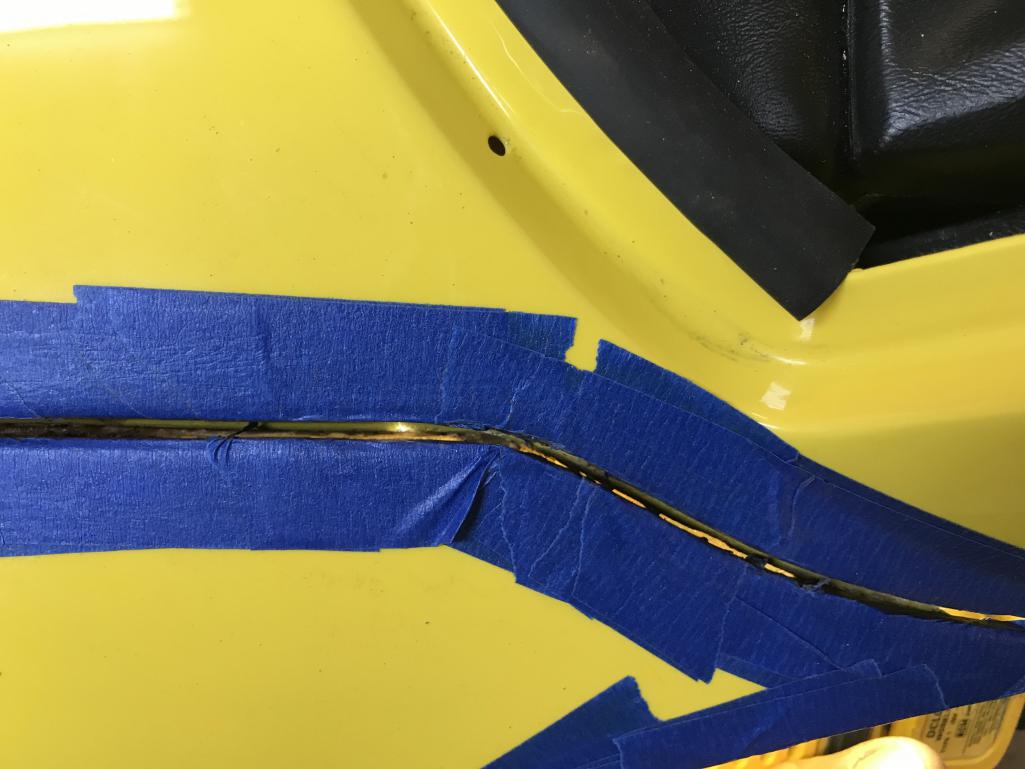
|
|
|
|
| bkrantz |
Apr 25 2021, 08:10 PM
Post
#2640
|
|
914 Guru Group: Members Posts: 8,154 Joined: 3-August 19 From: SW Colorado Member No.: 23,343 Region Association: Rocky Mountains |
I got out the Ospho and a syringe.
Attached thumbnail(s) 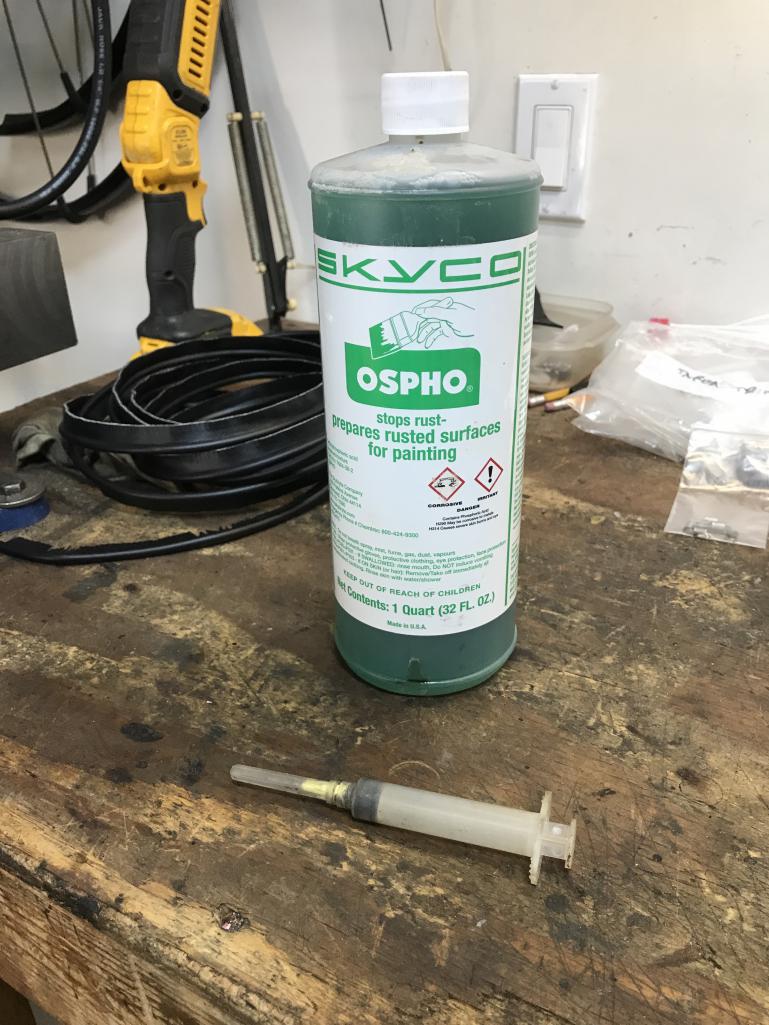
|
|
|
|
|
1 User(s) are reading this topic (1 Guests and 0 Anonymous Users)
0 Members:

|
Lo-Fi Version | Time is now: 30th November 2024 - 06:36 AM |
Invision Power Board
v9.1.4 © 2024 IPS, Inc.