|
|
|
Porsche, and the Porsche crest are registered trademarks of Dr. Ing. h.c. F. Porsche AG.
This site is not affiliated with Porsche in any way. Its only purpose is to provide an online forum for car enthusiasts. All other trademarks are property of their respective owners. |
|
|

  |

| bkrantz |
 May 5 2021, 08:02 PM May 5 2021, 08:02 PM
Post
#2721
|
|
914 Guru  Group: Members Posts: 8,066 Joined: 3-August 19 From: SW Colorado Member No.: 23,343 Region Association: Rocky Mountains |
The deepest part of the case is the protrusion around the drive shaft. Since I seated the shaft further into the gear, the base of the notch is now inside the protrusion.
Attached thumbnail(s) 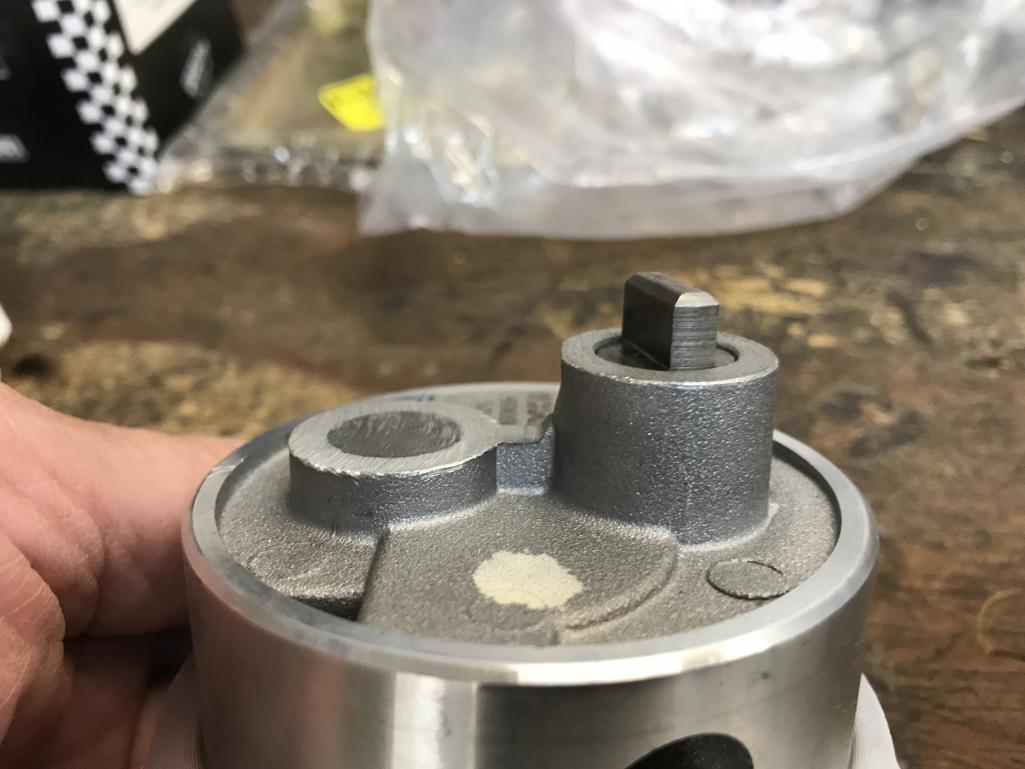
|
   |

 
|
| bkrantz |
May 5 2021, 08:04 PM
Post
#2722
|
|
914 Guru Group: Members Posts: 8,066 Joined: 3-August 19 From: SW Colorado Member No.: 23,343 Region Association: Rocky Mountains |
I filed off the end of the protrusion (easy, since the pump case is aluminum). I took off about 0.75 mm (0.03 inch).
Attached thumbnail(s) 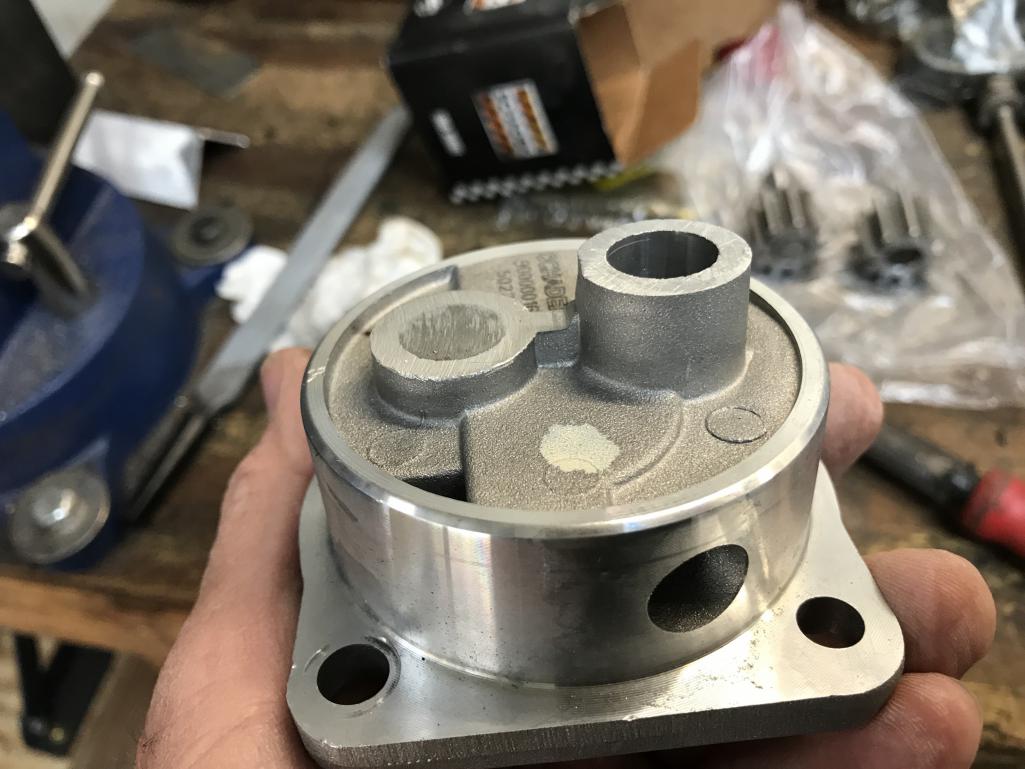
|
|
|
|
| bkrantz |
May 5 2021, 08:05 PM
Post
#2723
|
|
914 Guru Group: Members Posts: 8,066 Joined: 3-August 19 From: SW Colorado Member No.: 23,343 Region Association: Rocky Mountains |
Now the base of the notch extends beyond the case.
Attached thumbnail(s) 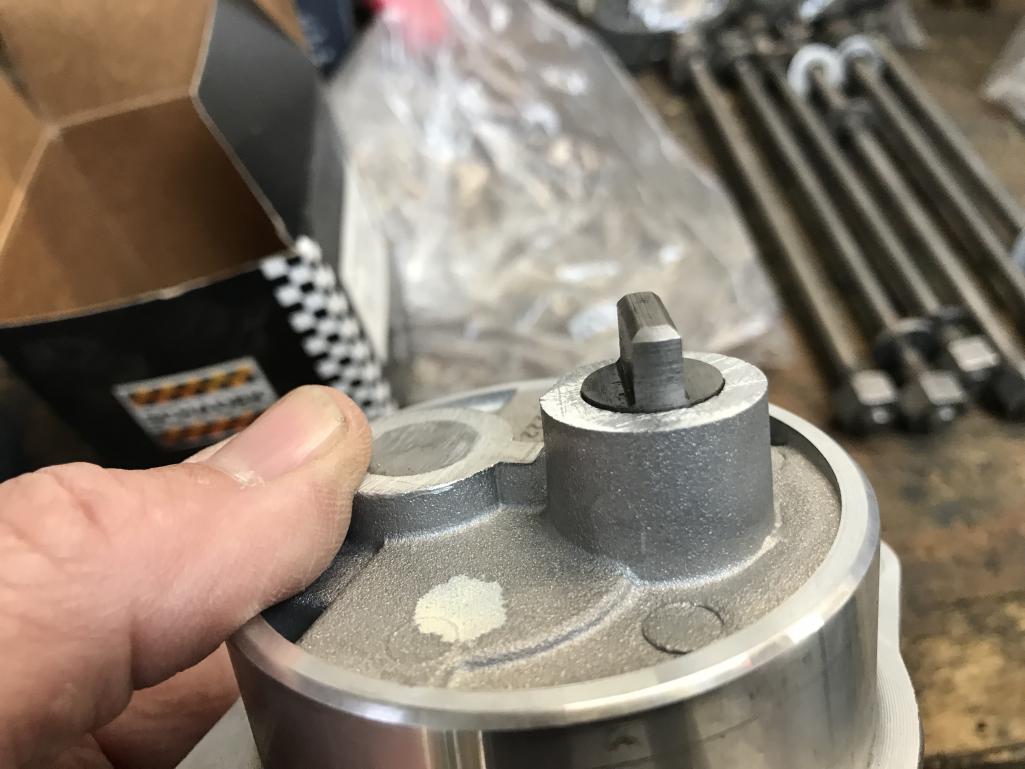
|
|
|
|
| bkrantz |
May 5 2021, 08:08 PM
Post
#2724
|
|
914 Guru Group: Members Posts: 8,066 Joined: 3-August 19 From: SW Colorado Member No.: 23,343 Region Association: Rocky Mountains |
Now the pump sits tight into the engine case, with about 0.75 mm clearance with the cam end (without any gaskets).
Attached thumbnail(s) 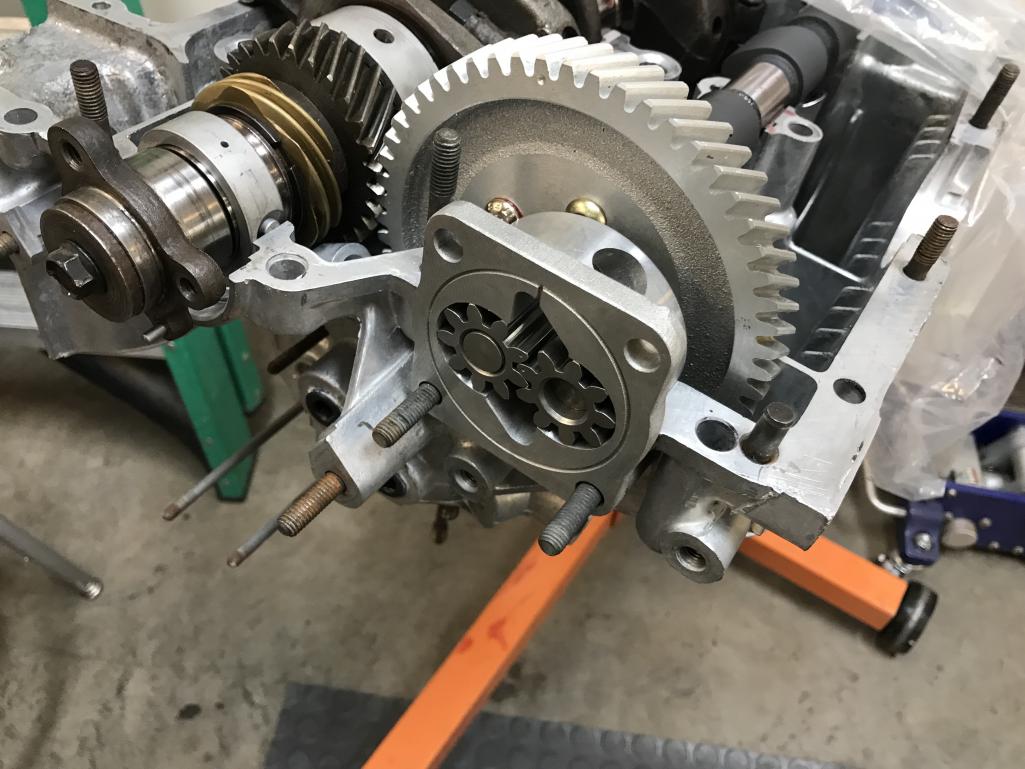
|
|
|
|
| bkrantz |
May 5 2021, 08:09 PM
Post
#2725
|
|
914 Guru Group: Members Posts: 8,066 Joined: 3-August 19 From: SW Colorado Member No.: 23,343 Region Association: Rocky Mountains |
And the pump gears sit inside the case and do not protrude.
Attached thumbnail(s) 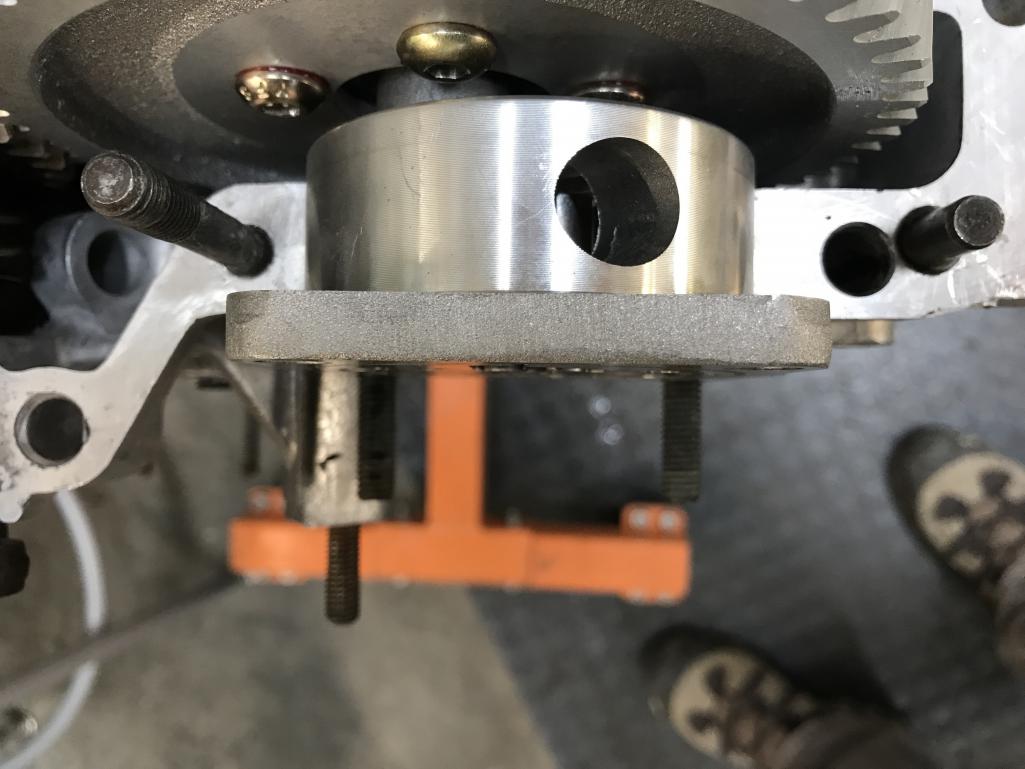
|
|
|
|
| bkrantz |
May 5 2021, 08:10 PM
Post
#2726
|
|
914 Guru Group: Members Posts: 8,066 Joined: 3-August 19 From: SW Colorado Member No.: 23,343 Region Association: Rocky Mountains |
To celebrate I cleaned up the case through-bolts, washers, and nuts.
Attached thumbnail(s) 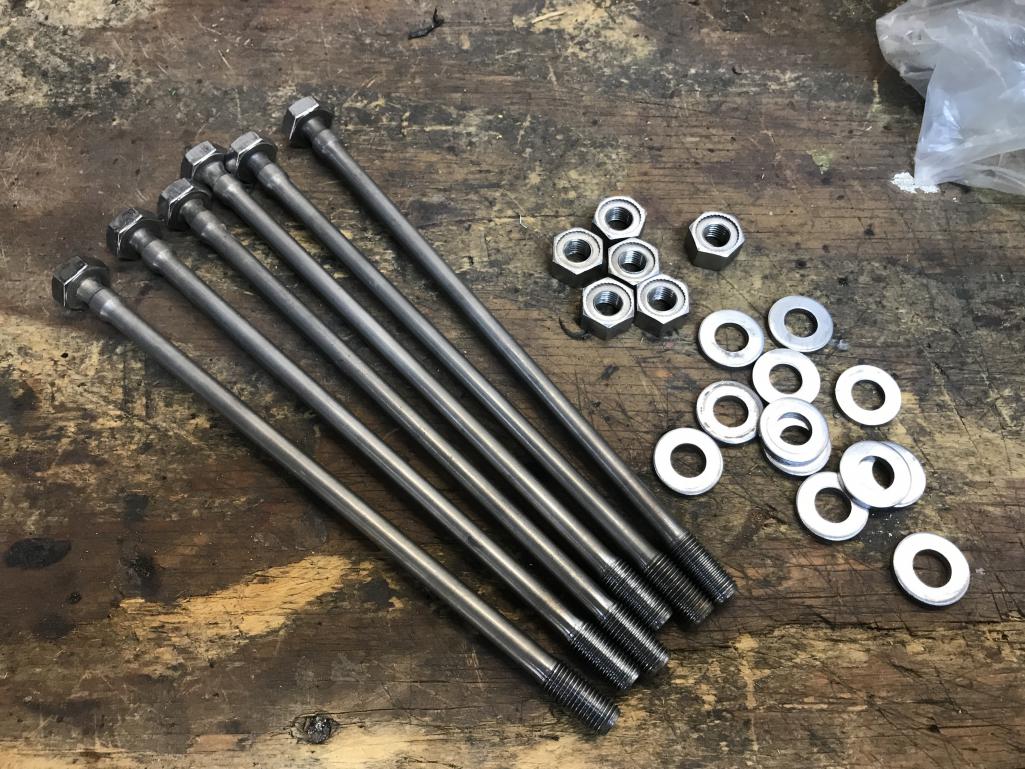
|
|
|
|
| bkrantz |
May 6 2021, 07:13 PM
Post
#2727
|
|
914 Guru Group: Members Posts: 8,066 Joined: 3-August 19 From: SW Colorado Member No.: 23,343 Region Association: Rocky Mountains |
I found my left-over Dynamat, and decided to use some scraps on the bulkhead under the dash, since the relocated fuel pump is on the other side of this sheet metal.
|
|
|
|
| bkrantz |
May 6 2021, 07:14 PM
Post
#2728
|
|
914 Guru Group: Members Posts: 8,066 Joined: 3-August 19 From: SW Colorado Member No.: 23,343 Region Association: Rocky Mountains |
After about 20 minutes. It might not matter much, but I would rather not hear the pump.
Attached thumbnail(s) 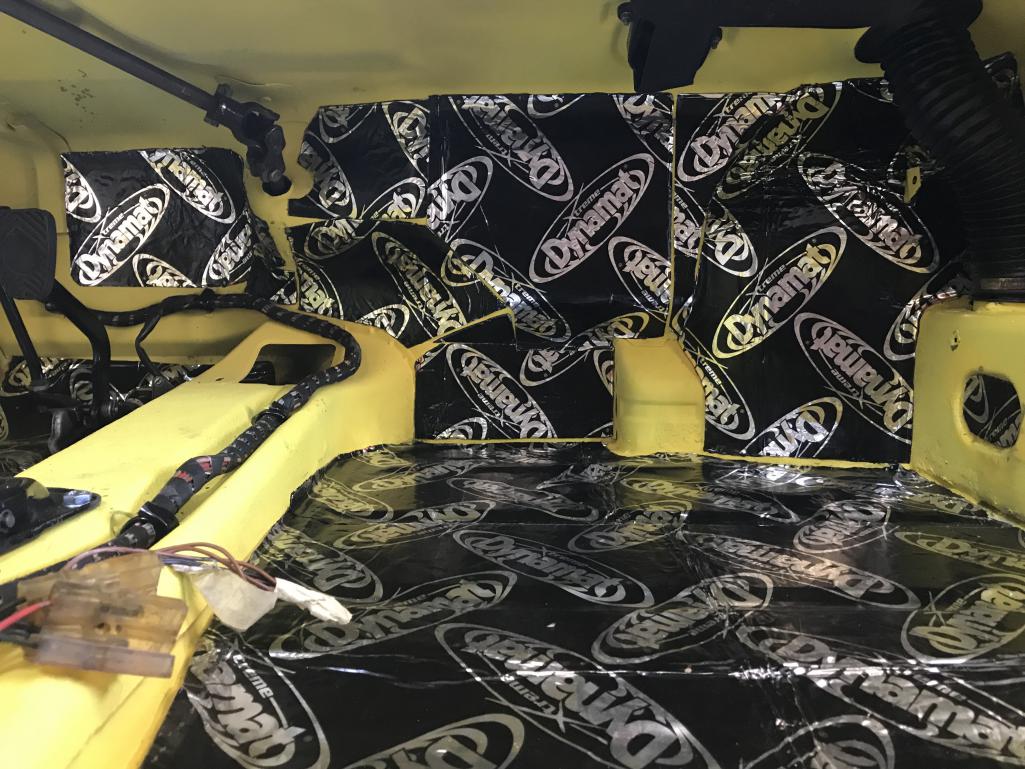
|
|
|
|
| bkrantz |
May 6 2021, 07:20 PM
Post
#2729
|
|
914 Guru Group: Members Posts: 8,066 Joined: 3-August 19 From: SW Colorado Member No.: 23,343 Region Association: Rocky Mountains |
I then got on to installing the main gauge panel.
I finally got the LED bulbs for the indicator and back lights. Attached thumbnail(s) 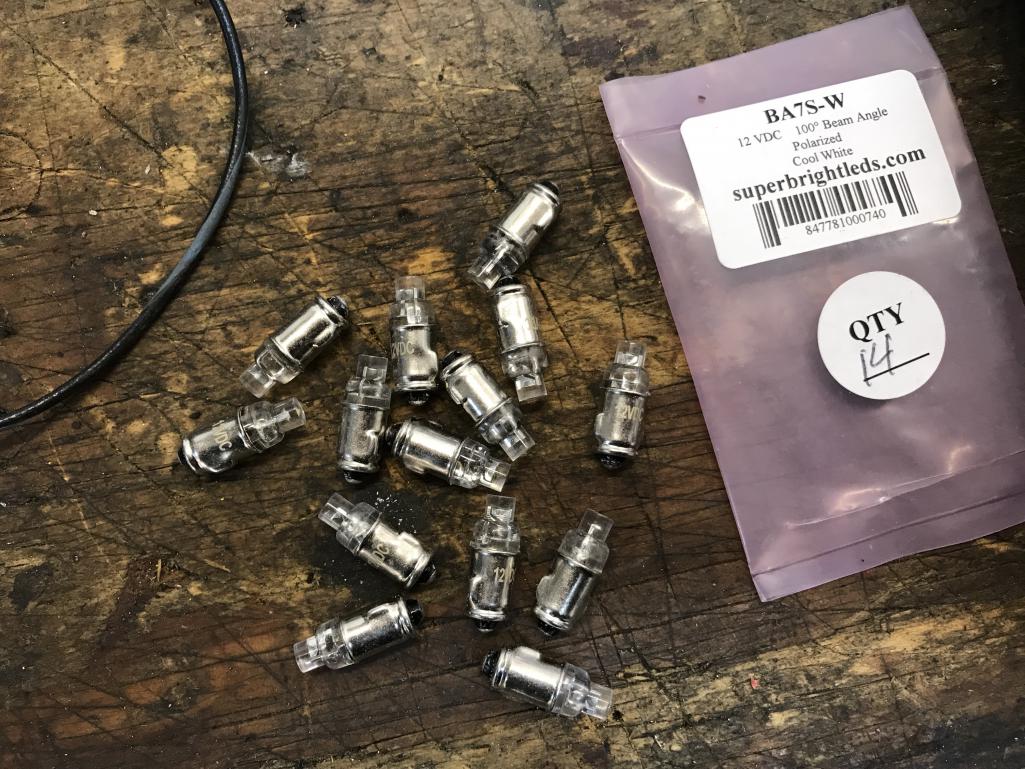
|
|
|
|
| bkrantz |
May 6 2021, 07:21 PM
Post
#2730
|
|
914 Guru Group: Members Posts: 8,066 Joined: 3-August 19 From: SW Colorado Member No.: 23,343 Region Association: Rocky Mountains |
First I replaced all the bulbs in the common back-light string.
Attached thumbnail(s) 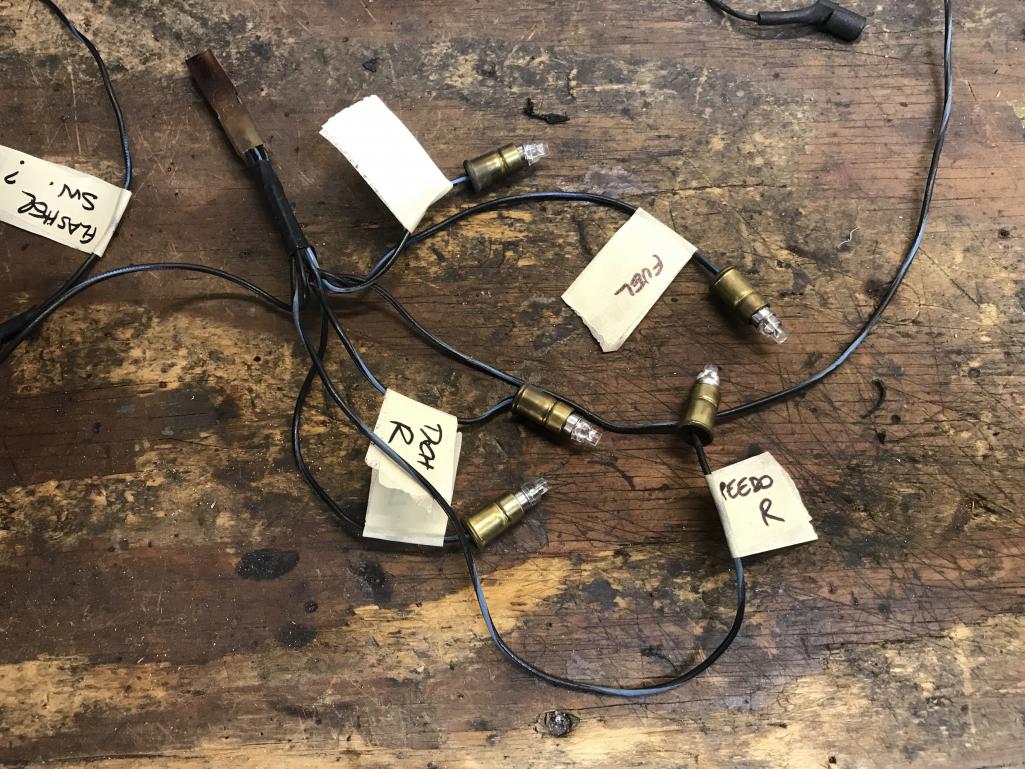
|
|
|
|
| bkrantz |
May 6 2021, 07:25 PM
Post
#2731
|
|
914 Guru Group: Members Posts: 8,066 Joined: 3-August 19 From: SW Colorado Member No.: 23,343 Region Association: Rocky Mountains |
Here's my references for wire locations: photos I took in October 2019 (never enough) and the color schematics.
Attached thumbnail(s) 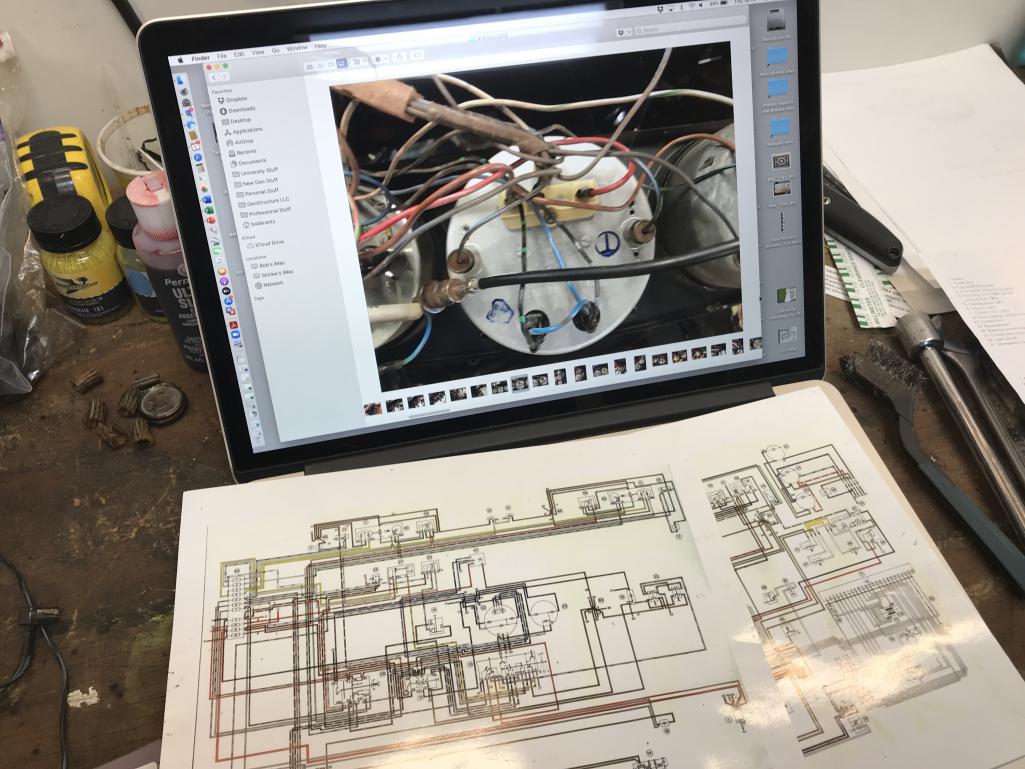
|
|
|
|
| bkrantz |
May 6 2021, 07:26 PM
Post
#2732
|
|
914 Guru Group: Members Posts: 8,066 Joined: 3-August 19 From: SW Colorado Member No.: 23,343 Region Association: Rocky Mountains |
Ready to start!
Attached thumbnail(s) 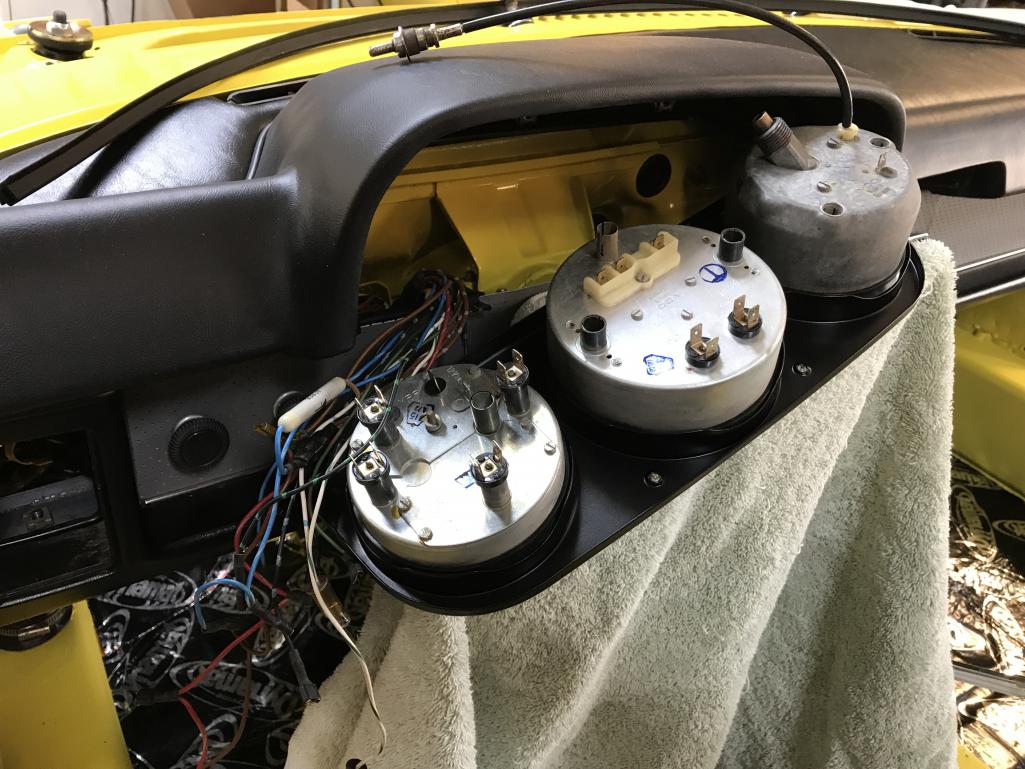
|
|
|
|
| bkrantz |
May 6 2021, 07:28 PM
Post
#2733
|
|
914 Guru Group: Members Posts: 8,066 Joined: 3-August 19 From: SW Colorado Member No.: 23,343 Region Association: Rocky Mountains |
And then, done. I was able to find places for all the wires, and wires for all the places.
Attached thumbnail(s) 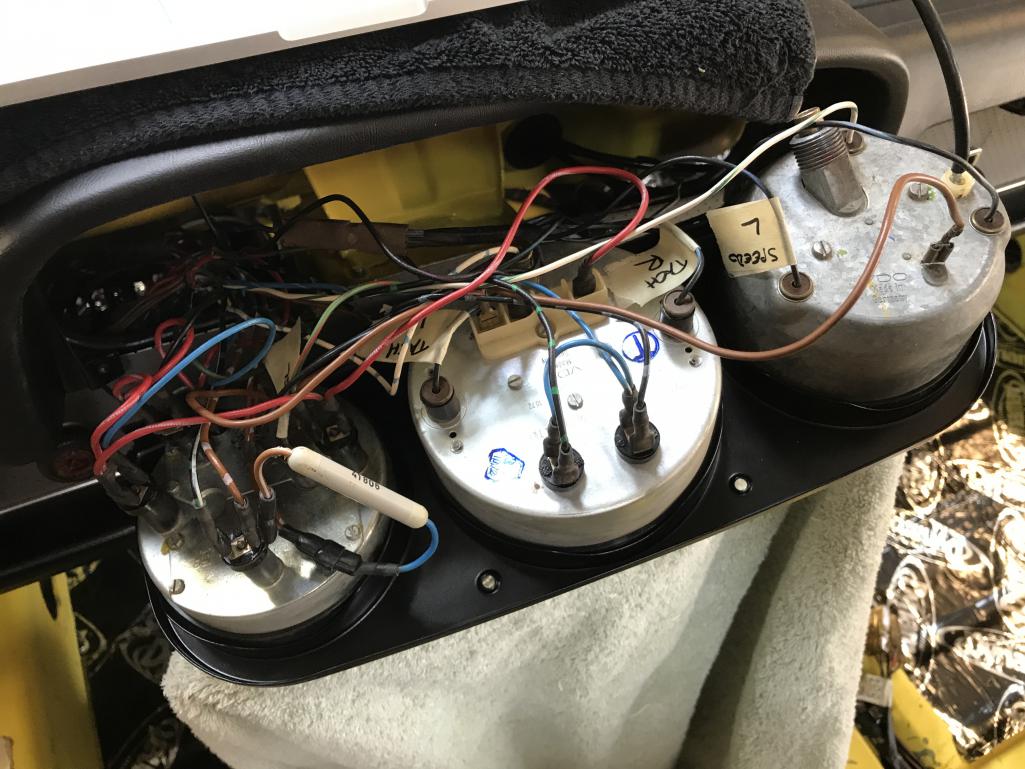
|
|
|
|
| bkrantz |
May 6 2021, 07:30 PM
Post
#2734
|
|
914 Guru Group: Members Posts: 8,066 Joined: 3-August 19 From: SW Colorado Member No.: 23,343 Region Association: Rocky Mountains |
And then I installed the gauge panel.
I have a couple more things to check, and then I plan to connect a battery and see if some things work. Attached thumbnail(s) 
|
|
|
|
| Kansas 914 |
May 6 2021, 07:48 PM
Post
#2735
|
|
Advanced Member Group: Members Posts: 2,999 Joined: 1-March 03 From: Durango, Colorado Member No.: 373 Region Association: Rocky Mountains |
QUOTE(bkrantz @ May 6 2021, 07:28 PM)  And then, done. I was able to find places for all the wires, and wires for all the places. Make sure you don't put an LED in the "GEN" socket. The alternator needs a load to charge. I think you are already aware of that. |
|
|
|
| bkrantz |
May 6 2021, 08:06 PM
Post
#2736
|
|
914 Guru Group: Members Posts: 8,066 Joined: 3-August 19 From: SW Colorado Member No.: 23,343 Region Association: Rocky Mountains |
QUOTE(Kansas 914 @ May 6 2021, 07:48 PM) QUOTE(bkrantz @ May 6 2021, 07:28 PM) And then, done. I was able to find places for all the wires, and wires for all the places. Make sure you don't put an LED in the "GEN" socket. The alternator needs a load to charge. I think you are already aware of that. Hi, Mike. I should have mentioned that--one of the few things I remembered to do (or not to do) the first time. |
|
|
|
| Puebloswatcop |
May 7 2021, 07:08 AM
Post
#2737
|
|
Senior Member Group: Members Posts: 1,395 Joined: 27-December 14 From: Mineola, Texas Member No.: 18,258 Region Association: Southwest Region |
Love following your build. It has been full of the small details that plague these builds along with your solutions to the problems. Thanks for sharing.
|
|
|
|
| 930cabman |
May 7 2021, 01:00 PM
Post
#2738
|
|
Advanced Member Group: Members Posts: 3,546 Joined: 12-November 20 From: Buffalo Member No.: 24,877 Region Association: North East States |
QUOTE(Puebloswatcop @ May 7 2021, 07:08 AM) Love following your build. It has been full of the small details that plague these builds along with your solutions to the problems. Thanks for sharing. +1, tons of details most of which are never addressed (myself included) Great job and thank you for documenting. Is there an end date for the build? |
|
|
|
| bkrantz |
May 7 2021, 07:15 PM
Post
#2739
|
|
914 Guru Group: Members Posts: 8,066 Joined: 3-August 19 From: SW Colorado Member No.: 23,343 Region Association: Rocky Mountains |
QUOTE(930cabman @ May 7 2021, 01:00 PM) QUOTE(Puebloswatcop @ May 7 2021, 07:08 AM) Love following your build. It has been full of the small details that plague these builds along with your solutions to the problems. Thanks for sharing. +1, tons of details most of which are never addressed (myself included) Great job and thank you for documenting. Is there an end date for the build? Thanks, guys. I was aiming for September, since we have our big annual car show on Labor Day (except last year). But now I have some other things showing up on my calendar. And even if I had nothing else, it would be a challenge. Since winter can start here in October, I think I should pace this into next spring. |
|
|
|
| bkrantz |
May 7 2021, 07:19 PM
Post
#2740
|
|
914 Guru Group: Members Posts: 8,066 Joined: 3-August 19 From: SW Colorado Member No.: 23,343 Region Association: Rocky Mountains |
I got some 50 mm hose, that almost matches the 60 mm stuff from 914 Rubber. It is also a bit stiffer.
Attached thumbnail(s) 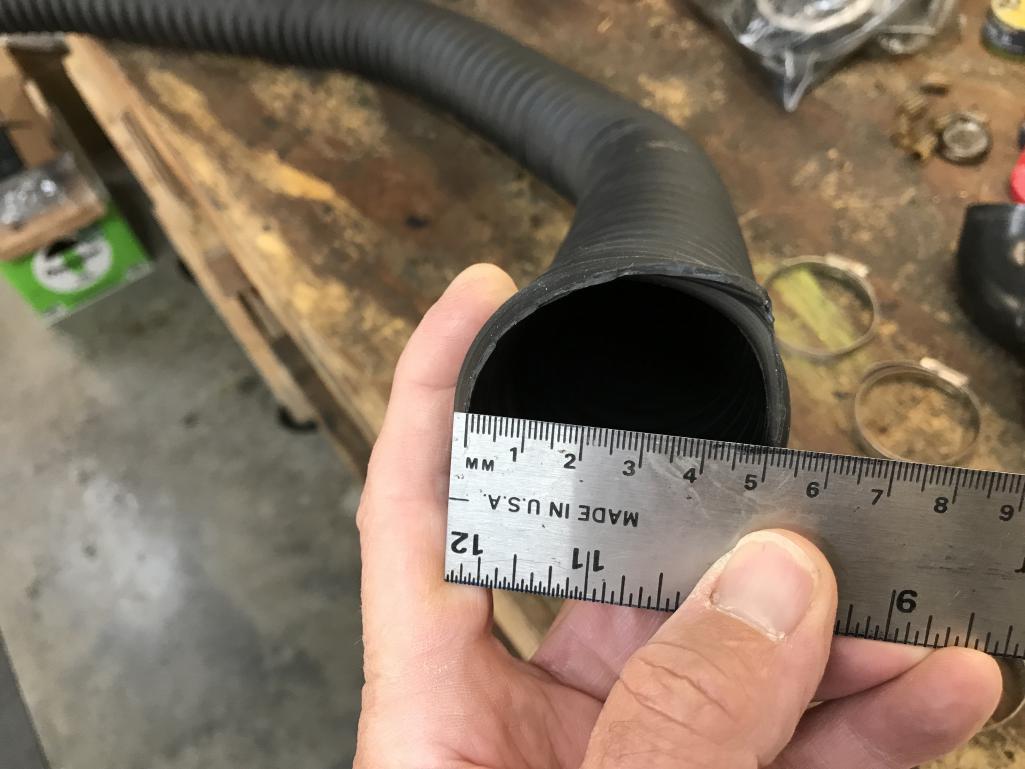
|
|
|
|
|
2 User(s) are reading this topic (2 Guests and 0 Anonymous Users)
0 Members:

|
Lo-Fi Version | Time is now: 27th September 2024 - 09:21 PM |
Invision Power Board
v9.1.4 © 2024 IPS, Inc.