|
|
|
Porsche, and the Porsche crest are registered trademarks of Dr. Ing. h.c. F. Porsche AG.
This site is not affiliated with Porsche in any way. Its only purpose is to provide an online forum for car enthusiasts. All other trademarks are property of their respective owners. |
|
|

  |

| bkrantz |
 Dec 15 2021, 08:24 PM Dec 15 2021, 08:24 PM
Post
#4341
|
|
914 Guru  Group: Members Posts: 8,347 Joined: 3-August 19 From: SW Colorado Member No.: 23,343 Region Association: Rocky Mountains |
The ECU will mount to a plate attached to the trunk wall, and the relay box will piggy-back on top of the ECU. There is enough room to attach serial cables to the right side of the ECU, and the big cable clears the jack.
I also mocked up the position of the O2 signal processor, and the tach signal adapter. I plan a 1 inch hole for cables to pass into the engine compartment just to the right of the tach adapter. Attached thumbnail(s) 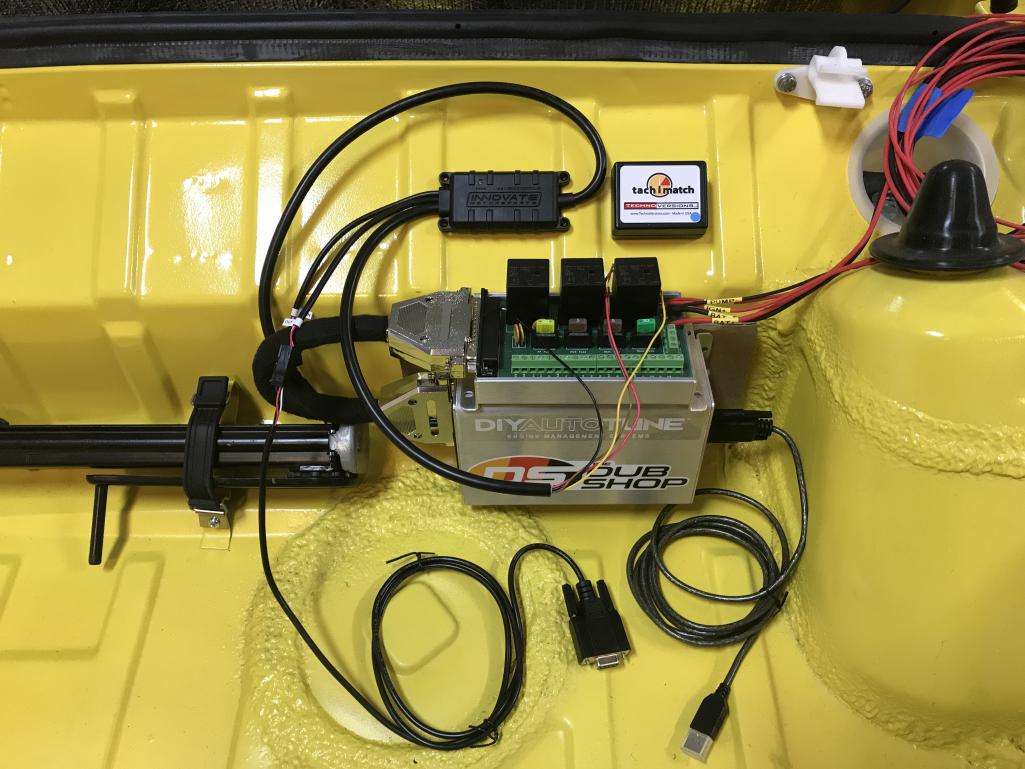
|
   |

 
|
| bkrantz |
Dec 15 2021, 08:26 PM
Post
#4342
|
|
914 Guru Group: Members Posts: 8,347 Joined: 3-August 19 From: SW Colorado Member No.: 23,343 Region Association: Rocky Mountains |
With my remaining time today, I worked out the connections between all the components. I think I finally have it all sorted.
Attached thumbnail(s) 
|
|
|
|
| Puebloswatcop |
Dec 16 2021, 08:41 AM
Post
#4343
|
|
Senior Member Group: Members Posts: 1,444 Joined: 27-December 14 From: Mineola, Texas Member No.: 18,258 Region Association: Southwest Region |
QUOTE(bkrantz @ Dec 15 2021, 08:24 PM)  The ECU will mount to a plate attached to the trunk wall, and the relay box will piggy-back on top of the ECU. There is enough room to attach serial cables to the right side of the ECU, and the big cable clears the jack. I also mocked up the position of the O2 signal processor, and the tach signal adapter. I plan a 1 inch hole for cables to pass into the engine compartment just to the right of the tach adapter. I really like your mounting solution it looks very clean and organized... |
|
|
|
| bkrantz |
Dec 16 2021, 08:31 PM
Post
#4344
|
|
914 Guru Group: Members Posts: 8,347 Joined: 3-August 19 From: SW Colorado Member No.: 23,343 Region Association: Rocky Mountains |
QUOTE(Puebloswatcop @ Dec 16 2021, 07:41 AM) QUOTE(bkrantz @ Dec 15 2021, 08:24 PM) The ECU will mount to a plate attached to the trunk wall, and the relay box will piggy-back on top of the ECU. There is enough room to attach serial cables to the right side of the ECU, and the big cable clears the jack. I also mocked up the position of the O2 signal processor, and the tach signal adapter. I plan a 1 inch hole for cables to pass into the engine compartment just to the right of the tach adapter. I really like your mounting solution it looks very clean and organized... Thanks--I still like it today, but I will wait to make it permanent until after I get all the wiring done. |
|
|
|
| bkrantz |
Dec 16 2021, 08:34 PM
Post
#4345
|
|
914 Guru Group: Members Posts: 8,347 Joined: 3-August 19 From: SW Colorado Member No.: 23,343 Region Association: Rocky Mountains |
More details while I am waiting for parts to finish the engine-trans mating.
I got out the pieces for the shift rod, including new bushings and conical screws. Attached thumbnail(s) 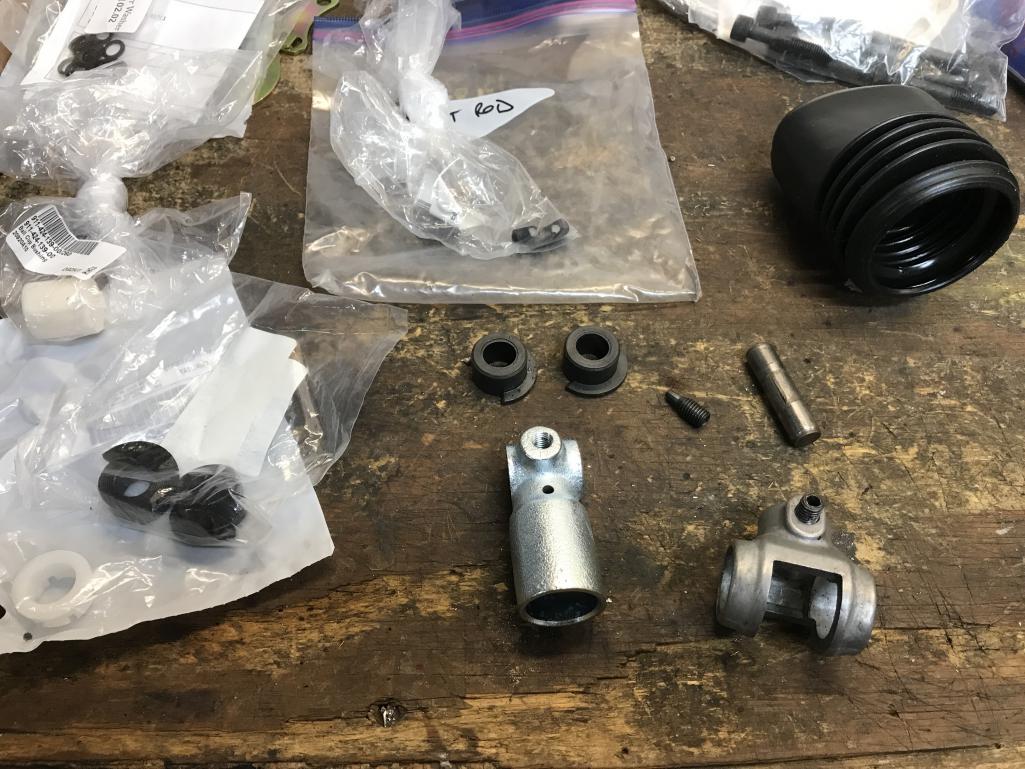
|
|
|
|
| bkrantz |
Dec 16 2021, 08:36 PM
Post
#4346
|
|
914 Guru Group: Members Posts: 8,347 Joined: 3-August 19 From: SW Colorado Member No.: 23,343 Region Association: Rocky Mountains |
New bushings pressed into the coupling.
Attached thumbnail(s) 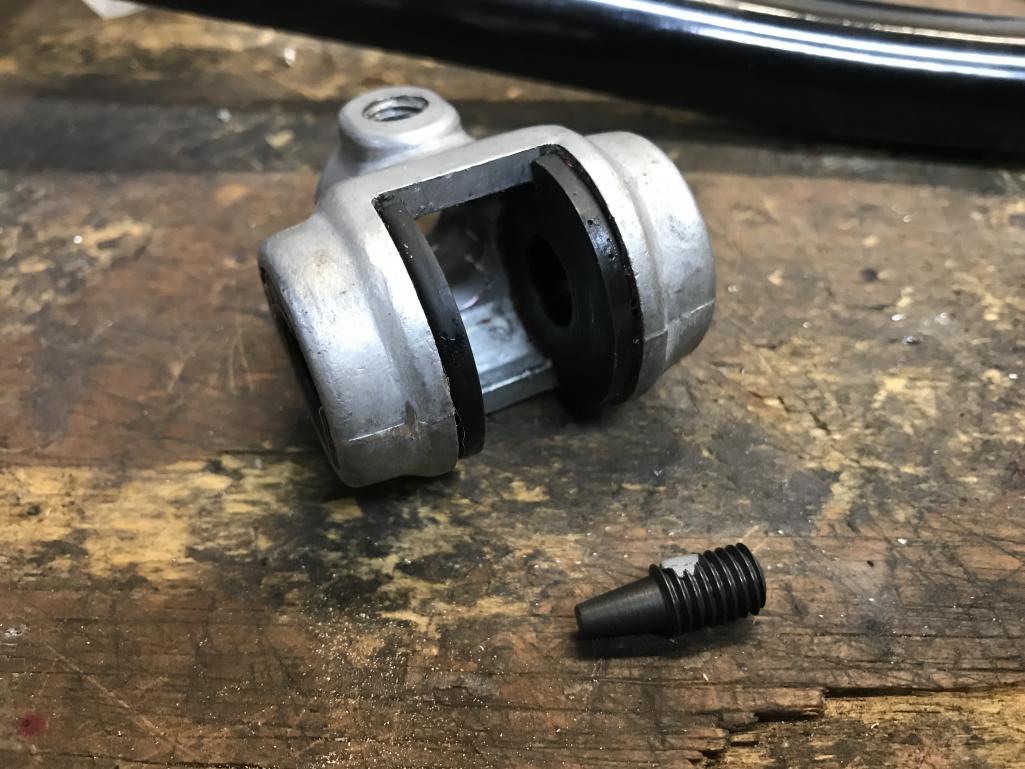
|
|
|
|
| bkrantz |
Dec 16 2021, 08:37 PM
Post
#4347
|
|
914 Guru Group: Members Posts: 8,347 Joined: 3-August 19 From: SW Colorado Member No.: 23,343 Region Association: Rocky Mountains |
Coupling on the rear rod (and yes, the screw side will face down).
Attached thumbnail(s) 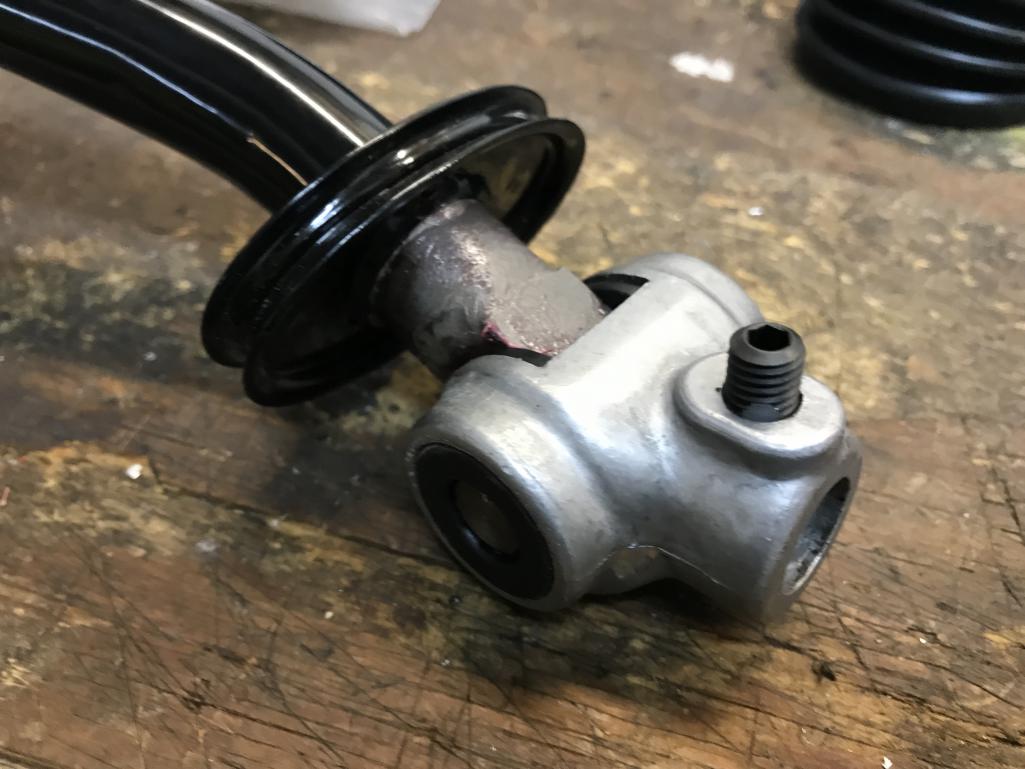
|
|
|
|
| bkrantz |
Dec 16 2021, 08:38 PM
Post
#4348
|
|
914 Guru Group: Members Posts: 8,347 Joined: 3-August 19 From: SW Colorado Member No.: 23,343 Region Association: Rocky Mountains |
With the rubber boot, ready to install.
Attached thumbnail(s) 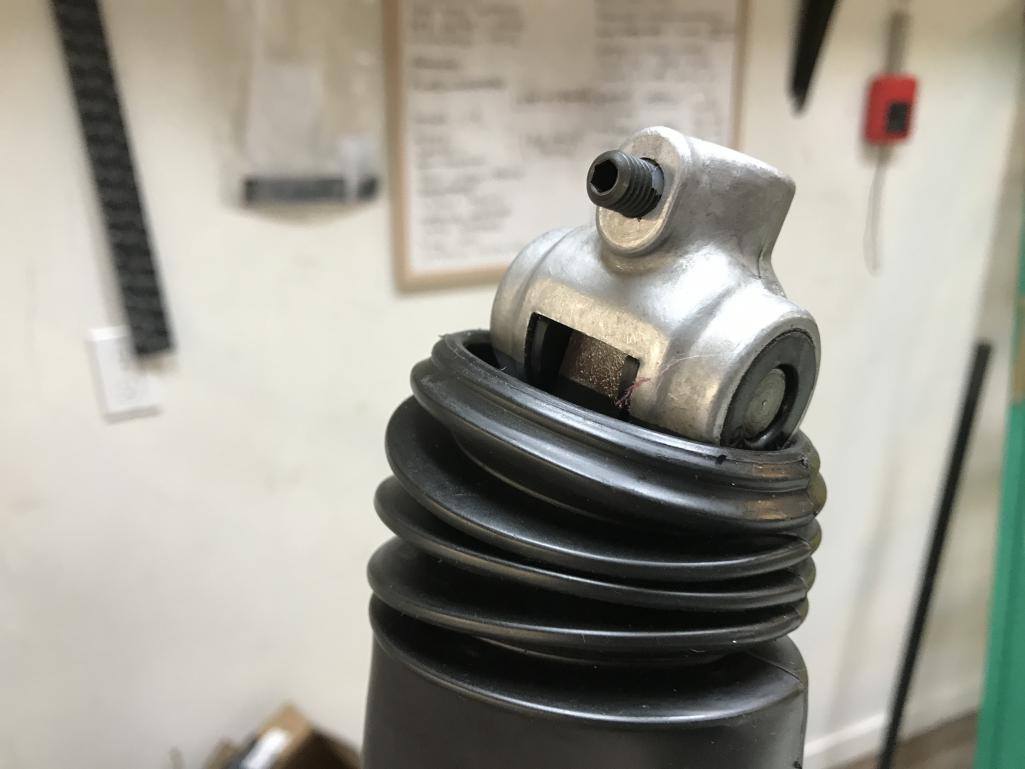
|
|
|
|
| bkrantz |
Dec 16 2021, 08:40 PM
Post
#4349
|
|
914 Guru Group: Members Posts: 8,347 Joined: 3-August 19 From: SW Colorado Member No.: 23,343 Region Association: Rocky Mountains |
A couple of problems I did not notice with the front rod: I installed it "sideways", and did not notice that the powder coating got onto the machined end that inserts snugly into the coupling.
Attached thumbnail(s) 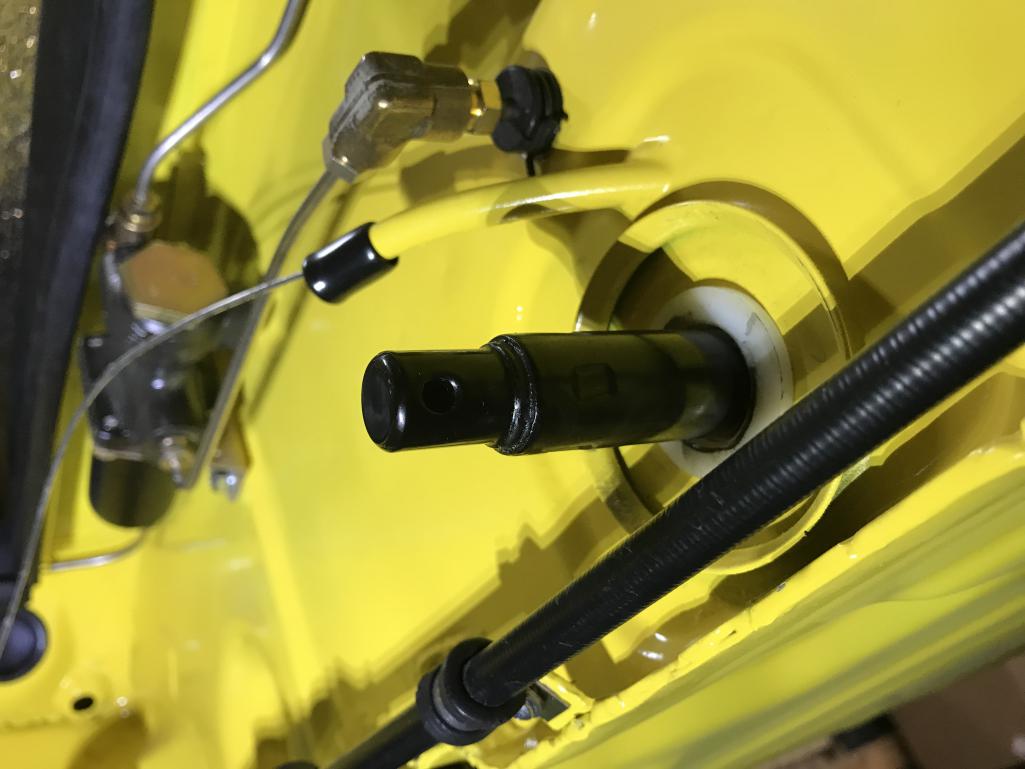
|
|
|
|
| bkrantz |
Dec 16 2021, 08:42 PM
Post
#4350
|
|
914 Guru Group: Members Posts: 8,347 Joined: 3-August 19 From: SW Colorado Member No.: 23,343 Region Association: Rocky Mountains |
A bit of scraping and sanding, and the rod fits into the coupling.
Attached thumbnail(s) 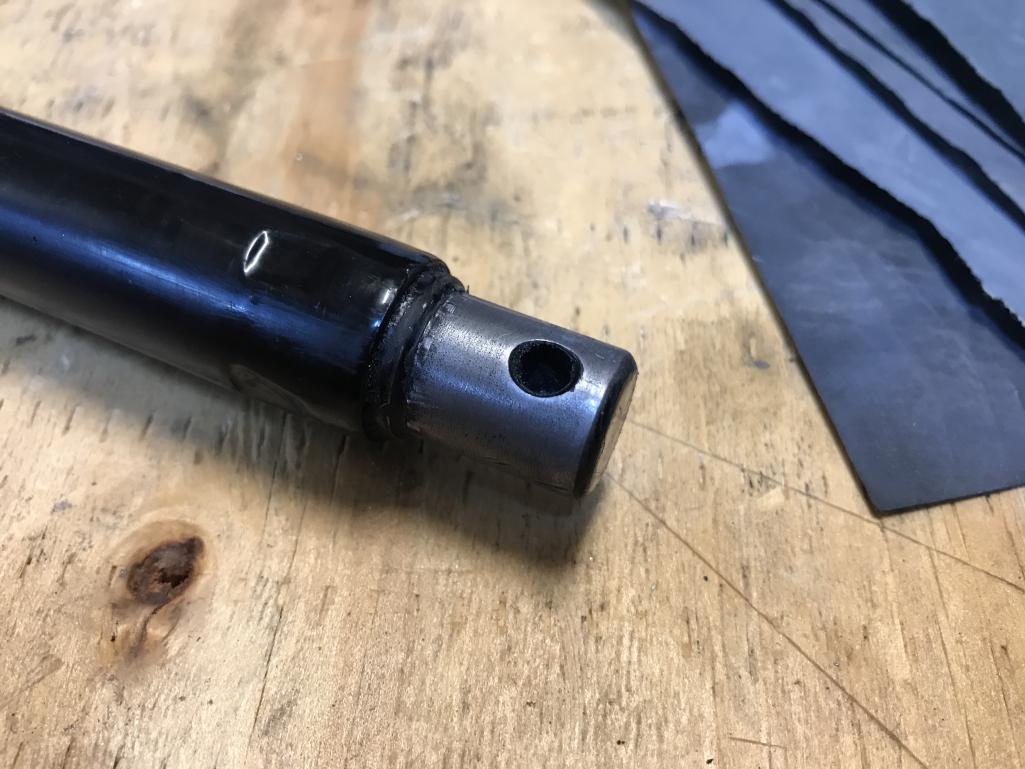
|
|
|
|
| bkrantz |
Dec 16 2021, 08:42 PM
Post
#4351
|
|
914 Guru Group: Members Posts: 8,347 Joined: 3-August 19 From: SW Colorado Member No.: 23,343 Region Association: Rocky Mountains |
Back in the car, and roughly aligned.
Attached thumbnail(s) 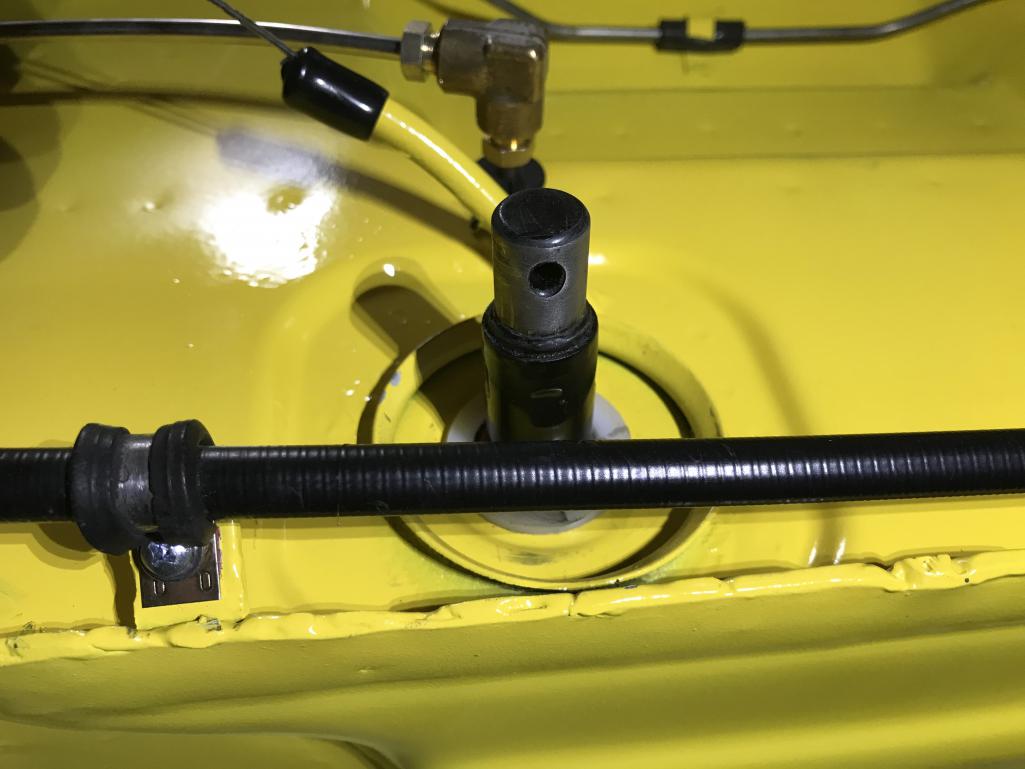
|
|
|
|
| bkrantz |
Dec 16 2021, 08:45 PM
Post
#4352
|
|
914 Guru Group: Members Posts: 8,347 Joined: 3-August 19 From: SW Colorado Member No.: 23,343 Region Association: Rocky Mountains |
I forgot to mention that to remove the front rod, I have to open access to the shift lever base and loosen the bolt. I guess I should leave it open until the engine and trans are in place.
Attached thumbnail(s) 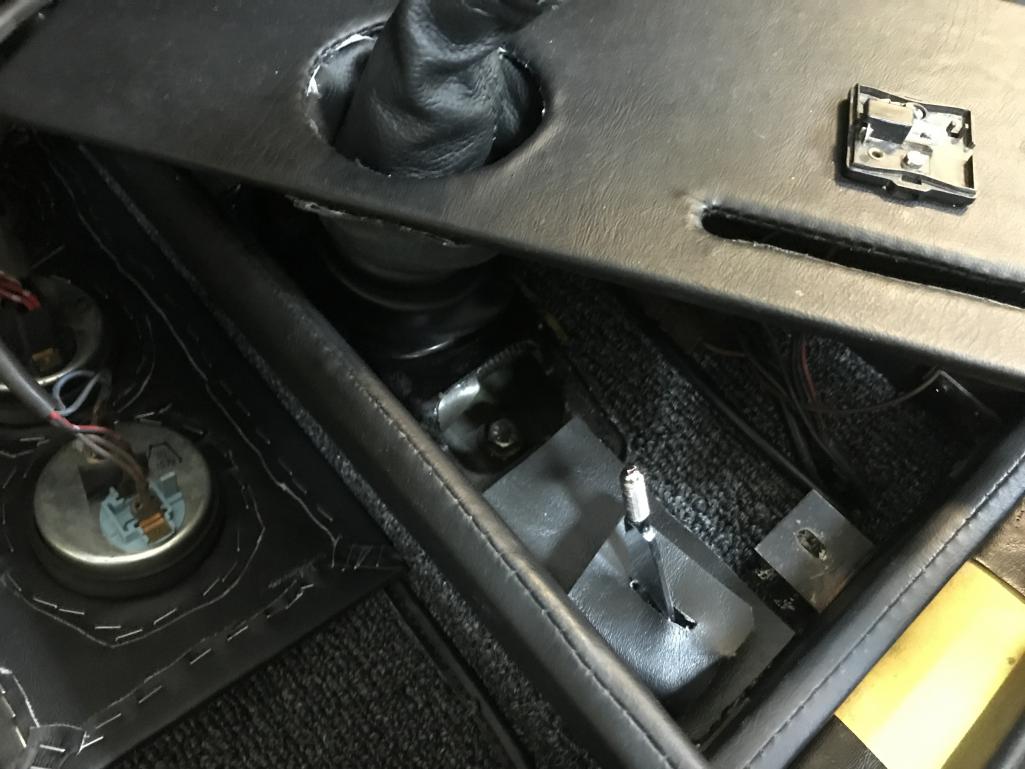
|
|
|
|
| bkrantz |
Dec 16 2021, 08:47 PM
Post
#4353
|
|
914 Guru Group: Members Posts: 8,347 Joined: 3-August 19 From: SW Colorado Member No.: 23,343 Region Association: Rocky Mountains |
Final shift linkage bit, at the trans input. New bushings for the shaft hole and the ball joint.
Attached thumbnail(s) 
|
|
|
|
| bkrantz |
Dec 16 2021, 08:50 PM
Post
#4354
|
|
914 Guru Group: Members Posts: 8,347 Joined: 3-August 19 From: SW Colorado Member No.: 23,343 Region Association: Rocky Mountains |
Finally, the input coupler--more re-plated bling that nobody will see.
Attached thumbnail(s) 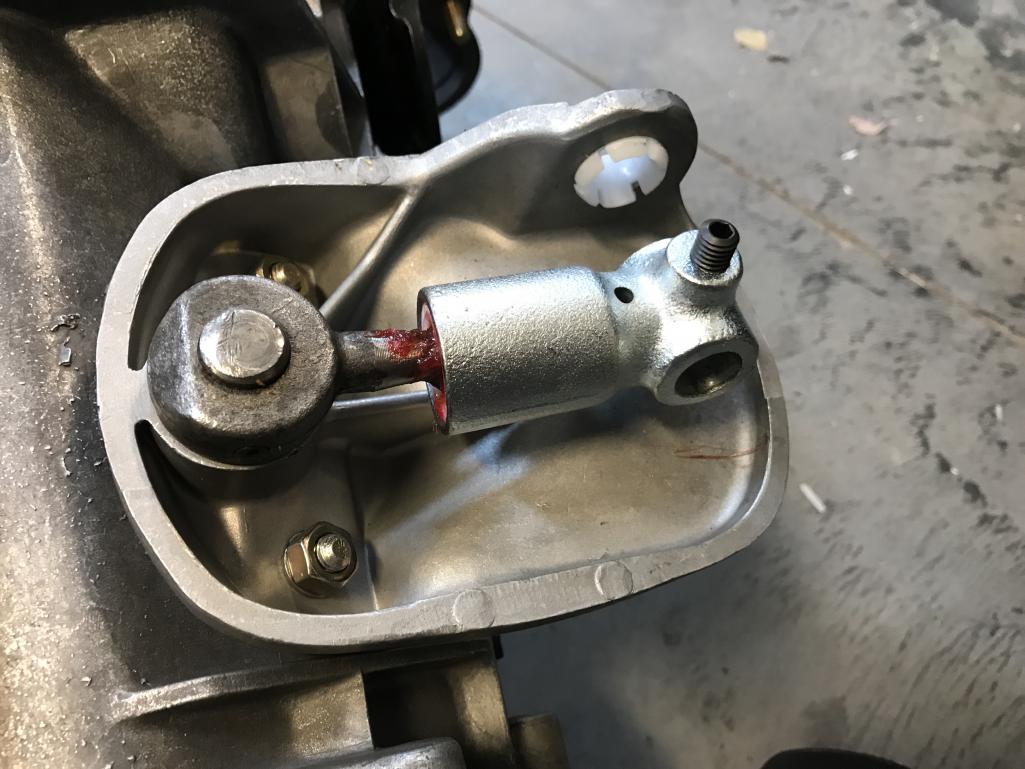
|
|
|
|
| nivekdodge |
Dec 16 2021, 09:44 PM
Post
#4355
|
|
Member Group: Members Posts: 299 Joined: 28-August 21 From: Pittsburgh Pa Member No.: 25,860 Region Association: MidAtlantic Region |
Exquisite
|
|
|
|
| bkrantz |
Dec 17 2021, 09:27 PM
Post
#4356
|
|
914 Guru Group: Members Posts: 8,347 Joined: 3-August 19 From: SW Colorado Member No.: 23,343 Region Association: Rocky Mountains |
I am trying to do all the things that are easier while the engine in still out. I got out all the trunk hinge parts and torsion bars.
Attached thumbnail(s) 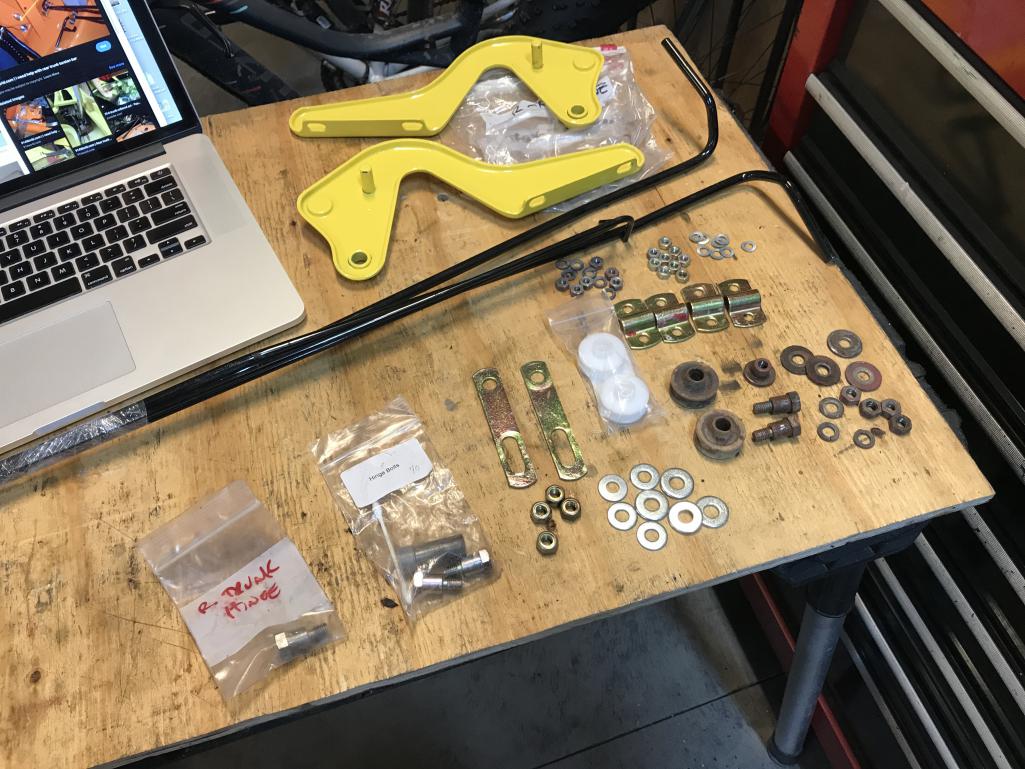
|
|
|
|
| bkrantz |
Dec 17 2021, 09:28 PM
Post
#4357
|
|
914 Guru Group: Members Posts: 8,347 Joined: 3-August 19 From: SW Colorado Member No.: 23,343 Region Association: Rocky Mountains |
First, I used a die to chase all the studs.
Attached thumbnail(s) 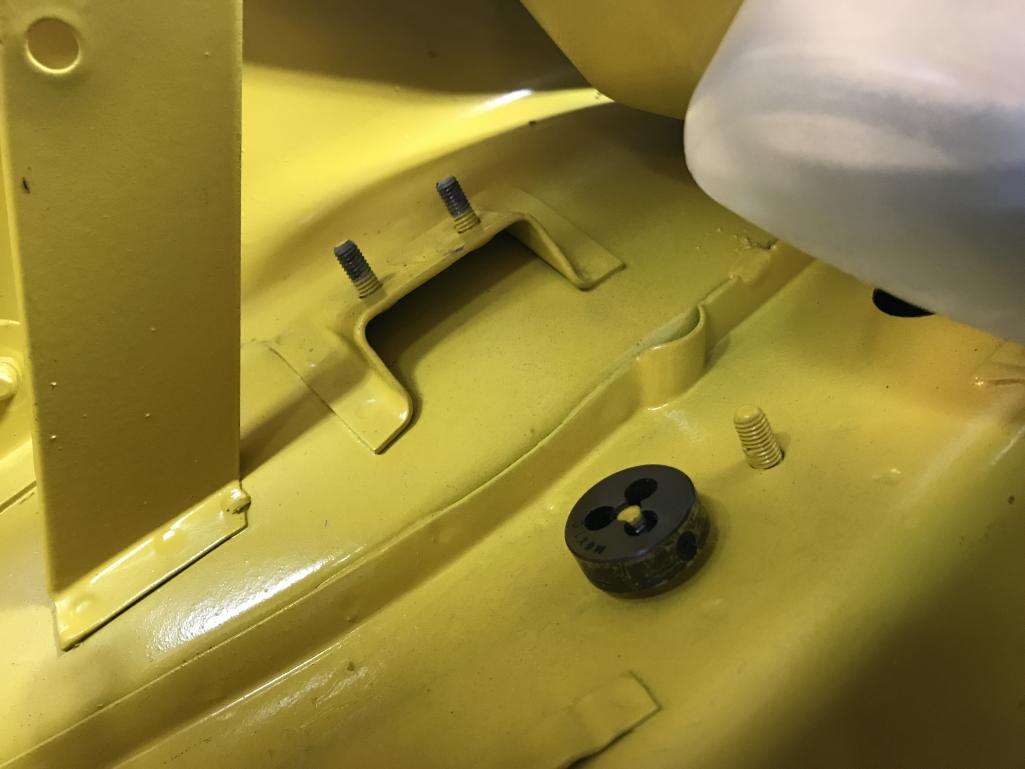
|
|
|
|
| bkrantz |
Dec 17 2021, 09:31 PM
Post
#4358
|
|
914 Guru Group: Members Posts: 8,347 Joined: 3-August 19 From: SW Colorado Member No.: 23,343 Region Association: Rocky Mountains |
Then I fought the torsion bars into place, and clamped down. These things as a b*tch even at the beginning.
Attached thumbnail(s) 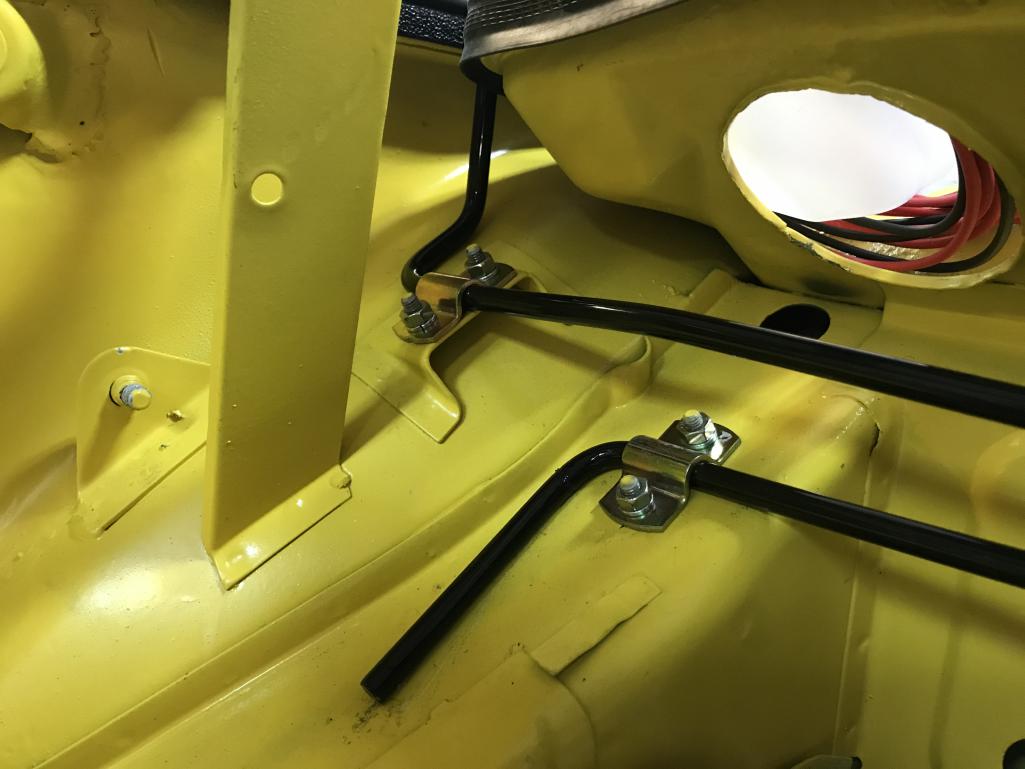
|
|
|
|
| bkrantz |
Dec 17 2021, 09:33 PM
Post
#4359
|
|
914 Guru Group: Members Posts: 8,347 Joined: 3-August 19 From: SW Colorado Member No.: 23,343 Region Association: Rocky Mountains |
At least I did remember to pass the bars through the hoop bracket. BTW, these are also powder-coated.
Attached thumbnail(s) 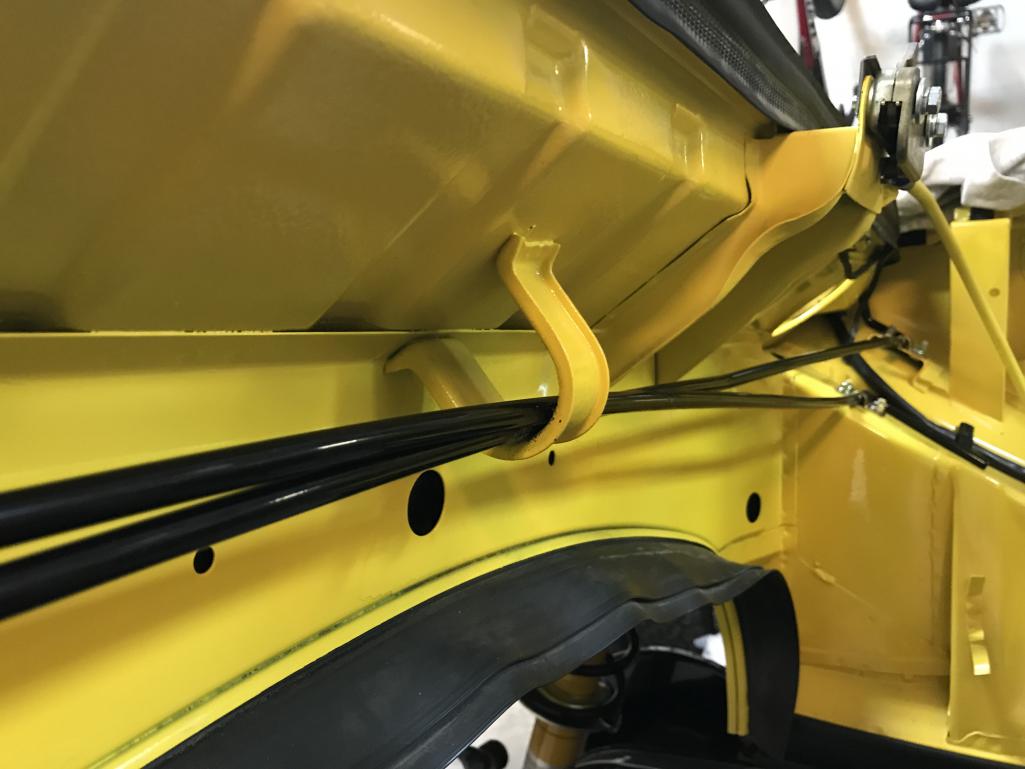
|
|
|
|
| bkrantz |
Dec 17 2021, 09:36 PM
Post
#4360
|
|
914 Guru Group: Members Posts: 8,347 Joined: 3-August 19 From: SW Colorado Member No.: 23,343 Region Association: Rocky Mountains |
Then the hinges, with the lever piece. I used lock nuts on the lever studs.
Attached thumbnail(s) 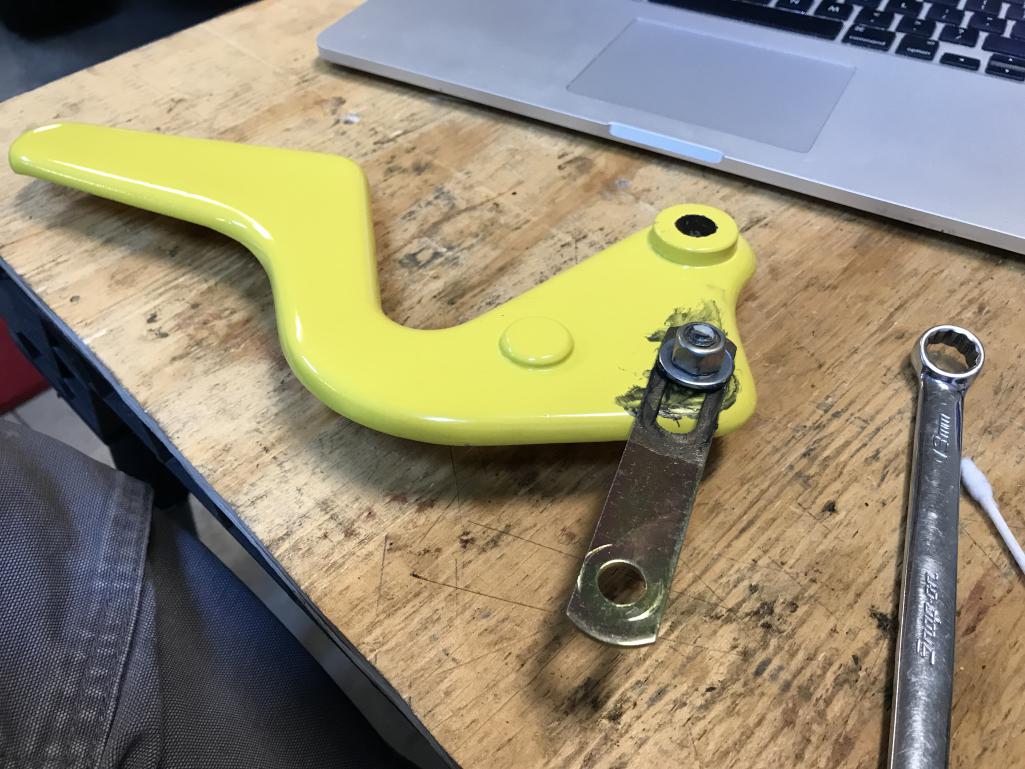
|
|
|
|
|
1 User(s) are reading this topic (1 Guests and 0 Anonymous Users)
0 Members:

|
Lo-Fi Version | Time is now: 29th April 2025 - 08:27 AM |
Invision Power Board
v9.1.4 © 2025 IPS, Inc.