|
|
|
Porsche, and the Porsche crest are registered trademarks of Dr. Ing. h.c. F. Porsche AG.
This site is not affiliated with Porsche in any way. Its only purpose is to provide an online forum for car enthusiasts. All other trademarks are property of their respective owners. |
|
|

  |

| bkrantz |
 Dec 18 2021, 09:14 PM Dec 18 2021, 09:14 PM
Post
#4381
|
|
914 Guru  Group: Members Posts: 8,347 Joined: 3-August 19 From: SW Colorado Member No.: 23,343 Region Association: Rocky Mountains |
To minimize mess, after installing one CV on each half-shaft, I attached the stub axle with a new paper gasket.
Attached thumbnail(s) 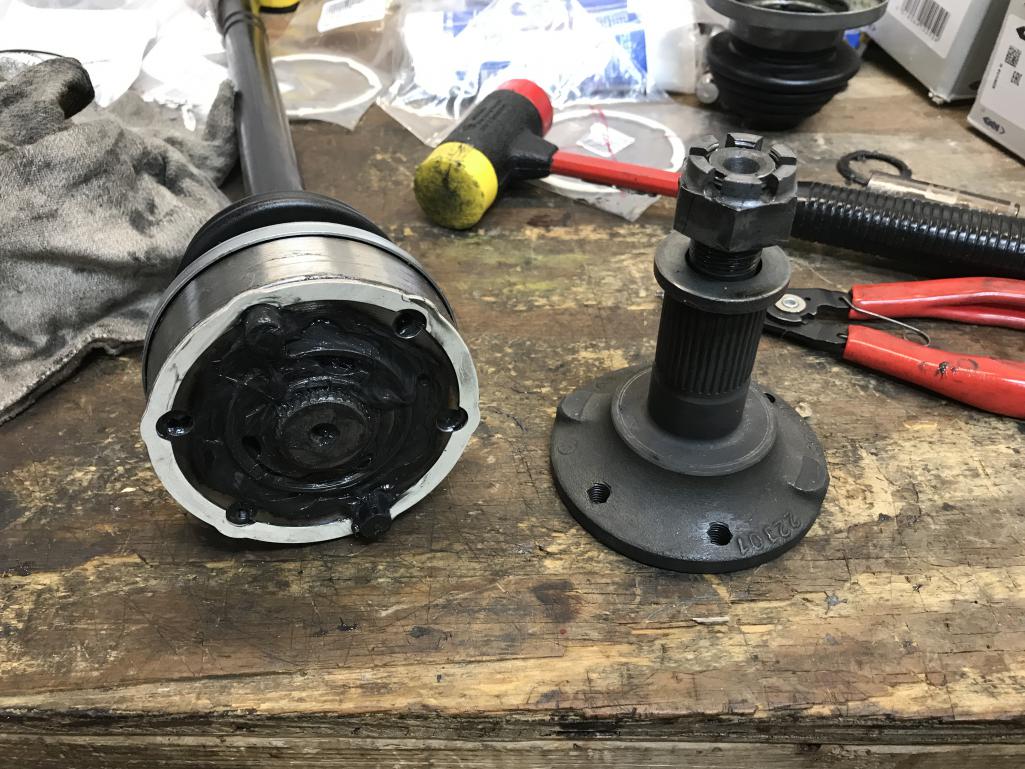
|
   |

 
|
| bkrantz |
Dec 18 2021, 09:16 PM
Post
#4382
|
|
914 Guru Group: Members Posts: 8,347 Joined: 3-August 19 From: SW Colorado Member No.: 23,343 Region Association: Rocky Mountains |
Without my press, I used a vise to squeeze the CV with new locating pins into the flange, enough to get the bolts started.
Attached thumbnail(s) 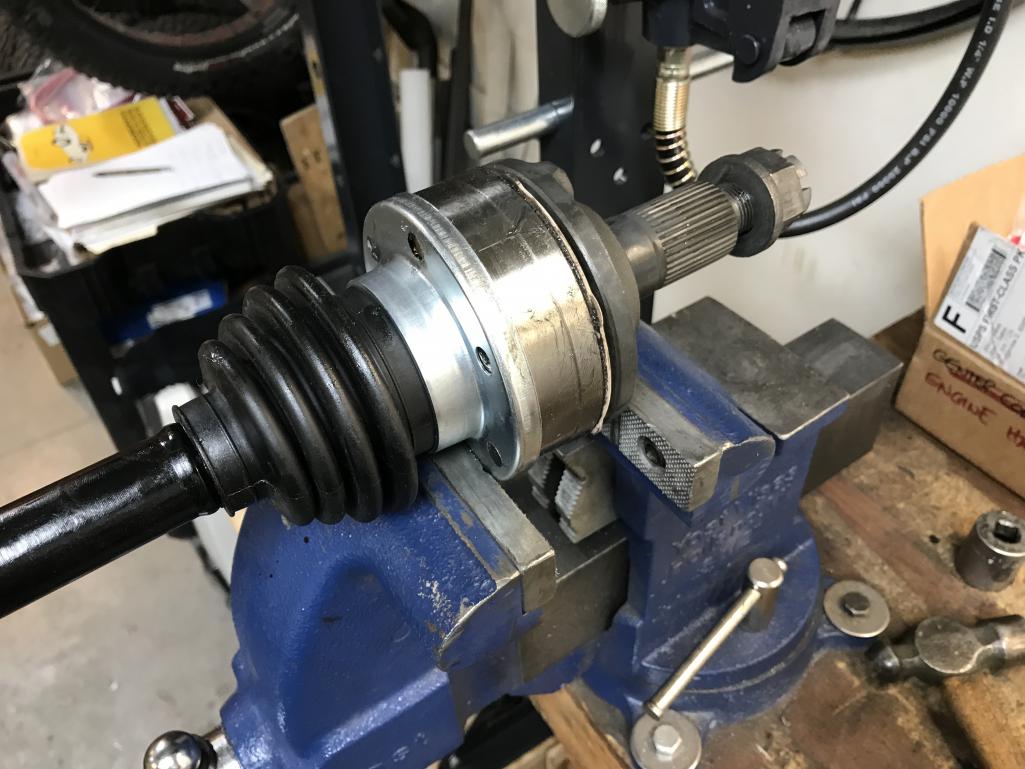
|
|
|
|
| bkrantz |
Dec 18 2021, 09:23 PM
Post
#4383
|
|
914 Guru Group: Members Posts: 8,347 Joined: 3-August 19 From: SW Colorado Member No.: 23,343 Region Association: Rocky Mountains |
I then used new factory bolts, with new Schorr washers, and re-plated hardware, and got the stub axles attached.
I then installed the CV on the other end. Attached thumbnail(s) 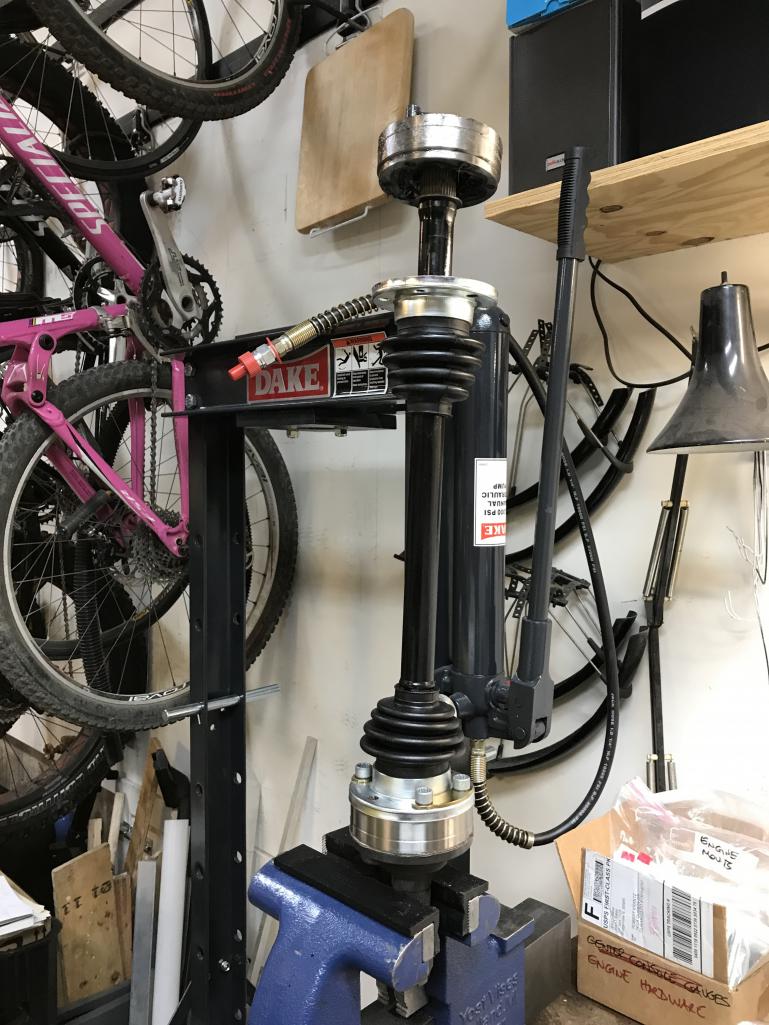
|
|
|
|
| bkrantz |
Dec 18 2021, 09:26 PM
Post
#4384
|
|
914 Guru Group: Members Posts: 8,347 Joined: 3-August 19 From: SW Colorado Member No.: 23,343 Region Association: Rocky Mountains |
Eventually, I had two complete axles, ready to install.
Attached thumbnail(s) 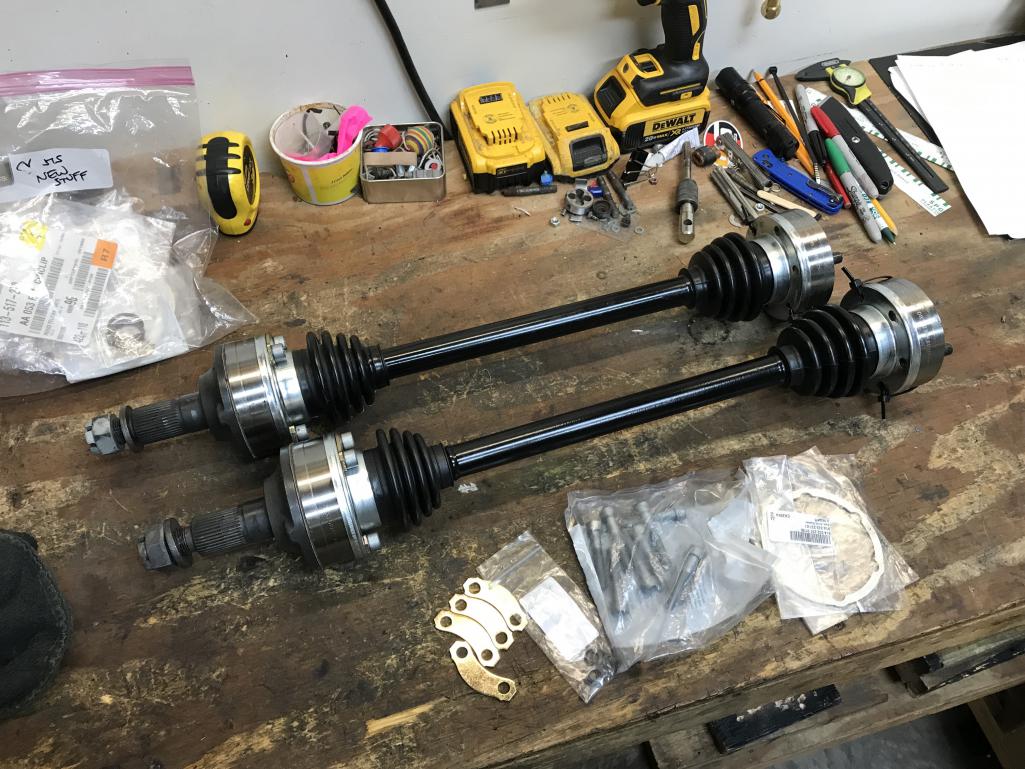
|
|
|
|
| bkrantz |
Dec 18 2021, 09:27 PM
Post
#4385
|
|
914 Guru Group: Members Posts: 8,347 Joined: 3-August 19 From: SW Colorado Member No.: 23,343 Region Association: Rocky Mountains |
And so, into the rear hubs.
Attached thumbnail(s) 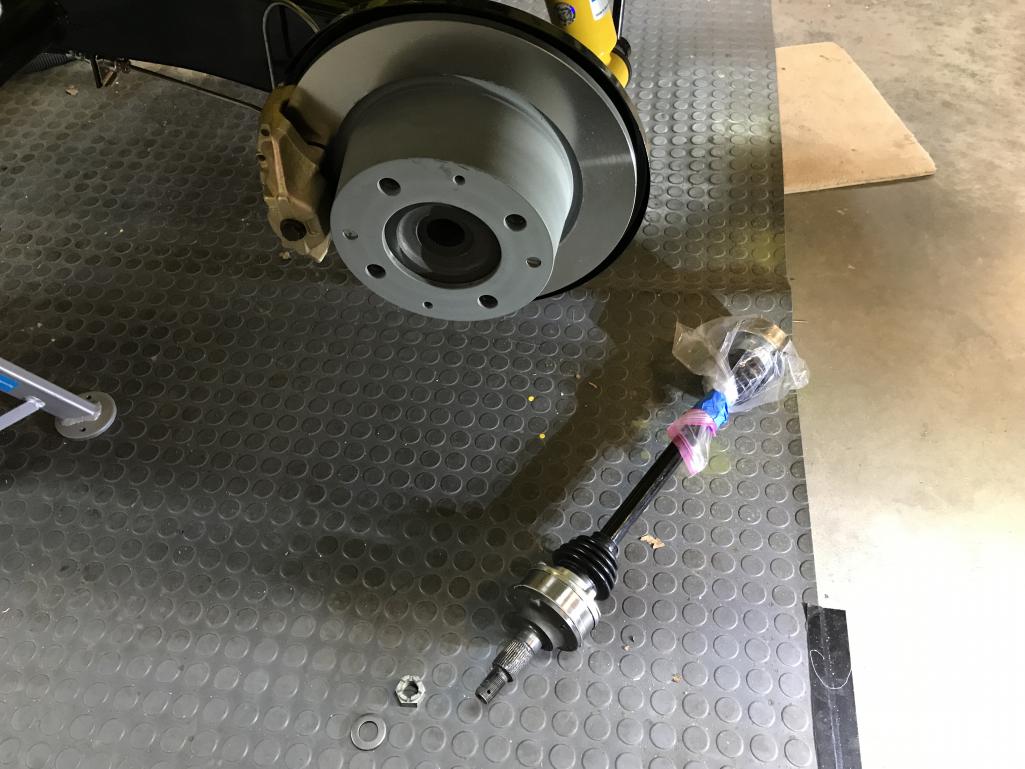
|
|
|
|
| bkrantz |
Dec 18 2021, 09:28 PM
Post
#4386
|
|
914 Guru Group: Members Posts: 8,347 Joined: 3-August 19 From: SW Colorado Member No.: 23,343 Region Association: Rocky Mountains |
Easy to insert the splined stub axle.
Attached thumbnail(s) 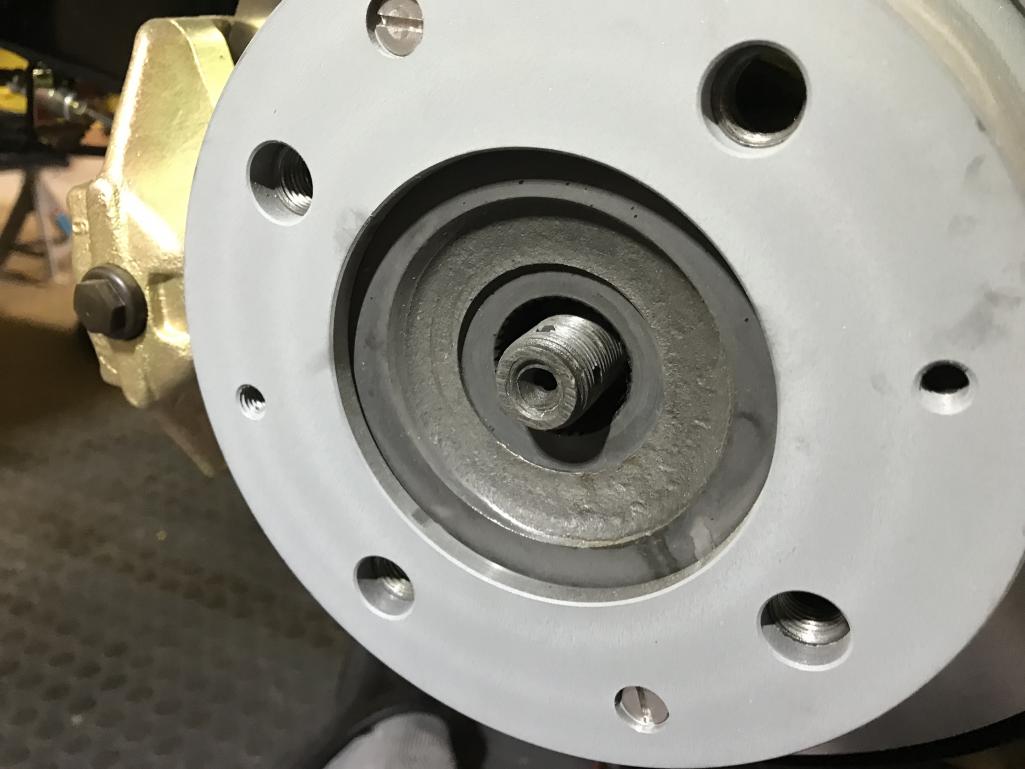
|
|
|
|
| bkrantz |
Dec 18 2021, 09:39 PM
Post
#4387
|
|
914 Guru Group: Members Posts: 8,347 Joined: 3-August 19 From: SW Colorado Member No.: 23,343 Region Association: Rocky Mountains |
I braced the hub, and then got out the big torque wrench. 30-35 mkp (220-250 ft-lbs) is a big twist.
Attached thumbnail(s) 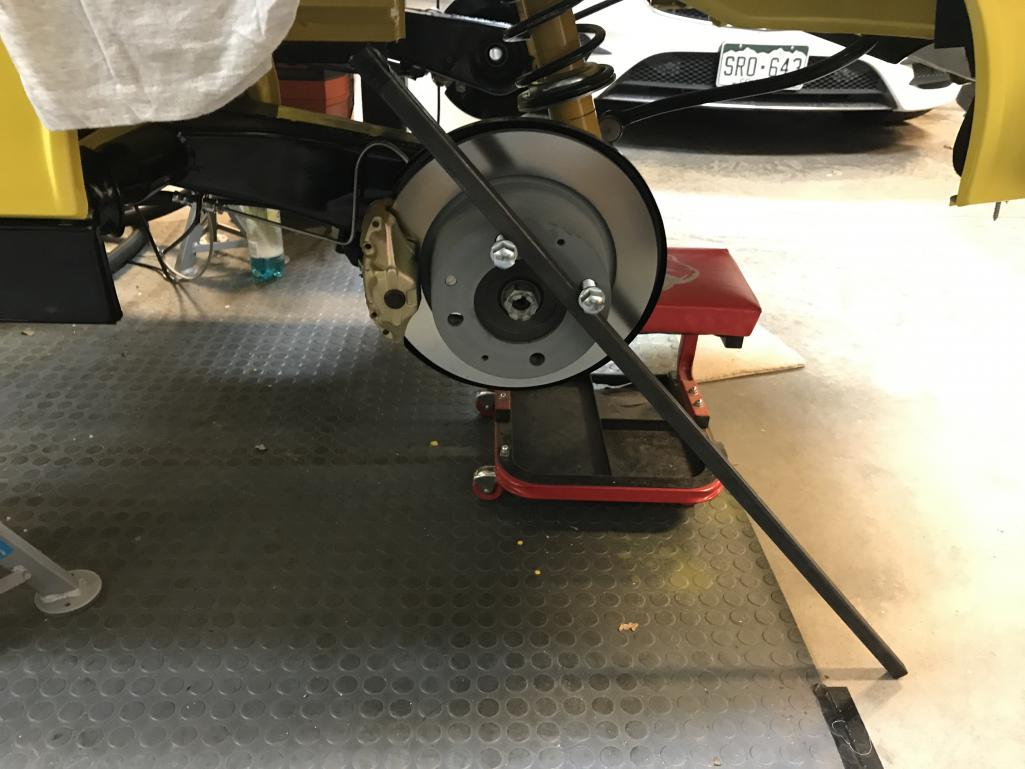
|
|
|
|
| bkrantz |
Dec 18 2021, 09:42 PM
Post
#4388
|
|
914 Guru Group: Members Posts: 8,347 Joined: 3-August 19 From: SW Colorado Member No.: 23,343 Region Association: Rocky Mountains |
And then finished with cotter pins.
Attached thumbnail(s) 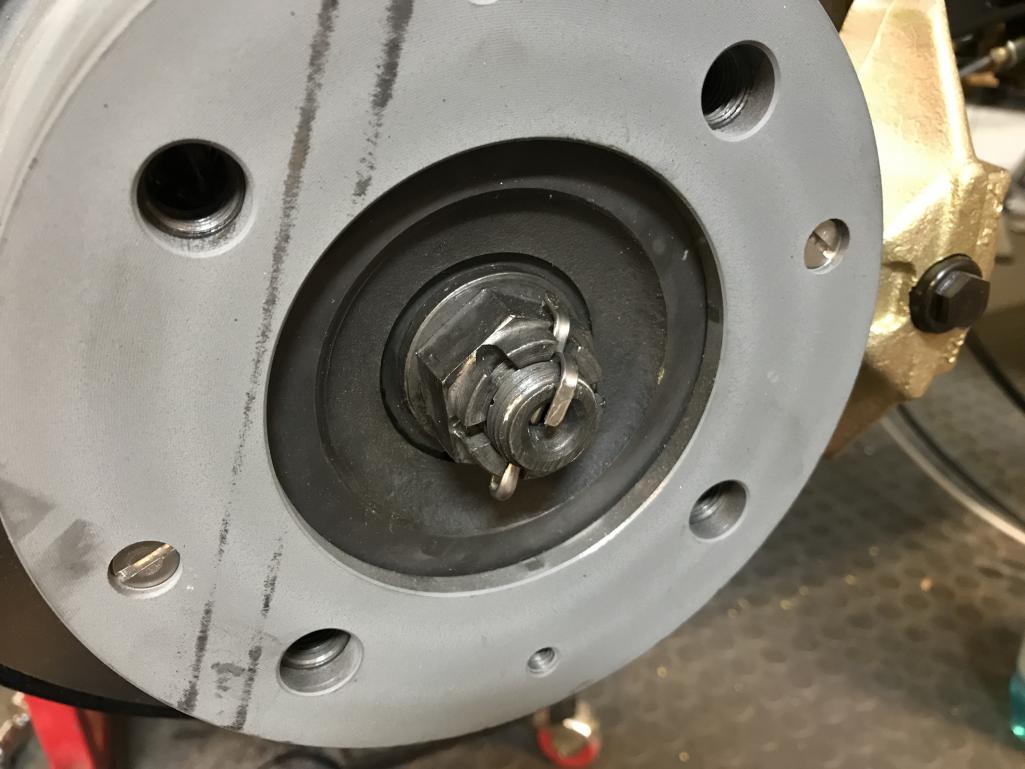
|
|
|
|
| bkrantz |
Dec 18 2021, 09:43 PM
Post
#4389
|
|
914 Guru Group: Members Posts: 8,347 Joined: 3-August 19 From: SW Colorado Member No.: 23,343 Region Association: Rocky Mountains |
Ready for engine and trans.
Attached thumbnail(s) 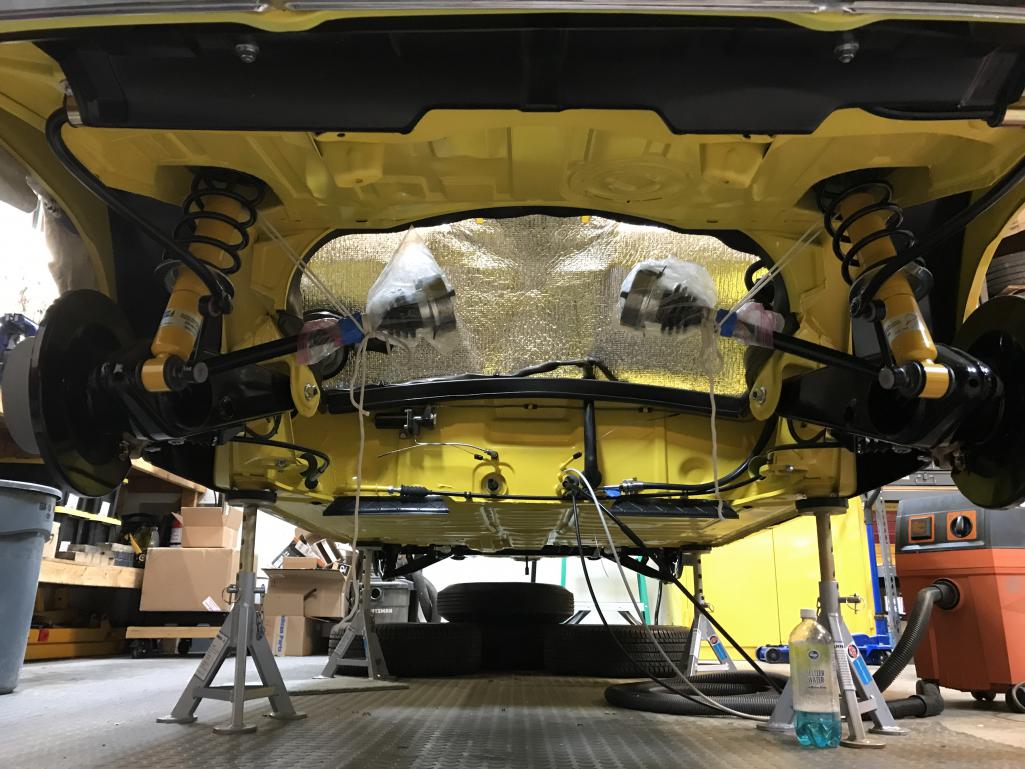
|
|
|
|
| euro911 |
Dec 19 2021, 12:25 PM
Post
#4390
|
|
Retired & living the dream. God help me if I wake up! Group: Members Posts: 8,885 Joined: 2-December 06 From: So.Cal. & No.AZ (USA) Member No.: 7,300 Region Association: Southern California |
Paint the rotor hats black to help dissipate the heat. Also keeps rust at bay (IMG:style_emoticons/default/idea.gif)
|
|
|
|
| bkrantz |
Dec 19 2021, 08:09 PM
Post
#4391
|
|
914 Guru Group: Members Posts: 8,347 Joined: 3-August 19 From: SW Colorado Member No.: 23,343 Region Association: Rocky Mountains |
Thanks for the tip, Mark. I will put that on the list.
|
|
|
|
| bkrantz |
Dec 19 2021, 08:11 PM
Post
#4392
|
|
914 Guru Group: Members Posts: 8,347 Joined: 3-August 19 From: SW Colorado Member No.: 23,343 Region Association: Rocky Mountains |
I got some 22 G 3-conductor cable. This will connect the O2 sensor control with the AFR gauge.
Attached thumbnail(s) 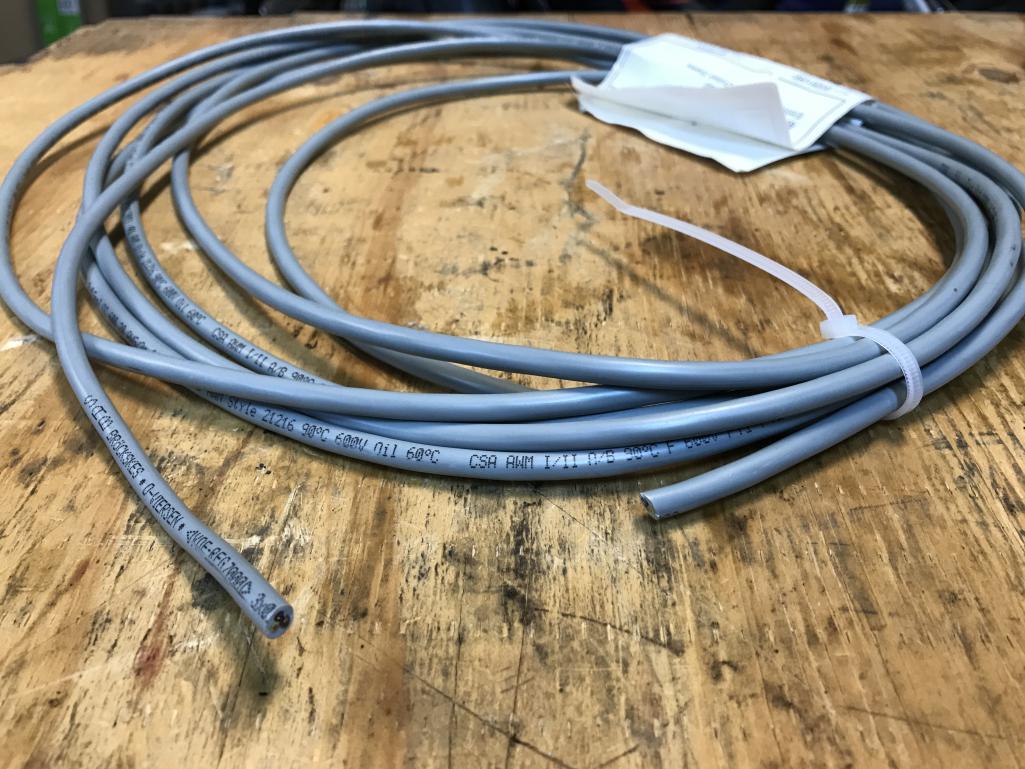
|
|
|
|
| bkrantz |
Dec 19 2021, 08:14 PM
Post
#4393
|
|
914 Guru Group: Members Posts: 8,347 Joined: 3-August 19 From: SW Colorado Member No.: 23,343 Region Association: Rocky Mountains |
To get from the frunk to the interior I need to snake the cable through the snorkel. First, a bit of stiff wire.
Attached thumbnail(s) 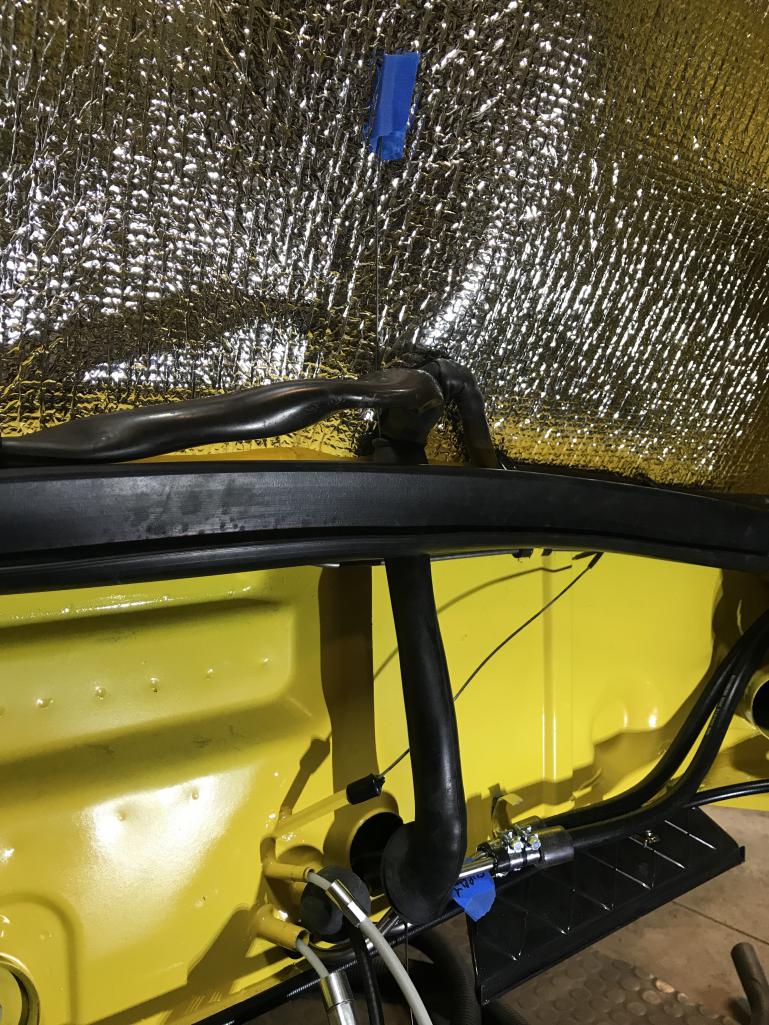
|
|
|
|
| bkrantz |
Dec 19 2021, 08:15 PM
Post
#4394
|
|
914 Guru Group: Members Posts: 8,347 Joined: 3-August 19 From: SW Colorado Member No.: 23,343 Region Association: Rocky Mountains |
Then the cable.
Attached thumbnail(s) 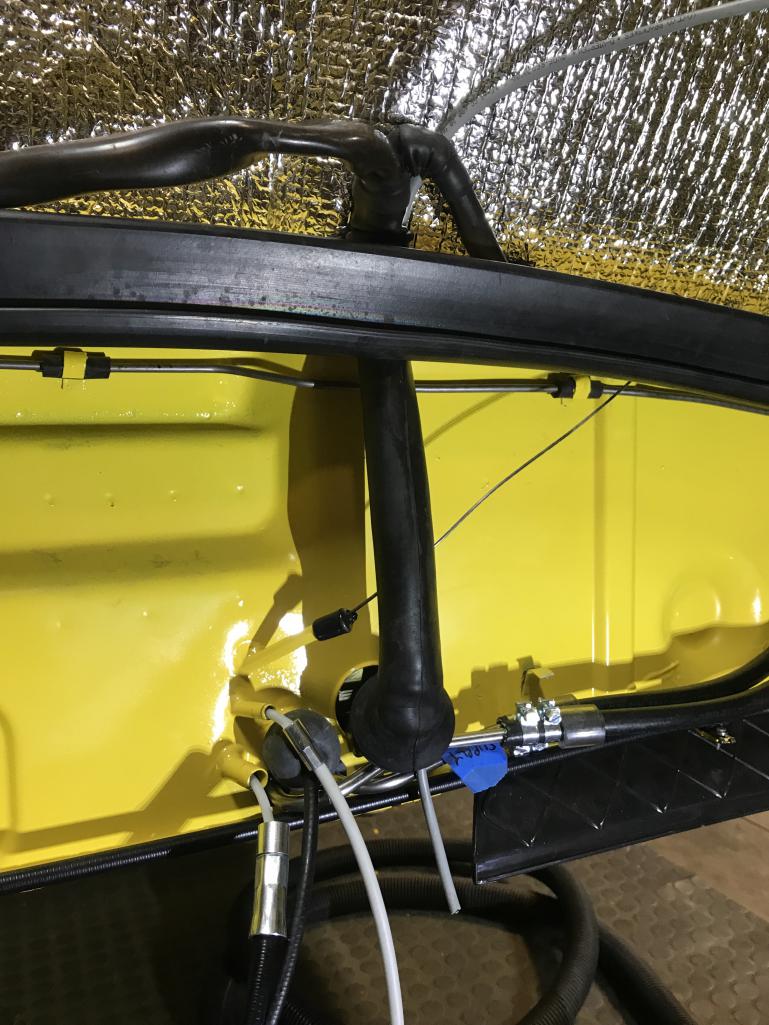
|
|
|
|
| bkrantz |
Dec 19 2021, 08:16 PM
Post
#4395
|
|
914 Guru Group: Members Posts: 8,347 Joined: 3-August 19 From: SW Colorado Member No.: 23,343 Region Association: Rocky Mountains |
And into the interior.
Attached thumbnail(s) 
|
|
|
|
| bkrantz |
Dec 19 2021, 08:17 PM
Post
#4396
|
|
914 Guru Group: Members Posts: 8,347 Joined: 3-August 19 From: SW Colorado Member No.: 23,343 Region Association: Rocky Mountains |
Now to connect the cable to the leads for the gauge. I soldered the connections.
Attached thumbnail(s) 
|
|
|
|
| bkrantz |
Dec 19 2021, 08:19 PM
Post
#4397
|
|
914 Guru Group: Members Posts: 8,347 Joined: 3-August 19 From: SW Colorado Member No.: 23,343 Region Association: Rocky Mountains |
And then heat-shrink tubing around each connection, and around all three.
Attached thumbnail(s) 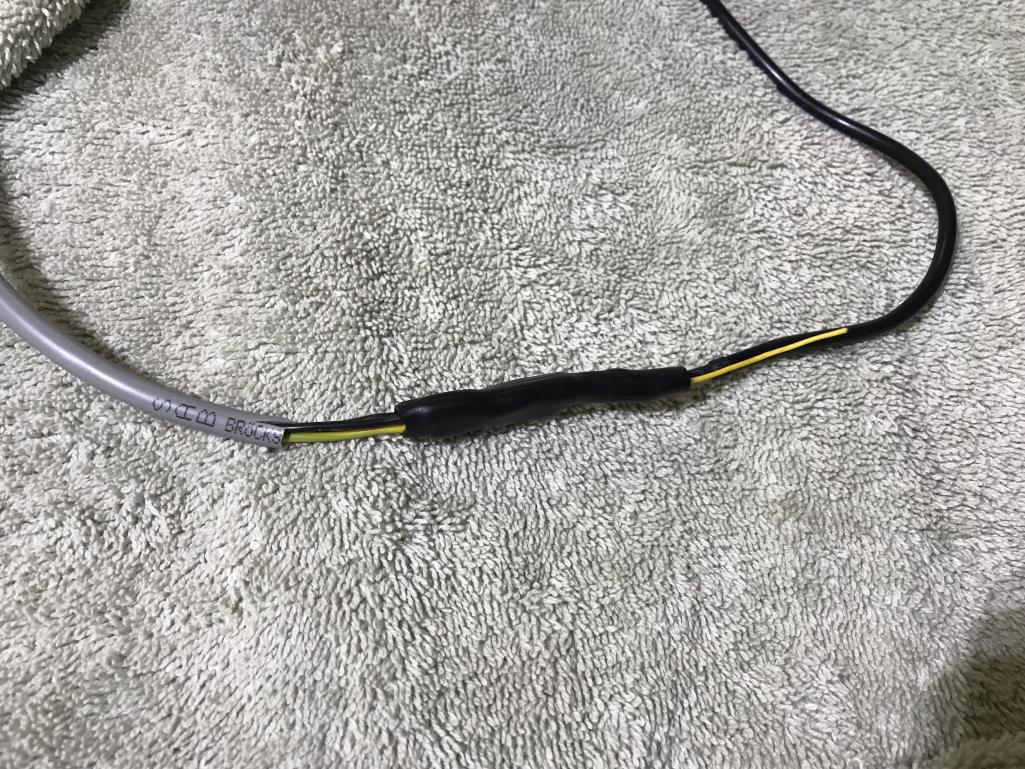
|
|
|
|
| bkrantz |
Dec 19 2021, 08:21 PM
Post
#4398
|
|
914 Guru Group: Members Posts: 8,347 Joined: 3-August 19 From: SW Colorado Member No.: 23,343 Region Association: Rocky Mountains |
I think the gauge will live in the center arm rest, next to my hidden audio system controller.
Attached thumbnail(s) 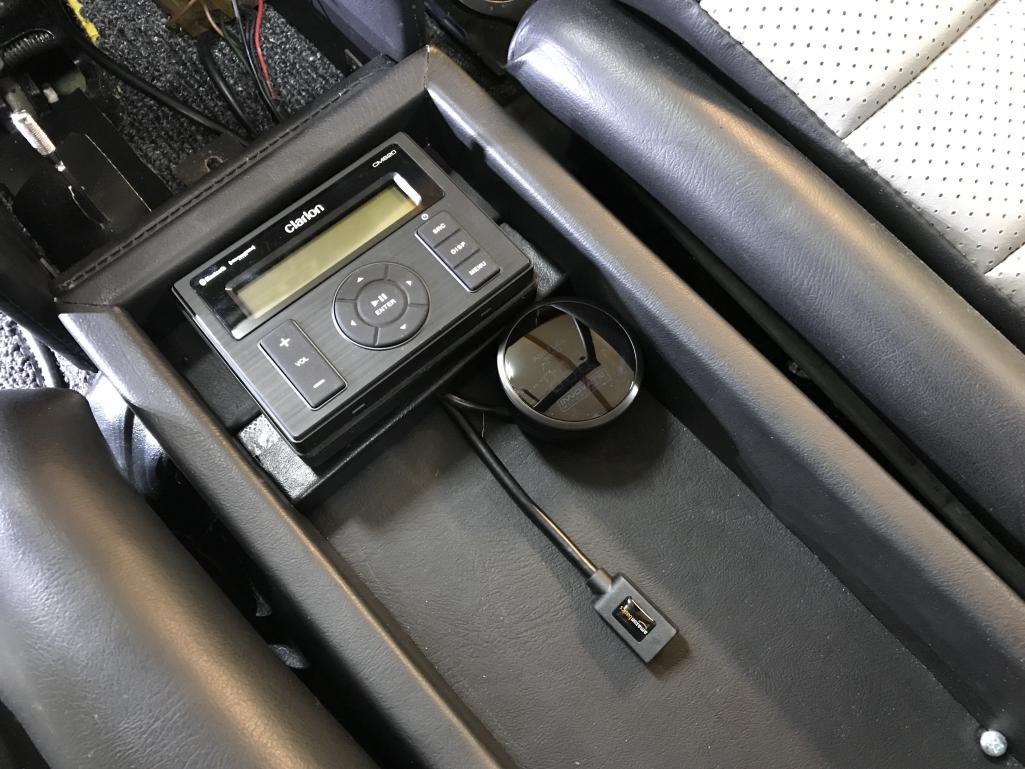
|
|
|
|
| bkrantz |
Dec 19 2021, 08:24 PM
Post
#4399
|
|
914 Guru Group: Members Posts: 8,347 Joined: 3-August 19 From: SW Colorado Member No.: 23,343 Region Association: Rocky Mountains |
At the other end, I put the snorkel back in place. I will find the best route for the cable when I do all the engine wiring.
Attached thumbnail(s) 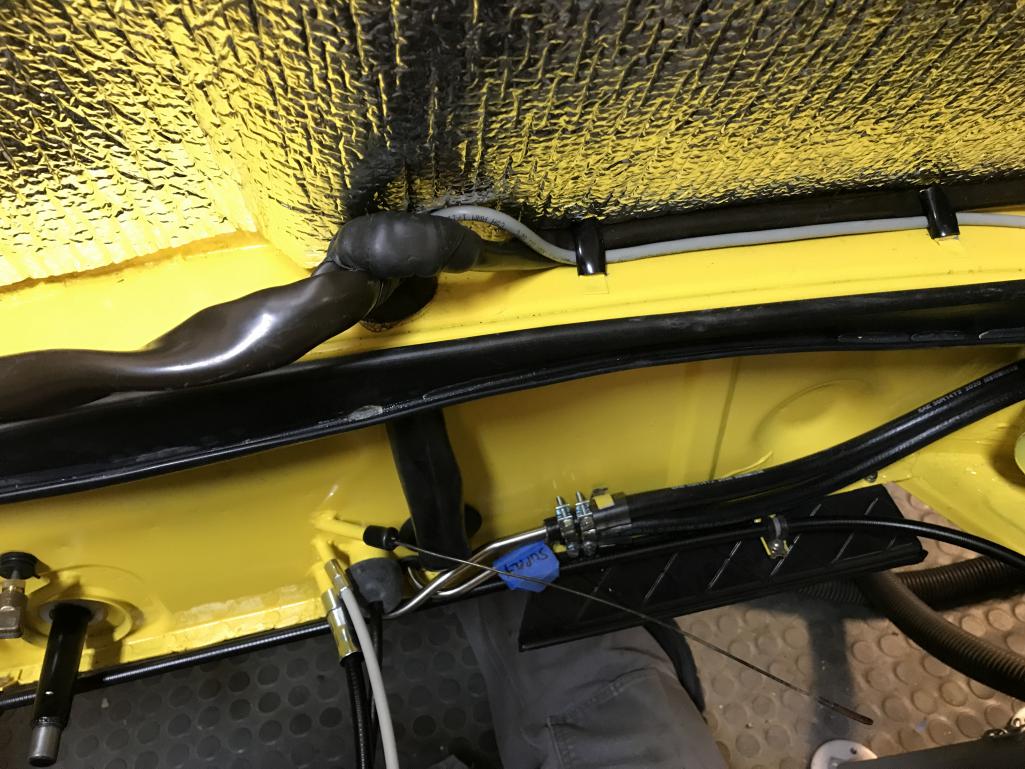
|
|
|
|
| bkrantz |
Dec 19 2021, 08:25 PM
Post
#4400
|
|
914 Guru Group: Members Posts: 8,347 Joined: 3-August 19 From: SW Colorado Member No.: 23,343 Region Association: Rocky Mountains |
Speaking of wire placement, I drilled a 1 inch hole in the trunk wall.
Attached thumbnail(s) 
|
|
|
|
|
1 User(s) are reading this topic (1 Guests and 0 Anonymous Users)
0 Members:

|
Lo-Fi Version | Time is now: 29th April 2025 - 03:02 AM |
Invision Power Board
v9.1.4 © 2025 IPS, Inc.