|
|

|
Porsche, and the Porsche crest are registered trademarks of Dr. Ing. h.c. F. Porsche AG.
This site is not affiliated with Porsche in any way. Its only purpose is to provide an online forum for car enthusiasts. All other trademarks are property of their respective owners. |
|
|
  |
| Montreal914 |
 Jan 6 2022, 09:43 PM Jan 6 2022, 09:43 PM
Post
#4621
|
|
Senior Member    Group: Members Posts: 1,810 Joined: 8-August 10 From: Claremont, CA Member No.: 12,023 Region Association: Southern California 
|
Beautiful work and meticulous installation (IMG:style_emoticons/default/smilie_pokal.gif)
What brand of speedometer cable? (IMG:style_emoticons/default/sad.gif) |
| Morph914 |
 Jan 7 2022, 09:57 AM Jan 7 2022, 09:57 AM
Post
#4622
|
|
Member   Group: Members Posts: 435 Joined: 22-August 16 From: St Augustine, FL Member No.: 20,326 Region Association: South East States 
|
I spent almost an hour on this. First I chased the threads, but no luck. Then I used my Dremel to chamfer the first threads in the cap and on the angle drive. I got it started straight, and it held for about two turns--yay! But as I screwed it tight, it cocked twisted again. Fudge! I will probably hold just fine, but this will bother me and my OCD. I had the same problem with mine, tried several times with no luck and the same issues as yours. (IMG:style_emoticons/default/headbang.gif) Finally one day I crawled back under held my tongue a certain way, the planets aligned, the Speedo Gods had mercy and the damn thing went on correctly. (IMG:style_emoticons/default/piratenanner.gif) I was so happy for this small issue to be behind me. So don’t give up on it just yet. Cheers, John |
| ndfrigi |
 Jan 7 2022, 10:46 AM Jan 7 2022, 10:46 AM
Post
#4623
|
|
Advanced Member     Group: Members Posts: 2,965 Joined: 21-August 11 From: Orange County Member No.: 13,474 Region Association: Southern California 
|
|
| Puebloswatcop |
 Jan 7 2022, 06:56 PM Jan 7 2022, 06:56 PM
Post
#4624
|
|
Senior Member    Group: Members Posts: 1,443 Joined: 27-December 14 From: Mineola, Texas Member No.: 18,258 Region Association: Southwest Region |
I spent almost an hour on this. First I chased the threads, but no luck. Then I used my Dremel to chamfer the first threads in the cap and on the angle drive. I got it started straight, and it held for about two turns--yay! But as I screwed it tight, it cocked twisted again. Fudge! I will probably hold just fine, but this will bother me and my OCD. I am with you on this. I would be awake nights wracking my brain about why it is not going on straight..... |
| bkrantz |
 Jan 7 2022, 08:25 PM Jan 7 2022, 08:25 PM
Post
#4625
|
|
914 Guru      Group: Members Posts: 8,345 Joined: 3-August 19 From: SW Colorado Member No.: 23,343 Region Association: Rocky Mountains 
|
wow! been watching your build and give us encouragement and learned a lot from your detailed informations. I just want to ask if the bolt/nut for tranny mount is better that the nut is on top or the usual from various 914 that the nut is at the bottom? 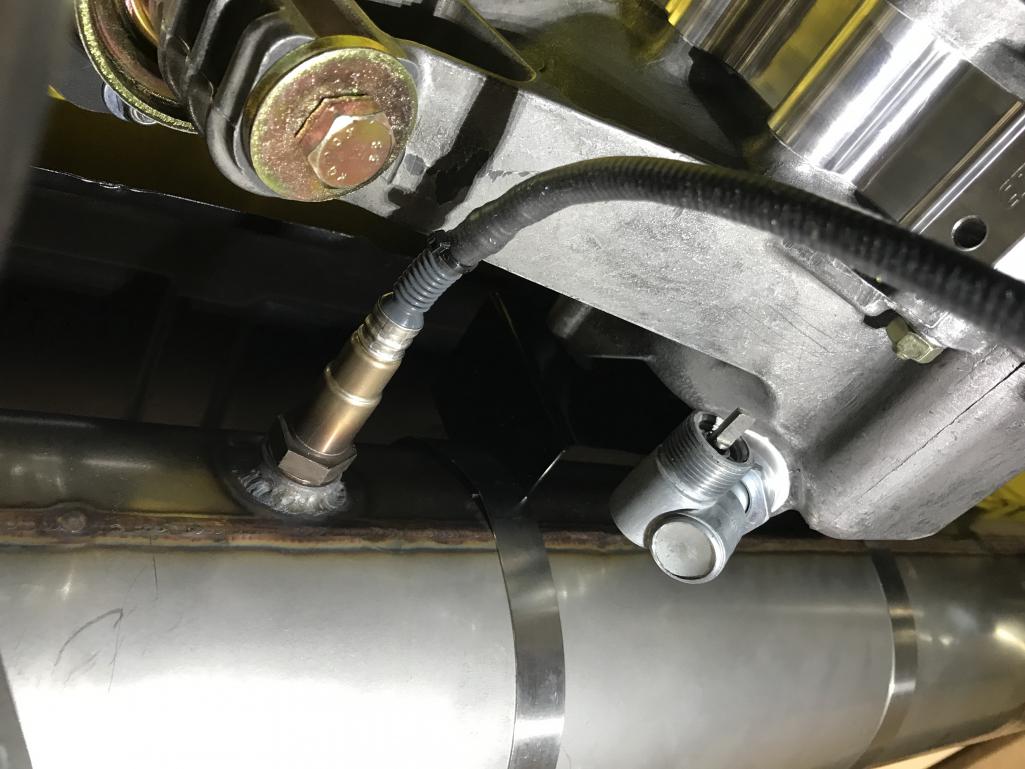 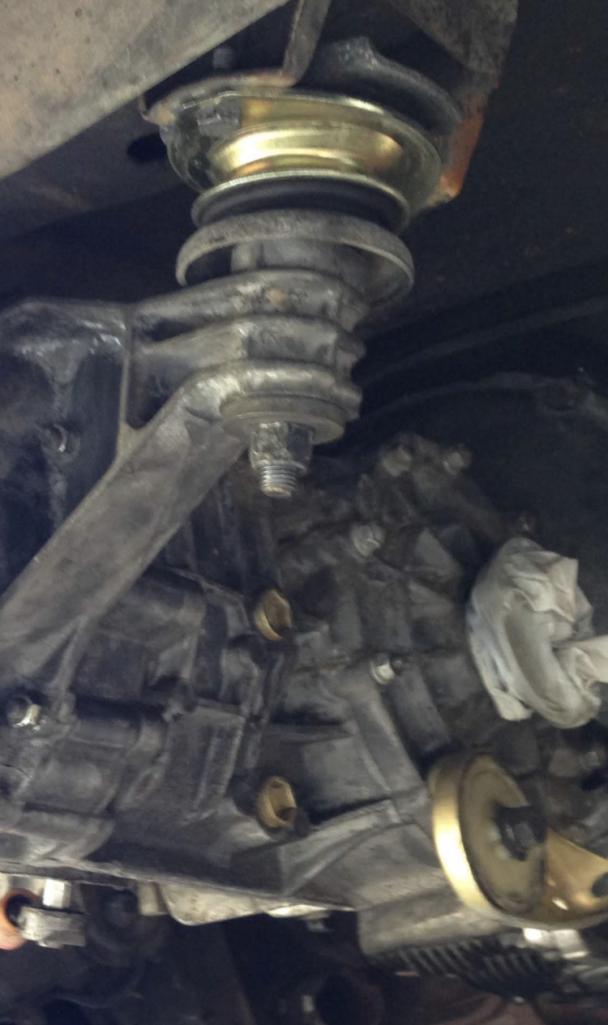 I followed the geometry shown in the factory parts catalog. And with the nut on top, I can remove the bolt without removing the mount--not sure if this will be helpful in the future or not. |
| bkrantz |
 Jan 7 2022, 08:26 PM Jan 7 2022, 08:26 PM
Post
#4626
|
|
914 Guru      Group: Members Posts: 8,345 Joined: 3-August 19 From: SW Colorado Member No.: 23,343 Region Association: Rocky Mountains 
|
I spent almost an hour on this. First I chased the threads, but no luck. Then I used my Dremel to chamfer the first threads in the cap and on the angle drive. I got it started straight, and it held for about two turns--yay! But as I screwed it tight, it cocked twisted again. Fudge! I will probably hold just fine, but this will bother me and my OCD. I am with you on this. I would be awake nights wracking my brain about why it is not going on straight..... Gee, thanks. Now I will never sleep. (IMG:style_emoticons/default/blink.gif) |
| bkrantz |
 Jan 7 2022, 08:29 PM Jan 7 2022, 08:29 PM
Post
#4627
|
|
914 Guru      Group: Members Posts: 8,345 Joined: 3-August 19 From: SW Colorado Member No.: 23,343 Region Association: Rocky Mountains 
|
With a few more parts, I am ready to start the "final" wiring for the EFI system. Here the dual bus and cover I got from McMaster-Carr, and some small gauge ring terminals.
Attached thumbnail(s) 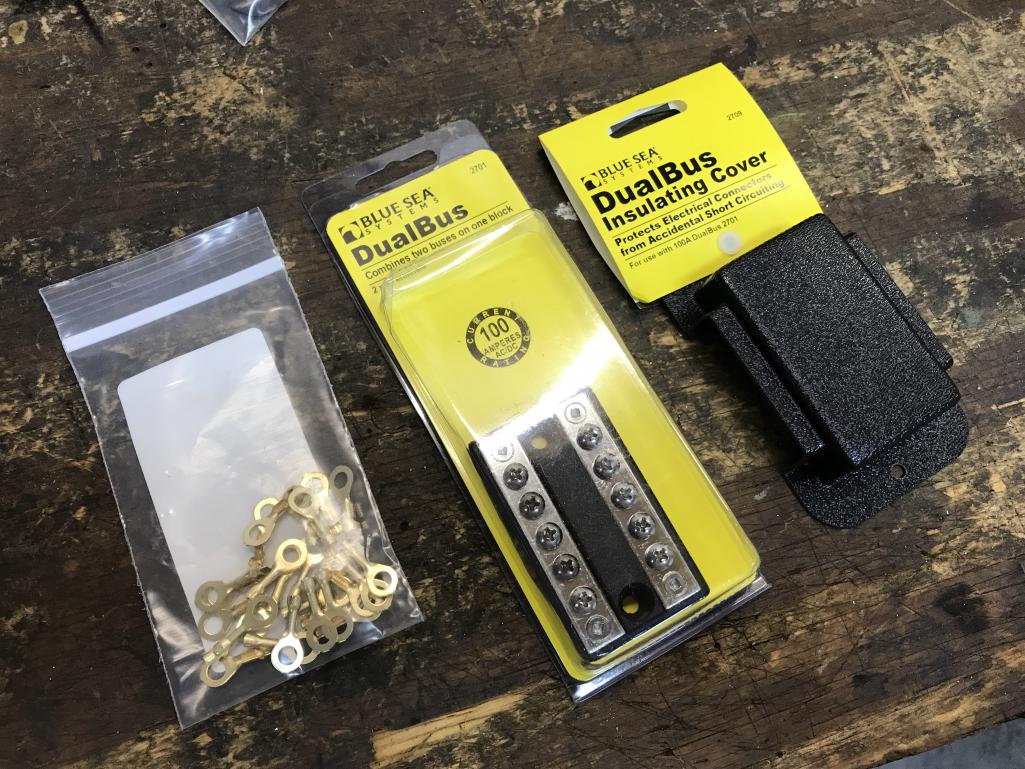
|
| bkrantz |
 Jan 7 2022, 08:31 PM Jan 7 2022, 08:31 PM
Post
#4628
|
|
914 Guru      Group: Members Posts: 8,345 Joined: 3-August 19 From: SW Colorado Member No.: 23,343 Region Association: Rocky Mountains 
|
I decided on this layout, L to R: the tach signal adapter, the O2 sensor controller, and the double bus.
Attached thumbnail(s) 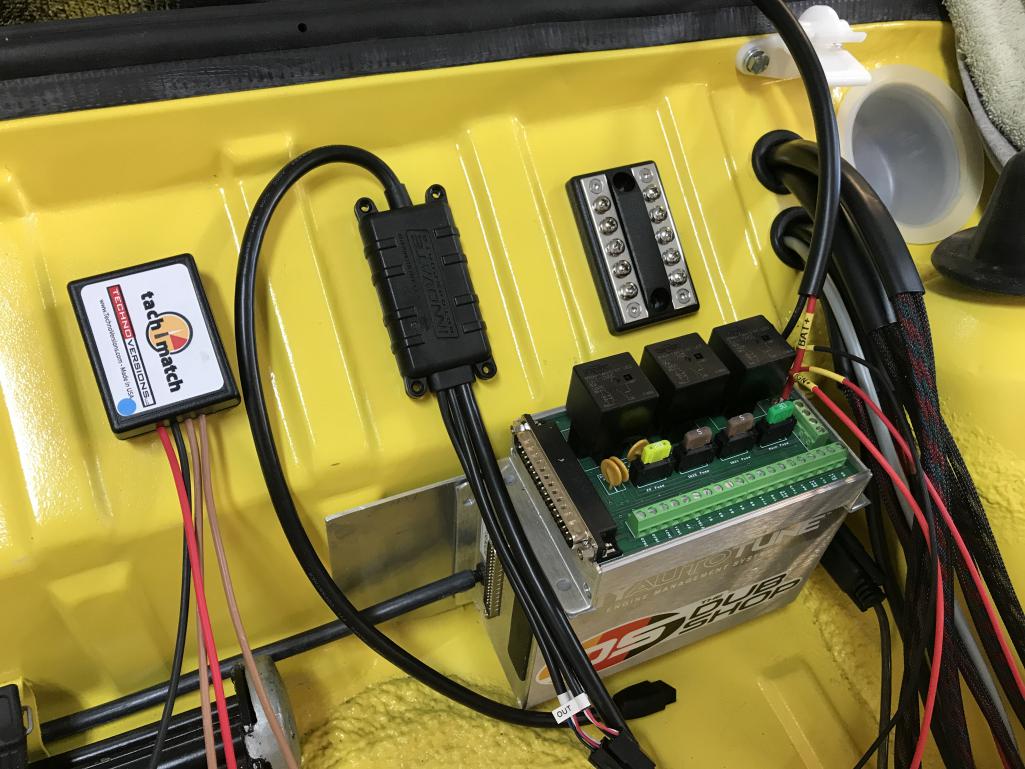
|
| bkrantz |
 Jan 7 2022, 08:33 PM Jan 7 2022, 08:33 PM
Post
#4629
|
|
914 Guru      Group: Members Posts: 8,345 Joined: 3-August 19 From: SW Colorado Member No.: 23,343 Region Association: Rocky Mountains 
|
Now its just one wire at a time, after confirming which wire goes where. I am soldering the terminals on to avoid future problems.
Attached thumbnail(s) 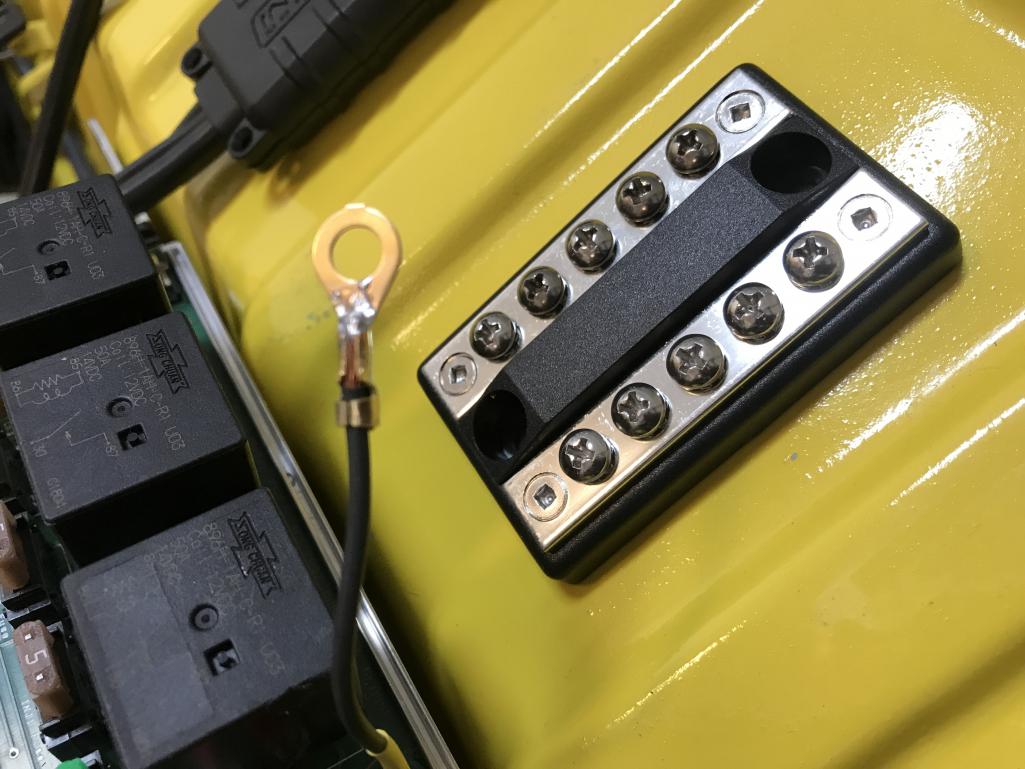
|
| bkrantz |
 Jan 7 2022, 08:33 PM Jan 7 2022, 08:33 PM
Post
#4630
|
|
914 Guru      Group: Members Posts: 8,345 Joined: 3-August 19 From: SW Colorado Member No.: 23,343 Region Association: Rocky Mountains 
|
And first connection on the ground bus.
Attached thumbnail(s) 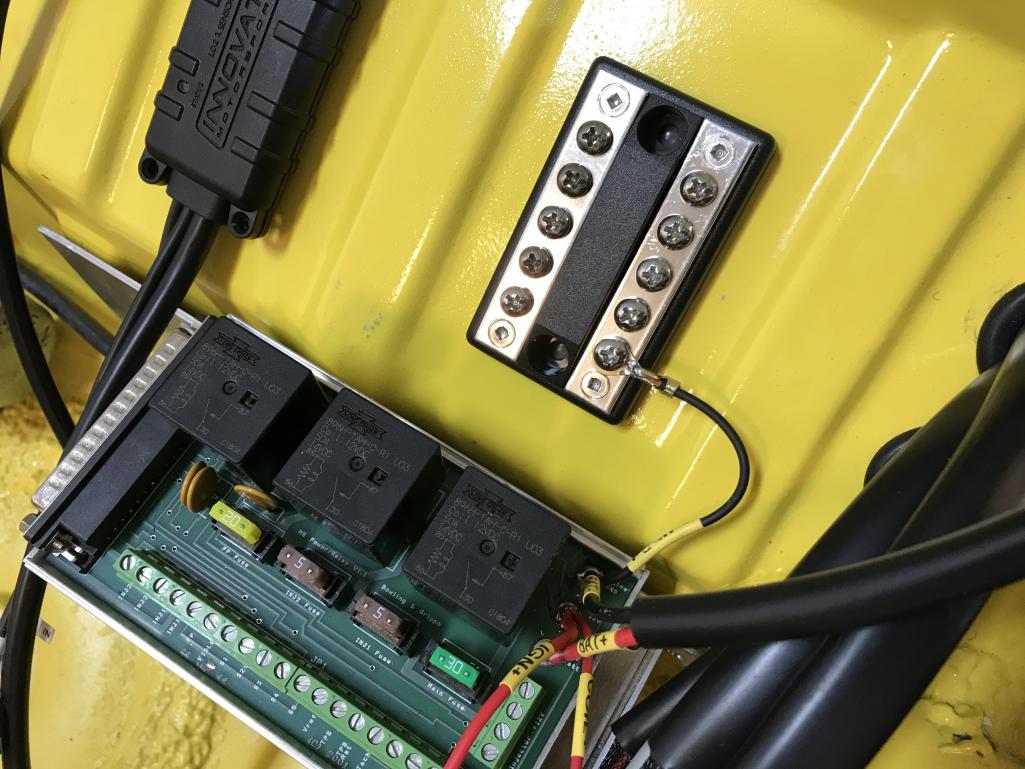
|
| bkrantz |
 Jan 7 2022, 08:37 PM Jan 7 2022, 08:37 PM
Post
#4631
|
|
914 Guru      Group: Members Posts: 8,345 Joined: 3-August 19 From: SW Colorado Member No.: 23,343 Region Association: Rocky Mountains 
|
I added some electrical tape along the exposed edge of the relay box, since the wires will hang over the edge.
Attached thumbnail(s) 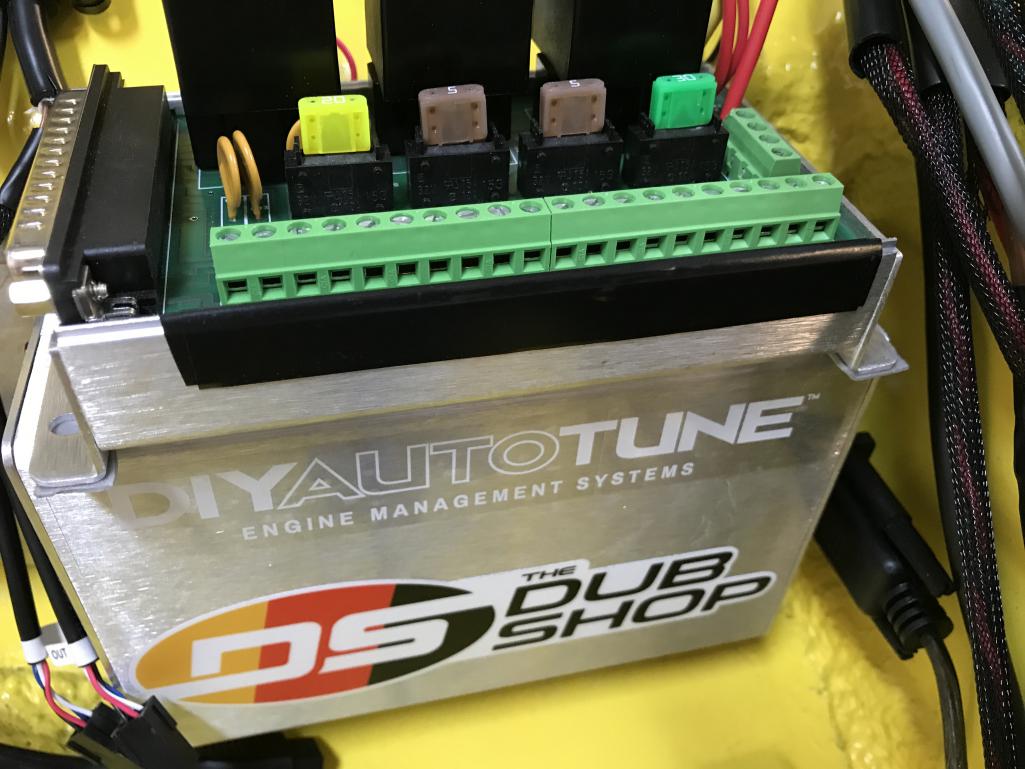
|
| bkrantz |
 Jan 7 2022, 08:40 PM Jan 7 2022, 08:40 PM
Post
#4632
|
|
914 Guru      Group: Members Posts: 8,345 Joined: 3-August 19 From: SW Colorado Member No.: 23,343 Region Association: Rocky Mountains 
|
That's enough for today, with the connections done for the O2 system and the coil.
Attached thumbnail(s) 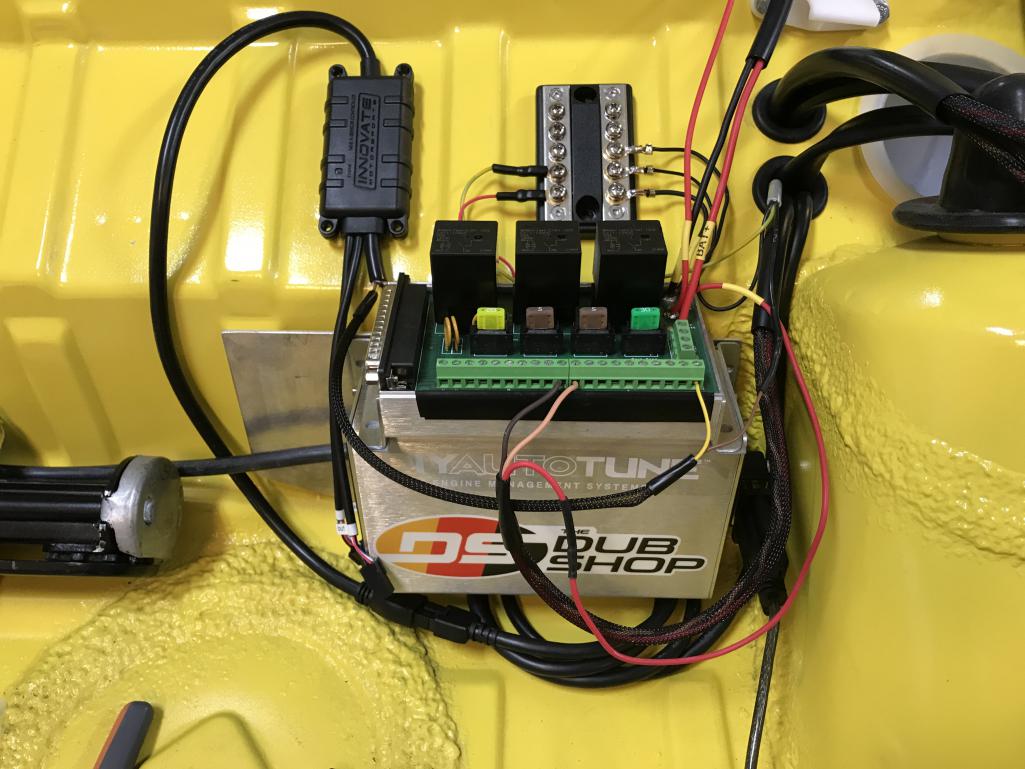
|
| bkrantz |
 Jan 8 2022, 08:04 PM Jan 8 2022, 08:04 PM
Post
#4633
|
|
914 Guru      Group: Members Posts: 8,345 Joined: 3-August 19 From: SW Colorado Member No.: 23,343 Region Association: Rocky Mountains 
|
Just a few more wires run today. The device on the left is the rpm signal converter, with the cover removed.
Attached thumbnail(s) 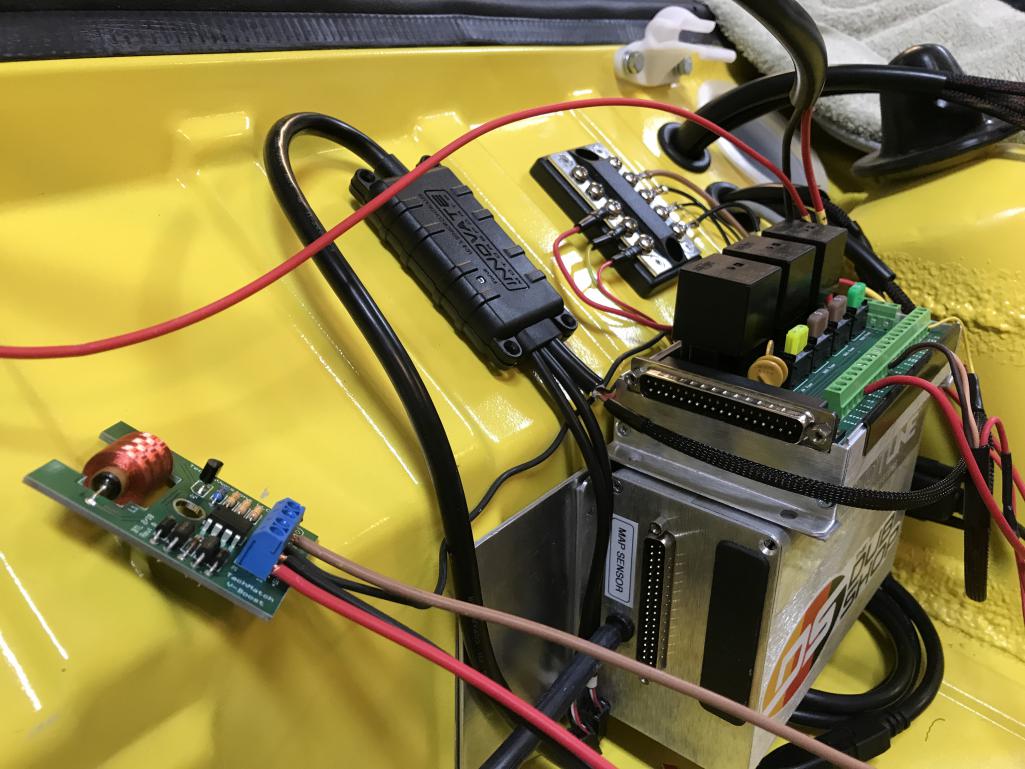
|
| bkrantz |
 Jan 9 2022, 07:40 PM Jan 9 2022, 07:40 PM
Post
#4634
|
|
914 Guru      Group: Members Posts: 8,345 Joined: 3-August 19 From: SW Colorado Member No.: 23,343 Region Association: Rocky Mountains 
|
Tach signal converter all wired up.
Attached thumbnail(s) 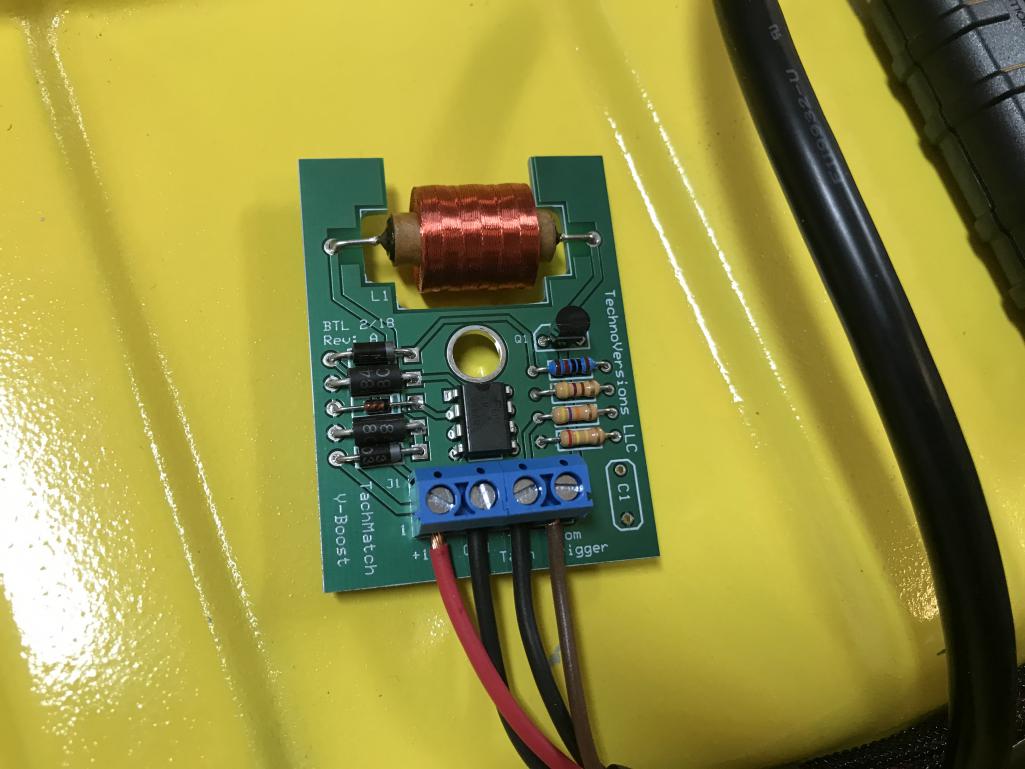
|
| bkrantz |
 Jan 9 2022, 07:42 PM Jan 9 2022, 07:42 PM
Post
#4635
|
|
914 Guru      Group: Members Posts: 8,345 Joined: 3-August 19 From: SW Colorado Member No.: 23,343 Region Association: Rocky Mountains 
|
So that's all the various boxes and components connected. Now for the cables from the engine sensors.
Attached thumbnail(s) 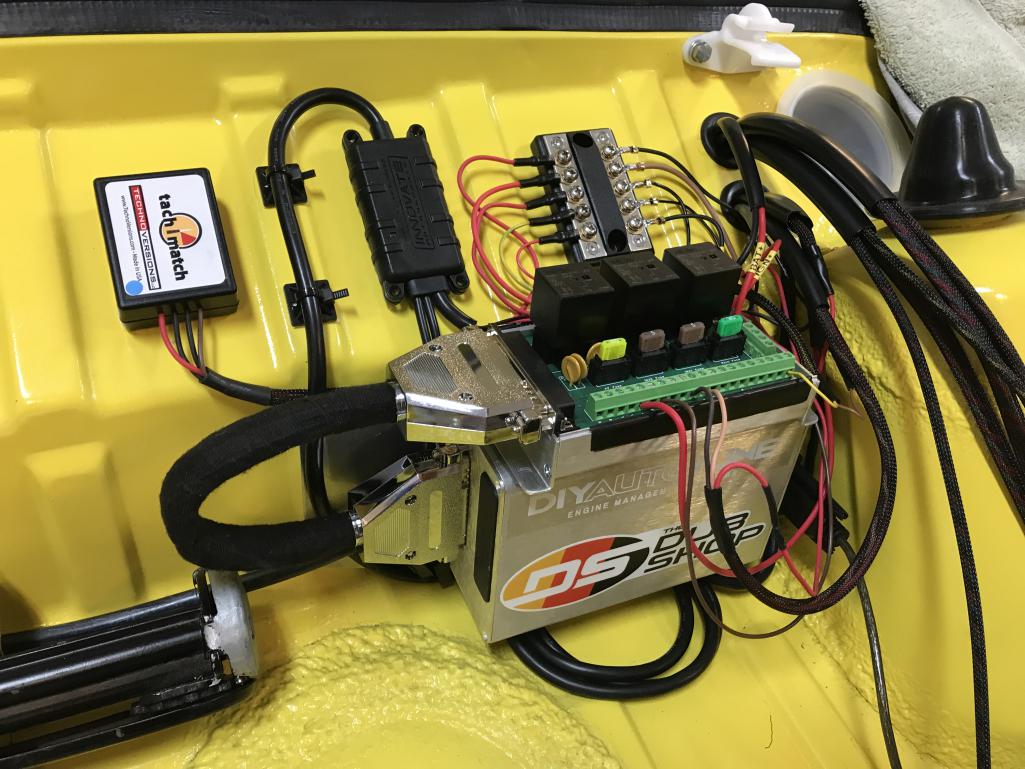
|
| bkrantz |
 Jan 9 2022, 07:44 PM Jan 9 2022, 07:44 PM
Post
#4636
|
|
914 Guru      Group: Members Posts: 8,345 Joined: 3-August 19 From: SW Colorado Member No.: 23,343 Region Association: Rocky Mountains 
|
Whew. After a solid 5 hours, everything is connected. For each cable, I trimmed back the mesh cable cover, then covered the raw mesh end with heat-shrink, and trimmed and tinned each wire end before making the screw connection on the relay board.
Once I confirm that the engine runs again, I will tidy this up a bit. Attached thumbnail(s) 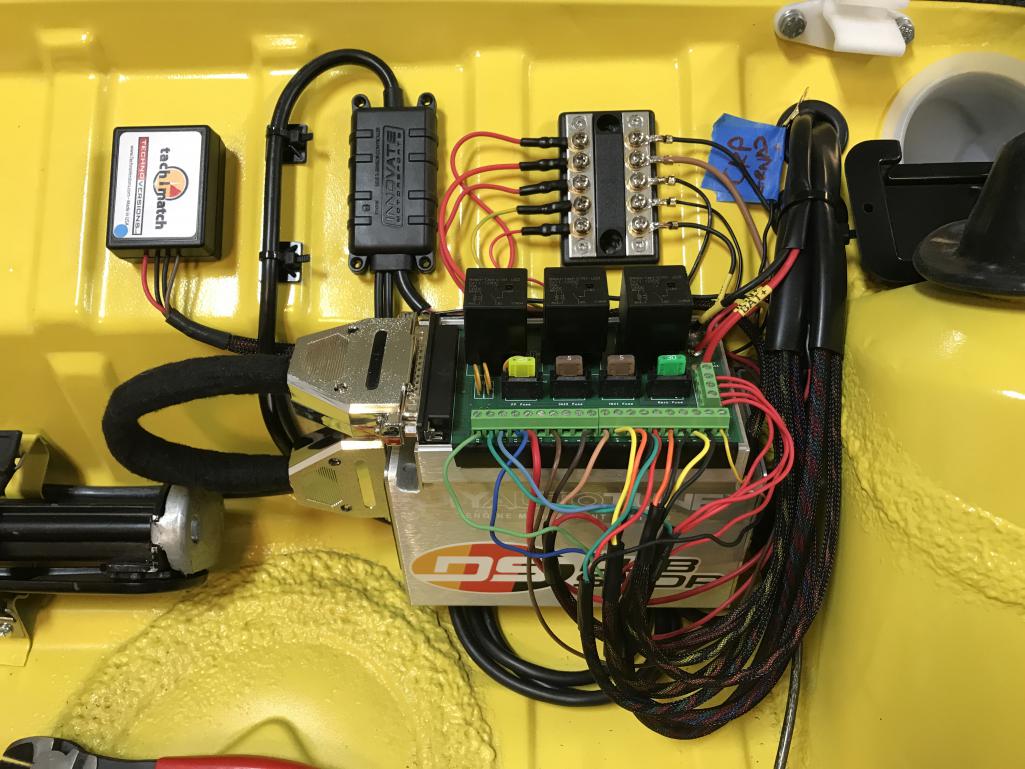
|
| bkrantz |
 Jan 9 2022, 07:46 PM Jan 9 2022, 07:46 PM
Post
#4637
|
|
914 Guru      Group: Members Posts: 8,345 Joined: 3-August 19 From: SW Colorado Member No.: 23,343 Region Association: Rocky Mountains 
|
And here's the waste from shortening the cables.
Attached thumbnail(s) 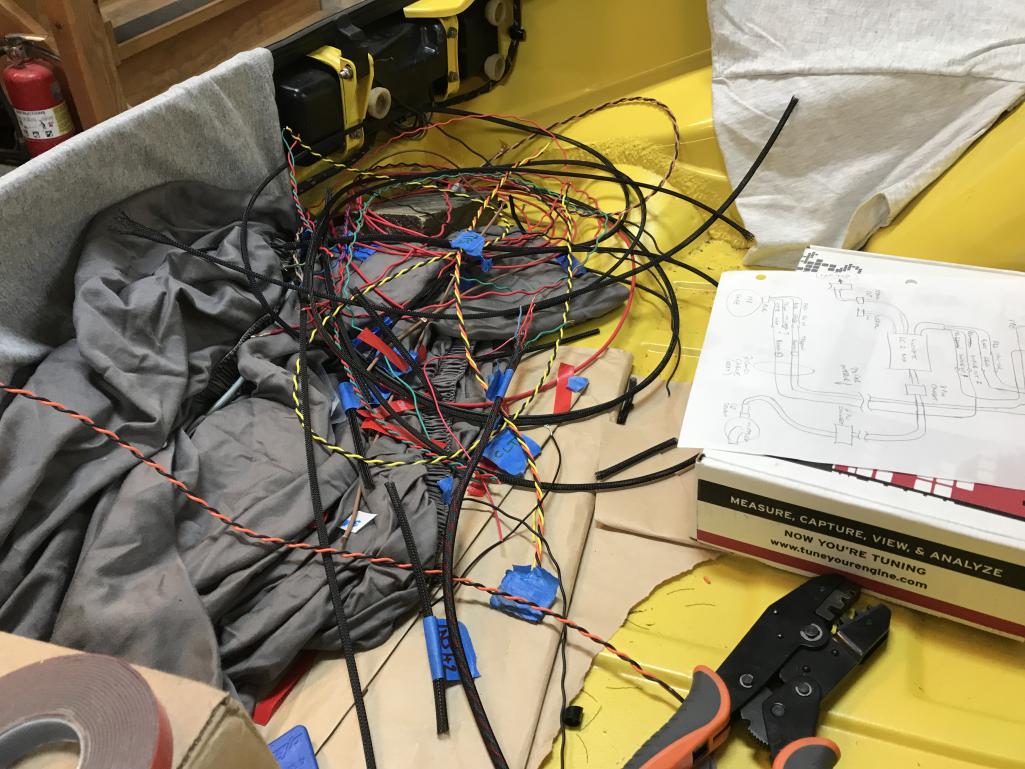
|
| bkrantz |
 Jan 9 2022, 07:47 PM Jan 9 2022, 07:47 PM
Post
#4638
|
|
914 Guru      Group: Members Posts: 8,345 Joined: 3-August 19 From: SW Colorado Member No.: 23,343 Region Association: Rocky Mountains 
|
Another task crossed off.
Attached thumbnail(s) 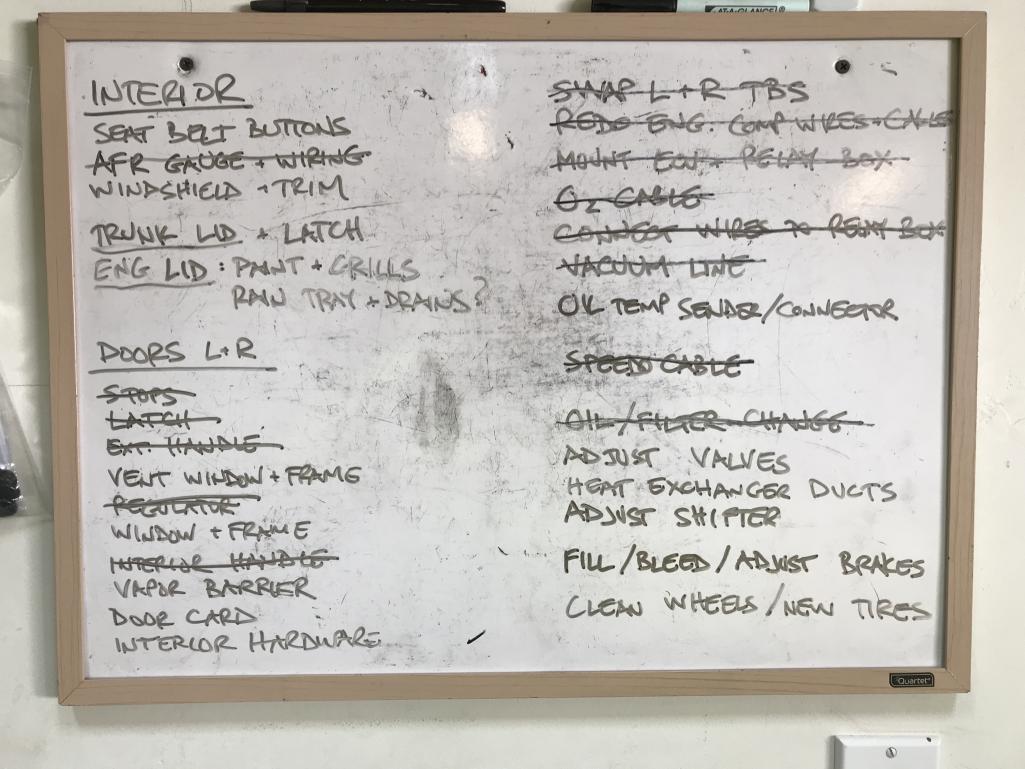
|
| bkrantz |
 Jan 10 2022, 08:36 PM Jan 10 2022, 08:36 PM
Post
#4639
|
|
914 Guru      Group: Members Posts: 8,345 Joined: 3-August 19 From: SW Colorado Member No.: 23,343 Region Association: Rocky Mountains 
|
One last wire had to be resolved, and the Dub Shop schematics did the trick. I am 99% confident I have every connection as Mario designed. (But when my son helped with temporary connections for the first engine start a couple of weeks ago, we had 2 wires from the Hall sensor reversed. Hmm)
Attached thumbnail(s) 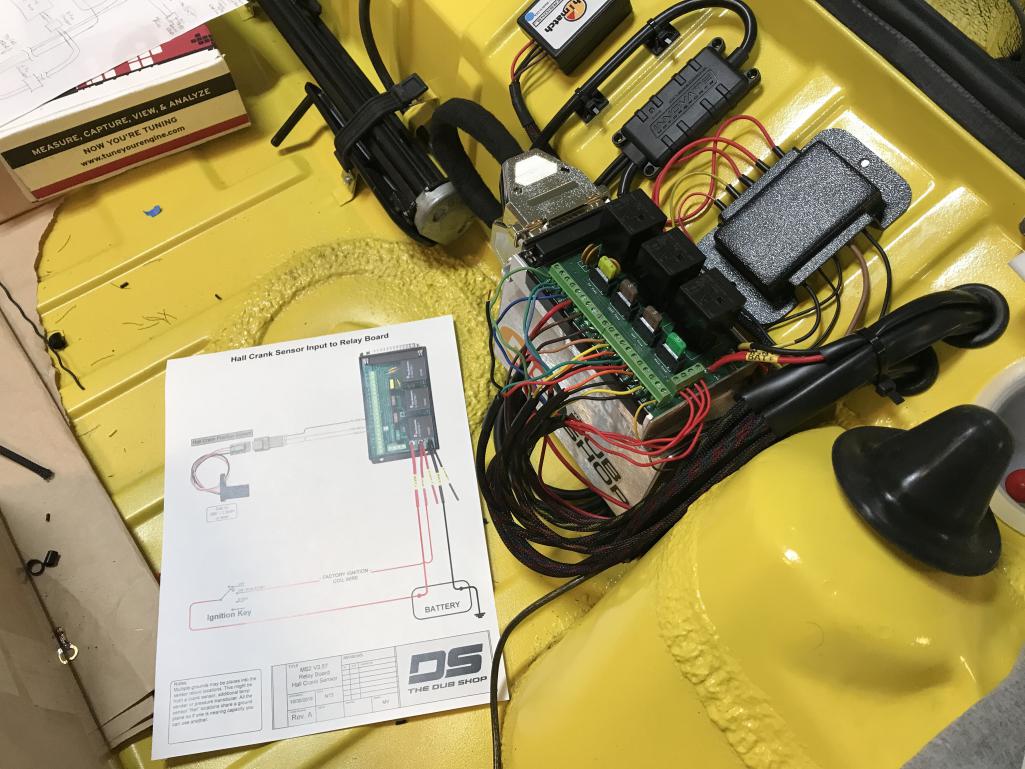
|
| bkrantz |
 Jan 10 2022, 08:40 PM Jan 10 2022, 08:40 PM
Post
#4640
|
|
914 Guru      Group: Members Posts: 8,345 Joined: 3-August 19 From: SW Colorado Member No.: 23,343 Region Association: Rocky Mountains 
|
With everything connections, I turned the key to Run--no flames or explosions. But since I changed the oil and filter, I want to get oil circulating again.
Attached thumbnail(s) 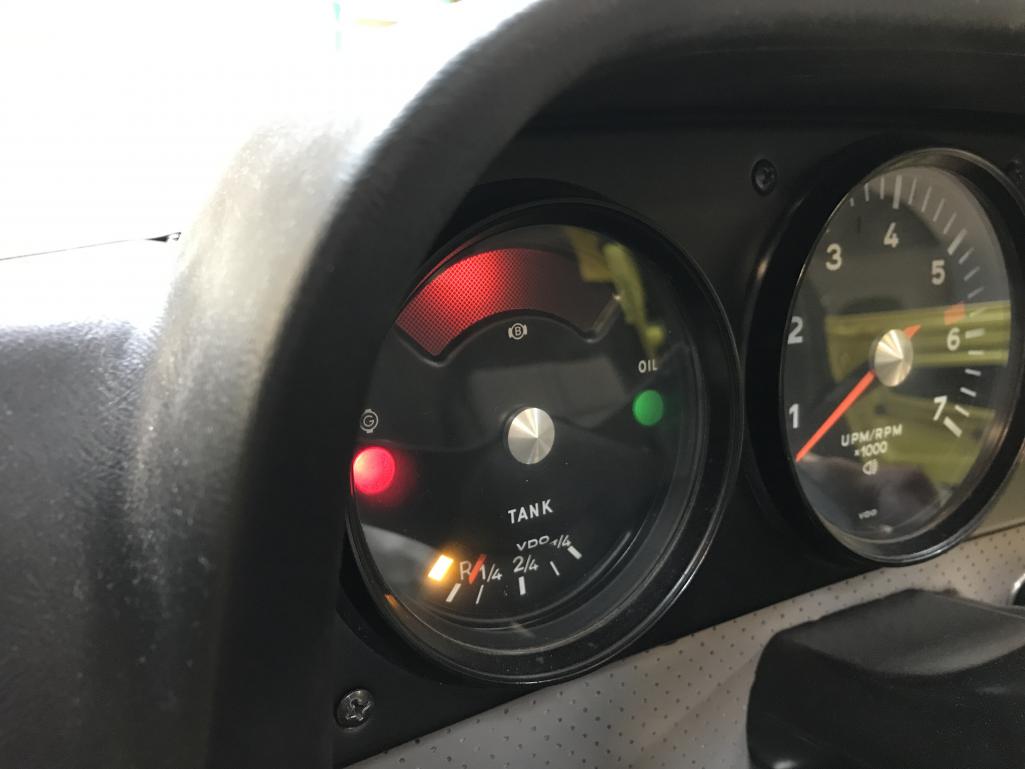
|
  |
1 User(s) are reading this topic (1 Guests and 0 Anonymous Users)
0 Members:

|
Lo-Fi Version | Time is now: 26th April 2025 - 09:10 PM |
Invision Power Board
v9.1.4 © 2025 IPS, Inc.


