|
|

|
Porsche, and the Porsche crest are registered trademarks of Dr. Ing. h.c. F. Porsche AG.
This site is not affiliated with Porsche in any way. Its only purpose is to provide an online forum for car enthusiasts. All other trademarks are property of their respective owners. |
|
|
  |
| bkrantz |
 Apr 13 2020, 08:00 PM Apr 13 2020, 08:00 PM
Post
#481
|
|
914 Guru      Group: Members Posts: 8,342 Joined: 3-August 19 From: SW Colorado Member No.: 23,343 Region Association: Rocky Mountains 
|
And after a bunch of welding and grinding, and more welding and grinding.
Attached thumbnail(s) 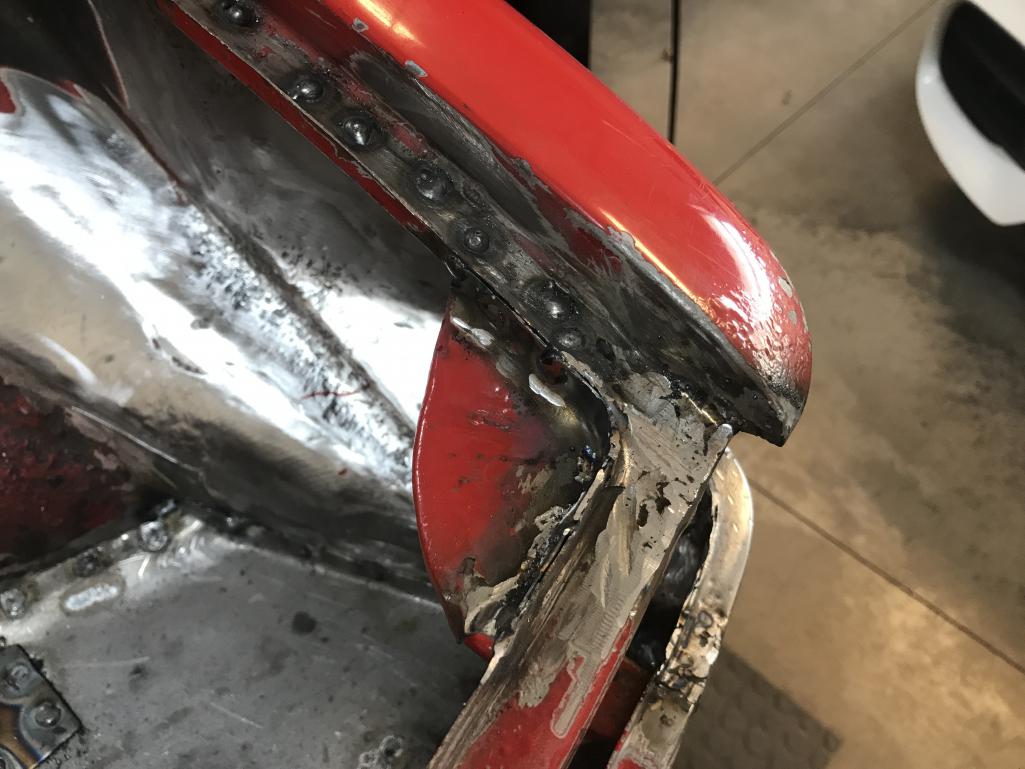
|
| bkrantz |
 Apr 14 2020, 07:49 PM Apr 14 2020, 07:49 PM
Post
#482
|
|
914 Guru      Group: Members Posts: 8,342 Joined: 3-August 19 From: SW Colorado Member No.: 23,343 Region Association: Rocky Mountains 
|
With the trunk corners done, I am on to the list of remaining small tasks.
Attached thumbnail(s) 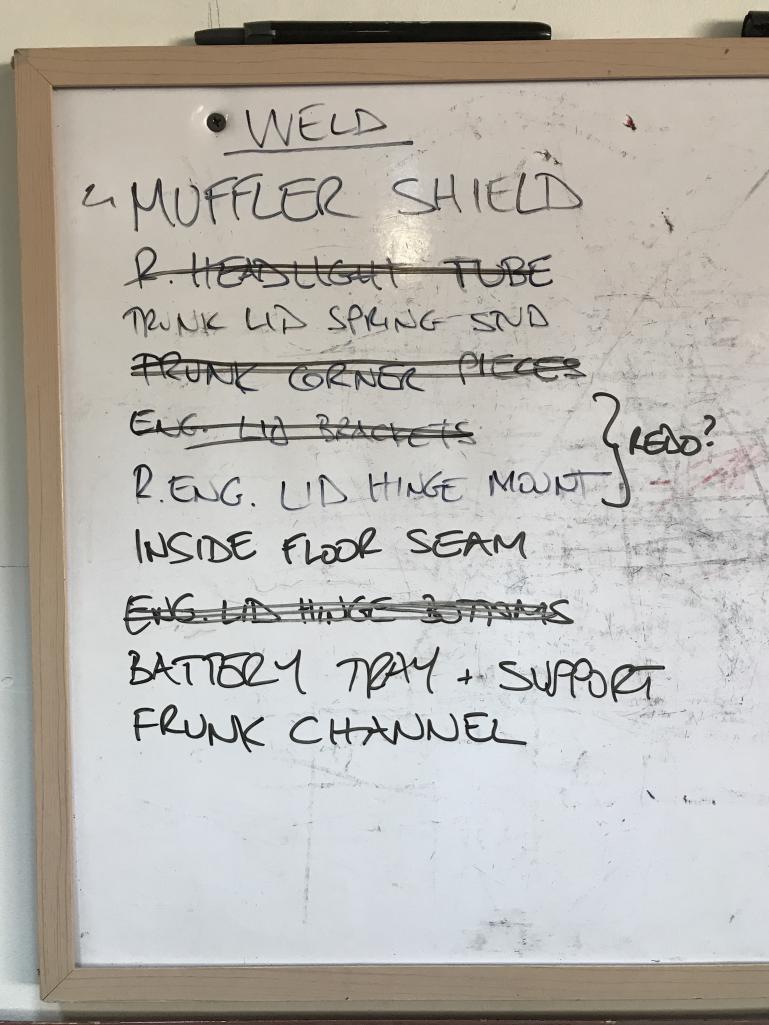
|
| bkrantz |
 Apr 14 2020, 07:51 PM Apr 14 2020, 07:51 PM
Post
#483
|
|
914 Guru      Group: Members Posts: 8,342 Joined: 3-August 19 From: SW Colorado Member No.: 23,343 Region Association: Rocky Mountains 
|
Headlight box drain tube.
Attached thumbnail(s) 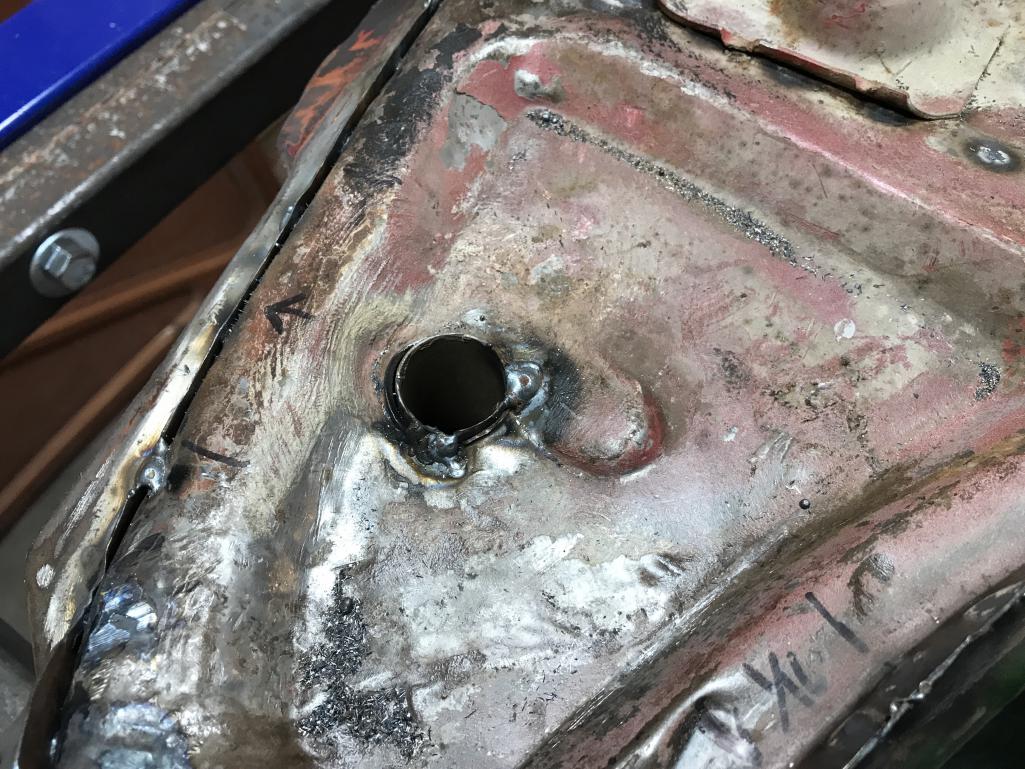
|
| bkrantz |
 Apr 14 2020, 07:52 PM Apr 14 2020, 07:52 PM
Post
#484
|
|
914 Guru      Group: Members Posts: 8,342 Joined: 3-August 19 From: SW Colorado Member No.: 23,343 Region Association: Rocky Mountains 
|
Bottom side of engine lid hinge mounts.
Attached thumbnail(s) 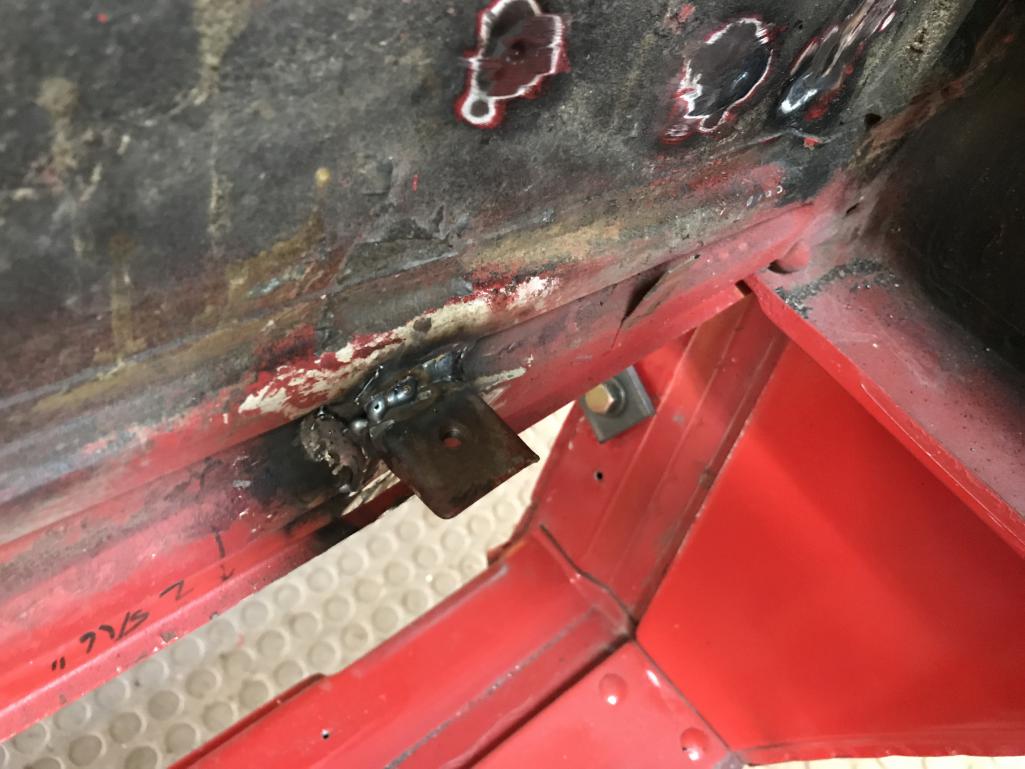
|
| bkrantz |
 Apr 14 2020, 07:53 PM Apr 14 2020, 07:53 PM
Post
#485
|
|
914 Guru      Group: Members Posts: 8,342 Joined: 3-August 19 From: SW Colorado Member No.: 23,343 Region Association: Rocky Mountains 
|
Next up, the muffler shield.
Attached thumbnail(s) 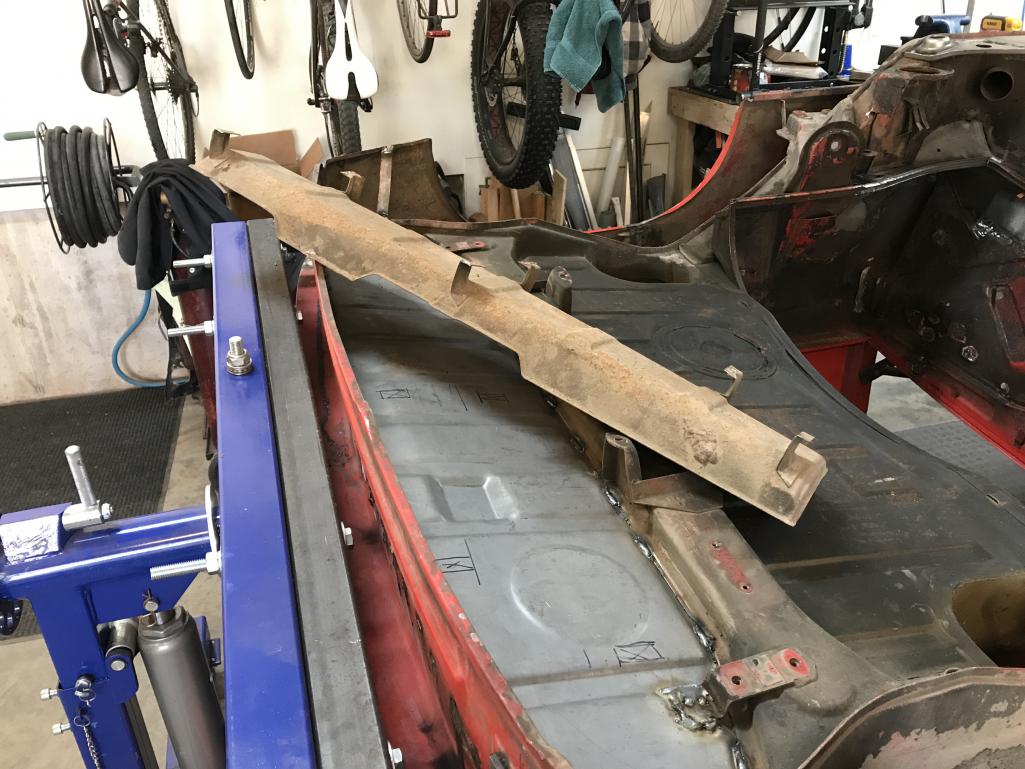
|
| raynekat |
 Apr 14 2020, 08:55 PM Apr 14 2020, 08:55 PM
Post
#486
|
|
Advanced Member     Group: Members Posts: 2,169 Joined: 30-December 14 From: Coeur d'Alene, Idaho Member No.: 18,263 Region Association: Pacific Northwest 
|
Next up, the muffler shield. Bob....mine is removable. Plus I had it ceramic coated to keep the heat out of the rear trunk. Unsure if that worked or not, but the theory was sound. (IMG:style_emoticons/default/wink.gif) I'll have to see if I have pics from my build. But just think....screws to hold the shield to the standoffs. |
| bkrantz |
 Apr 15 2020, 09:14 PM Apr 15 2020, 09:14 PM
Post
#487
|
|
914 Guru      Group: Members Posts: 8,342 Joined: 3-August 19 From: SW Colorado Member No.: 23,343 Region Association: Rocky Mountains 
|
Thanks, Doug. I remember that from your build, and it has me thinking.
|
| bkrantz |
 Apr 15 2020, 09:15 PM Apr 15 2020, 09:15 PM
Post
#488
|
|
914 Guru      Group: Members Posts: 8,342 Joined: 3-August 19 From: SW Colorado Member No.: 23,343 Region Association: Rocky Mountains 
|
No real work today, but I did look over the body shell again, and found a few more things for the list.
Attached thumbnail(s) 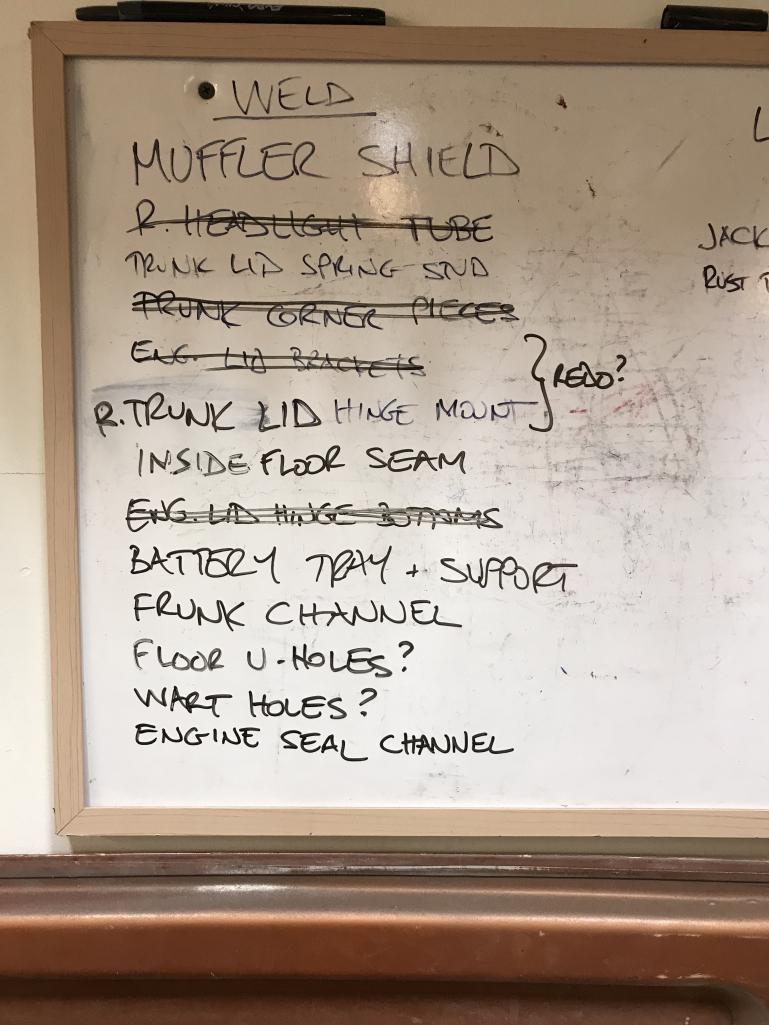
|
| bkrantz |
 Apr 16 2020, 09:40 PM Apr 16 2020, 09:40 PM
Post
#489
|
|
914 Guru      Group: Members Posts: 8,342 Joined: 3-August 19 From: SW Colorado Member No.: 23,343 Region Association: Rocky Mountains 
|
I got started on the muffler shield. I want this to be bolt on, but no holes in the trunk floor. I removed the 6 original legs and fabricated 2 brackets with bolts welded in as studs.
Attached thumbnail(s) 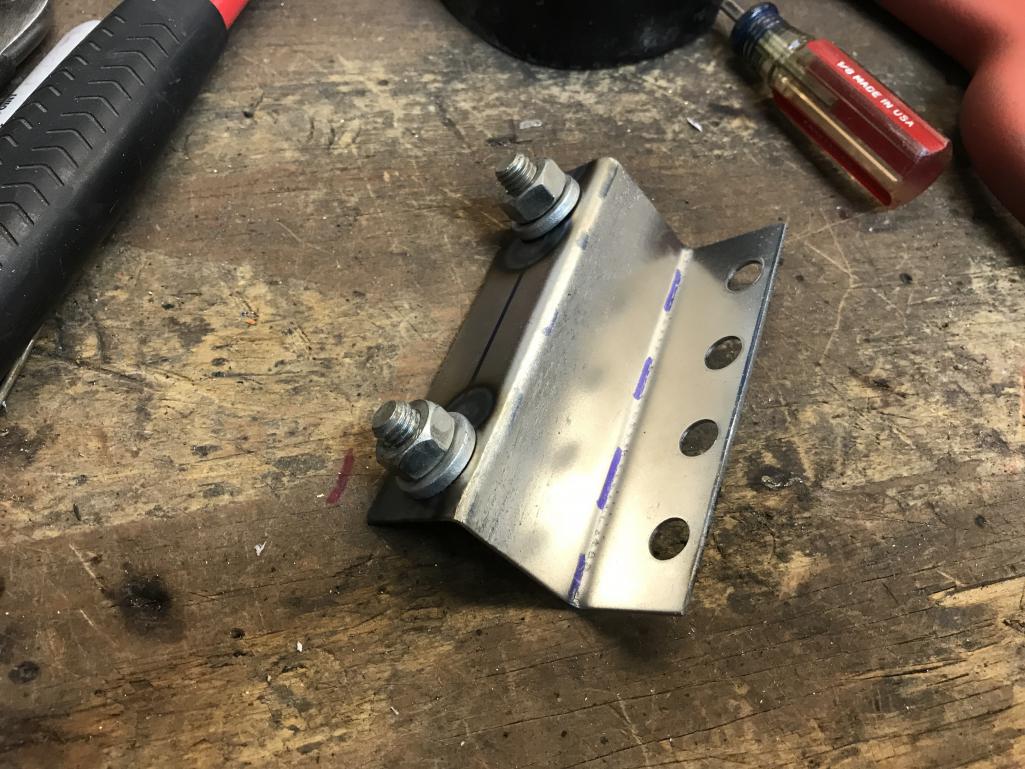
|
| bkrantz |
 Apr 16 2020, 09:43 PM Apr 16 2020, 09:43 PM
Post
#490
|
|
914 Guru      Group: Members Posts: 8,342 Joined: 3-August 19 From: SW Colorado Member No.: 23,343 Region Association: Rocky Mountains 
|
Here's the shield with the new brackets bolted on for placement on the trunk floor.
Attached thumbnail(s) 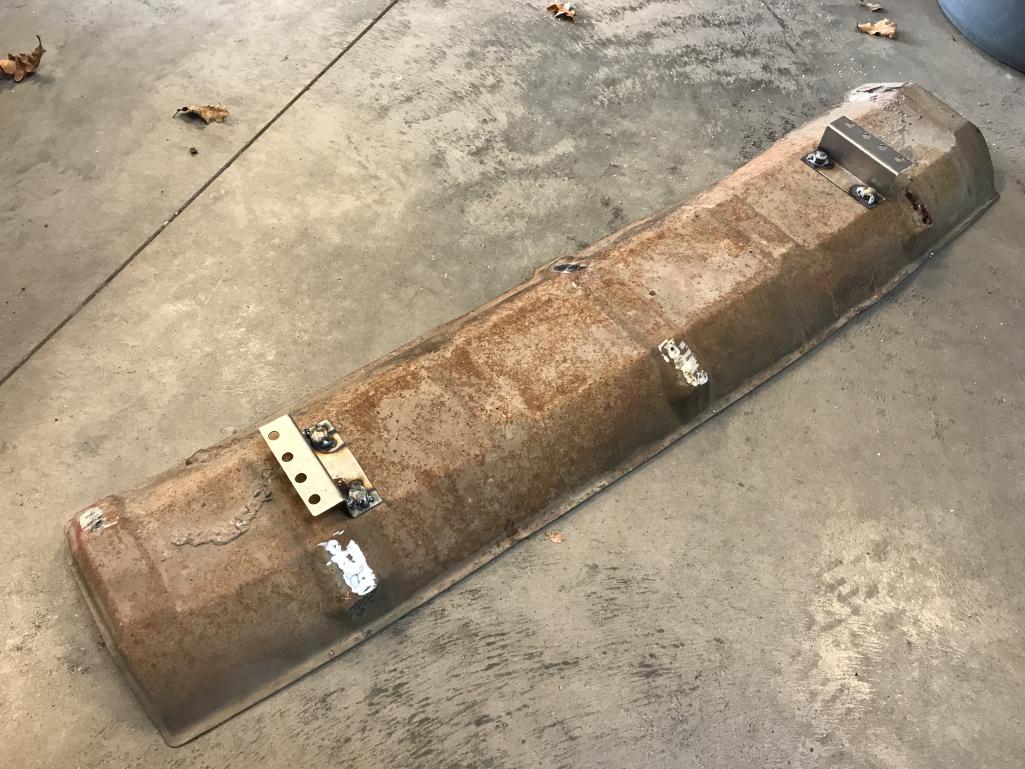
|
| Kansas 914 |
 Apr 17 2020, 06:30 AM Apr 17 2020, 06:30 AM
Post
#491
|
|
Advanced Member     Group: Members Posts: 2,999 Joined: 1-March 03 From: Durango, Colorado Member No.: 373 Region Association: Rocky Mountains 
|
|
| bkrantz |
 Apr 17 2020, 08:20 PM Apr 17 2020, 08:20 PM
Post
#492
|
|
914 Guru      Group: Members Posts: 8,342 Joined: 3-August 19 From: SW Colorado Member No.: 23,343 Region Association: Rocky Mountains 
|
Thanks, me too. The shield sits in the stock location +/- 1/4 inch. And it seems plenty rigid.
|
| bkrantz |
 Apr 17 2020, 08:21 PM Apr 17 2020, 08:21 PM
Post
#493
|
|
914 Guru      Group: Members Posts: 8,342 Joined: 3-August 19 From: SW Colorado Member No.: 23,343 Region Association: Rocky Mountains 
|
Here is one of the new brackets welded in place.
Attached thumbnail(s) 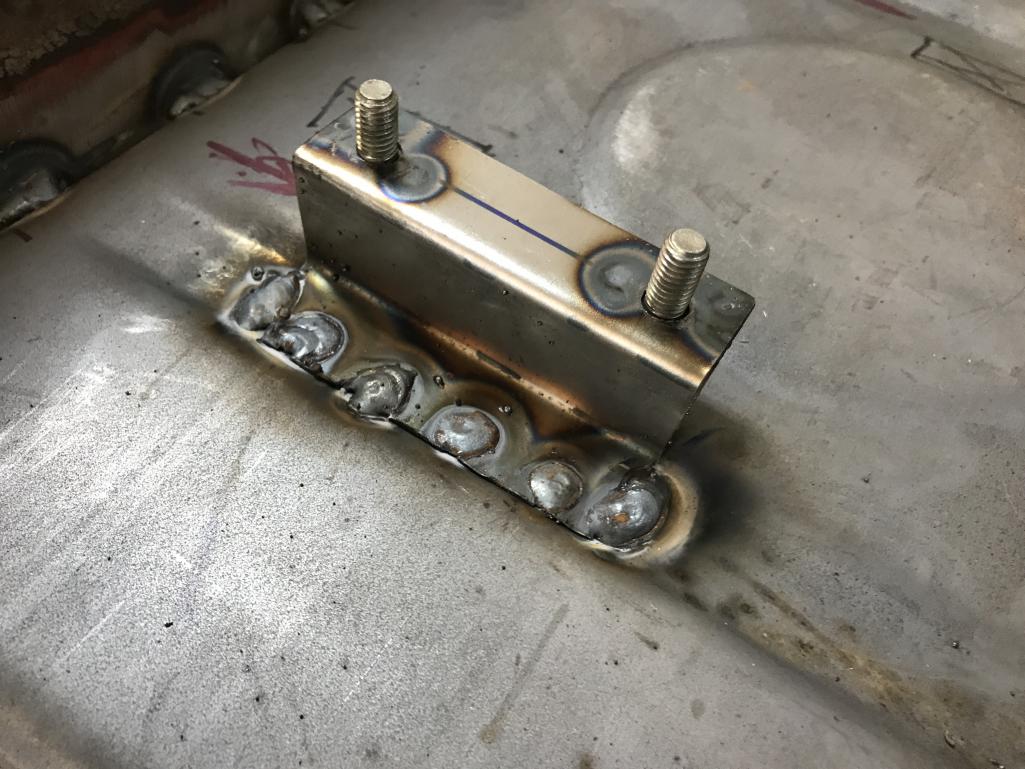
|
| bkrantz |
 Apr 17 2020, 08:21 PM Apr 17 2020, 08:21 PM
Post
#494
|
|
914 Guru      Group: Members Posts: 8,342 Joined: 3-August 19 From: SW Colorado Member No.: 23,343 Region Association: Rocky Mountains 
|
Both brackets.
Attached thumbnail(s) 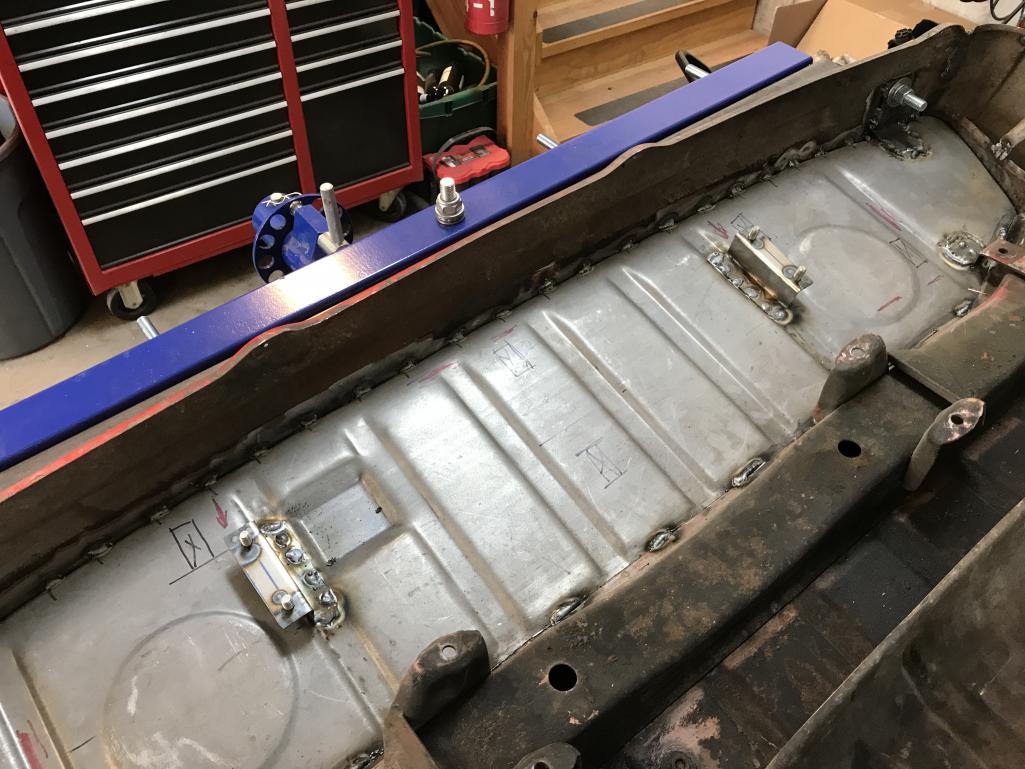
|
| bkrantz |
 Apr 17 2020, 08:22 PM Apr 17 2020, 08:22 PM
Post
#495
|
|
914 Guru      Group: Members Posts: 8,342 Joined: 3-August 19 From: SW Colorado Member No.: 23,343 Region Association: Rocky Mountains 
|
And the shield bolted on. Done with this and crossed off the list.
Attached thumbnail(s) 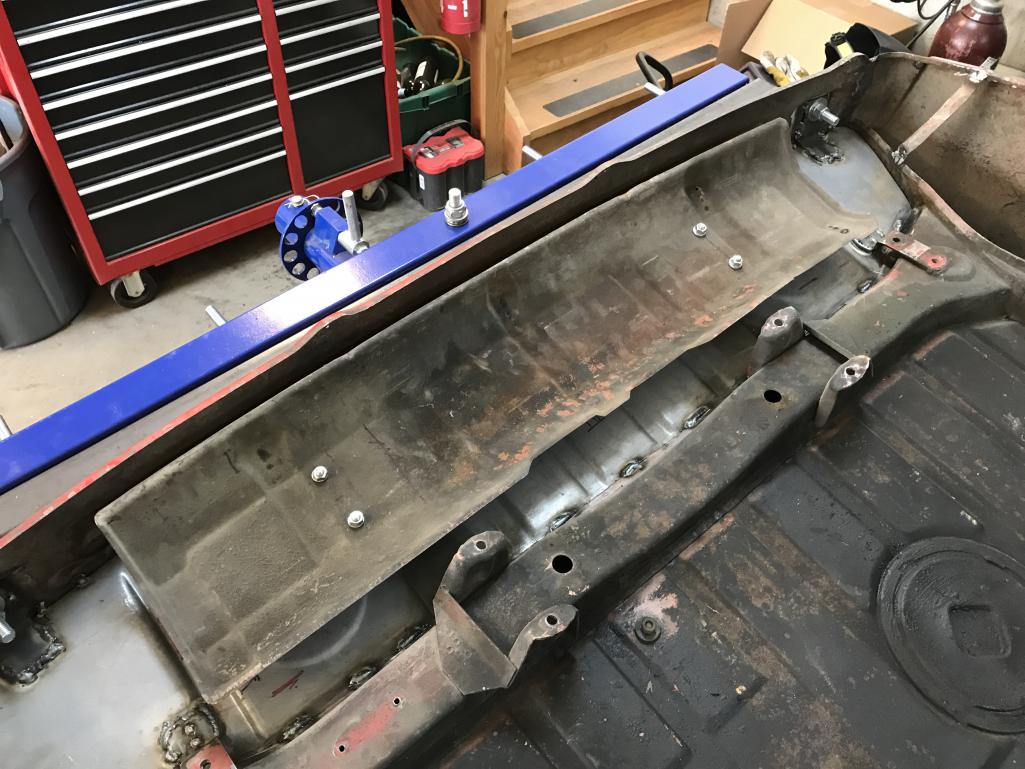
|
| Bmw635 |
 Apr 17 2020, 09:09 PM Apr 17 2020, 09:09 PM
Post
#496
|
|
Member   Group: Members Posts: 66 Joined: 19-February 20 From: OC, CA Member No.: 23,943 Region Association: Southern California |
|
| BeatNavy |
 Apr 18 2020, 05:56 AM Apr 18 2020, 05:56 AM
Post
#497
|
|
Certified Professional Scapegoat     Group: Members Posts: 2,951 Joined: 26-February 14 From: Easton, MD Member No.: 17,042 Region Association: MidAtlantic Region 
|
Here's the shield with the new brackets bolted on for placement on the trunk floor. I really like this idea and glad you made the extra effort to do it this way. (IMG:style_emoticons/default/agree.gif) I've been contemplating best way to do as well. I've been running without it for the last few weeks, but it probably needs to go back on. I like this approach. |
| bkrantz |
 Apr 18 2020, 07:44 PM Apr 18 2020, 07:44 PM
Post
#498
|
|
914 Guru      Group: Members Posts: 8,342 Joined: 3-August 19 From: SW Colorado Member No.: 23,343 Region Association: Rocky Mountains 
|
|
| bkrantz |
 Apr 18 2020, 07:48 PM Apr 18 2020, 07:48 PM
Post
#499
|
|
914 Guru      Group: Members Posts: 8,342 Joined: 3-August 19 From: SW Colorado Member No.: 23,343 Region Association: Rocky Mountains 
|
I decided to weld the U-holes in the passenger floor. I would rather have the simplicity than the original details.
Attached thumbnail(s) 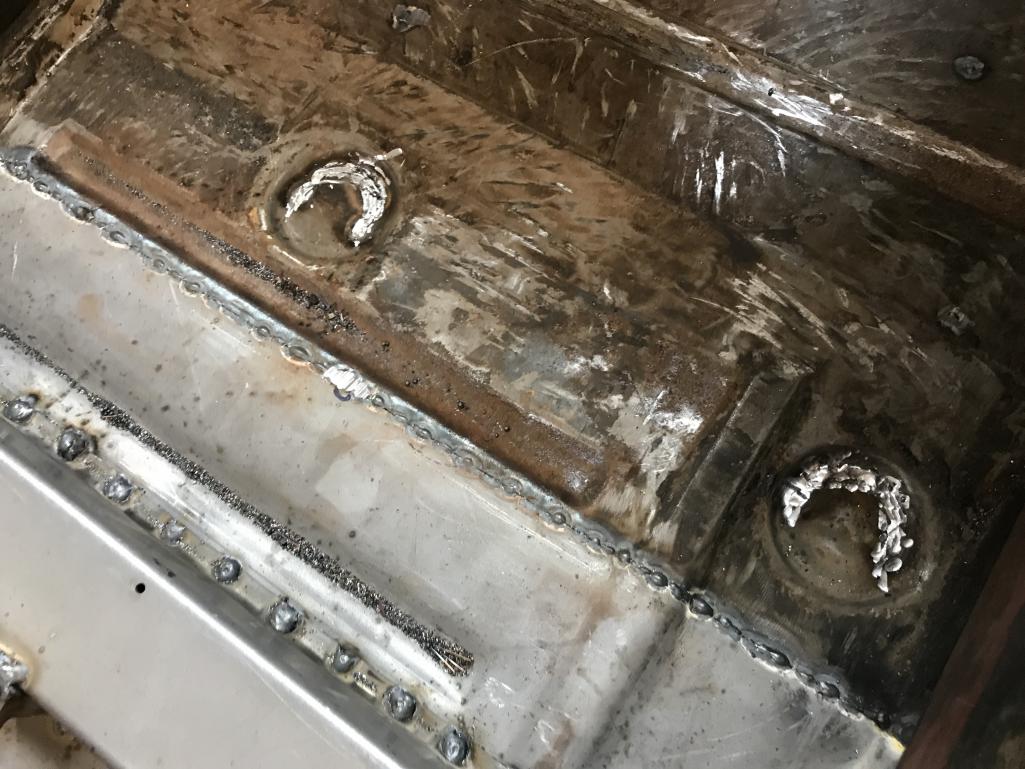
|
| bkrantz |
 Apr 18 2020, 07:53 PM Apr 18 2020, 07:53 PM
Post
#500
|
|
914 Guru      Group: Members Posts: 8,342 Joined: 3-August 19 From: SW Colorado Member No.: 23,343 Region Association: Rocky Mountains 
|
And now onto the channel for the weatherstrip around the frunk opening. First, identifying all the rusted segments. These include the front edge (pretty much all on the inner side):
Attached thumbnail(s) 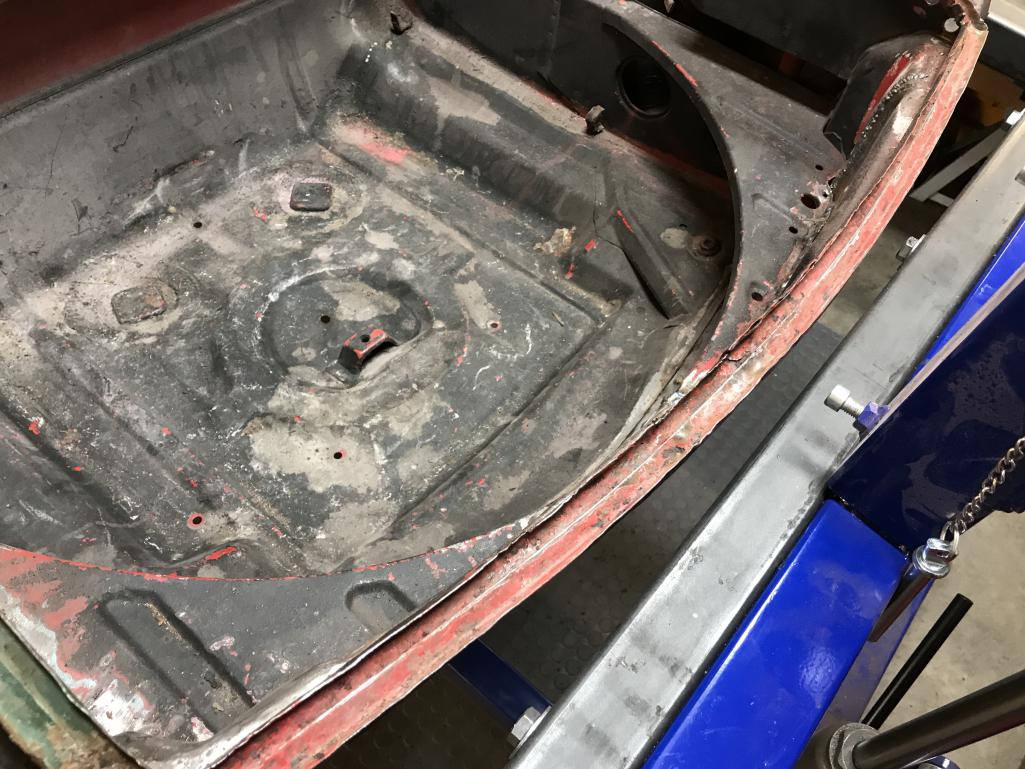
|
  |
1 User(s) are reading this topic (1 Guests and 0 Anonymous Users)
0 Members:

|
Lo-Fi Version | Time is now: 20th April 2025 - 12:45 AM |
Invision Power Board
v9.1.4 © 2025 IPS, Inc.


