|
|

|
Porsche, and the Porsche crest are registered trademarks of Dr. Ing. h.c. F. Porsche AG.
This site is not affiliated with Porsche in any way. Its only purpose is to provide an online forum for car enthusiasts. All other trademarks are property of their respective owners. |
|
|
  |
| bkrantz |
 Apr 16 2022, 08:38 PM Apr 16 2022, 08:38 PM
Post
#5061
|
|
914 Guru      Group: Members Posts: 8,345 Joined: 3-August 19 From: SW Colorado Member No.: 23,343 Region Association: Rocky Mountains 
|
Gauge reading--just barely more than original "null" reading.
Attached thumbnail(s) 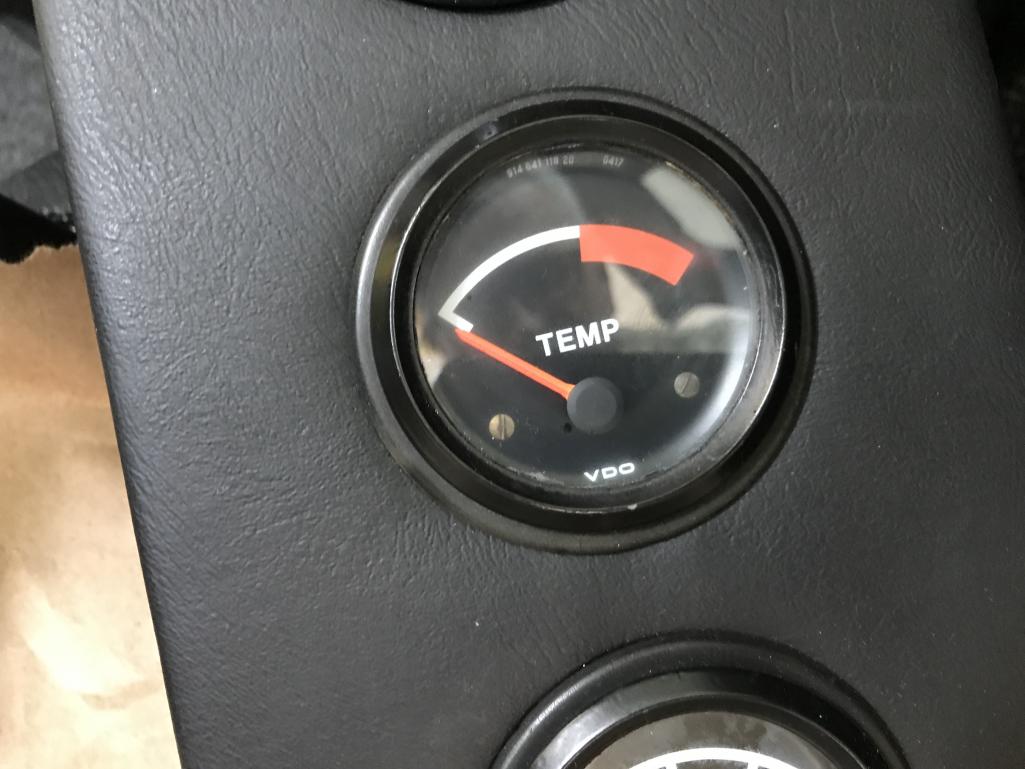
|
| bkrantz |
 Apr 16 2022, 08:40 PM Apr 16 2022, 08:40 PM
Post
#5062
|
|
914 Guru      Group: Members Posts: 8,345 Joined: 3-August 19 From: SW Colorado Member No.: 23,343 Region Association: Rocky Mountains 
|
More heat.
Attached thumbnail(s) 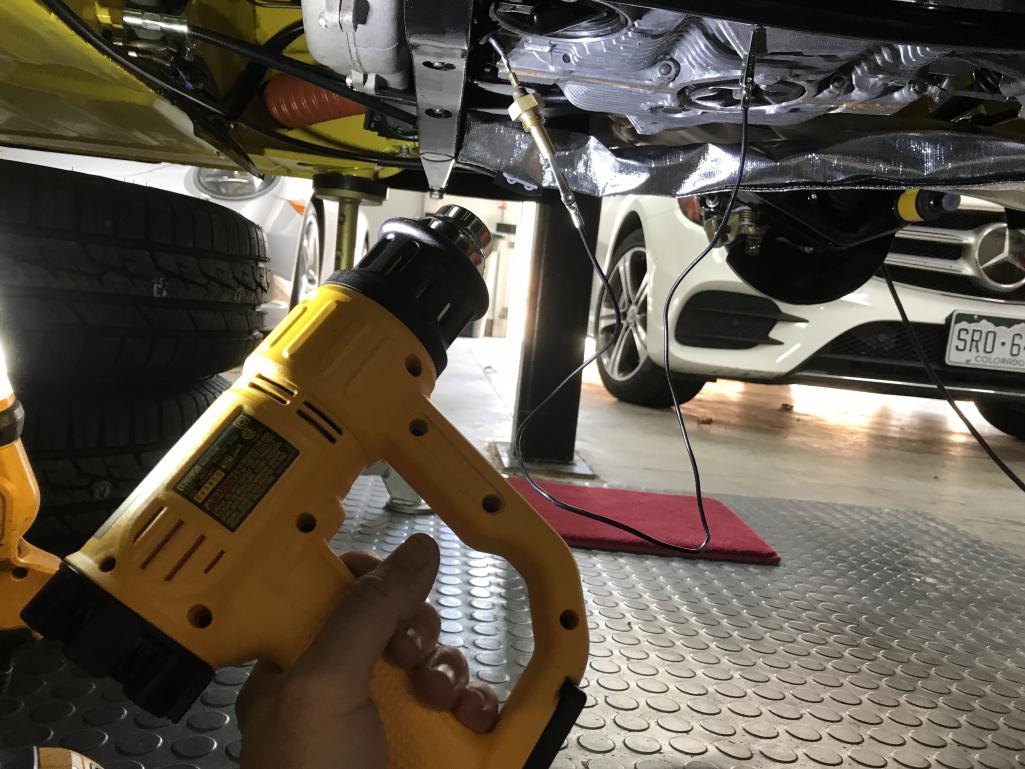
|
| bkrantz |
 Apr 16 2022, 08:41 PM Apr 16 2022, 08:41 PM
Post
#5063
|
|
914 Guru      Group: Members Posts: 8,345 Joined: 3-August 19 From: SW Colorado Member No.: 23,343 Region Association: Rocky Mountains 
|
Much lower resistance.
Attached thumbnail(s) 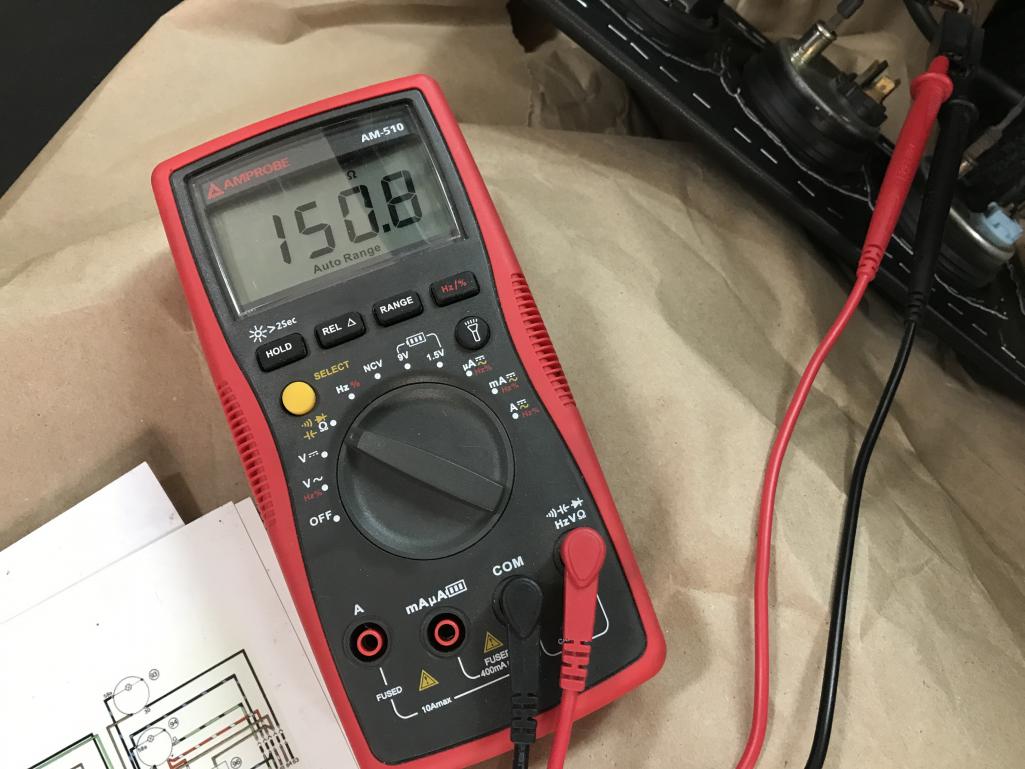
|
| bkrantz |
 Apr 16 2022, 08:43 PM Apr 16 2022, 08:43 PM
Post
#5064
|
|
914 Guru      Group: Members Posts: 8,345 Joined: 3-August 19 From: SW Colorado Member No.: 23,343 Region Association: Rocky Mountains 
|
Finally, some temperature indication.
Now I can swap the new sender for the old one. I guess its time for another oil change. Too bad the car is not on a rotisserie! Attached thumbnail(s) 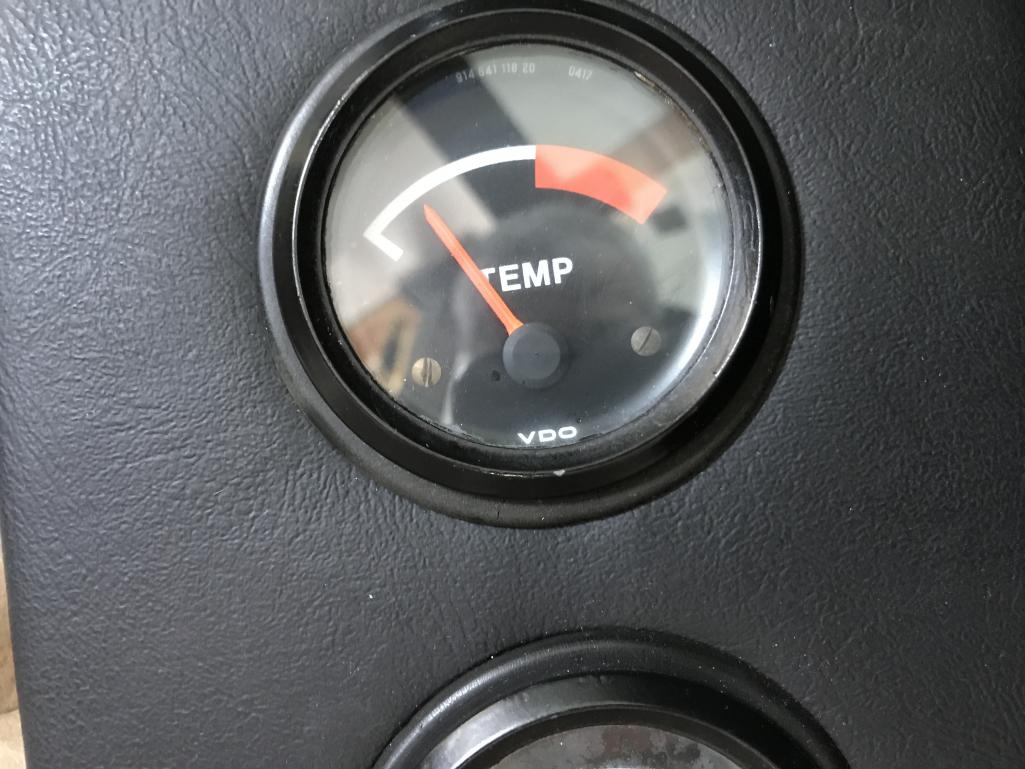
|
| bkrantz |
 Apr 16 2022, 08:45 PM Apr 16 2022, 08:45 PM
Post
#5065
|
|
914 Guru      Group: Members Posts: 8,345 Joined: 3-August 19 From: SW Colorado Member No.: 23,343 Region Association: Rocky Mountains 
|
I noticed another teaser from my 914: the brake lights were on all the time (with the key on).
Attached thumbnail(s) 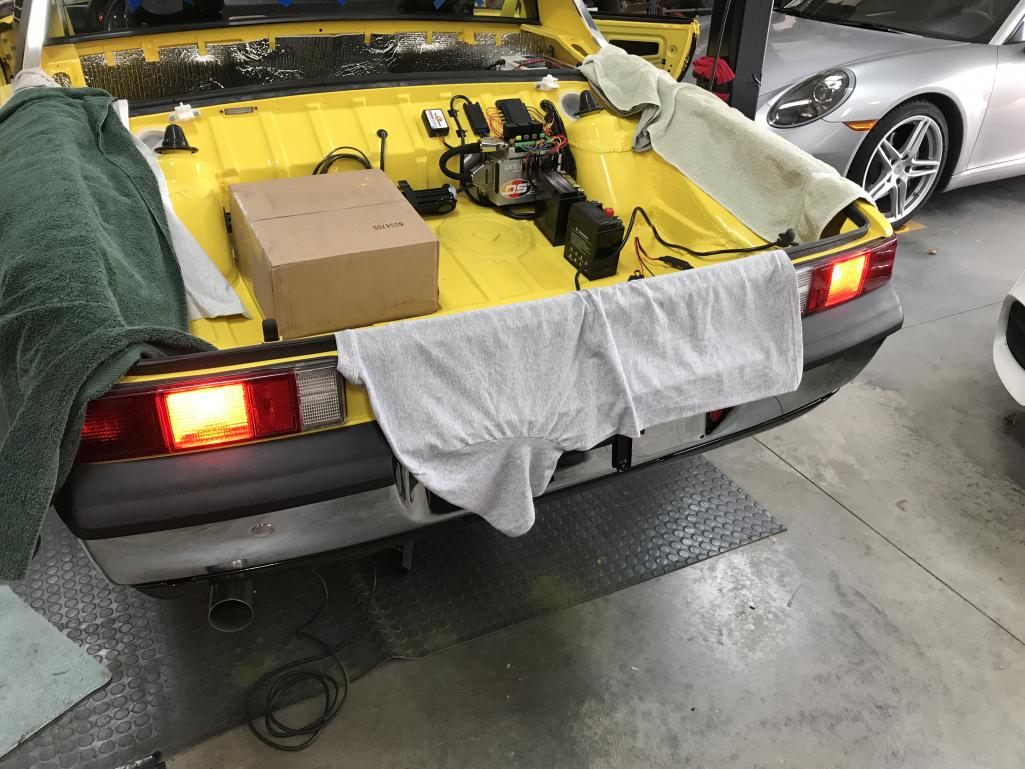
|
| bkrantz |
 Apr 16 2022, 08:48 PM Apr 16 2022, 08:48 PM
Post
#5066
|
|
914 Guru      Group: Members Posts: 8,345 Joined: 3-August 19 From: SW Colorado Member No.: 23,343 Region Association: Rocky Mountains 
|
Turns out the trigger arm for the brake light switch was under the ring on the piston rod. I guess this happened when I swapped master cylinders.
Attached thumbnail(s) 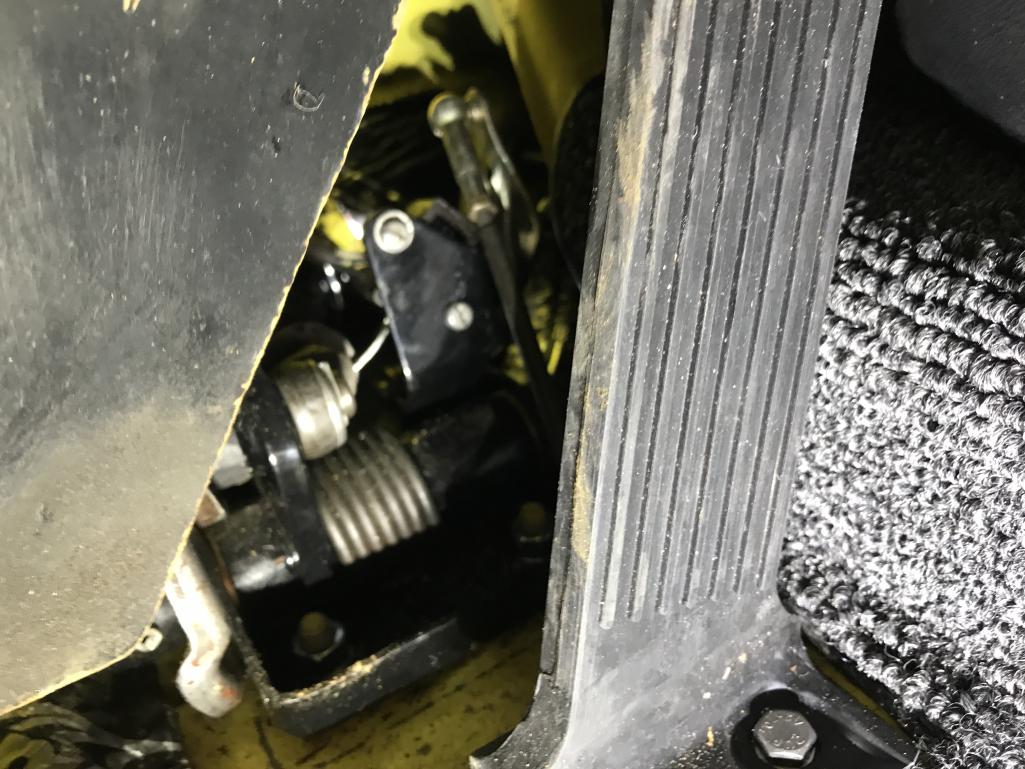
|
| bkrantz |
 Apr 17 2022, 07:32 PM Apr 17 2022, 07:32 PM
Post
#5067
|
|
914 Guru      Group: Members Posts: 8,345 Joined: 3-August 19 From: SW Colorado Member No.: 23,343 Region Association: Rocky Mountains 
|
After draining the oil, I removed the cover to expose the old temp sensor.
Attached thumbnail(s) 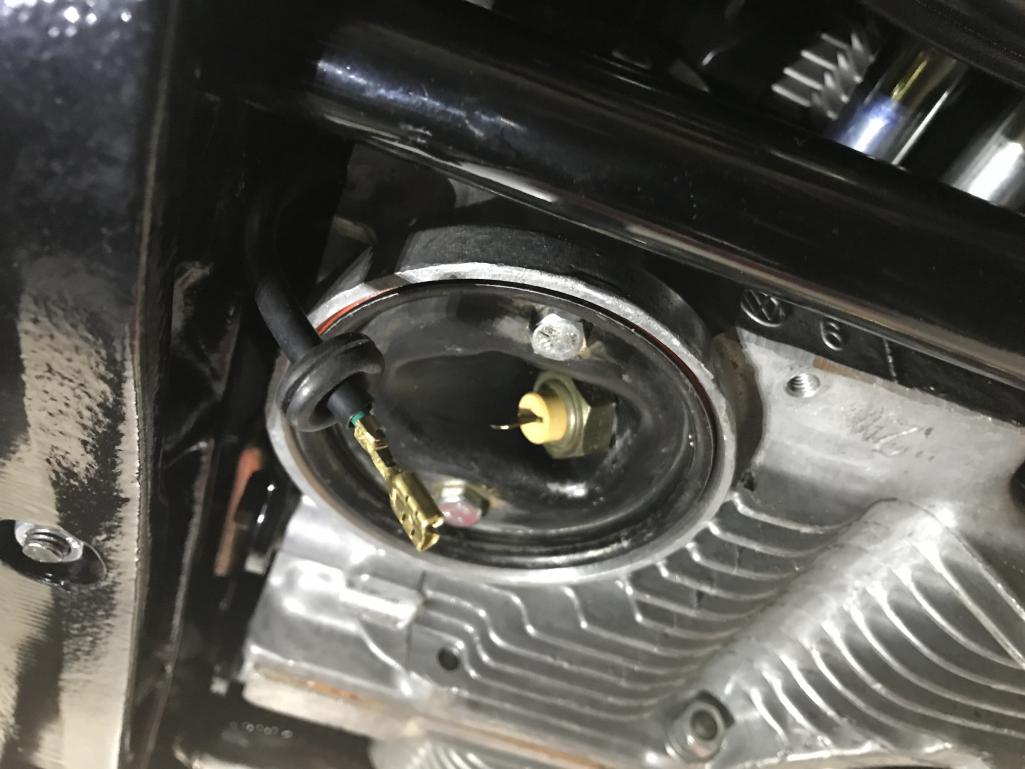
|
| bkrantz |
 Apr 17 2022, 07:33 PM Apr 17 2022, 07:33 PM
Post
#5068
|
|
914 Guru      Group: Members Posts: 8,345 Joined: 3-August 19 From: SW Colorado Member No.: 23,343 Region Association: Rocky Mountains 
|
And swapped in the new one.
Attached thumbnail(s) 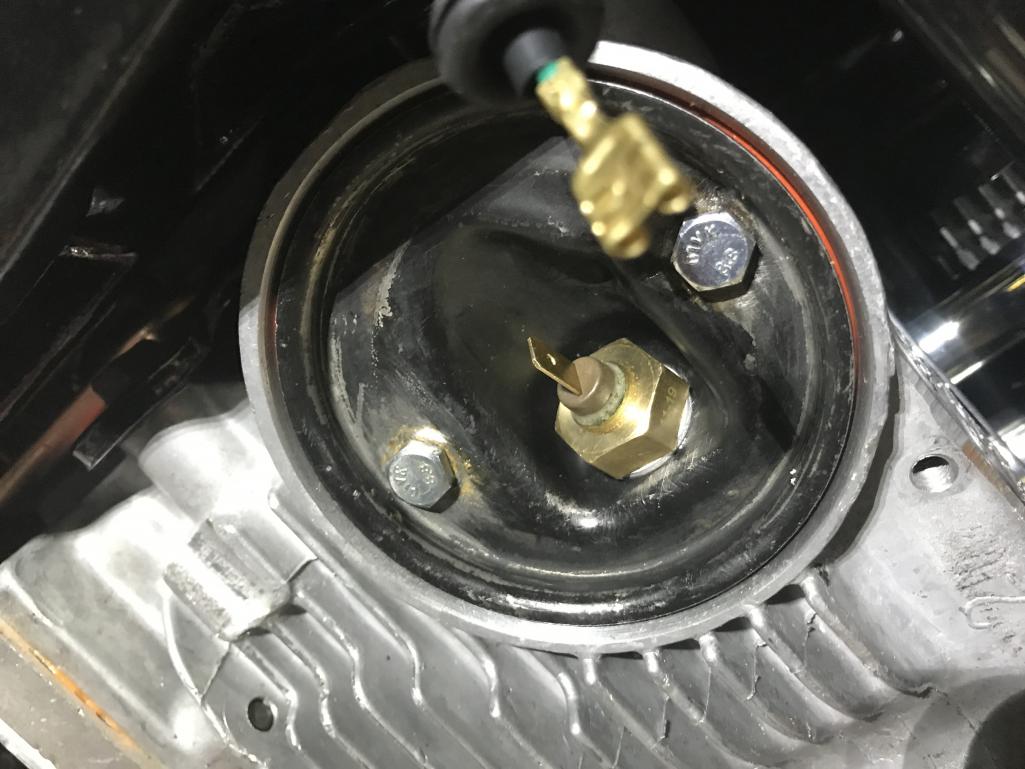
|
| bkrantz |
 Apr 17 2022, 07:34 PM Apr 17 2022, 07:34 PM
Post
#5069
|
|
914 Guru      Group: Members Posts: 8,345 Joined: 3-August 19 From: SW Colorado Member No.: 23,343 Region Association: Rocky Mountains 
|
And after a bit of fuss, and a dab of sealant, I re-installed the cover and connected the sensor lead.
Attached thumbnail(s) 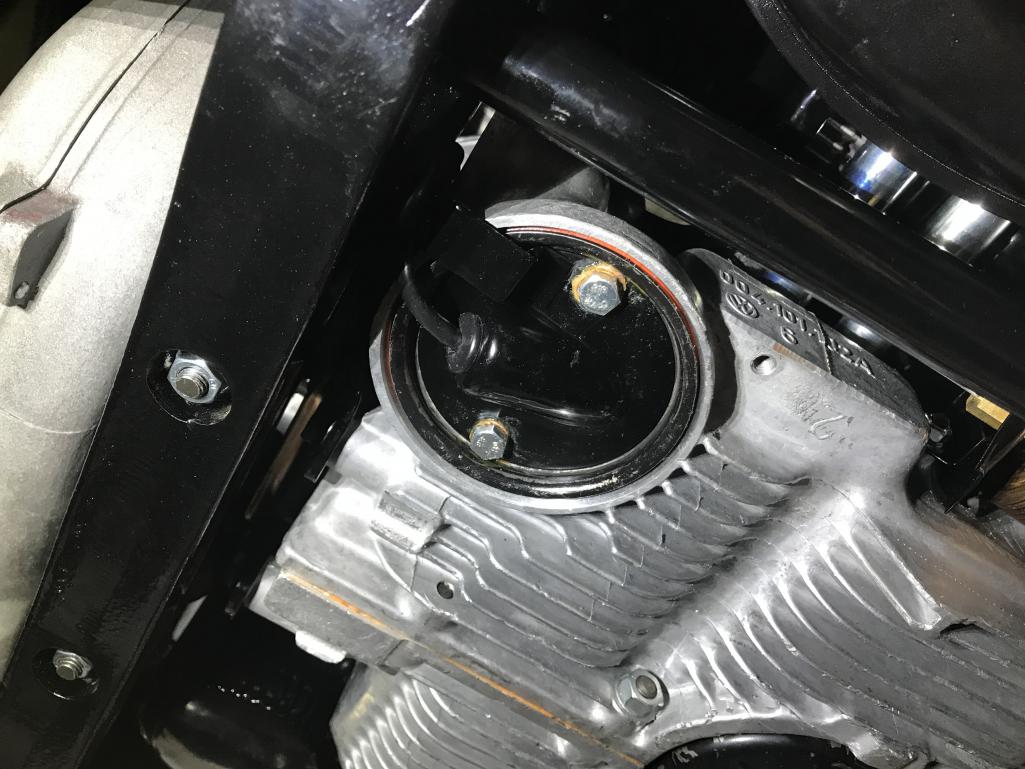
|
| bkrantz |
 Apr 17 2022, 07:37 PM Apr 17 2022, 07:37 PM
Post
#5070
|
|
914 Guru      Group: Members Posts: 8,345 Joined: 3-August 19 From: SW Colorado Member No.: 23,343 Region Association: Rocky Mountains 
|
The original connector for the oil temp lead (under the battery) finally gave up. The next time I have good access with the engine removed, I will replace it properly. For now I made a temporary repair.
Attached thumbnail(s) 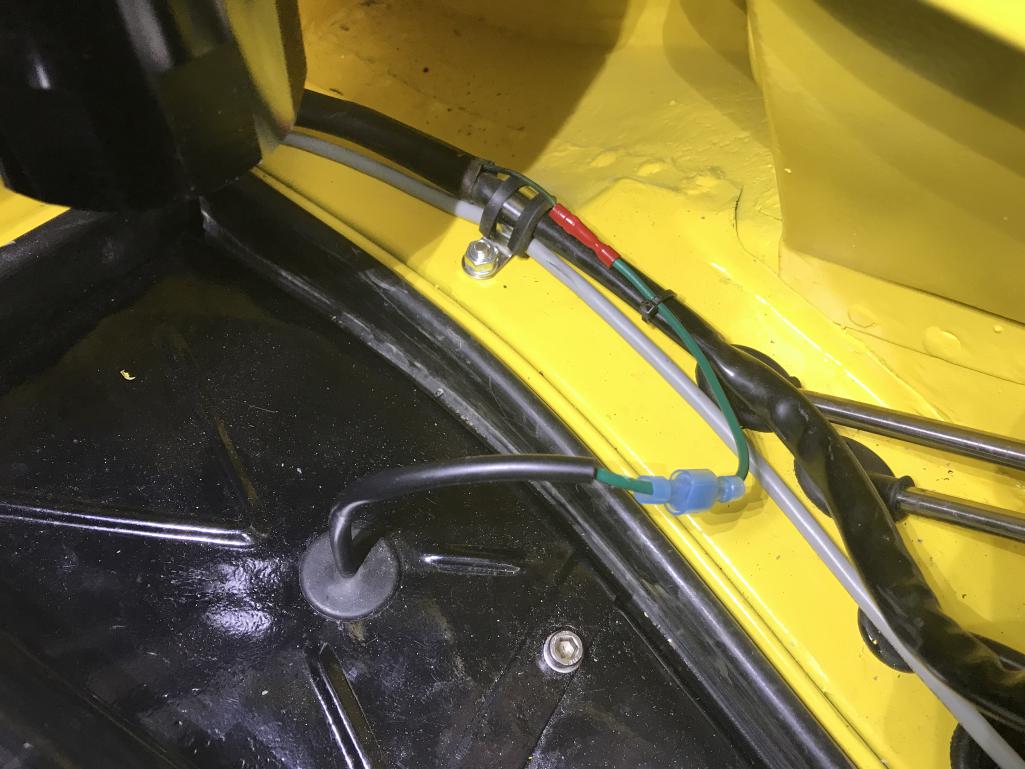
|
| NS914 |
 Apr 18 2022, 06:12 PM Apr 18 2022, 06:12 PM
Post
#5071
|
|
Member   Group: Members Posts: 198 Joined: 9-June 09 From: Dartmouth, Nova Scotia Member No.: 10,455 Region Association: Canada 
|
I cannot thank you enough for the level of detail and fantastic photography throughout this build! Among the many things I have learned, I have found my most recent question answered.....where does that green wire go???? LOL!
So your pictures show it coming up out of the engine bay and I am assuming it goes through the centre tunnel and up to the gauges! Happy Easter and thanks for all of your work!!! Grant |
| NS914 |
 Apr 18 2022, 06:19 PM Apr 18 2022, 06:19 PM
Post
#5072
|
|
Member   Group: Members Posts: 198 Joined: 9-June 09 From: Dartmouth, Nova Scotia Member No.: 10,455 Region Association: Canada 
|
I cannot thank you enough for the level of detail and fantastic photography throughout this build! Among the many things I have learned, I have found my most recent question answered.....where does that green wire go???? LOL! So your pictures show it coming up out of the engine bay and I am assuming it goes through the centre tunnel and up to the gauges! Happy Easter and thanks for all of your work!!! ...and my apologies, I realized I didn't know your first name, well Bob, thanks so much again! Grant |
| bkrantz |
 Apr 18 2022, 07:59 PM Apr 18 2022, 07:59 PM
Post
#5073
|
|
914 Guru      Group: Members Posts: 8,345 Joined: 3-August 19 From: SW Colorado Member No.: 23,343 Region Association: Rocky Mountains 
|
Thanks, Grant. Glad you found some of this useful.
The green wire for the oil temp ducks into the harness below the battery, joins the other wires that enters the interior via the "snorkel", and comes out of the harness at the center console. It is the single connector between the doubles in the photo. The console gauge harness then connects these to the gauges. In my car, the gauge harness wire for the oil temp gauge is white. Attached thumbnail(s) 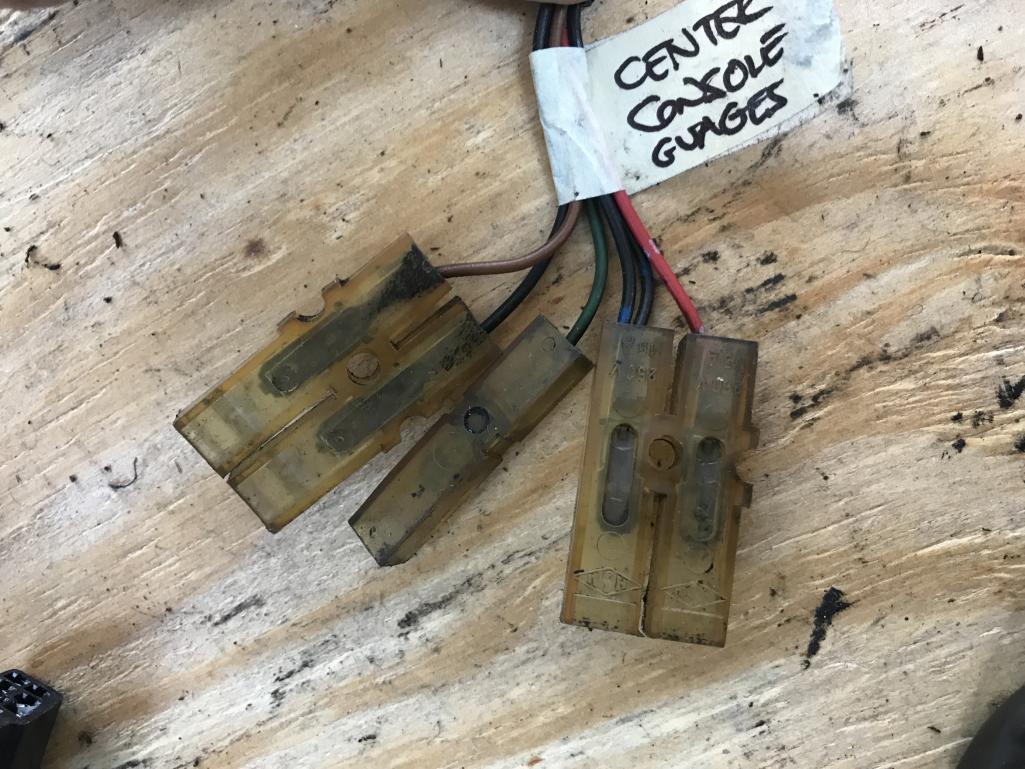
|
| NS914 |
 Apr 19 2022, 08:12 AM Apr 19 2022, 08:12 AM
Post
#5074
|
|
Member   Group: Members Posts: 198 Joined: 9-June 09 From: Dartmouth, Nova Scotia Member No.: 10,455 Region Association: Canada 
|
Thanks so much Bob! I nice to have easy work in amongst some of the more challenging jobs.
I need to replace the Brake light switch at the pedal and fiddle with the headlights....they are possessed re up and down....lights work though. LOL! I hope you will not mind but I can see myself reaching out to you again soon...LOL Grant |
| bkrantz |
 Apr 19 2022, 07:44 PM Apr 19 2022, 07:44 PM
Post
#5075
|
|
914 Guru      Group: Members Posts: 8,345 Joined: 3-August 19 From: SW Colorado Member No.: 23,343 Region Association: Rocky Mountains 
|
Happy to help. The headlights can be a challenge, but you should find some good info around here.
|
| bkrantz |
 Apr 19 2022, 07:47 PM Apr 19 2022, 07:47 PM
Post
#5076
|
|
914 Guru      Group: Members Posts: 8,345 Joined: 3-August 19 From: SW Colorado Member No.: 23,343 Region Association: Rocky Mountains 
|
Time to start on the targa top. I should have all the new rubber and hardware I need.
Attached thumbnail(s) 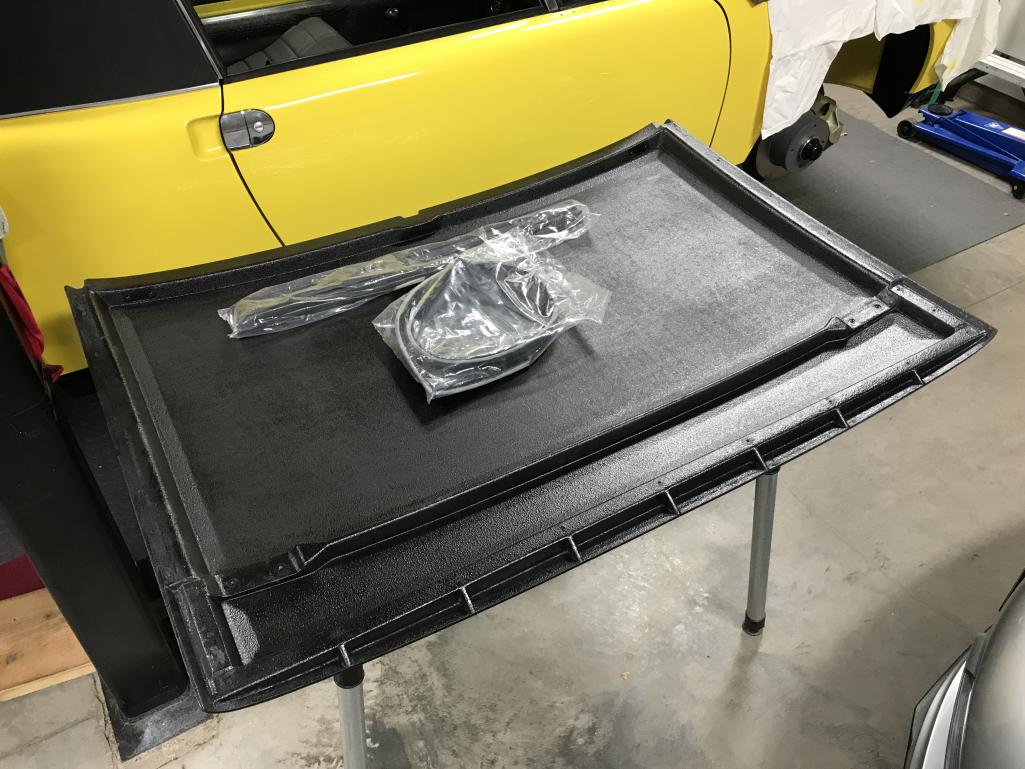
|
| bkrantz |
 Apr 19 2022, 07:53 PM Apr 19 2022, 07:53 PM
Post
#5077
|
|
914 Guru      Group: Members Posts: 8,345 Joined: 3-August 19 From: SW Colorado Member No.: 23,343 Region Association: Rocky Mountains 
|
I will have to recycle the old metal strips from the original rear weatherstripping. As many of you know, the short side pieces are bonded to the rubber on the original.
Attached thumbnail(s) 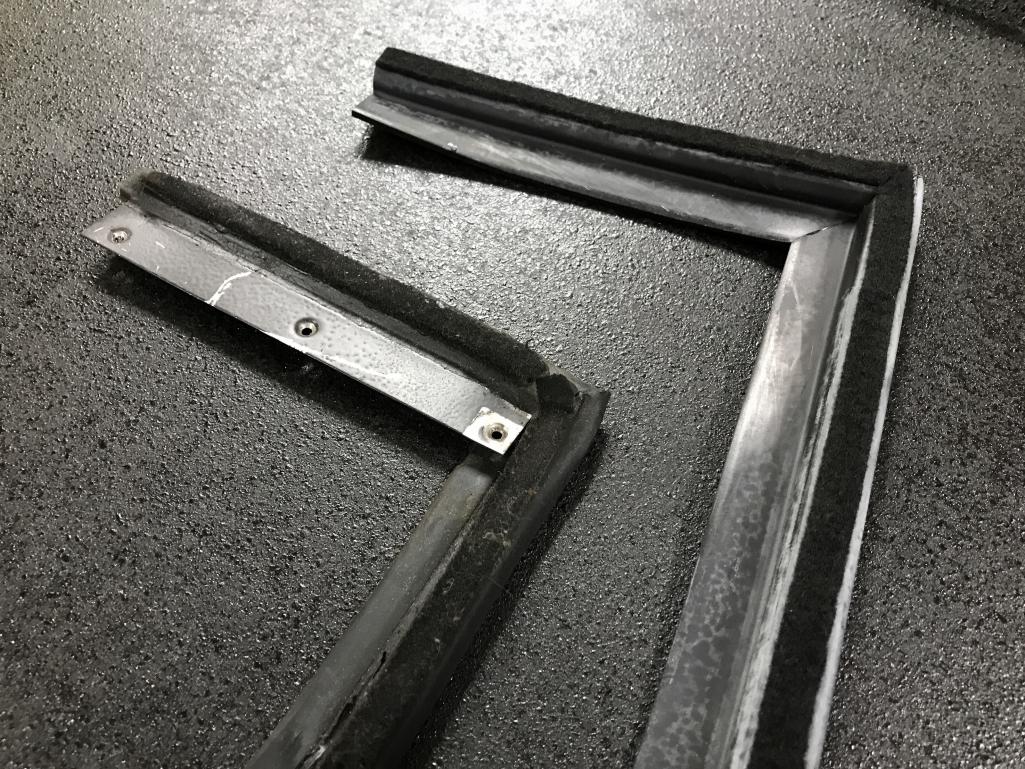
|
| bkrantz |
 Apr 19 2022, 07:55 PM Apr 19 2022, 07:55 PM
Post
#5078
|
|
914 Guru      Group: Members Posts: 8,345 Joined: 3-August 19 From: SW Colorado Member No.: 23,343 Region Association: Rocky Mountains 
|
Step 1 is to separate the rubber from the metal.
Attached thumbnail(s) 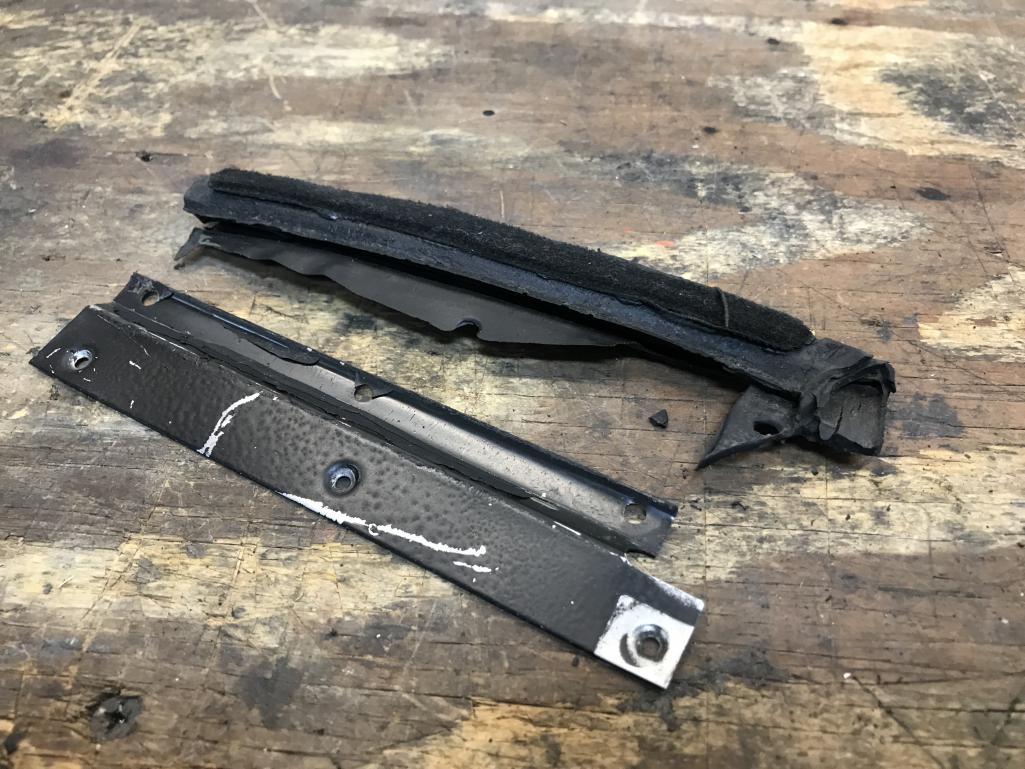
|
| bkrantz |
 Apr 19 2022, 07:57 PM Apr 19 2022, 07:57 PM
Post
#5079
|
|
914 Guru      Group: Members Posts: 8,345 Joined: 3-August 19 From: SW Colorado Member No.: 23,343 Region Association: Rocky Mountains 
|
Then I need to remove the PO black paint. I sure hope these are the last parts I need to restore. For this, I was able to get most of the paint off with my thumb nail.
Attached thumbnail(s) 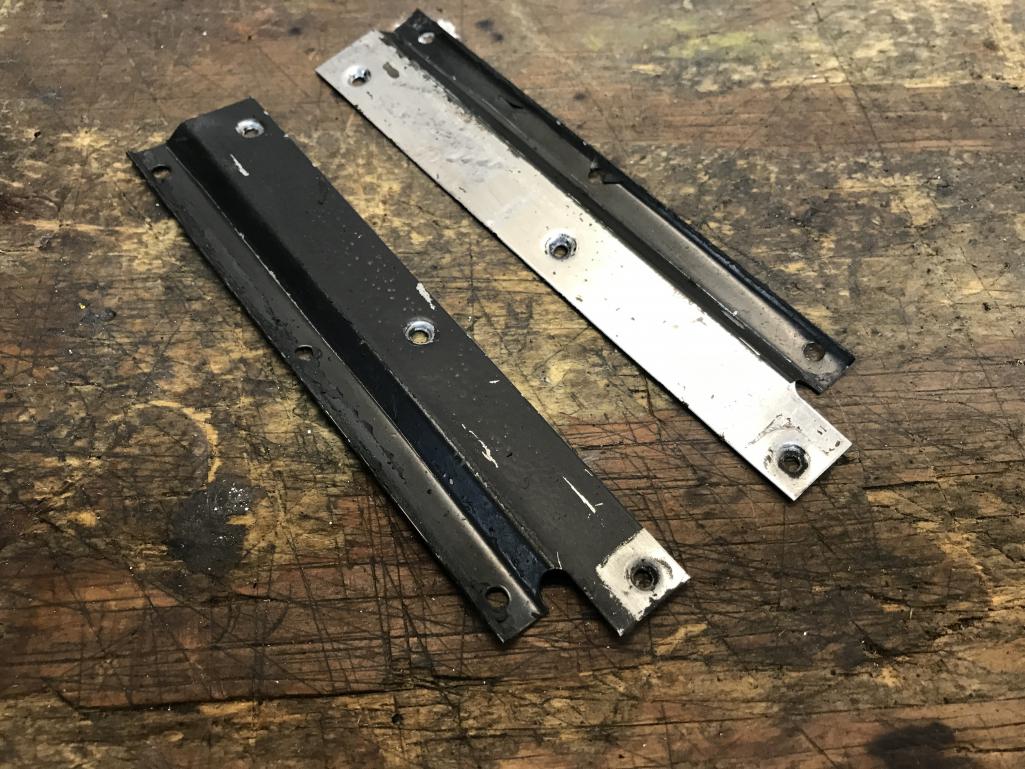
|
| bkrantz |
 Apr 19 2022, 07:58 PM Apr 19 2022, 07:58 PM
Post
#5080
|
|
914 Guru      Group: Members Posts: 8,345 Joined: 3-August 19 From: SW Colorado Member No.: 23,343 Region Association: Rocky Mountains 
|
And I got started on the cross strips.
Attached thumbnail(s) 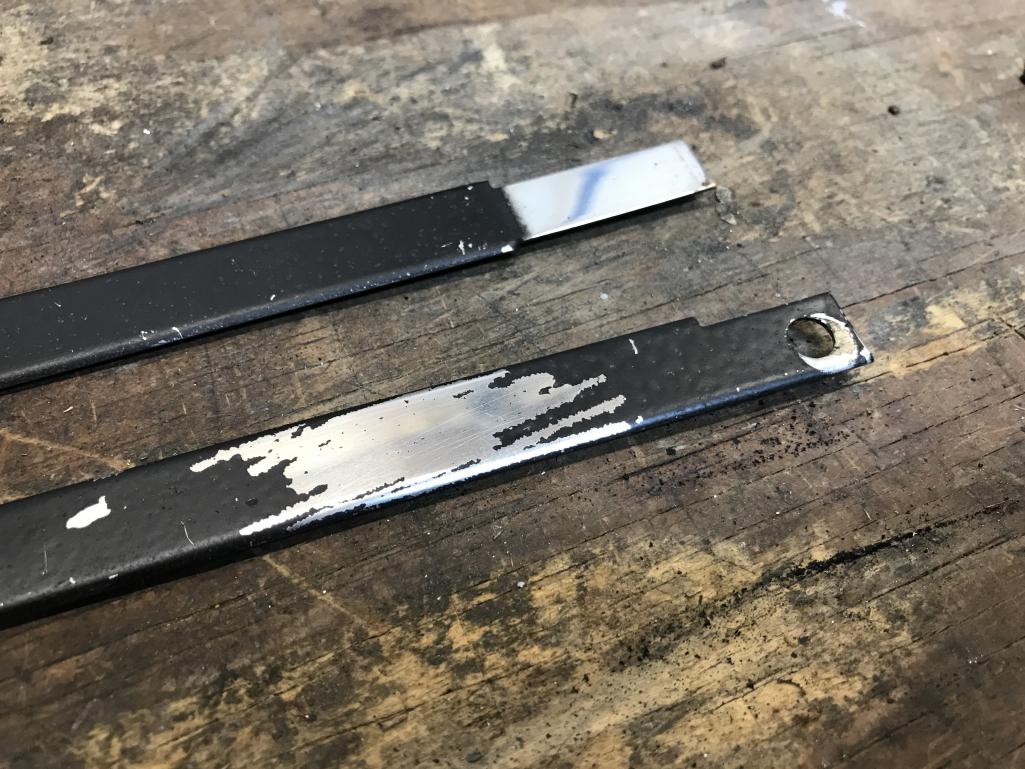
|
  |
1 User(s) are reading this topic (1 Guests and 0 Anonymous Users)
0 Members:

|
Lo-Fi Version | Time is now: 24th April 2025 - 09:42 AM |
Invision Power Board
v9.1.4 © 2025 IPS, Inc.


