|
|

|
Porsche, and the Porsche crest are registered trademarks of Dr. Ing. h.c. F. Porsche AG.
This site is not affiliated with Porsche in any way. Its only purpose is to provide an online forum for car enthusiasts. All other trademarks are property of their respective owners. |
|
|
  |
| raynekat |
 May 30 2022, 11:05 PM May 30 2022, 11:05 PM
Post
#5361
|
|
Advanced Member     Group: Members Posts: 2,169 Joined: 30-December 14 From: Coeur d'Alene, Idaho Member No.: 18,263 Region Association: Pacific Northwest 
|
You had me on the ski mount plugs.....
|
| Puebloswatcop |
 May 31 2022, 05:44 PM May 31 2022, 05:44 PM
Post
#5362
|
|
Senior Member    Group: Members Posts: 1,443 Joined: 27-December 14 From: Mineola, Texas Member No.: 18,258 Region Association: Southwest Region |
Bob,
The cover you made looks awesome. I love seeing the solutions you come up with and then make them happen. |
| bkrantz |
 May 31 2022, 08:14 PM May 31 2022, 08:14 PM
Post
#5363
|
|
914 Guru      Group: Members Posts: 8,343 Joined: 3-August 19 From: SW Colorado Member No.: 23,343 Region Association: Rocky Mountains 
|
Thanks, Howard. The cover is not done yet. I need to fix it in place. My idea is a velcro patch on the firewall and corresponding spot on the cover. Here's an angled spacer inside the cover to mount the velcro.
Attached thumbnail(s) 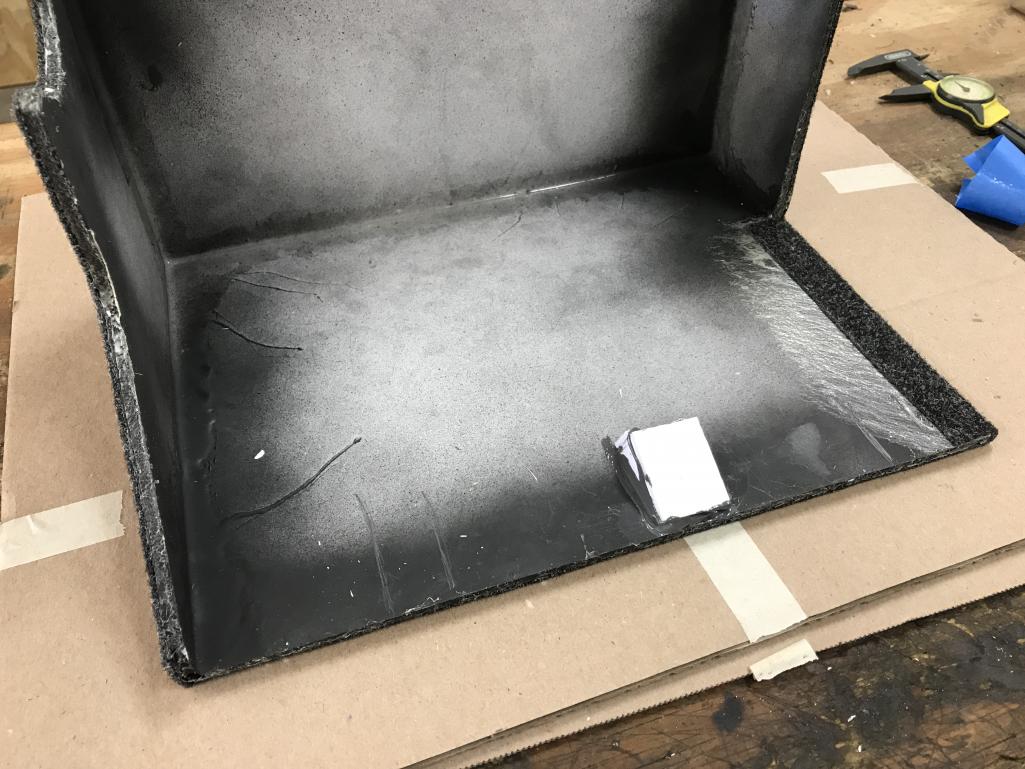
|
| bkrantz |
 May 31 2022, 08:21 PM May 31 2022, 08:21 PM
Post
#5364
|
|
914 Guru      Group: Members Posts: 8,343 Joined: 3-August 19 From: SW Colorado Member No.: 23,343 Region Association: Rocky Mountains 
|
While letting the epoxy set, I got started on suspension alignment. I want to get the settings close enough so I can take the car for a test drive, and make the final alignment less of a chore.
After I measured the camber again all around, I got started on the right rear. With the wheel off, I can finally re-attach the sway bar link. Attached thumbnail(s) 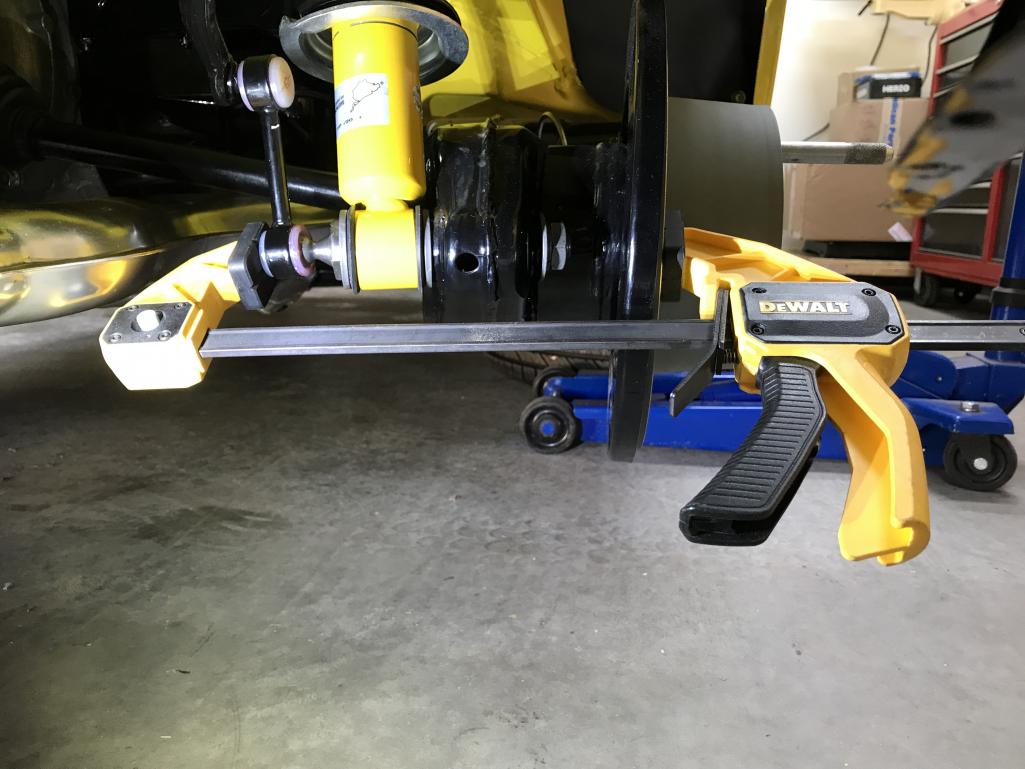
|
| bkrantz |
 May 31 2022, 08:24 PM May 31 2022, 08:24 PM
Post
#5365
|
|
914 Guru      Group: Members Posts: 8,343 Joined: 3-August 19 From: SW Colorado Member No.: 23,343 Region Association: Rocky Mountains 
|
Oops, my inner fender liners block access to the outer suspension mount.
Attached thumbnail(s) 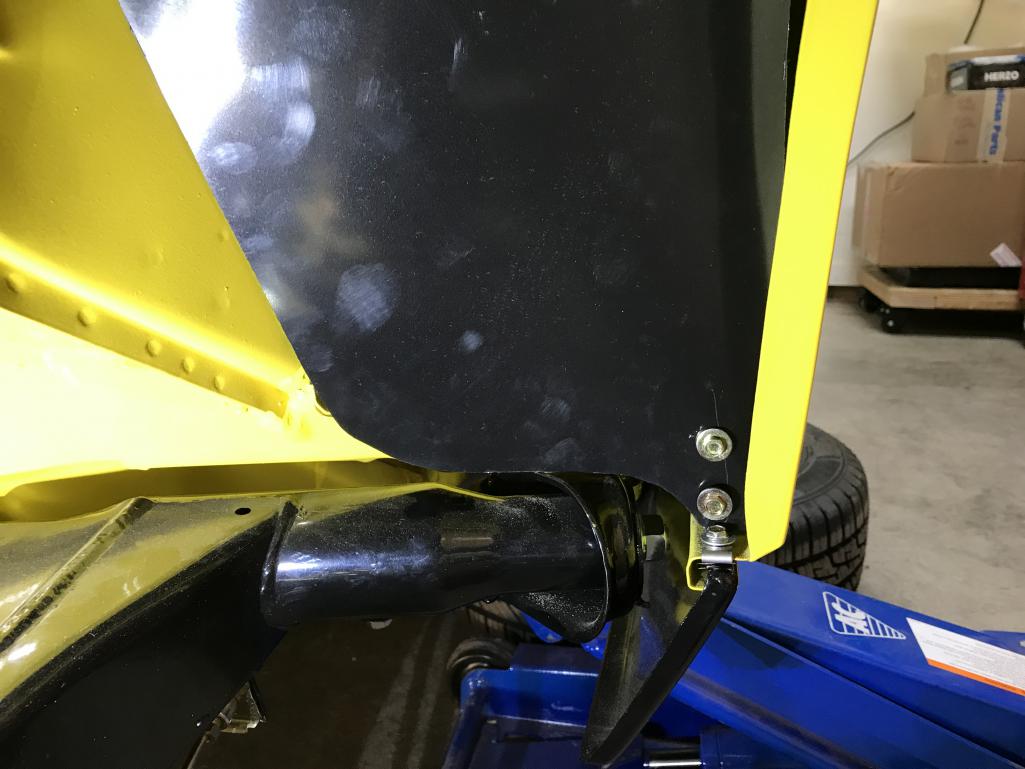
|
| bkrantz |
 May 31 2022, 08:25 PM May 31 2022, 08:25 PM
Post
#5366
|
|
914 Guru      Group: Members Posts: 8,343 Joined: 3-August 19 From: SW Colorado Member No.: 23,343 Region Association: Rocky Mountains 
|
That's better. You can see the original stack of shims: 2 x 4mm, and 2 x 2 mm for a total of 12mm.
Attached thumbnail(s) 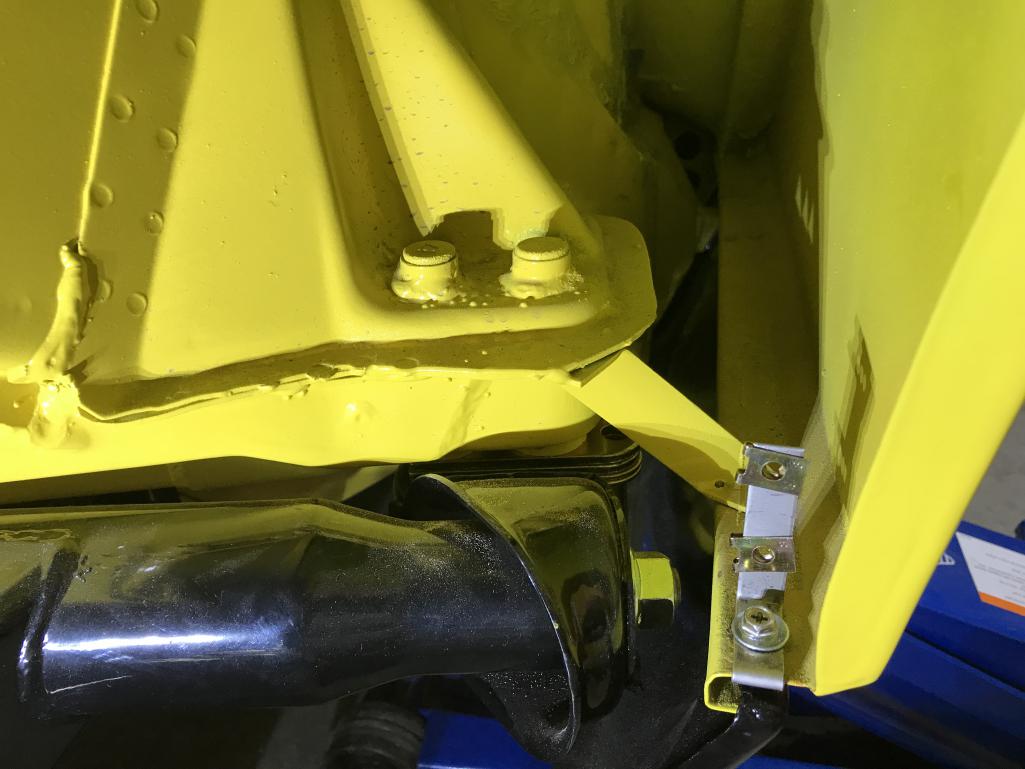
|
| bkrantz |
 May 31 2022, 08:36 PM May 31 2022, 08:36 PM
Post
#5367
|
|
914 Guru      Group: Members Posts: 8,343 Joined: 3-August 19 From: SW Colorado Member No.: 23,343 Region Association: Rocky Mountains 
|
The first camber measurement was -0.1°. I want something like -0.75° all around. So I removed one 4mm shim. That dropped the camber right on target to -0.75° (and I noted that each 1mm of shim stack change is about 0.15°).
Attached thumbnail(s) 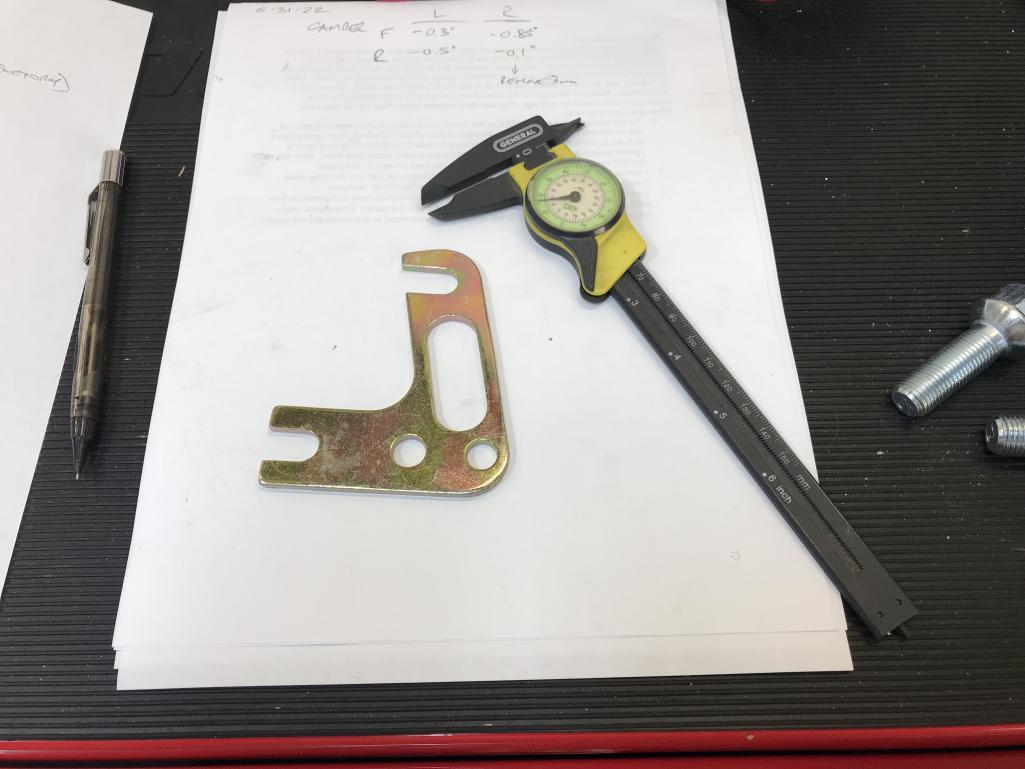
|
| bkrantz |
 May 31 2022, 08:44 PM May 31 2022, 08:44 PM
Post
#5368
|
|
914 Guru      Group: Members Posts: 8,343 Joined: 3-August 19 From: SW Colorado Member No.: 23,343 Region Association: Rocky Mountains 
|
Same process on the left side, but to get the sway bar link aligned, I had to lift the trailing arm.
Attached thumbnail(s) 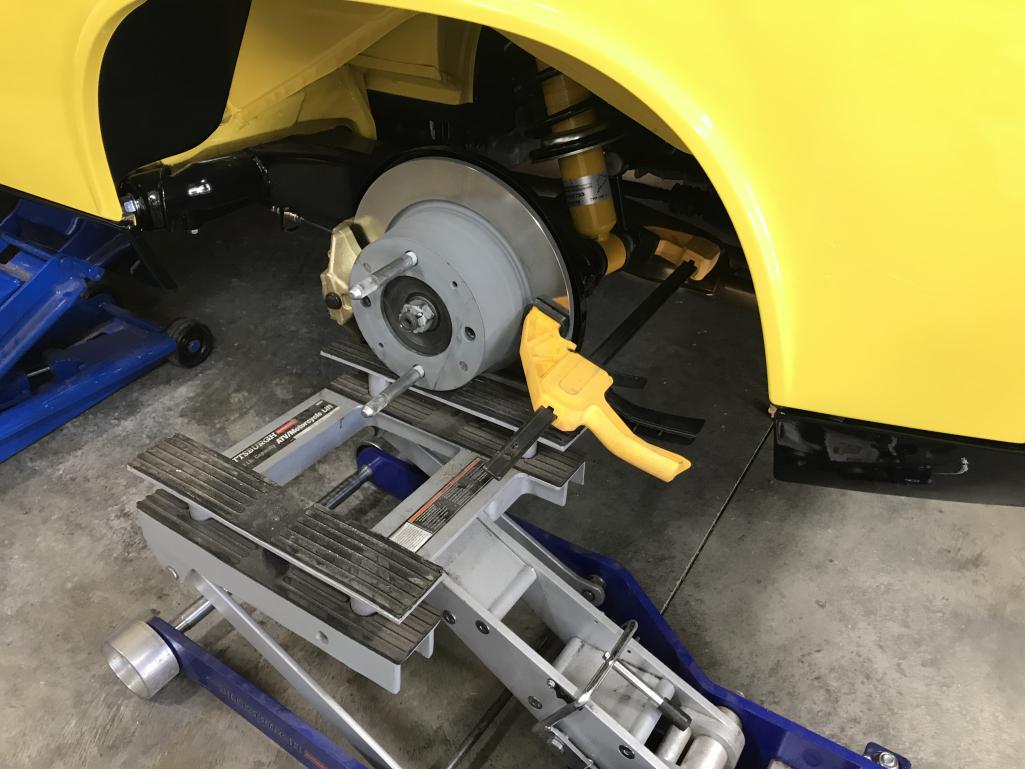
|
| bkrantz |
 May 31 2022, 08:45 PM May 31 2022, 08:45 PM
Post
#5369
|
|
914 Guru      Group: Members Posts: 8,343 Joined: 3-August 19 From: SW Colorado Member No.: 23,343 Region Association: Rocky Mountains 
|
Here's the original shim stack on the left side, a 2, 3, and 4 mm for a total of 9mm.
Attached thumbnail(s) 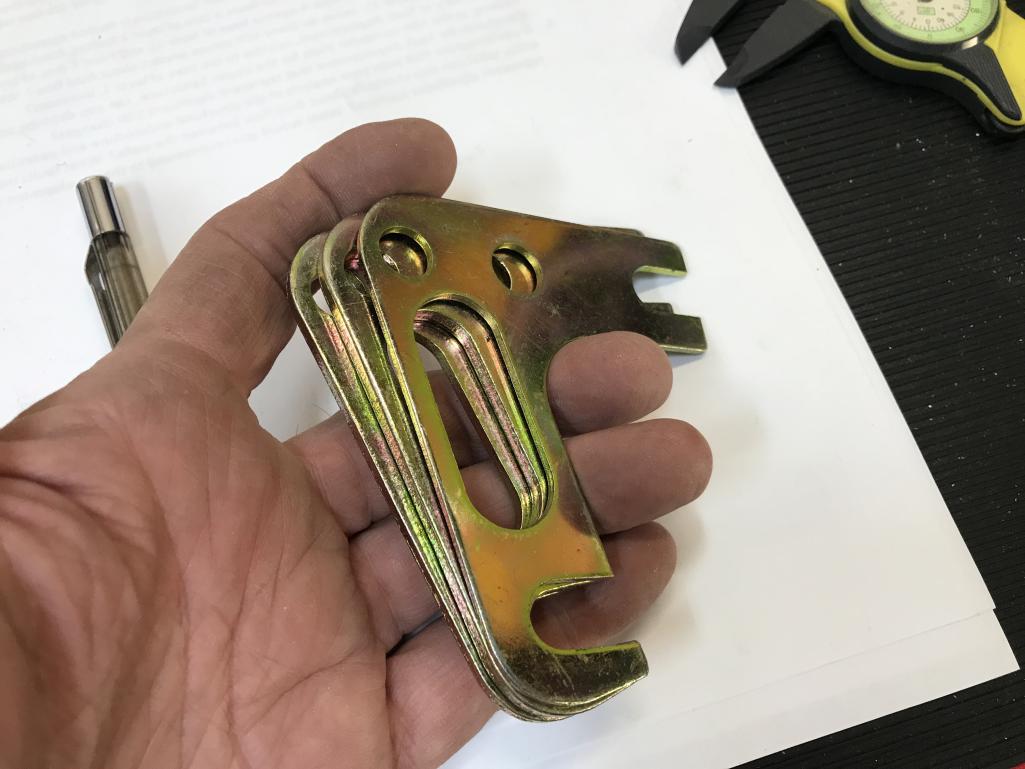
|
| bkrantz |
 May 31 2022, 08:48 PM May 31 2022, 08:48 PM
Post
#5370
|
|
914 Guru      Group: Members Posts: 8,343 Joined: 3-August 19 From: SW Colorado Member No.: 23,343 Region Association: Rocky Mountains 
|
Two 4mm shims decreases the shim stack by 1mm. That got the measured camber to -0.75°.
Attached thumbnail(s) 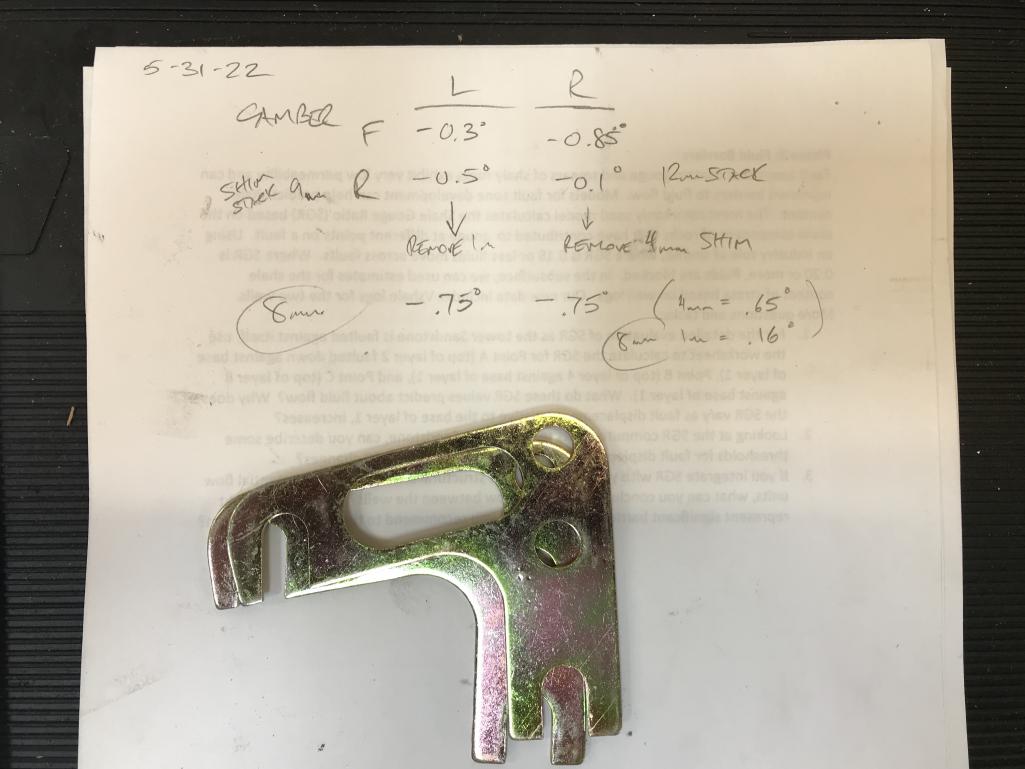
|
| bkrantz |
 May 31 2022, 08:52 PM May 31 2022, 08:52 PM
Post
#5371
|
|
914 Guru      Group: Members Posts: 8,343 Joined: 3-August 19 From: SW Colorado Member No.: 23,343 Region Association: Rocky Mountains 
|
Then I got started on the front. The top of the left strut is easy to access.
Attached thumbnail(s) 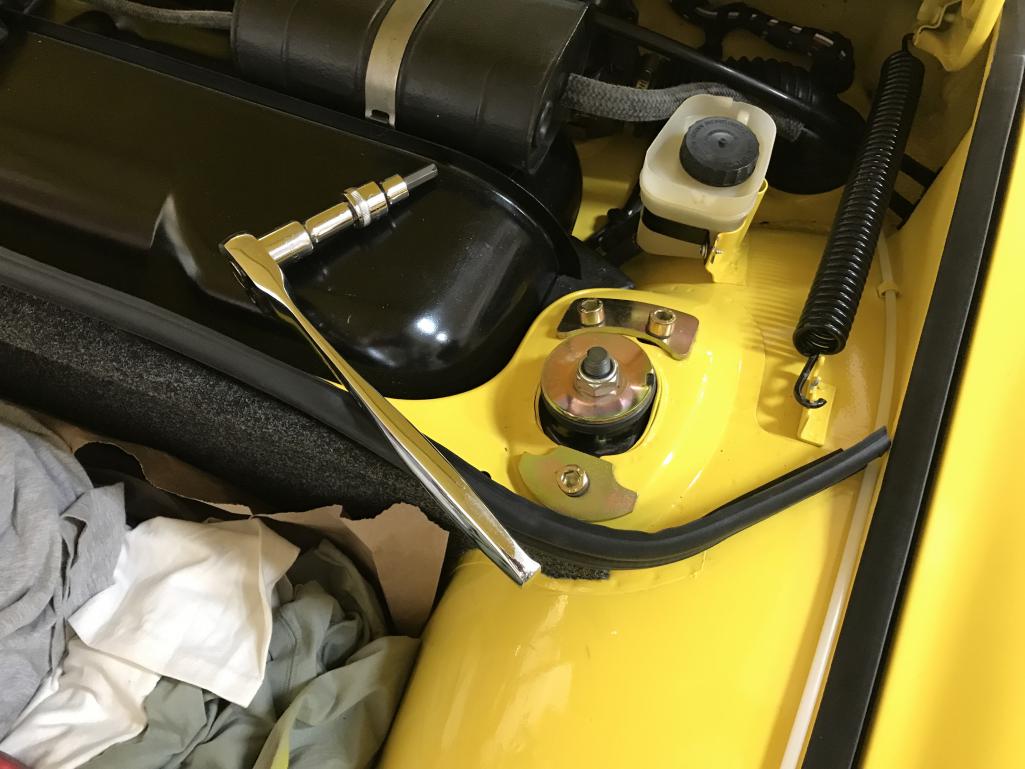
|
| bkrantz |
 May 31 2022, 08:54 PM May 31 2022, 08:54 PM
Post
#5372
|
|
914 Guru      Group: Members Posts: 8,343 Joined: 3-August 19 From: SW Colorado Member No.: 23,343 Region Association: Rocky Mountains 
|
The original camber measured -0.3°, so I shifted the strut top inward about 4mm.
Attached thumbnail(s) 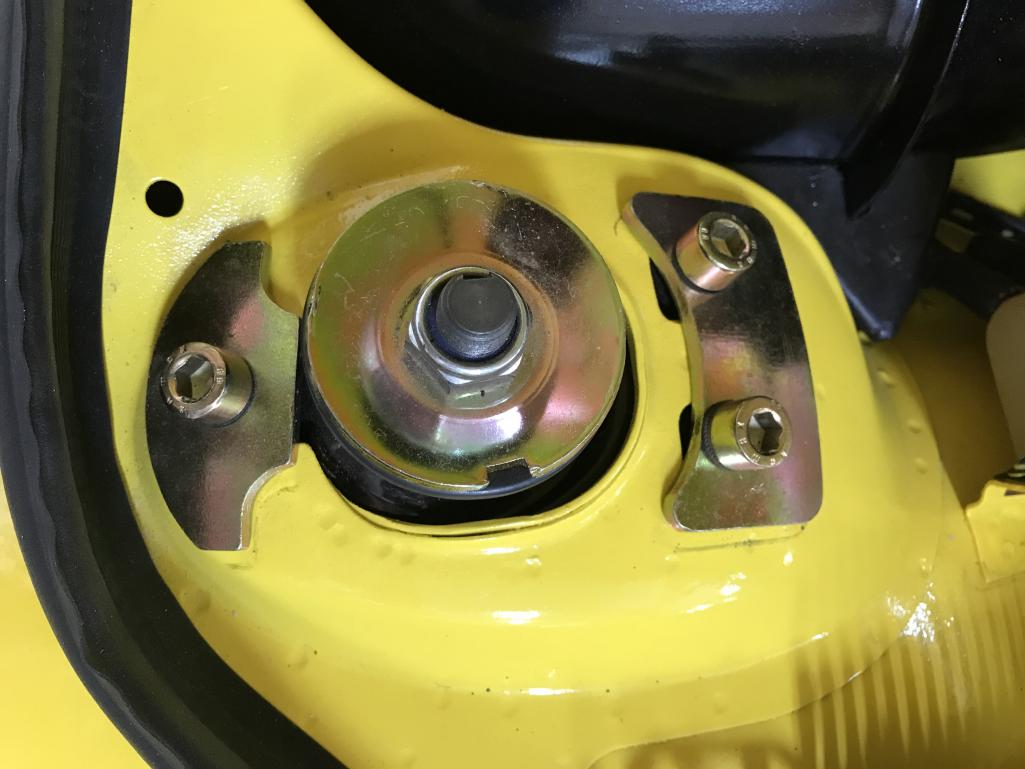
|
| bkrantz |
 May 31 2022, 08:55 PM May 31 2022, 08:55 PM
Post
#5373
|
|
914 Guru      Group: Members Posts: 8,343 Joined: 3-August 19 From: SW Colorado Member No.: 23,343 Region Association: Rocky Mountains 
|
That got the camber to about -0.7° on my high-tech gauge.
Attached thumbnail(s) 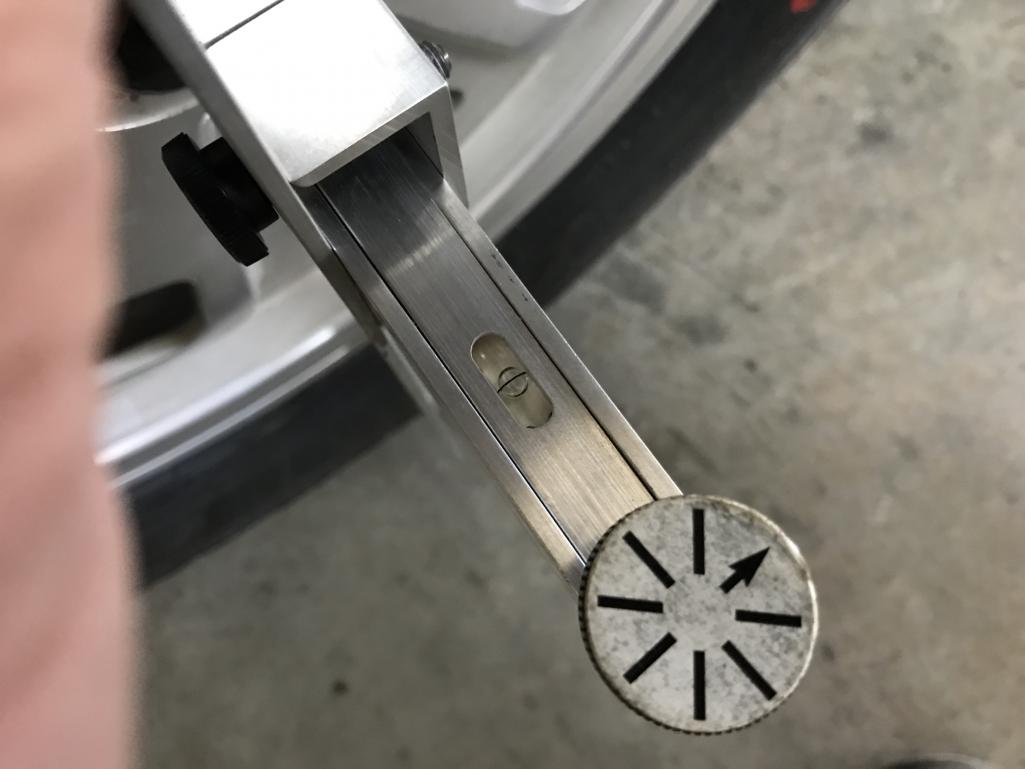
|
| bkrantz |
 May 31 2022, 08:59 PM May 31 2022, 08:59 PM
Post
#5374
|
|
914 Guru      Group: Members Posts: 8,343 Joined: 3-August 19 From: SW Colorado Member No.: 23,343 Region Association: Rocky Mountains 
|
Of course, the right strut top is blocked a bit by the evaporator tank.
Attached thumbnail(s) 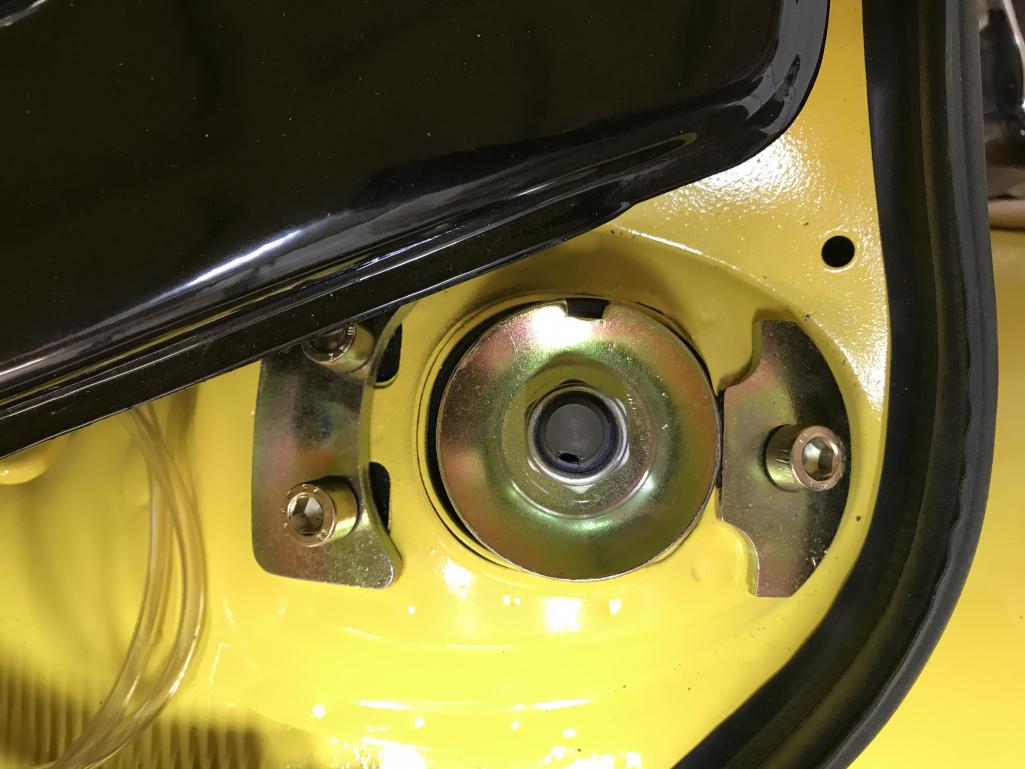
|
| bkrantz |
 May 31 2022, 09:03 PM May 31 2022, 09:03 PM
Post
#5375
|
|
914 Guru      Group: Members Posts: 8,343 Joined: 3-August 19 From: SW Colorado Member No.: 23,343 Region Association: Rocky Mountains 
|
Tank detached enough to get to the inner bolt.
The original camber measured -0.85°. When I shifted the strut top out as far as it goes, I got -0.6°, and then I moved it back inward to get about -0.7°. Next up: some rough toe setting. Attached thumbnail(s) 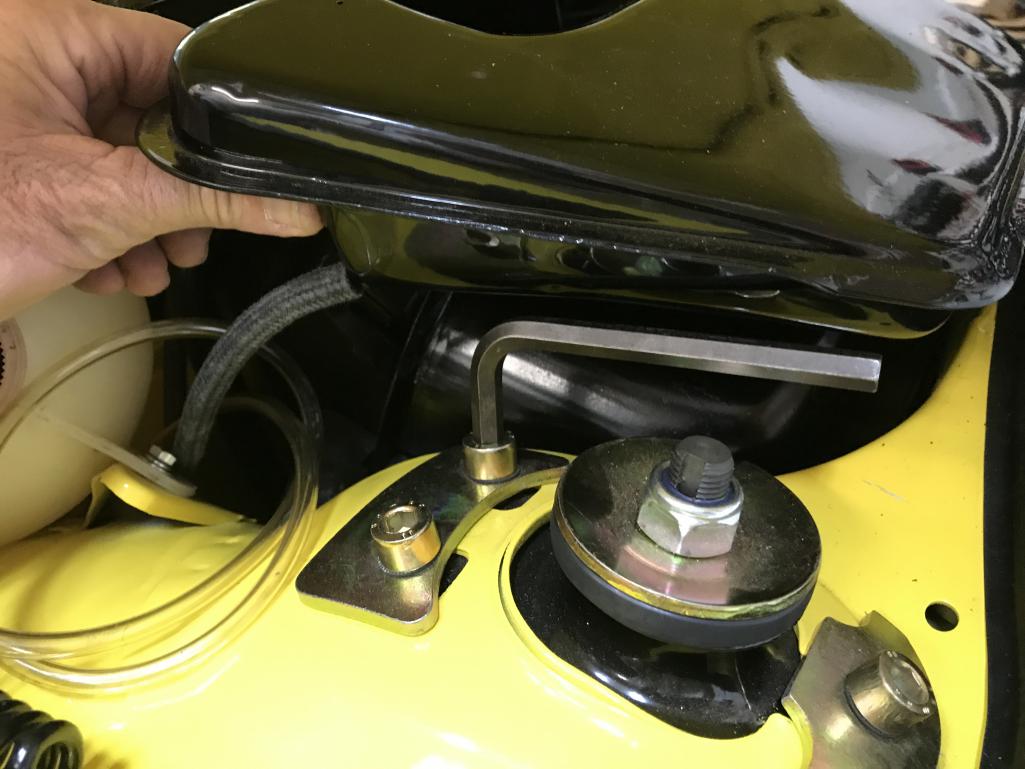
|
| bkrantz |
 Jun 1 2022, 08:09 PM Jun 1 2022, 08:09 PM
Post
#5376
|
|
914 Guru      Group: Members Posts: 8,343 Joined: 3-August 19 From: SW Colorado Member No.: 23,343 Region Association: Rocky Mountains 
|
Oops, I lied. Instead of working on toe settings, I worked on soft stuff. First, here is the velcro on my EFI brain cover, and the trunk wall.
Attached thumbnail(s) 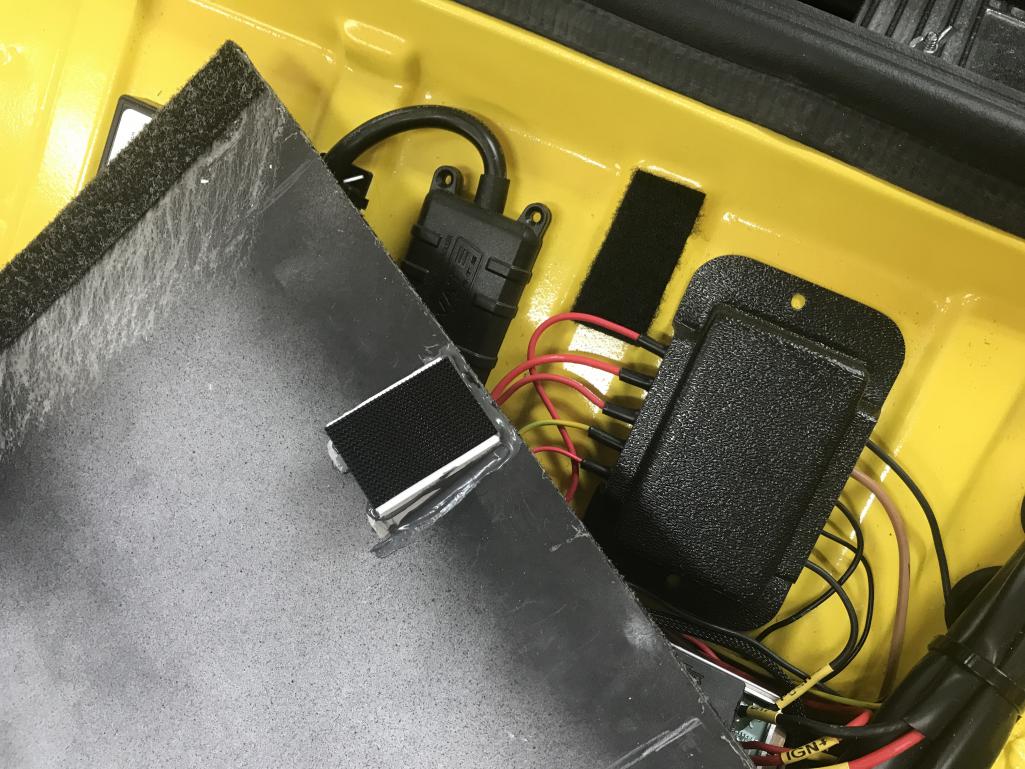
|
| bkrantz |
 Jun 1 2022, 08:09 PM Jun 1 2022, 08:09 PM
Post
#5377
|
|
914 Guru      Group: Members Posts: 8,343 Joined: 3-August 19 From: SW Colorado Member No.: 23,343 Region Association: Rocky Mountains 
|
The cover seems pretty well attached.
Attached thumbnail(s) 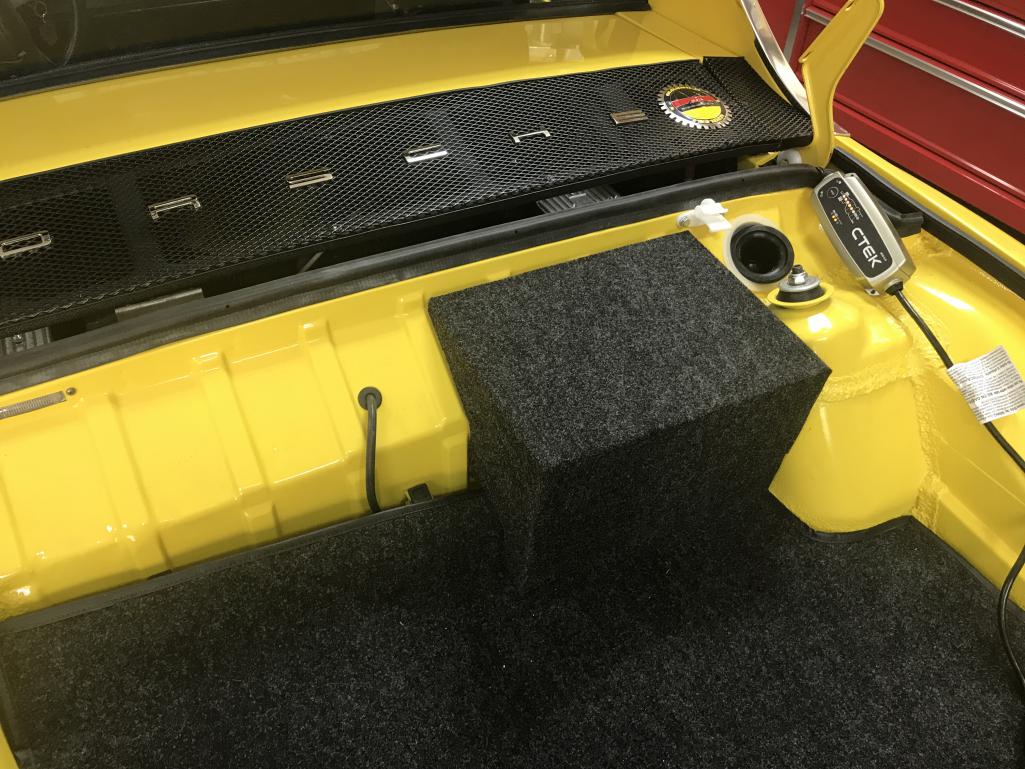
|
| bkrantz |
 Jun 1 2022, 08:11 PM Jun 1 2022, 08:11 PM
Post
#5378
|
|
914 Guru      Group: Members Posts: 8,343 Joined: 3-August 19 From: SW Colorado Member No.: 23,343 Region Association: Rocky Mountains 
|
I also got more door card parts delivered. I now have a variety of pins and cups.
Attached thumbnail(s) 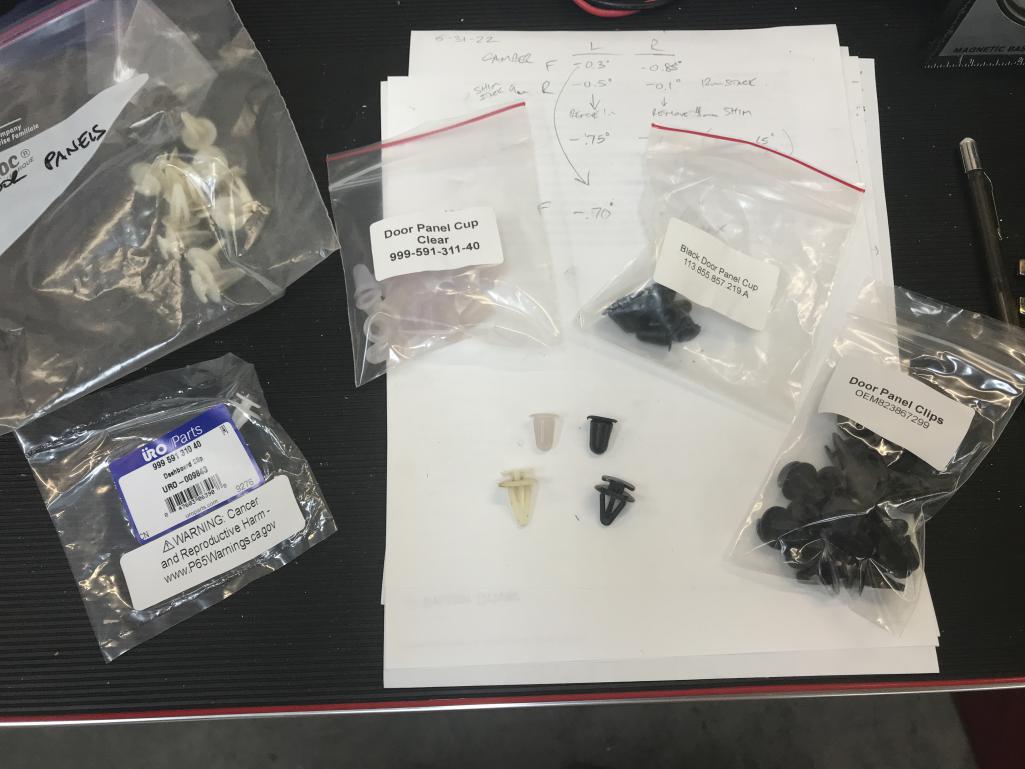
|
| bkrantz |
 Jun 1 2022, 08:13 PM Jun 1 2022, 08:13 PM
Post
#5379
|
|
914 Guru      Group: Members Posts: 8,343 Joined: 3-August 19 From: SW Colorado Member No.: 23,343 Region Association: Rocky Mountains 
|
For future reference, the original white pins (and the URO copies) are longer. The black pins, and both the clear and black cups, all from 914 Rubber, are shorter.
I went ahead with the short black pins and cups. Attached thumbnail(s) 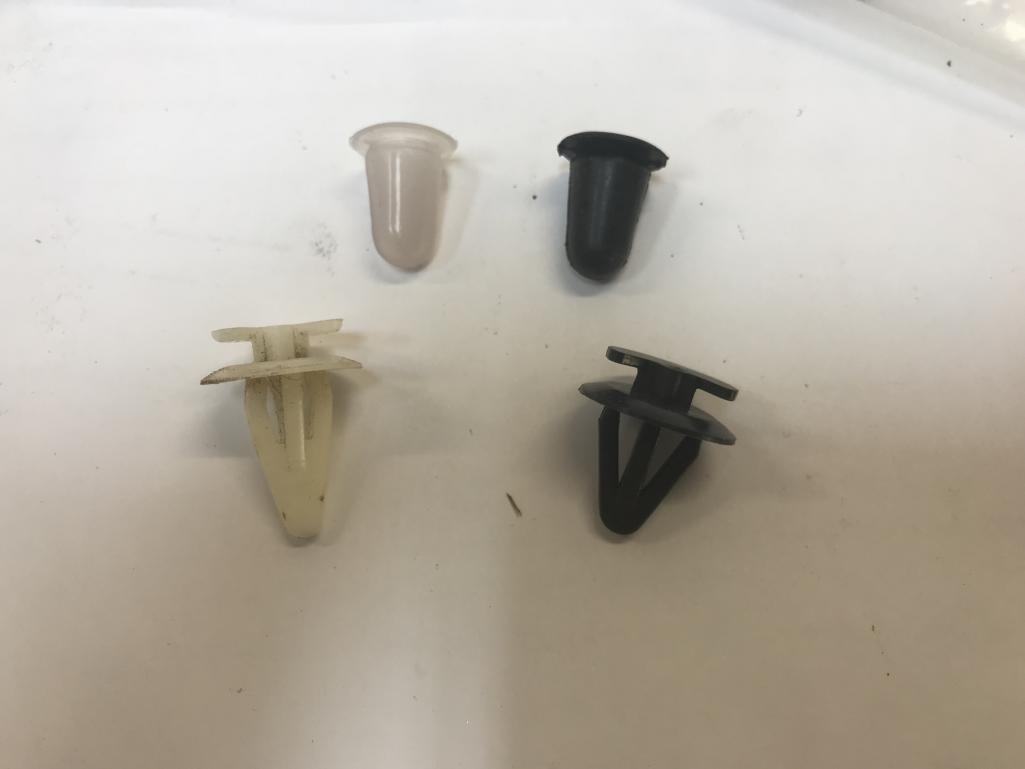
|
| bkrantz |
 Jun 1 2022, 08:13 PM Jun 1 2022, 08:13 PM
Post
#5380
|
|
914 Guru      Group: Members Posts: 8,343 Joined: 3-August 19 From: SW Colorado Member No.: 23,343 Region Association: Rocky Mountains 
|
Pins in the right door card.
Attached thumbnail(s) 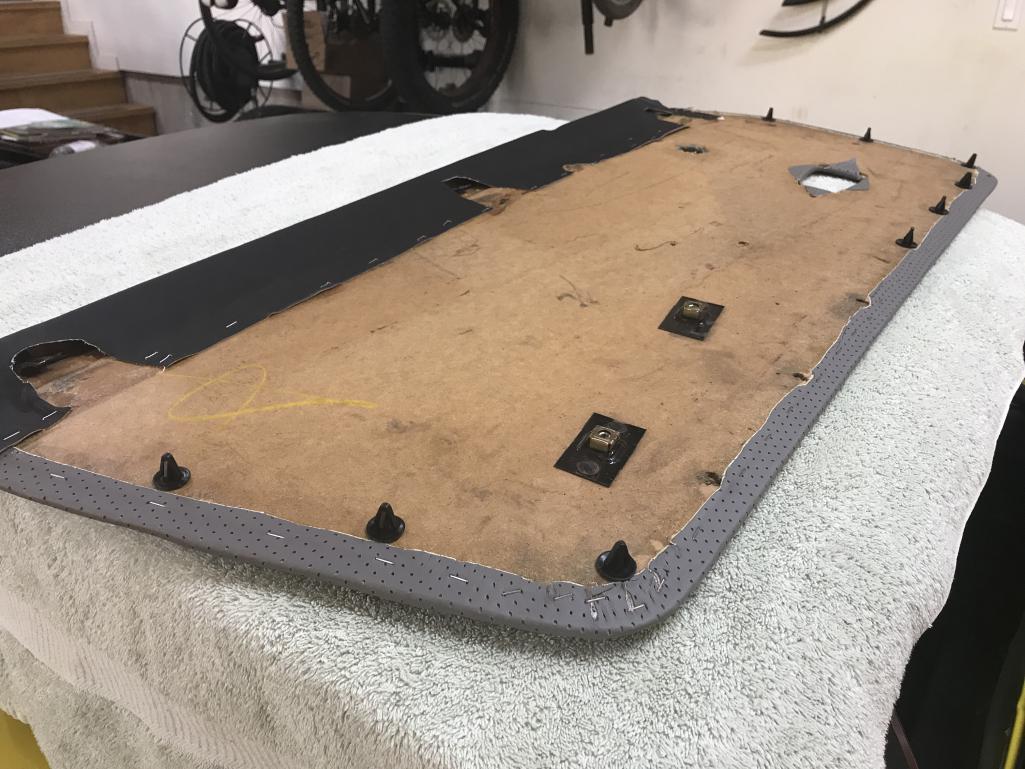
|
  |
1 User(s) are reading this topic (1 Guests and 0 Anonymous Users)
0 Members:

|
Lo-Fi Version | Time is now: 23rd April 2025 - 01:13 PM |
Invision Power Board
v9.1.4 © 2025 IPS, Inc.


