|
|

|
Porsche, and the Porsche crest are registered trademarks of Dr. Ing. h.c. F. Porsche AG.
This site is not affiliated with Porsche in any way. Its only purpose is to provide an online forum for car enthusiasts. All other trademarks are property of their respective owners. |
|
|
  |
| bkrantz |
 Apr 24 2020, 08:33 PM Apr 24 2020, 08:33 PM
Post
#541
|
|
914 Guru      Group: Members Posts: 8,342 Joined: 3-August 19 From: SW Colorado Member No.: 23,343 Region Association: Rocky Mountains 
|
With the frunk channel done, I switched to the read panel. This was the last bit of bodywork with significant filler (than know of--knock on wood).
Here's the panel before grinding off the filler. Attached thumbnail(s) 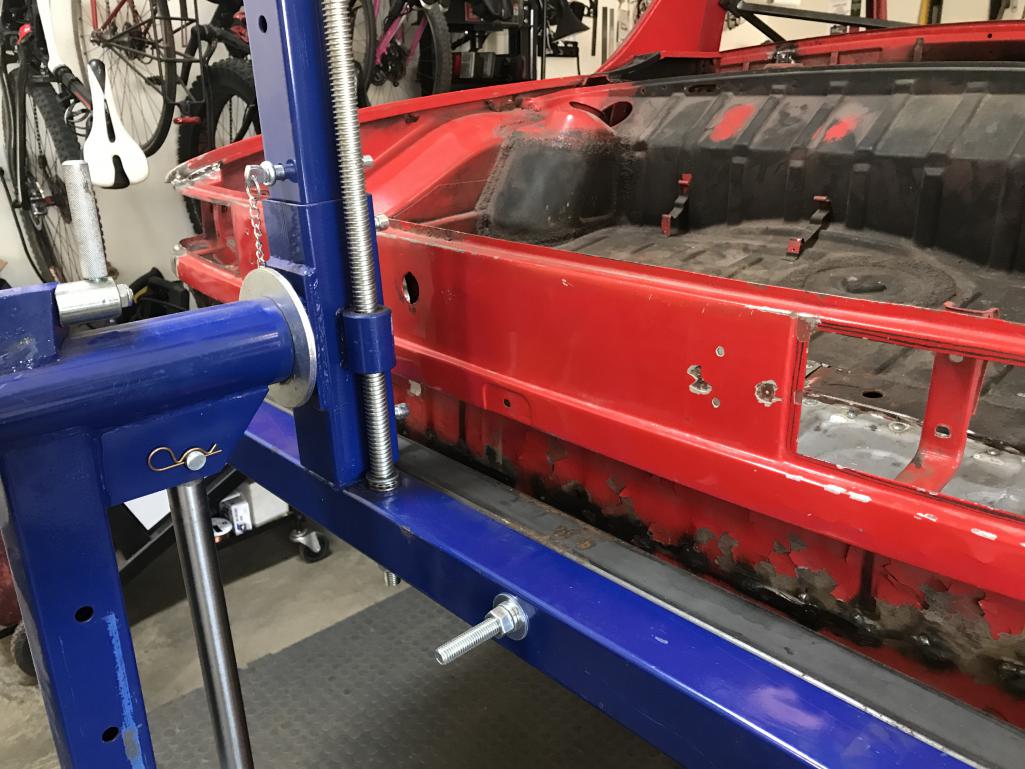
|
| bkrantz |
 Apr 24 2020, 08:34 PM Apr 24 2020, 08:34 PM
Post
#542
|
|
914 Guru      Group: Members Posts: 8,342 Joined: 3-August 19 From: SW Colorado Member No.: 23,343 Region Association: Rocky Mountains 
|
And after.
Attached thumbnail(s) 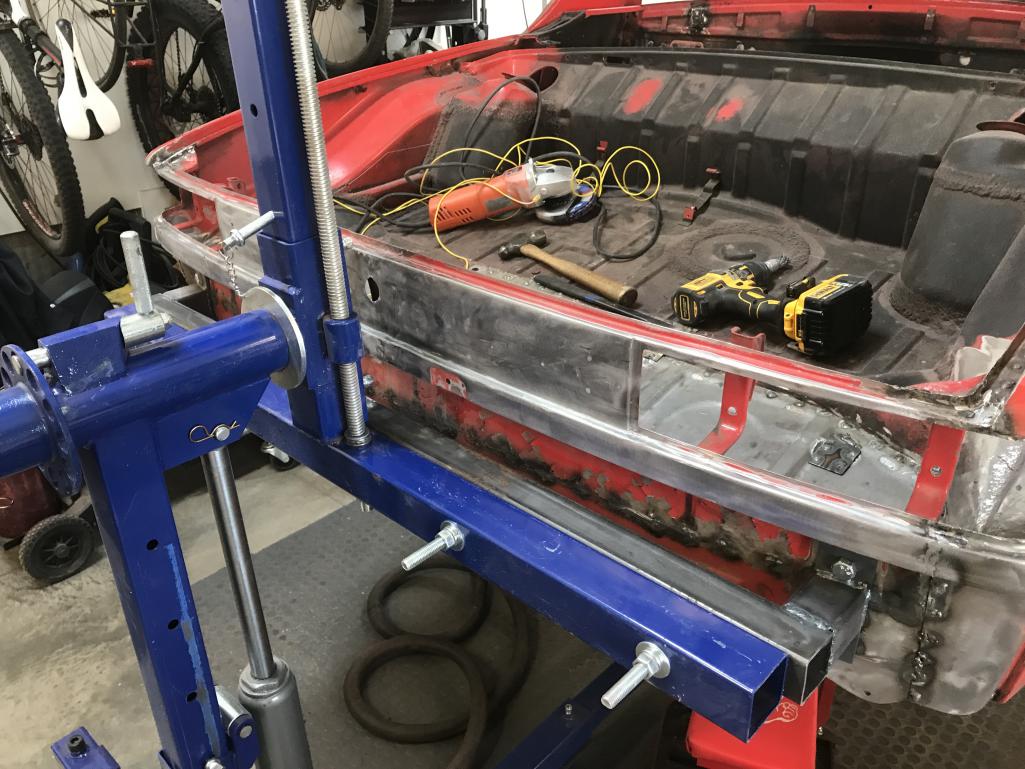
|
| bkrantz |
 Apr 24 2020, 08:36 PM Apr 24 2020, 08:36 PM
Post
#543
|
|
914 Guru      Group: Members Posts: 8,342 Joined: 3-August 19 From: SW Colorado Member No.: 23,343 Region Association: Rocky Mountains 
|
Some dents and dings, and holes from the PORSCHE reflector panel installed by a PO.
Attached thumbnail(s) 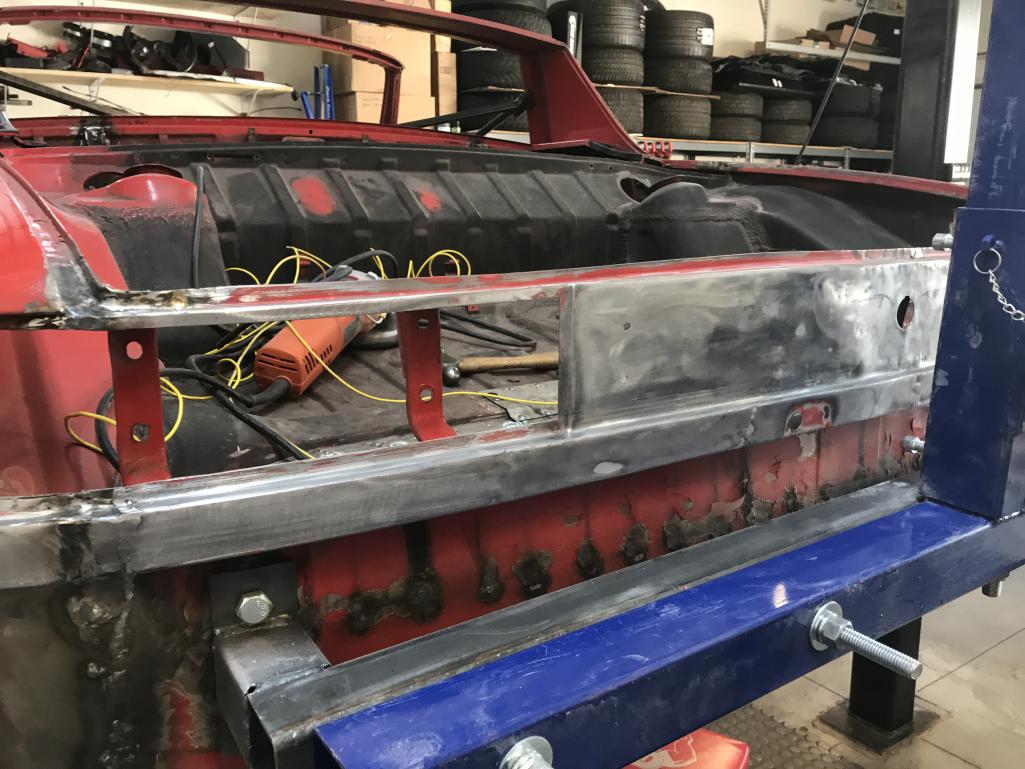
|
| bkrantz |
 Apr 24 2020, 08:38 PM Apr 24 2020, 08:38 PM
Post
#544
|
|
914 Guru      Group: Members Posts: 8,342 Joined: 3-August 19 From: SW Colorado Member No.: 23,343 Region Association: Rocky Mountains 
|
The reflector panel holes will get welded, and the stock holed for the original insignia will get cleaned of bondo.
Attached thumbnail(s) 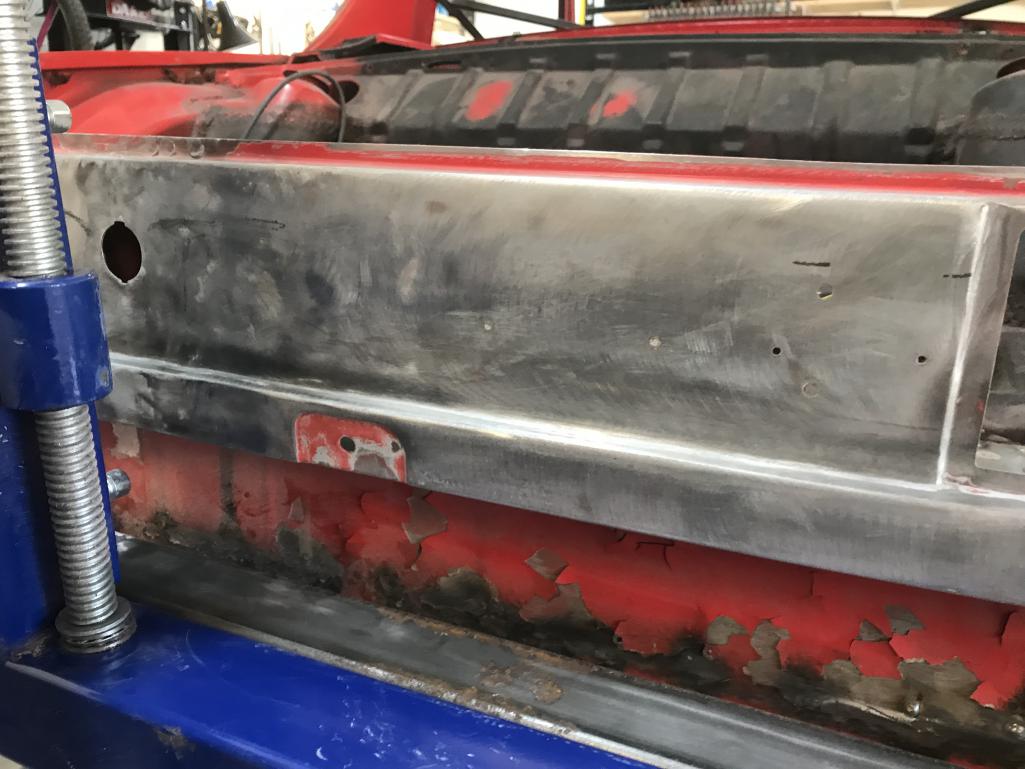
|
| bkrantz |
 Apr 24 2020, 08:40 PM Apr 24 2020, 08:40 PM
Post
#545
|
|
914 Guru      Group: Members Posts: 8,342 Joined: 3-August 19 From: SW Colorado Member No.: 23,343 Region Association: Rocky Mountains 
|
For access to the inside of the panel, I removed the trunk lock mounting plate.
Attached thumbnail(s) 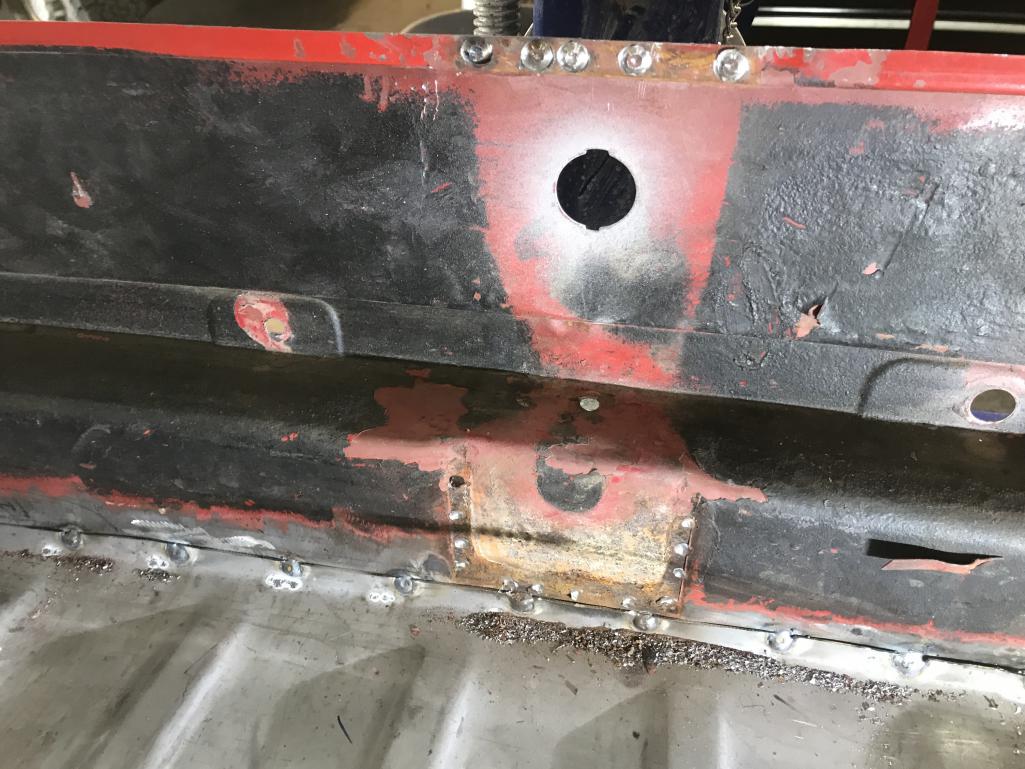
|
| bkrantz |
 Apr 24 2020, 08:41 PM Apr 24 2020, 08:41 PM
Post
#546
|
|
914 Guru      Group: Members Posts: 8,342 Joined: 3-August 19 From: SW Colorado Member No.: 23,343 Region Association: Rocky Mountains 
|
Here's the mounting plate. Pretty lumpy.
Attached thumbnail(s) 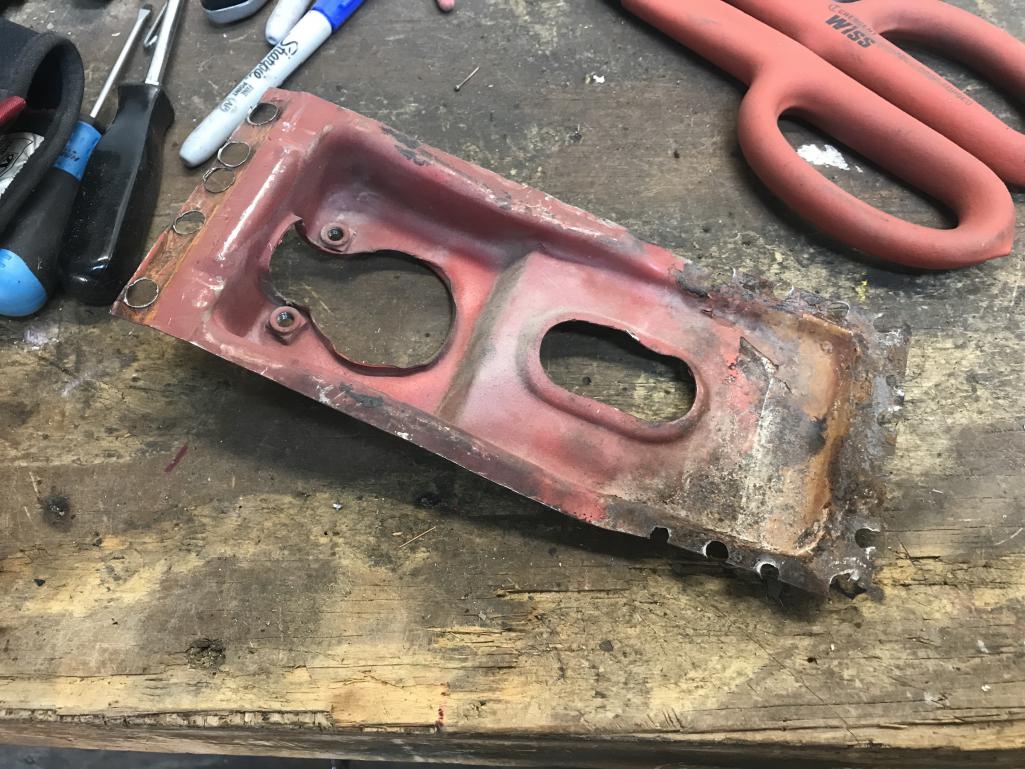
|
| raynekat |
 Apr 24 2020, 09:27 PM Apr 24 2020, 09:27 PM
Post
#547
|
|
Advanced Member     Group: Members Posts: 2,169 Joined: 30-December 14 From: Coeur d'Alene, Idaho Member No.: 18,263 Region Association: Pacific Northwest 
|
Here's the mounting plate. Pretty lumpy. Hey, I like my smashed pototos lumpy. (IMG:style_emoticons/default/rolleyes.gif) Looking good there Robert with all your progress. |
| bkrantz |
 Apr 25 2020, 08:20 PM Apr 25 2020, 08:20 PM
Post
#548
|
|
914 Guru      Group: Members Posts: 8,342 Joined: 3-August 19 From: SW Colorado Member No.: 23,343 Region Association: Rocky Mountains 
|
Here's the mounting plate. Pretty lumpy. Hey, I like my smashed pototos lumpy. (IMG:style_emoticons/default/rolleyes.gif) Looking good there Robert with all your progress. Thanks, Doug. Still thinking positive here, lumps and all. |
| bkrantz |
 Apr 25 2020, 08:23 PM Apr 25 2020, 08:23 PM
Post
#549
|
|
914 Guru      Group: Members Posts: 8,342 Joined: 3-August 19 From: SW Colorado Member No.: 23,343 Region Association: Rocky Mountains 
|
For better access I unbolted the rotisserie rear upright, with the car on jack stands.
Attached thumbnail(s) 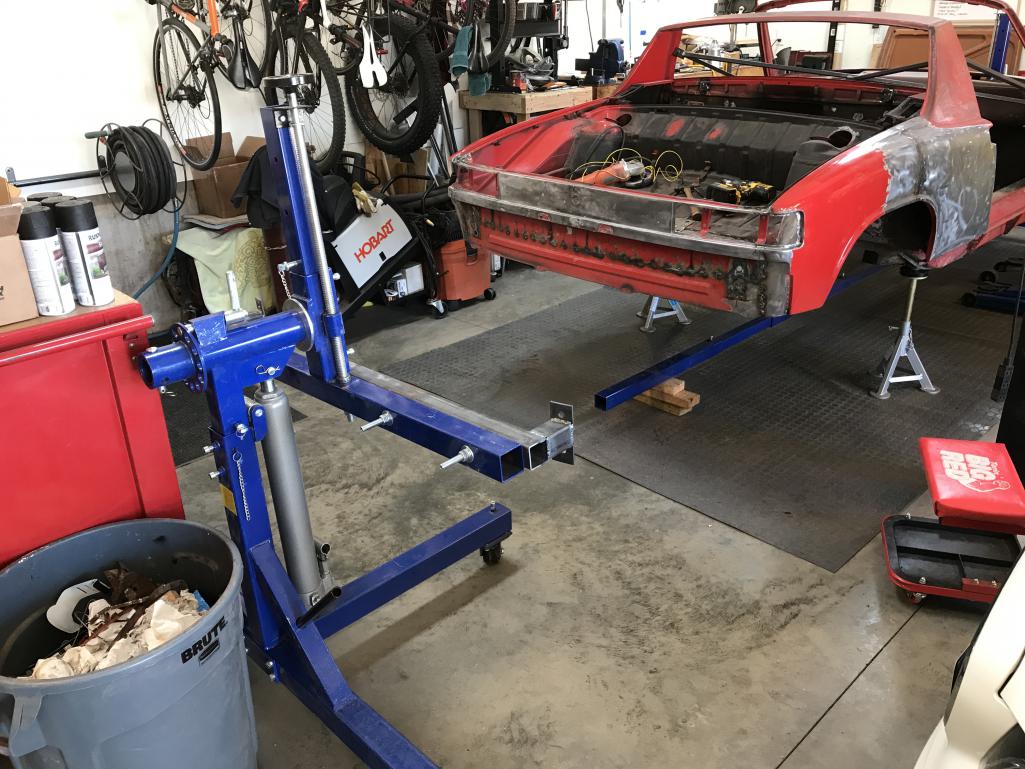
|
| bkrantz |
 Apr 25 2020, 08:24 PM Apr 25 2020, 08:24 PM
Post
#550
|
|
914 Guru      Group: Members Posts: 8,342 Joined: 3-August 19 From: SW Colorado Member No.: 23,343 Region Association: Rocky Mountains 
|
Now I can see the worst spots.
Attached thumbnail(s) 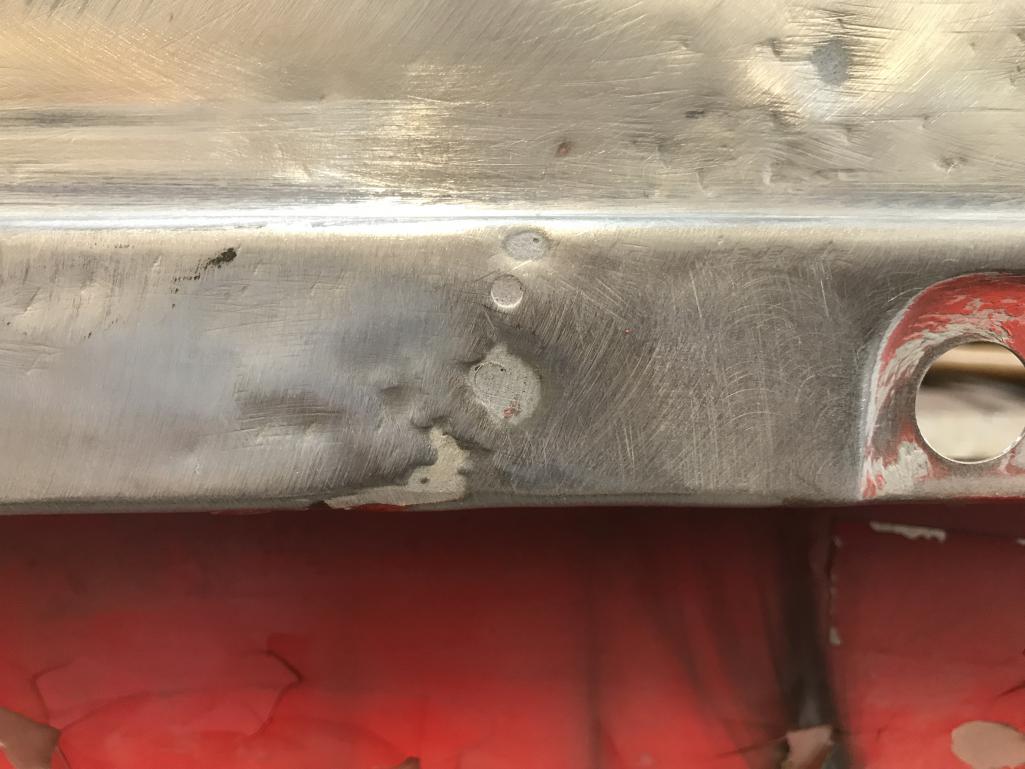
|
| bkrantz |
 Apr 25 2020, 08:25 PM Apr 25 2020, 08:25 PM
Post
#551
|
|
914 Guru      Group: Members Posts: 8,342 Joined: 3-August 19 From: SW Colorado Member No.: 23,343 Region Association: Rocky Mountains 
|
And this.
Attached thumbnail(s) 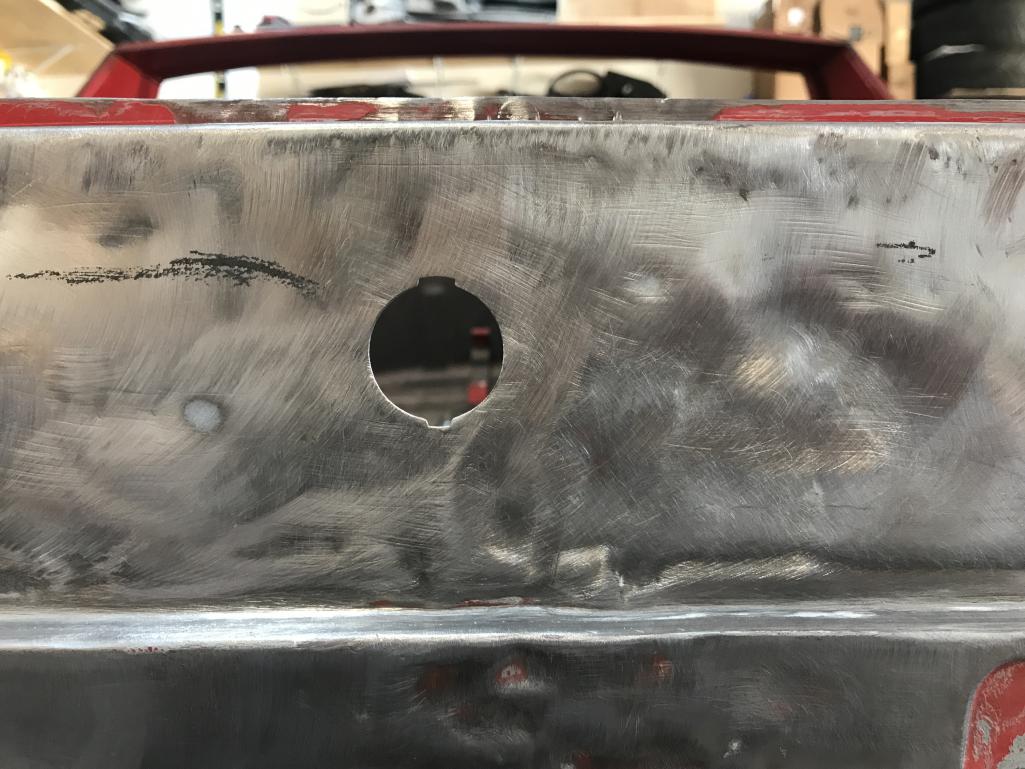
|
| bkrantz |
 Apr 25 2020, 08:27 PM Apr 25 2020, 08:27 PM
Post
#552
|
|
914 Guru      Group: Members Posts: 8,342 Joined: 3-August 19 From: SW Colorado Member No.: 23,343 Region Association: Rocky Mountains 
|
I propped the trunk lid in place, to compare alignments. The lid has its own issues, including a dip along the trailing edge.
Attached thumbnail(s) 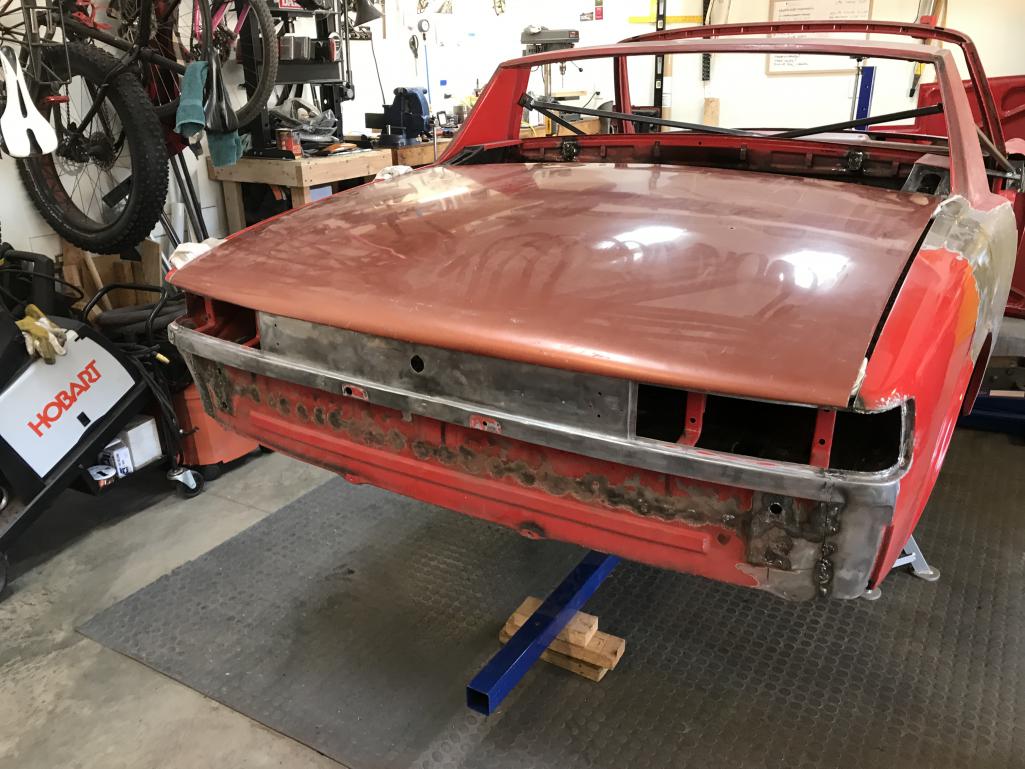
|
| bkrantz |
 Apr 25 2020, 08:28 PM Apr 25 2020, 08:28 PM
Post
#553
|
|
914 Guru      Group: Members Posts: 8,342 Joined: 3-August 19 From: SW Colorado Member No.: 23,343 Region Association: Rocky Mountains 
|
Right side looks pretty good.
Attached thumbnail(s) 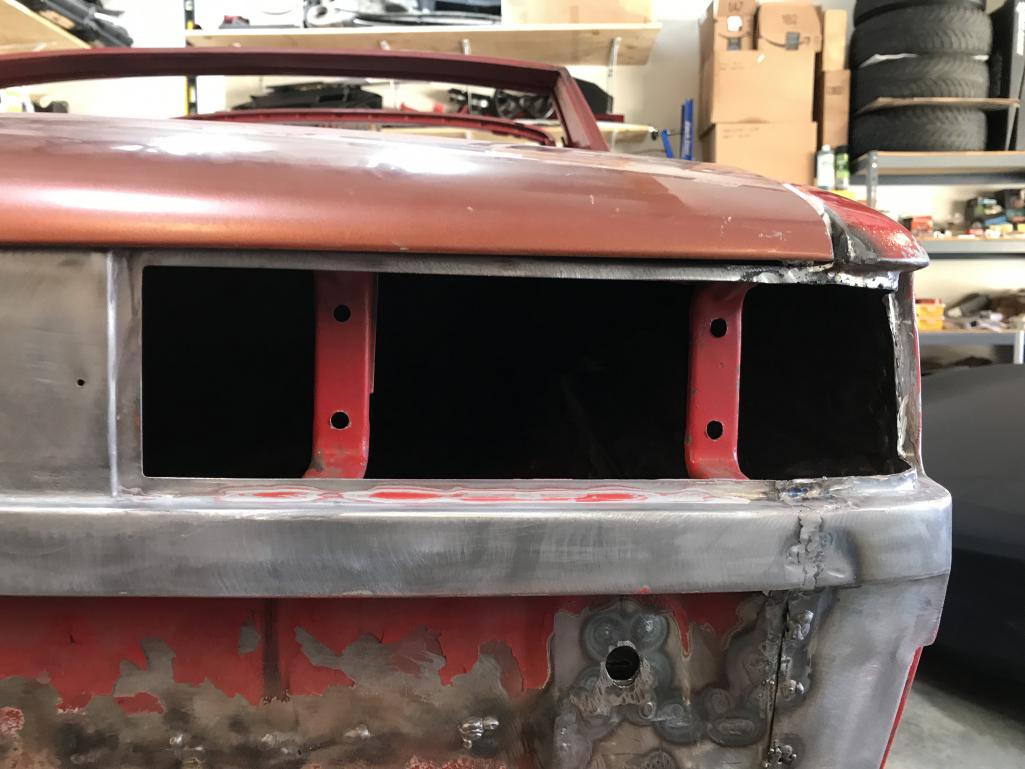
|
| bkrantz |
 Apr 25 2020, 08:29 PM Apr 25 2020, 08:29 PM
Post
#554
|
|
914 Guru      Group: Members Posts: 8,342 Joined: 3-August 19 From: SW Colorado Member No.: 23,343 Region Association: Rocky Mountains 
|
Left side not so great. The problem is mostly a "droopy" lid edge.
Attached thumbnail(s) 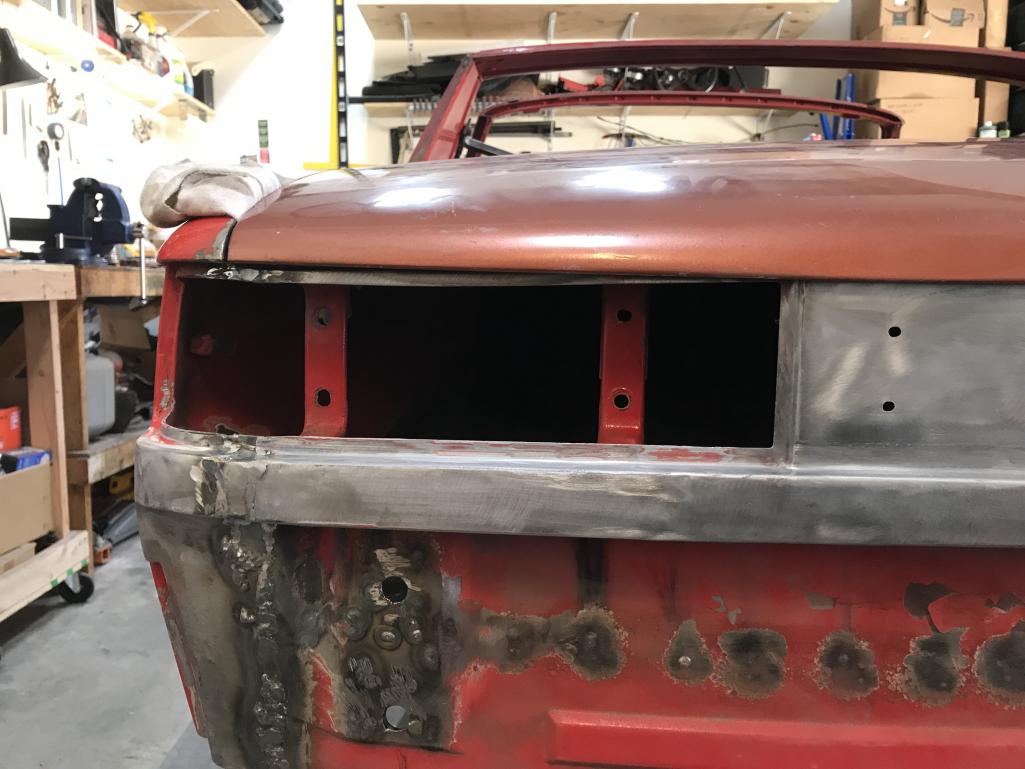
|
| bkrantz |
 Apr 26 2020, 08:58 PM Apr 26 2020, 08:58 PM
Post
#555
|
|
914 Guru      Group: Members Posts: 8,342 Joined: 3-August 19 From: SW Colorado Member No.: 23,343 Region Association: Rocky Mountains 
|
I worked more today to get things "straight": the top and bottom of the raised boss, and the top edge of the rear panel.
After some moderate metal work, things looked a little better. Attached thumbnail(s) 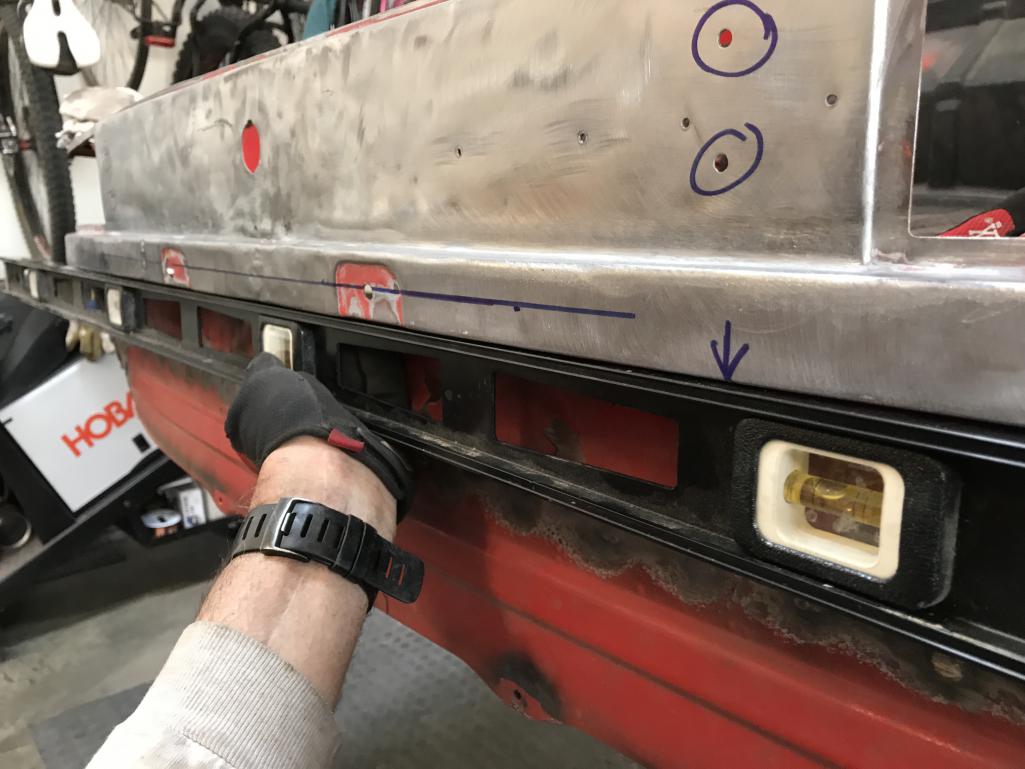
|
| bkrantz |
 Apr 26 2020, 08:59 PM Apr 26 2020, 08:59 PM
Post
#556
|
|
914 Guru      Group: Members Posts: 8,342 Joined: 3-August 19 From: SW Colorado Member No.: 23,343 Region Association: Rocky Mountains 
|
Eye-balling along the lower edge of the boss. Ignore all the lumps for now.
Attached thumbnail(s) 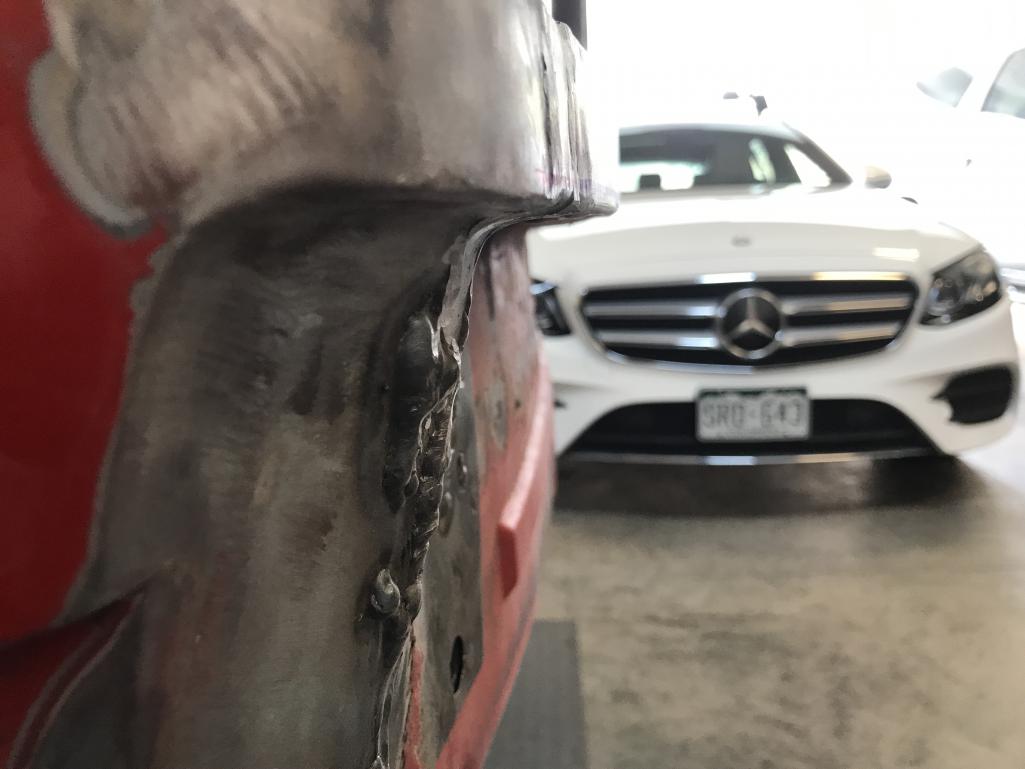
|
| bkrantz |
 Apr 26 2020, 09:00 PM Apr 26 2020, 09:00 PM
Post
#557
|
|
914 Guru      Group: Members Posts: 8,342 Joined: 3-August 19 From: SW Colorado Member No.: 23,343 Region Association: Rocky Mountains 
|
Watching the angles.
Attached thumbnail(s) 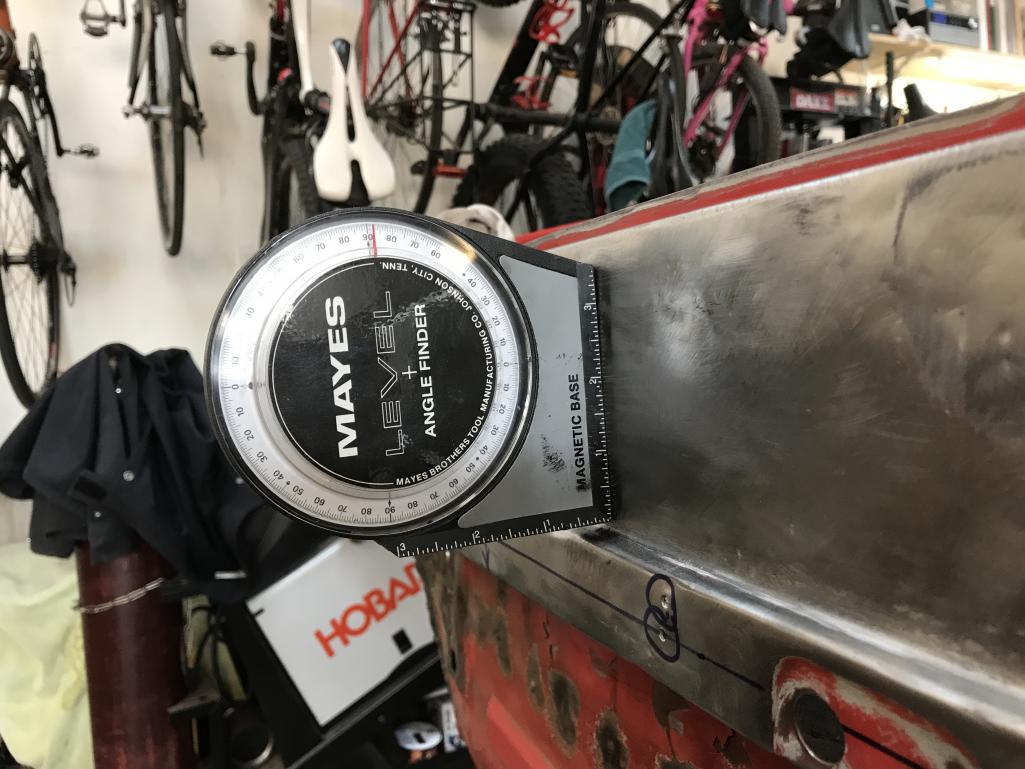
|
| bkrantz |
 Apr 26 2020, 09:02 PM Apr 26 2020, 09:02 PM
Post
#558
|
|
914 Guru      Group: Members Posts: 8,342 Joined: 3-August 19 From: SW Colorado Member No.: 23,343 Region Association: Rocky Mountains 
|
When things where looking nearly straight by eye, I rigged up my long level as a reference line. Looking pretty good, with a variance of about 1/16 inch.
Attached thumbnail(s) 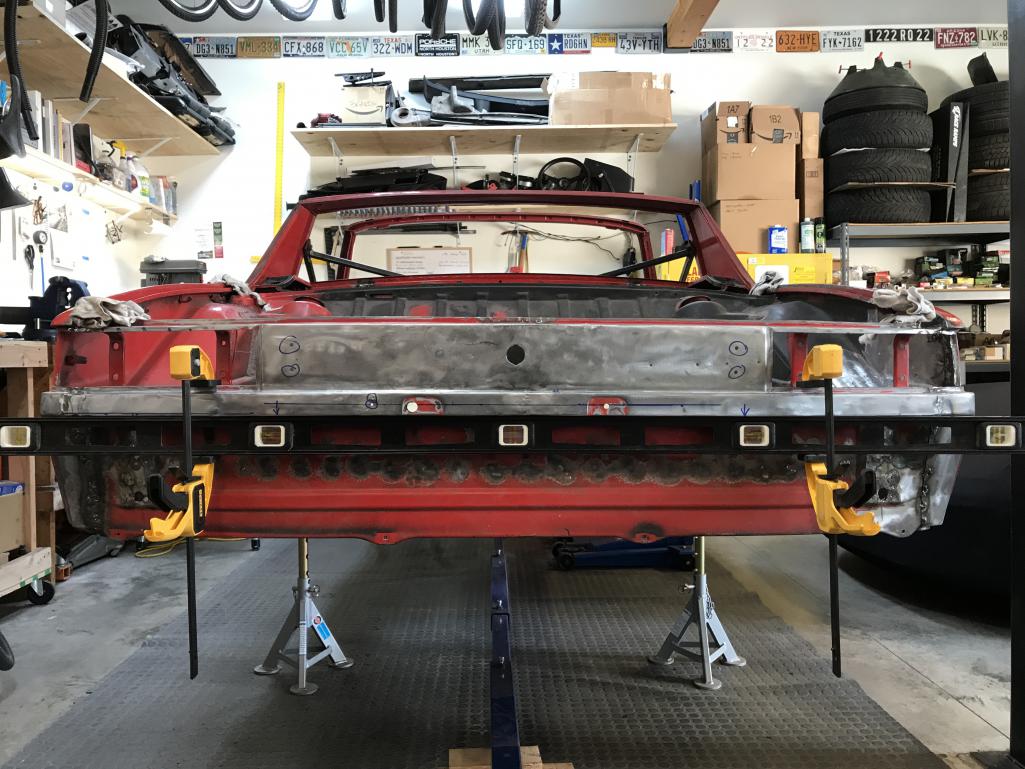
|
| bkrantz |
 Apr 26 2020, 09:04 PM Apr 26 2020, 09:04 PM
Post
#559
|
|
914 Guru      Group: Members Posts: 8,342 Joined: 3-August 19 From: SW Colorado Member No.: 23,343 Region Association: Rocky Mountains 
|
But the trunk lid has its own problems, especially along the rear edge.
Attached thumbnail(s) 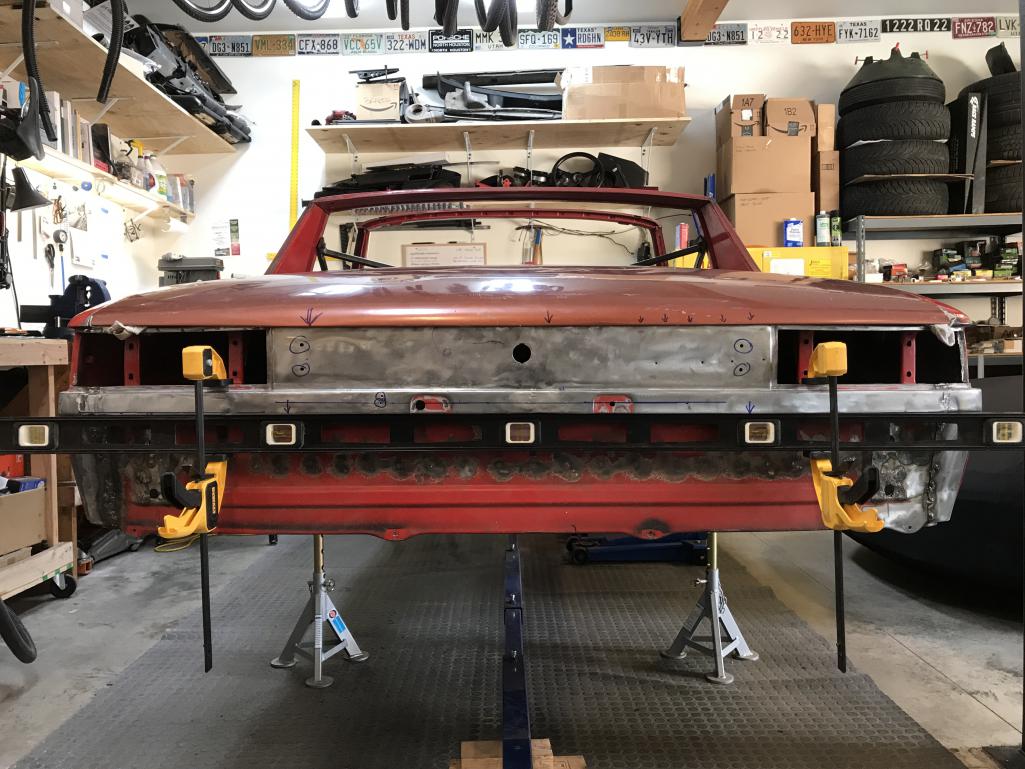
|
| bkrantz |
 Apr 26 2020, 09:06 PM Apr 26 2020, 09:06 PM
Post
#560
|
|
914 Guru      Group: Members Posts: 8,342 Joined: 3-August 19 From: SW Colorado Member No.: 23,343 Region Association: Rocky Mountains 
|
As I started to work the trunk lid edge, I heard a crunch, and my rust-free lid suddenly had a rust-trough hole. Damn. (See my other thread asking for advice)
Attached thumbnail(s) 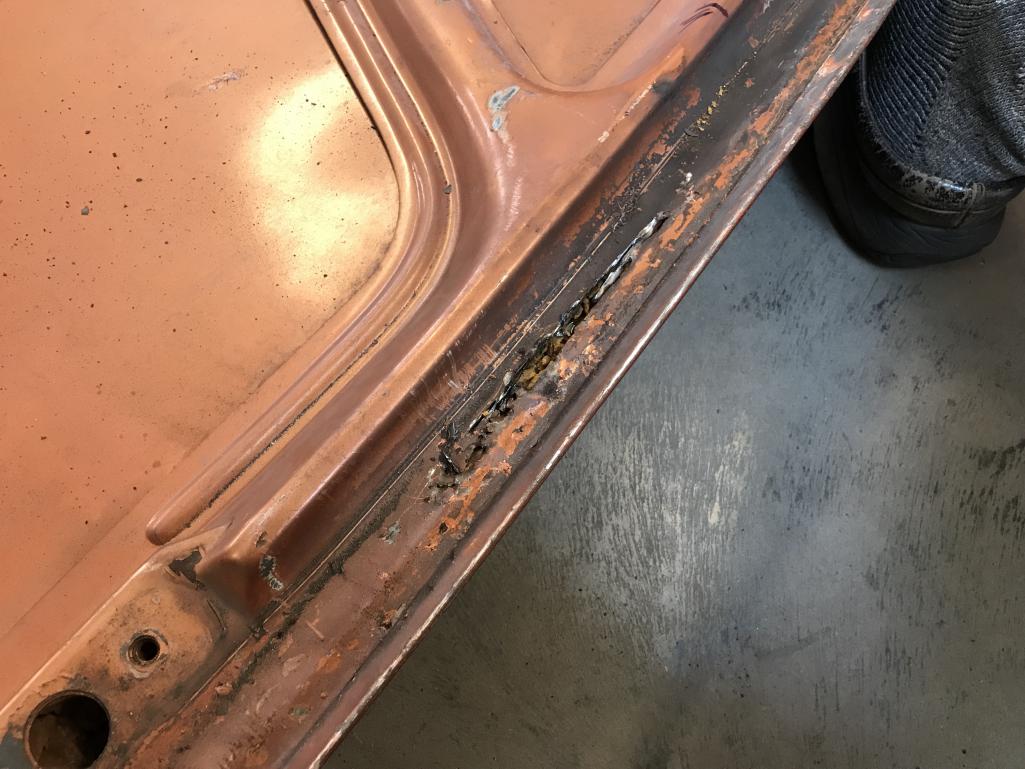
|
  |
1 User(s) are reading this topic (1 Guests and 0 Anonymous Users)
0 Members:

|
Lo-Fi Version | Time is now: 20th April 2025 - 05:38 AM |
Invision Power Board
v9.1.4 © 2025 IPS, Inc.


