|
|

|
Porsche, and the Porsche crest are registered trademarks of Dr. Ing. h.c. F. Porsche AG.
This site is not affiliated with Porsche in any way. Its only purpose is to provide an online forum for car enthusiasts. All other trademarks are property of their respective owners. |
|
|
  |
| bkrantz |
 Jun 4 2022, 08:12 PM Jun 4 2022, 08:12 PM
Post
#5421
|
|
914 Guru      Group: Members Posts: 8,343 Joined: 3-August 19 From: SW Colorado Member No.: 23,343 Region Association: Rocky Mountains 
|
Windshield installation, Step 1: clean the channel with adhesive remover.
Attached thumbnail(s) 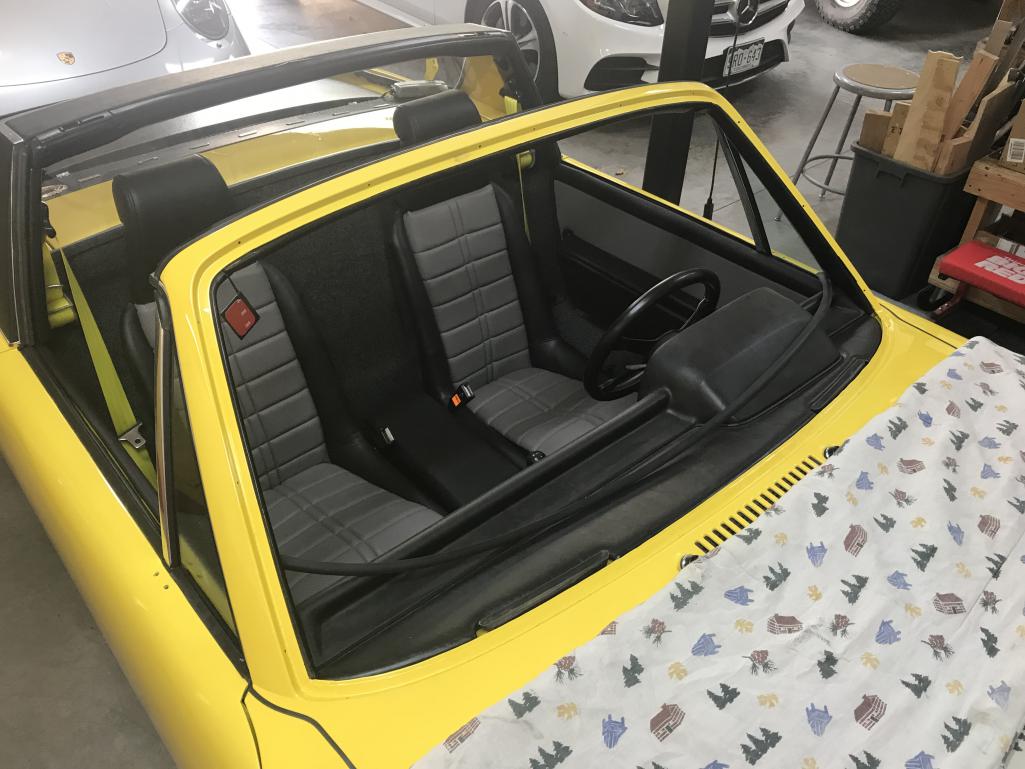
|
| bkrantz |
 Jun 4 2022, 08:13 PM Jun 4 2022, 08:13 PM
Post
#5422
|
|
914 Guru      Group: Members Posts: 8,343 Joined: 3-August 19 From: SW Colorado Member No.: 23,343 Region Association: Rocky Mountains 
|
Step 2a: mask the channel.
Attached thumbnail(s) 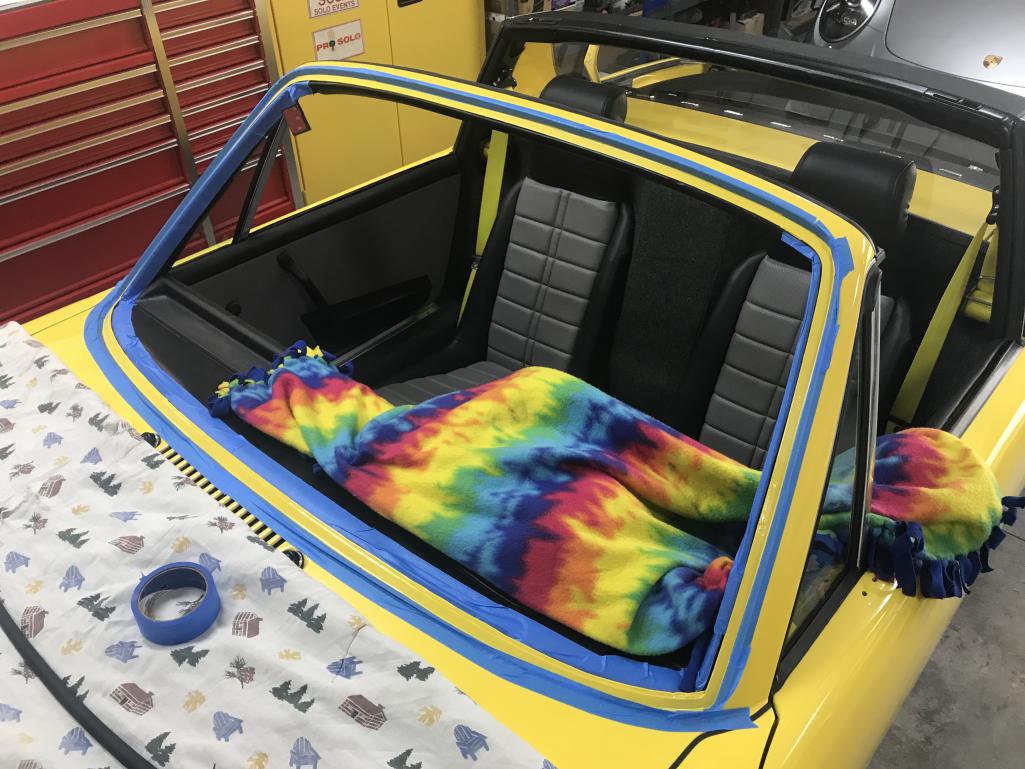
|
| bkrantz |
 Jun 4 2022, 08:14 PM Jun 4 2022, 08:14 PM
Post
#5423
|
|
914 Guru      Group: Members Posts: 8,343 Joined: 3-August 19 From: SW Colorado Member No.: 23,343 Region Association: Rocky Mountains 
|
Step 2b: paint the channel with butyl primer.
Attached thumbnail(s) 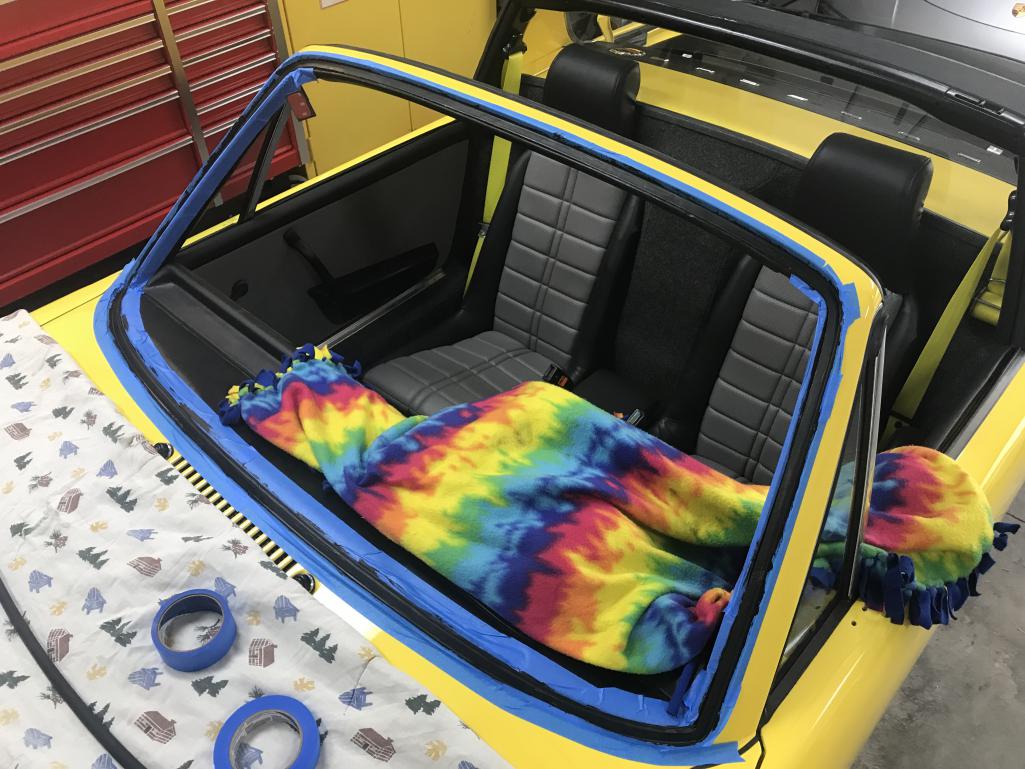
|
| bkrantz |
 Jun 4 2022, 08:15 PM Jun 4 2022, 08:15 PM
Post
#5424
|
|
914 Guru      Group: Members Posts: 8,343 Joined: 3-August 19 From: SW Colorado Member No.: 23,343 Region Association: Rocky Mountains 
|
Step 3: clean the glass, especially the edge that will contact the butyl.
Attached thumbnail(s) 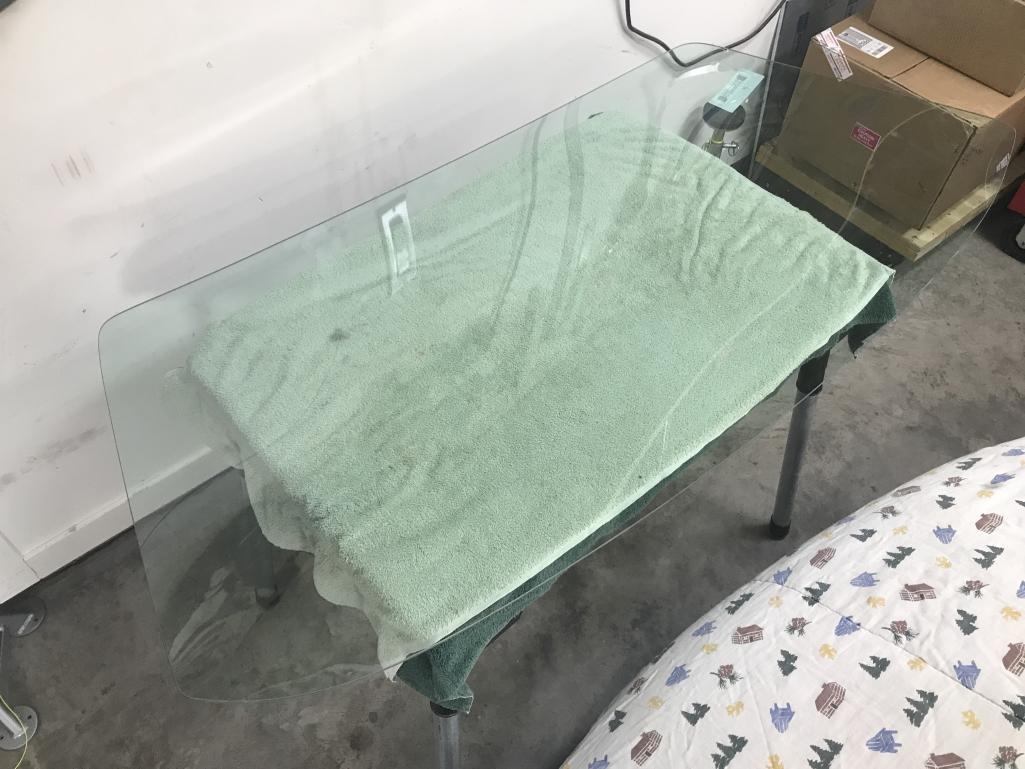
|
| nivekdodge |
 Jun 4 2022, 09:28 PM Jun 4 2022, 09:28 PM
Post
#5425
|
|
Member   Group: Members Posts: 299 Joined: 28-August 21 From: Pittsburgh Pa Member No.: 25,860 Region Association: MidAtlantic Region 
|
You have started it, correct? Does the dynamat work or does everyone do it because, everyone does it?
|
| barnfind9141972 |
 Jun 4 2022, 11:19 PM Jun 4 2022, 11:19 PM
Post
#5426
|
|
Member   Group: Members Posts: 101 Joined: 10-December 20 From: Rancho Mirage, CA Member No.: 24,976 Region Association: Southern California |
You have started it, correct? Does the dynamat work or does everyone do it because, everyone does it? @nivekdodge yes it works great, adds a little weight but definitely improves road noise and for me the best improvement was the doors. They went from tin can to super solid, I have a two 6.5 speakers and a 8 inch subwoofer on top of msds headers and no weird vibrations or tons of noise or reverb |
| nivekdodge |
 Jun 5 2022, 04:49 PM Jun 5 2022, 04:49 PM
Post
#5427
|
|
Member   Group: Members Posts: 299 Joined: 28-August 21 From: Pittsburgh Pa Member No.: 25,860 Region Association: MidAtlantic Region 
|
You have started it, correct? Does the dynamat work or does everyone do it because, everyone does it? @nivekdodge yes it works great, adds a little weight but definitely improves road noise and for me the best improvement was the doors. They went from tin can to super solid, I have a two 6.5 speakers and a 8 inch subwoofer on top of msds headers and no weird vibrations or tons of noise or reverb Thanks, you never hear if it works or not Kevin |
| bkrantz |
 Jun 5 2022, 08:12 PM Jun 5 2022, 08:12 PM
Post
#5428
|
|
914 Guru      Group: Members Posts: 8,343 Joined: 3-August 19 From: SW Colorado Member No.: 23,343 Region Association: Rocky Mountains 
|
You have started it, correct? Does the dynamat work or does everyone do it because, everyone does it? Do you mean starting the engine? So far only in the garage, so I can't swear that my firewall system works . On the inside, starting from the painted firewall I have Dynamat, Dynaliner, and perlon carpet. On the engine side I have a layer of foil backed with insulation. I do know that I can thump on the firewall and the sound does not resonate though. |
| bkrantz |
 Jun 5 2022, 08:16 PM Jun 5 2022, 08:16 PM
Post
#5429
|
|
914 Guru      Group: Members Posts: 8,343 Joined: 3-August 19 From: SW Colorado Member No.: 23,343 Region Association: Rocky Mountains 
|
Here's the windshield after painting the butyl primer with the masking tape removed.
Attached thumbnail(s) 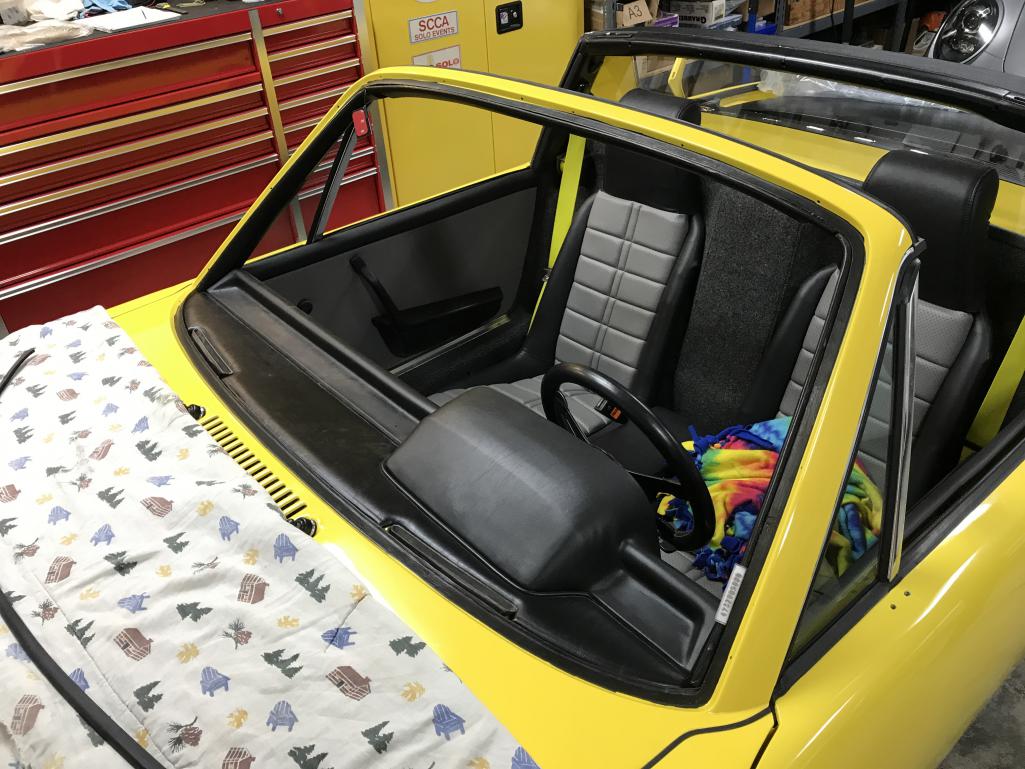
|
| bkrantz |
 Jun 5 2022, 08:22 PM Jun 5 2022, 08:22 PM
Post
#5430
|
|
914 Guru      Group: Members Posts: 8,343 Joined: 3-August 19 From: SW Colorado Member No.: 23,343 Region Association: Rocky Mountains 
|
Next, I fitted the lower (inside) windshield seal.
Attached thumbnail(s) 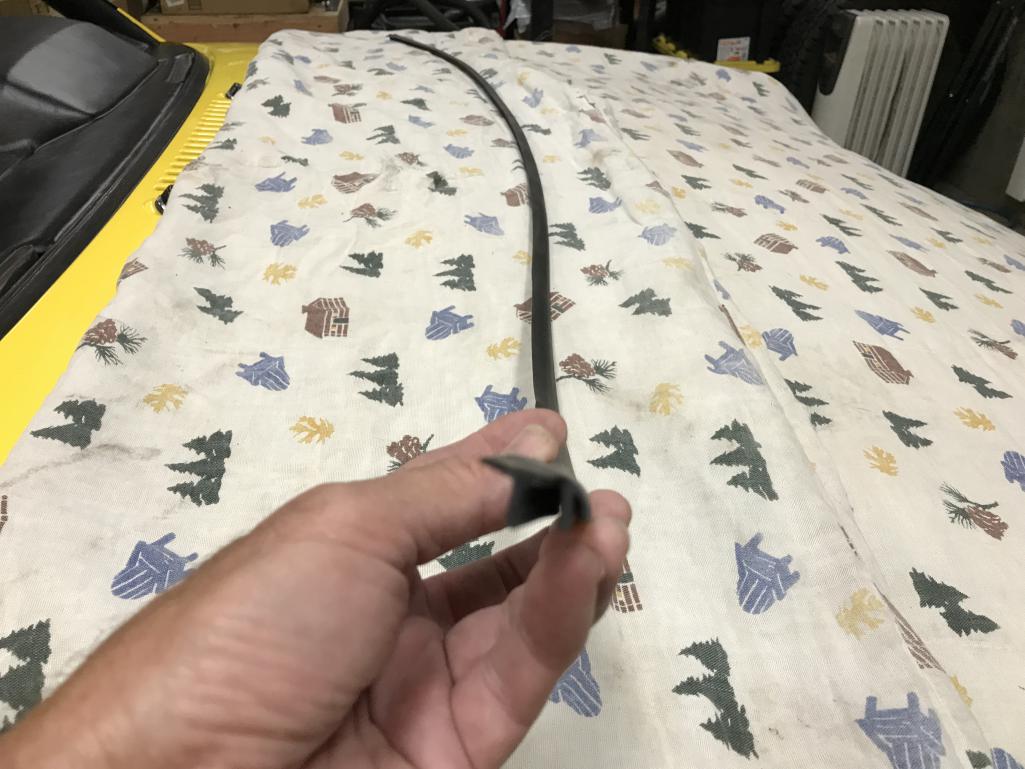
|
| bkrantz |
 Jun 5 2022, 08:24 PM Jun 5 2022, 08:24 PM
Post
#5431
|
|
914 Guru      Group: Members Posts: 8,343 Joined: 3-August 19 From: SW Colorado Member No.: 23,343 Region Association: Rocky Mountains 
|
I notched the ends so they tuck under the bottoms of the A-pillar pads.
Attached thumbnail(s) 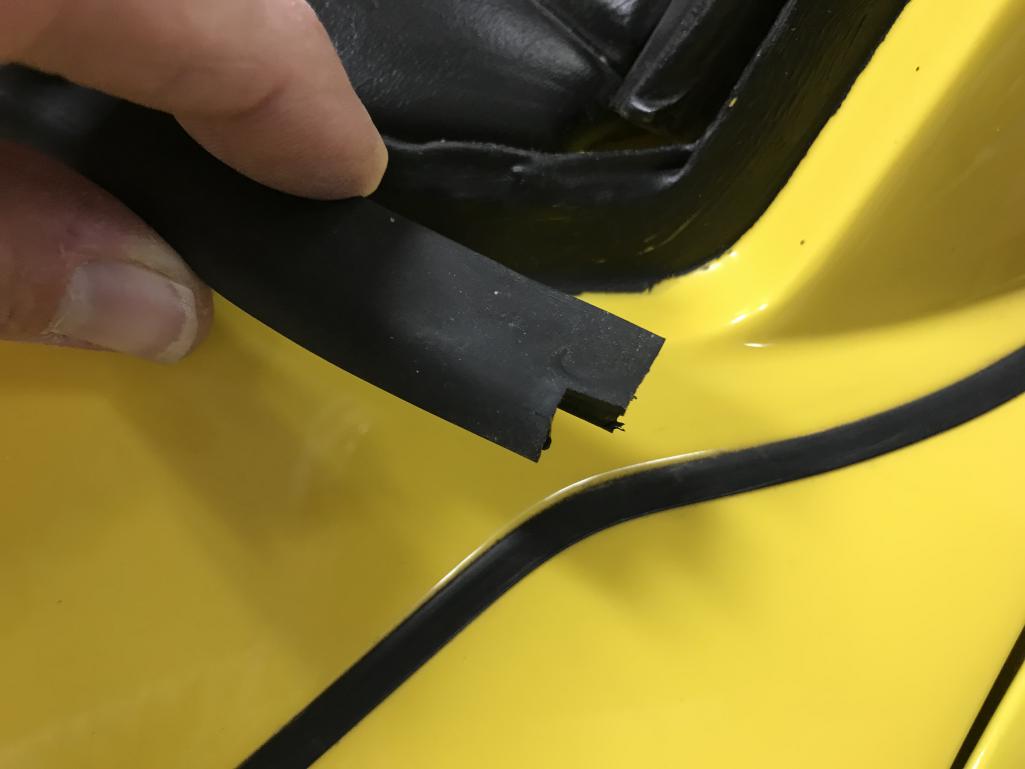
|
| bkrantz |
 Jun 5 2022, 08:25 PM Jun 5 2022, 08:25 PM
Post
#5432
|
|
914 Guru      Group: Members Posts: 8,343 Joined: 3-August 19 From: SW Colorado Member No.: 23,343 Region Association: Rocky Mountains 
|
Like this. Note that I had to remove this strip during the installation of the windshield trim clips.
Attached thumbnail(s) 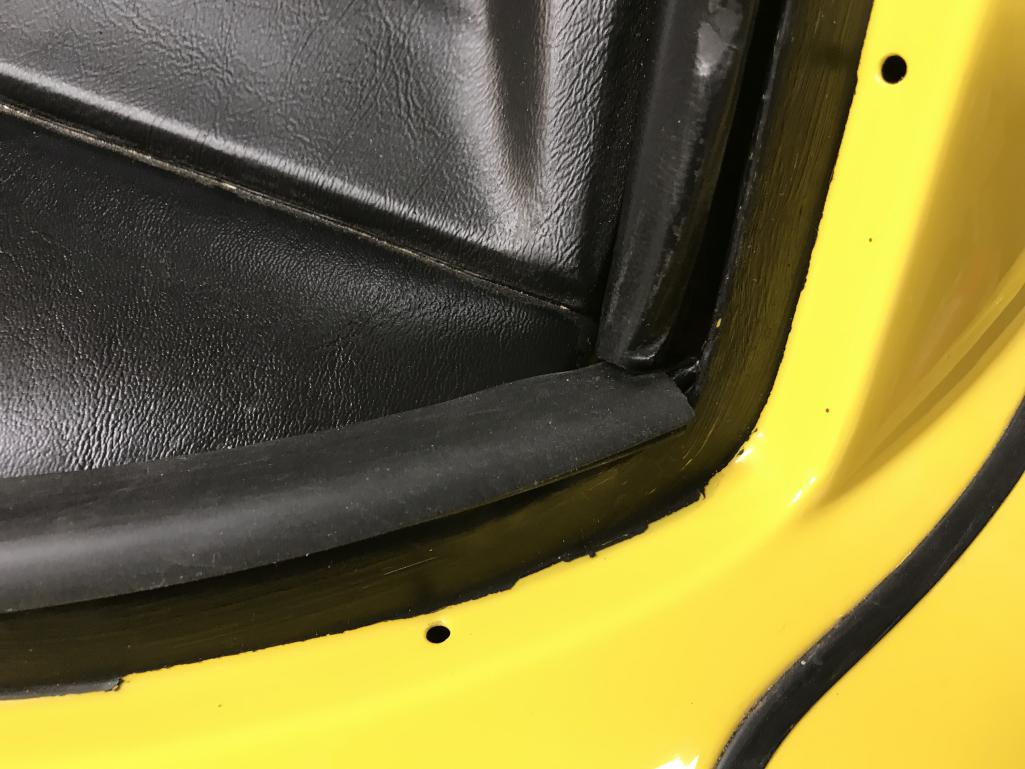
|
| bkrantz |
 Jun 5 2022, 08:27 PM Jun 5 2022, 08:27 PM
Post
#5433
|
|
914 Guru      Group: Members Posts: 8,343 Joined: 3-August 19 From: SW Colorado Member No.: 23,343 Region Association: Rocky Mountains 
|
Next I got out the windshield trim kit. This contains the 3 sections of the trim plus all the small pieces.
Attached thumbnail(s) 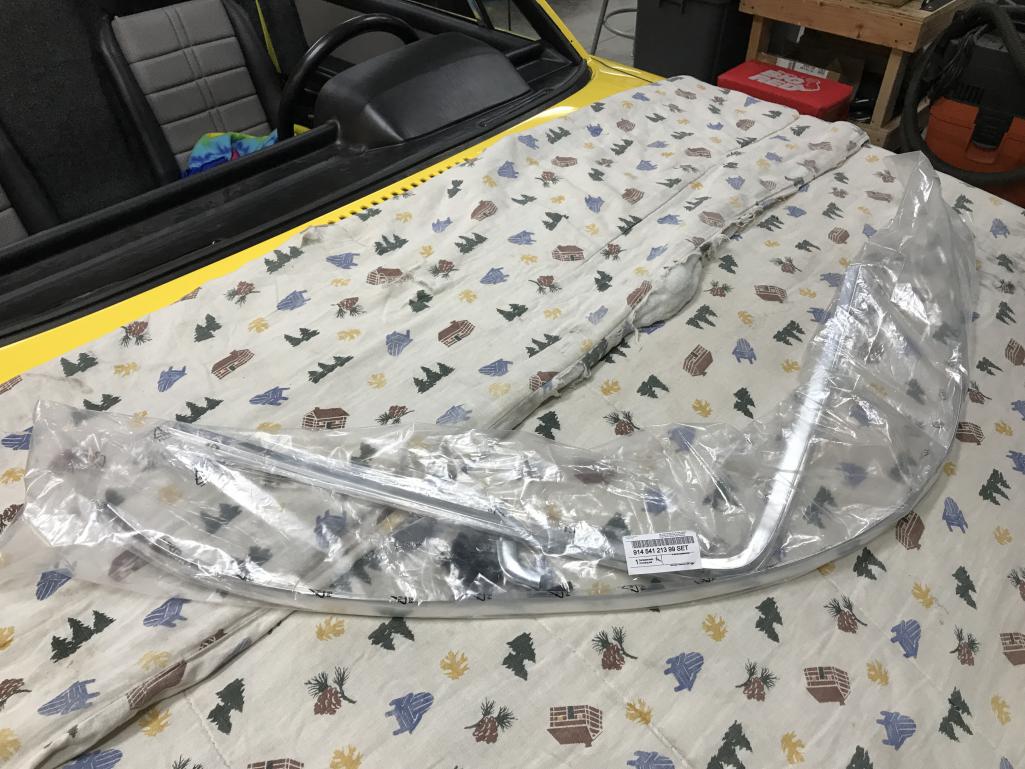
|
| bkrantz |
 Jun 5 2022, 08:29 PM Jun 5 2022, 08:29 PM
Post
#5434
|
|
914 Guru      Group: Members Posts: 8,343 Joined: 3-August 19 From: SW Colorado Member No.: 23,343 Region Association: Rocky Mountains 
|
The small pieces include another batch of (aftermarket) plastic retaining clips, rubber spacers, and 3 aluminum trim junctions. Note that I plan to use the factory clips since I have read they are more robust and reliable.
Attached thumbnail(s) 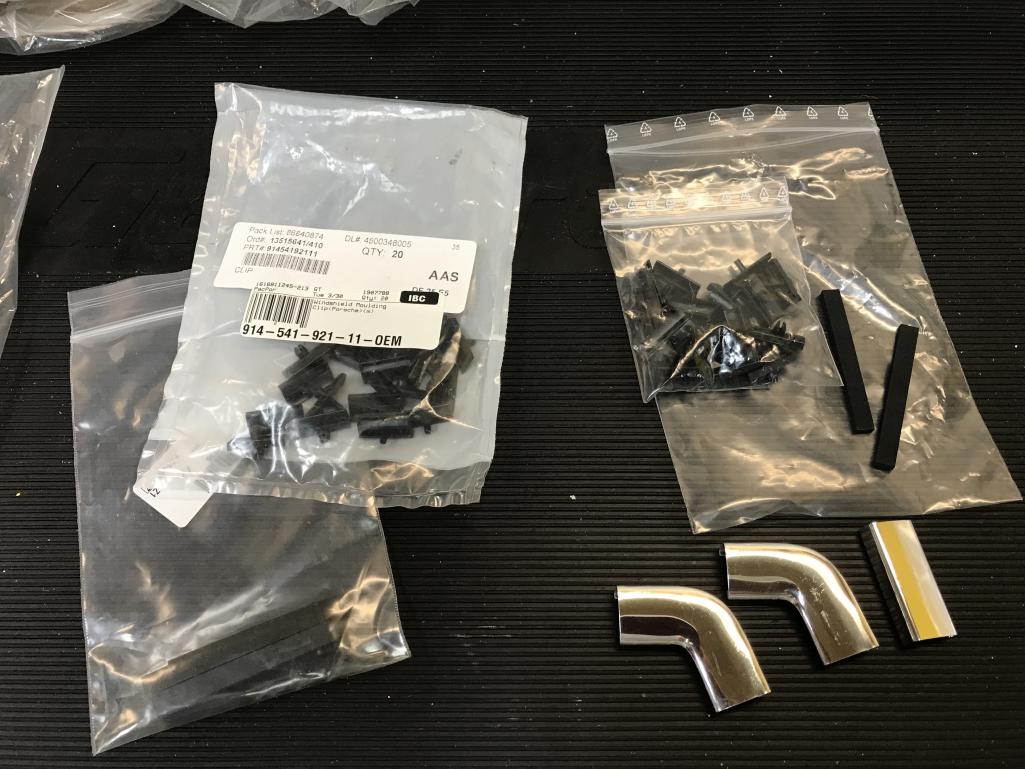
|
| bkrantz |
 Jun 5 2022, 08:36 PM Jun 5 2022, 08:36 PM
Post
#5435
|
|
914 Guru      Group: Members Posts: 8,343 Joined: 3-August 19 From: SW Colorado Member No.: 23,343 Region Association: Rocky Mountains 
|
I also dry-fit the trim. As others have said, this stuff is VERY flexible. Thats good since I had to do some gentle bending on all 3 pieces.
Attached thumbnail(s) 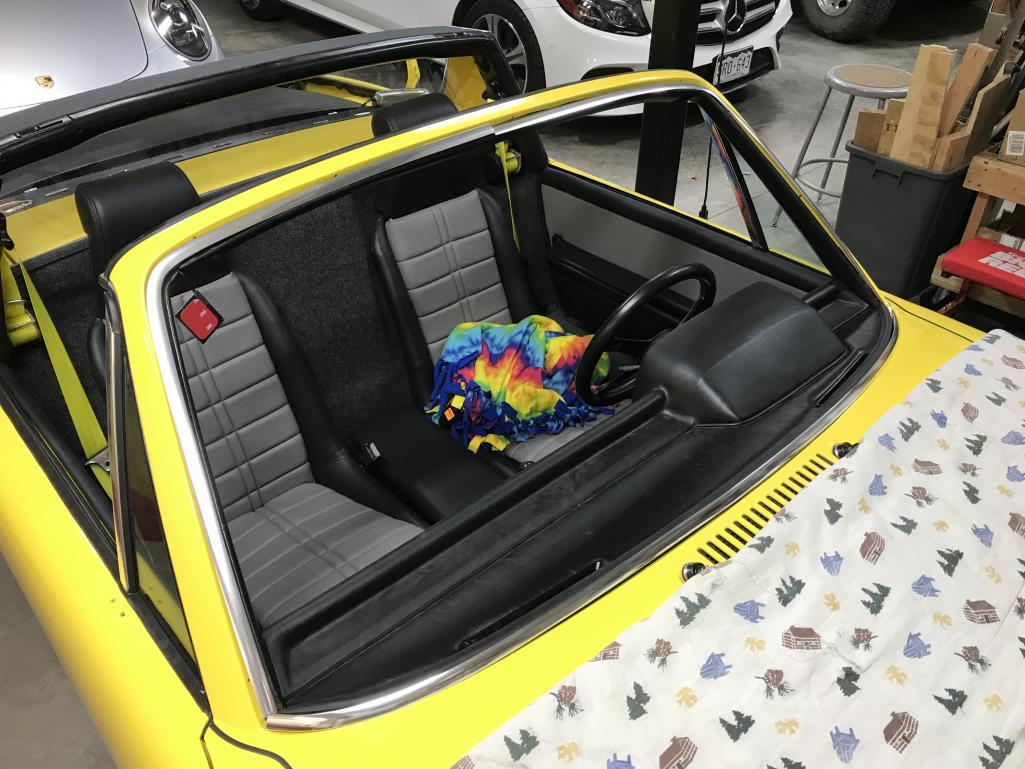
|
| bkrantz |
 Jun 5 2022, 08:37 PM Jun 5 2022, 08:37 PM
Post
#5436
|
|
914 Guru      Group: Members Posts: 8,343 Joined: 3-August 19 From: SW Colorado Member No.: 23,343 Region Association: Rocky Mountains 
|
Step 4: OK, time for the retaining clips. I had one spare of the factory clips.
Attached thumbnail(s) 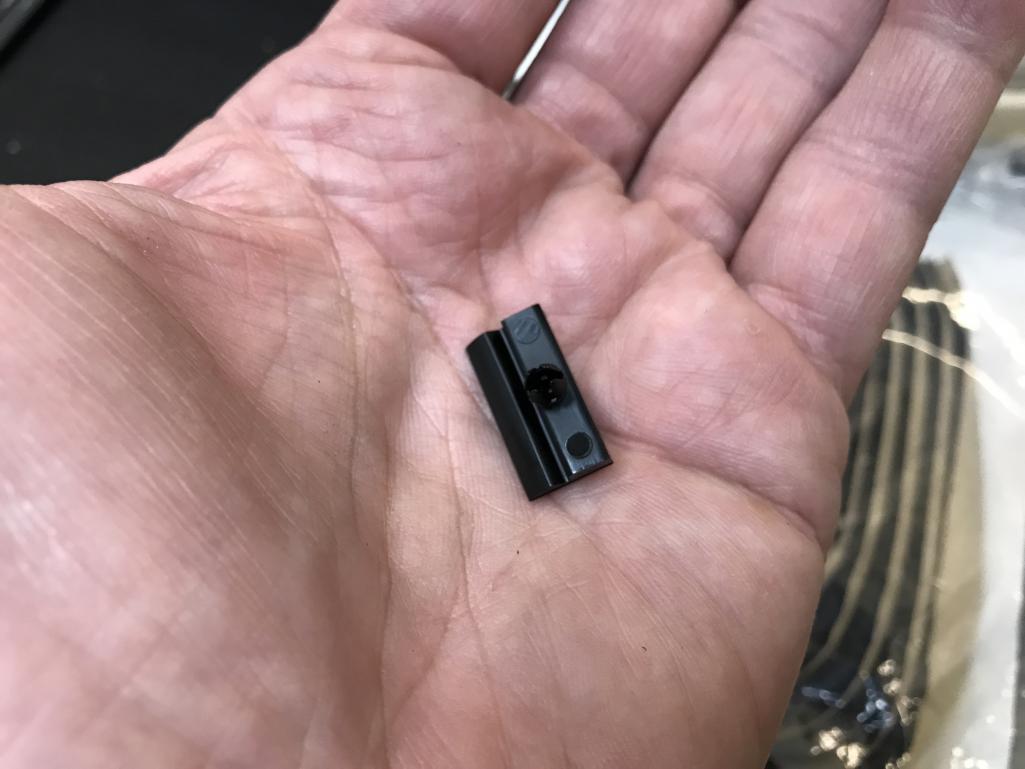
|
| bkrantz |
 Jun 5 2022, 08:38 PM Jun 5 2022, 08:38 PM
Post
#5437
|
|
914 Guru      Group: Members Posts: 8,343 Joined: 3-August 19 From: SW Colorado Member No.: 23,343 Region Association: Rocky Mountains 
|
My method: first dip the prongs into some soapy water.
Attached thumbnail(s) 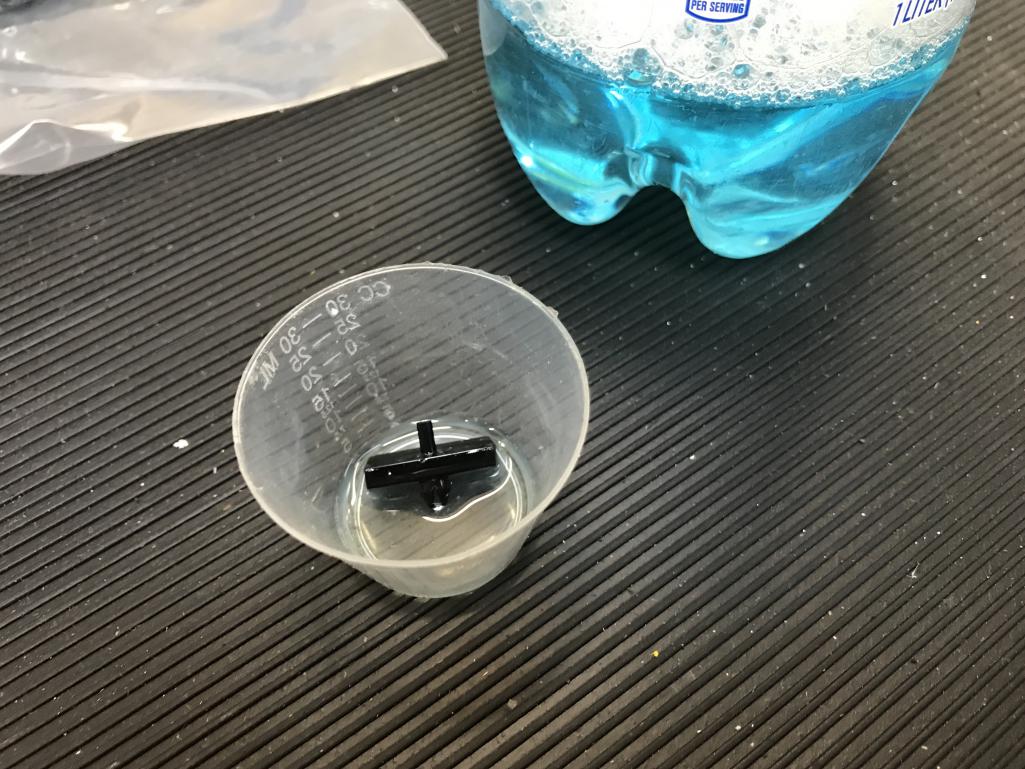
|
| bkrantz |
 Jun 5 2022, 08:41 PM Jun 5 2022, 08:41 PM
Post
#5438
|
|
914 Guru      Group: Members Posts: 8,343 Joined: 3-August 19 From: SW Colorado Member No.: 23,343 Region Association: Rocky Mountains 
|
Then use a 5mm 1/4" socket on an extension and soft mallet to tap the prongs into the hole.
Attached thumbnail(s) 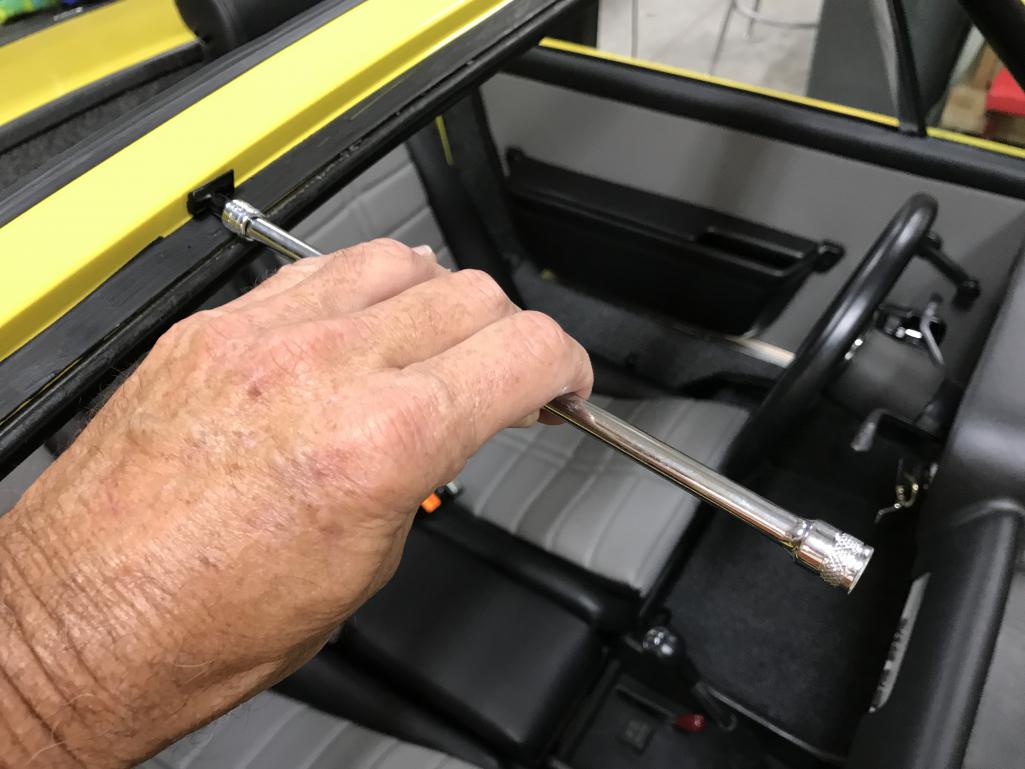
|
| bkrantz |
 Jun 5 2022, 08:43 PM Jun 5 2022, 08:43 PM
Post
#5439
|
|
914 Guru      Group: Members Posts: 8,343 Joined: 3-August 19 From: SW Colorado Member No.: 23,343 Region Association: Rocky Mountains 
|
And then seat the plastic stud with a pin punch. Easy, right?
Attached thumbnail(s) 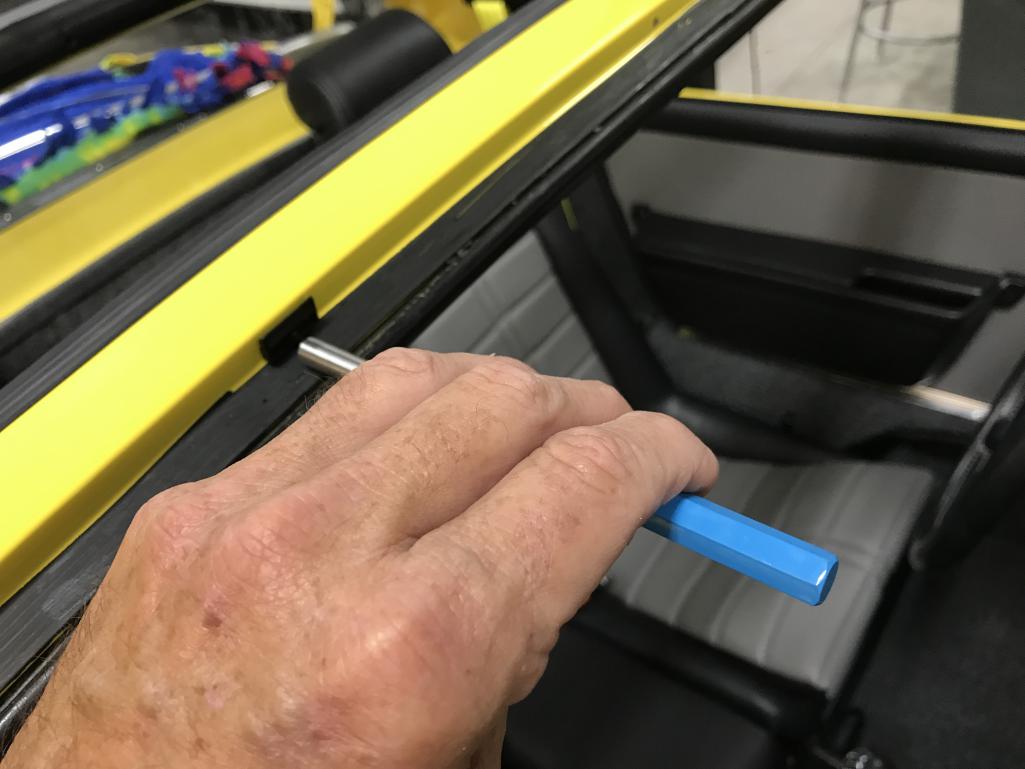
|
| bkrantz |
 Jun 5 2022, 08:45 PM Jun 5 2022, 08:45 PM
Post
#5440
|
|
914 Guru      Group: Members Posts: 8,343 Joined: 3-August 19 From: SW Colorado Member No.: 23,343 Region Association: Rocky Mountains 
|
But my first attempt failed. I hit the clip too hard (and probably unevenly) trying to seat the prongs, and the clip split. After that, I had no spares.
Attached thumbnail(s) 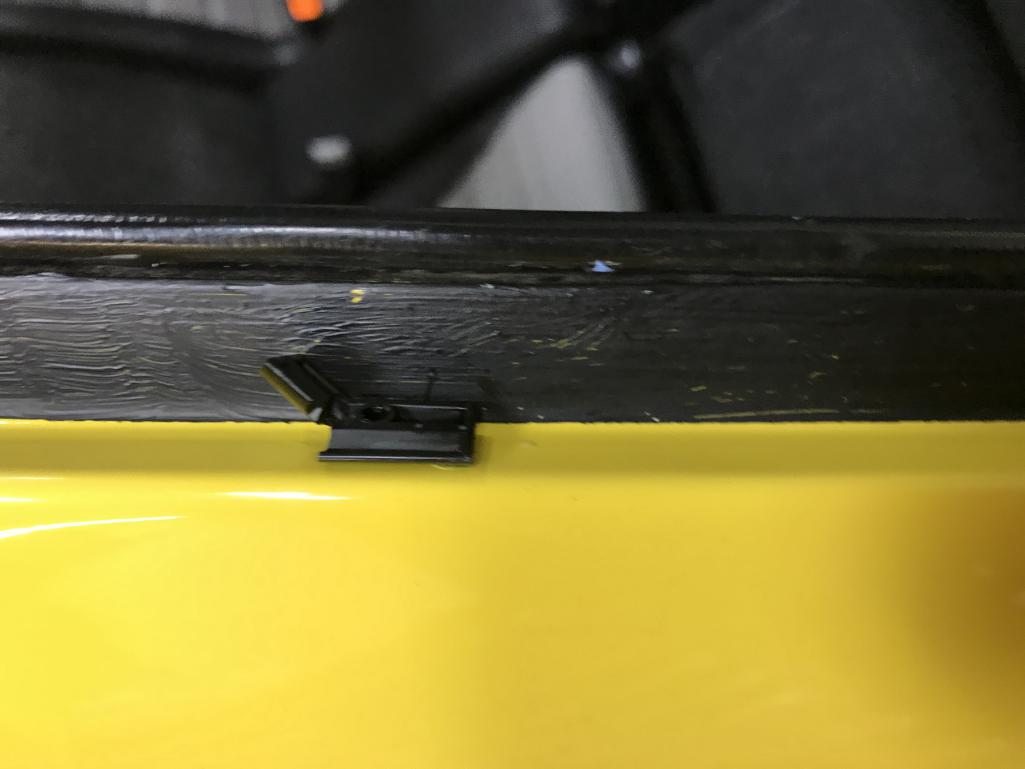
|
  |
1 User(s) are reading this topic (1 Guests and 0 Anonymous Users)
0 Members:

|
Lo-Fi Version | Time is now: 23rd April 2025 - 07:39 AM |
Invision Power Board
v9.1.4 © 2025 IPS, Inc.


