|
|

|
Porsche, and the Porsche crest are registered trademarks of Dr. Ing. h.c. F. Porsche AG.
This site is not affiliated with Porsche in any way. Its only purpose is to provide an online forum for car enthusiasts. All other trademarks are property of their respective owners. |
|
|
  |
| bkrantz |
 May 4 2020, 08:26 PM May 4 2020, 08:26 PM
Post
#601
|
|
914 Guru      Group: Members Posts: 8,342 Joined: 3-August 19 From: SW Colorado Member No.: 23,343 Region Association: Rocky Mountains 
|
And I took a quick look at the rear panel. More work to do.
Attached thumbnail(s) 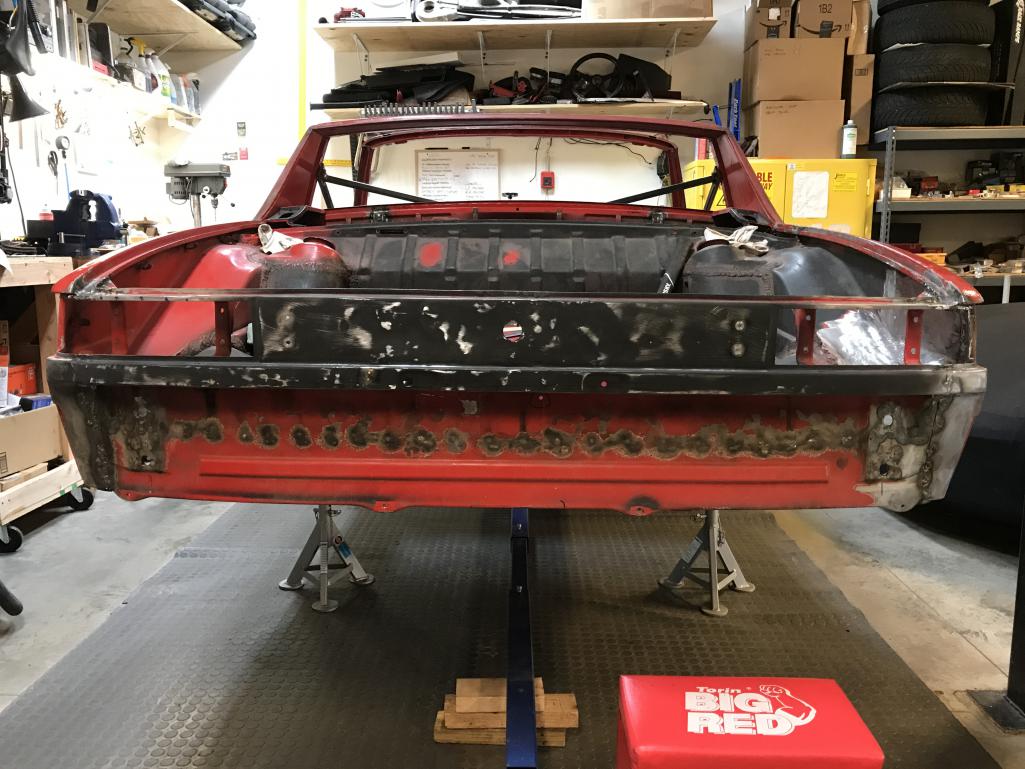
|
| BeatNavy |
 May 5 2020, 04:42 AM May 5 2020, 04:42 AM
Post
#602
|
|
Certified Professional Scapegoat     Group: Members Posts: 2,951 Joined: 26-February 14 From: Easton, MD Member No.: 17,042 Region Association: MidAtlantic Region 
|
Ok, that helps fill in the gap, thank you! I've got a small version of one of those profile gauges, but nothing like that for car body work. The tool whore in me may need to acquire one of those.
Appreciate it (IMG:style_emoticons/default/beer.gif) |
| bkrantz |
 May 5 2020, 09:42 PM May 5 2020, 09:42 PM
Post
#603
|
|
914 Guru      Group: Members Posts: 8,342 Joined: 3-August 19 From: SW Colorado Member No.: 23,343 Region Association: Rocky Mountains 
|
|
| bkrantz |
 May 6 2020, 08:00 PM May 6 2020, 08:00 PM
Post
#604
|
|
914 Guru      Group: Members Posts: 8,342 Joined: 3-August 19 From: SW Colorado Member No.: 23,343 Region Association: Rocky Mountains 
|
First job today was to weld up the "extra" holes in the rear panel, and then give it another pass of metal work.
Attached thumbnail(s) 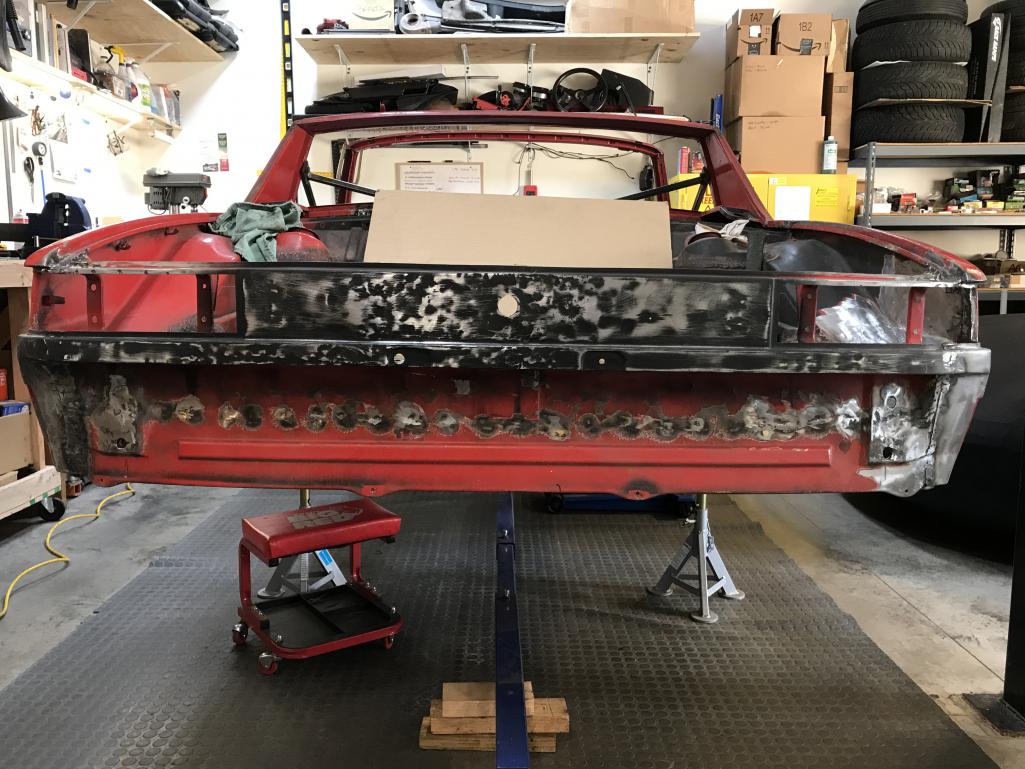
|
| bkrantz |
 May 6 2020, 08:03 PM May 6 2020, 08:03 PM
Post
#605
|
|
914 Guru      Group: Members Posts: 8,342 Joined: 3-August 19 From: SW Colorado Member No.: 23,343 Region Association: Rocky Mountains 
|
I then gave the other panels another smoothing pass. I might be getting these as good as I can. The photos might not show that the highs and lows differ by only about a mm or less.
Front left Attached thumbnail(s) 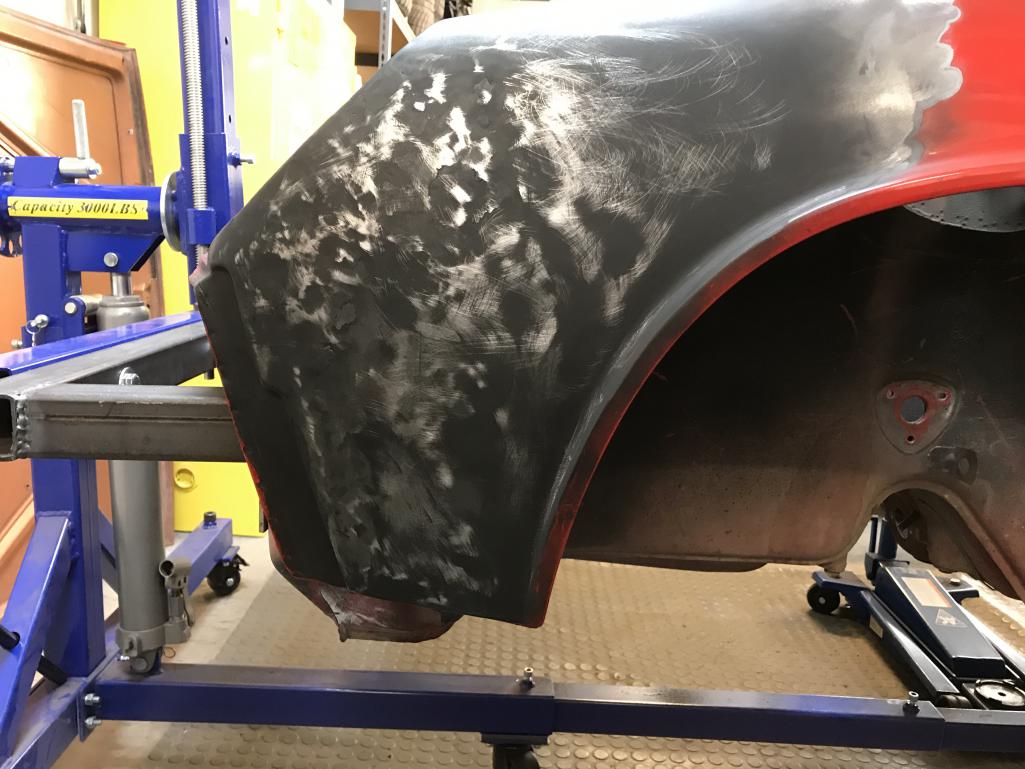
|
| bkrantz |
 May 6 2020, 08:03 PM May 6 2020, 08:03 PM
Post
#606
|
|
914 Guru      Group: Members Posts: 8,342 Joined: 3-August 19 From: SW Colorado Member No.: 23,343 Region Association: Rocky Mountains 
|
Front right
Attached thumbnail(s) 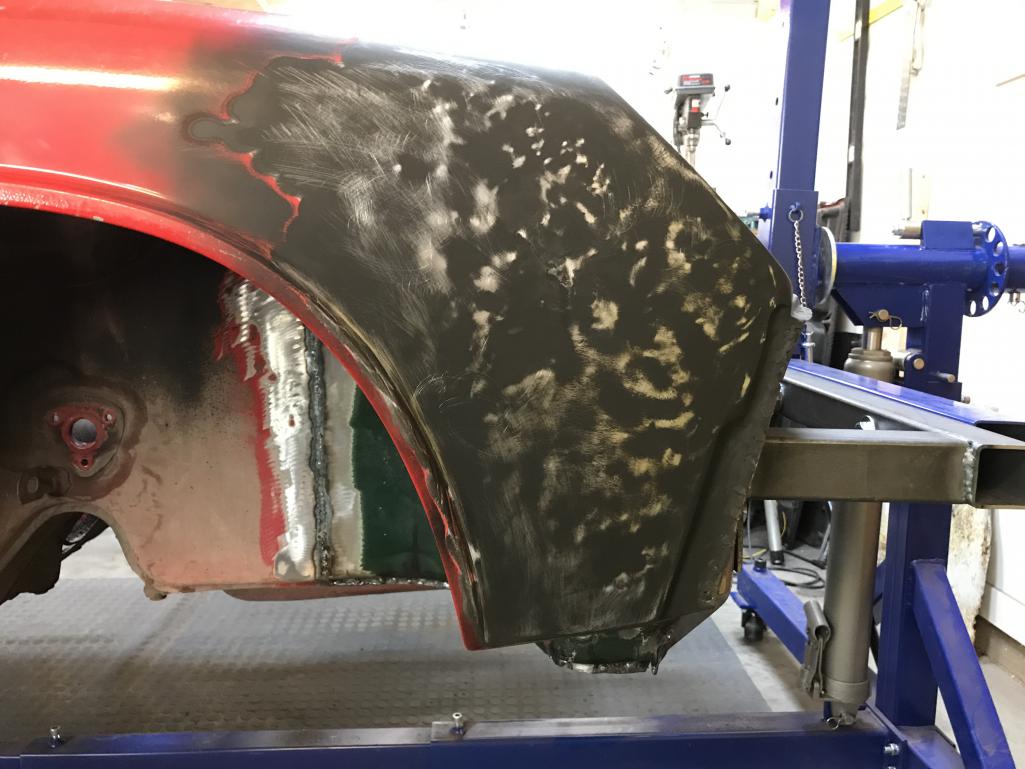
|
| bkrantz |
 May 6 2020, 08:04 PM May 6 2020, 08:04 PM
Post
#607
|
|
914 Guru      Group: Members Posts: 8,342 Joined: 3-August 19 From: SW Colorado Member No.: 23,343 Region Association: Rocky Mountains 
|
Left cowl
Attached thumbnail(s) 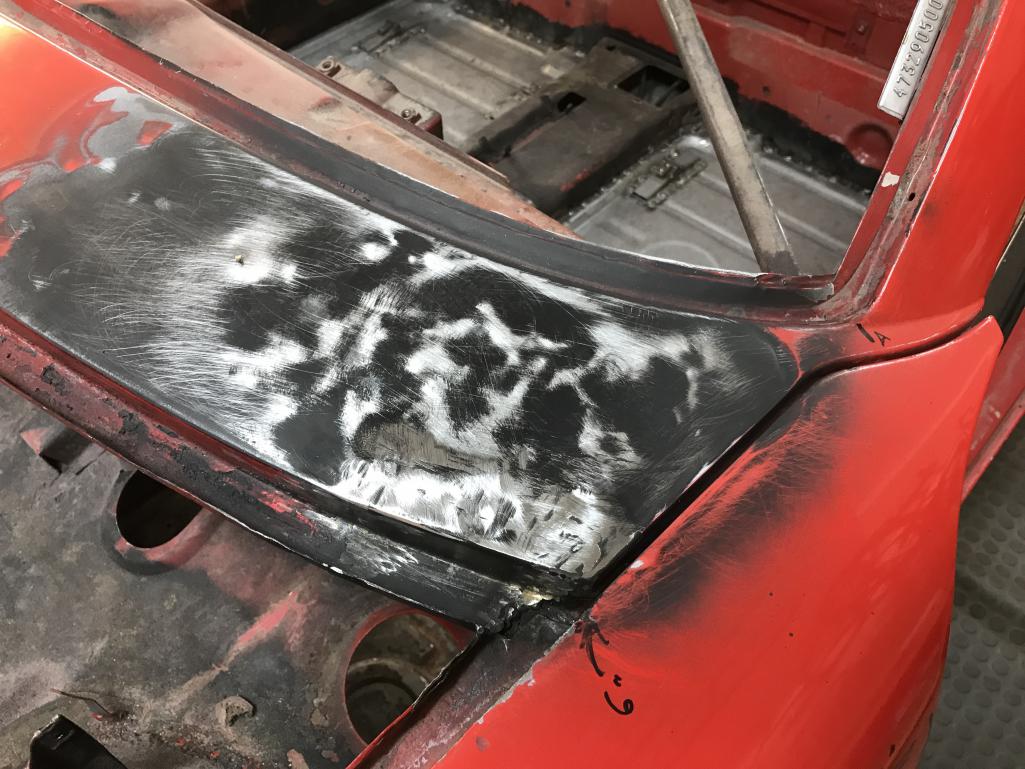
|
| bkrantz |
 May 6 2020, 08:04 PM May 6 2020, 08:04 PM
Post
#608
|
|
914 Guru      Group: Members Posts: 8,342 Joined: 3-August 19 From: SW Colorado Member No.: 23,343 Region Association: Rocky Mountains 
|
Right cowl
Attached thumbnail(s) 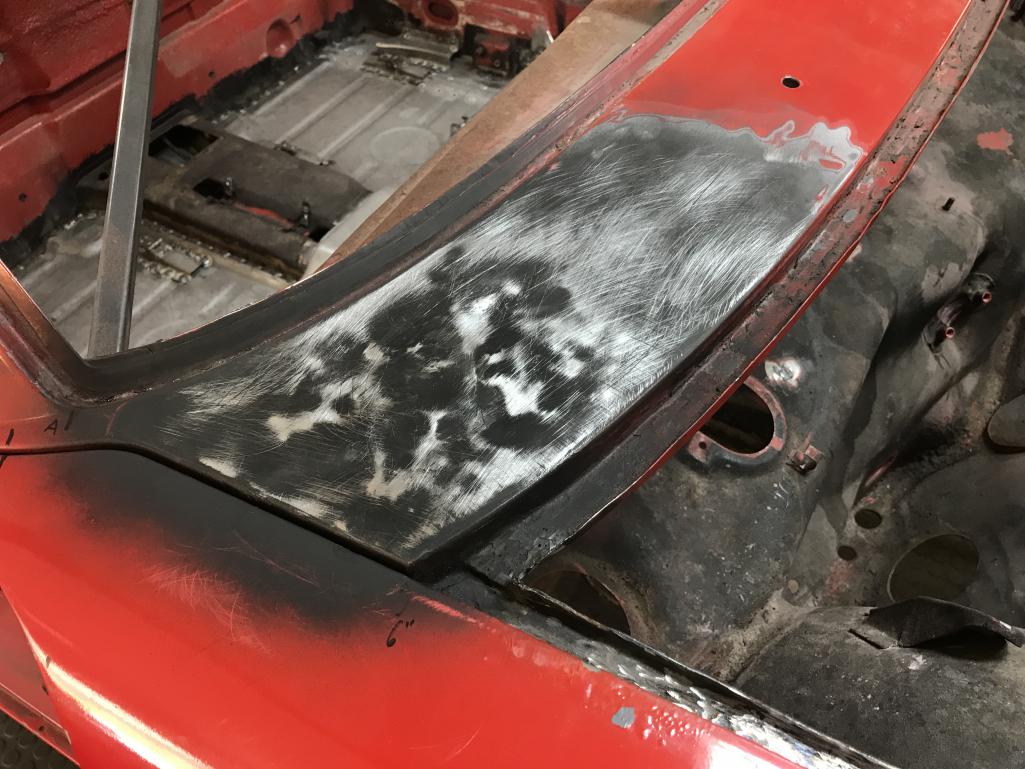
|
| bkrantz |
 May 6 2020, 08:06 PM May 6 2020, 08:06 PM
Post
#609
|
|
914 Guru      Group: Members Posts: 8,342 Joined: 3-August 19 From: SW Colorado Member No.: 23,343 Region Association: Rocky Mountains 
|
And I made a first check of the right rear fender. More work to do here.
Attached thumbnail(s) 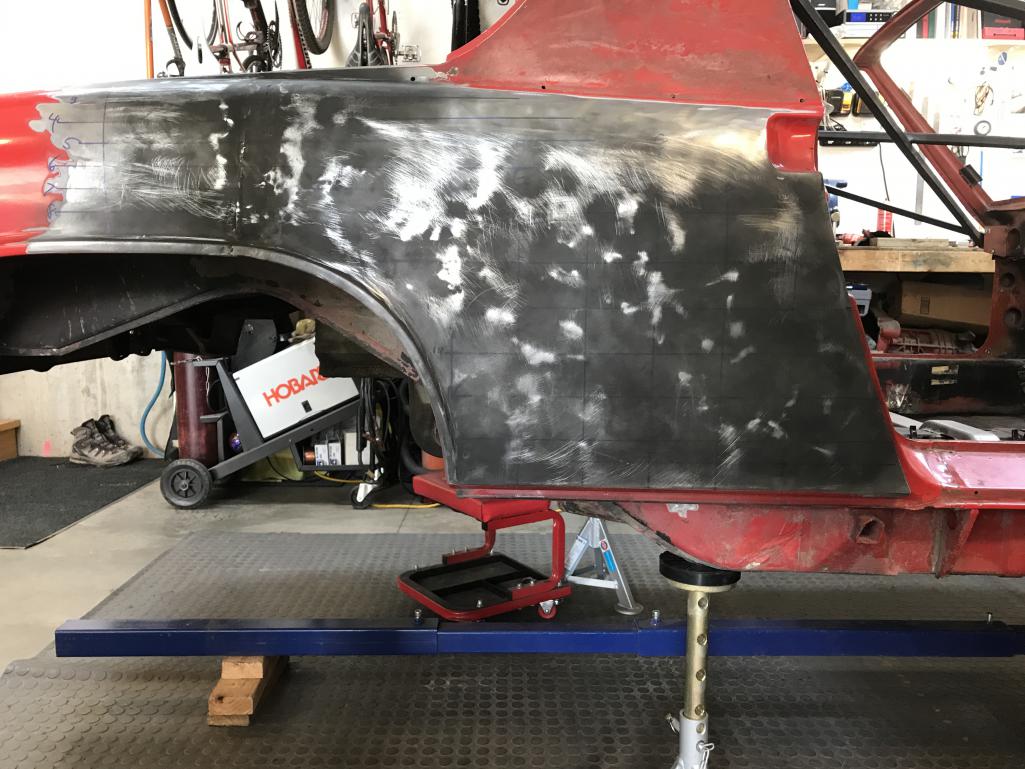
|
| bkrantz |
 May 7 2020, 08:20 PM May 7 2020, 08:20 PM
Post
#610
|
|
914 Guru      Group: Members Posts: 8,342 Joined: 3-August 19 From: SW Colorado Member No.: 23,343 Region Association: Rocky Mountains 
|
I took a break from panel work today. The first task was replacing a broken stud for the trunk lid torsion bar bracket on the right side. The PO repair was a hole drilled and tapped "nearby".
Attached thumbnail(s) 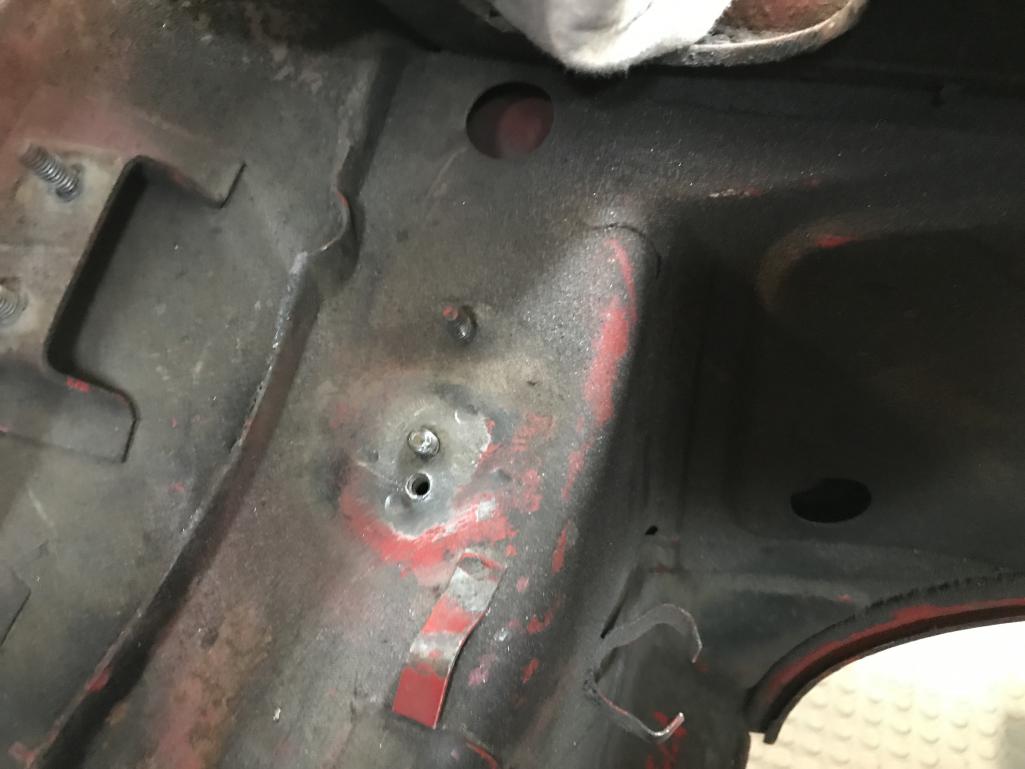
|
| bkrantz |
 May 7 2020, 08:22 PM May 7 2020, 08:22 PM
Post
#611
|
|
914 Guru      Group: Members Posts: 8,342 Joined: 3-August 19 From: SW Colorado Member No.: 23,343 Region Association: Rocky Mountains 
|
First step was to cut off the remains bit of stud, and then drill through the flange inside the long.
Attached thumbnail(s) 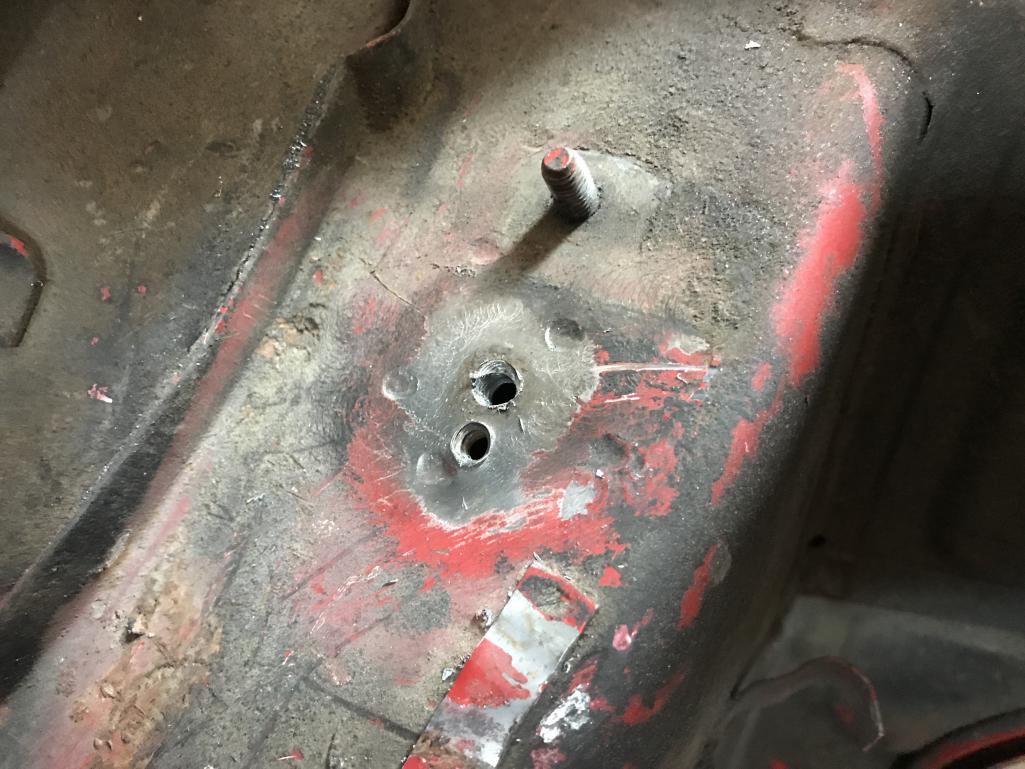
|
| bkrantz |
 May 7 2020, 08:22 PM May 7 2020, 08:22 PM
Post
#612
|
|
914 Guru      Group: Members Posts: 8,342 Joined: 3-August 19 From: SW Colorado Member No.: 23,343 Region Association: Rocky Mountains 
|
Then I tapped the new hole (M8 x 1.0).
Attached thumbnail(s) 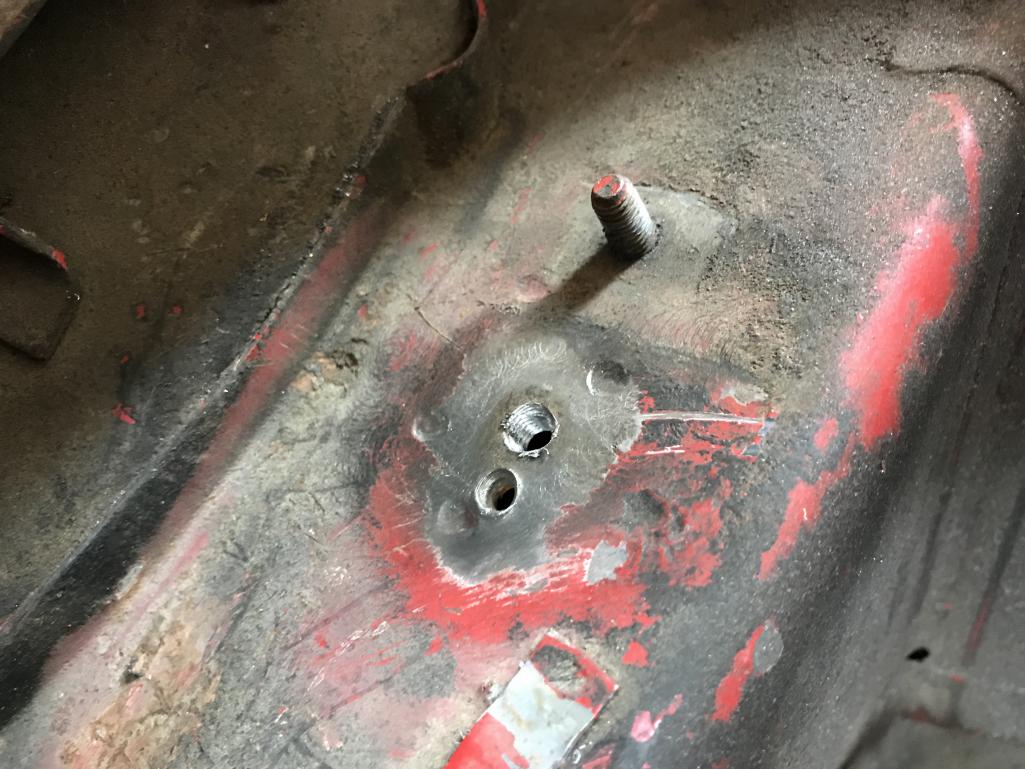
|
| bkrantz |
 May 7 2020, 08:23 PM May 7 2020, 08:23 PM
Post
#613
|
|
914 Guru      Group: Members Posts: 8,342 Joined: 3-August 19 From: SW Colorado Member No.: 23,343 Region Association: Rocky Mountains 
|
Here's the new stud screwed in place.
Attached thumbnail(s) 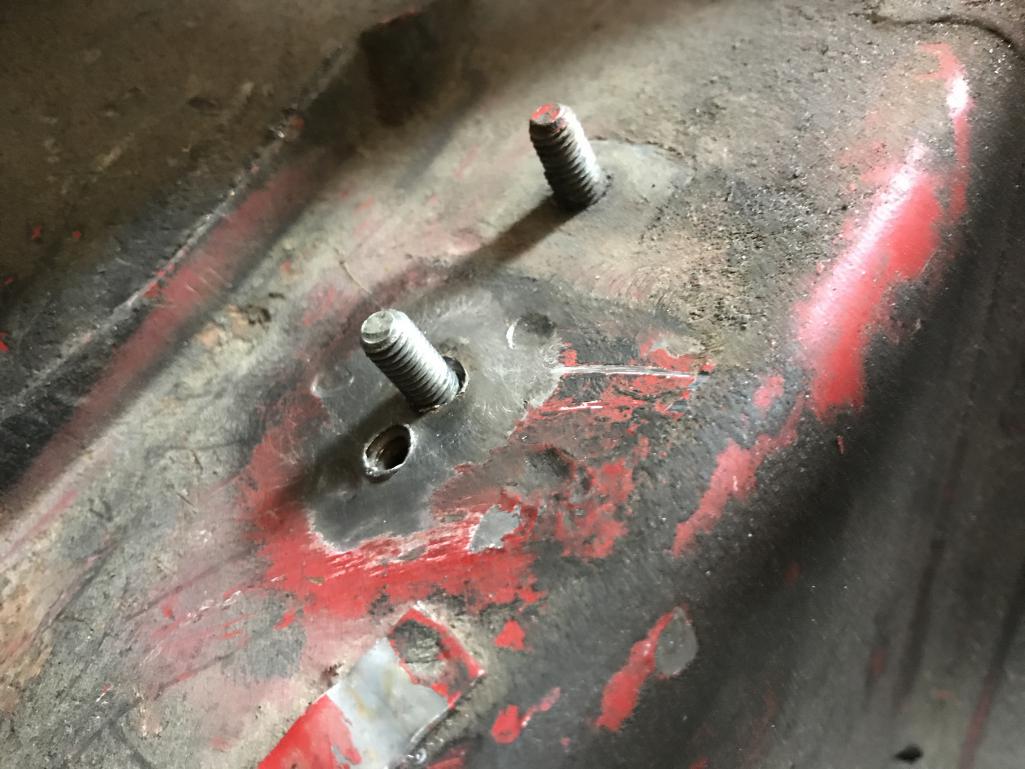
|
| bkrantz |
 May 7 2020, 08:24 PM May 7 2020, 08:24 PM
Post
#614
|
|
914 Guru      Group: Members Posts: 8,342 Joined: 3-August 19 From: SW Colorado Member No.: 23,343 Region Association: Rocky Mountains 
|
And then tack-welded (along with the PO hole) and ground down to accept th bracket.
Attached thumbnail(s) 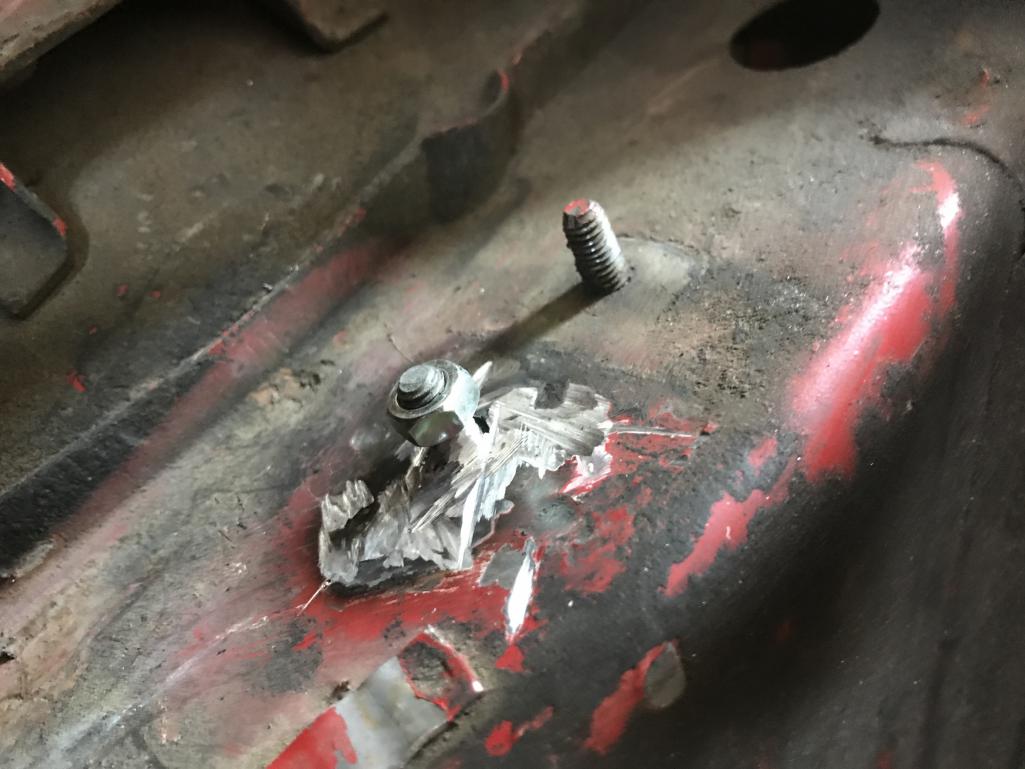
|
| bkrantz |
 May 7 2020, 08:26 PM May 7 2020, 08:26 PM
Post
#615
|
|
914 Guru      Group: Members Posts: 8,342 Joined: 3-August 19 From: SW Colorado Member No.: 23,343 Region Association: Rocky Mountains 
|
Next, I went to work on the trunk lid. As I previously reported, this replacement lid had a rust-through in the inner rib along the trailing edge. I had cut out the rusted section and cleared out some of the inner foam.
Attached thumbnail(s) 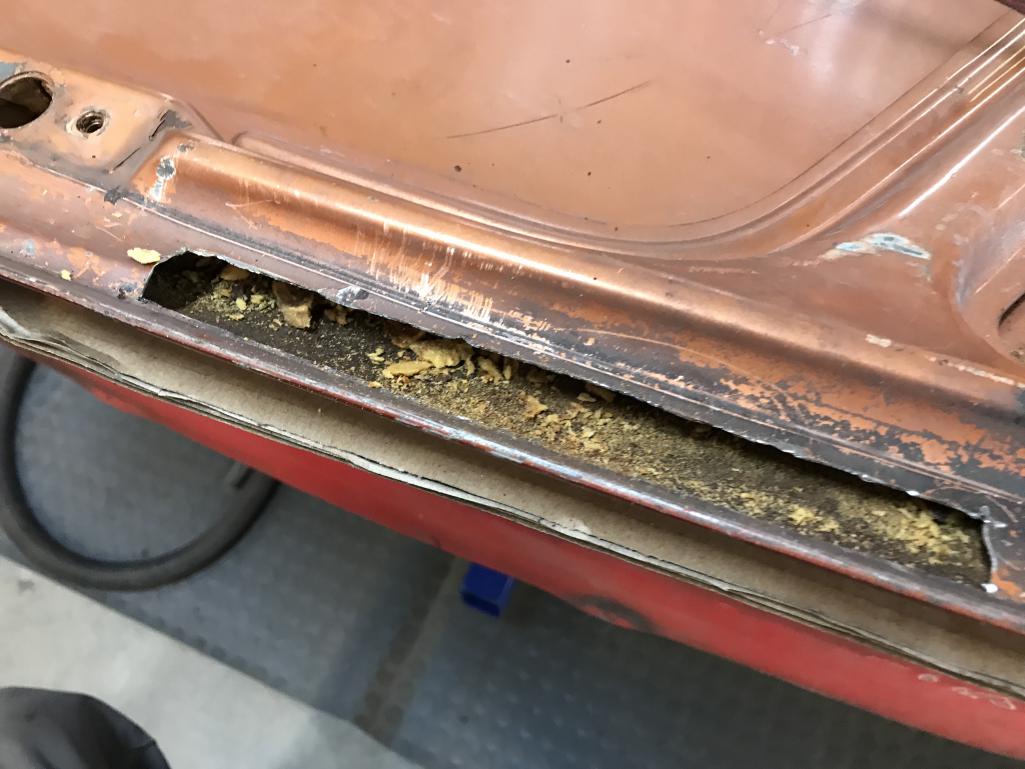
|
| bkrantz |
 May 7 2020, 08:28 PM May 7 2020, 08:28 PM
Post
#616
|
|
914 Guru      Group: Members Posts: 8,342 Joined: 3-August 19 From: SW Colorado Member No.: 23,343 Region Association: Rocky Mountains 
|
Today, I went after more of the foam. I managed to clear it from the side with the access hole and through the center latch area.
Attached thumbnail(s) 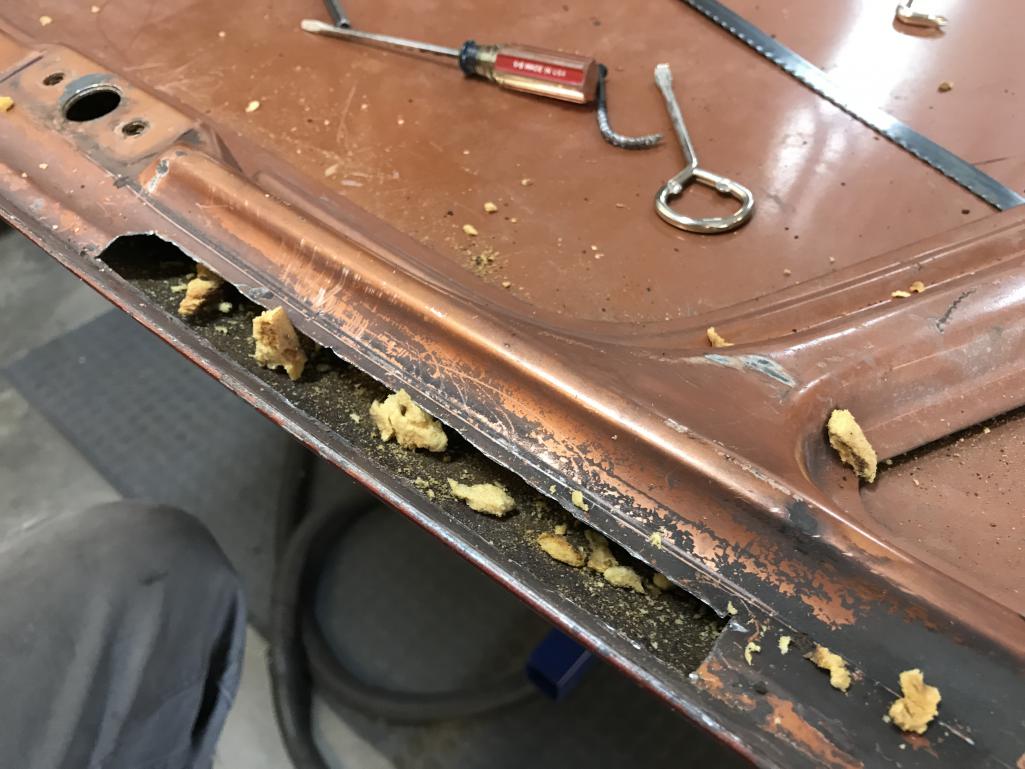
|
| bkrantz |
 May 7 2020, 08:29 PM May 7 2020, 08:29 PM
Post
#617
|
|
914 Guru      Group: Members Posts: 8,342 Joined: 3-August 19 From: SW Colorado Member No.: 23,343 Region Association: Rocky Mountains 
|
I broke out the bore scope to see the degree of rust and remaining foam.
Attached thumbnail(s) 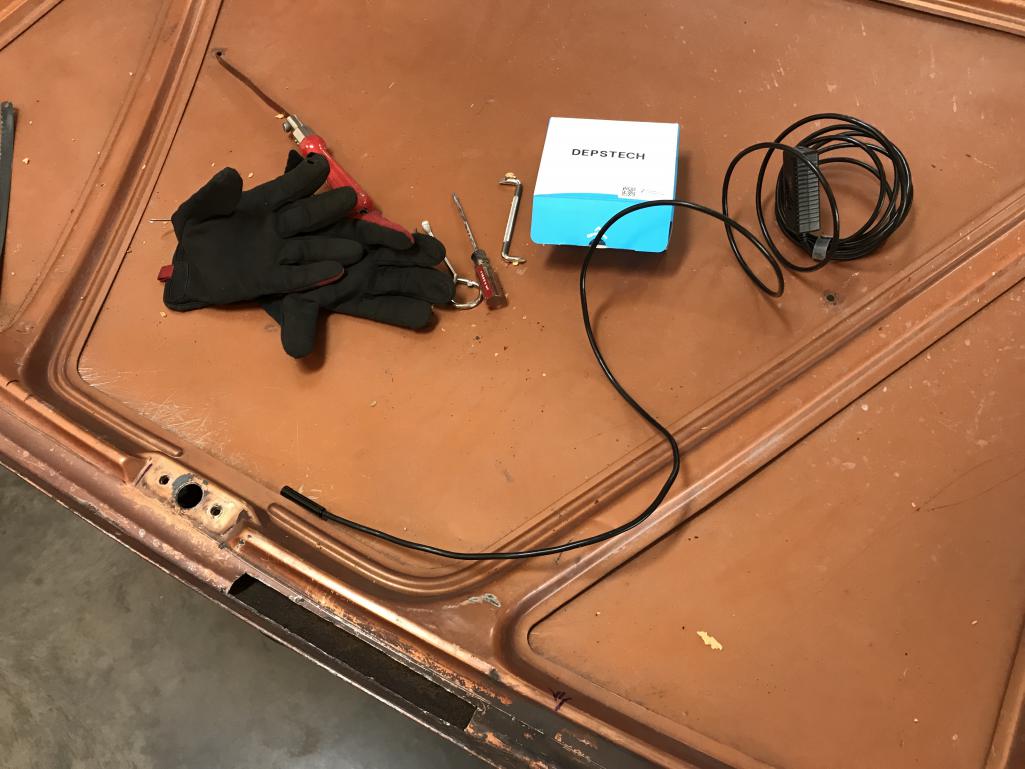
|
| bkrantz |
 May 7 2020, 08:31 PM May 7 2020, 08:31 PM
Post
#618
|
|
914 Guru      Group: Members Posts: 8,342 Joined: 3-August 19 From: SW Colorado Member No.: 23,343 Region Association: Rocky Mountains 
|
Here's a shot from inside the space between the rib and the trunk lid skin. Looks like the worst rust is where I cut out the original spot. But still lots of foam to extract from the other side.
Attached thumbnail(s) 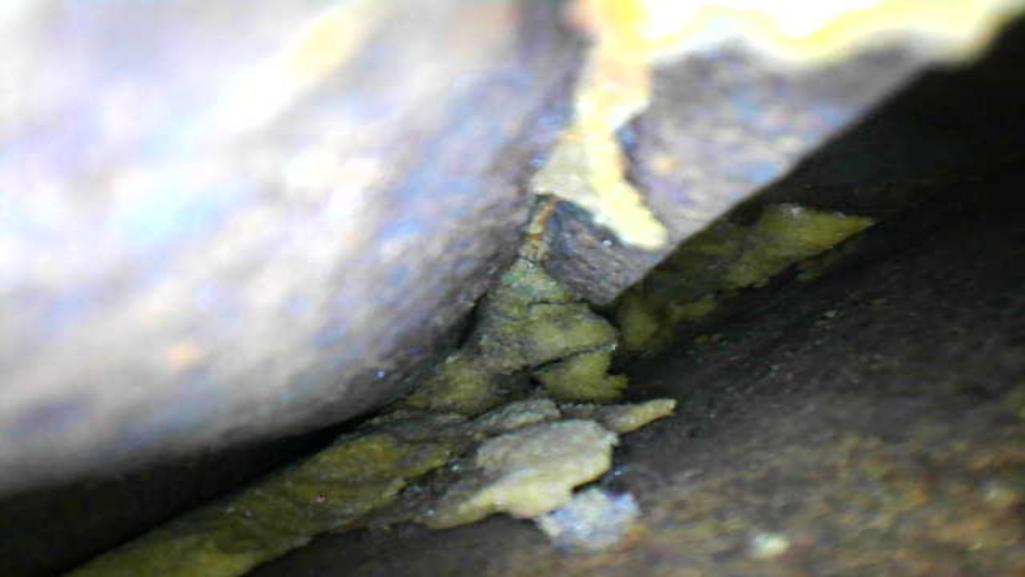
|
| raynekat |
 May 7 2020, 10:06 PM May 7 2020, 10:06 PM
Post
#619
|
|
Advanced Member     Group: Members Posts: 2,169 Joined: 30-December 14 From: Coeur d'Alene, Idaho Member No.: 18,263 Region Association: Pacific Northwest 
|
Here's a shot from inside the space between the rib and the trunk lid skin. Looks like the worst rust is where I cut out the original spot. But still lots of foam to extract from the other side. Now that's something you don't see everyday! The "money" shot. Well done there Bob. |
| Kansas 914 |
 May 8 2020, 08:32 AM May 8 2020, 08:32 AM
Post
#620
|
|
Advanced Member     Group: Members Posts: 2,999 Joined: 1-March 03 From: Durango, Colorado Member No.: 373 Region Association: Rocky Mountains 
|
I wonder if there is a chemical that would "eat" the foam and not damage the metal?
|
  |
1 User(s) are reading this topic (1 Guests and 0 Anonymous Users)
0 Members:

|
Lo-Fi Version | Time is now: 20th April 2025 - 07:04 AM |
Invision Power Board
v9.1.4 © 2025 IPS, Inc.


