|
|
|
Porsche, and the Porsche crest are registered trademarks of Dr. Ing. h.c. F. Porsche AG.
This site is not affiliated with Porsche in any way. Its only purpose is to provide an online forum for car enthusiasts. All other trademarks are property of their respective owners. |
|
|

  |

| FL000 |
 Oct 22 2019, 08:38 PM Oct 22 2019, 08:38 PM
Post
#1
|
|
Member  Group: Members Posts: 481 Joined: 31-January 12 From: Lancaster, CA Member No.: 14,076 Region Association: Southern California |
Hi World, I am moving on to the next phase of my project, and have enough things planned that I will call it phase 2. Hopefully this thread will motivate me to see it through quicker, and maybe help someone else at the same time.
Phase 1 was my 7 year adventure taking a banged up 73 roller and installing a SBC, renegade kit, and Sheridan body kit. Here is basically what it looks like now 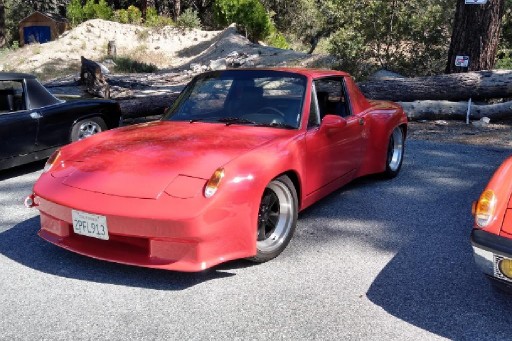 Had fun driving it for a summer and a winter, then realized I am ready to start the next round of upgrades. The list in no particular order and consists of: Heat and a/c Audi 01E install Fuel injection Boxster brakes Fix passenger door gap Time and money varies, so no timeline for when it will get done, but my wife's 62 Lincoln is next in line so I do have some encouragement to finish! |
   |

 
|
| FL000 |
Oct 22 2019, 08:52 PM
Post
#2
|
|
Member Group: Members Posts: 481 Joined: 31-January 12 From: Lancaster, CA Member No.: 14,076 Region Association: Southern California |
After driving it one year I quickly realized I am getting too old to enjoy it living in the desert without heat and a/c. I just finished the under dash blower unit install with heat, and to make room for the a/c compressor I decided to switch from a mechanical to electric water pump.
I went with the Vintage Air Heritage series under dash unit. Fits, and puts out plenty of air. 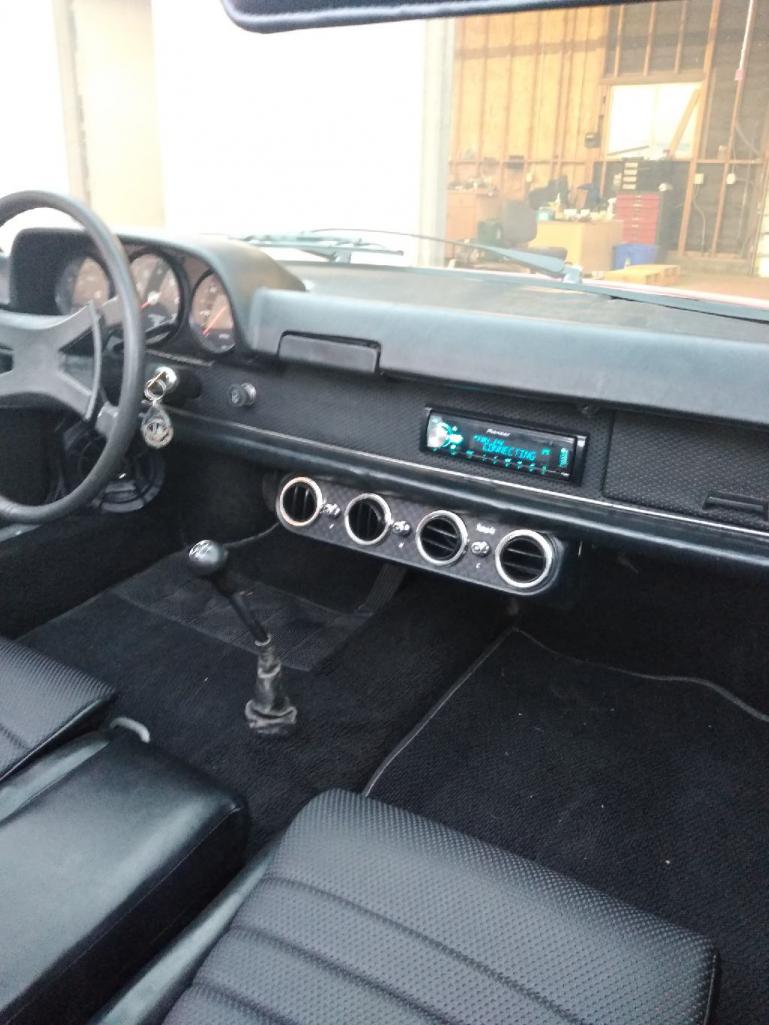 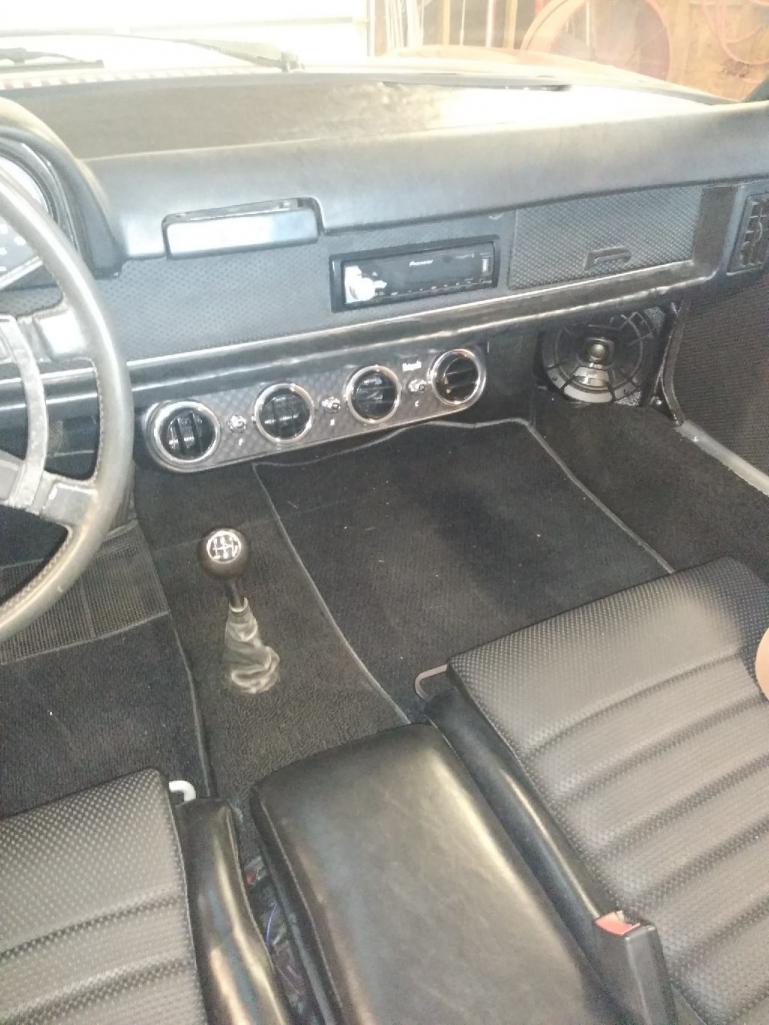 I went back and forth on where to pull the water from, and eventually settled on running the lines through the passenger long. 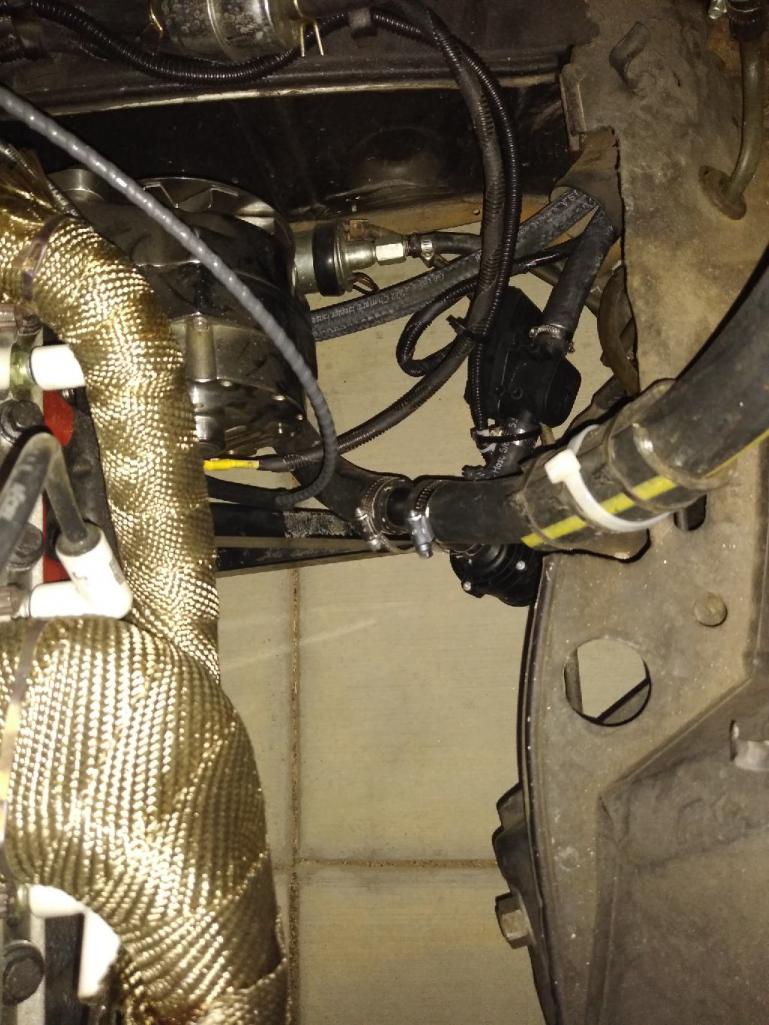 For pic above, take note of the 2 black components connected to the heater hose. The first one, closest to the long is the heater control valve, and the next one partially hidden behind the radiator hose is a booster pump; more to come on that. 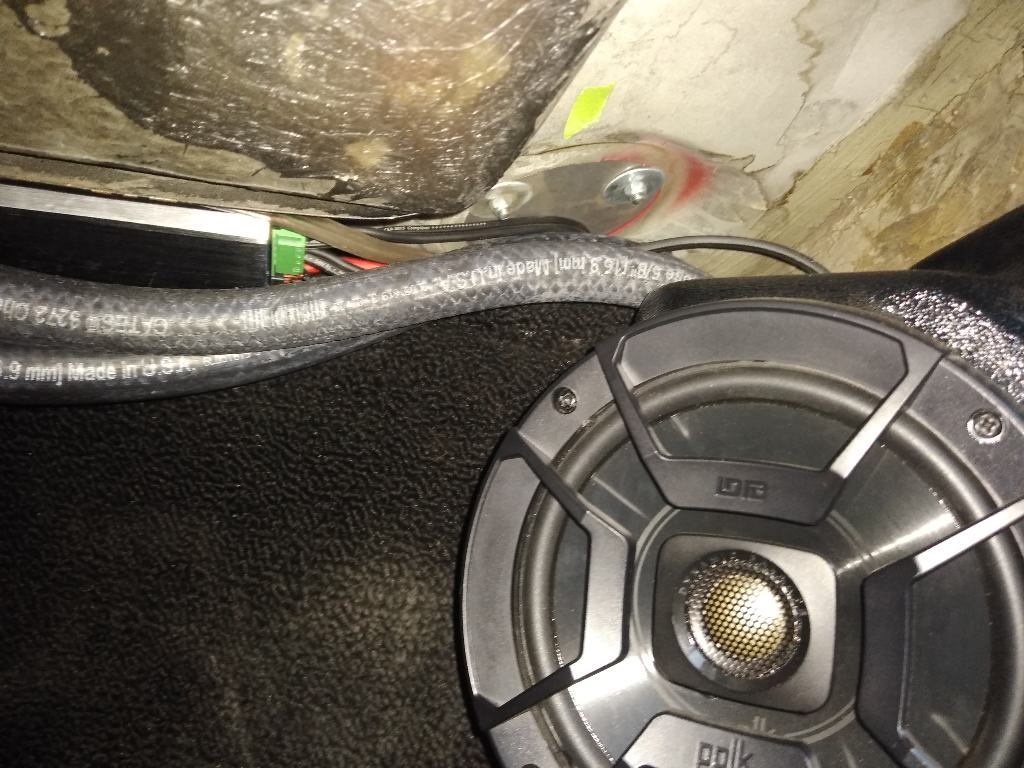 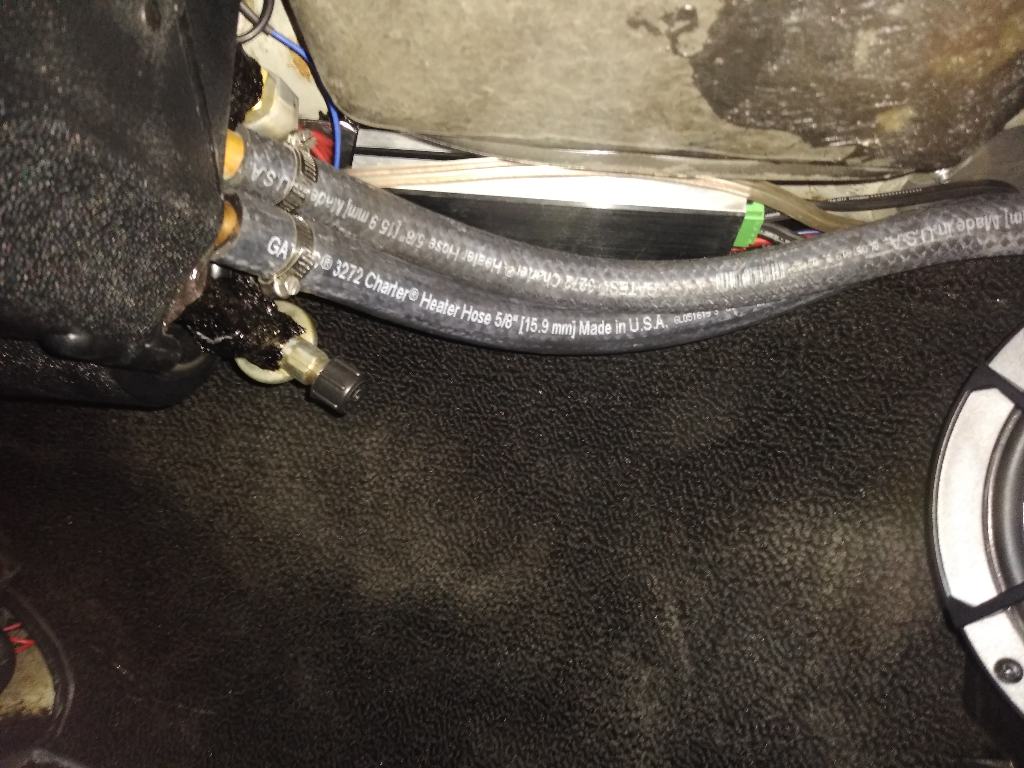 |
|
|
|
| FL000 |
Oct 22 2019, 09:29 PM
Post
#3
|
|
Member Group: Members Posts: 481 Joined: 31-January 12 From: Lancaster, CA Member No.: 14,076 Region Association: Southern California |
I know there are a number of electric water pumps on the market, but the Davies Craig caught my eye and is the one I went with. Pretty slick little unit that uses pulse wave modulation (PWM) to hit the target temp, which should help on the efficiency side. It also has as a control module that allows you to set your target temp, and control the radiator fans. Set it and forget it in theory. Here it is installed
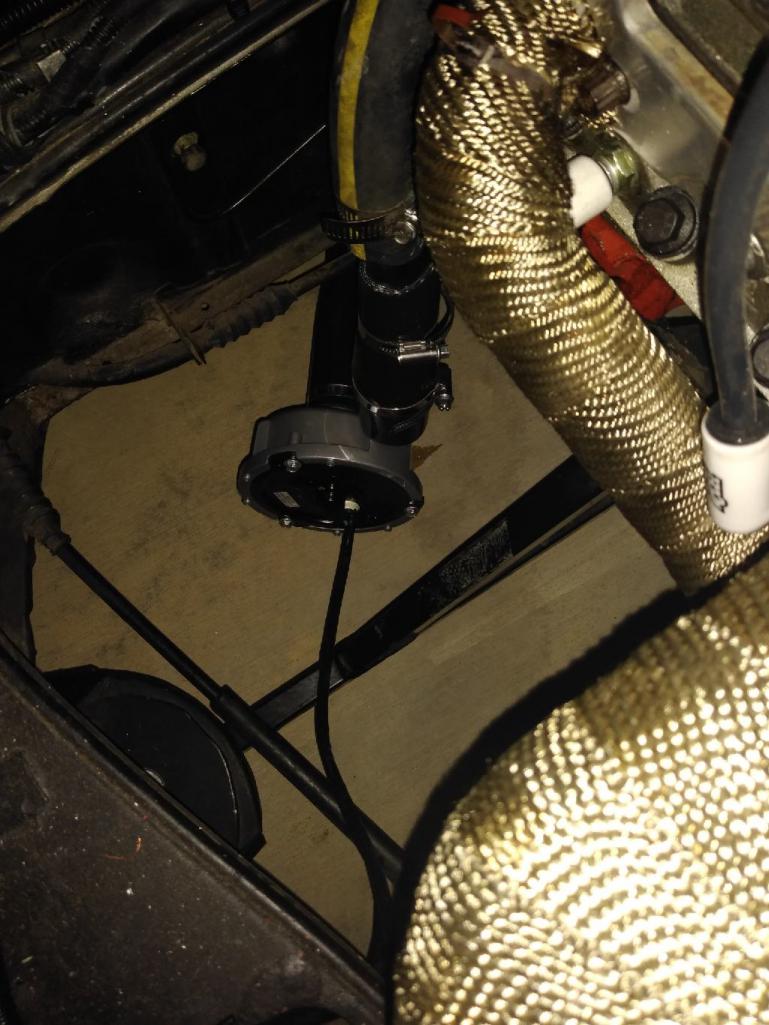  Yes that is a drop of water below it, yes it drives me nuts, and yes it will be fixed (IMG:style_emoticons/default/smile.gif) The pump looks lower then it really is compared to the engine bar, but I am going to secure it with a mount higher to be safe. I was pretty proud of these adapters I made, even though they don't look all that impressive! The tube was too thick to put a DIY bead in, so I welded a bead around it. Seems to be sealing good so far. 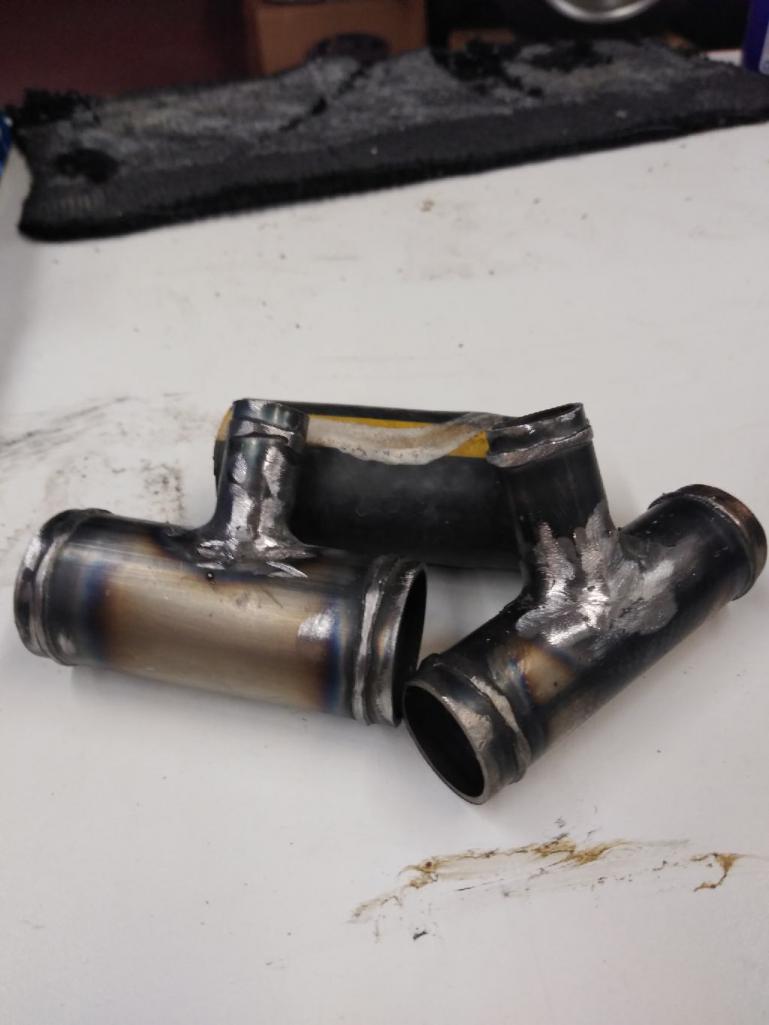 As I mentioned the waterpump uses PWM, which basically means cycling between off and on. For DC motors that is a better approach then say trying to control the RPM with varying voltage. Because of this I was concerned my heater core would not see a consistent flow of hot water through it, and consequently may lead to inconsistent heat flowing out of the blower. Probably wouldn't have mattered, but I am a bit anal by nature so I decided to account for it. I installed the booster pump shown in the previous post, and added an Arduino UNO to control it. I tapped into the potentiometer wire from the heater valve, and the more you turn the heat knob up the more the booster pump flows. This also seems to be working well. |
|
|
|
| djway |
Oct 22 2019, 09:38 PM
Post
#4
|
|
Senior Member Group: Members Posts: 787 Joined: 16-October 15 From: Riverside Member No.: 19,266 Region Association: Southern California |
QUOTE(FL 000 @ Oct 22 2019, 08:29 PM)  I know there are a number of electric water pumps on the market, but the Davies Craig caught my eye and is the one I went with. Pretty slick little unit that uses pulse wave modulation (PWM) to hit the target temp, which should help on the efficiency side. It also has as a control module that allows you to set your target temp, and control the radiator fans. Set it and forget it in theory. Here it is installed Yes that is a drop of water below it, yes it drives me nuts, and yes it will be fixed (IMG:style_emoticons/default/smile.gif) The pump looks lower then it really is compared to the engine bar, but I am going to secure it with a mount higher to be safe. I was pretty proud of these adapters I made, even though they don't look all that impressive! The tube was too thick to put a DIY bead in, so I welded a bead around it. Seems to be sealing good so far. As I mentioned the waterpump uses PWM, which basically means cycling between off and on. For DC motors that is a better approach then say trying to control the RPM with varying voltage. Because of this I was concerned my heater core would not see a consistent flow of hot water through it, and consequently may lead to inconsistent heat flowing out of the blower. Probably wouldn't have mattered, but I am a bit anal by nature so I decided to account for it. I installed the booster pump shown in the previous post, and added an Arduino UNO to control it. I tapped into the potentiometer wire from the heater valve, and the more you turn the heat knob up the more the booster pump flows. This also seems to be working well. Can you provide more detail on the booster pump for the electrically impaired (IMG:style_emoticons/default/blink.gif) (IMG:style_emoticons/default/biggrin.gif) |
|
|
|
| FL000 |
Oct 22 2019, 09:44 PM
Post
#5
|
|
Member Group: Members Posts: 481 Joined: 31-January 12 From: Lancaster, CA Member No.: 14,076 Region Association: Southern California |
I know these cars are small, and was reminded of that many times on this project trying to add all the components, running wire and keeping it out of sight. I know there is not much room under and behind the seats, but turns out it was one of my better options. I didn't want to overload my fuse panel, so I added a power distribution block for positive and negative cables runs under the seat. Leaves some room for growth too (no idea whatelse I made decide to add).
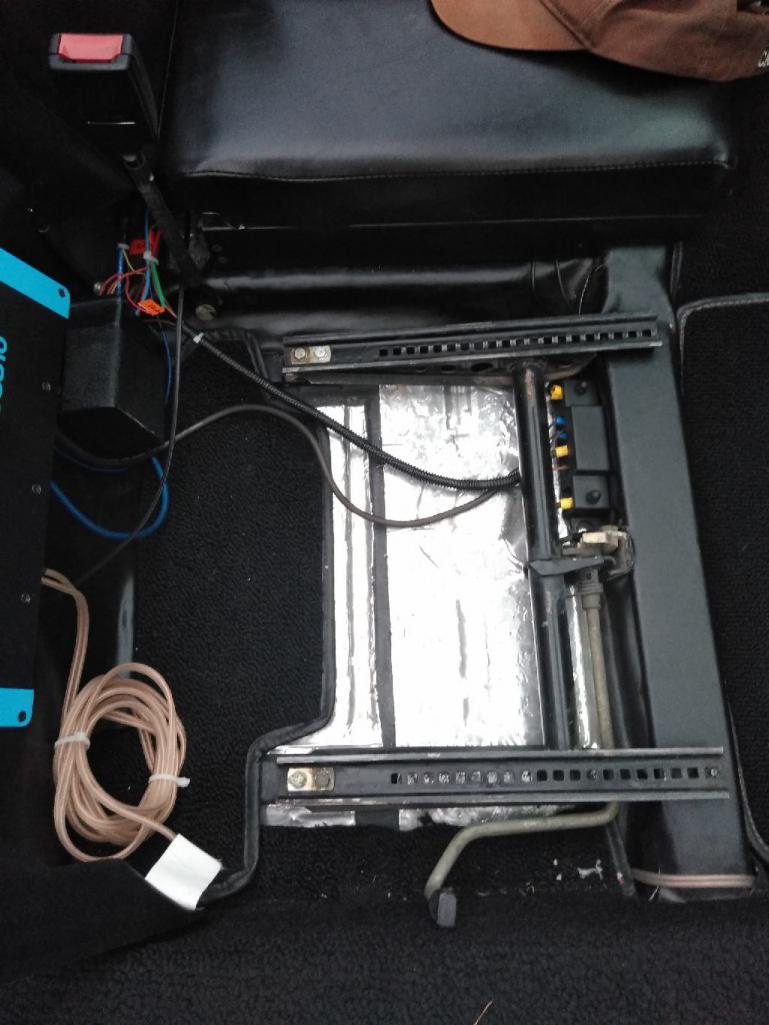 (Above) The small black box under the bass box houses my Arduino, a motor shield, and a few other components for the booster pump control. 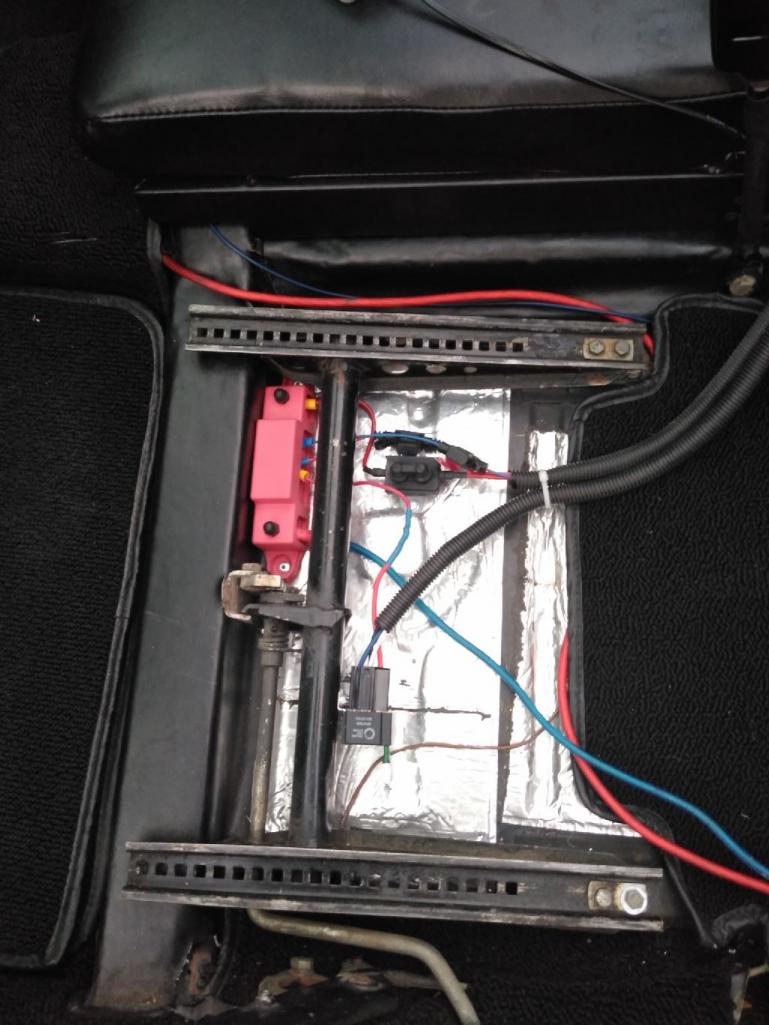 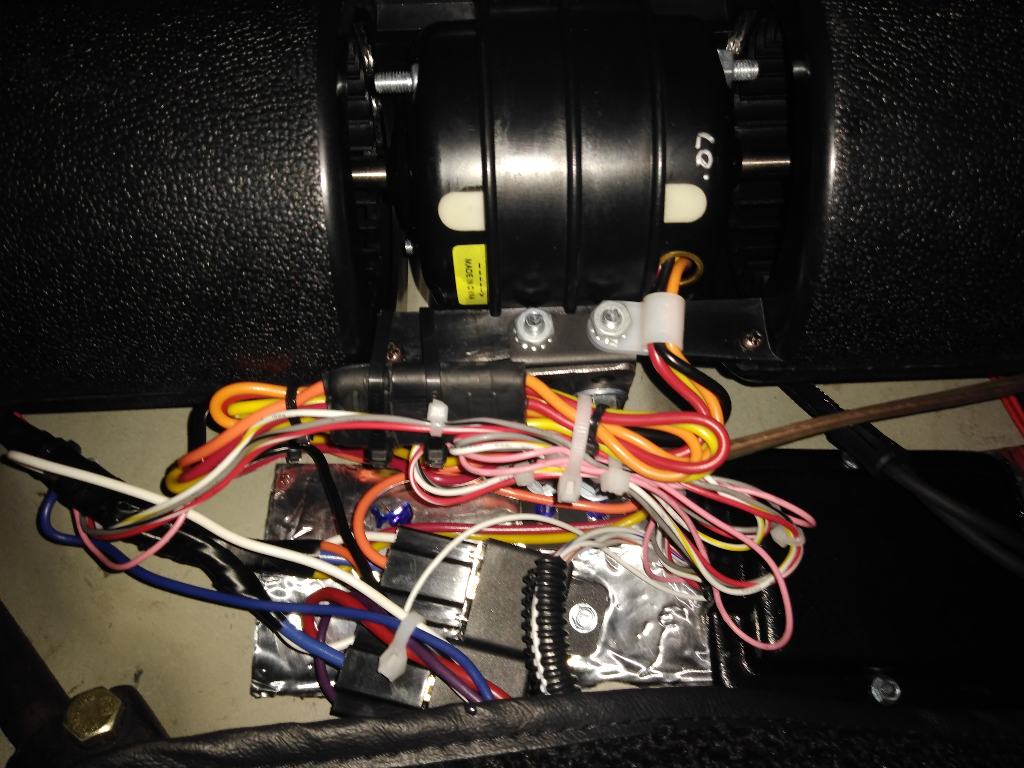 (Above) Wires for blower tucked up out of the way behind it. |
|
|
|
| FL000 |
Oct 22 2019, 10:03 PM
Post
#6
|
|
Member Group: Members Posts: 481 Joined: 31-January 12 From: Lancaster, CA Member No.: 14,076 Region Association: Southern California |
[quote name='djway' date='Oct 22 2019, 08:38 PM' post='2756568']
[/quote] Can you provide more detail on the booster pump for the electrically impaired (IMG:style_emoticons/default/blink.gif) (IMG:style_emoticons/default/biggrin.gif) [/quote] Something tells me I butchered the quote... Sure, I'll try. In a car with a mechanical water pump there is constant pressure in the coolant system, including the heater lines. When you adjust your heat setting in tbe cabin it is typically opening a valve on the heater hose to allow coolant to flow through your heater core. With my water pump using pulse wave modulation, it may be on for 10 seconds, off for 20, on for 10, off for 20 and so on. So if I turn my heater to full hot, which opens the valve completely, it would not gauruntee that water was constantly flowing through my heater core. So the little booster pump I have is a simple 12 volt pump that flows about 4-5 gallons per minute at max capacity. It works independent of the water pump, and is controlled by the heat setting on the blower unit in the cabin. Turns out I also use PWM to control the booster pump, but don't worry about that for now! Just know that when I select max heat the booster pump flows to it's max capacity, and as you lower the heat it slows down. Hope that helps (IMG:style_emoticons/default/beerchug.gif) |
|
|
|
| FL000 |
Oct 22 2019, 10:19 PM
Post
#7
|
|
Member Group: Members Posts: 481 Joined: 31-January 12 From: Lancaster, CA Member No.: 14,076 Region Association: Southern California |
Yep, I butchered the quote. Hopefully will live and learn as this progresses.
The heater is just in time for winter use, so a/c will be done before next summer. I usually completely underestimate how much work all this will be, but the a/c shouldn't be bad. I'll need to build a custom compressor mount (nothing fancy), then acquire the parts: compressor, lines, evaporator, a few odds and ends. I had the forethought to prerun the wires needed for the trinary switch and clutch, so that should save some time. I would also like to attempt the Audi 01E trans install next year. Here is what my rebuilt unit looks like. I had 100 mm axle stubs installed to match up with my Renegade axles. 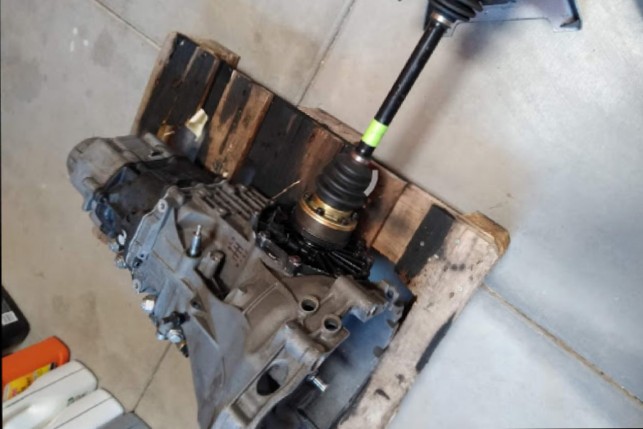 The challenges for me will be building the trans mounts, and the cable shifter linkage. I plan to use a Boxster S shifter and cables. I will definitely be asking for help when I get there. |
|
|
|
| Andyrew |
Oct 22 2019, 11:16 PM
Post
#8
|
|
Spooling.... Please wait Group: Members Posts: 13,380 Joined: 20-January 03 From: Riverbank, Ca Member No.: 172 Region Association: Northern California |
Love everything about this! Good choice on the pump. (IMG:style_emoticons/default/biggrin.gif)
|
|
|
|
| FL000 |
Oct 23 2019, 04:53 PM
Post
#9
|
|
Member Group: Members Posts: 481 Joined: 31-January 12 From: Lancaster, CA Member No.: 14,076 Region Association: Southern California |
QUOTE(Andyrew @ Oct 22 2019, 10:16 PM) Thanks Andrew - I am pretty sure I got the water pump idea from you (IMG:style_emoticons/default/beerchug.gif) |
|
|
|
| Gearup |
Oct 24 2019, 04:23 PM
Post
#10
|
|
Member Group: Members Posts: 165 Joined: 21-April 15 From: Denver Member No.: 18,660 Region Association: None |
Removed
|
|
|
|
| djway |
Oct 26 2019, 12:08 AM
Post
#11
|
|
Senior Member Group: Members Posts: 787 Joined: 16-October 15 From: Riverside Member No.: 19,266 Region Association: Southern California |
Thanks for the information.
Another question, can you get the hot water from up front near the radiator? |
|
|
|
| jim_hoyland |
Oct 26 2019, 06:44 AM
Post
#12
|
|
Get that VIN ? Group: Members Posts: 10,085 Joined: 1-May 03 From: Sunset Beach, CA Member No.: 643 Region Association: Southern California |
Thanks for sharing, interesting to see your innovation; and, it was great seeing your car at the WCR in Monrovia. That is one cool car (IMG:style_emoticons/default/smile.gif)
|
|
|
|
| FL000 |
Oct 26 2019, 12:38 PM
Post
#13
|
|
Member Group: Members Posts: 481 Joined: 31-January 12 From: Lancaster, CA Member No.: 14,076 Region Association: Southern California |
QUOTE(djway @ Oct 25 2019, 11:08 PM) Thanks for the information. Another question, can you get the hot water from up front near the radiator? I would have rather tapped into the water lines up front but chose not to for a couple reasons. In the frunk area I felt like it would clutter it up too much with the lines, valve, and booster pump. I also didn't want to cut into that area unless I had to. If I had pre-planned this before I did the bodywork and paint I probably would have went that route. It would have been great if I could have tapped in under the car near the steering rack, but space was an issue again. I plan to add a hydraulic clutch m/c soon and need to save some room in that area. |
|
|
|
| FL000 |
Oct 26 2019, 12:43 PM
Post
#14
|
|
Member Group: Members Posts: 481 Joined: 31-January 12 From: Lancaster, CA Member No.: 14,076 Region Association: Southern California |
QUOTE(jim_hoyland @ Oct 26 2019, 05:44 AM) Thanks for sharing, interesting to see your innovation; and, it was great seeing your car at the WCR in Monrovia. That is one cool car (IMG:style_emoticons/default/smile.gif) Thanks Jim, it was great meeting you at WCR this year; I dig your car too! |
|
|
|
| jb6000 |
Oct 27 2019, 09:27 AM
Post
#15
|
|
Member Group: Members Posts: 52 Joined: 15-September 18 From: Ca Member No.: 22,486 Region Association: None |
I am not too far from you and have a sbc 914 project.
I have a OE1 and a Boxster S trans. I just bought the Renegade trans mount for the Boxster Trans. |
|
|
|
| FL000 |
Oct 27 2019, 09:01 PM
Post
#16
|
|
Member Group: Members Posts: 481 Joined: 31-January 12 From: Lancaster, CA Member No.: 14,076 Region Association: Southern California |
QUOTE(jb6000 @ Oct 27 2019, 08:27 AM) I am not too far from you and have a sbc 914 project. I have a OE1 and a Boxster S trans. I just bought the Renegade trans mount for the Boxster Trans. I have been following you build, looks like a good project! Luckily you are ahead of me on the trans so I am sure I will learn some useful things from you. |
|
|
|
| FL000 |
Mar 29 2020, 09:49 PM
Post
#17
|
|
Member Group: Members Posts: 481 Joined: 31-January 12 From: Lancaster, CA Member No.: 14,076 Region Association: Southern California |
Heat worked great this winter and I got to drive a bunch more than last year. Finally got started on the air conditioning this weekend. These are some of the parts I have to work with:
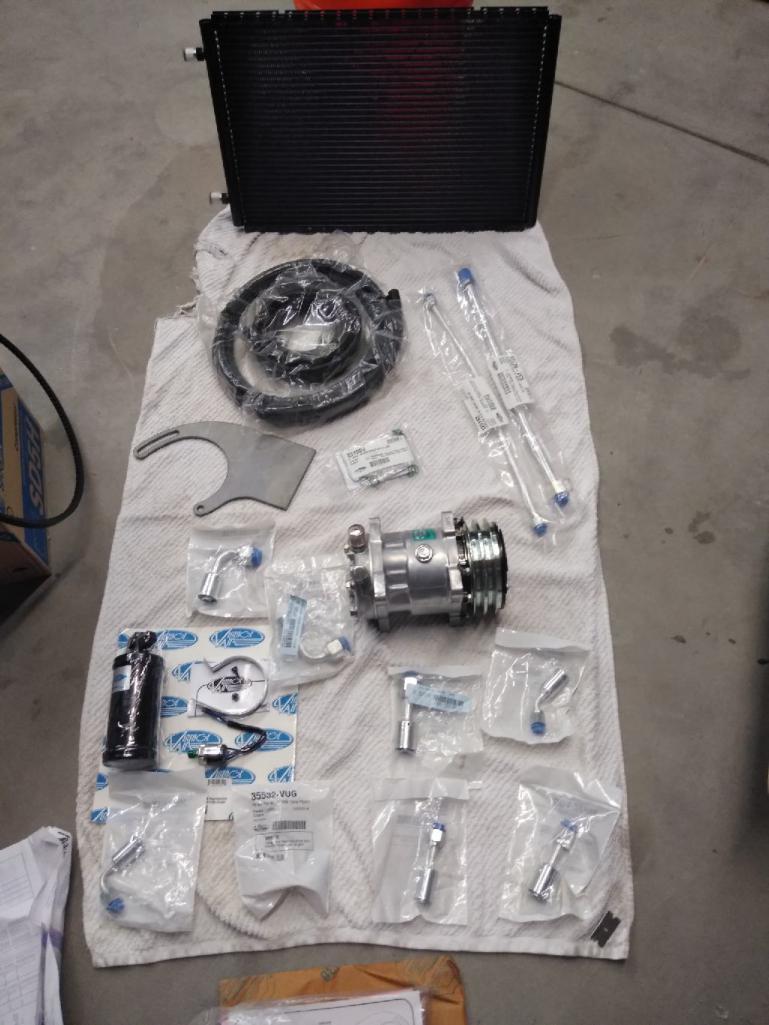 My Renegade setup has the double v-belt crank pulley to drive the alternator and water pump. Both grooves are for 13/32" belts. The AC compressor I got has a (double) v-belt groove pulley made for 17/32" belts. I researched sizes the best I could and decided a 13/32" belt should work. Was happy to see it doesn't bottom out in the groove.  |
|
|
|
| FL000 |
Mar 29 2020, 10:08 PM
Post
#18
|
|
Member Group: Members Posts: 481 Joined: 31-January 12 From: Lancaster, CA Member No.: 14,076 Region Association: Southern California |
I made a template for my brackets, fit looked good, made the cuts and mounted the compressor. Was happy with the placement and then decided to put on an old belt to see what size I may need... the shift rod was in the way (IMG:style_emoticons/default/blink.gif). It's always something right?
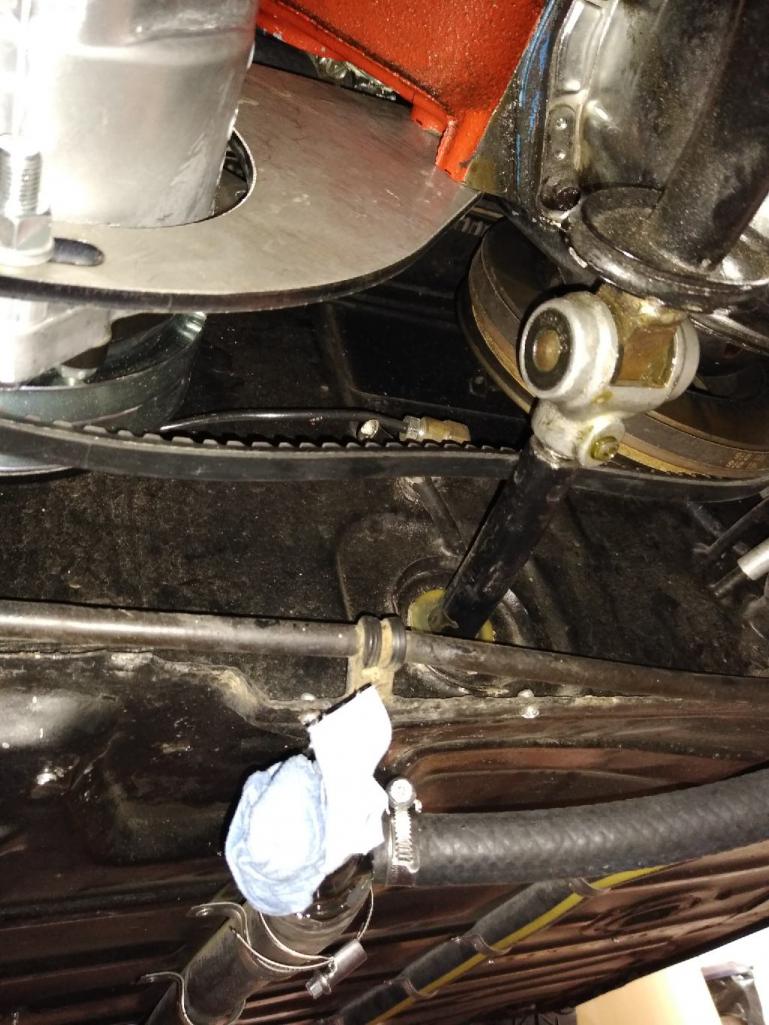 All was not lost since I had another bracket, and one will be cut down substantially for the rear brace. Second attempt made everything fit well, and the compromise was moving the compressor closer to the header pipe than I would have chosen. There is a few inches clearance so I am going to call that good; time will tell. 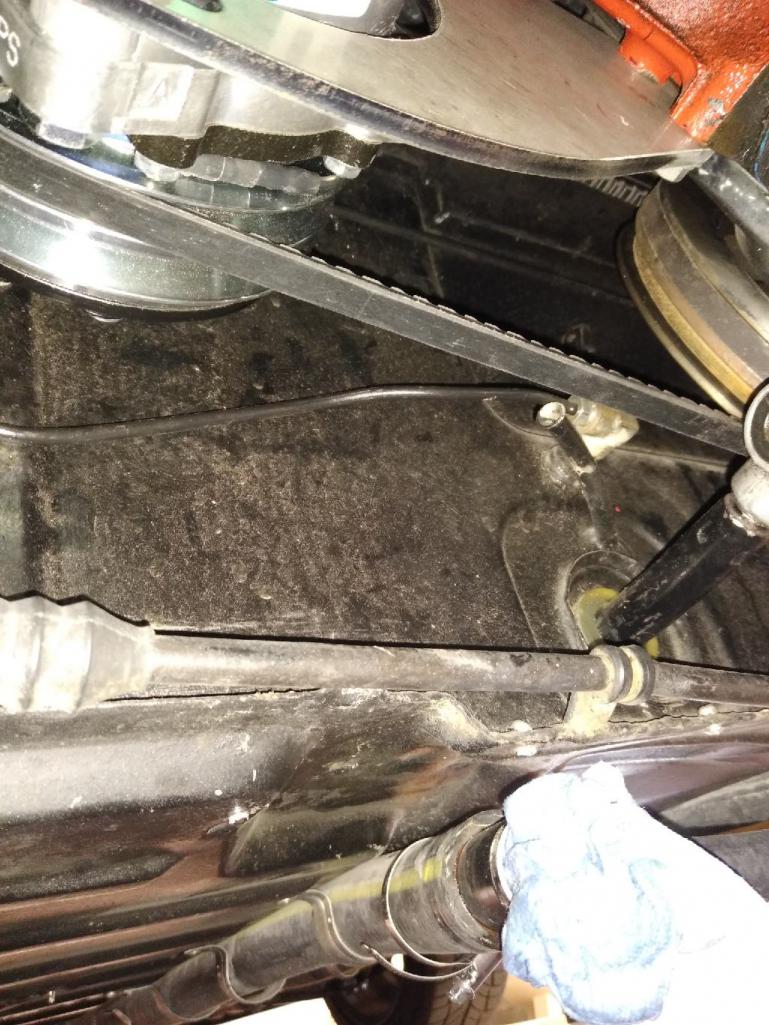 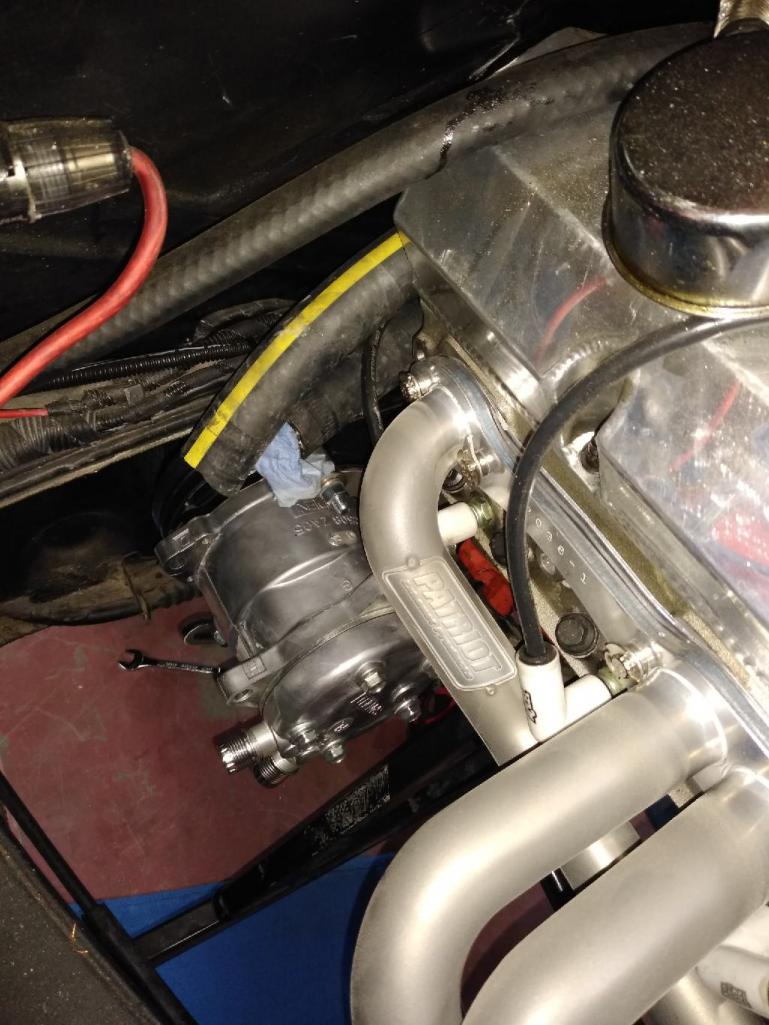 |
|
|
|
| Mueller |
Mar 29 2020, 11:06 PM
Post
#19
|
|
914 Freak! Group: Members Posts: 17,155 Joined: 4-January 03 From: Antioch, CA Member No.: 87 Region Association: None |
Looks like a fun project, will be watching for sure.
|
|
|
|
| Daryl32 |
Mar 29 2020, 11:16 PM
Post
#20
|
|
Member Group: Members Posts: 133 Joined: 14-January 20 From: Southern California Member No.: 23,827 Region Association: Southern California |
Very COOL!!
I got John to go with the Davis Craig system also for his 350 swap. 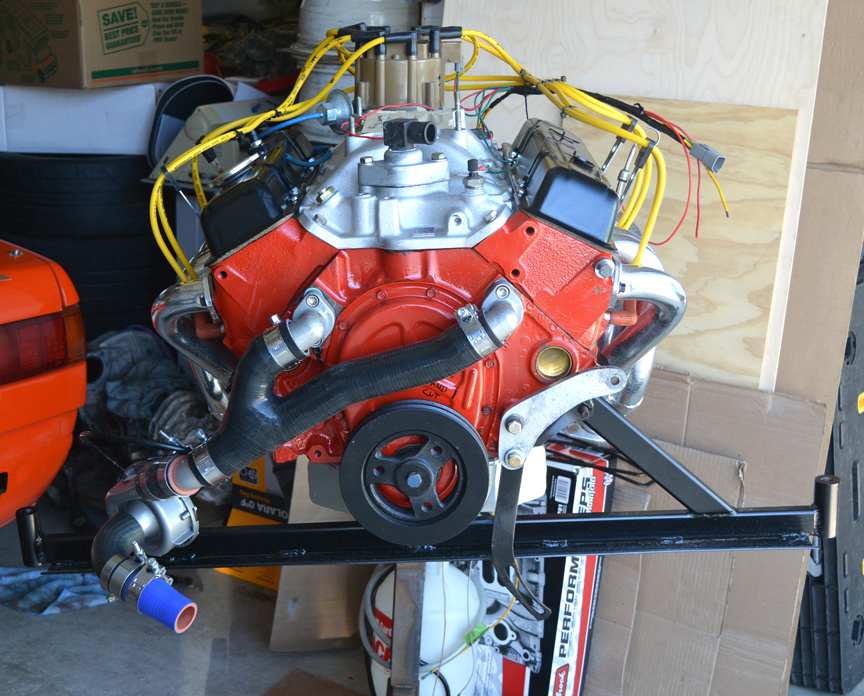 |
|
|
|
|
1 User(s) are reading this topic (1 Guests and 0 Anonymous Users)
0 Members:

|
Lo-Fi Version | Time is now: 16th June 2026 - 09:59 PM |
Invision Power Board
v9.1.4 © 2026 IPS, Inc.