|
|
|
Porsche, and the Porsche crest are registered trademarks of Dr. Ing. h.c. F. Porsche AG.
This site is not affiliated with Porsche in any way. Its only purpose is to provide an online forum for car enthusiasts. All other trademarks are property of their respective owners. |
|
|

  |

| FL000 |
 Aug 19 2020, 04:44 PM Aug 19 2020, 04:44 PM
Post
#41
|
|
Member  Group: Members Posts: 442 Joined: 31-January 12 From: Lancaster, CA Member No.: 14,076 Region Association: Southern California |
Next up is installing the Brad Mayeur 914LTD Long kit to fix my passenger door gap. It has been very hot here the past couple weeks (in the desert, go figure) so work is going slower than I would like. So far I removed the door sill supports and the jack points and rough fitted the stiffners in place.
Getting to this point wasn't too bad but the jack points proved to be a delicate operation. With the Sheridan kit (soon to be known as 914rubber kit?!) in place, I had limited access to remove them. An extended reach disk grinder, a die grinder, and sawsall made it happen. A small blemish here or there but in general I didn't butcher anything too bad. (IMG:style_emoticons/default/lol-2.gif) 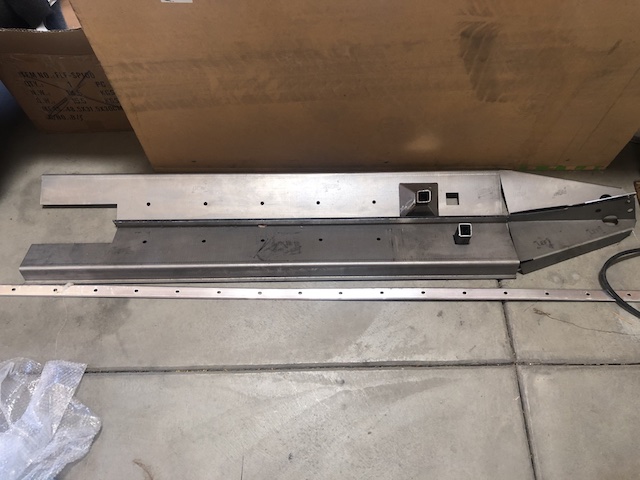 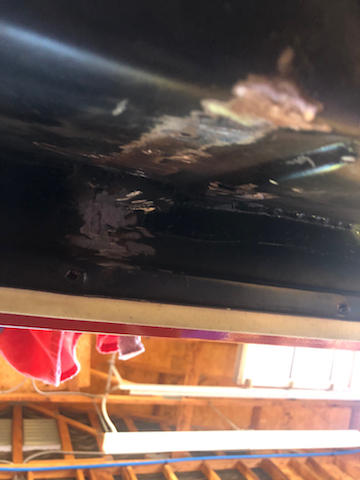 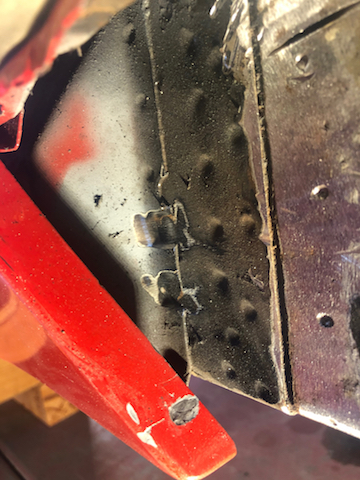 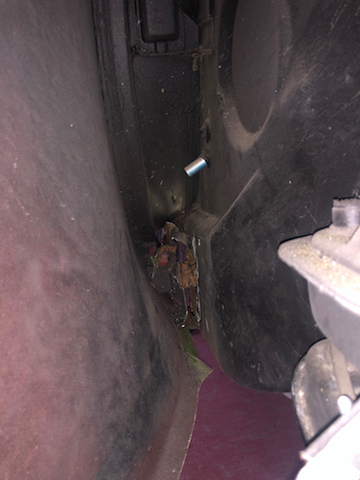 |
   |

 
|
| FL000 |
Aug 19 2020, 04:49 PM
Post
#42
|
|
Member Group: Members Posts: 442 Joined: 31-January 12 From: Lancaster, CA Member No.: 14,076 Region Association: Southern California |
I know many of you have installed these before. The instructions read fairly straight forward, but I am wondering if I need to allow the gap to be a smidgeon large when welding it in so the gap settles to the right amount when the full weight is back on the wheels? I don't want to overthink it, but this seems like a case where I only get one shot to make it right.
|
|
|
|
| 914forme |
Aug 19 2020, 06:19 PM
Post
#43
|
|
Times a wastin', get wrenchin'! Group: Members Posts: 3,896 Joined: 24-July 04 From: Dayton, Ohio Member No.: 2,388 Region Association: None |
Okay this is how I did it on my auto-X car.
I supported the middle let both ends droop. That opened up the gap, I then took my Porta Power and used it to get the gaps where I wanted them. One end up on the Roll bar, top off, and the other in the foot well. Had a board down there to spread the load. And just pumped it until I got the gap I wanted. I went to harbor freight and bought the biggest C-clamps they had, I used three of them per log. Screws on the outside will clear the threshold and get back under to hold the log in place. Clamp it to and take your time on the welding, I also did the engmann kit at the same time, now Maddoog makes them. Hope that helps |
|
|
|
| 76-914 |
Aug 19 2020, 07:08 PM
Post
#44
|
|
Repeat Offender & Resident Subaru Antagonist Group: Members Posts: 13,693 Joined: 23-January 09 From: Temecula, CA Member No.: 9,964 Region Association: Southern California |
QUOTE(FL 000 @ Aug 19 2020, 02:42 PM)  Been a few months since I have done much work but I have been having fun driving! A/C seems to be working well but may need a few more tweaks down the road. Went on a long road trip last month and the cab got heat soaked; AC was still blowing cold but it was getting hot inside. If anyone has any ideas I am open ears, and I am thinking a couple of things may help: 1) I need to make a panel to seal off the opening between my radiator and forward bulkhead in front of the gas tank so the hot air only escapes through the cutouts by the tires. Relying on my fiberglass hood to do that job isn't working well, especially at speed when the increased pressure is pushing the hood up. 2) Additional thermo mat in the cab couldn't hurt. I have a decent amount on the floors, the front/rear firewall, and inside the doors. I forgot to put some under the targa top. Oh yes. BTDT. In my case the tank would get so hot that the gas, being pre-heated, would vapor lock after 45 minutes or so unless it was cold outside. I chased it for months before realizing I had created the problem. I ran 4500 miles w/o a problem until I changed radiators in anticipation of a future AC install. And along with the larger radiator I increase the opening in the grille thus violating the 20% rule which I had adhered to during the original conversion. My intake allowed too much air into the trunk and the excess would escape over the gas tank and into the cabin. What seems like heat soak in the cabin happens when the heated air from the radiator is passing over a tank full of hot gasoline. You'll need to balance that out by increasing your fender well outlets or ducting your intake air out the fender wells. If increasing the fender well cutouts doesn't work you need to get a pressure differential gage to check that the there is negative side (the area where the wheels are) and a positive area in the trunk. I've read comments about flares interfering with this but cannot confirm as there just isn't much reliable info out there. I can say that every conversion I've been in has some "overflow" of warm air into the cabin. If you duct and it is sealed you will have 0% overflow. This was the best thing I ever did to mine. The AC was the 2nd best improvement. I choose aluminum because I had a little experience with it and all the tools to do so. Otherwise, I might have chosen some flexible AC/Heat duct or canvas. Canvas being the more durable of the two and less likely to tear. (IMG:style_emoticons/default/beerchug.gif) |
|
|
|
| FL000 |
Aug 20 2020, 05:55 PM
Post
#45
|
|
Member Group: Members Posts: 442 Joined: 31-January 12 From: Lancaster, CA Member No.: 14,076 Region Association: Southern California |
QUOTE(914forme @ Aug 19 2020, 05:19 PM) Okay this is how I did it on my auto-X car. I supported the middle let both ends droop. That opened up the gap, I then took my Porta Power and used it to get the gaps where I wanted them. One end up on the Roll bar, top off, and the other in the foot well. Had a board down there to spread the load. And just pumped it until I got the gap I wanted. I went to harbor freight and bought the biggest C-clamps they had, I used three of them per log. Screws on the outside will clear the threshold and get back under to hold the log in place. Clamp it to and take your time on the welding, I also did the engmann kit at the same time, now Maddoog makes them. Hope that helps Thanks for the additional info Stephen. Based on your method it sounds like I don't need to account for additional movement once I go from having it supported in the air to back on the wheels. My gap opens to the desired amount just by jacking up the side of the car, so I will support it in the middle (front and rear) and use a jack or stand under the trans to maintain the gap. Just picked up 3 huge C-clamps and an F-clamp to boot so hopefully I can move to the next step soon. |
|
|
|
| FL000 |
Aug 20 2020, 06:44 PM
Post
#46
|
|
Member Group: Members Posts: 442 Joined: 31-January 12 From: Lancaster, CA Member No.: 14,076 Region Association: Southern California |
QUOTE(76-914 @ Aug 19 2020, 06:08 PM) QUOTE(FL 000 @ Aug 19 2020, 02:42 PM) Been a few months since I have done much work but I have been having fun driving! A/C seems to be working well but may need a few more tweaks down the road. Went on a long road trip last month and the cab got heat soaked; AC was still blowing cold but it was getting hot inside. If anyone has any ideas I am open ears, and I am thinking a couple of things may help: 1) I need to make a panel to seal off the opening between my radiator and forward bulkhead in front of the gas tank so the hot air only escapes through the cutouts by the tires. Relying on my fiberglass hood to do that job isn't working well, especially at speed when the increased pressure is pushing the hood up. 2) Additional thermo mat in the cab couldn't hurt. I have a decent amount on the floors, the front/rear firewall, and inside the doors. I forgot to put some under the targa top. Oh yes. BTDT. In my case the tank would get so hot that the gas, being pre-heated, would vapor lock after 45 minutes or so unless it was cold outside. I chased it for months before realizing I had created the problem. I ran 4500 miles w/o a problem until I changed radiators in anticipation of a future AC install. And along with the larger radiator I increase the opening in the grille thus violating the 20% rule which I had adhered to during the original conversion. My intake allowed too much air into the trunk and the excess would escape over the gas tank and into the cabin. What seems like heat soak in the cabin happens when the heated air from the radiator is passing over a tank full of hot gasoline. You'll need to balance that out by increasing your fender well outlets or ducting your intake air out the fender wells. If increasing the fender well cutouts doesn't work you need to get a pressure differential gage to check that the there is negative side (the area where the wheels are) and a positive area in the trunk. I've read comments about flares interfering with this but cannot confirm as there just isn't much reliable info out there. I can say that every conversion I've been in has some "overflow" of warm air into the cabin. If you duct and it is sealed you will have 0% overflow. This was the best thing I ever did to mine. The AC was the 2nd best improvement. I choose aluminum because I had a little experience with it and all the tools to do so. Otherwise, I might have chosen some flexible AC/Heat duct or canvas. Canvas being the more durable of the two and less likely to tear. (IMG:style_emoticons/default/beerchug.gif) Alright, Kent I think I have some work to do. Luckily I have not had a problem with vapor lock to date. I hadn't thought about measuring the pressure differential and that could potentially be a fun project. With all the body work done I will try the duct option first and see if that makes any improvements. Summer is getting close to over so maybe by next year I can fit that into the list of things to do! |
|
|
|
| 914forme |
Aug 20 2020, 06:48 PM
Post
#47
|
|
Times a wastin', get wrenchin'! Group: Members Posts: 3,896 Joined: 24-July 04 From: Dayton, Ohio Member No.: 2,388 Region Association: None |
Make sure you measure everything, and they stay there once you jack it and support it. This is a measure 20 times, do a small weld, and hen take more measurements.
|
|
|
|
| theer |
Aug 20 2020, 08:24 PM
Post
#48
|
|
Senior Member Group: Members Posts: 691 Joined: 31-July 15 From: Dover, MA Member No.: 19,014 Region Association: North East States |
QUOTE(76-914 @ Aug 19 2020, 09:08 PM) QUOTE(FL 000 @ Aug 19 2020, 02:42 PM) Been a few months since I have done much work but I have been having fun driving! A/C seems to be working well but may need a few more tweaks down the road. Went on a long road trip last month and the cab got heat soaked; AC was still blowing cold but it was getting hot inside. If anyone has any ideas I am open ears, and I am thinking a couple of things may help: 1) I need to make a panel to seal off the opening between my radiator and forward bulkhead in front of the gas tank so the hot air only escapes through the cutouts by the tires. Relying on my fiberglass hood to do that job isn't working well, especially at speed when the increased pressure is pushing the hood up. 2) Additional thermo mat in the cab couldn't hurt. I have a decent amount on the floors, the front/rear firewall, and inside the doors. I forgot to put some under the targa top. Oh yes. BTDT. In my case the tank would get so hot that the gas, being pre-heated, would vapor lock after 45 minutes or so unless it was cold outside. I chased it for months before realizing I had created the problem. I ran 4500 miles w/o a problem until I changed radiators in anticipation of a future AC install. And along with the larger radiator I increase the opening in the grille thus violating the 20% rule which I had adhered to during the original conversion. My intake allowed too much air into the trunk and the excess would escape over the gas tank and into the cabin. What seems like heat soak in the cabin happens when the heated air from the radiator is passing over a tank full of hot gasoline. You'll need to balance that out by increasing your fender well outlets or ducting your intake air out the fender wells. If increasing the fender well cutouts doesn't work you need to get a pressure differential gage to check that the there is negative side (the area where the wheels are) and a positive area in the trunk. I've read comments about flares interfering with this but cannot confirm as there just isn't much reliable info out there. I can say that every conversion I've been in has some "overflow" of warm air into the cabin. If you duct and it is sealed you will have 0% overflow. This was the best thing I ever did to mine. The AC was the 2nd best improvement. I choose aluminum because I had a little experience with it and all the tools to do so. Otherwise, I might have chosen some flexible AC/Heat duct or canvas. Canvas being the more durable of the two and less likely to tear. (IMG:style_emoticons/default/beerchug.gif) (IMG:style_emoticons/default/agree.gif) I have the same issue on my Subie conversion. The bulkhead seal makes a big difference, if you can get it to seal. Also, make sure to close off all the original heat/fresh air holes. That’s how the hot air is getting in the cabin. I saw that You currently have an AC hose coming in through one, so that might be tricky. If you’ve taken out the original fresh air blower and diverter valves, you’ll have eight openings to block off- 4 on each side: a round opening by the fender wall where the hot air came from the stock motor; above it a smaller round hole for the side dash vents; oval hole where the diverter valves were mounted; And, the defroster openings. Maddog makes a kit to seal off all the openings except the defrosters. Without the air box installed, outside air will come though the cowl grill and into the cabin through all those, and any other, openings. I was surprised how much air gets in, even with the roof on and windows closed. |
|
|
|
| 76-914 |
Aug 20 2020, 09:24 PM
Post
#49
|
|
Repeat Offender & Resident Subaru Antagonist Group: Members Posts: 13,693 Joined: 23-January 09 From: Temecula, CA Member No.: 9,964 Region Association: Southern California |
I my case blocking off all holes didn’t help much. My tank was too hot to touch with my bare hand for more than a few seconds. It radiated heat to the firewall itself. The firewall was hot to the touch as well. If your going to duck it then don’t worry about checking pressure differential. Ducking will eliminate the problem entirely. (IMG:style_emoticons/default/beerchug.gif)
|
|
|
|
| FL000 |
Aug 29 2020, 02:31 PM
Post
#50
|
|
Member Group: Members Posts: 442 Joined: 31-January 12 From: Lancaster, CA Member No.: 14,076 Region Association: Southern California |
Appreciate the comments on how to keep the hot air out of the cabin. I am going to make sure all the original holes for the heater are sealed (have the block off kit installed but may have missed some). I’ll also duct it to force the air out the wheel well vents.
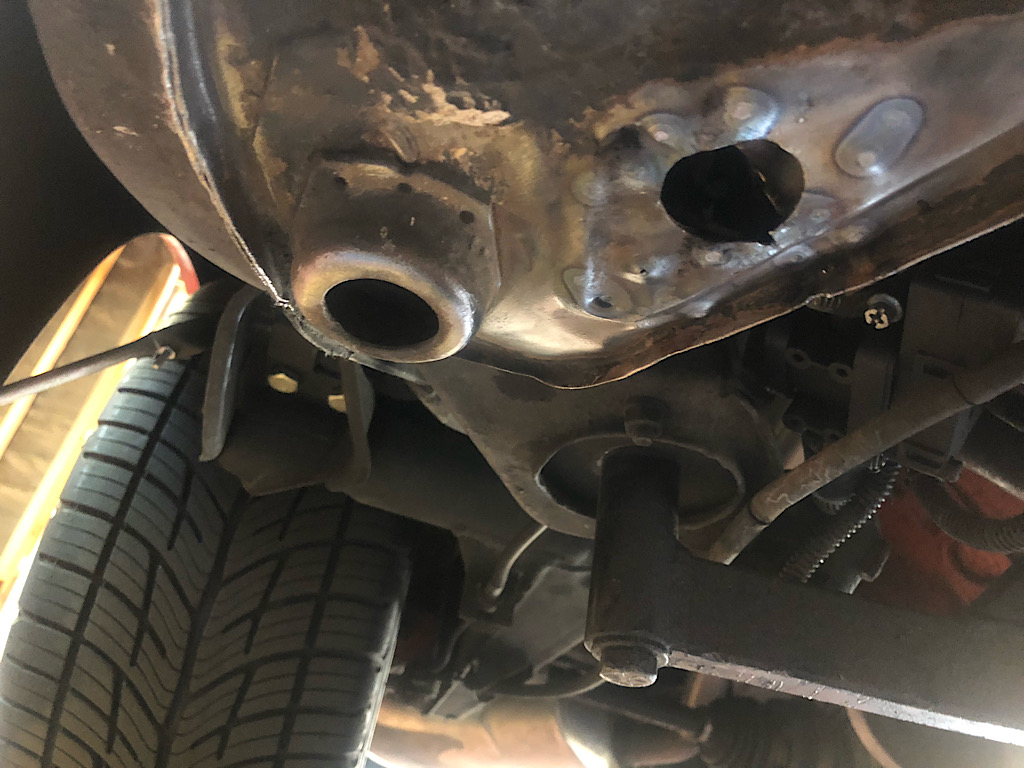
Back to the long support and question on this brace that supports the jack donut. I have a little ‘while I’m in there’ on my mind and thinking I might as well straighten it out if it isn’t too difficult. Is it just some spot welds around the perimeter or does the donut need to come off separate? I figure it will be easier to straighten out if it is removed. Thoughts? Maybe I should just leave it alone and press... 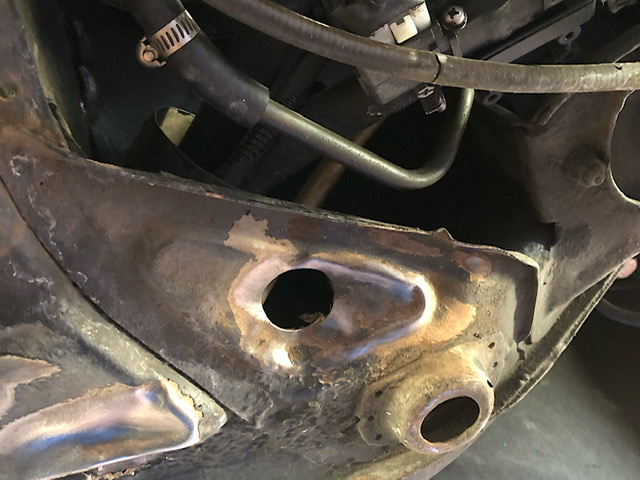 |
|
|
|
| 76-914 |
Aug 29 2020, 04:25 PM
Post
#51
|
|
Repeat Offender & Resident Subaru Antagonist Group: Members Posts: 13,693 Joined: 23-January 09 From: Temecula, CA Member No.: 9,964 Region Association: Southern California |
Looks like the edge of the brace won't move much further. Maybe saw cut it leaving the spot welds in place. After the gap issue is resolved go back and seam weld the brace. (IMG:style_emoticons/default/beerchug.gif)
|
|
|
|
| dakotaewing |
Aug 29 2020, 07:01 PM
Post
#52
|
|
Senior Member Group: Members Posts: 1,163 Joined: 8-July 03 From: DeSoto, Tx Member No.: 897 Region Association: Southwest Region |
When I added the Mayer kit for my car I bought a drill press and Quadrupled the number of holes for the roset welds. Consider having smaller C-clamps for the bottom crimp welds.
I have a bunch of pics on the install in my build page. And be advised that these will affect the fit of the rockers - more than a little bit... |
|
|
|
| tygaboy |
Aug 29 2020, 07:42 PM
Post
#53
|
|
914 Guru Group: Members Posts: 5,540 Joined: 6-October 15 From: Petaluma, CA Member No.: 19,241 Region Association: Northern California |
QUOTE(dakotaewing @ Aug 29 2020, 06:01 PM) When I added the Mayer kit for my car I bought a drill press and Quadrupled the number of holes for the roset welds. Consider having smaller C-clamps for the bottom crimp welds. I have a bunch of pics on the install in my build page. And be advised that these will affect the fit of the rockers - more than a little bit... (IMG:style_emoticons/default/agree.gif) I had prepped a Mayer kit for my build and did the same thing. I ended up going a different way but did like the idea of more attachment points. Just remember that the only place the part contacts the long is on the long's raised ribs - unless you add a filler plate to close that gap. |
|
|
|
| Matty900 |
Aug 30 2020, 10:01 PM
Post
#54
|
|
Senior Member Group: Members Posts: 1,290 Joined: 21-February 15 From: Oregon Member No.: 18,454 Region Association: Pacific Northwest |
QUOTE(FL 000 @ Aug 19 2020, 02:42 PM) Been a few months since I have done much work but I have been having fun driving! A/C seems to be working well but may need a few more tweaks down the road. Went on a long road trip last month and the cab got heat soaked; AC was still blowing cold but it was getting hot inside. If anyone has any ideas I am open ears, and I am thinking a couple of things may help: 1) I need to make a panel to seal off the opening between my radiator and forward bulkhead in front of the gas tank so the hot air only escapes through the cutouts by the tires. Relying on my fiberglass hood to do that job isn't working well, especially at speed when the increased pressure is pushing the hood up. 2) Additional thermo mat in the cab couldn't hurt. I have a decent amount on the floors, the front/rear firewall, and inside the doors. I forgot to put some under the targa top. I am starting to try and figure this out for my V8 car and I am curious about the hood and the pressure. I am thinking of having a decorative cover made for the firewall and gas tank and have some thermal protection added in it. Can you post some photos of the inside of the fiberglass hood and let me know where it is pushing up? |
|
|
|
| FL000 |
Aug 31 2020, 07:24 PM
Post
#55
|
|
Member Group: Members Posts: 442 Joined: 31-January 12 From: Lancaster, CA Member No.: 14,076 Region Association: Southern California |
QUOTE(Matty900 @ Aug 30 2020, 09:01 PM) I am starting to try and figure this out for my V8 car and I am curious about the hood and the pressure. I am thinking of having a decorative cover made for the firewall and gas tank and have some thermal protection added in it. Can you post some photos of the inside of the fiberglass hood and let me know where it is pushing up? Sure thing @Matty900 , I have noticed while driving around the pressure forces the air up over the bulkhead in front of the gas tank. Fiberglass never fits as well as the stock steel hood right? So I realized during reassembly after paint that the factory bulkhead seal was too tall. Nothing a little trimming couldn’t fix, but yours my fit better with that in mind. The channel running left/right is letting air through, and more at speed. 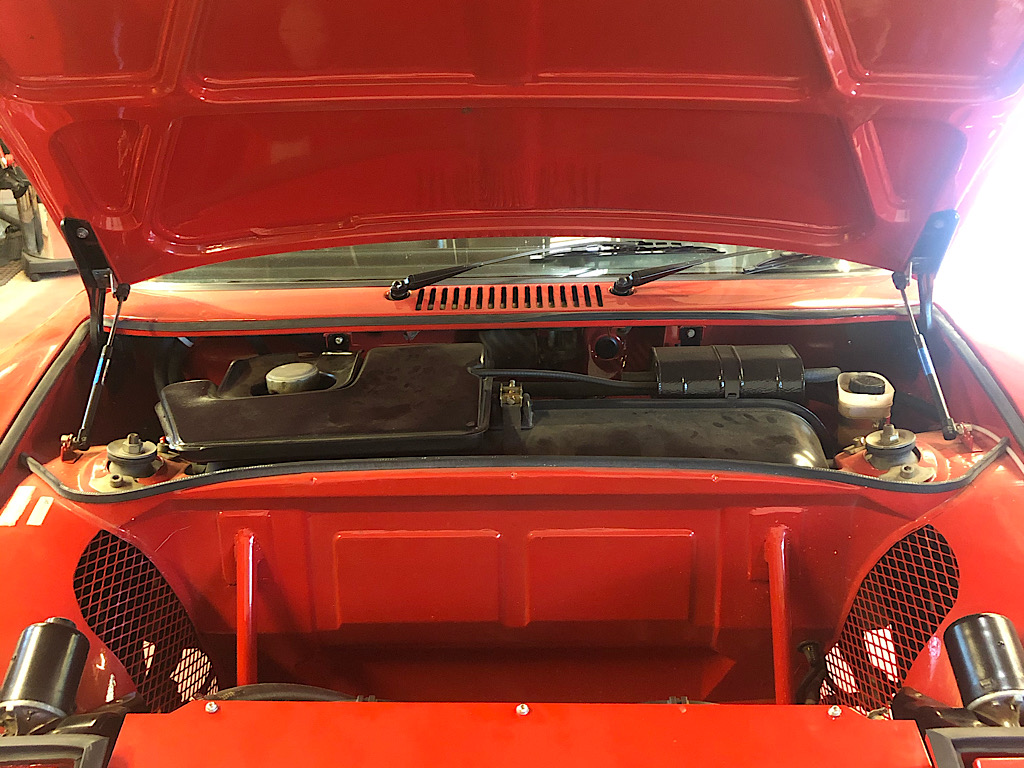 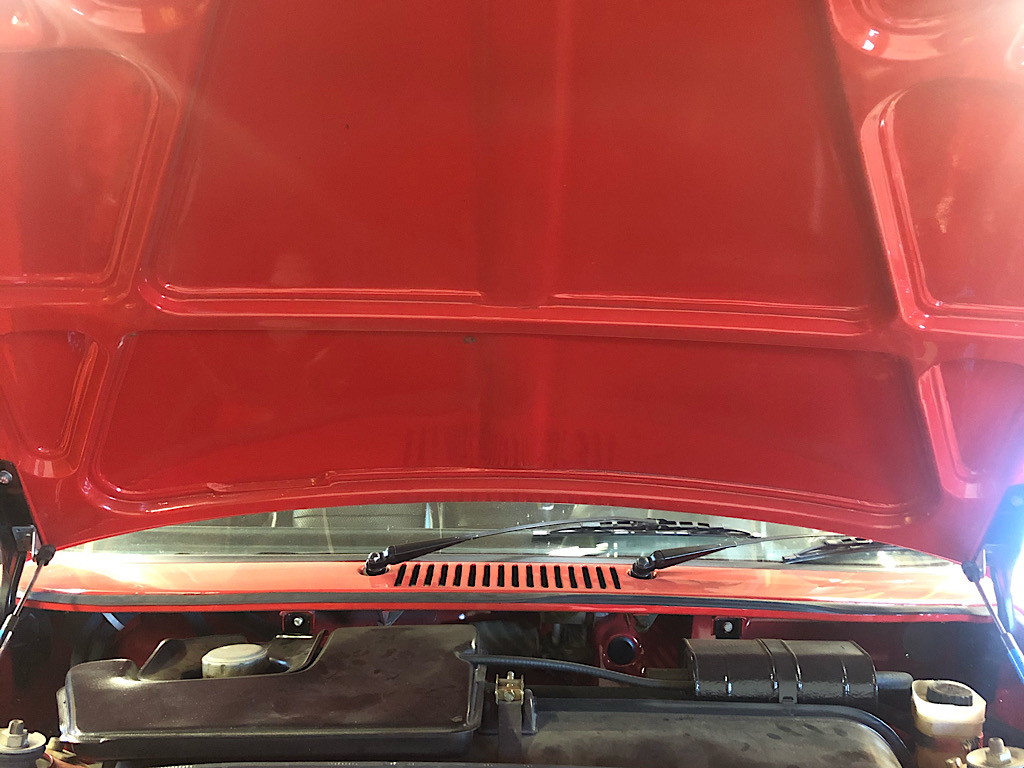 My plan is to seal off this top planform area best I can, and use a thermal blanket on the front of the bulkhead and underside of cover. 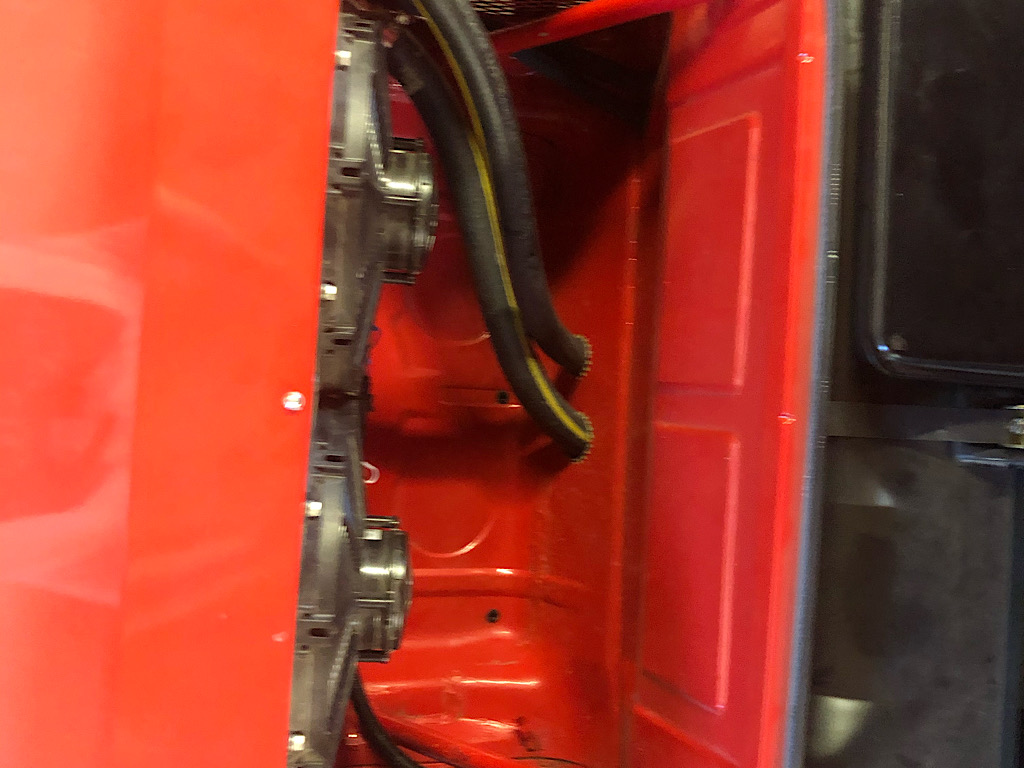 |
|
|
|
| Matty900 |
Sep 1 2020, 12:01 PM
Post
#56
|
|
Senior Member Group: Members Posts: 1,290 Joined: 21-February 15 From: Oregon Member No.: 18,454 Region Association: Pacific Northwest |
We got the 1st set of Carbon fiber parts done but realized that I need to get the GT hood pins. We are working on the balsa wood reinforcement that will go on these. The weight savings is drastic but don't think that I really need that with 400+ hp.
Attached thumbnail(s) 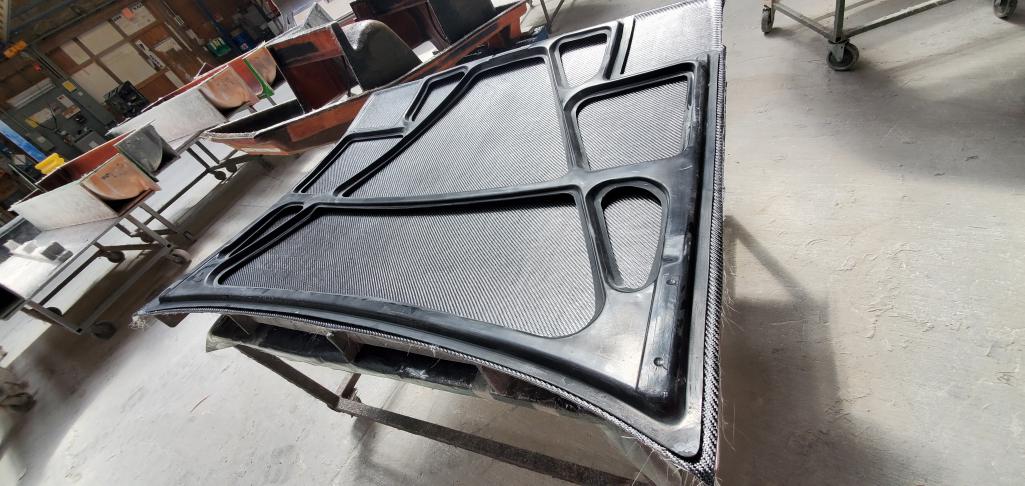
|
|
|
|
| FL000 |
Sep 6 2020, 01:21 PM
Post
#57
|
|
Member Group: Members Posts: 442 Joined: 31-January 12 From: Lancaster, CA Member No.: 14,076 Region Association: Southern California |
QUOTE(Matty900 @ Sep 1 2020, 11:01 AM) We got the 1st set of Carbon fiber parts done but realized that I need to get the GT hood pins. We are working on the balsa wood reinforcement that will go on these. The weight savings is drastic but don't think that I really need that with 400+ hp. Wow that sure looks nice. Would have to seriously consider leaving the underside as is it I had one of those. |
|
|
|
| FL000 |
Sep 6 2020, 01:39 PM
Post
#58
|
|
Member Group: Members Posts: 442 Joined: 31-January 12 From: Lancaster, CA Member No.: 14,076 Region Association: Southern California |
I signed up for the WCR in Nov so time to get some work done. I used my stud welder to try and pull the rear jack support piece back straight. Got it closer but ended up over pulling in a few areas that created raised dimples.
 Ended up removing it to hammer and dolly it. Didn’t take as long as I thought it would to remove. On a side note I was surprised how easy it was to straighten a number of areas on the floor pan using a hammer inside the car. I didn’t pay much attention to the underside when I went through the car the first time, but when I am done with this I think it will look pretty straight. A little surface rust underneath but nothing too bad. 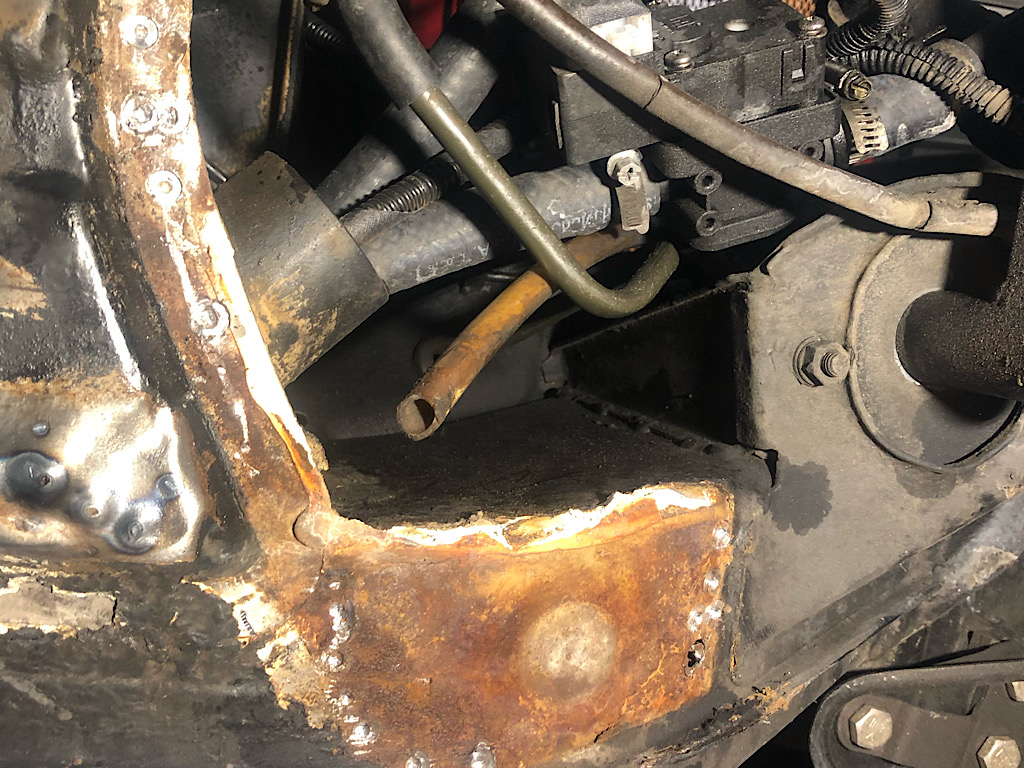 I know many of you can walk circles around me with metal work, but I think these turned out well given my skill level for a couple hours work. Here are some before and afters. 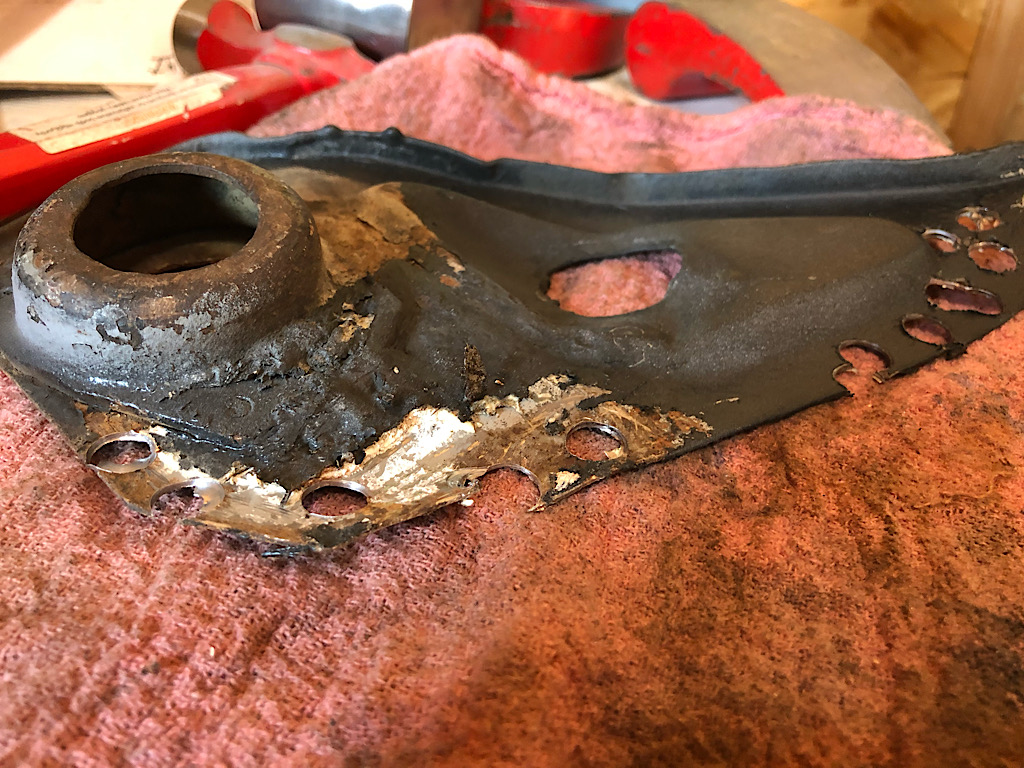 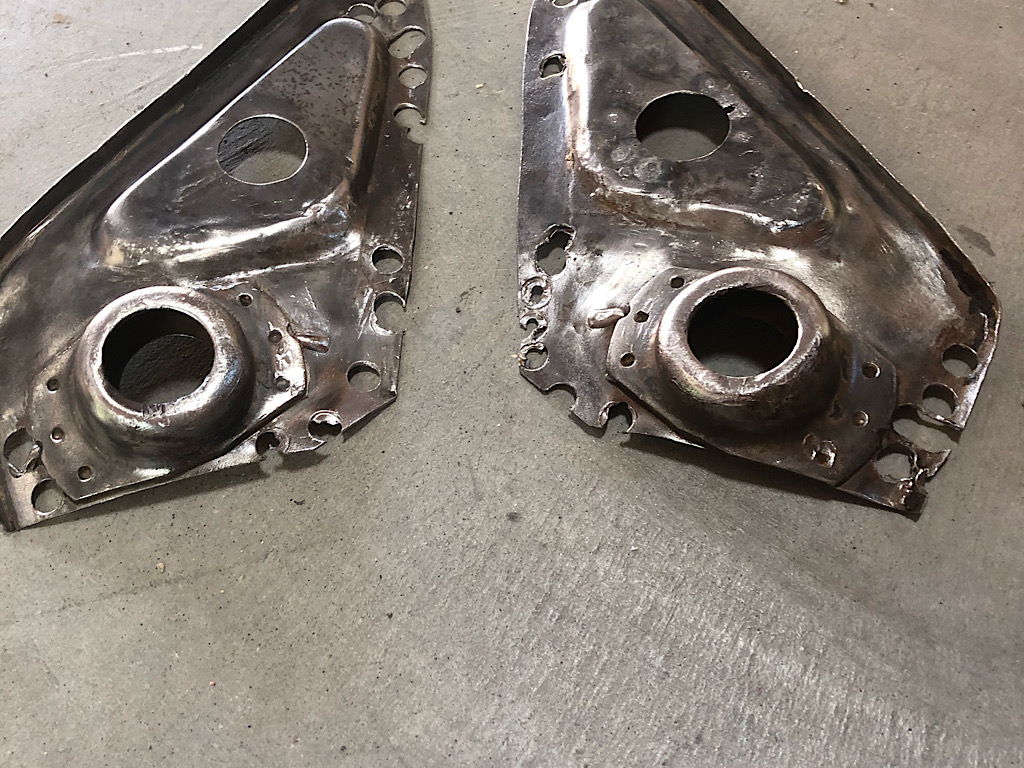 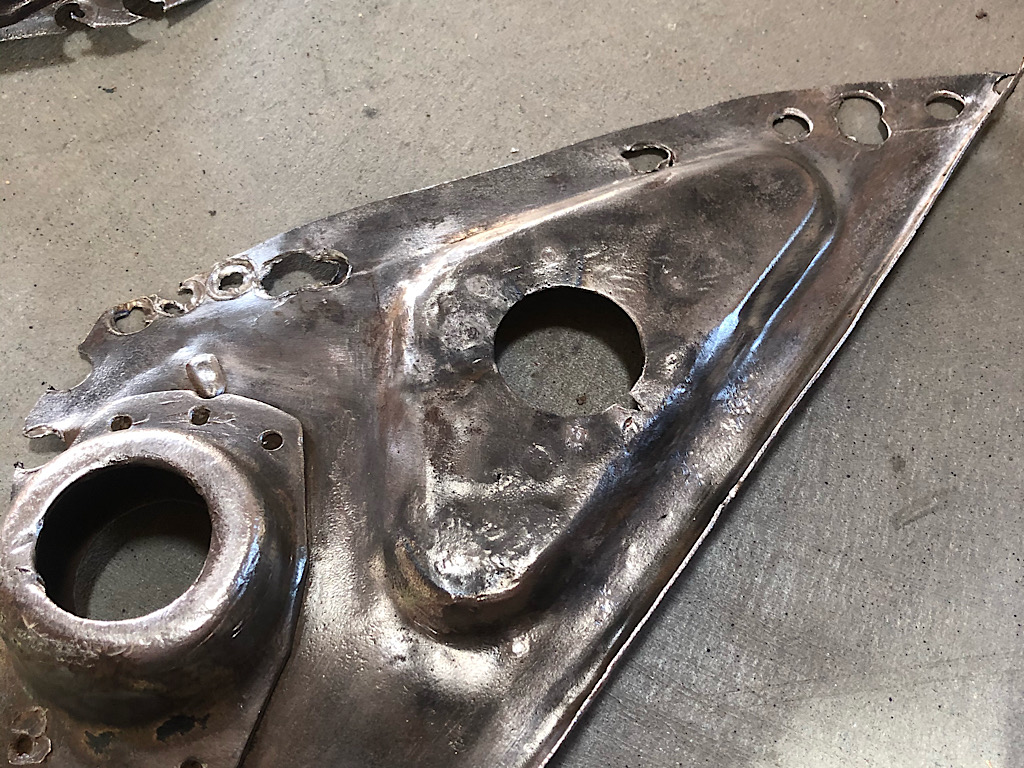 Should I fill in with any other of those holes I drilled or just reuse them all for plug welds when reattaching? |
|
|
|
| FL000 |
Sep 6 2020, 01:55 PM
Post
#59
|
|
Member Group: Members Posts: 442 Joined: 31-January 12 From: Lancaster, CA Member No.: 14,076 Region Association: Southern California |
Next up got the car on supports to adjust the door gaps for the long kit. A bit scary having it resting in a couple pieces of lumber and jack stands, but I have other platforms under each wheel in case she decides to fall. I think I’ll limit the time my skull is under the car too.
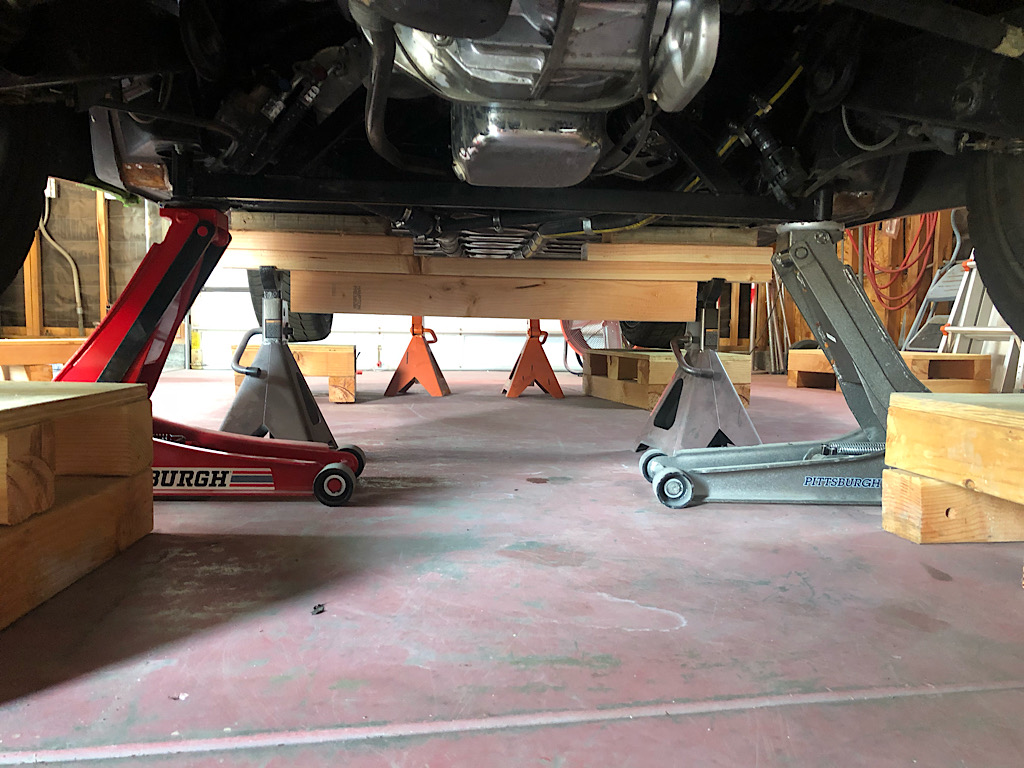 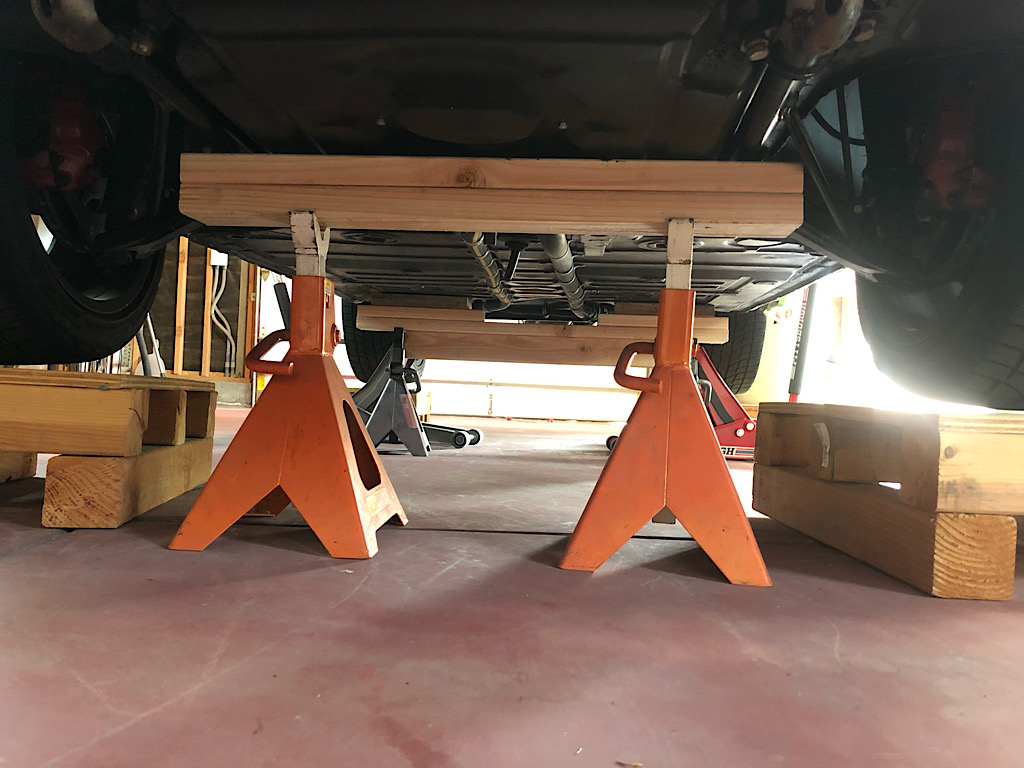 Here are my driver and passenger side door gaps as resting on the supports without anything else supporting the rear: 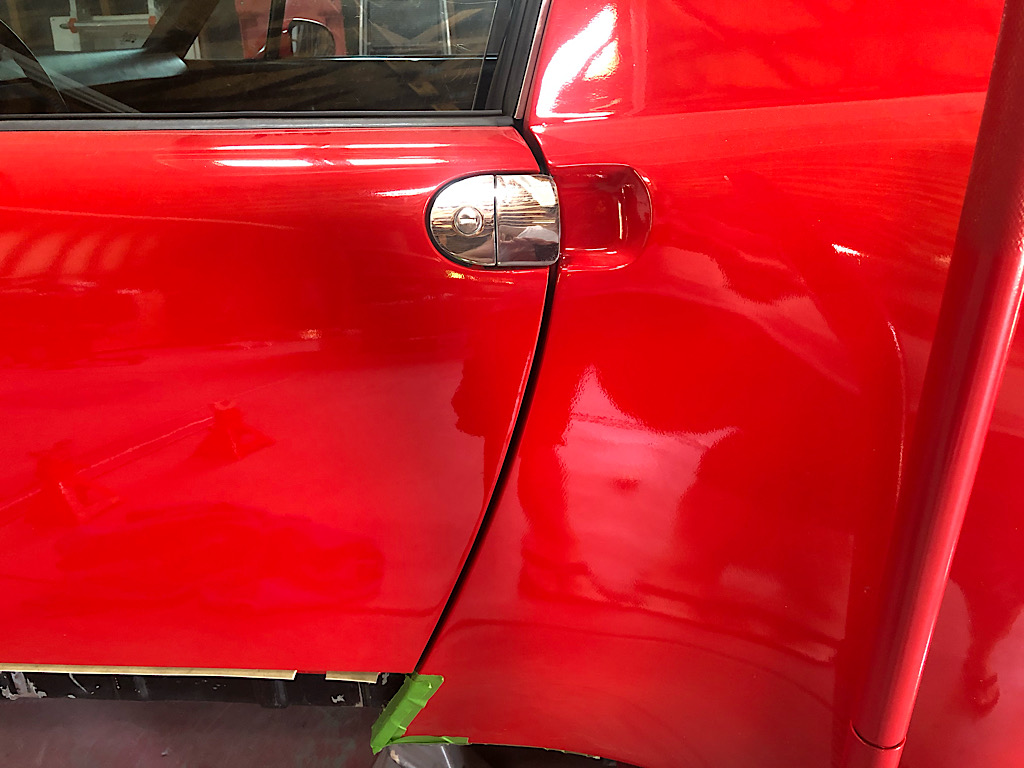 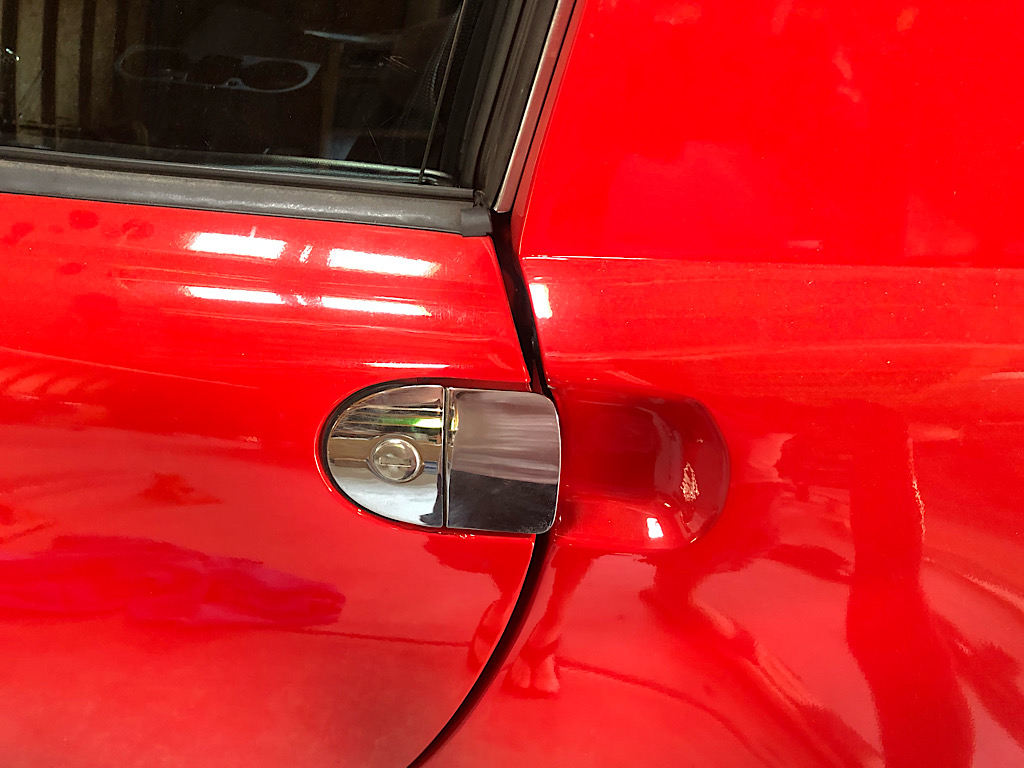 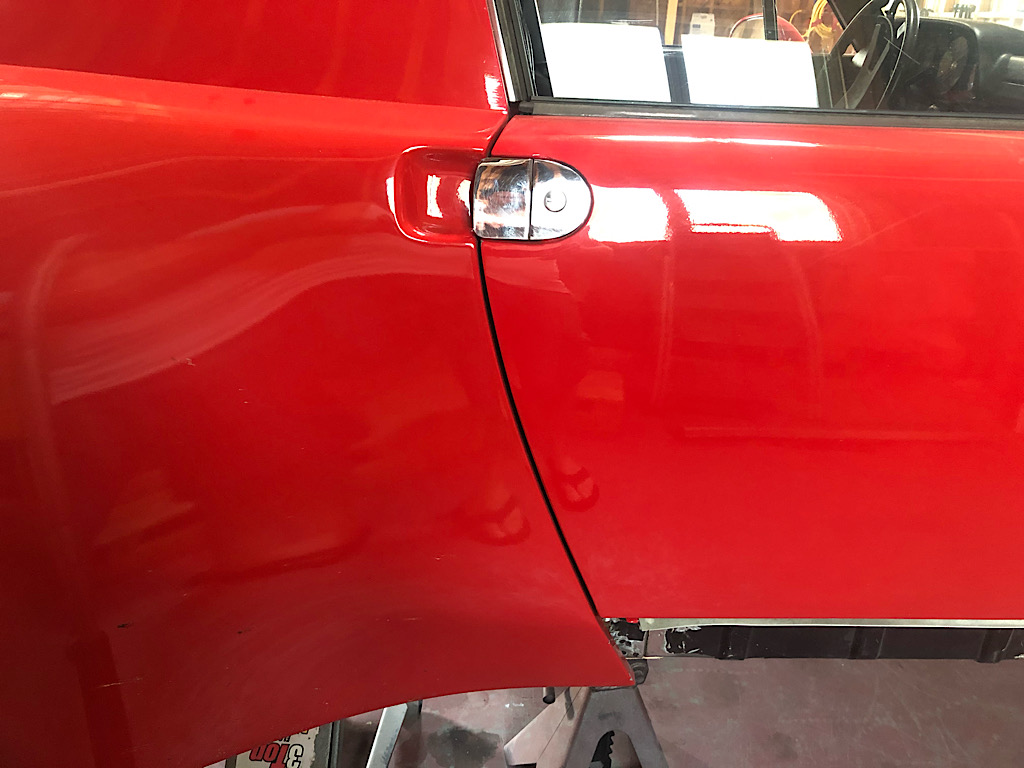 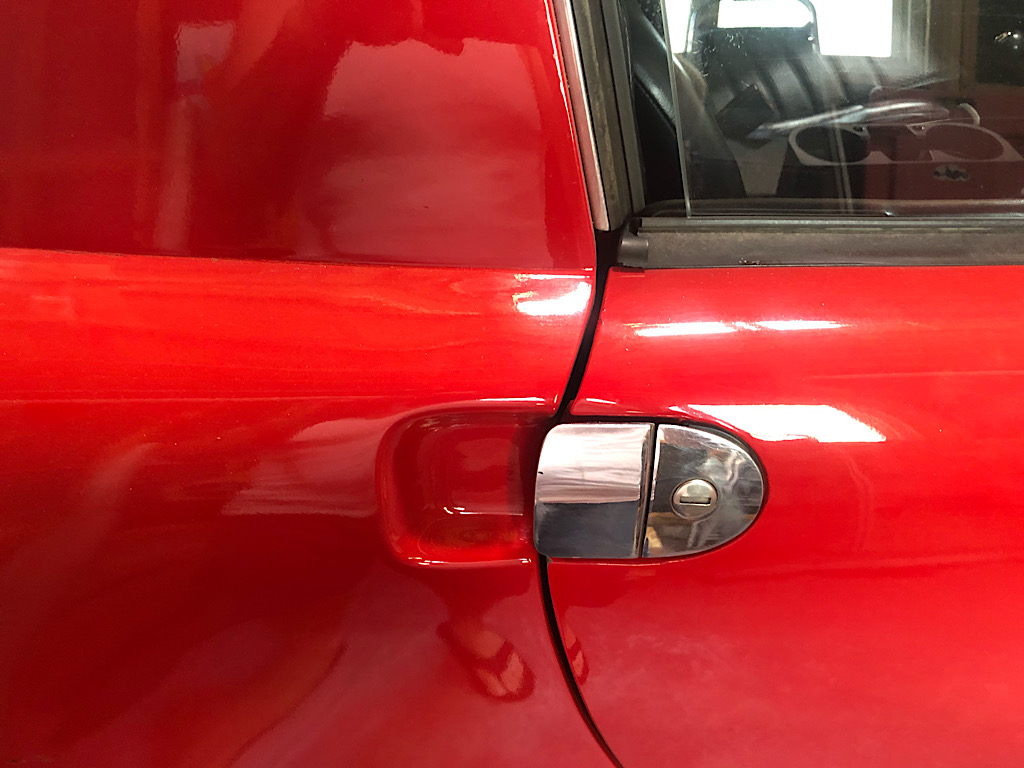 I’m pretty happy with the passenger door gap as shown here. Driver side will need to be closed up a bit. Calling on @914forme and others - my plan is to weld the passenger side long kit in first since the gap is good, then use a jack under the trans to lift and close the driver side door gap to the right amount before welding in the driver side. My assumption is the passenger side won’t move while doing this. Good assumption or no? I would like to do this with the doors attached so no easy way I am aware of to set both driver/passenger gaps before welding. |
|
|
|
| 76-914 |
Sep 6 2020, 02:21 PM
Post
#60
|
|
Repeat Offender & Resident Subaru Antagonist Group: Members Posts: 13,693 Joined: 23-January 09 From: Temecula, CA Member No.: 9,964 Region Association: Southern California |
Insert some wood shims from inside between the door jamb and door?
|
|
|
|
|
1 User(s) are reading this topic (1 Guests and 0 Anonymous Users)
0 Members:

|
Lo-Fi Version | Time is now: 31st March 2025 - 03:32 AM |
Invision Power Board
v9.1.4 © 2025 IPS, Inc.