|
|

|
Porsche, and the Porsche crest are registered trademarks of Dr. Ing. h.c. F. Porsche AG.
This site is not affiliated with Porsche in any way. Its only purpose is to provide an online forum for car enthusiasts. All other trademarks are property of their respective owners. |
|
|
  |
| Literati914 |
 Oct 22 2021, 10:50 PM Oct 22 2021, 10:50 PM
Post
#121
|
|
Senior Member    Group: Members Posts: 1,777 Joined: 16-November 06 From: Dallas, TX Member No.: 7,222 Region Association: Southwest Region |
Passenger side installed .. I swear I gotta quit going back to “improve” the weld (IMG:style_emoticons/default/icon8.gif)
Attached thumbnail(s) 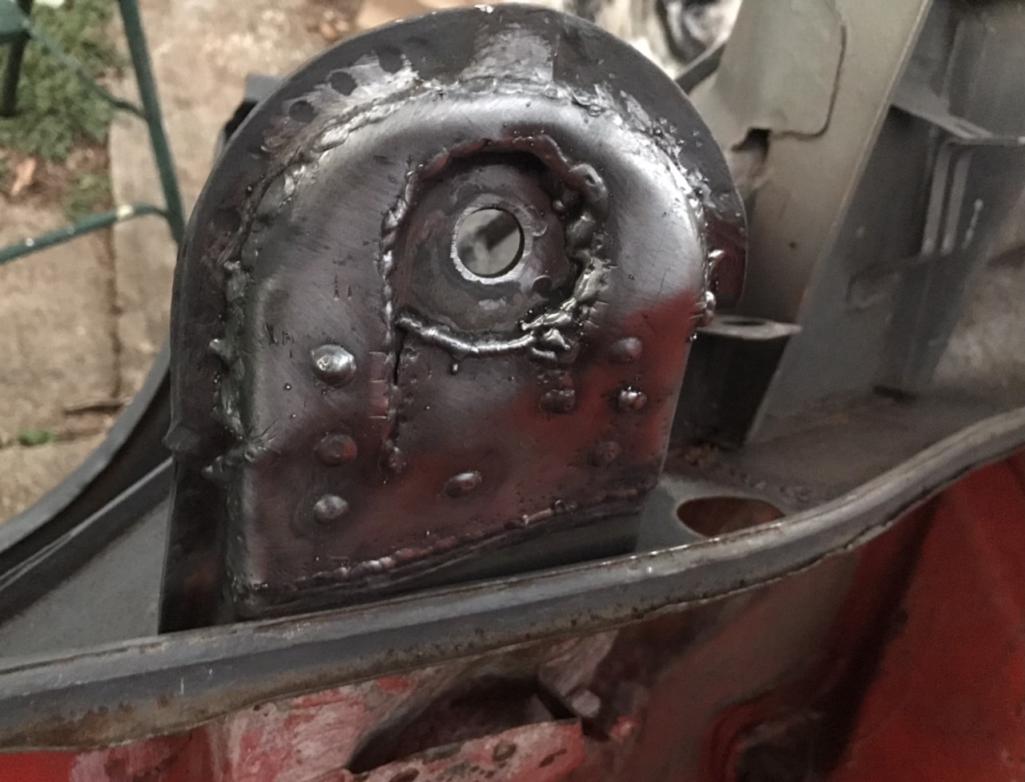
|
| Literati914 |
 Oct 23 2021, 08:08 PM Oct 23 2021, 08:08 PM
Post
#122
|
|
Senior Member    Group: Members Posts: 1,777 Joined: 16-November 06 From: Dallas, TX Member No.: 7,222 Region Association: Southwest Region |
Driver Side before shaping the piece to fit:
Attached thumbnail(s) 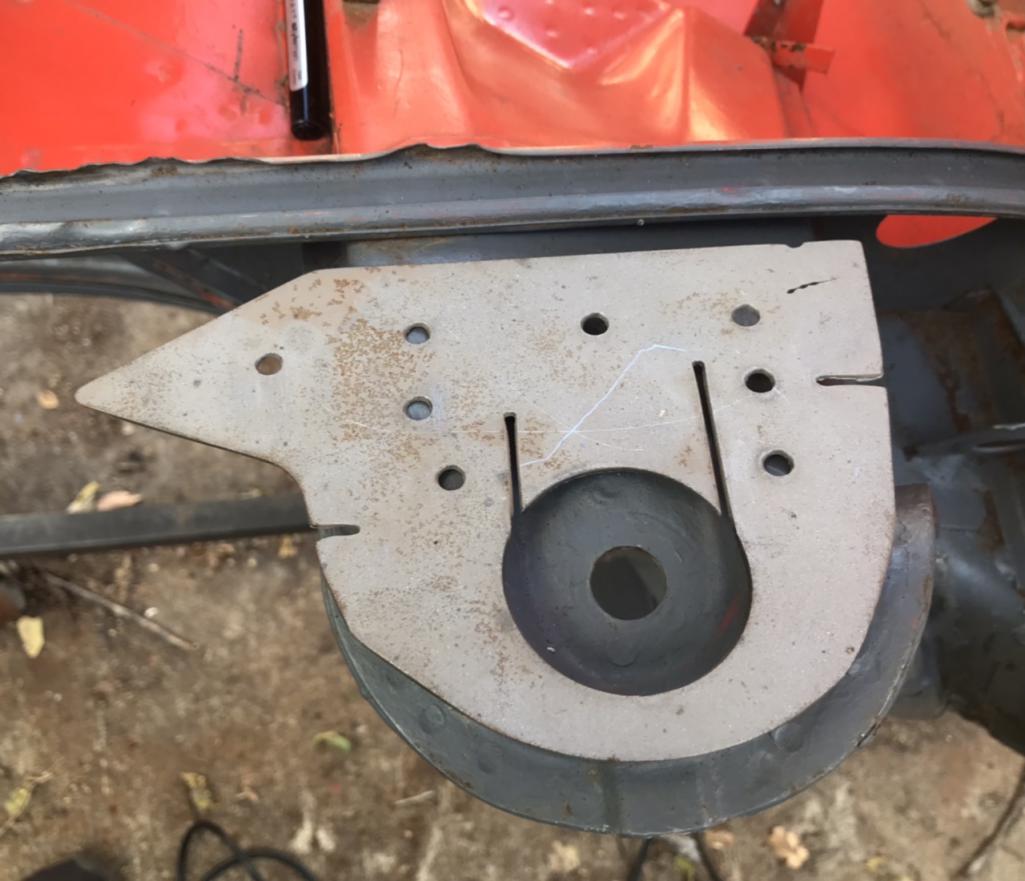
|
| Literati914 |
 Oct 23 2021, 08:10 PM Oct 23 2021, 08:10 PM
Post
#123
|
|
Senior Member    Group: Members Posts: 1,777 Joined: 16-November 06 From: Dallas, TX Member No.: 7,222 Region Association: Southwest Region |
..and driver side welding complete:
Attached thumbnail(s) 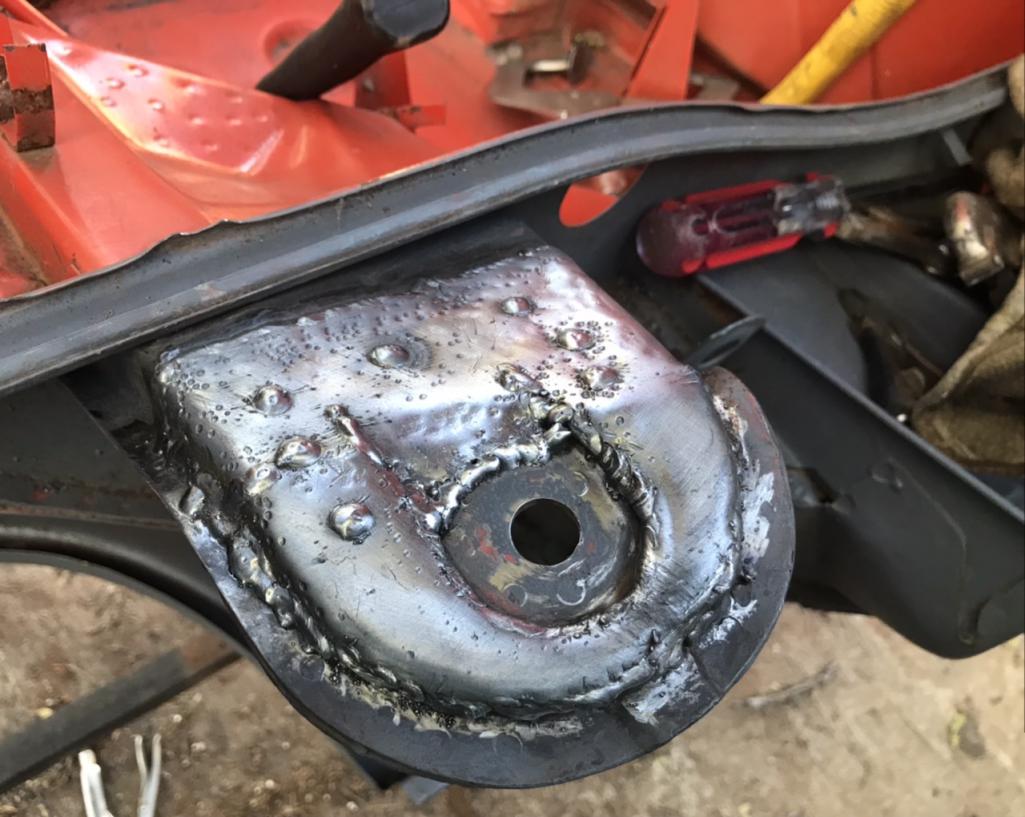
|
| Literati914 |
 Oct 24 2021, 08:09 PM Oct 24 2021, 08:09 PM
Post
#124
|
|
Senior Member    Group: Members Posts: 1,777 Joined: 16-November 06 From: Dallas, TX Member No.: 7,222 Region Association: Southwest Region |
Went back and installed the rear sway bar reinforcement plates inside to trunk space. Again, this is a nonstandard rear sway bar and so it was necessary to weld the plates in a slightly different location compared to stock. In this picture the plate sitting on the left side is the stock placement (just there for illustration purposes) and the one one the right is where mine needed to be welded. This illustrates the difference in bracket placement widths that I’d mentioned earlier:
Attached thumbnail(s) 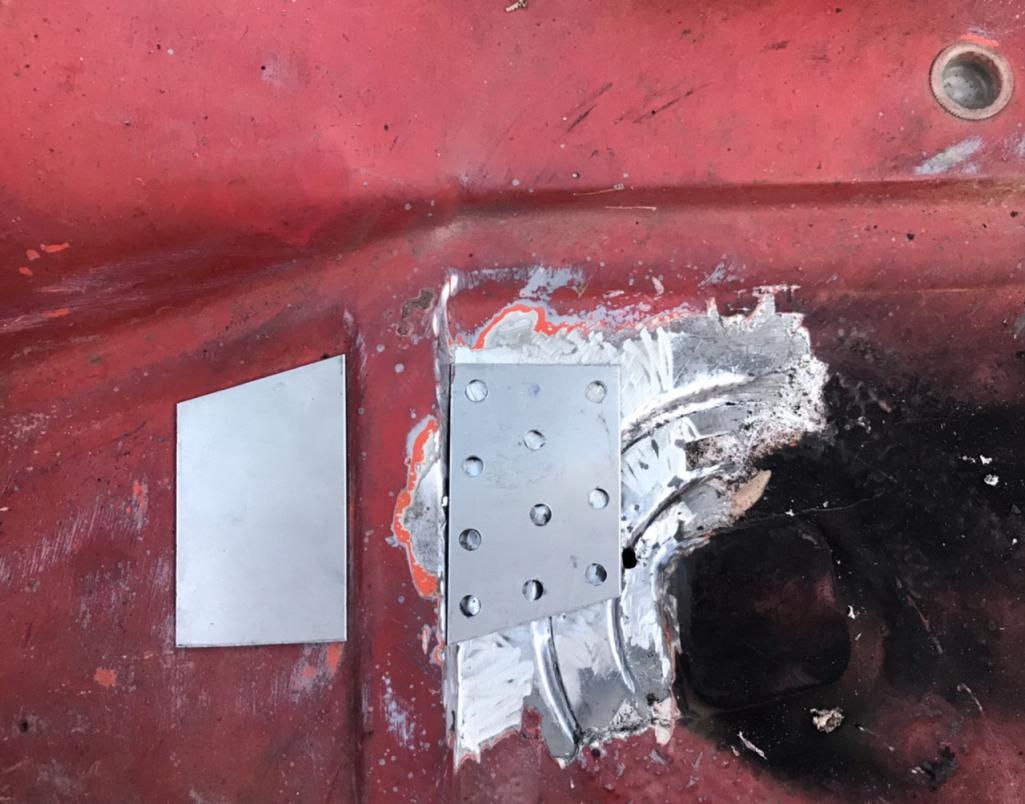
|
| Literati914 |
 Oct 24 2021, 08:16 PM Oct 24 2021, 08:16 PM
Post
#125
|
|
Senior Member    Group: Members Posts: 1,777 Joined: 16-November 06 From: Dallas, TX Member No.: 7,222 Region Association: Southwest Region |
Before making the welds though, I needed to weld the circular “factory access caps” so that they would not shift under hard cornering (the brackets I welded underneath are welded over the seam slightly), and not create a crack in the mount’s attachment welds. Highlighted with purple arrow:
Attached thumbnail(s) 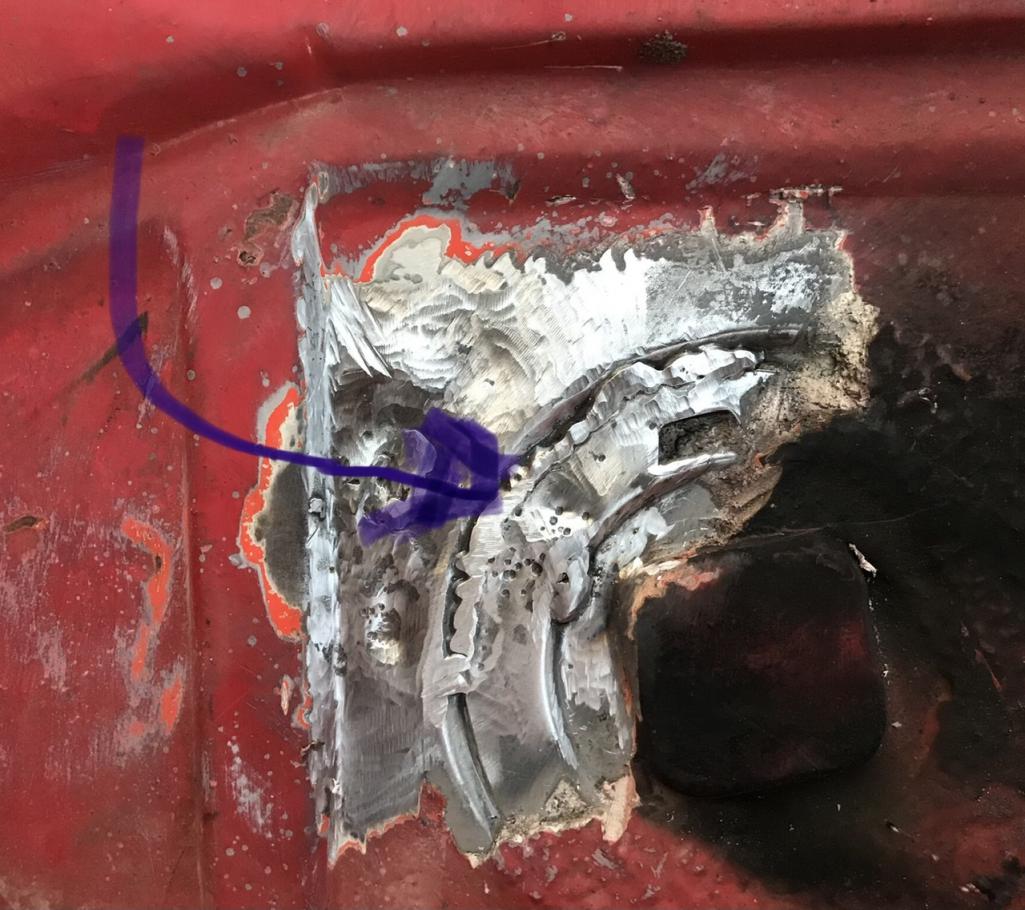
|
| Literati914 |
 Oct 24 2021, 08:17 PM Oct 24 2021, 08:17 PM
Post
#126
|
|
Senior Member    Group: Members Posts: 1,777 Joined: 16-November 06 From: Dallas, TX Member No.: 7,222 Region Association: Southwest Region |
Passenger side installed:
Attached thumbnail(s) 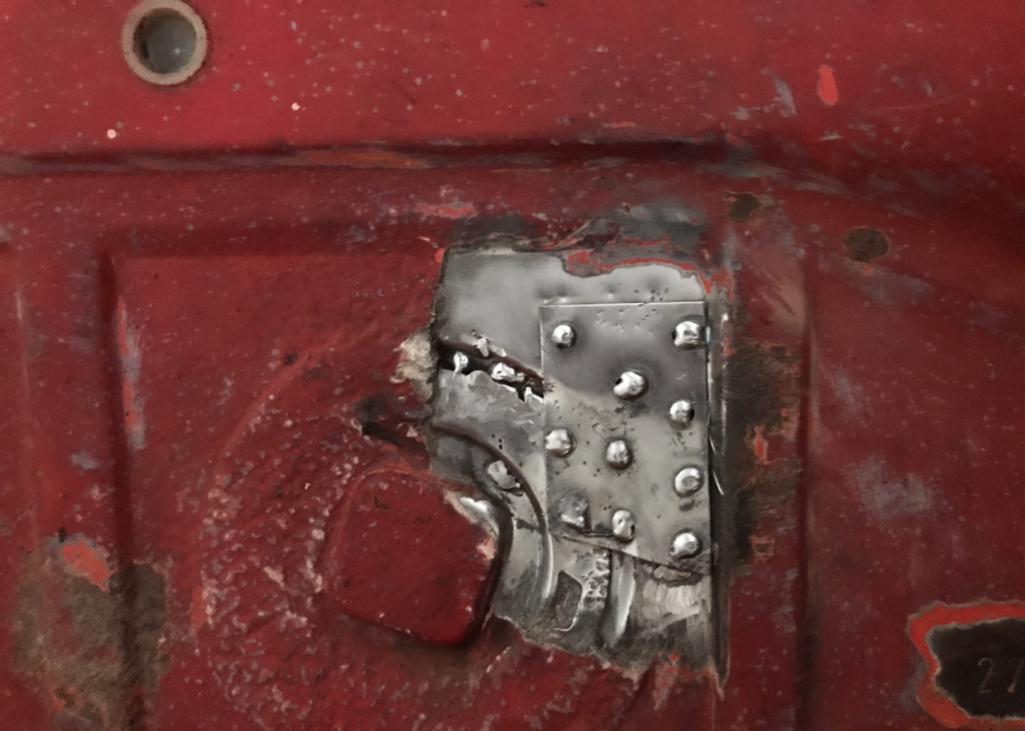
|
| Literati914 |
 Oct 24 2021, 08:18 PM Oct 24 2021, 08:18 PM
Post
#127
|
|
Senior Member    Group: Members Posts: 1,777 Joined: 16-November 06 From: Dallas, TX Member No.: 7,222 Region Association: Southwest Region |
Driver’s side too..
Attached thumbnail(s) 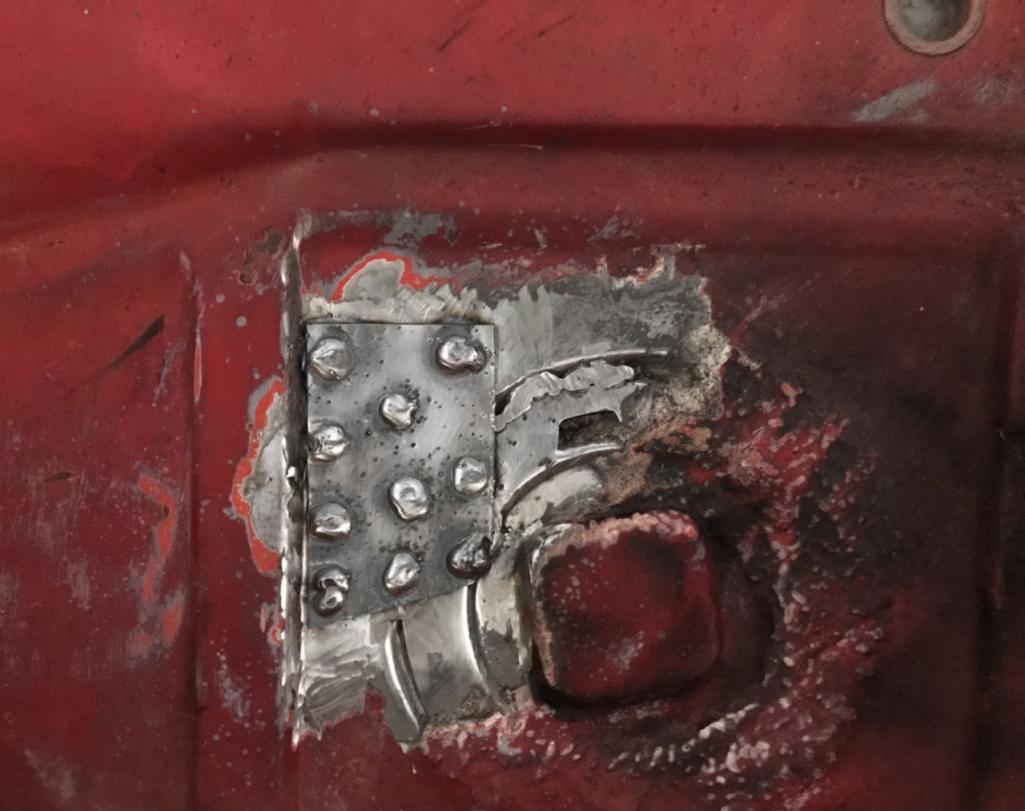
|
| Literati914 |
 Oct 25 2021, 07:10 PM Oct 25 2021, 07:10 PM
Post
#128
|
|
Senior Member    Group: Members Posts: 1,777 Joined: 16-November 06 From: Dallas, TX Member No.: 7,222 Region Association: Southwest Region |
Clutch cable tube forward of the shifter area is next. Remember I’ve already dealt with the other two possible failure areas regarding this tube, so mine was broken in all three spots. Started off by measuring up 3.5” and marking where the internal bracket is and also the area I’ll be using for access:
Attached thumbnail(s) 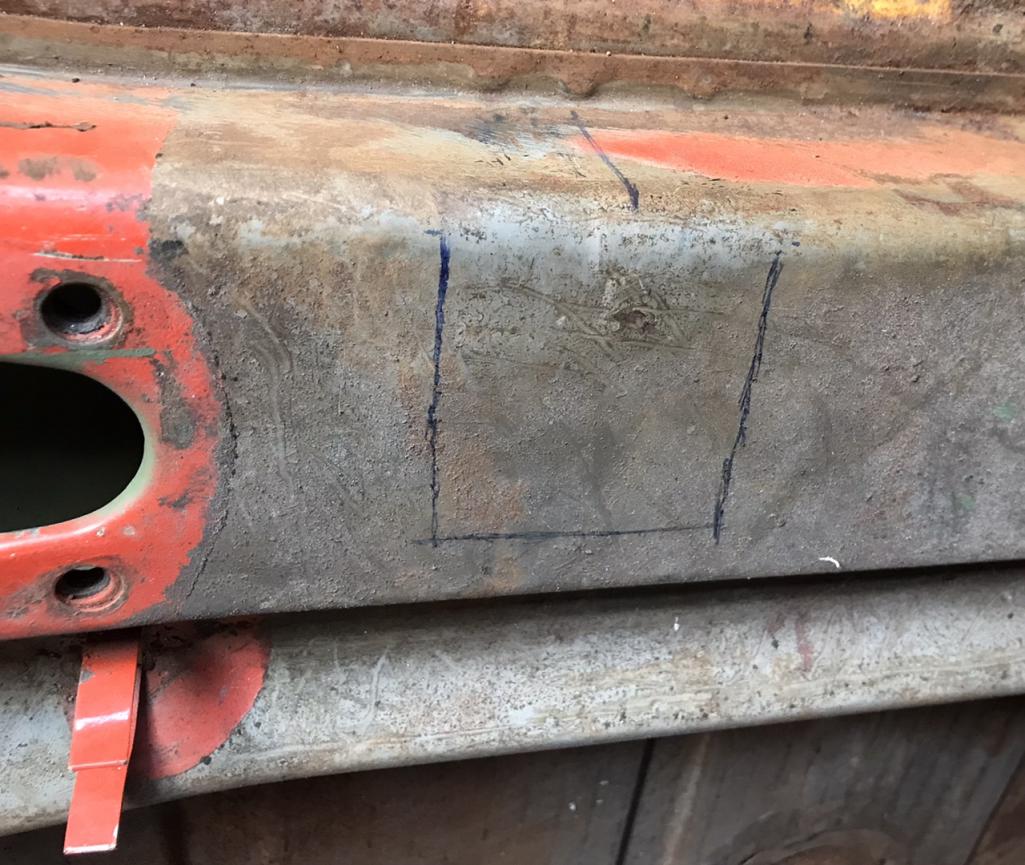
|
| Literati914 |
 Oct 25 2021, 07:14 PM Oct 25 2021, 07:14 PM
Post
#129
|
|
Senior Member    Group: Members Posts: 1,777 Joined: 16-November 06 From: Dallas, TX Member No.: 7,222 Region Association: Southwest Region |
..access area cut. Note I purposely cut it to hinge on the opposite from any other time I’ve seen this repair done - why? because the throttle cables mount sort of attaches to the top of the other side and I didn’t want to cut though it.:
Attached thumbnail(s) 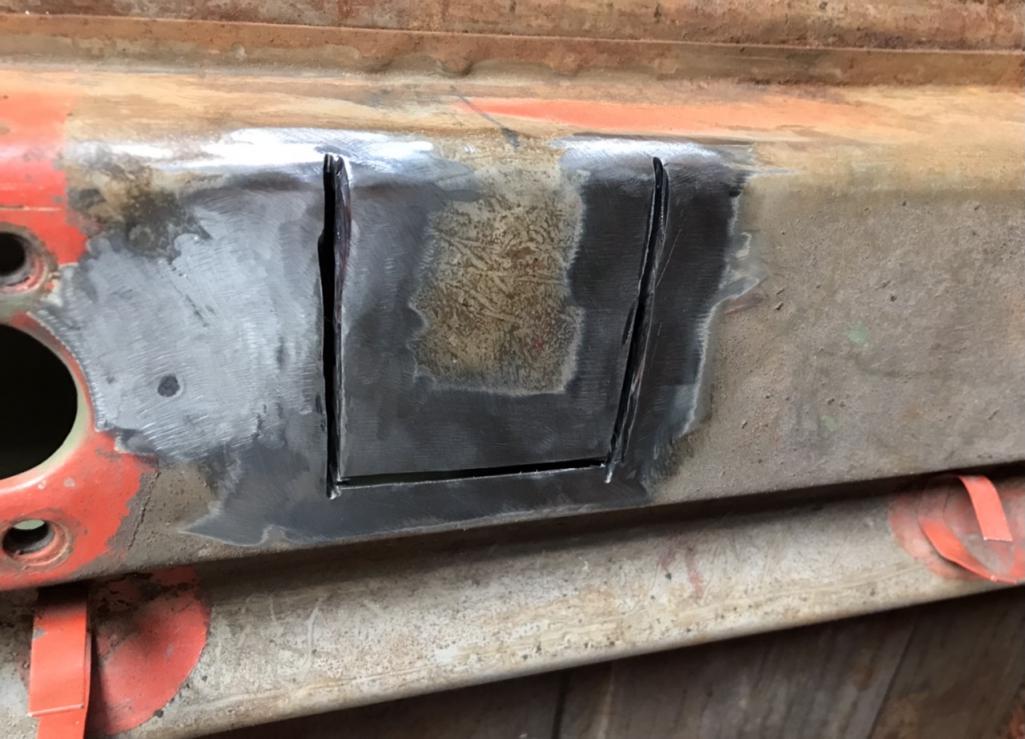
|
| Literati914 |
 Oct 25 2021, 07:16 PM Oct 25 2021, 07:16 PM
Post
#130
|
|
Senior Member    Group: Members Posts: 1,777 Joined: 16-November 06 From: Dallas, TX Member No.: 7,222 Region Association: Southwest Region |
Here’s what I found inside, the tube was completely pulled away from the retaining bracket :
Attached thumbnail(s) 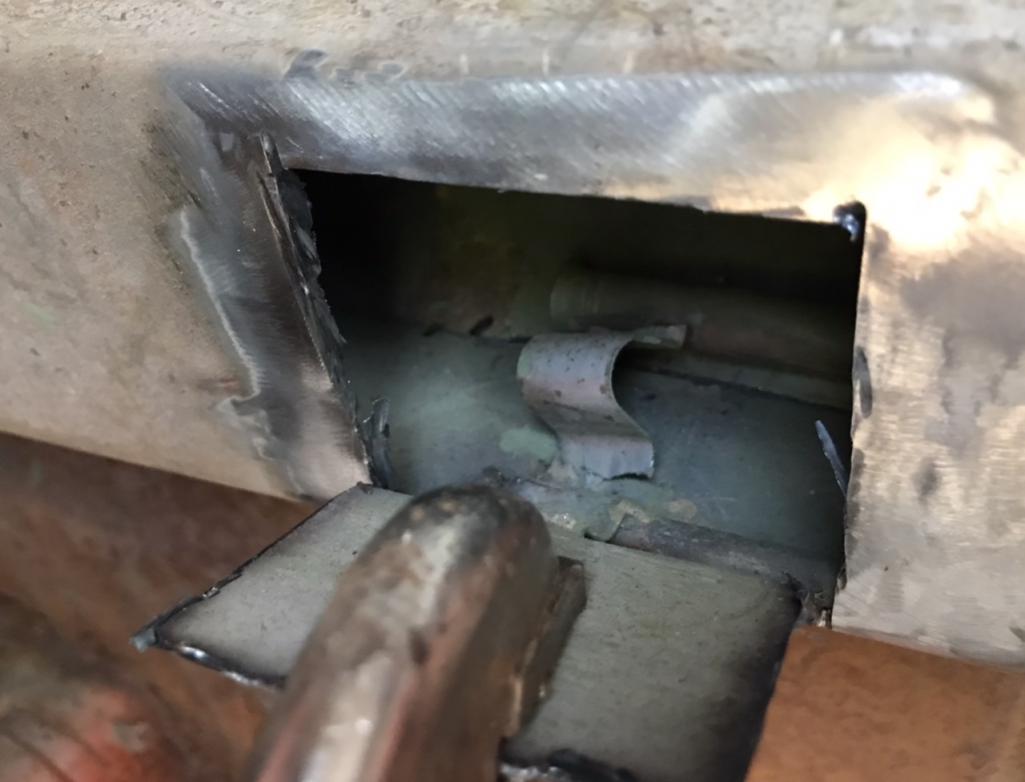
|
| Literati914 |
 Oct 25 2021, 07:19 PM Oct 25 2021, 07:19 PM
Post
#131
|
|
Senior Member    Group: Members Posts: 1,777 Joined: 16-November 06 From: Dallas, TX Member No.: 7,222 Region Association: Southwest Region |
Getting a good ground was a challenge (access port too small mostly) but I was able to get it firmly welded. A big ‘ol screw driver passes thru the tube with no obstruction:
Attached thumbnail(s) 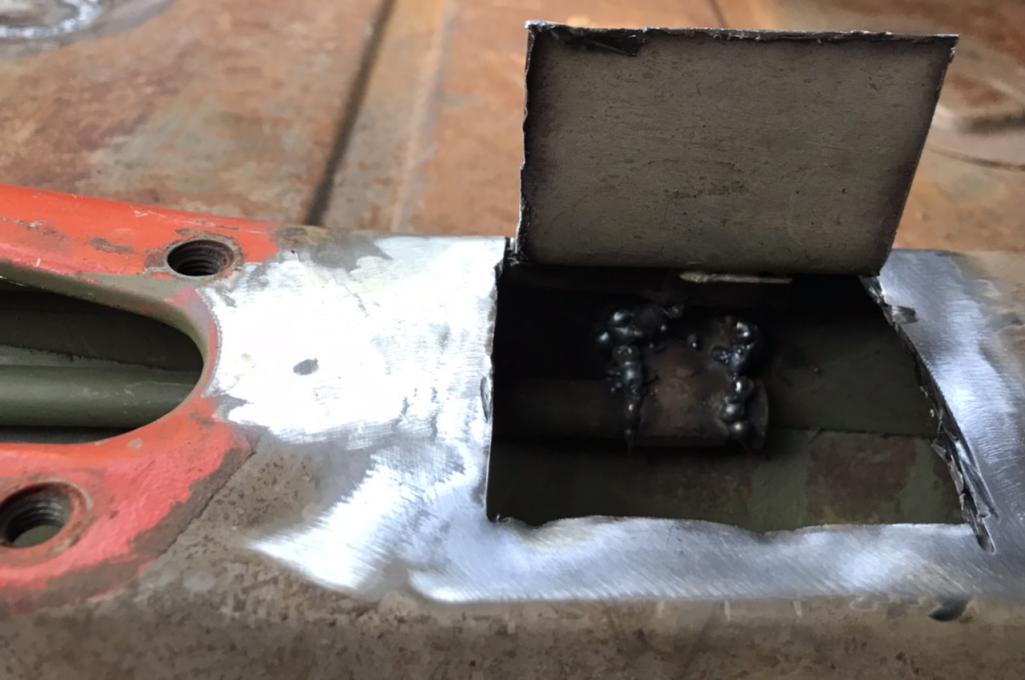
|
| Literati914 |
 Oct 25 2021, 07:22 PM Oct 25 2021, 07:22 PM
Post
#132
|
|
Senior Member    Group: Members Posts: 1,777 Joined: 16-November 06 From: Dallas, TX Member No.: 7,222 Region Association: Southwest Region |
The top of the original bracket was easily accessed from my port but I needed to drill a couple holes and plug weld the bottom from the outside:
Attached thumbnail(s) 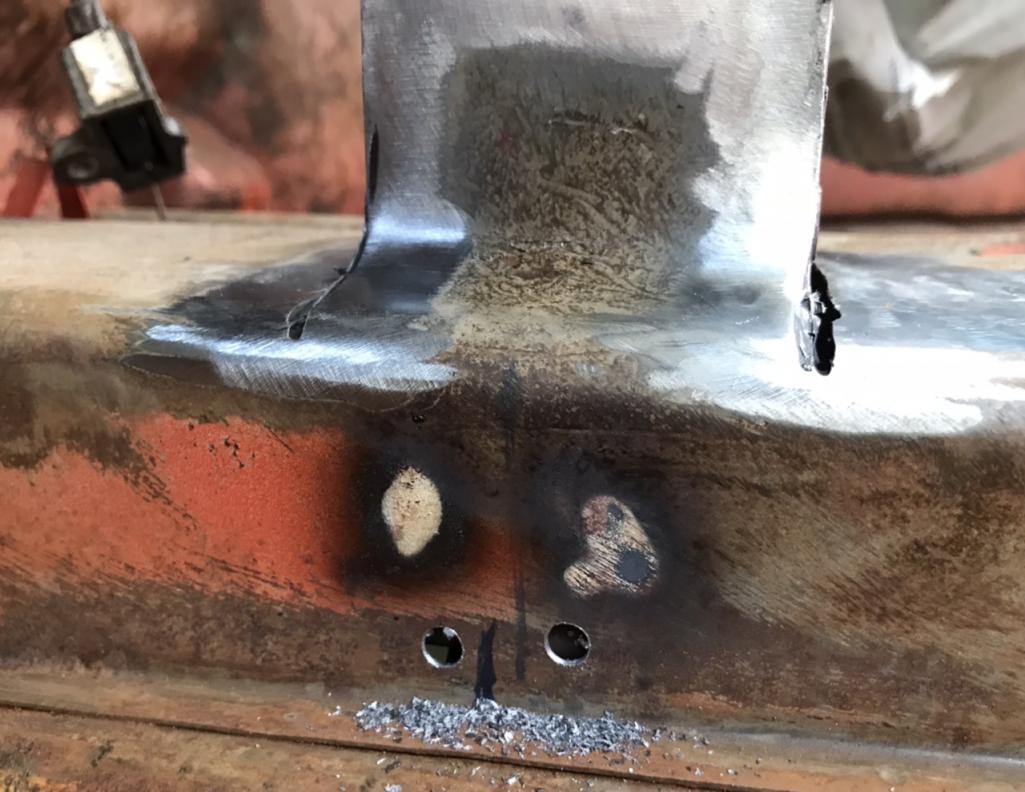
|
| Literati914 |
 Oct 25 2021, 07:23 PM Oct 25 2021, 07:23 PM
Post
#133
|
|
Senior Member    Group: Members Posts: 1,777 Joined: 16-November 06 From: Dallas, TX Member No.: 7,222 Region Association: Southwest Region |
..repair complete and closed up :
Attached thumbnail(s) 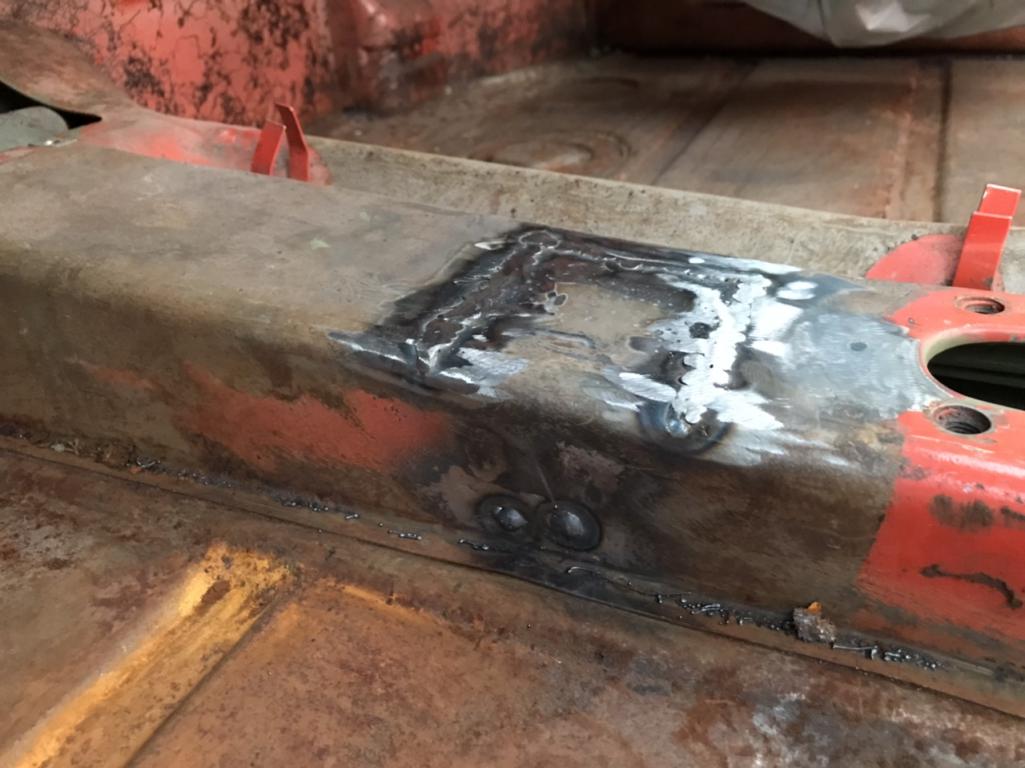
|
| tygaboy |
 Oct 26 2021, 08:09 AM Oct 26 2021, 08:09 AM
Post
#134
|
|
914 Guru      Group: Members Posts: 5,465 Joined: 6-October 15 From: Petaluma, CA Member No.: 19,241 Region Association: Northern California 
|
Weld 'er up! Fun stuff, getting in all those fiddly areas, huh? (IMG:style_emoticons/default/dry.gif)
You're getting it done - way to keep at it. (IMG:style_emoticons/default/smilie_pokal.gif) |
| Literati914 |
 Oct 26 2021, 06:40 PM Oct 26 2021, 06:40 PM
Post
#135
|
|
Senior Member    Group: Members Posts: 1,777 Joined: 16-November 06 From: Dallas, TX Member No.: 7,222 Region Association: Southwest Region |
Attached thumbnail(s) 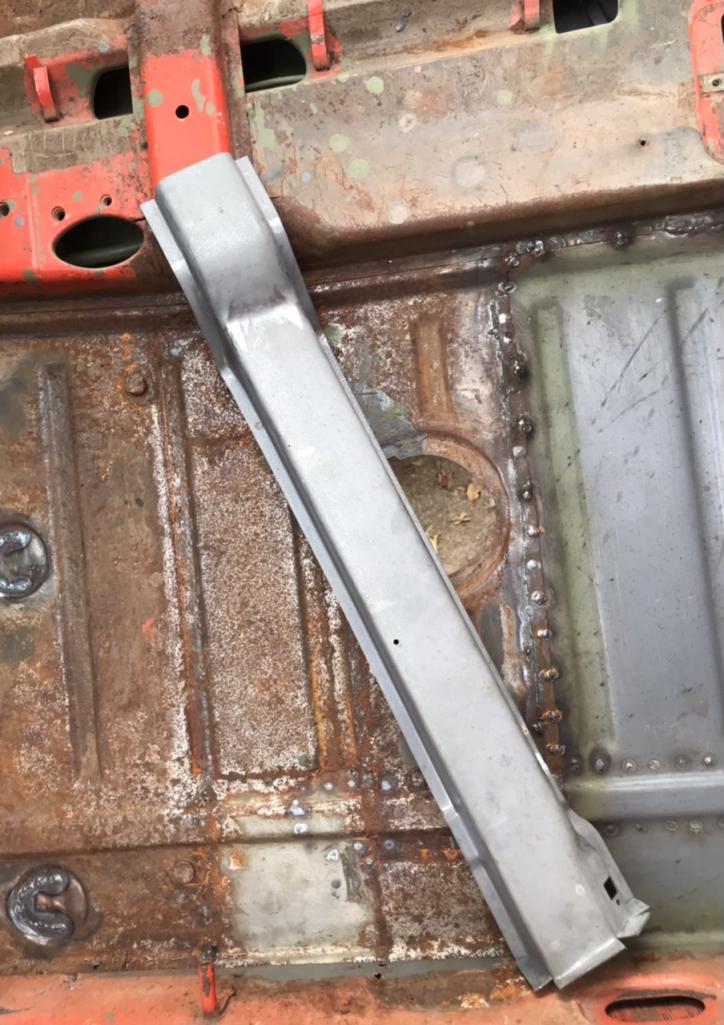
|
| Literati914 |
 Oct 27 2021, 07:37 PM Oct 27 2021, 07:37 PM
Post
#136
|
|
Senior Member    Group: Members Posts: 1,777 Joined: 16-November 06 From: Dallas, TX Member No.: 7,222 Region Association: Southwest Region |
I cleaned the metal up real good, and primed the metal after laying tape at the weld spots.. and then welded on the seat adjuster bracket holder that I saved from the old cross-member. I finished welding this new unit in place but it got too dark for a good pic:
Attached thumbnail(s) 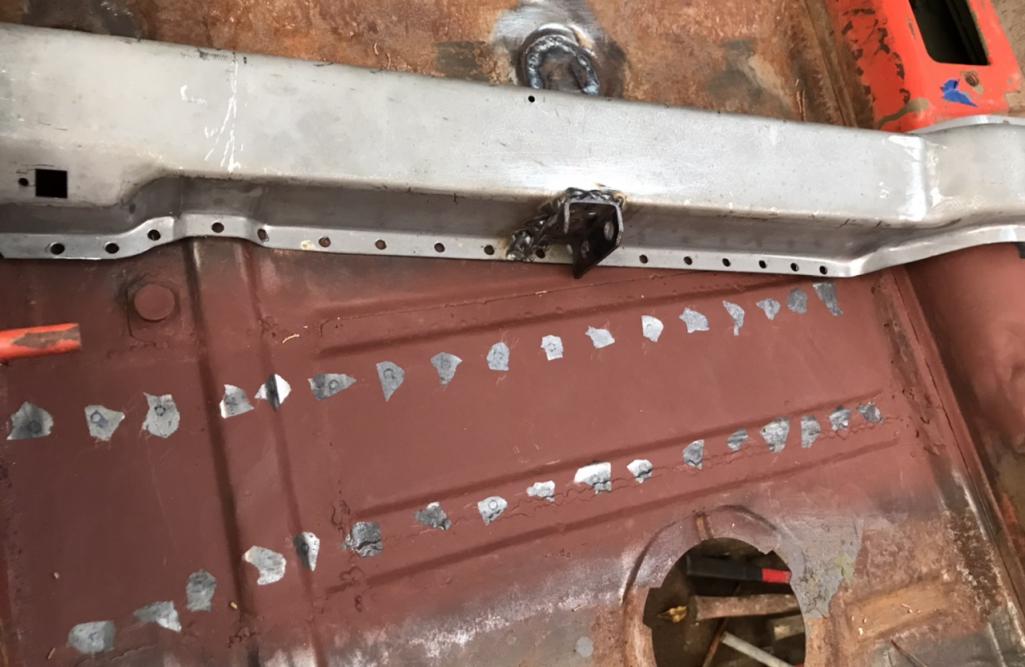
|
| Literati914 |
 Oct 28 2021, 11:21 PM Oct 28 2021, 11:21 PM
Post
#137
|
|
Senior Member    Group: Members Posts: 1,777 Joined: 16-November 06 From: Dallas, TX Member No.: 7,222 Region Association: Southwest Region |
Cross-member installed:
Attached thumbnail(s) 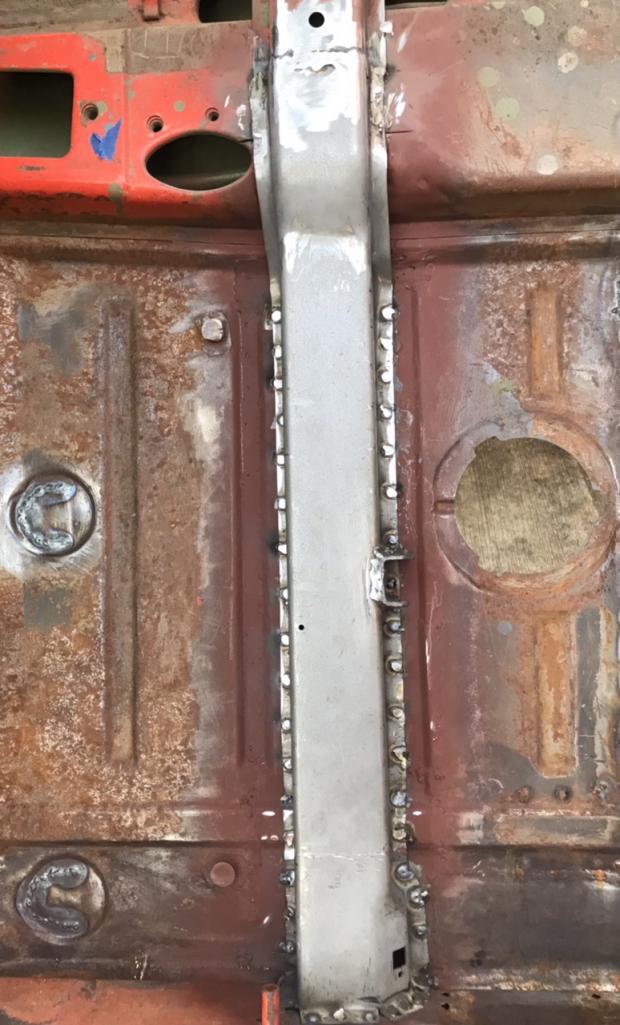
|
| Literati914 |
 Oct 29 2021, 08:05 PM Oct 29 2021, 08:05 PM
Post
#138
|
|
Senior Member    Group: Members Posts: 1,777 Joined: 16-November 06 From: Dallas, TX Member No.: 7,222 Region Association: Southwest Region |
Parking Brake mount went back on today. It was in good enough condition that I recycled it. I sprayed a protective coating on the backside and on the inner long side too:
Attached thumbnail(s) 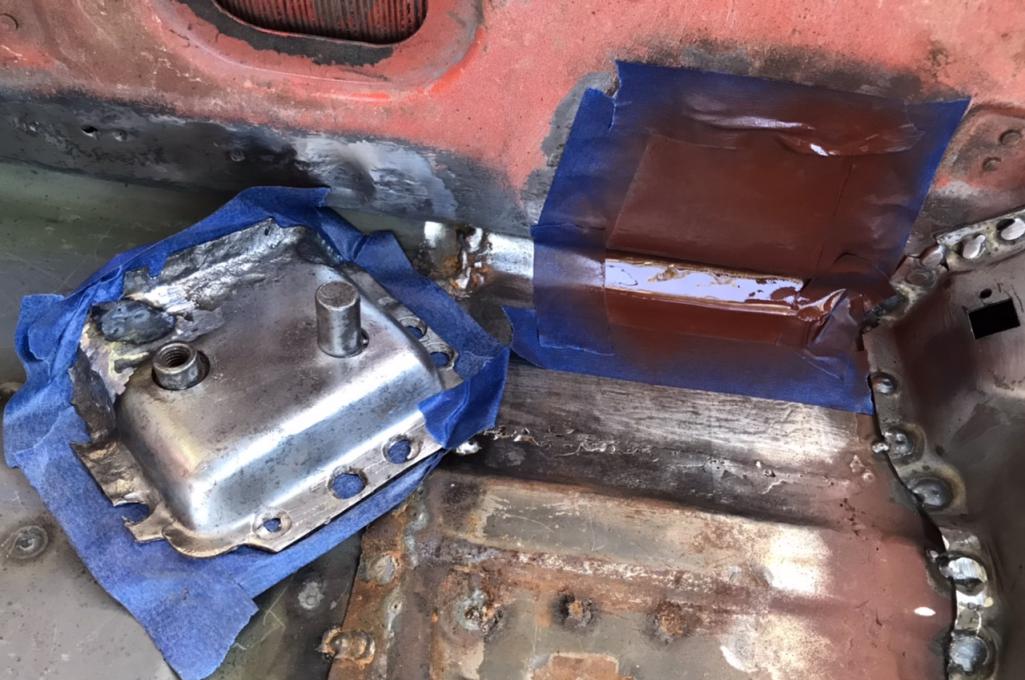
|
| Literati914 |
 Oct 29 2021, 08:06 PM Oct 29 2021, 08:06 PM
Post
#139
|
|
Senior Member    Group: Members Posts: 1,777 Joined: 16-November 06 From: Dallas, TX Member No.: 7,222 Region Association: Southwest Region |
.. welding process:
Attached thumbnail(s) 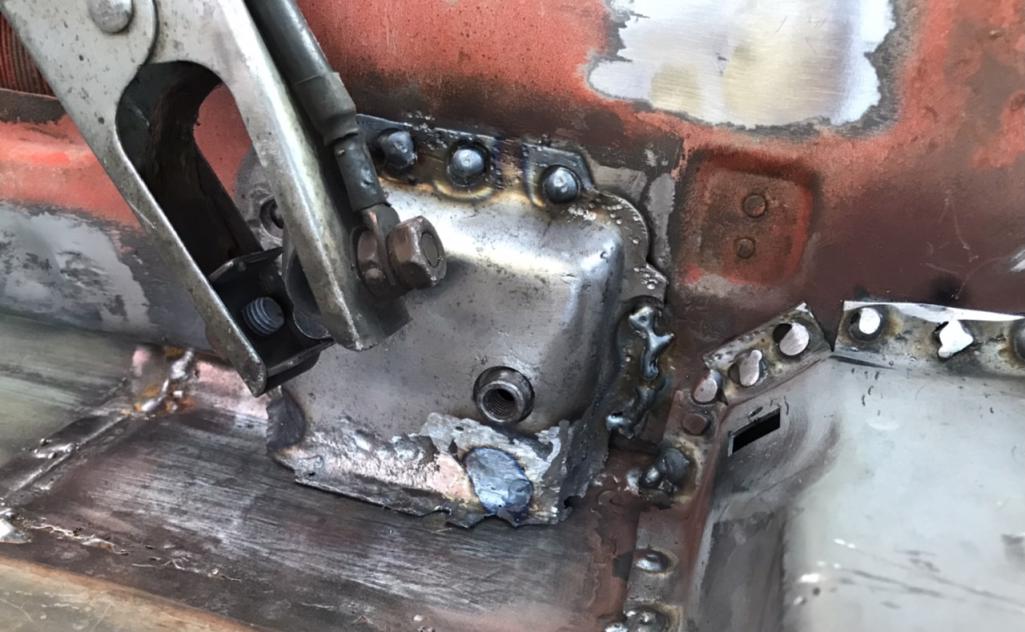
|
| Literati914 |
 Oct 29 2021, 08:08 PM Oct 29 2021, 08:08 PM
Post
#140
|
|
Senior Member    Group: Members Posts: 1,777 Joined: 16-November 06 From: Dallas, TX Member No.: 7,222 Region Association: Southwest Region |
After that I slapped back on the original cable cover after coating both sides with a protective coat:
Attached thumbnail(s) 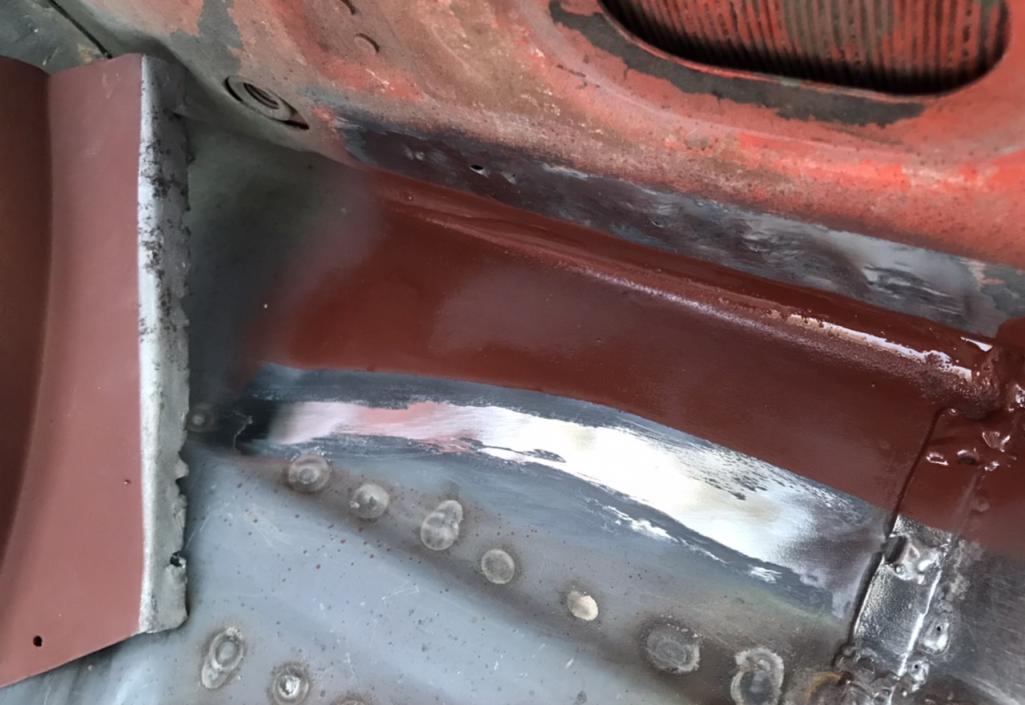
|
  |
1 User(s) are reading this topic (1 Guests and 0 Anonymous Users)
0 Members:

|
Lo-Fi Version | Time is now: 22nd December 2024 - 01:03 AM |
Invision Power Board
v9.1.4 © 2024 IPS, Inc.


