|
|

|
Porsche, and the Porsche crest are registered trademarks of Dr. Ing. h.c. F. Porsche AG.
This site is not affiliated with Porsche in any way. Its only purpose is to provide an online forum for car enthusiasts. All other trademarks are property of their respective owners. |
|
|
  |
| Costa05 |
 Nov 12 2021, 09:18 AM Nov 12 2021, 09:18 AM
Post
#121
|
|
Member   Group: Members Posts: 320 Joined: 27-October 16 From: Phoenix, Arizona Member No.: 20,535 Region Association: Southwest Region 
|
Nice work. Oddly enough I enjoy the body work phase of my project.
Did you get a reservation made for the paint booth? |
| mgarrison |
 Nov 19 2021, 09:22 AM Nov 19 2021, 09:22 AM
Post
#122
|
|
Member   Group: Members Posts: 398 Joined: 14-February 20 From: Chandler, AZ Member No.: 23,922 Region Association: Southwest Region 
|
Hey Rich, no, no booth reservations. Debating just building a temp booth out of PVC and plastic. The whole transport to EVIT and then back again after fresh paint just seems ripe for disaster - not sure I trust my body dolly enough to strap it down to a trailer for transport! (IMG:style_emoticons/default/dry.gif)
Nice work. Oddly enough I enjoy the body work phase of my project. Did you get a reservation made for the paint booth? |
| mgarrison |
 Nov 19 2021, 09:35 AM Nov 19 2021, 09:35 AM
Post
#123
|
|
Member   Group: Members Posts: 398 Joined: 14-February 20 From: Chandler, AZ Member No.: 23,922 Region Association: Southwest Region 
|
I am definitely not enjoying the body work/filler phase! The war between my tendency towards OCD vs. wanting to see progress vs. fearing it might rain again are making me a bit unhinged! (IMG:style_emoticons/default/screwy.gif)
I moved to trying to complete one section at a time, with some sanding on other filler sections while I wait for another layer of filler to harden/dry. 70's VW manufactured body panels are "interesting", I guess you could say. (IMG:style_emoticons/default/icon8.gif) I started with a longer block, but got too frustrated. Ended up using a 6" x 3" block. This is after 3 coats of 2K primer. Here's the initial sanding with the block in a horizontal orientation: 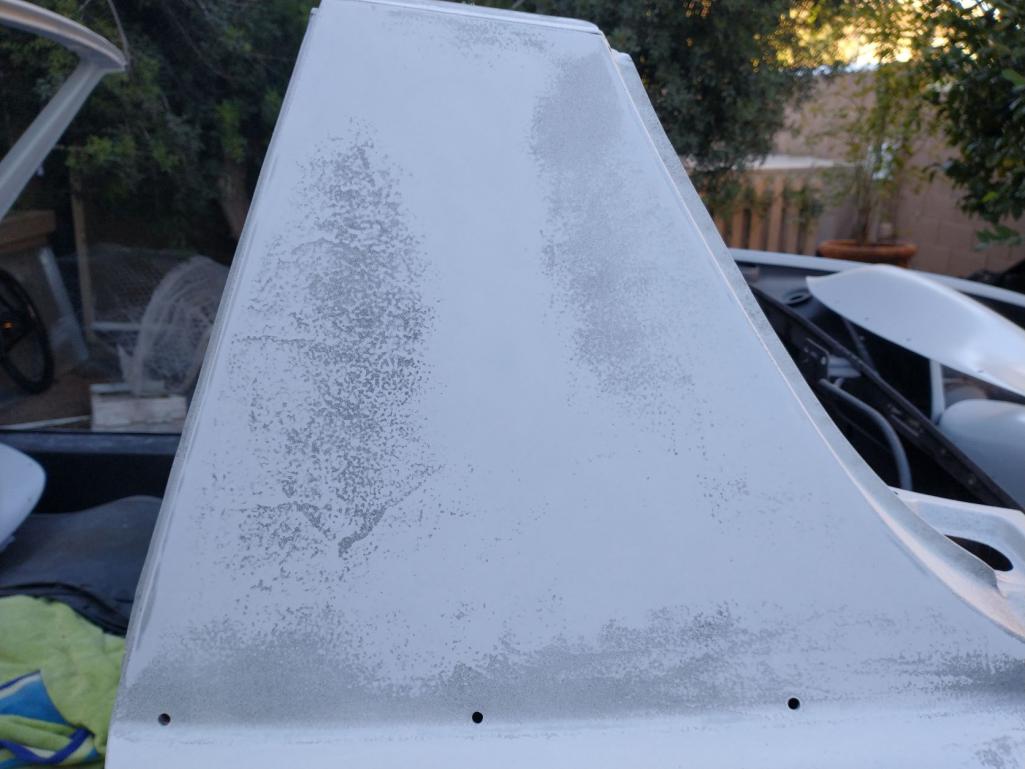 The dark areas are lower, where the guide coat was not sanded off. Here's the second round of sanding with the block in a vertical orientation: 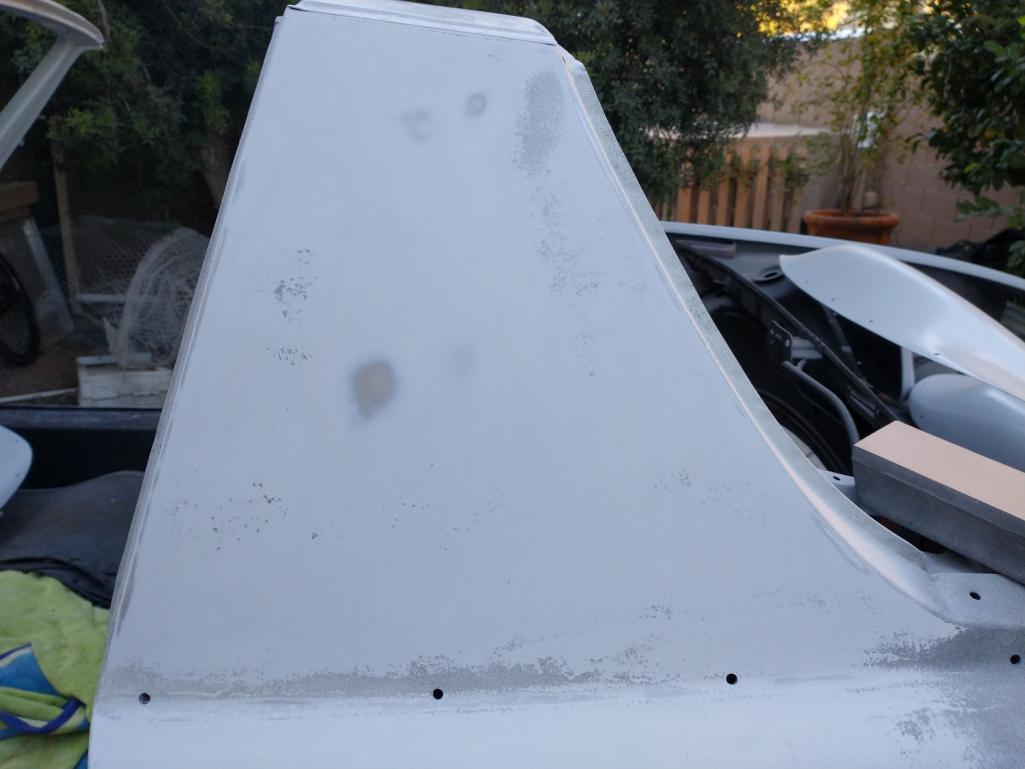 This is after the 3rd round of filler and sanding, keeping the block in a horizontal orientation: 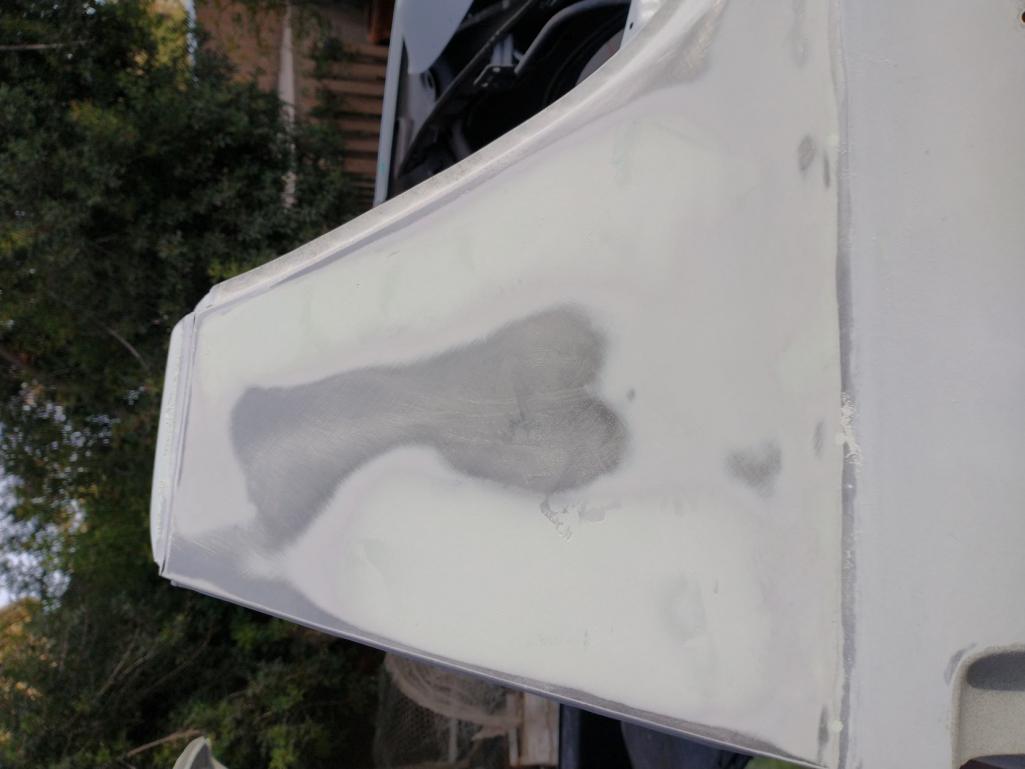 Here's after the 4th round of filler and sanding. Again, keeping the block in the horizontal orientation: 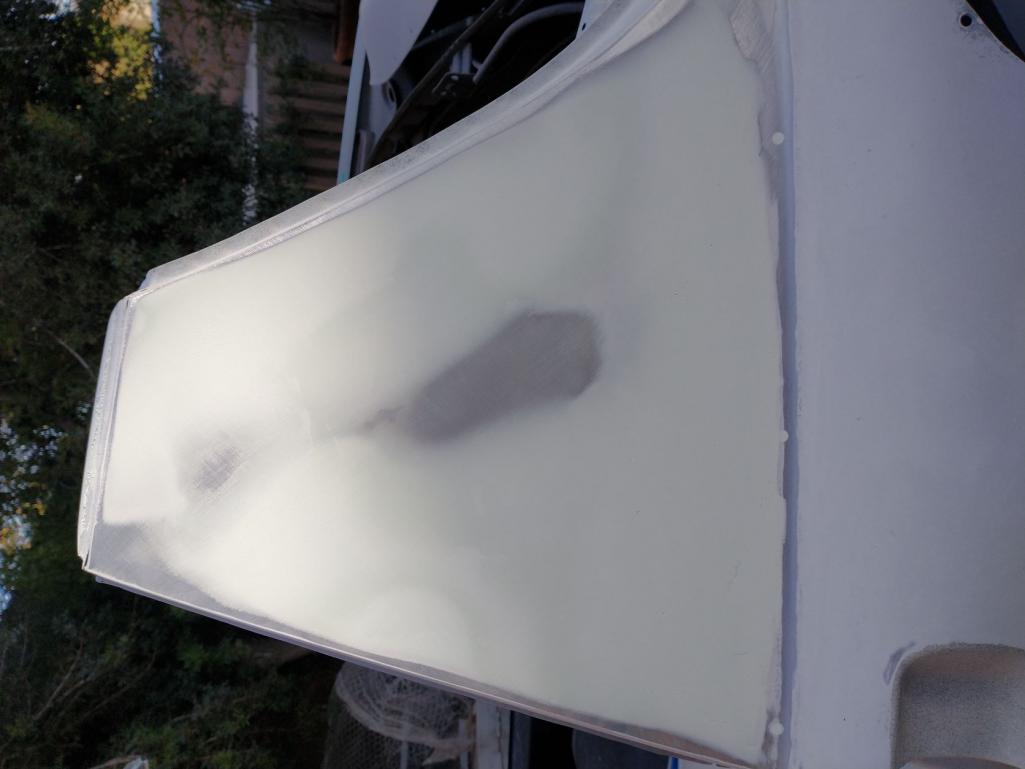 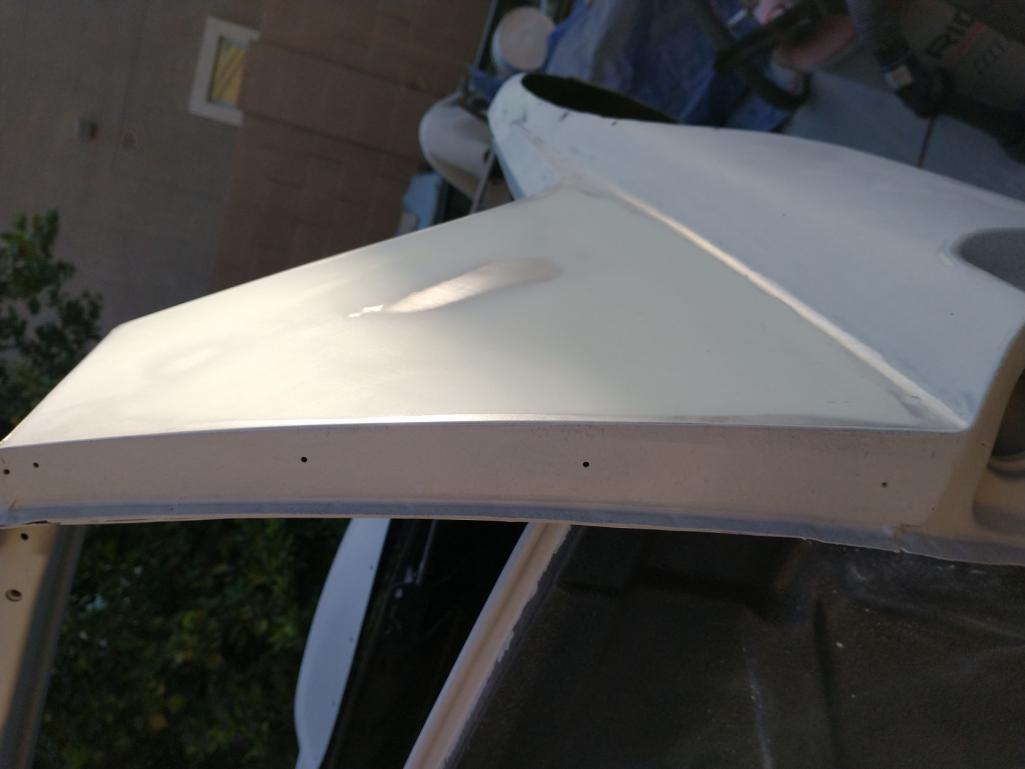 Just need to skim it with some glaze at this point. And, of course need to do the same on the passenger sail panel. And the top of the Targa bar... (IMG:style_emoticons/default/wacko.gif) |
| mgarrison |
 Nov 23 2021, 03:07 PM Nov 23 2021, 03:07 PM
Post
#124
|
|
Member   Group: Members Posts: 398 Joined: 14-February 20 From: Chandler, AZ Member No.: 23,922 Region Association: Southwest Region 
|
After getting all my filler and panels as good as I could (without my head exploding!), I saw there was a chance for rain the next day (IMG:style_emoticons/default/blink.gif) Since my boss was AWOL and not responding to me, I figured it was time for a break and there was time enough to get a quick coat of primer covering the bare metal to avoid any flash rust from moisture (and my head from exploding). Went pretty well & quick despite being too breezy...
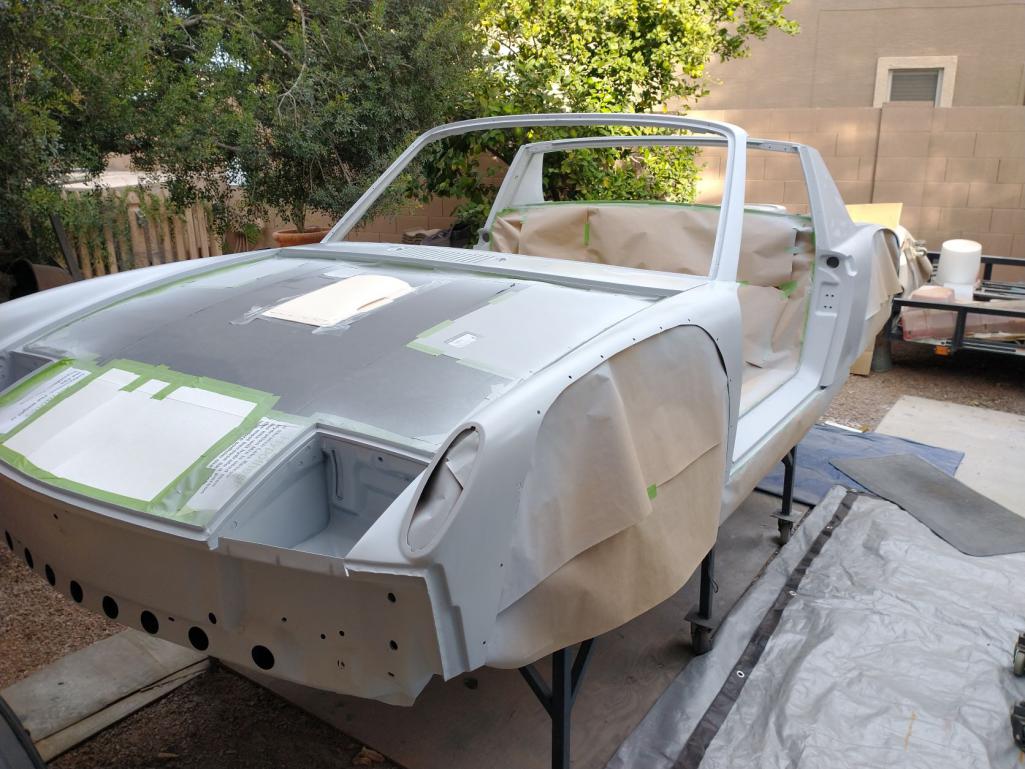 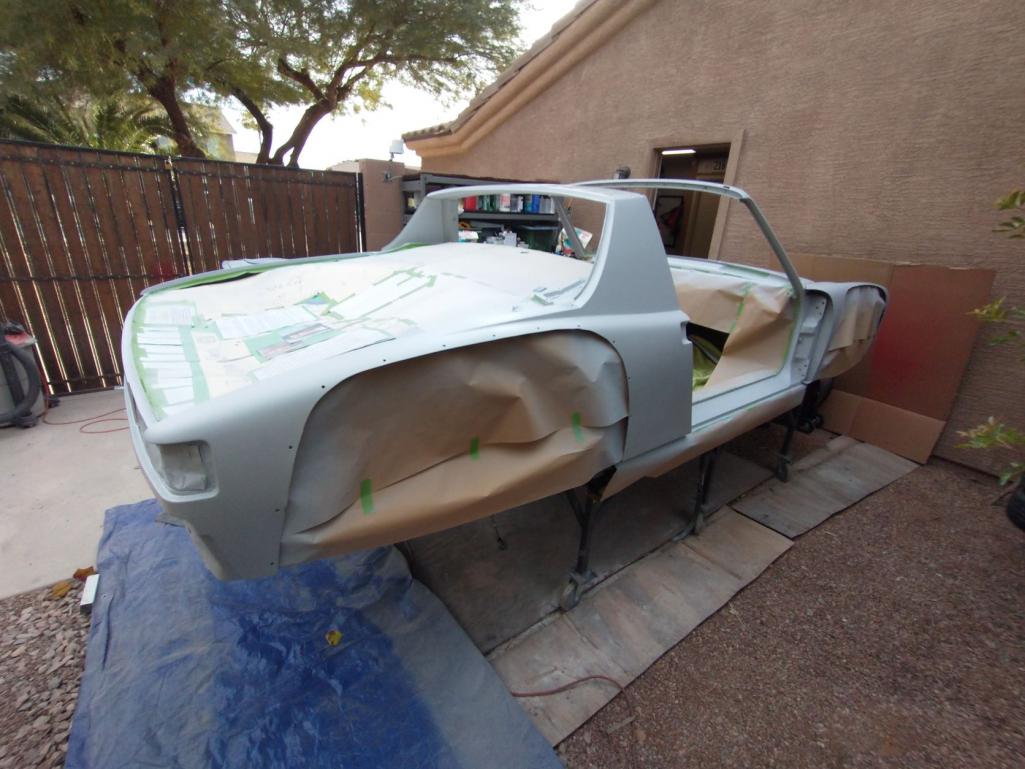 And then I started to notice some "dry patches". I needed to mix up another batch of primer to finish the last fender, so I mixed a bit more and went over the "dry patches" again to make sure they were covered well. No joy... 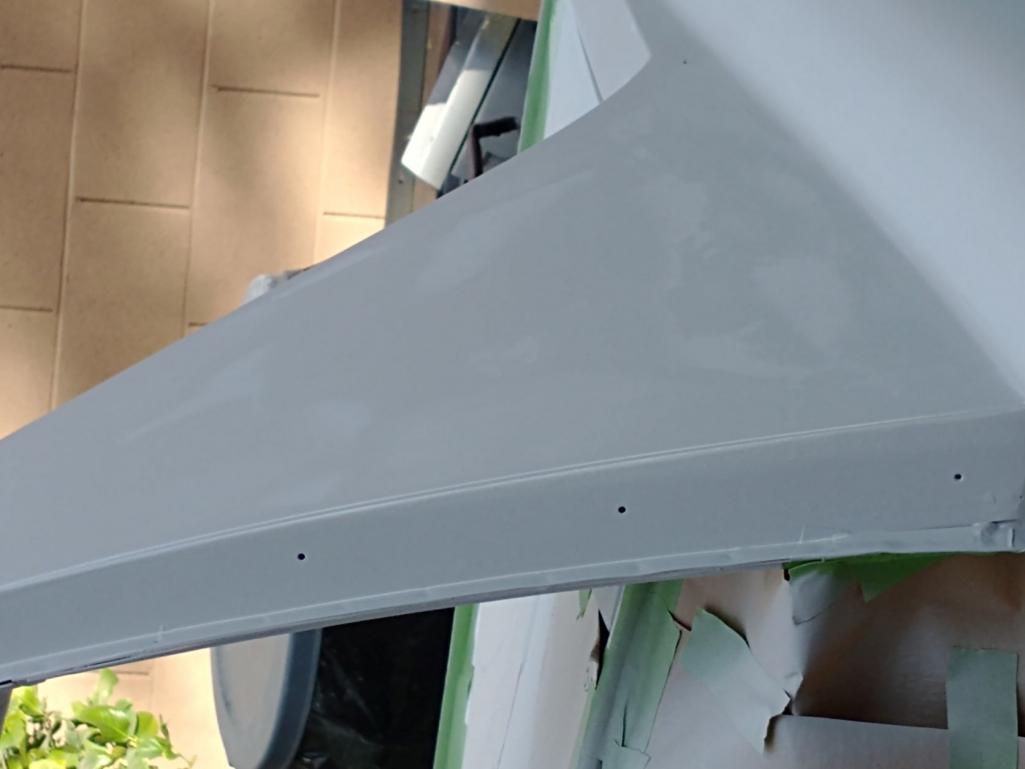 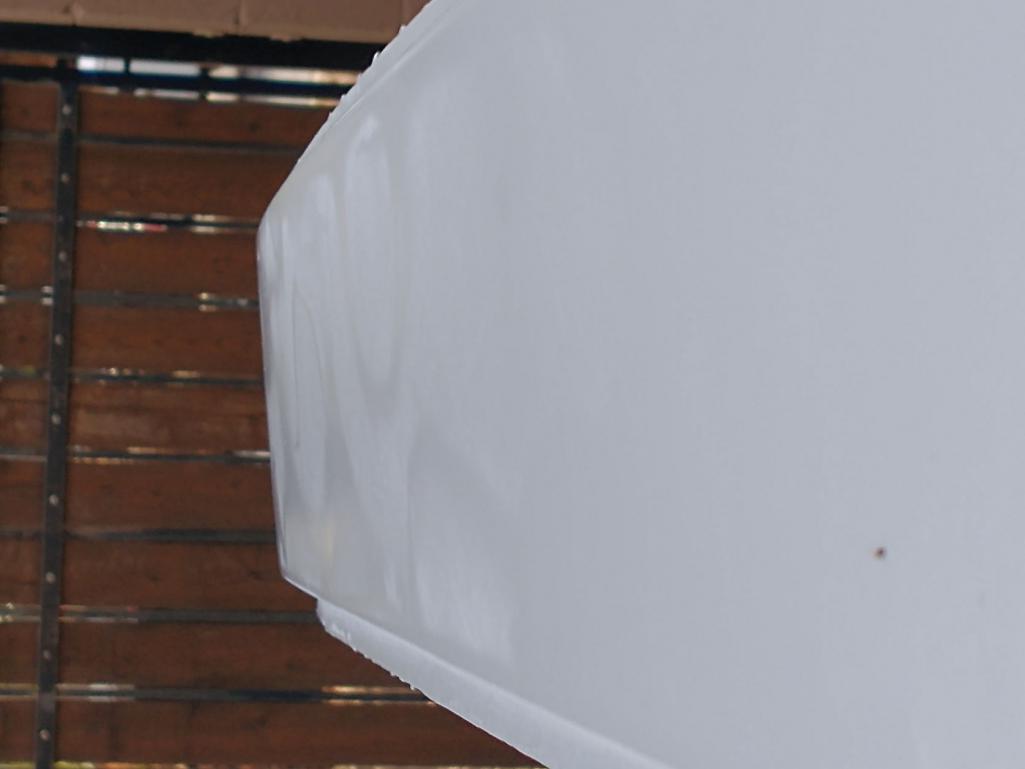 After closer inspection I saw that anywhere I had done filler & glaze, it looked rough/dry. It slowly dawned on me that in my rush to get the bare metal covered, I had failed to sand the filler/glaze with anything beyond 120 grit (IMG:style_emoticons/default/headbang.gif) I've decided doing bodywork is like playing a video game where you know all the required steps to win/complete the game, but doing them perfectly, and at exactly the right second while not impossible, is highly improbable. (IMG:style_emoticons/default/sheeplove.gif) |
| mgarrison |
 Dec 19 2021, 05:15 PM Dec 19 2021, 05:15 PM
Post
#125
|
|
Member   Group: Members Posts: 398 Joined: 14-February 20 From: Chandler, AZ Member No.: 23,922 Region Association: Southwest Region 
|
I finally got the chassis sanded again, and sprayed with primer one last time - I hope! I moved on to the flares and then the doors. Block sanding is rather revealing when it comes to the imperfections you can discover.
The fiberglass flares were not terribly expensive, but when you really get down close with them it gets frustrating fast! 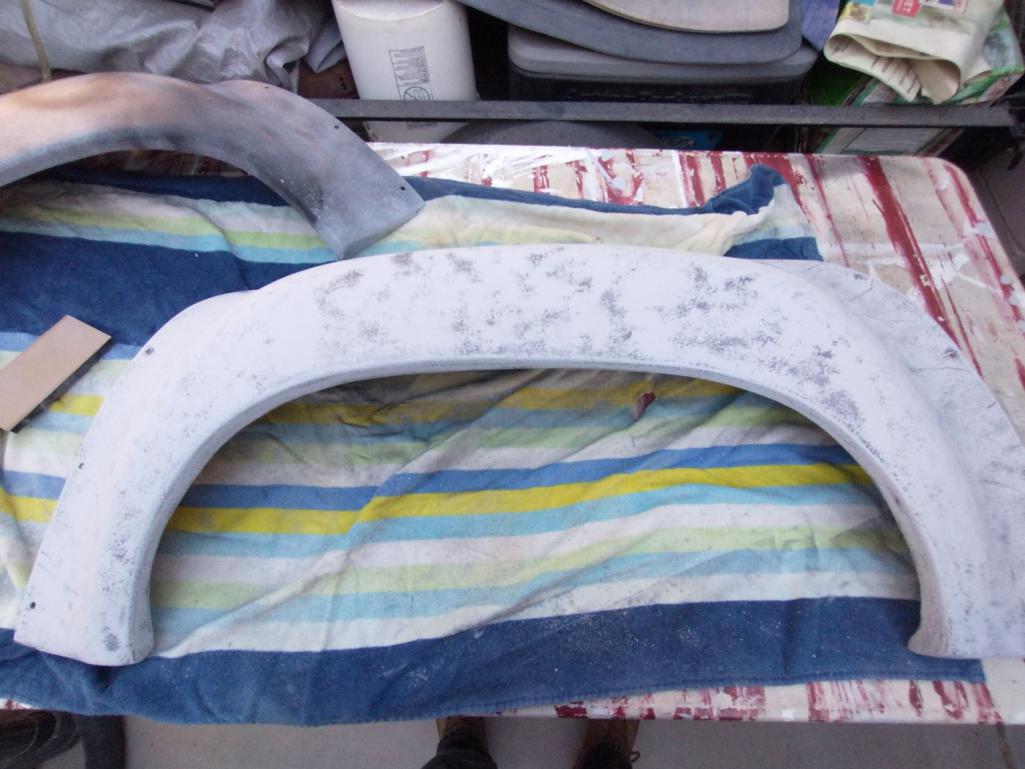 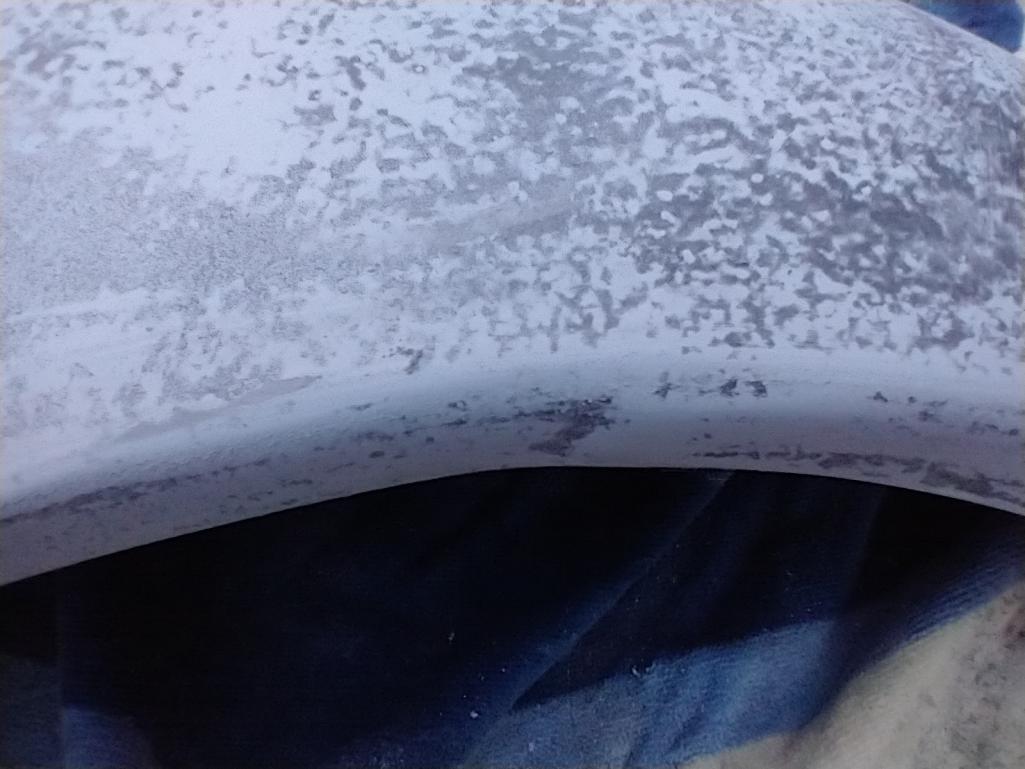 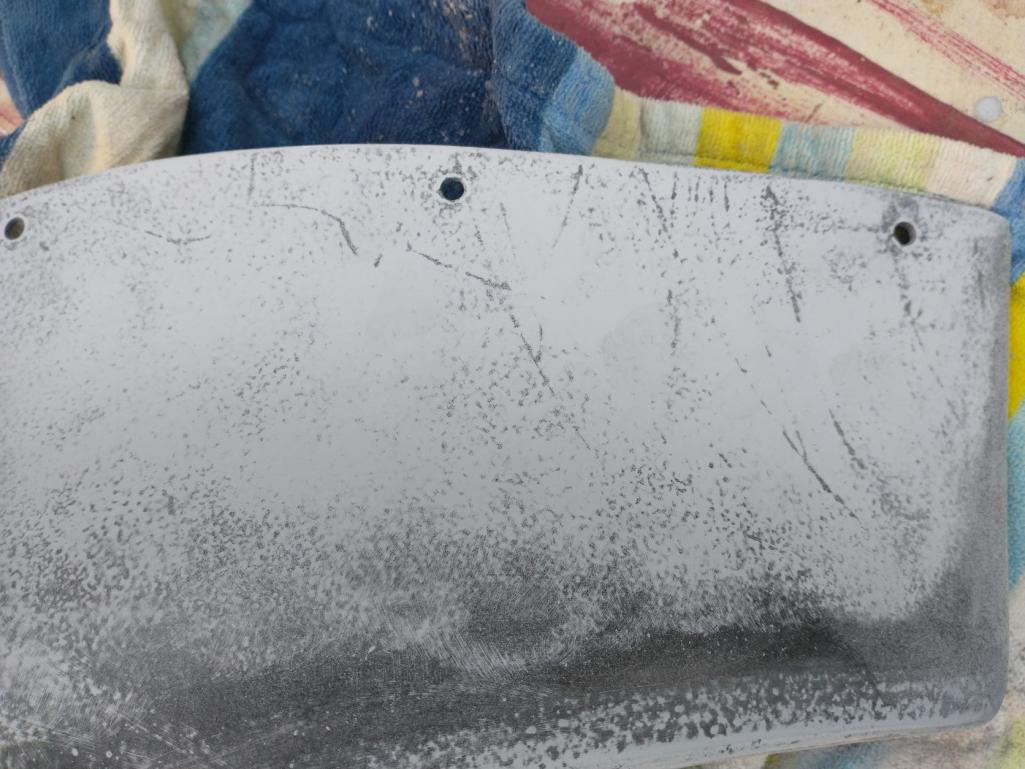 Lucky for me, I had one of the best supervisors around overseeing my efforts! (IMG:style_emoticons/default/lol-2.gif) 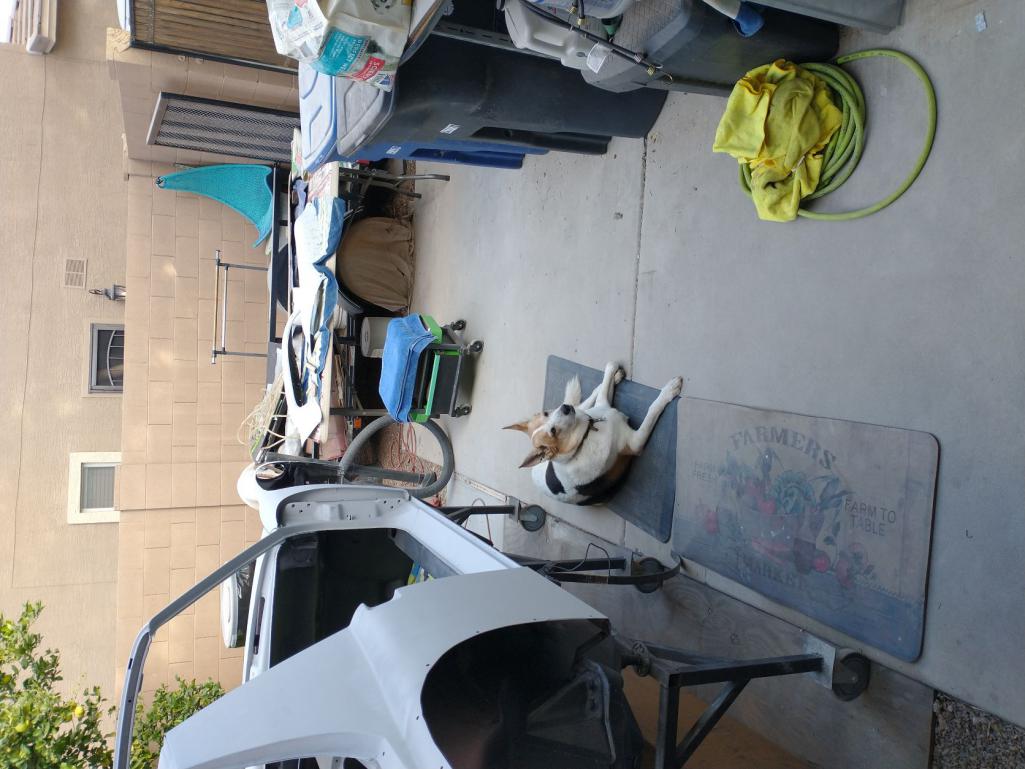 I know the doors are 48 years old, but whew, they are anything but flat/smooth! 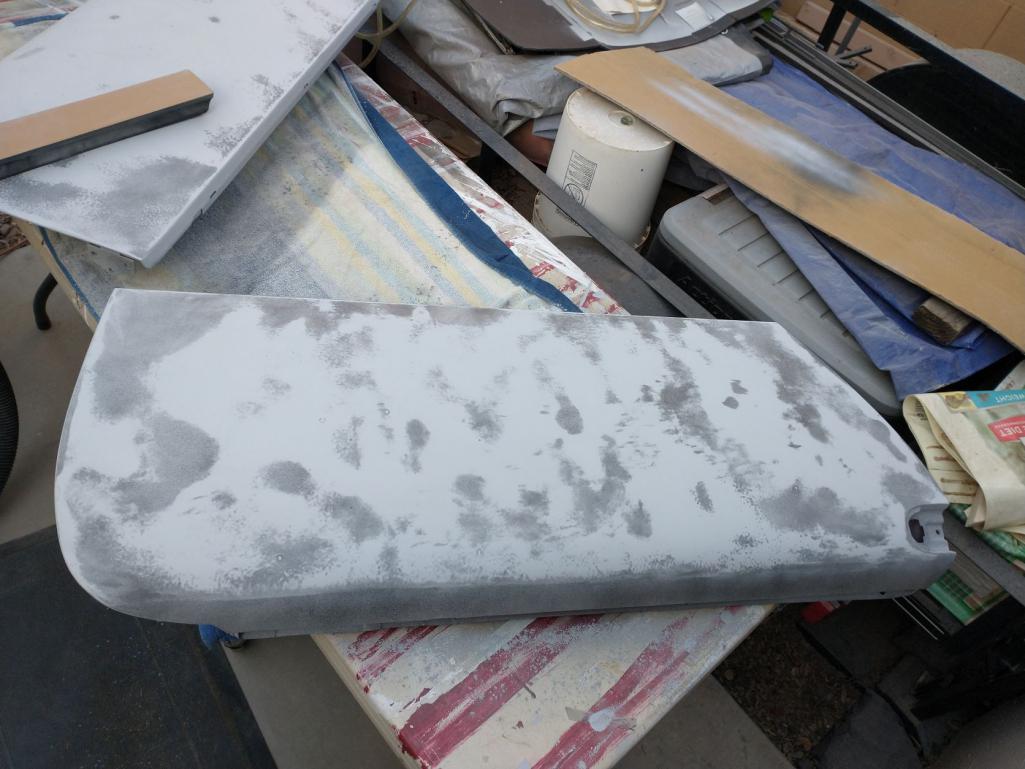 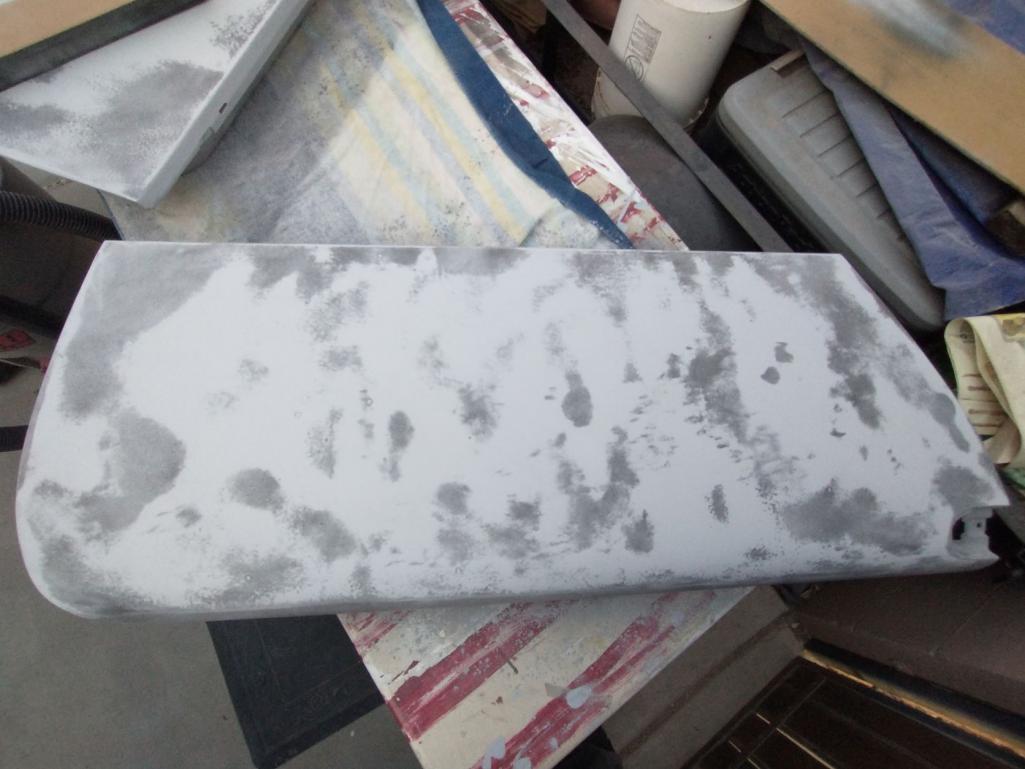 I ended up ordering some spray filler/surfacer - basically a high build primer, I guess. I figured it would really help with the minor imperfections I struggled to fix with standard filler/glaze. Also figured I would use the spray surfacer on the flares to deal with their lack of a smooth surface. The surfacer needs a 1.8-2.5mm spray tip. I could not readily find a spray gun with a larger tip, and did not want to spend $100+ for a 1.4mm gun and a 1.8mm tip to go with it. I saw a video of a guy who got the HF "purple" $15 gun and drilled the tip out to use for thicker primers - seemed like a good idea to try for $15...did not work out well! I could not get the gun to spray anything, not even water after drilling the tip out. It's spare parts now! So, what do you do when you have product mixed up, and the gun its in wont spray? Grab another gun of course, but the only thing I had for spraying thicker stuff was the Shutz gun for spraying the Raptor bed liner...Well, it came out a little "bumpy" to say the least! (IMG:style_emoticons/default/headbang.gif) 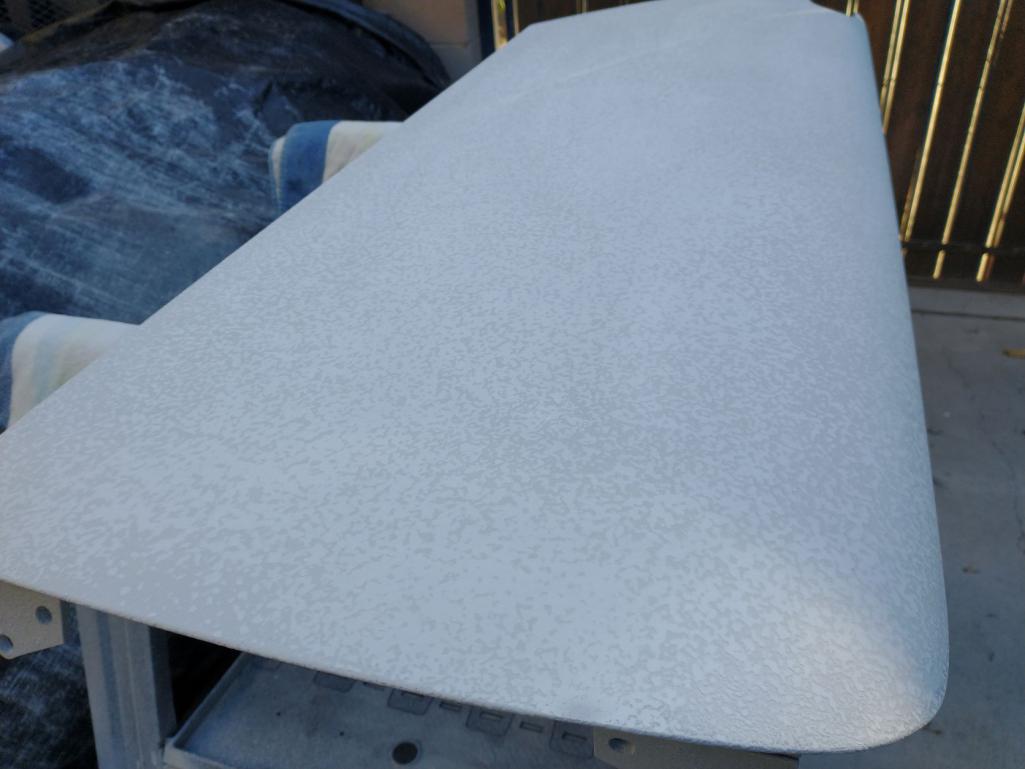 90% gets sanded off anyway...right? It just takes longer...I finally found a two gun kit HF sells for $50 that includes a 1.8mm tip. Worked ok in the end, but seems like I need to thin the surfacer a bit so it will spray easier. 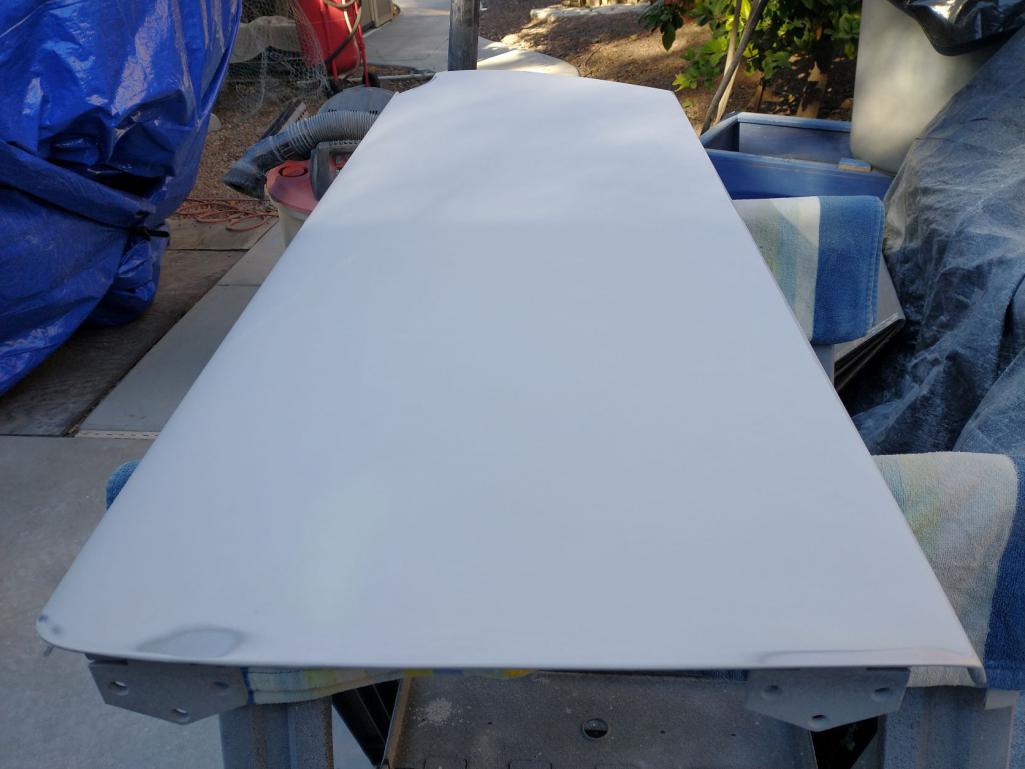 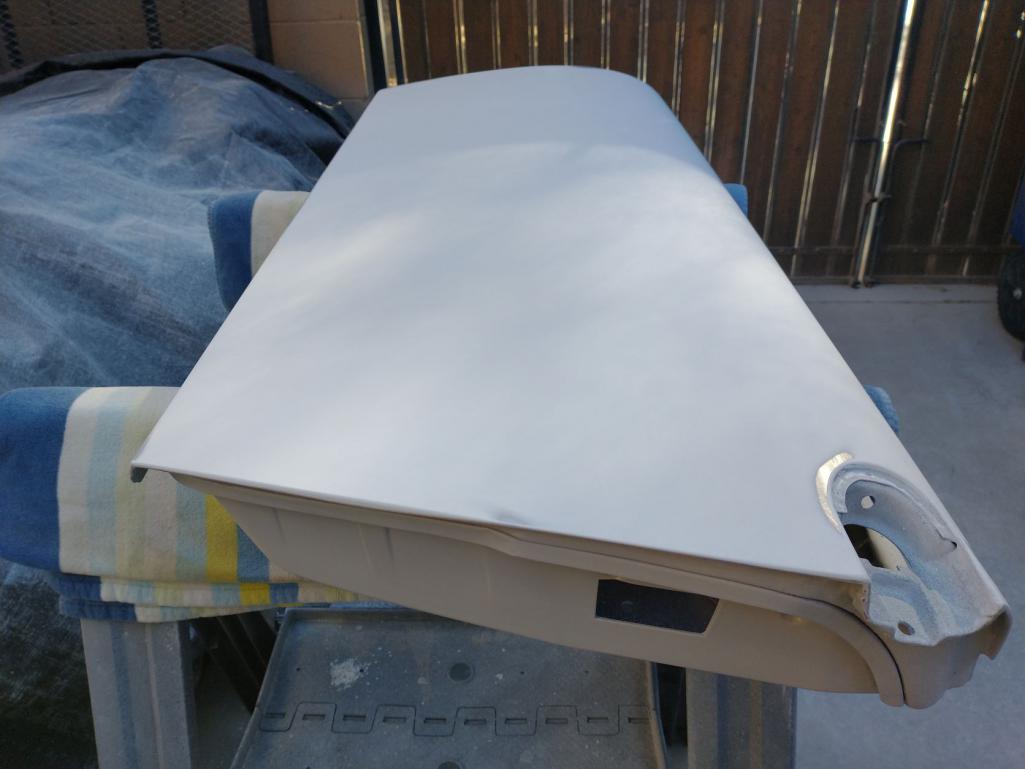 |
| Mayne |
 Dec 20 2021, 08:23 AM Dec 20 2021, 08:23 AM
Post
#126
|
|
Member   Group: Members Posts: 254 Joined: 28-February 17 From: NM Member No.: 20,880 Region Association: None |
Looking good. All this effort to flat these panels will definitely pay off with the final result.
|
| mgarrison |
 Jan 7 2022, 03:55 PM Jan 7 2022, 03:55 PM
Post
#127
|
|
Member   Group: Members Posts: 398 Joined: 14-February 20 From: Chandler, AZ Member No.: 23,922 Region Association: Southwest Region 
|
Still plodding along, slowly (IMG:style_emoticons/default/brain.gif)
Working on block sanding the flares after doing two coats of the primer-surfacer. More tedious than the doors for sure, but less surface area, I guess (IMG:style_emoticons/default/idea.gif) 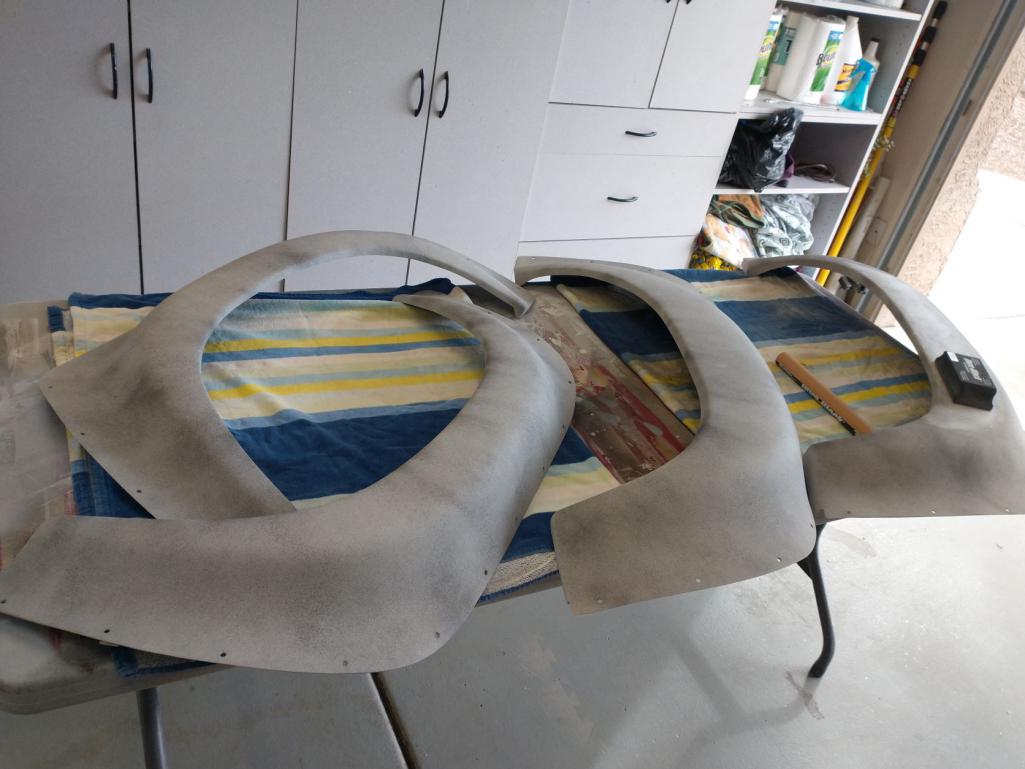 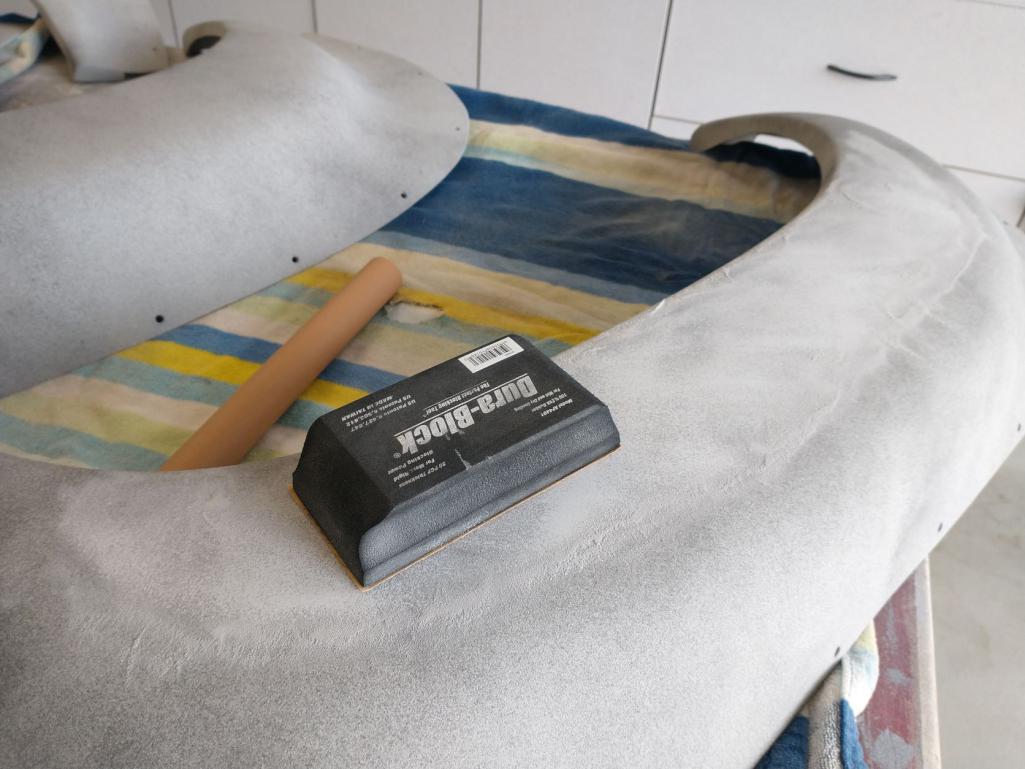 How'd that song go..."One down. One (or 3 in my case!) to go. Another town. One more show..." 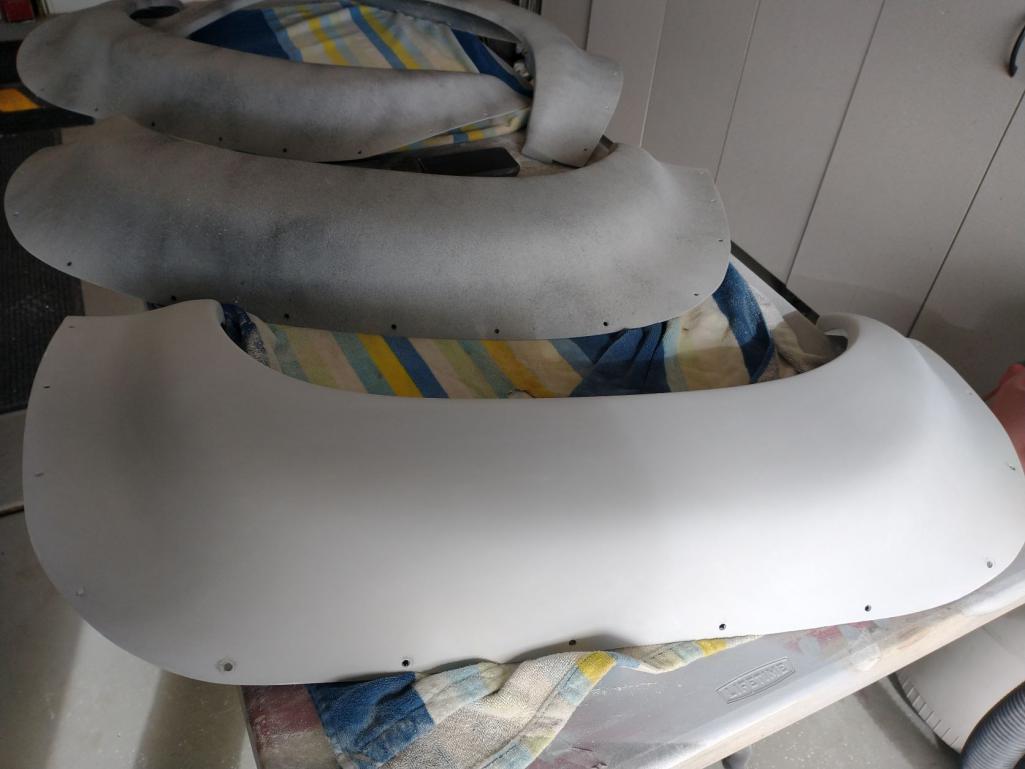 I'm hearing my hood and decklid are supposed to ship out on Tuesday. WOOHOO, more sanding! (IMG:style_emoticons/default/w00t.gif) |
| slowrodent |
 Jan 7 2022, 04:44 PM Jan 7 2022, 04:44 PM
Post
#128
|
|
Member   Group: Members Posts: 215 Joined: 29-February 20 From: Tucson/Oro Valley Member No.: 23,981 Region Association: Southwest Region 
|
Mike
It makes me chuckle how similar our experiences have been with the high-build primer. I too have an old HF paint gun that would not spray it. I too drilled mine out to a 2.0 tip size. Still had tons of trouble spraying it, and the whole gun plugged up inside. I managed to tear it down and clean it out, but I'm not looking forward to trying it again. I too tried to reduce it a bit (per recommendations) and I really didn't see any improvement. Luckily I'd say my bodywork is essentially done, with the exception of a final wet sand. (minus some final work on trunk, hood, doors) Always great to see progress such as yours. Keep up the great work! Kevin |
| mgarrison |
 Jan 19 2022, 04:44 PM Jan 19 2022, 04:44 PM
Post
#129
|
|
Member   Group: Members Posts: 398 Joined: 14-February 20 From: Chandler, AZ Member No.: 23,922 Region Association: Southwest Region 
|
I had my primed flares stashed in the storage, but they were in the way, and I REALLY needed to see/feel some progress, so I installed them today. It's a bit of a process, but came out really nice, IMHO!
I decided to use Rivnuts and motorcycle fairing bolts instead of body rivets. I figured I would be able to easily remove the flares for suspension work, or if one gets damaged for some crazy reason. Rivnuts are just too cool! 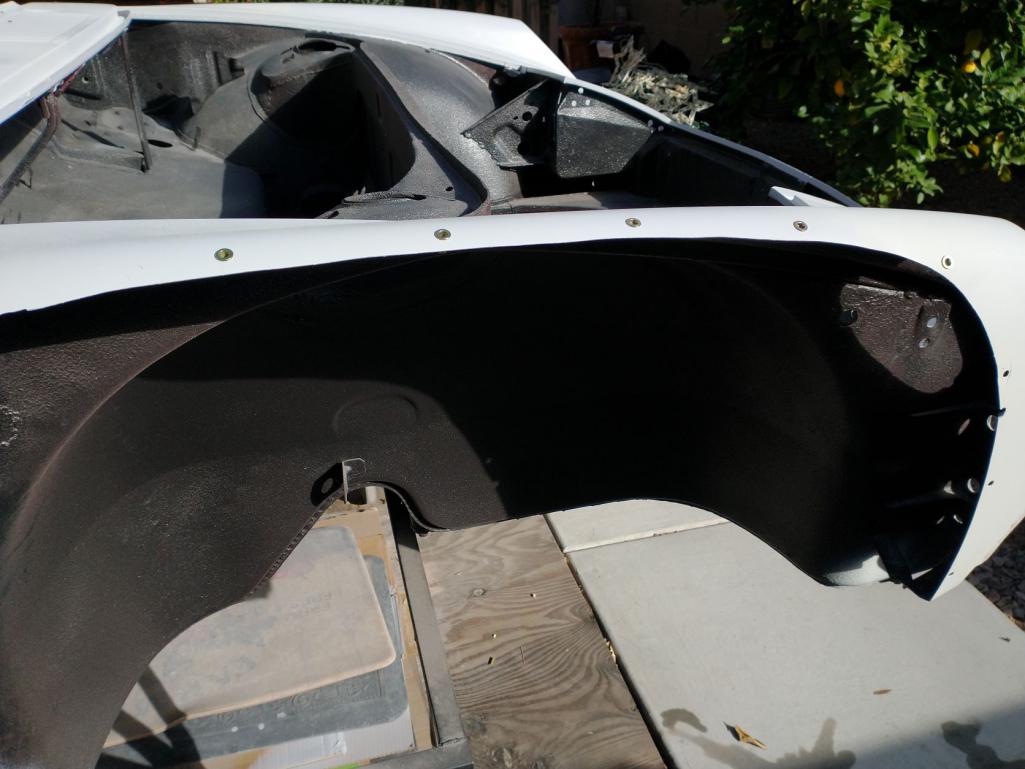 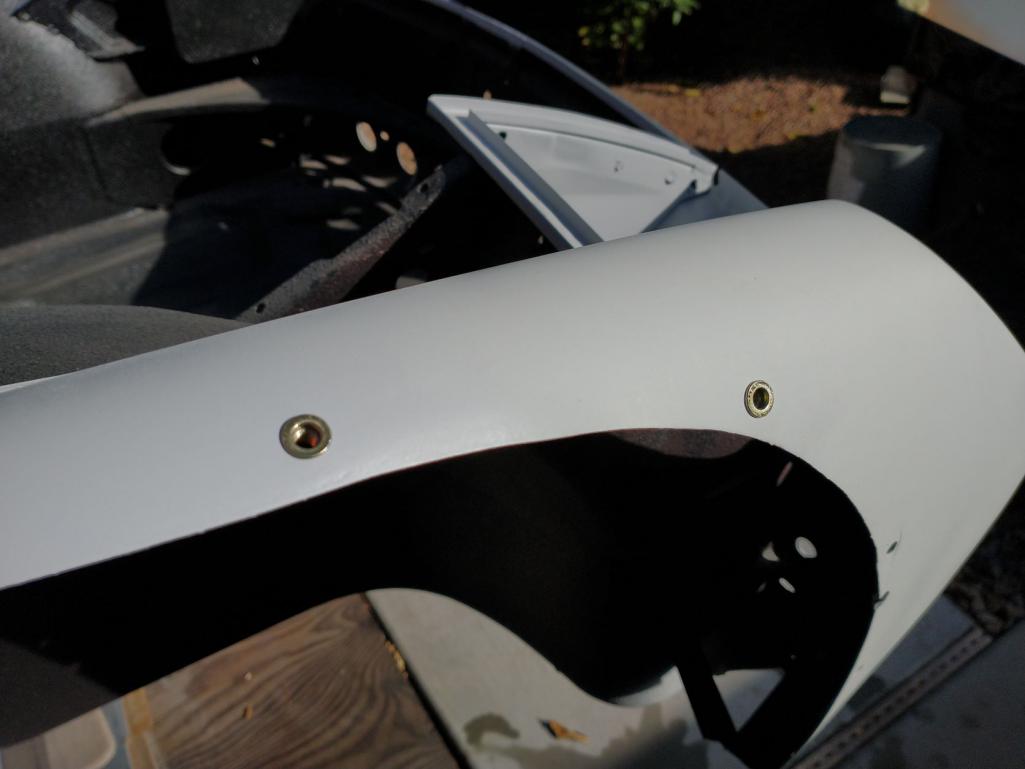 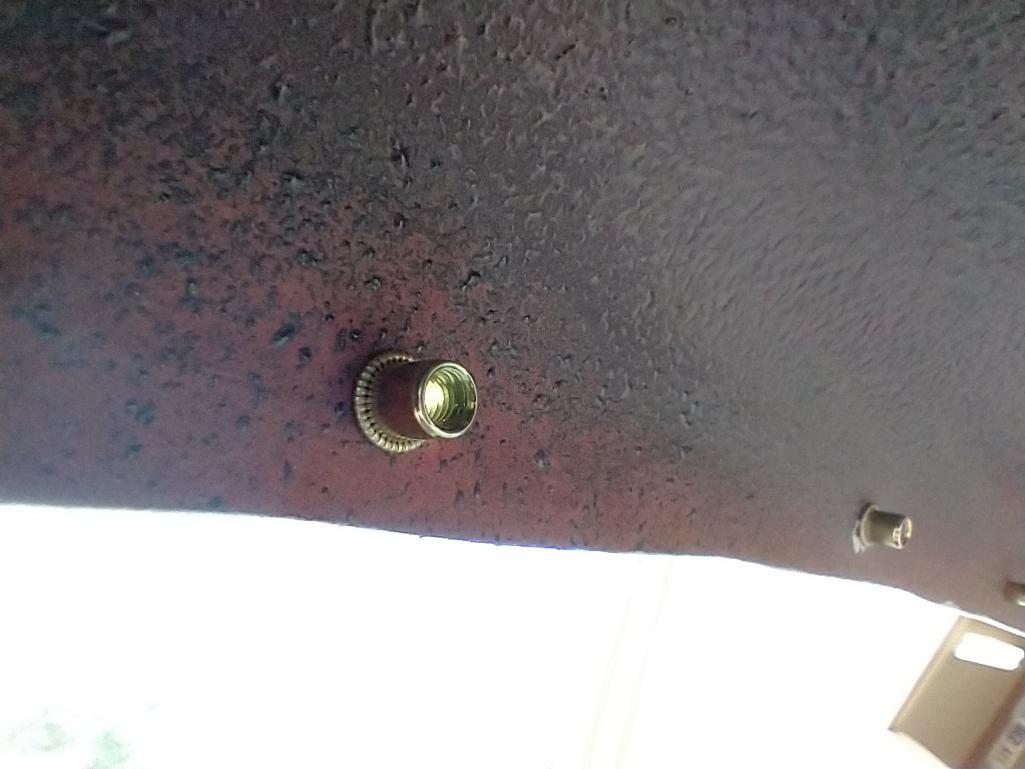 I first tried test fitting everything without the fender beading. 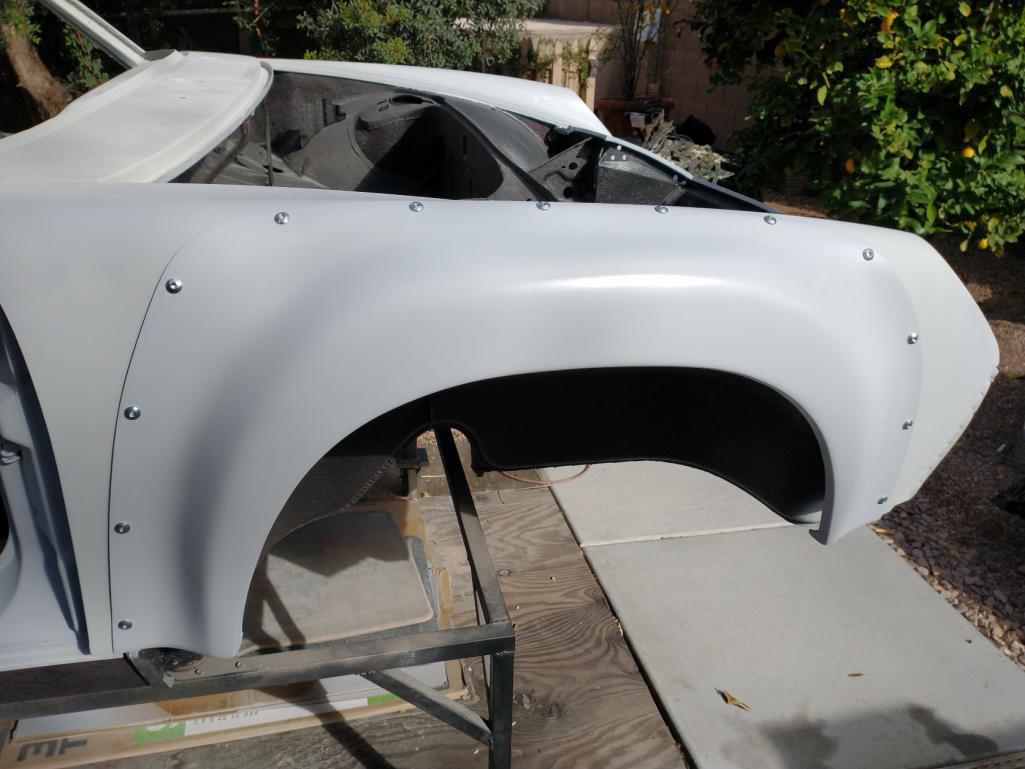 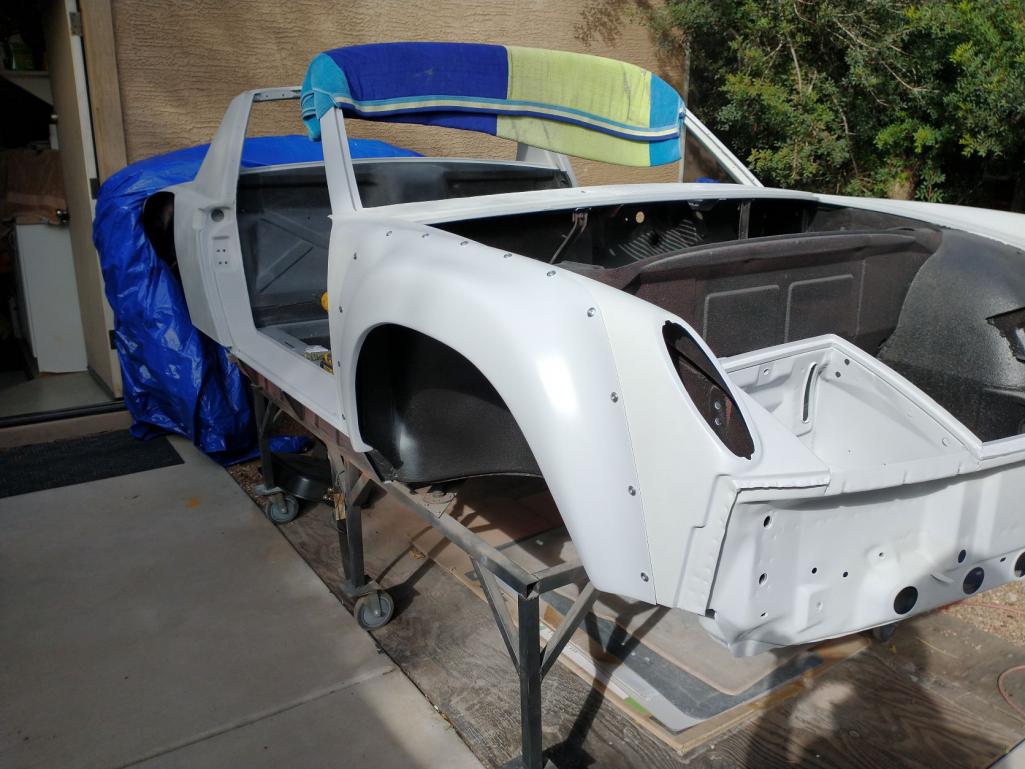 But then decided I should go ahead and install the beading since I will just leave the flares on to keep them out of my way. 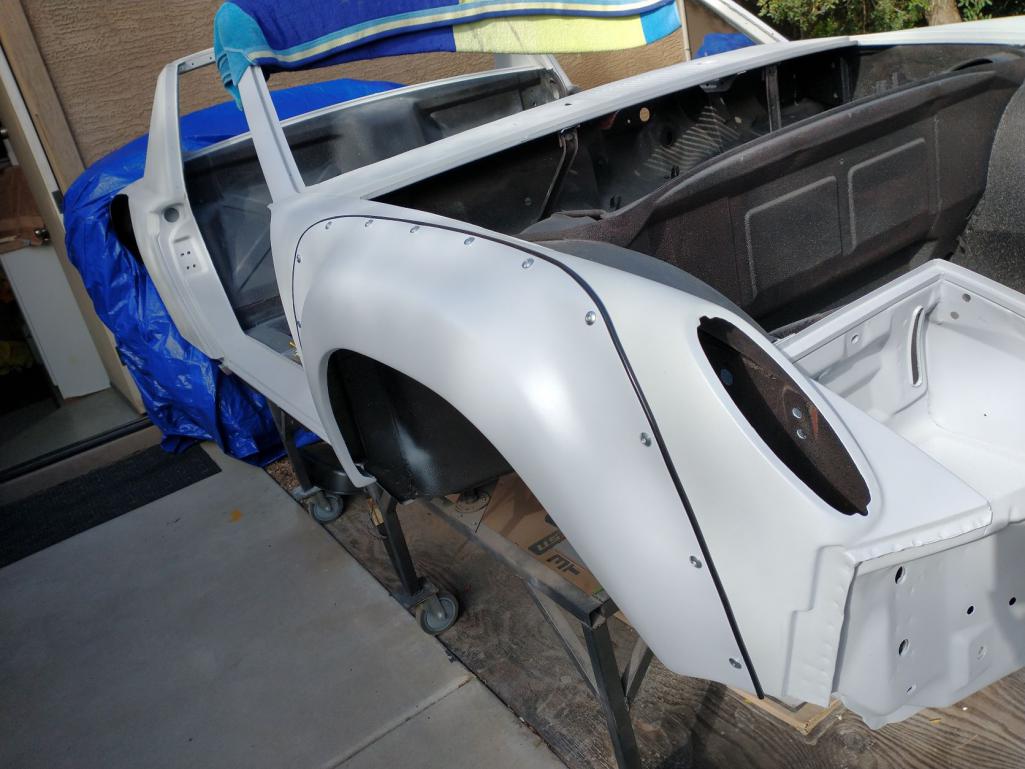 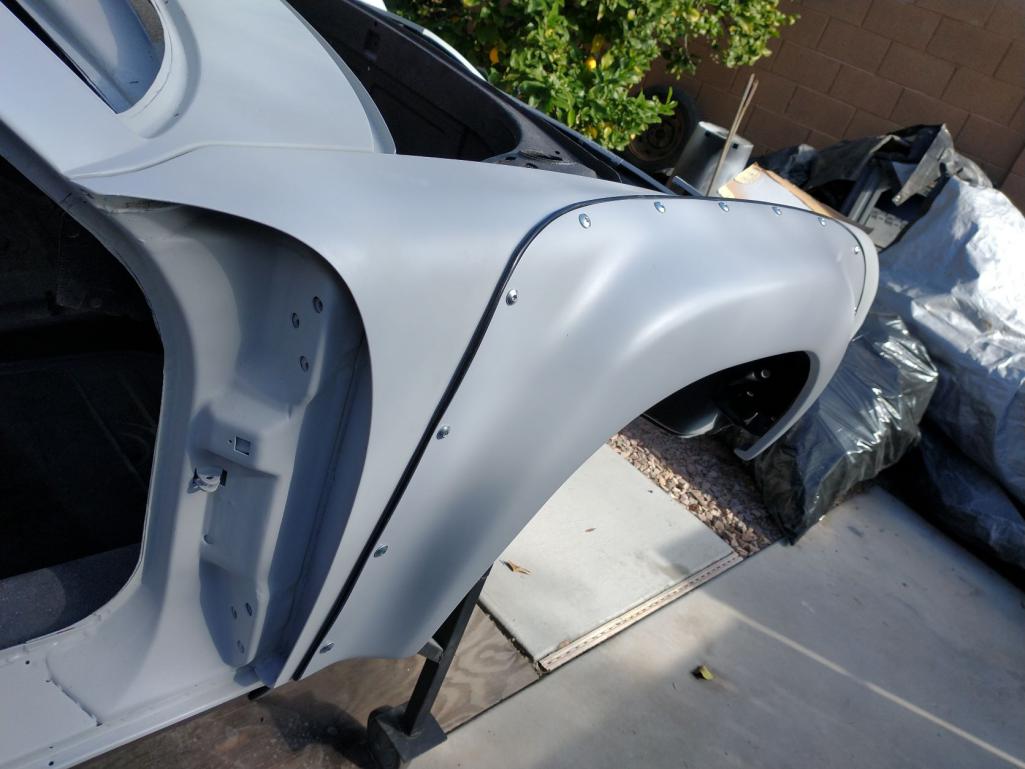 After the first fender, the process went pretty smooth, and things started looking more and more cool! (IMG:style_emoticons/default/piratenanner.gif) 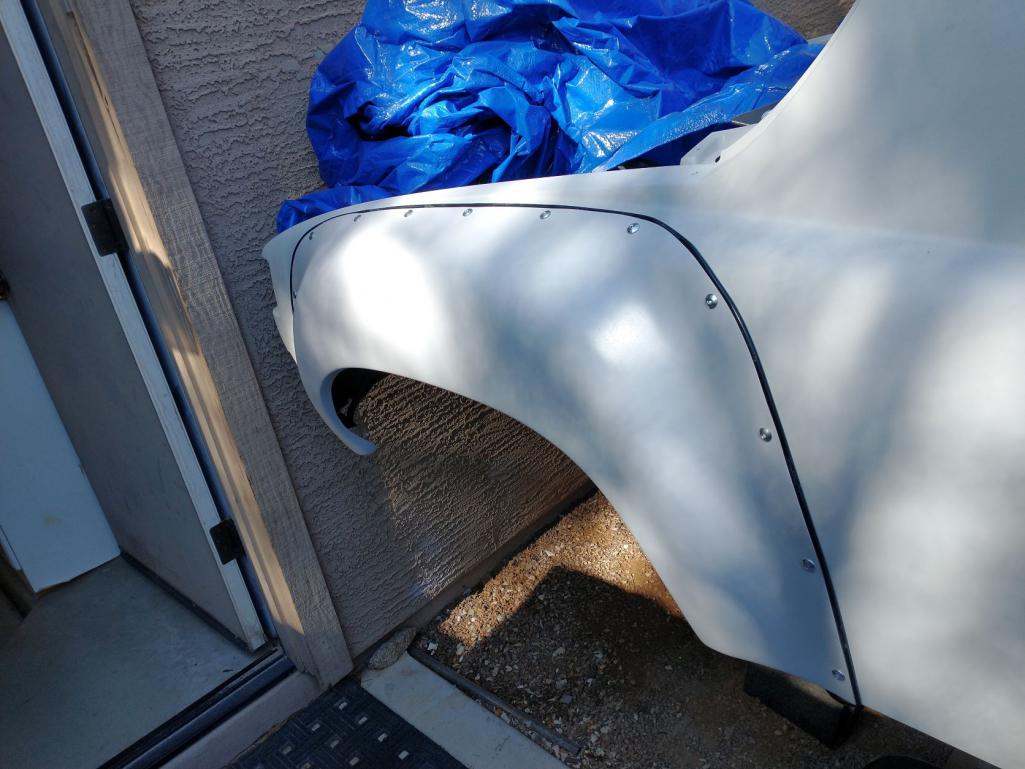 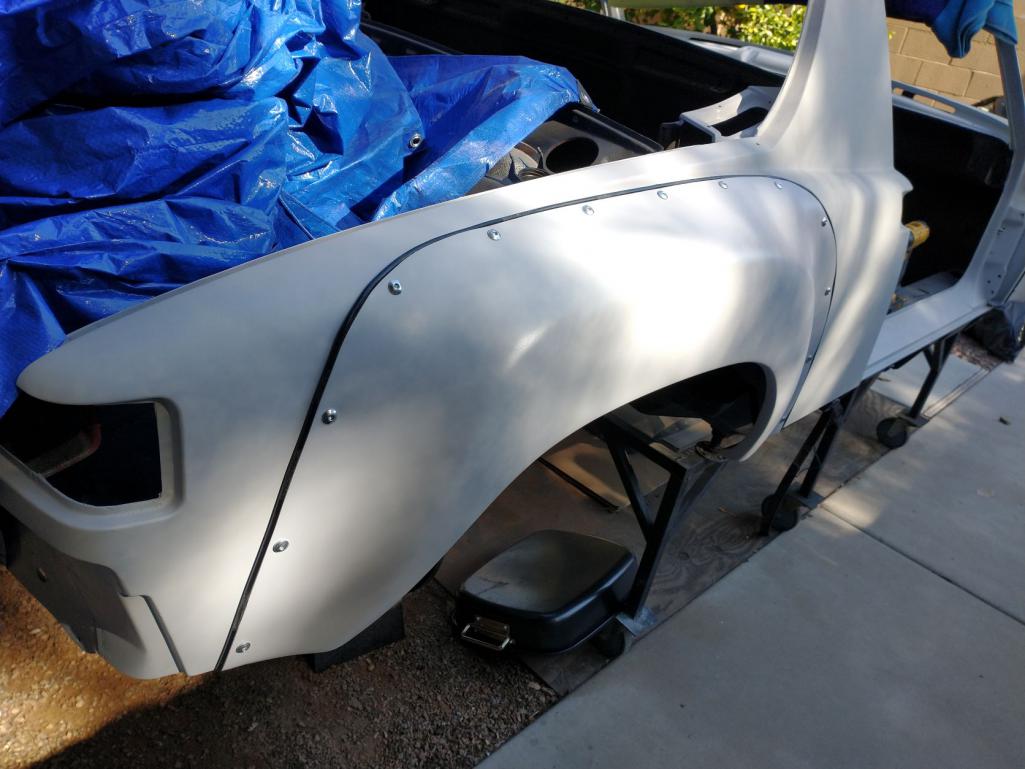 Looking pretty "car like" even if it is only primer! 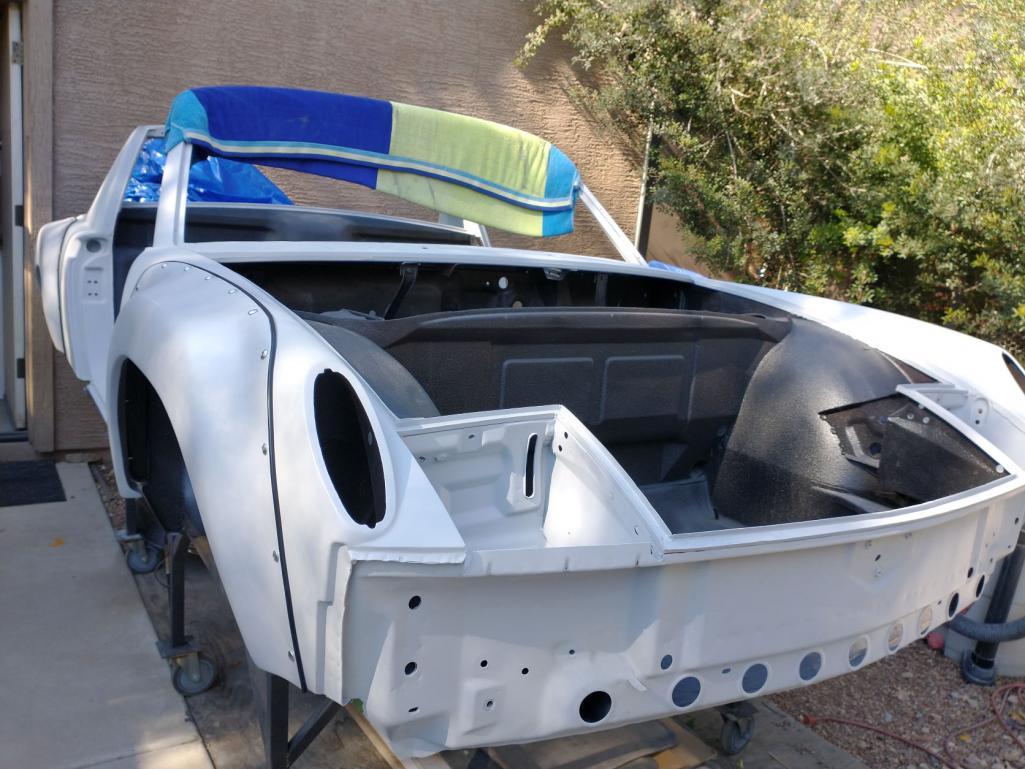 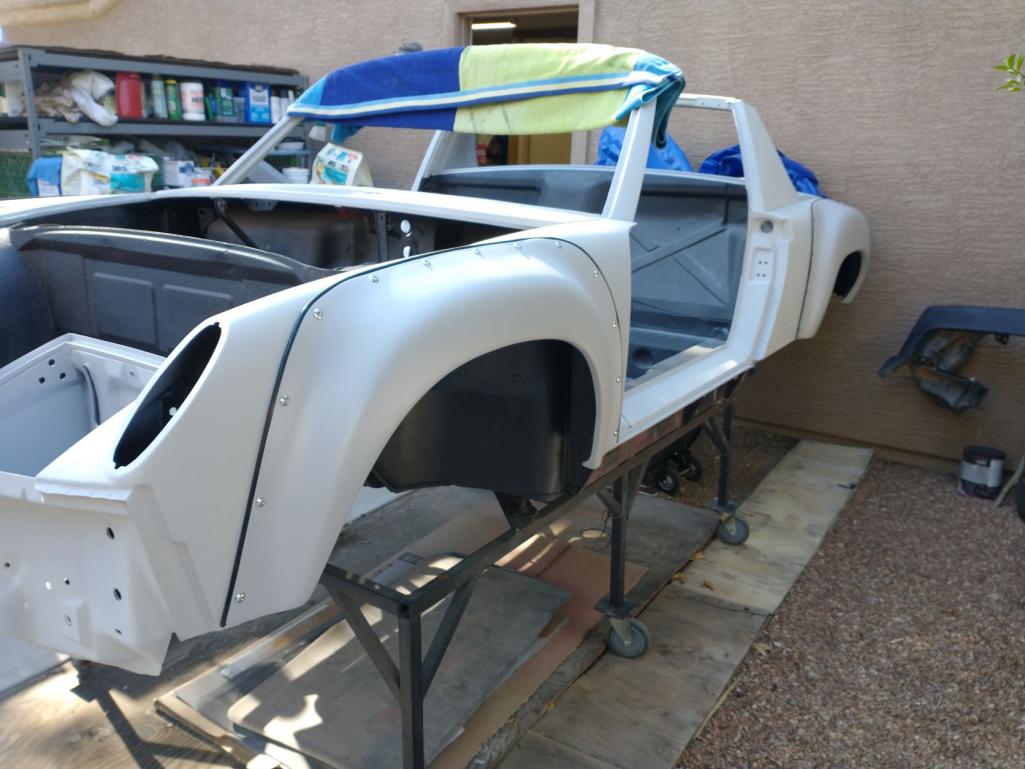 I figured I was on a roll, so I test fit the valance I picked up from a local member who was not going to use it. 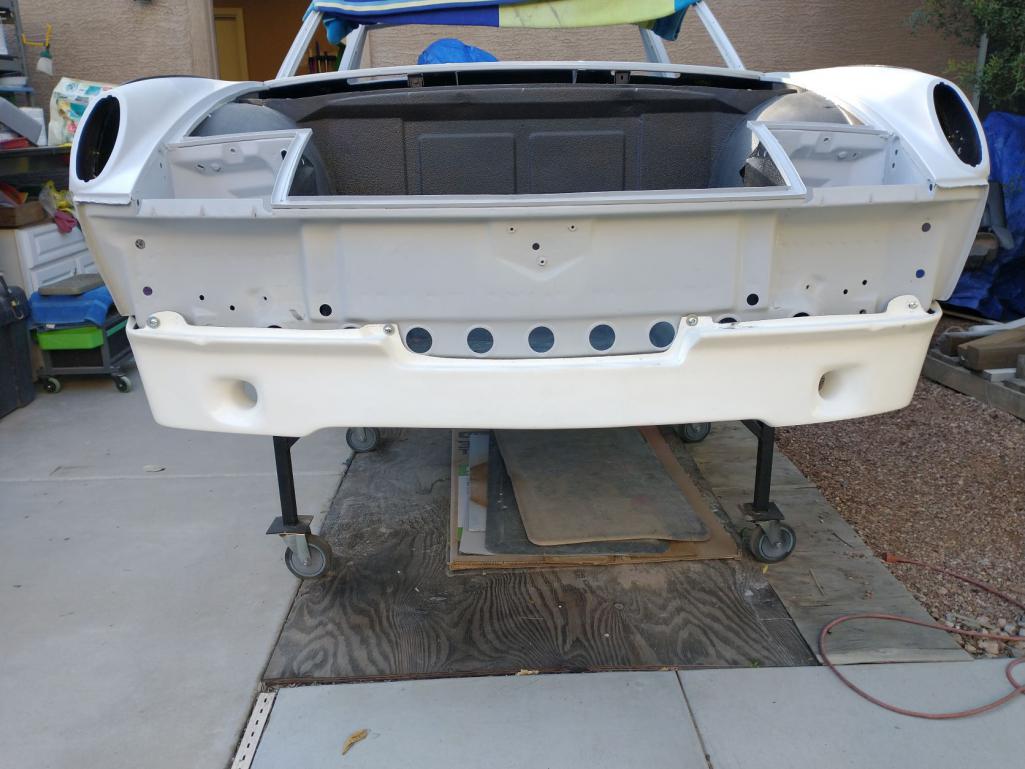 Anyone have any great suggestions for a straight forward way to build out the ends of the valance to match the flares...? (IMG:style_emoticons/default/popcorn[1].gif) 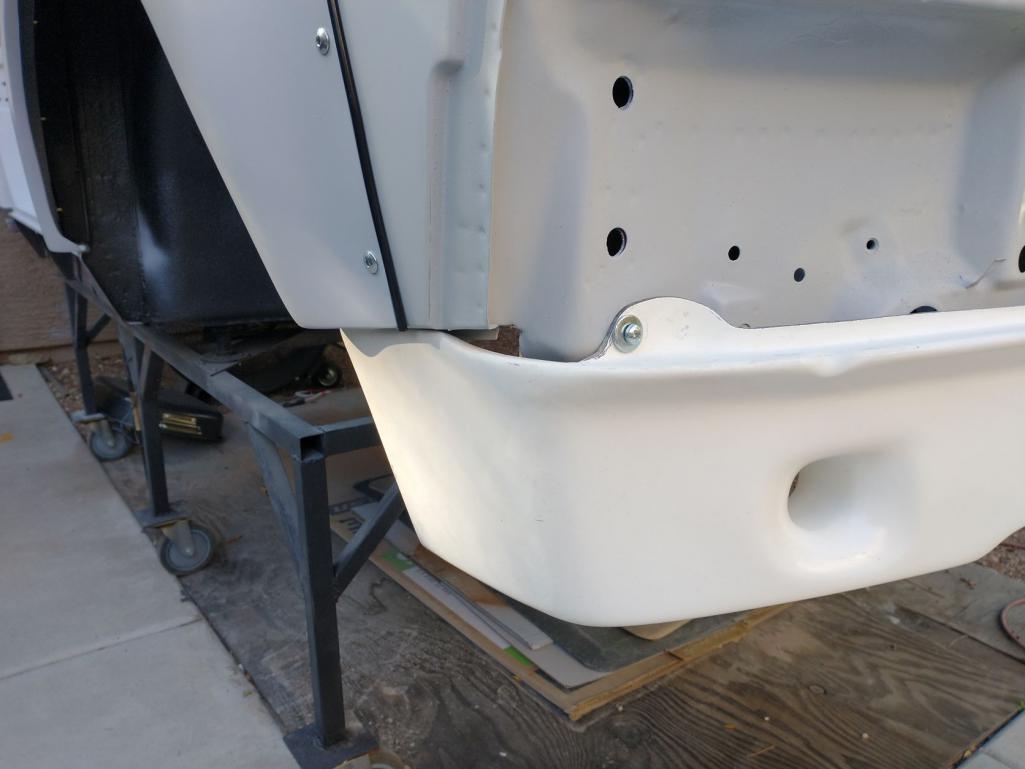 |
| 76-914 |
 Jan 19 2022, 10:50 PM Jan 19 2022, 10:50 PM
Post
#130
|
|
Repeat Offender & Resident Subaru Antagonist           Group: Members Posts: 13,830 Joined: 23-January 09 From: Temecula, CA Member No.: 9,964 Region Association: Southern California 
|
I glued urethane blocks in place, sanded them down to match the contour and glassed over.
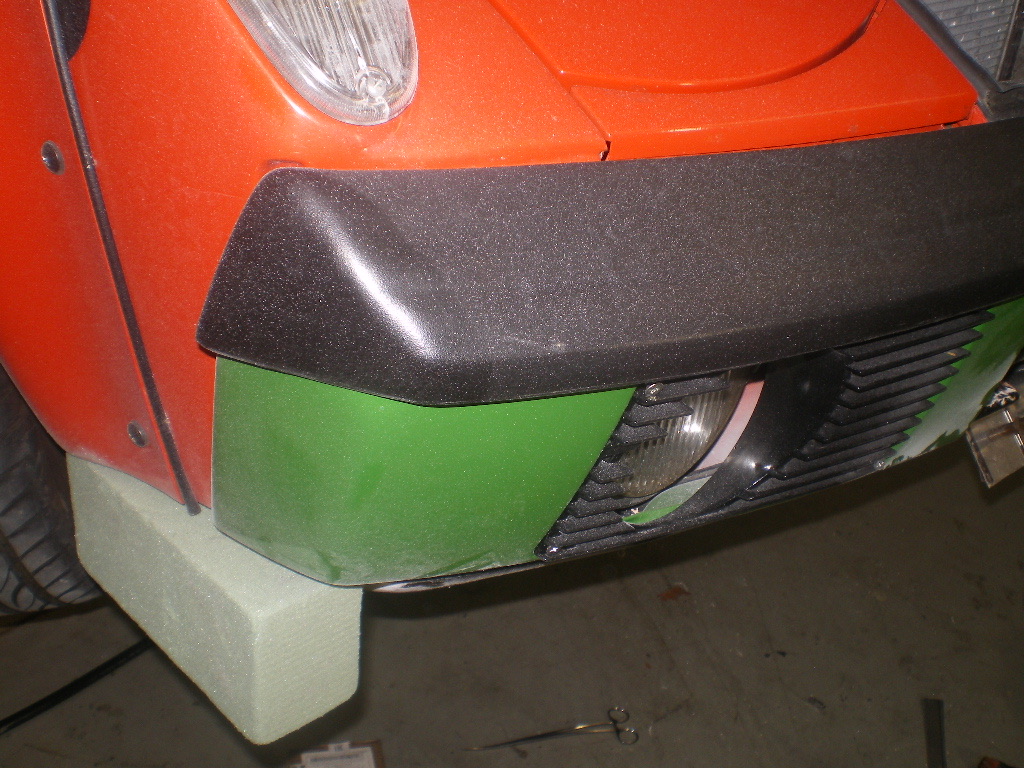 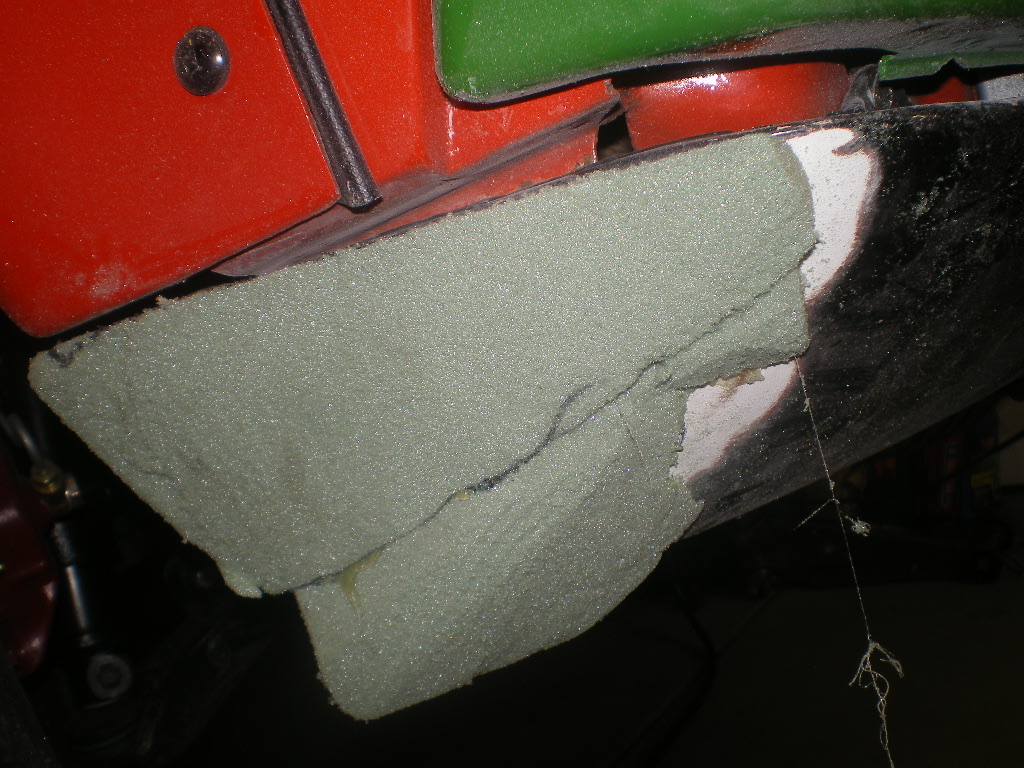 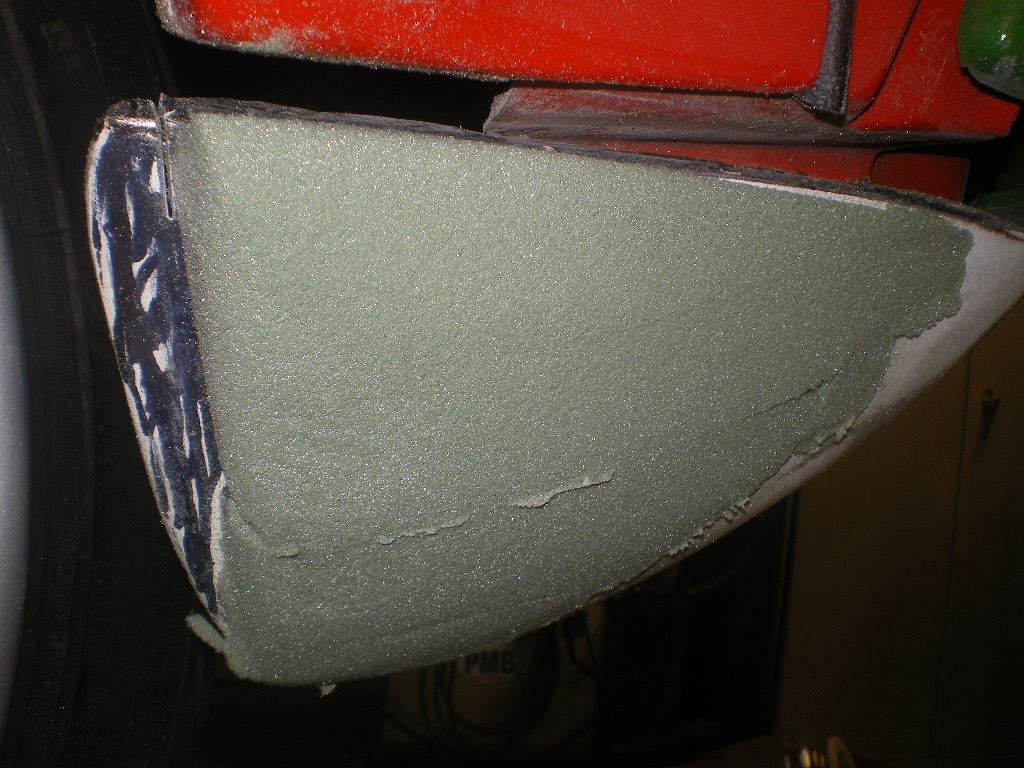 |
| mgarrison |
 Jan 20 2022, 07:48 AM Jan 20 2022, 07:48 AM
Post
#131
|
|
Member   Group: Members Posts: 398 Joined: 14-February 20 From: Chandler, AZ Member No.: 23,922 Region Association: Southwest Region 
|
NICE! Thanks for sharing - my brain had not stumbled across a relatively easy, straightforward way of building the ends up to match.
|
| mgarrison |
 Jan 20 2022, 08:39 PM Jan 20 2022, 08:39 PM
Post
#132
|
|
Member   Group: Members Posts: 398 Joined: 14-February 20 From: Chandler, AZ Member No.: 23,922 Region Association: Southwest Region 
|
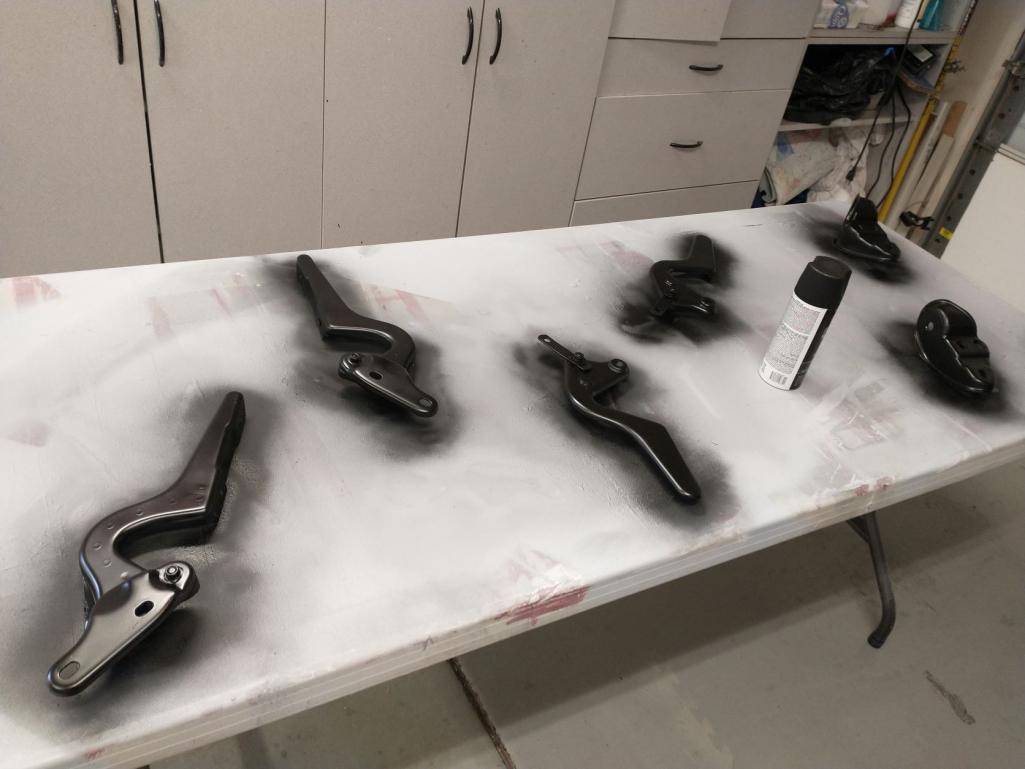
While I'm waiting for my hood and deck lid (sitting on a Yellow Freight truck in PHX - who knows when I'll hear from them to schedule delivery), I figured I would get the hinges ready to put to use. I tried using a wire wheel, but there were too many nooks and crannies, so I got out the abrasive blaster. It makes quick work of things, but the clean up takes forever - such a mess!
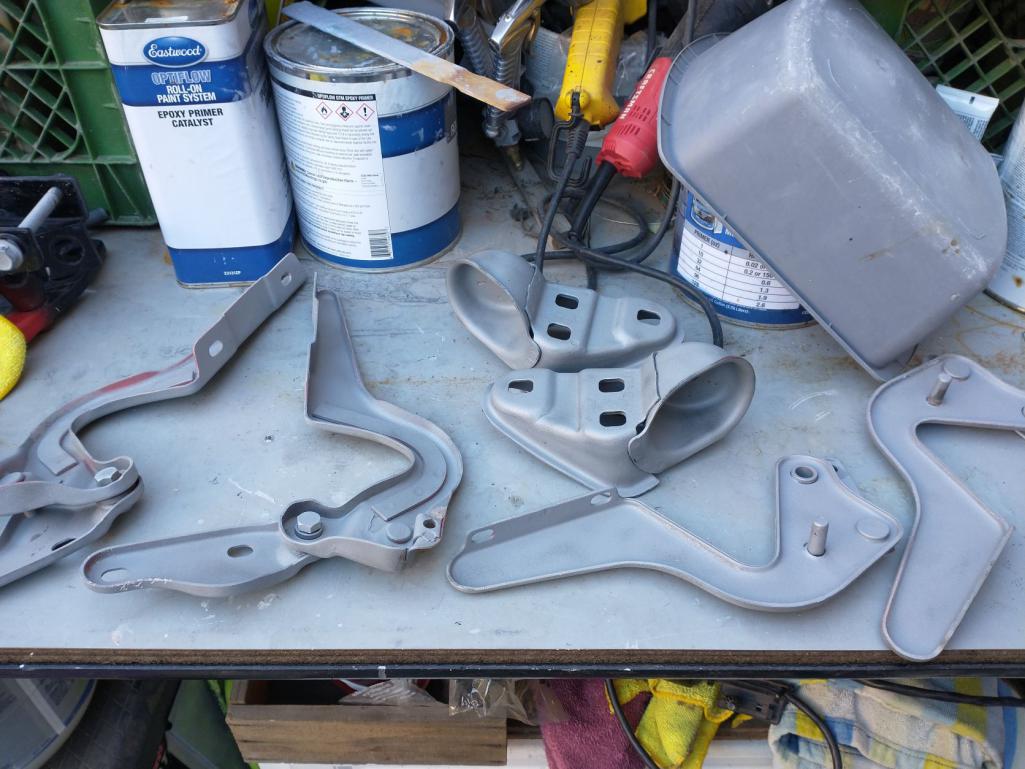 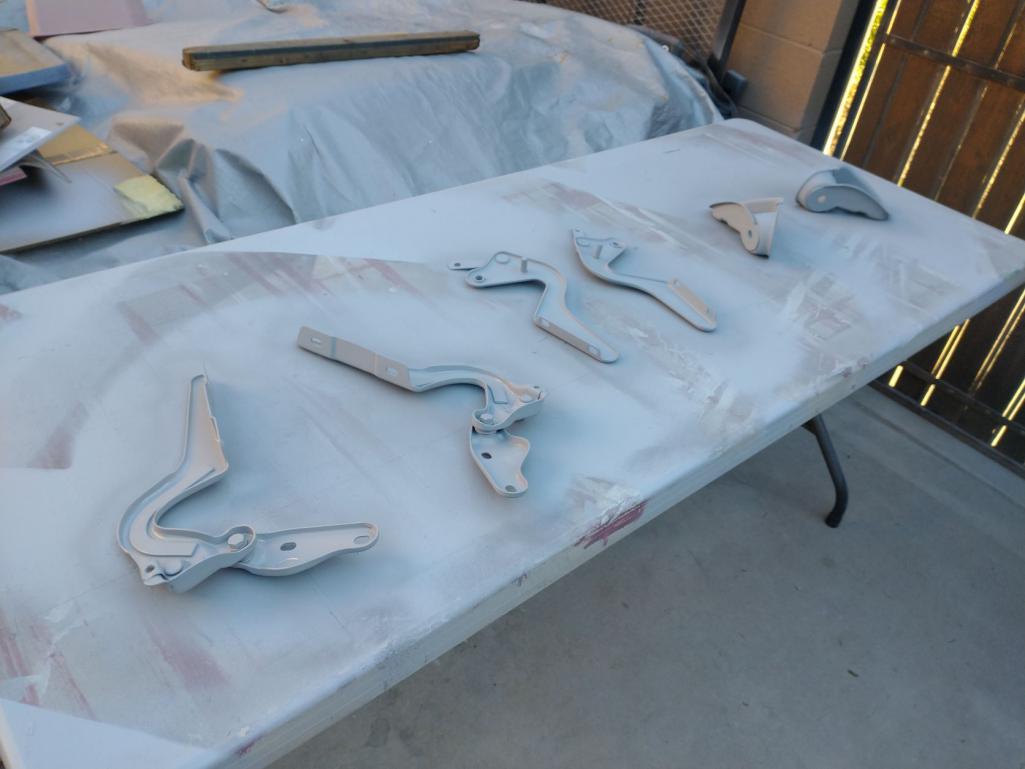 It's not much, but at least I got something done today... |
| mgarrison |
 Jan 22 2022, 10:23 AM Jan 22 2022, 10:23 AM
Post
#133
|
|
Member   Group: Members Posts: 398 Joined: 14-February 20 From: Chandler, AZ Member No.: 23,922 Region Association: Southwest Region 
|
I didn't really like the way the fairing bolts were digging in to the primer in certain spots. The angle of the flare does not match the fender angle very well in some locations. Once you tighten down the fairing bolt, the flare flexes to match the fender much better.
I found some black nylon washers on Amazon and for $10 figured it was worth a try to see how they would look, and how much protection they might add for the paint. Not sure I'm totally sold on them since they make the fairing bolts sick up/protrude out more, but they do match the fender beading well. (IMG:style_emoticons/default/idea.gif) 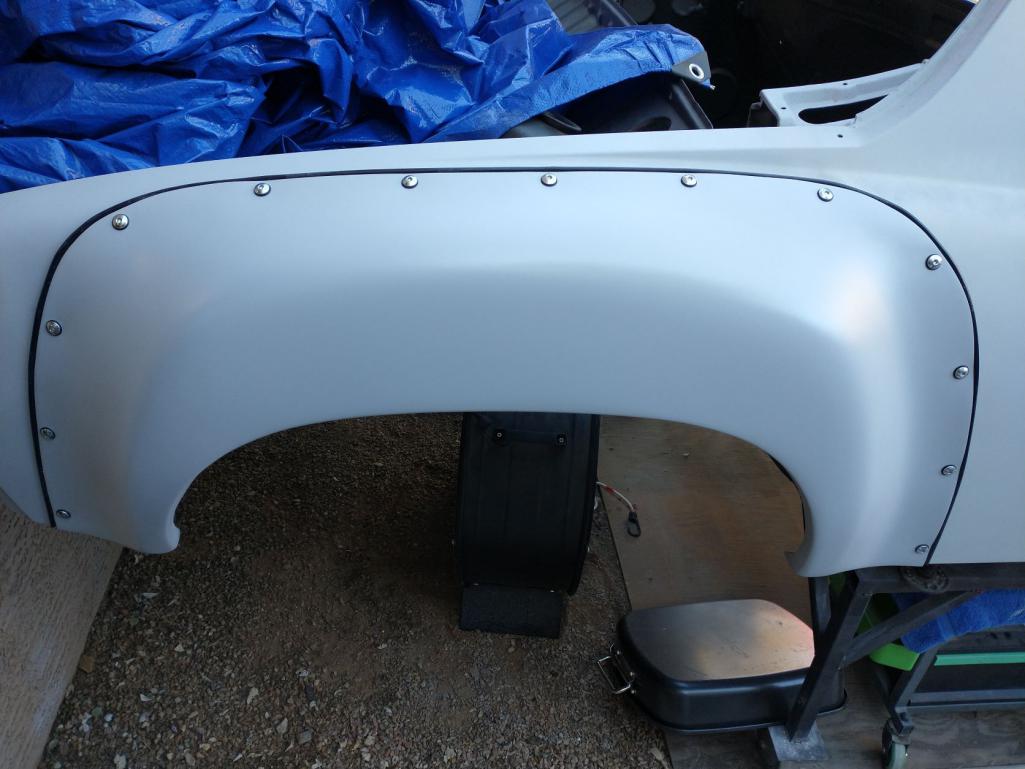 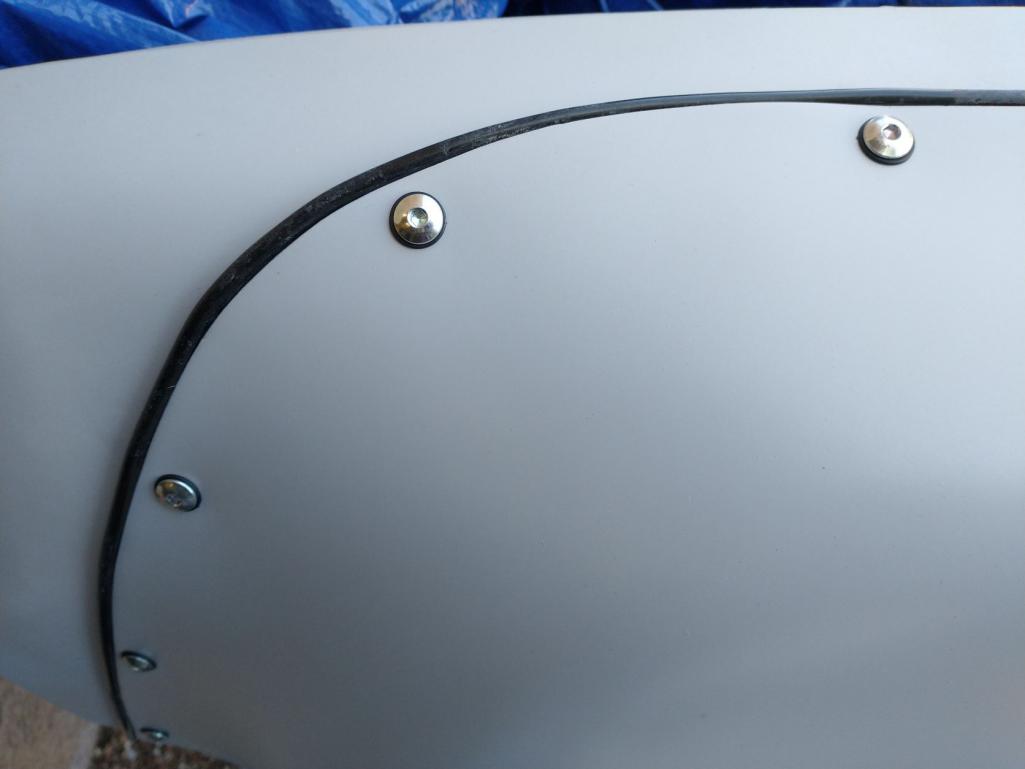 |
| mgarrison |
 Jan 22 2022, 07:27 PM Jan 22 2022, 07:27 PM
Post
#134
|
|
Member   Group: Members Posts: 398 Joined: 14-February 20 From: Chandler, AZ Member No.: 23,922 Region Association: Southwest Region 
|
|
| 76-914 |
 Jan 22 2022, 07:55 PM Jan 22 2022, 07:55 PM
Post
#135
|
|
Repeat Offender & Resident Subaru Antagonist           Group: Members Posts: 13,830 Joined: 23-January 09 From: Temecula, CA Member No.: 9,964 Region Association: Southern California 
|
Don't mean to High Jack your thread continuously but wanted to pass this on. In place of a blast cabinet you can use a cardboard box with a piece plexiglass duct taped in for a window and drop light. I used a water heater box with one end open then tilted the box into a bucket to drain off the sand afterwards. The cardboard survives very well since it is soft. I blasted my longer pieces and ended up using for the short pieces as well. When finished I cut it up and put it in the recyclable trash bin. I built a paint booth using a roll of plastic, 1x2's, an electric staple gun for ~ $60. That was in 2009 so adjust accordingly. I used a squirrel caged fan from a junk yard forced air heating unit with a $5 AC filter. It was a pressurized booth rather than the standard negative pressure style but it worked very well. The booth looked like it needed to go on a diet since it puffed out but again it worked well and was cheaper than towing the car to a "real" paint booth. Keep posting your progress. (IMG:style_emoticons/default/popcorn[1].gif)
|
| mgarrison |
 Jan 27 2022, 12:55 PM Jan 27 2022, 12:55 PM
Post
#136
|
|
Member   Group: Members Posts: 398 Joined: 14-February 20 From: Chandler, AZ Member No.: 23,922 Region Association: Southwest Region 
|
My hood & deck lid saga...
On November 1st, 2021 I ordered my fiberglass hood and deck lid. Paid the vendor $1,350 including shipping. On January 13th, 2022 I receive noticed my hood and lid are finished and have been picked up by the shipping company. I use the tracking number to keep an eye on things... According to the shipping company's sight, the truck/trailer arrived in Phoenix 1/18/2022. I don't hear anything, so I follow up with the vendor. They say customers usually hear from the shipper the next business day, and maybe give them till Monday. Monday comes and goes, so I follow up again. I finally hear back from the vendor once they got the scoop from the shipper: They have lost the freight. Usually they can find it. They are doing a sweep of the three terminals it passed through on its way, but there are 100+ docks at each terminal. Hopefully they will hear from them soon. Ya just cant make this (IMG:style_emoticons/default/stromberg.gif) up... (IMG:style_emoticons/default/WTF.gif) |
| mgarrison |
 Jan 31 2022, 08:25 AM Jan 31 2022, 08:25 AM
Post
#137
|
|
Member   Group: Members Posts: 398 Joined: 14-February 20 From: Chandler, AZ Member No.: 23,922 Region Association: Southwest Region 
|
While I'm STILL waiting for the shipper to find my hood, I'm trying to keep working on other things.
I trimmed up the front valance. Then sprayed it with surfacer, sanded smooth, and got it sprayed black. Toying with the idea of spraying it with the Raptor liner to match the rockers, but for now just black is good enough. 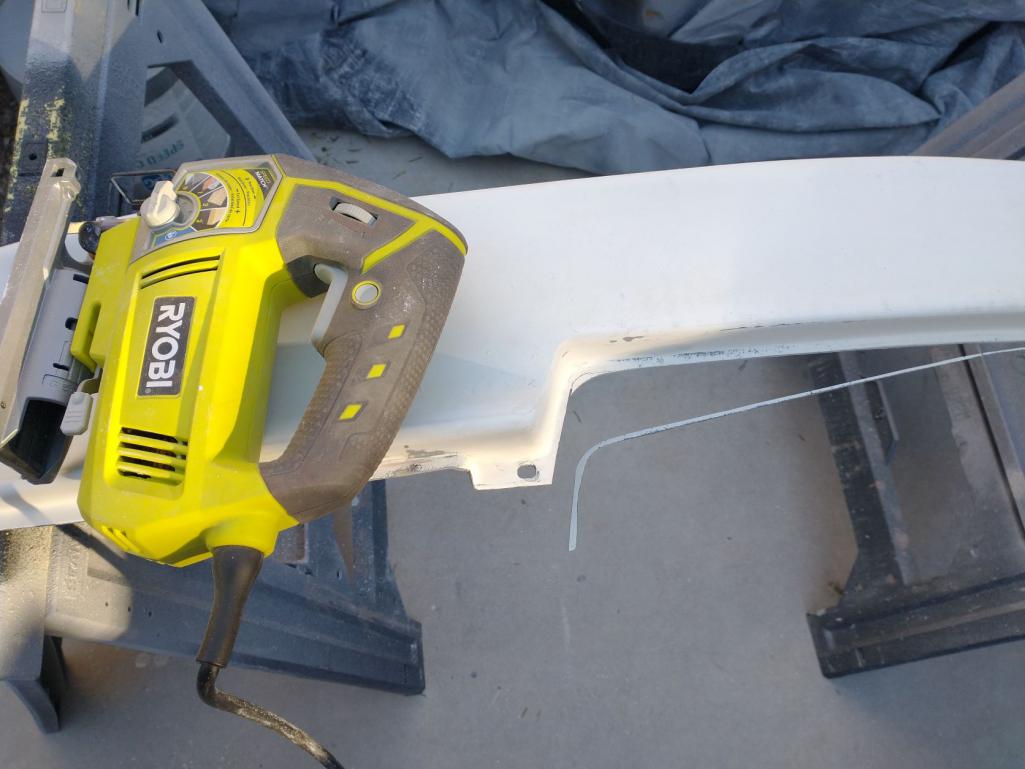 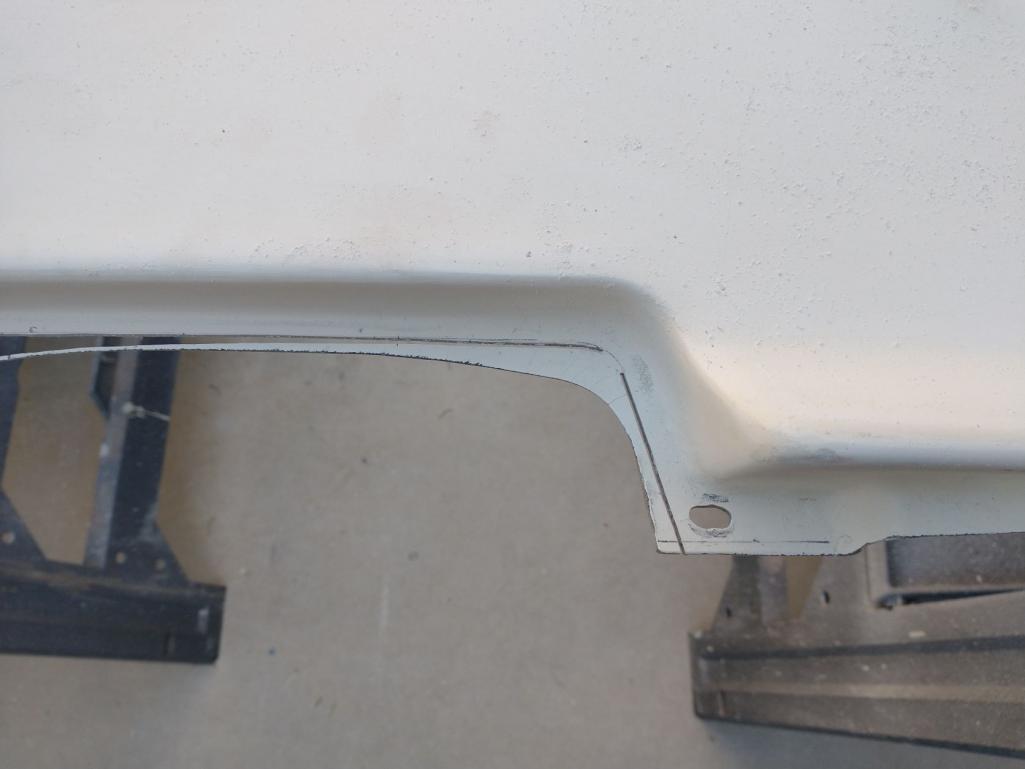 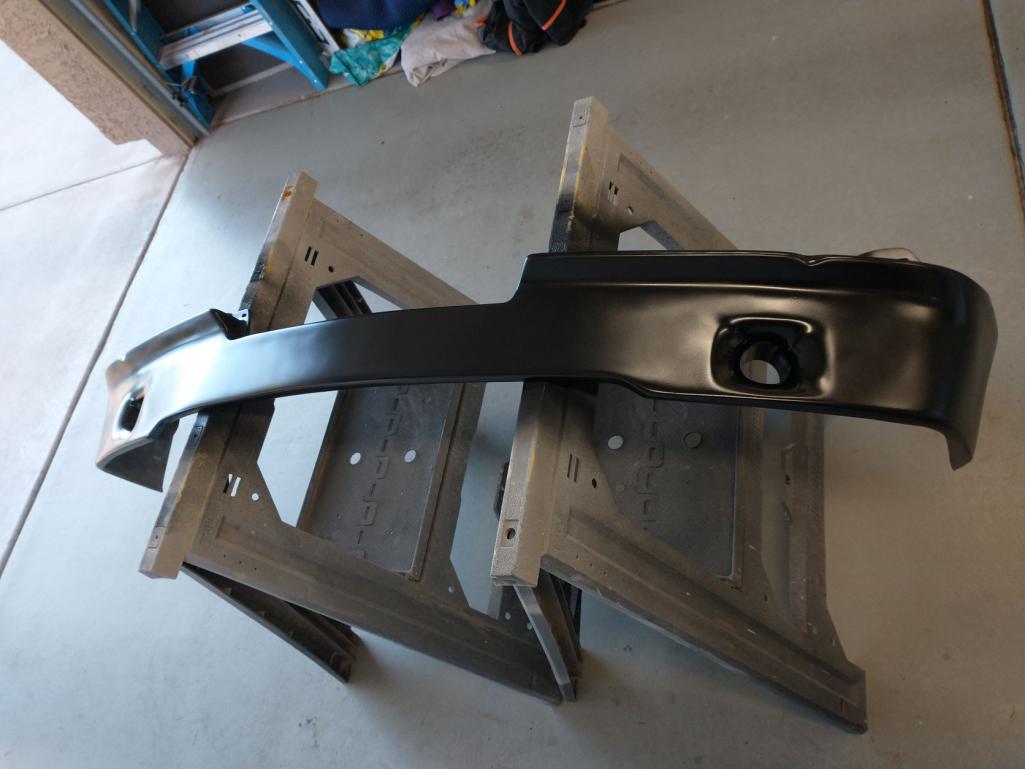 |
| slowrodent |
 Jan 31 2022, 02:48 PM Jan 31 2022, 02:48 PM
Post
#138
|
|
Member   Group: Members Posts: 215 Joined: 29-February 20 From: Tucson/Oro Valley Member No.: 23,981 Region Association: Southwest Region 
|
Very nice work Mike. I think your flares look great! Keep up the excellent work.
|
| mgarrison |
 Feb 2 2022, 08:46 PM Feb 2 2022, 08:46 PM
Post
#139
|
|
Member   Group: Members Posts: 398 Joined: 14-February 20 From: Chandler, AZ Member No.: 23,922 Region Association: Southwest Region 
|
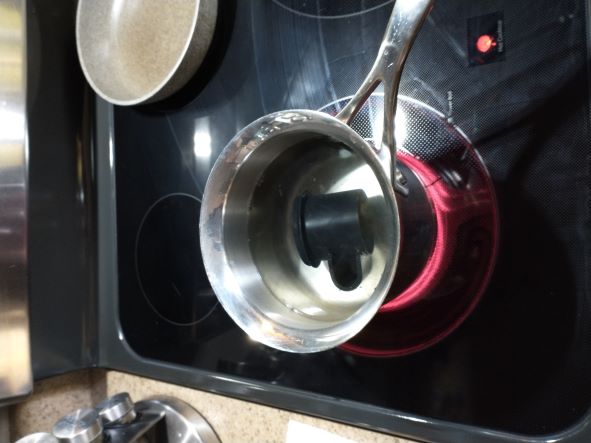
Boiling bushings today! (IMG:style_emoticons/default/stirthepot.gif) Special thanks to Ian for his video on boiling the bushings to help ease the install (IMG:style_emoticons/default/pray.gif)
 I had to go get a larger diameter threaded rod, washers, etc. Then I did not have a large enough open end wrench for the larger nuts! Borrowed one from a neighbor... 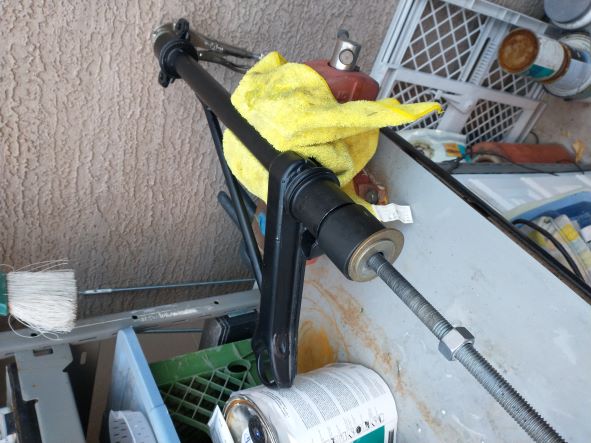 Of course I experienced the extra special fun of installing one of the rear bushings on the wrong A-arm (IMG:style_emoticons/default/headbang.gif) At least I noticed it when I went to install the other rear bushing, but getting that thing back off without destroying it was a small battle! (IMG:style_emoticons/default/chair.gif) Clocking the angles was also more difficult than one might expect - make sure you have a long bar... 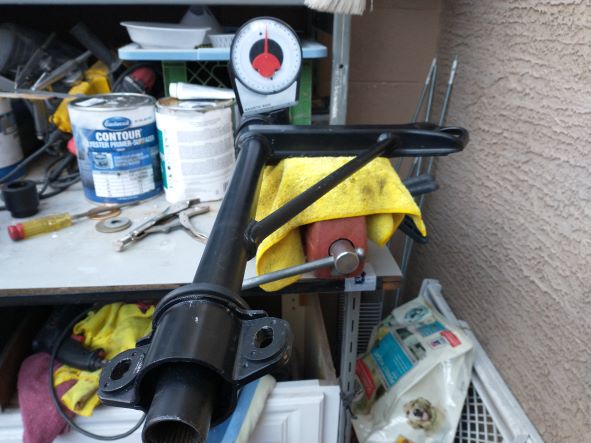 |
| mgarrison |
 Feb 4 2022, 07:13 PM Feb 4 2022, 07:13 PM
Post
#140
|
|
Member   Group: Members Posts: 398 Joined: 14-February 20 From: Chandler, AZ Member No.: 23,922 Region Association: Southwest Region 
|
Well, it's official; Yellow Freight lost my hood and deck lid! The vendor emailed me today to let me know they were filing a claim with Yellow Freight, and I could have them build more parts, or they could return my $$$...
(IMG:style_emoticons/default/WTF.gif) I did get my trailing arm bushings installed this afternoon. I tried to follow the basic instructions of using a pipe clamp since I don't have a press. It did not go very well. I spent about 1.5 hours fighting to get the first arm done. 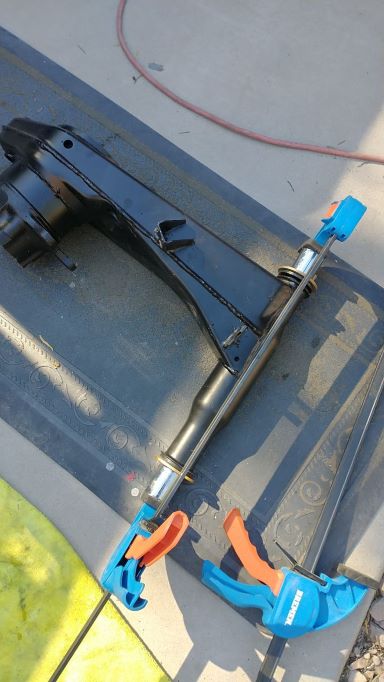 But, I was able to ferret out a method that was simple and effective, but only used an orange plastic dead blow hammer for installation. It literally took me about 10 minutes to install the bushings and shaft in the second trailing arm! Here's my method for those without a press handy: 1. Install one bushing in the trailing arm (I started with the outboard bushing) No soap used/needed, and the bushing pressed in rather easy (my trailing arms are NOT powder coated) 2. Lube the inside of the bushing you installed, and lube one end of the shaft about 1/3 of the length. 3. Starting from the side without the bushing installed, insert the shaft through the arm and into the bushing. Press it in as far as you can with your hands - a twisting motion helped. 4. Tap the shaft further into the bushing with the dead blow. Go past the end of the bushing you installed and keep going until the other end of the shaft is flush with the end of the arm without a bushing. 5. Lube the inside of the second bushing and install it into the trailing arm - you should be able to tap it into the trailing arm without too much difficulty. 6. On the end where the shaft is sticking out too far, drive it back into the second bushing until it's flush with both bushings - I used a large socket on the ground to allow the end of the shaft an opening to go into past the bushing. Sorry I don't have pics - by the time I figured it all out I had the second arm complete! (IMG:style_emoticons/default/confused24.gif) I touched up the black paint on the arms where I had scuffed it up a bit wrestling to install all the bushings. One teenie-tiny step closer. 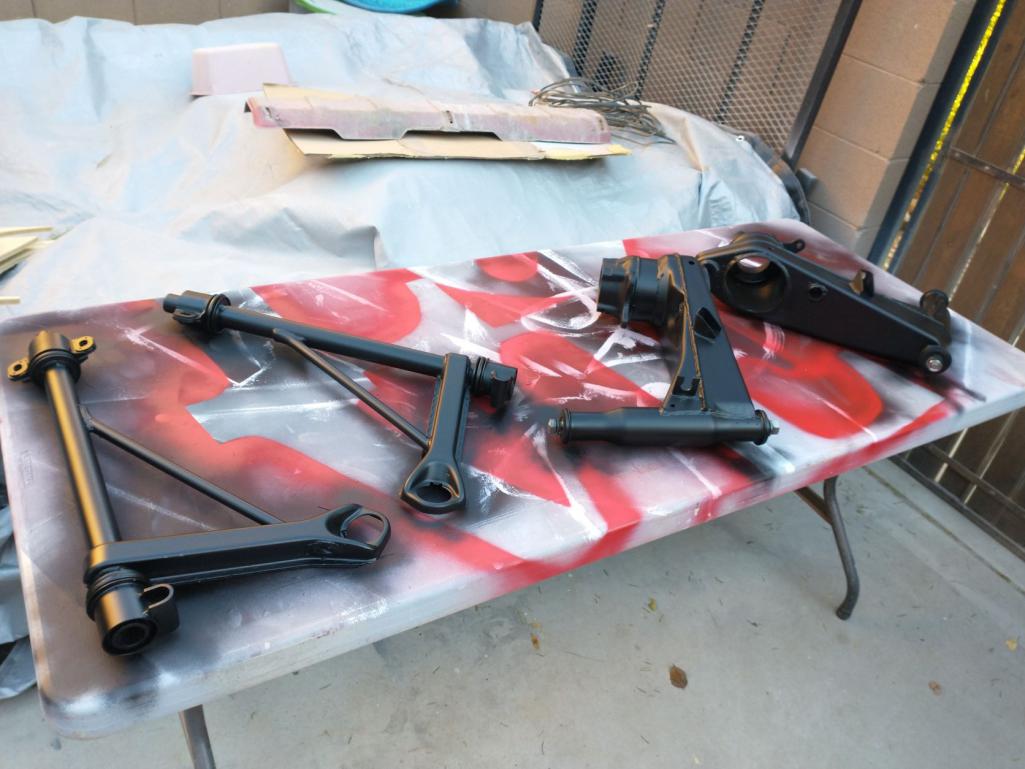 |
  |
1 User(s) are reading this topic (1 Guests and 0 Anonymous Users)
0 Members:

|
Lo-Fi Version | Time is now: 21st December 2025 - 03:27 PM |
Invision Power Board
v9.1.4 © 2025 IPS, Inc.


