|
|

|
Porsche, and the Porsche crest are registered trademarks of Dr. Ing. h.c. F. Porsche AG.
This site is not affiliated with Porsche in any way. Its only purpose is to provide an online forum for car enthusiasts. All other trademarks are property of their respective owners. |
|
|
  |
| Mayne |
 Feb 5 2022, 08:34 AM Feb 5 2022, 08:34 AM
Post
#141
|
|
Member   Group: Members Posts: 254 Joined: 28-February 17 From: NM Member No.: 20,880 Region Association: None |
Nice, detailed work. Those will look great going onto a freshly painted body.
|
| mgarrison |
 Feb 8 2022, 04:25 PM Feb 8 2022, 04:25 PM
Post
#142
|
|
Member   Group: Members Posts: 376 Joined: 14-February 20 From: Chandler, AZ Member No.: 23,922 Region Association: Southwest Region 
|
I've been trying to clean up my 5-bolt hubs and the Boxster calipers. The post about Iron-X was very timely - I just ordered some from Amazon to help cleaning the hubs. The citrus degreaser only gets you so far!
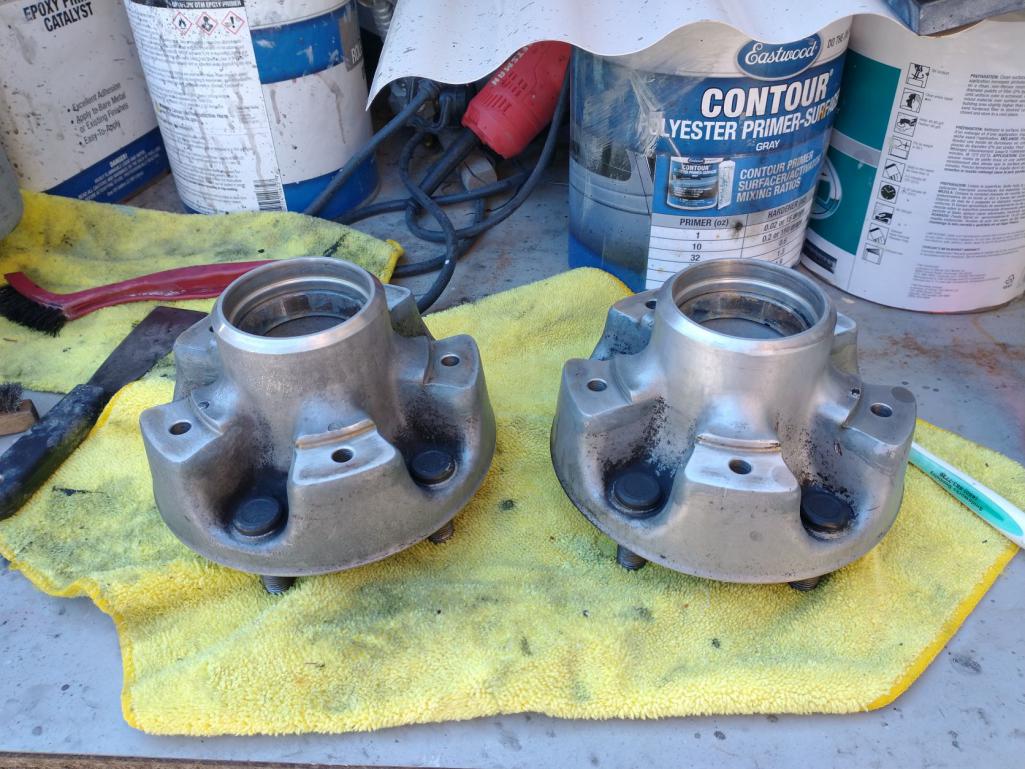 Debating what color to paint these, and still need to order the Brembo stencils. 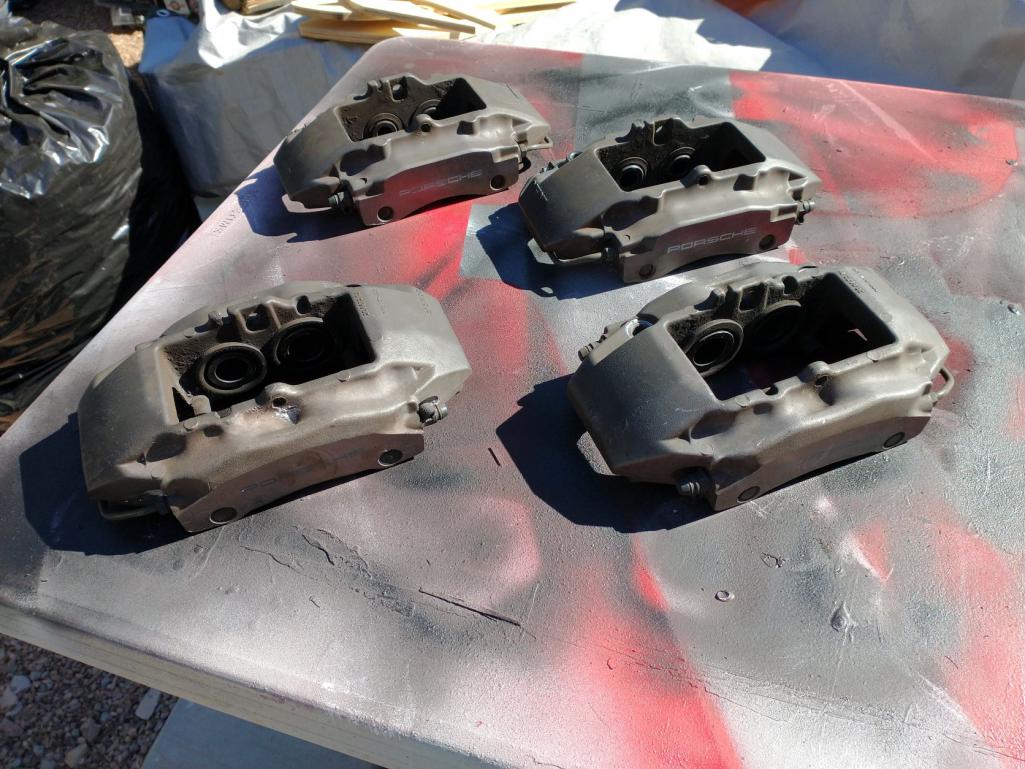 I'd like to paint them Ravenna green with black Brembo logos. The rattle can of Ravenna green I have says it works on calipers, but I'm not sure it would hold up to the heat! (IMG:style_emoticons/default/idea.gif) |
| mgarrison |
 Feb 10 2022, 09:00 PM Feb 10 2022, 09:00 PM
Post
#143
|
|
Member   Group: Members Posts: 376 Joined: 14-February 20 From: Chandler, AZ Member No.: 23,922 Region Association: Southwest Region 
|
I got the calipers all taped off and bleeders replaced with bolts so I could blast them. They came out pretty dang good!
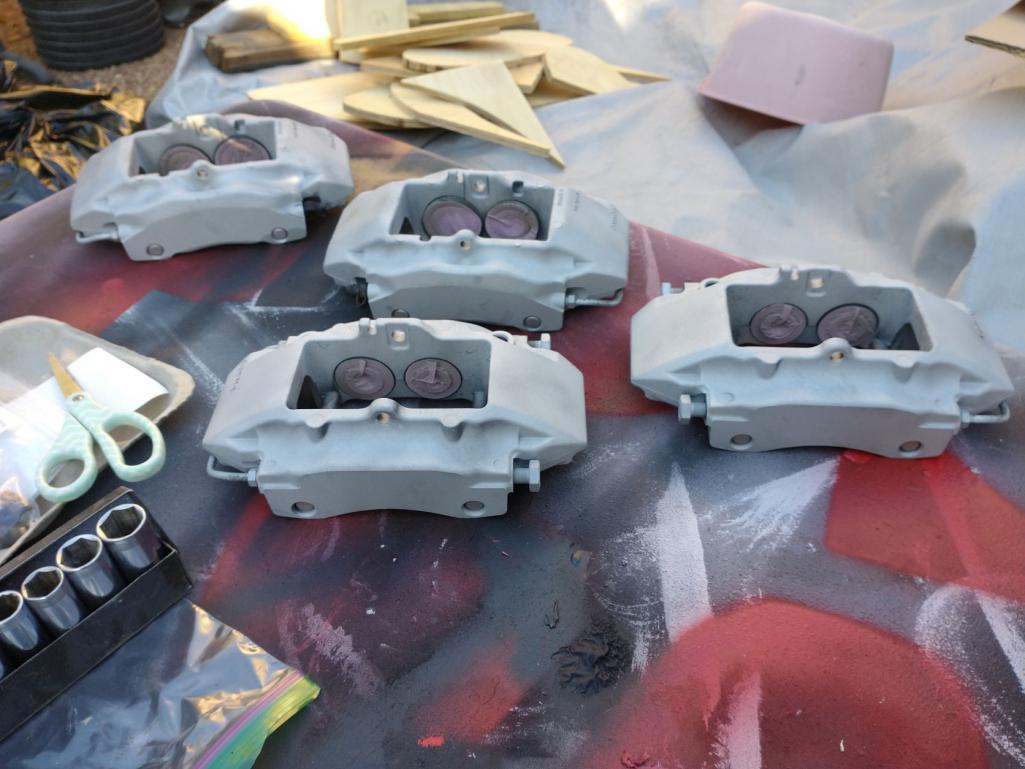 I consulted my Aesthetic Director (my wife), and we decided to go with the traditional red calipers with the white Brembo logo. I got two of them painted with 3 layers of red. Still waiting on the Brembo stencils though. 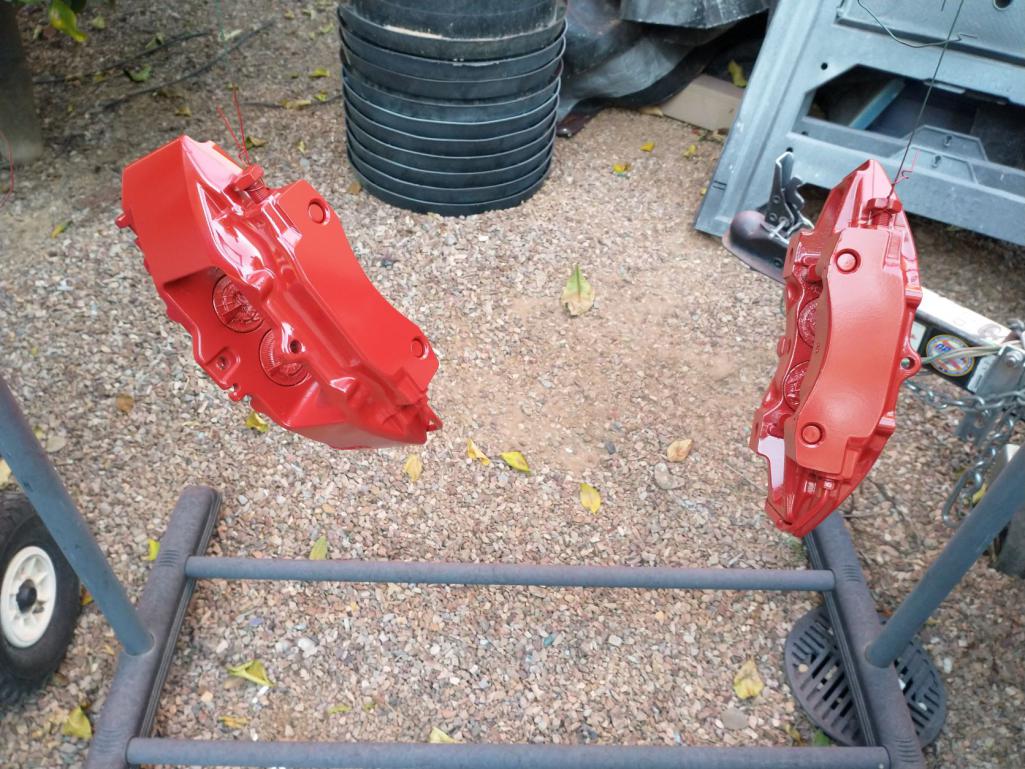 I spent some time removing the old tie rods, and cleaning up the steering rack. Looks much better now. 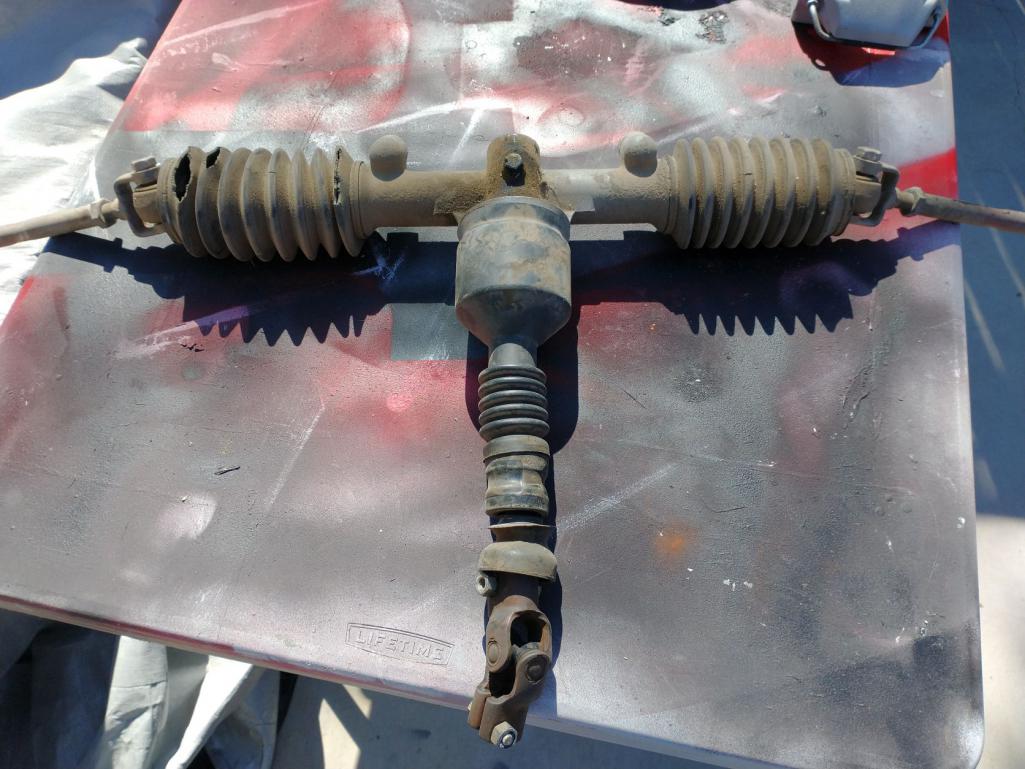 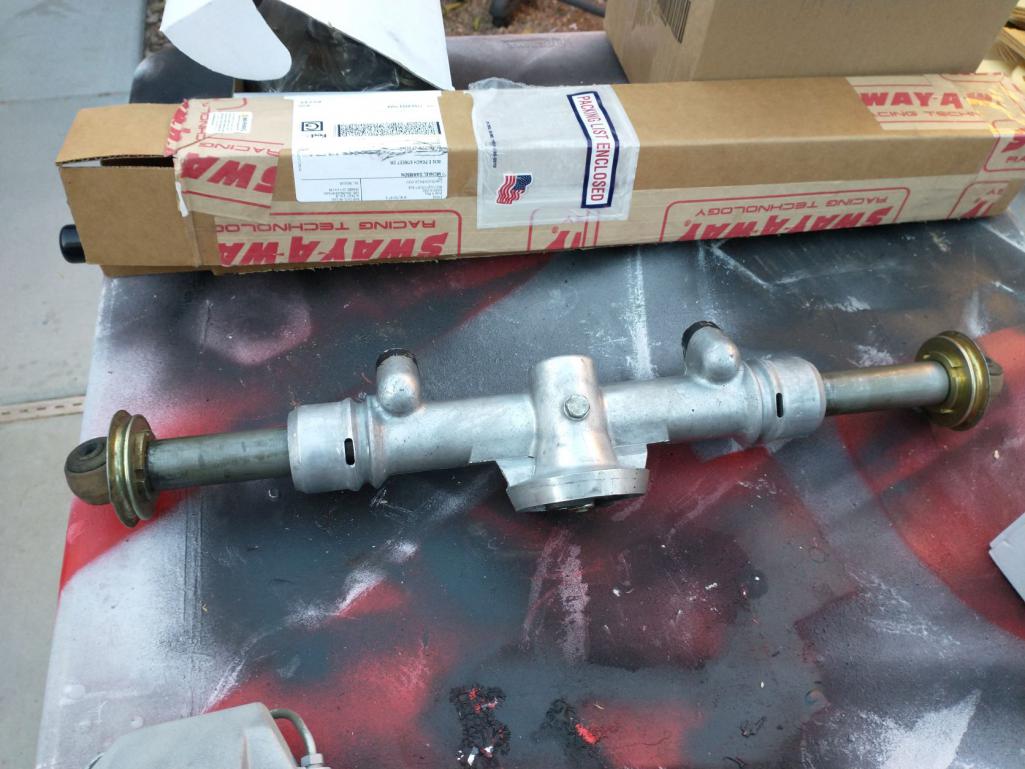 Some of the parts I ordered are starting to show up, but in bits and pieces from various warehouses. The only complete "set" that has made it was the rear hubs and studs, so I installed the studs. My jack pads made it which I hope will assist with getting the chassis off the body dolly and back onto jack stands. 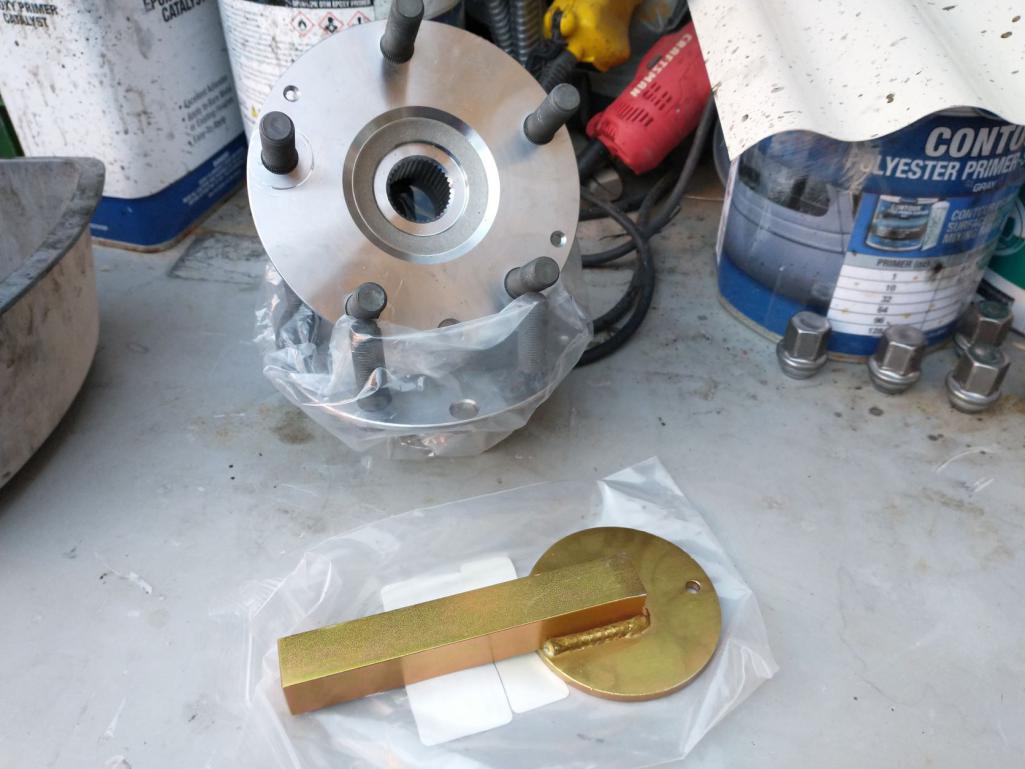 |
| mgarrison |
 Feb 11 2022, 02:57 PM Feb 11 2022, 02:57 PM
Post
#144
|
|
Member   Group: Members Posts: 376 Joined: 14-February 20 From: Chandler, AZ Member No.: 23,922 Region Association: Southwest Region 
|
Just when I think things can't get any weirder...YRC shows up at my door a bit ago totally unannounced. They want to deliver my hood & decklid that were supposed to be lost. The driver hands the box down and we notice part of the hood is poking out through the side of the box. Ruh-Roh...
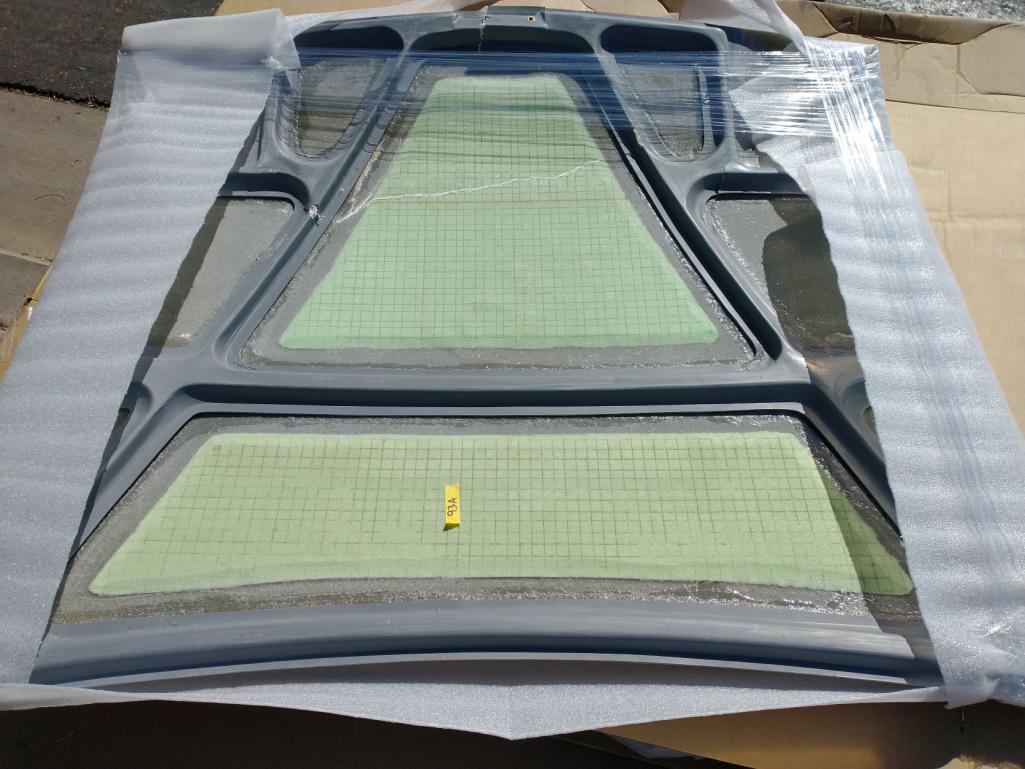 Not sure exactly what they did to this while it was "lost", but it doesn't look like those scratches & break happened while it was in a box! 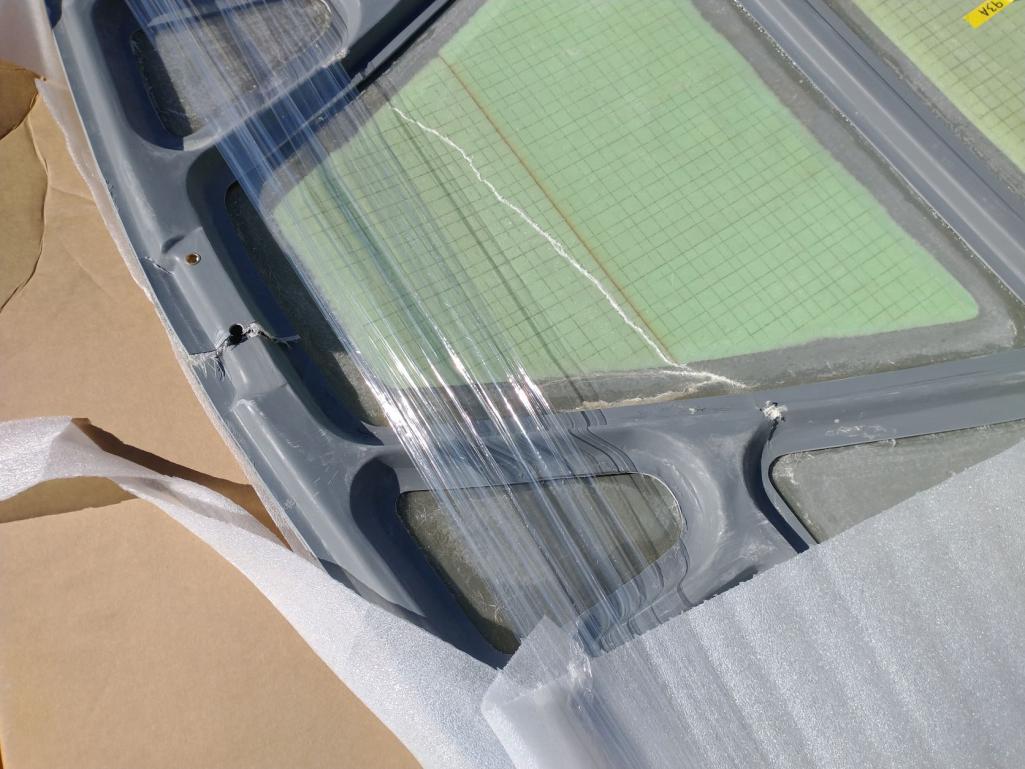 I thought 2022 was supposed to be better than 2021... (IMG:style_emoticons/default/WTF.gif) |
| slowrodent |
 Feb 11 2022, 03:13 PM Feb 11 2022, 03:13 PM
Post
#145
|
|
Member   Group: Members Posts: 159 Joined: 29-February 20 From: Tucson/Oro Valley Member No.: 23,981 Region Association: Southwest Region 
|
Sorry to see that. Those look like really nice parts... Bummer. (IMG:style_emoticons/default/sad.gif)
|
| mgp4591 |
 Feb 12 2022, 07:26 PM Feb 12 2022, 07:26 PM
Post
#146
|
|
914 Guru      Group: Members Posts: 5,521 Joined: 1-August 12 From: Salt Lake City Ut Member No.: 14,748 Region Association: Intermountain Region 
|
Not going with the PORSCHE logo on the calipers? They've already got brembo cast into them...
|
| mgarrison |
 Feb 13 2022, 06:32 PM Feb 13 2022, 06:32 PM
Post
#147
|
|
Member   Group: Members Posts: 376 Joined: 14-February 20 From: Chandler, AZ Member No.: 23,922 Region Association: Southwest Region 
|
I managed to get the turbo tie rod kit installed on my steering rack. Getting those boots on requires about 6 arms! (IMG:style_emoticons/default/headbang.gif)
I have to say I'm a bit disappointed that a $200+ "kit" does not include any retainers to hold the boots - you have to use your existing inner retainers, and tie wraps for the outer side... (IMG:style_emoticons/default/confused24.gif) 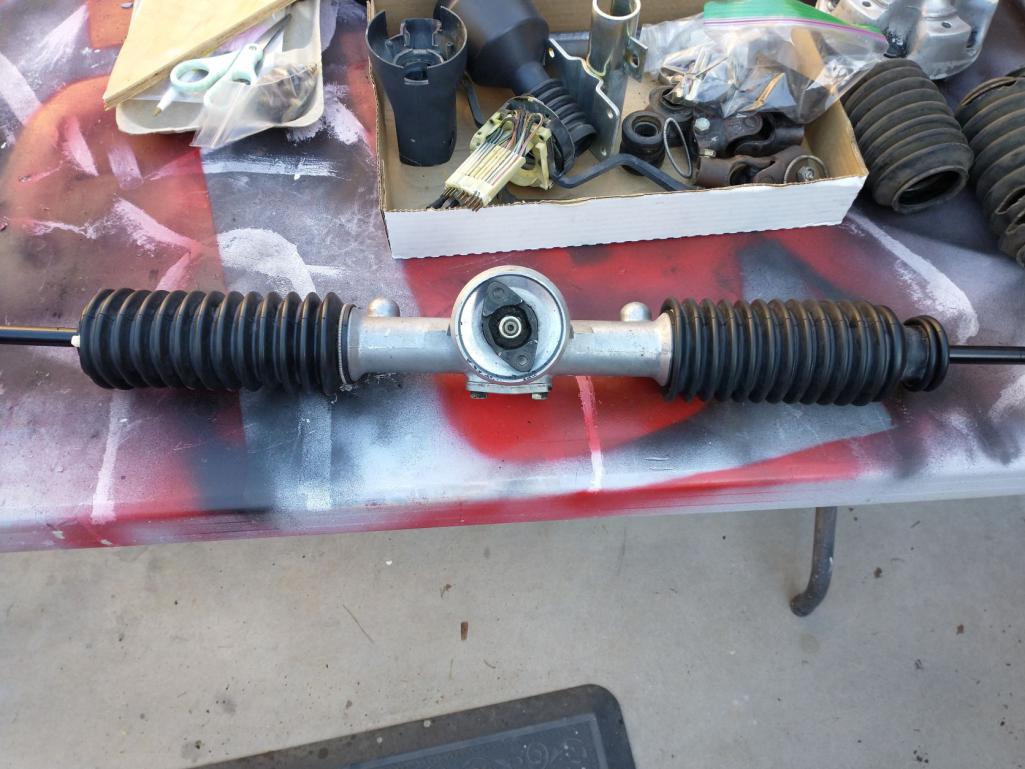 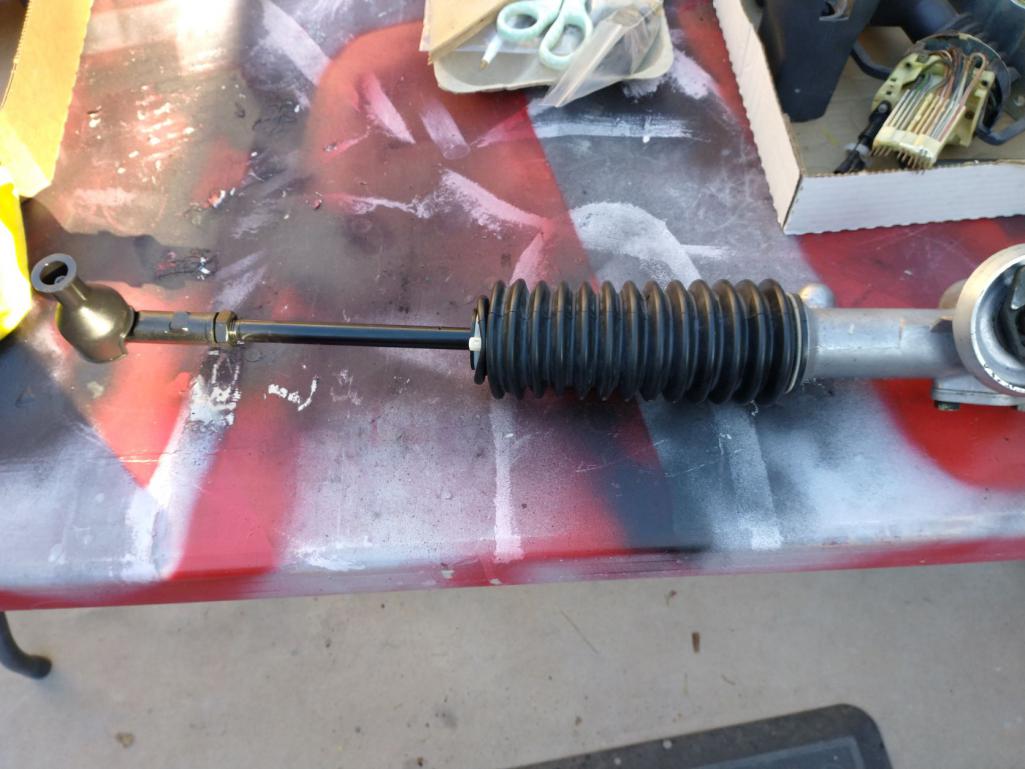 |
| mgarrison |
 Feb 17 2022, 07:48 PM Feb 17 2022, 07:48 PM
Post
#148
|
|
Member   Group: Members Posts: 376 Joined: 14-February 20 From: Chandler, AZ Member No.: 23,922 Region Association: Southwest Region 
|
I thought I would get the 914 off the body dolly and onto jack stands so that I can start to bolt the suspension, etc. back on. We put it on the body dolly before we had the Quick Jack. Makes me wonder how...
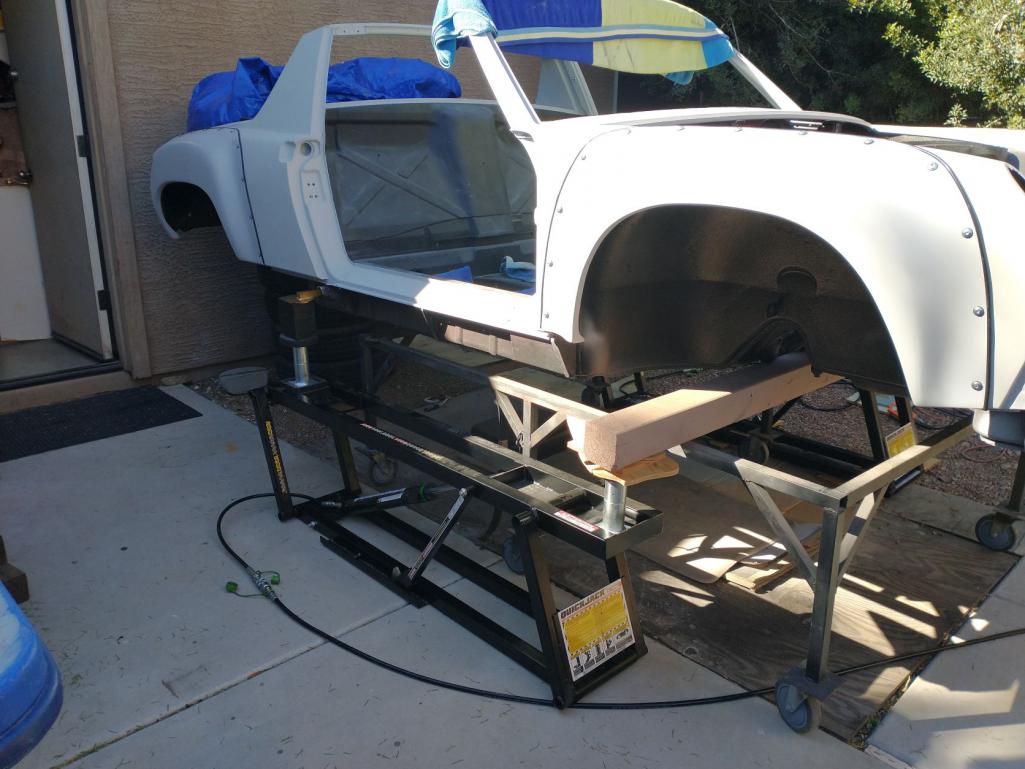 Since it's a full mon, and in the old (IMG:style_emoticons/default/stromberg.gif) Happens. This happened when the one Quick Jack did not go down for some strange reason, and I didn't catch it soon enough! (IMG:style_emoticons/default/headbang.gif) 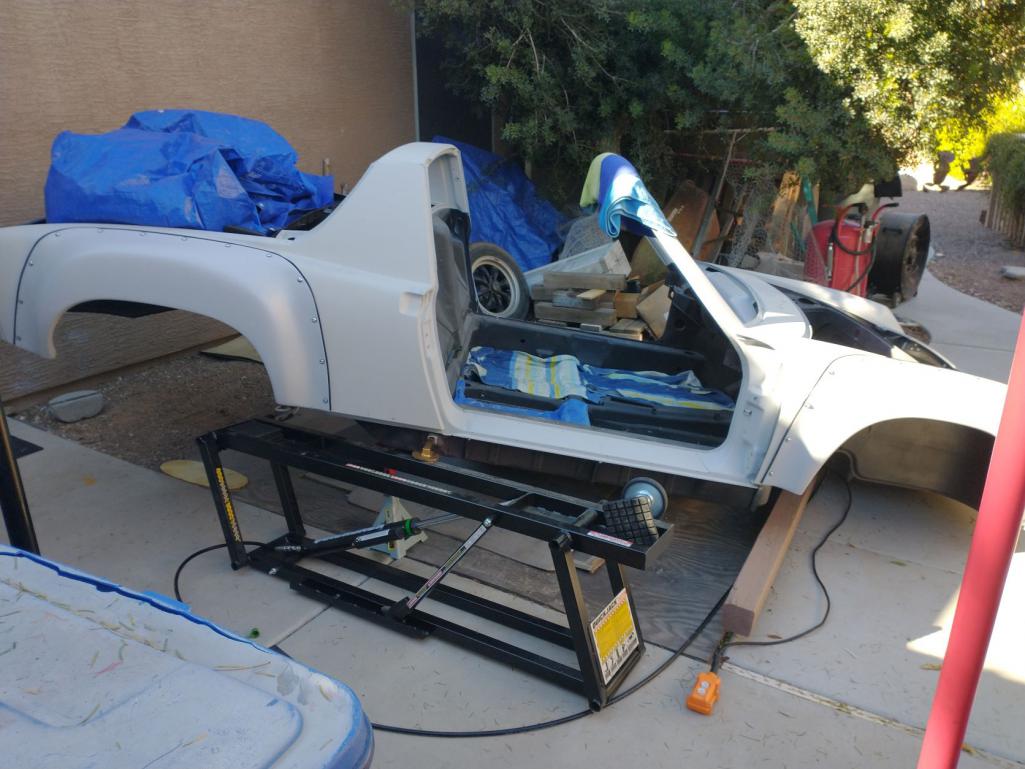 Luckily, it was a slow pivot and the 4x4 I had to stabilize the front kept it from hitting the concrete. I got jack stands under the back ASAP, and worked to get the front up off the 4x4. Inching it back into place took a bit, but thankfully was uneventful. 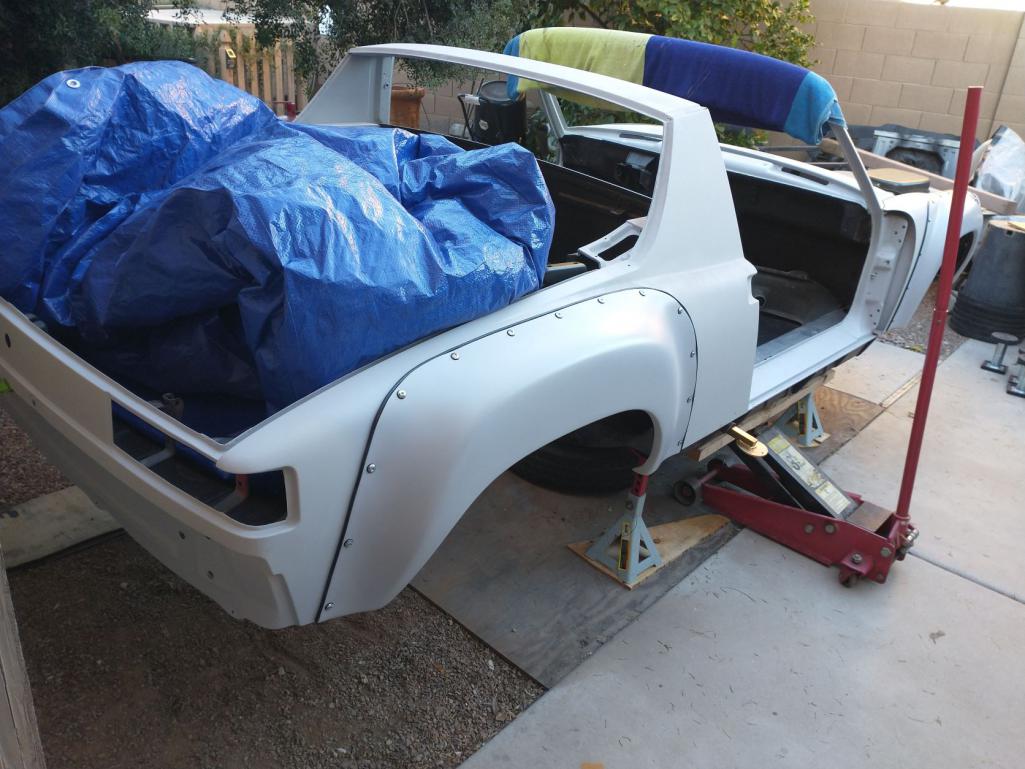 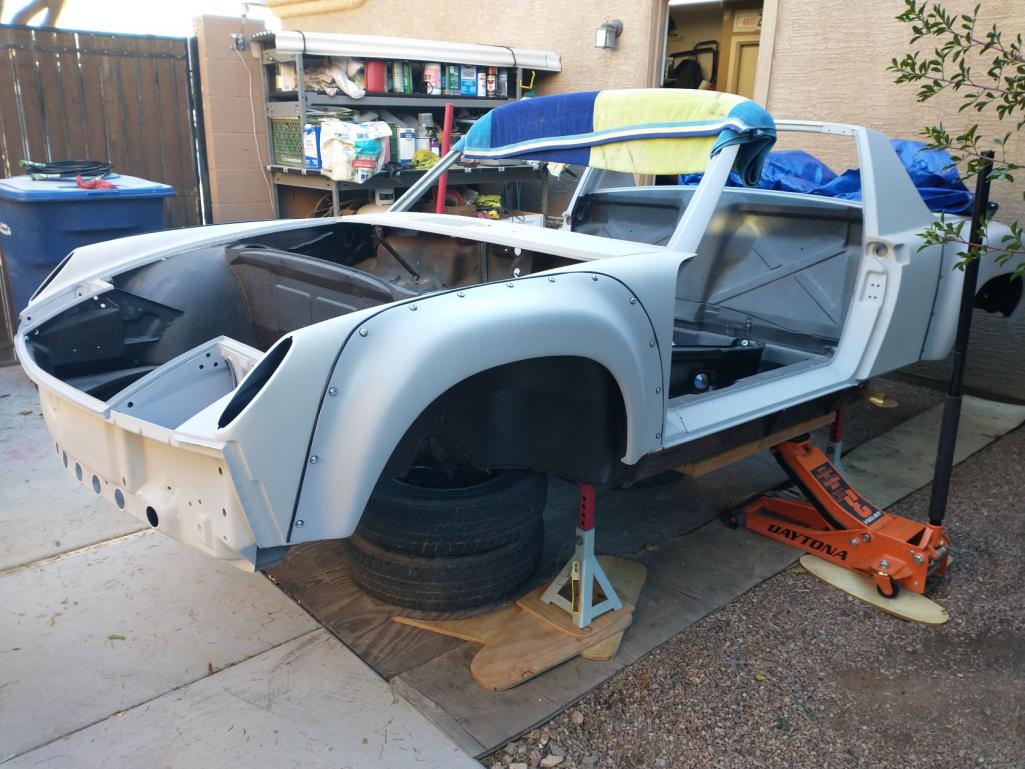 I was going to post something from about "We can rebuild her. We have (most of) the parts...", but the chassis spill took the joy out of it. 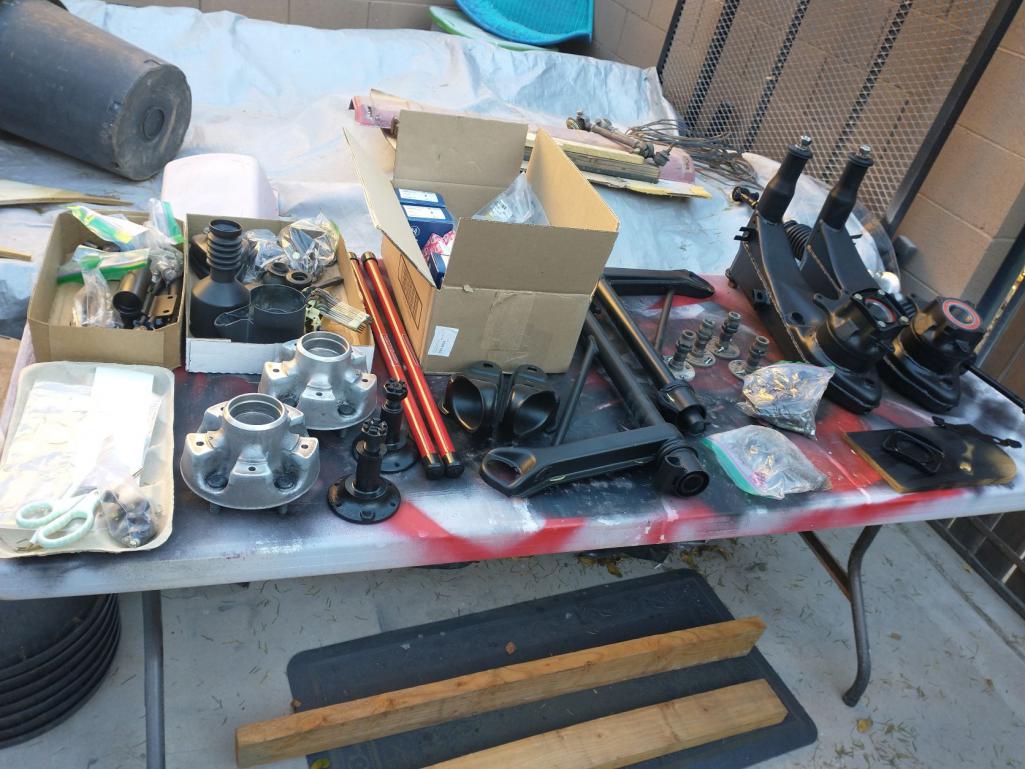 At least I can start to bolt the suspension back on now...And I was wise enough to pull my front valance off "just in case I needed to lift from the front" (IMG:style_emoticons/default/blink.gif) 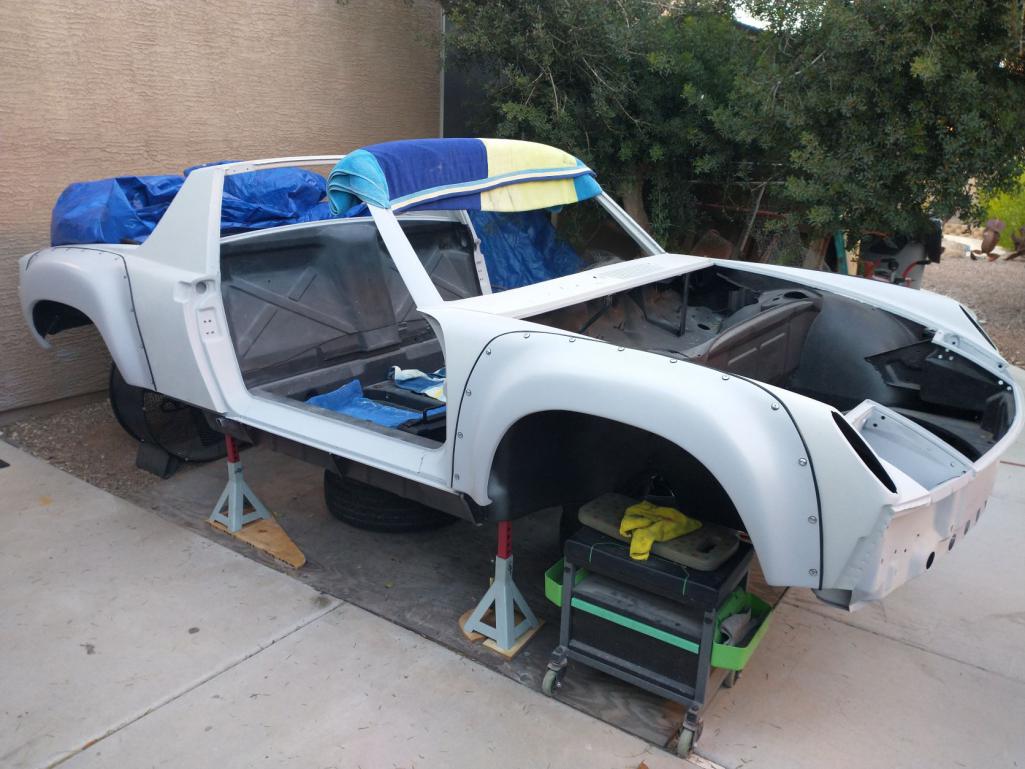 |
| 76-914 |
 Feb 17 2022, 07:54 PM Feb 17 2022, 07:54 PM
Post
#149
|
|
Repeat Offender & Resident Subaru Antagonist           Group: Members Posts: 13,652 Joined: 23-January 09 From: Temecula, CA Member No.: 9,964 Region Association: Southern California 
|
Did you clean your underwear out afterwards? (IMG:style_emoticons/default/happy11.gif) IIRC, Mark posted that those kits would required re-use of those spring retainers. Probably forgot to list that in the ad. (IMG:style_emoticons/default/beerchug.gif)
|
| Mayne |
 Feb 18 2022, 08:28 AM Feb 18 2022, 08:28 AM
Post
#150
|
|
Member   Group: Members Posts: 254 Joined: 28-February 17 From: NM Member No.: 20,880 Region Association: None |
Scary little incident! Glad no humans or 914s were injured.
|
| mgarrison |
 Feb 18 2022, 09:48 AM Feb 18 2022, 09:48 AM
Post
#151
|
|
Member   Group: Members Posts: 376 Joined: 14-February 20 From: Chandler, AZ Member No.: 23,922 Region Association: Southwest Region 
|
Yep. I told my wife after that she would have been proud; I didn't yell & curse. I got quiet and thought "ok, that just happened. Now what?". I did scramble to get jack stands under where I could to stabilize it (IMG:style_emoticons/default/wacko.gif)
|
| mgarrison |
 Feb 20 2022, 05:58 PM Feb 20 2022, 05:58 PM
Post
#152
|
|
Member   Group: Members Posts: 376 Joined: 14-February 20 From: Chandler, AZ Member No.: 23,922 Region Association: Southwest Region 
|
I'm trying to keep cleaning and doing things that I can while I wait for the rest of my parts to show up. Still need strut top mounts, steering coupler, ball joint hardware, and rear rotors...Shipping these days sucks! (IMG:style_emoticons/default/headbang.gif)
On today's menu; smoked 5-bolt hubs is today's special! (IMG:style_emoticons/default/lol-2.gif) I figured this was an easy way to heat the hubs up to 250-300 degrees like the manual says to. 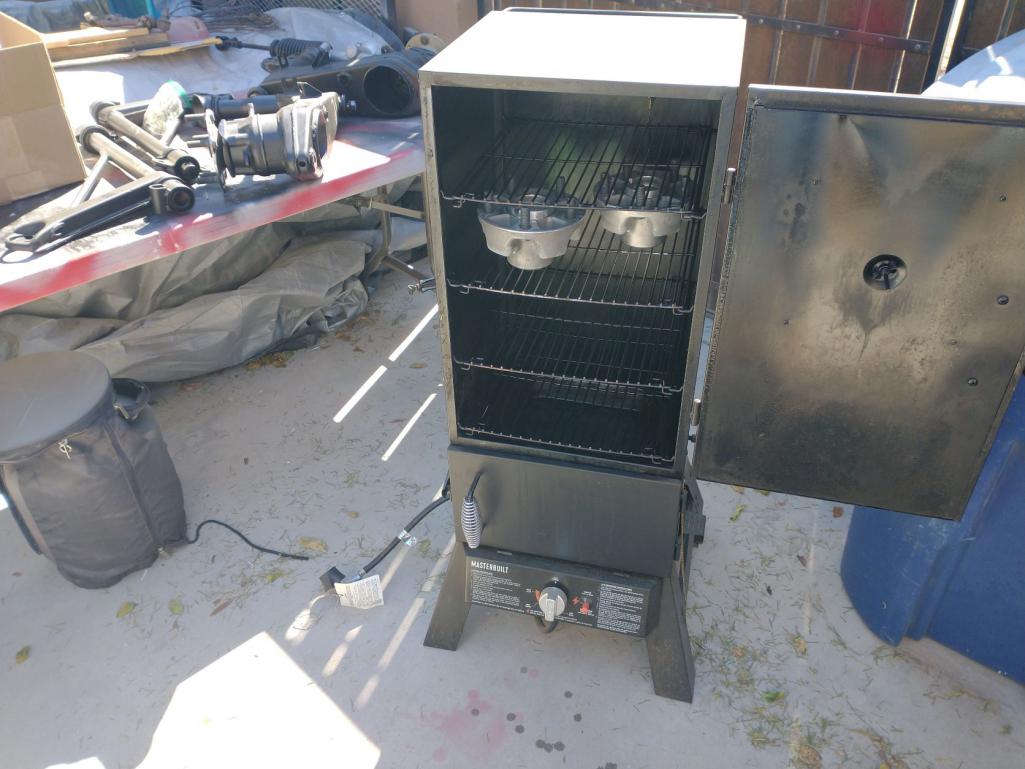 Still was quite the fight to get the inner races fully seated (IMG:style_emoticons/default/chair.gif) Managed OK in the end, but I did go pretty Tourette's for a bit during the process! (IMG:style_emoticons/default/hissyfit.gif) 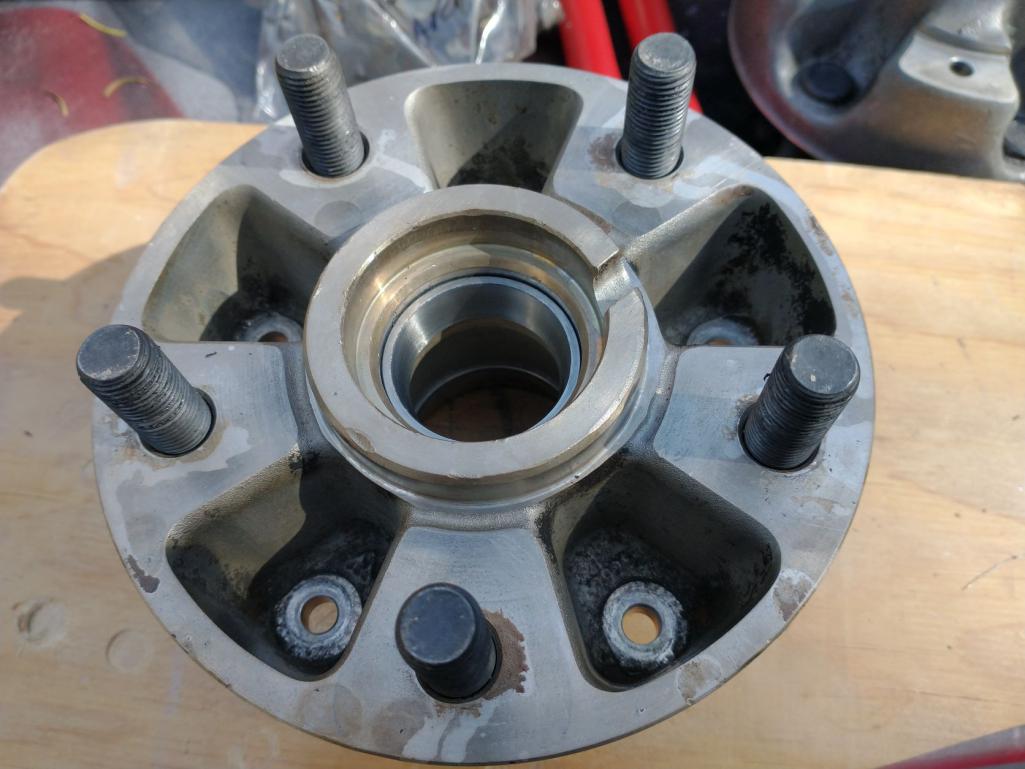 I need to write this date down - I actually bolted a couple parts onto the chassis! 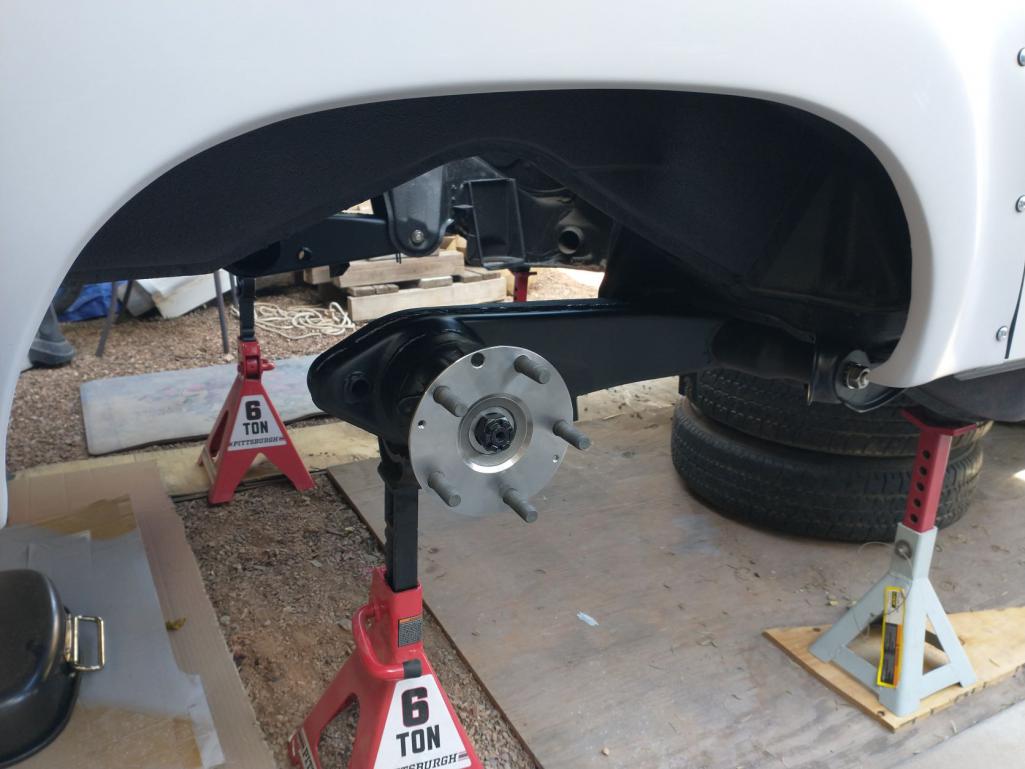 Wrapped the car up tight again...70% chance of rain by Wednesday. (IMG:style_emoticons/default/sad.gif) |
| mgarrison |
 Feb 21 2022, 03:08 PM Feb 21 2022, 03:08 PM
Post
#153
|
|
Member   Group: Members Posts: 376 Joined: 14-February 20 From: Chandler, AZ Member No.: 23,922 Region Association: Southwest Region 
|
Ok, don't do what I did here:
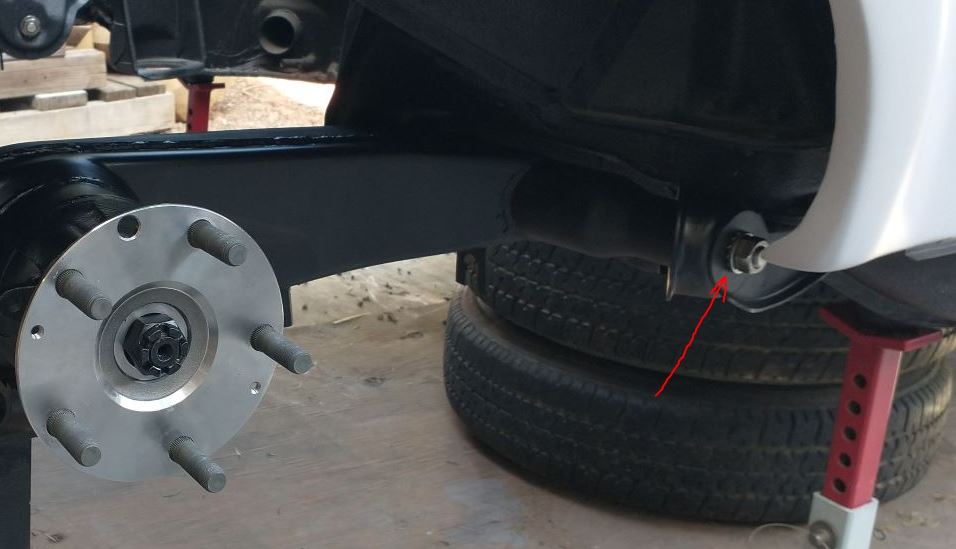 The toothed/splined washer goes on the end of the threaded pivot shaft - the goal is to keep the shaft from spinning. Only the flat washer and nut should be on the outside. (IMG:style_emoticons/default/headbang.gif) |
| mgarrison |
 Feb 22 2022, 02:52 PM Feb 22 2022, 02:52 PM
Post
#154
|
|
Member   Group: Members Posts: 376 Joined: 14-February 20 From: Chandler, AZ Member No.: 23,922 Region Association: Southwest Region 
|
Painted the Brembo logos today before the rain is due tomorrow. They need to cure for a week before I can clear coat them.
Little Brembo "packages"... 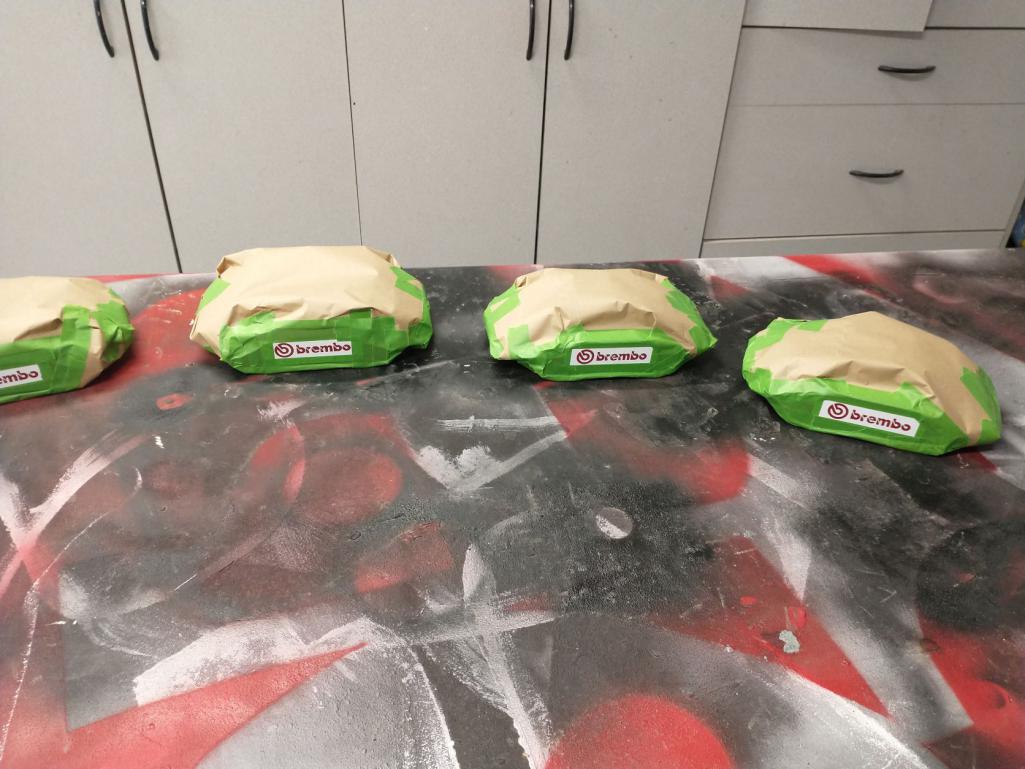 First coat... 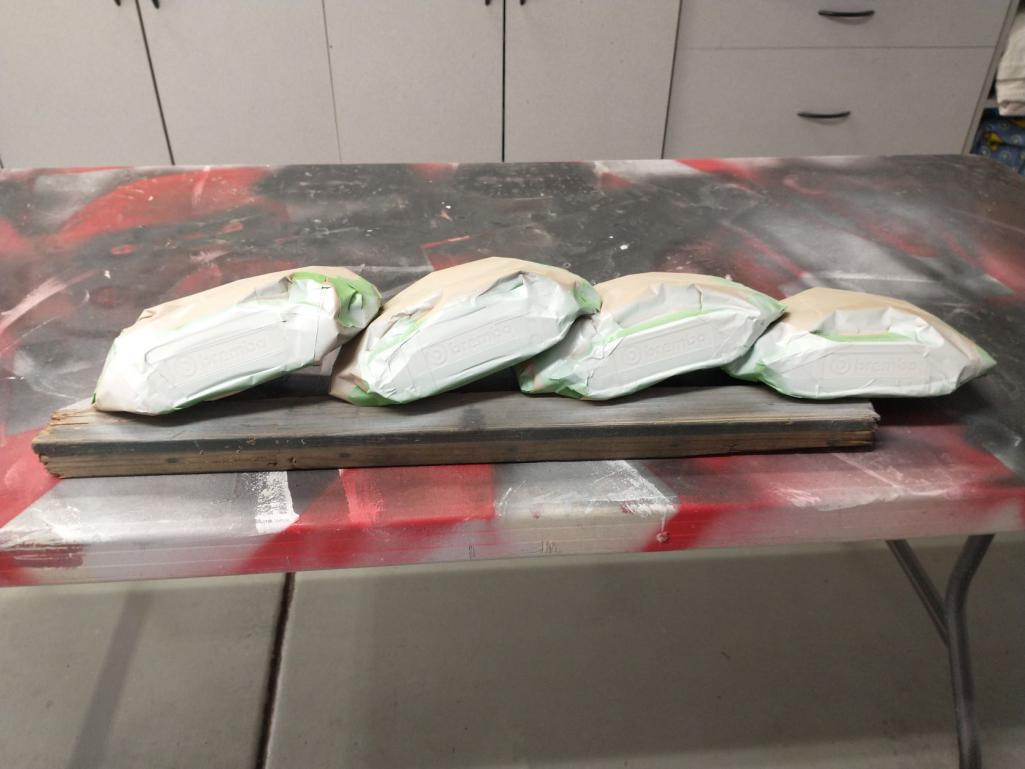 I followed the paint directions of 2 light coats with 10min between each, followed by a 3rd medium coat. Seems like it was too thick/heavy for the logos. 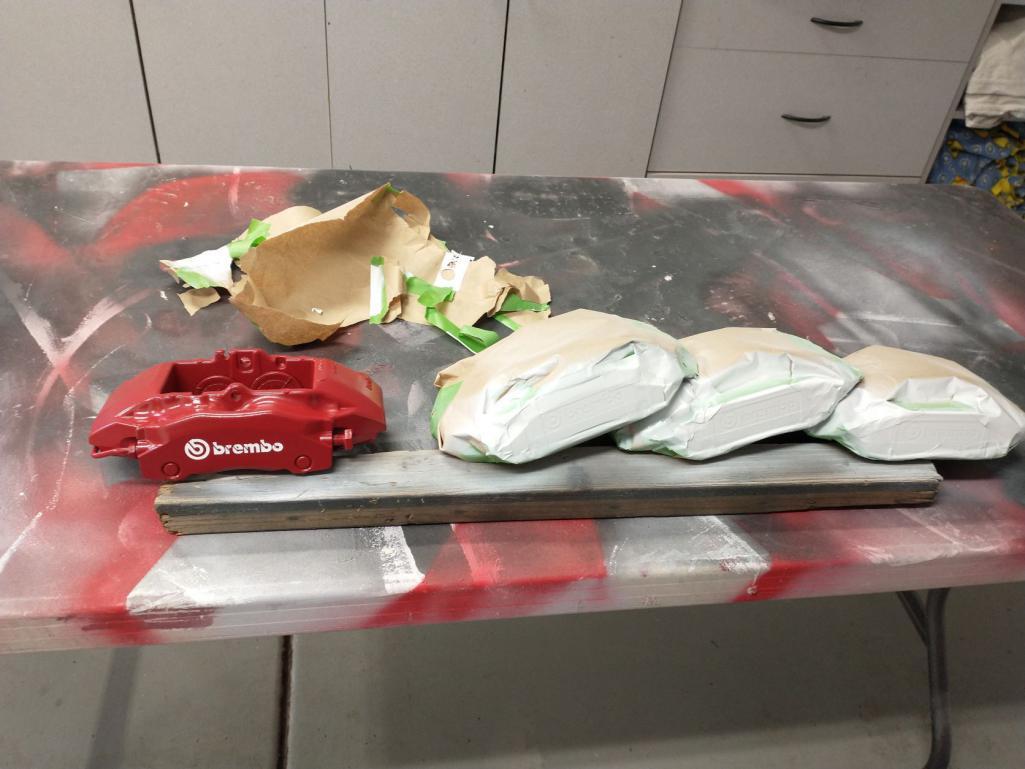 Hopefully, after they cure for a week and get clear coated and cure for another week, they will end up looking ok from 5-10 feet. Oh well, I tried... 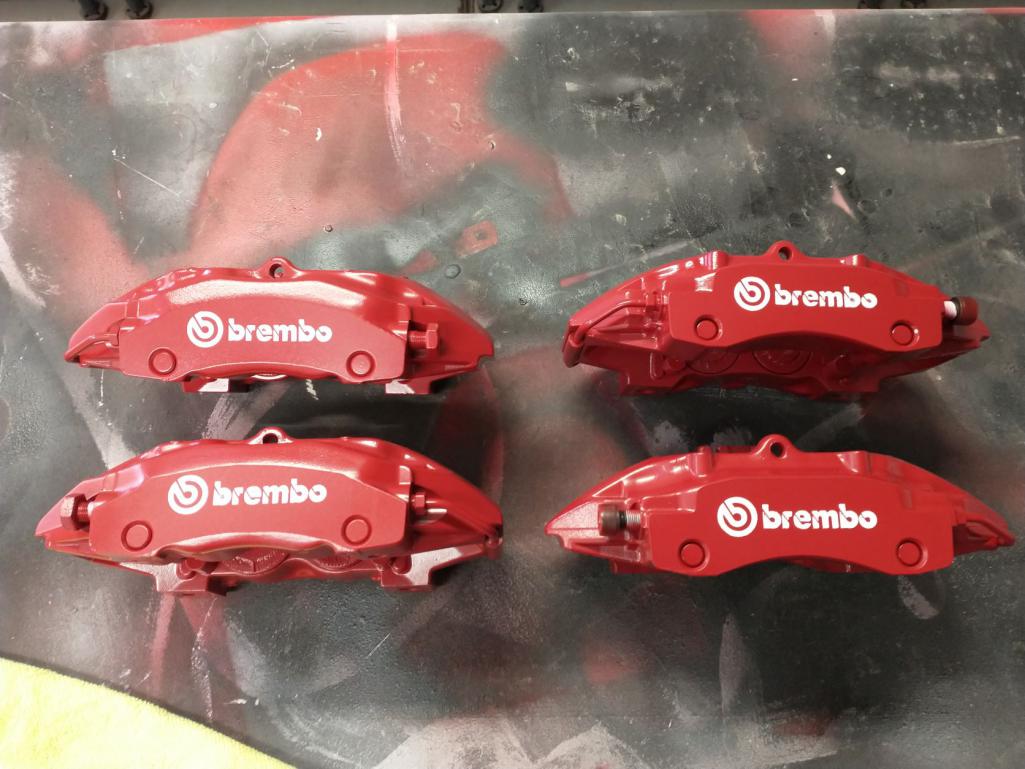 If I had to do it again, I might just buy the cheapo high-temp stickers off Amazon and clear coat them; it was $30 for 4 stencils, plus cost of paint, etc. The stencils were not centered on the backing, which made placing them challenging. I guess I expected too much for my $30+ postage (IMG:style_emoticons/default/confused24.gif) |
| mgarrison |
 Mar 15 2022, 04:26 PM Mar 15 2022, 04:26 PM
Post
#155
|
|
Member   Group: Members Posts: 376 Joined: 14-February 20 From: Chandler, AZ Member No.: 23,922 Region Association: Southwest Region 
|
Been puttering around trying to work on random things while I wait for parts to arrive. I stripped the engine lid, cleaned up the mesh and primed and painted them. I had a rattle can of the sample Ravenna Green, so I figured WTH I'll use it on the engine lid! I ran out of the clear coat to go over it, but it doesn't look half bad...for a rattle can job! (IMG:style_emoticons/default/idea.gif)
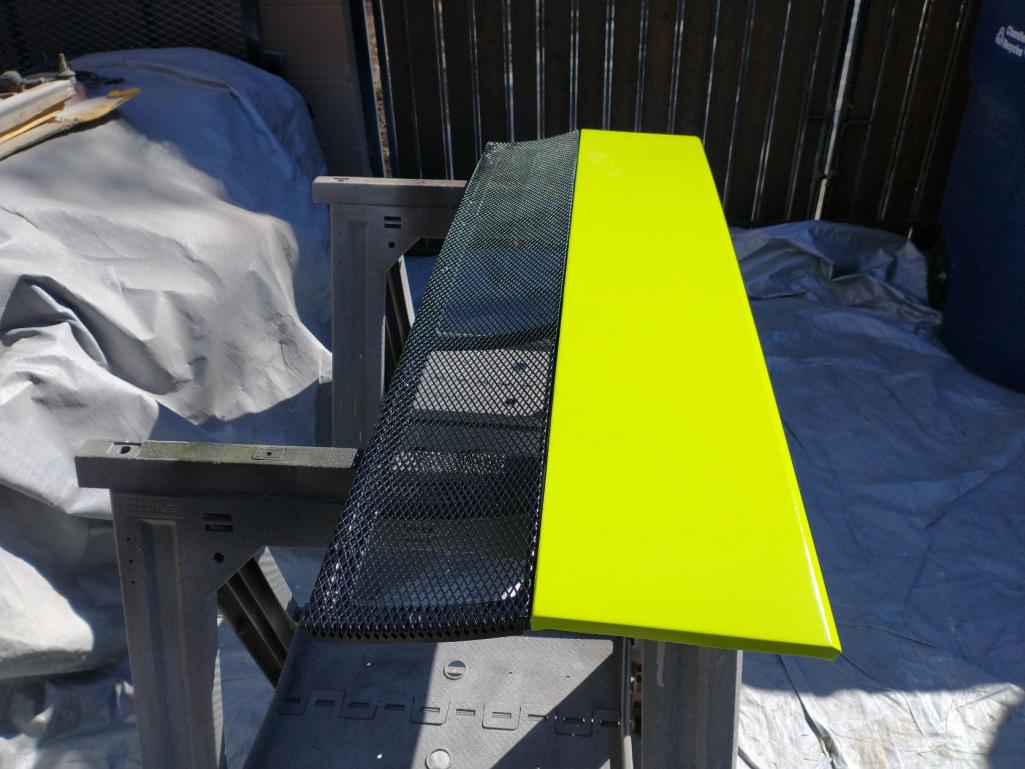 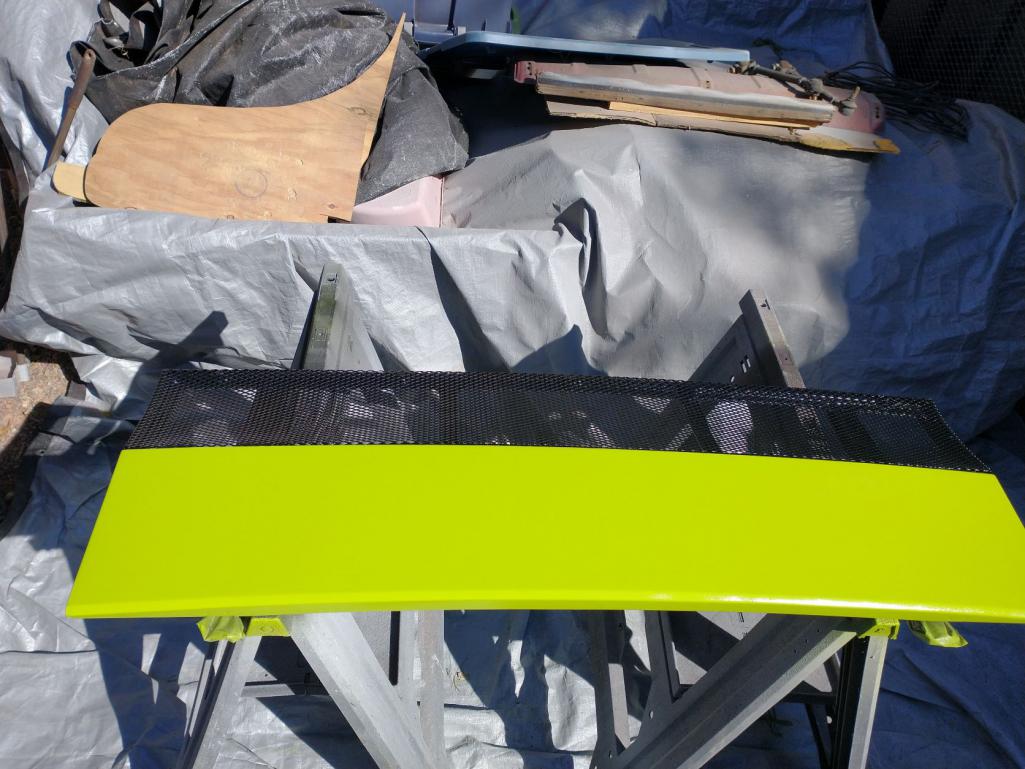 Speaking of parts arriving...My hood and deck lid finally made it! The box looked fine, I pulled them out to check them before the driver ran off. Just when I thought things were looking up. After getting them fully unwrapped, it looks like they must have dropped the box pretty hard and it crushed the corner of the duckbill spoiler on the one side. (IMG:style_emoticons/default/headbang.gif) 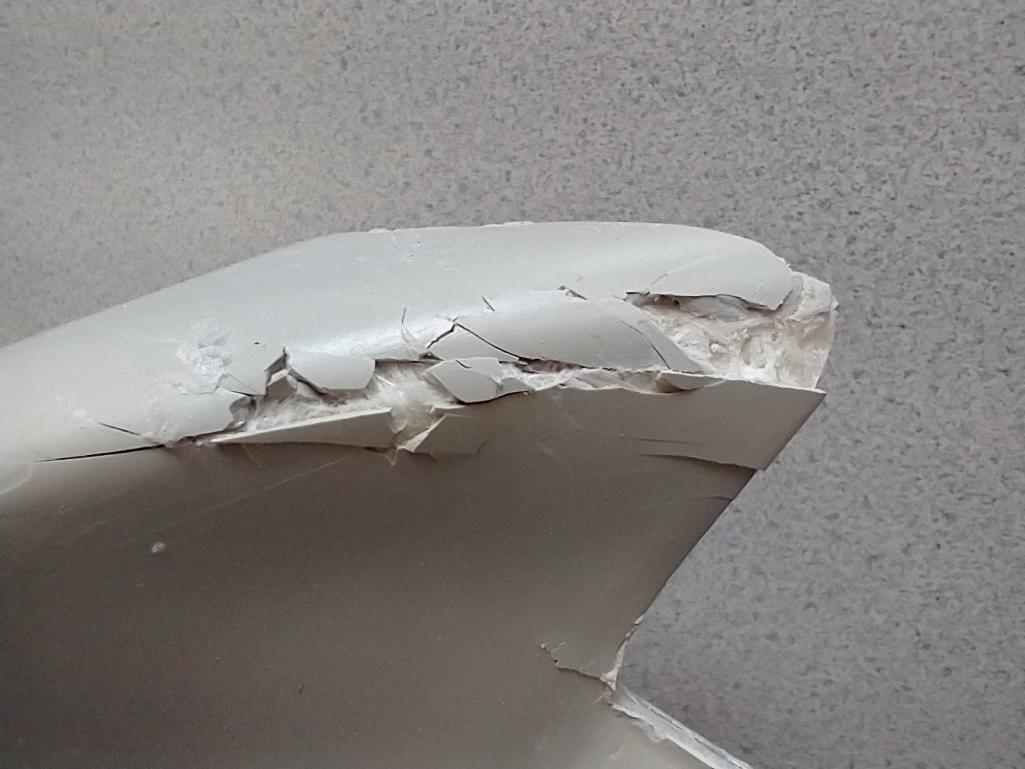 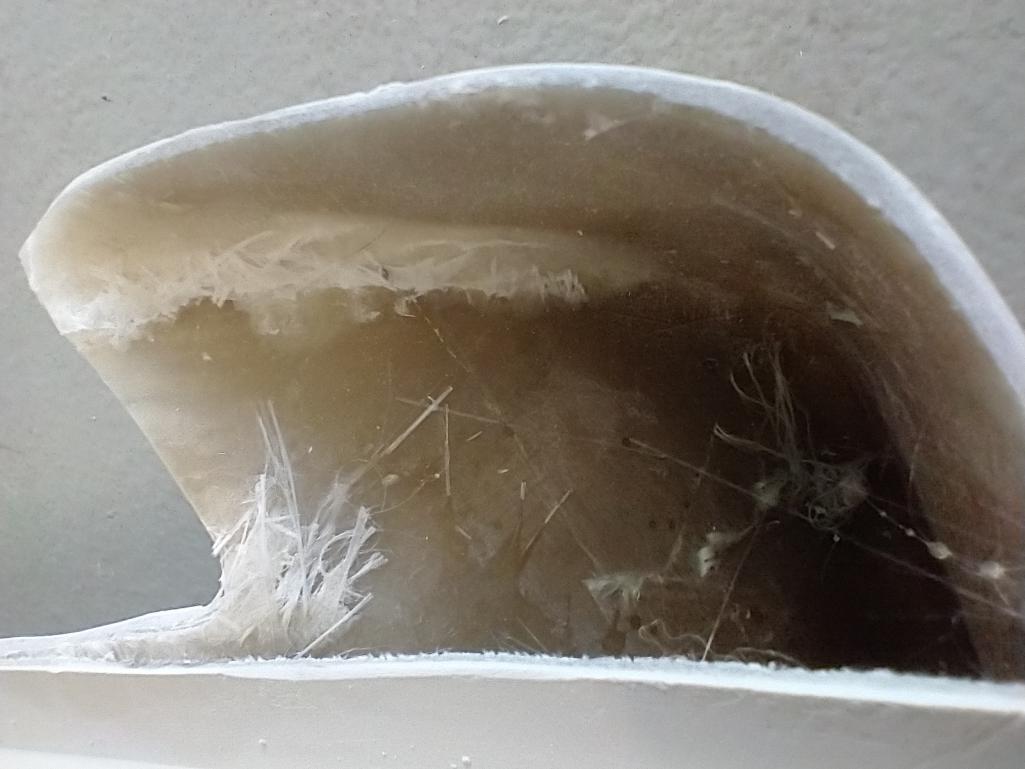 |
| mgarrison |
 Mar 17 2022, 09:40 PM Mar 17 2022, 09:40 PM
Post
#156
|
|
Member   Group: Members Posts: 376 Joined: 14-February 20 From: Chandler, AZ Member No.: 23,922 Region Association: Southwest Region 
|
My Rebel Racing parts finally made it! (IMG:style_emoticons/default/piratenanner.gif)
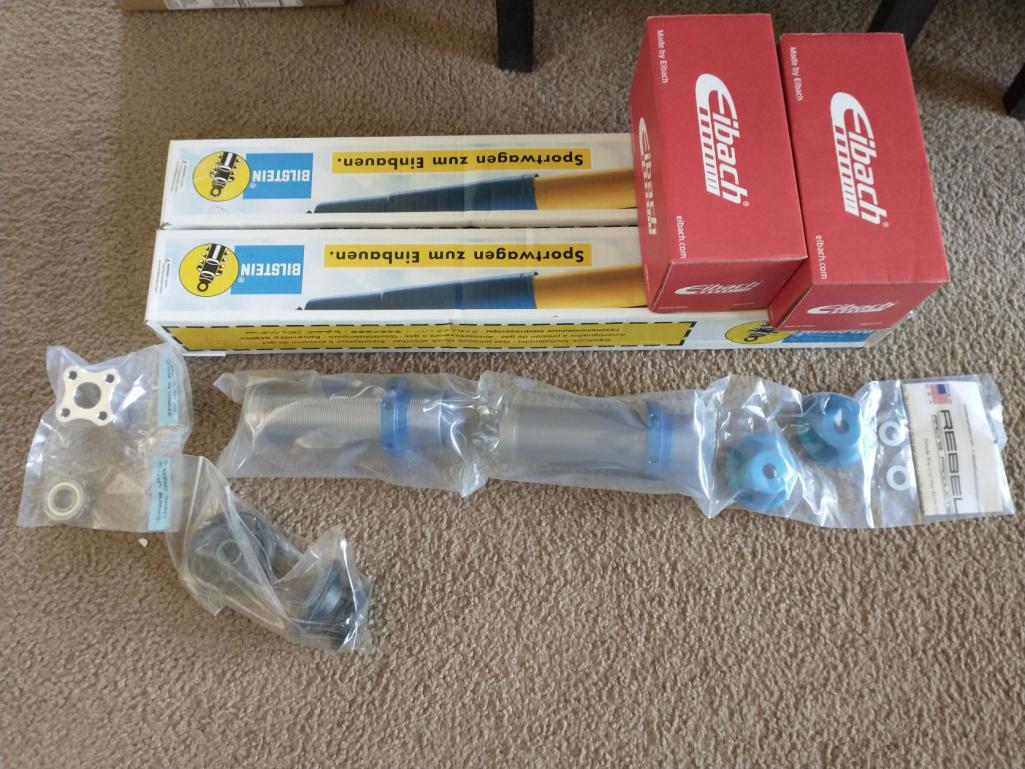 It took me two tries, and looking back at the pics on RR's site to get these assembled correctly (IMG:style_emoticons/default/screwy.gif) 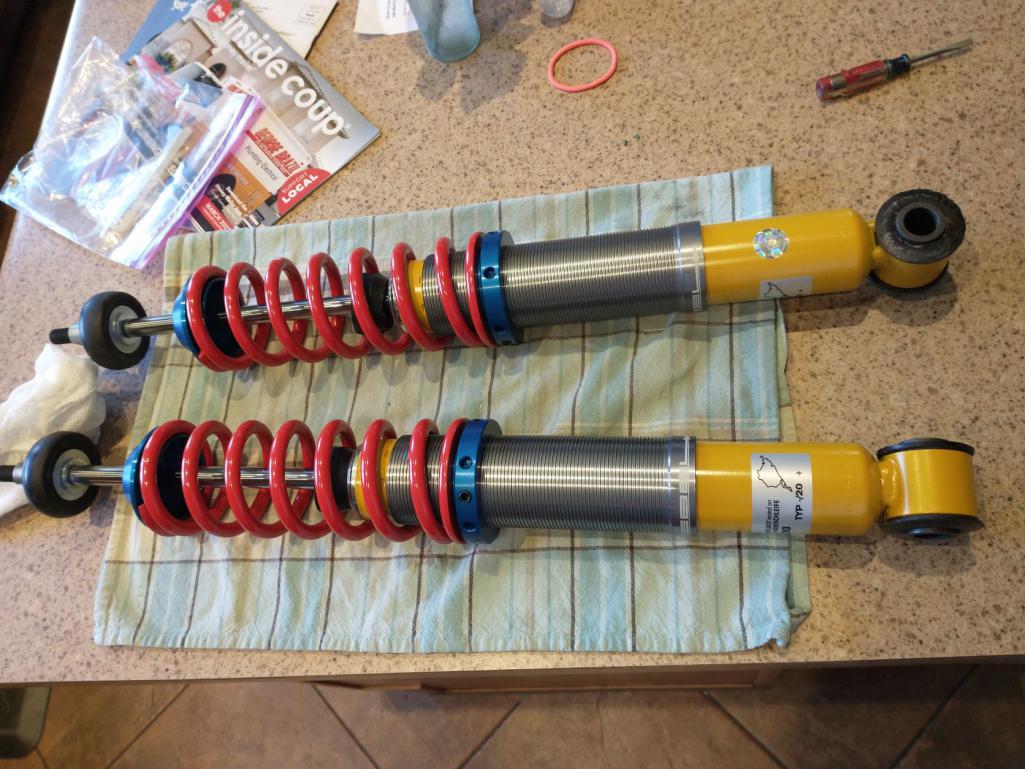 I went with the billet steering coupler...Don't want to mess with it again! (IMG:style_emoticons/default/headbang.gif) 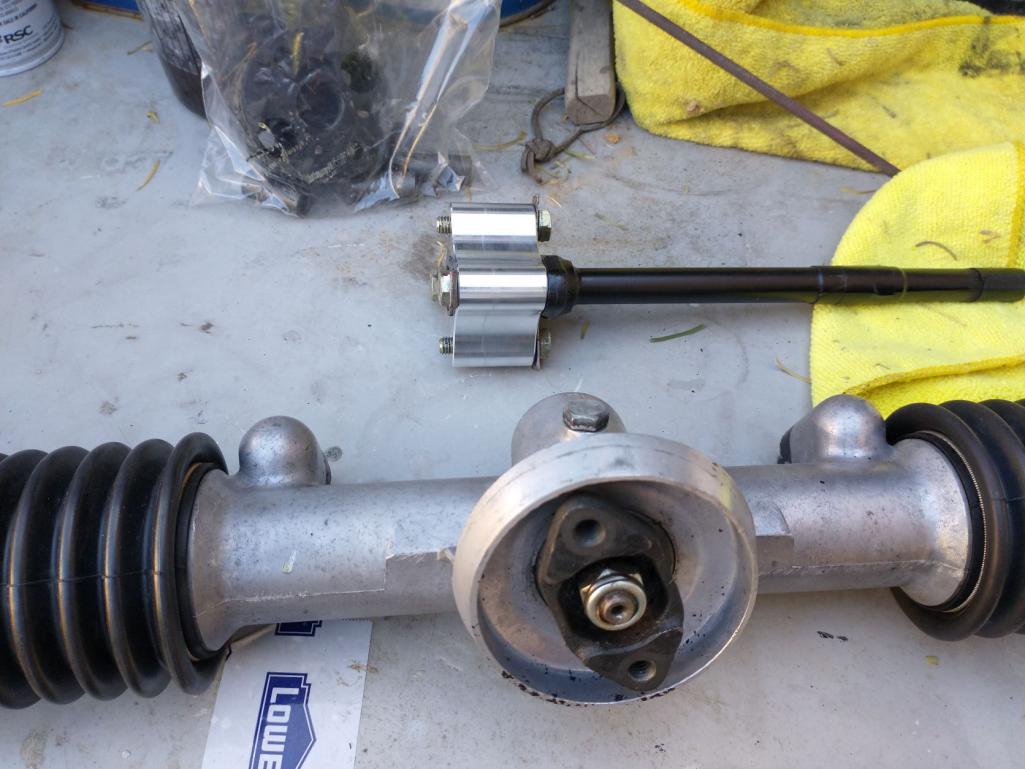 I think it should stop ok... (IMG:style_emoticons/default/happy11.gif) 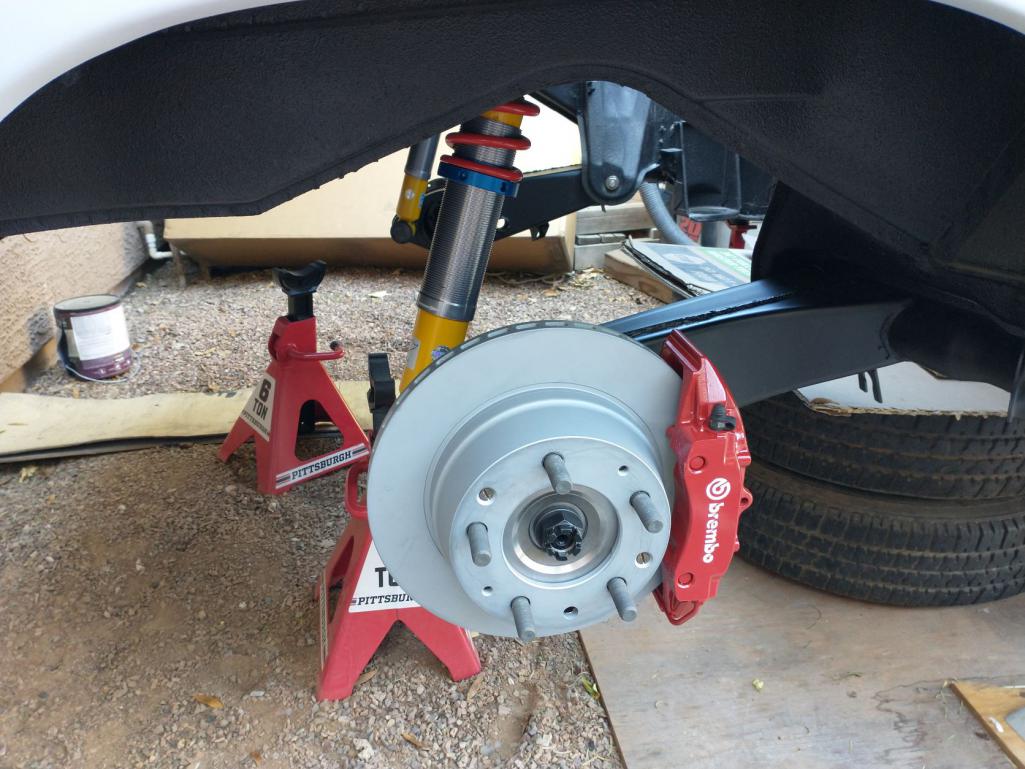 |
| tygaboy |
 Mar 17 2022, 09:48 PM Mar 17 2022, 09:48 PM
Post
#157
|
|
914 Guru      Group: Members Posts: 5,477 Joined: 6-October 15 From: Petaluma, CA Member No.: 19,241 Region Association: Northern California 
|
Congrats on all the forward progress! But man, oh man, all the shipping damage you're suffering just sucks. So sorry to see and fingers crossed it all works out.
|
| mgarrison |
 Mar 18 2022, 08:56 PM Mar 18 2022, 08:56 PM
Post
#158
|
|
Member   Group: Members Posts: 376 Joined: 14-February 20 From: Chandler, AZ Member No.: 23,922 Region Association: Southwest Region 
|
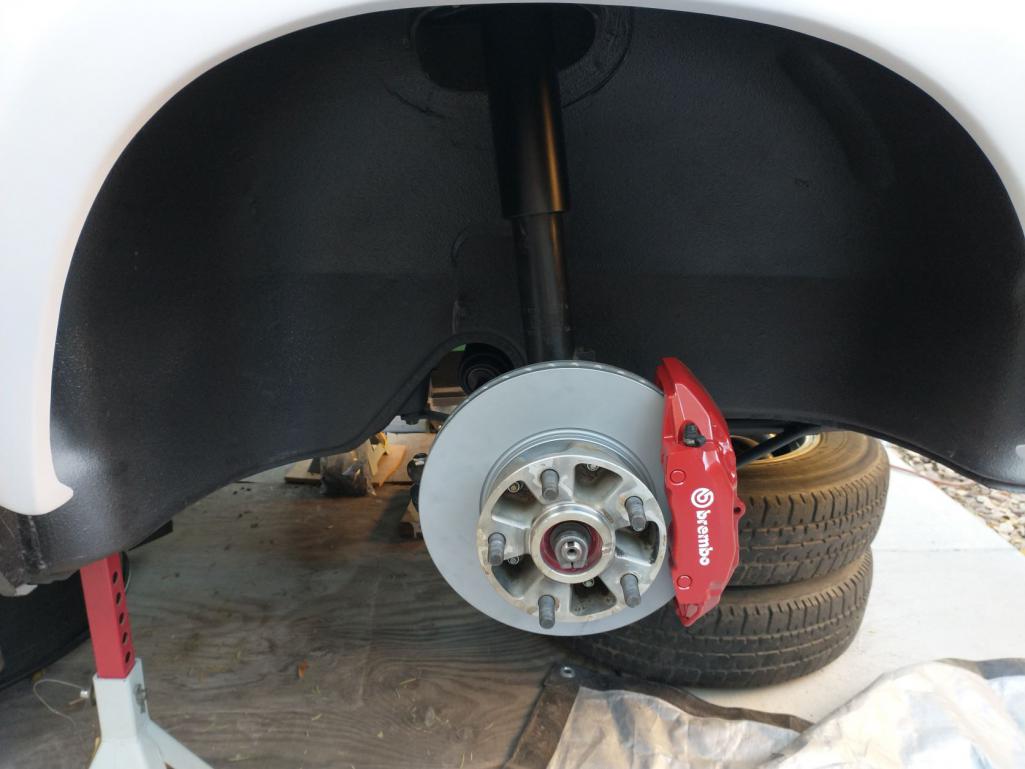
After destroying a new bearing for the steering column, I regrouped on the front axle. Getting there, inch by bloody inch! (IMG:style_emoticons/default/smash.gif)
 |
| Costa05 |
 Mar 18 2022, 09:33 PM Mar 18 2022, 09:33 PM
Post
#159
|
|
Member   Group: Members Posts: 320 Joined: 27-October 16 From: Phoenix, Arizona Member No.: 20,535 Region Association: Southwest Region 
|
Front rotors and brakes look great. Moving right along with it.
|
| slowrodent |
 Mar 19 2022, 08:48 AM Mar 19 2022, 08:48 AM
Post
#160
|
|
Member   Group: Members Posts: 159 Joined: 29-February 20 From: Tucson/Oro Valley Member No.: 23,981 Region Association: Southwest Region 
|
Really excellent work. Your attention to detail is just superb. Gonna be one handsome car.
|
  |
4 User(s) are reading this topic (4 Guests and 0 Anonymous Users)
0 Members:

|
Lo-Fi Version | Time is now: 7th January 2025 - 10:41 PM |
Invision Power Board
v9.1.4 © 2025 IPS, Inc.


