|
|

|
Porsche, and the Porsche crest are registered trademarks of Dr. Ing. h.c. F. Porsche AG.
This site is not affiliated with Porsche in any way. Its only purpose is to provide an online forum for car enthusiasts. All other trademarks are property of their respective owners. |
|
|
  |
| mgarrison |
 Feb 22 2023, 03:53 PM Feb 22 2023, 03:53 PM
Post
#241
|
|
Member   Group: Members Posts: 376 Joined: 14-February 20 From: Chandler, AZ Member No.: 23,922 Region Association: Southwest Region 
|
Coming along real well Mike! Thanks Rich! I need to pick your brain on how you calculated the capacity of your overflow/expansion tank. And, your fuel pump choice...what I've read so far says to size the pump based on HP. Not sure if that's how you went about it, or if you found Subaru specific requirements (IMG:style_emoticons/default/idea.gif) |
| 76-914 |
 Feb 22 2023, 06:12 PM Feb 22 2023, 06:12 PM
Post
#242
|
|
Repeat Offender & Resident Subaru Antagonist           Group: Members Posts: 13,652 Joined: 23-January 09 From: Temecula, CA Member No.: 9,964 Region Association: Southern California 
|
Crap! (IMG:style_emoticons/default/headbang.gif) I did forget to post the link. I was doing this on my phone while sitting in the ER. Here you go. https://www.aircraftspruce.com/search/searc...s=baffle%20seal
|
| Costa05 |
 Feb 22 2023, 10:10 PM Feb 22 2023, 10:10 PM
Post
#243
|
|
Member   Group: Members Posts: 320 Joined: 27-October 16 From: Phoenix, Arizona Member No.: 20,535 Region Association: Southwest Region 
|
Coming along real well Mike! Thanks Rich! I need to pick your brain on how you calculated the capacity of your overflow/expansion tank. And, your fuel pump choice...what I've read so far says to size the pump based on HP. Not sure if that's how you went about it, or if you found Subaru specific requirements (IMG:style_emoticons/default/idea.gif) I chose a basic high pressure Walbro fuel pump. Covers my less than 200 hp needs just fine. As for coolant expansion, there is a formula for calculating total expansion based upon total volume of coolant and temp. Add in the engine, radiator and hoses into the volume avail. Final size of expansion tank required was minimal so I ran a 1.25 quart Moroso aluminum one. It does overflow into a catch tank at temp which works as it should. No issues yet even on 100 degree days. Good fans and duct work helps a lot. I rarely get above 200 degrees on my temps. I think all systems react differently though. |
| mgarrison |
 Feb 23 2023, 07:53 AM Feb 23 2023, 07:53 AM
Post
#244
|
|
Member   Group: Members Posts: 376 Joined: 14-February 20 From: Chandler, AZ Member No.: 23,922 Region Association: Southwest Region 
|
Crap! (IMG:style_emoticons/default/headbang.gif) I did forget to post the link. I was doing this on my phone while sitting in the ER. Here you go. https://www.aircraftspruce.com/search/searc...s=baffle%20seal Ruh-Roh...I hope all is ok on your end! And THANKS! Replying to 914World while in the ER is above & beyond (IMG:style_emoticons/default/smilie_pokal.gif) |
| mgarrison |
 Mar 6 2023, 01:59 PM Mar 6 2023, 01:59 PM
Post
#245
|
|
Member   Group: Members Posts: 376 Joined: 14-February 20 From: Chandler, AZ Member No.: 23,922 Region Association: Southwest Region 
|
My AN adapters and fittings finally arrived. I installed the adapters on my radiator, and did a quick test fit of the elbow on the passenger side (lower outlet)...
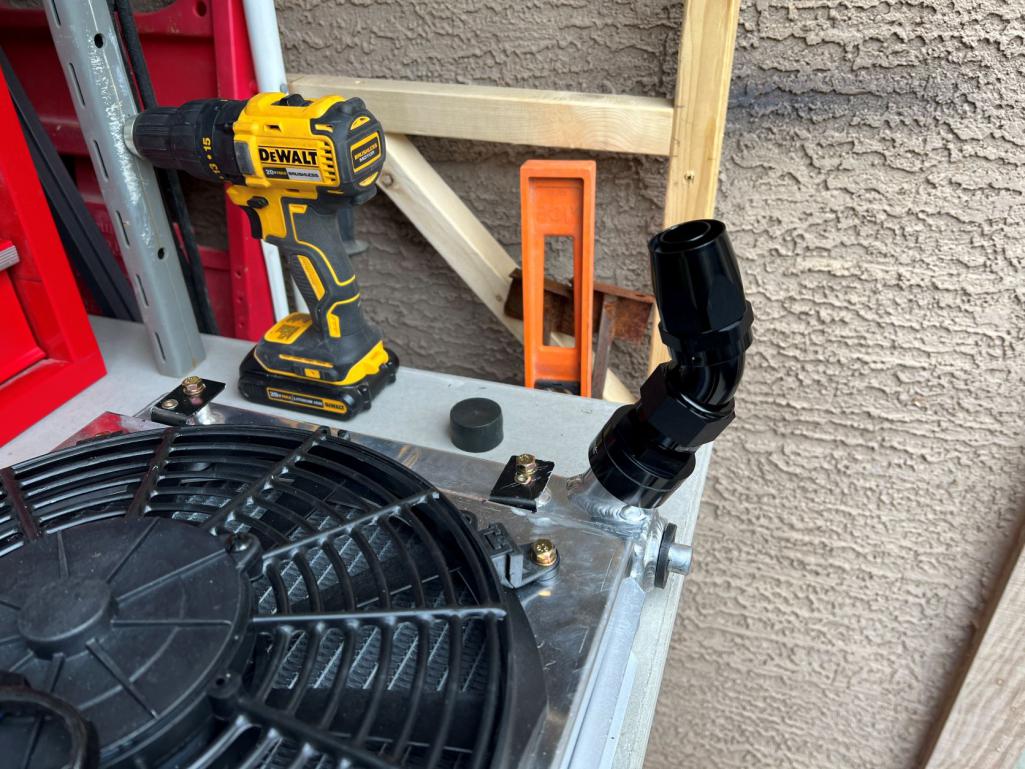 Then into the car to see if it's all going to clear. At first I had about a finger's width below the elbow, but it turns out the radiator was not seated all the way! 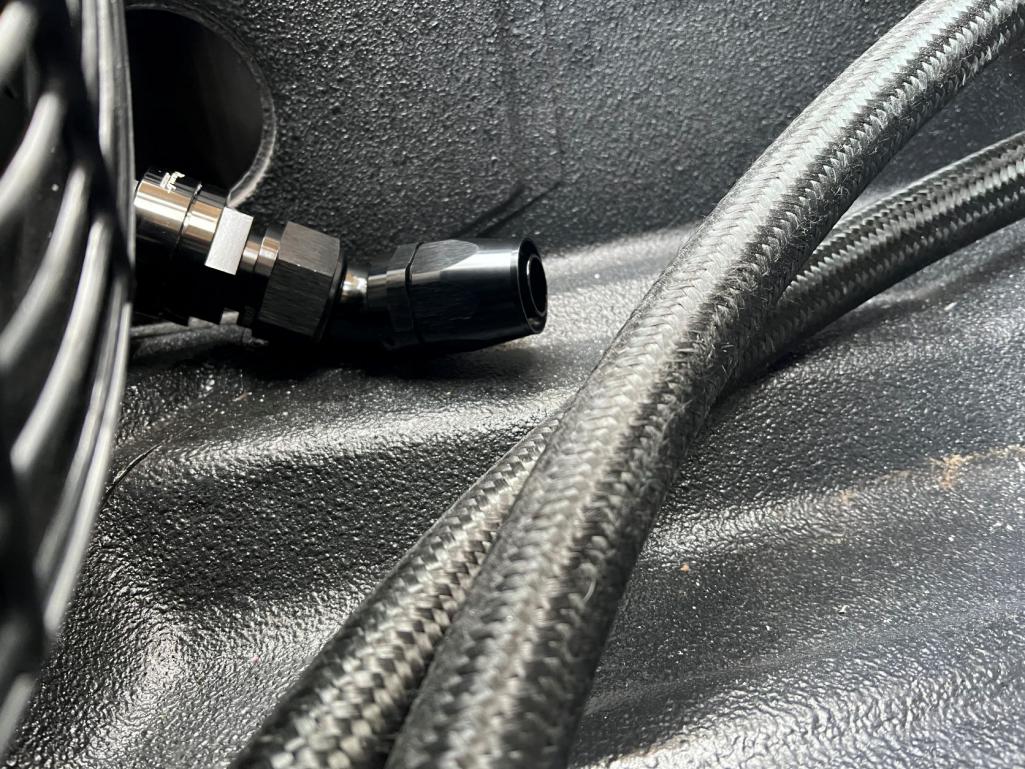 (IMG:style_emoticons/default/headbang.gif) On to revision #3 I guess (IMG:style_emoticons/default/wacko.gif) |
| tygaboy |
 Mar 6 2023, 02:29 PM Mar 6 2023, 02:29 PM
Post
#246
|
|
914 Guru      Group: Members Posts: 5,477 Joined: 6-October 15 From: Petaluma, CA Member No.: 19,241 Region Association: Northern California 
|
Only three revisions? You're far more effecient than I am! (IMG:style_emoticons/default/laugh.gif)
Seriously though, it sucks when those sorts of surprises happen. Just try and remember, a few weeks from now you'll have it solved and it'll just be another story about your build that you can share at Cars & Coffee when people are drooling over your car! FAB on! (IMG:style_emoticons/default/sawzall-smiley.gif) (IMG:style_emoticons/default/aktion035.gif) (IMG:style_emoticons/default/smash.gif) (IMG:style_emoticons/default/welder.gif) (IMG:style_emoticons/default/smilie_pokal.gif) |
| 76-914 |
 Mar 6 2023, 05:26 PM Mar 6 2023, 05:26 PM
Post
#247
|
|
Repeat Offender & Resident Subaru Antagonist           Group: Members Posts: 13,652 Joined: 23-January 09 From: Temecula, CA Member No.: 9,964 Region Association: Southern California 
|
It happens.I'll bet Phil @Superhawk996 has a few stories of engineering mishaps at one of the Big 3. BTW> VW Golf expansion tanks are dirt cheap and will fit your application. (IMG:style_emoticons/default/beerchug.gif)
|
| Superhawk996 |
 Mar 6 2023, 07:25 PM Mar 6 2023, 07:25 PM
Post
#248
|
|
914 Guru      Group: Members Posts: 6,653 Joined: 25-August 18 From: Woods of N. Idaho Member No.: 22,428 Region Association: Galt's Gulch 
|
It happens.I'll bet Phil @Superhawk996 has a few stories of engineering mishaps at one of the Big 3. BTW> VW Golf expansion tanks are dirt cheap and will fit your application. (IMG:style_emoticons/default/beerchug.gif) It happens a lot less than it did when I first started. Digital mock up (CAD) came a long way during my career. It still happens occasionally during pre production prototype builds when parts are being heavily iterated and things are hand assembled. By the time you get to mass production an interference like that would be costing millions per day while the line is shut down. Don’t want to be that guy. I haven’t looked at this thread in a while - wow! Lots of awesome progress. You’ll come up with a rework like Chris said. The car will be awesome and the story will be memorable! |
| mgarrison |
 Mar 6 2023, 09:14 PM Mar 6 2023, 09:14 PM
Post
#249
|
|
Member   Group: Members Posts: 376 Joined: 14-February 20 From: Chandler, AZ Member No.: 23,922 Region Association: Southwest Region 
|
Thanks guys! Appreciate the encouragement (IMG:style_emoticons/default/pray.gif)
I figure its another shot at enhancing aesthetic/style points...think I've heard that around here somewhere (IMG:style_emoticons/default/idea.gif) |
| Lilchopshop |
 Mar 7 2023, 05:21 AM Mar 7 2023, 05:21 AM
Post
#250
|
|
Member   Group: Members Posts: 75 Joined: 17-February 20 From: New York Member No.: 23,932 Region Association: North East States |
Thanks guys! Appreciate the encouragement (IMG:style_emoticons/default/pray.gif) I figure its another shot at enhancing aesthetic/style points...think I've heard that around here somewhere (IMG:style_emoticons/default/idea.gif) I'm always excited to see updates on this thread. Nice work @mgarrison ! I purchased that same radiator for my build and was also planning on using the water-neck adaptor with AN fittings and hose. What size AN hose are you using? A couple of thoughts on your interference situation... The water-neck adapter sure does look cool, but maybe it adds too much length here. Could you use a short section of rubber hose as the transition between the radiator and your AN hose? What about finding someone to TIG weld a short section of aluminum elbow to the radiator outlet? |
| mgarrison |
 Mar 7 2023, 09:03 AM Mar 7 2023, 09:03 AM
Post
#251
|
|
Member   Group: Members Posts: 376 Joined: 14-February 20 From: Chandler, AZ Member No.: 23,922 Region Association: Southwest Region 
|
Thanks guys! Appreciate the encouragement (IMG:style_emoticons/default/pray.gif) I figure its another shot at enhancing aesthetic/style points...think I've heard that around here somewhere (IMG:style_emoticons/default/idea.gif) I'm always excited to see updates on this thread. Nice work @mgarrison ! I purchased that same radiator for my build and was also planning on using the water-neck adaptor with AN fittings and hose. What size AN hose are you using? A couple of thoughts on your interference situation... The water-neck adapter sure does look cool, but maybe it adds too much length here. Could you use a short section of rubber hose as the transition between the radiator and your AN hose? What about finding someone to TIG weld a short section of aluminum elbow to the radiator outlet? Just unprofessional observations from my situation, so YMMV... I'm sure you could have aluminum AN bungs welded into the radiator inlets. But, I wasn't sure where to get that done/who I'd trust to do it right on a brand new Mishimoto radiator. If I had it to do over, I'd see if Mishimoto would do it for me. Looking at how low that inlet sits in relation to the bottom of the radiator, and how low you need to mount the radiator to clear the hood support structure (nearly impossible to see/figure out until I cut my hood vent), I don't think a hose would work unless it was molded as an elbow, and even then it would be snug, or you might need to shorten the end attaching to the inlet. If the inlets were horizontal it would be much simpler...When I spoke to the Mishimoto guys about flow direction in their Celica radiator, they did mention you could run it upside down. Drain plug would be on top, and overflow connection on bottom, but it is possible. That would put the "lower" inlet near the hood and angled towards the hood though. I was not super happy with how my radiator mount came out. It worked and wasn't really seen, but sure could be better. I'm getting my chance to improve it I guess! (IMG:style_emoticons/default/sawzall-smiley.gif) I ran -16 braided hose through my longs. The -20 did not really fit, and seemed to collapse much easier than the -16. Not sure on the hose specs as it came with the engine/trans I bought from another member of 914World. If your using -20 I have 4 -20 bulkhead fittings you can have if you want/need them - just cover shipping and there yours... |
| Lilchopshop |
 Mar 8 2023, 06:27 AM Mar 8 2023, 06:27 AM
Post
#252
|
|
Member   Group: Members Posts: 75 Joined: 17-February 20 From: New York Member No.: 23,932 Region Association: North East States |
Thanks guys! Appreciate the encouragement (IMG:style_emoticons/default/pray.gif) I figure its another shot at enhancing aesthetic/style points...think I've heard that around here somewhere (IMG:style_emoticons/default/idea.gif) I'm always excited to see updates on this thread. Nice work @mgarrison ! I purchased that same radiator for my build and was also planning on using the water-neck adaptor with AN fittings and hose. What size AN hose are you using? A couple of thoughts on your interference situation... The water-neck adapter sure does look cool, but maybe it adds too much length here. Could you use a short section of rubber hose as the transition between the radiator and your AN hose? What about finding someone to TIG weld a short section of aluminum elbow to the radiator outlet? Just unprofessional observations from my situation, so YMMV... I'm sure you could have aluminum AN bungs welded into the radiator inlets. But, I wasn't sure where to get that done/who I'd trust to do it right on a brand new Mishimoto radiator. If I had it to do over, I'd see if Mishimoto would do it for me. Looking at how low that inlet sits in relation to the bottom of the radiator, and how low you need to mount the radiator to clear the hood support structure (nearly impossible to see/figure out until I cut my hood vent), I don't think a hose would work unless it was molded as an elbow, and even then it would be snug, or you might need to shorten the end attaching to the inlet. If the inlets were horizontal it would be much simpler...When I spoke to the Mishimoto guys about flow direction in their Celica radiator, they did mention you could run it upside down. Drain plug would be on top, and overflow connection on bottom, but it is possible. That would put the "lower" inlet near the hood and angled towards the hood though. I was not super happy with how my radiator mount came out. It worked and wasn't really seen, but sure could be better. I'm getting my chance to improve it I guess! (IMG:style_emoticons/default/sawzall-smiley.gif) I ran -16 braided hose through my longs. The -20 did not really fit, and seemed to collapse much easier than the -16. Not sure on the hose specs as it came with the engine/trans I bought from another member of 914World. If your using -20 I have 4 -20 bulkhead fittings you can have if you want/need them - just cover shipping and there yours... I just learned a hip new acronym! (YMMV) I'm one step closer to hanging with the cool kids! (IMG:style_emoticons/default/shades.gif) Thanks! I'm also using the -16 hose, but thank you for the offer of your fittings! That would be a helluva deal! Those things are not cheap! |
| mgarrison |
 Mar 8 2023, 10:06 PM Mar 8 2023, 10:06 PM
Post
#253
|
|
Member   Group: Members Posts: 376 Joined: 14-February 20 From: Chandler, AZ Member No.: 23,922 Region Association: Southwest Region 
|
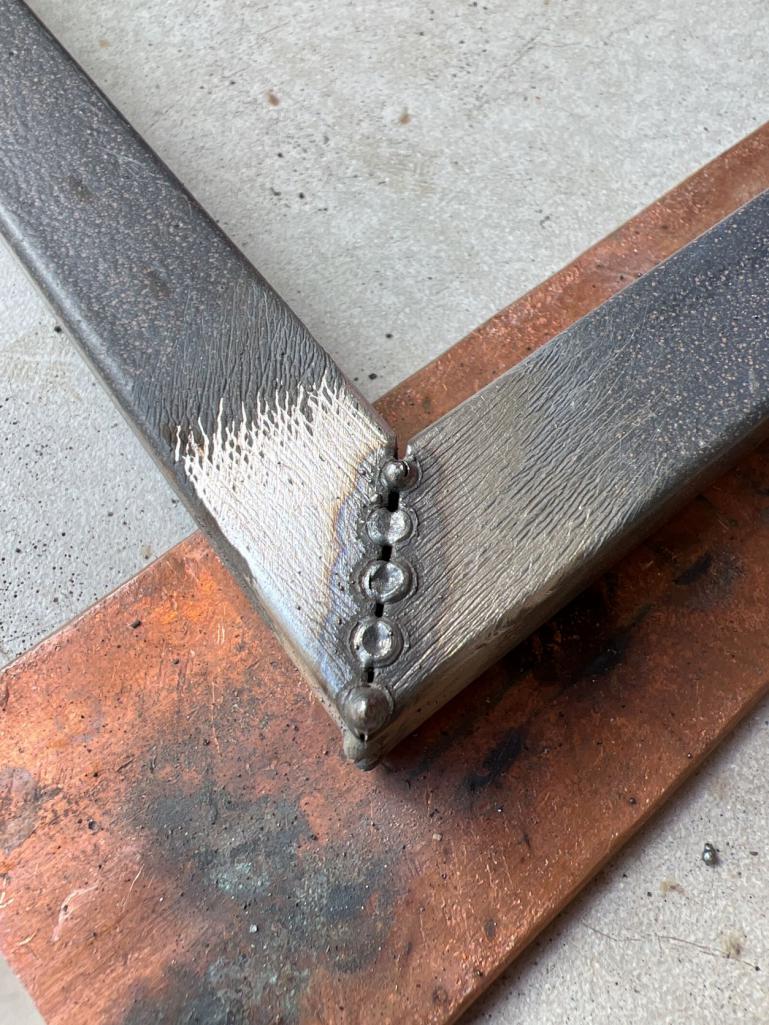
I deconstructed my old radiator mount and ducting, saving all the parts that I could reuse - mostly the ducting/shrouding and the lower mounts. I got out the micrometer and discovered this square tubing I'm trying to recycle/upcycle is only .5mm thick! (IMG:style_emoticons/default/wacko.gif) No wonder it's such a challenge to weld. Most of the welds are coming out ok, but some sections seem to be more of an issue. This is with my welder dialed as low as she'll go, and just a beat & a half hit of the juice...
 I was able to recover my lower mounts to reuse. Thankfully! 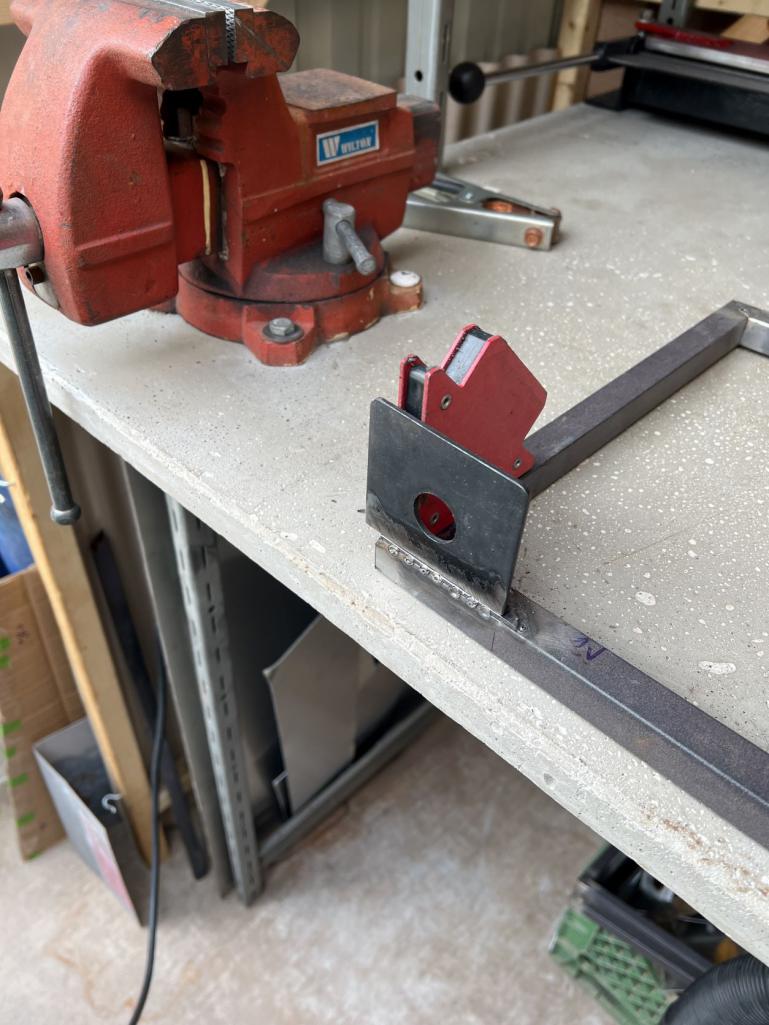 I must have measured 6-7 times and installed/removed the rubber grommets for the mounts too many times to count, but they lined up better than I got them to last time! 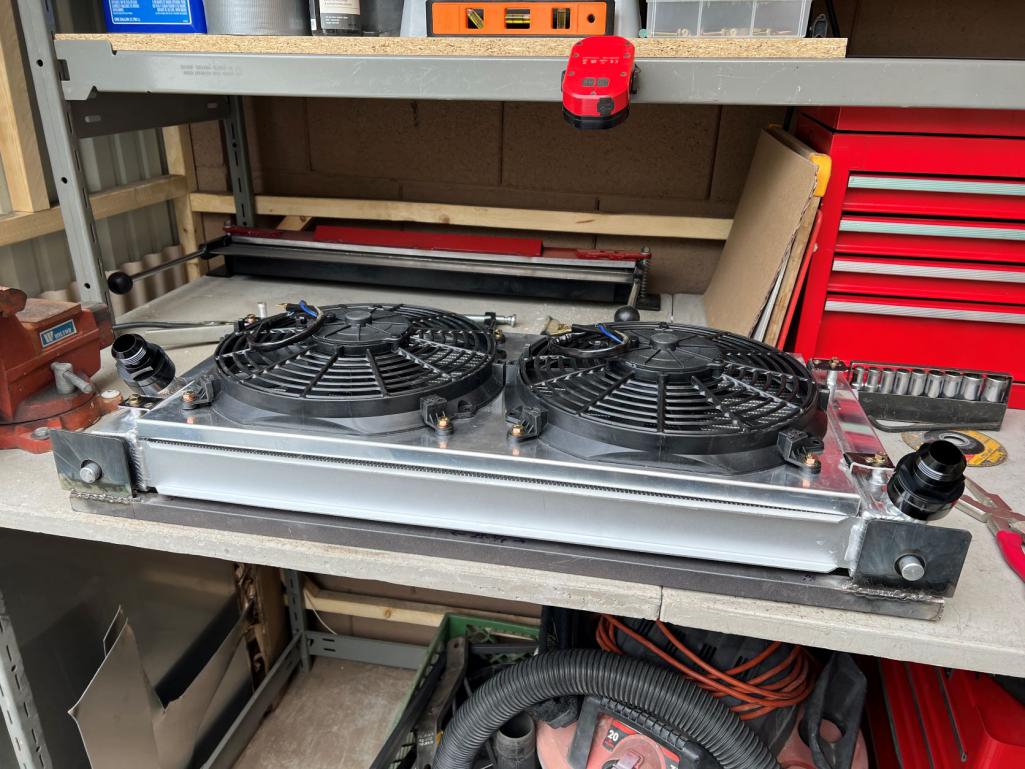 I was so focused on getting the lower mounts to line up as best I could, I totally forgot to pay attention to my overall width, and that little issue of the headlight buckets intruding in the upper half of the space, but not the lower half...Made the frame too wide to fit between the headlight buckets! (IMG:style_emoticons/default/headbang.gif) On to Revision 3.1 Minor remodel complete, I paid much better attention to test fit each step of the way. Looks like it's gonna work out ok. 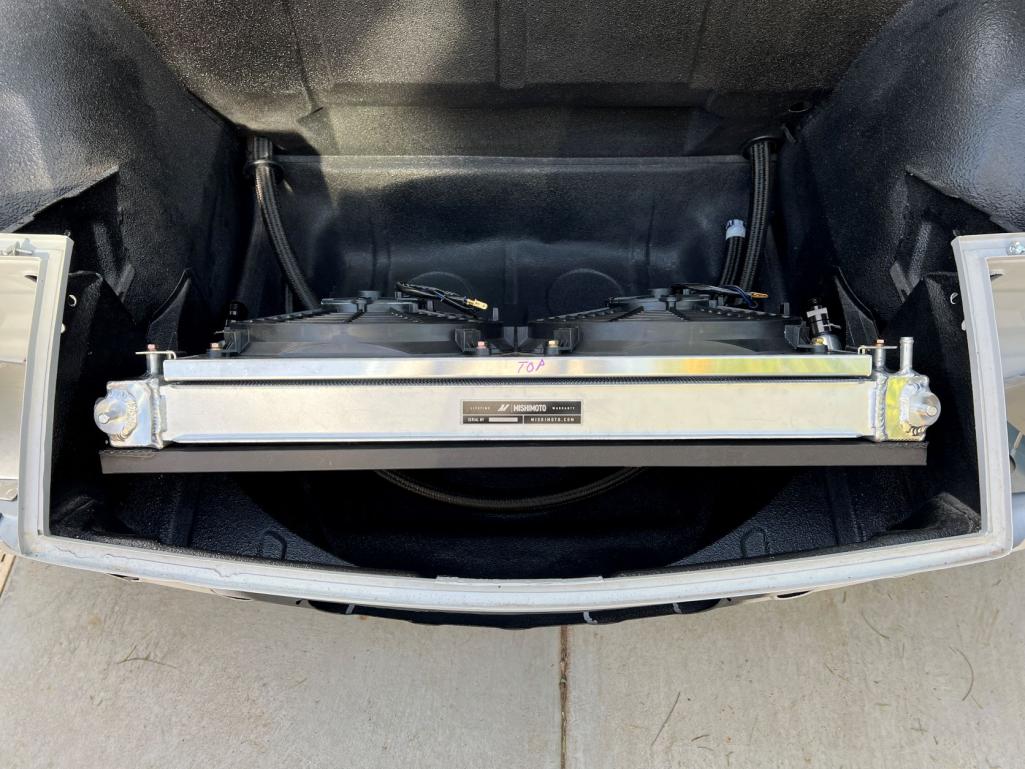 Got the top mounts figured out after a couple of tries - odd angles always hurt my brain (IMG:style_emoticons/default/blink.gif) 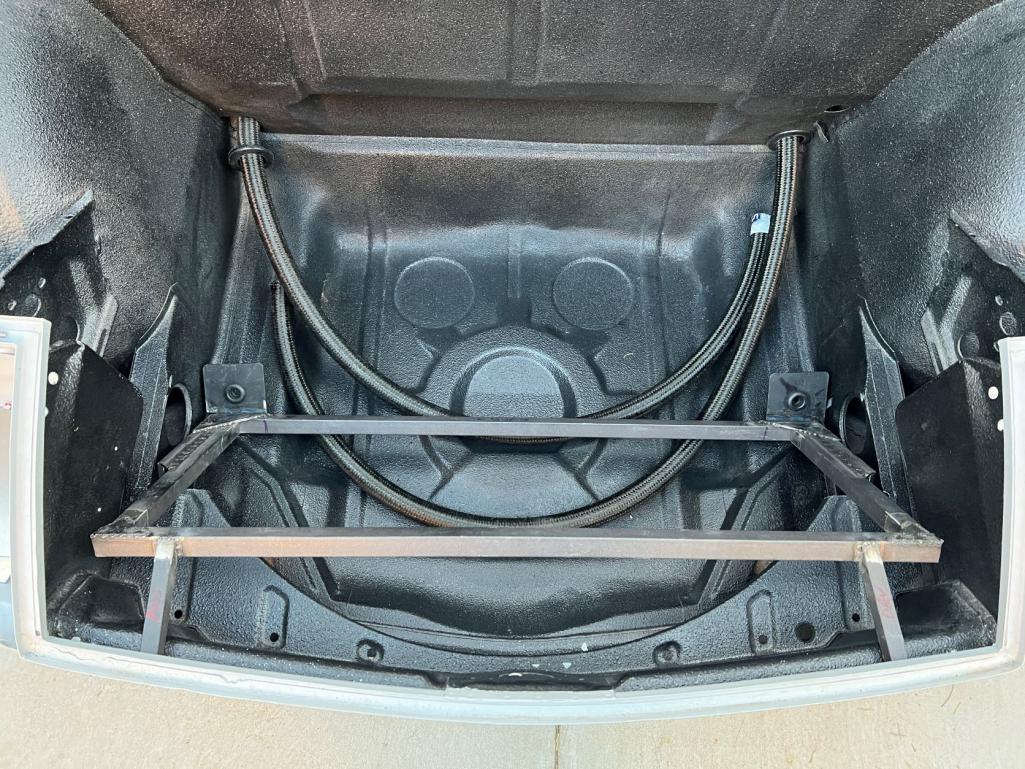 Now to work out the lower attachment points (IMG:style_emoticons/default/popcorn[1].gif) |
| tygaboy |
 Mar 9 2023, 08:51 AM Mar 9 2023, 08:51 AM
Post
#254
|
|
914 Guru      Group: Members Posts: 5,477 Joined: 6-October 15 From: Petaluma, CA Member No.: 19,241 Region Association: Northern California 
|
Not the best pic of it but I just added side walls to that angled support area. It has a floor that extends back far enough that I can get a fastener in there that bolts that area to the chassis. I can get you more specific pics, if that would help.
Attached thumbnail(s) 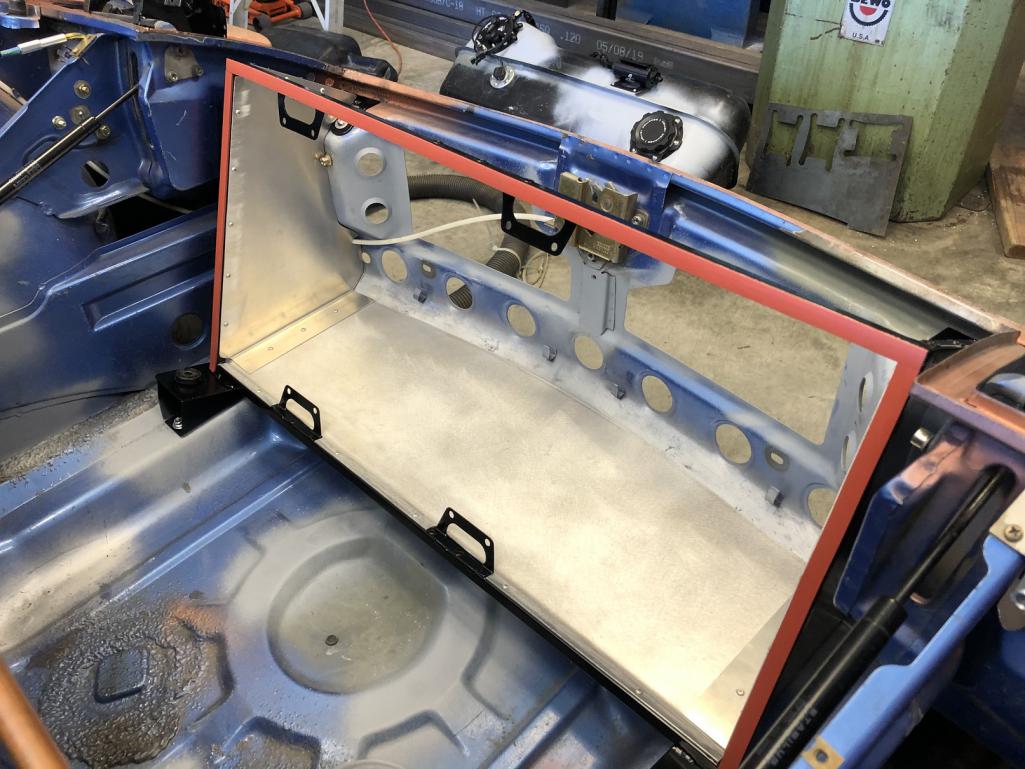
|
| mgarrison |
 Mar 9 2023, 11:44 AM Mar 9 2023, 11:44 AM
Post
#255
|
|
Member   Group: Members Posts: 376 Joined: 14-February 20 From: Chandler, AZ Member No.: 23,922 Region Association: Southwest Region 
|
Not the best pic of it but I just added side walls to that angled support area. It has a floor that extends back far enough that I can get a fastener in there that bolts that area to the chassis. I can get you more specific pics, if that would help. Thanks Chris - I think I have a concept that will work. Funny thing - I'd already saved that pic from your build to help guide me building the frame and ducting! (IMG:style_emoticons/default/pray.gif) |
| mgarrison |
 Mar 10 2023, 10:32 PM Mar 10 2023, 10:32 PM
Post
#256
|
|
Member   Group: Members Posts: 376 Joined: 14-February 20 From: Chandler, AZ Member No.: 23,922 Region Association: Southwest Region 
|
We interrupt your regularly scheduled update for this distraction...
The 914 took her first "trip". Our neighbors offered me their garage for a week while they are out of town. My wife sang "Flintstone's, meet the Flintstone's" as we rolled across the street! Their garage makes the 914 look like it's in the belly of a giant whale! (IMG:style_emoticons/default/blink.gif) 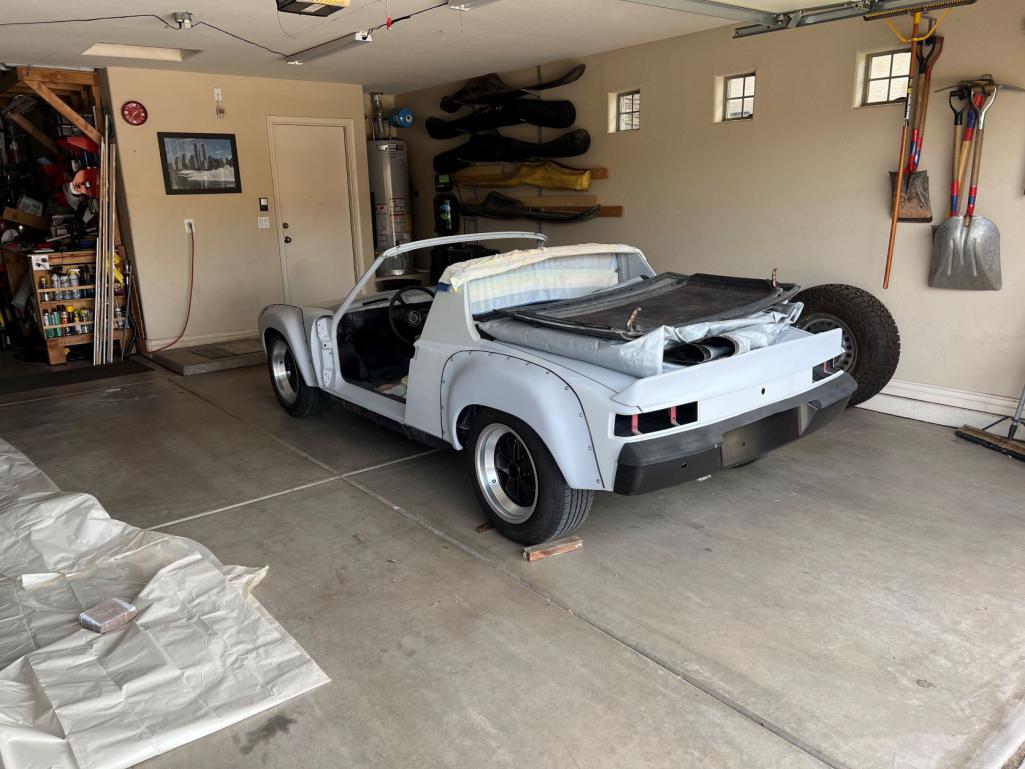 We moved the 914 so I can pour a concrete pad under where it has been parked. Figure I'll use it for the 914, Miata, or trailer often. 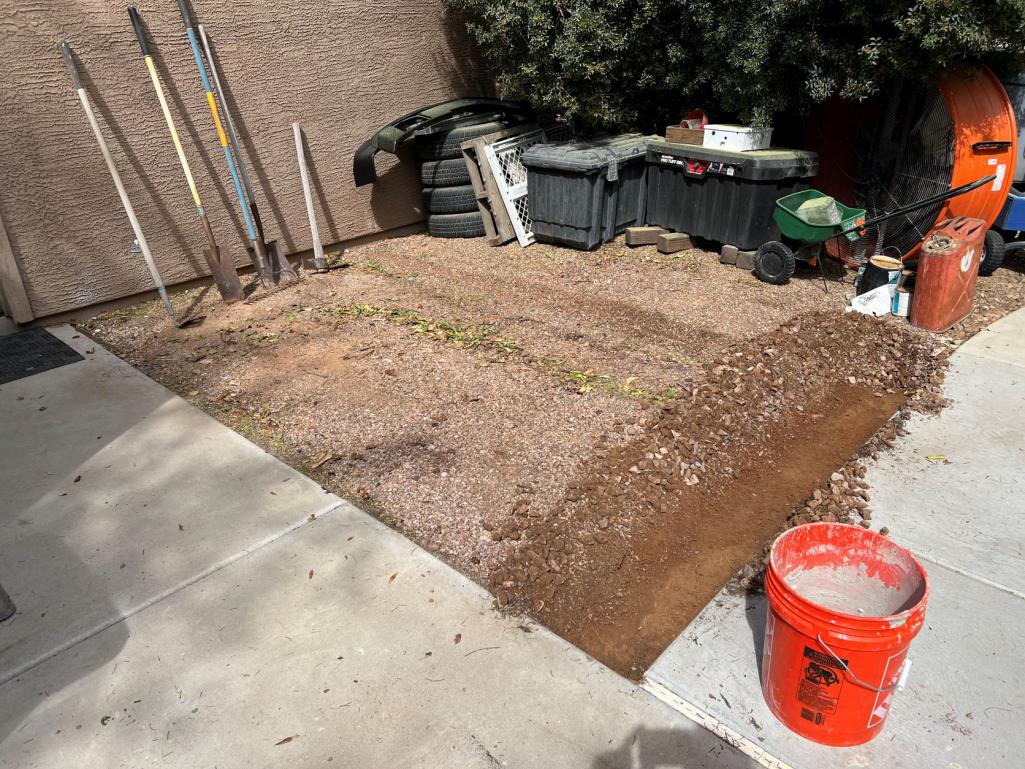 It was twice the cost to have a small concrete truck deliver mix on site, so I split it in half and made two trips with our trailer to get the 37 80lb bags of concrete (IMG:style_emoticons/default/screwy.gif) 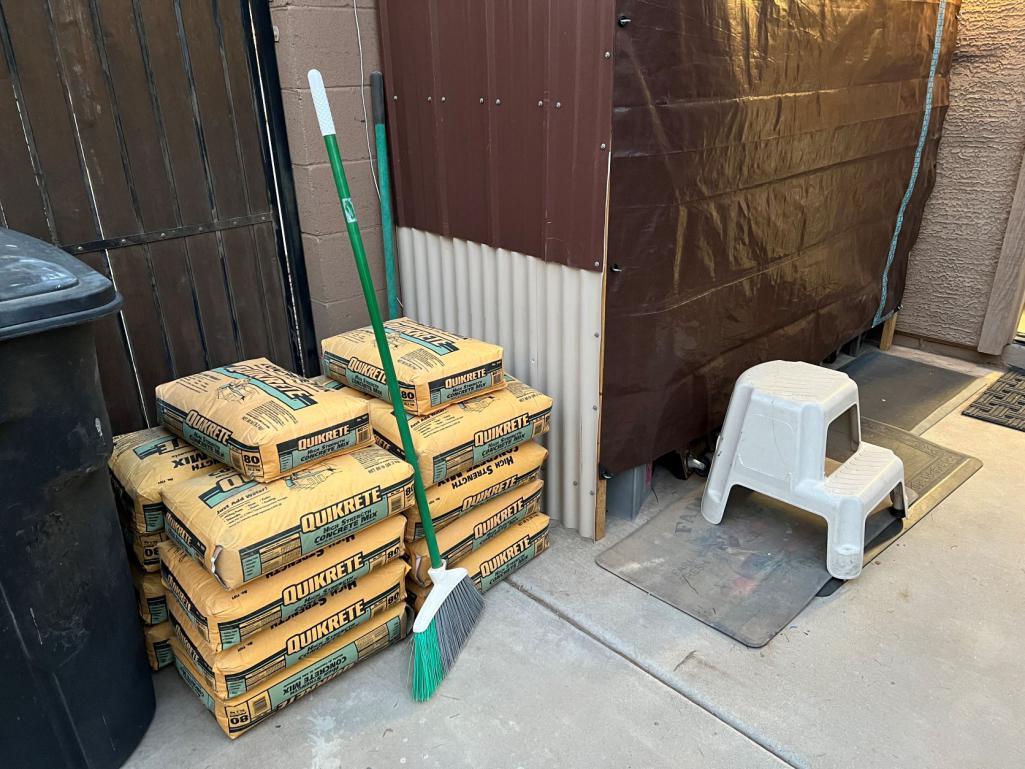 Got it all formed up and ready to go... 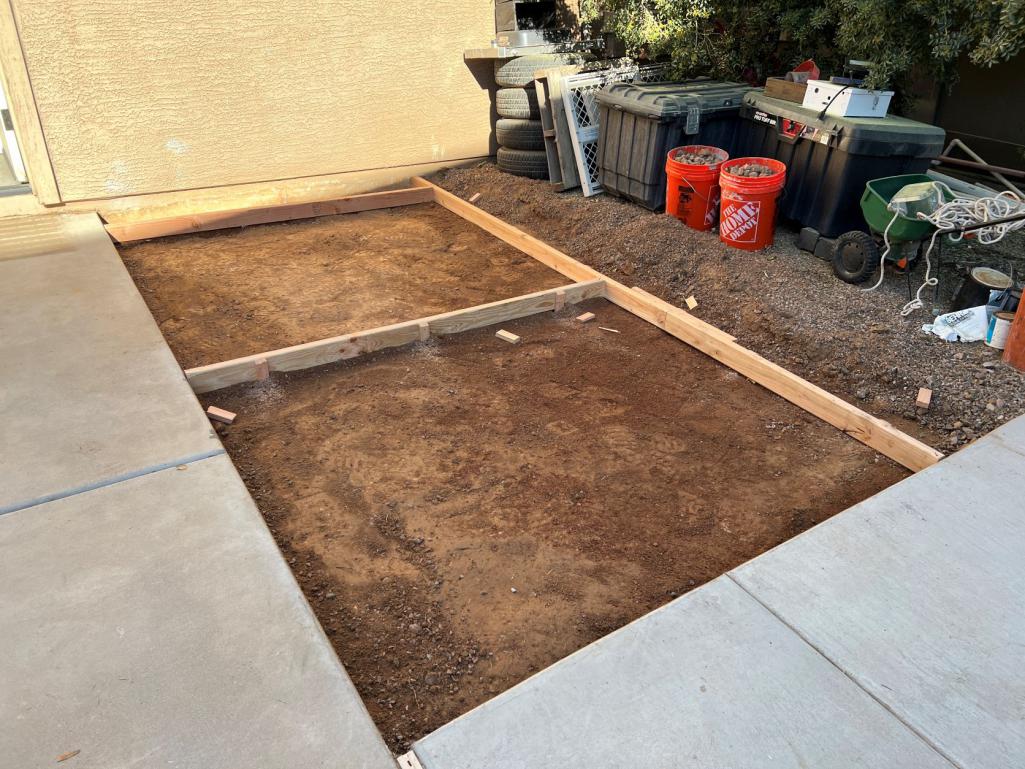 Of course scheduling really bit me in the hiney; everyone was at work/school on the day I needed to mix & pour the first section. Solo Miho, again... 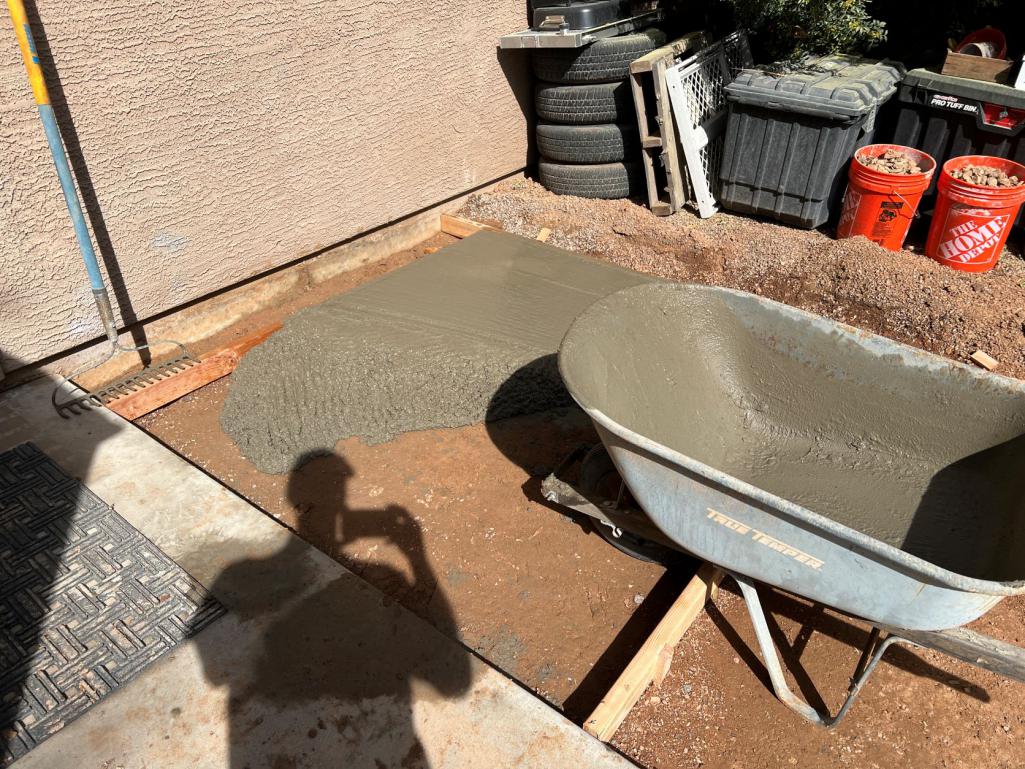 I mixed two bags at a time... 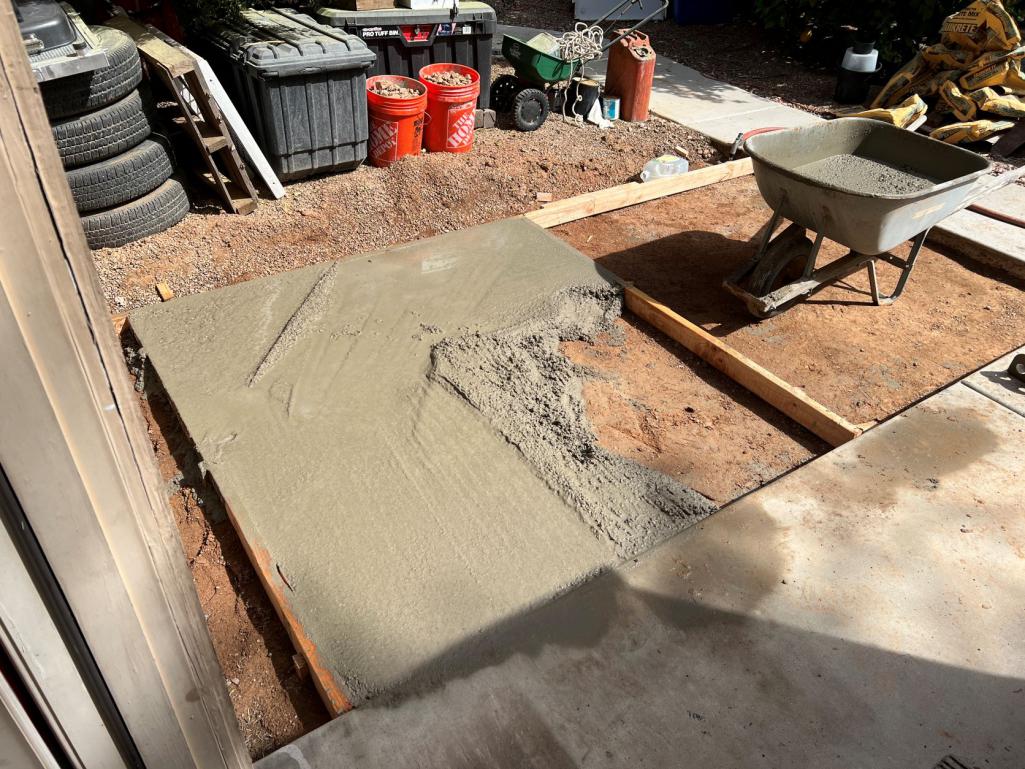 Oddly enough, two 80lb bags equals my body weight. So, I carried myself 9X (IMG:style_emoticons/default/wacko.gif) 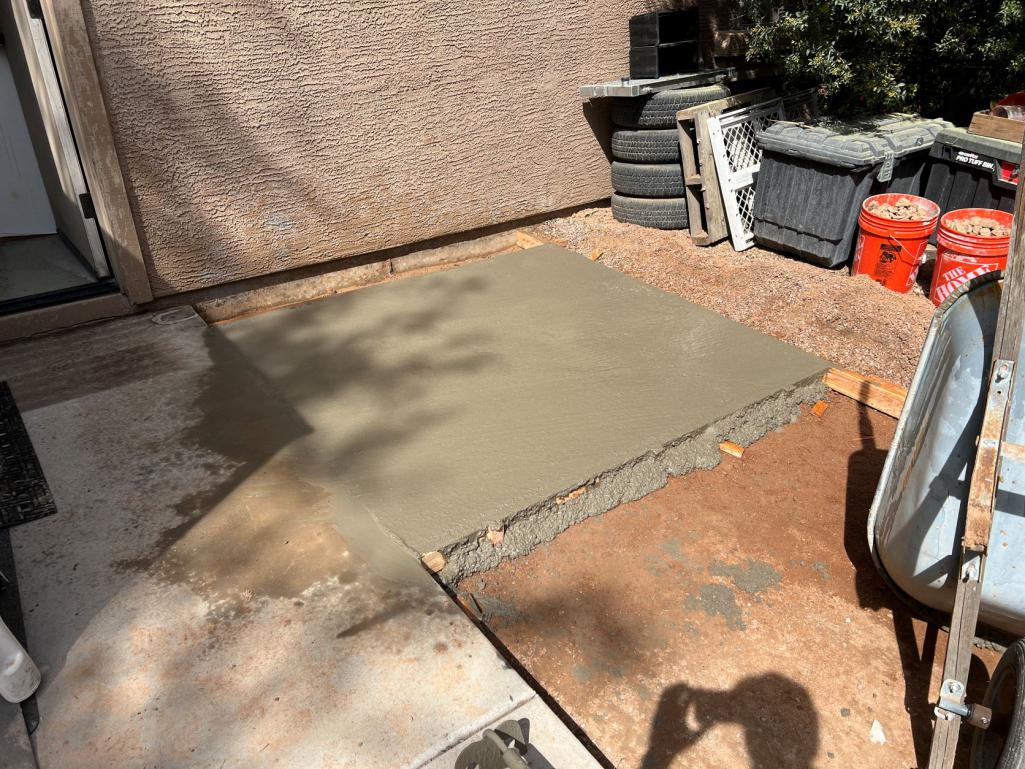 Got it all finished off in time to pick up our daughter from school, and then off to Lowe's to get bags for round #2 on Sunday. Can't wait! (IMG:style_emoticons/default/icon8.gif) 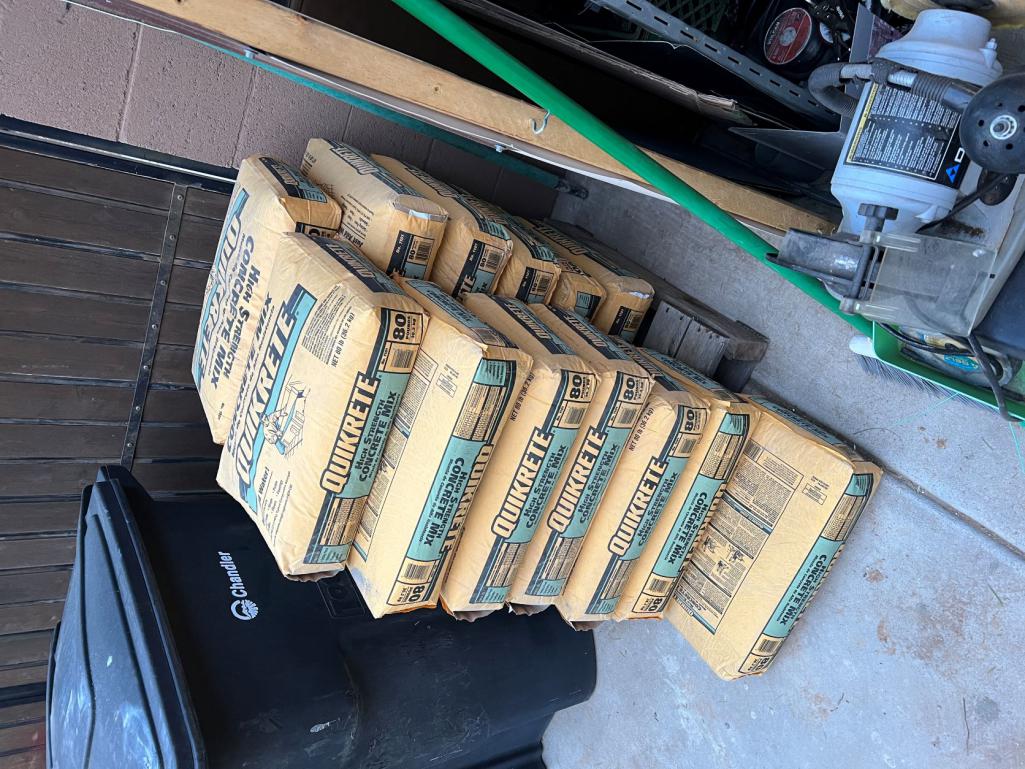 |
| mgarrison |
 Mar 13 2023, 02:48 PM Mar 13 2023, 02:48 PM
Post
#257
|
|
Member   Group: Members Posts: 376 Joined: 14-February 20 From: Chandler, AZ Member No.: 23,922 Region Association: Southwest Region 
|
Round two is in the books. Thankfully our son helped me so the mixing was much easier.
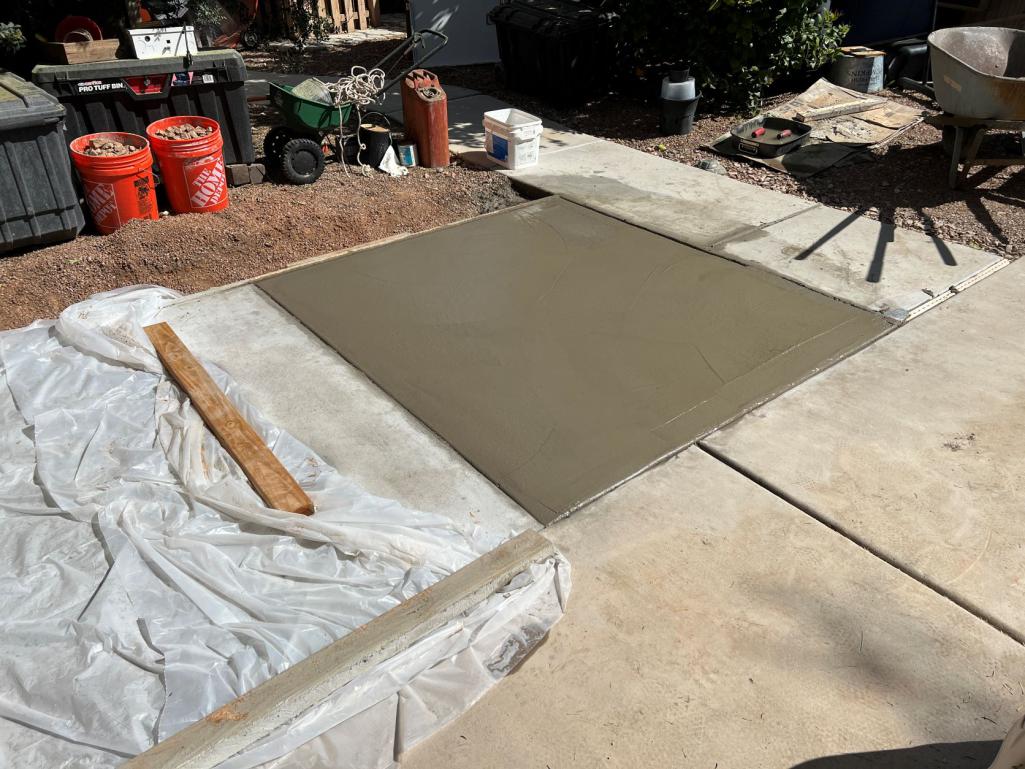 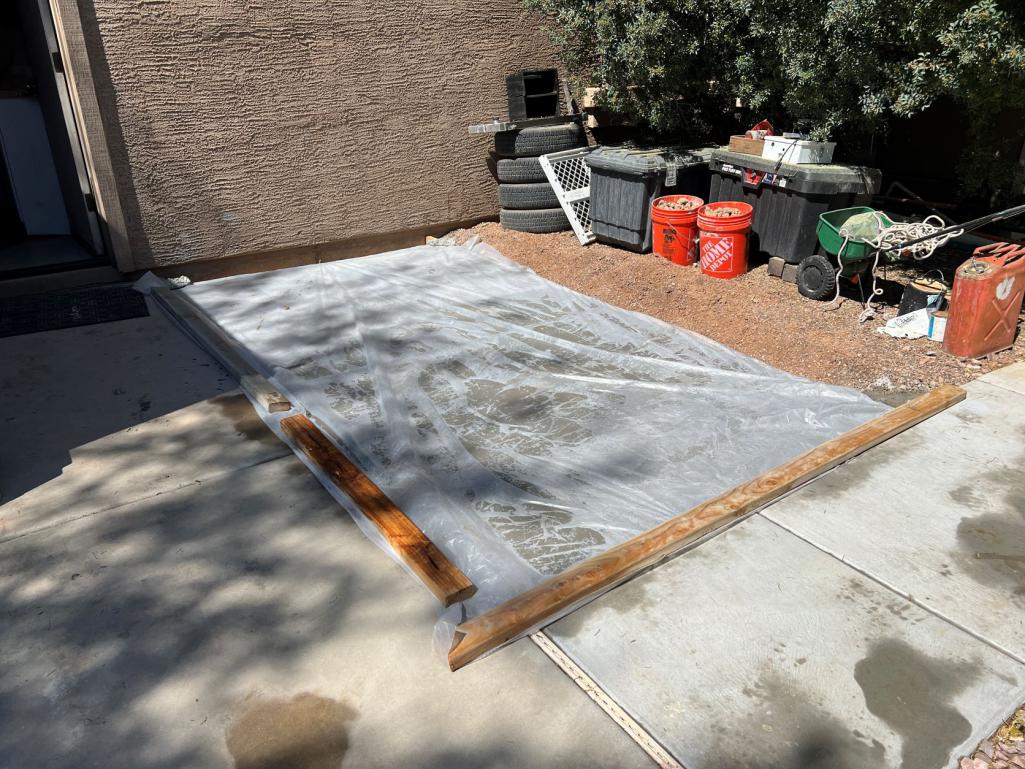 Now just have to wait 5 days for the concrete to cure. Neighbors get back Wednesday, so we need to figure out where to stash the 914 for a couple of days (IMG:style_emoticons/default/confused24.gif) |
| mgarrison |
 Mar 17 2023, 11:57 AM Mar 17 2023, 11:57 AM
Post
#258
|
|
Member   Group: Members Posts: 376 Joined: 14-February 20 From: Chandler, AZ Member No.: 23,922 Region Association: Southwest Region 
|
Kicked the wife out of the "Jeep garage" for a couple of days until the concrete is fully cured. Worked on the lower mounts yesterday afternoon for a bit - killed my back. That frunk floor is a long way down! (IMG:style_emoticons/default/wacko.gif)
This morning I broke out the Quick Jack so that things are easier on my tired, old back! 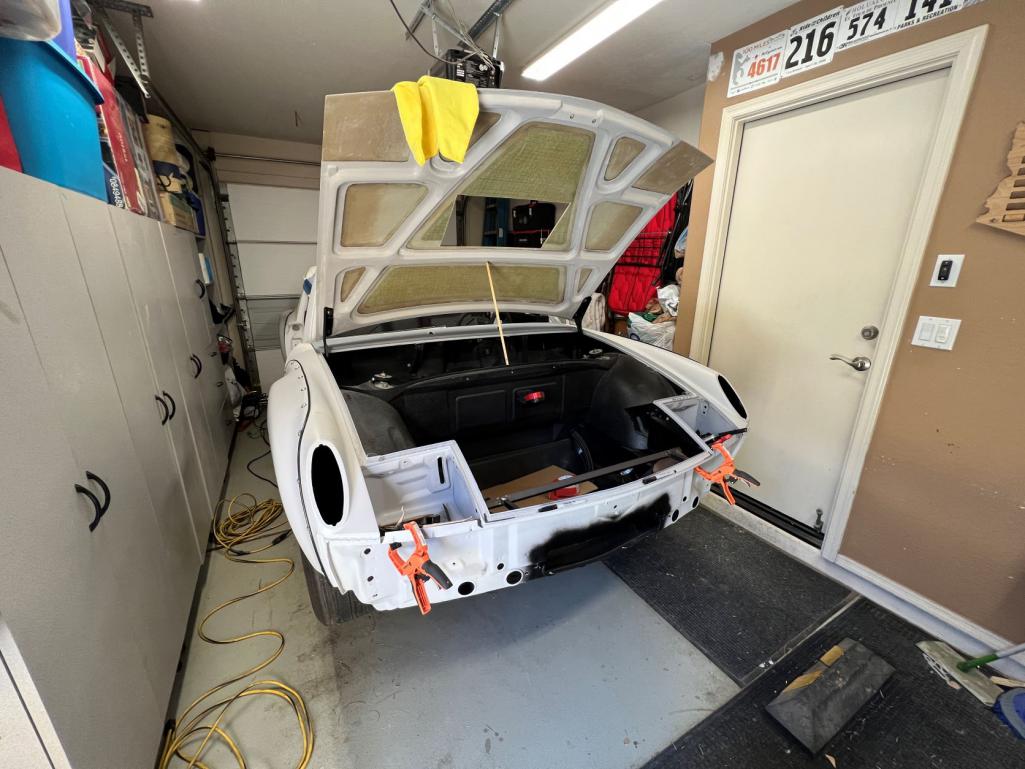 |
| mgarrison |
 Mar 17 2023, 08:56 PM Mar 17 2023, 08:56 PM
Post
#259
|
|
Member   Group: Members Posts: 376 Joined: 14-February 20 From: Chandler, AZ Member No.: 23,922 Region Association: Southwest Region 
|
Concrete is all cured and ready for the 914!
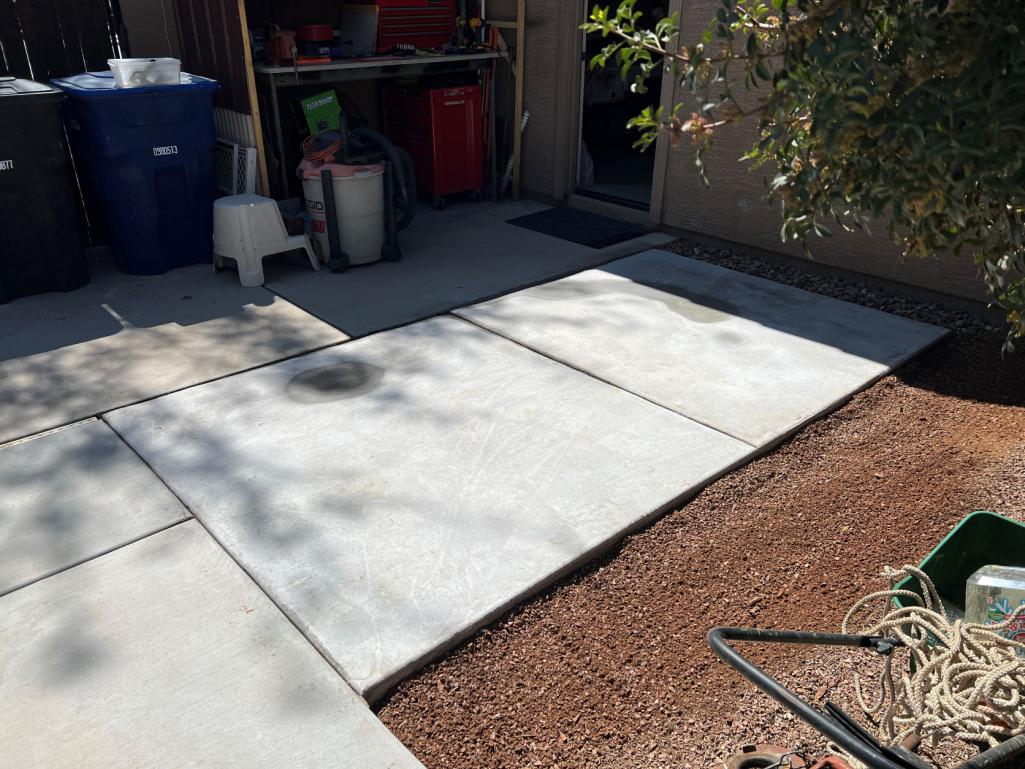 I got to spend a few hours this afternoon and made some progress. Lower ducting is in place. I just need to get more rivets - only had 3 left from the last revision. 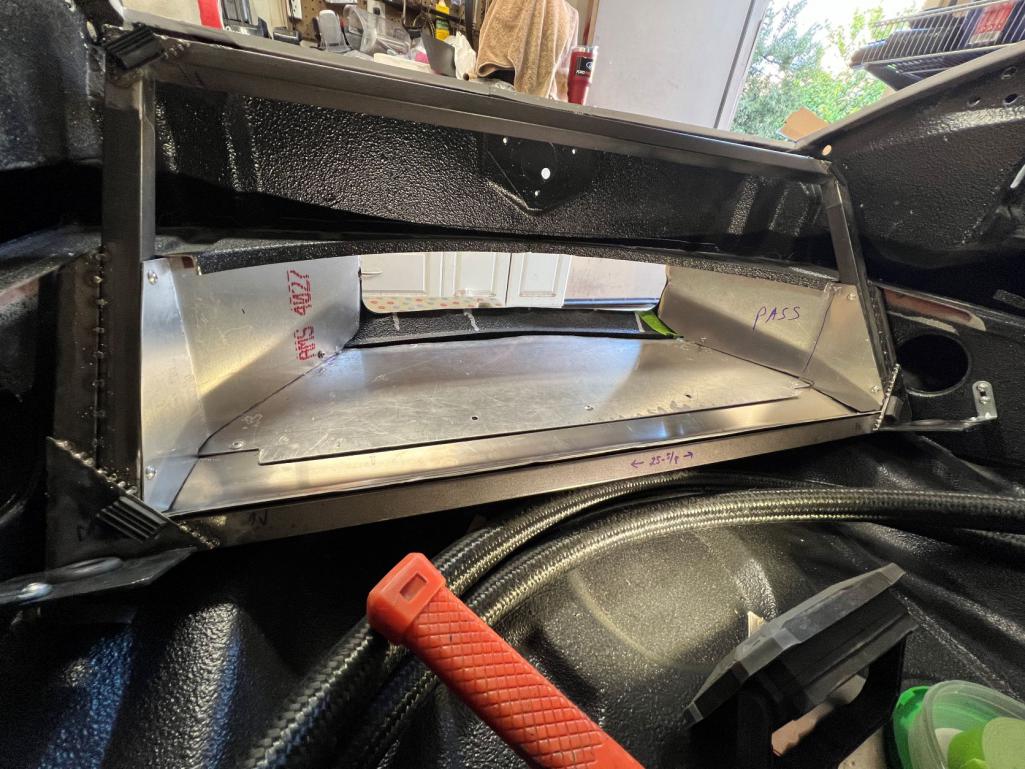 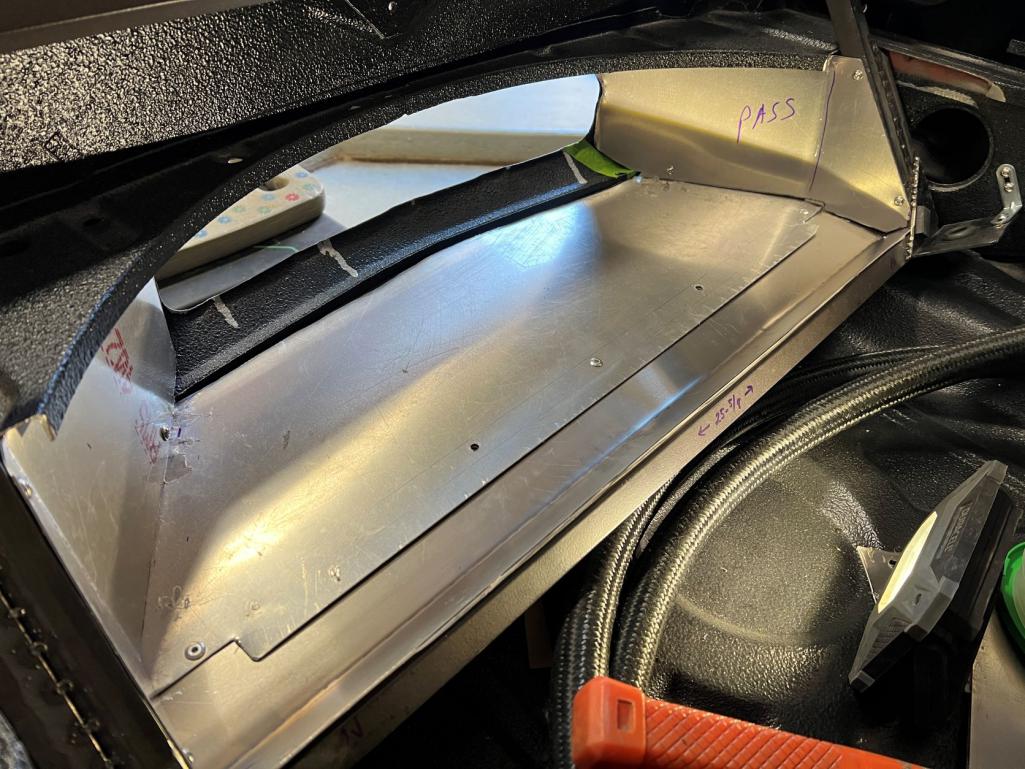 I have the upper sides cut out. Just working on fine tuning them and then I'll need the rivets to attach them. I'm trying to reuse as much as possible from the last revision - that's why the bottom is two pieces riveted together. (IMG:style_emoticons/default/smash.gif) |
| mgarrison |
 Mar 20 2023, 10:45 AM Mar 20 2023, 10:45 AM
Post
#260
|
|
Member   Group: Members Posts: 376 Joined: 14-February 20 From: Chandler, AZ Member No.: 23,922 Region Association: Southwest Region 
|
I had to redo my upper mounts. I had a bracket that was for...something! Worked out to be about the perfect size and shape. Just had to cut out the center section and drill the mount holes.
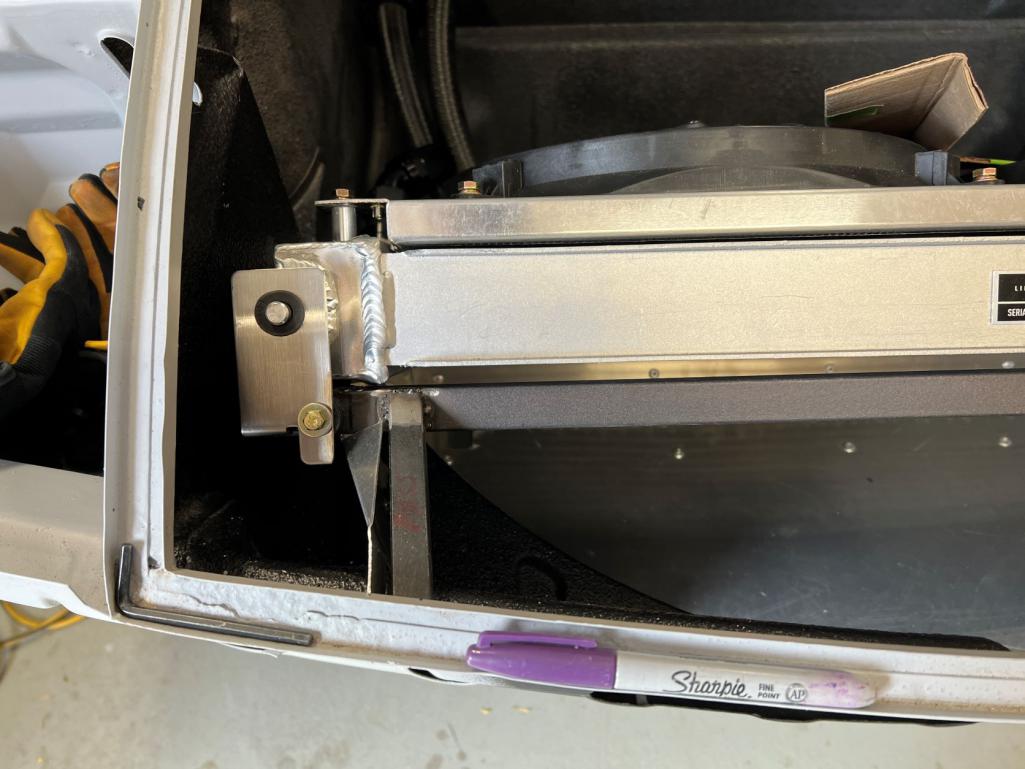 I tried 3-4 times to figure out how to make a cover like this work, and get it mounted, but it just never worked out - always some little issue biting my on the butt! 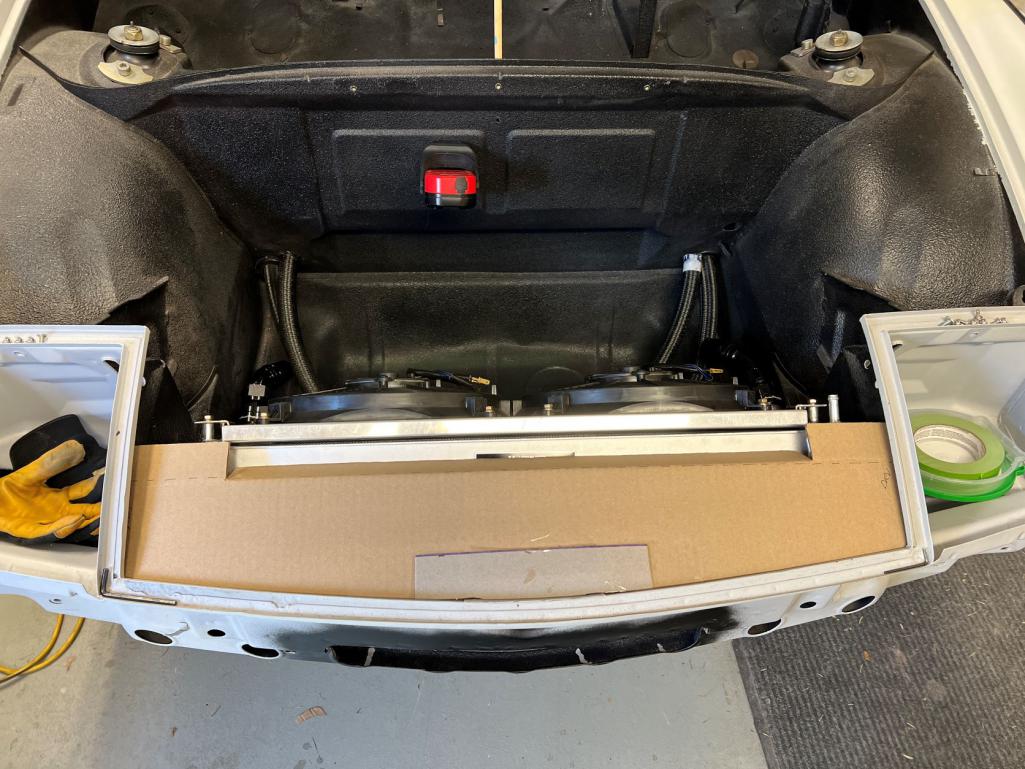 Ended up with a design that covers less, but it directs the air where it needs to go (IMG:style_emoticons/default/wacko.gif) 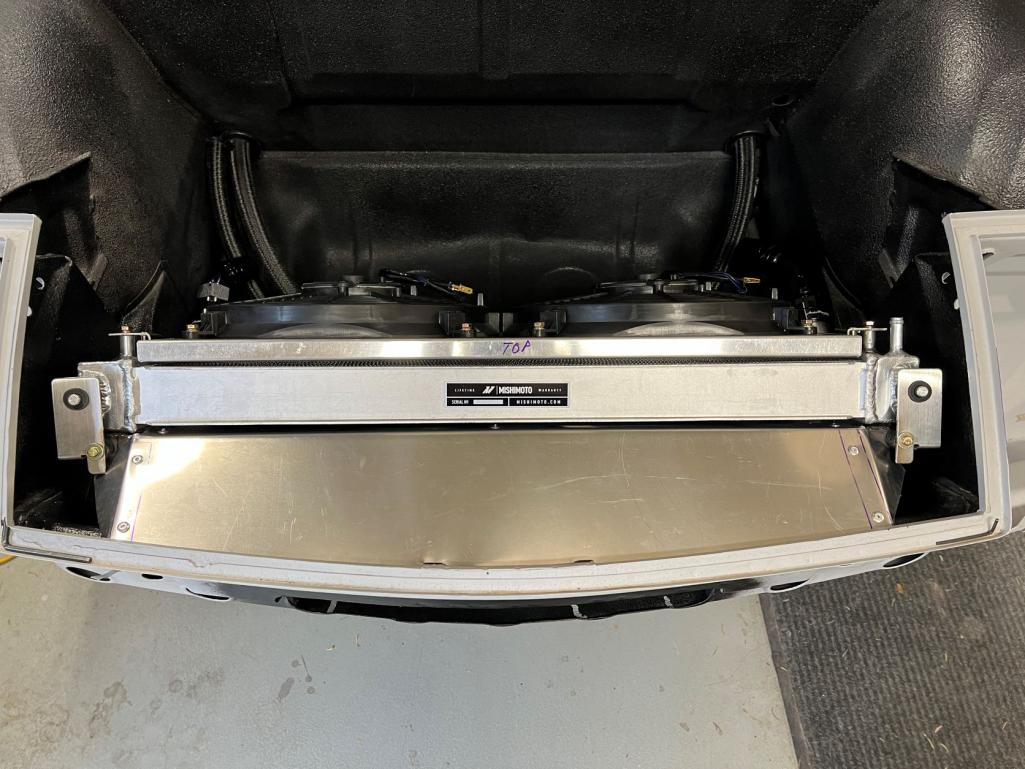 Cosmetic cover will have to come later...maybe. She's back in her spot, but at least the plywood is gone! 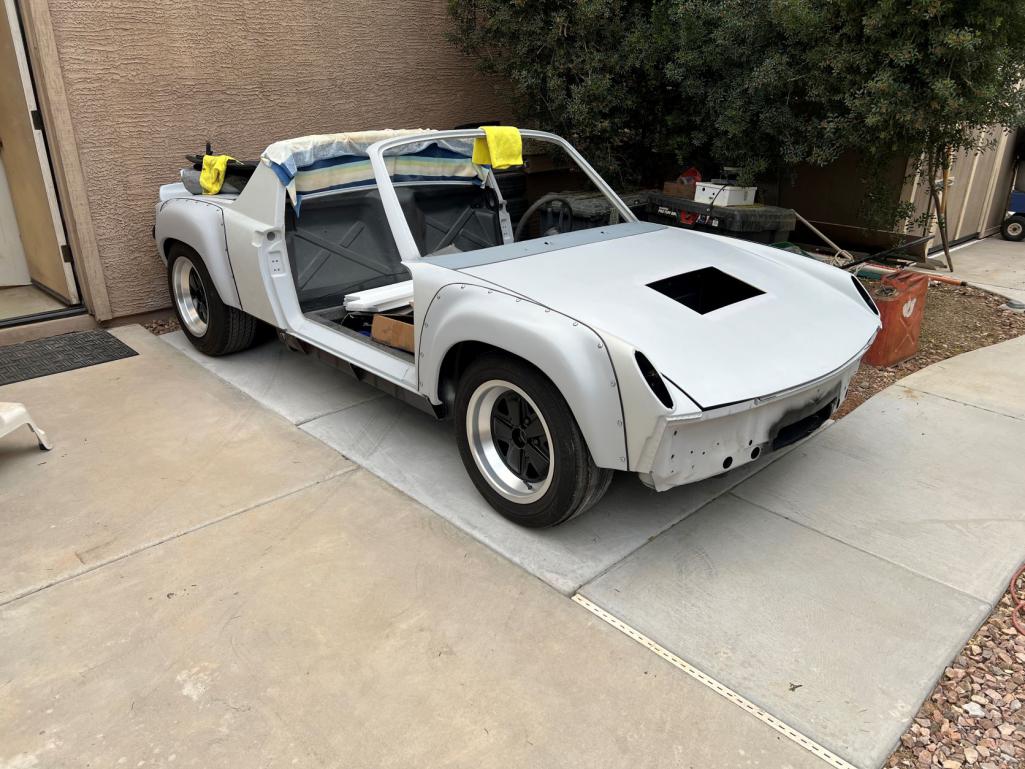 |
  |
1 User(s) are reading this topic (1 Guests and 0 Anonymous Users)
0 Members:

|
Lo-Fi Version | Time is now: 8th January 2025 - 03:50 PM |
Invision Power Board
v9.1.4 © 2025 IPS, Inc.


