|
|
|
Porsche, and the Porsche crest are registered trademarks of Dr. Ing. h.c. F. Porsche AG.
This site is not affiliated with Porsche in any way. Its only purpose is to provide an online forum for car enthusiasts. All other trademarks are property of their respective owners. |
|
|

  |

| dereknlee |
 Jun 9 2020, 09:59 PM Jun 9 2020, 09:59 PM
Post
#41
|
|
Member  Group: Members Posts: 73 Joined: 16-March 12 From: Shoreline, WA Member No.: 14,259 Region Association: Pacific Northwest |
Installed new control arm bushings. The last one was the most difficult. I smudged the paint trying to remove after it went wonky. Quick shot of paint and then this evening it came around to my way of thinking.
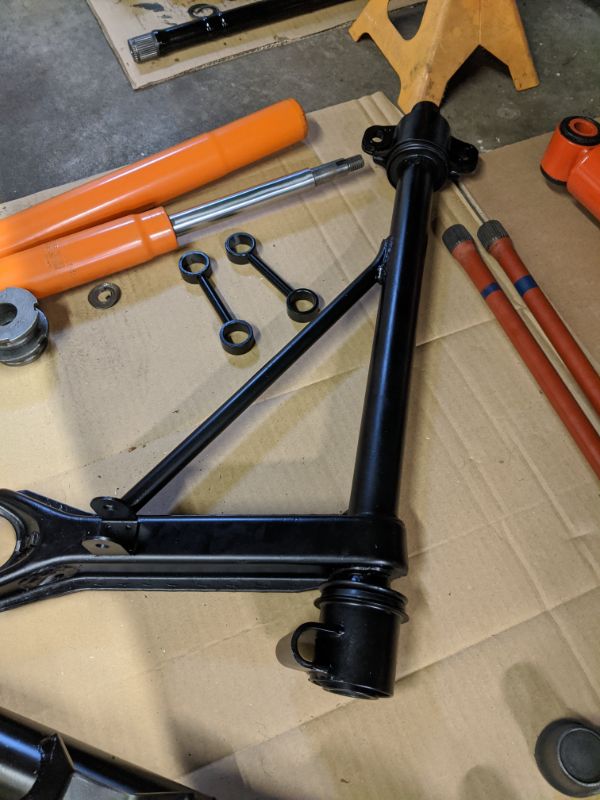 The old bushings were pretty shot, not that re-using was in the cards. But this explains the torsion bar wear spots.  Spent some time with the blast cabinet. Dozen or so parts ready for paint or plating. Strut housing cleaned up real nice and got a couple coats of paint on it, noticed a run right as I thought I was applying the final coat - every dang time!  Meanwhile, it's been like Christmas around here with all the packages arriving. 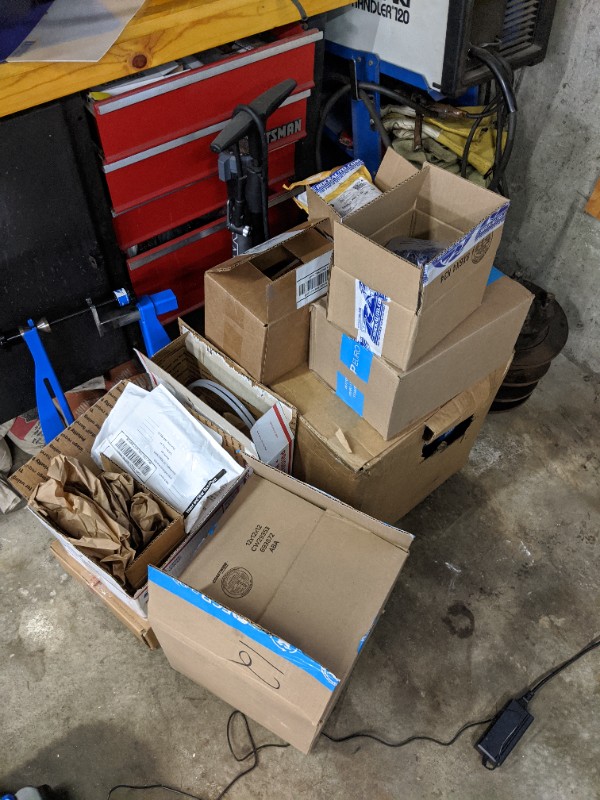 -Derek |
   |

 
|
| kroelofsen |
Jun 10 2020, 12:41 AM
Post
#42
|
|
Member Group: Members Posts: 102 Joined: 27-June 19 From: The Netherlands Member No.: 23,255 Region Association: Europe |
Nice work, did it myself a few weeks ago. Now ready to get installed.
|
|
|
|
| dereknlee |
Jun 10 2020, 10:16 PM
Post
#43
|
|
Member Group: Members Posts: 73 Joined: 16-March 12 From: Shoreline, WA Member No.: 14,259 Region Association: Pacific Northwest |
Got the rear bearings installed, and then spent some time trying to replicate the white paint numbers from photographs taken before they were sand blasted. Had to call in my wife as my penmanship terrible and apparently even worse holding a paint brush. One of the more silly aspects of this project, but fun:
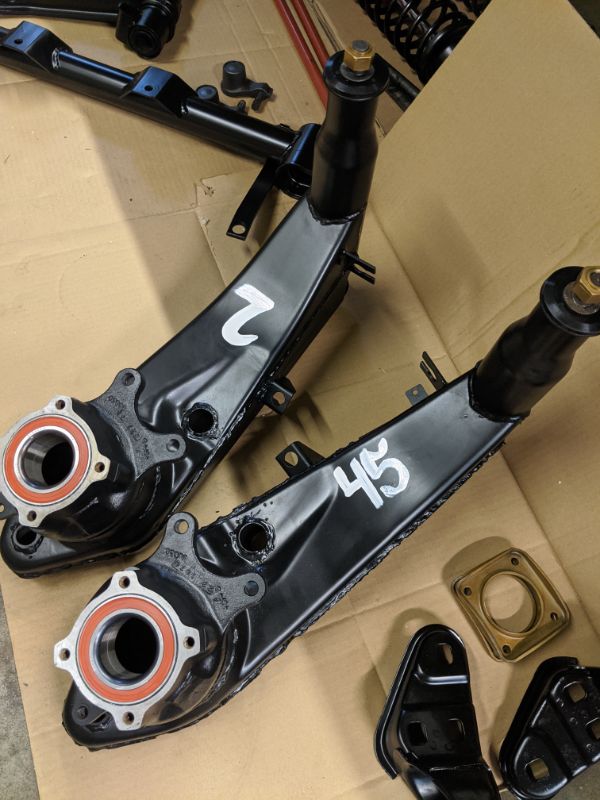 I'd say she did a good job: 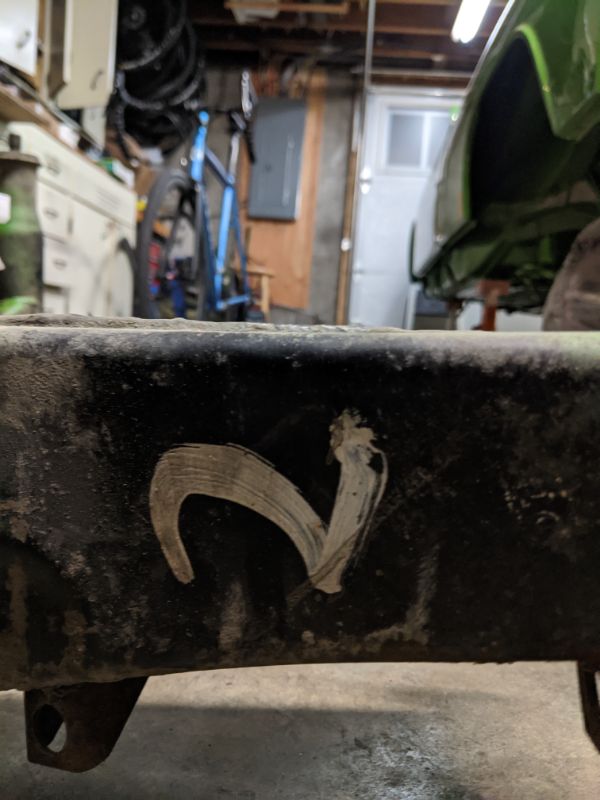 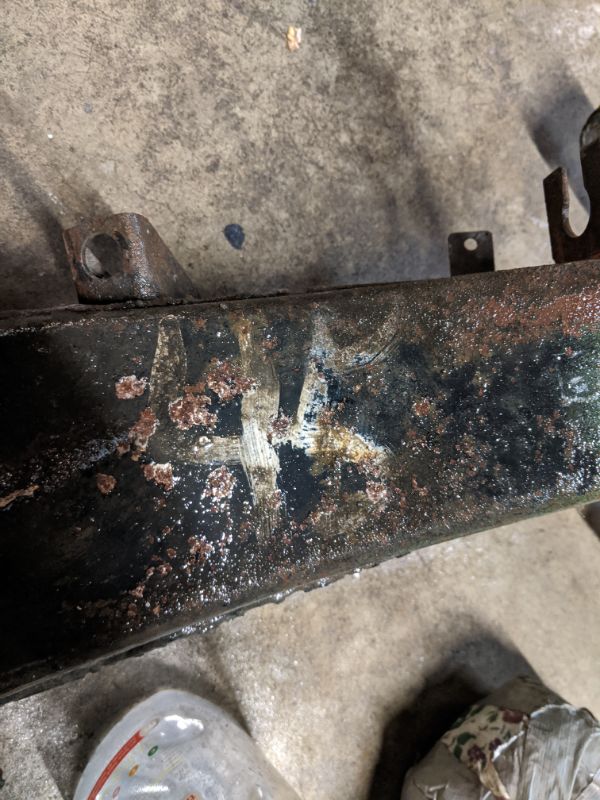 I wonder what the factory worker who slapped on these numbers would think if they saw how much effort went in to trying to duplicate what they did. (IMG:style_emoticons/default/screwy.gif) -Derek |
|
|
|
| bbrock |
Jun 11 2020, 08:24 AM
Post
#44
|
|
914 Guru Group: Members Posts: 5,269 Joined: 17-February 17 From: Montana Member No.: 20,845 Region Association: Rocky Mountains |
QUOTE(dereknlee @ Jun 10 2020, 10:16 PM)  I wonder what the factory worker who slapped on these numbers would think if they saw how much effort went in to trying to duplicate what they did. (IMG:style_emoticons/default/screwy.gif) -Derek Love it! From a fellow (IMG:style_emoticons/default/screwy.gif) 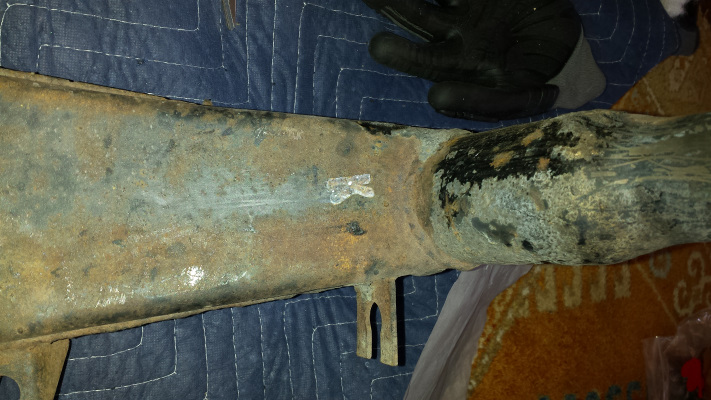  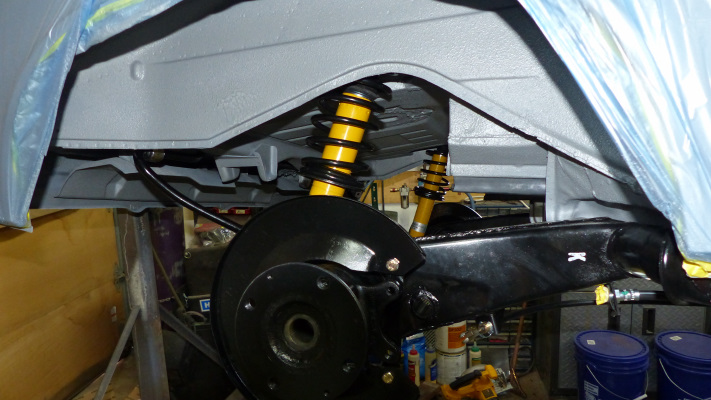 |
|
|
|
| dereknlee |
Jun 13 2020, 10:45 PM
Post
#45
|
|
Member Group: Members Posts: 73 Joined: 16-March 12 From: Shoreline, WA Member No.: 14,259 Region Association: Pacific Northwest |
Looks good Brent! I assume these were some sort of QA stamp or other assembly process indicator?
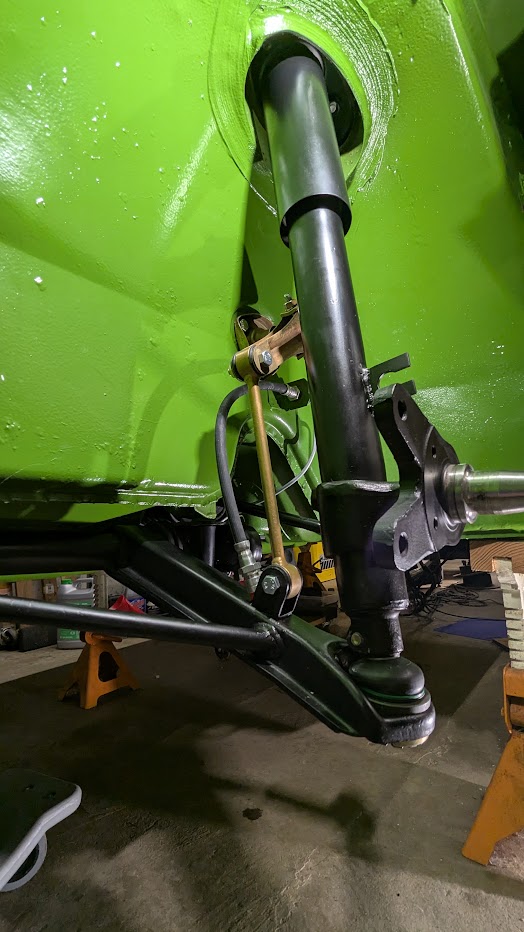
Steering rack feels pretty good, but the tie rod ends were tired. Made up a a wrench to remove the big threaded washers to get to this point. 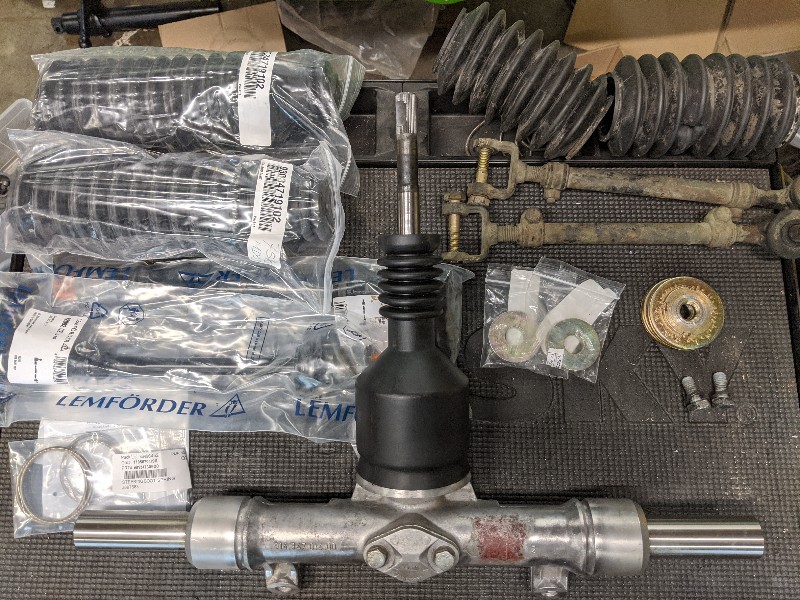 And then learned I need to make another wrench to install the tie rods. Great. Got it done though. 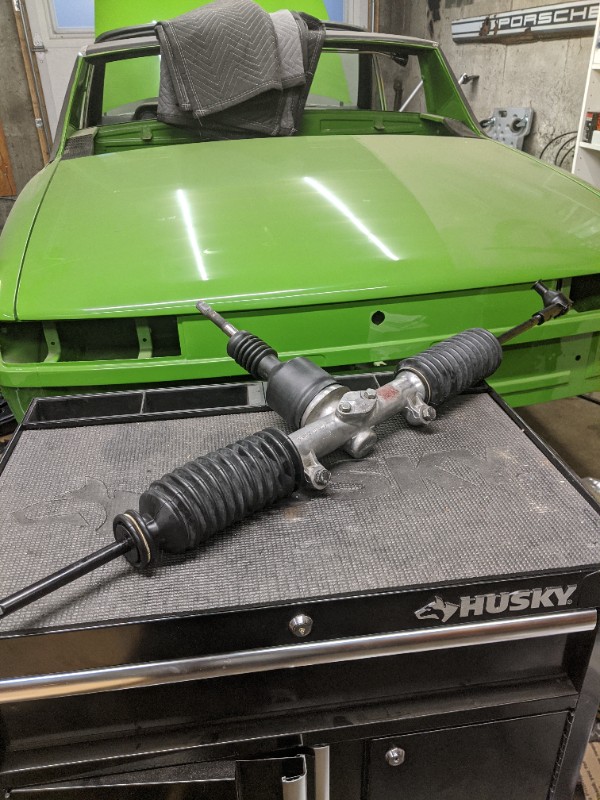 Turbo tie rod ends were a concession on originality, but I figured I might as well - cost differential was small and it's a bolt on improvement. Not pictured was more adventures in plating. The front sway bar bushings mounts are proving to be a real bear because they are pitted and have a bunch of tight corners. Ended up taking a pencil anode and moving it around by hand in 1/2" of electrolyte bath to 'paint' the corners. Worked better than anything else I tried, but the results are still not that great to look at. -Derek |
|
|
|
| JamesM |
Jun 14 2020, 02:34 AM
Post
#46
|
|
Advanced Member Group: Members Posts: 2,187 Joined: 6-April 06 From: Kearns, UT Member No.: 5,834 Region Association: Intermountain Region |
QUOTE(bbrock @ Jun 11 2020, 06:24 AM) Here is one for you then... 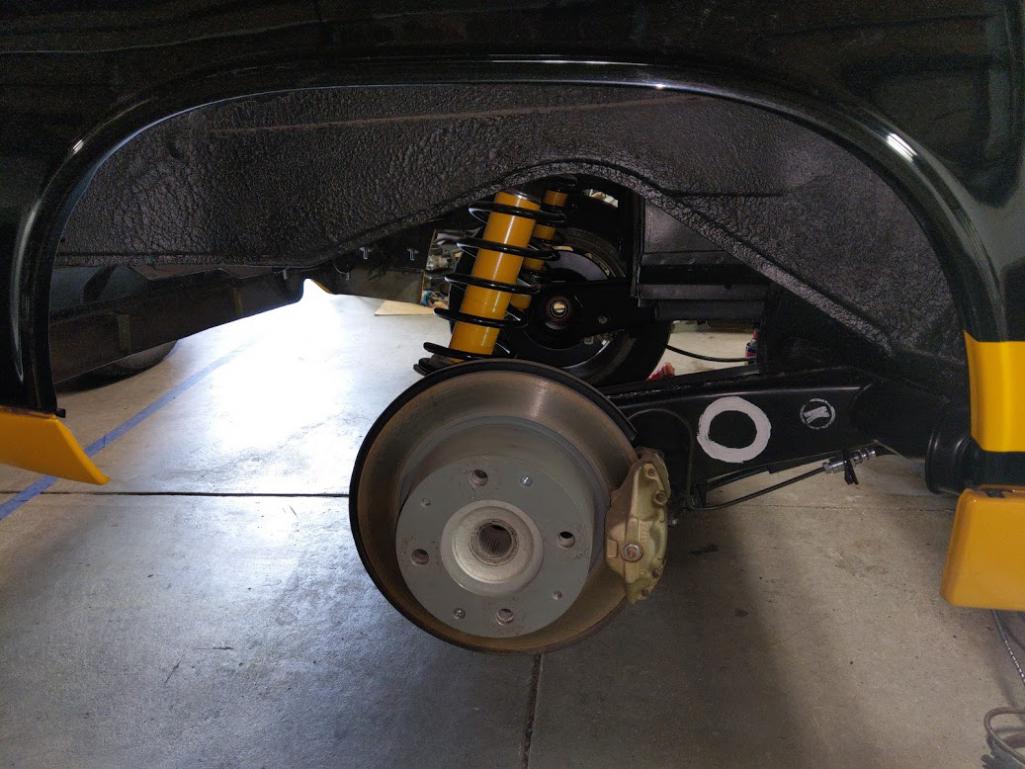 |
|
|
|
| bbrock |
Jun 14 2020, 11:16 AM
Post
#47
|
|
914 Guru Group: Members Posts: 5,269 Joined: 17-February 17 From: Montana Member No.: 20,845 Region Association: Rocky Mountains |
QUOTE(JamesM @ Jun 14 2020, 02:34 AM) QUOTE(bbrock @ Jun 11 2020, 06:24 AM) Here is one for you then... Love it! I'm a little jealous of the personal touch yours got beyond the usual "K" stamps. |
|
|
|
| dereknlee |
Jun 14 2020, 08:05 PM
Post
#48
|
|
Member Group: Members Posts: 73 Joined: 16-March 12 From: Shoreline, WA Member No.: 14,259 Region Association: Pacific Northwest |
Whoever wielded the K stamp worked on a lot of cars! It would be interesting to have the meaning of these inscrutable marks explained.
Not a lot of progress to report today. Sway bar bushing mounts took way too long to finish, sway bar arms aren't going to be any easier. While I am questioning a bit why I didn't just pay to have all this done, loving how easy it is to turn bright zinc gold. 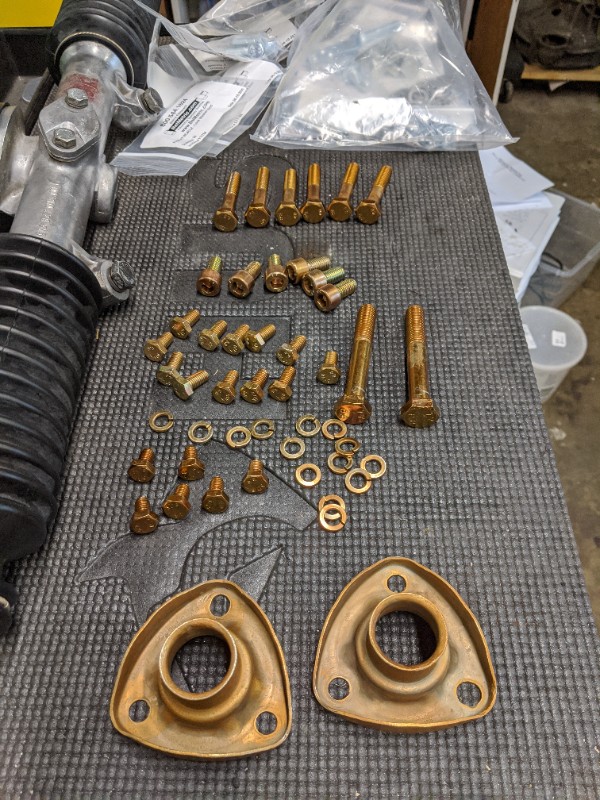 -Derek |
|
|
|
| flat4guy |
Jun 14 2020, 08:53 PM
Post
#49
|
|
Member Group: Members Posts: 475 Joined: 10-October 16 From: nor cal Member No.: 20,484 Region Association: Northern California |
Love reading your thread - makes me feel lazy with my car. Great job so far.
|
|
|
|
| dereknlee |
Jun 14 2020, 10:25 PM
Post
#50
|
|
Member Group: Members Posts: 73 Joined: 16-March 12 From: Shoreline, WA Member No.: 14,259 Region Association: Pacific Northwest |
QUOTE(flat4guy @ Jun 14 2020, 07:53 PM) Love reading your thread - makes me feel lazy with my car. Great job so far. Glad you're enjoying the updates, I'm having fun with it. Don't mistake the last months progress for any sort of industriousness on my part. The car hasn't driven since 2008, so time averaged I have been super lazy on this project. -Derek |
|
|
|
| dereknlee |
Feb 25 2024, 09:23 PM
Post
#51
|
|
Member Group: Members Posts: 73 Joined: 16-March 12 From: Shoreline, WA Member No.: 14,259 Region Association: Pacific Northwest |
Been a busy few years, but sadly not on the 914. It's once again covered in dust. This fall I picked up a Honda C70 passport that was in pretty rough shape and got it back running and looking good again.
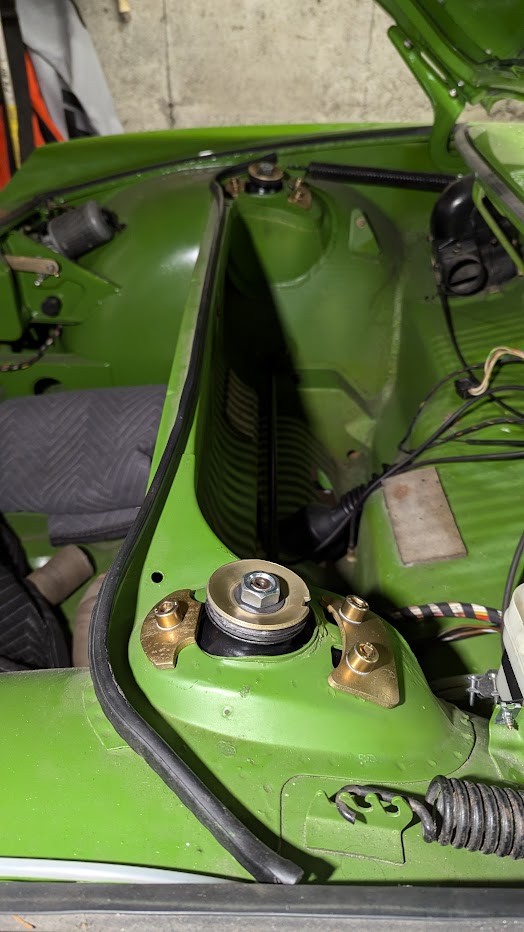
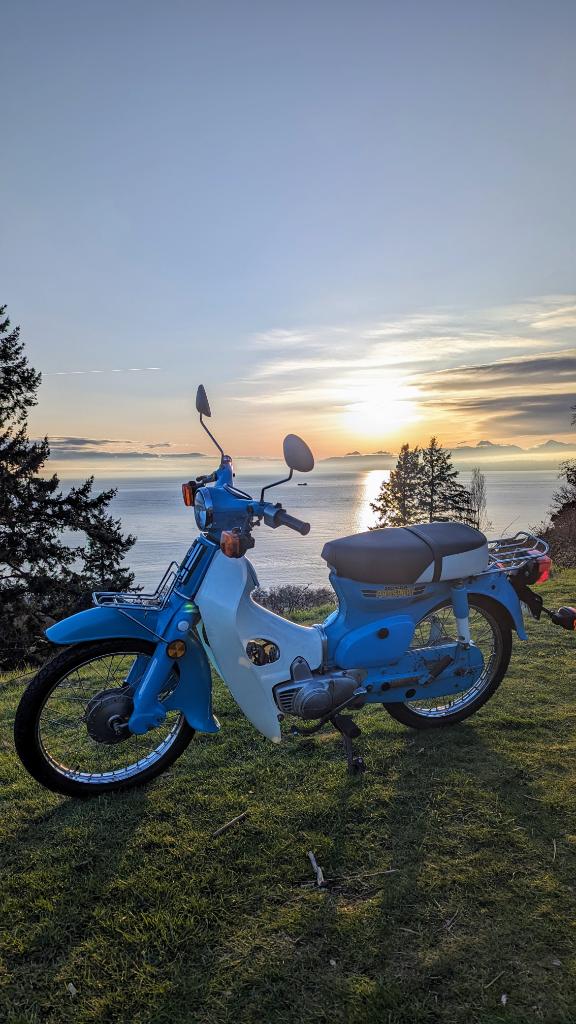 I had so much fun working evenings and weekends on that bike. It was a good mix of mechanical tasks and cosmetic work. But I knew that I'd enjoy working on the 914 just as much. It's easier for me to lose momentum on the 914 because of the scale, and also because I care so much more about getting it just right. But there is only one way to eat an elephant, so I'm back at it. Its strange reading some of the earlier posts or digging through the boxes of parts, because I have almost no memory of some of it. But all this time what has been front of mind are two leftover washers from the wiper mechanism install. They aren't called out in the PET, but I remember figuring out a few years back where they went and making a mental note to install them. Fortunately, the airbox wasn't fully installed and the posts can be maneuvered out of the hood without removing the dash bolt. So today, the washers are in and my brain can rest easy. 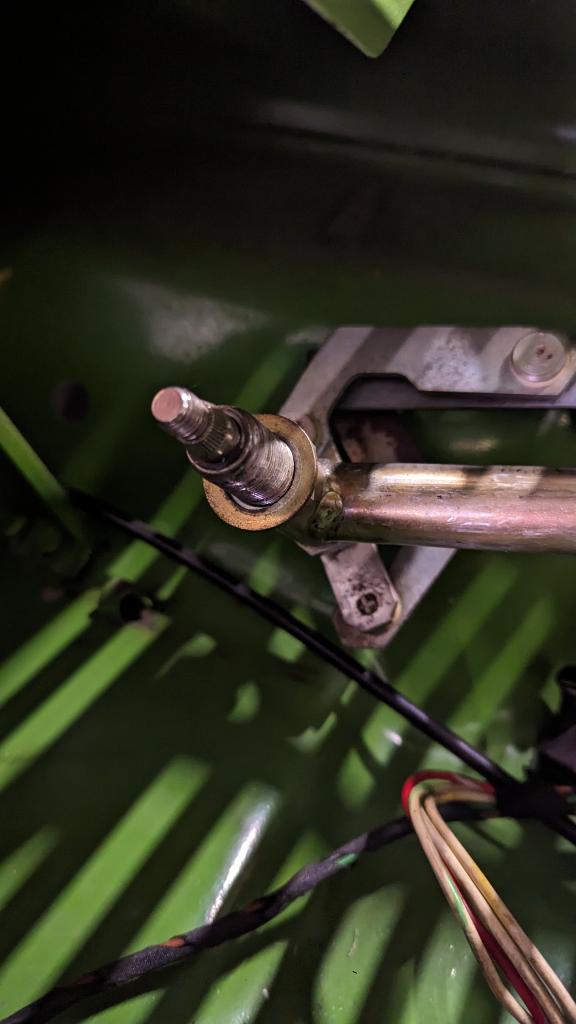 I also rekeyed the ignition, front and rear hood keys using a set of wafers that must have arrived from keys4classics about the time I stopped working on the project. I have no record of the original key code for my car, and know it was re-keyed at some point. So I bought a set of oem keys on ebay, then ordered wafers to fit that code - so that all the locks match a known baseline. I vaguely remembered that there was something wrong with my ignition lock mechanism, and found that I had sourced a donor (another "problem" as this project stretches on - I don't know what parts I already have lying around). So now, after 3 years, the ignition cylinder is back in the car. Also got the rear trunk mechanism re-assembled and installed. 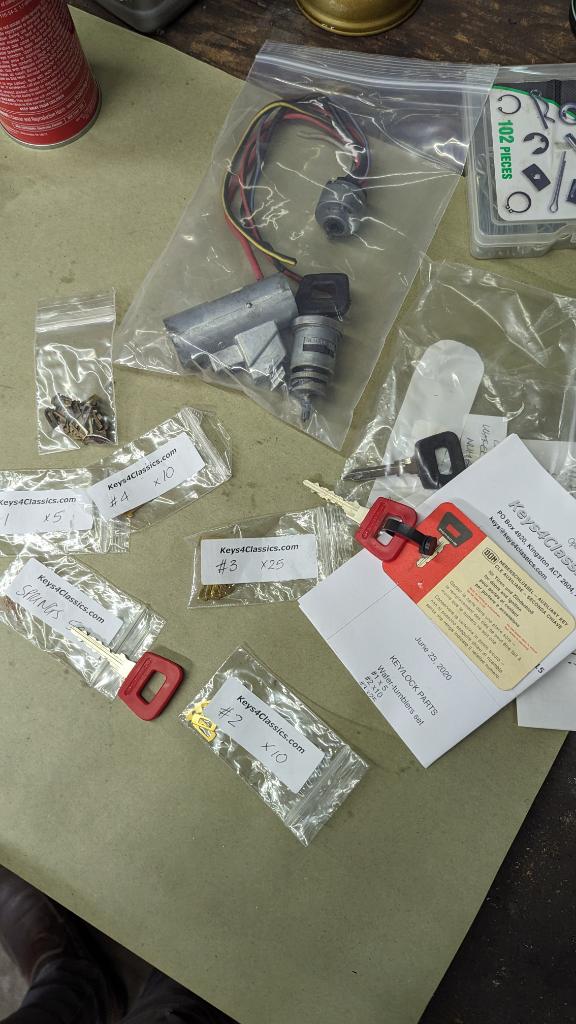 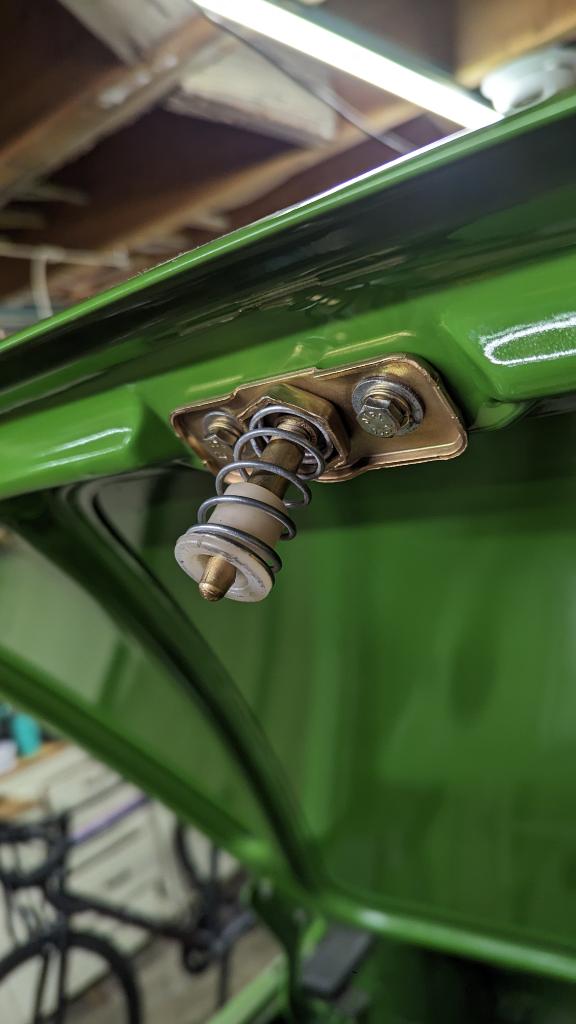 With the rekeyed release handle, I installed a new cable for the front hood release. On my first attempt a few years ago, with 914rubber supplied wire and housing, I had introduced some bends in the line that I then blamed for the very high pull force required to release the latch. So this time I was very careful, and used a new oem cable assembly. But even with a cable that I am sure has no deformation, it still requires very high cable force to release. A final item on my mind has been a mistake I made removing a stuck bearing from one of the wheel hubs. Circumstances are hazy, but I know i had to cut it off, and clumsily ended up cutting into the machined surface. I blended it with a file and at the time thought it wasn't too bad - and looking at it today it isn't as deep as I recall. But still, wondering if it is worth finding a replacement - or would it be fine running as is? 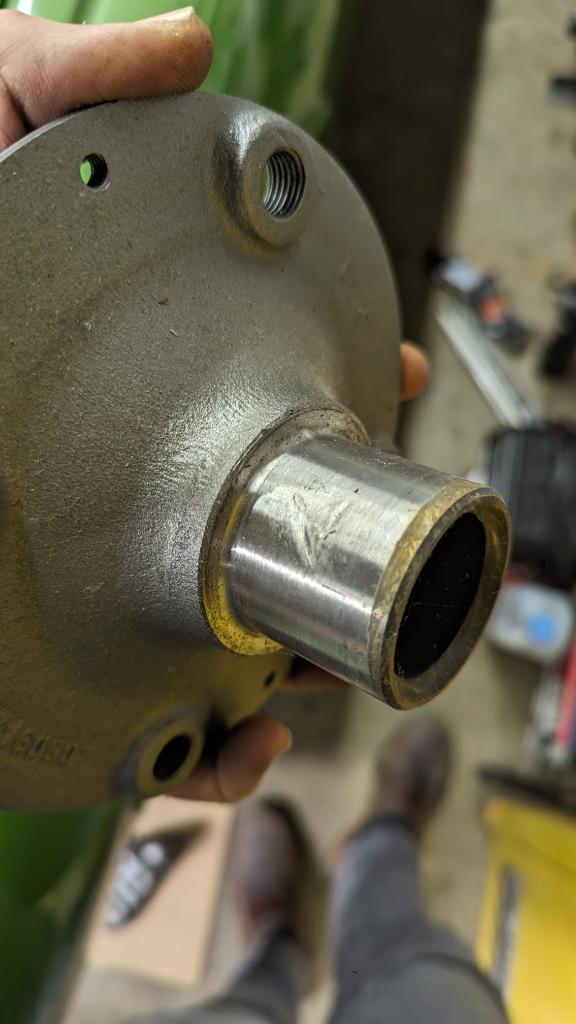 -Derek |
|
|
|
| dereknlee |
Nov 27 2024, 10:41 PM
Post
#52
|
|
Member Group: Members Posts: 73 Joined: 16-March 12 From: Shoreline, WA Member No.: 14,259 Region Association: Pacific Northwest |
Don't recall what specifically stalled out progress earlier this year, but I am back working on the front suspension and having fun. Steering track, A arms, stabilizers and new (to my car) sway bar are all in. Amazing how much difference this makes in the number of parts laying about.
  If progress continues the car will be ready to sit on tires again before long (by my standards at least). The old steel wheels were rusty and had been repainted. So I decided to have them sand blasted and I'm in the process of re-painting them. I will be taking them back to the factory - all black except for a silver ring around on the front side. The spare was left alone (pictured) so I am leaving it as is (obv, new rubber when the car is drivable). Looks like the car came with 155R15 Michelin ZX tires. Considering Michelin XZX 165R15 and Vredestein Sprint Classic 155R15. Will probably go with Michelin for originality, but wish they made a modern classic in 155 (other than the X). 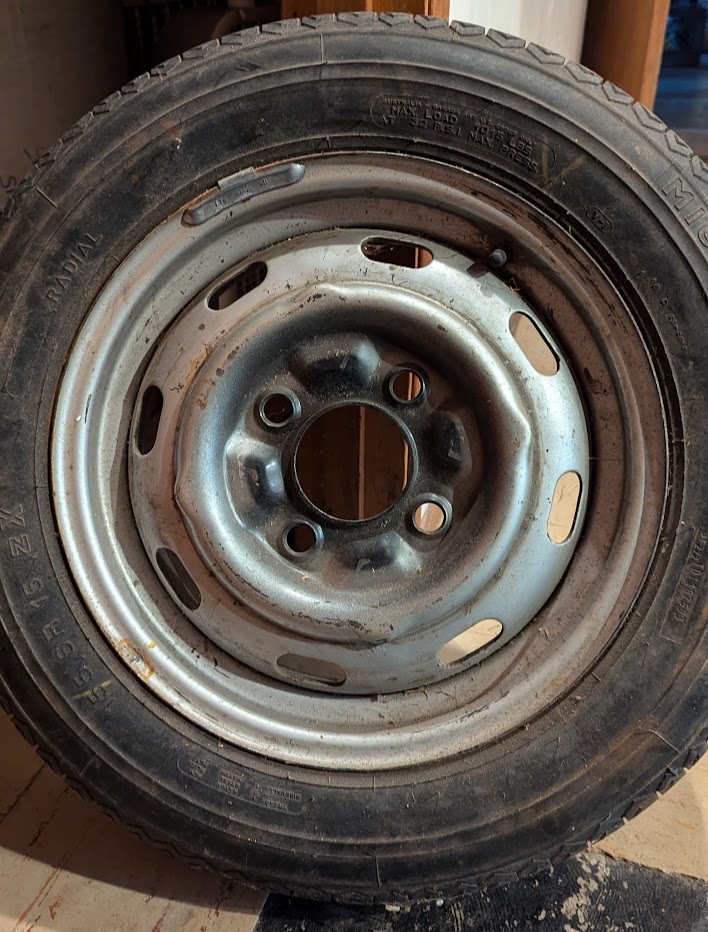 -Derek |
|
|
|
| dereknlee |
Dec 8 2024, 09:49 PM
Post
#53
|
|
Member Group: Members Posts: 73 Joined: 16-March 12 From: Shoreline, WA Member No.: 14,259 Region Association: Pacific Northwest |
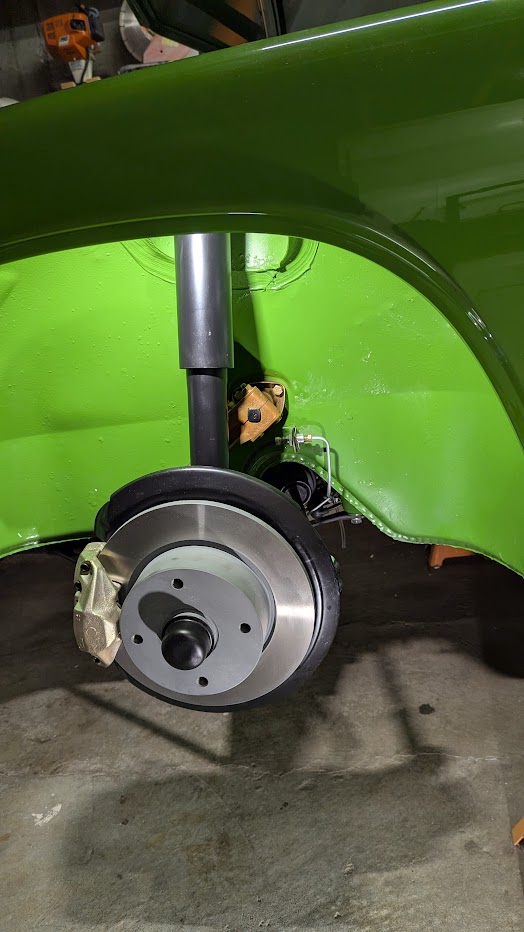
Front suspension and brakes are done.
 On to the rear. I have been disappointed with the brake line set I purchased from Stoddard a few years back. -The line between the MC and tunnel was unusable (too short). -The line between the tunnel elbow and brake pressure reducer in the rear is to long. -The long passenger-side line in the rear has too much length in the final 90 bend going into the hose bracket so that I can't position the hose anywhere near where it needs to be to install the clip. -The kit did not have the brake lines needed to connect to the front brakes from the hoses on the struts (just had the lines for use with banjo fittings). Hoping to salvage some of the lines after retrieving my bubble flare kit in a week or so. Anyway, wheels are partway done - black paint is curing. Got some Michelin XZX 165s in a black Friday sale. Will post process photos when finished. On a compete tangent, the leather wrap on my steering wheel is cracked and most of the thread is gone. 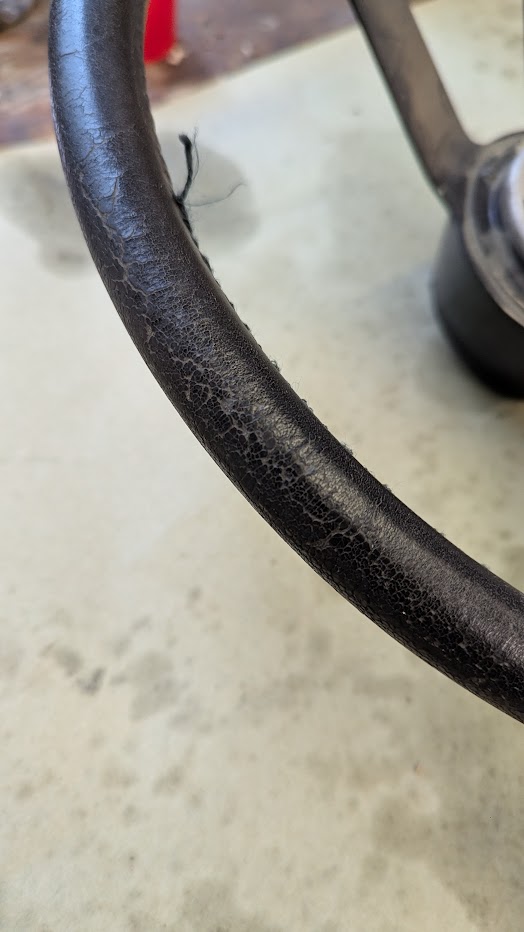 I'd planned on one day sending it out to a professional for a recover when the car was nearing a drivable state. But I watched a few videos on leather restoration and figure there is nothing to lose. So I've ordered the paint and finisher, and started sanding the cracked areas. Nothing to look at yet, but will share the outcome - good or bad. |
|
|
|
| dereknlee |
Jan 30 2025, 11:52 PM
Post
#54
|
|
Member Group: Members Posts: 73 Joined: 16-March 12 From: Shoreline, WA Member No.: 14,259 Region Association: Pacific Northwest |
So since December I have made progress on a few fronts:
Wheels are done painting and ready to have tires mounted. 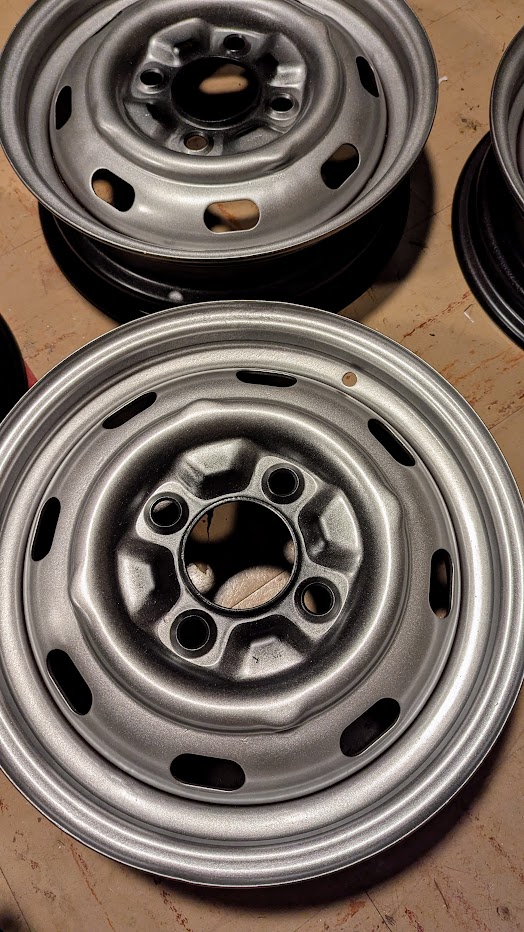 The 'cnc' brake line kit continued to disappoint, but I got all the lines in the rear installed. Only one of the five lines didn't need to be cut and re-flared to fit. My brake line flare kit was an estate sale find and initially I couldn't get it to make a flare, it would just push the line down in the die. To solve that problem I: -chased the die threads with a tap. -annealed the end of each line with a propane torch. -used a liberal amount of anti-seize. 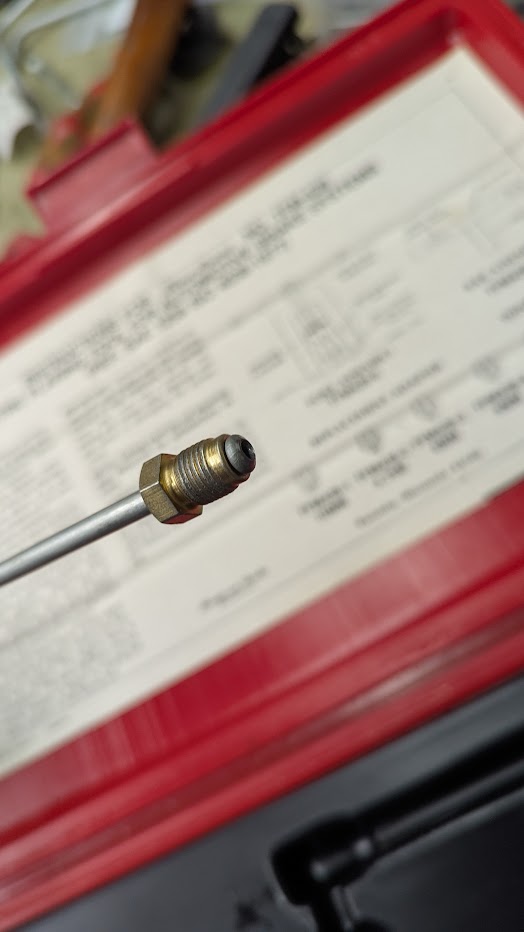 Once brake lines were fit, I installed the suspension. I found the hubs pressed in very easily using my bicycle headset press. 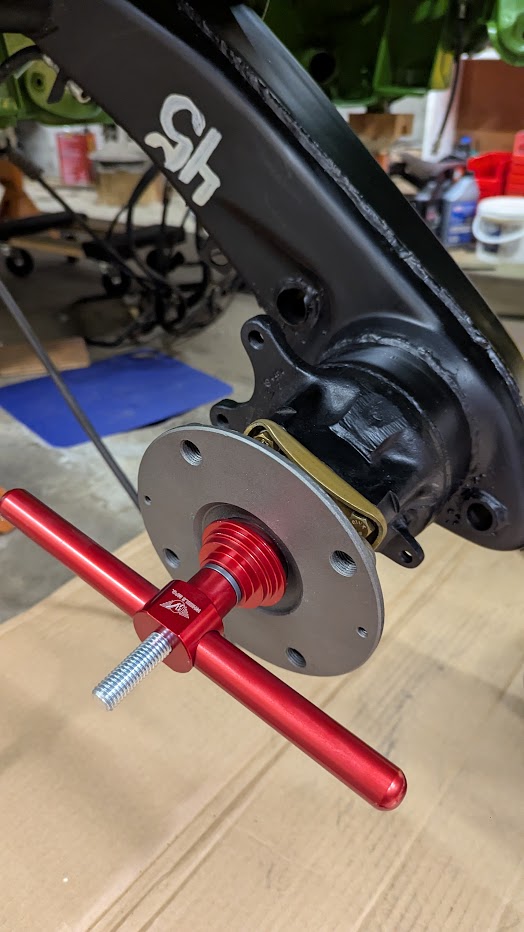 Obvious in retrospect, but I think the best order of operations for fitting the sway arm links is to press them onto the trailing bolt first (off the car, in a press) then install the bolt and press the bushing onto the sway bar ball with a C-clamp. 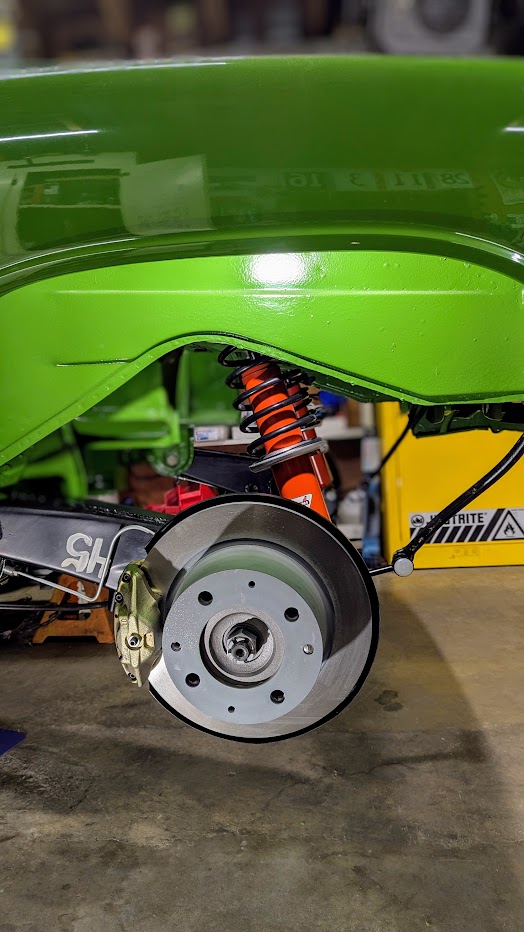 I still need to get some parking brake boots and clips. Steering wheel refurb is coming along nicely. I have sanded and repainted and I am very impressed with how much better the leather looks. Waiting on the proper thread to arrive so I can re-do the stitching. That will be tedious. In the mean time, I might start cleaning up aft wiring harness and getting it re-routed through the chassis - would be nice to get it off the floor. -Derek |
|
|
|
| jd74914 |
Jan 31 2025, 08:52 AM
Post
#55
|
|
Its alive Group: Members Posts: 4,872 Joined: 16-February 04 From: CT Member No.: 1,659 Region Association: North East States |
Clever use of a headset press!
|
|
|
|
| Cairo94507 |
Jan 31 2025, 08:55 AM
Post
#56
|
|
Michael Group: Members Posts: 10,601 Joined: 1-November 08 From: Auburn, CA Member No.: 9,712 Region Association: Northern California |
Excellent work Derek. (IMG:style_emoticons/default/beerchug.gif)
|
 |
|
| dereknlee |
Feb 2 2025, 11:36 PM
Post
#57
|
|
Member Group: Members Posts: 73 Joined: 16-March 12 From: Shoreline, WA Member No.: 14,259 Region Association: Pacific Northwest |
Rear wire bundle is re-taped and routed back through the engine bay and trunk (though clamps are loose so I can reposition if needed). I'm not confident that my tape work at the top of the snorkel matches how it was done at the factory. I didn't find many pictures on here of what it is supposed to look like, but it matches the tape that I removed.
Before / After 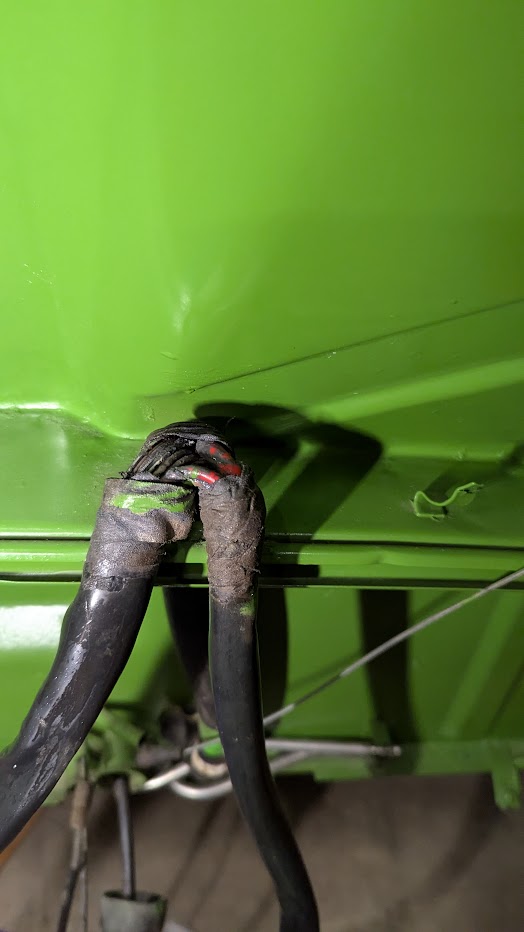 / / 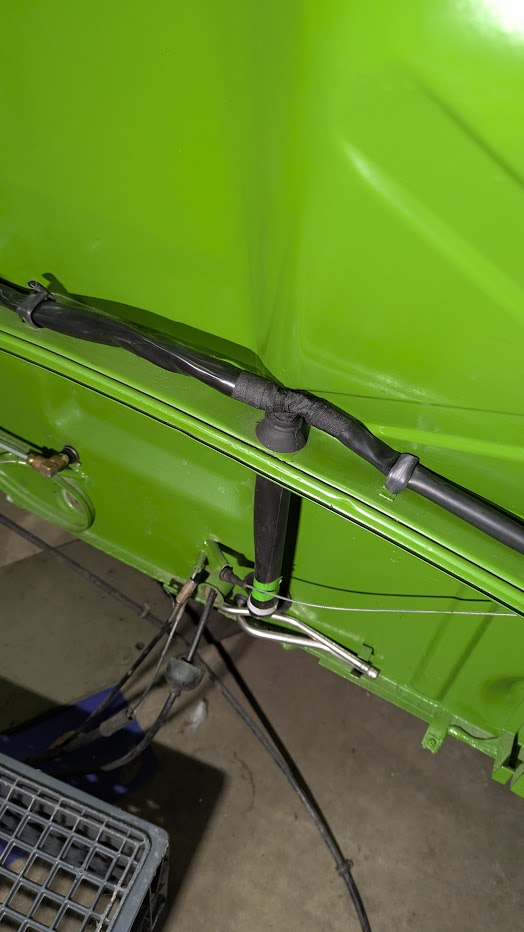 I also cleaned the bundle and re-wrapped the spiral tape. 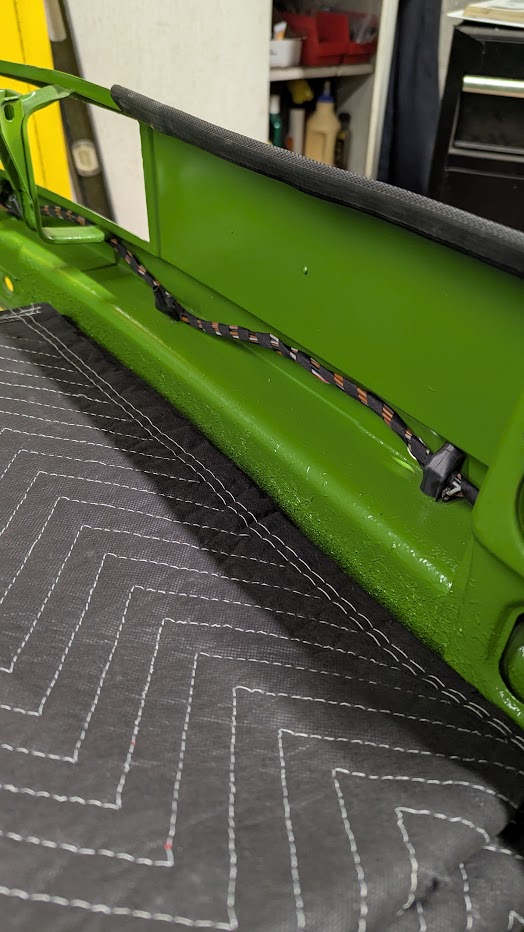 When I started the rust repairs in ~2009 I chipped out some areas of seam sealer in the engine compartment chasing rust. I've had a tube of 3M seam sealer or almost as long. Today I finally opened it up and tried my hand at duplicating the factory brush patterns. 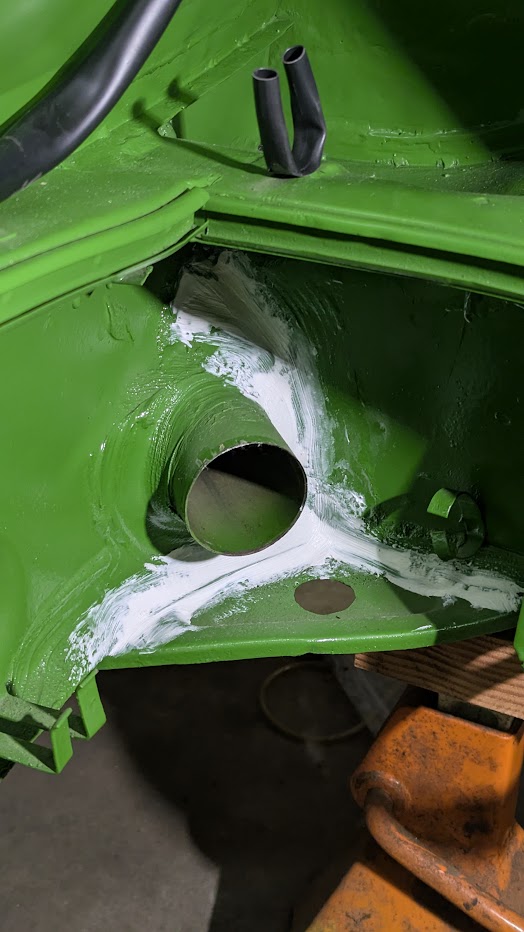 While the seam sealer dried I started installing the rear trunk lid torsion bars. Need to order the M10 wave washers and one plastic roller before I can finish there. I struggled a bit just to get the torsion bars back in the car, I don't relish getting them torqued into position. |
|
|
|
| Dion |
Feb 3 2025, 07:28 AM
Post
#58
|
|
RN Group: Members Posts: 2,926 Joined: 16-September 04 From: Audubon,PA Member No.: 2,766 Region Association: MidAtlantic Region |
Nice to see you back at it. Looks great.
|
|
|
|
| dereknlee |
Mar 5 2025, 10:10 PM
Post
#59
|
|
Member Group: Members Posts: 73 Joined: 16-March 12 From: Shoreline, WA Member No.: 14,259 Region Association: Pacific Northwest |
Few weeks of progress update:
After collecting the requisite wave washer and nylon roller, I faced my fears and got the trunk torsion springs installed. Took a couple evenings but was without major incident. Painted the fasteners (not shown I also painted the seam sealer pictured in an earlier post). Cleaned up the old trunk seals, installed them, then got the trunk lid installed and aligned. 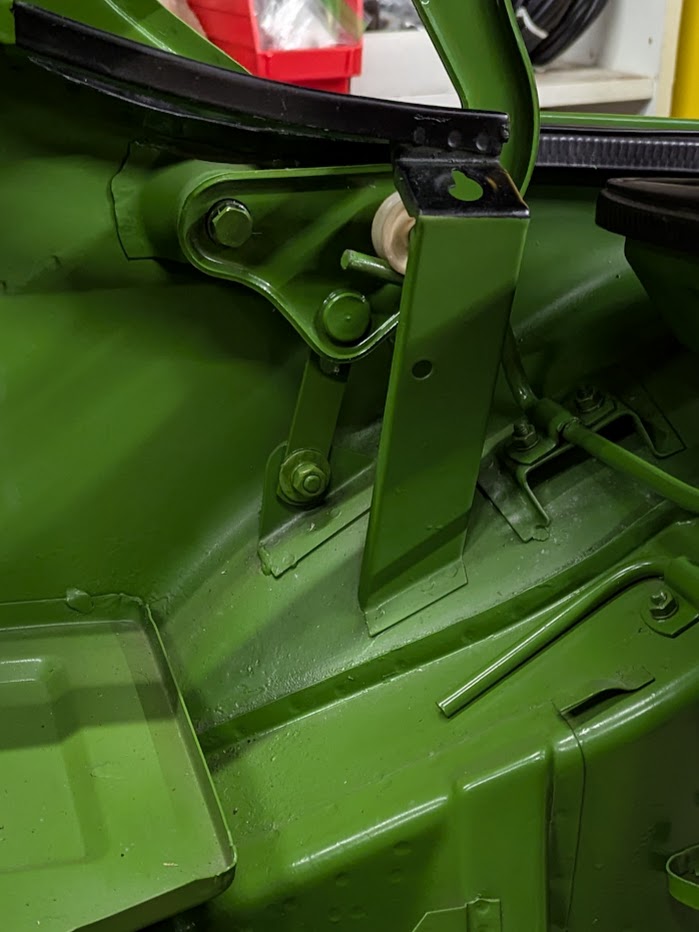 I've mentioned before how I was disappointed with the front hood release guide tube offerings in the aftermarket. It was way too flexible, so I had to practically plant a foot on the dash to apply enough force to release the hood. Plus it was translucent and not white. So I looked around for alternatives, and settled on bicycle brake line housing. Comes in white, metal liner takes compression loads, ID is correct. I got some for a couple bucks off ali-express as a proof of concept and installed it tonight. It is so much better! I measured the pull force at 30 lbs, which was surprising - qualitatively the hood now releases easily with one hand. Currently I am using a bicycle cable stop to keep the housing from sliding into the guide tube that passes through the dash. I'd like to get some nylon and machine a stop, like what the original had. I no longer have my original guide tube, but the brake cable has a smaller OD than the aftermarket tube. I had to slide a small piece of brake reservoir drain line on the end of the housing so that the P-clamp on the release mechanism would grip. 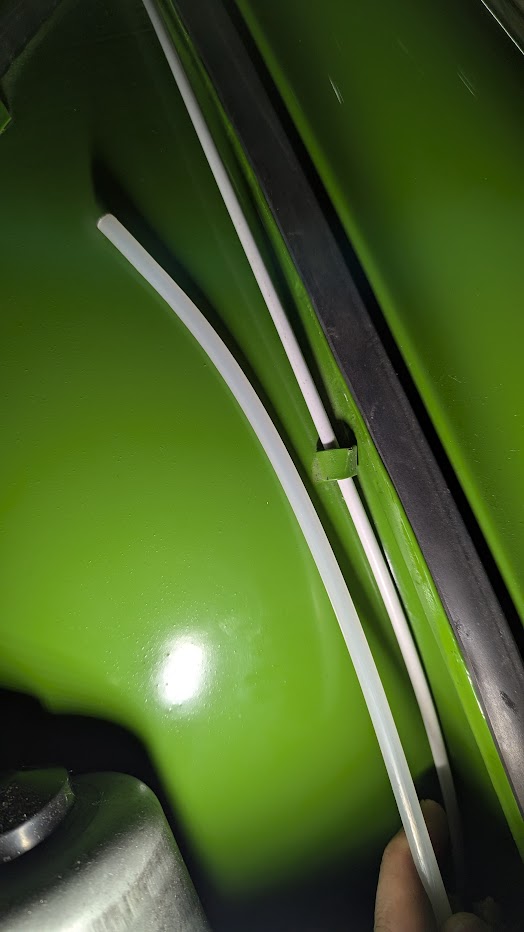 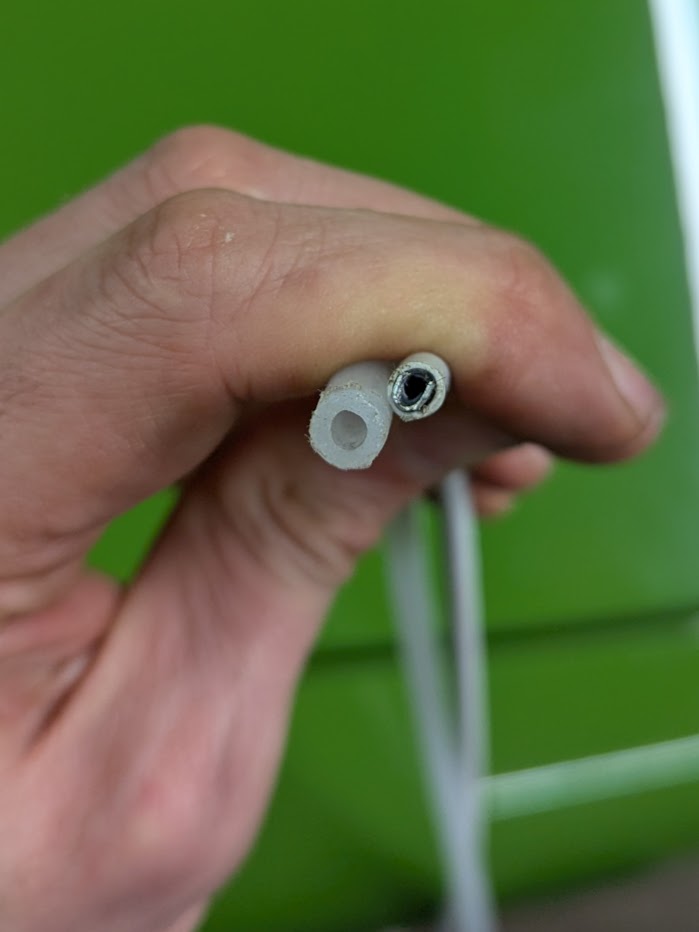 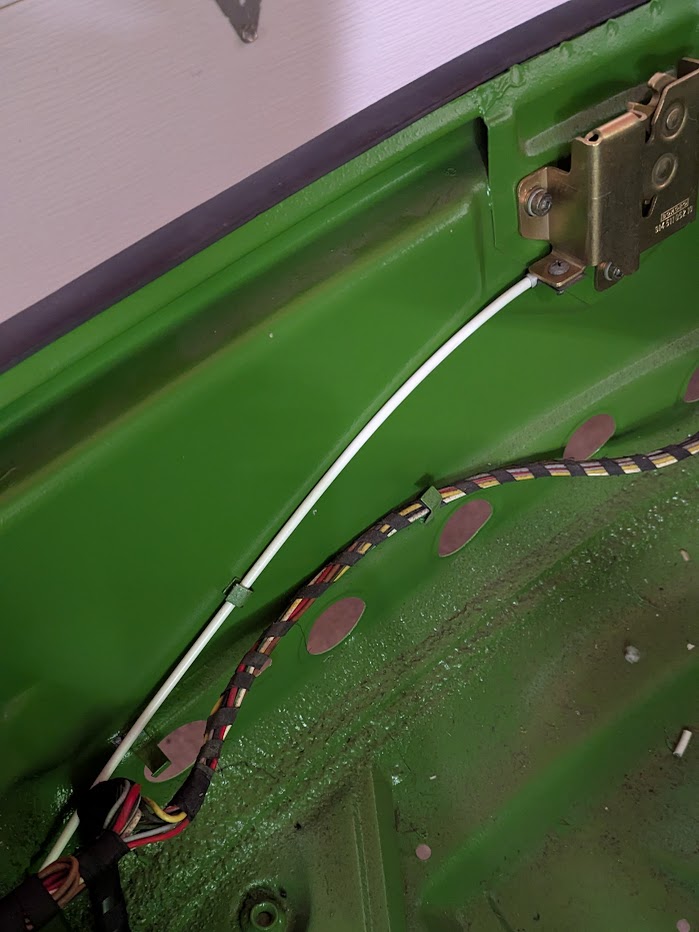 (cripes! need to vaccum out the dust!) So now the front and rear lids are both fully operable! 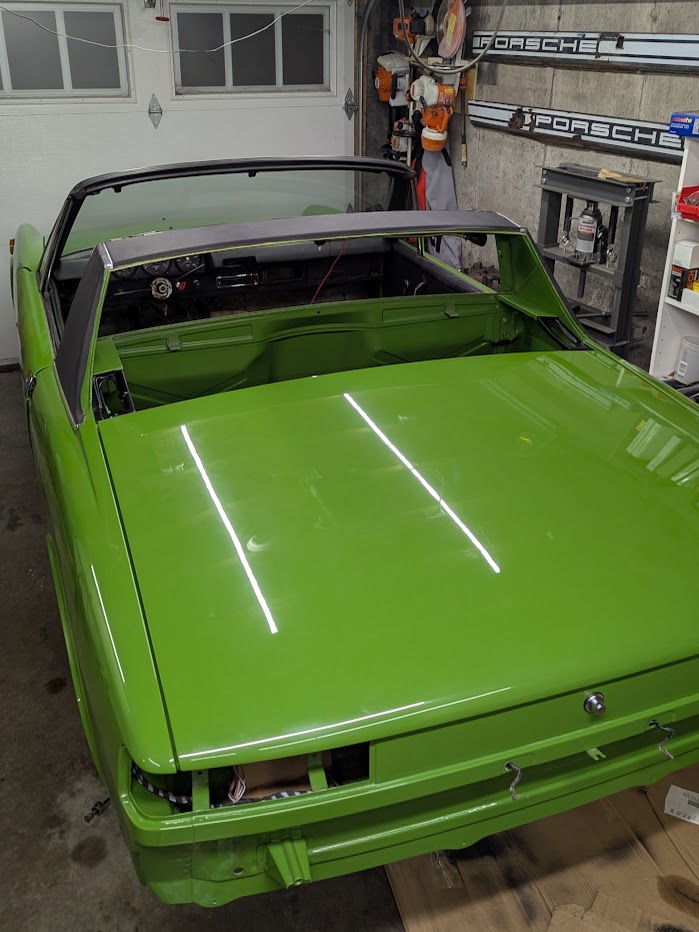 Also got new rubber mounted on the re-painted wheels. 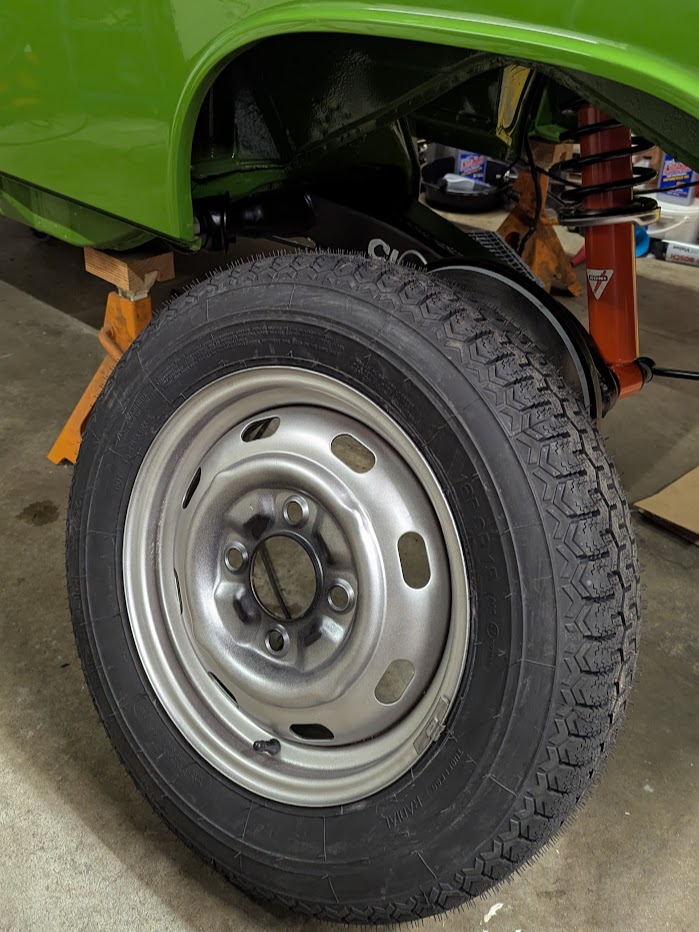 Next I think I will be returning to wiring. Rear signal assembly seals should arrive from 914 rubber in the next few days, which will establish the final position of that harness. Have some DAPO wire repairs to make in the cabin. -Derek |
|
|
|
| Cairo94507 |
Mar 6 2025, 09:53 AM
Post
#60
|
|
Michael Group: Members Posts: 10,601 Joined: 1-November 08 From: Auburn, CA Member No.: 9,712 Region Association: Northern California |
Coming along nicely. (IMG:style_emoticons/default/beerchug.gif)
|
|
|
|
|
1 User(s) are reading this topic (1 Guests and 0 Anonymous Users)
0 Members:

|
Lo-Fi Version | Time is now: 24th March 2026 - 05:32 PM |
Invision Power Board
v9.1.4 © 2026 IPS, Inc.