|
|

|
Porsche, and the Porsche crest are registered trademarks of Dr. Ing. h.c. F. Porsche AG.
This site is not affiliated with Porsche in any way. Its only purpose is to provide an online forum for car enthusiasts. All other trademarks are property of their respective owners. |
|
|
  |
| Montreal914 |
 Aug 8 2023, 07:37 AM Aug 8 2023, 07:37 AM
Post
#81
|
|
Senior Member    Group: Members Posts: 1,701 Joined: 8-August 10 From: Claremont, CA Member No.: 12,023 Region Association: Southern California 
|
Very nice progress! Both of these cowl repairs look very good! (IMG:style_emoticons/default/smile.gif)
That engine surely is a good motivator. Keep going at it, you will be at the painting stage before you know it. Have you found a shop near your area? |
| pencap914 |
 Aug 8 2023, 09:58 PM Aug 8 2023, 09:58 PM
Post
#82
|
|
Member   Group: Members Posts: 77 Joined: 16-April 06 Member No.: 5,872 Region Association: Northern California |
Very nice progress! Both of these cowl repairs look very good! (IMG:style_emoticons/default/smile.gif) That engine surely is a good motivator. Keep going at it, you will be at the painting stage before you know it. Have you found a shop near your area? Thanks! I used your thread as inspiration to tackle the cowl repairs. I've thought about a few shops for painting, just talking with others with car projects like this. Thinking of a shop in Nevada, because they can use paints that aren't subject to California laws...? Something about VOC limits...? I haven't looked into it much, I'm just trying to put one foot in front of the other. I do have a media blasting place lined up in Sacramento. Just need to finish fiddling with the tub and get it to him to have it stripped and primed. My goal is to now have it blasted for me to do all the block sanding, high-build primering, and general paint prep in time to have it painted by summer 2024. I've even started researching into painting it myself. Classic case of "Ok how hard can this be?" I'm sure I'll eat those words... From what I understand here's the recipe for successful painting:
|
| pencap914 |
 Dec 6 2023, 10:07 PM Dec 6 2023, 10:07 PM
Post
#83
|
|
Member   Group: Members Posts: 77 Joined: 16-April 06 Member No.: 5,872 Region Association: Northern California |
Car is back on the rotisserie to take care of a few things before sending off to media blasting.
Next task: Install the GT stiffening kit. I was debating on if this was worth it, but after talking with Eric Shea at Rennsport reunion at Laguna Seca, he's convincing me its a good idea if I'm going to run a 6cyl engine with wide tires. Who knows I may end up autocrossing or taking the car to the occasional track day so a few extra pounds of metal can't hurt. Anyone have any tips/tricks or pitfalls to avoid? 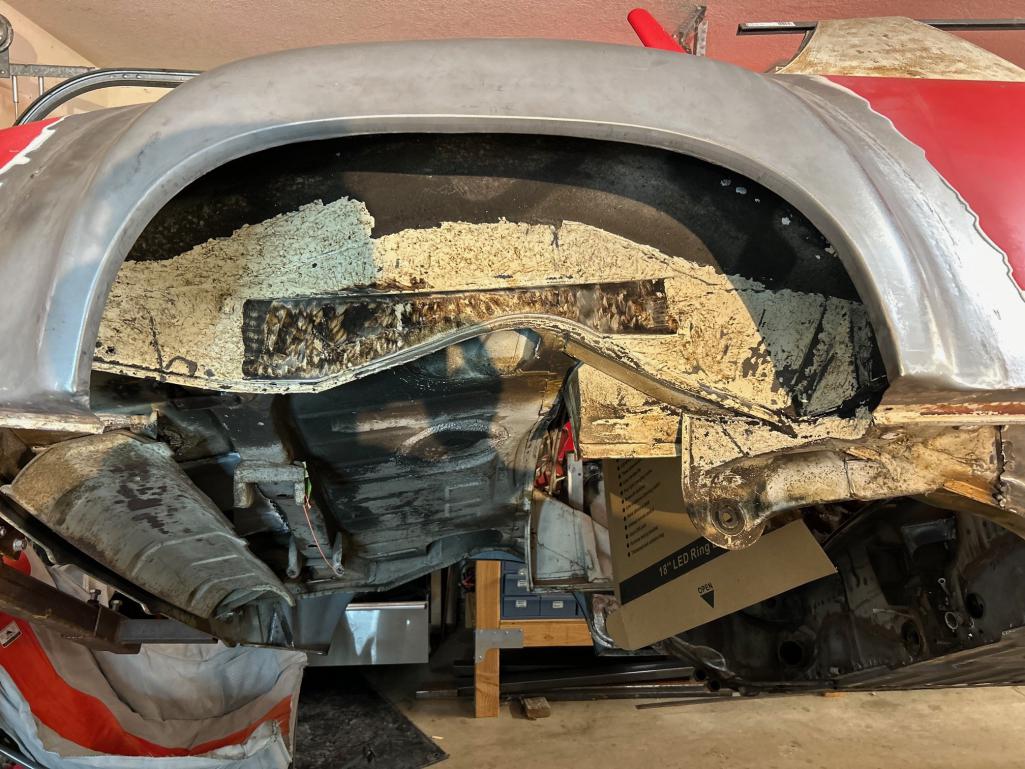 Since the car already has the "outer longitudinal stiffening kit" installed, I don't think I'll be using the left piece of this kit. 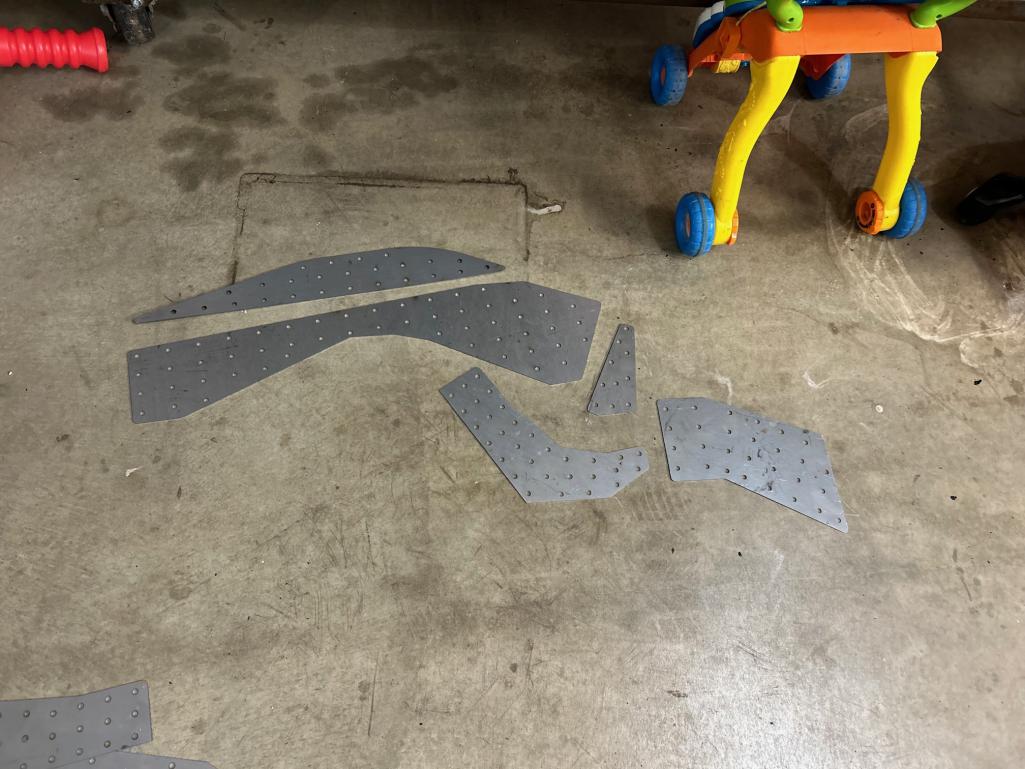 |
| pencap914 |
 Dec 13 2023, 05:21 PM Dec 13 2023, 05:21 PM
Post
#84
|
|
Member   Group: Members Posts: 77 Joined: 16-April 06 Member No.: 5,872 Region Association: Northern California |
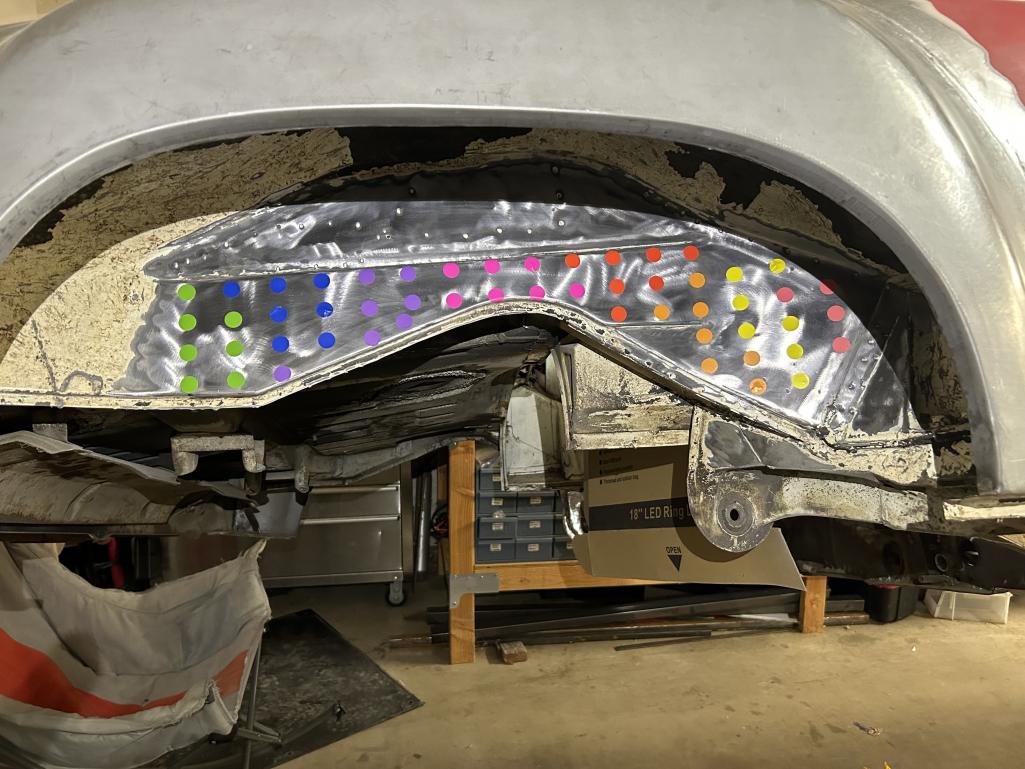
Well this idea backfired a bit...I painted the weld-through primer over these dots for where the rosette weld holes line up with the outer stiffening kit, but peeling off the dots leaves a sticky residue, or worse, top layer of paper rips off completely leaving the adhesive layer behind. No more stealing cheap Amazon.com colored dot stickers from my kids art supplies...
 |
| TheRuttmeister |
 Dec 13 2023, 07:12 PM Dec 13 2023, 07:12 PM
Post
#85
|
|
Newbie  Group: Members Posts: 26 Joined: 24-October 23 From: San Francisco Member No.: 27,680 Region Association: Northern California |
On clean dry air:
There are lots of options for in-line filters, ones that will filter dirt down to silly sizes (like, they will filter out viruses) plus oil and water. If your compressor allows it, its even better to put them in between the actual pump and the tank, that way your tank doesn't get full of water. Just get those. Dirty air would ruin everything. And air temp should only be a problem if you are really working your compressor really really hard, remember that the air cools as its being uncompressed! Although I don't paint cars, so I'll defer to others if they disagree. |
| Ishley |
 Dec 19 2023, 09:18 PM Dec 19 2023, 09:18 PM
Post
#86
|
|
Member   Group: Members Posts: 164 Joined: 4-October 21 From: Clarendon Hills Il Member No.: 25,957 Region Association: Upper MidWest 
|
I paint the inside of both panels… then use a sharpie to mark all the welds… and use a small 1/2 belt sander and sand the spots. It’s how I did it.
|
| rhodyguy |
 Dec 22 2023, 09:35 AM Dec 22 2023, 09:35 AM
Post
#87
|
|
Chimp Sanctuary NW. Check it out.                Group: Members Posts: 22,192 Joined: 2-March 03 From: Orion's Bell. The BELL! Member No.: 378 Region Association: Galt's Gulch |
What is the continuous duty cycle pressure for your comp?
|
| pencap914 |
 Mar 11 2024, 02:50 PM Mar 11 2024, 02:50 PM
Post
#88
|
|
Member   Group: Members Posts: 77 Joined: 16-April 06 Member No.: 5,872 Region Association: Northern California |
What is the continuous duty cycle pressure for your comp? I'm not sure actually, Its a Husky 60-gallon single stage compressor with a single phase 240v motor with a thermal overload switch. From my experience running mostly body saws, impact guns, sanders and die grinders I've never had it "thermal out." I think its rated for 11.5 CFM @ 90psi...? |
| pencap914 |
 Mar 11 2024, 02:58 PM Mar 11 2024, 02:58 PM
Post
#89
|
|
Member   Group: Members Posts: 77 Joined: 16-April 06 Member No.: 5,872 Region Association: Northern California |
Finally got the shell dropped off at the media blasting place! (IMG:style_emoticons/default/aktion035.gif) Now freeing up garage space to finish the engine test stand, and hopefully get this thing fired up and ready to go by the time it gets back. (~2 months).
There will be a few patches that will be needed but I don't expect anything big. Mostly in the driver side door there was a rust hole on the bottom front corner that will need repair. Lucky its in a spot that's inconspicuous. Now to research what undercoating I want to use... I'm in between the three following products:
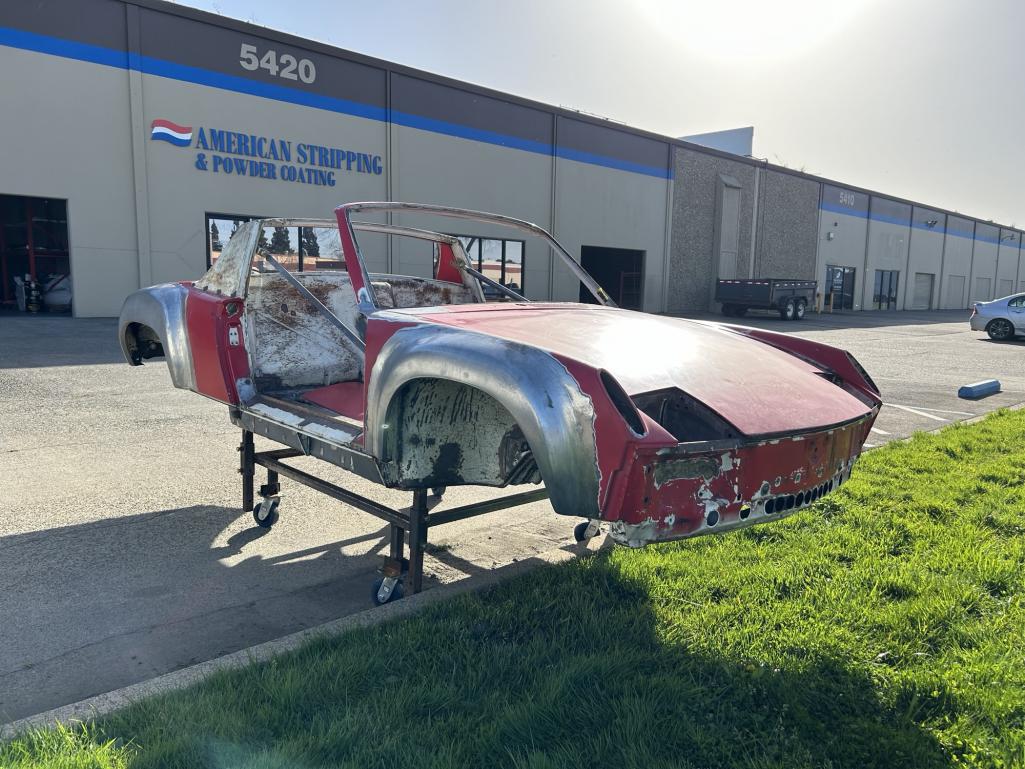 Felt cute, had to add the tail lights. This makes me want to build a single seat open-wheel racer from tube steel (IMG:style_emoticons/default/idea.gif) 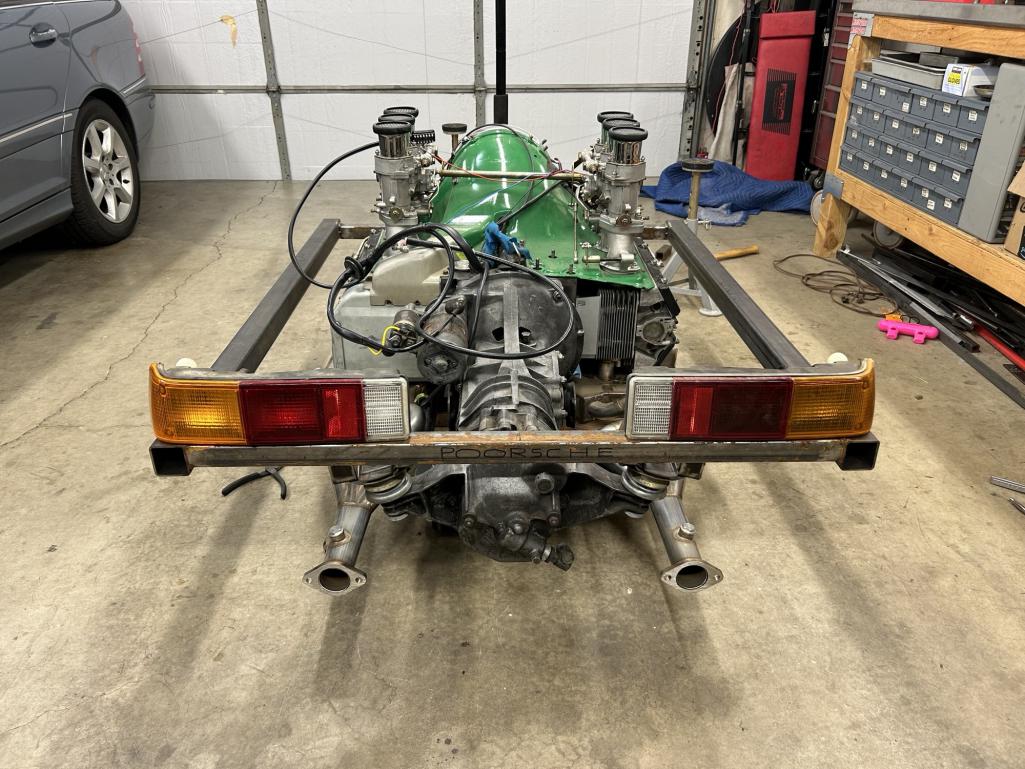 |
| mepstein |
 Mar 11 2024, 04:22 PM Mar 11 2024, 04:22 PM
Post
#90
|
|
914-6 GT in waiting                Group: Members Posts: 19,594 Joined: 19-September 09 From: Landenberg, PA/Wilmington, DE Member No.: 10,825 Region Association: MidAtlantic Region 
|
I’m using lizard skin. I’m not sure it’s the best but it’s the one I’ve chosen. I’m also using it inside the cabin for sound and temp control. The guys at my shop have used it before and it’s easy to diy. It can be painted which I intend to do.
|
| pencap914 |
 Apr 24 2024, 09:55 AM Apr 24 2024, 09:55 AM
Post
#91
|
|
Member   Group: Members Posts: 77 Joined: 16-April 06 Member No.: 5,872 Region Association: Northern California |
While the car is off to media blast/epoxy primer, I'm doing some of the plumbing. I noticed the pre-bent oil pipe from Patrick Motorsports hangs too low to be used with Ben's heat exchangers. Hopefully they allow returns on this thing, since it cost quite a bit.
I did acquire a pre-bent oil pipe from another member here, which I believe this is Ben's work, but upon bolting it up I noticed it contacts the heat exchangers. I can't move this up any further, since its already in contact with the oil return tube between cylinder 2-3. Anyone running this setup of the pre-bent stainless hard line with Ben's heat exchangers? Patrick Motorsports oil pipe: 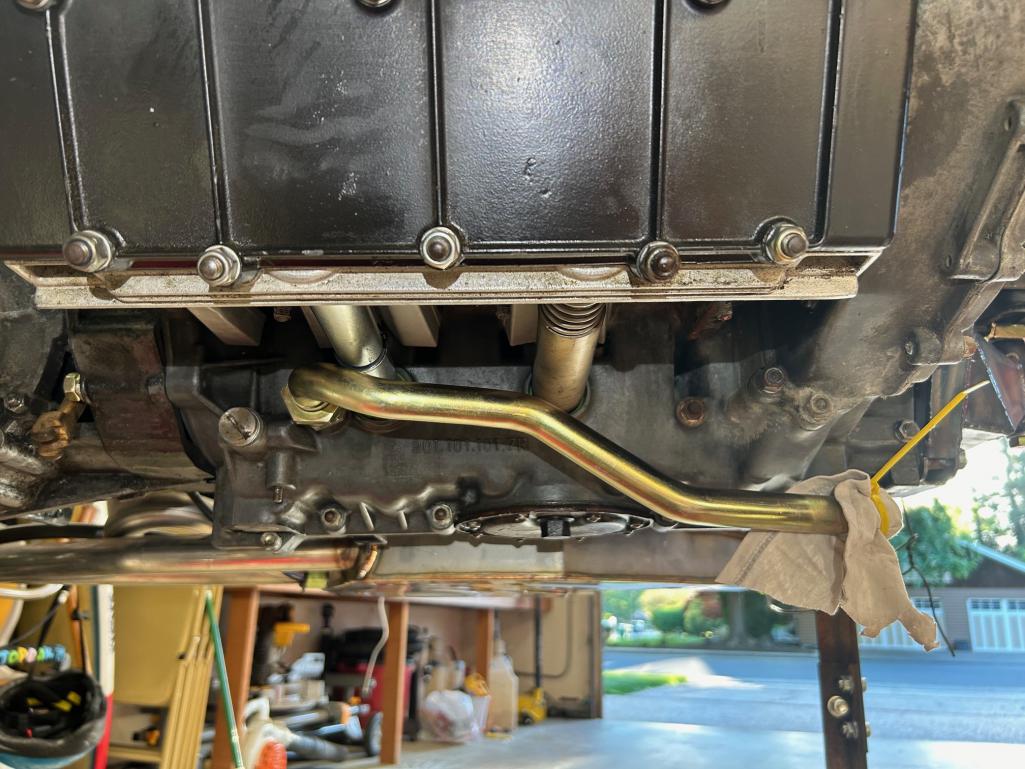 Stainless pre-bent oil pipe: 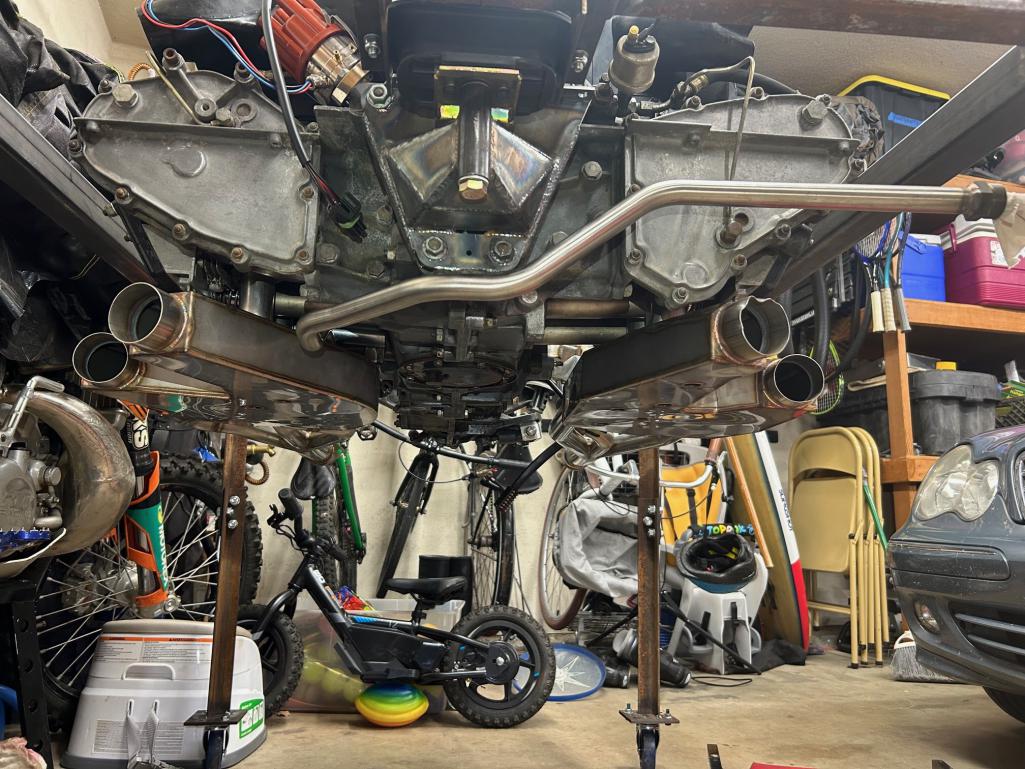 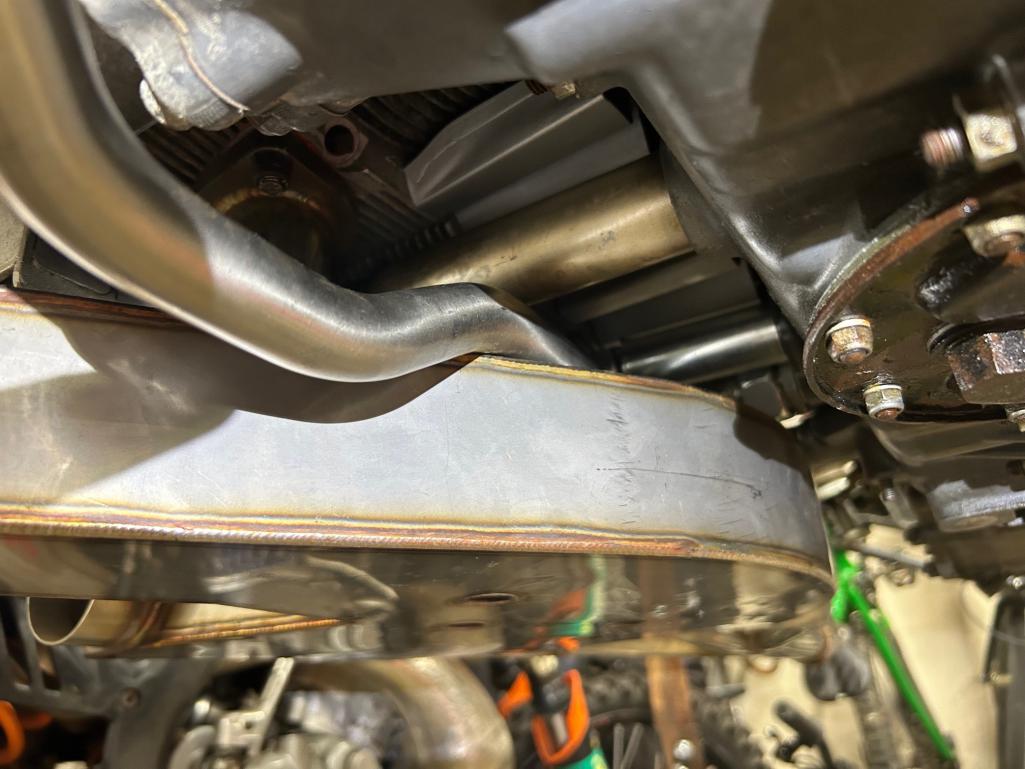 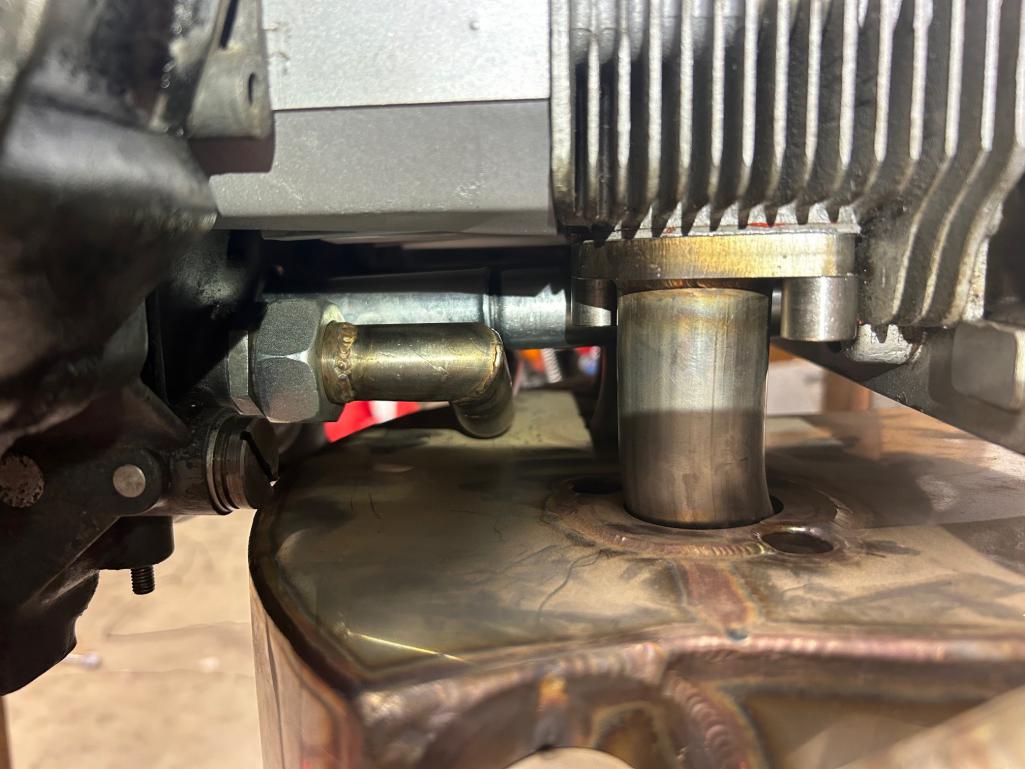 |
| pencap914 |
 Nov 22 2024, 06:05 PM Nov 22 2024, 06:05 PM
Post
#92
|
|
Member   Group: Members Posts: 77 Joined: 16-April 06 Member No.: 5,872 Region Association: Northern California |
Some overdue progress photos from summer:
Biggest milestones: Picked up the shell from the media blast/primer guy in Sacramento, and got the engine fired up on the test stand. Next steps will be doing minor repairs to the shell fixing the little "surprises" as result of the media blasting and tuning the engine. I'm only a few years behind schedule at this point but at least progress is being made. (IMG:style_emoticons/default/beerchug.gif) 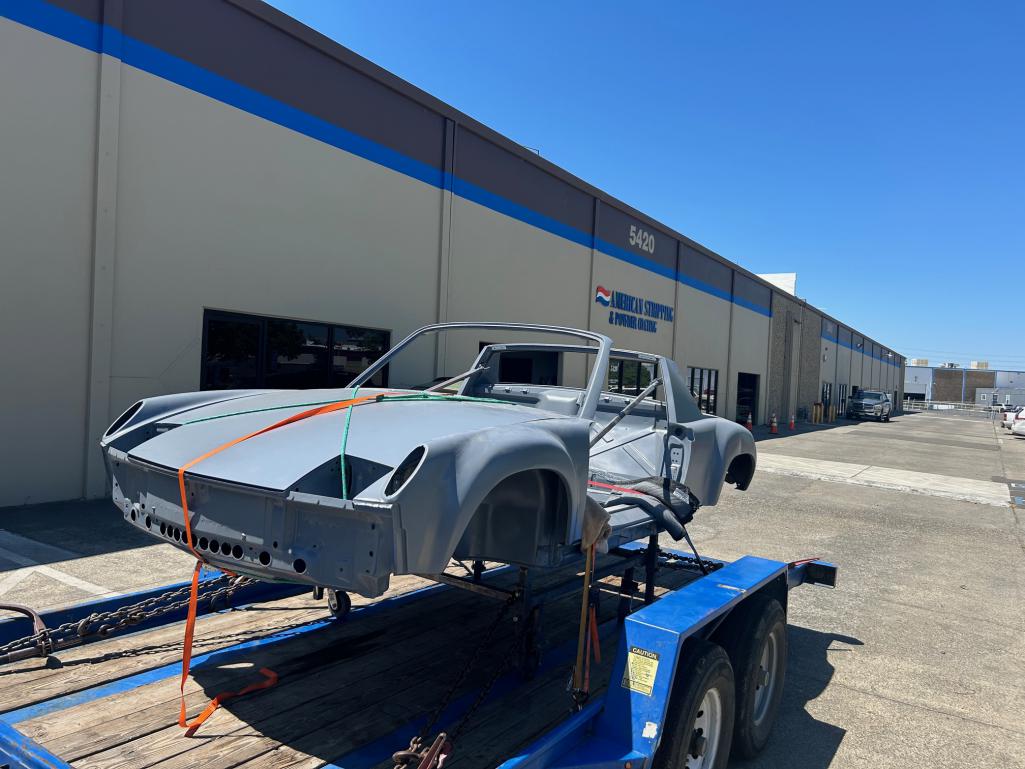 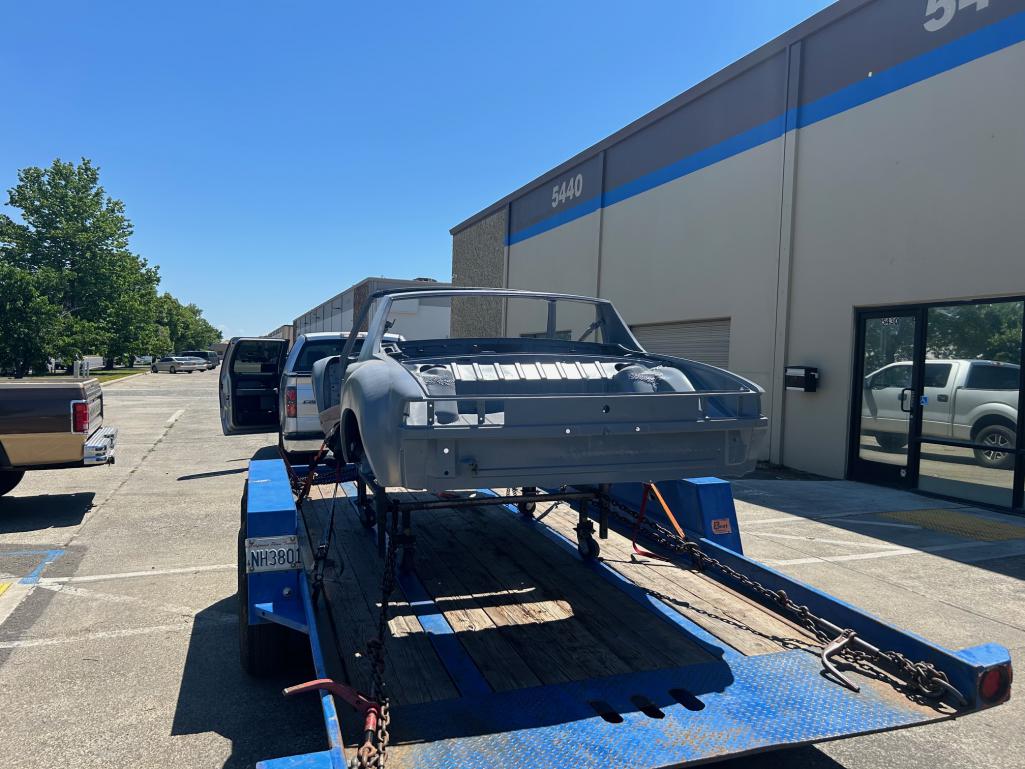 Sitting next to the other vehicle that competes for my attention. (IMG:style_emoticons/default/wacko.gif) 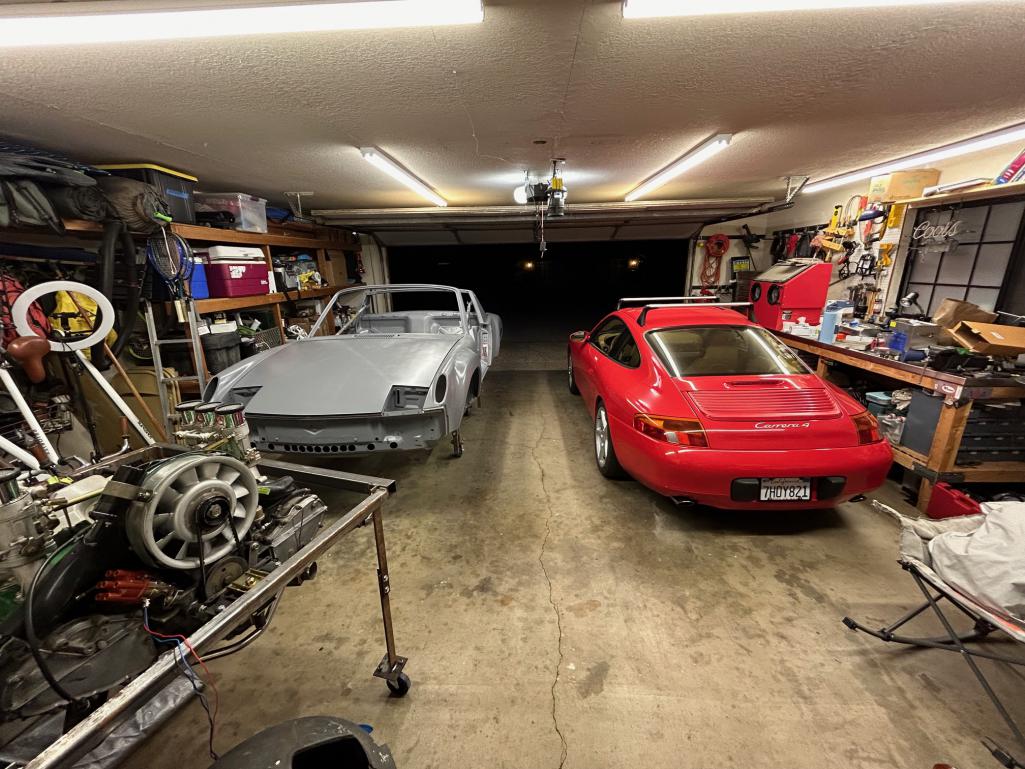 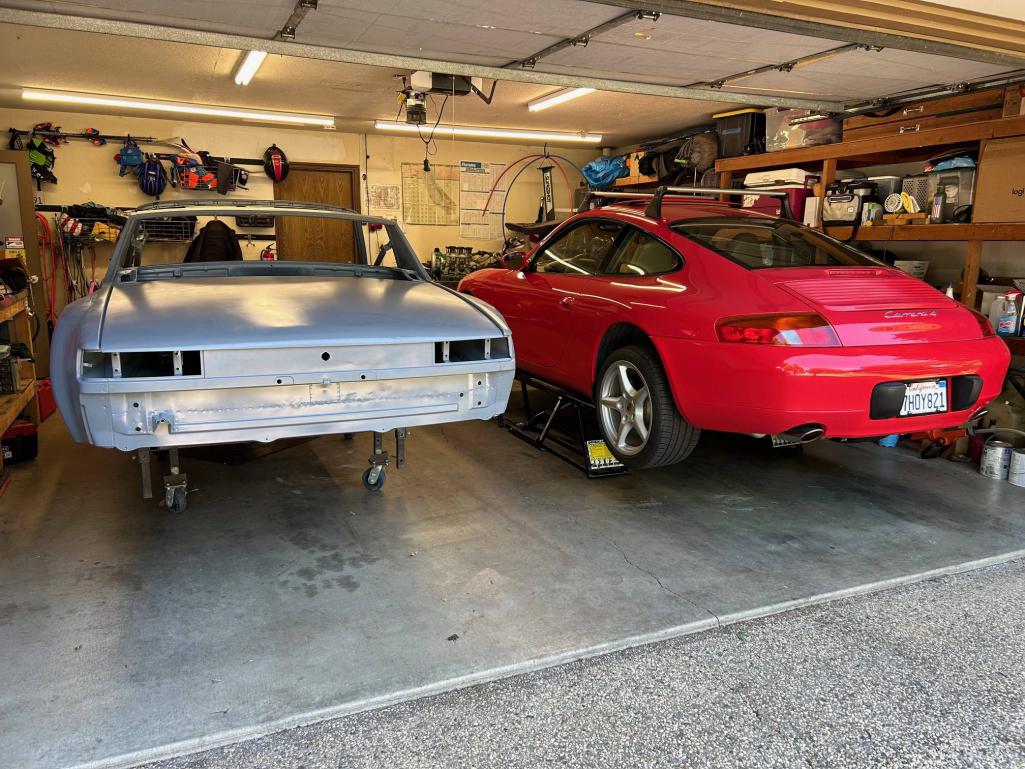 https://www.youtube.com/watch?v=xBpemDWBFeE |
| Cairo94507 |
 Nov 22 2024, 06:40 PM Nov 22 2024, 06:40 PM
Post
#93
|
|
Michael           Group: Members Posts: 10,093 Joined: 1-November 08 From: Auburn, CA Member No.: 9,712 Region Association: Northern California 
|
Excellent progress. It just takes time but you will be there soon. (IMG:style_emoticons/default/beerchug.gif)
|
| Montreal914 |
 Nov 23 2024, 10:09 AM Nov 23 2024, 10:09 AM
Post
#94
|
|
Senior Member    Group: Members Posts: 1,701 Joined: 8-August 10 From: Claremont, CA Member No.: 12,023 Region Association: Southern California 
|
Very nice progress!! (IMG:style_emoticons/default/cheer.gif)
Did you resolve the oil line routing issue? Thanks for sharing! |
  |
2 User(s) are reading this topic (2 Guests and 0 Anonymous Users)
0 Members:

|
Lo-Fi Version | Time is now: 24th November 2024 - 09:29 AM |
Invision Power Board
v9.1.4 © 2024 IPS, Inc.


