|
|

|
Porsche, and the Porsche crest are registered trademarks of Dr. Ing. h.c. F. Porsche AG.
This site is not affiliated with Porsche in any way. Its only purpose is to provide an online forum for car enthusiasts. All other trademarks are property of their respective owners. |
|
|
  |
| BillC |
 Jun 29 2020, 10:56 AM Jun 29 2020, 10:56 AM
Post
#21
|
|
Senior Member    Group: Members Posts: 559 Joined: 24-April 15 From: Silver Spring, MD Member No.: 18,667 Region Association: MidAtlantic Region 
|
So, we got the engine and fuel tank out yesterday. And, the DAPOs didn't disappoint.
On the engine, where the Decel Valve should be, I found this: 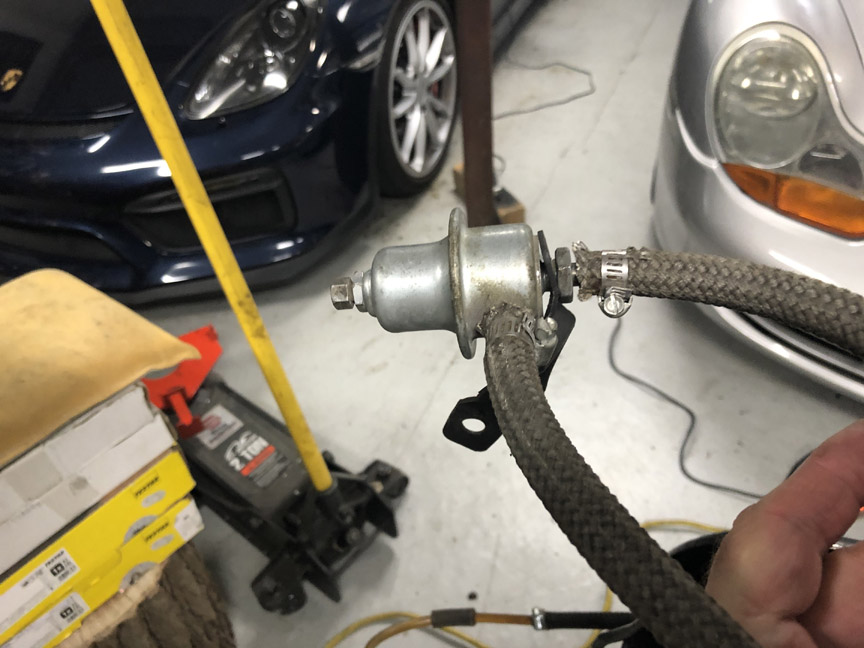 Yup, that's a fuel pressure regulator on a home-made mounting bracket. It does look similar to a decel valve, but they're just not quite the same thing. Plus, they didn't bother connecting or plugging the vacuum line that connects to the decel valve, so there's the source of the high idle. In the front, they did mount the fuel pump and filter under the tank. However, they did it by using a sheet metal screw to attach a hose clamp and then clamped the pump, with a little bit of old hose for noise dampening. 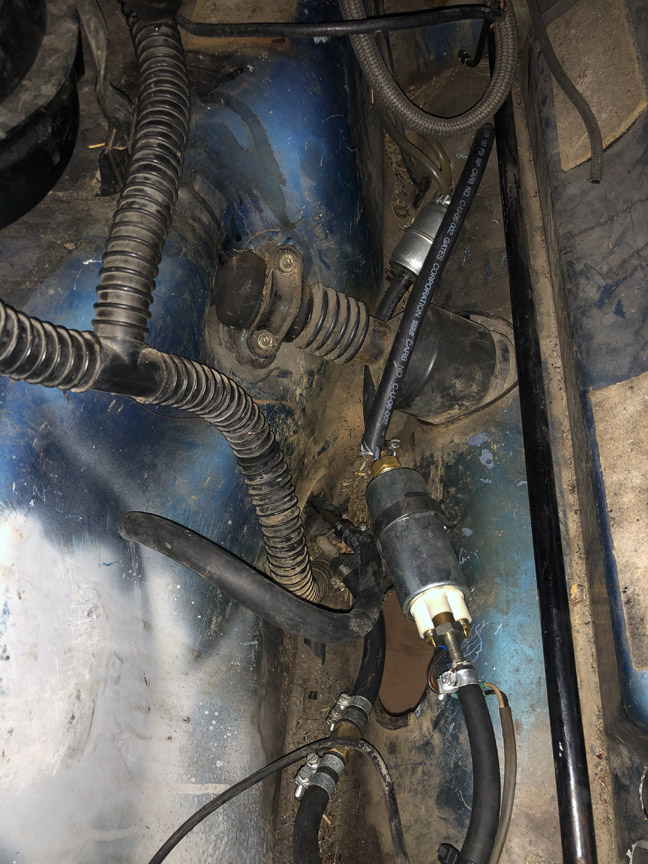 Not really a great mount, but probably the least "DAPO" thing they did to the car. The previous owner did mention that the car seemed to lose power at higher speeds. I think I may have found out why: 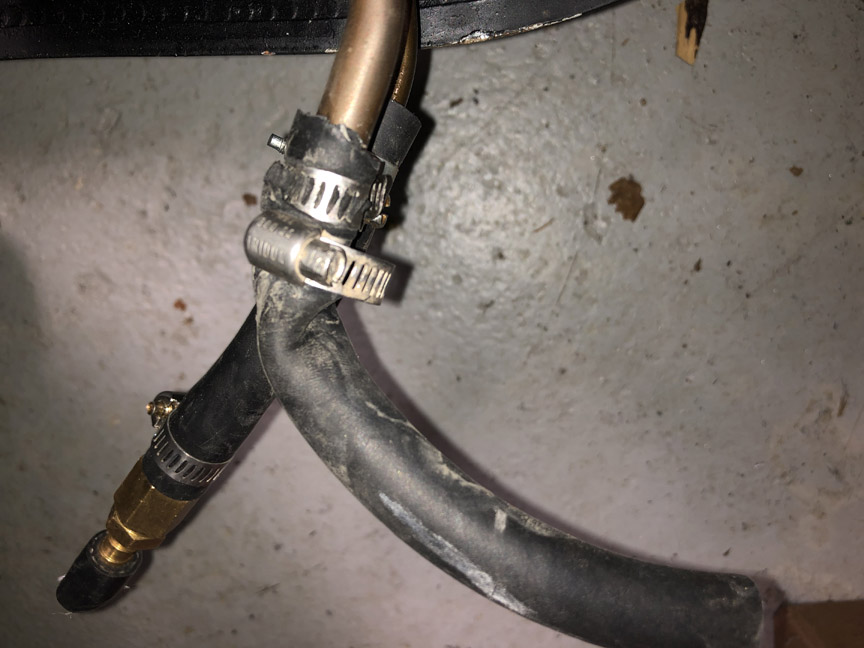 Apparently that crimp isn't enough to stop the car from running, but came very close. Also explains why it took so long to drain the fuel tank. |
| SirAndy |
 Jun 29 2020, 12:25 PM Jun 29 2020, 12:25 PM
Post
#22
|
|
Resident German                          Group: Admin Posts: 41,915 Joined: 21-January 03 From: Oakland, Kalifornia Member No.: 179 Region Association: Northern California |
|
| BillC |
 Jul 1 2020, 04:12 PM Jul 1 2020, 04:12 PM
Post
#23
|
|
Senior Member    Group: Members Posts: 559 Joined: 24-April 15 From: Silver Spring, MD Member No.: 18,667 Region Association: MidAtlantic Region 
|
Thanks! So do I. Well, it's finally time to put up or shut up. Up 'til now, I've been complaining about what has been done to the car over the years, now it's time to actually do something about it. Sunday, we pulled the engine and trans from the car. Monday, I spent time removing more stuff from the car. Yesterday, I pushed the engine-less car out of the garage and hosed out as much dirt as I could from the frunk, the gas tank area and under the rear trunk. No pictures of any of this, figured it was kinda boring and yesterday was quite soggy. Today is the start of the metal repairs. I started with the holes in the divider panel between the gas tank and the frunk. Here's what it looked like to start: 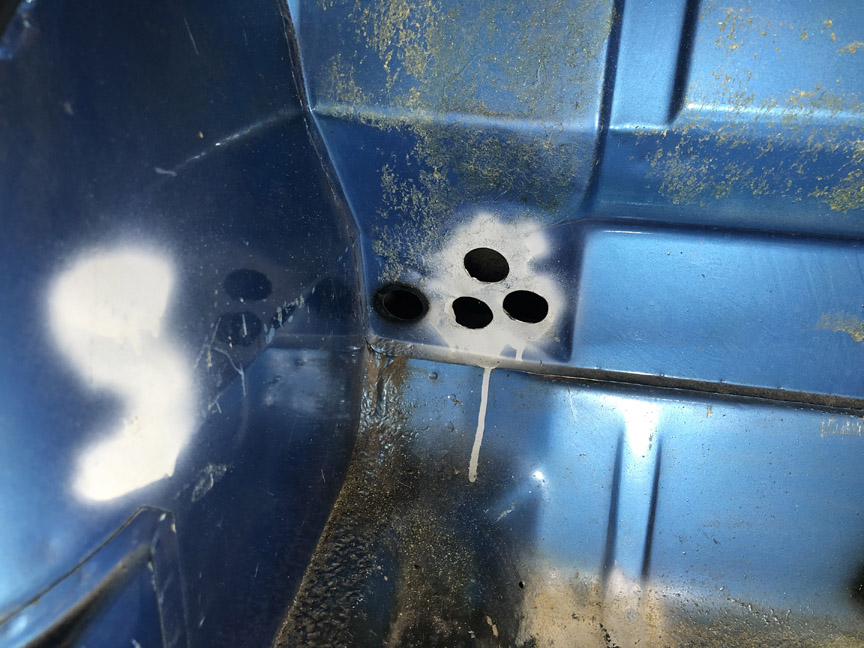 To start, I cut out the "web" between the holes, to make one large hole, which seemed easier to patch than 3 smaller holes. 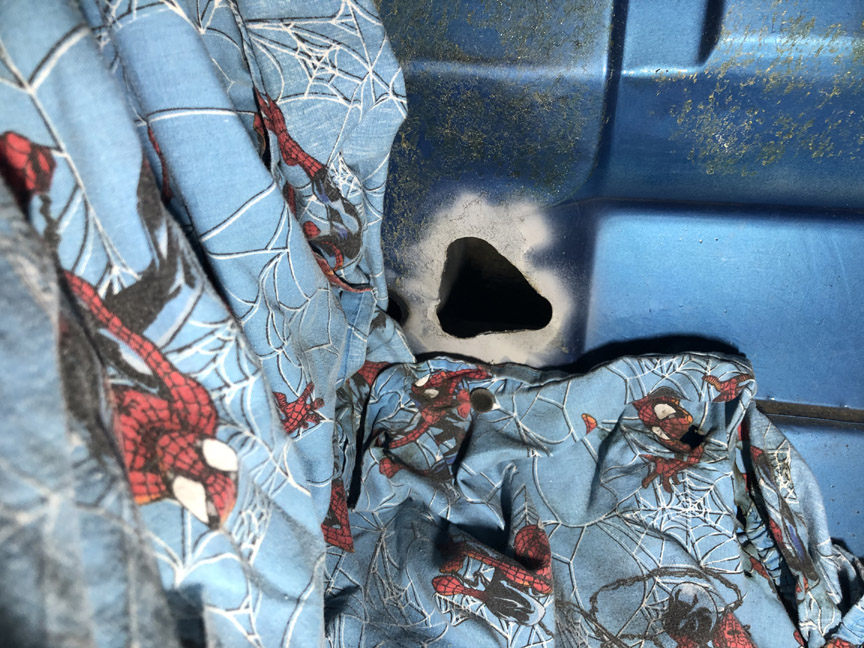 Then, I put a piece of cardboard behind the hole and used a pencil to outline out a patch. I cut out the cardboard, traced it on a piece of sheet metal and then cut out the piece of metal. Here's a pic of the patch tacked in place. 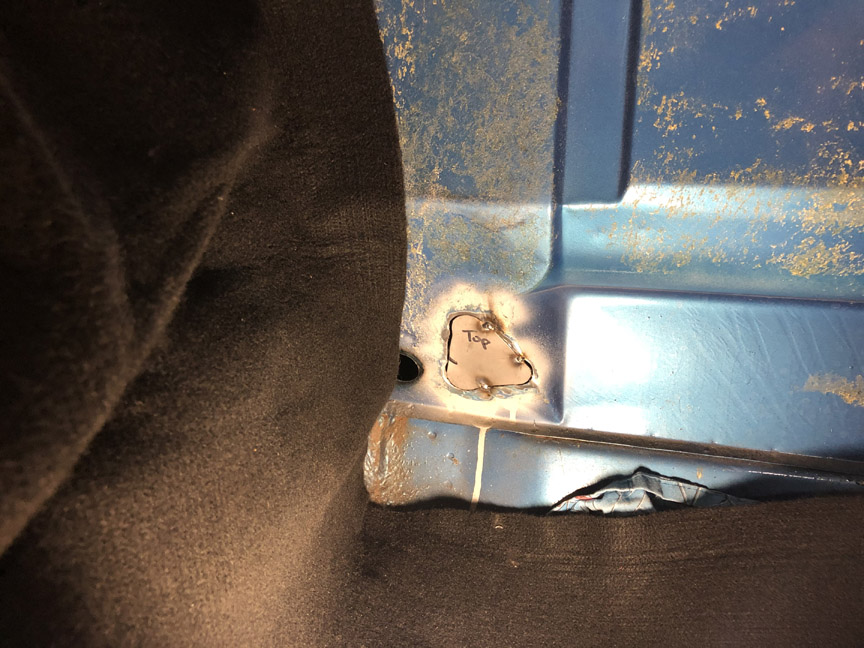 Then I got to work, welding and grinding. Here are a couple of pics of the patch installed and cleaned up (outside and inside): 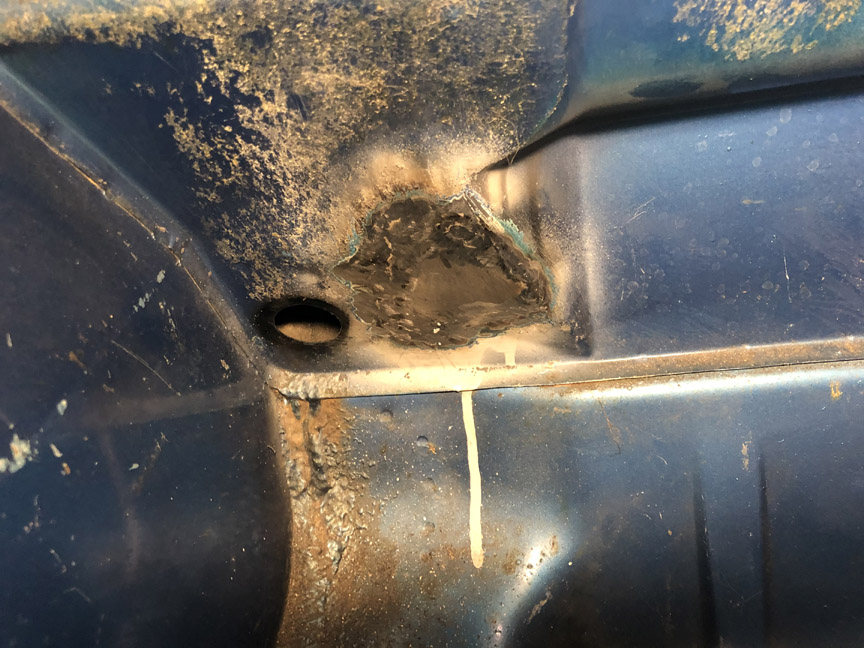 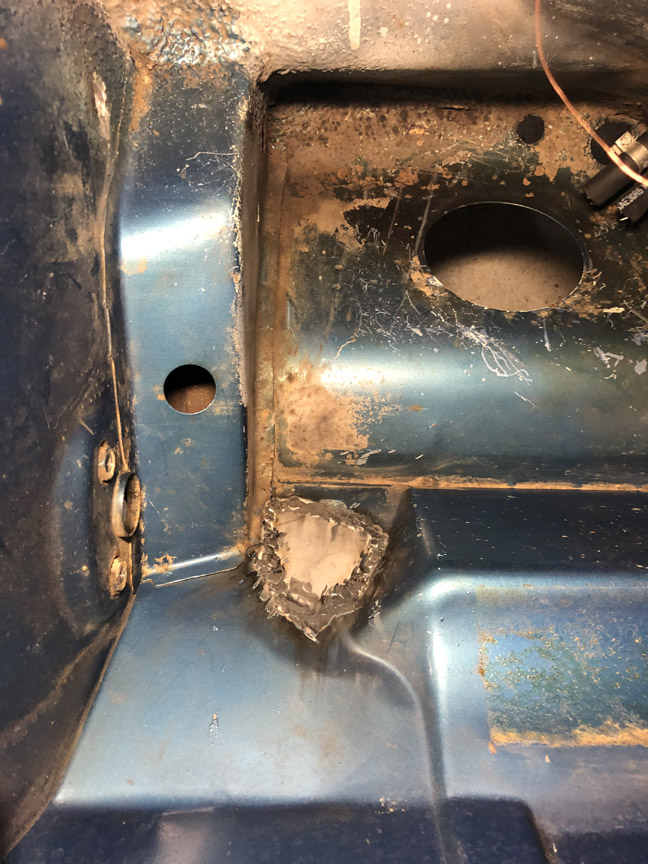 And, with a coat of primer: 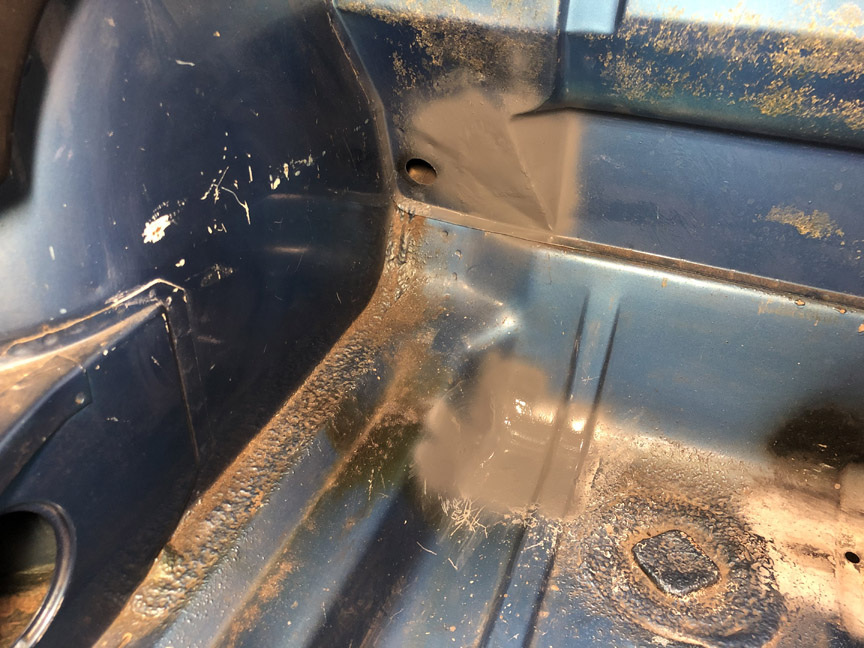 It seemed appropriate to use the primer that I won at Octeenerfest three years ago: 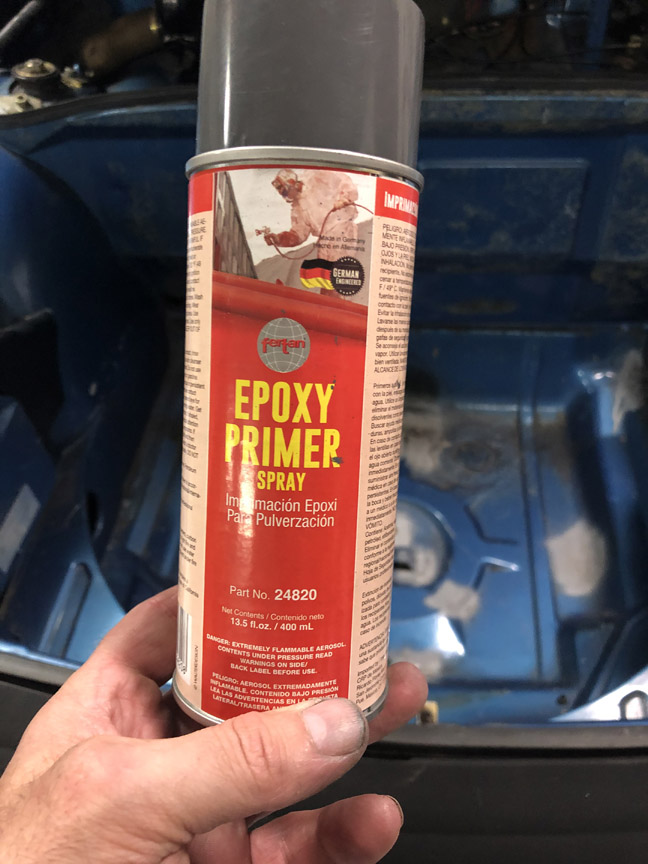 |
| Craigers17 |
 Jul 1 2020, 04:43 PM Jul 1 2020, 04:43 PM
Post
#24
|
|
Senior Member    Group: Members Posts: 807 Joined: 5-August 17 From: Rome, GA Member No.: 21,317 Region Association: South East States 
|
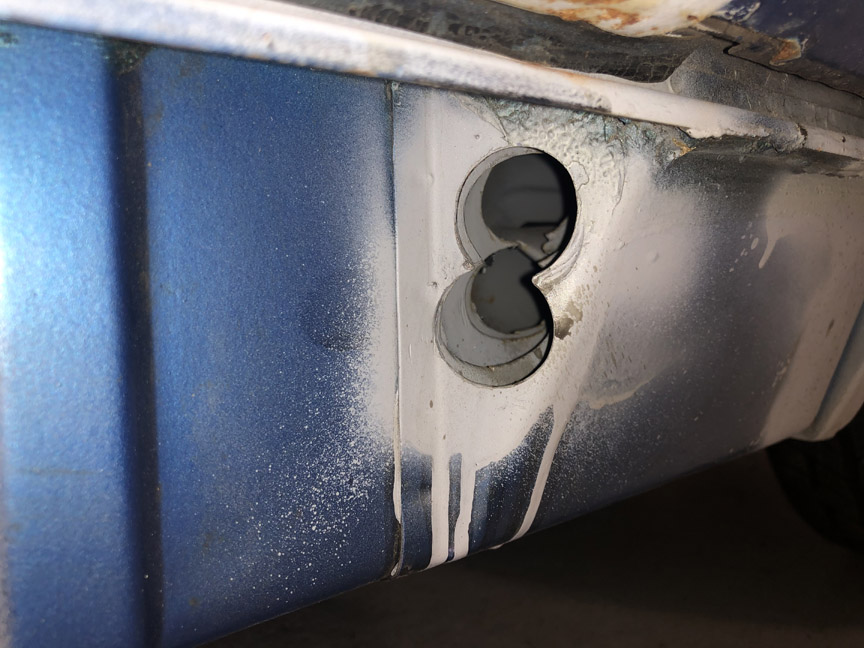
This situation seems particularly frustrating....especially on what look like some otherwise pretty solid longs. Did they really have to go through 4 frigg'n layers? It's really hard to imagine what the intended result was supposed to be.
 |
| 2mAn |
 Jul 1 2020, 04:56 PM Jul 1 2020, 04:56 PM
Post
#25
|
|
trying to see how long I can go without a 914   Group: Members Posts: 487 Joined: 14-November 13 From: Westchester (Los Angeles) Member No.: 16,644 Region Association: Southern California |
|
| Superhawk996 |
 Jul 1 2020, 05:02 PM Jul 1 2020, 05:02 PM
Post
#26
|
|
914 Guru      Group: Members Posts: 6,544 Joined: 25-August 18 From: Woods of N. Idaho Member No.: 22,428 Region Association: Galt's Gulch 
|
This situation seems particularly frustrating....especially on what look like some otherwise pretty solid longs. Did they really have to go through 4 frigg'n layers? It's really hard to imagine what the intended result was supposed to be. My guess is AC lines. My car had similar butchery from AC install |
| Wyvern |
 Jul 1 2020, 05:03 PM Jul 1 2020, 05:03 PM
Post
#27
|
|
Member   Group: Members Posts: 324 Joined: 7-October 15 From: San Francisco (East Bay) Member No.: 19,245 Region Association: Northern California |
When I started reading this I did not know what a "DAPO" was ... but each time I saw it i got a better idea , now I know . LOL
My buddy and I have talked about making a book PO FU ... but that may be a better name . We need a DAPO thread |
| BillC |
 Jul 1 2020, 05:22 PM Jul 1 2020, 05:22 PM
Post
#28
|
|
Senior Member    Group: Members Posts: 559 Joined: 24-April 15 From: Silver Spring, MD Member No.: 18,667 Region Association: MidAtlantic Region 
|
This situation seems particularly frustrating....especially on what look like some otherwise pretty solid longs. Did they really have to go through 4 frigg'n layers? It's really hard to imagine what the intended result was supposed to be. Yes, very frustrating. They went through three layers of structural metal and the heating duct. The worst part is that I have to cut big holes in the three structural layers to get to the heat duct and then rebuild things on my way out. My guess is AC lines. My car had similar butchery from AC install No idea. Someone else had previously suggested oil cooler lines. Could have been either, or something else entirely. Whatever it was supposed to be, they didn't complete it -- other than the frunk divider, there are no other holes where you'd expect AC or oil cooler lines to be run (at least, that I have found). When I started reading this I did not know what a "DAPO" was ... but each time I saw it i got a better idea , now I know . LOL My buddy and I have talked about making a book PO FU ... but that may be a better name . We need a DAPO thread I learned about "DAPO"s on this forum, too. Very fitting acronym. If someone starts a thread, I'll be nominating the picture that Craigers picked out. |
| BillC |
 Jul 2 2020, 05:19 PM Jul 2 2020, 05:19 PM
Post
#29
|
|
Senior Member    Group: Members Posts: 559 Joined: 24-April 15 From: Silver Spring, MD Member No.: 18,667 Region Association: MidAtlantic Region 
|
Made more progress today.
Removed the rear window and the engine deck lid. Found another thing that needs to be fixed -- apparently they stripped out the nut for the deck lid mount, so they drilled it out and dropped a bolt in from above. Was originally thinking of just putting a helicoil in to fix the welded nut, but it may have been drilled out too large for that, will measure tomorrow. Welded up the holes in the firewall, Also wirebrushed the rusty areas on the firewall and the window mounting area. Treated the rust with Loctite Rust Converter, which will get primered and painted after it dries. 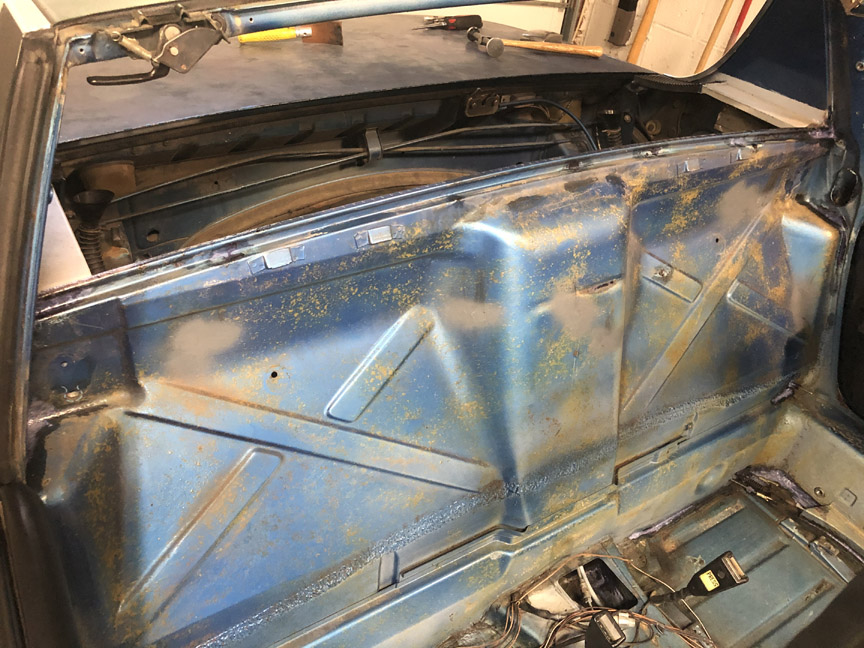 Also, the touch-up paint finally arrived from Paintscratch.com (we're having UPS problems). So, I touched up the frunk and gas tank areas. Looking much better: 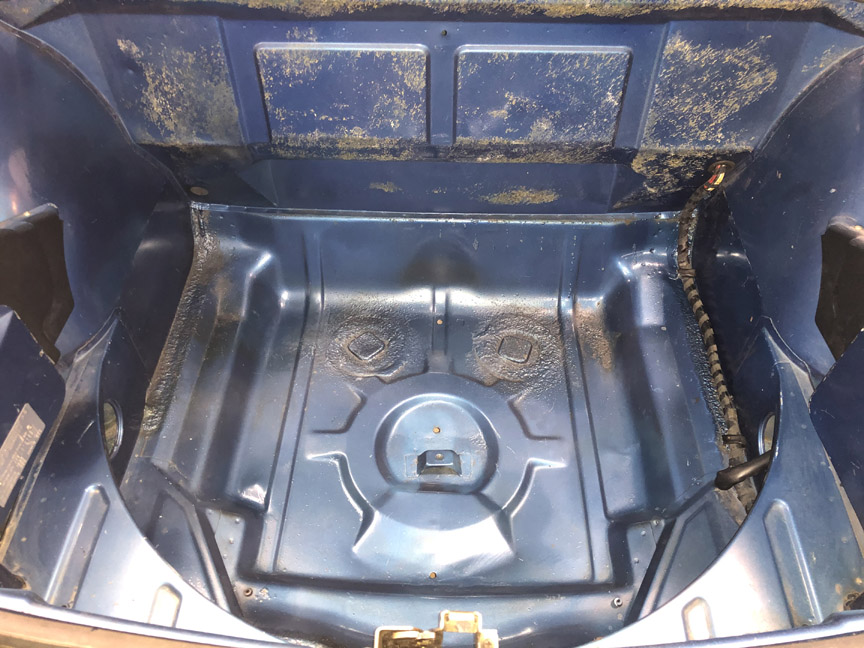 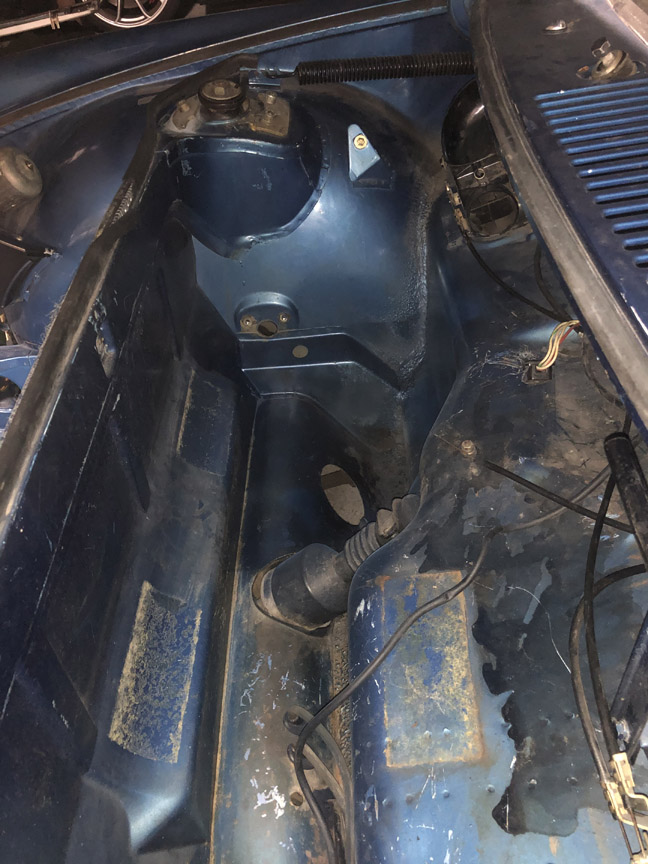 |
| Montreal914 |
 Jul 2 2020, 05:50 PM Jul 2 2020, 05:50 PM
Post
#30
|
|
Senior Member    Group: Members Posts: 1,707 Joined: 8-August 10 From: Claremont, CA Member No.: 12,023 Region Association: Southern California 
|
Not sure what your front sway bar setup is but I don't see any reinforcement plate on the inner wall, is it mounted on the wheel well side? Or was the factory installed sway bar didn't have the added plate? (IMG:style_emoticons/default/confused24.gif)
|
| BillC |
 Jul 2 2020, 05:53 PM Jul 2 2020, 05:53 PM
Post
#31
|
|
Senior Member    Group: Members Posts: 559 Joined: 24-April 15 From: Silver Spring, MD Member No.: 18,667 Region Association: MidAtlantic Region 
|
Not sure what your front sway bar setup is but I don't see any reinforcement plate on the inner wall, is it mounted on the wheel well side? Or was the factory installed sway bar didn't have the added plate? (IMG:style_emoticons/default/confused24.gif) It's a factory-installed sway bar, so no added plate on the inside. The mounting plates are spot-welded on the outside with multiple spots. |
| BillC |
 Jul 3 2020, 04:44 PM Jul 3 2020, 04:44 PM
Post
#32
|
|
Senior Member    Group: Members Posts: 559 Joined: 24-April 15 From: Silver Spring, MD Member No.: 18,667 Region Association: MidAtlantic Region 
|
It doesn't seem like I accomplished much today, but it took all day to do it.
I installed a new retractable antenna. Had to leave the old antenna base grommet, since the area of affected paint is larger than the new base. 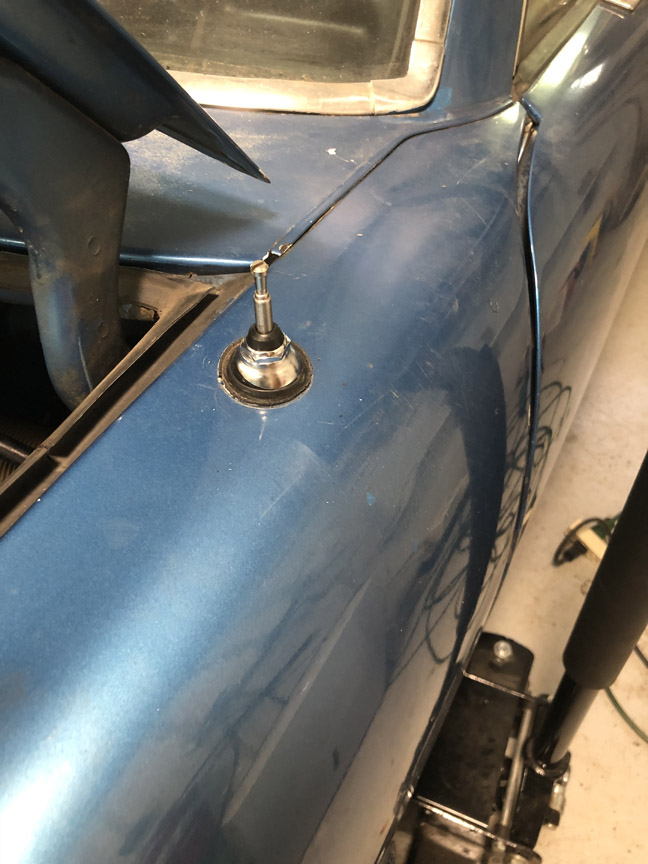 Then, I removed the windshield wiper assembly. I cleaned up and treated the rust around the wiper post holes. Then, I disassembled the wiper assembly and cleaned and greased the posts. 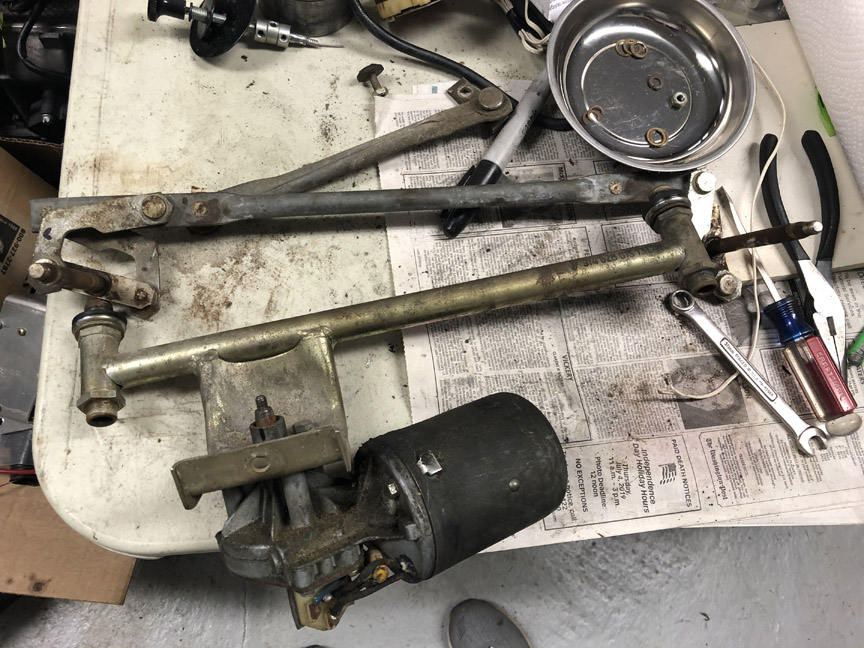 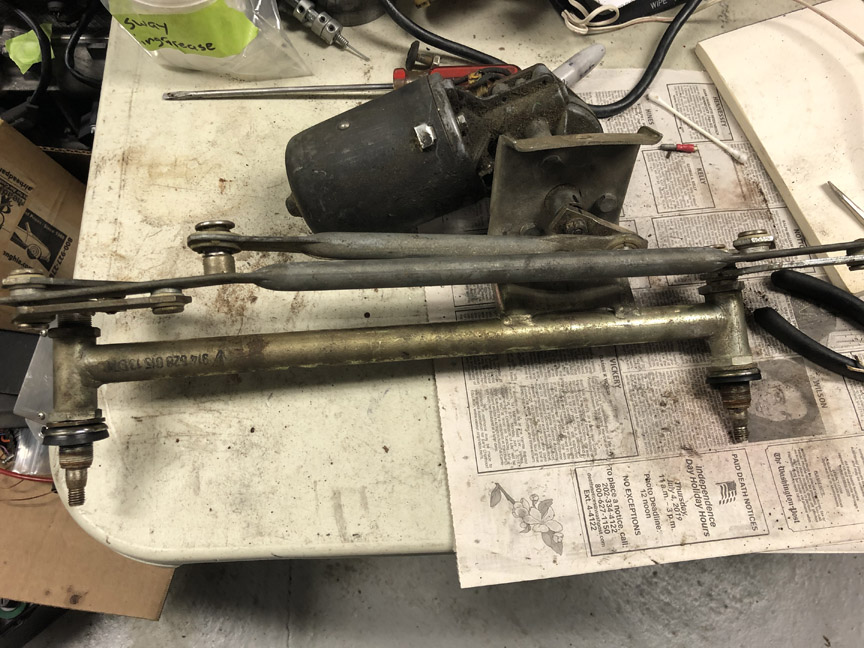 Hopefully, tomorrow I'll be able to paint around the post holes and then Sunday I'll be able to reinstall the wiper assembly. I also installed new hoses for the window washers, while I have easy access under the cowl. At some point, I'll install an electric pump for the washer. |
| BillC |
 Jul 6 2020, 04:26 PM Jul 6 2020, 04:26 PM
Post
#33
|
|
Senior Member    Group: Members Posts: 559 Joined: 24-April 15 From: Silver Spring, MD Member No.: 18,667 Region Association: MidAtlantic Region 
|
Well, I didn't make as much progress as hoped this weekend.
I went to reinstall the window wiper mechanism, and ended up breaking the 47-year-old rubber isolator mount. <sigh> So, time to order another part and wait for it to arrive. Hello, 914Rubber.... In the meantime, I fixed the control cables for the heating & ventilation system. Don't know why, but some of the cables were connected to the wrong locations. And, I fixed the stripped nut in the decklid mount. Since (I hope) everyone likes pictures, I took a bunch of this process. Of course, it took as long to take all the pics as it did to perform the actual repair. First step is to drill out the bad threads. Fortunately, the DAPO didn't over-drill the hole, it was just about the right size. 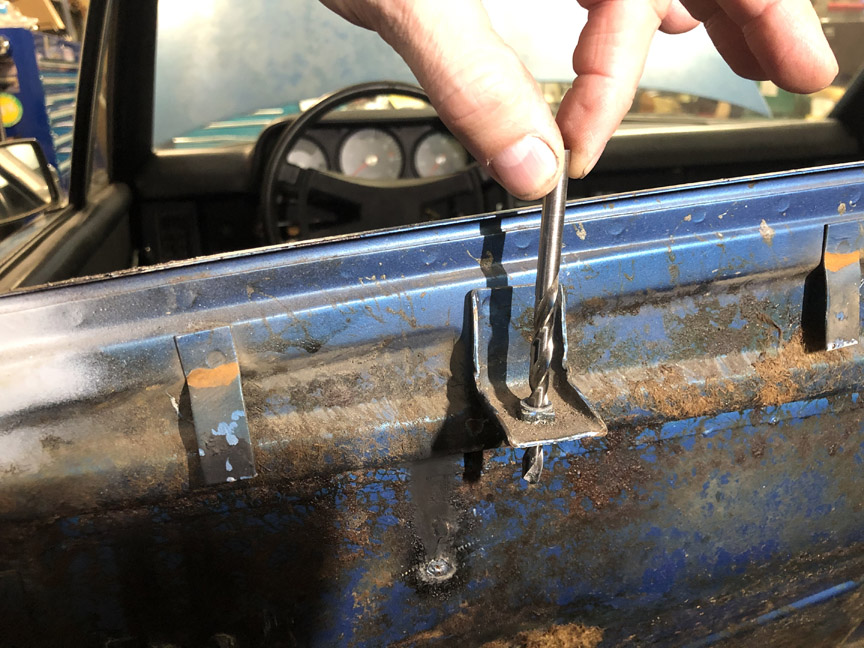 Then, I tapped the hole with the helicoil tap: 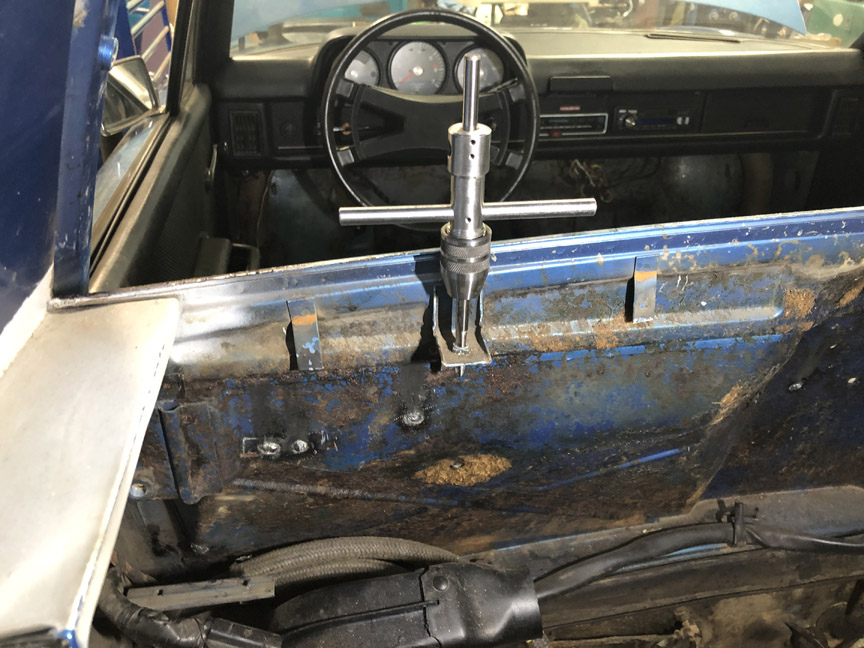 Then, to make sure the helicoil won't come out, I added some red loctite. 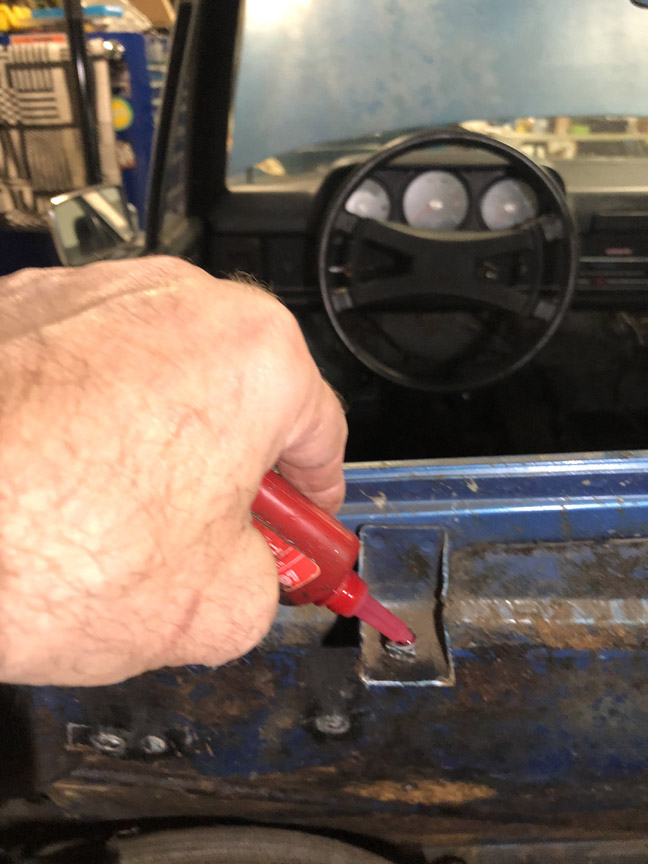 Next step was to install the helicoil insert. Here's a pic of the install tool, with the insert about halfway installed: 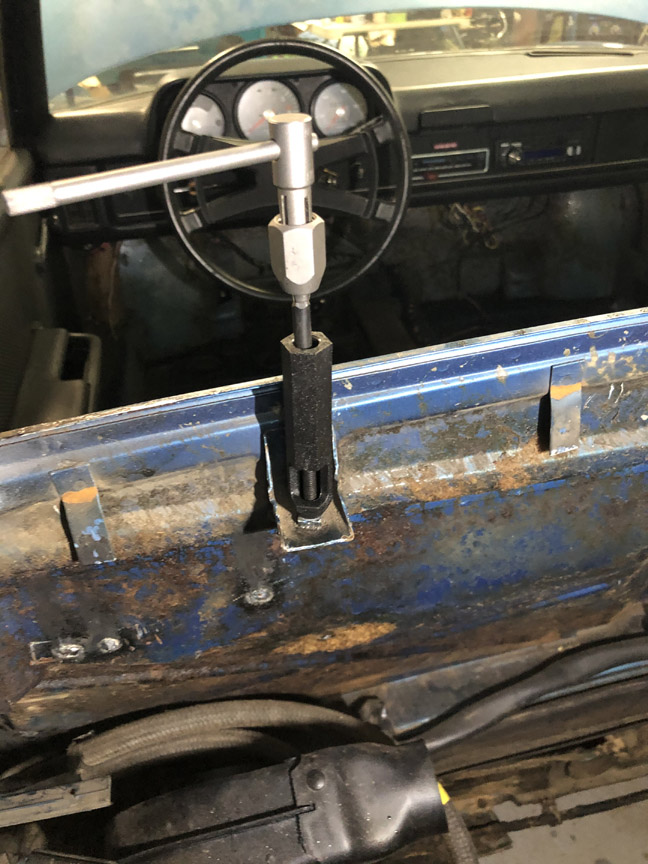 Final step was to break off the driving tang. The full kit comes with this special "breaker" tool (aka, a piece of steel rod), but it can be done with a screwdriver if you just buy the basic kit. 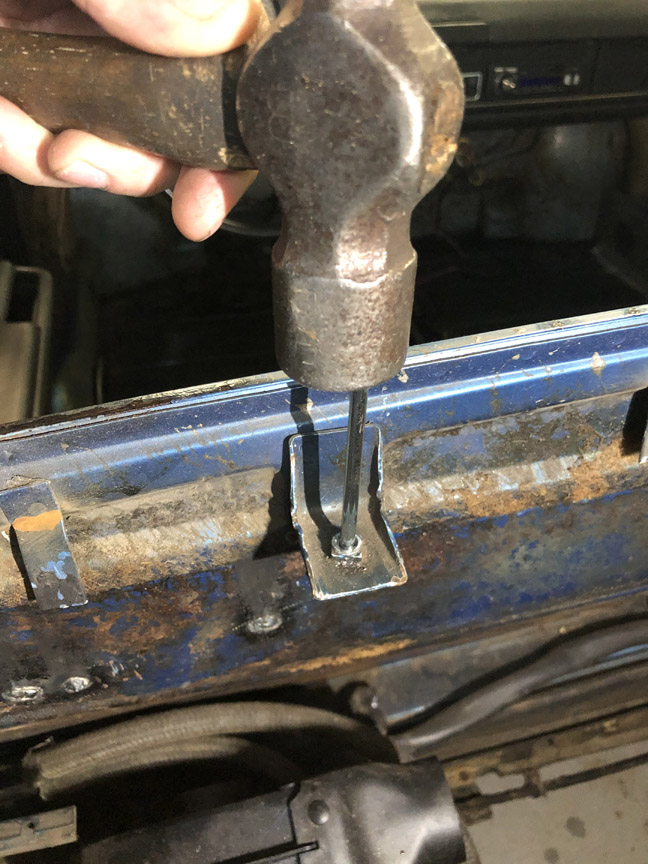 All done. This won't come out without destroying the mount. 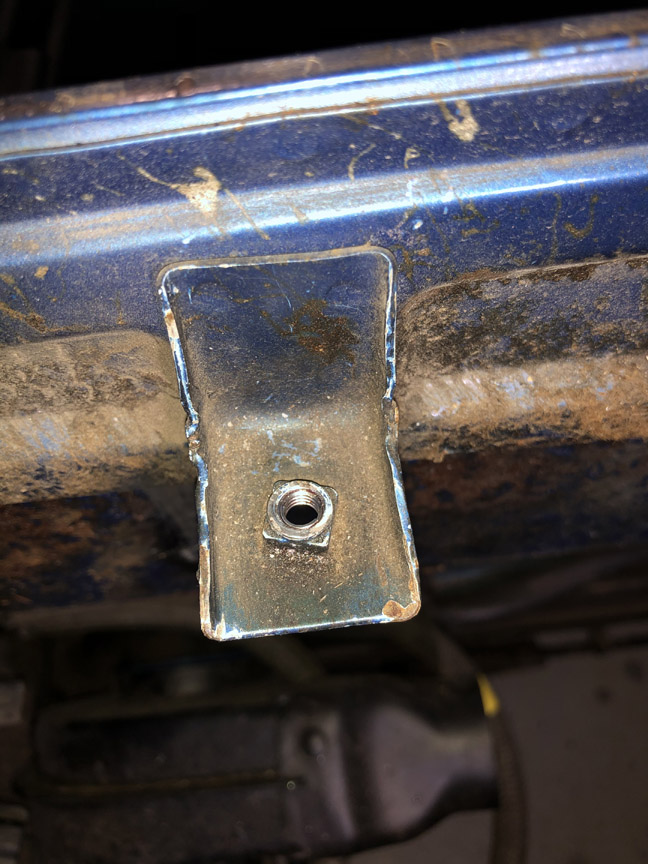 |
| Cairo94507 |
 Jul 6 2020, 05:54 PM Jul 6 2020, 05:54 PM
Post
#34
|
|
Michael           Group: Members Posts: 10,102 Joined: 1-November 08 From: Auburn, CA Member No.: 9,712 Region Association: Northern California 
|
Very nice. You are making great progress and tackling things one at a time will keep you from getting over loaded. (IMG:style_emoticons/default/beerchug.gif)
|
| Front yard mechanic |
 Jul 6 2020, 08:07 PM Jul 6 2020, 08:07 PM
Post
#35
|
|
Senior Member    Group: Members Posts: 1,233 Joined: 23-July 15 From: New Mexico Member No.: 18,984 Region Association: None 
|
If you ever sell the car think what the next owner will call you (IMG:style_emoticons/default/slap.gif)
|
| BillC |
 Jul 7 2020, 06:36 AM Jul 7 2020, 06:36 AM
Post
#36
|
|
Senior Member    Group: Members Posts: 559 Joined: 24-April 15 From: Silver Spring, MD Member No.: 18,667 Region Association: MidAtlantic Region 
|
If you ever sell the car think what the next owner will call you (IMG:style_emoticons/default/slap.gif) Well, among other things, I am trying to avoid being lumped into the same category of (future) previous owners. The guy who bought my previous 914 seemed very happy with it, and that includes having it shipped to a well-known 914 shop for a thorough inspection prior to receiving the car. |
| IronHillRestorations |
 Jul 7 2020, 03:16 PM Jul 7 2020, 03:16 PM
Post
#37
|
|
I. I. R. C.      Group: Members Posts: 6,785 Joined: 18-March 03 From: West TN Member No.: 439 Region Association: None 
|
Sad to see the misfortune of some cars. I hope my 2nd 914 never shows up here. I'd be curious as to the cost of the car Bill, if it was a high dollar car or not.
|
| get off my lawn |
 Jul 7 2020, 03:20 PM Jul 7 2020, 03:20 PM
Post
#38
|
|
Member   Group: Members Posts: 168 Joined: 18-August 11 From: west coast Member No.: 13,462 Region Association: None |
If you ever sell the car think what the next owner will call you (IMG:style_emoticons/default/slap.gif) LOL note to self: don't sell a car to anyone on 914world (IMG:style_emoticons/default/poke.gif) |
| Superhawk996 |
 Jul 8 2020, 06:40 AM Jul 8 2020, 06:40 AM
Post
#39
|
|
914 Guru      Group: Members Posts: 6,544 Joined: 25-August 18 From: Woods of N. Idaho Member No.: 22,428 Region Association: Galt's Gulch 
|
If you ever sell the car think what the next owner will call you (IMG:style_emoticons/default/slap.gif) Well, among other things, I am trying to avoid being lumped into the same category of (future) previous owners. The guy who bought my previous 914 seemed very happy with it, and that includes having it shipped to a well-known 914 shop for a thorough inspection prior to receiving the car. (IMG:style_emoticons/default/happy11.gif) Let's be honest - over the course of 40+ years, lots of these cars have had work done on them by people that that should have at least learned to work on a lawnmower before undertaking repairs on an automobile. (IMG:style_emoticons/default/sheeplove.gif) Congratuations @BillC for taking the time and effort to fix it with a sense of quality and workmanship that was often lacking in the orignal reapirs we find on these cars. |
| BillC |
 Jul 9 2020, 07:08 PM Jul 9 2020, 07:08 PM
Post
#40
|
|
Senior Member    Group: Members Posts: 559 Joined: 24-April 15 From: Silver Spring, MD Member No.: 18,667 Region Association: MidAtlantic Region 
|
The order with the rubber isolator finally came, so I installed the wiper motor and wipers.
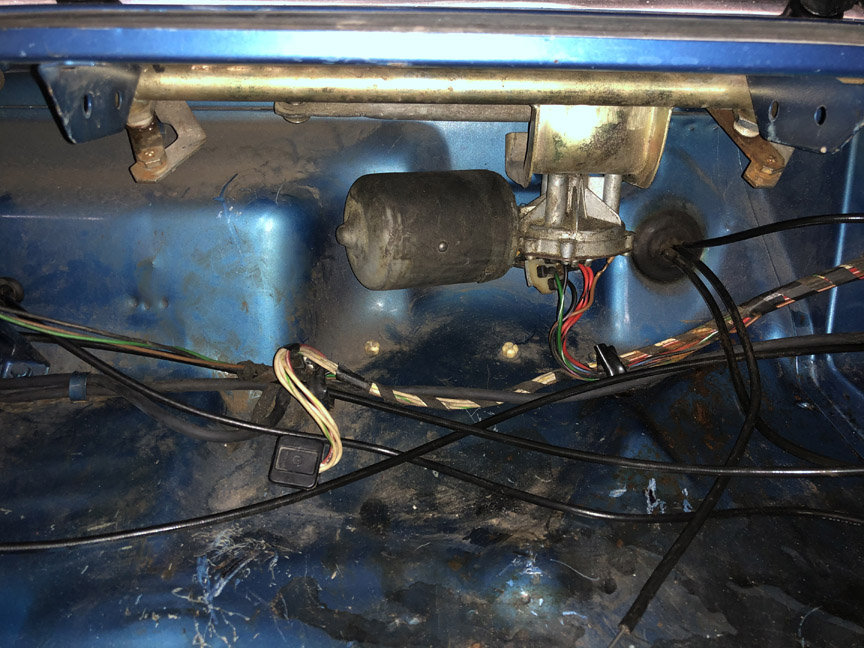 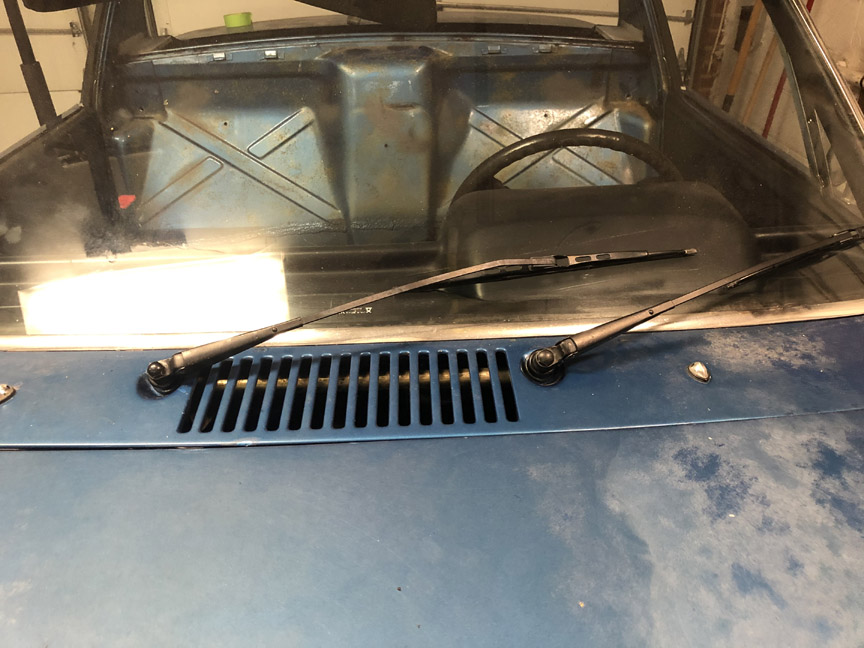 The hardest part of the installation is the nut for the other end of the isolator. It hides under the dash, and is very difficult to reach with the dash in place. Fortunately, if you take out the ashtray mount (two phillips screws and push forward to unclip), you can just barely get access with a 1/4" drive deep socket (10mm) and a universal joint. The red circle shows the inside nut. 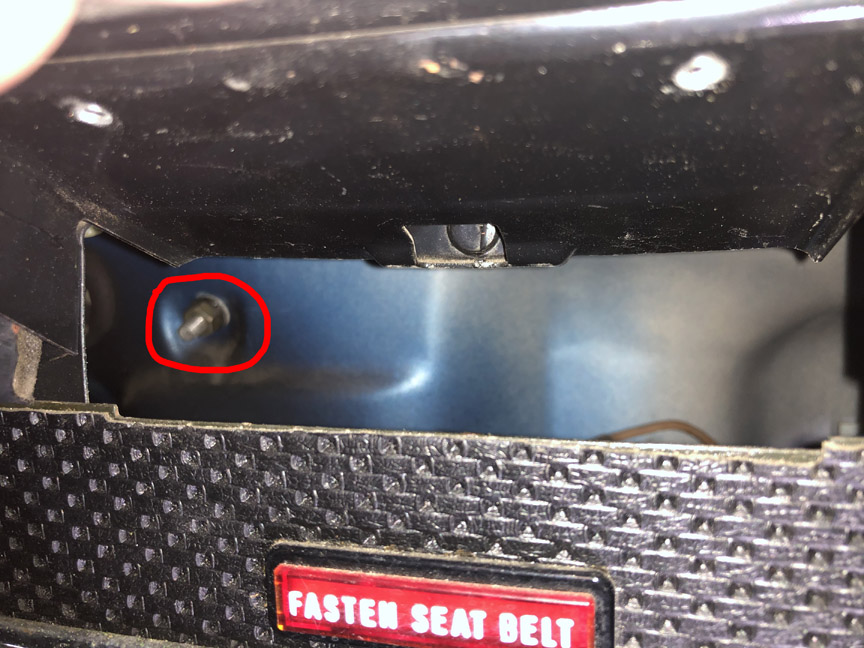 |
  |
1 User(s) are reading this topic (1 Guests and 0 Anonymous Users)
0 Members:

|
Lo-Fi Version | Time is now: 4th December 2024 - 02:21 AM |
Invision Power Board
v9.1.4 © 2024 IPS, Inc.


