|
|
|
Porsche, and the Porsche crest are registered trademarks of Dr. Ing. h.c. F. Porsche AG.
This site is not affiliated with Porsche in any way. Its only purpose is to provide an online forum for car enthusiasts. All other trademarks are property of their respective owners. |
|
|

  |

| Craigers17 |
 Sep 18 2020, 03:22 PM Sep 18 2020, 03:22 PM
Post
#1
|
|
Senior Member  Group: Members Posts: 800 Joined: 5-August 17 From: Rome, GA Member No.: 21,317 Region Association: South East States |
So I'm in the processing of re-installing my master cylinder, brakes etc. I had to take the 90 degree fitting off of the old master cylinder & use on the new one. My questions are:
1. Is there a washer or gasket that goes between the main M/C body and the fitting or just a washer between the 2 parts of the fitting? 2. There is a hole for the fluid to flow through in both the fitting body and the piece that pivots around it, for each of the front brakes. My question is do these 2 holes have to line up? My guess is they don't, but just wanted to double check before I install this beast....I really don't want to do this twice. I hope I have explained this accurately,...I'm just referring to the front brake splitter for lack of a better term, ...not the feed lines to the reservoir. I do realize that I need a washer below the rubber grommets where the feed lines go. Thanks for your help. 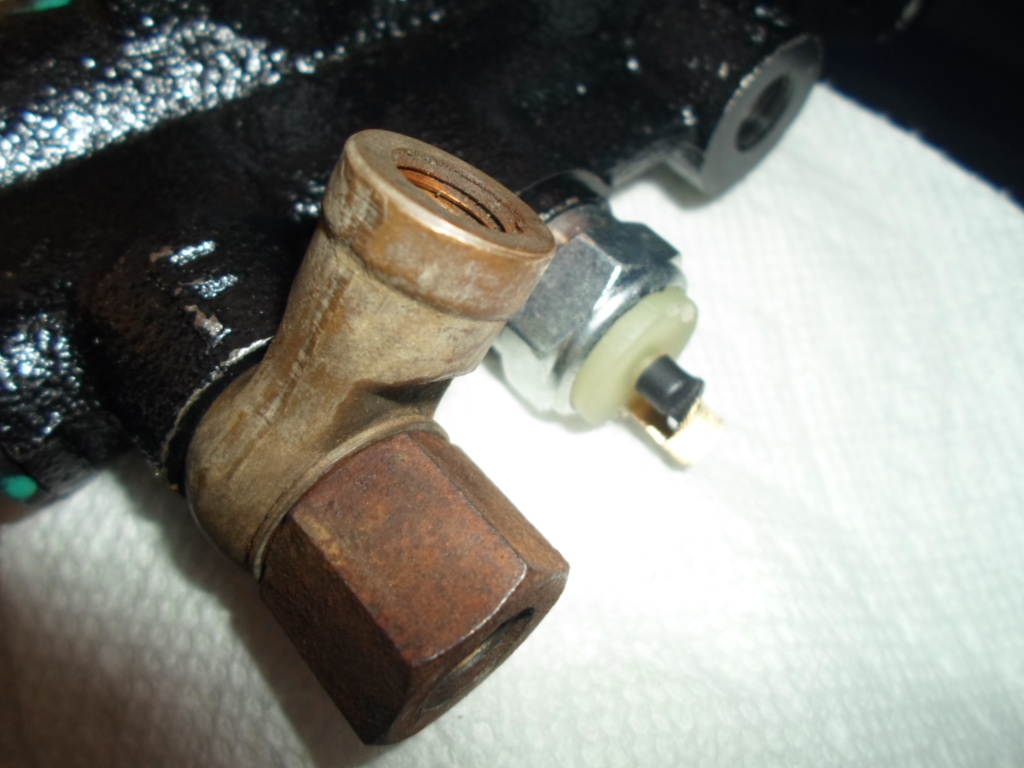 |
   |

 
|
| mankowski |
Sep 18 2020, 04:36 PM
Post
#2
|
|
Member Group: Members Posts: 128 Joined: 7-February 10 From: Portland, Oregon Member No.: 11,335 Region Association: Pacific Northwest |
I don't think the MC's come new with those fittings, so it may be typical to have to transfer these to the replacement. I've only replaced mine once, so hopefully others will weigh in, but I do not recall there being any alignment to do of the fitting. Not sure at all about the washer...sorry.
|
|
|
|
| mepstein |
Sep 18 2020, 06:08 PM
Post
#3
|
|
914-6 GT in waiting Group: Members Posts: 19,593 Joined: 19-September 09 From: Landenberg, PA/Wilmington, DE Member No.: 10,825 Region Association: MidAtlantic Region |
|
|
|
|
| Craigers17 |
Sep 18 2020, 06:37 PM
Post
#4
|
|
Senior Member Group: Members Posts: 800 Joined: 5-August 17 From: Rome, GA Member No.: 21,317 Region Association: South East States |
Thanks for the responses. I think I'm over-analyzing the situation, and they don't have to align, but we'll see what Eric says...thanks Mark.
....2 more pics..."exploded view".... 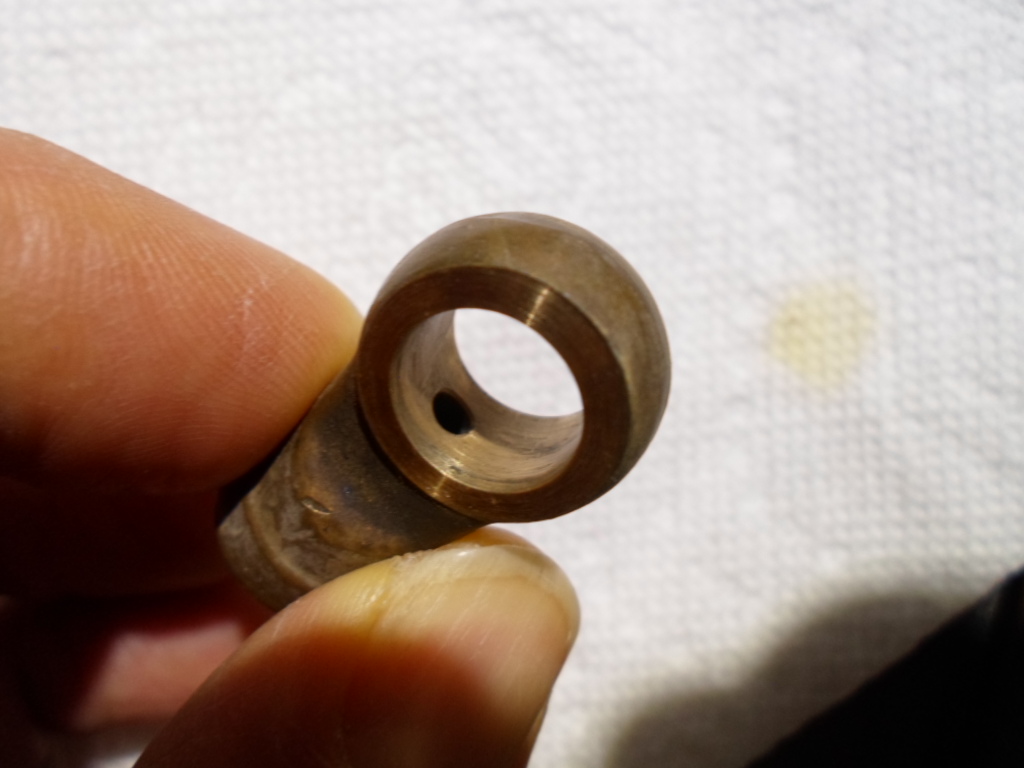 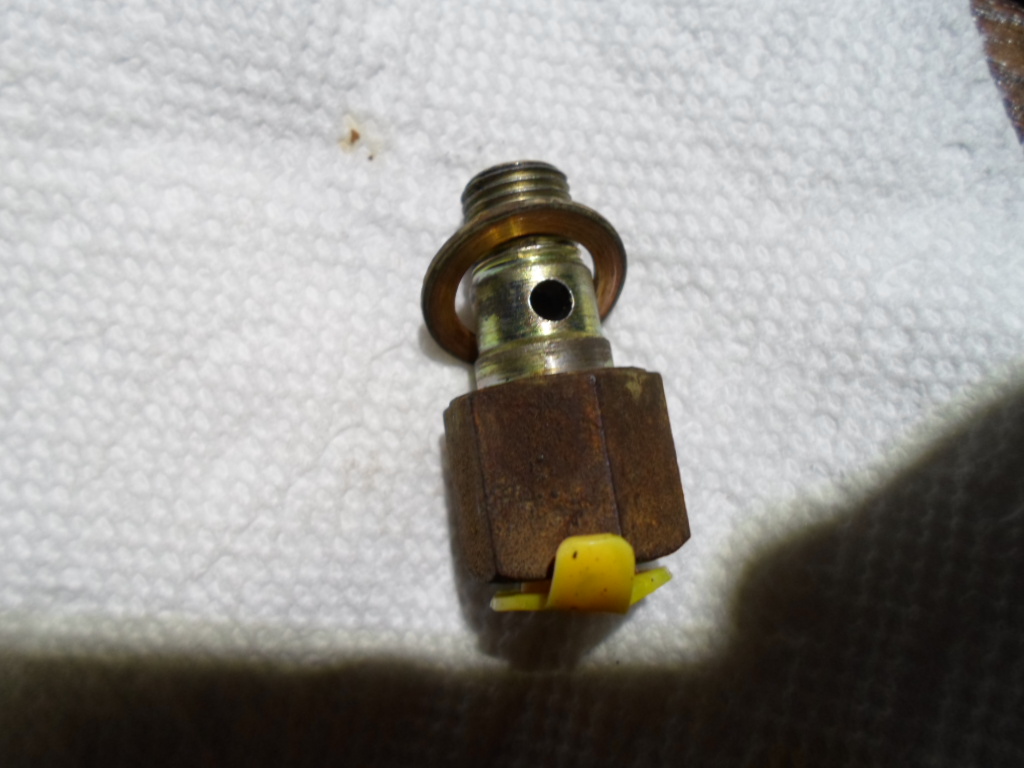 |
|
|
|
| ri914 |
Sep 18 2020, 06:54 PM
Post
#5
|
|
Member Group: Members Posts: 102 Joined: 13-August 20 From: rhode island Member No.: 24,593 Region Association: North East States |
QUOTE(Craigers17 @ Sep 18 2020, 08:37 PM)  Thanks for the responses. I think I'm over-analyzing the situation, and they don't have to align, but we'll see what Eric says...thanks Mark. ....2 more pics..."exploded view".... they do not have to align. I belive that fitting is called a "banjo" fitting. You do need a washer on both sides of the fitting. I always use new fittings each time I disassemble and reassemble. Not sure if you have to, but I remember someone telling me to do that early on. they sell these in kits of 1 or 4 at AutoZone, oreilly and other parts stores. good luck |
|
|
|
| bdstone914 |
Sep 19 2020, 07:30 AM
Post
#6
|
|
bdstone914 Group: Members Posts: 4,709 Joined: 8-November 03 From: Riverside CA Member No.: 1,319 |
Yes you need a crush washer on both sides of the vanjo fitting. The washers are different sizes. One size is NLA from Porsche. I found a replacement in a Wurth selection of crush washers. You can reuse the old ones. If they are copper flatten them in a vise then aneal them by heating to red hot and drop them in water. That softens the metal for a better seal.
No need to align the hole. I later bought a bag of 50 crush washers from McMaster carr. |
 |
|
| ri914 |
Sep 19 2020, 08:06 AM
Post
#7
|
|
Member Group: Members Posts: 102 Joined: 13-August 20 From: rhode island Member No.: 24,593 Region Association: North East States |
QUOTE(bdstone914 @ Sep 19 2020, 09:30 AM) Yes you need a crush washer on both sides of the vanjo fitting. The washers are different sizes. One size is NLA from Porsche. I found a replacement in a Wurth selection of crush washers. You can reuse the old ones. If they are copper flatten them in a vise then aneal them by heating to red hot and drop them in water. That softens the metal for a better seal. No need to align the hole. I later bought a bag of 50 crush washers from McMaster carr. haha I called it a banjo fitting (IMG:style_emoticons/default/smile.gif) |
|
|
|
| Craigers17 |
Sep 19 2020, 08:23 AM
Post
#8
|
|
Senior Member Group: Members Posts: 800 Joined: 5-August 17 From: Rome, GA Member No.: 21,317 Region Association: South East States |
Thanks for the replies and information gentlemen! Very helpful...this is what I needed to know.
....while I do try to consult the manual and Tech tips books first, as well as the search features, sometimes the experience and knowledge of the folks on this forum is invaluable. It is very much appreciated! (IMG:style_emoticons/default/beerchug.gif) |
|
|
|
| stownsen914 |
Sep 19 2020, 01:41 PM
Post
#9
|
|
Senior Member Group: Members Posts: 930 Joined: 3-October 06 From: Ossining, NY Member No.: 6,985 Region Association: None |
As mentioned above, you do need washers on both sides of the banjo fitting. I prefer to use new ones since they do deform. They should be standard sizes in case they're NLA or expensive from Porsche.
|
|
|
|
| IronHillRestorations |
Sep 19 2020, 07:00 PM
Post
#10
|
|
I. I. R. C. Group: Members Posts: 6,776 Joined: 18-March 03 From: West TN Member No.: 439 Region Association: None |
Yes you need a copper sealing ring on both sides of the banjo fitting, no crush washers (they’re for the drain plug).
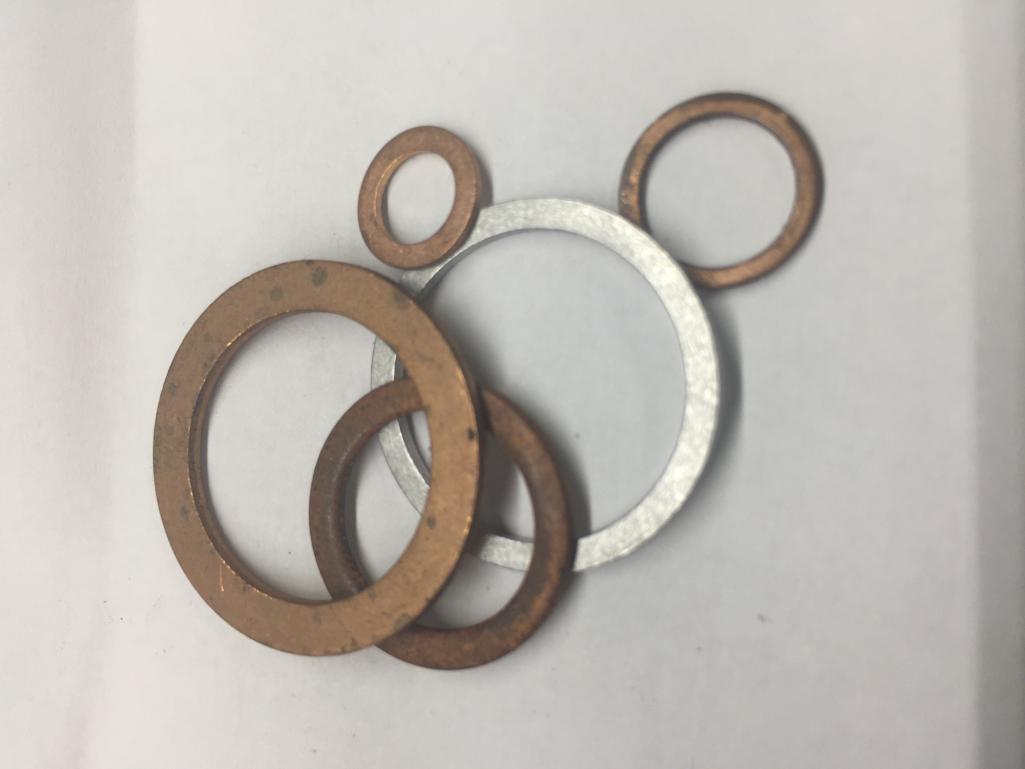 These are sealing rings, they’re solid copper (or aluminum for other applications), and what you need for sealing higher pressure banjo fittings, and do not or should not noticeably deform.  These are crush washers and are for things like the oil drain plug, or oil sump nut. They are designed to compress to aid sealing, but should not be used for brake fittings |
|
|
|
| bdstone914 |
Sep 20 2020, 08:14 AM
Post
#11
|
|
bdstone914 Group: Members Posts: 4,709 Joined: 8-November 03 From: Riverside CA Member No.: 1,319 |
@IronHillRestorations
date='Sep 19 2020, 06:00 PM' post='2852581'] Yes you need a copper sealing ring on both sides of the banjo fitting, no crush washers (they’re for the drain plug). These are sealing rings, they’re solid copper (or aluminum for other applications), and what you need for sealing higher pressure banjo fittings, and do not or should not noticeably deform. These are crush washers and are for things like the oil drain plug, or oil sump nut. They are designed to compress to aid sealing, but should not be used for brake fittings [/quote] Perry, Thanks for the correction. I miss spoke when i call them crush washers. Do you prefer copper or aluminum sealing washers? My thought is that aluminum is softer but can cause corrosion when against a steel surface. I like to aneal the copper washers to soften them. |
|
|
|
| IronHillRestorations |
Sep 20 2020, 09:32 AM
Post
#12
|
|
I. I. R. C. Group: Members Posts: 6,776 Joined: 18-March 03 From: West TN Member No.: 439 Region Association: None |
The aluminum are for oil line fittings. I’d only use the copper ones for the brake line fittings. I can see some value in anealing the exhaust copper gaskets, but I don’t think it’s necessary for sealing rings
|
|
|
|
| Craigers17 |
Sep 20 2020, 11:21 AM
Post
#13
|
|
Senior Member Group: Members Posts: 800 Joined: 5-August 17 From: Rome, GA Member No.: 21,317 Region Association: South East States |
QUOTE(IronHillRestorations @ Sep 20 2020, 09:32 AM) The aluminum are for oil line fittings. I’d only use the copper ones for the brake line fittings. I can see some value in anealing the exhaust copper gaskets, but I don’t think it’s necessary for sealing rings Perry, Bruce, & Stownsen914, Thanks for the additional info! Embarrassingly enough, I found the second washer under a crusty coat of dirt and rust .... still attached to the old MC. At least now I know exactly what size both washers are. On a crappier note, while trying to wrestle the new M/C onto the reservoir lines, I tore one of the 2 rubber grommets...so I'll need to grab a couple of those before this proceeds any further.....what a pain in the ass this job is. After further reconsideration, I think I'm going to take out the gas tank, and replace the reservoir & the feed lines too. That way I can get these lines fitted into the M/C first, and then feed them up to the reservoir as noted in another post......live and learn..... |
|
|
|
| RichPugh |
Sep 20 2020, 07:55 PM
Post
#14
|
|
Member Group: Members Posts: 132 Joined: 28-October 14 From: Baltimore, MD Member No.: 18,068 Region Association: MidAtlantic Region |
QUOTE I think I'm going to take out the gas tank, and replace the reservoir & the feed lines too. That way I can get these lines fitted into the M/C first, and then feed them up to the reservoir as noted in another post......live and learn..... Thats the move. I have my tank out currently to get the fresh air blower motor fan working (sucessfully did that today) and next is to tackle replacing the stock MC w/ a 19mm. working under the car trying to fit the MC to the hoses, SUCKS. |
|
|
|
| VaccaRabite |
Sep 21 2020, 01:05 PM
Post
#15
|
|
En Garde! Group: Admin Posts: 13,589 Joined: 15-December 03 From: Dallastown, PA Member No.: 1,435 Region Association: MidAtlantic Region |
QUOTE(RichPugh @ Sep 20 2020, 09:55 PM) QUOTE I think I'm going to take out the gas tank, and replace the reservoir & the feed lines too. That way I can get these lines fitted into the M/C first, and then feed them up to the reservoir as noted in another post......live and learn..... Thats the move. I have my tank out currently to get the fresh air blower motor fan working (sucessfully did that today) and next is to tackle replacing the stock MC w/ a 19mm. working under the car trying to fit the MC to the hoses, SUCKS. I wish I had thought of that when I did it. Thats a tough, sucky and blind job while laying under a 914. I did get better at it though as I had to do it a few times (3 times - replacing the old MC, the first replacement MC was DOA, then the second replacement worked as expected). Zach |
|
|
|
| Eric_Shea |
Sep 25 2020, 05:03 PM
Post
#16
|
|
PMB Performance Group: Admin Posts: 19,289 Joined: 3-September 03 From: Salt Lake City, UT Member No.: 1,110 Region Association: Rocky Mountains |
10x16 and 14x16 Copper Gaskets go on the banjo bolts 14x16 under the head and 10x16 under the banjo and on the MC side.
|
|
|
|
| Craigers17 |
Sep 26 2020, 03:27 AM
Post
#17
|
|
Senior Member Group: Members Posts: 800 Joined: 5-August 17 From: Rome, GA Member No.: 21,317 Region Association: South East States |
QUOTE(Eric_Shea @ Sep 25 2020, 05:03 PM) 10x16 and 14x16 Copper Gaskets go on the banjo bolts 14x16 under the head and 10x16 under the banjo and on the MC side. Thanks Eric. I should receive your reservoir line kit in a day or so, and then hopefully get all these components re-installed. |
|
|
|
| MartyYeoman |
Sep 26 2020, 07:48 PM
Post
#18
|
|
Senior Member Group: Members Posts: 1,526 Joined: 19-June 03 From: San Ramon, CA Member No.: 839 Region Association: Northern California |
The best way I've found to install the two reservoir lines is with the fuel tank out. If you have enough length on the fuel lines under the tank you won't need to totally remove the tank. Just uncouple and lift away the end near the reservoir. After doing this job both ways, I'm almost positive the factory had the tank out of the way during their install. Getting to the two grommets is easier too.
|
|
|
|
| Craigers17 |
Sep 27 2020, 04:22 AM
Post
#19
|
|
Senior Member Group: Members Posts: 800 Joined: 5-August 17 From: Rome, GA Member No.: 21,317 Region Association: South East States |
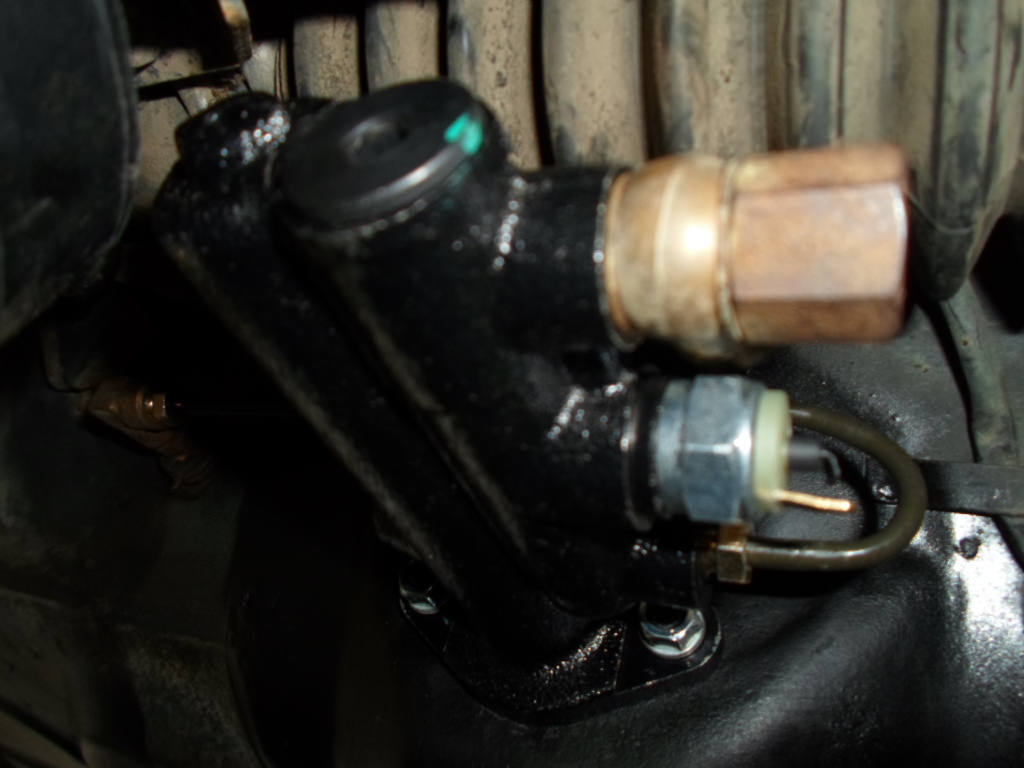
QUOTE(MartyYeoman @ Sep 26 2020, 07:48 PM) The best way I've found to install the two reservoir lines is with the fuel tank out. If you have enough length on the fuel lines under the tank you won't need to totally remove the tank. Just uncouple and lift away the end near the reservoir. After doing this job both ways, I'm almost positive the factory had the tank out of the way during their install. Getting to the two grommets is easier too. Thanks Marty, ...that's exactly what I did yesterday, although I went ahead and took the reservoir lines completely out and installed them into the M/C on the bench. Since this is the first time doing this, at least I was able to get a "feel" for how everything seats properly. In a moment of brilliance, I filled the gas tank up right before I started this "brake job", so that did give me the pleasure of siphoning out about 14 gallons of gas just to make the partial removal a bit easier. After having done this on the bench, my hat goes off to all of you have successfully completed the task while under the car! Anyhow, I included a few pics, including what appears to be some mouse or other critter's snacks and waste under the tank. I should be able to get this whole thing reassembled today(m/c, pedal cluster, accelerator cable, clutch cable, etc), and the calipers hopefully next weekend. Pics of snacks...and yes, I know, I should pull the tank out completely, clean & refresh, including steering rack, turbo tie rods, etc. Those will be projects for another day. Right now I've already gone down one too many rabbit holes... I need to get this thing running and roadworthy again. I feel as if I'm getting precariously close to the "ran when parked" status. While alot of this stuff is trivial to most of you, for a man of my modest mechanical talents, I currently have too many items in the "open" category that I feel I need to button up. 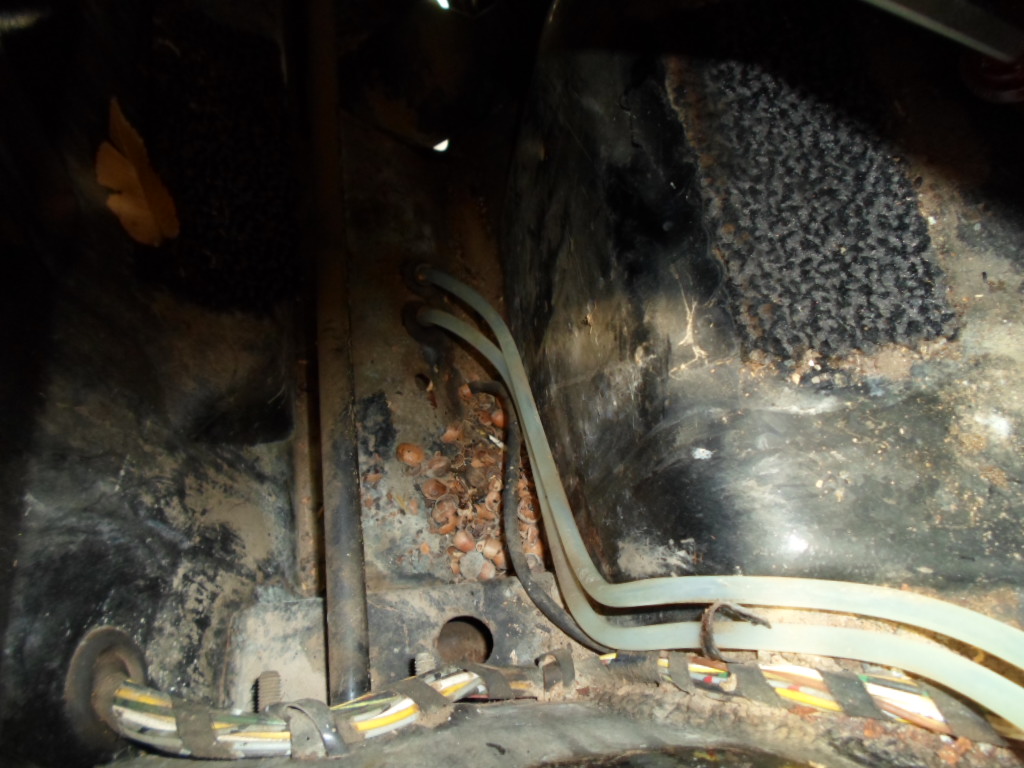 ....another under tank pic w/ massive screwdriver supporting the tank..... 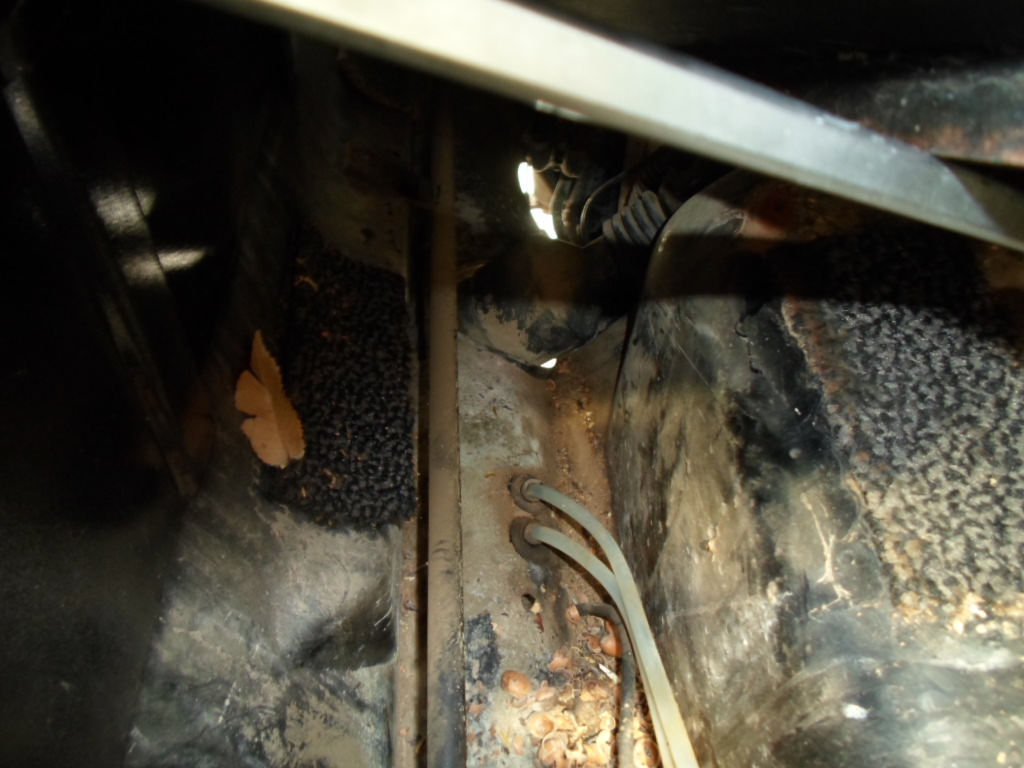 ....new m/c with reservoir lines, grommets, and washers installed .... hopefully there will be no issues in feeding this apparatus back up through from under the car.... 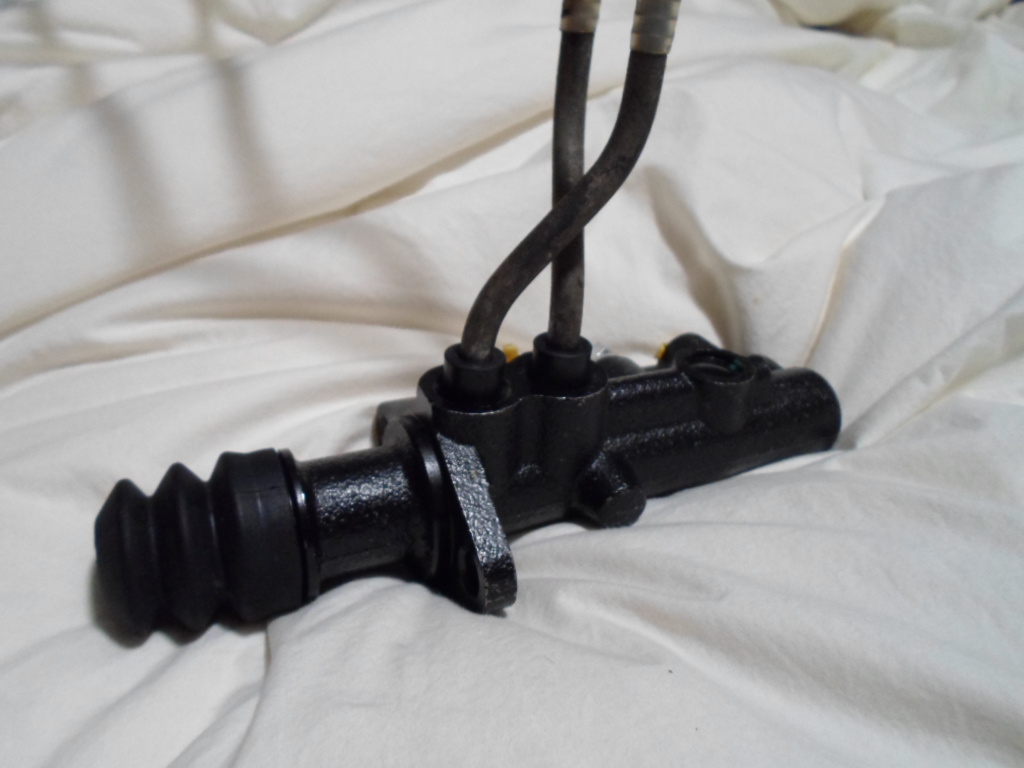 ...will post more pics later.... |
|
|
|
| Craigers17 |
Sep 27 2020, 12:19 PM
Post
#20
|
|
Senior Member Group: Members Posts: 800 Joined: 5-August 17 From: Rome, GA Member No.: 21,317 Region Association: South East States |
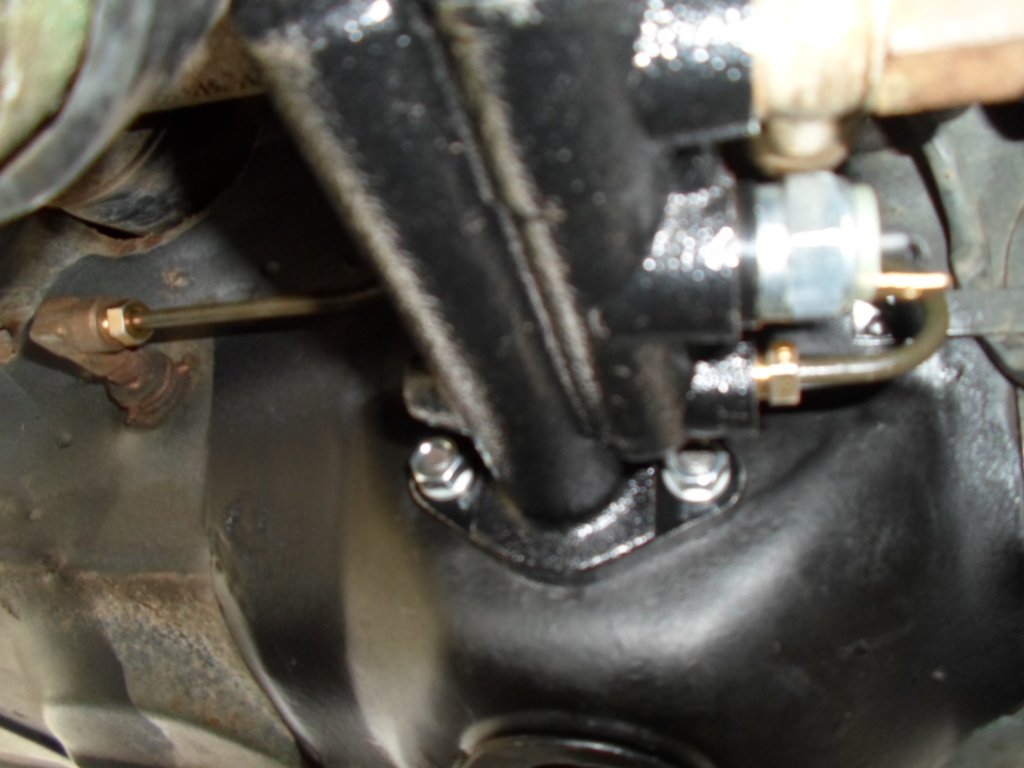
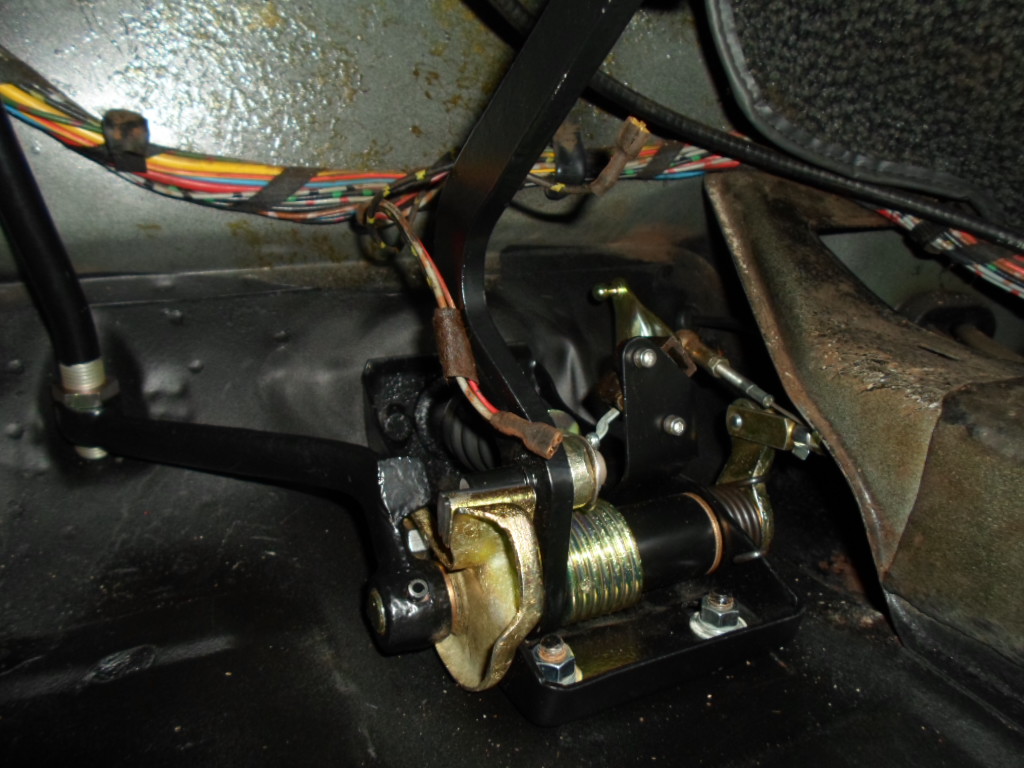
Got the m/c and pedal cluster installed. I still have a few odds and ends to add like the accelerator pedal, but I HOPE the hard part is done. As soon as I sand/paint the clips that hold in the soft lines, I'll finish the line and caliper installation and bleed the system out.
   |
|
|
|
|
1 User(s) are reading this topic (1 Guests and 0 Anonymous Users)
0 Members:

|
Lo-Fi Version | Time is now: 23rd November 2024 - 07:52 PM |
Invision Power Board
v9.1.4 © 2024 IPS, Inc.