|
|

|
Porsche, and the Porsche crest are registered trademarks of Dr. Ing. h.c. F. Porsche AG.
This site is not affiliated with Porsche in any way. Its only purpose is to provide an online forum for car enthusiasts. All other trademarks are property of their respective owners. |
|
|
  |
| Montreal914 |
 Aug 10 2023, 01:34 PM Aug 10 2023, 01:34 PM
Post
#141
|
|
Senior Member    Group: Members Posts: 1,700 Joined: 8-August 10 From: Claremont, CA Member No.: 12,023 Region Association: Southern California 
|
Super nice job you're doing. Great fit-up on those panels. (IMG:style_emoticons/default/wub.gif) (IMG:style_emoticons/default/pray.gif) Thank you! Coming from you (IMG:style_emoticons/default/pray.gif) I appreciate the compliment. The file is one of my preferred tool… (IMG:style_emoticons/default/smile.gif) |
| TRS63 |
 Aug 11 2023, 06:21 AM Aug 11 2023, 06:21 AM
Post
#142
|
|
Member   Group: Members Posts: 324 Joined: 14-September 20 From: Germany - Stuttgart Member No.: 24,690 Region Association: Europe 
|
Taking time to get the perfect fit is key to quality work. Well done (IMG:style_emoticons/default/aktion035.gif)
Antoine |
| tygaboy |
 Aug 11 2023, 07:12 AM Aug 11 2023, 07:12 AM
Post
#143
|
|
914 Guru      Group: Members Posts: 5,451 Joined: 6-October 15 From: Petaluma, CA Member No.: 19,241 Region Association: Northern California 
|
Prior to welding new sections in place, have you been double checking the alignment of your pickup points? Looking at your jig, it appears somewhat light gauge. A quick double check will let you know all is good before new metal is secured in place. You don't have to ask why ........... Although it looks like I am ready to weld this in, I am not there yet. Yes I will measure everything and also temporarily reinstall the fender to check door gap. Each little step is at slow pace where subsequent steps planning are part of every move. Think think think, act, trying to minimize the “ah darn” moments. @TRS63 Antoine is far more concise but if I may: HEY EVERYONE! The above bolded words are what make the ALL difference between an OK job (or worse) and the quality result @Montreal914 is achieving. Ask me how I know! Sooooo many times I've wanted to make progress and had a "that's going to be fine, it's close enough" attitude, only to complete a step and be disappointed in what I'd just done. Then I was left building off of what wasn't as good as I'd hoped. So I want to give a big (IMG:style_emoticons/default/smilie_pokal.gif) to @Montreal914 for making this point. It's the one thing that makes the biggest difference for me. If I don't take the time to fit the material properly, I won't get the result I want. If I can't get into a (reasonably) relaxed, comfortable position, the weld isn't going to be as good. People poke at me for doing things over and over again and this is one reason why I was doing that: my process wasn't working. I just redid (!) the rear panel on my LS car and was sending in-process pics to @buddyv Robert. He commented about how fast I was able to crank out the project. It was because I spent a lot of up-front time thinking, planing, wondering, checking. He saw the execution, not the "pre-work". In the past I'd have just gone for it. Fun maybe, but not effective. That said, I have a LOT left to learn - and always will. But I'm telling you, our friend here has nailed what I've come to believe are THE most important skills: patience and planning. Great job and thanks for calling out your model for success! OK, rant over. Back into the shop! |
| Montreal914 |
 Aug 11 2023, 10:23 AM Aug 11 2023, 10:23 AM
Post
#144
|
|
Senior Member    Group: Members Posts: 1,700 Joined: 8-August 10 From: Claremont, CA Member No.: 12,023 Region Association: Southern California 
|
@tygaboy WOW! (IMG:style_emoticons/default/wub.gif)
I guess I have self set my bar high now... (IMG:style_emoticons/default/unsure.gif) I will have to keep it up because the pros are watching and will give me bad review if I don't... (IMG:style_emoticons/default/laugh.gif) (IMG:style_emoticons/default/blink.gif) But seriously, I wouldn't be able to tackle any of this without the high quality build threads and the detailed information we can find here. (IMG:style_emoticons/default/smilie_pokal.gif) Thank you all for this generous boost, now I am fired up to get busy on the build! (IMG:style_emoticons/default/smash.gif) |
| tygaboy |
 Aug 12 2023, 07:52 AM Aug 12 2023, 07:52 AM
Post
#145
|
|
914 Guru      Group: Members Posts: 5,451 Joined: 6-October 15 From: Petaluma, CA Member No.: 19,241 Region Association: Northern California 
|
@Montreal914 - One last comment about how critical I've found the patience and attitude thing and I'll stop clogging your thread. You may have seen my post about visiting the Singer factory last year:
http://www.914world.com/bbs2/index.php?sho...7&hl=Singer For a more complete summary, read post # 8 but for thouse without patience (IMG:style_emoticons/default/happy11.gif) here's the short version, one I try and live by, about acceptable variance: If Singer is +/- ZERO, going forward at the Red Barn, it's +/- less than yesterday! |
| Montreal914 |
 Jul 13 2024, 12:34 PM Jul 13 2024, 12:34 PM
Post
#146
|
|
Senior Member    Group: Members Posts: 1,700 Joined: 8-August 10 From: Claremont, CA Member No.: 12,023 Region Association: Southern California 
|
Yikes... 11 months later... (IMG:style_emoticons/default/rolleyes.gif)
Well not much done in the last ~year on the tub rust repair but still a few updates. I took a break and focussed on other components finishing, such as many parts plating and powder coating. Shown below is a portion of it. (IMG:style_emoticons/default/smile.gif) 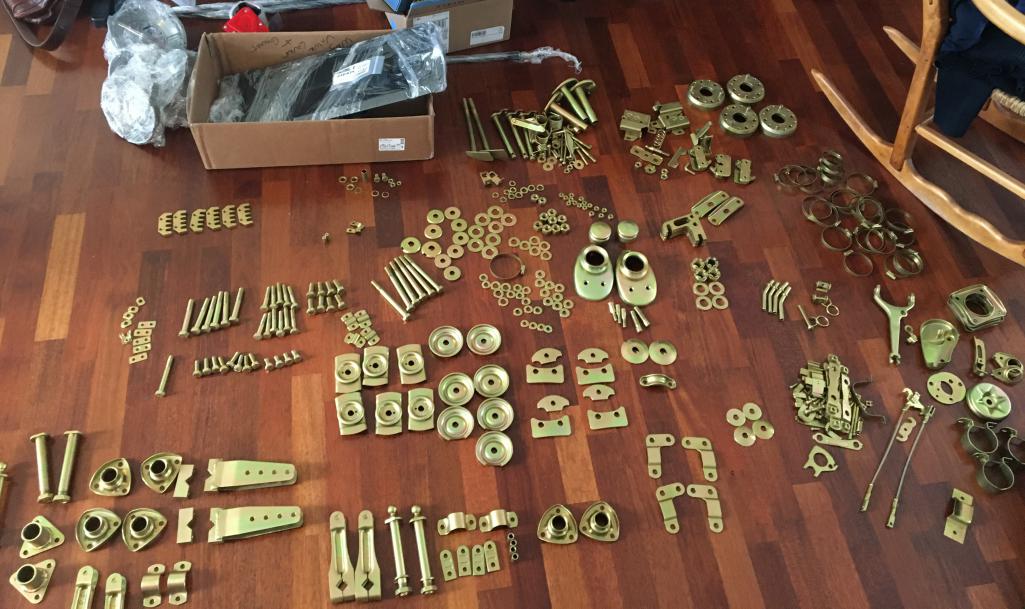 Also rebuilt my pedal cluster with the final help from @bdstone914 . (IMG:style_emoticons/default/smilie_pokal.gif) 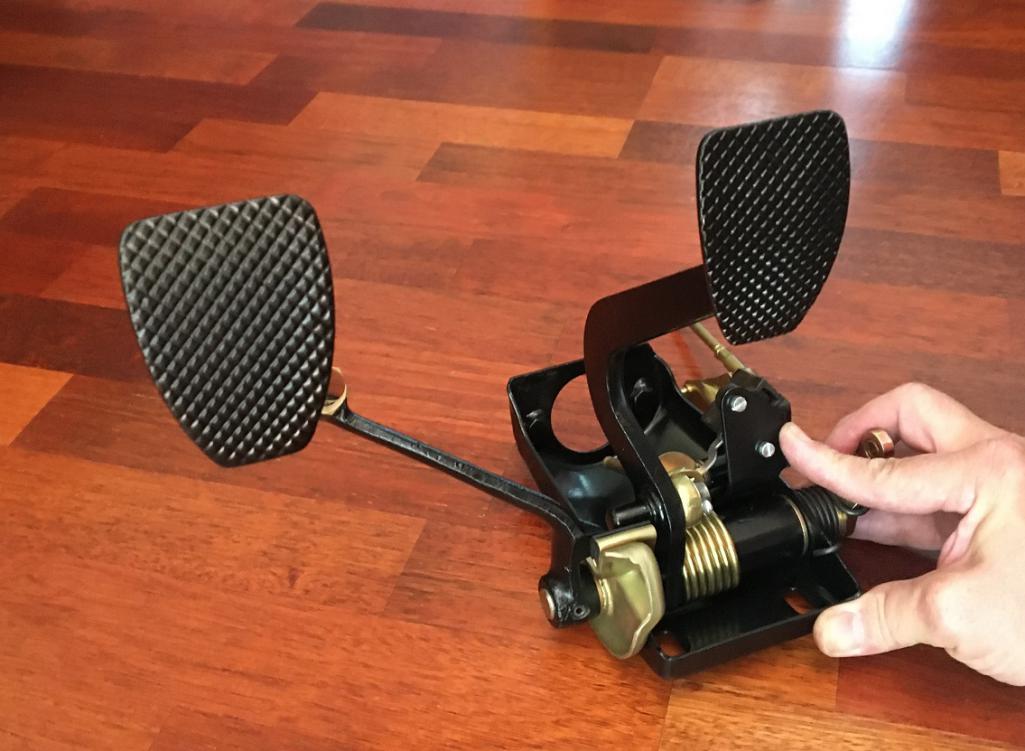 Now, back to the main work, the tub... (IMG:style_emoticons/default/smash.gif) I removed the tar insulation on the cabin floor using the dry ice method. In the past I have used the heat gun and the multi-tool on another 914. I definitely prefrerred the dry ice method for a few reasons. Quick, clean, low noise, cool (great feature when working in a warm environment), efficient, other... (IMG:style_emoticons/default/sunglasses.gif) 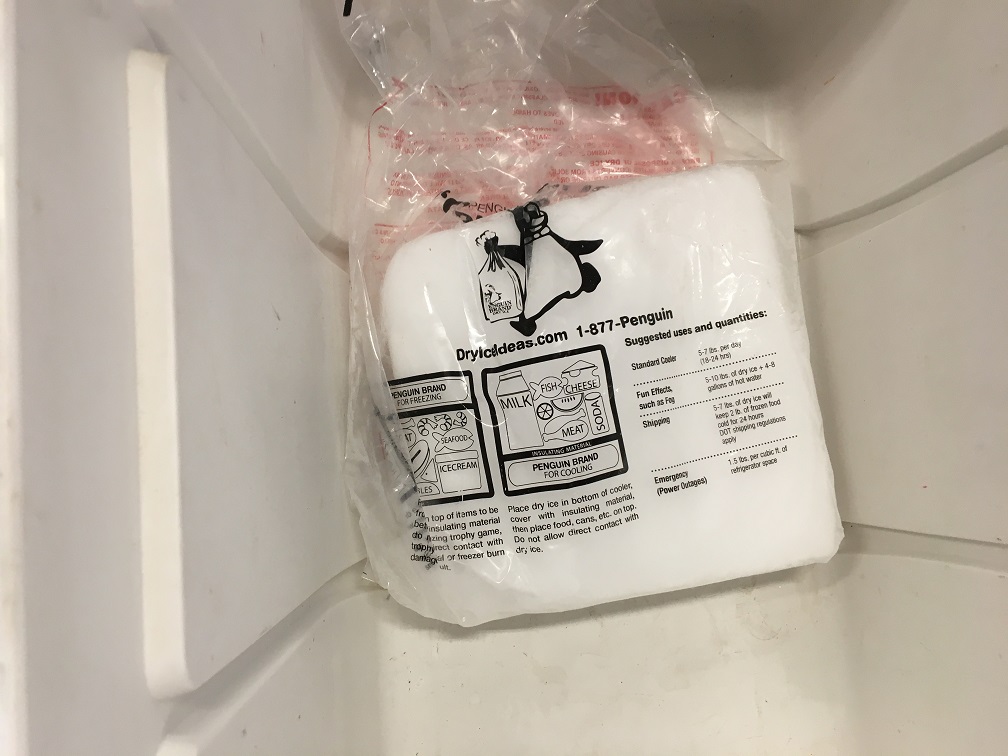 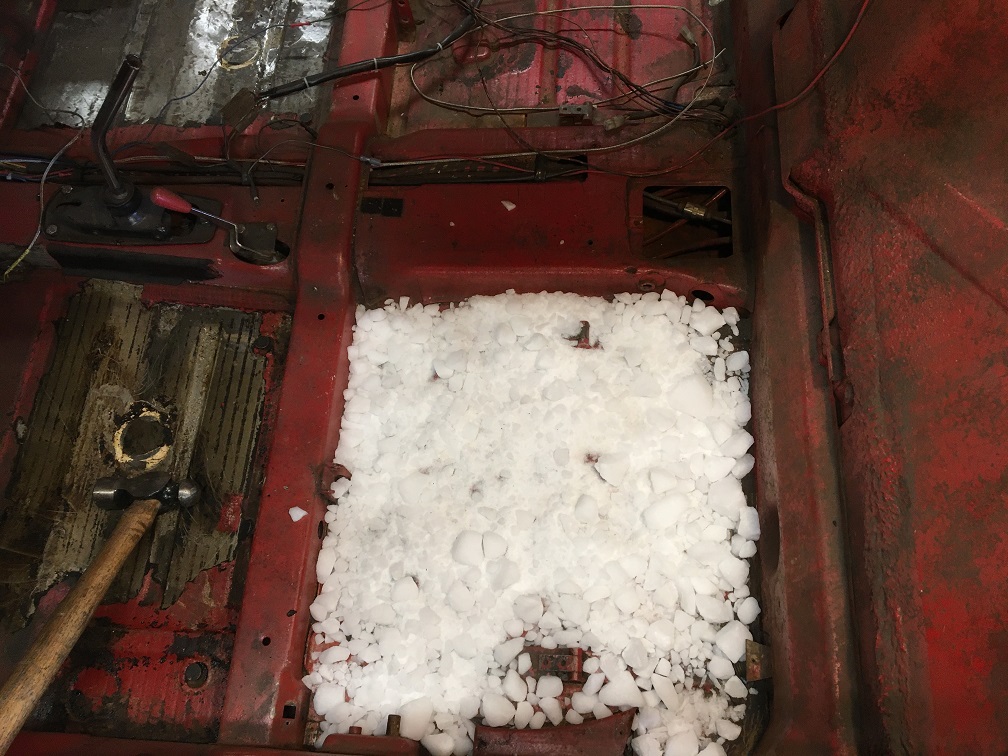 Here you can see the frost on the underside, bringing a very pleasant cool breeze (IMG:style_emoticons/default/biggrin.gif) 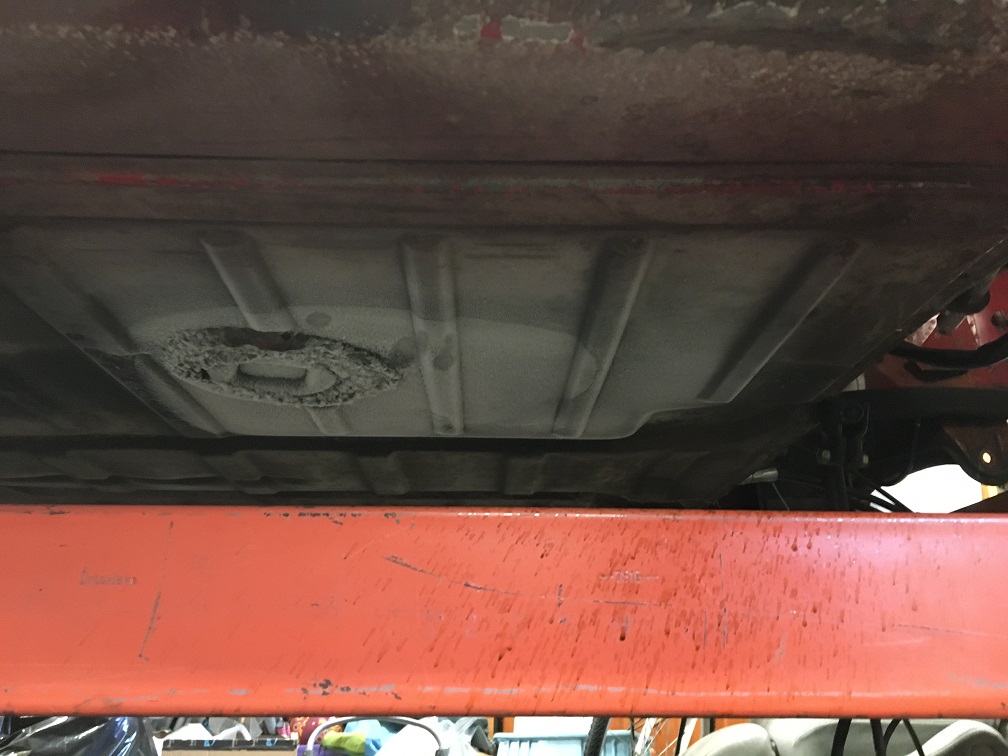 Next I moved on to close these factory access points for welding. These horseshoe cut are normally covered with a round metal disk bonded in seam sealer. This is good for production cost cut, but that doesn't apply here. (IMG:style_emoticons/default/smile.gif) 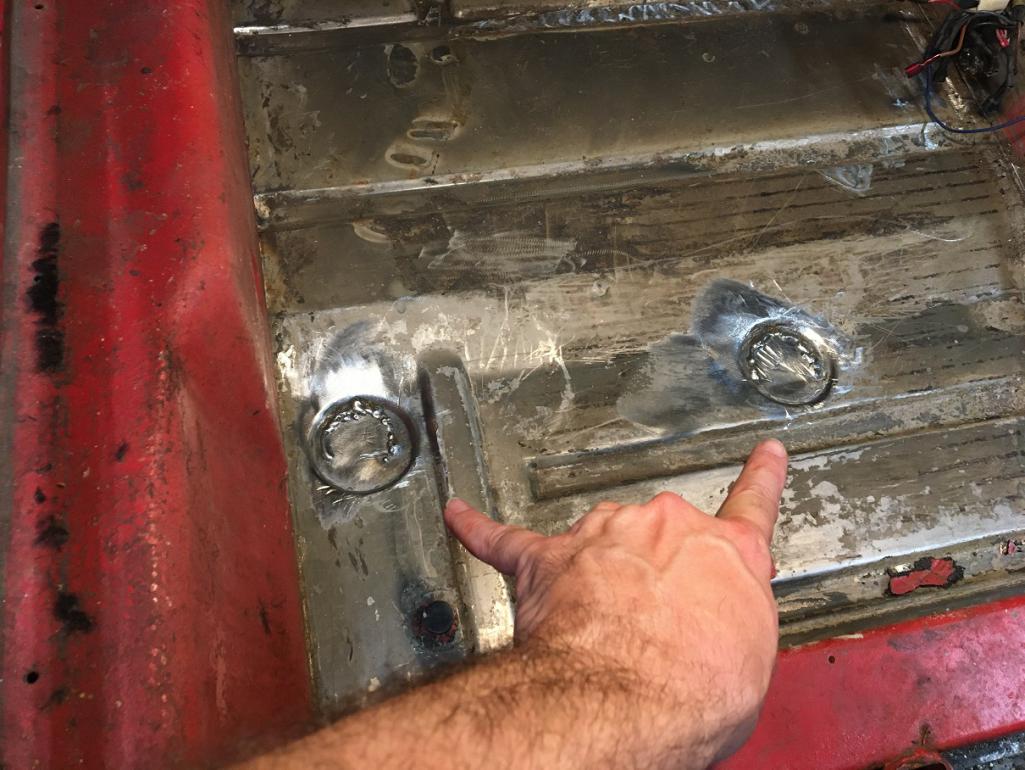 |
| Montreal914 |
 Jul 13 2024, 01:58 PM Jul 13 2024, 01:58 PM
Post
#147
|
|
Senior Member    Group: Members Posts: 1,700 Joined: 8-August 10 From: Claremont, CA Member No.: 12,023 Region Association: Southern California 
|
Continuation for post above...
There are five of these access points in the floor, two on either side symetric in front of the seat cross member and the fifth one just below the MC port hole shown below. That one was showing some rust, so I removed some of it and made a patch. This is a difficult and unpleasant area to work on... (IMG:style_emoticons/default/headbang.gif) 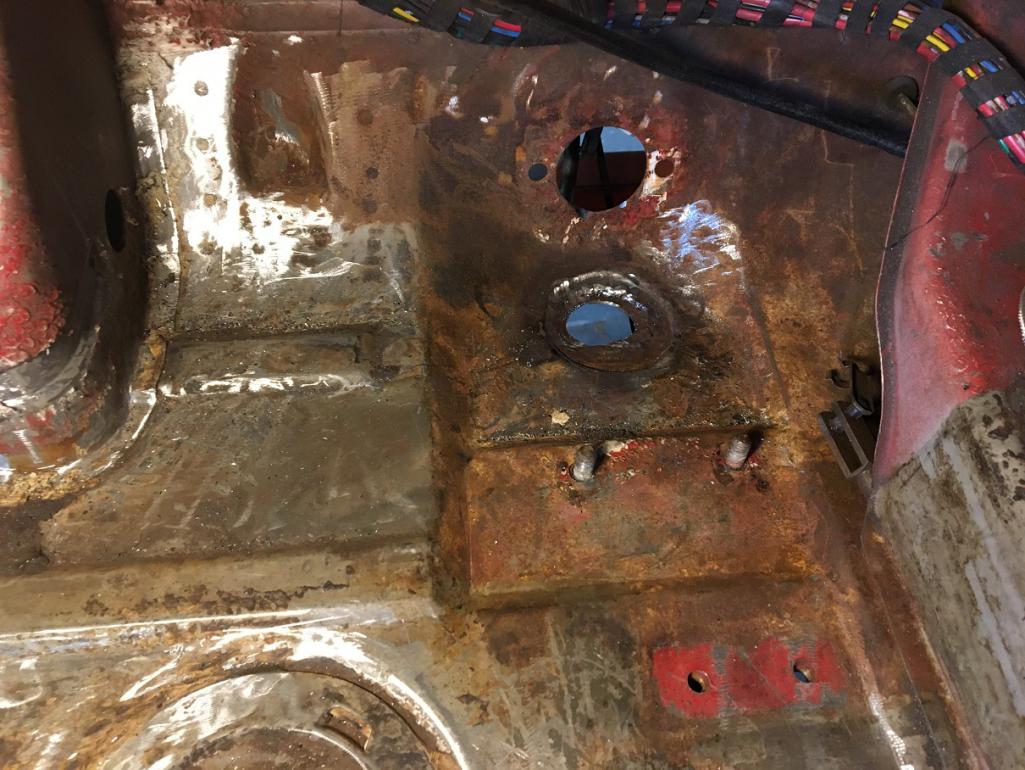 And here is the patch before welding. 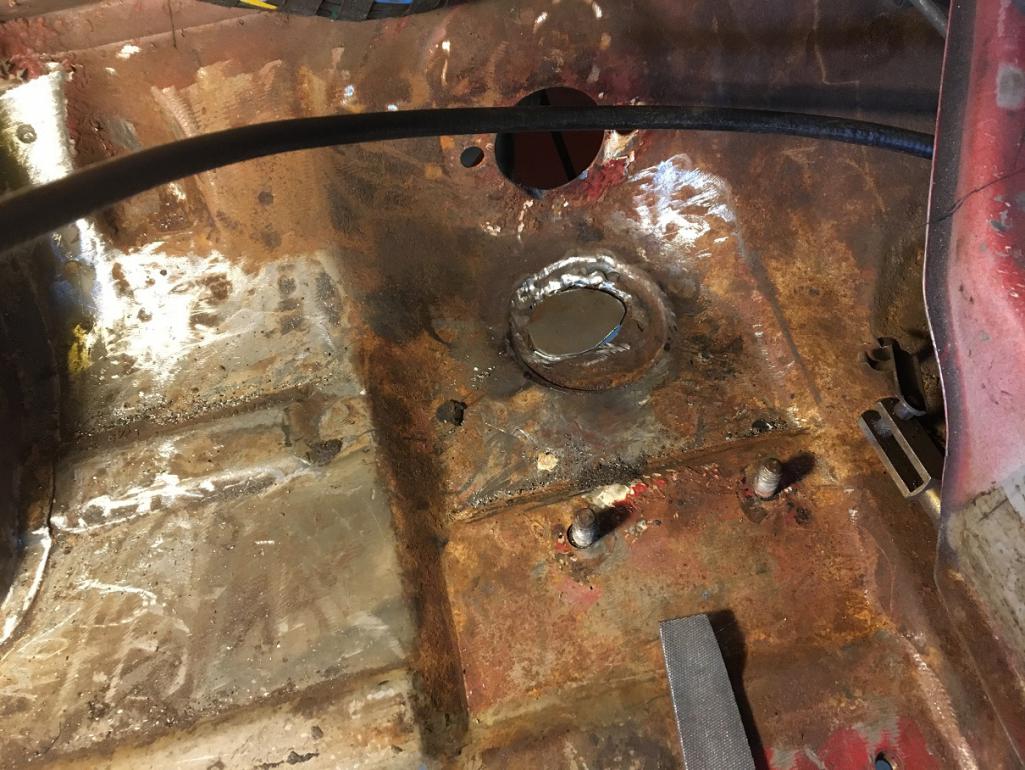 And the final results when everything was massaged with the finger sander (which I really find practical). 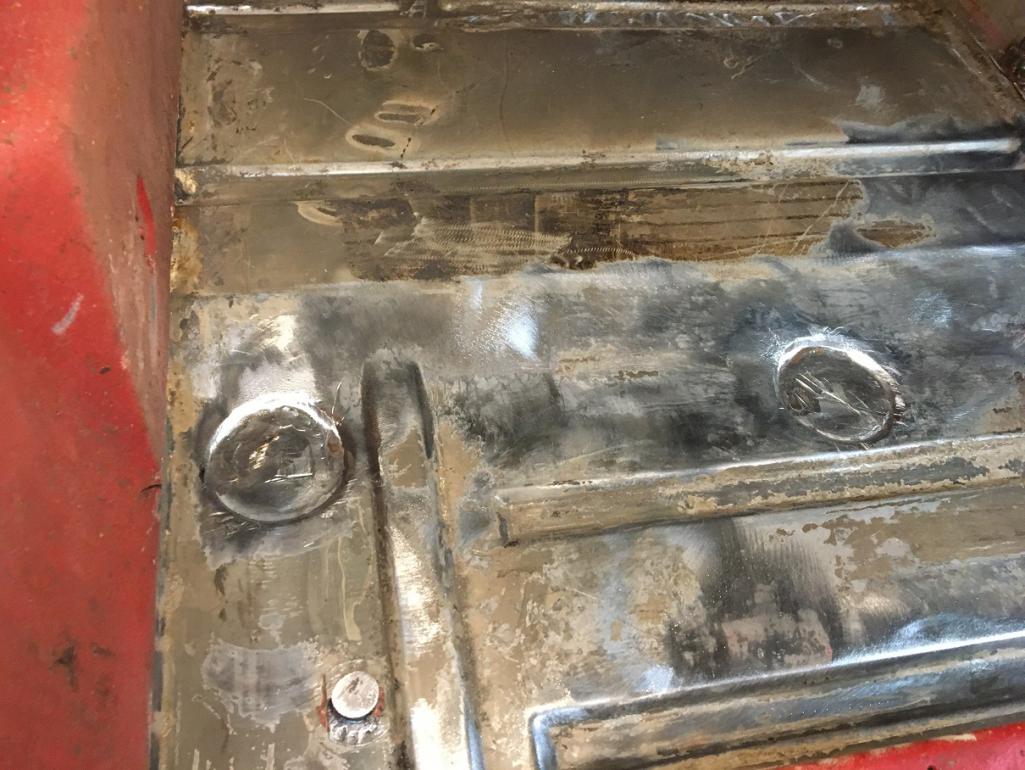 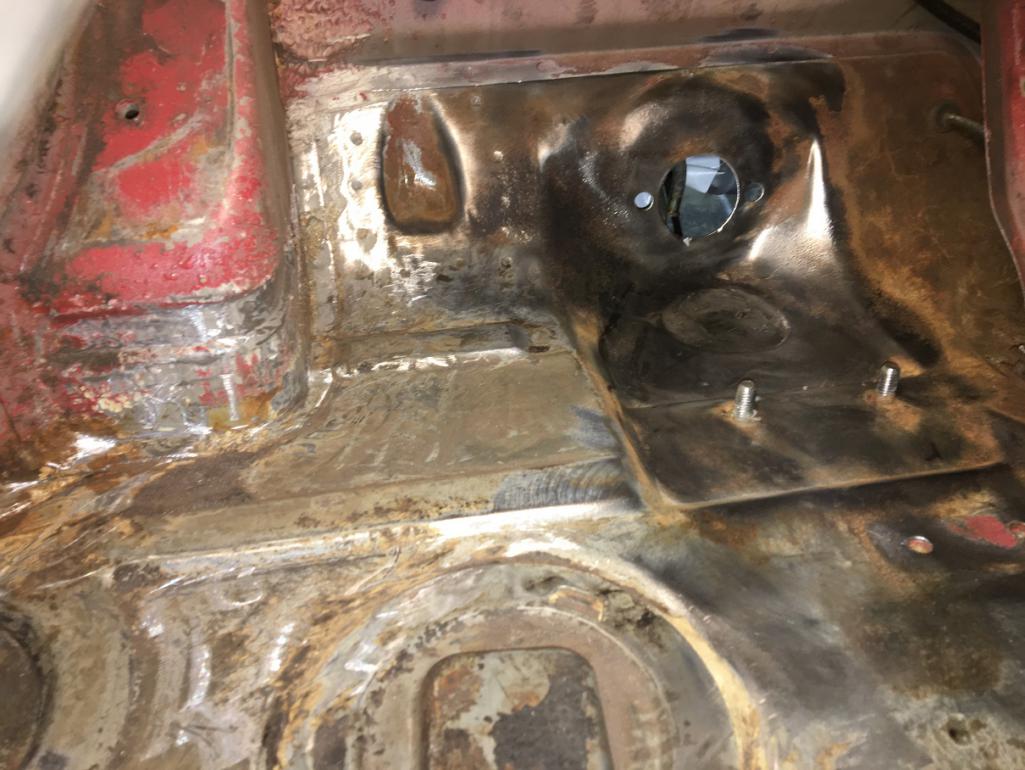 And the overall situation as of now. 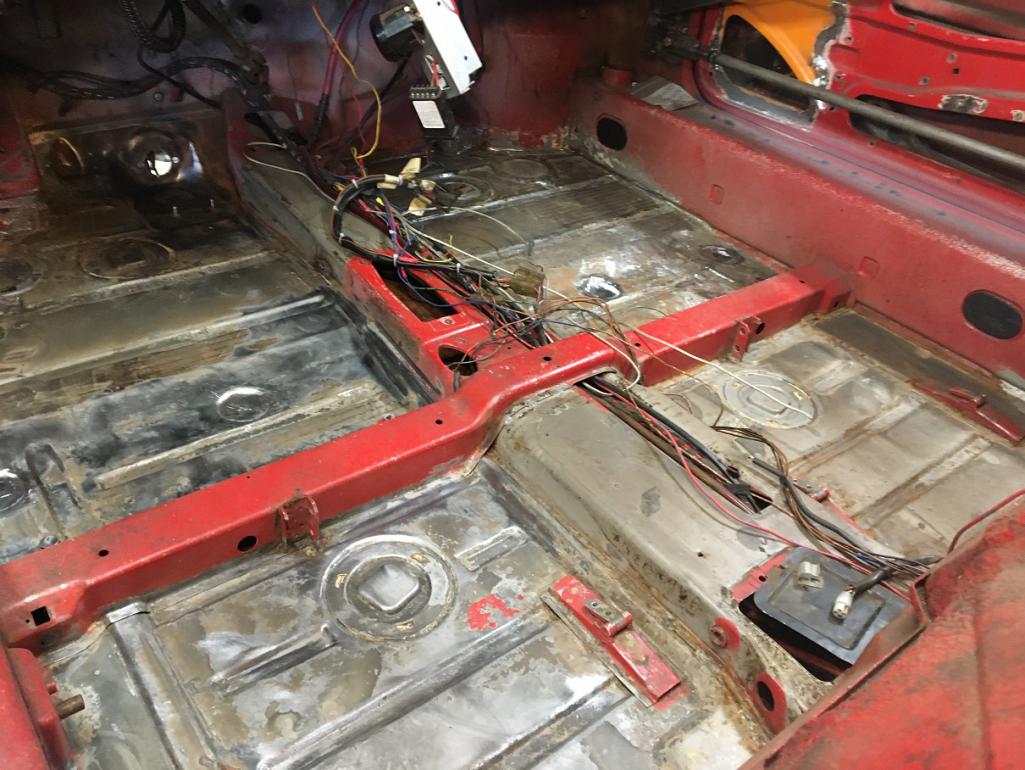 Next, I want to flow some citric acid on the tunnel floor to get rid of this surface rust... (IMG:style_emoticons/default/dry.gif) these two next pictures were taken from the shifer tunnel opening looking towards the front and the back. 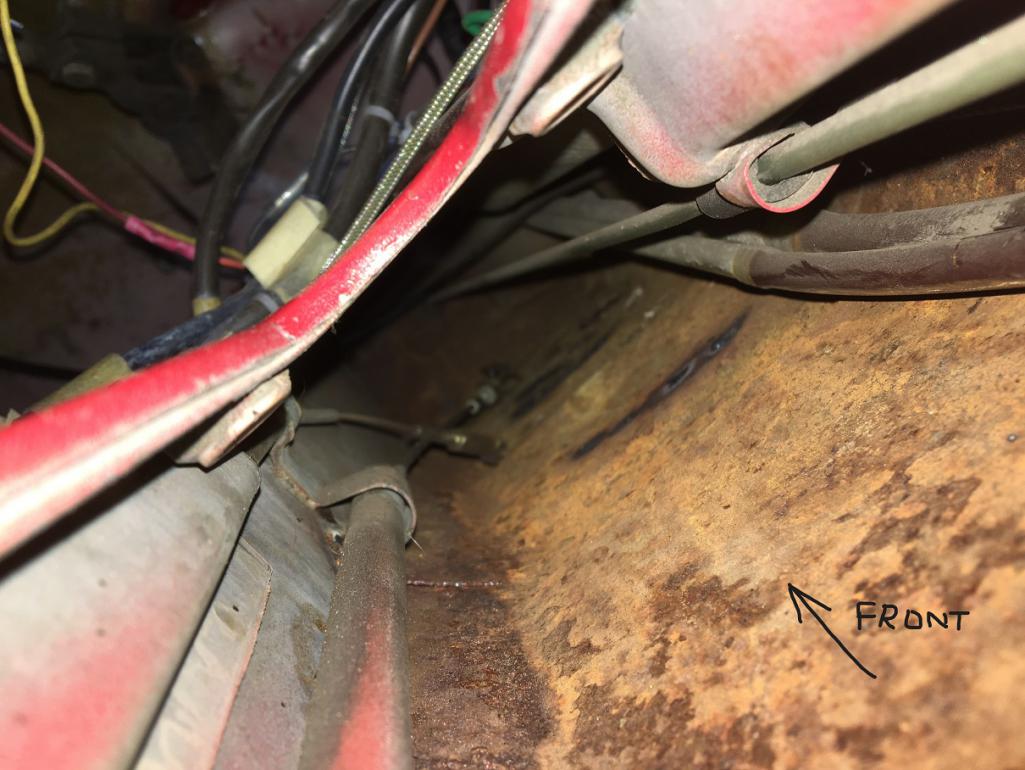 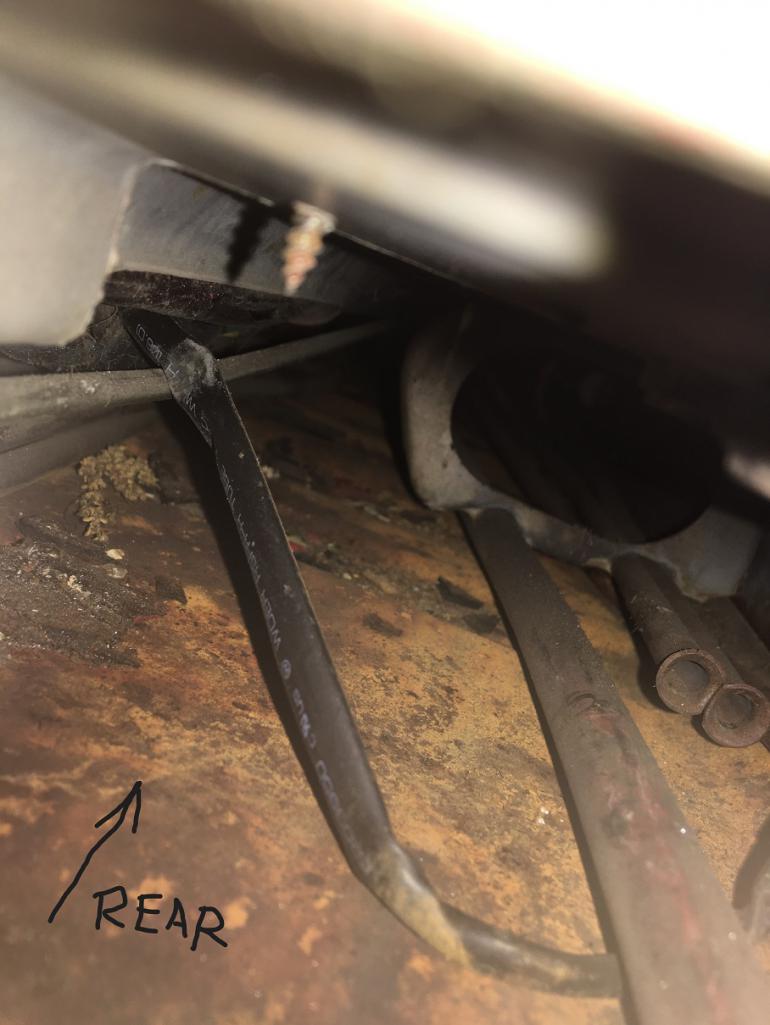 |
| Montreal914 |
 Jul 13 2024, 02:30 PM Jul 13 2024, 02:30 PM
Post
#148
|
|
Senior Member    Group: Members Posts: 1,700 Joined: 8-August 10 From: Claremont, CA Member No.: 12,023 Region Association: Southern California 
|
Next I wanted to remove some of the dents that were created on the underside of the floor over the course of the car's life. Unfortunately, many of our cars have suffered these mis-treatements where they were jacked or supported by the thin sheetmetal at one point.
I used a trick Rick Ollah ( @rick 918-S (IMG:style_emoticons/default/pray.gif) ) showed in one of his post. Starting point (IMG:style_emoticons/default/dry.gif) 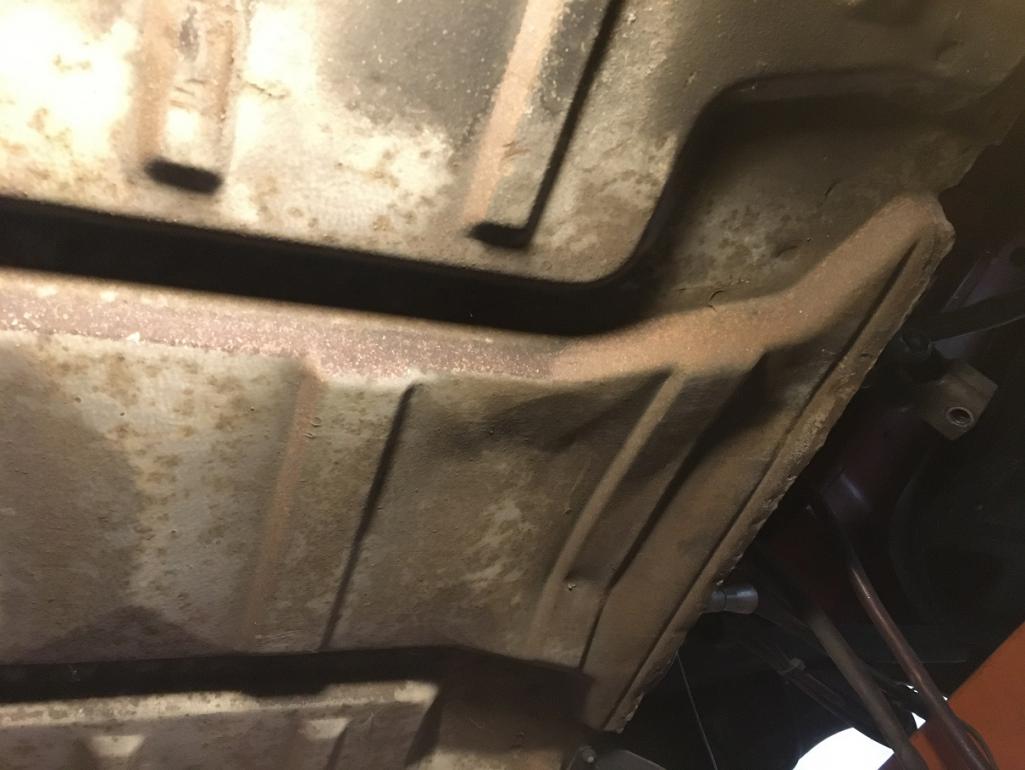 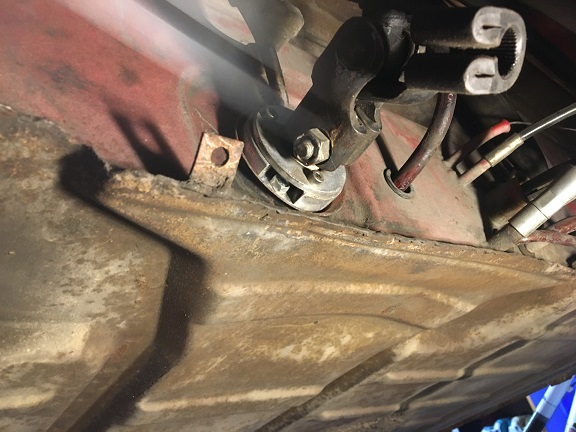 I welded a few 1/4 nuts in key areas. Here you can see the first one welded and the surface prepared for another two. Dang it is not easy to weld upside down... (IMG:style_emoticons/default/dry.gif) But the purpose is temporary so I didn't care of the welds. 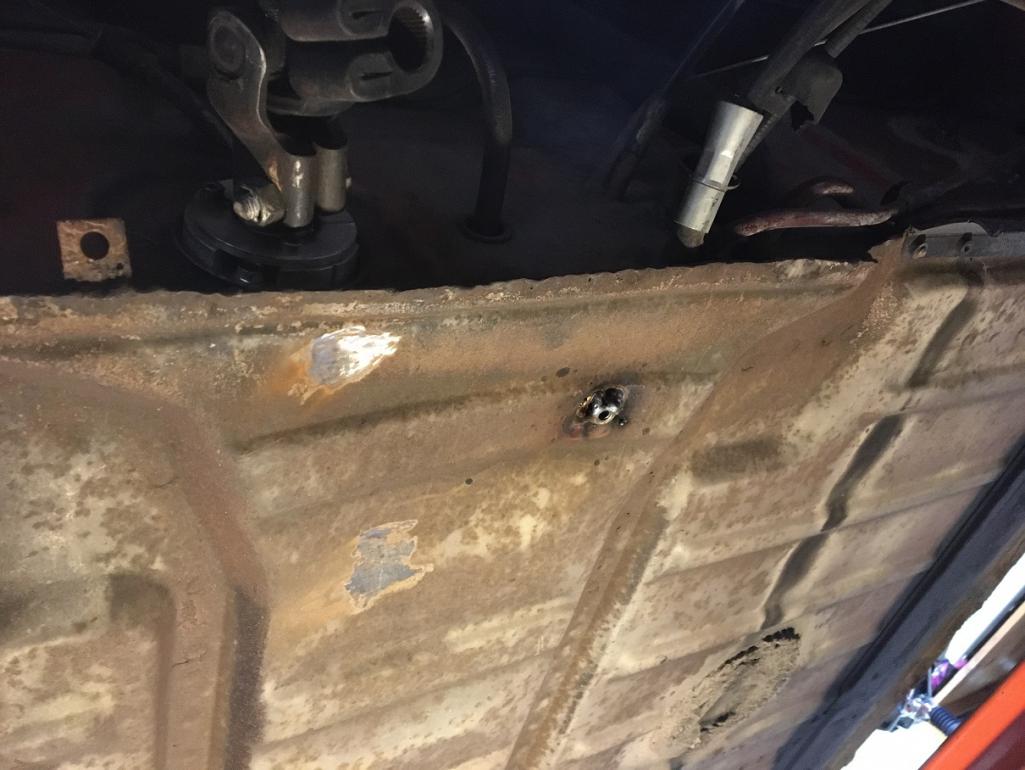 Next is Rick's technique! (IMG:style_emoticons/default/sunglasses.gif) Gently pull the lever and out comes the metal! 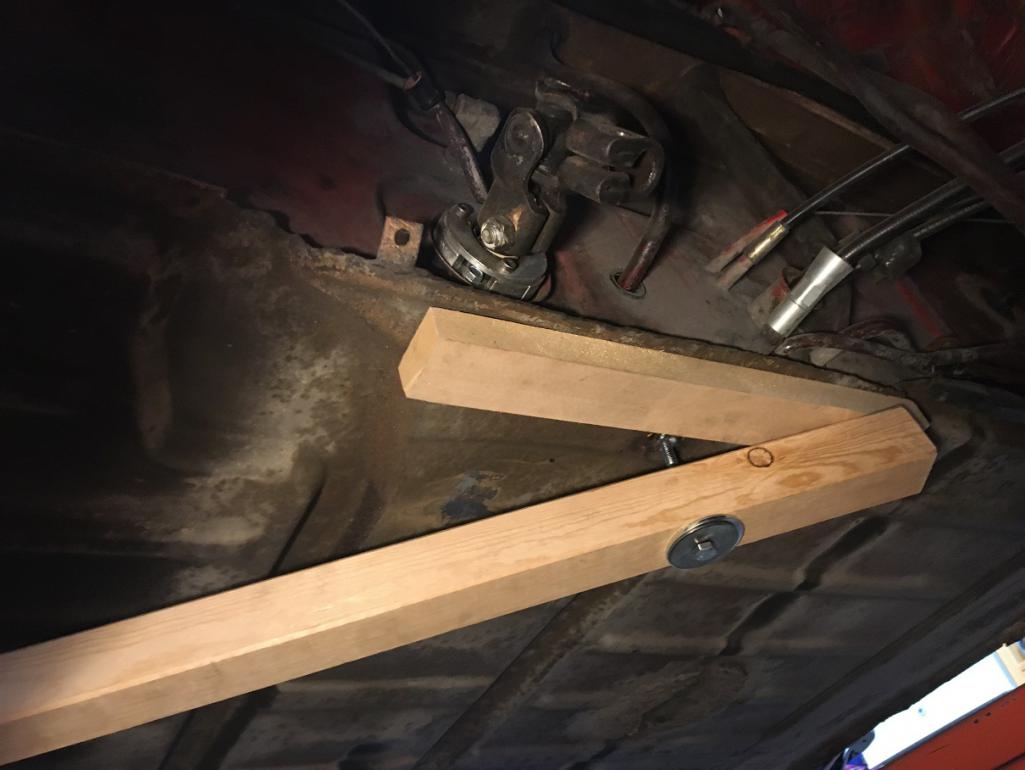 And this is the end result. It is not perfect, but a net improvement compared to what it was. 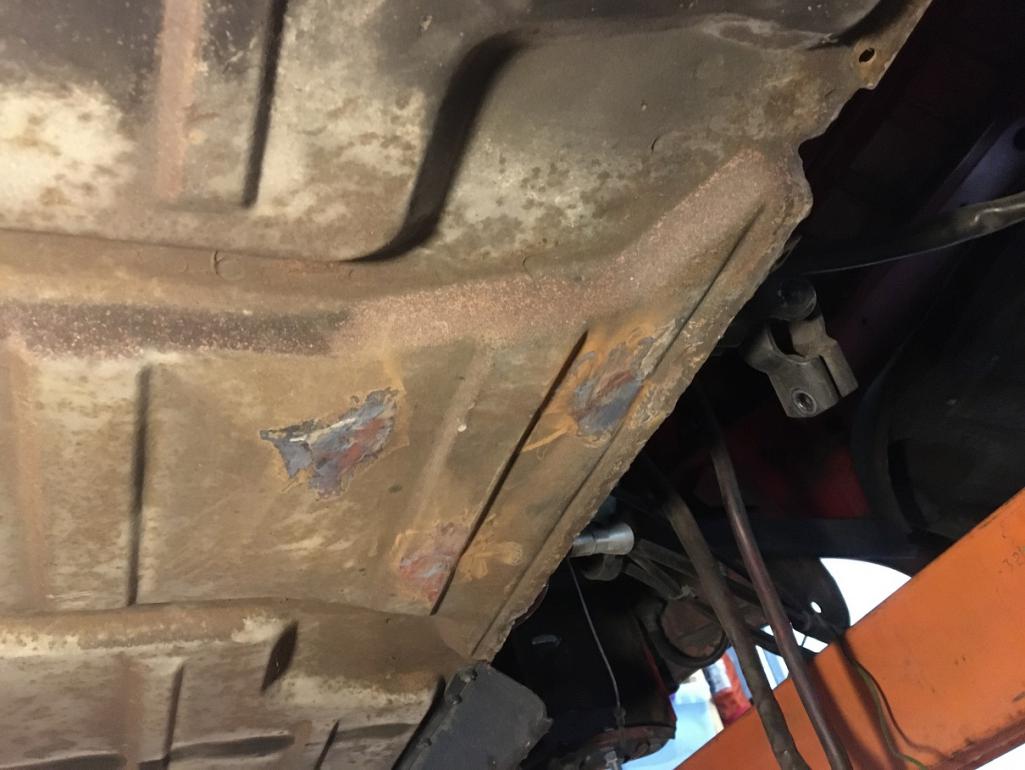 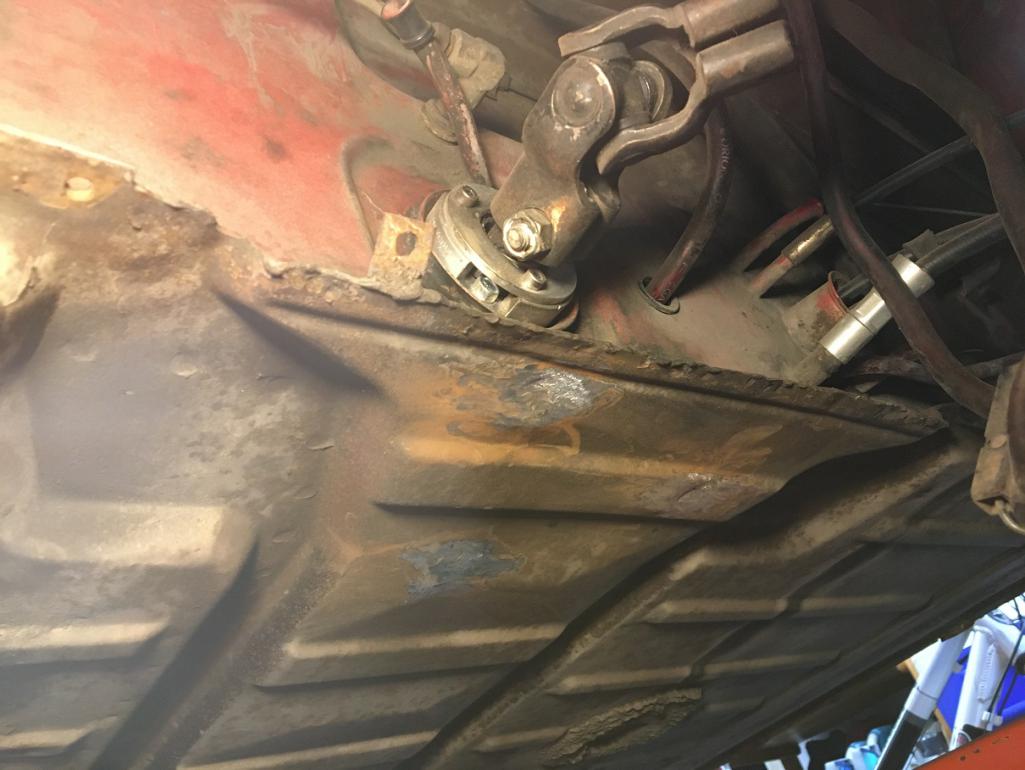 |
| rick 918-S |
 Jul 13 2024, 02:58 PM Jul 13 2024, 02:58 PM
Post
#149
|
|
Hey nice rack! -Celette                Group: Members Posts: 20,783 Joined: 30-December 02 From: Now in Superior WI Member No.: 43 Region Association: Northstar Region 

|
That worked nicely. (IMG:style_emoticons/default/thumb3d.gif)
|
| 930cabman |
 Jul 13 2024, 05:56 PM Jul 13 2024, 05:56 PM
Post
#150
|
|
Advanced Member     Group: Members Posts: 3,695 Joined: 12-November 20 From: Buffalo Member No.: 24,877 Region Association: North East States 
|
+1 with the dry ice, I recently used it to remove the floor tar, worked great. Also used it to shrink new rear wheel bearings and later hubs.
Two birds |
| rick 918-S |
 Jul 14 2024, 05:56 AM Jul 14 2024, 05:56 AM
Post
#151
|
|
Hey nice rack! -Celette                Group: Members Posts: 20,783 Joined: 30-December 02 From: Now in Superior WI Member No.: 43 Region Association: Northstar Region 

|
I like the dry ice thing. I have never used it but have seen it shown on some of the car building shows. Has to be better than a heat gun and a vibrating scraper. (IMG:style_emoticons/default/slap.gif)
|
| rick 918-S |
 Jul 14 2024, 05:56 AM Jul 14 2024, 05:56 AM
Post
#152
|
|
Hey nice rack! -Celette                Group: Members Posts: 20,783 Joined: 30-December 02 From: Now in Superior WI Member No.: 43 Region Association: Northstar Region 

|
Double post. (IMG:style_emoticons/default/slap.gif)
|
| technicalninja |
 Jul 14 2024, 11:58 AM Jul 14 2024, 11:58 AM
Post
#153
|
|
Advanced Member     Group: Members Posts: 2,003 Joined: 31-January 23 From: Granbury Texas Member No.: 27,135 Region Association: Southwest Region 
|
Just ran through your thread!
So many little rust repair jobs... You're KICKING ASS! Really nice work! The pulling the lower panel out trick worked great! I too, am prone to use wood when working on sheet metal. The wood has a tiny little bit of "give" that a metal bar does not. Now, my real question is... What's up with that BAD ASSED bearing for the forward shift linkage? I really liked Chris Foley's solution... https://tangerineracing.com/shop/ols/produc...ift-rod-bearing Right up to the point I saw yours! Yours is the "Terminator" version of the Tangerine set up and I'd love to know where I could get one... |
| Montreal914 |
 Jul 14 2024, 02:21 PM Jul 14 2024, 02:21 PM
Post
#154
|
|
Senior Member    Group: Members Posts: 1,700 Joined: 8-August 10 From: Claremont, CA Member No.: 12,023 Region Association: Southern California 
|
@technicalninja ,
You can read it al here: http://www.914world.com/bbs2/index.php?sho...=329708&hl= Credit goes to the original designers. I simply redid what is available from member vendors, except for the gearbox shift console I guess. Enjoy the read! (IMG:style_emoticons/default/beerchug.gif) |
| technicalninja |
 Jul 14 2024, 02:40 PM Jul 14 2024, 02:40 PM
Post
#155
|
|
Advanced Member     Group: Members Posts: 2,003 Joined: 31-January 23 From: Granbury Texas Member No.: 27,135 Region Association: Southwest Region 
|
Thanks for the link!
You did the whole puppy! And did it really well! I actually bought a "grab bag" of 914 stuff because it had a couple of those u-joint set ups in it... Your thread is a DIY instruction set! Thanks! The shift console you did is the CLEANEST version I've seen yet. Yep, you're a "gear head" too! A "gear head" is one who builds his stuff himself even when the same thing is available for nothing more than money... Every single "inventor" was a "gear head" first! |
| Montreal914 |
 Aug 26 2024, 08:06 PM Aug 26 2024, 08:06 PM
Post
#156
|
|
Senior Member    Group: Members Posts: 1,700 Joined: 8-August 10 From: Claremont, CA Member No.: 12,023 Region Association: Southern California 
|
Time for some overdue update. (IMG:style_emoticons/default/smile.gif)
As mentioned in the previous post, I wanted to tackle the rust on the floor in the tunnel. For some reason, I wanted to complete this before getting back to the driver's side longitudinal work. Happy with my previous results in the opper area of the driver's side long, I setup my submersible pump in my bin and flowed citric acid in the tunnel via the shifter port in the lower firewall. Here you can see the blue hose in the port (yellow arrow). 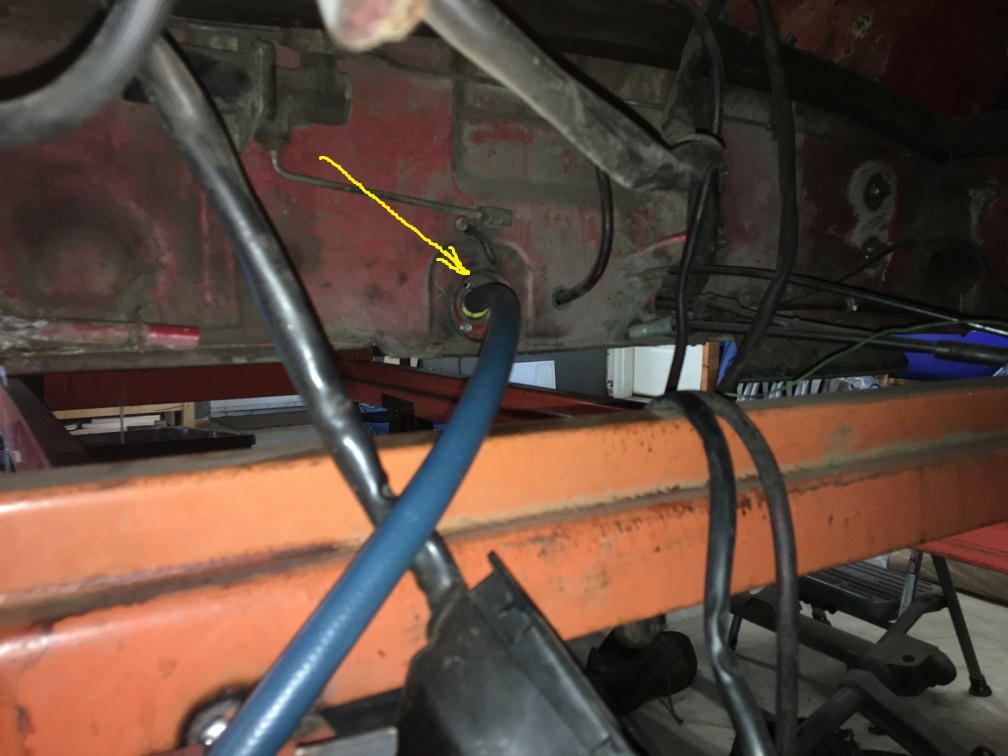 And here we can see the flow in the tunnel via the rear access port: 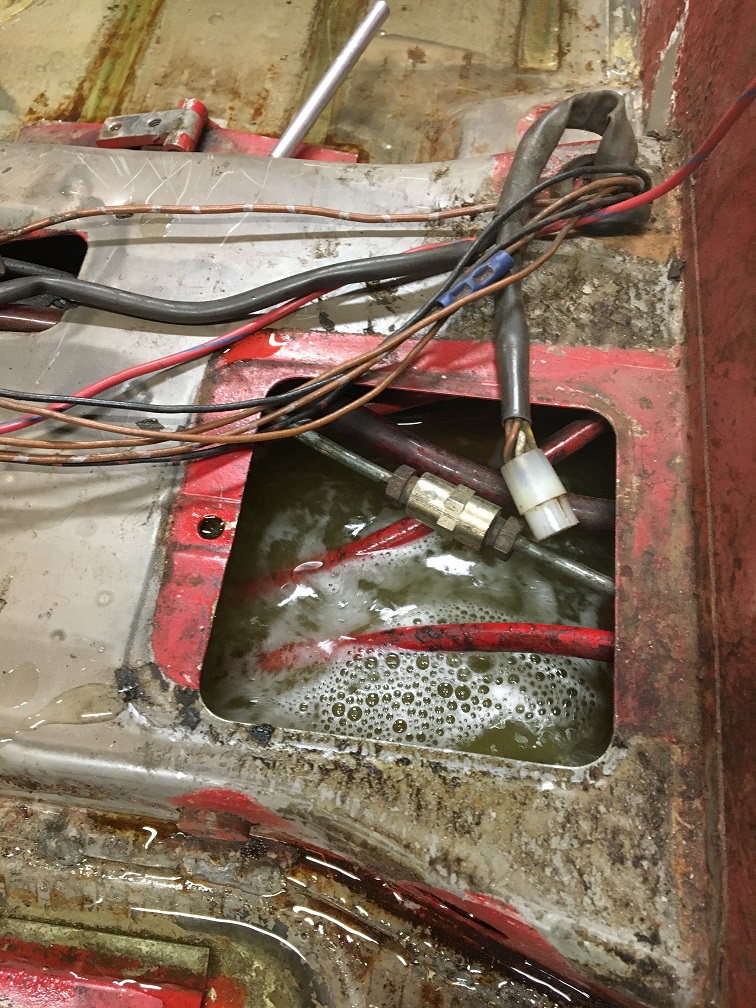 Towards the front of the car, I tried to conceal the flow as best as I could so the outlet would flow in the master cylinder port. 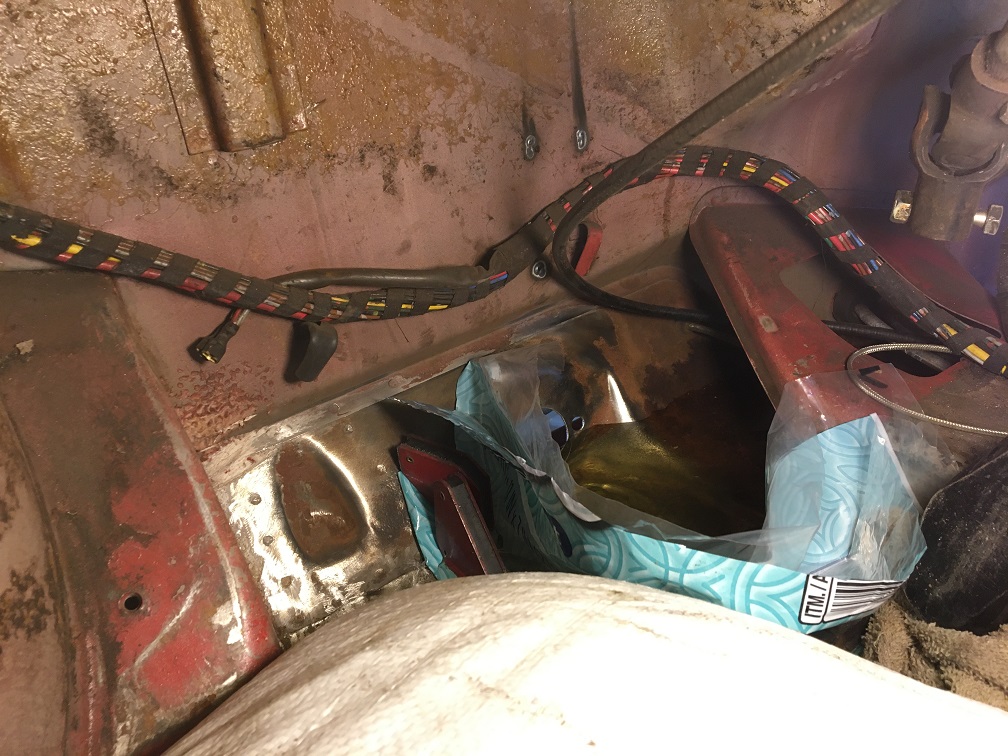 And here is the flow! (IMG:style_emoticons/default/smile.gif) 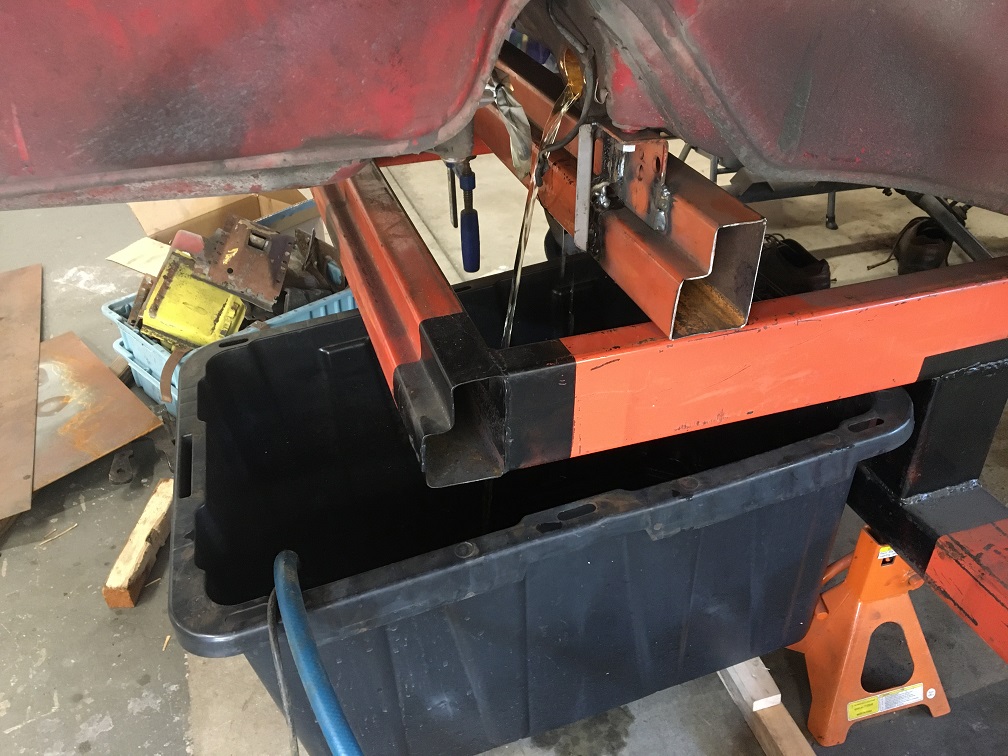 Now, as much as I would have liked for the liquid to stay within the tunnel, it ended up leaking pretty much everywhere on the cabin floor... (IMG:style_emoticons/default/dry.gif) 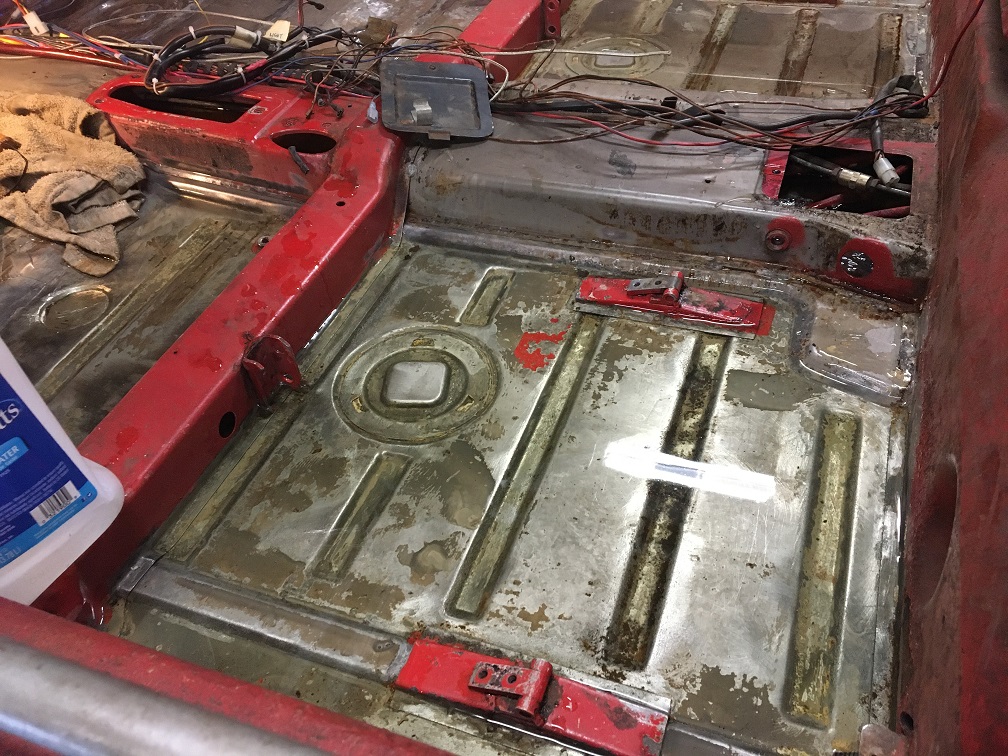 I got tired of scooping the fluid everywhere and neutralized the wash with my baking sode solution. In the end it did cleanup a good portion of the surface rust. I may go back to it with evaporust and just let it soak, but I am not sure yet. This is before (shifter lever port). 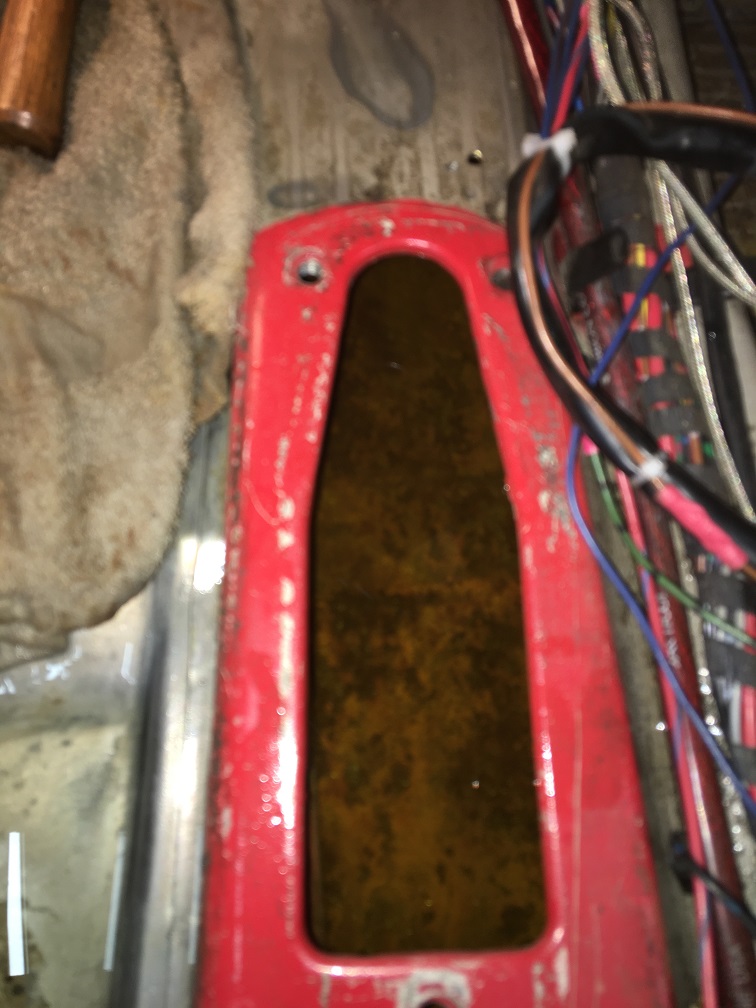 And this is after: 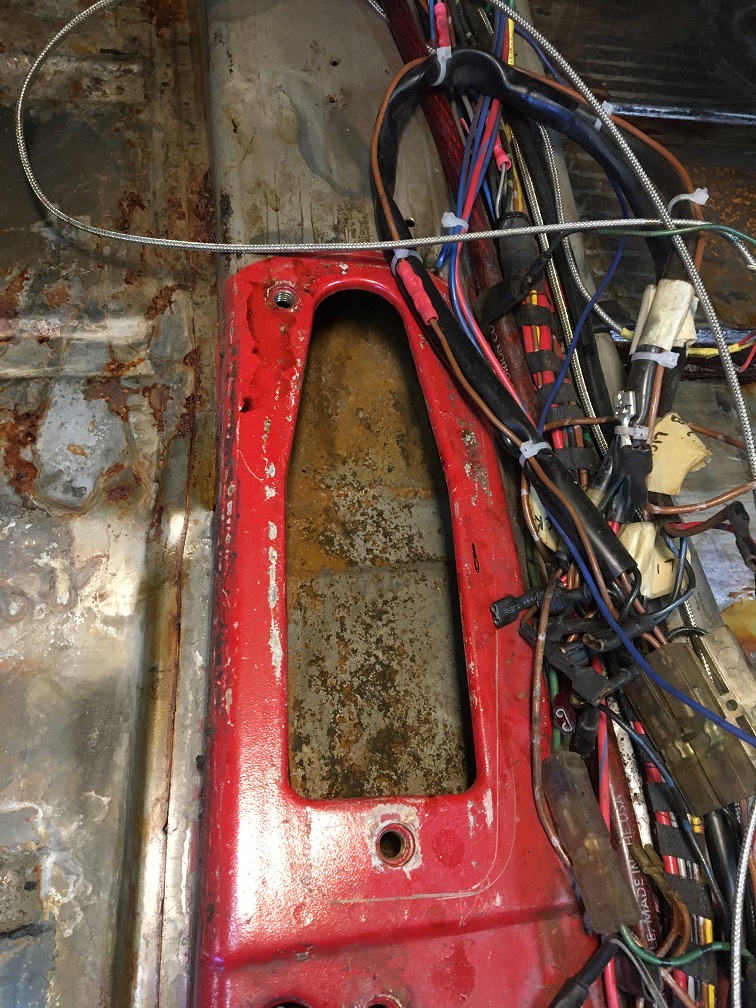 Once done I will spread some ospho, then paint with Eastwood cavity paint with the wand. This should complete the area. No matter what, the is no rust issue in that area, which leads me to the work area where there definitely used to be some! (IMG:style_emoticons/default/rolleyes.gif) The driver's side long! (IMG:style_emoticons/default/cheer.gif) Where were we... (IMG:style_emoticons/default/idea.gif) I believe I left it off at this step of the progres... 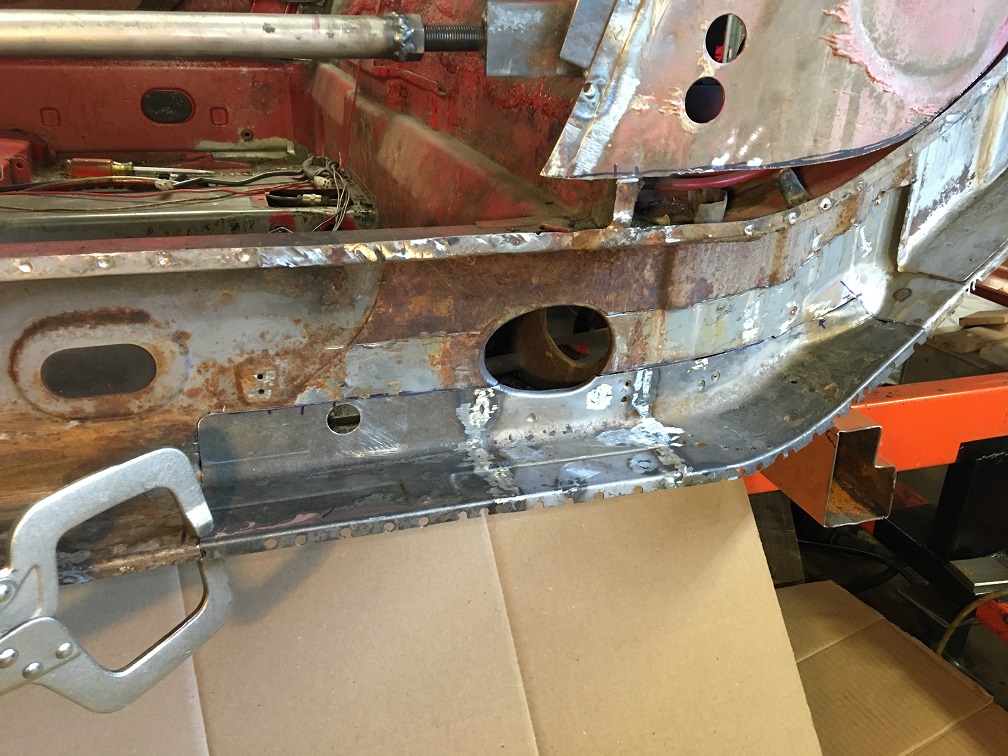 Now, what is coming up may seem out of assembly sequence but it was done such that I could do the weld right side up while I had access. We know how unpleasant it is to weld upside down, and I don't believe my project requires the rotisserie setup, at least, not yet... So, before installing the repair piece for the long, I wanted to install the triangle/donut chassis lift point. First, let's repair the part that was removed. I made small disks to plug the various drilled holes created when I removed the part to make it solid again 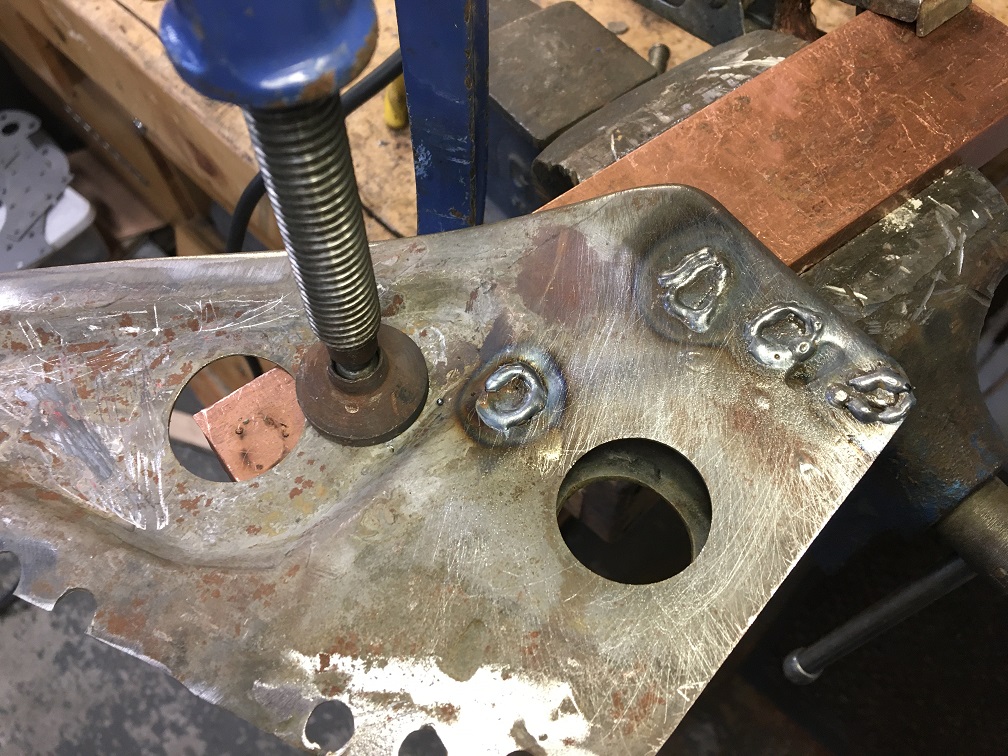 Part is now ready for installation, no holes as this will be the receiving side of the plug welds. 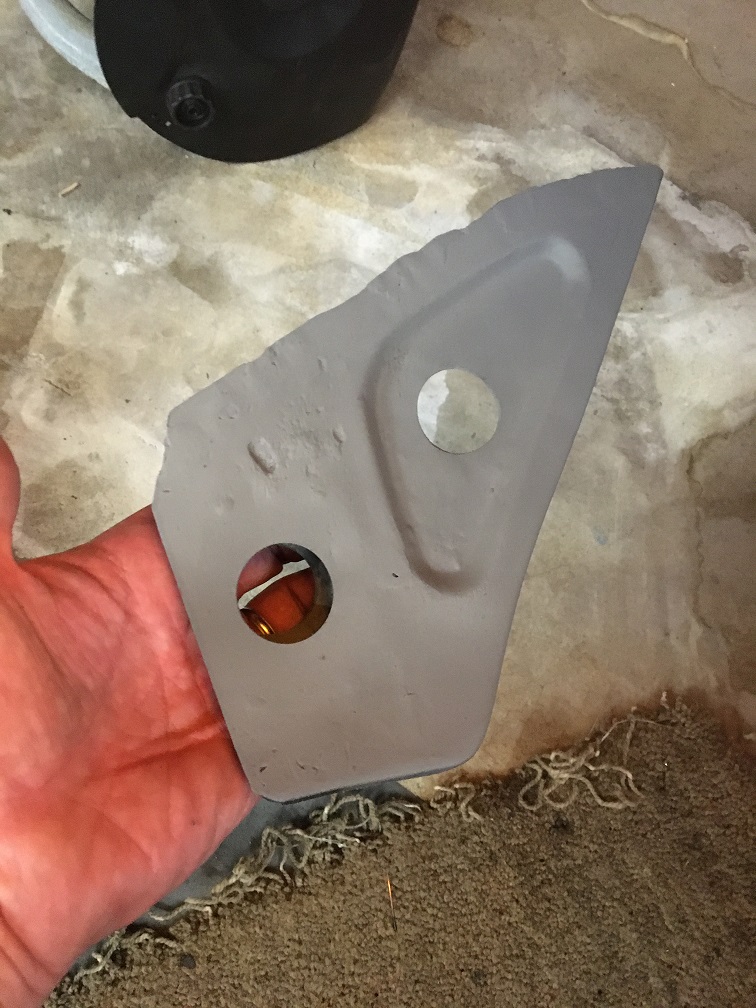 With the long cut out as it is, I can have access to do the plug weld for the triangle from above. Having pre-drilled holes in the bottom firewall/floor flange, the triangle is clamped and I can see the welding area through the window. (IMG:style_emoticons/default/sunglasses.gif) (IMG:style_emoticons/default/welder.gif) 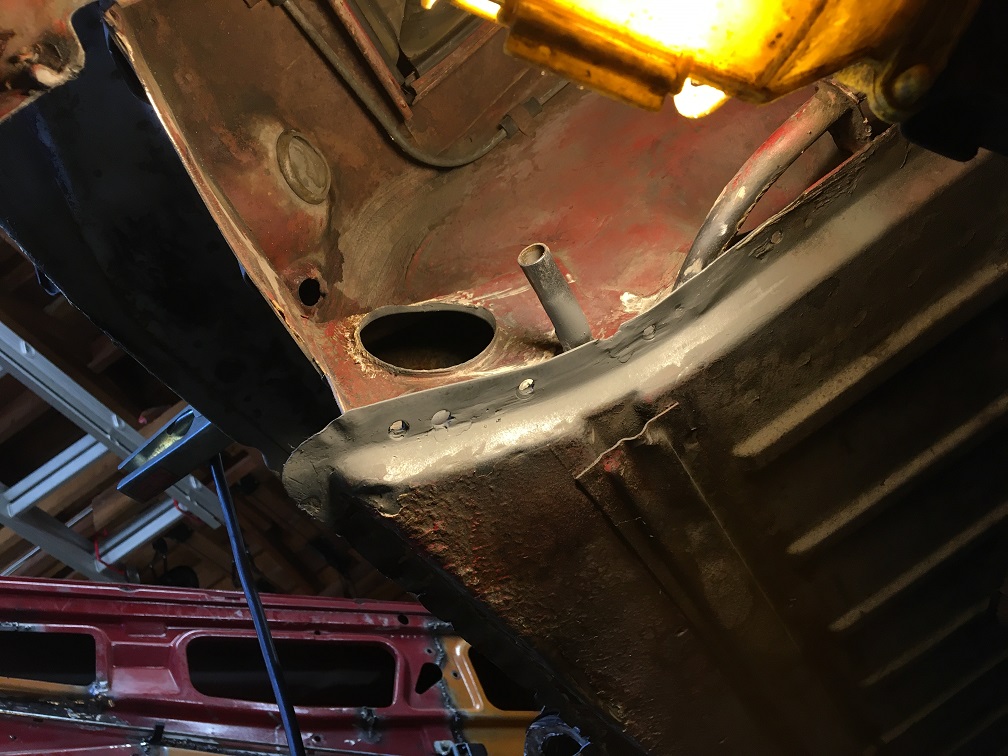 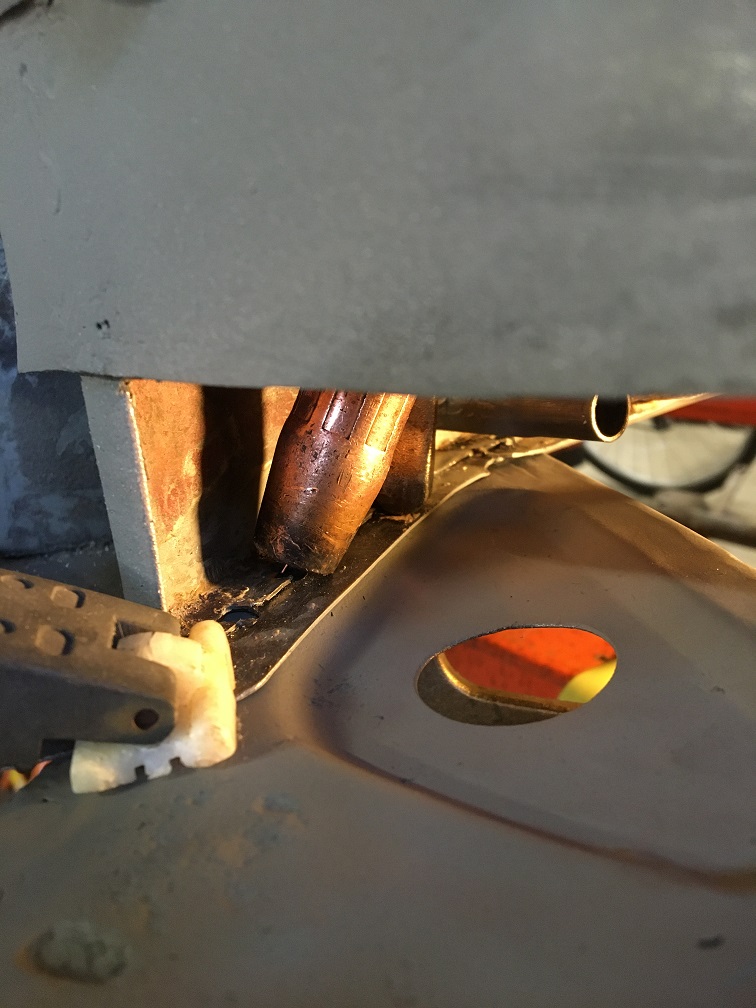 And the result as seen per the lower engine bay area. 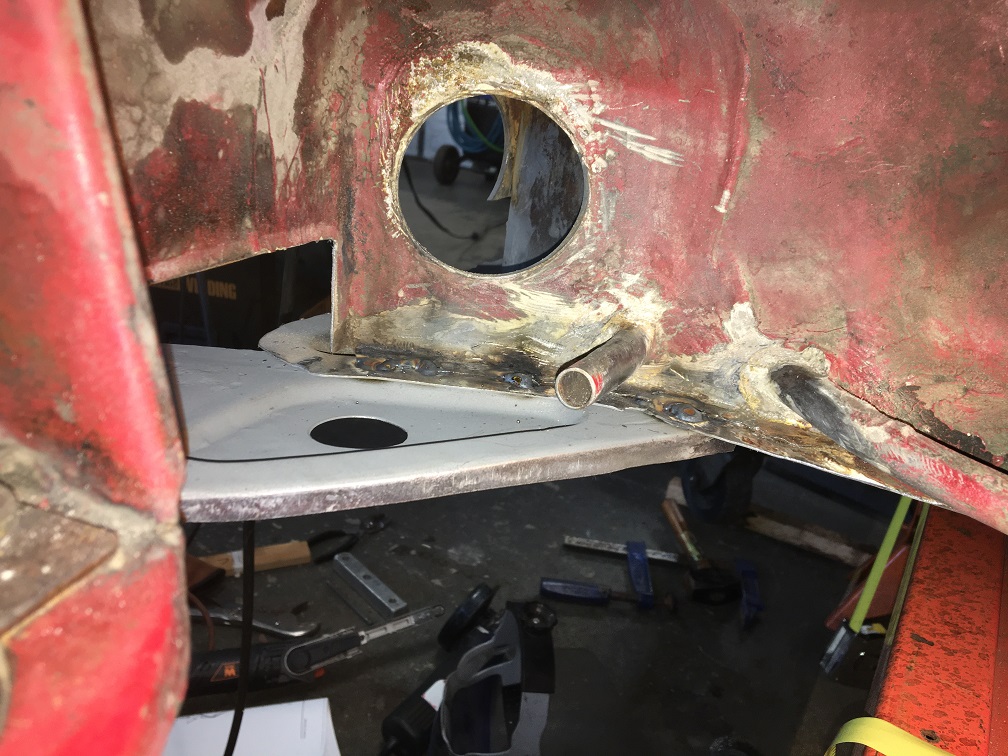 |
| friethmiller |
 Aug 26 2024, 08:59 PM Aug 26 2024, 08:59 PM
Post
#157
|
|
Senior Member    Group: Members Posts: 664 Joined: 10-February 19 From: Austin, TX Member No.: 22,863 Region Association: Southwest Region 
|
@Montreal914 - good stuff here. I liked your approach to rust removal in the tunnel. I’m jealous of your ongoing longitudinal work. Can’t wait to see how you go about completing the repair. (IMG:style_emoticons/default/popcorn[1].gif)
|
| Montreal914 |
 Aug 26 2024, 09:31 PM Aug 26 2024, 09:31 PM
Post
#158
|
|
Senior Member    Group: Members Posts: 1,700 Joined: 8-August 10 From: Claremont, CA Member No.: 12,023 Region Association: Southern California 
|
Now that the triangle is welded in the engine bay side, we can start preparing for the welding of the long repair piece.
Before installing it, I prepared a couple of small parts to create an backing at the upper junction (at the engine mount area). Here you see a bent tab that will live in between the two layers at the engine mount bump. 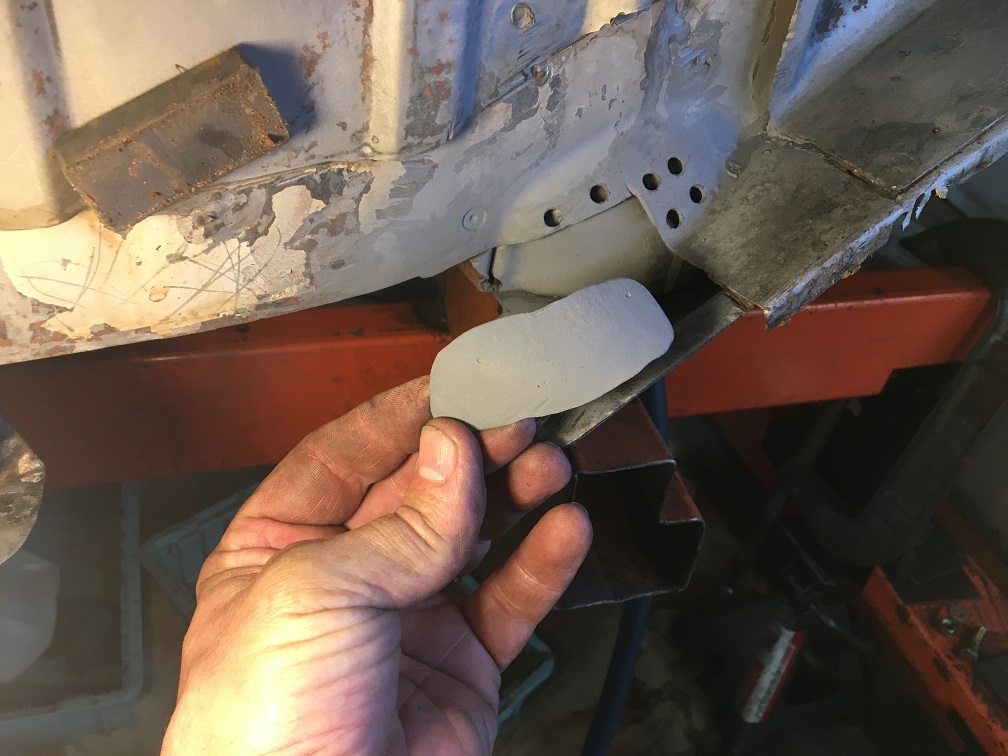 And here is the flat one for the bottom. The bent one is welded in. 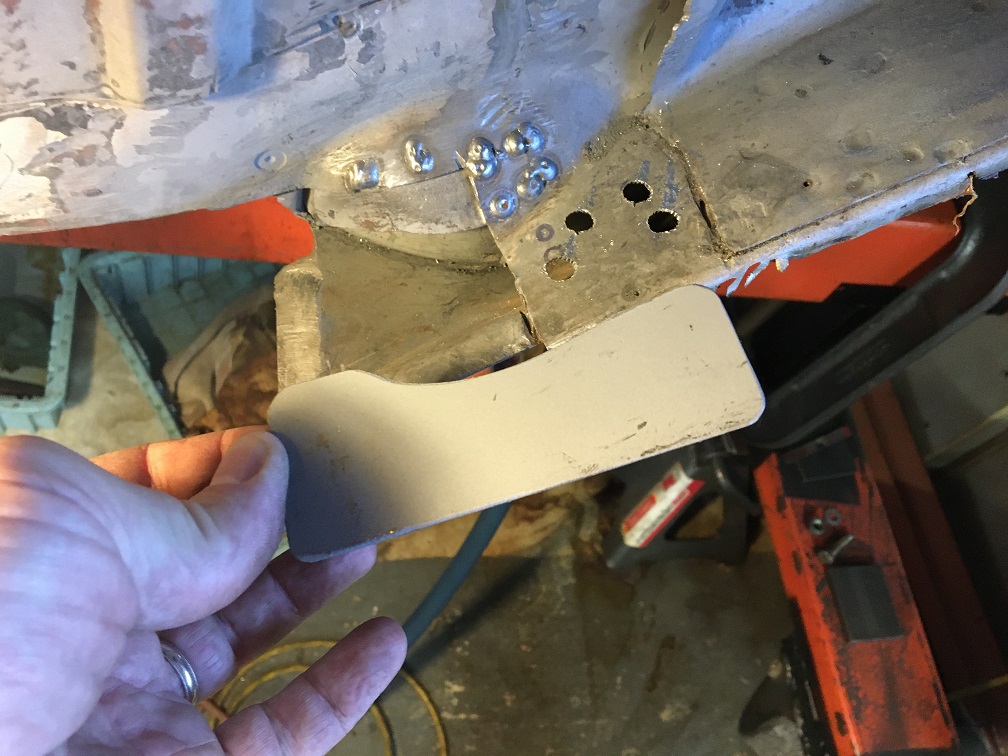 Getting ready! 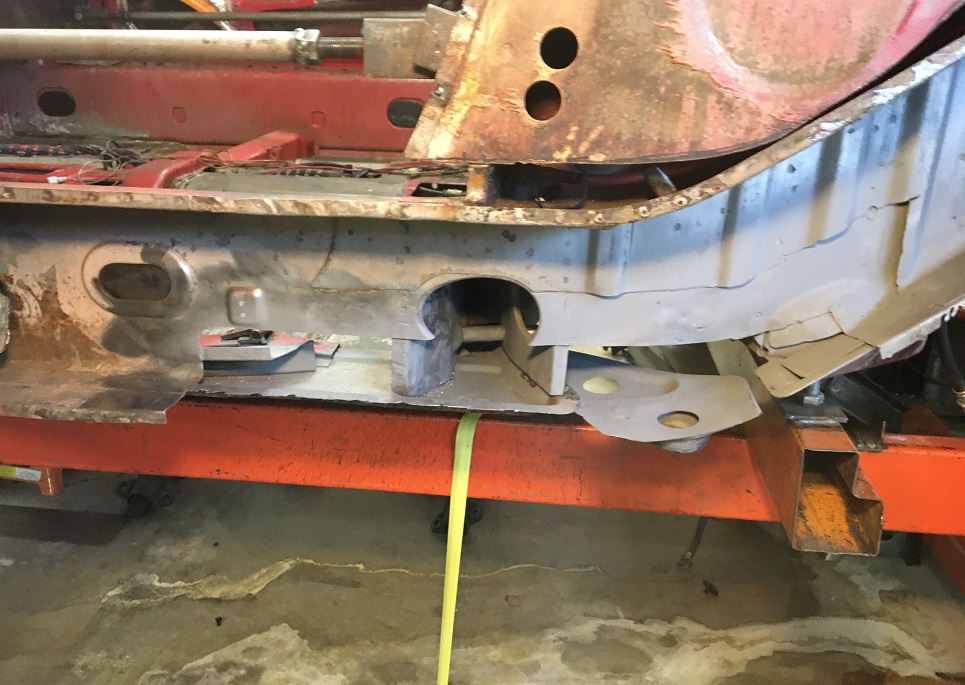 Looking at my repair piece one last time, I wasn't happy with the porosity of the middle segment of the three pieces that composes it. (IMG:style_emoticons/default/dry.gif) 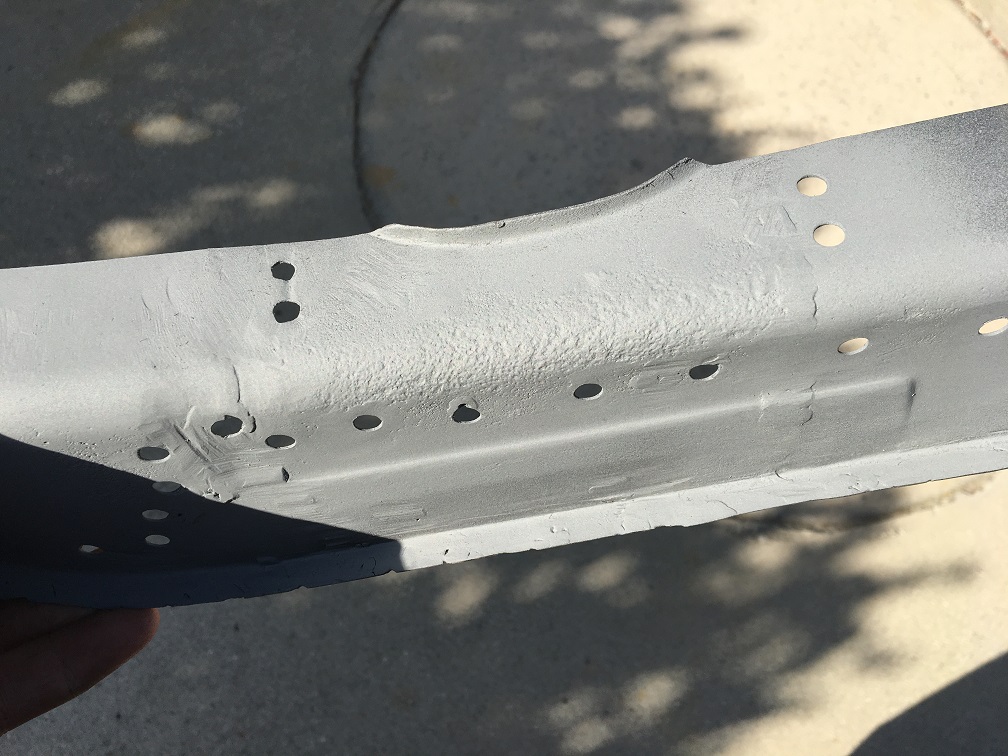 I realised that this area could easily be reinforced and would live between the two walls of the lower firewall boxed area. (IMG:style_emoticons/default/idea.gif) So I added a layer and slep very well. (IMG:style_emoticons/default/rolleyes.gif) 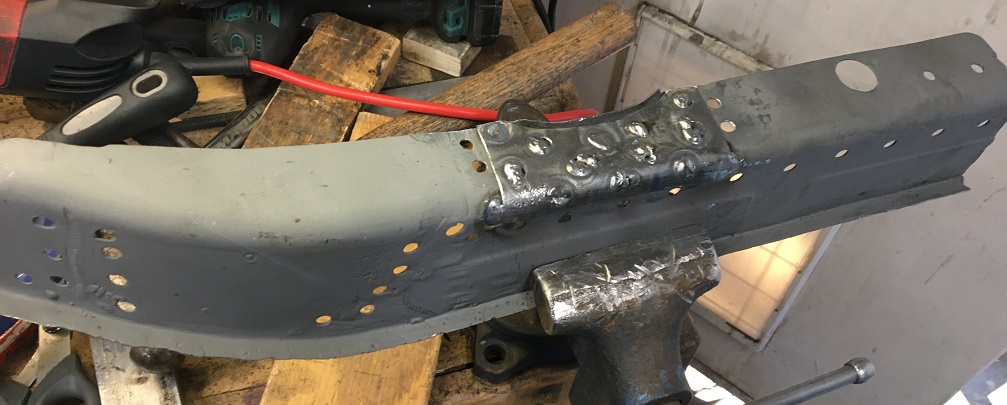 Final, final, final check... looking good! 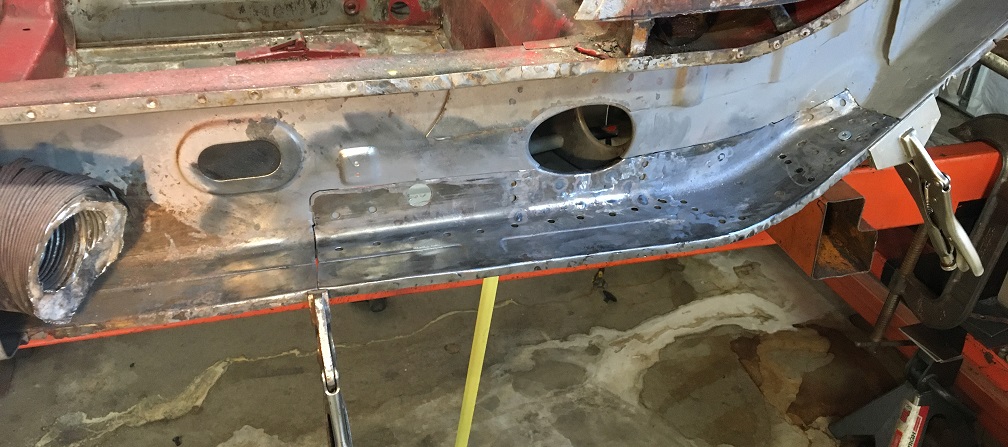 And plug welded! (IMG:style_emoticons/default/welder.gif) This setup did not require any upside-down welds. The portion of the floor exposed was plug welded from the top, so did the remainder of the donut triangle. 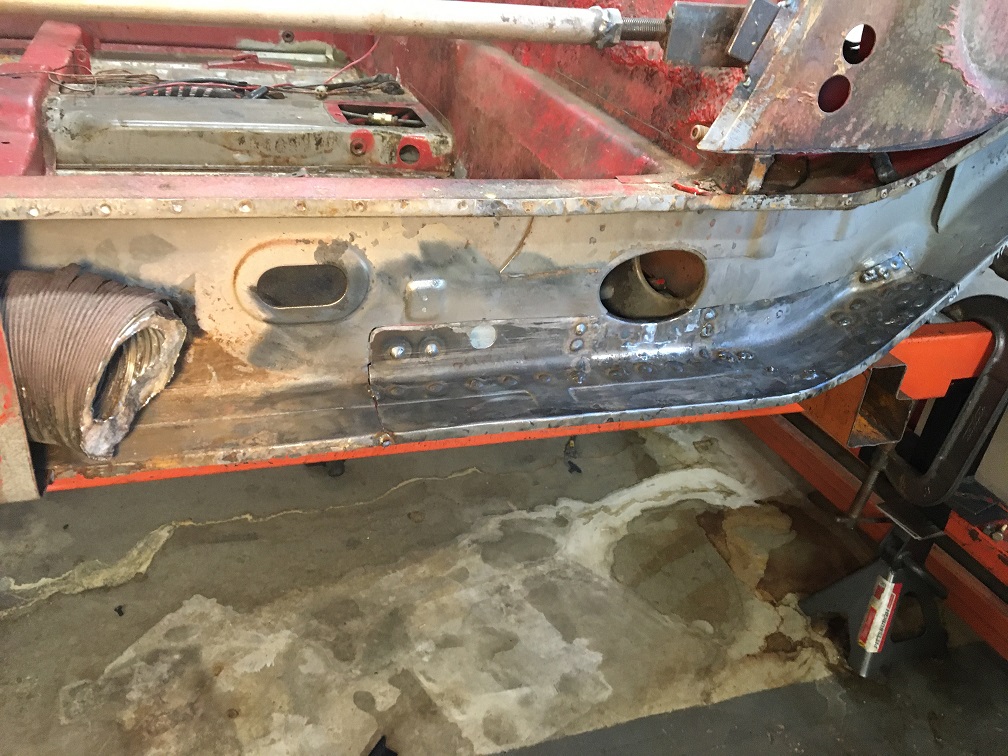 Then the butt welds at the seams 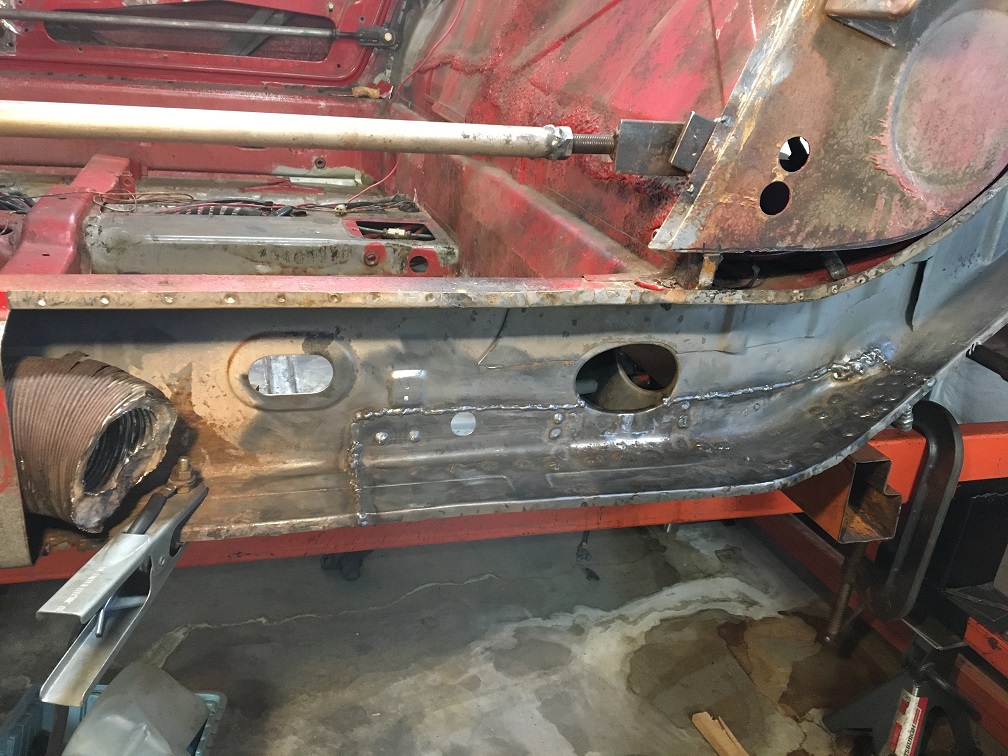 And everything cleaned up! (IMG:style_emoticons/default/sunglasses.gif) (IMG:style_emoticons/default/beer3.gif) 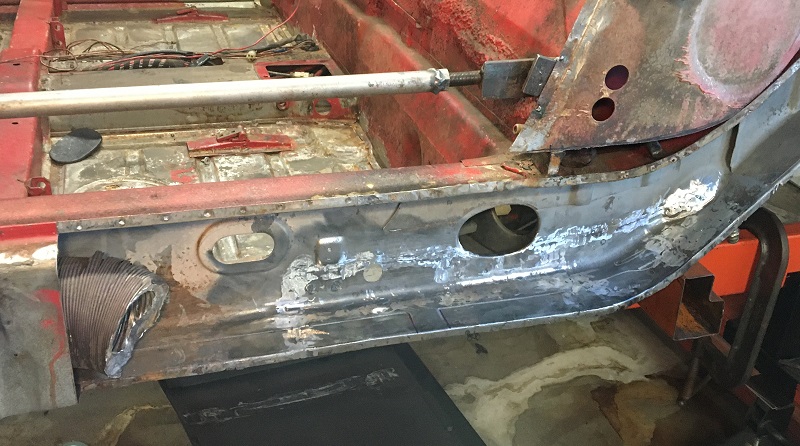 Now that the inside-outer layer is repaired, time to get busy on the inside-inner layer. Like the previous repair piece, the inside-inner repair part will be composed of a few recuperated sections. Here the rear portion was cut and initially adjusted. It's looking promising. (IMG:style_emoticons/default/smile.gif) 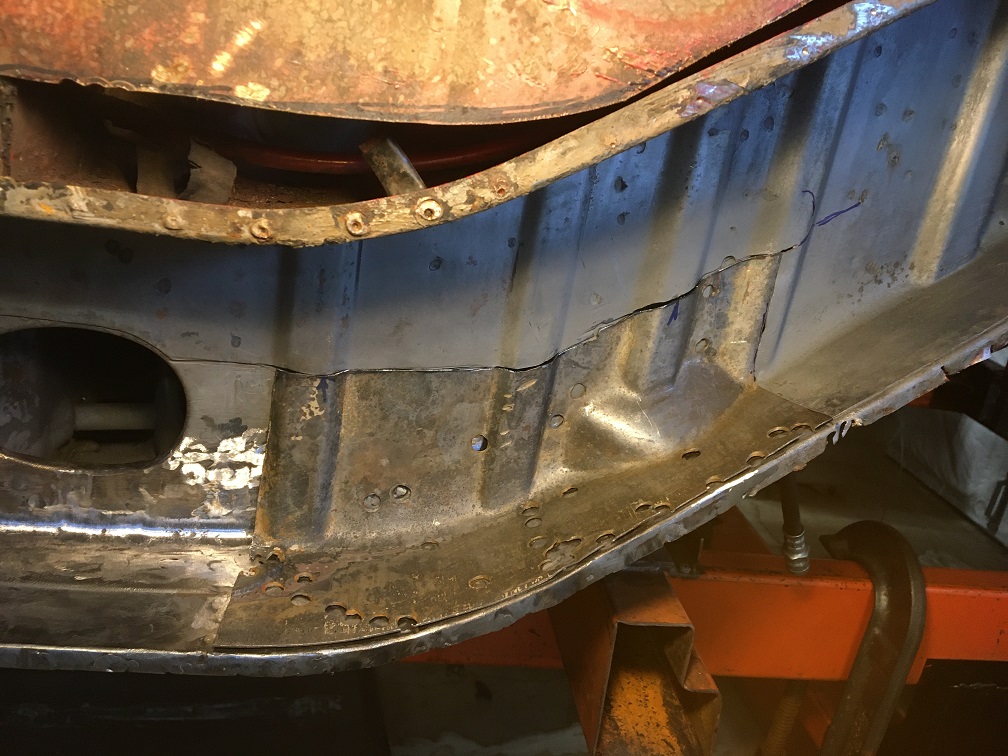 Now for the front piece that will be joined to the piece shown above, I ran into a small issue. Because the inside-outer piece was a composition of parts, there is now an embossment that was originally at a different location. Below you can see the inside inner and clearly, the inside outer as a boss not at the right location. 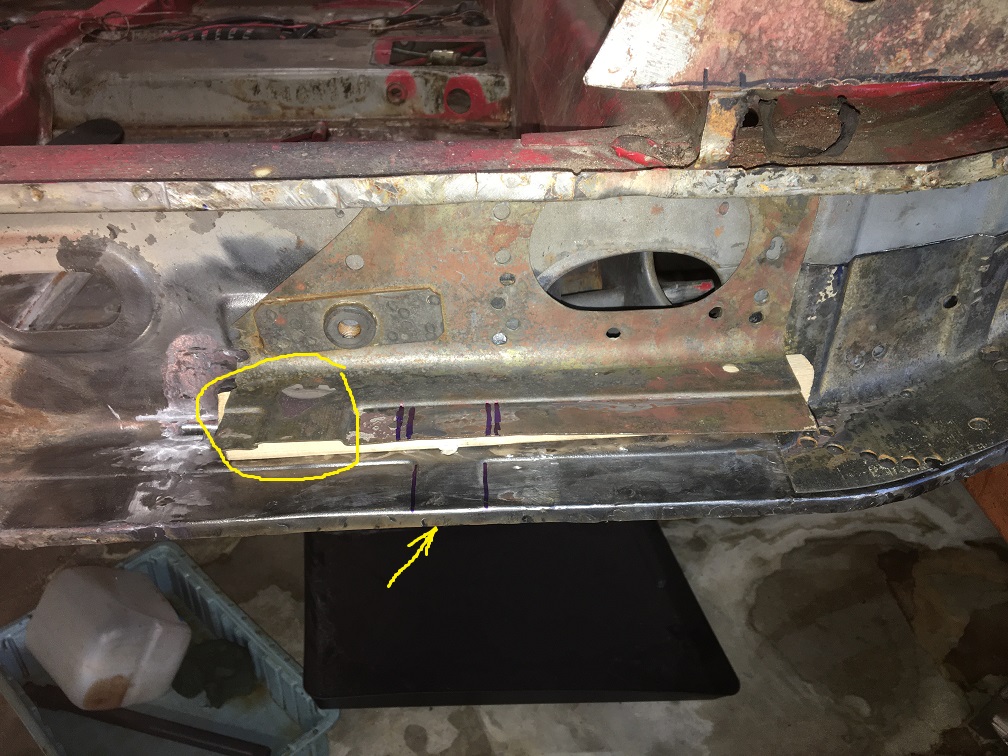 Therefore the inside-inner layer will need to be modified to accomodate for that non-original boss. That's it, I am no longer good for concours... (IMG:style_emoticons/default/lol-2.gif) Here is the current situation and where a new recess has to be created (sharpie lined). 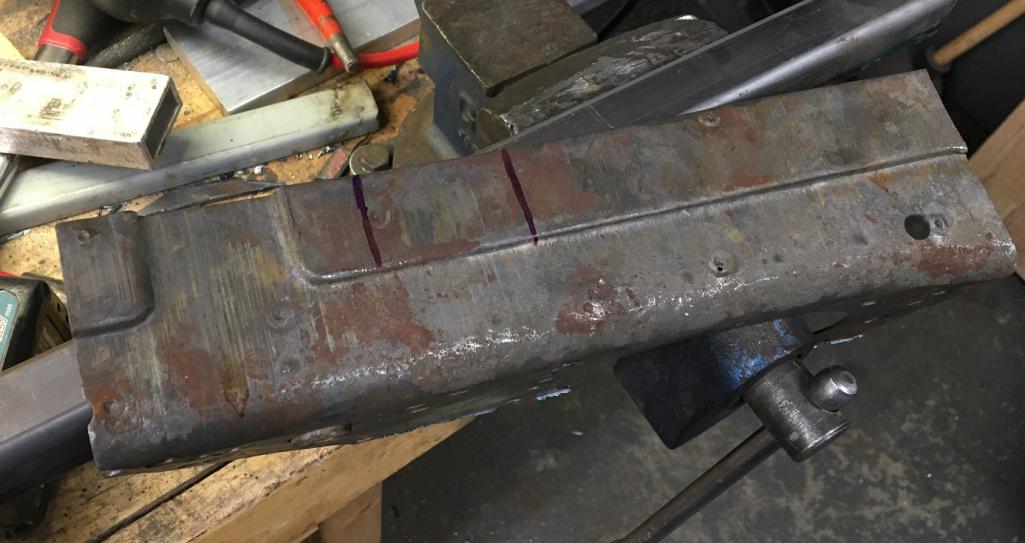 And here is the result after using some basic tools (hammer, square tube, vise). 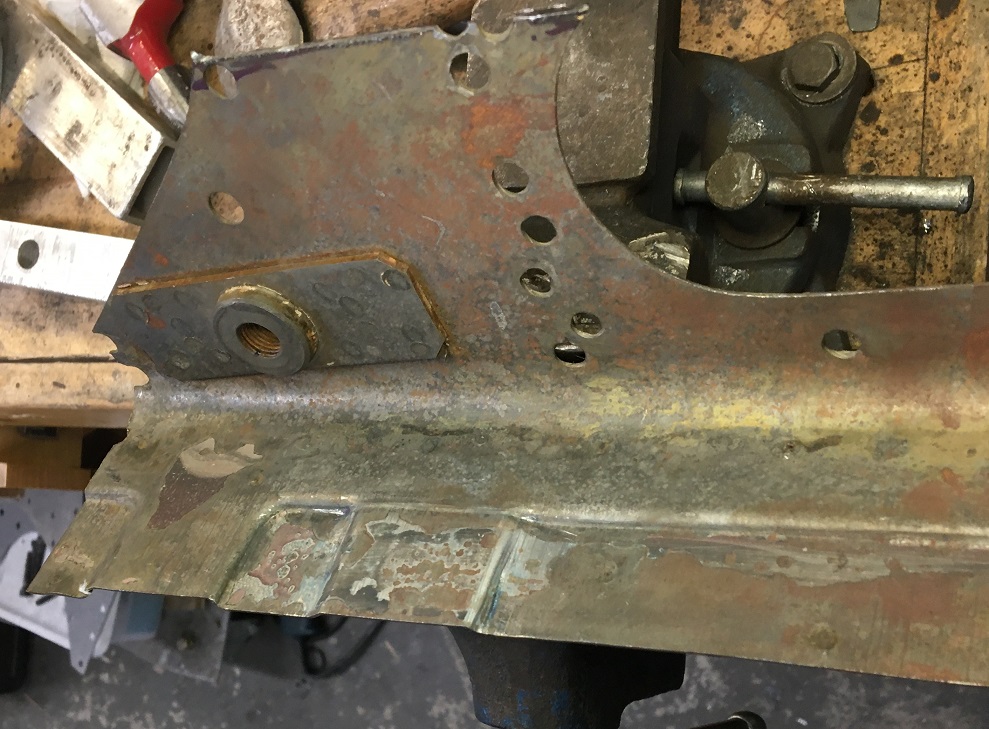 While fitting the second piece I decide to make a reinforcement layer that would overlap the weld seam of the inside inner (the previous repair piece just installed). So I used some scraps and added another 5 1/2" length to the front. We can see the very first fit test below of the most front piece (added reinforcement layer). 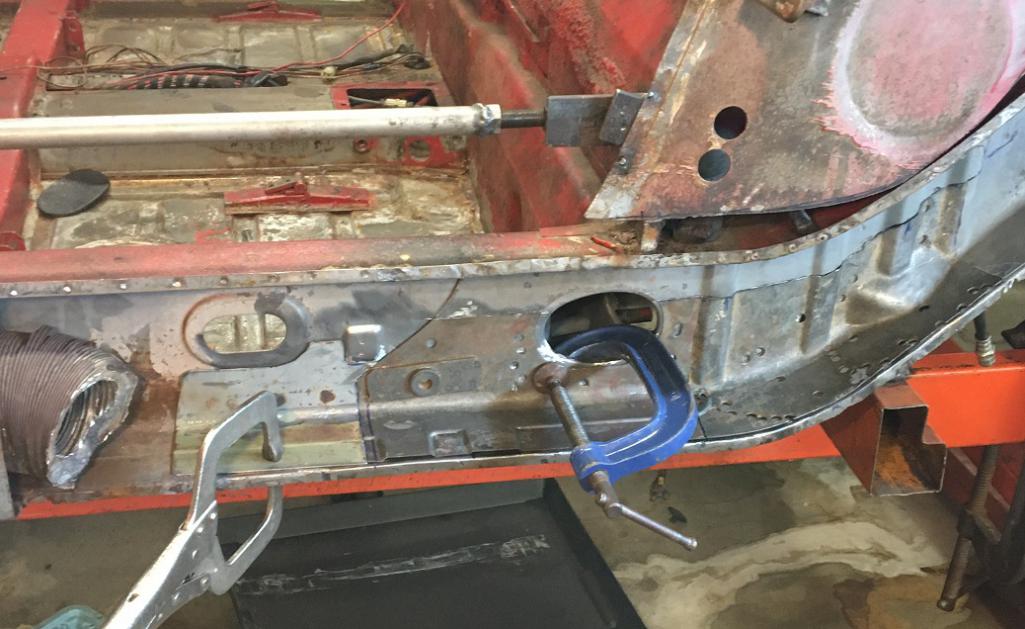 After many back and forth check, file/adjust, fit. check adjust fit,... The now three pieces are tacked in-situ to ensure the fit. 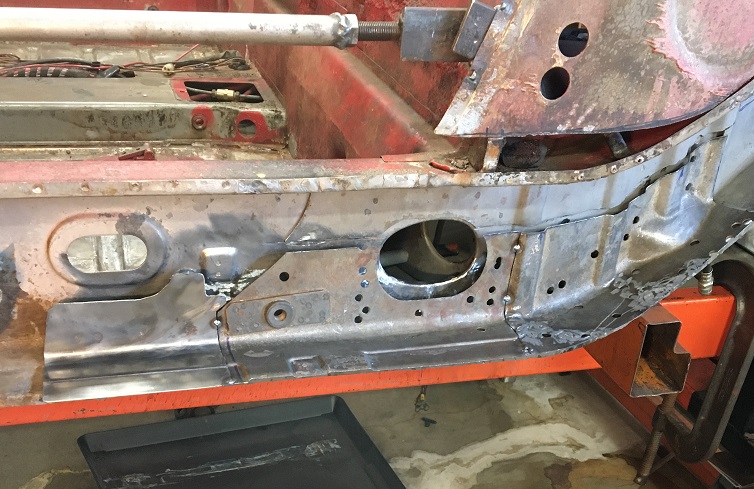 Then they get welded together with proper copper backing and clamps to ensure no movement. 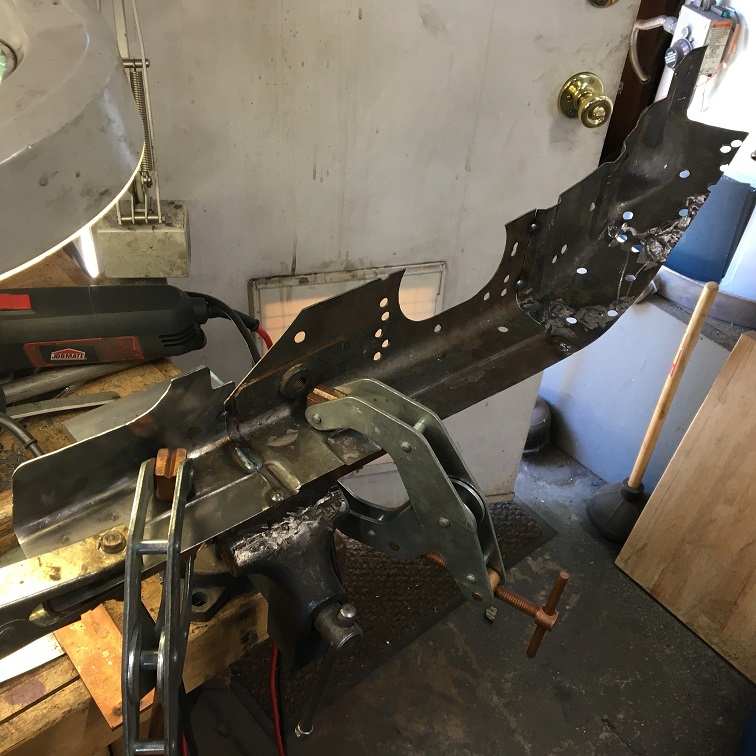 |
| Montreal914 |
 Aug 26 2024, 09:56 PM Aug 26 2024, 09:56 PM
Post
#159
|
|
Senior Member    Group: Members Posts: 1,700 Joined: 8-August 10 From: Claremont, CA Member No.: 12,023 Region Association: Southern California 
|
Once the inside-inner layer piece composed of three section was fully welded it was time for the final fit check and last adjustements.
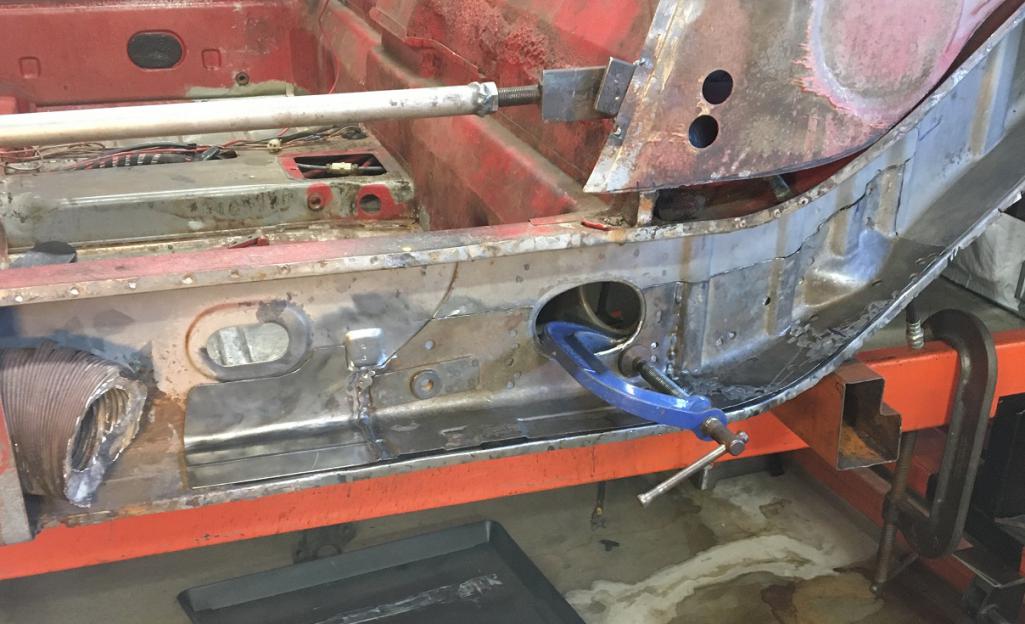 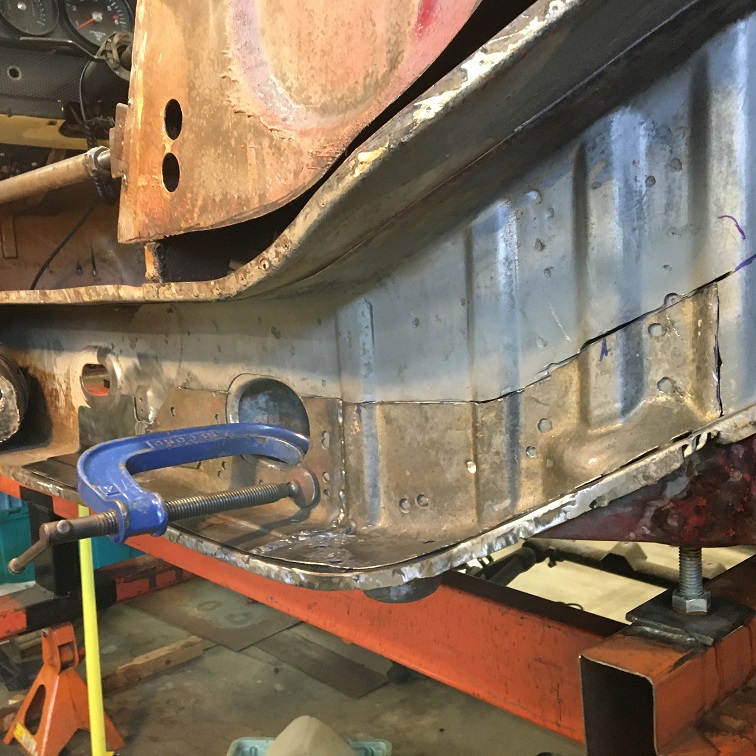 Then sprayed it with weldthrough primer which later became a pain to weld... (IMG:style_emoticons/default/headbang.gif) 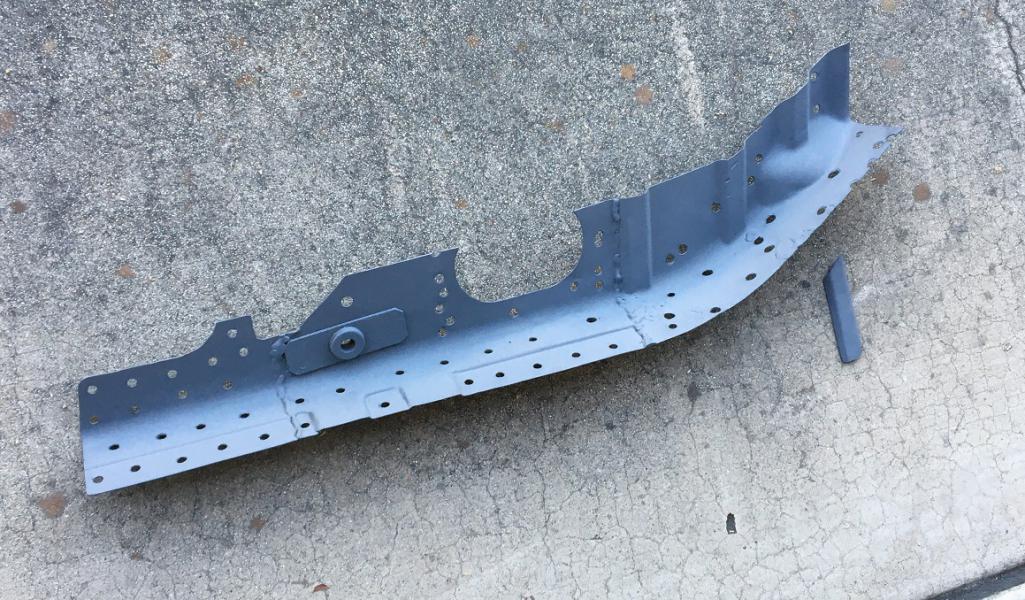 In the above image you may have noticed on the lower right another piece. This is a backing that will fit at the back vertical joint which is in the middle of a corrugation. Below we can see its installation. 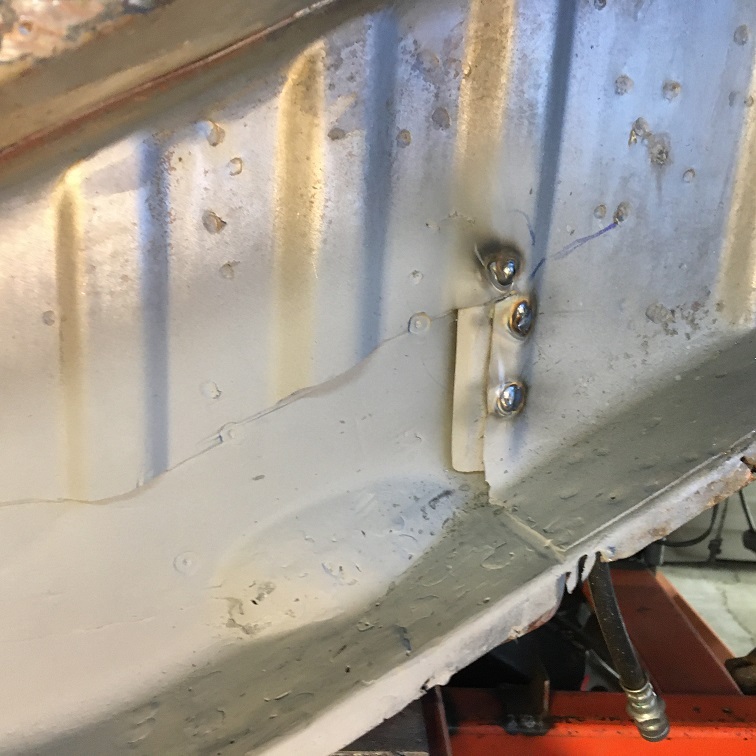 And the final result of the inside-inner layer plug welded and seam butt welded. (IMG:style_emoticons/default/welder.gif) (IMG:style_emoticons/default/beer3.gif) 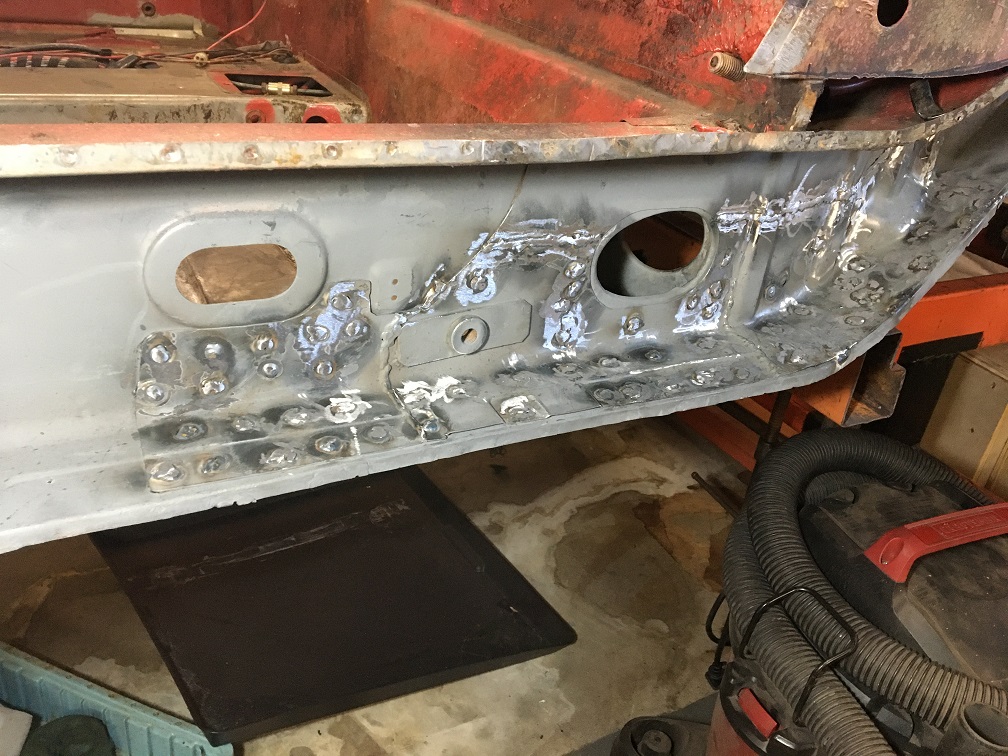 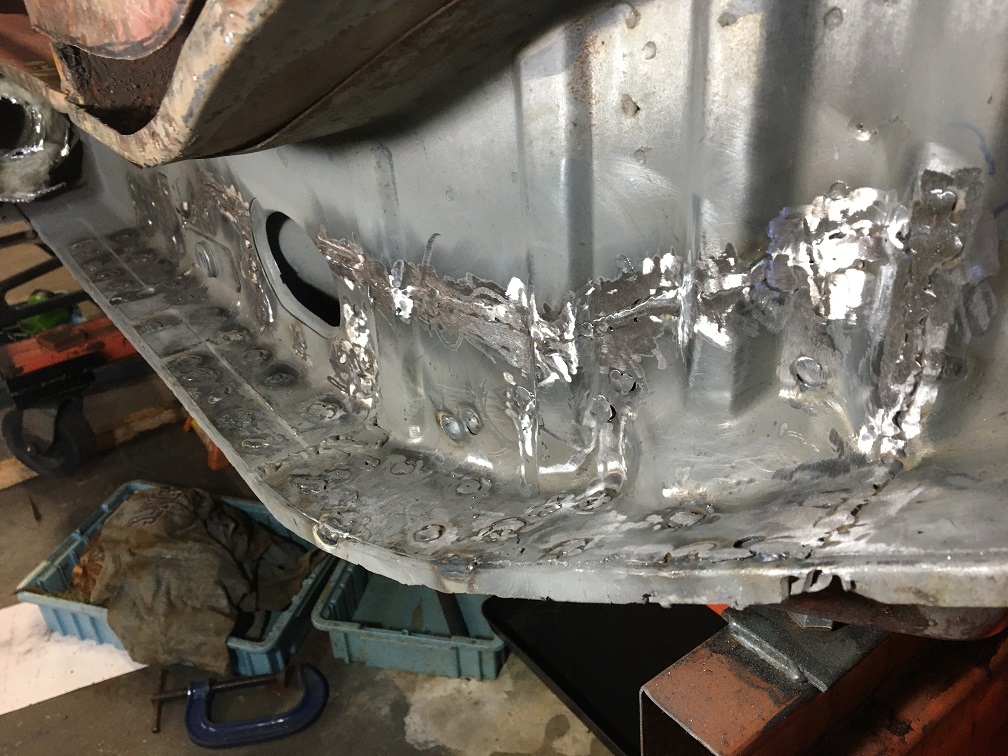 Needless to say that I am very happy to have reached this milestone. A few more things to complete like the rear heating elbow tube, then moving on with the outer part of the repair. I am planning on opening up more of the outer towards the front as I need to replace the insulated heating duct/tube, but I mostly want to investigate the condition. More to come! (IMG:style_emoticons/default/smile.gif) |
| Montreal914 |
 Aug 26 2024, 10:09 PM Aug 26 2024, 10:09 PM
Post
#160
|
|
Senior Member    Group: Members Posts: 1,700 Joined: 8-August 10 From: Claremont, CA Member No.: 12,023 Region Association: Southern California 
|
@Montreal914 - good stuff here. I liked your approach to rust removal in the tunnel. I’m jealous of your ongoing longitudinal work. Can’t wait to see how you go about completing the repair. (IMG:style_emoticons/default/popcorn[1].gif) @friethmiller Fred, the jealousy is definitely mutual! (IMG:style_emoticons/default/laugh.gif) I only wish I could work at your speed! Then maybe I could be driving my car again in a timely manner. (IMG:style_emoticons/default/driving.gif) Although I would love to form pieces for the repair, as you can see I mostly work with recycled original parts. It is still a lot of work to recuperate a portion of a good part, clean it up, and use it. I have very limited "real" tools, so I make do with what I have; my crappy 3" vise and my cheap HF grinder. (IMG:style_emoticons/default/laugh.gif) (IMG:style_emoticons/default/smash.gif) I do like my Amazon finger sander though, really practical. (IMG:style_emoticons/default/smile.gif) |
  |
23 User(s) are reading this topic (23 Guests and 0 Anonymous Users)
0 Members:

|
Lo-Fi Version | Time is now: 22nd November 2024 - 09:47 PM |
Invision Power Board
v9.1.4 © 2024 IPS, Inc.


