|
|

|
Porsche, and the Porsche crest are registered trademarks of Dr. Ing. h.c. F. Porsche AG.
This site is not affiliated with Porsche in any way. Its only purpose is to provide an online forum for car enthusiasts. All other trademarks are property of their respective owners. |
|
|
  |
| Puebloswatcop |
 Nov 4 2021, 04:50 PM Nov 4 2021, 04:50 PM
Post
#101
|
|
Senior Member    Group: Members Posts: 1,435 Joined: 27-December 14 From: Mineola, Texas Member No.: 18,258 Region Association: Southwest Region |
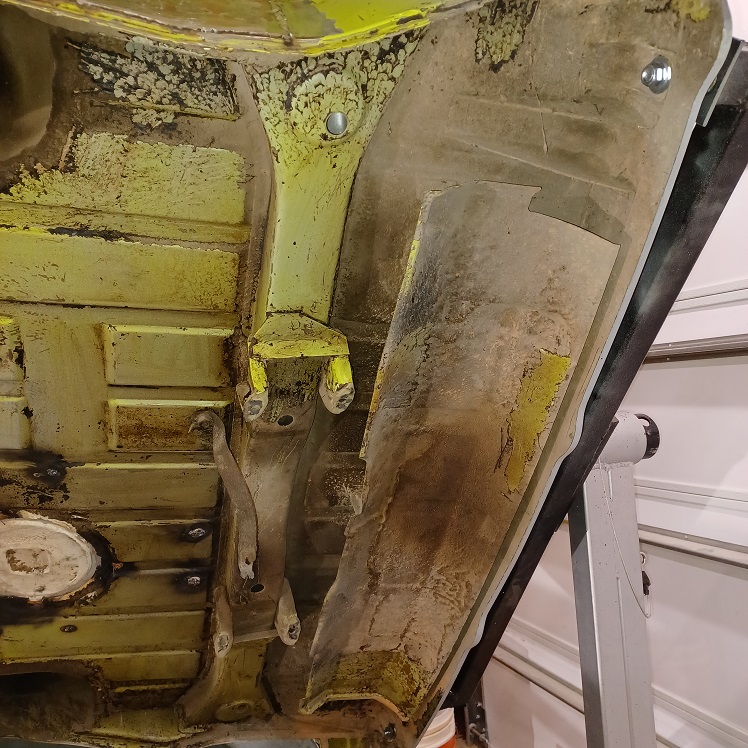
I am trying to figure out if the undercoating was all from the factory or if someone added more? Did the heat shield come from the factory or dealership with undercoating on it....I would think that might be an aweful smell when it got hot.
 |
| Puebloswatcop |
 Nov 4 2021, 04:54 PM Nov 4 2021, 04:54 PM
Post
#102
|
|
Senior Member    Group: Members Posts: 1,435 Joined: 27-December 14 From: Mineola, Texas Member No.: 18,258 Region Association: Southwest Region |
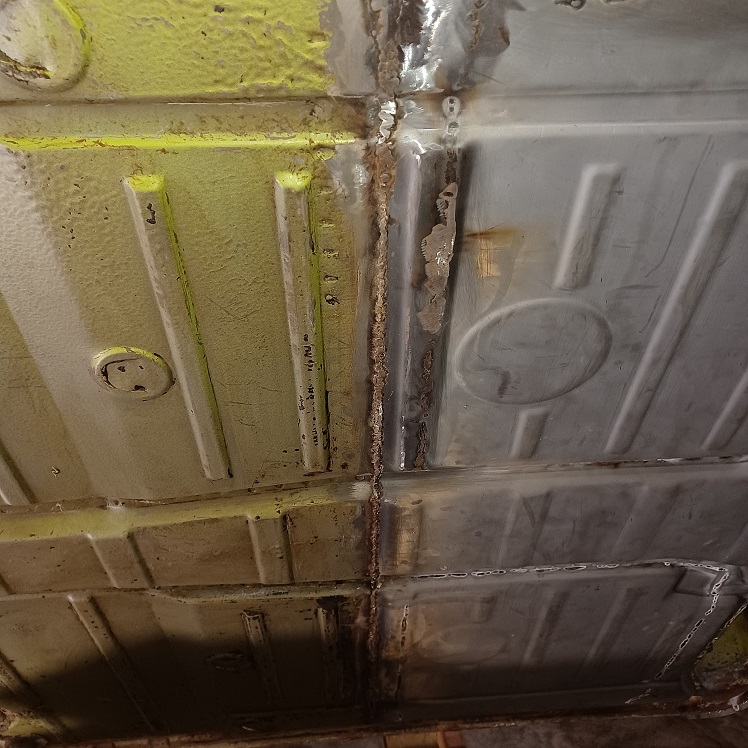
At least I didnt have to scrape the undercoating from half of the floor since I replaced it I will have to grind and add another bead of weld to the seam though, now that I dont have to do it laying upside down....I hate overhead welding.
 |
| Puebloswatcop |
 Nov 4 2021, 04:57 PM Nov 4 2021, 04:57 PM
Post
#103
|
|
Senior Member    Group: Members Posts: 1,435 Joined: 27-December 14 From: Mineola, Texas Member No.: 18,258 Region Association: Southwest Region |
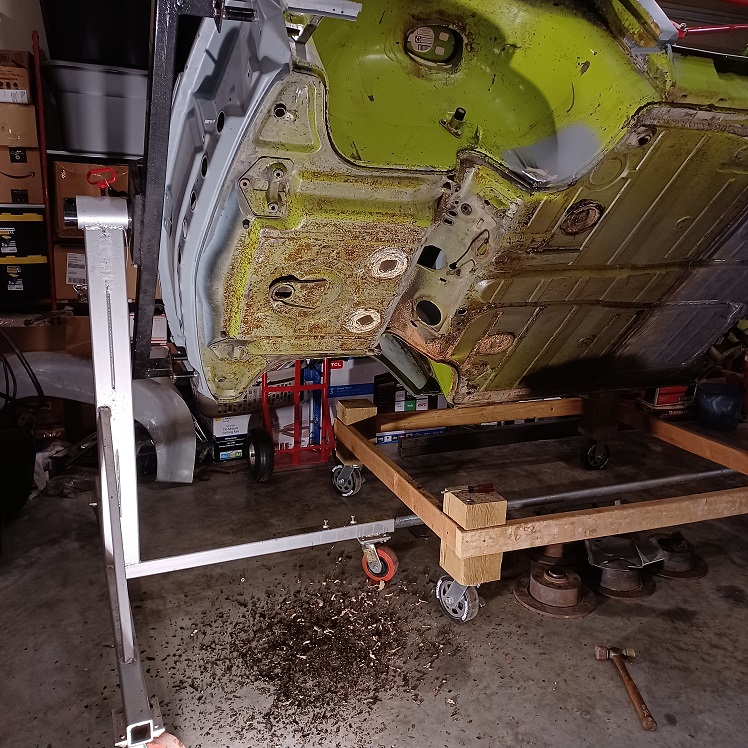
After getting about 90% of the front half cleaned off, it was time for lunch. Only took about 3 hours...lol
 |
| Puebloswatcop |
 Nov 4 2021, 05:00 PM Nov 4 2021, 05:00 PM
Post
#104
|
|
Senior Member    Group: Members Posts: 1,435 Joined: 27-December 14 From: Mineola, Texas Member No.: 18,258 Region Association: Southwest Region |
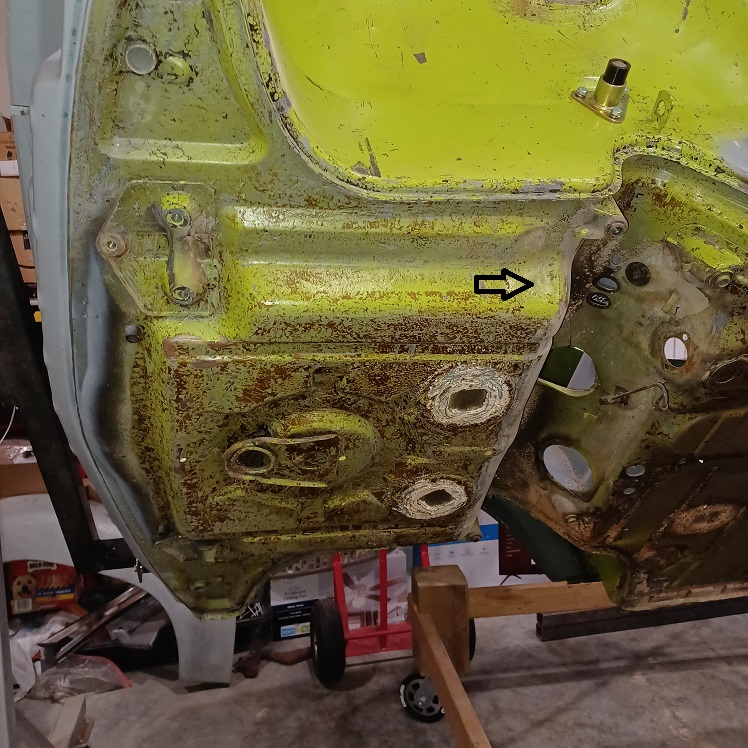
I did find a few dents in the floor pan of the frunk that need some attention. Also was wondering if it would be better to re-seal the floor plugs or just weld them in? anyones thoughts would be appreciated.
 |
| Puebloswatcop |
 Nov 4 2021, 05:03 PM Nov 4 2021, 05:03 PM
Post
#105
|
|
Senior Member    Group: Members Posts: 1,435 Joined: 27-December 14 From: Mineola, Texas Member No.: 18,258 Region Association: Southwest Region |
Allot of the seam sealer is still pretty well adhered. There was a short strip that was peeling so I removed it. Question would it be better to remove it all and reseal all of the seams, Or just spots where it needs attention?
Attached image(s) 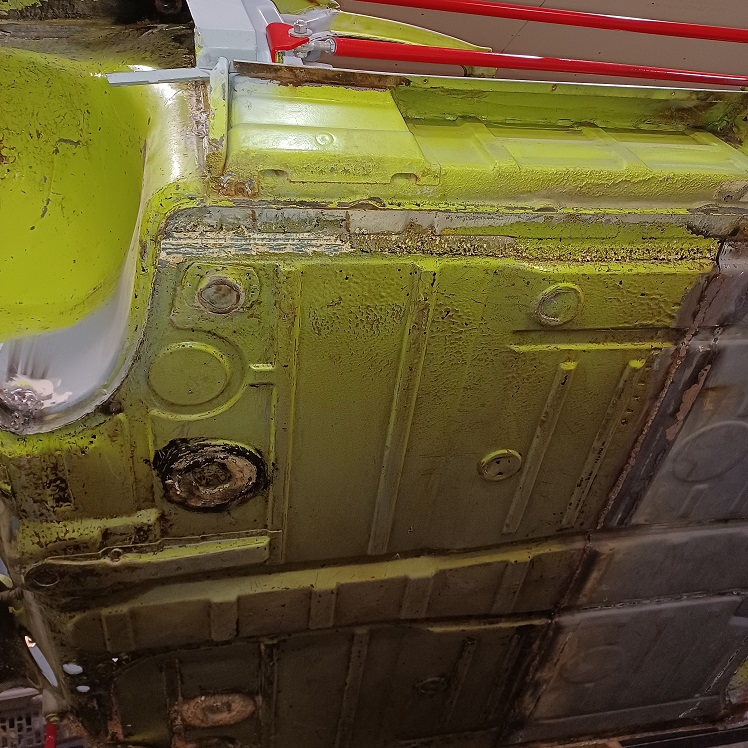
|
| Puebloswatcop |
 Nov 4 2021, 05:08 PM Nov 4 2021, 05:08 PM
Post
#106
|
|
Senior Member    Group: Members Posts: 1,435 Joined: 27-December 14 From: Mineola, Texas Member No.: 18,258 Region Association: Southwest Region |
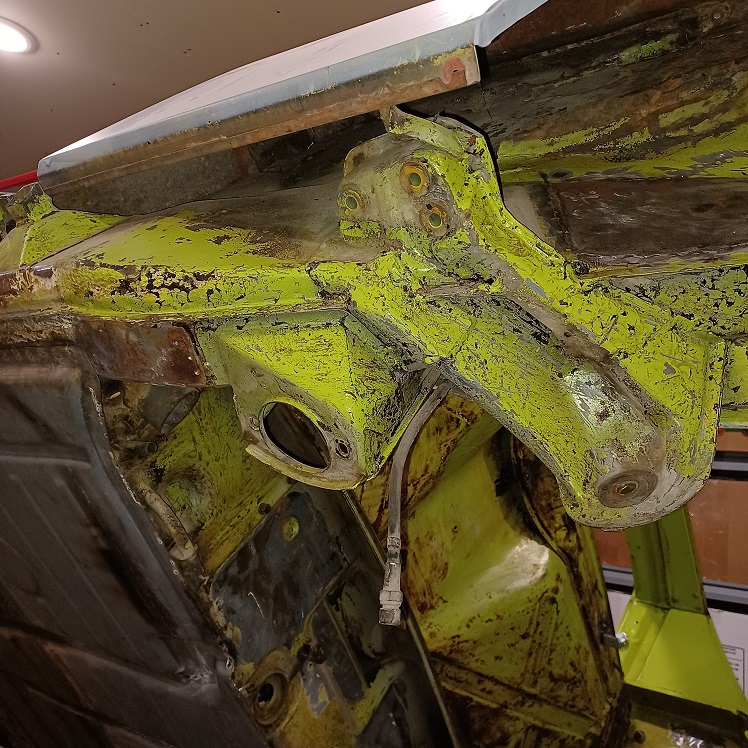
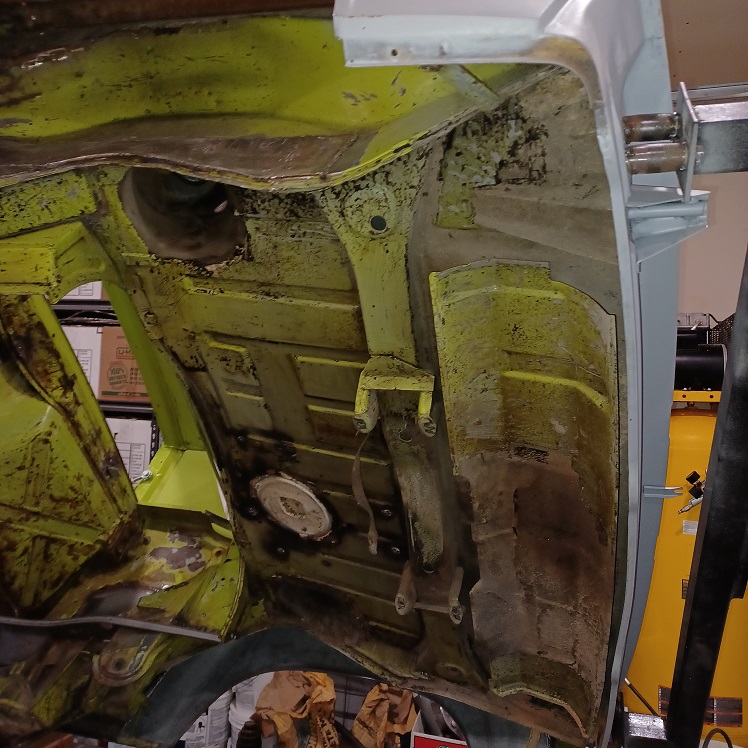
Got some of the heavy stuff off of the suspension mounts and the heat shield....Then it was Busch time (IMG:style_emoticons/default/beer3.gif)
  |
| Puebloswatcop |
 Nov 5 2021, 04:32 PM Nov 5 2021, 04:32 PM
Post
#107
|
|
Senior Member    Group: Members Posts: 1,435 Joined: 27-December 14 From: Mineola, Texas Member No.: 18,258 Region Association: Southwest Region |
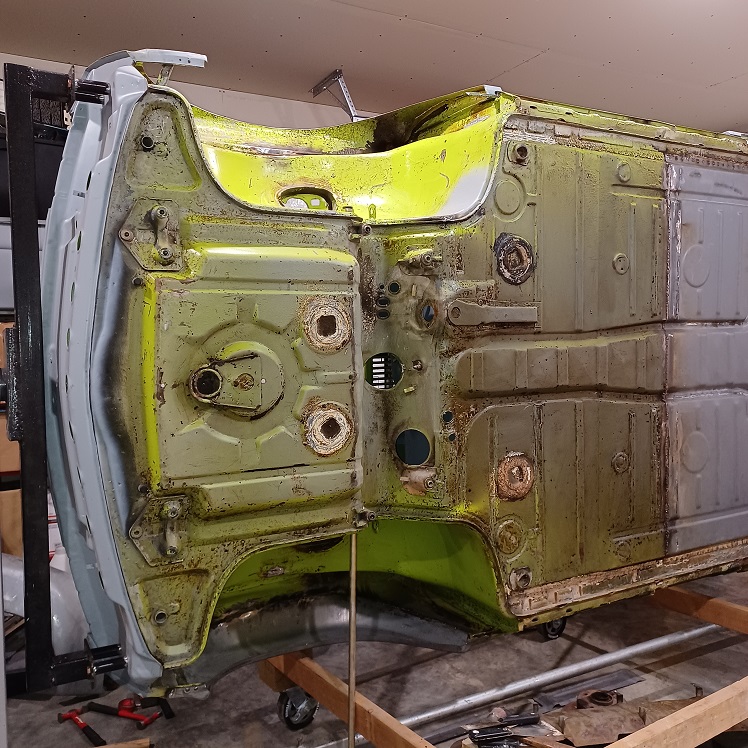
Another day of stripping under coating, yee ha,
 |
| Puebloswatcop |
 Nov 5 2021, 04:33 PM Nov 5 2021, 04:33 PM
Post
#108
|
|
Senior Member    Group: Members Posts: 1,435 Joined: 27-December 14 From: Mineola, Texas Member No.: 18,258 Region Association: Southwest Region |
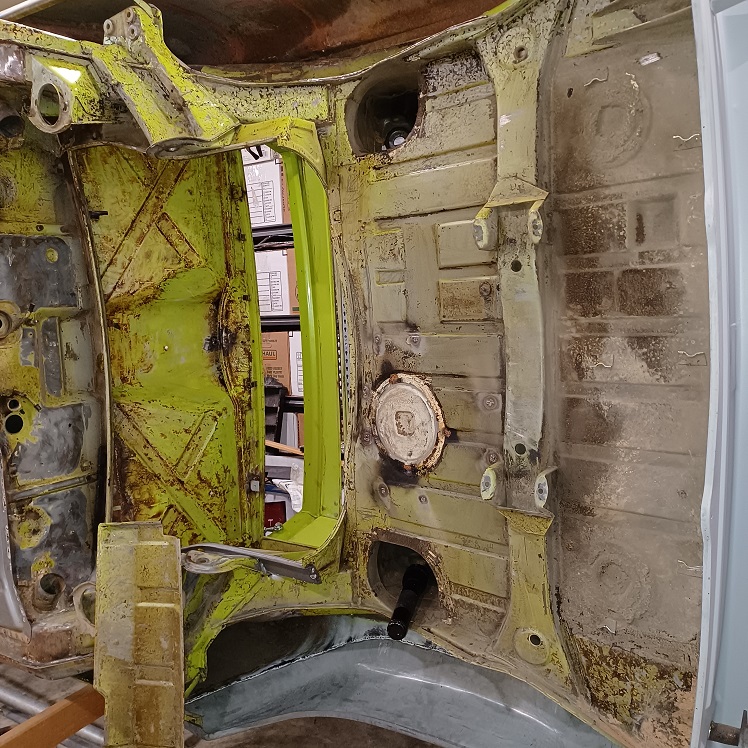
Still a long way to go to get it cleaned up:
 |
| Puebloswatcop |
 Nov 5 2021, 04:35 PM Nov 5 2021, 04:35 PM
Post
#109
|
|
Senior Member    Group: Members Posts: 1,435 Joined: 27-December 14 From: Mineola, Texas Member No.: 18,258 Region Association: Southwest Region |
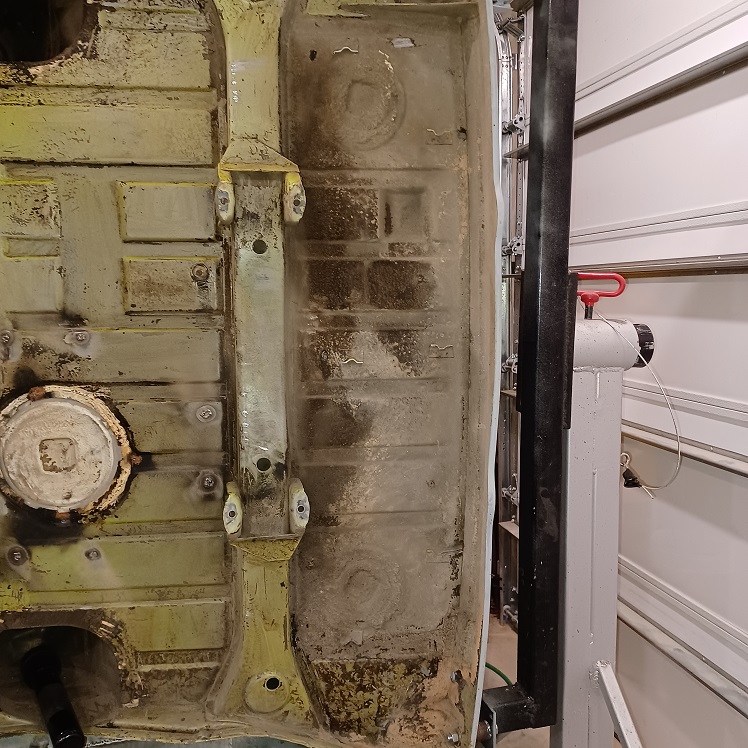
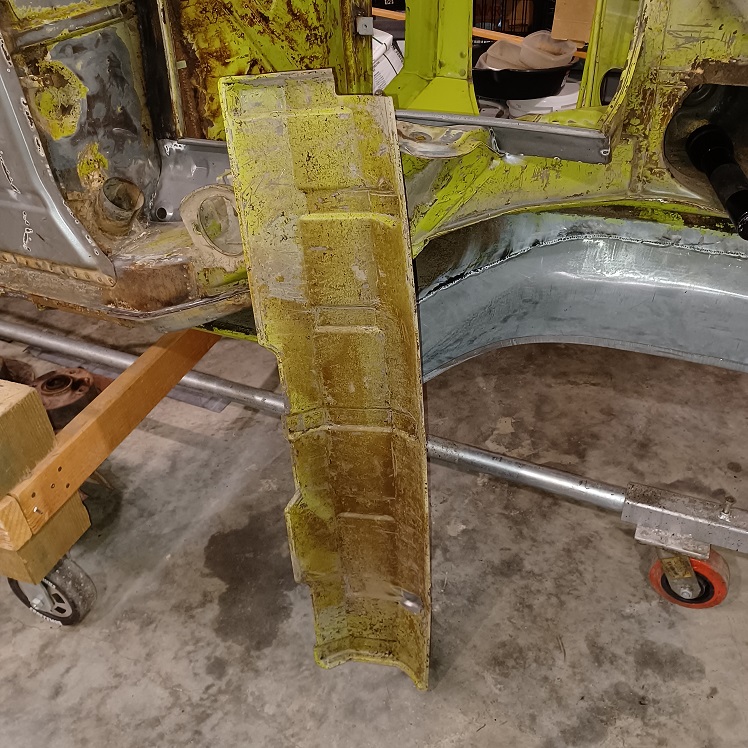
I did get the muffler heat shield removed and of course allot more undercoating under that.
  |
| Puebloswatcop |
 Nov 5 2021, 04:39 PM Nov 5 2021, 04:39 PM
Post
#110
|
|
Senior Member    Group: Members Posts: 1,435 Joined: 27-December 14 From: Mineola, Texas Member No.: 18,258 Region Association: Southwest Region |
Still a few questions...
1. What is the reccomendation for removing and re-applying the seam sealer? All or just where it was coming off? 2. As for the body plugs, leave them, reseal or weld them in? 3. Any recommendations on what to use to remove the glue from the rear firewall? Thanks for any input...or recommendations. |
| bkrantz |
 Nov 5 2021, 07:32 PM Nov 5 2021, 07:32 PM
Post
#111
|
|
914 Guru      Group: Members Posts: 8,322 Joined: 3-August 19 From: SW Colorado Member No.: 23,343 Region Association: Rocky Mountains 
|
I was pretty aggressive about removing original seam sealer. I tried prying under the edge of each section. If it came off easily, or if I saw rust, I kept going.
I welded some of the body plugs, but I am not fussy about originality. |
| Puebloswatcop |
 Nov 6 2021, 07:45 AM Nov 6 2021, 07:45 AM
Post
#112
|
|
Senior Member    Group: Members Posts: 1,435 Joined: 27-December 14 From: Mineola, Texas Member No.: 18,258 Region Association: Southwest Region |
I was pretty aggressive about removing original seam sealer. I tried prying under the edge of each section. If it came off easily, or if I saw rust, I kept going. I welded some of the body plugs, but I am not fussy about originality. Thanks for your input Bob. I'm not fussy about originality either. I just want a sound car that will look good and last and be the fun to drive 914 we all love. |
| Puebloswatcop |
 Nov 8 2021, 04:19 PM Nov 8 2021, 04:19 PM
Post
#113
|
|
Senior Member    Group: Members Posts: 1,435 Joined: 27-December 14 From: Mineola, Texas Member No.: 18,258 Region Association: Southwest Region |
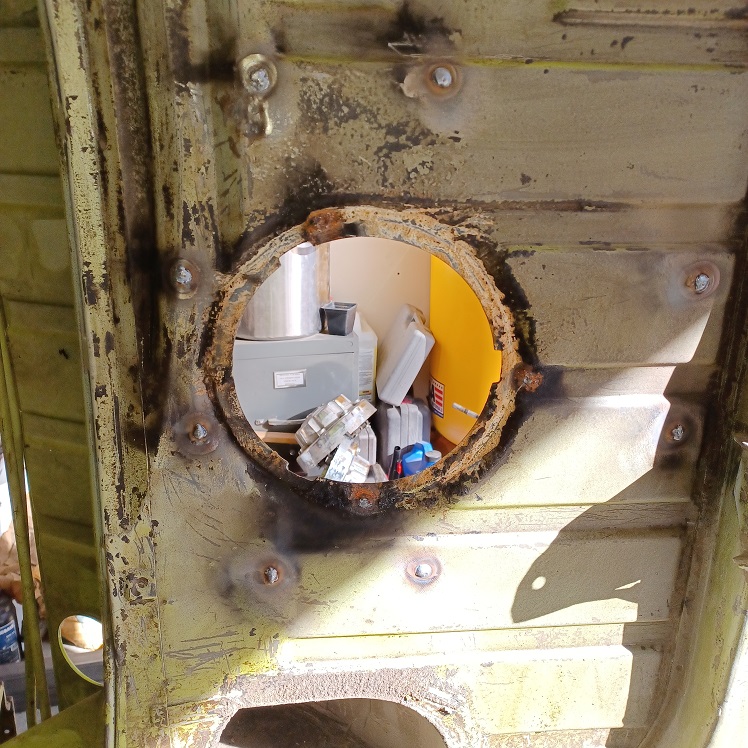
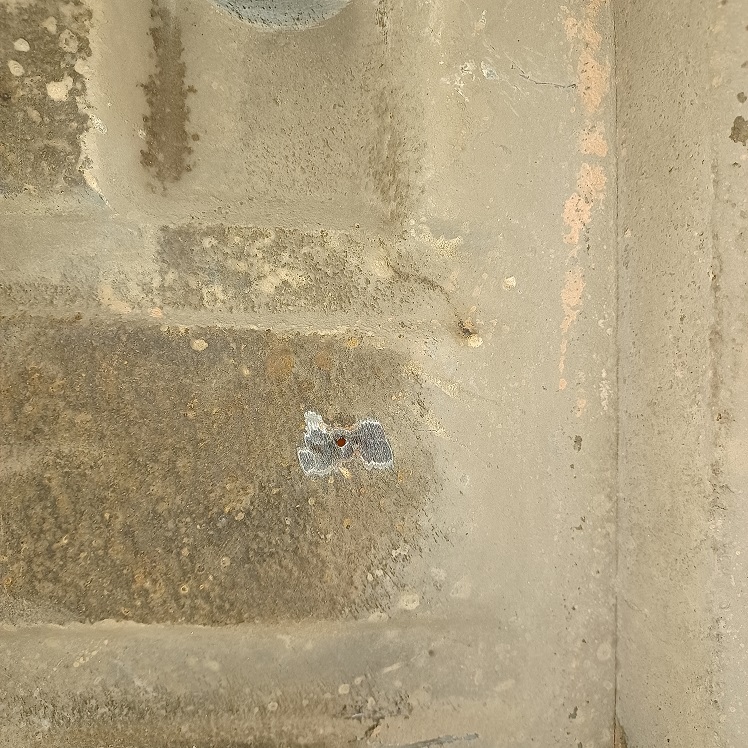
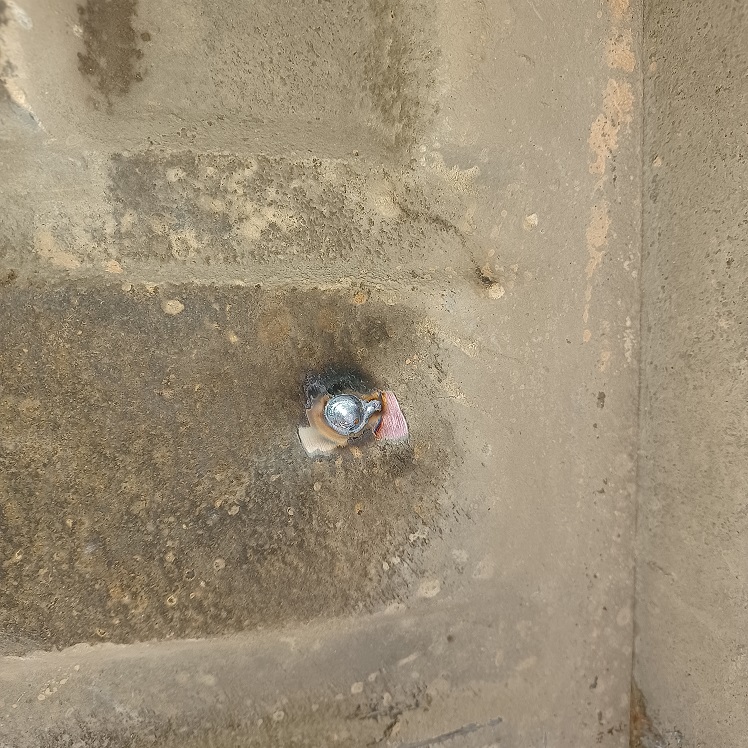
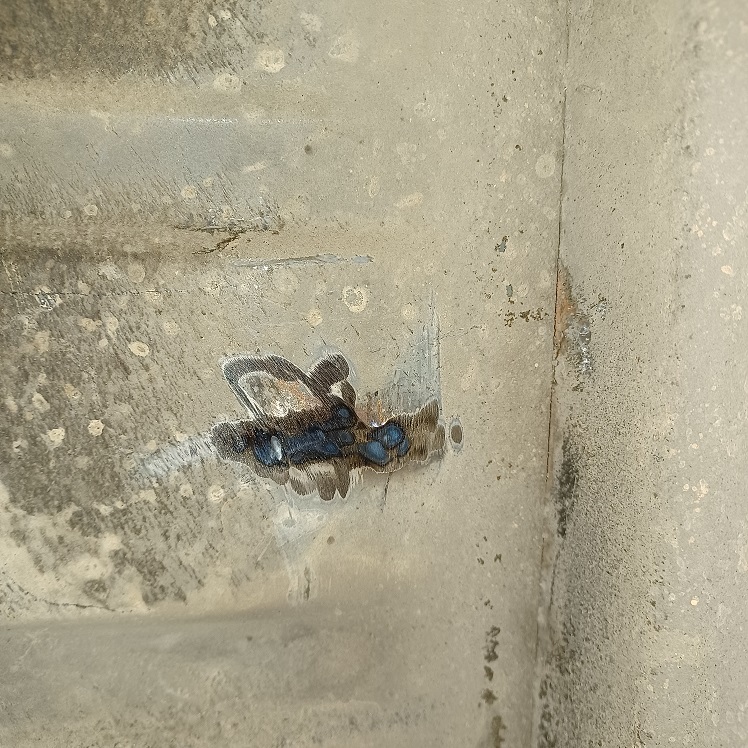
Another day of welding up holes. The P/O had installed a makeshift oil cooler that vented up into the trunk, so I had to fill all the holes he drilled. About a dozen.
    |
| Puebloswatcop |
 Nov 8 2021, 04:28 PM Nov 8 2021, 04:28 PM
Post
#114
|
|
Senior Member    Group: Members Posts: 1,435 Joined: 27-December 14 From: Mineola, Texas Member No.: 18,258 Region Association: Southwest Region |
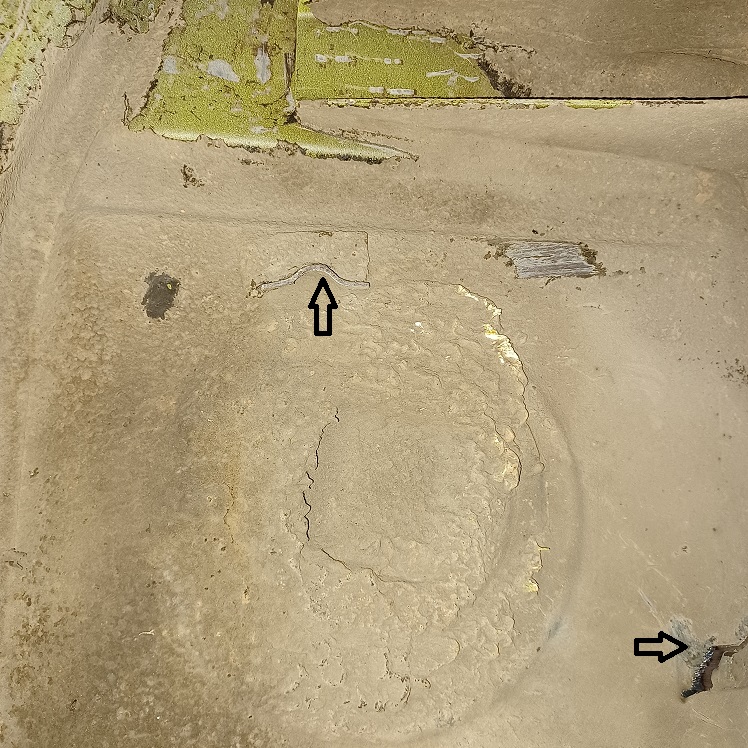
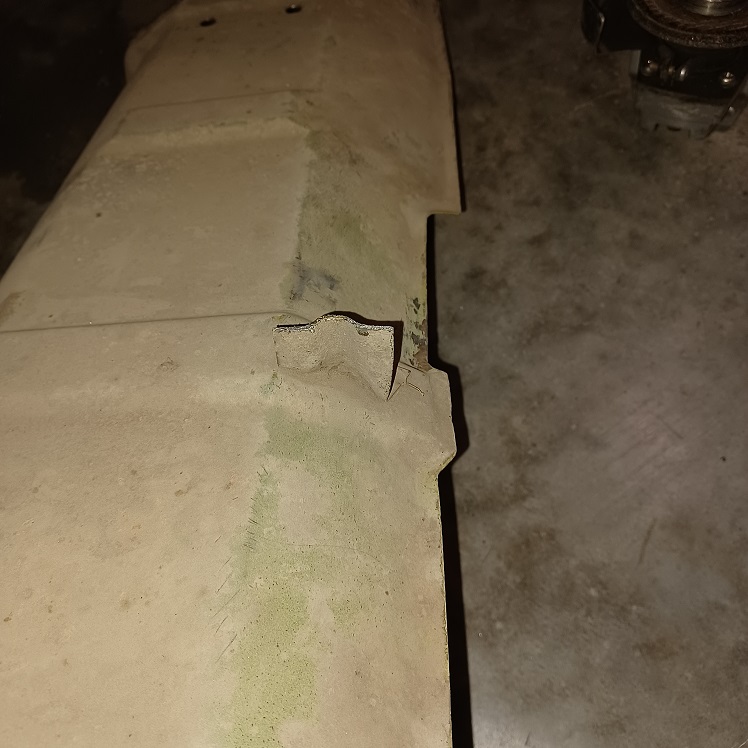
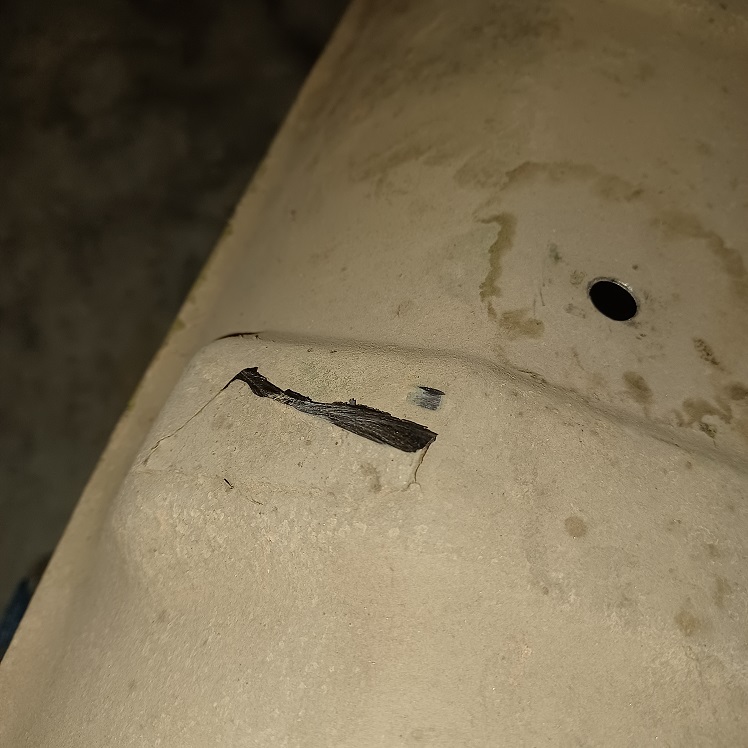
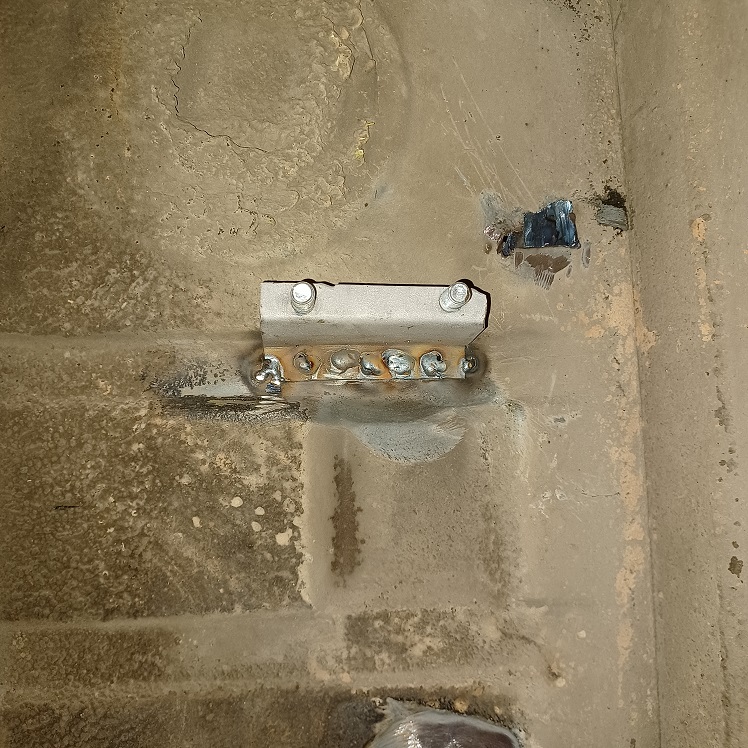
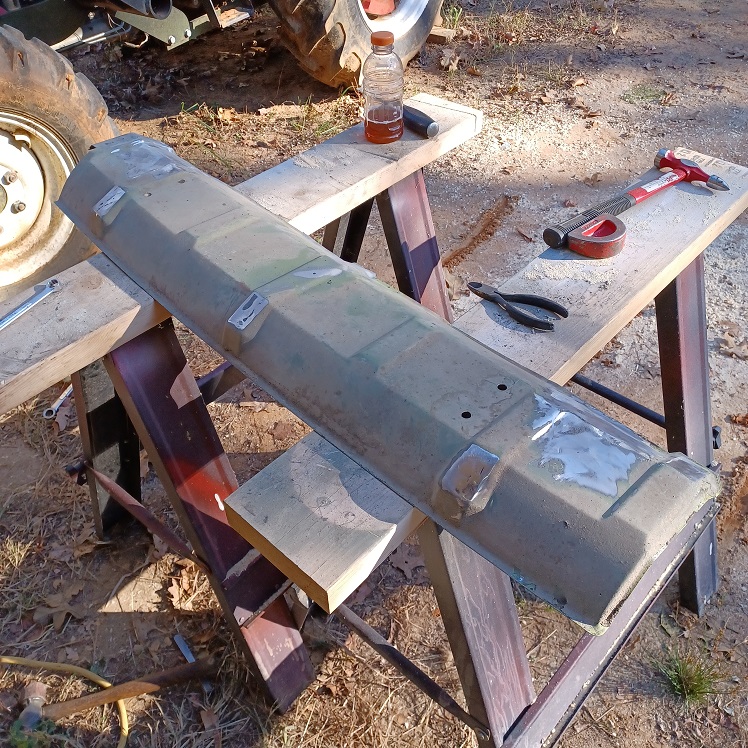
Then figured I would go to work on the heat shield. I really liked the idea that a couple of guys had about making the shield removable. So I fabricated 2 brackets using the design that Bob Krantz did in his build. Then bolted them where I wanted them to be located on the body and the shield. I left the cut off brackets on both so I could line everything up so the shield would be at the same height and in the exact same location as when it was welded in. Then clamped it back in place with vice grips to mark the locations for the brackets.
   |
| Puebloswatcop |
 Nov 8 2021, 04:30 PM Nov 8 2021, 04:30 PM
Post
#115
|
|
Senior Member    Group: Members Posts: 1,435 Joined: 27-December 14 From: Mineola, Texas Member No.: 18,258 Region Association: Southwest Region |
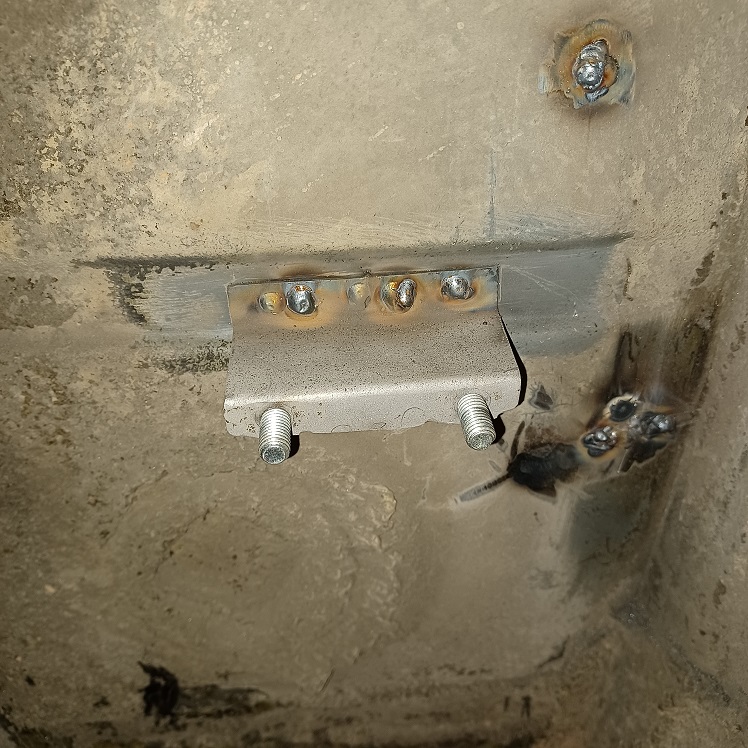
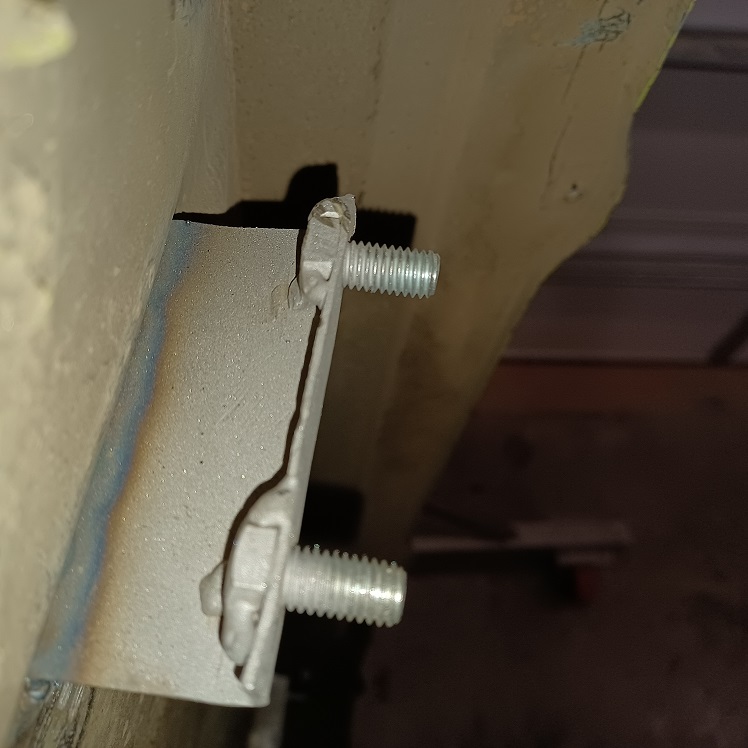
Then welded the brackets in place on the body.
   |
| Puebloswatcop |
 Nov 8 2021, 04:33 PM Nov 8 2021, 04:33 PM
Post
#116
|
|
Senior Member    Group: Members Posts: 1,435 Joined: 27-December 14 From: Mineola, Texas Member No.: 18,258 Region Association: Southwest Region |
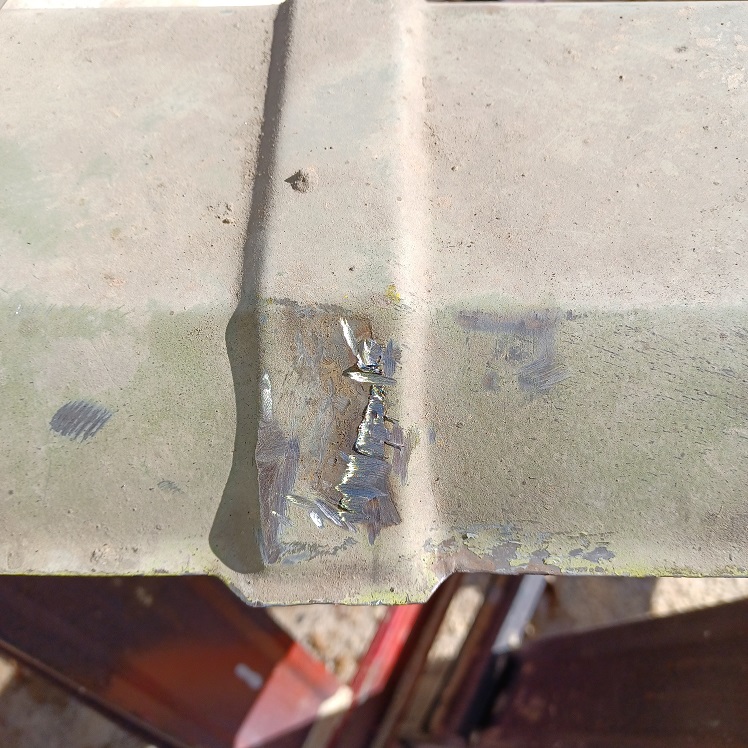
After confirming the fit I went through and cut off all of the old brackets.
  |
| Puebloswatcop |
 Nov 8 2021, 04:37 PM Nov 8 2021, 04:37 PM
Post
#117
|
|
Senior Member    Group: Members Posts: 1,435 Joined: 27-December 14 From: Mineola, Texas Member No.: 18,258 Region Association: Southwest Region |
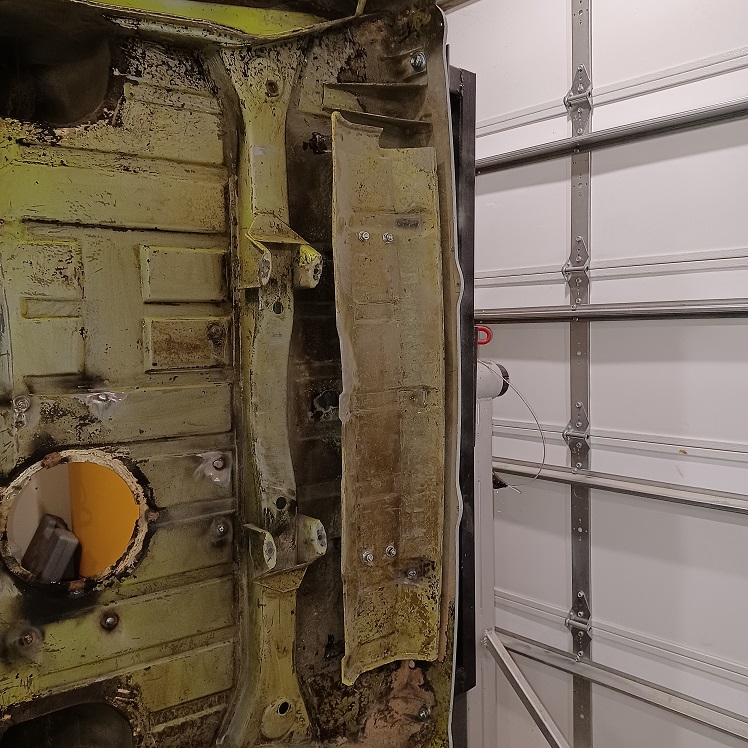
In the end, I am pleased with the fit. Now i can go back to cleaning all the undercoating and dirt. Hopefully soon it will be time to have the body blasted. 47 years of dirt is waring on me...lol
 |
| Puebloswatcop |
 Nov 9 2021, 09:23 AM Nov 9 2021, 09:23 AM
Post
#118
|
|
Senior Member    Group: Members Posts: 1,435 Joined: 27-December 14 From: Mineola, Texas Member No.: 18,258 Region Association: Southwest Region |
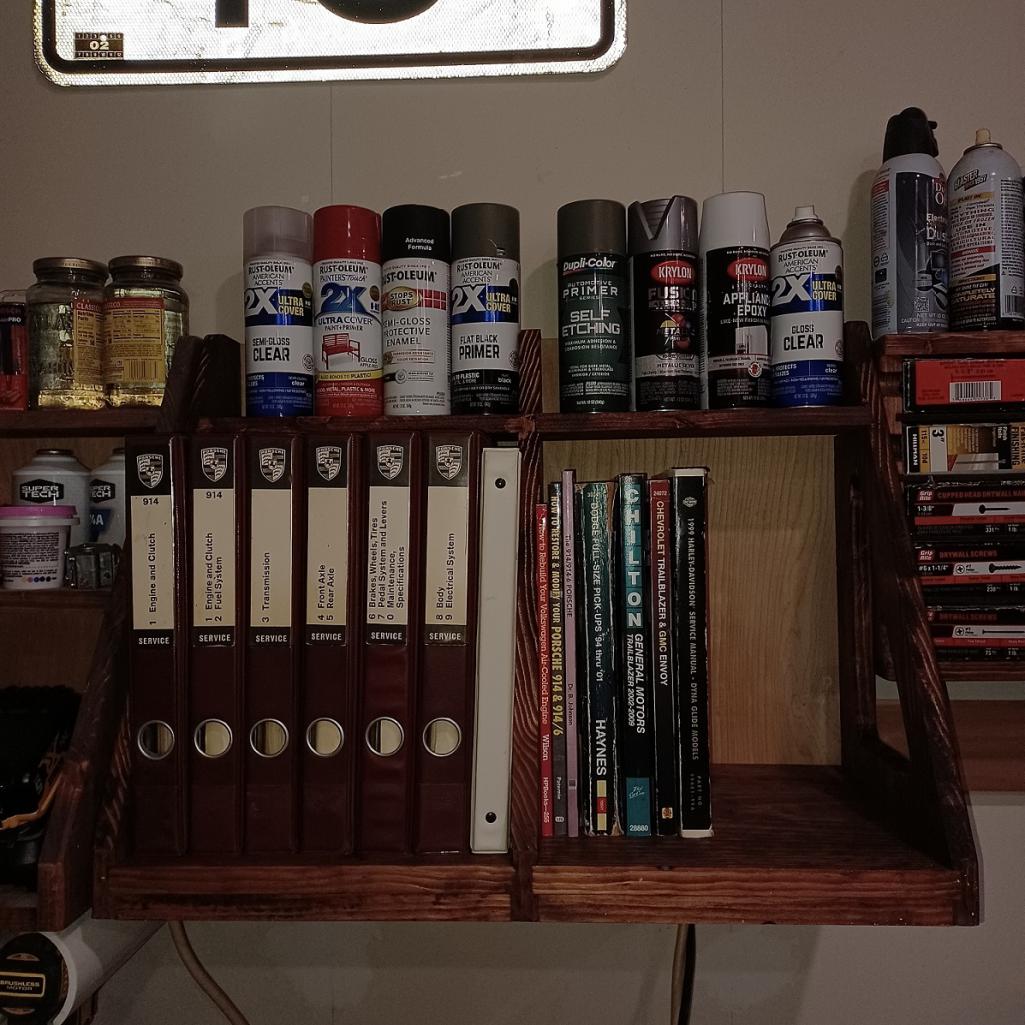
So, over the weekend I got frustrated about not having my work manuals in the garage where they are readily handy. So I built a bookshelf to add to the wall specifically for workshop manuals.
 And I picked up a white board to help keep me on task. I've already identified several things that need doing, hopfully it will help me stay focused. 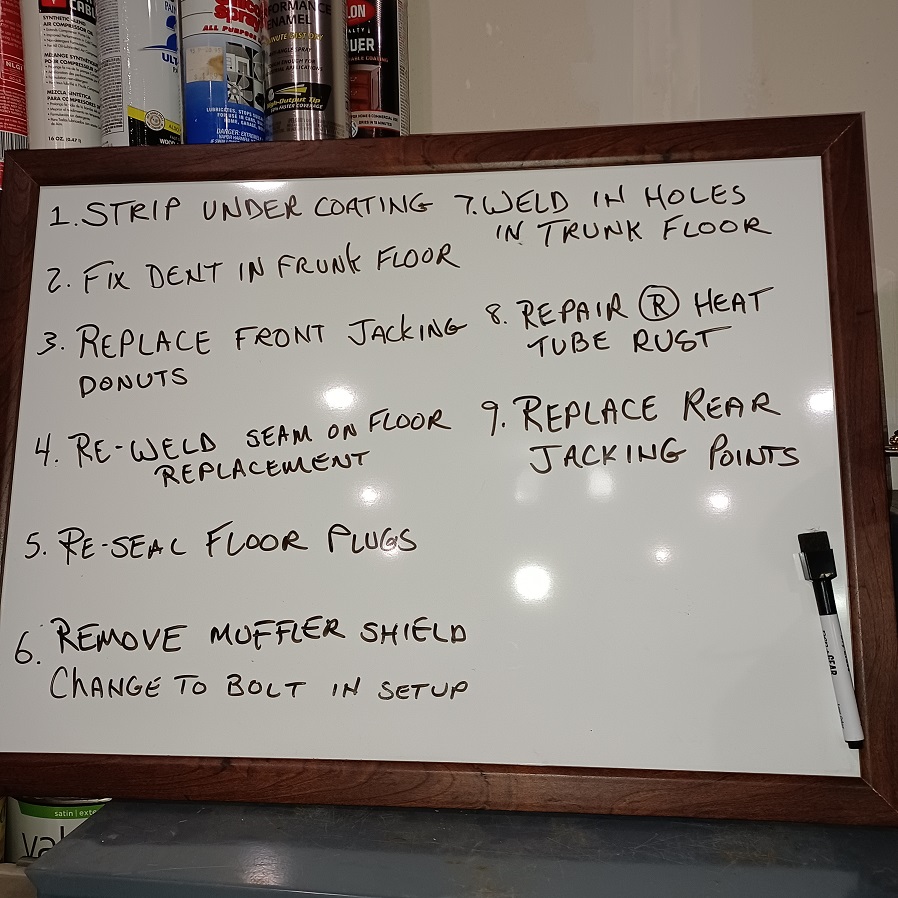 |
| Puebloswatcop |
 Nov 9 2021, 05:33 PM Nov 9 2021, 05:33 PM
Post
#119
|
|
Senior Member    Group: Members Posts: 1,435 Joined: 27-December 14 From: Mineola, Texas Member No.: 18,258 Region Association: Southwest Region |
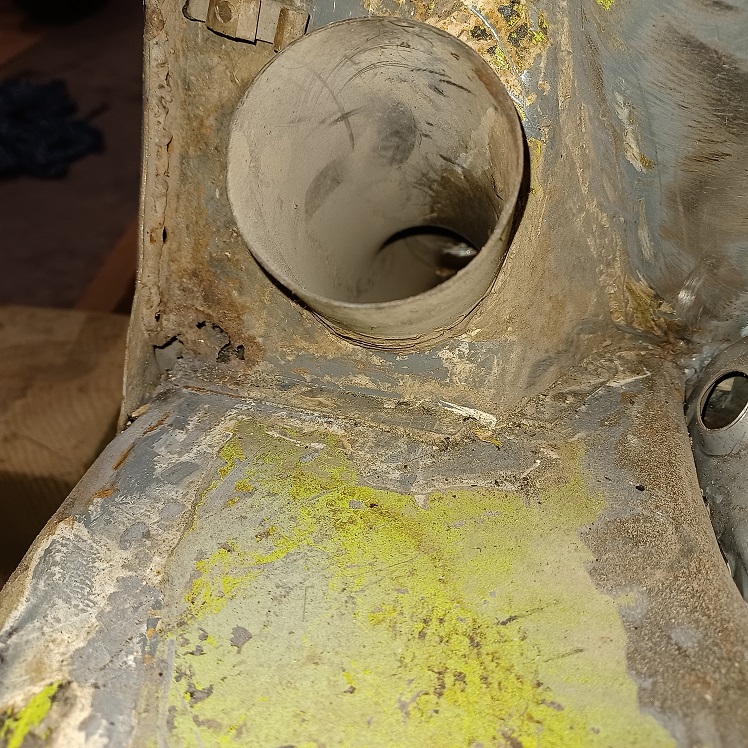
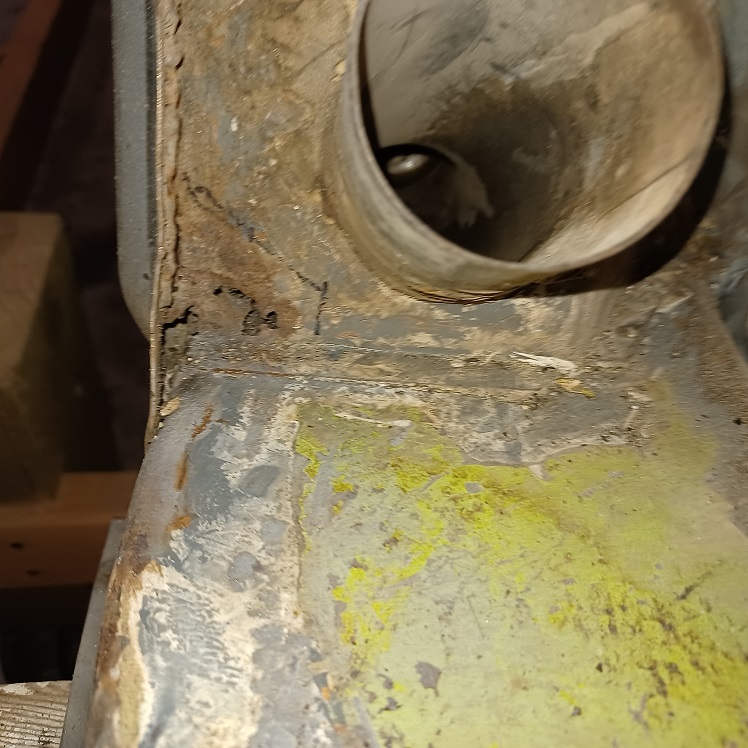
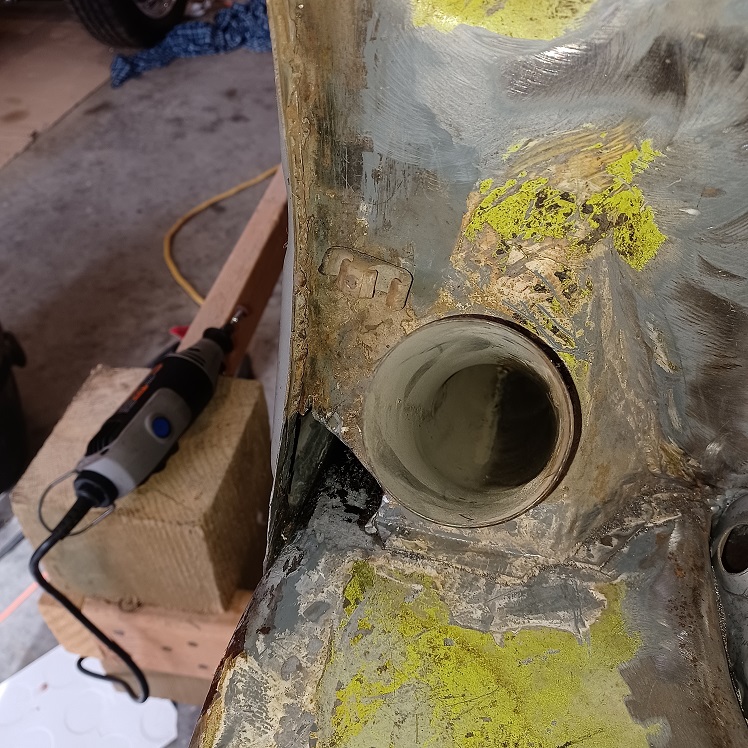
BAck to working on the car, or should I say playing, I love retirement. Decided to repair a rust issue below the drivers side het tube. This area is a PITA to get to because none of my cutting wheels would fit without cutting into the heater tube. Luckily the rust area was very small.
  |
| Puebloswatcop |
 Nov 9 2021, 05:37 PM Nov 9 2021, 05:37 PM
Post
#120
|
|
Senior Member    Group: Members Posts: 1,435 Joined: 27-December 14 From: Mineola, Texas Member No.: 18,258 Region Association: Southwest Region |
So between metal sheers, a 2" cutoff wheel and borrowing my wife's dremmel tool, I was able to cut out the spot till I hit solid metal again. Not the straight lines I had envisioned, but will just have to adust the patch to fit.
 |
  |
1 User(s) are reading this topic (1 Guests and 0 Anonymous Users)
0 Members:

|
Lo-Fi Version | Time is now: 4th April 2025 - 04:36 PM |
Invision Power Board
v9.1.4 © 2025 IPS, Inc.


