|
|

|
Porsche, and the Porsche crest are registered trademarks of Dr. Ing. h.c. F. Porsche AG.
This site is not affiliated with Porsche in any way. Its only purpose is to provide an online forum for car enthusiasts. All other trademarks are property of their respective owners. |
|
|
  |
| Puebloswatcop |
 Feb 5 2022, 09:21 AM Feb 5 2022, 09:21 AM
Post
#321
|
|
Senior Member    Group: Members Posts: 1,401 Joined: 27-December 14 From: Mineola, Texas Member No.: 18,258 Region Association: Southwest Region |
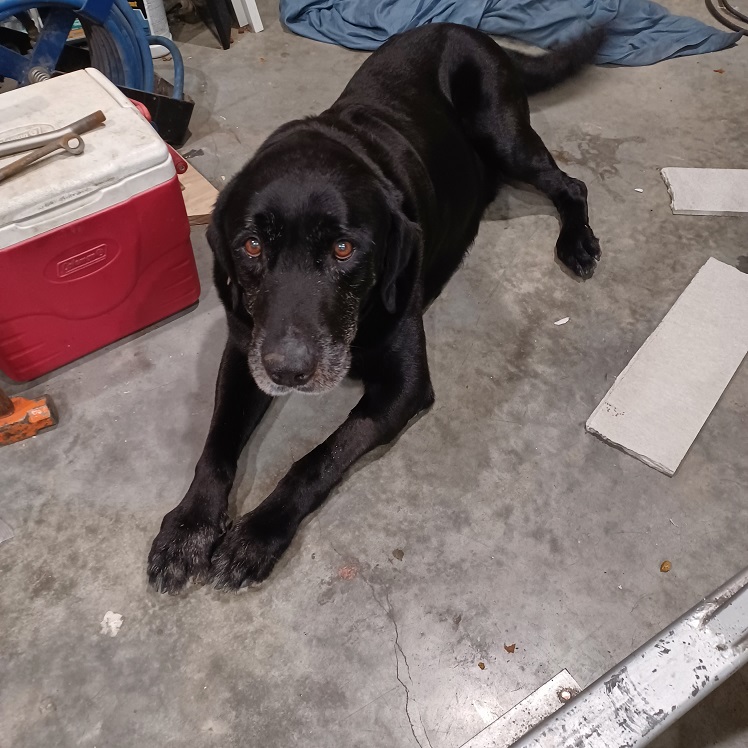
The cold weather makes it rather difficult to work, even though the garage is heated. Since the dogs can't go out, I had a rather large supervisor lurking everywhere I went.
 |
| Puebloswatcop |
 Feb 5 2022, 09:29 AM Feb 5 2022, 09:29 AM
Post
#322
|
|
Senior Member    Group: Members Posts: 1,401 Joined: 27-December 14 From: Mineola, Texas Member No.: 18,258 Region Association: Southwest Region |
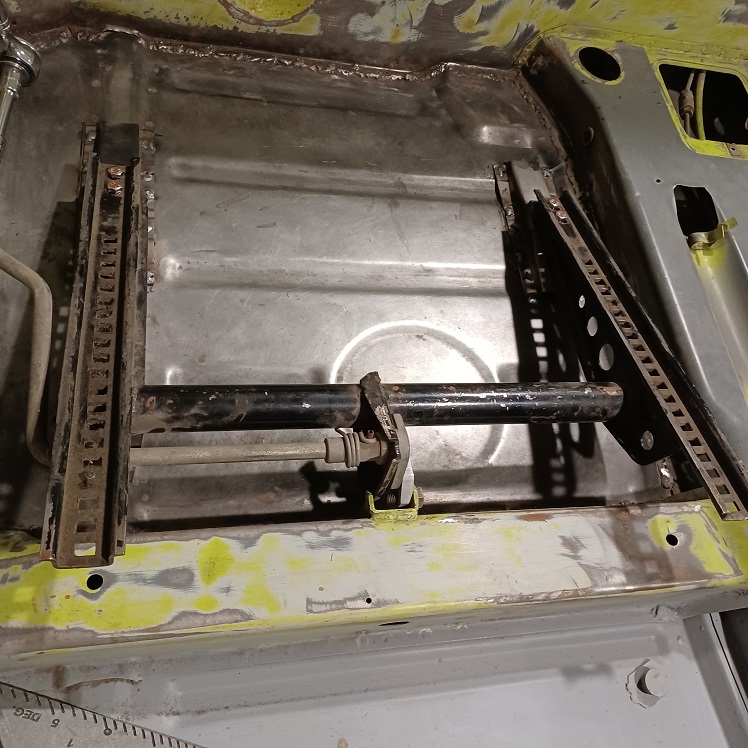
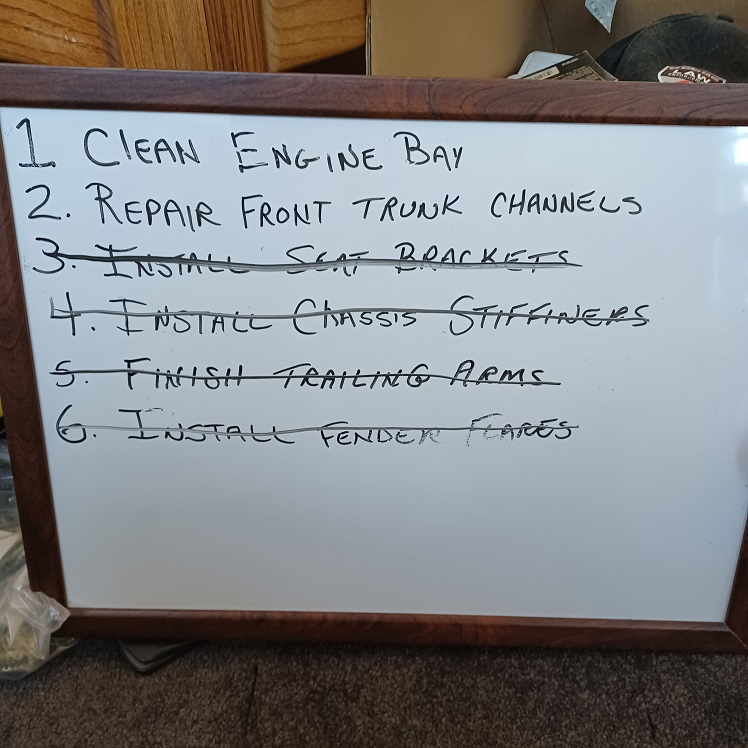
But I was able to get the passenger side seat brackets installed. So cross one more item off this list.
  |
| Puebloswatcop |
 Feb 7 2022, 06:15 PM Feb 7 2022, 06:15 PM
Post
#323
|
|
Senior Member    Group: Members Posts: 1,401 Joined: 27-December 14 From: Mineola, Texas Member No.: 18,258 Region Association: Southwest Region |
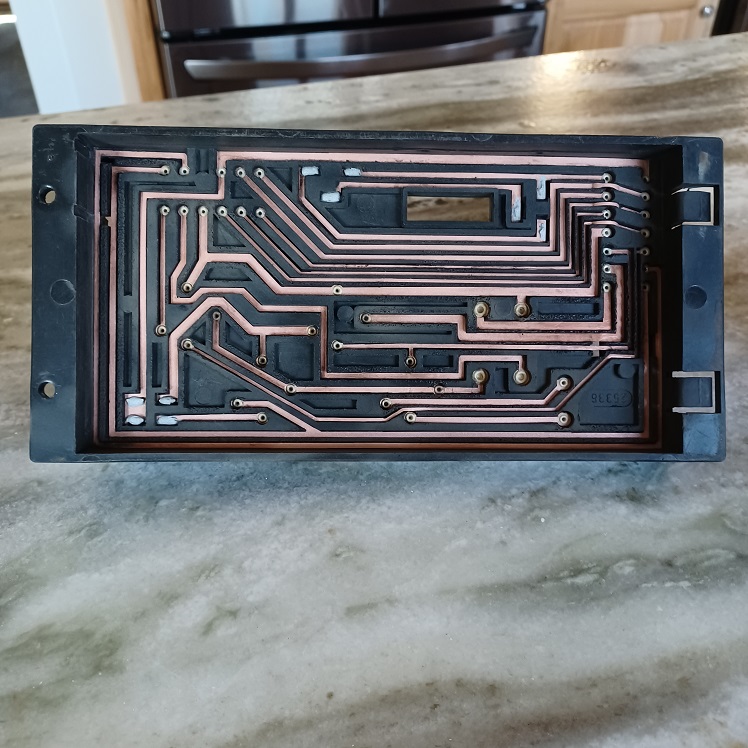
So, since I am going on another trip in a few days, I didn't want to get into any body work. Instead I decided to work on my relay board. The potting tar on the back was typical, all cracked and falling out. So I spent several hours cleaning all of that garbage out and then tested every cirquit to be sure all the connections were good. I would like to solder all the connections, but am afraid that I might melt the plastic while attempting to do so. If anyone has any suggestions as to how I can do that, please let me know. In the mean time the board is all clean and the epoxy to re-pott it is on its way.
 |
| Puebloswatcop |
 Feb 7 2022, 06:20 PM Feb 7 2022, 06:20 PM
Post
#324
|
|
Senior Member    Group: Members Posts: 1,401 Joined: 27-December 14 From: Mineola, Texas Member No.: 18,258 Region Association: Southwest Region |
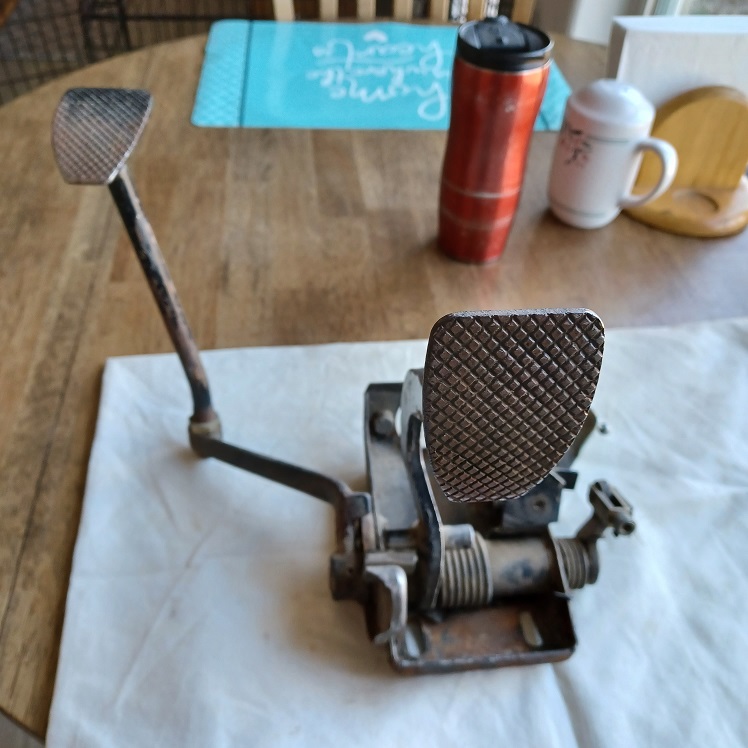
The other thing I decided to work on was the pedal cluster, its of course covered in years of crud and some minor rust. I spent a couple of hours trying to remove the Clutch Pedal from the cluster and it is well rusted in place. I've tried penetrating oil, heat, and beating on the shaft with a hammer and punch. No luck (IMG:style_emoticons/default/headbang.gif) , call it a night and go eat dinner, will try again tomorrow. Put more penetrating oil for an overnight soak.
 |
| Puebloswatcop |
 Feb 8 2022, 01:50 PM Feb 8 2022, 01:50 PM
Post
#325
|
|
Senior Member    Group: Members Posts: 1,401 Joined: 27-December 14 From: Mineola, Texas Member No.: 18,258 Region Association: Southwest Region |
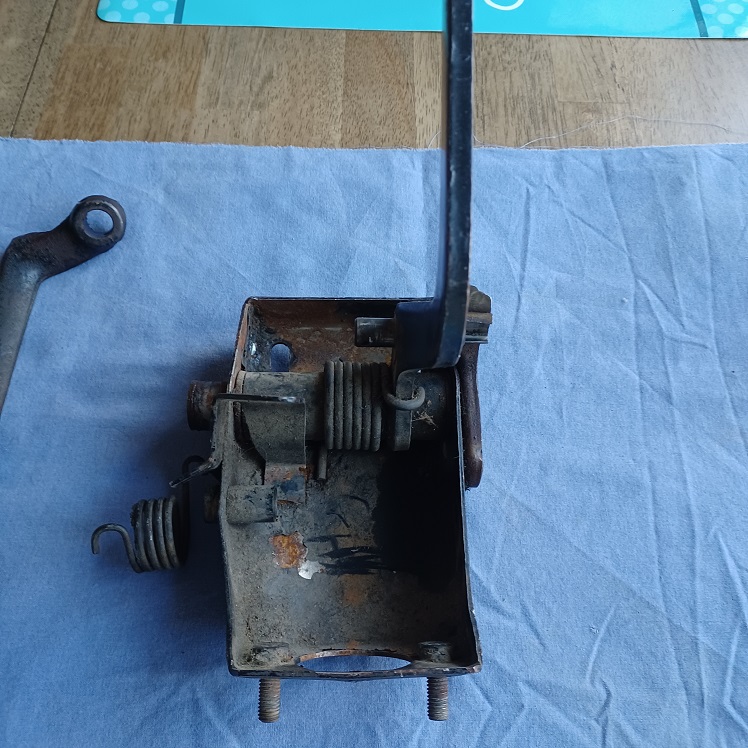
Today it was back to work on the pedal cluster, it took allot of elbow grease, penetrating oil and hammering to get the clutch pedal shaft out, but I did finally have success.
 |
| Puebloswatcop |
 Feb 8 2022, 01:53 PM Feb 8 2022, 01:53 PM
Post
#326
|
|
Senior Member    Group: Members Posts: 1,401 Joined: 27-December 14 From: Mineola, Texas Member No.: 18,258 Region Association: Southwest Region |
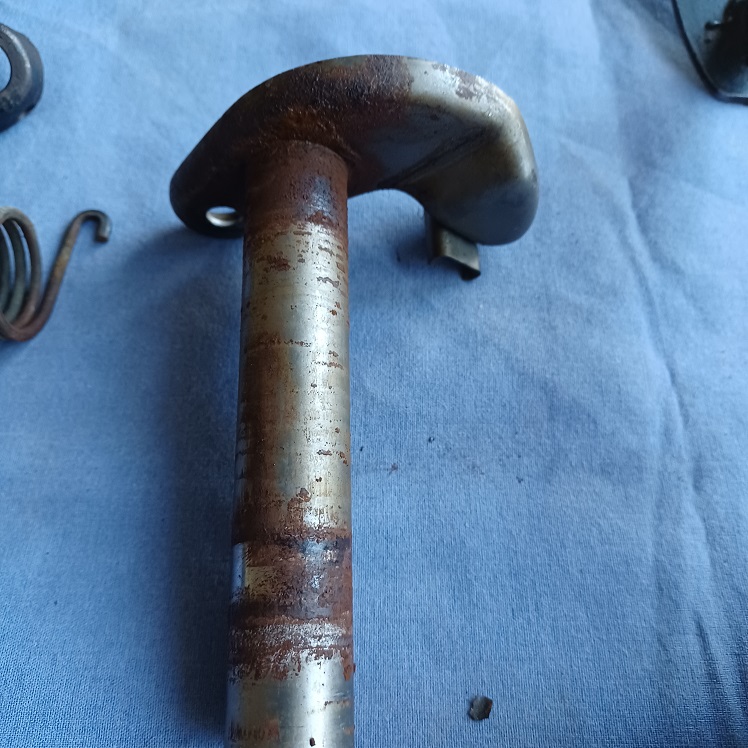
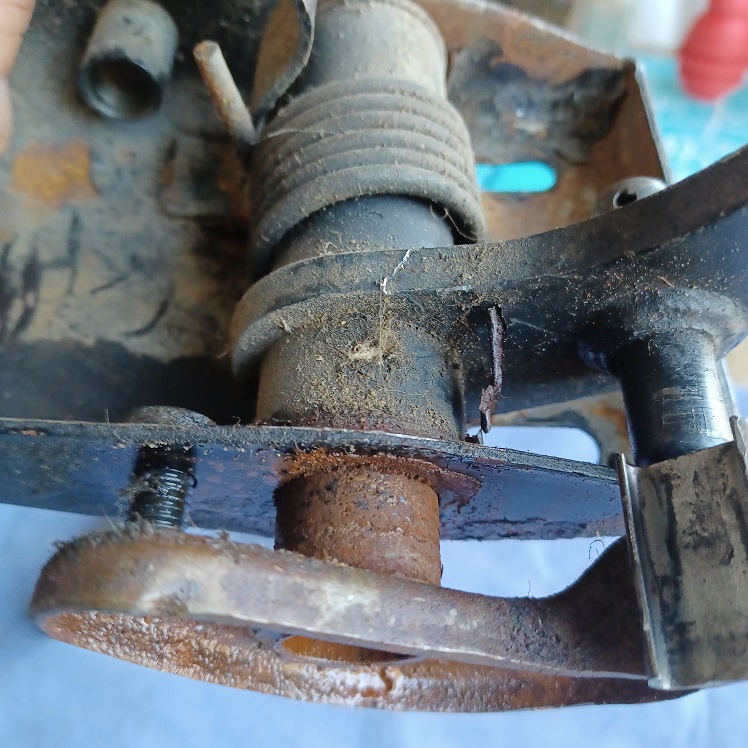
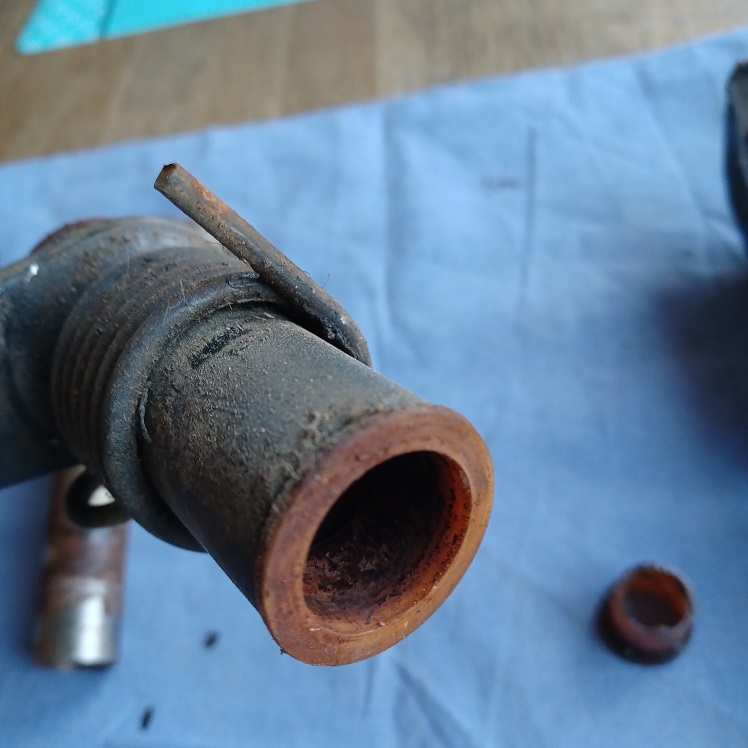
There was a fair amount of heavy rust in all of the working parts
   |
| 914sgofast2 |
 Feb 8 2022, 01:54 PM Feb 8 2022, 01:54 PM
Post
#327
|
|
Senior Member    Group: Members Posts: 650 Joined: 10-May 13 From: El Dorado Hills, CA Member No.: 15,855 Region Association: None |
So, since I am going on another trip in a few days, I didn't want to get into any body work. Instead I decided to work on my relay board. The potting tar on the back was typical, all cracked and falling out. So I spent several hours cleaning all of that garbage out and then tested every cirquit to be sure all the connections were good. I would like to solder all the connections, but am afraid that I might melt the plastic while attempting to do so. If anyone has any suggestions as to how I can do that, please let me know. In the mean time the board is all clean and the epoxy to re-pott it is on its way.  I just sprayed mine with a can of rubberized underseal. Worked great and didn’t bleed through. |
| Puebloswatcop |
 Feb 8 2022, 02:00 PM Feb 8 2022, 02:00 PM
Post
#328
|
|
Senior Member    Group: Members Posts: 1,401 Joined: 27-December 14 From: Mineola, Texas Member No.: 18,258 Region Association: Southwest Region |
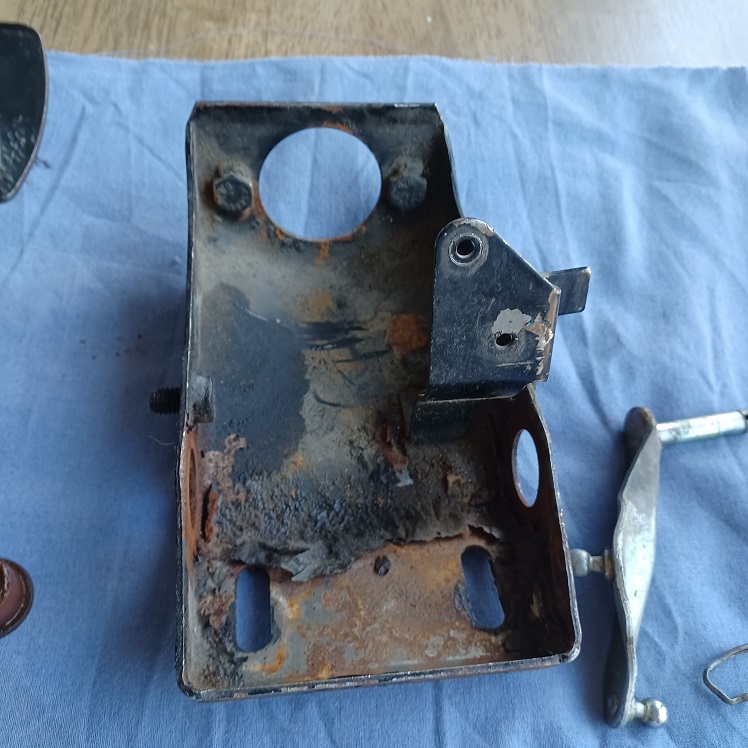
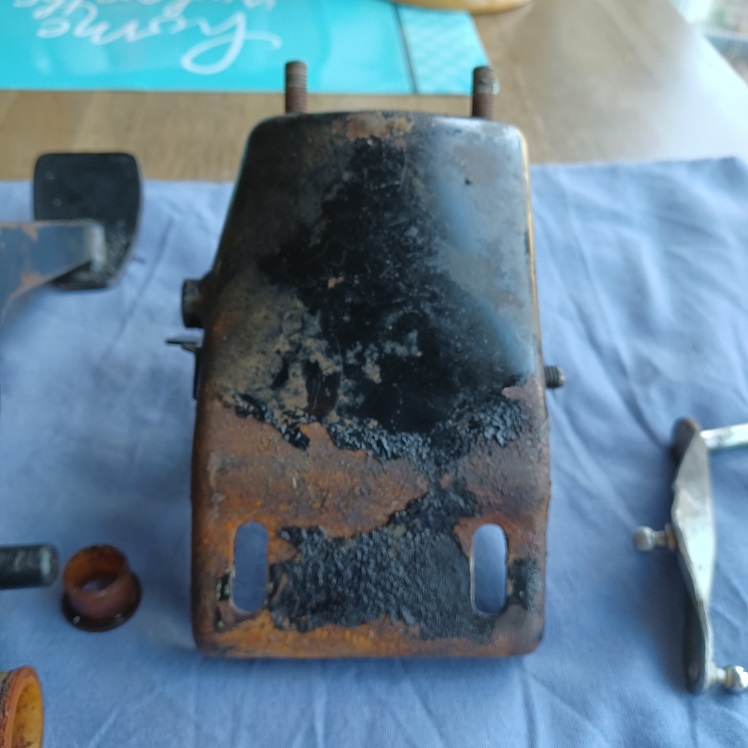
The base had the typical rust and paint peeling (from brake fluid leakage I believe) but the rust was not too deep in the metal.
  |
| Puebloswatcop |
 Feb 8 2022, 02:05 PM Feb 8 2022, 02:05 PM
Post
#329
|
|
Senior Member    Group: Members Posts: 1,401 Joined: 27-December 14 From: Mineola, Texas Member No.: 18,258 Region Association: Southwest Region |
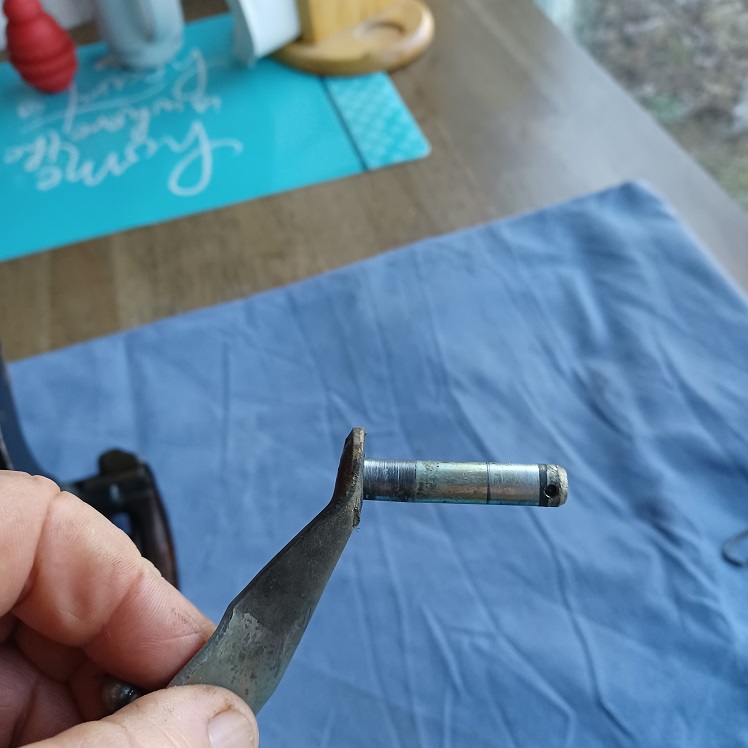
The reverse lever is trash. Not sure if it even worked for the P/O since it was bent so badly. Both the shaft and the assembly are bent beyond repair.
 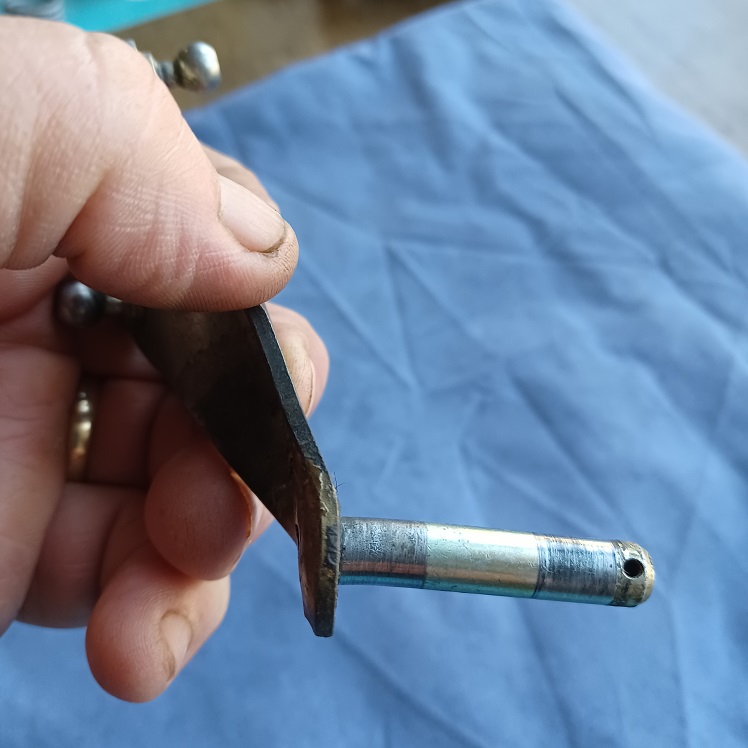 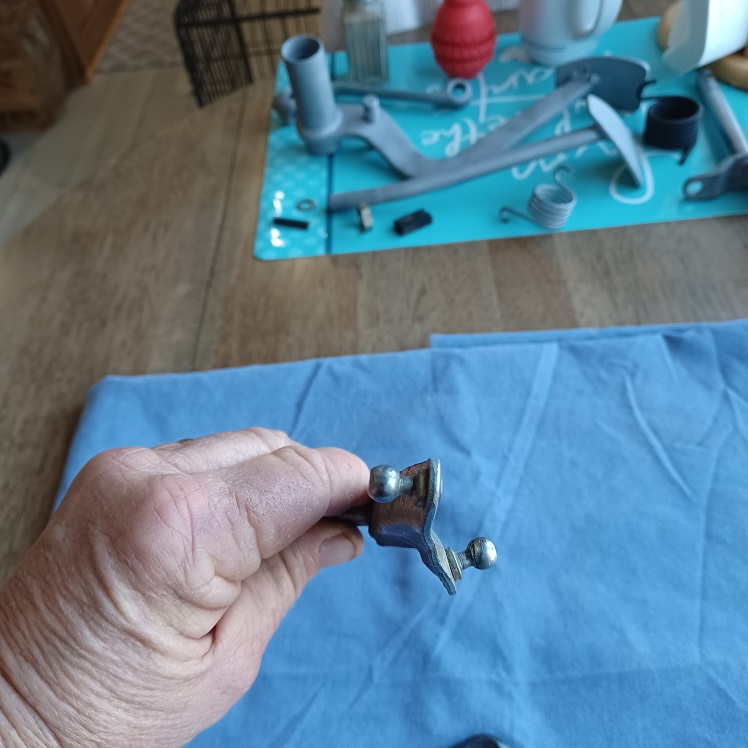 |
| Puebloswatcop |
 Feb 8 2022, 02:08 PM Feb 8 2022, 02:08 PM
Post
#330
|
|
Senior Member    Group: Members Posts: 1,401 Joined: 27-December 14 From: Mineola, Texas Member No.: 18,258 Region Association: Southwest Region |
All the parts have been cleaned and while I am awaiting a new reverse lever as well as a couple other parts, I will send the usable parts for powder coating and plating. I also have all new hardware for the entire cluster.
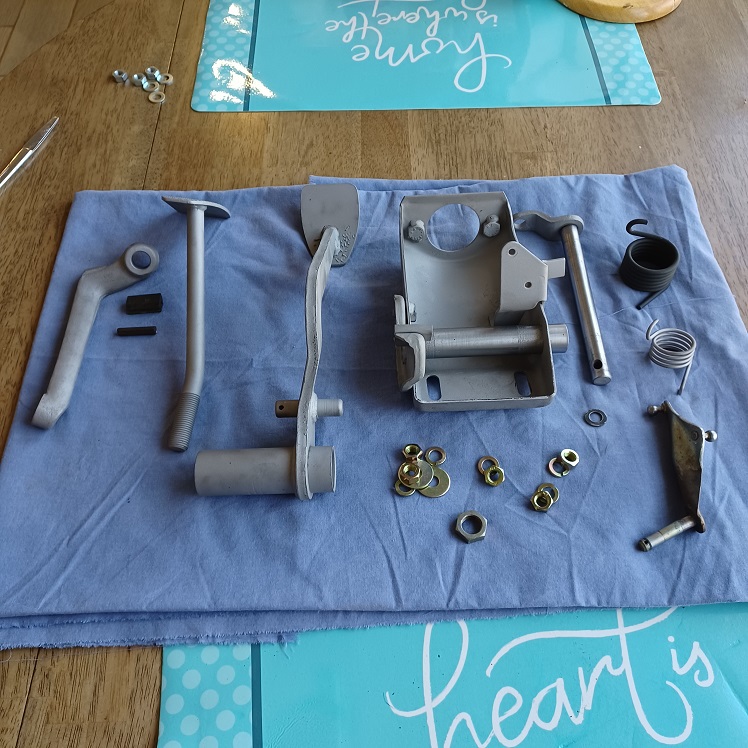 |
| Puebloswatcop |
 Feb 8 2022, 02:12 PM Feb 8 2022, 02:12 PM
Post
#331
|
|
Senior Member    Group: Members Posts: 1,401 Joined: 27-December 14 From: Mineola, Texas Member No.: 18,258 Region Association: Southwest Region |
So, since I am going on another trip in a few days, I didn't want to get into any body work. Instead I decided to work on my relay board. The potting tar on the back was typical, all cracked and falling out. So I spent several hours cleaning all of that garbage out and then tested every cirquit to be sure all the connections were good. I would like to solder all the connections, but am afraid that I might melt the plastic while attempting to do so. If anyone has any suggestions as to how I can do that, please let me know. In the mean time the board is all clean and the epoxy to re-pott it is on its way.  I just sprayed mine with a can of rubberized underseal. Worked great and didn’t bleed through. Had I not already ordered the epoxy sealer I would have considered doing that too. But by the time I had seen a post (I believe it was yours) about the underseal, the epoxy had already shipped. |
| ClayPerrine |
 Feb 8 2022, 02:43 PM Feb 8 2022, 02:43 PM
Post
#332
|
|
Life's been good to me so far.....                Group: Admin Posts: 15,902 Joined: 11-September 03 From: Hurst, TX. Member No.: 1,143 Region Association: NineFourteenerVille 
|
The reverse lever is trash. Not sure if it even worked for the P/O since it was bent so badly. Both the shaft and the assembly are bent beyond repair.    That happens when someone gets a little too "enthusiastic" when pushing on the accelerator pedal. Proper adjustment of the throttle stop behind the pedal will prevent it from happening again. Once everything is hooked back up, hold the pedal down to wide open throttle and adjust the stop up to meet the back of the pedal. Then you can get "enthusiastic" as you want and you won't bend it again. |
| Puebloswatcop |
 Feb 8 2022, 06:05 PM Feb 8 2022, 06:05 PM
Post
#333
|
|
Senior Member    Group: Members Posts: 1,401 Joined: 27-December 14 From: Mineola, Texas Member No.: 18,258 Region Association: Southwest Region |
The reverse lever is trash. Not sure if it even worked for the P/O since it was bent so badly. Both the shaft and the assembly are bent beyond repair.    That happens when someone gets a little too "enthusiastic" when pushing on the accelerator pedal. Proper adjustment of the throttle stop behind the pedal will prevent it from happening again. Once everything is hooked back up, hold the pedal down to wide open throttle and adjust the stop up to meet the back of the pedal. Then you can get "enthusiastic" as you want and you won't bend it again. Thanks Clay. It also looks like someone tried to use a framing hammer to straighten it...lol. I couldn't believe how bad it was...not even going to try to straighten it. Hope you are doing well. |
| Puebloswatcop |
 Feb 19 2022, 03:10 PM Feb 19 2022, 03:10 PM
Post
#334
|
|
Senior Member    Group: Members Posts: 1,401 Joined: 27-December 14 From: Mineola, Texas Member No.: 18,258 Region Association: Southwest Region |
Well, got back from my trip to California and Colorado and found that the epoxy I ordered for the Relay board arrived while I was gone...Yeah.
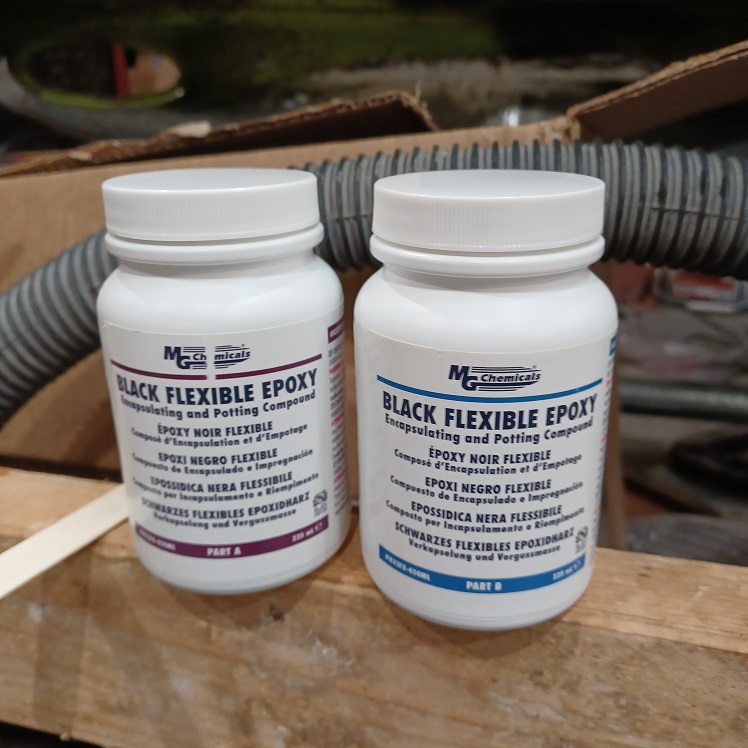 |
| Puebloswatcop |
 Feb 19 2022, 03:18 PM Feb 19 2022, 03:18 PM
Post
#335
|
|
Senior Member    Group: Members Posts: 1,401 Joined: 27-December 14 From: Mineola, Texas Member No.: 18,258 Region Association: Southwest Region |
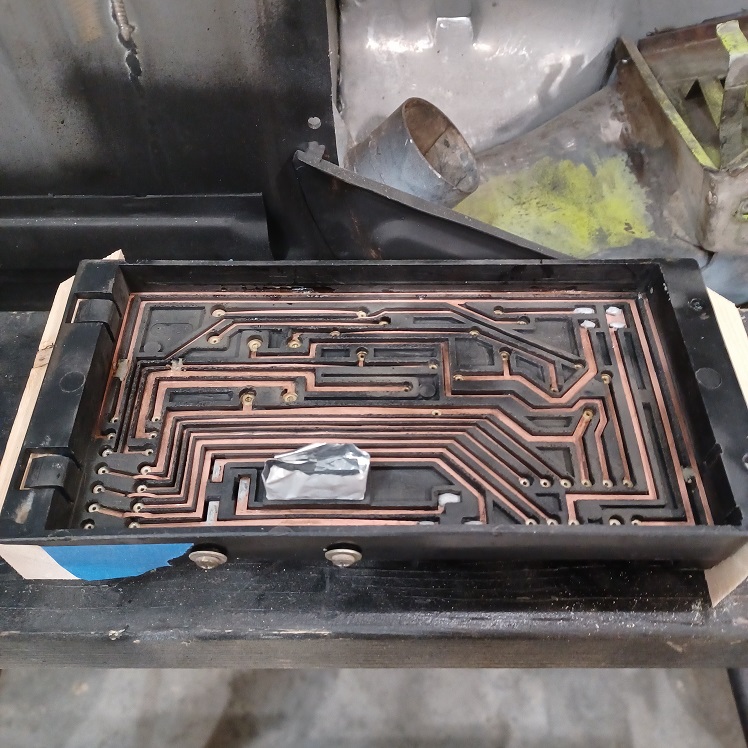
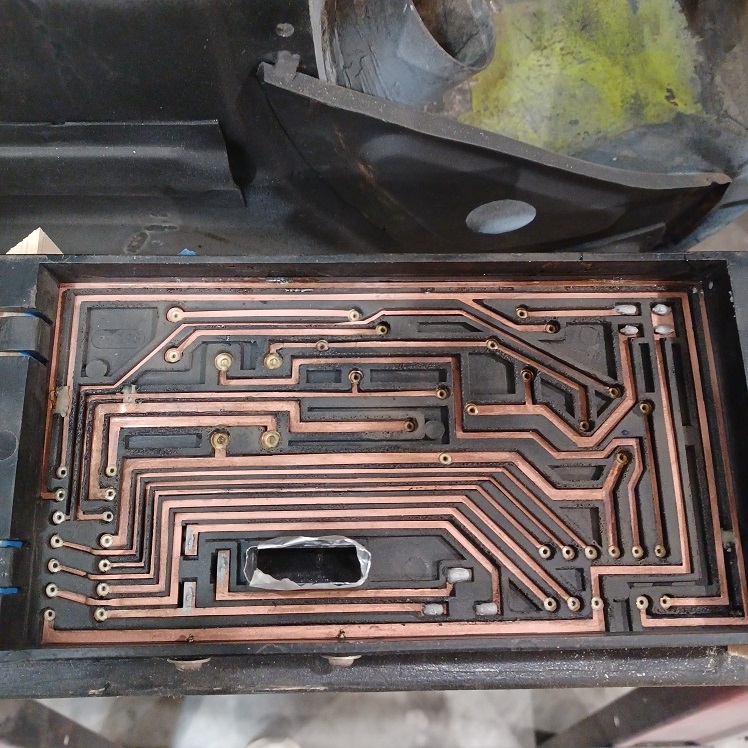
I checked the board by holding a light to the top side of the board and looking for any light that came through to the bottom. Then filled those holes with paste wax to seal them up. Since I wanted to fill it a bit thicker than was originally there, I taped off the end and the square hole where the voltage regulator mounts. Hopefully the tape will keep the epoxy from running out.
  |
| Puebloswatcop |
 Feb 19 2022, 03:22 PM Feb 19 2022, 03:22 PM
Post
#336
|
|
Senior Member    Group: Members Posts: 1,401 Joined: 27-December 14 From: Mineola, Texas Member No.: 18,258 Region Association: Southwest Region |
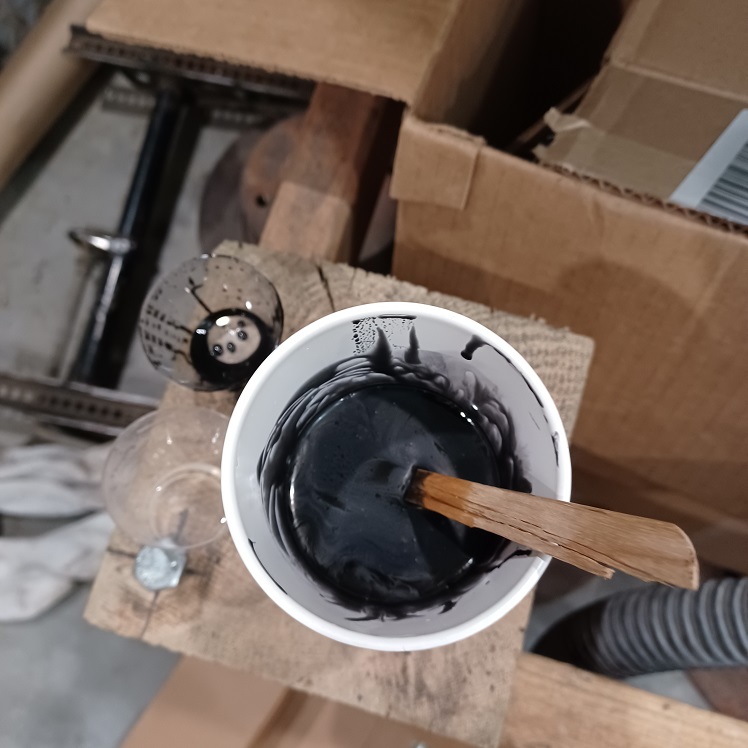
Then it was time to mix the epoxy. Pretty straight forward, It take a 1:1 mix ratio, so added 60 ml of each part to a red solo cup (wont be drinking any beer from that cup) and mixed it for about a minute, then let the brew set for about 10-15 minutes to allow as much air as I could to escape, without the brew hardening.
 |
| Puebloswatcop |
 Feb 19 2022, 03:25 PM Feb 19 2022, 03:25 PM
Post
#337
|
|
Senior Member    Group: Members Posts: 1,401 Joined: 27-December 14 From: Mineola, Texas Member No.: 18,258 Region Association: Southwest Region |
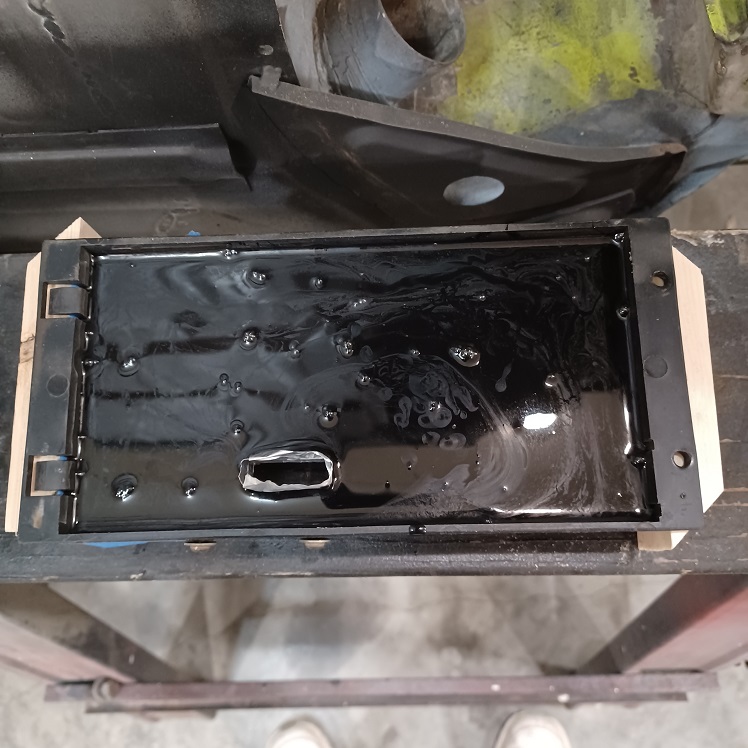
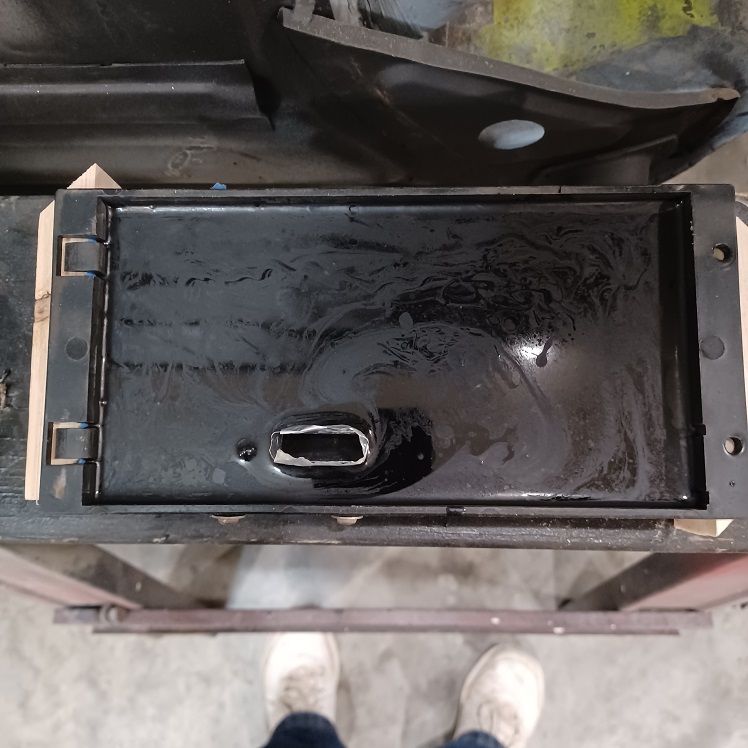
After checking to be sure the board was level on the bench, I poured the epoxy in. My guestimate was spot on and I used the entire 120 ml to get the depth I wanted. You can see the amount of air that gets into it just from pouring.
 |
| Puebloswatcop |
 Feb 19 2022, 03:28 PM Feb 19 2022, 03:28 PM
Post
#338
|
|
Senior Member    Group: Members Posts: 1,401 Joined: 27-December 14 From: Mineola, Texas Member No.: 18,258 Region Association: Southwest Region |
So, using a toothpick, I went in and popped all of the bubbles. I checked every 5 minutes and found that several bubbles were continuing to rise, so continued to pop them. After about 30 minutes no more bubbles would rise to the surface.
 |
| Puebloswatcop |
 Feb 19 2022, 03:31 PM Feb 19 2022, 03:31 PM
Post
#339
|
|
Senior Member    Group: Members Posts: 1,401 Joined: 27-December 14 From: Mineola, Texas Member No.: 18,258 Region Association: Southwest Region |
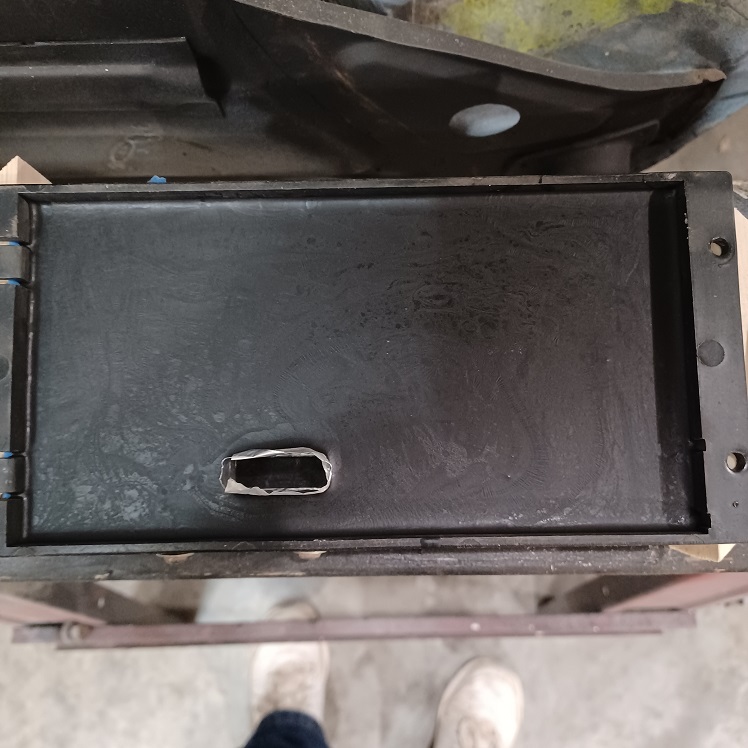
After about an hour still no bubbles and the surface had skinned over pretty well. So now It will sit for about 48 hours to completely set up.
 |
| Puebloswatcop |
 Feb 23 2022, 09:11 AM Feb 23 2022, 09:11 AM
Post
#340
|
|
Senior Member    Group: Members Posts: 1,401 Joined: 27-December 14 From: Mineola, Texas Member No.: 18,258 Region Association: Southwest Region |
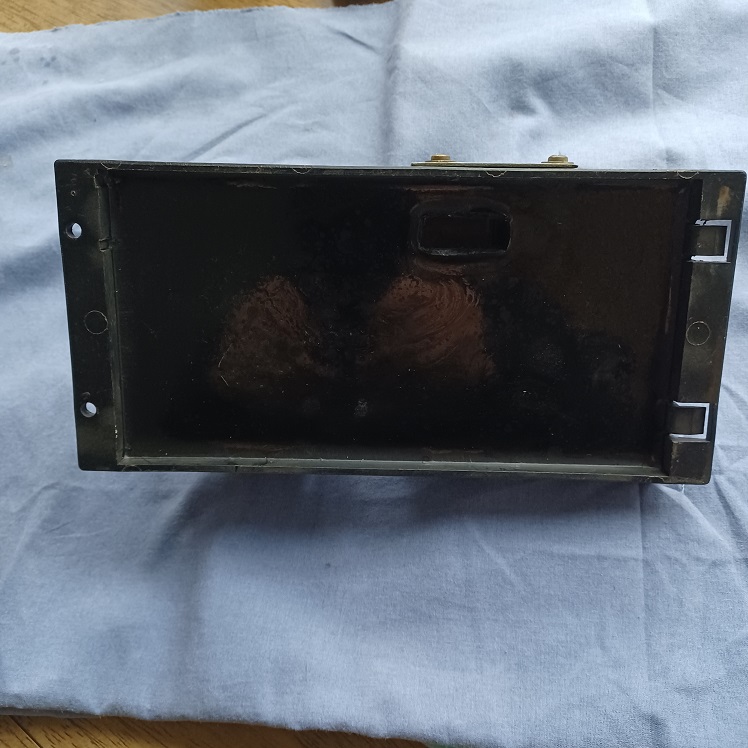
The relay board is all set up. No leaks of potting material and it came out nice and level and smooth. The only thing I would do differently is where I used the aluminum tape to build up the hole where the voltage regulator goes. That aluminum tape was a PIA to remove, it sticks quite well.
 |
  |
1 User(s) are reading this topic (1 Guests and 0 Anonymous Users)
0 Members:

|
Lo-Fi Version | Time is now: 25th November 2024 - 04:17 AM |
Invision Power Board
v9.1.4 © 2024 IPS, Inc.


