|
|

|
Porsche, and the Porsche crest are registered trademarks of Dr. Ing. h.c. F. Porsche AG.
This site is not affiliated with Porsche in any way. Its only purpose is to provide an online forum for car enthusiasts. All other trademarks are property of their respective owners. |
|
|
  |
| Puebloswatcop |
 Feb 23 2022, 09:13 AM Feb 23 2022, 09:13 AM
Post
#341
|
|
Senior Member    Group: Members Posts: 1,401 Joined: 27-December 14 From: Mineola, Texas Member No.: 18,258 Region Association: Southwest Region |
And here is the top of the board, all complete. Just need to find what box the rest of my relays are in and insert the cover stem when it returns from being re-plated.
Attached image(s) 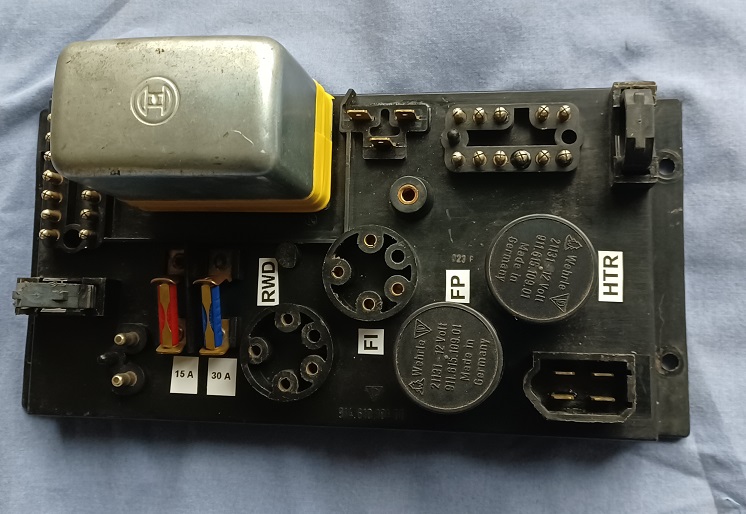
|
| Puebloswatcop |
 Feb 25 2022, 08:06 AM Feb 25 2022, 08:06 AM
Post
#342
|
|
Senior Member    Group: Members Posts: 1,401 Joined: 27-December 14 From: Mineola, Texas Member No.: 18,258 Region Association: Southwest Region |
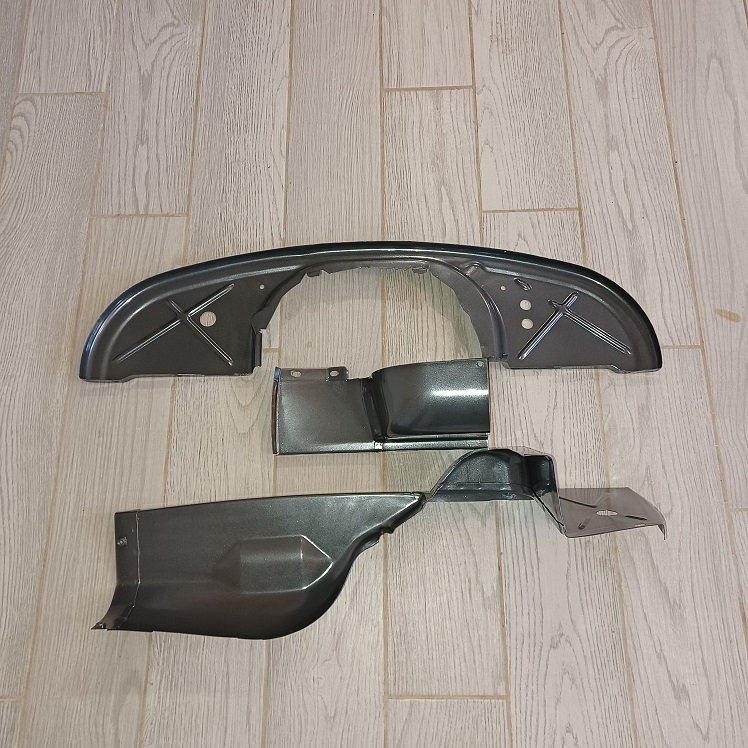
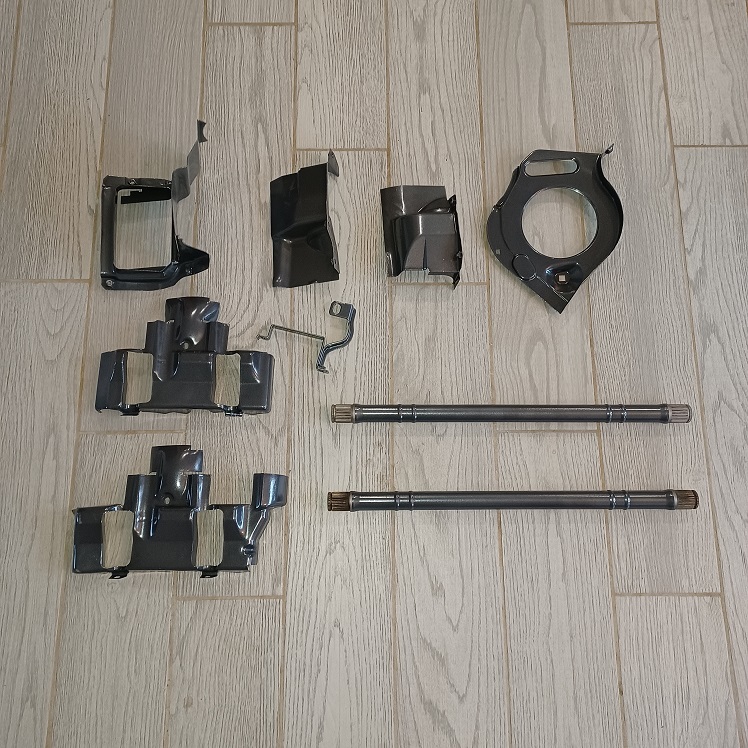
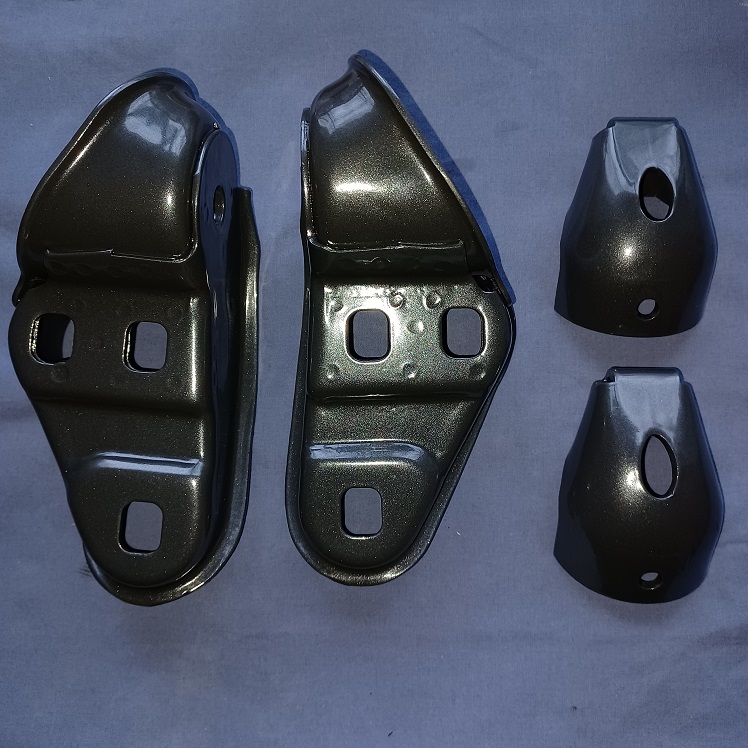
Got the first set of metal back from the powder coater. I decided to go with something beside the standard black for these parts. So it is a custom gunmetal color.
  |
| Puebloswatcop |
 Feb 25 2022, 08:28 AM Feb 25 2022, 08:28 AM
Post
#343
|
|
Senior Member    Group: Members Posts: 1,401 Joined: 27-December 14 From: Mineola, Texas Member No.: 18,258 Region Association: Southwest Region |
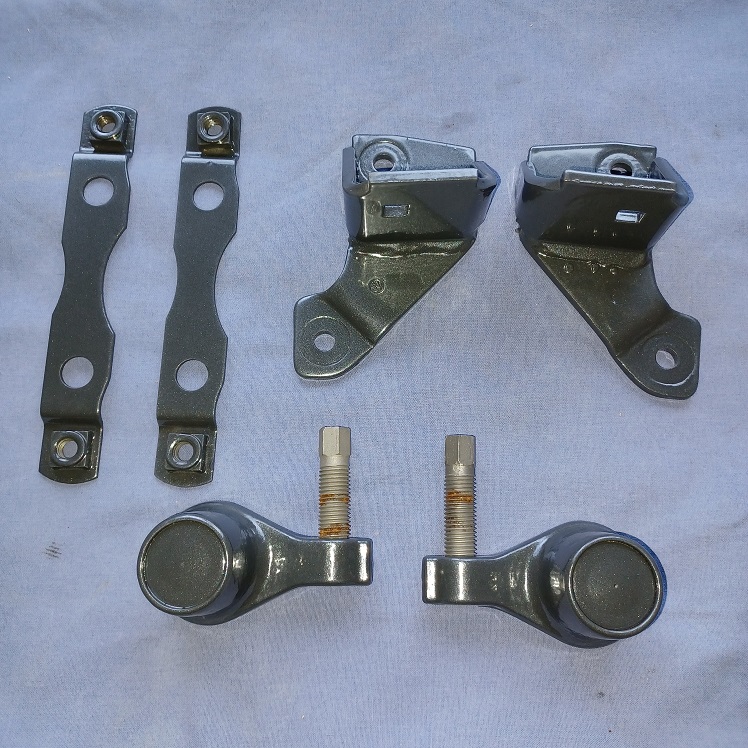
More Parts
  |
| Puebloswatcop |
 Feb 25 2022, 08:36 AM Feb 25 2022, 08:36 AM
Post
#344
|
|
Senior Member    Group: Members Posts: 1,401 Joined: 27-December 14 From: Mineola, Texas Member No.: 18,258 Region Association: Southwest Region |
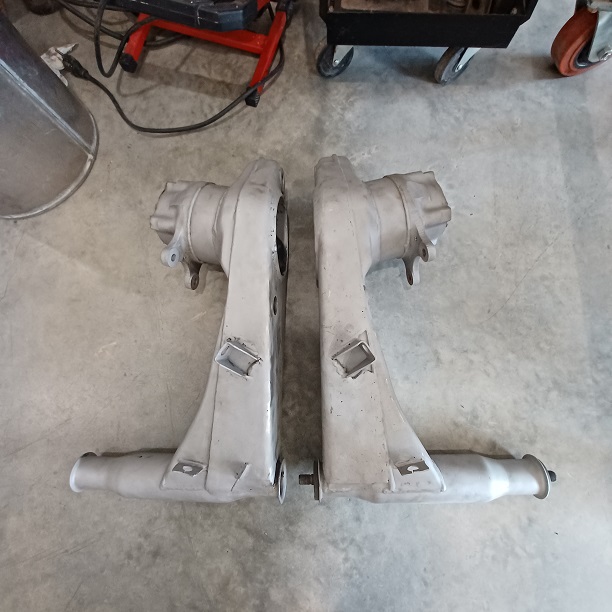
Then, after pressing the axle shaft out of the trailing arm, these wet to the powder coater,
 |
| Puebloswatcop |
 Feb 25 2022, 08:41 AM Feb 25 2022, 08:41 AM
Post
#345
|
|
Senior Member    Group: Members Posts: 1,401 Joined: 27-December 14 From: Mineola, Texas Member No.: 18,258 Region Association: Southwest Region |
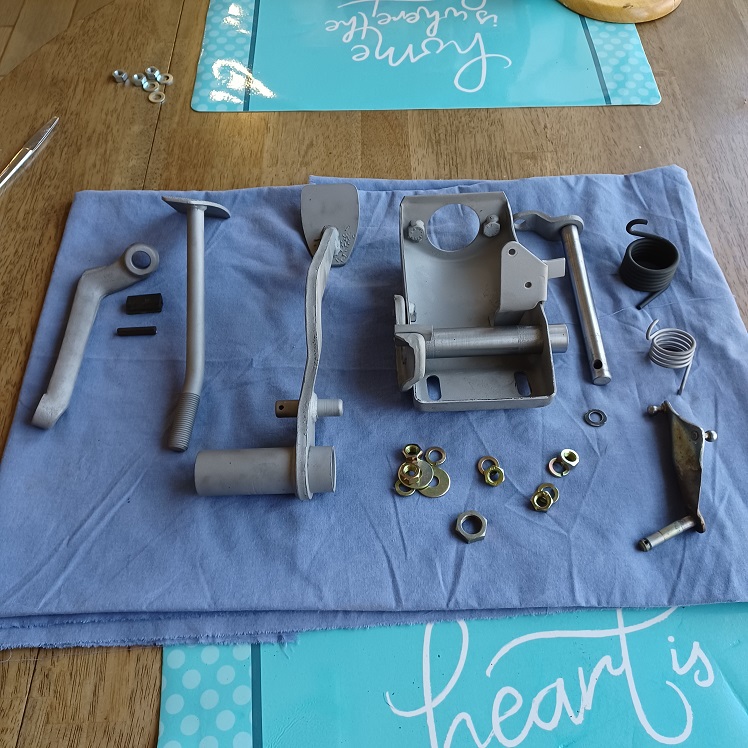
Pedal Cluster parts also went to the powder coater. They will be done in the standard black.
 |
| Puebloswatcop |
 Feb 25 2022, 08:54 AM Feb 25 2022, 08:54 AM
Post
#346
|
|
Senior Member    Group: Members Posts: 1,401 Joined: 27-December 14 From: Mineola, Texas Member No.: 18,258 Region Association: Southwest Region |
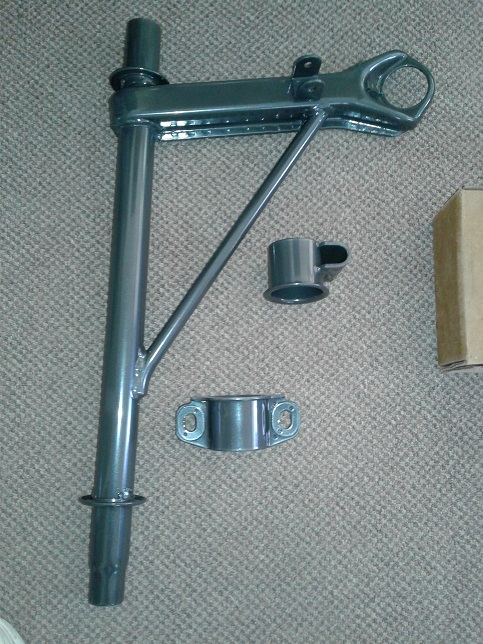
I decided to assemble the fron A Arms as well:
 |
| Puebloswatcop |
 Feb 25 2022, 09:06 AM Feb 25 2022, 09:06 AM
Post
#347
|
|
Senior Member    Group: Members Posts: 1,401 Joined: 27-December 14 From: Mineola, Texas Member No.: 18,258 Region Association: Southwest Region |
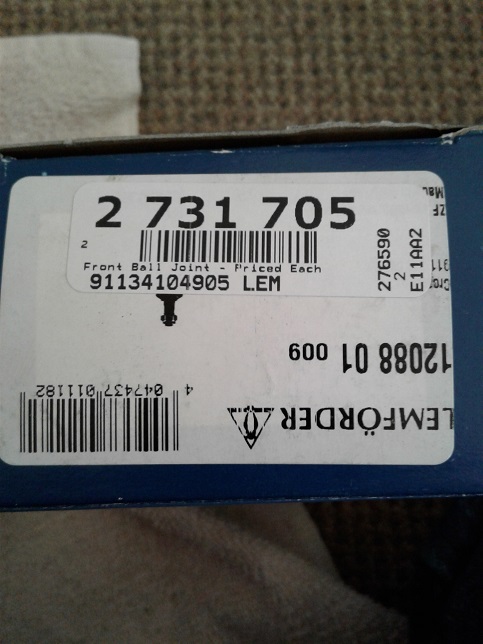
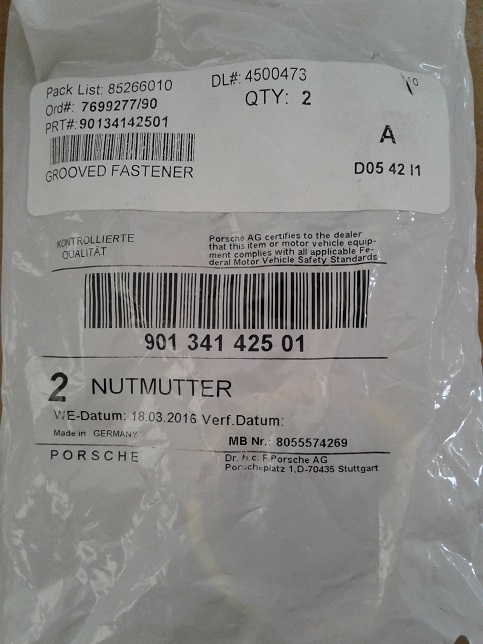
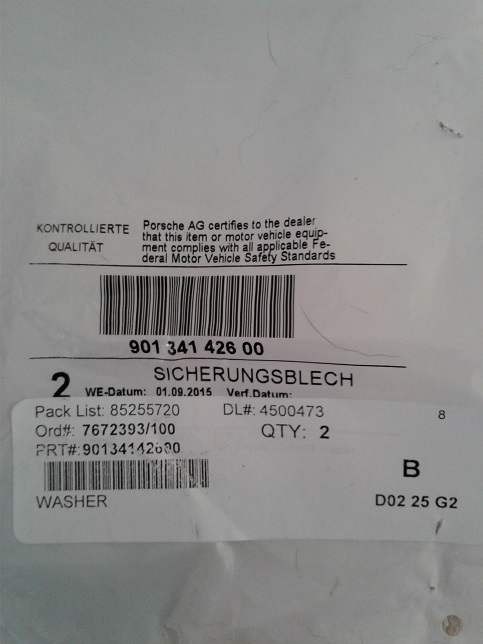
Here are the parts incuding the Ball Joints, ball joint nut and the star washers.
   |
| Puebloswatcop |
 Feb 25 2022, 09:12 AM Feb 25 2022, 09:12 AM
Post
#348
|
|
Senior Member    Group: Members Posts: 1,401 Joined: 27-December 14 From: Mineola, Texas Member No.: 18,258 Region Association: Southwest Region |
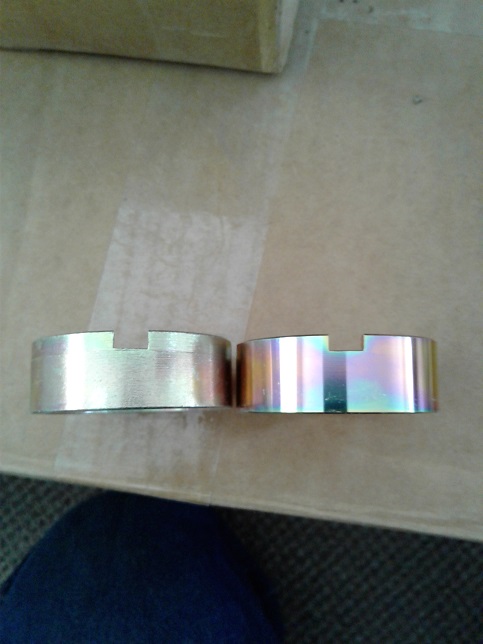
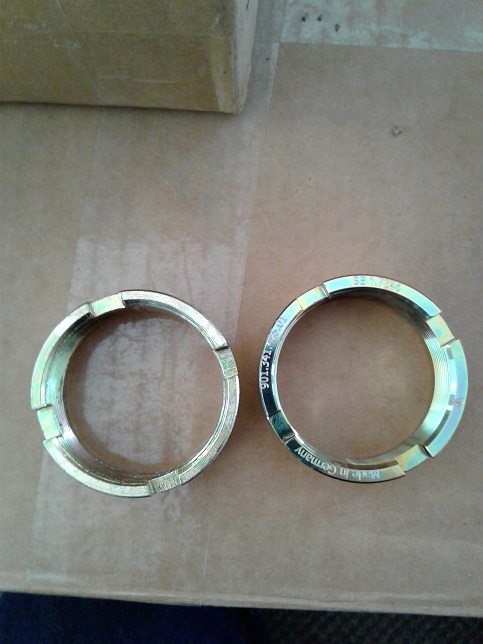
I originally bought aftermarket ball joint nuts, but they didn't want to thread onto the ball joints, so I re-ordered them directly from Porsche. You can definately see the difference in quality. Lesson learned: some parts just cant be replaced by Aftermarket.
  |
| Puebloswatcop |
 Feb 25 2022, 09:21 AM Feb 25 2022, 09:21 AM
Post
#349
|
|
Senior Member    Group: Members Posts: 1,401 Joined: 27-December 14 From: Mineola, Texas Member No.: 18,258 Region Association: Southwest Region |
I purchased the rubber bushing kit with the installation tools from Elephat Racing...
 |
| Puebloswatcop |
 Feb 25 2022, 09:31 AM Feb 25 2022, 09:31 AM
Post
#350
|
|
Senior Member    Group: Members Posts: 1,401 Joined: 27-December 14 From: Mineola, Texas Member No.: 18,258 Region Association: Southwest Region |
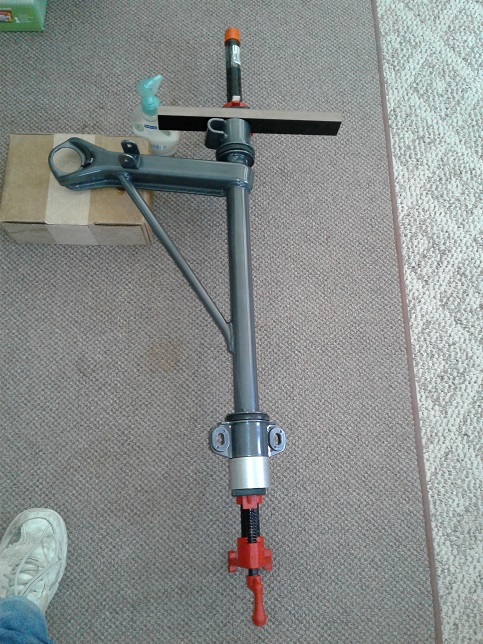
After preparing the bushings with liquid soap and setting the mounts to the proper andgle, I pressed each bushing and mount onto the control arm using a pipe clamp.
 |
| Puebloswatcop |
 Feb 25 2022, 09:33 AM Feb 25 2022, 09:33 AM
Post
#351
|
|
Senior Member    Group: Members Posts: 1,401 Joined: 27-December 14 From: Mineola, Texas Member No.: 18,258 Region Association: Southwest Region |
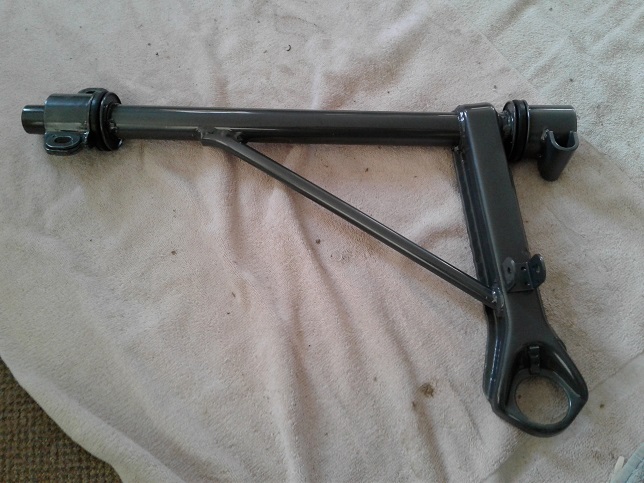
One side completed, wash, rinse and repeat for the other side.
 |
| Puebloswatcop |
 Feb 25 2022, 09:35 AM Feb 25 2022, 09:35 AM
Post
#352
|
|
Senior Member    Group: Members Posts: 1,401 Joined: 27-December 14 From: Mineola, Texas Member No.: 18,258 Region Association: Southwest Region |
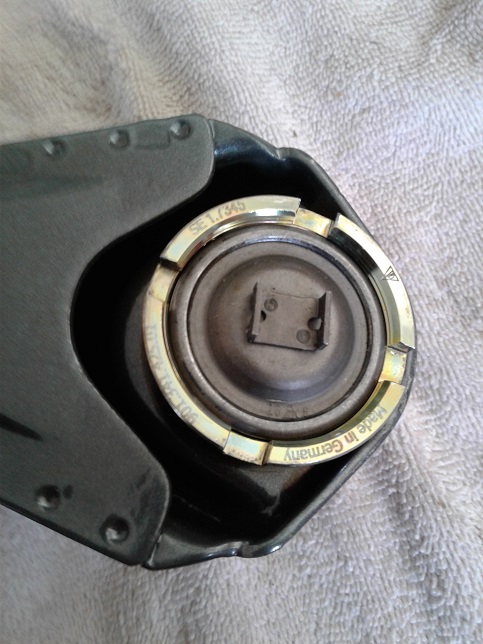
I installed the ball joint, but will have to do the final torque once the arms are installed.
 |
| 9146C |
 Feb 25 2022, 09:39 AM Feb 25 2022, 09:39 AM
Post
#353
|
|
Member   Group: Members Posts: 228 Joined: 14-September 19 From: US Member No.: 23,460 Region Association: None 
|
The powder coating looks great Kevin.
Nice job on the relay board as well. Looking forward to seeing the progress on the bodywork as well. Keep up the great work! |
| Puebloswatcop |
 Feb 25 2022, 09:46 AM Feb 25 2022, 09:46 AM
Post
#354
|
|
Senior Member    Group: Members Posts: 1,401 Joined: 27-December 14 From: Mineola, Texas Member No.: 18,258 Region Association: Southwest Region |
The powder coating looks great Kevin. Nice job on the relay board as well. Looking forward to seeing the progress on the bodywork as well. Keep up the great work! Thanks, These cold days do pay off for getting the component jobs done. But I cant wait for warmer weather so I can roll the body out and start the blasting process..... |
| Puebloswatcop |
 Feb 25 2022, 02:54 PM Feb 25 2022, 02:54 PM
Post
#355
|
|
Senior Member    Group: Members Posts: 1,401 Joined: 27-December 14 From: Mineola, Texas Member No.: 18,258 Region Association: Southwest Region |
Also decided to kill the rest of a cold day assembling the rear axle shafts. Getting the new boots on was more difficult than I anticipated. I have only removed old nasty ones which are easy.
So I broke out a little dish soap to help things along. Then laid out the parts for re-assembly... 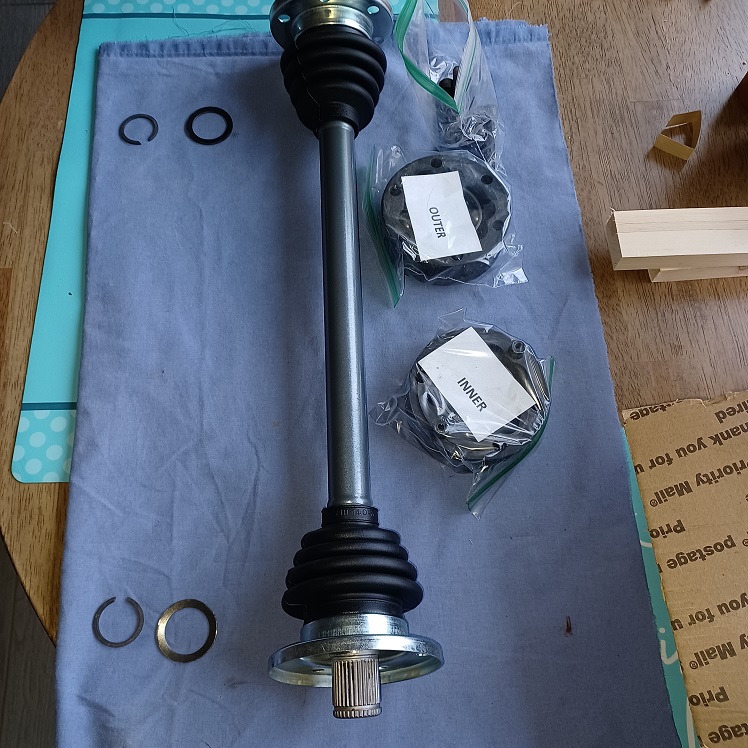 |
| Puebloswatcop |
 Feb 25 2022, 03:03 PM Feb 25 2022, 03:03 PM
Post
#356
|
|
Senior Member    Group: Members Posts: 1,401 Joined: 27-December 14 From: Mineola, Texas Member No.: 18,258 Region Association: Southwest Region |
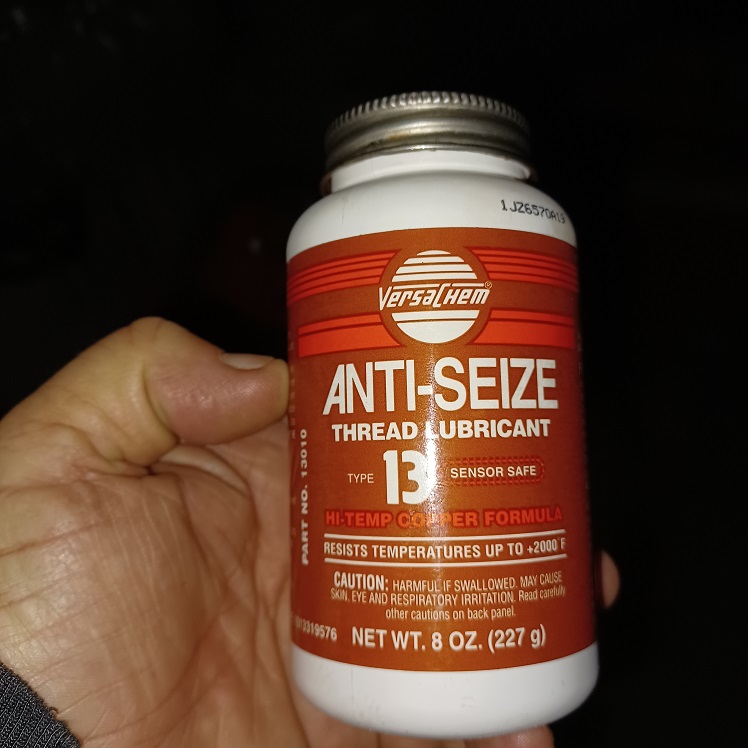
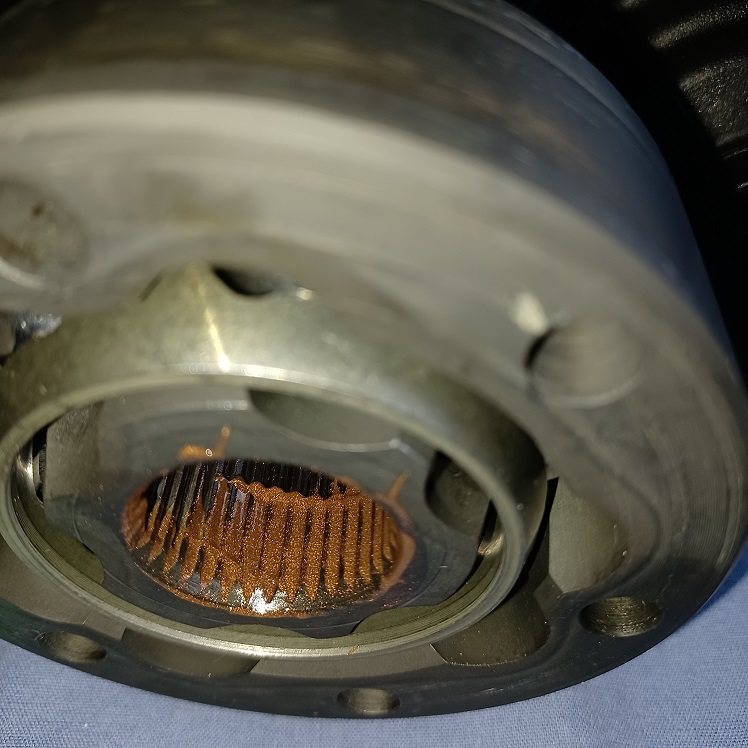
I put anti-sieze lubricant in the splines of each of the joints. Just a thin layer because it does squeze out on the other side and you dont want that mixed in with the grease.
  |
| Puebloswatcop |
 Feb 25 2022, 03:07 PM Feb 25 2022, 03:07 PM
Post
#357
|
|
Senior Member    Group: Members Posts: 1,401 Joined: 27-December 14 From: Mineola, Texas Member No.: 18,258 Region Association: Southwest Region |
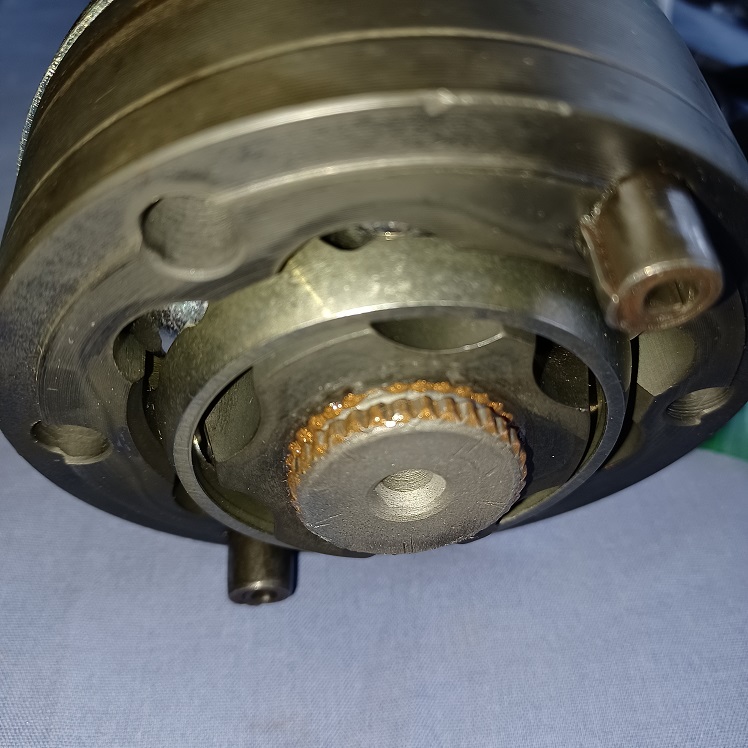
Then tap the joint onto the shaft until it is fully seated.
 |
| Puebloswatcop |
 Feb 25 2022, 03:10 PM Feb 25 2022, 03:10 PM
Post
#358
|
|
Senior Member    Group: Members Posts: 1,401 Joined: 27-December 14 From: Mineola, Texas Member No.: 18,258 Region Association: Southwest Region |
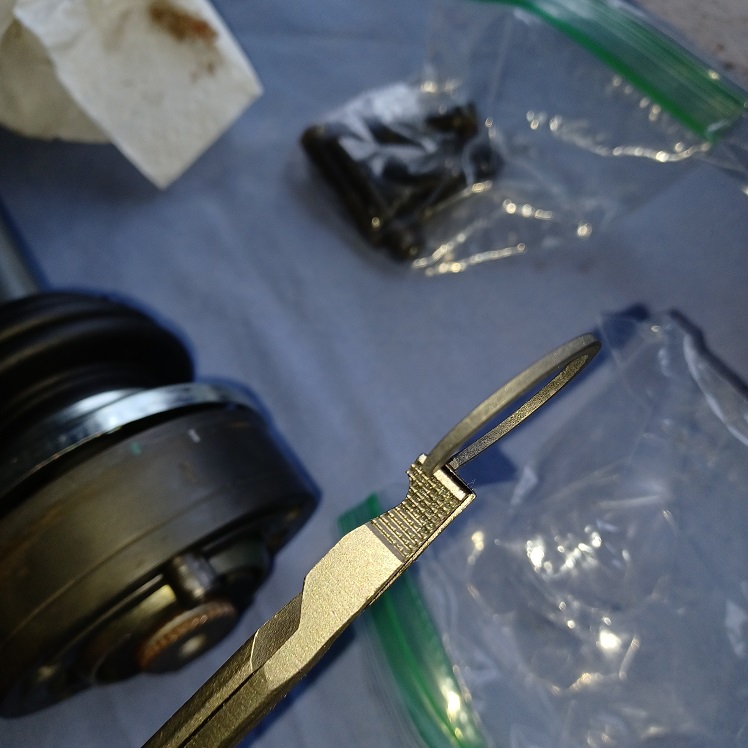
Then comes installing the retaining clip. I have a special pair of ring spreaders for this type of clip. They basically spread the circle as you squeeze them and that way I dont over stretch or otherwise damage the rings
 |
| Puebloswatcop |
 Feb 25 2022, 03:12 PM Feb 25 2022, 03:12 PM
Post
#359
|
|
Senior Member    Group: Members Posts: 1,401 Joined: 27-December 14 From: Mineola, Texas Member No.: 18,258 Region Association: Southwest Region |
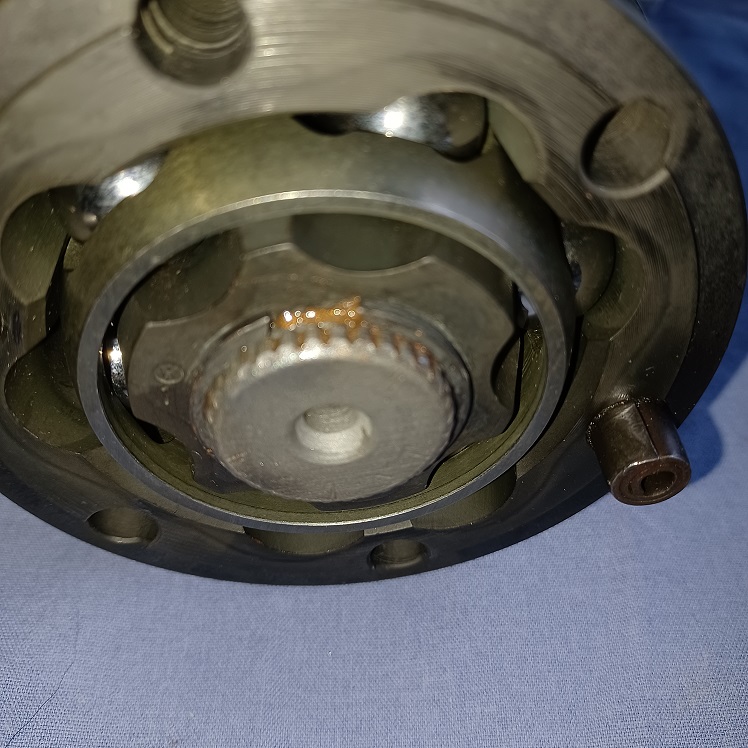
Then install th clips, sorry the pic is a bit blurry. The key is to be sure that the clip is fully seated all the way around in the groove in the shaft.
 |
| Puebloswatcop |
 Feb 25 2022, 03:14 PM Feb 25 2022, 03:14 PM
Post
#360
|
|
Senior Member    Group: Members Posts: 1,401 Joined: 27-December 14 From: Mineola, Texas Member No.: 18,258 Region Association: Southwest Region |
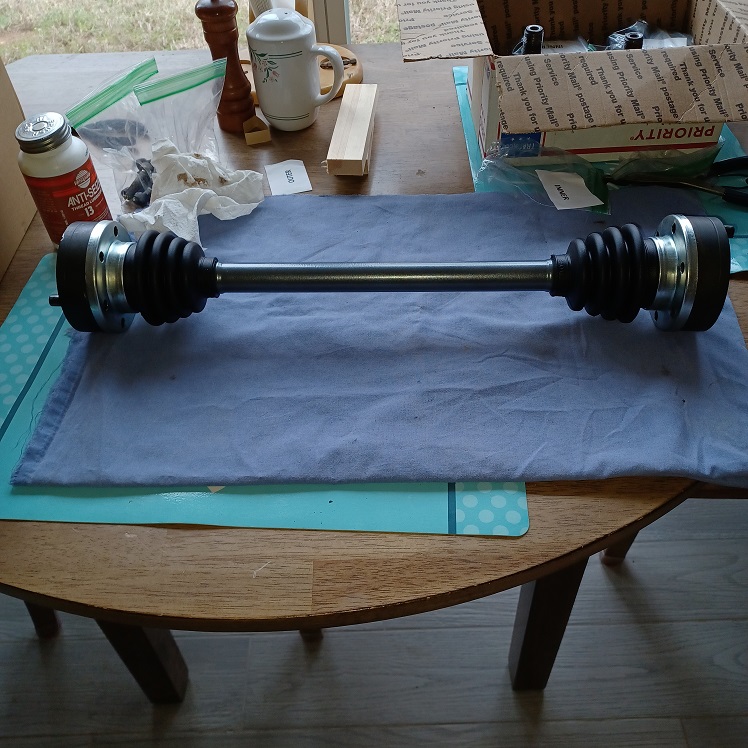
Axle shaft #1 all assembled
 |
  |
6 User(s) are reading this topic (6 Guests and 0 Anonymous Users)
0 Members:

|
Lo-Fi Version | Time is now: 25th November 2024 - 04:34 AM |
Invision Power Board
v9.1.4 © 2024 IPS, Inc.


