|
|

|
Porsche, and the Porsche crest are registered trademarks of Dr. Ing. h.c. F. Porsche AG.
This site is not affiliated with Porsche in any way. Its only purpose is to provide an online forum for car enthusiasts. All other trademarks are property of their respective owners. |
|
|
  |
| Puebloswatcop |
 Feb 25 2022, 03:16 PM Feb 25 2022, 03:16 PM
Post
#361
|
|
Senior Member    Group: Members Posts: 1,401 Joined: 27-December 14 From: Mineola, Texas Member No.: 18,258 Region Association: Southwest Region |
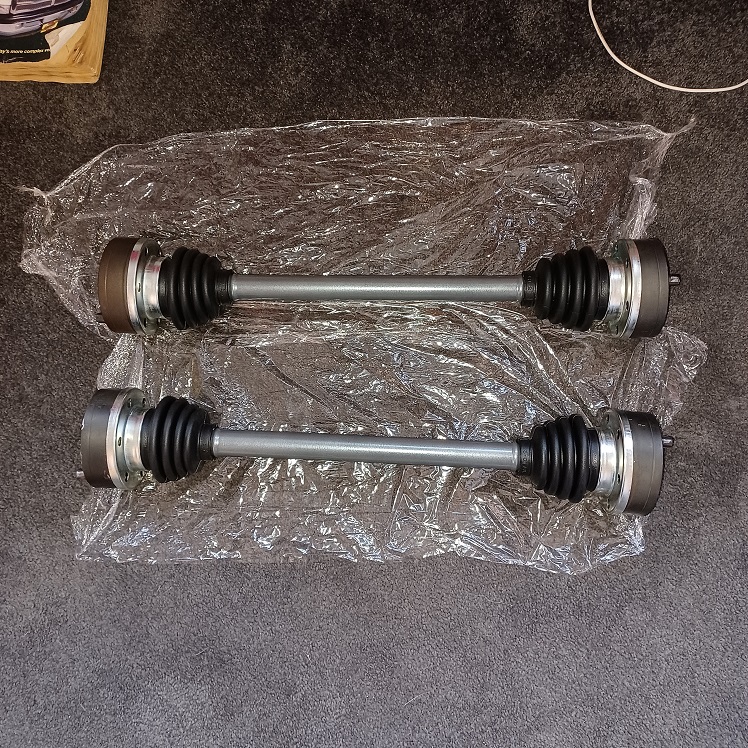
Again...wash, rinse and repeat and now I have two complete axle shafts....Will grease them tomorrow....
 |
| Puebloswatcop |
 Feb 25 2022, 04:34 PM Feb 25 2022, 04:34 PM
Post
#362
|
|
Senior Member    Group: Members Posts: 1,401 Joined: 27-December 14 From: Mineola, Texas Member No.: 18,258 Region Association: Southwest Region |
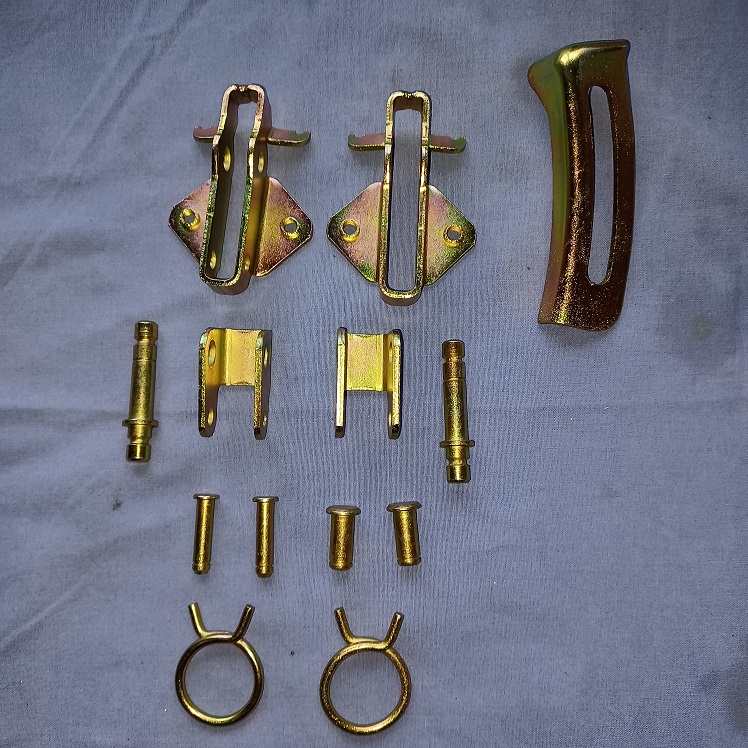
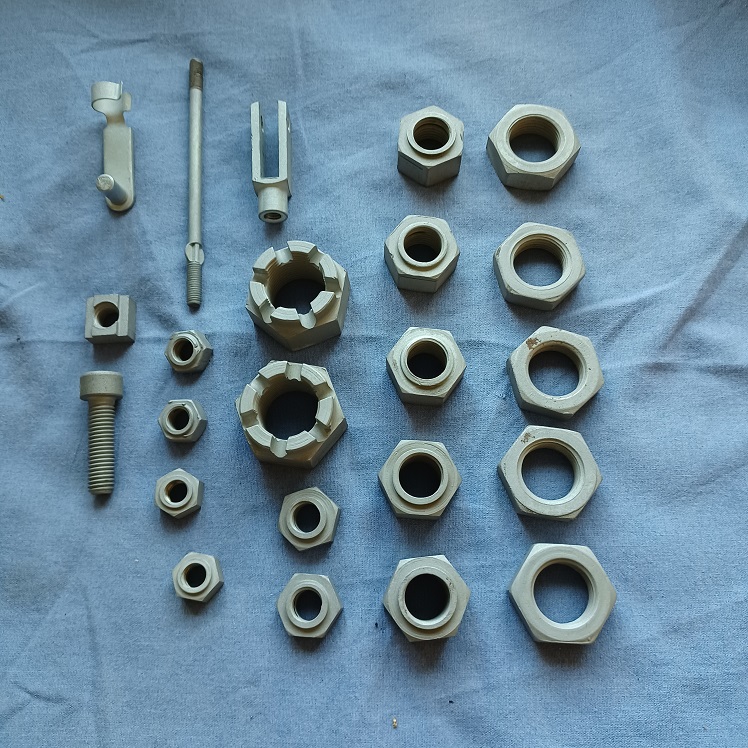
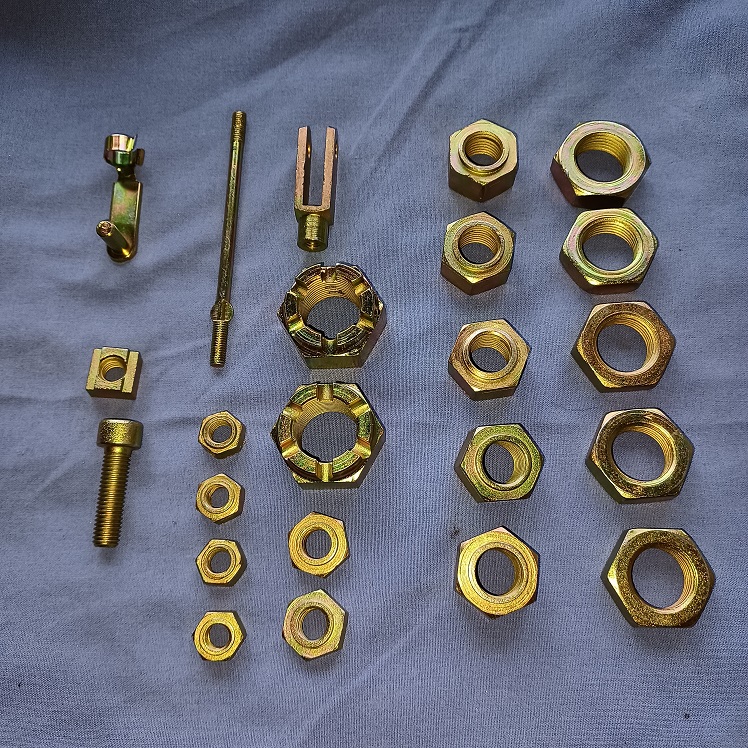
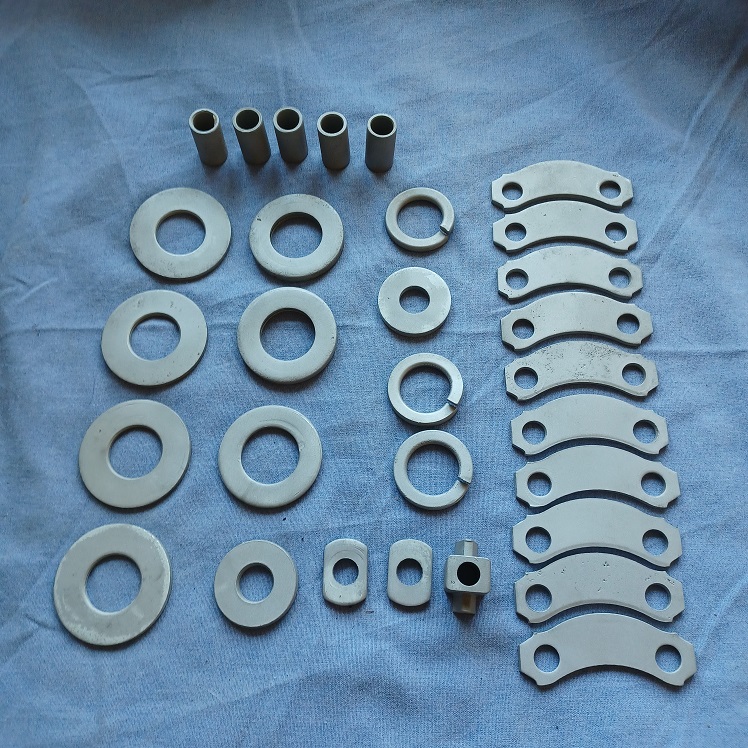
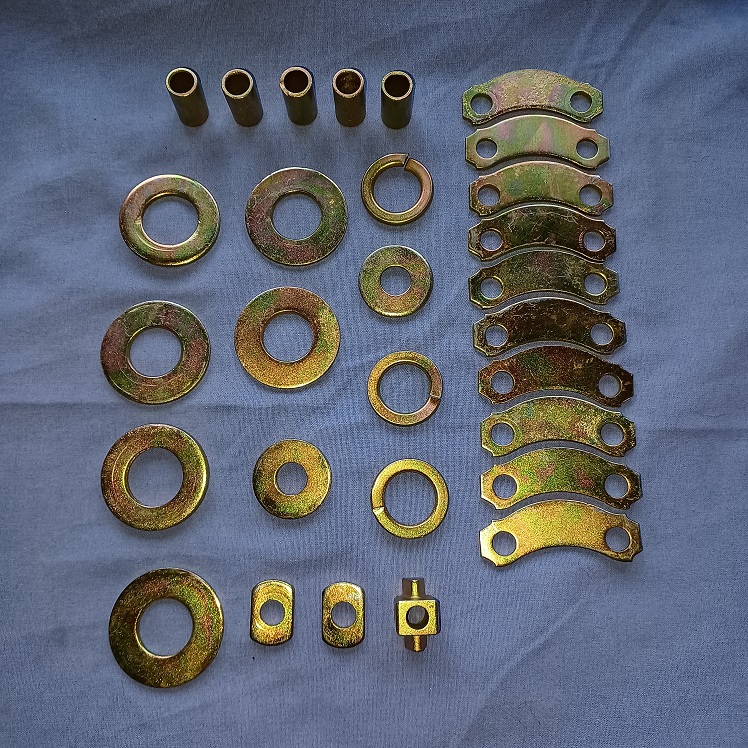
What an awesome day!!!! While assembling the axle shafts, UPS dropped off another package. All my parts came back from Finishing and Plating Services of Kinosha WI.
I must say I am impressed with the work they do, their turn around time and to not lose even 1 small part. And the price is phenominally low. So I highly recommend that if you need parts plated, look them up. Here are some before and after pics. I did blast all of my parts before sending them, so it helped in the final product. 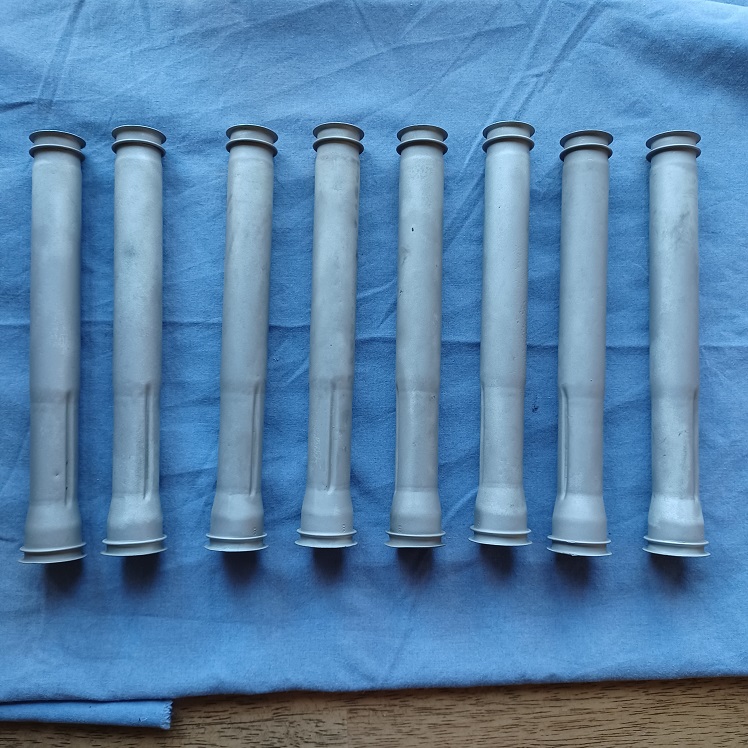 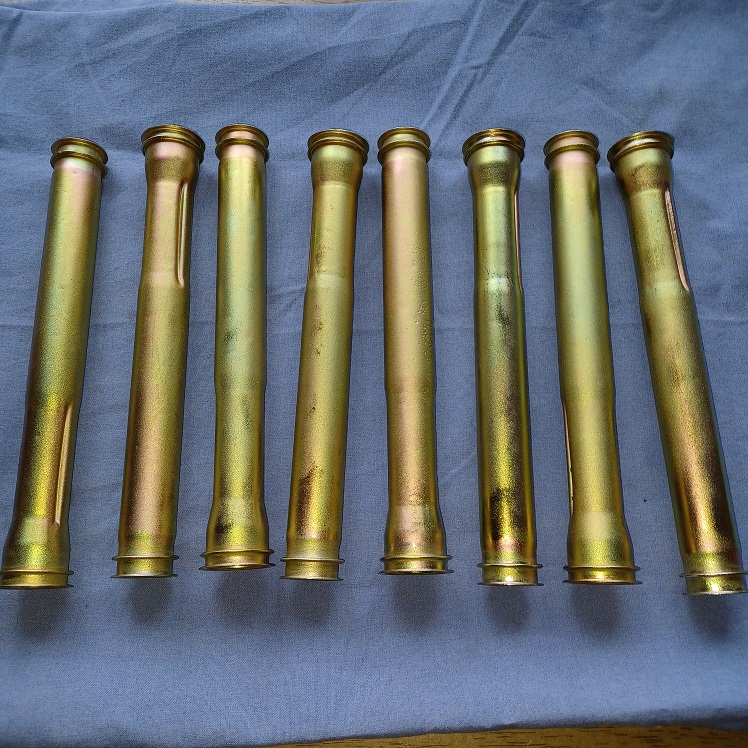 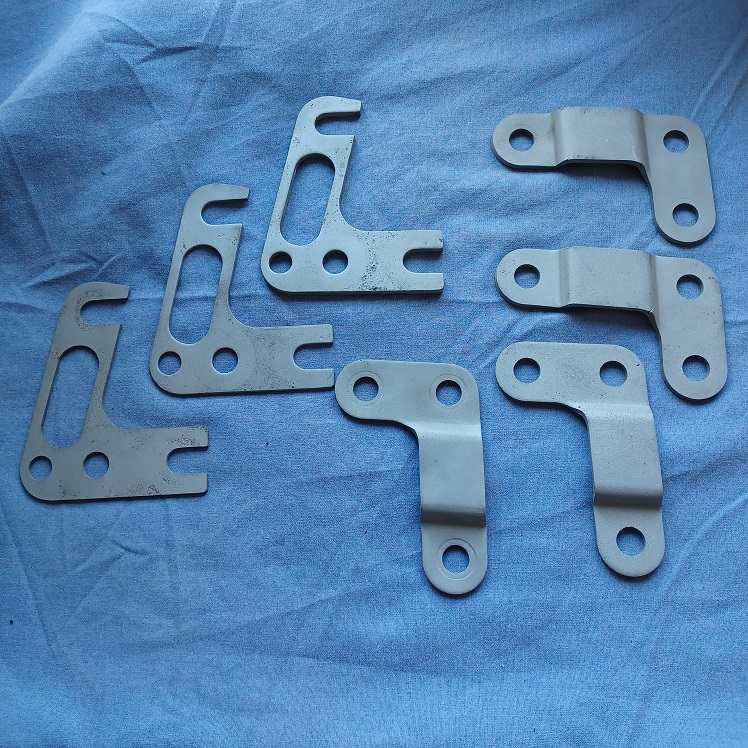 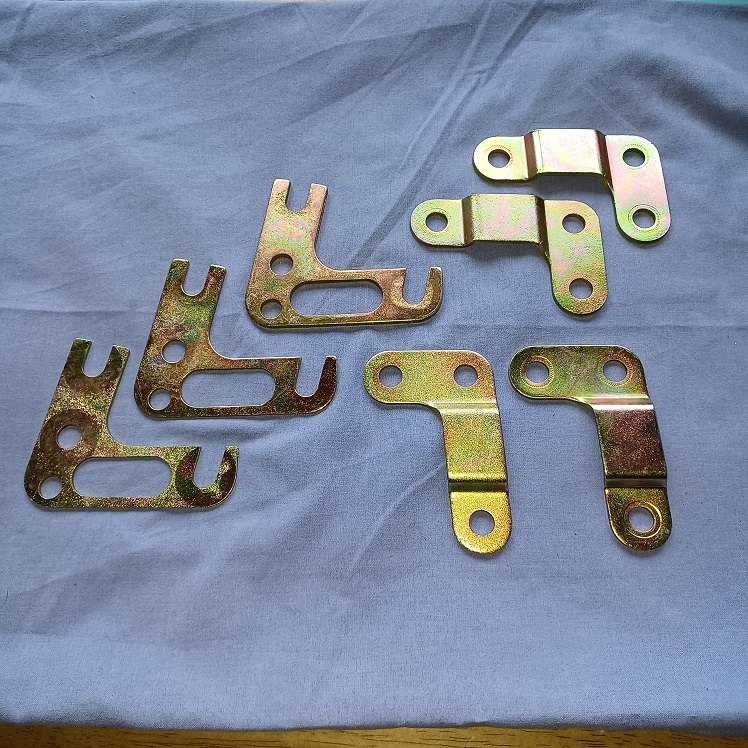 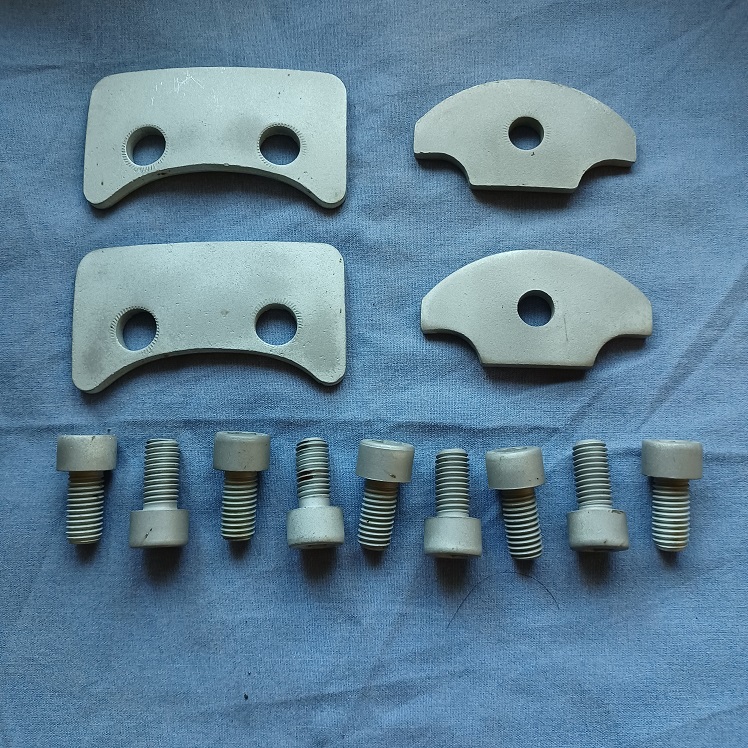 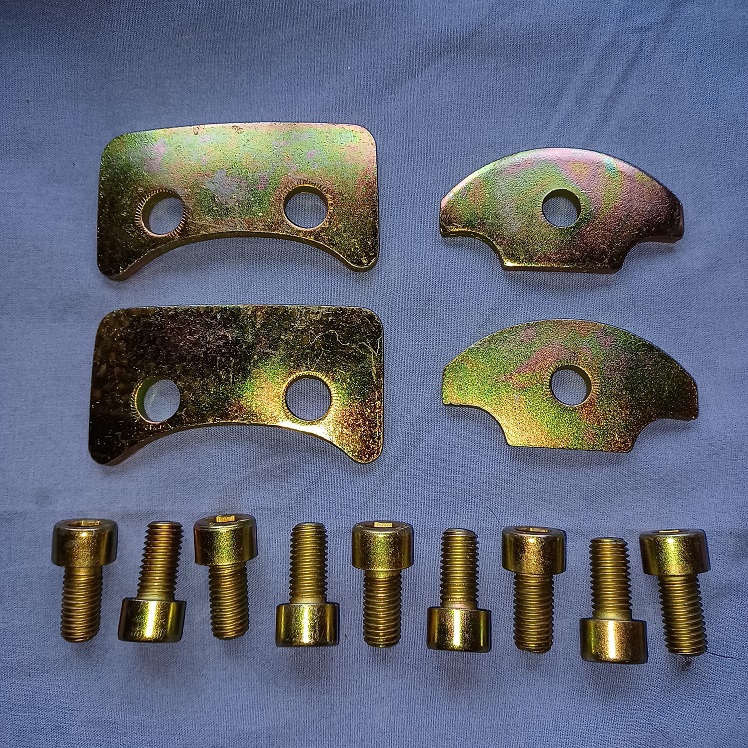 |
| Puebloswatcop |
 Feb 25 2022, 04:44 PM Feb 25 2022, 04:44 PM
Post
#363
|
|
Senior Member    Group: Members Posts: 1,401 Joined: 27-December 14 From: Mineola, Texas Member No.: 18,258 Region Association: Southwest Region |
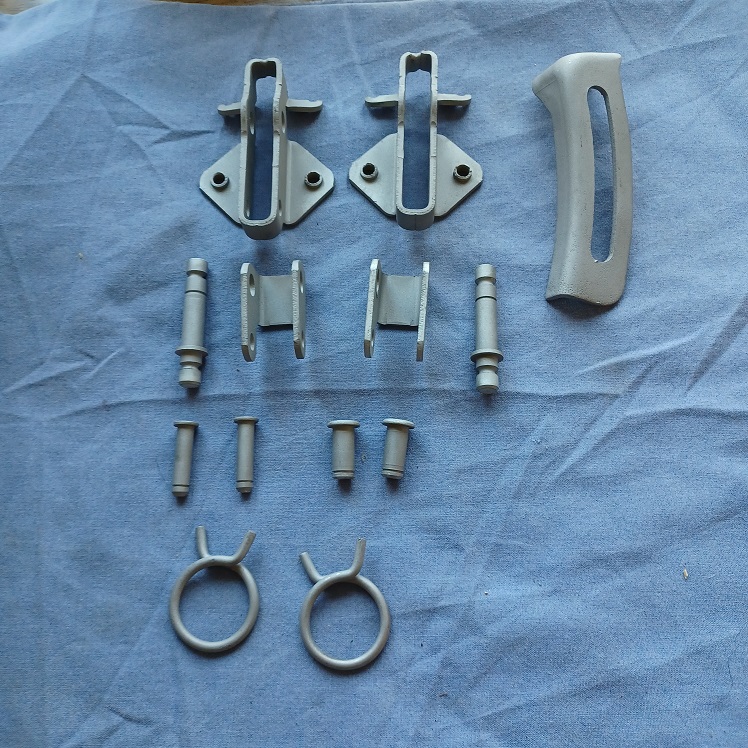
Here are a few more parts pics. There are many more, but I think you can see the quality of the product they put out, and I don't want to bore anyone.
      |
| bkrantz |
 Feb 25 2022, 08:45 PM Feb 25 2022, 08:45 PM
Post
#364
|
|
914 Guru      Group: Members Posts: 8,150 Joined: 3-August 19 From: SW Colorado Member No.: 23,343 Region Association: Rocky Mountains 
|
Bling!
|
| 76-914 |
 Feb 25 2022, 09:55 PM Feb 25 2022, 09:55 PM
Post
#365
|
|
Repeat Offender & Resident Subaru Antagonist           Group: Members Posts: 13,634 Joined: 23-January 09 From: Temecula, CA Member No.: 9,964 Region Association: Southern California 
|
Eye Candy for sure.
|
| Puebloswatcop |
 Mar 1 2022, 05:43 PM Mar 1 2022, 05:43 PM
Post
#366
|
|
Senior Member    Group: Members Posts: 1,401 Joined: 27-December 14 From: Mineola, Texas Member No.: 18,258 Region Association: Southwest Region |
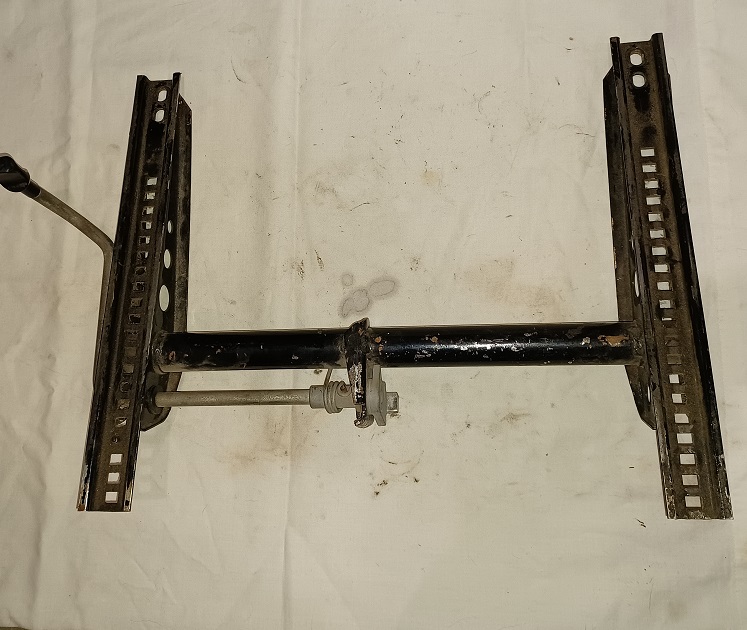
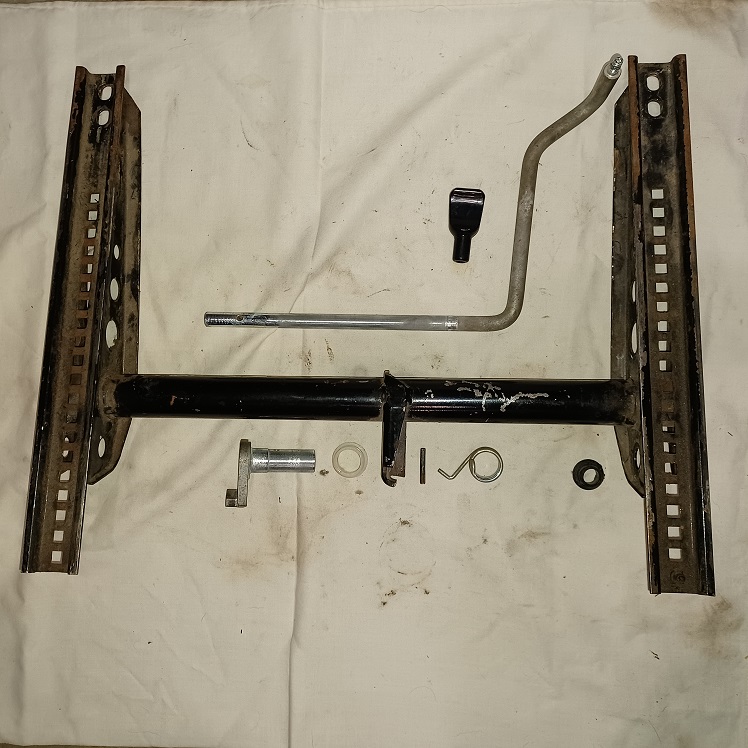
Spent the last couple of days cleaning and blasting parts. The seat base rails are getting complete rebuilds, so had to tear them apart.
  |
| Puebloswatcop |
 Mar 1 2022, 05:47 PM Mar 1 2022, 05:47 PM
Post
#367
|
|
Senior Member    Group: Members Posts: 1,401 Joined: 27-December 14 From: Mineola, Texas Member No.: 18,258 Region Association: Southwest Region |
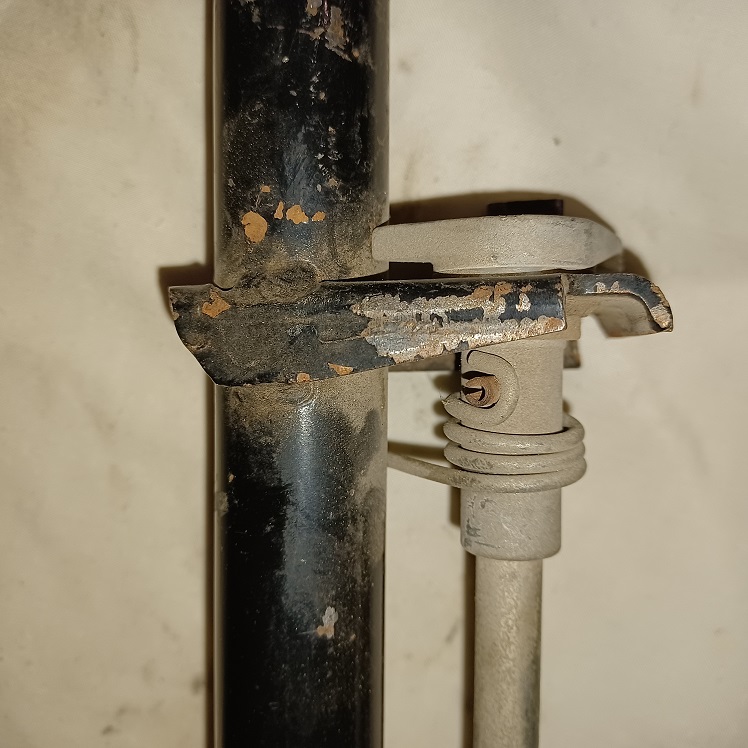
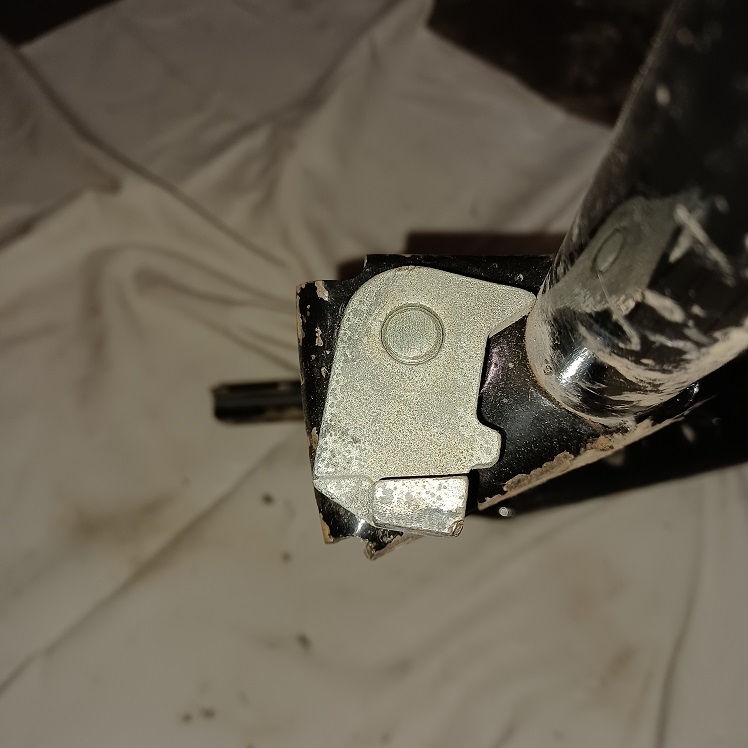
You can see that time has not been kind to the finish on the unpainted parts, there is pitting and the surface coating has taken a hit....
  |
| Puebloswatcop |
 Mar 1 2022, 05:50 PM Mar 1 2022, 05:50 PM
Post
#368
|
|
Senior Member    Group: Members Posts: 1,401 Joined: 27-December 14 From: Mineola, Texas Member No.: 18,258 Region Association: Southwest Region |
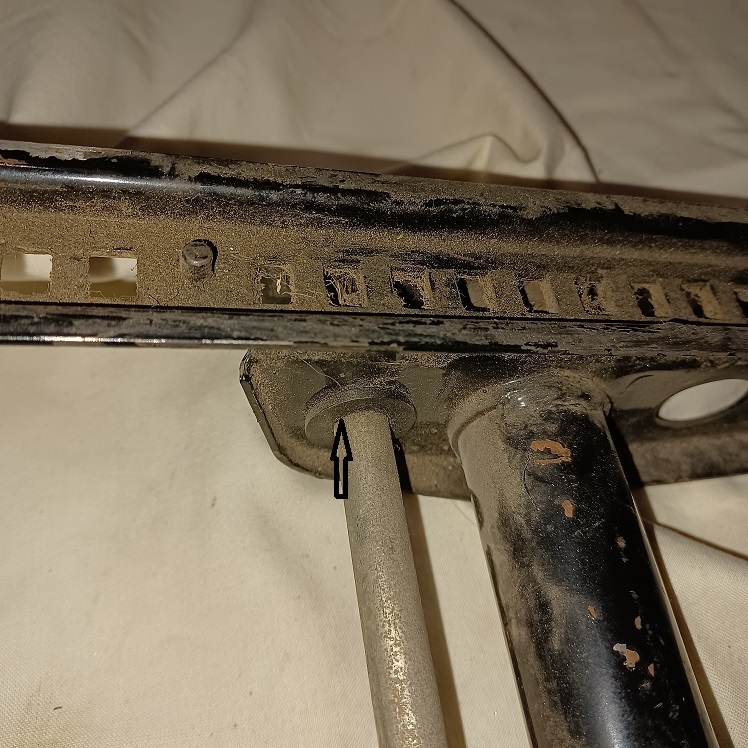
However the Plastic bushings are actually in pretty good shape and are tight, however I already ordered all new ones, so they will be replaced as well....
 |
| Puebloswatcop |
 Mar 1 2022, 05:53 PM Mar 1 2022, 05:53 PM
Post
#369
|
|
Senior Member    Group: Members Posts: 1,401 Joined: 27-December 14 From: Mineola, Texas Member No.: 18,258 Region Association: Southwest Region |
Then I took the drivers side base and blasted and painted it. I used self etching primer and then hit it with 3 coats of semi gloss black...hopfully that will keep it well protected...
Here is a before and an after pic.... 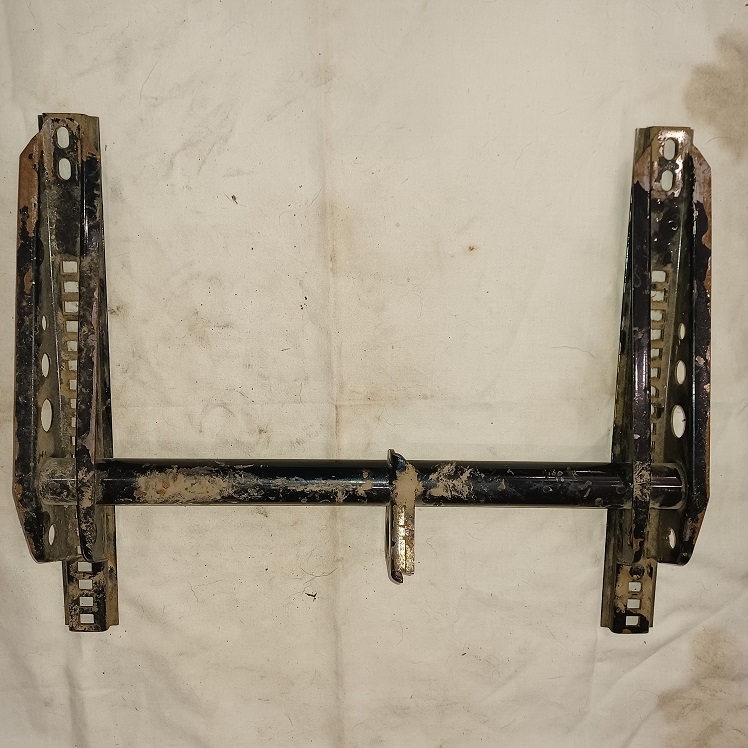 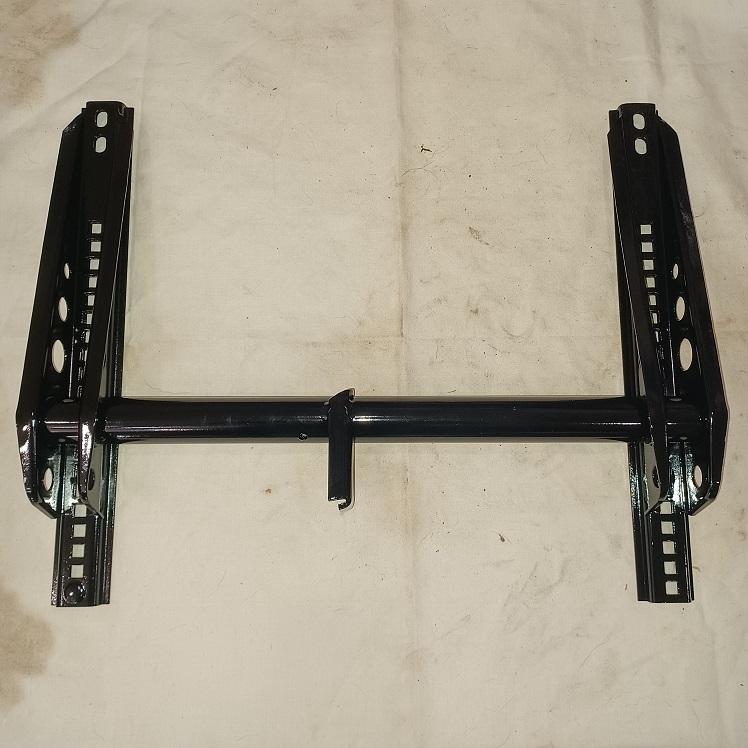 |
| Puebloswatcop |
 Mar 1 2022, 05:56 PM Mar 1 2022, 05:56 PM
Post
#370
|
|
Senior Member    Group: Members Posts: 1,401 Joined: 27-December 14 From: Mineola, Texas Member No.: 18,258 Region Association: Southwest Region |
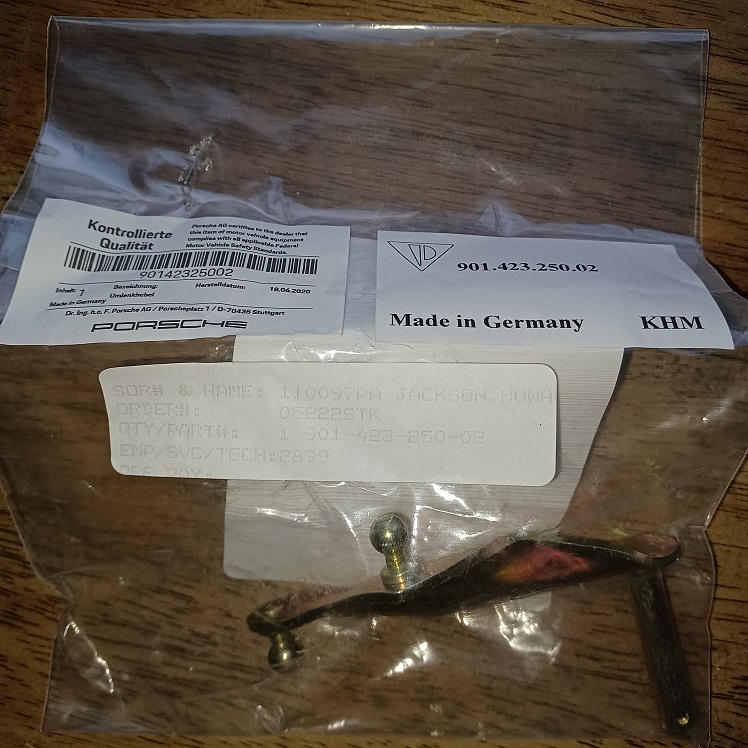
My new throttle lever for the pedal cluster arrived as well. I ordered it directly from Porsche, a bit more pricey, but figured there should be no fitment issues....
 |
| Puebloswatcop |
 Mar 1 2022, 06:01 PM Mar 1 2022, 06:01 PM
Post
#371
|
|
Senior Member    Group: Members Posts: 1,401 Joined: 27-December 14 From: Mineola, Texas Member No.: 18,258 Region Association: Southwest Region |
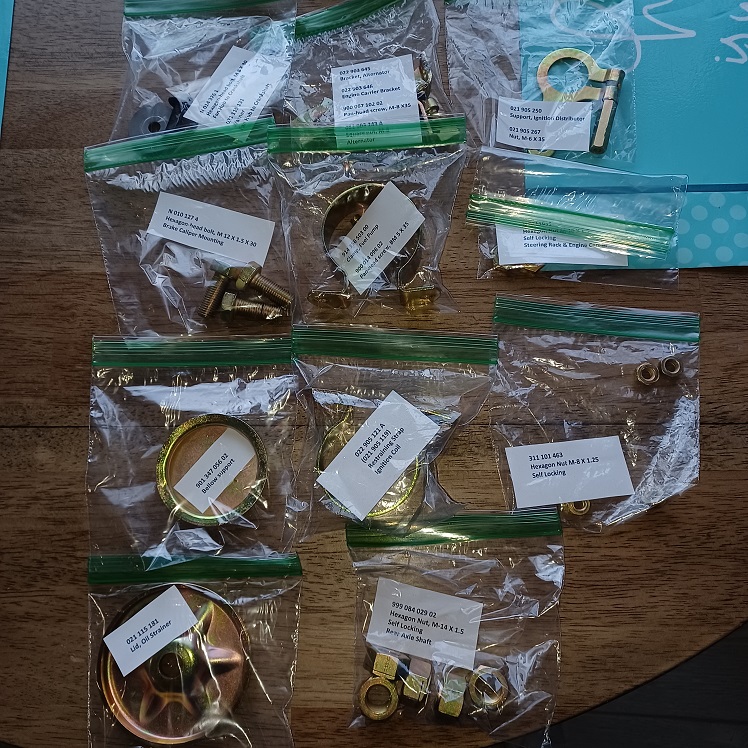
After going to the polls and casting my vote, decided to kill the rest of my day sorting, bagging and cataloging the parts that came back from the plater....such fun since my memory isn't as good as it used to be, and they don't re-bag them the way I had them sorted when I sent them....lol. Guess I will have to come up with a better system to make it easier in the future...Maybe photo all of them with their tags before sending.
 |
| Puebloswatcop |
 Mar 2 2022, 03:33 PM Mar 2 2022, 03:33 PM
Post
#372
|
|
Senior Member    Group: Members Posts: 1,401 Joined: 27-December 14 From: Mineola, Texas Member No.: 18,258 Region Association: Southwest Region |
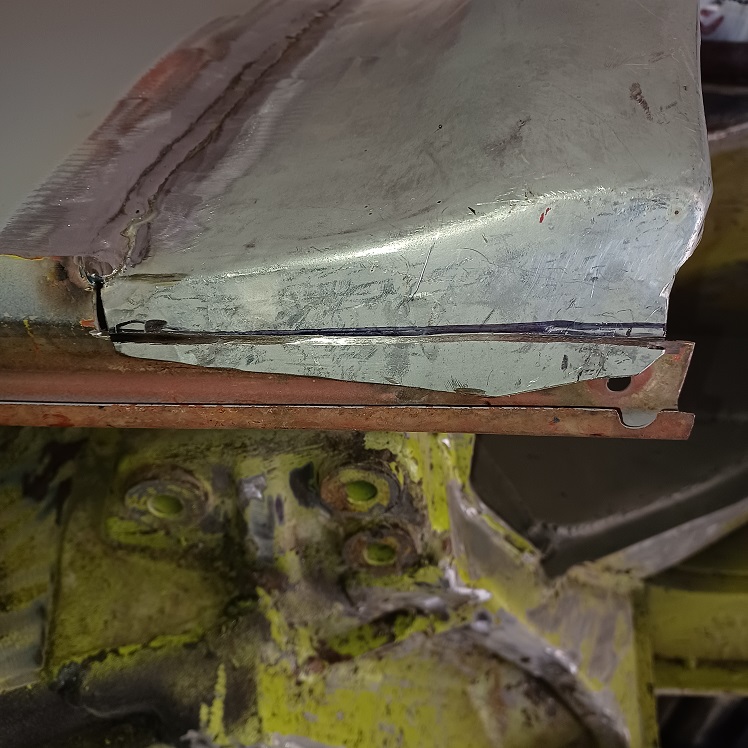
Today was such a nice day I took the hotrod out for a quick spin before doing a bit of welding on the 914. Worked on finishing the bottom edge of the fender flare. First marked of the front lip for cutting. I left the original lip from the narrow fender, so I could tie in the alignment of the flare and the holes for mounting the rocker.
 |
| Puebloswatcop |
 Mar 2 2022, 03:37 PM Mar 2 2022, 03:37 PM
Post
#373
|
|
Senior Member    Group: Members Posts: 1,401 Joined: 27-December 14 From: Mineola, Texas Member No.: 18,258 Region Association: Southwest Region |
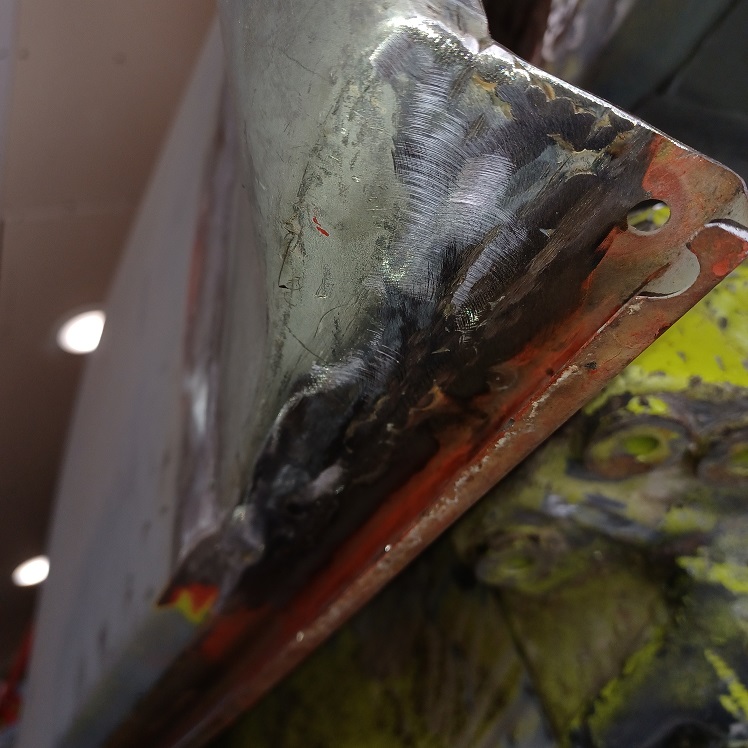
When I finished cutting I realized I had cut on the wrong side of the mark, so welding the two pieces together over a wide gap was a bit tricky, but got it done and am happy with the result...
 |
| Puebloswatcop |
 Mar 2 2022, 03:40 PM Mar 2 2022, 03:40 PM
Post
#374
|
|
Senior Member    Group: Members Posts: 1,401 Joined: 27-December 14 From: Mineola, Texas Member No.: 18,258 Region Association: Southwest Region |
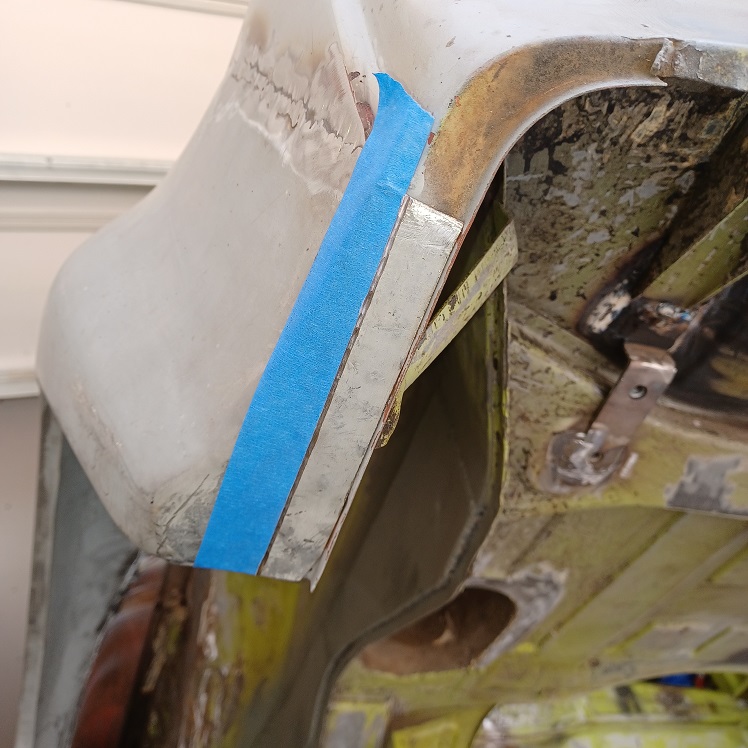
Then I moved to the trailing edge of the flare. This time I marked it with tape so I would know exactly where to cut the flange so that the edges butted together withou the oversized gap.
 |
| Puebloswatcop |
 Mar 2 2022, 03:43 PM Mar 2 2022, 03:43 PM
Post
#375
|
|
Senior Member    Group: Members Posts: 1,401 Joined: 27-December 14 From: Mineola, Texas Member No.: 18,258 Region Association: Southwest Region |
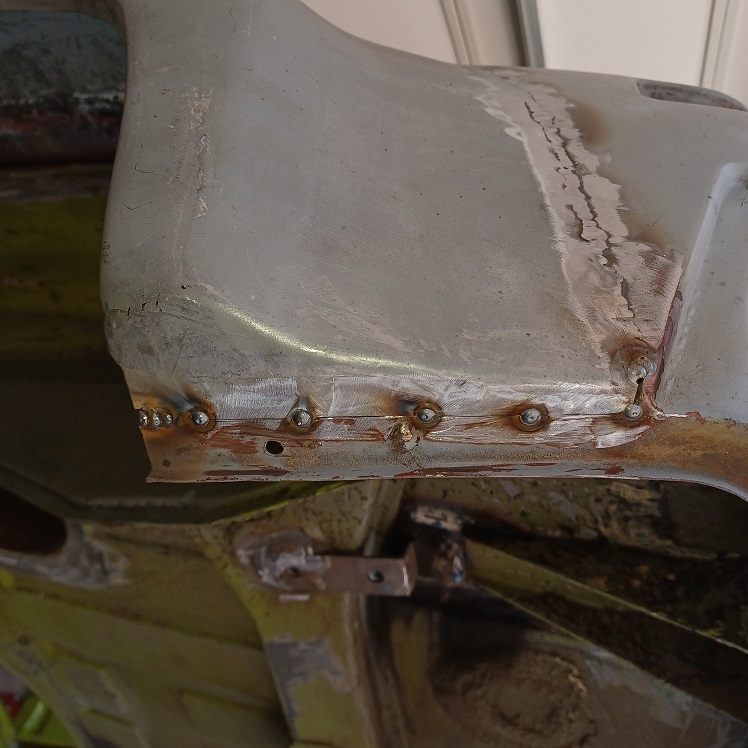
Tack welded as it went, and kept the seem very tight.
 |
| Puebloswatcop |
 Mar 2 2022, 03:45 PM Mar 2 2022, 03:45 PM
Post
#376
|
|
Senior Member    Group: Members Posts: 1,401 Joined: 27-December 14 From: Mineola, Texas Member No.: 18,258 Region Association: Southwest Region |
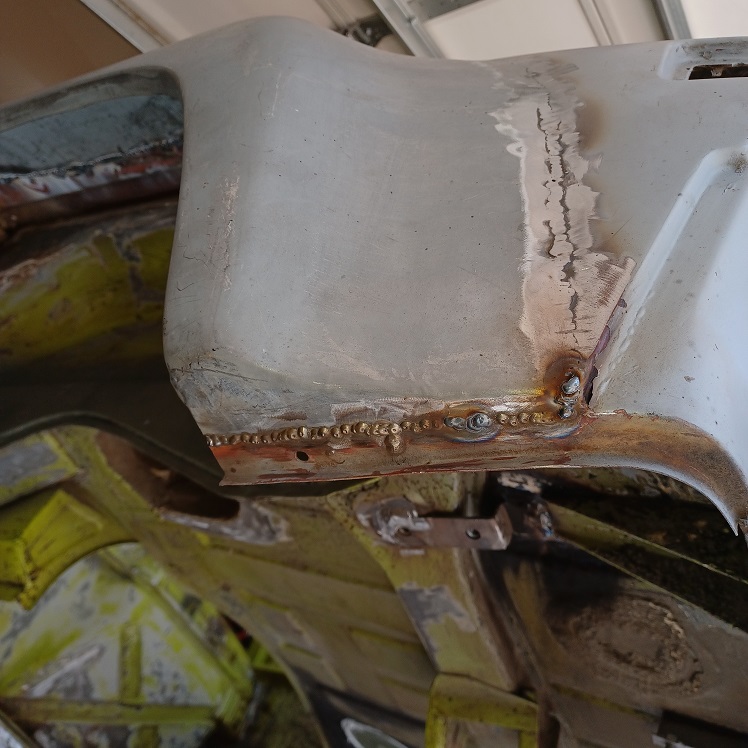
Then finished welding the seam, nice when you get the gap closed up and can get good welds the first time around and not have to fill burn outs...
 |
| Puebloswatcop |
 Mar 2 2022, 03:46 PM Mar 2 2022, 03:46 PM
Post
#377
|
|
Senior Member    Group: Members Posts: 1,401 Joined: 27-December 14 From: Mineola, Texas Member No.: 18,258 Region Association: Southwest Region |
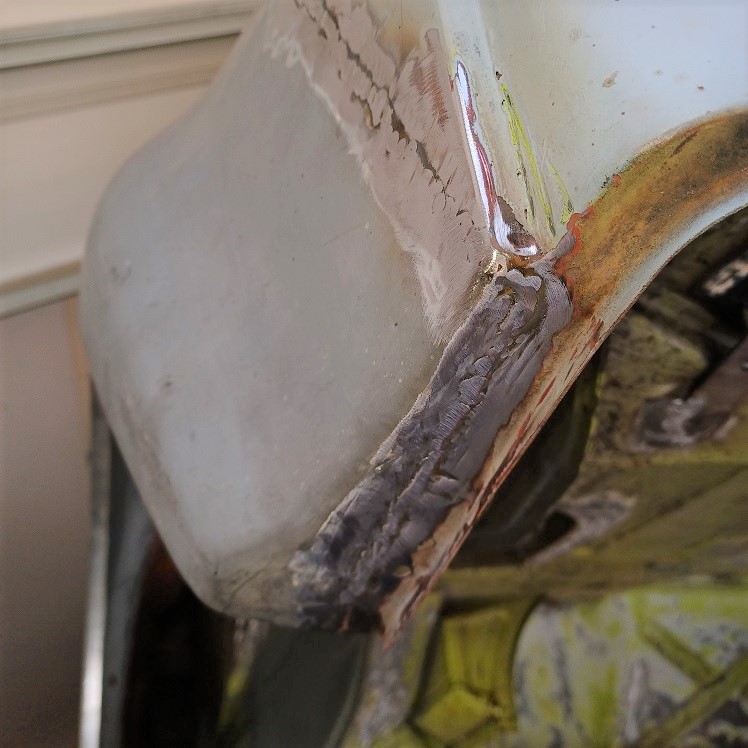
So now, one fender is done, 3 more to tie in...
 |
| Puebloswatcop |
 Mar 3 2022, 06:04 PM Mar 3 2022, 06:04 PM
Post
#378
|
|
Senior Member    Group: Members Posts: 1,401 Joined: 27-December 14 From: Mineola, Texas Member No.: 18,258 Region Association: Southwest Region |
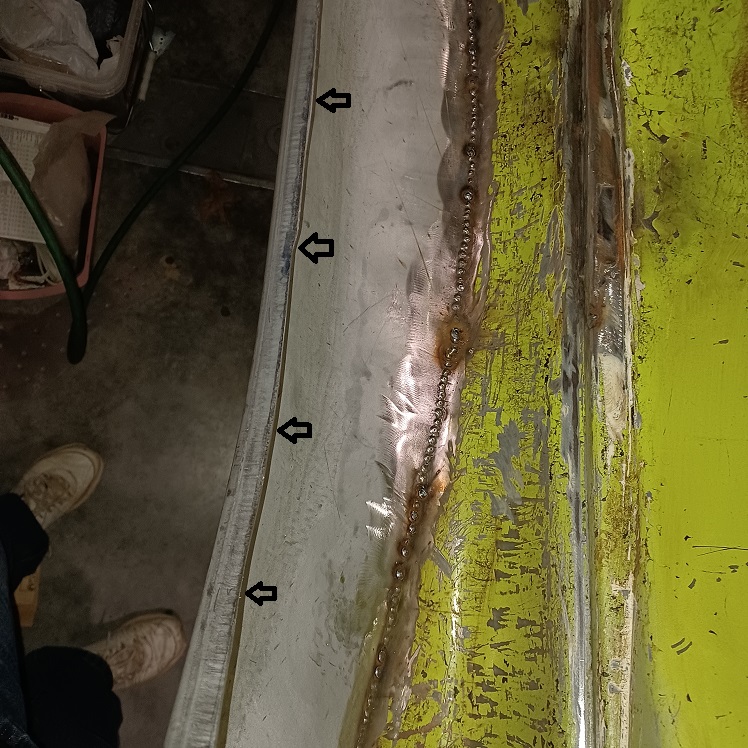
Today I focused on finishing up the fender flares. Including cutting the fender lips so they are consistent widths on all 4. You can see in this picture how uneven the edges are after stamping.
 |
| Puebloswatcop |
 Mar 3 2022, 06:07 PM Mar 3 2022, 06:07 PM
Post
#379
|
|
Senior Member    Group: Members Posts: 1,401 Joined: 27-December 14 From: Mineola, Texas Member No.: 18,258 Region Association: Southwest Region |
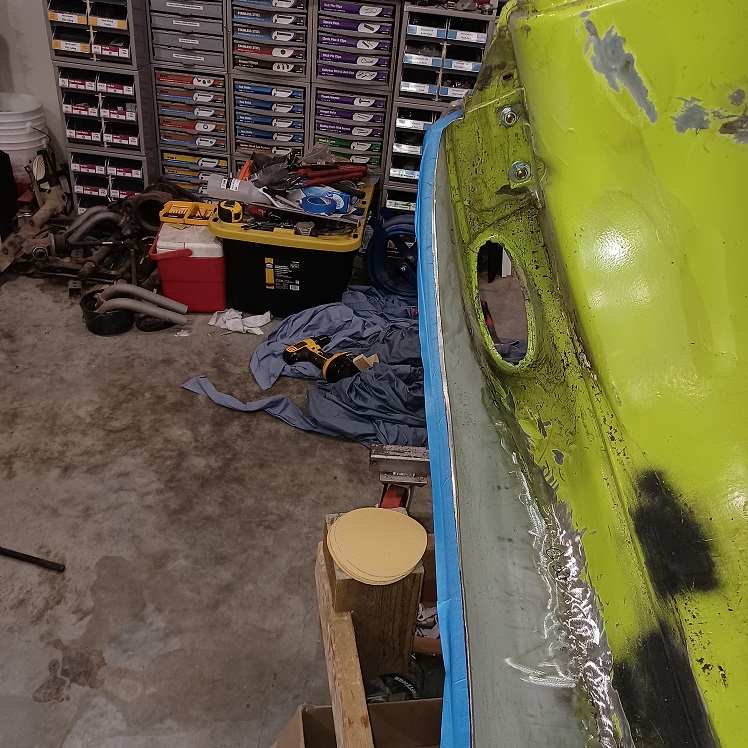
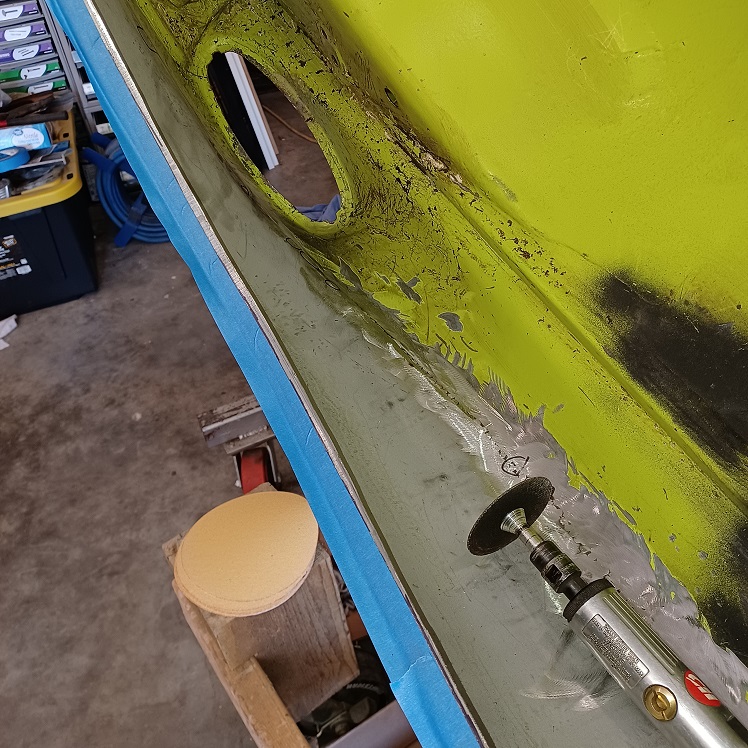
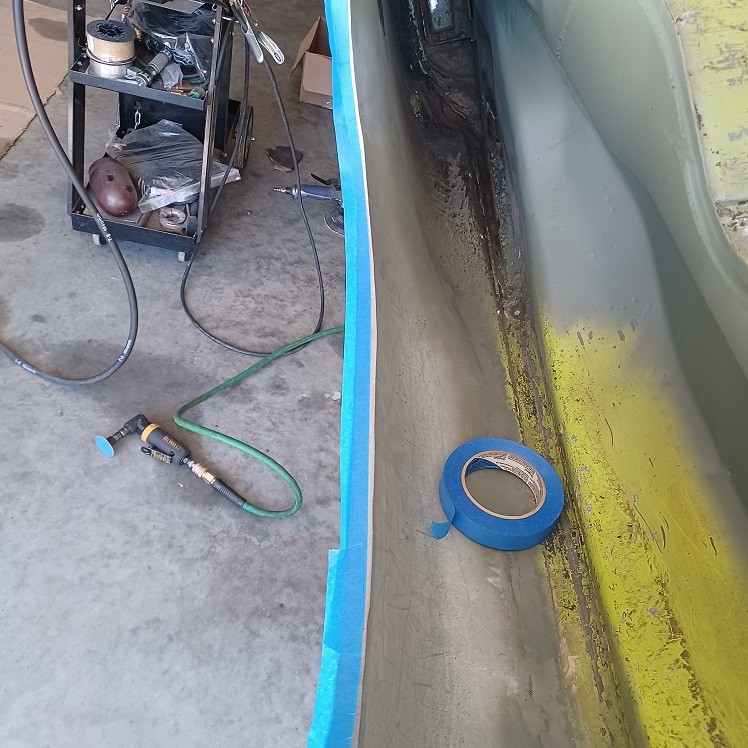
First I used a scribe to mark each lip, using the outer edge of the fender as the guide. Then taped them along the scribe line so it was easier to see where the cut line would be.
   |
| Puebloswatcop |
 Mar 3 2022, 06:13 PM Mar 3 2022, 06:13 PM
Post
#380
|
|
Senior Member    Group: Members Posts: 1,401 Joined: 27-December 14 From: Mineola, Texas Member No.: 18,258 Region Association: Southwest Region |
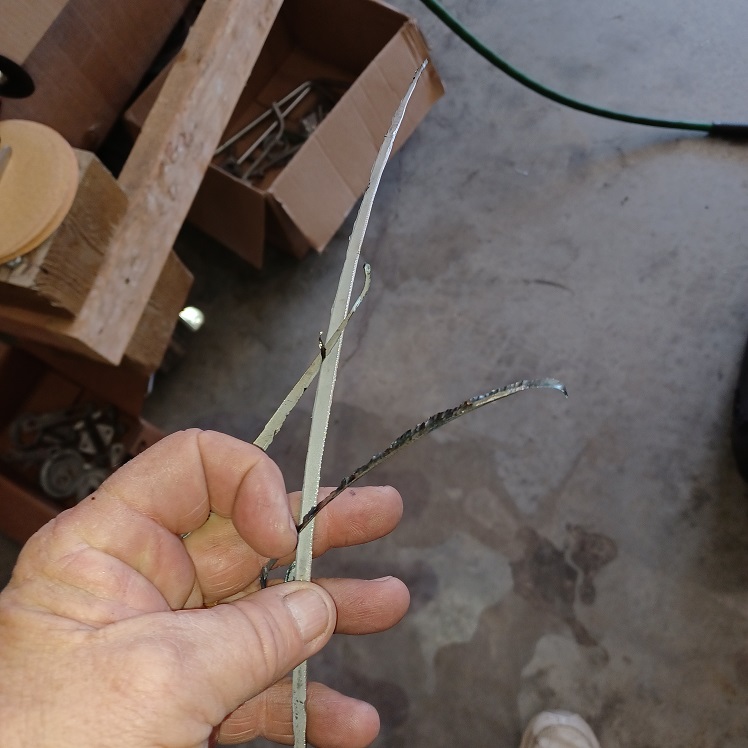
Then cut each flare using a cutoff wheel. In some places the cut offs were as much as 1/4 inch wide.
 |
  |
1 User(s) are reading this topic (1 Guests and 0 Anonymous Users)
0 Members:

|
Lo-Fi Version | Time is now: 25th November 2024 - 02:06 AM |
Invision Power Board
v9.1.4 © 2024 IPS, Inc.


