|
|

|
Porsche, and the Porsche crest are registered trademarks of Dr. Ing. h.c. F. Porsche AG.
This site is not affiliated with Porsche in any way. Its only purpose is to provide an online forum for car enthusiasts. All other trademarks are property of their respective owners. |
|
|
  |
| Puebloswatcop |
 Mar 3 2022, 06:15 PM Mar 3 2022, 06:15 PM
Post
#381
|
|
Senior Member    Group: Members Posts: 1,401 Joined: 27-December 14 From: Mineola, Texas Member No.: 18,258 Region Association: Southwest Region |
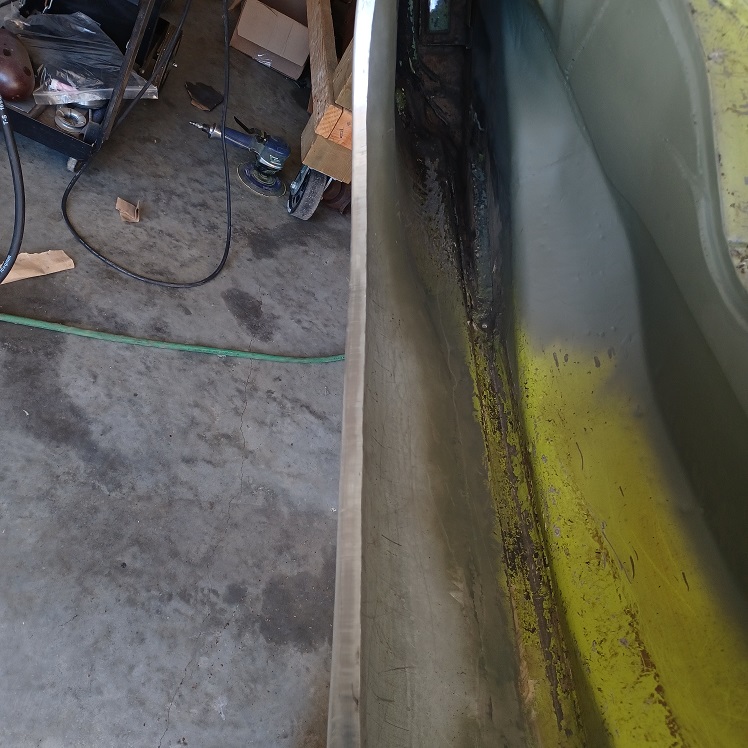
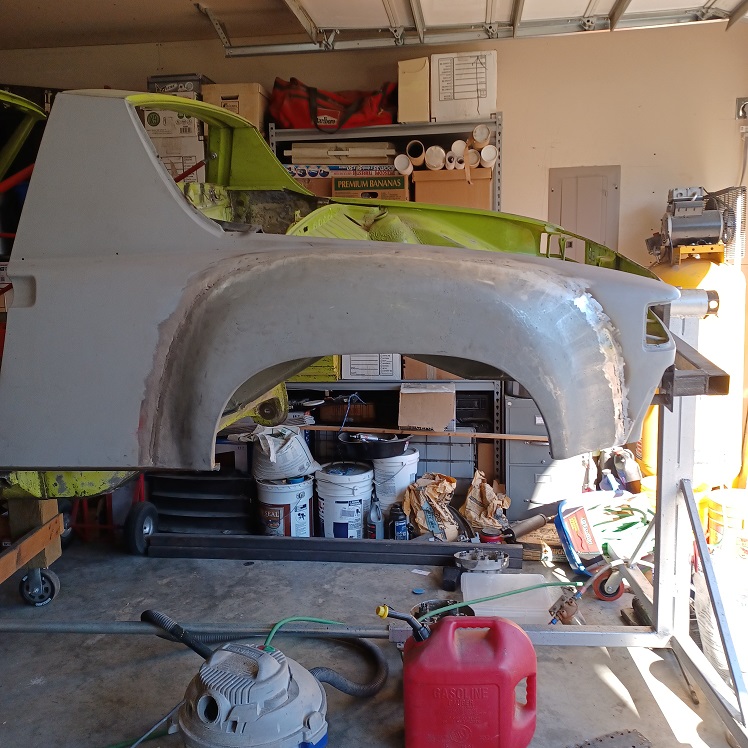
Then went back and cleaned up each cut with a sanding disk.
 |
| Puebloswatcop |
 Mar 3 2022, 06:22 PM Mar 3 2022, 06:22 PM
Post
#382
|
|
Senior Member    Group: Members Posts: 1,401 Joined: 27-December 14 From: Mineola, Texas Member No.: 18,258 Region Association: Southwest Region |
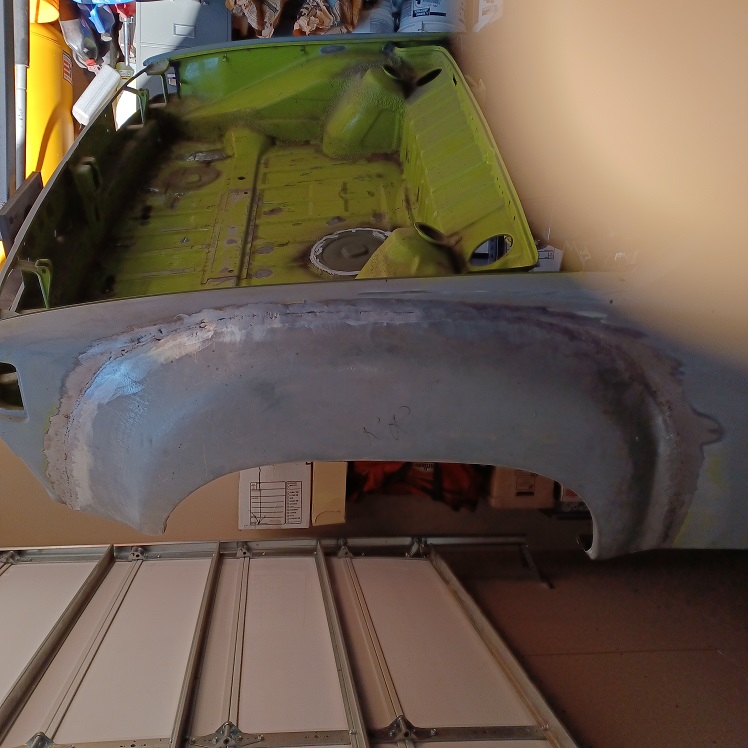
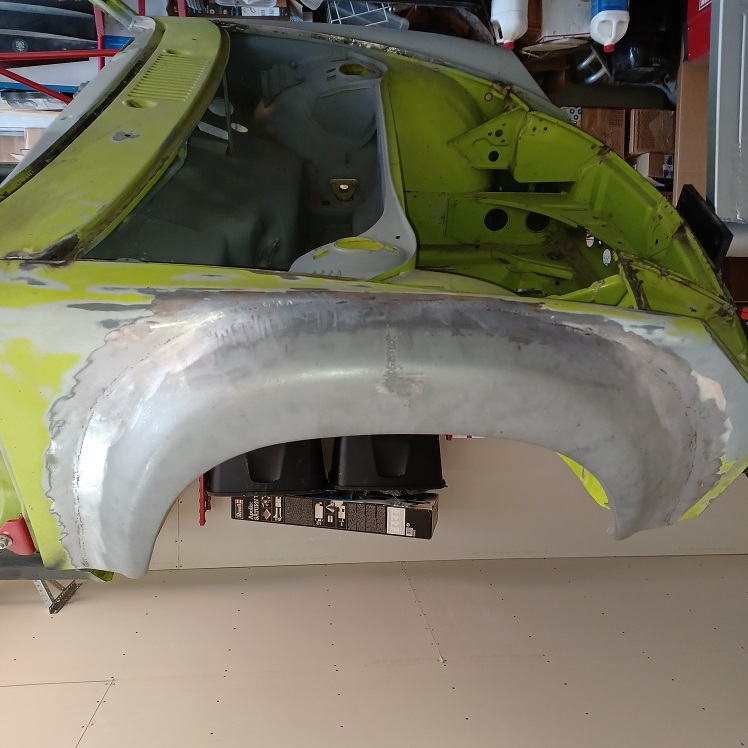
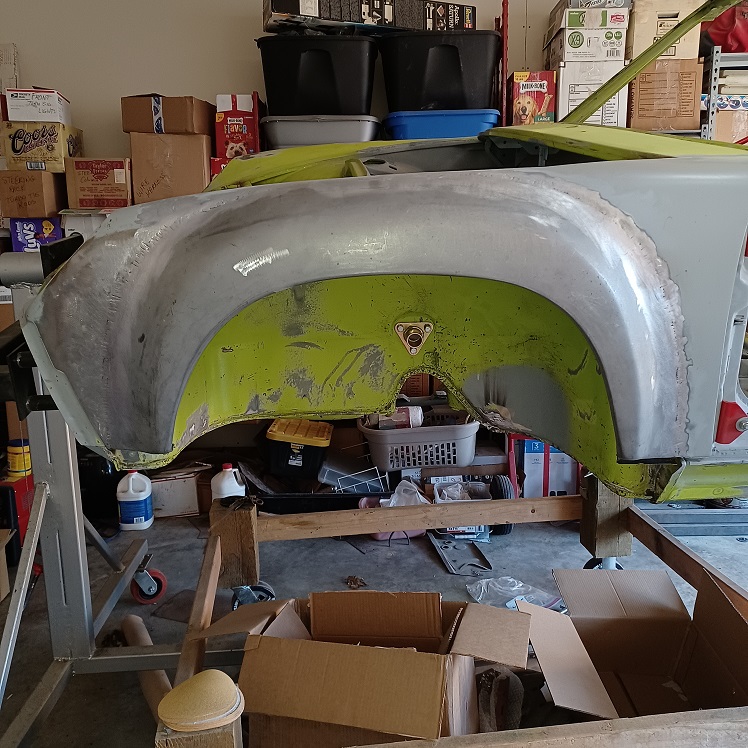
Also went back through each weld seam checking for any pin holes, welded them up and ground the weld lines down. My welding skills certainly lacked when I started putting the flares on, but improved as I went. But will have to clean up the weld lines during further body work. Overall I am pleased with the outcome. There is allot to be said for measure twice (or 50 time) cut once.
    |
| Puebloswatcop |
 Mar 4 2022, 12:42 PM Mar 4 2022, 12:42 PM
Post
#383
|
|
Senior Member    Group: Members Posts: 1,401 Joined: 27-December 14 From: Mineola, Texas Member No.: 18,258 Region Association: Southwest Region |
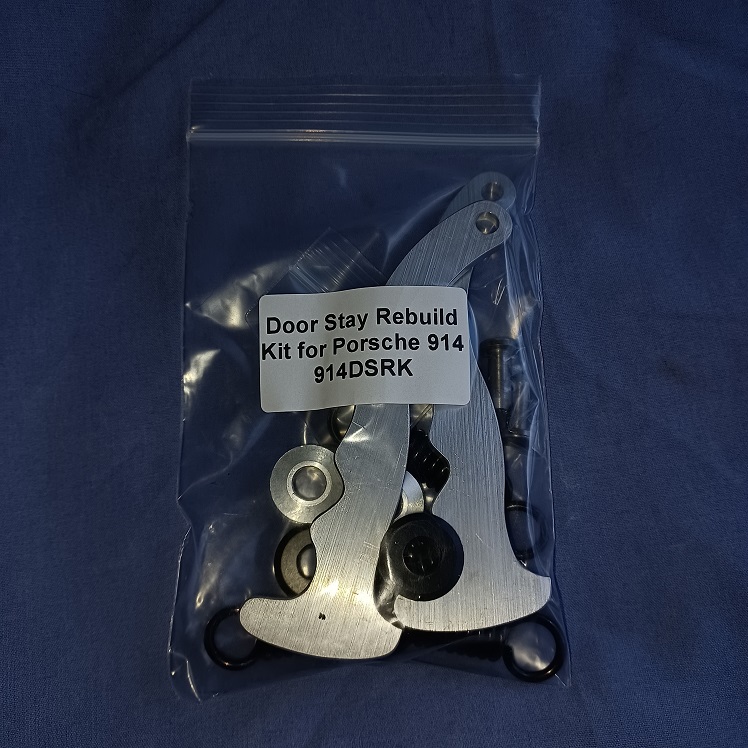
The door stay rebuild kit came from 914 Rubber today. Very nice kit, comes with new stay straps, new springs and both rollers.
 |
| Puebloswatcop |
 Mar 4 2022, 12:44 PM Mar 4 2022, 12:44 PM
Post
#384
|
|
Senior Member    Group: Members Posts: 1,401 Joined: 27-December 14 From: Mineola, Texas Member No.: 18,258 Region Association: Southwest Region |
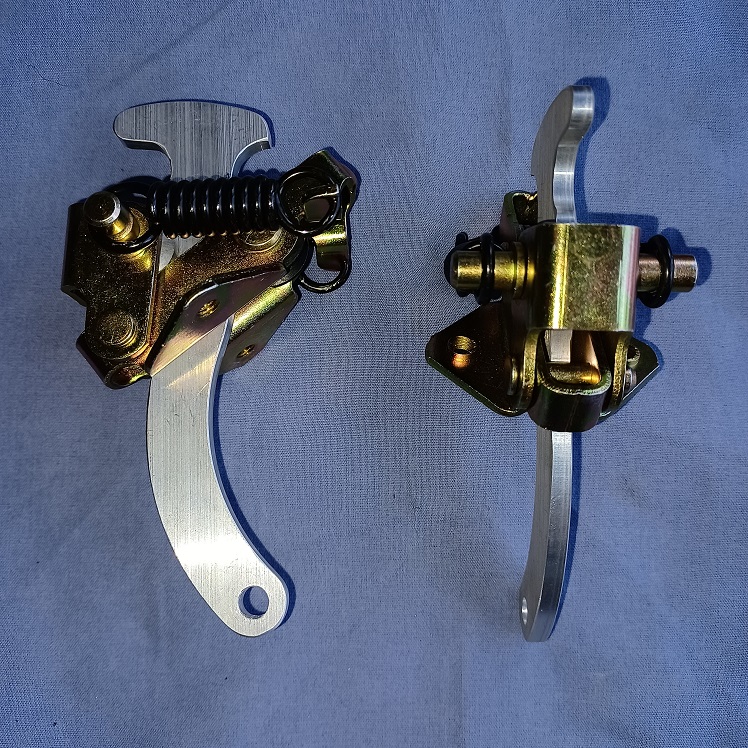
Re-assembly of the door stays is really straight forward. Took a whopping 5 minutes, wore me out for the day...lol.
 |
| 9146C |
 Mar 4 2022, 03:17 PM Mar 4 2022, 03:17 PM
Post
#385
|
|
Member   Group: Members Posts: 228 Joined: 14-September 19 From: US Member No.: 23,460 Region Association: None 
|
The flares look really nice!
I really like how the axle shafts turned out...and of course, all the new shiny bits! Keep up the good work! |
| Puebloswatcop |
 Mar 5 2022, 08:11 PM Mar 5 2022, 08:11 PM
Post
#386
|
|
Senior Member    Group: Members Posts: 1,401 Joined: 27-December 14 From: Mineola, Texas Member No.: 18,258 Region Association: Southwest Region |
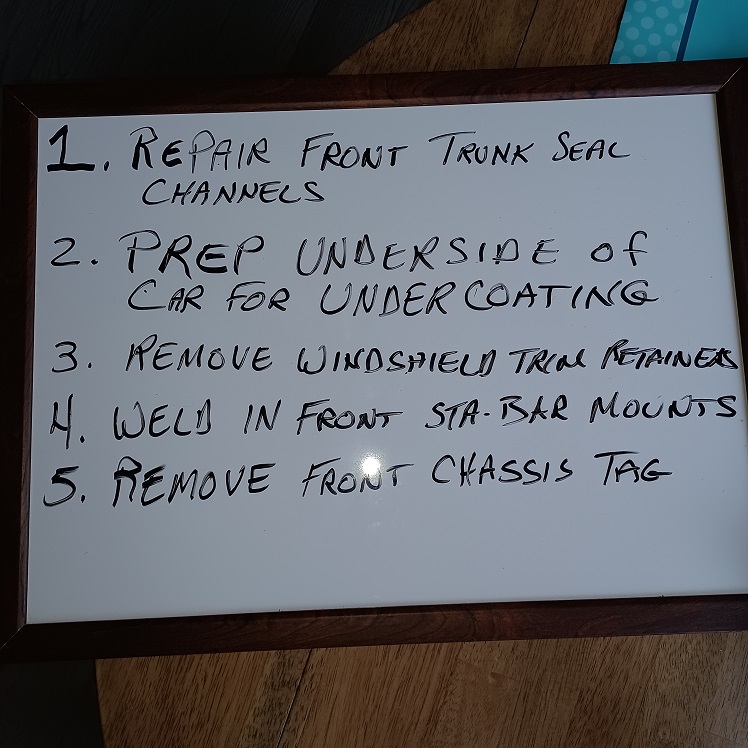
Started my day by writing a new goal list on the white board for this next week, not sure why but I always list the hardest things first and the quick and easy last....lol
 |
| Puebloswatcop |
 Mar 5 2022, 08:14 PM Mar 5 2022, 08:14 PM
Post
#387
|
|
Senior Member    Group: Members Posts: 1,401 Joined: 27-December 14 From: Mineola, Texas Member No.: 18,258 Region Association: Southwest Region |
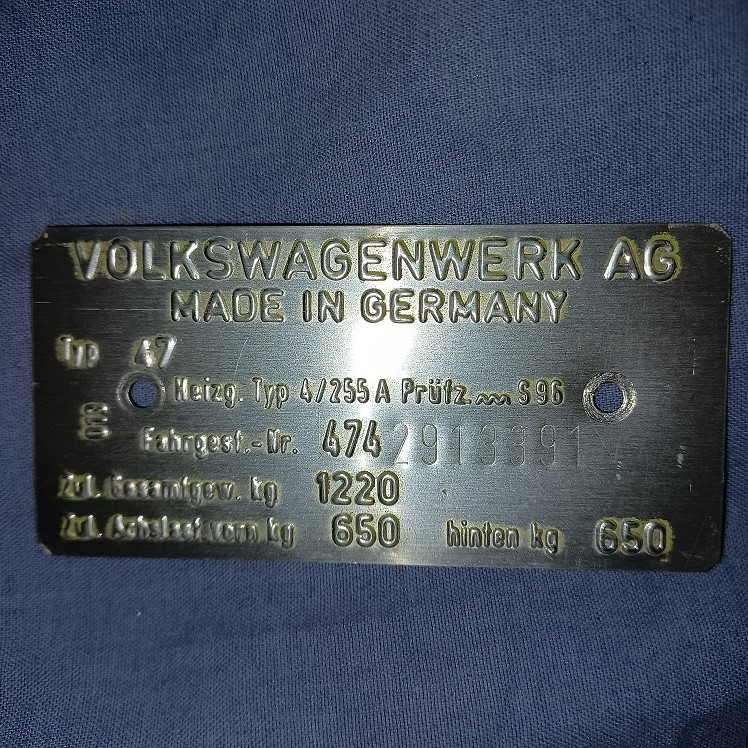
Then I seem to do the easy things first and the harder (more time consuming) things last. I got the tag removed from the front headlight bucket and cleaned all of the green overspray paint off of it.
 |
| Puebloswatcop |
 Mar 5 2022, 08:19 PM Mar 5 2022, 08:19 PM
Post
#388
|
|
Senior Member    Group: Members Posts: 1,401 Joined: 27-December 14 From: Mineola, Texas Member No.: 18,258 Region Association: Southwest Region |
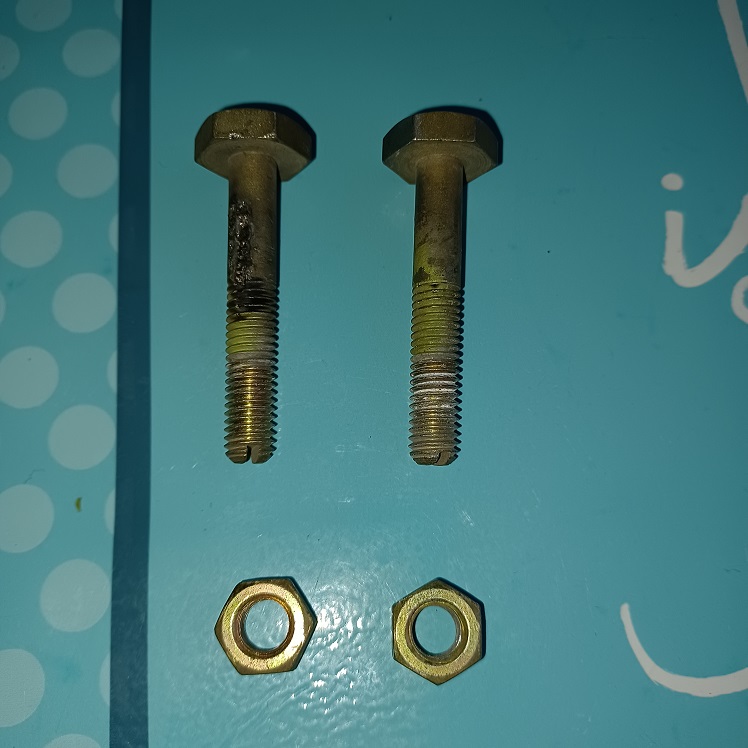
While I was removing the id plate, I found I had not removed the adjusting stop screws for the headlights, These need to go for re-plating in the next batch.
 |
| Puebloswatcop |
 Mar 5 2022, 08:21 PM Mar 5 2022, 08:21 PM
Post
#389
|
|
Senior Member    Group: Members Posts: 1,401 Joined: 27-December 14 From: Mineola, Texas Member No.: 18,258 Region Association: Southwest Region |
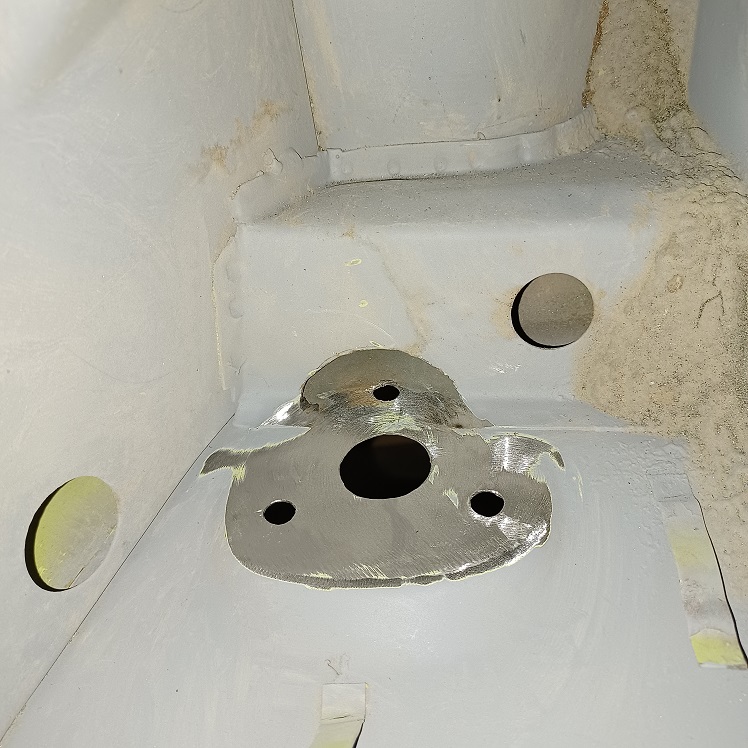
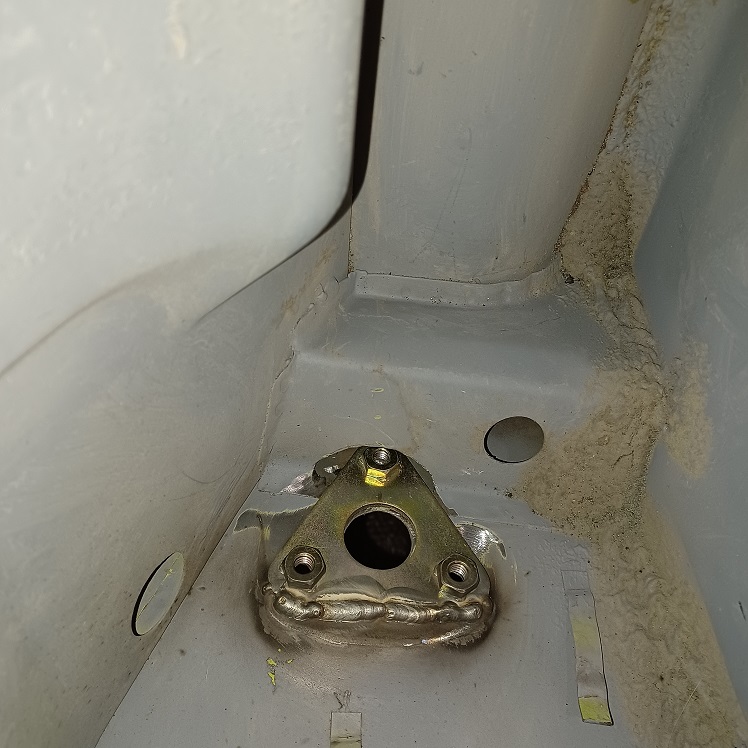
Then moved on to welding the inside mounting plates for the front stabalizer bar. I had already measured and drilled the holes for the bar and the mounts, while I was in Colorado. Sanded all of the paint off of the inside and outside mounting areas...
 |
| Puebloswatcop |
 Mar 5 2022, 08:25 PM Mar 5 2022, 08:25 PM
Post
#390
|
|
Senior Member    Group: Members Posts: 1,401 Joined: 27-December 14 From: Mineola, Texas Member No.: 18,258 Region Association: Southwest Region |
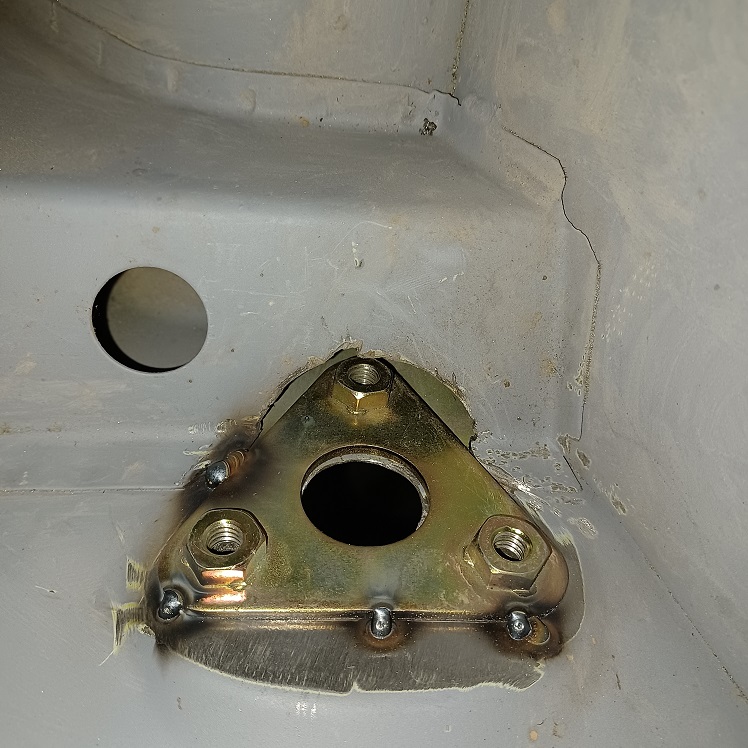
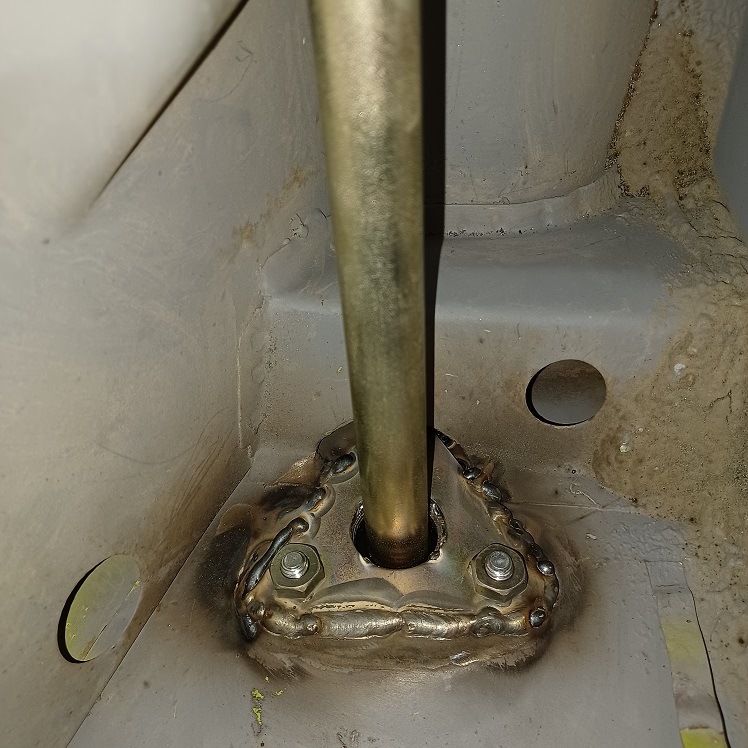
Then I bolted the mounts back in and replaced the bar. Measured the positioning of the mounts, by measuring from the bottom pan and the trunk wall. I was able to get the bar within .022 inches from side to side. Then tack welded the mounts in place.
 |
| Puebloswatcop |
 Mar 5 2022, 08:30 PM Mar 5 2022, 08:30 PM
Post
#391
|
|
Senior Member    Group: Members Posts: 1,401 Joined: 27-December 14 From: Mineola, Texas Member No.: 18,258 Region Association: Southwest Region |
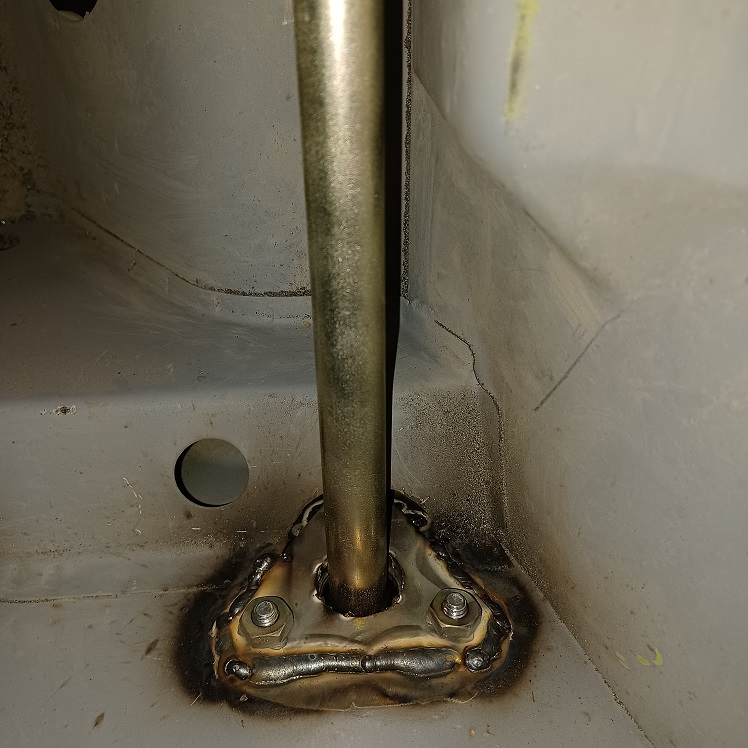
Then trying to figure out how to be a contortionist, I was able to weld the mounts in place. Doing the to edge isn't bad, but the two lower edges are hard to see when the nozzle is at the right angle to weld them. and there is no way to weld in the bottom corner from the inside. So for the bottom corner, I drilled through the wheel well and plug welded the bottom corner in 5 places.
 |
| Puebloswatcop |
 Mar 5 2022, 08:32 PM Mar 5 2022, 08:32 PM
Post
#392
|
|
Senior Member    Group: Members Posts: 1,401 Joined: 27-December 14 From: Mineola, Texas Member No.: 18,258 Region Association: Southwest Region |
After welding I re-inserted the bar and double checked the placement. All is good, so tomorrow I will remove the bar again and clean up the welds before priming.
  |
| Puebloswatcop |
 Mar 5 2022, 08:34 PM Mar 5 2022, 08:34 PM
Post
#393
|
|
Senior Member    Group: Members Posts: 1,401 Joined: 27-December 14 From: Mineola, Texas Member No.: 18,258 Region Association: Southwest Region |
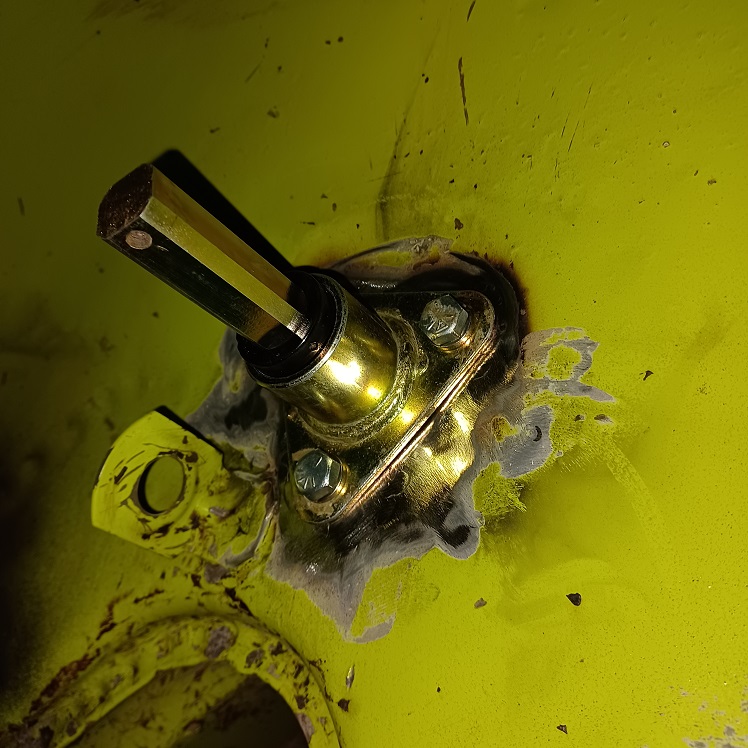
An outside shot with the bar installed....
 |
| Literati914 |
 Mar 5 2022, 09:06 PM Mar 5 2022, 09:06 PM
Post
#394
|
|
Senior Member    Group: Members Posts: 1,735 Joined: 16-November 06 From: Dallas, TX Member No.: 7,222 Region Association: Southwest Region |
Good work as alway Kevin!
Did you send (ship) the actual bar off for plating with the all the small stuff? I mean duh, you must of… that is ideal, but must have run the shipping up a bit (I’m an observant CSOB, aren’t I) . |
| Puebloswatcop |
 Mar 6 2022, 07:49 AM Mar 6 2022, 07:49 AM
Post
#395
|
|
Senior Member    Group: Members Posts: 1,401 Joined: 27-December 14 From: Mineola, Texas Member No.: 18,258 Region Association: Southwest Region |
Actually, The bar and all of its components are an old Weltmeister bar. I've had it for years, still in the box. So thank goodness I didn't have to ship it for plating. With the cost of shipping these days, I probably would have saved by buying a new bar.....LOL
Good work as alway Kevin! Did you send (ship) the actual bar off for plating with the all the small stuff? I mean duh, you must of… that is ideal, but must have run the shipping up a bit (I’m an observant CSOB, aren’t I) . |
| Shivers |
 Mar 6 2022, 09:14 AM Mar 6 2022, 09:14 AM
Post
#396
|
|
Senior Member     Group: Members Posts: 2,781 Joined: 19-October 20 From: La Quinta, CA Member No.: 24,781 Region Association: Southern California |
Really coming along. Nice work
|
| Puebloswatcop |
 Mar 7 2022, 10:56 AM Mar 7 2022, 10:56 AM
Post
#397
|
|
Senior Member    Group: Members Posts: 1,401 Joined: 27-December 14 From: Mineola, Texas Member No.: 18,258 Region Association: Southwest Region |
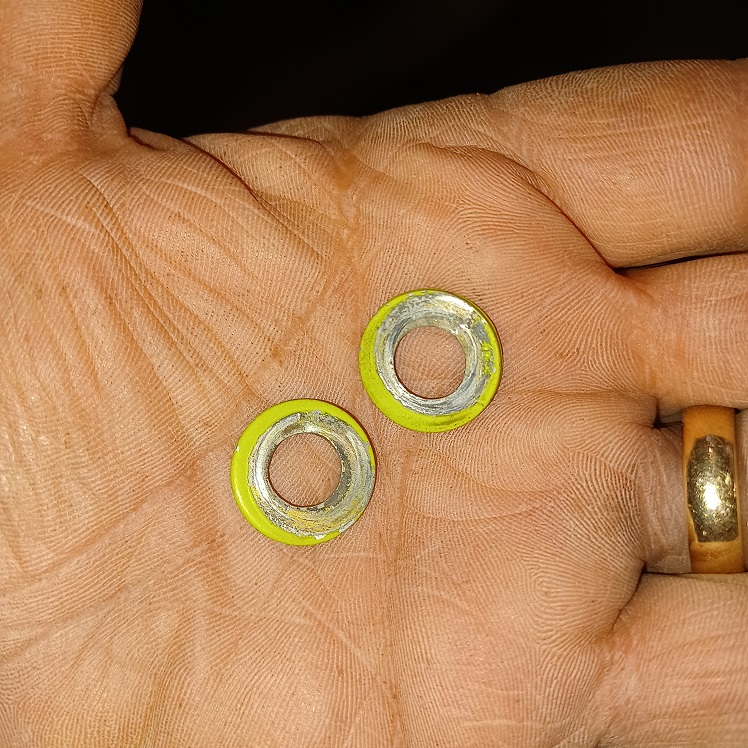
Have you ever had something rattling around in your car? You cant find it and it drives you crazy....Well thats what was going on with the twin. Every time I would rotate it on the rotisserie I kept hearing things bouncing around. I narrowed it down to the driver's side Long. The longs were solid, so I never cut them open. So I went on a mission. Spent about an hour blowing compressed air from the rear of the long, and this is what came out.... (IMG:style_emoticons/default/WTF.gif)
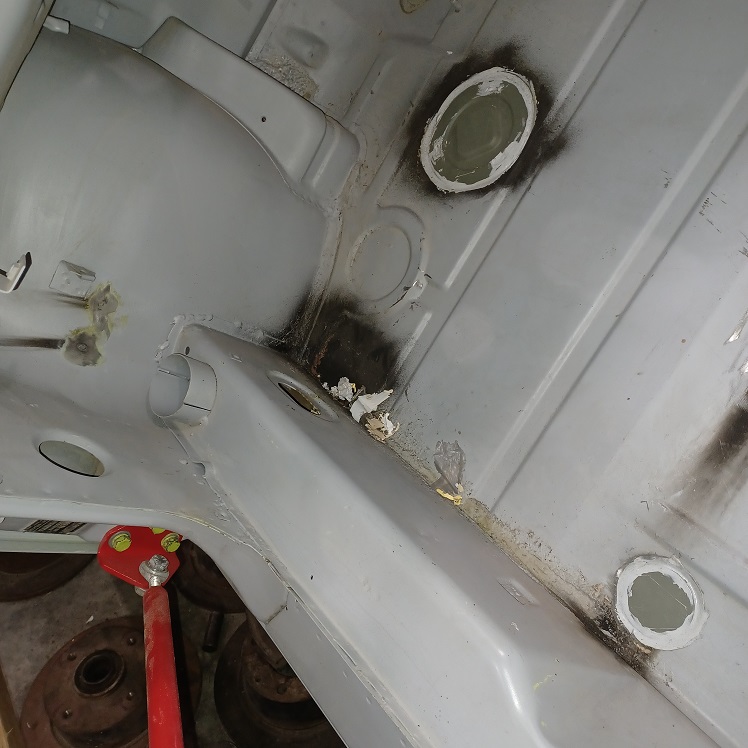 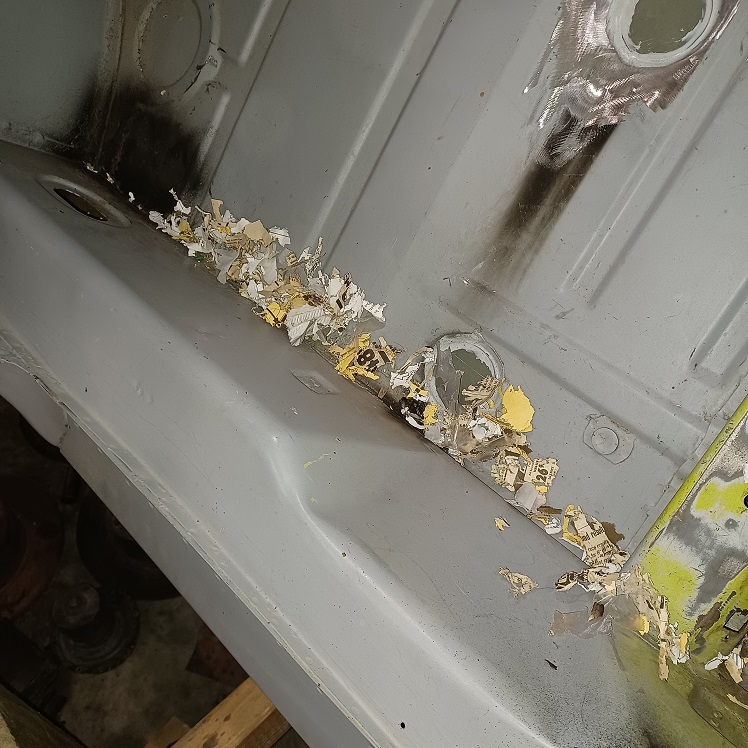 |
| Puebloswatcop |
 Mar 7 2022, 10:59 AM Mar 7 2022, 10:59 AM
Post
#398
|
|
Senior Member    Group: Members Posts: 1,401 Joined: 27-December 14 From: Mineola, Texas Member No.: 18,258 Region Association: Southwest Region |
But the paper just kept on coming. The mice really had a field day in the drivers long...
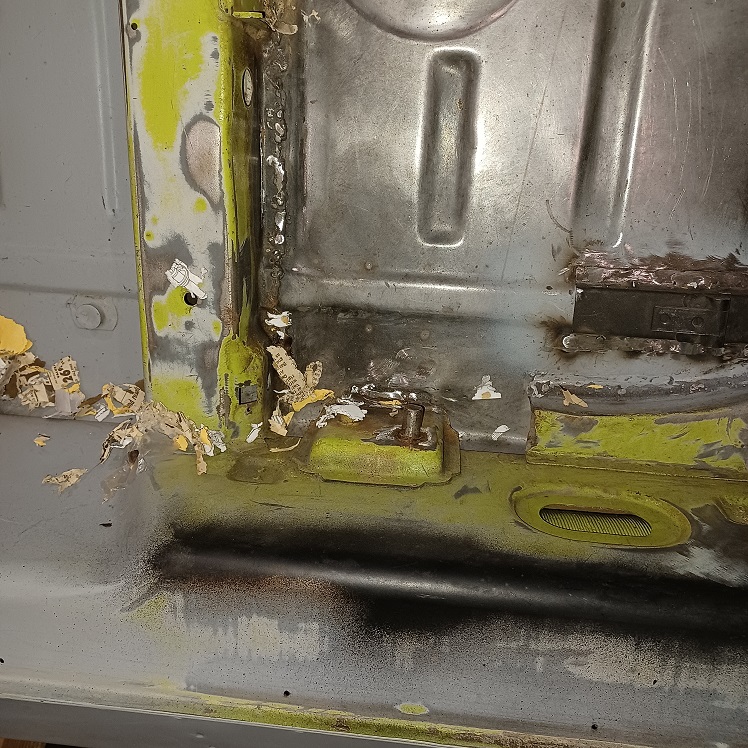 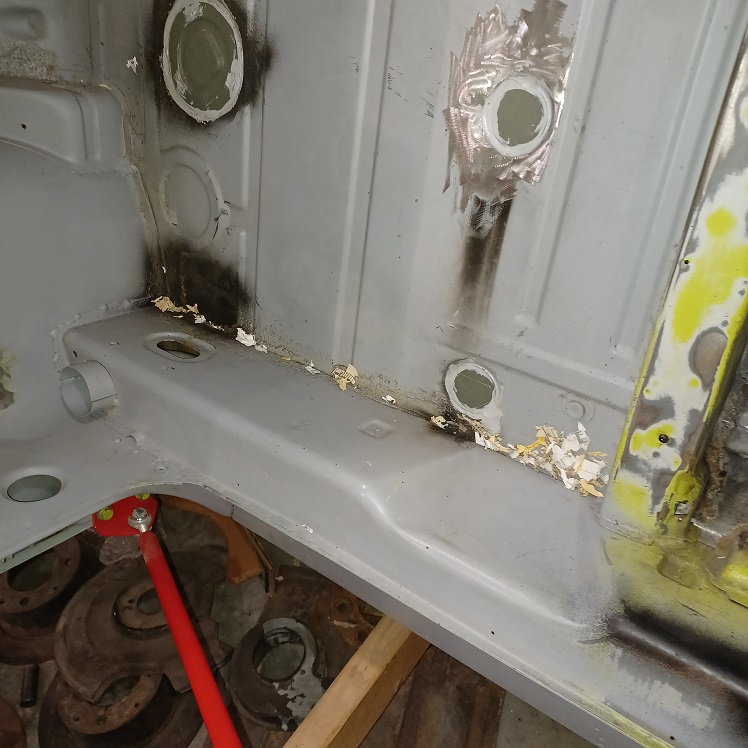 |
| Puebloswatcop |
 Mar 7 2022, 11:04 AM Mar 7 2022, 11:04 AM
Post
#399
|
|
Senior Member    Group: Members Posts: 1,401 Joined: 27-December 14 From: Mineola, Texas Member No.: 18,258 Region Association: Southwest Region |
Even after removing all of the mouse house, I still had that annoying rattle, something was bouncing around in there and I wasnt about to give up till I got it out. After about another hour I was able to see what was in there. Just had to fasion a magnet to get down inside the long between the steel and the heat tube....and finally had success... no more rattle
 |
| Puebloswatcop |
 Mar 8 2022, 12:13 PM Mar 8 2022, 12:13 PM
Post
#400
|
|
Senior Member    Group: Members Posts: 1,401 Joined: 27-December 14 From: Mineola, Texas Member No.: 18,258 Region Association: Southwest Region |
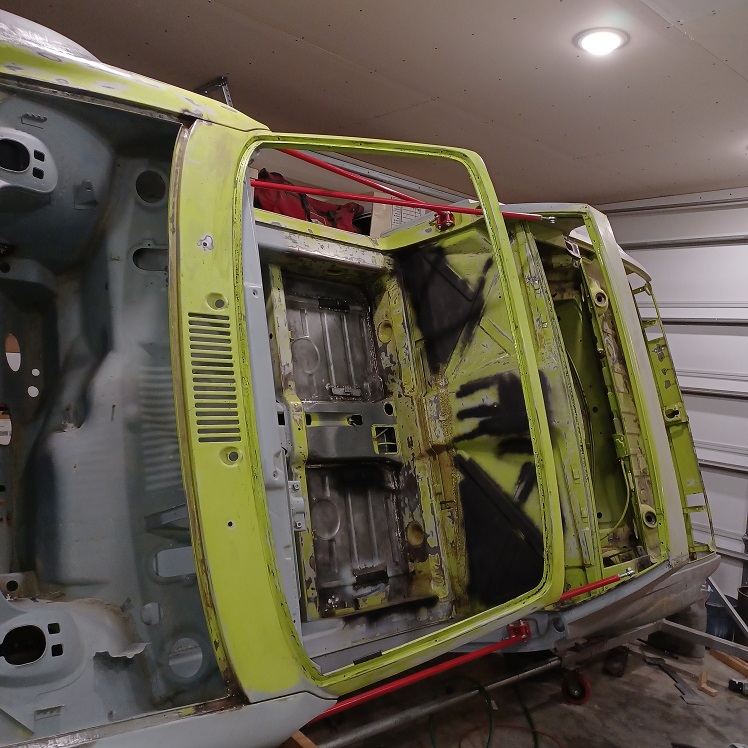
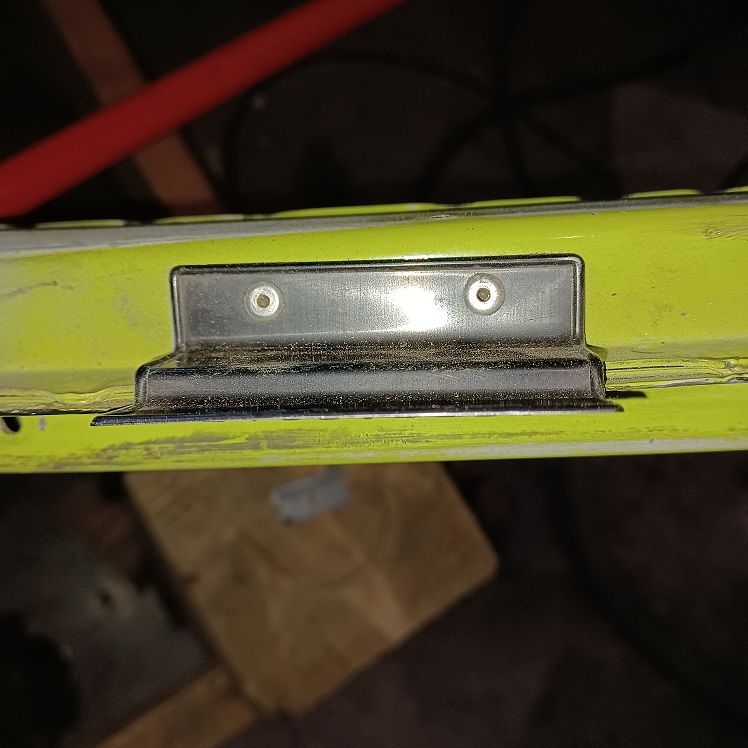
Started removing all of the little things on the car like the trim clips and the VIN plate.
  |
  |
7 User(s) are reading this topic (7 Guests and 0 Anonymous Users)
0 Members:

|
Lo-Fi Version | Time is now: 25th November 2024 - 04:34 AM |
Invision Power Board
v9.1.4 © 2024 IPS, Inc.


