|
|

|
Porsche, and the Porsche crest are registered trademarks of Dr. Ing. h.c. F. Porsche AG.
This site is not affiliated with Porsche in any way. Its only purpose is to provide an online forum for car enthusiasts. All other trademarks are property of their respective owners. |
|
|
  |
| Puebloswatcop |
 Mar 18 2022, 09:46 AM Mar 18 2022, 09:46 AM
Post
#421
|
|
Senior Member    Group: Members Posts: 1,401 Joined: 27-December 14 From: Mineola, Texas Member No.: 18,258 Region Association: Southwest Region |
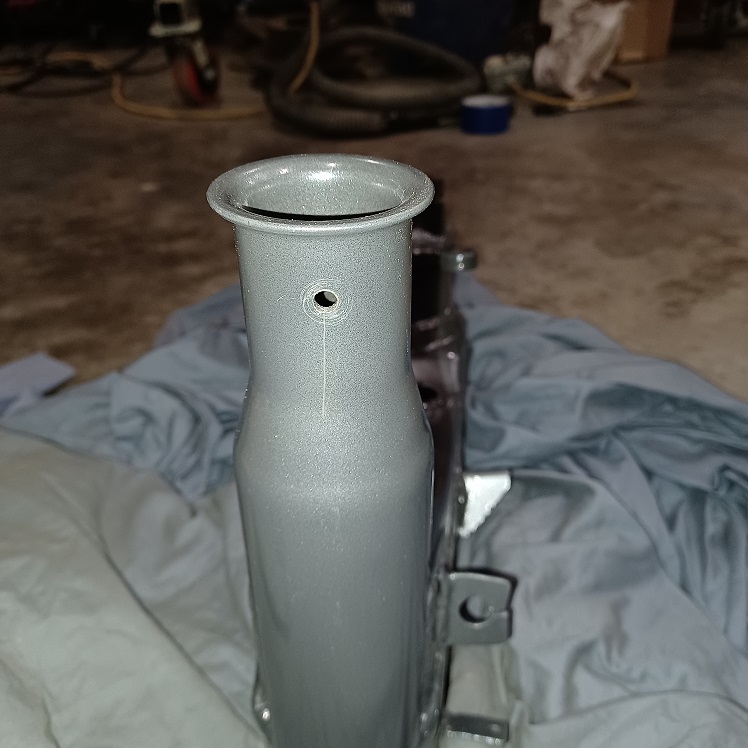
Then began drilling the hole in increments till it was the correct size of 7/32", and of course I screwed up, and scratched the tube. Not a real deep scratch but left me cursing myself (IMG:style_emoticons/default/dry.gif)
 |
| Puebloswatcop |
 Mar 18 2022, 09:54 AM Mar 18 2022, 09:54 AM
Post
#422
|
|
Senior Member    Group: Members Posts: 1,401 Joined: 27-December 14 From: Mineola, Texas Member No.: 18,258 Region Association: Southwest Region |
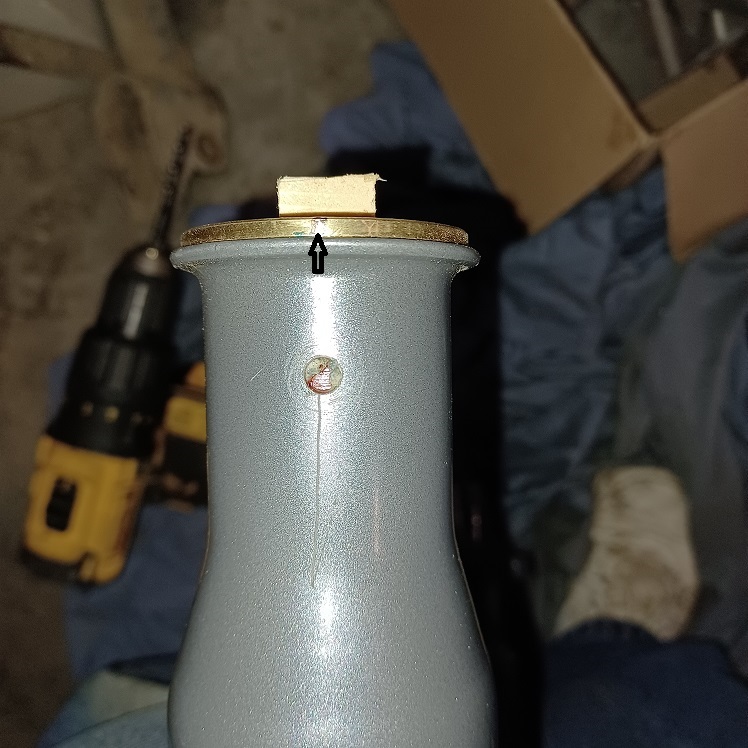
Then it was time to insert the bushings. I marked each bushing where the grease grooves intersected in the bushing, so that I could line one of the two points up with the holes drilled in the trailing arm. Although the fit was tight in the arm, I added polyurethane glue to the inside of the trailing arm before inserting the bushings to ensure there wouldn't be any slippage. Then using my bar clamp, pulled the bushings into place.
 |
| Puebloswatcop |
 Mar 18 2022, 09:59 AM Mar 18 2022, 09:59 AM
Post
#423
|
|
Senior Member    Group: Members Posts: 1,401 Joined: 27-December 14 From: Mineola, Texas Member No.: 18,258 Region Association: Southwest Region |
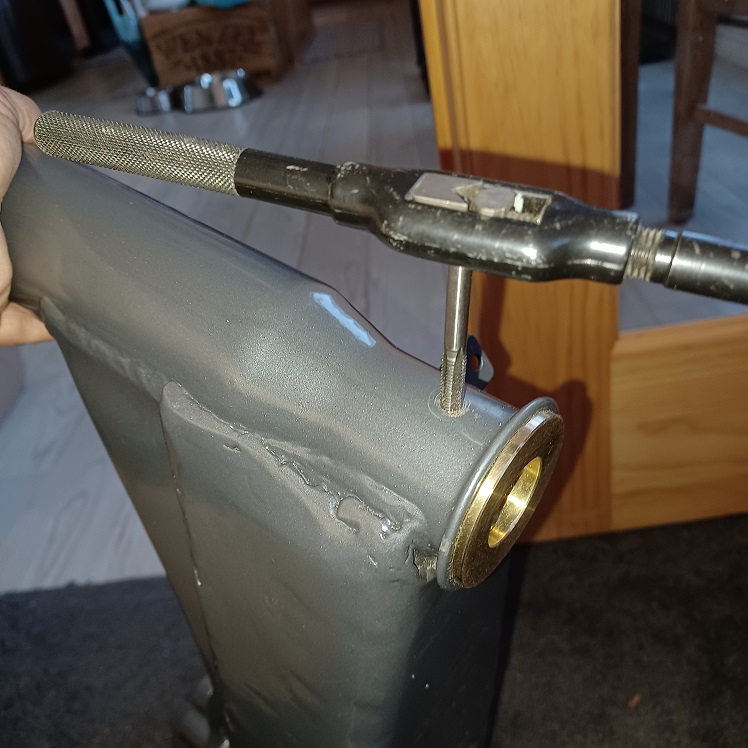
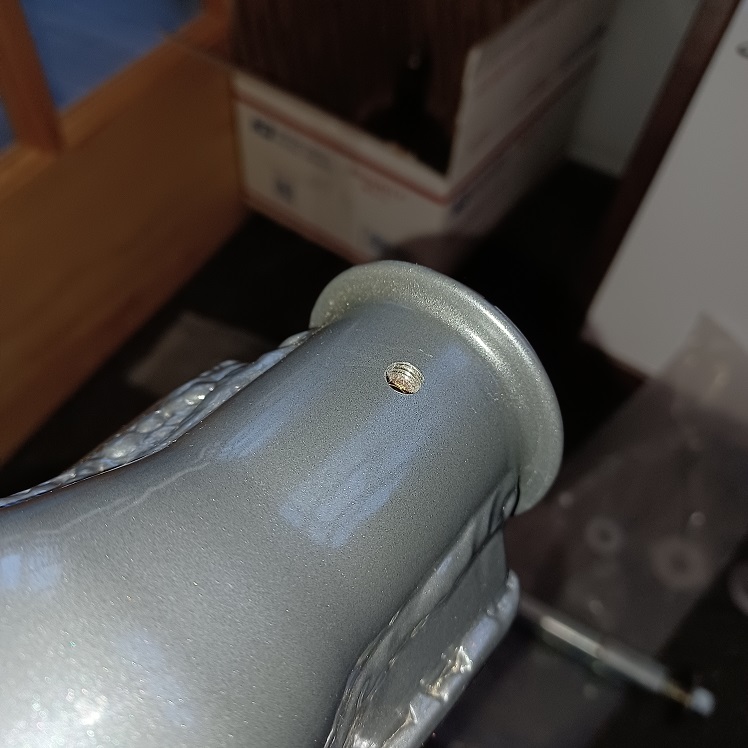
After the bushings set up, I drilled the hole through the bronze bushing, it lined up very well with the grease grooves inside the bushing. Then I tapped the hole for the grease fittings and took 600 grit sandpaper and made sure I got any burrs off of the inside of the bronze bushing.
  |
| Puebloswatcop |
 Mar 18 2022, 10:05 AM Mar 18 2022, 10:05 AM
Post
#424
|
|
Senior Member    Group: Members Posts: 1,401 Joined: 27-December 14 From: Mineola, Texas Member No.: 18,258 Region Association: Southwest Region |
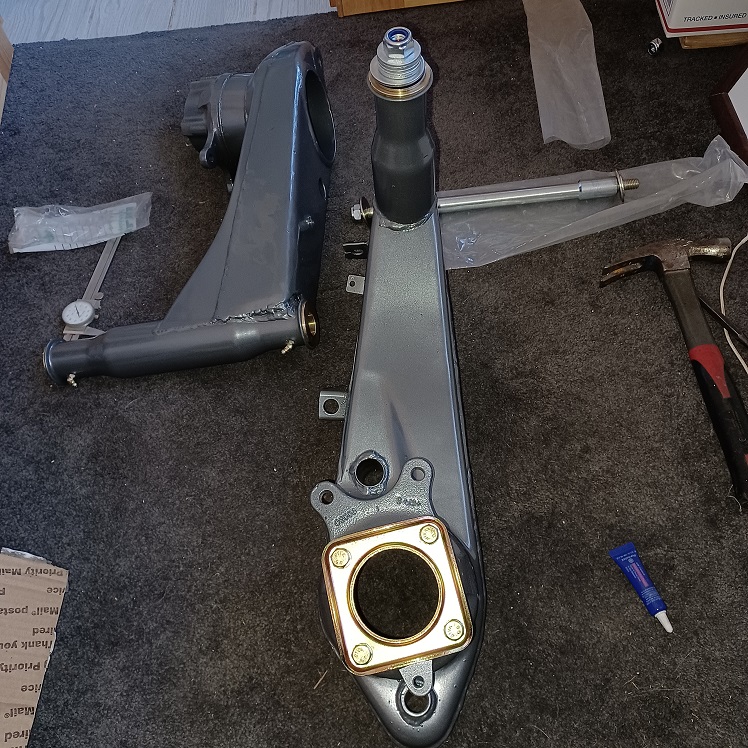
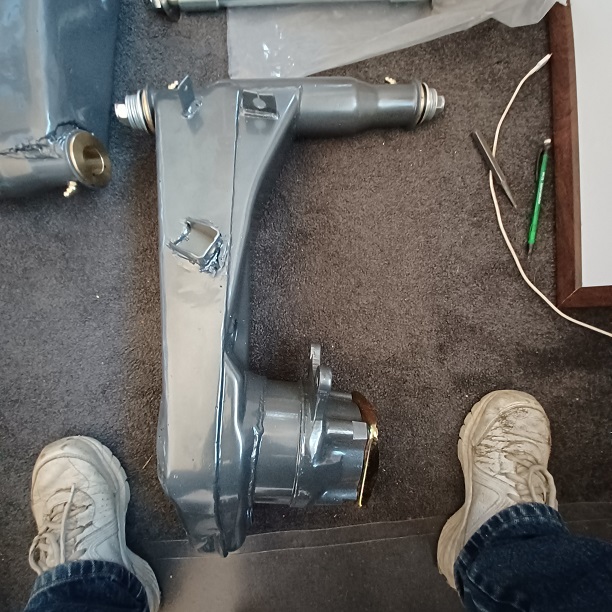
I inserted the grease fittings using some purple thread lock ( to be sure they don't vibrate loose) and lightly greased the bushings, then insterted the pivot shaft. Now I just have to wait for the rear bearings and five lug hubs to arrive and I can finsh these up.
  |
| ClayPerrine |
 Mar 18 2022, 05:54 PM Mar 18 2022, 05:54 PM
Post
#425
|
|
Life's been good to me so far.....                Group: Admin Posts: 15,902 Joined: 11-September 03 From: Hurst, TX. Member No.: 1,143 Region Association: NineFourteenerVille 
|
You may have a problem....
There is not a lot of room between the front of the arm and the chassis. Even if they go in, you are going to have a hard time getting a grease gun on the fittings. You probably would have been better off putting the grease fittings in the bottom of the arms, instead of the front. Just my $.02. Clay |
| Puebloswatcop |
 Mar 19 2022, 07:27 AM Mar 19 2022, 07:27 AM
Post
#426
|
|
Senior Member    Group: Members Posts: 1,401 Joined: 27-December 14 From: Mineola, Texas Member No.: 18,258 Region Association: Southwest Region |
You may have a problem.... There is not a lot of room between the front of the arm and the chassis. Even if they go in, you are going to have a hard time getting a grease gun on the fittings. You probably would have been better off putting the grease fittings in the bottom of the arms, instead of the front. Just my $.02. Clay Thanks Clay. you know I didn't think about that. Now that I picture it in my mind you may be right. I will have to check the fit and then make changes accoringly. I put in 45 degree fittings, at a minimum may have to change them to 90s. Re locating them would be the other option....keeping my fingers crossed that I won't have to. |
| Puebloswatcop |
 Mar 20 2022, 08:38 AM Mar 20 2022, 08:38 AM
Post
#427
|
|
Senior Member    Group: Members Posts: 1,401 Joined: 27-December 14 From: Mineola, Texas Member No.: 18,258 Region Association: Southwest Region |
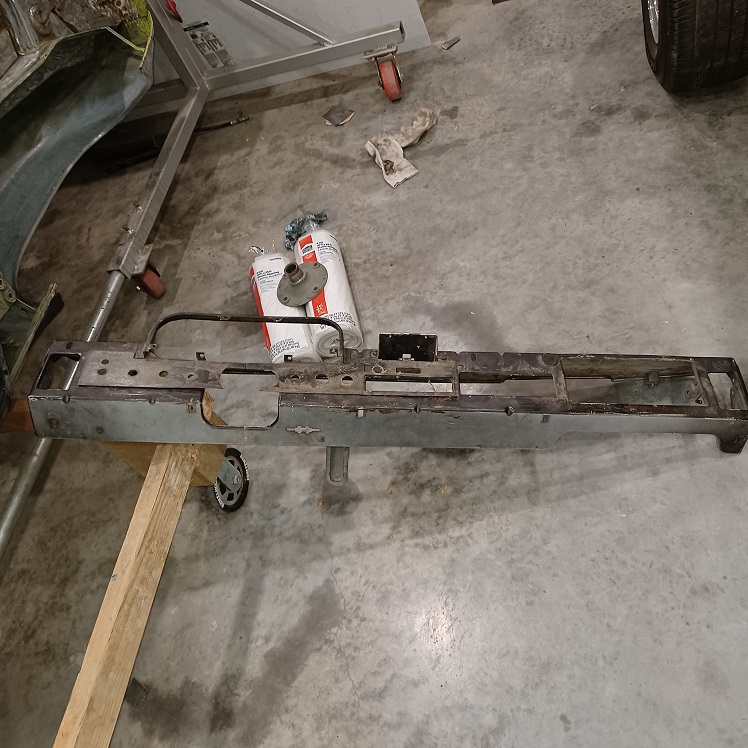
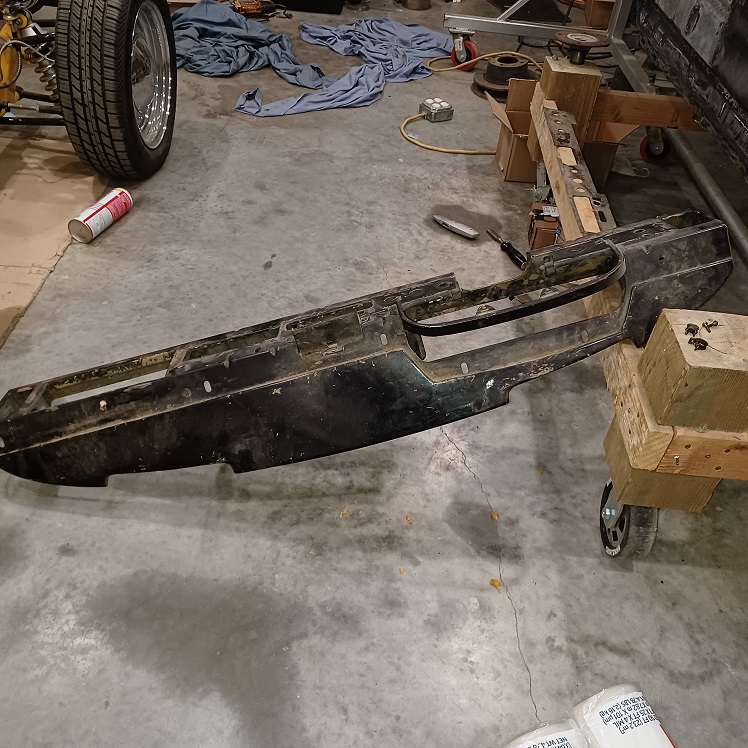
This morning I decided to start working on the dash frame while I am waiting on some epoxy paint for the body. It amazes me how nearly 50 years of grime can build up in every nook and cranny of these cars.
 |
| Puebloswatcop |
 Mar 20 2022, 08:41 AM Mar 20 2022, 08:41 AM
Post
#428
|
|
Senior Member    Group: Members Posts: 1,401 Joined: 27-December 14 From: Mineola, Texas Member No.: 18,258 Region Association: Southwest Region |
Checking the hand scribbled body number on the underside of the dash it is the original dash. The number is a match to the chasis number of the car. Strange how they wrote the numeral 1. It looks like a 7 but the seven actually has a slash through it.
Attached image(s) 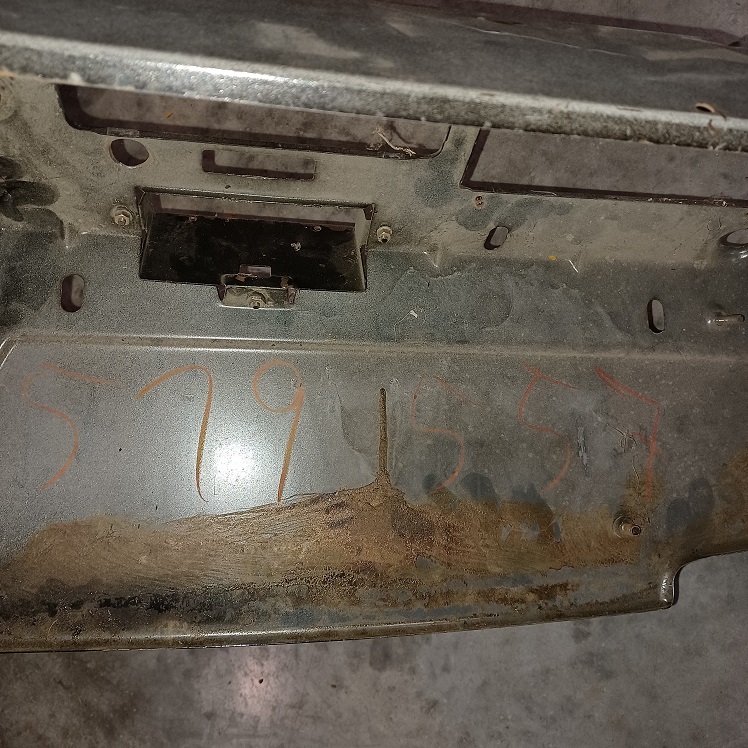
|
| Puebloswatcop |
 Mar 20 2022, 08:46 AM Mar 20 2022, 08:46 AM
Post
#429
|
|
Senior Member    Group: Members Posts: 1,401 Joined: 27-December 14 From: Mineola, Texas Member No.: 18,258 Region Association: Southwest Region |
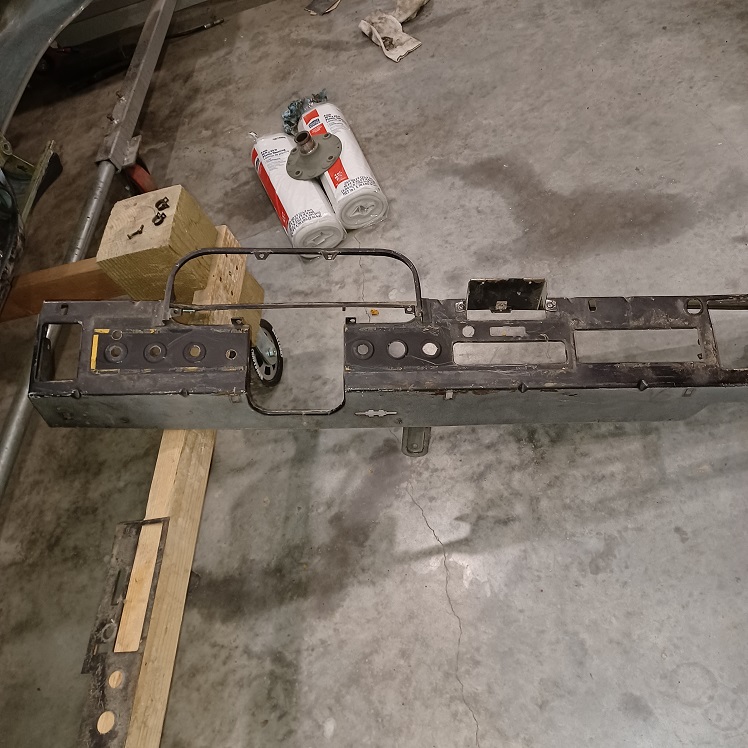
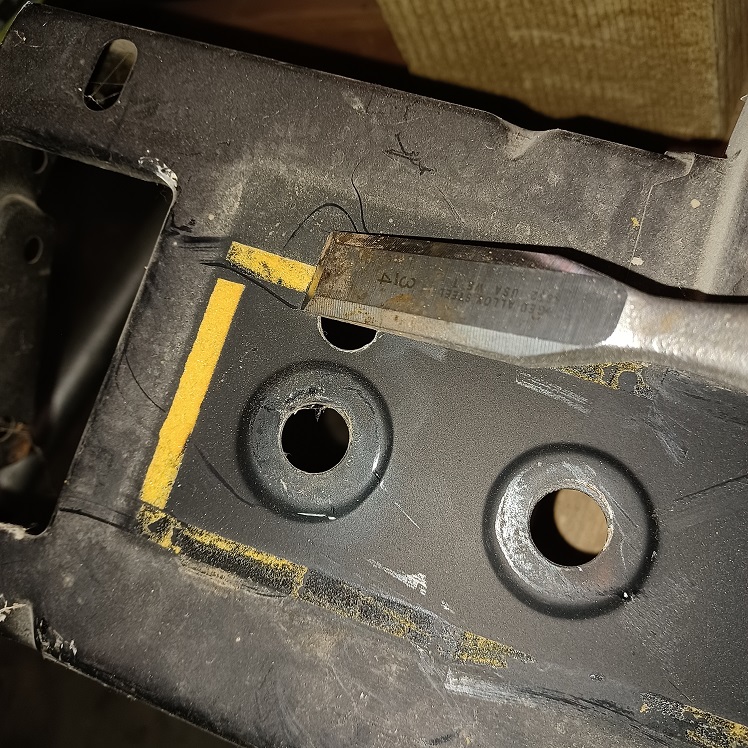
Started by carefully removing the metal overlay on the dash front, it is amazing to me that these are just stuck on with double sided tape and that it is still stuck after all these years. Then scraped the tape off of the dash.
  |
| Puebloswatcop |
 Mar 20 2022, 08:48 AM Mar 20 2022, 08:48 AM
Post
#430
|
|
Senior Member    Group: Members Posts: 1,401 Joined: 27-December 14 From: Mineola, Texas Member No.: 18,258 Region Association: Southwest Region |
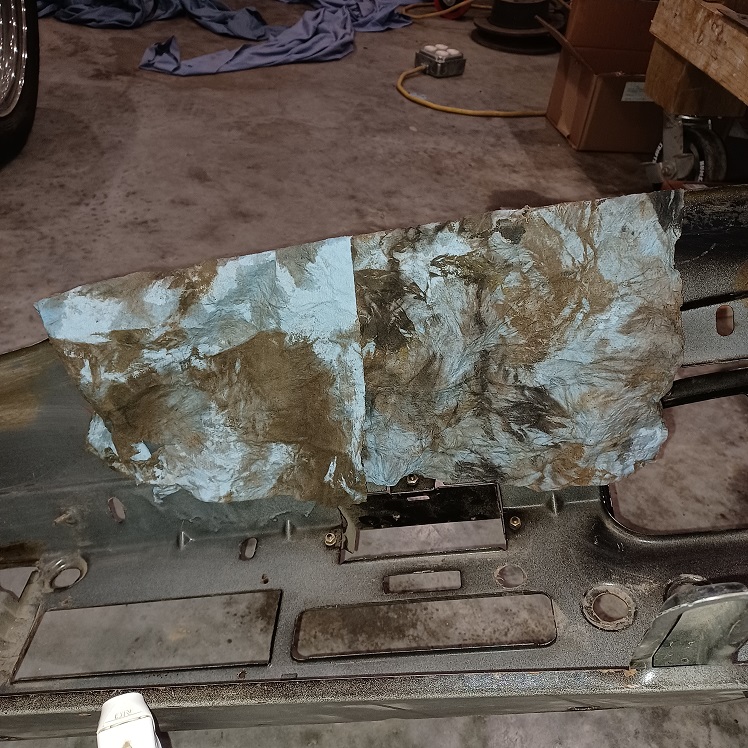
A quick wipe down to get some of the 48 years of dirt and grime off.....
  |
| Puebloswatcop |
 Mar 20 2022, 08:50 AM Mar 20 2022, 08:50 AM
Post
#431
|
|
Senior Member    Group: Members Posts: 1,401 Joined: 27-December 14 From: Mineola, Texas Member No.: 18,258 Region Association: Southwest Region |
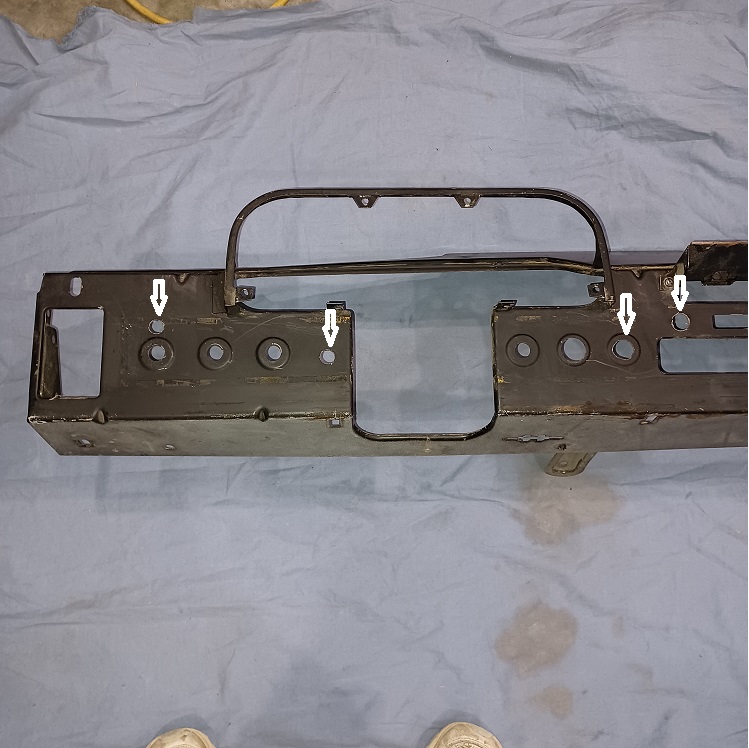
Then time to assess the damage the P.O. did to it by adding all the holes for the switches he added to the car.
 |
| Puebloswatcop |
 Mar 20 2022, 08:53 AM Mar 20 2022, 08:53 AM
Post
#432
|
|
Senior Member    Group: Members Posts: 1,401 Joined: 27-December 14 From: Mineola, Texas Member No.: 18,258 Region Association: Southwest Region |
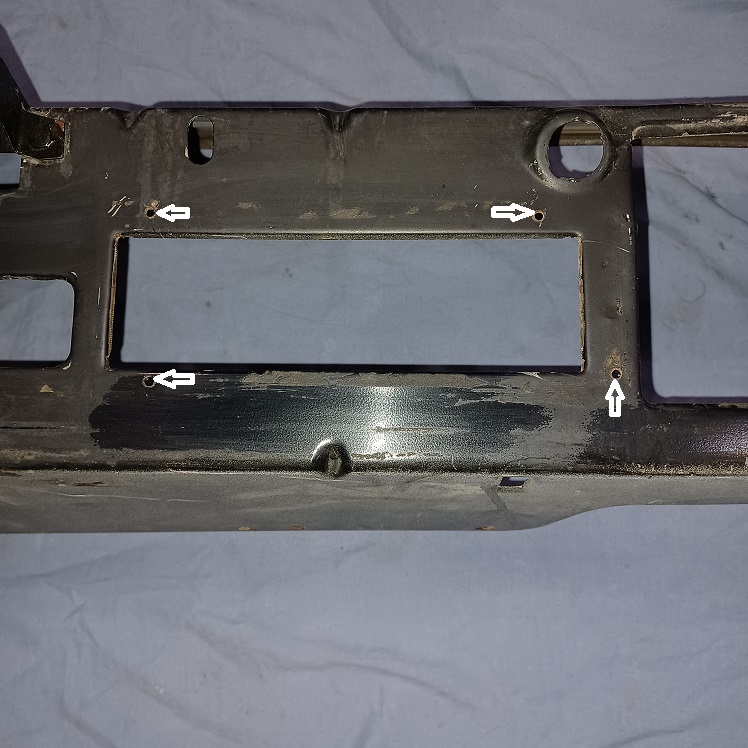
Not really sure why there are 4 screw holes around the radio mounting hole, but will have to weld these up as well.
 |
| Puebloswatcop |
 Mar 20 2022, 08:56 AM Mar 20 2022, 08:56 AM
Post
#433
|
|
Senior Member    Group: Members Posts: 1,401 Joined: 27-December 14 From: Mineola, Texas Member No.: 18,258 Region Association: Southwest Region |
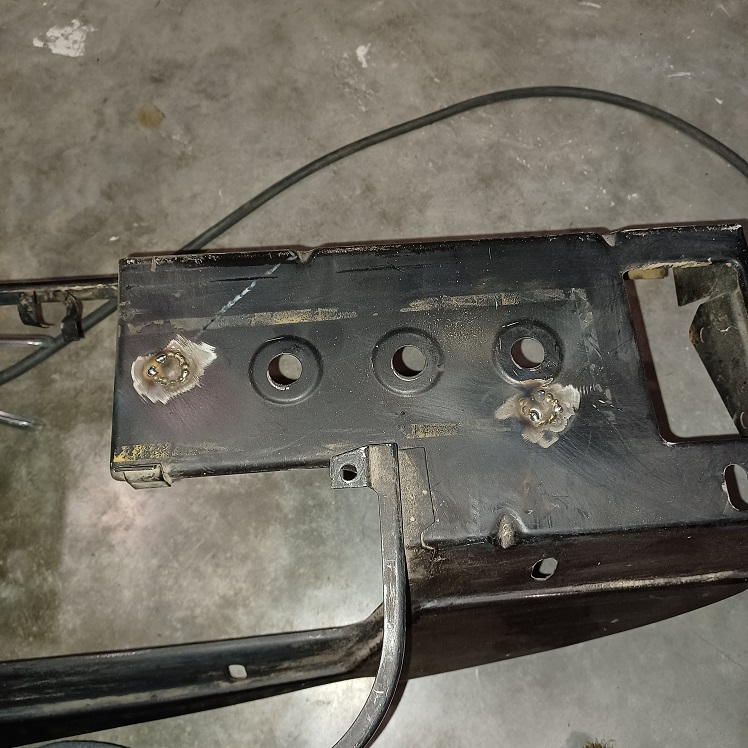
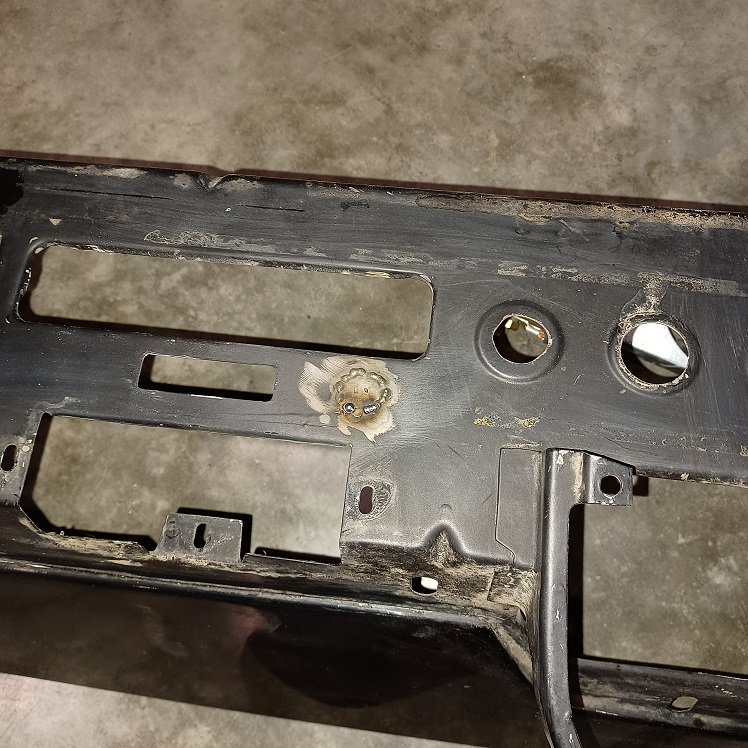
Really not hard to spot the P.O. manufactured holes from the back. The jagged edges kind of give them away. Not something you want to find with your fingers thats for sure.
Will have to weld all of the extra holes back up. 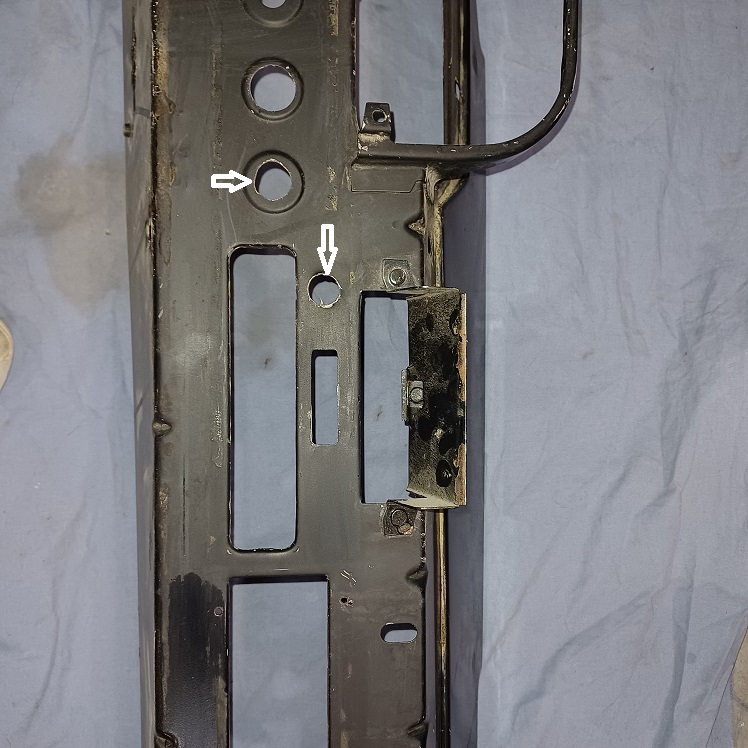 |
| Puebloswatcop |
 Mar 20 2022, 08:59 AM Mar 20 2022, 08:59 AM
Post
#434
|
|
Senior Member    Group: Members Posts: 1,401 Joined: 27-December 14 From: Mineola, Texas Member No.: 18,258 Region Association: Southwest Region |
On the dash overlay, I will fill in the holes that are in red. But, question...does anyone know what the square hole was for? it was definately a factory hole, but nothing that corresponds on the dash frame itself and in my research I cant see any use for it.
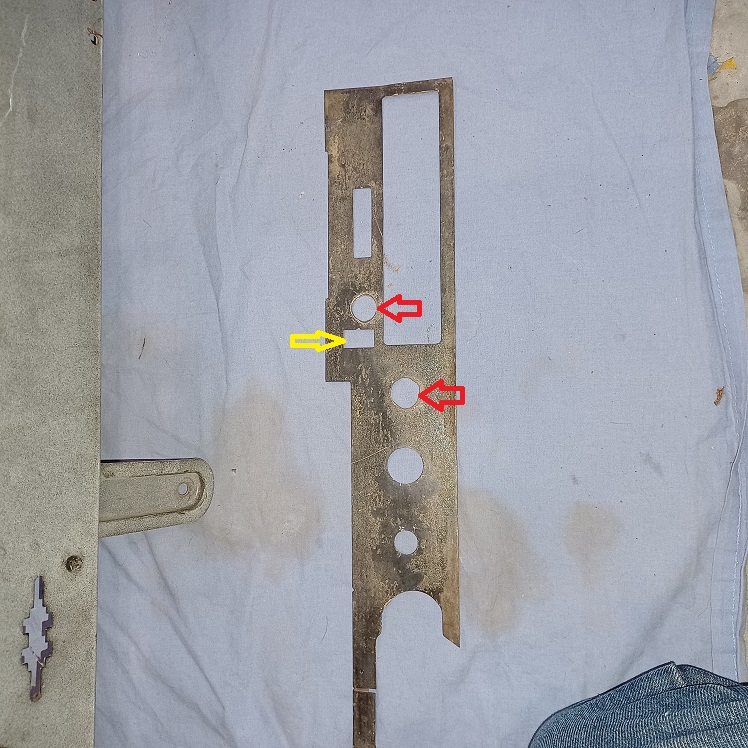 |
| Puebloswatcop |
 Mar 20 2022, 09:04 AM Mar 20 2022, 09:04 AM
Post
#435
|
|
Senior Member    Group: Members Posts: 1,401 Joined: 27-December 14 From: Mineola, Texas Member No.: 18,258 Region Association: Southwest Region |
Will have to weld these two holes shut as well. Am trying to decide if I am going to weld the seatbelt warning light hole closed since I am not going to re-install the seatbelt warning system....what do you guys think?
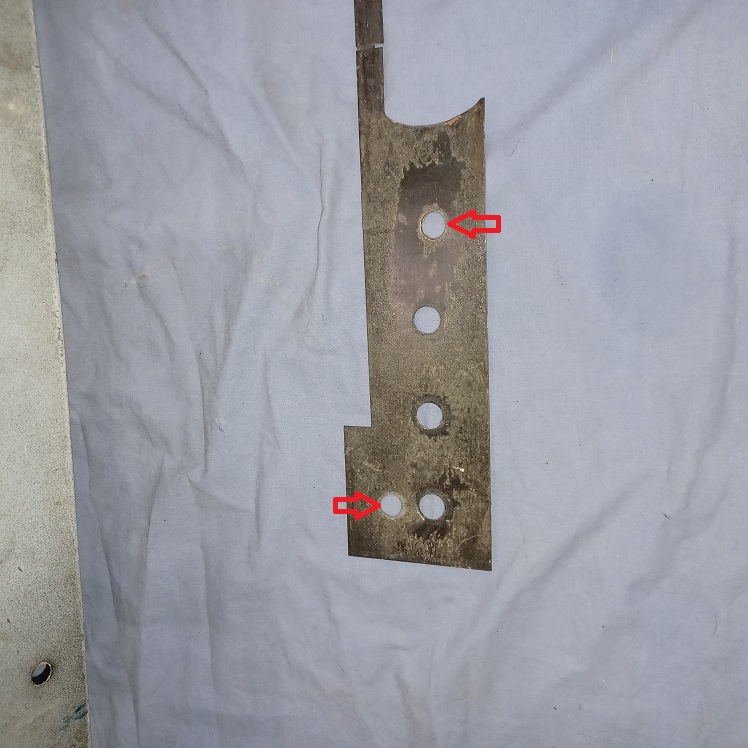 |
| Puebloswatcop |
 Mar 21 2022, 04:55 PM Mar 21 2022, 04:55 PM
Post
#436
|
|
Senior Member    Group: Members Posts: 1,401 Joined: 27-December 14 From: Mineola, Texas Member No.: 18,258 Region Association: Southwest Region |
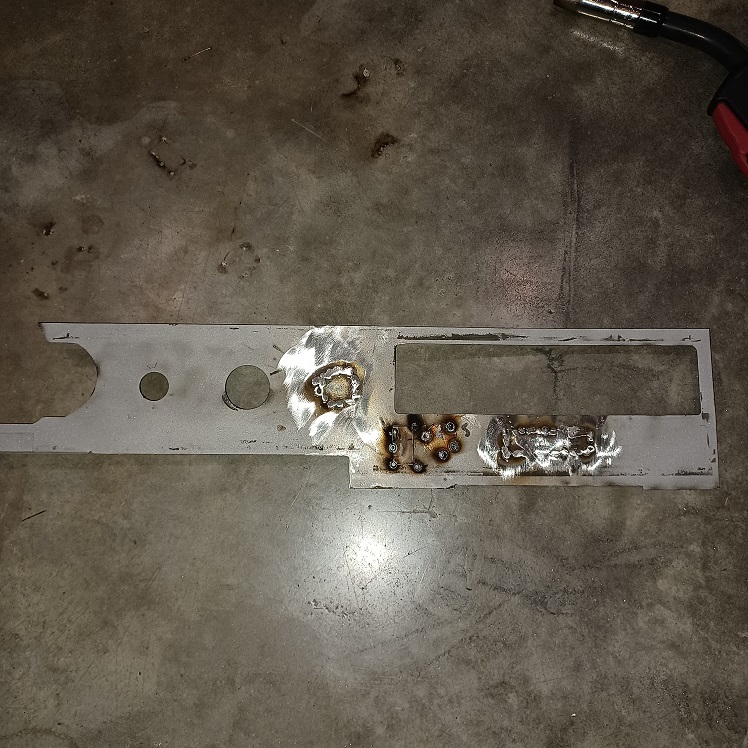
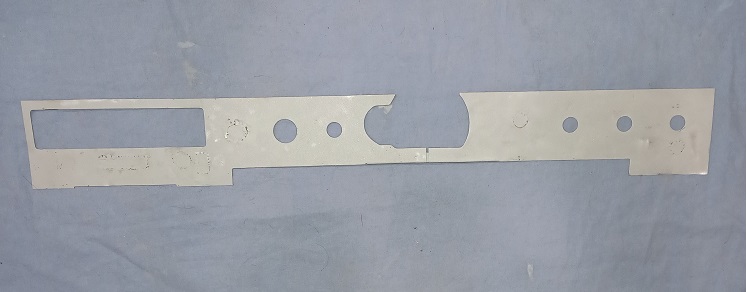
Didn't accomplish much today (IMG:style_emoticons/default/huh.gif) , had to drive 30 miles to get a piece of 22 ga metal to fill the holes in the dash cover plate. But cut 6 pieces to fill the PO holes as well as the seatbelt warning light and the other mystery holes
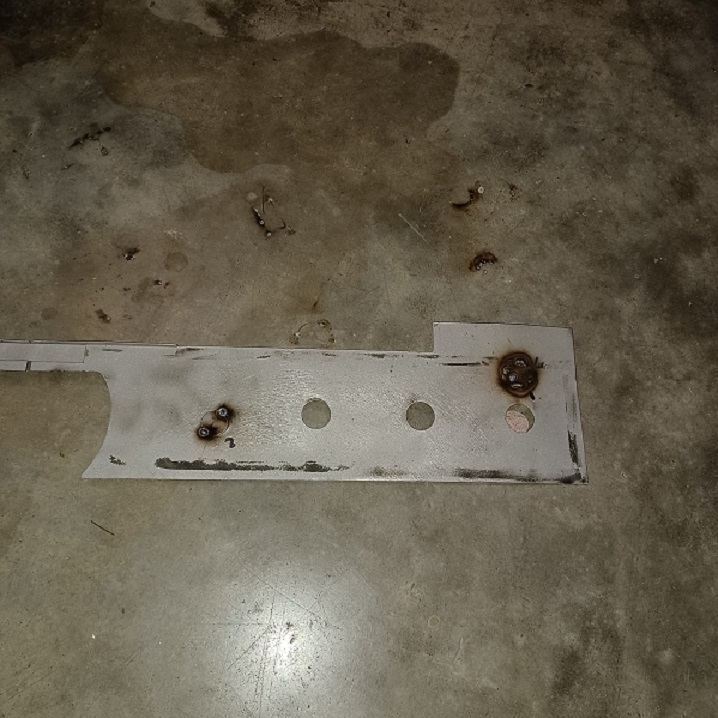  |
| Puebloswatcop |
 Mar 21 2022, 04:58 PM Mar 21 2022, 04:58 PM
Post
#437
|
|
Senior Member    Group: Members Posts: 1,401 Joined: 27-December 14 From: Mineola, Texas Member No.: 18,258 Region Association: Southwest Region |
then welded them all closed and ground them flush. Man was I having a hard time trying not to burn big holes in the 22 ga sheet metal...
 |
| Puebloswatcop |
 Mar 23 2022, 08:45 AM Mar 23 2022, 08:45 AM
Post
#438
|
|
Senior Member    Group: Members Posts: 1,401 Joined: 27-December 14 From: Mineola, Texas Member No.: 18,258 Region Association: Southwest Region |
|
| Puebloswatcop |
 Mar 23 2022, 08:48 AM Mar 23 2022, 08:48 AM
Post
#439
|
|
Senior Member    Group: Members Posts: 1,401 Joined: 27-December 14 From: Mineola, Texas Member No.: 18,258 Region Association: Southwest Region |
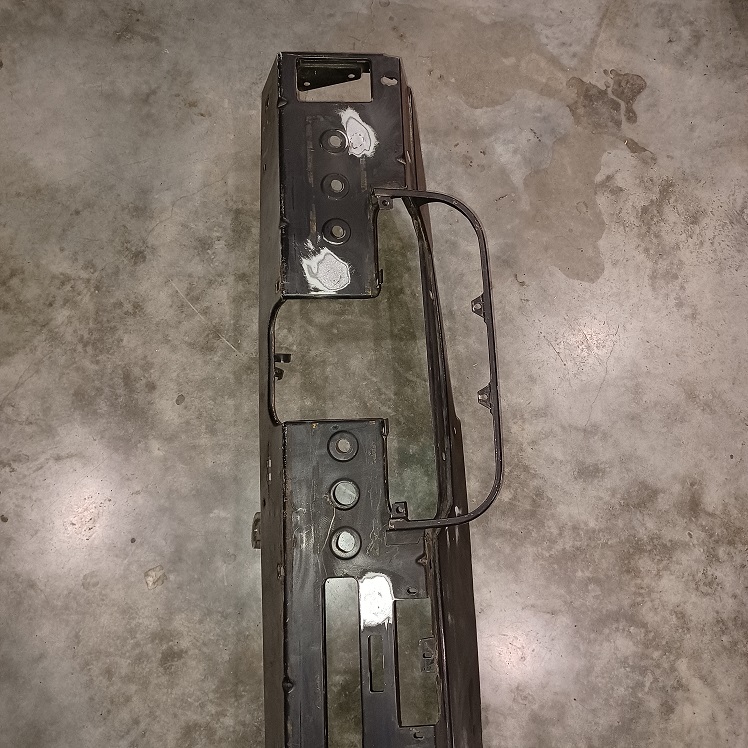
and sanded flat....Now its off to the powder coater for blasting and new color...
 |
| Shivers |
 Mar 23 2022, 08:58 AM Mar 23 2022, 08:58 AM
Post
#440
|
|
Senior Member     Group: Members Posts: 2,781 Joined: 19-October 20 From: La Quinta, CA Member No.: 24,781 Region Association: Southern California |
Checking the hand scribbled body number on the underside of the dash it is the original dash. The number is a match to the chasis number of the car. Strange how they wrote the numeral 1. It looks like a 7 but the seven actually has a slash through it. My wife worked with numbers, she does the same thing when she writes a |
  |
55 User(s) are reading this topic (55 Guests and 0 Anonymous Users)
0 Members:

|
Lo-Fi Version | Time is now: 25th November 2024 - 06:48 AM |
Invision Power Board
v9.1.4 © 2024 IPS, Inc.


