|
|

|
Porsche, and the Porsche crest are registered trademarks of Dr. Ing. h.c. F. Porsche AG.
This site is not affiliated with Porsche in any way. Its only purpose is to provide an online forum for car enthusiasts. All other trademarks are property of their respective owners. |
|
|
  |
| Puebloswatcop |
 Jun 13 2022, 05:59 PM Jun 13 2022, 05:59 PM
Post
#561
|
|
Senior Member    Group: Members Posts: 1,401 Joined: 27-December 14 From: Mineola, Texas Member No.: 18,258 Region Association: Southwest Region |
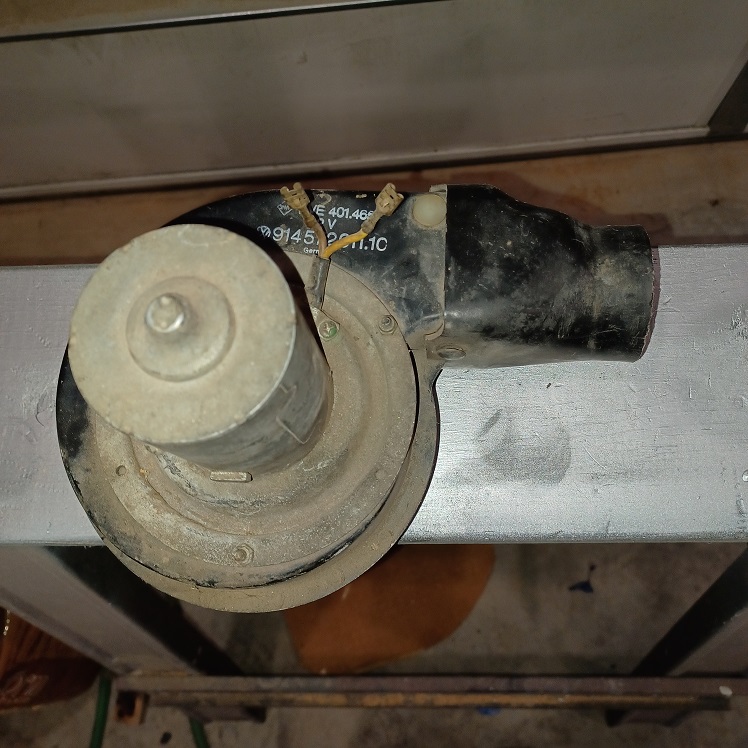
Today I figured I would tackle the heater blower fan. I put the power to it and it functions absolutely wonderfully. But it looks horrible and the air coming through smells like mouse urine....yep, the little critters found their way into it. That was evident when I fired it up and all kinds of crap came out...
 |
| Puebloswatcop |
 Jun 13 2022, 06:04 PM Jun 13 2022, 06:04 PM
Post
#562
|
|
Senior Member    Group: Members Posts: 1,401 Joined: 27-December 14 From: Mineola, Texas Member No.: 18,258 Region Association: Southwest Region |
So Time to strip it down. Hirs the output nozzle had to come off. It is held on by two tension spring fastenters. These just get pried out with a screwdriver. they are pretty robust, just make sure you don't shoot the across the garage when you pry them out.
So after finding the first one, I pried the second with a screwdriver till I could use a small pair of needlenose pliers to keep a grip on things... 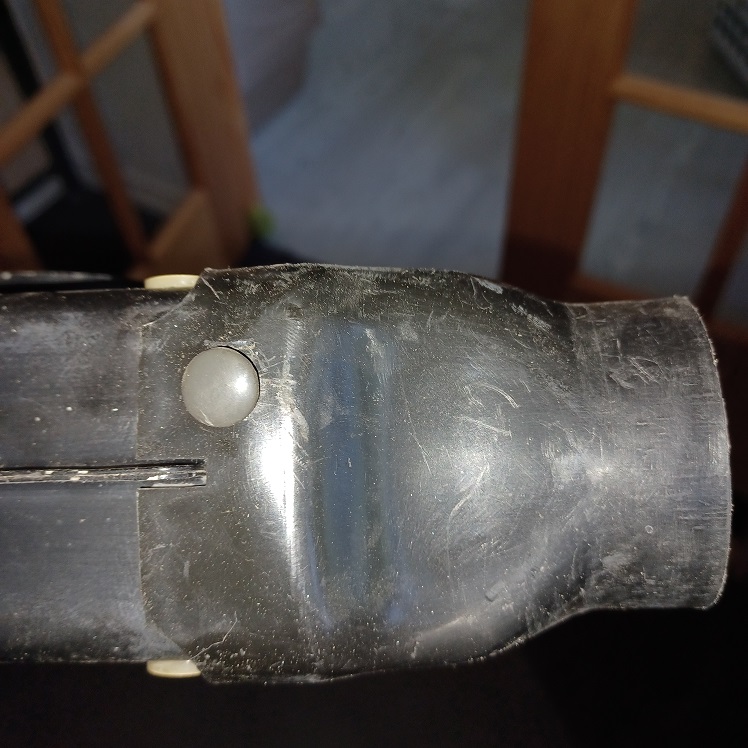 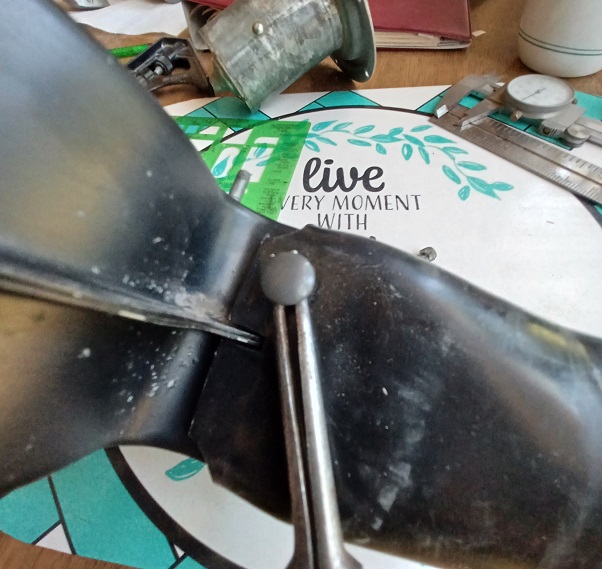 |
| Puebloswatcop |
 Jun 13 2022, 06:11 PM Jun 13 2022, 06:11 PM
Post
#563
|
|
Senior Member    Group: Members Posts: 1,401 Joined: 27-December 14 From: Mineola, Texas Member No.: 18,258 Region Association: Southwest Region |
Then to make things a bit easier to handle I removed the moter and blower cage assembly from the housing. Its easy, requiring the removal of just 3, 7 mm, lock nuts.
Then just slide the assembly out of the housing.. 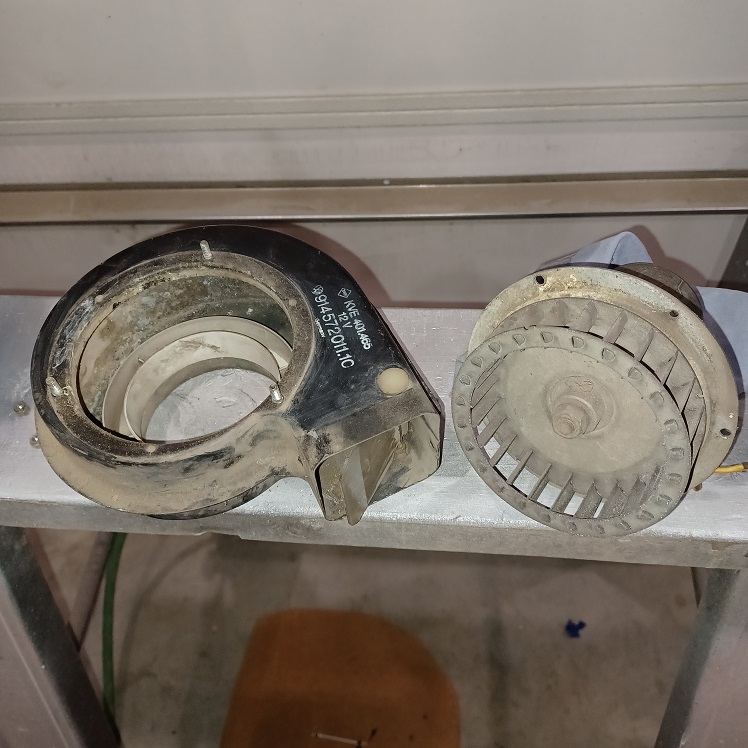 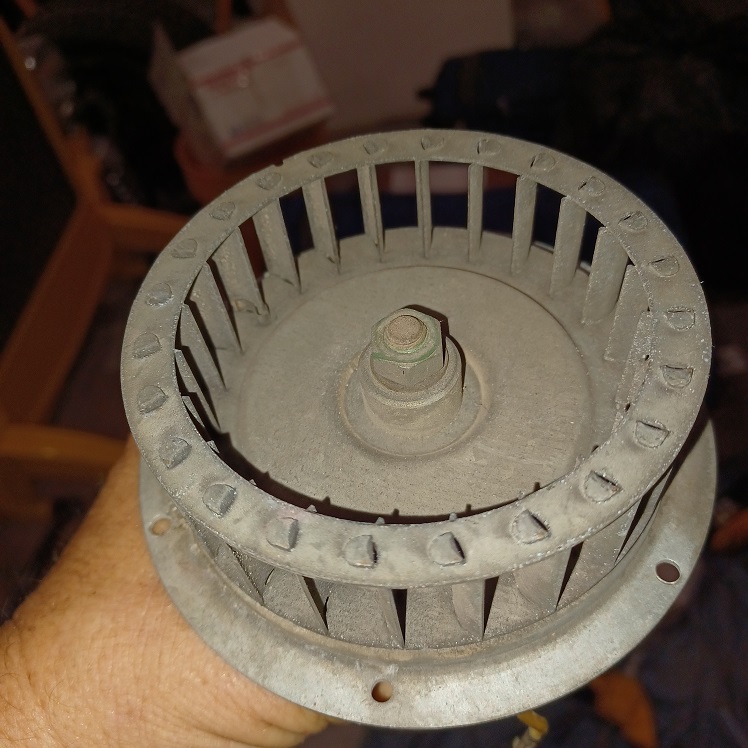 |
| Puebloswatcop |
 Jun 13 2022, 06:20 PM Jun 13 2022, 06:20 PM
Post
#564
|
|
Senior Member    Group: Members Posts: 1,401 Joined: 27-December 14 From: Mineola, Texas Member No.: 18,258 Region Association: Southwest Region |
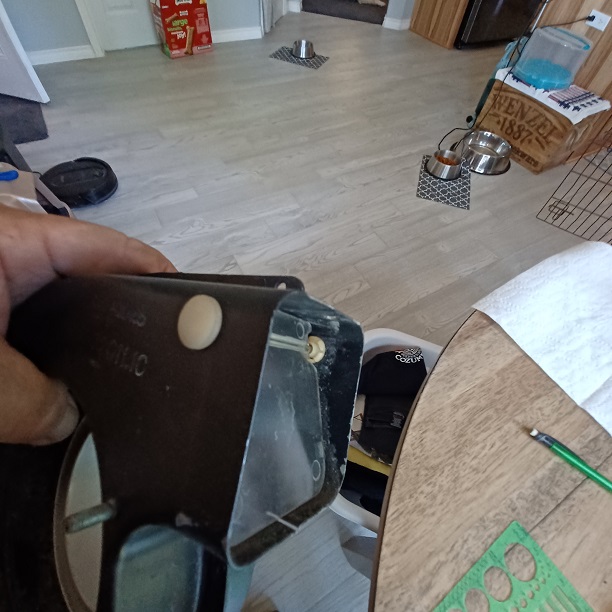
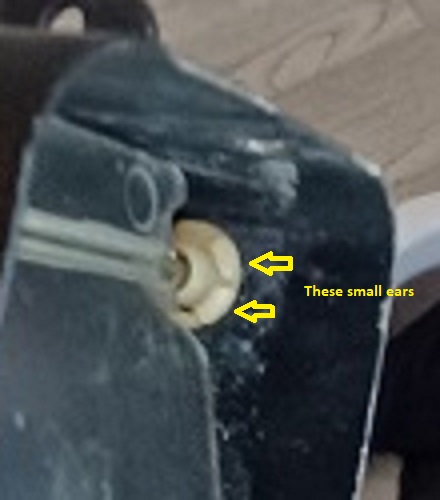
The next thing is to remove the air flap. It is held in by 2 plastic snap in studs. be careful removing these as I am not sure you can find replacements and like all the parts in these 50+ year old cars, they can be very brittle. You just have to use a small screwdriver to work two or three of the ears back into the hole then they can be gently pried out from the outside. (sorry for the blurry pic, it doesnt stay as clear when you blow it up)
  |
| Puebloswatcop |
 Jun 13 2022, 06:24 PM Jun 13 2022, 06:24 PM
Post
#565
|
|
Senior Member    Group: Members Posts: 1,401 Joined: 27-December 14 From: Mineola, Texas Member No.: 18,258 Region Association: Southwest Region |
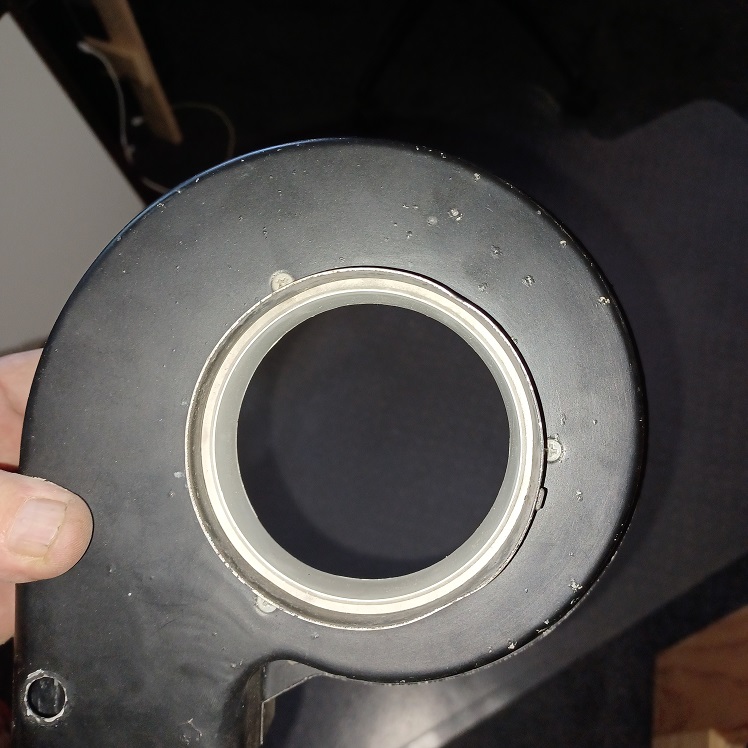
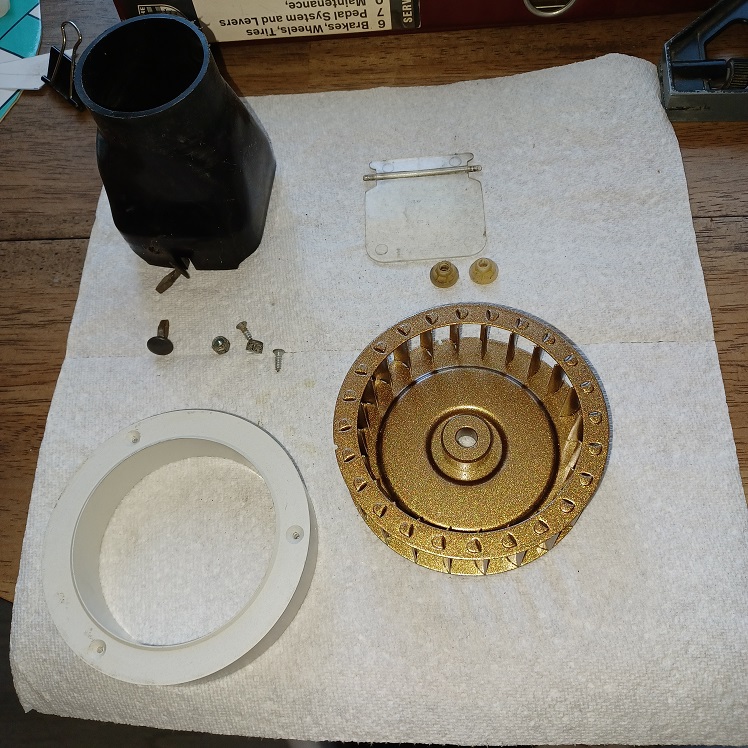
The last thing that needs to be removed is a plastic ring. it is held in by 3 tiny phillips head screws. After that you are simply left with the housing, and a bunch of parts...
 |
| Puebloswatcop |
 Jun 13 2022, 06:26 PM Jun 13 2022, 06:26 PM
Post
#566
|
|
Senior Member    Group: Members Posts: 1,401 Joined: 27-December 14 From: Mineola, Texas Member No.: 18,258 Region Association: Southwest Region |
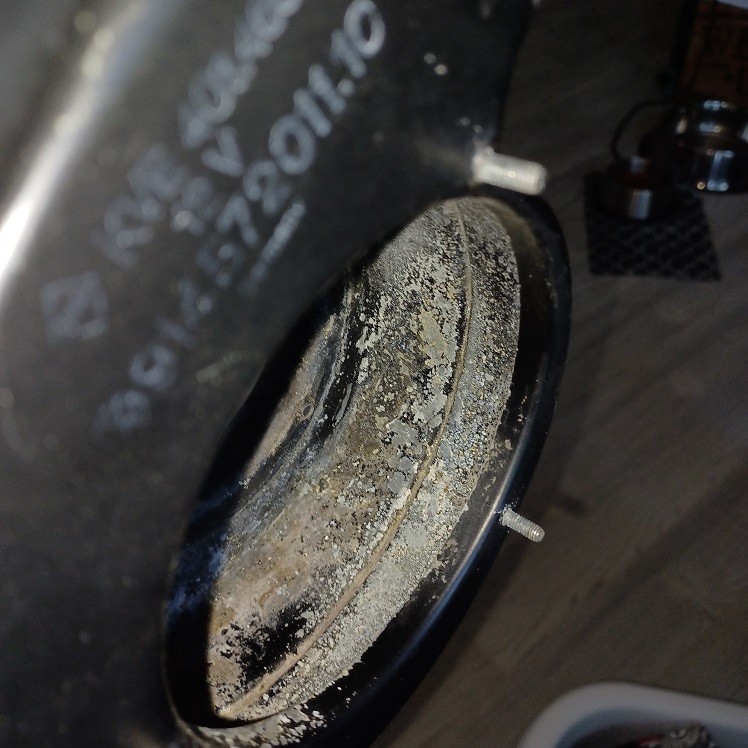
This is what happens to the inside when the mice leave their gracious deposits inside.
 |
| Puebloswatcop |
 Jun 13 2022, 06:30 PM Jun 13 2022, 06:30 PM
Post
#567
|
|
Senior Member    Group: Members Posts: 1,401 Joined: 27-December 14 From: Mineola, Texas Member No.: 18,258 Region Association: Southwest Region |
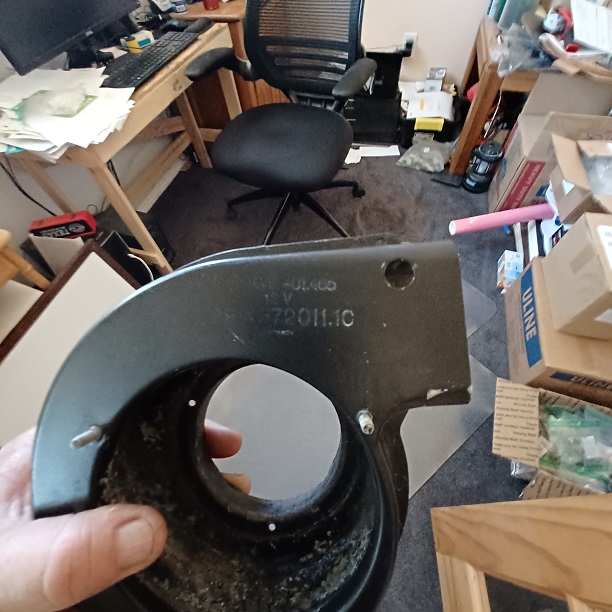
If you noticed in the previous piture, the part number printing was still quite visible, so my original plan was to clean and repaint the inside and just wash off the outside.....so much for plans. when I cleaned the outside with soap and water most of the printing came off.... Damn
 |
| Puebloswatcop |
 Jun 13 2022, 06:34 PM Jun 13 2022, 06:34 PM
Post
#568
|
|
Senior Member    Group: Members Posts: 1,401 Joined: 27-December 14 From: Mineola, Texas Member No.: 18,258 Region Association: Southwest Region |
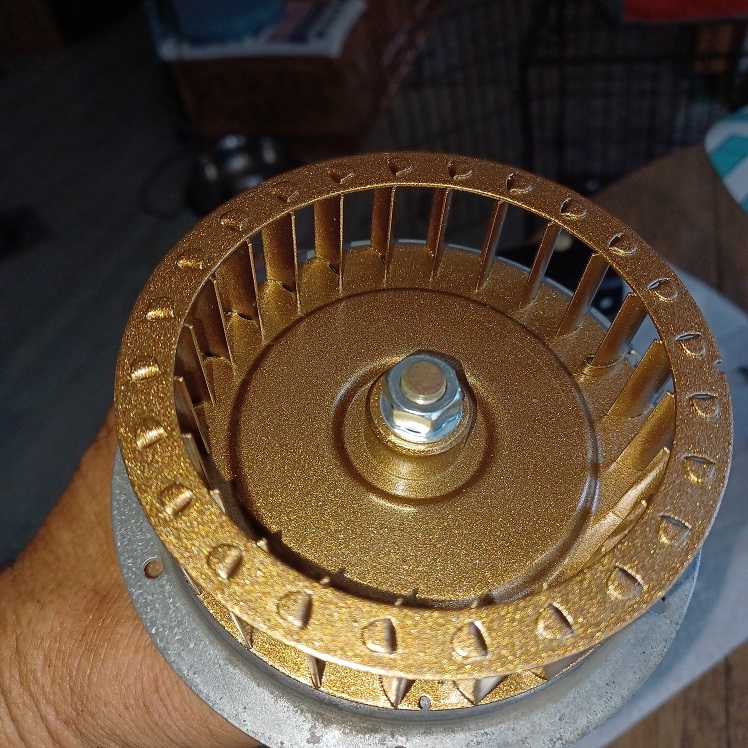
To add insult to injury I blasted and repainted the blower cage with silver paint which I then baked on in the oven using the same 3 temp proceedures I have in the past. Paint came out hard as a rock, but as you can see, it somehow decided to enrich the color to gold....wow, I wish I could make that happen to everything I paint..., oh well its a squirrel cage, so gold will just have to do....
 |
| Puebloswatcop |
 Jun 13 2022, 06:39 PM Jun 13 2022, 06:39 PM
Post
#569
|
|
Senior Member    Group: Members Posts: 1,401 Joined: 27-December 14 From: Mineola, Texas Member No.: 18,258 Region Association: Southwest Region |
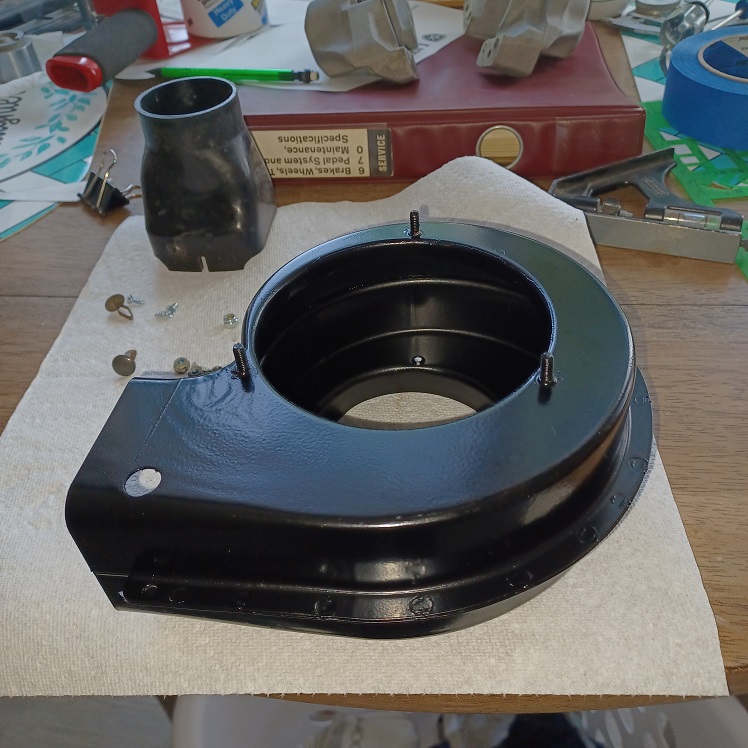
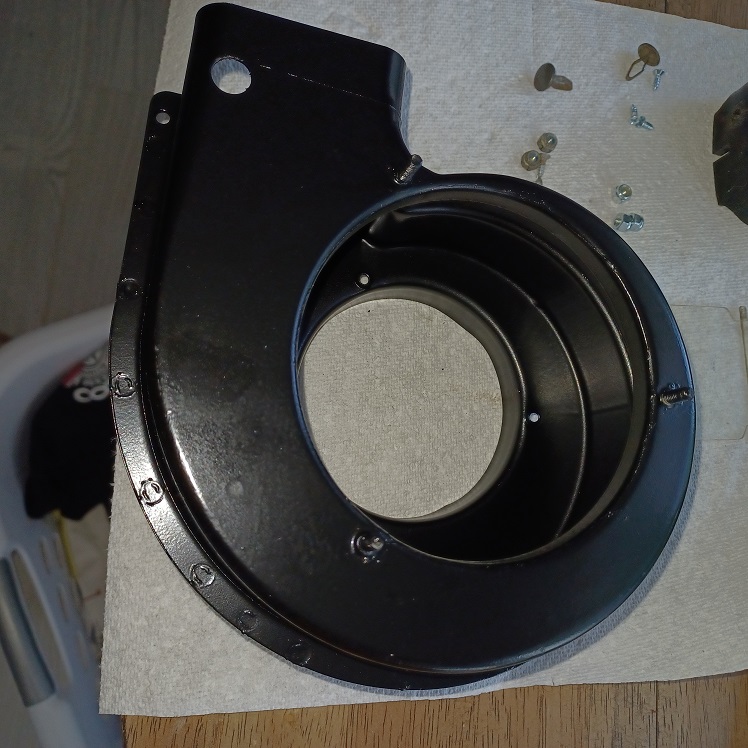
So.. back to the housing. I decided to try to salvage what printing was left on the housing, So blasted the inside and masked off the entire outside. After painting the inside I removed the masking and yep, all of the printing came with it as well as a bunch of spots of the black paint. So plan 3 blast the whole housing and paint the entire thing with semi gloss black. Then oven bake....this time just black, no gold.
  |
| Puebloswatcop |
 Jun 13 2022, 06:42 PM Jun 13 2022, 06:42 PM
Post
#570
|
|
Senior Member    Group: Members Posts: 1,401 Joined: 27-December 14 From: Mineola, Texas Member No.: 18,258 Region Association: Southwest Region |
So now to re-assemble. First the flap. Gently pushed the stud fasteners into place, praying they wouldnt break...success
Then screw the plastic ring back into place using new screws 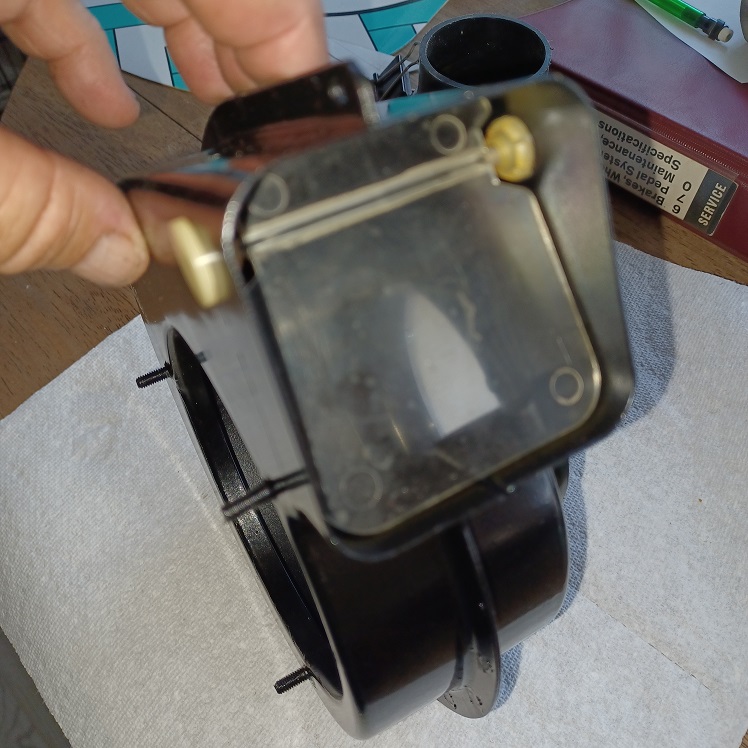 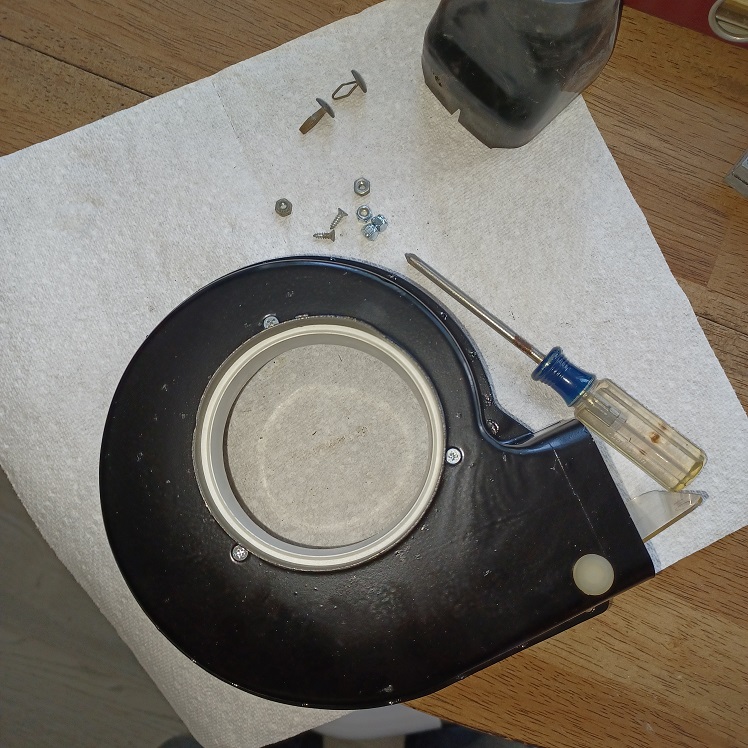 |
| Puebloswatcop |
 Jun 13 2022, 06:44 PM Jun 13 2022, 06:44 PM
Post
#571
|
|
Senior Member    Group: Members Posts: 1,401 Joined: 27-December 14 From: Mineola, Texas Member No.: 18,258 Region Association: Southwest Region |
Then using a new 13 mm nut and toothed lock washer, I mounted the blower cage back onto the motor.
 |
| Puebloswatcop |
 Jun 13 2022, 06:46 PM Jun 13 2022, 06:46 PM
Post
#572
|
|
Senior Member    Group: Members Posts: 1,401 Joined: 27-December 14 From: Mineola, Texas Member No.: 18,258 Region Association: Southwest Region |
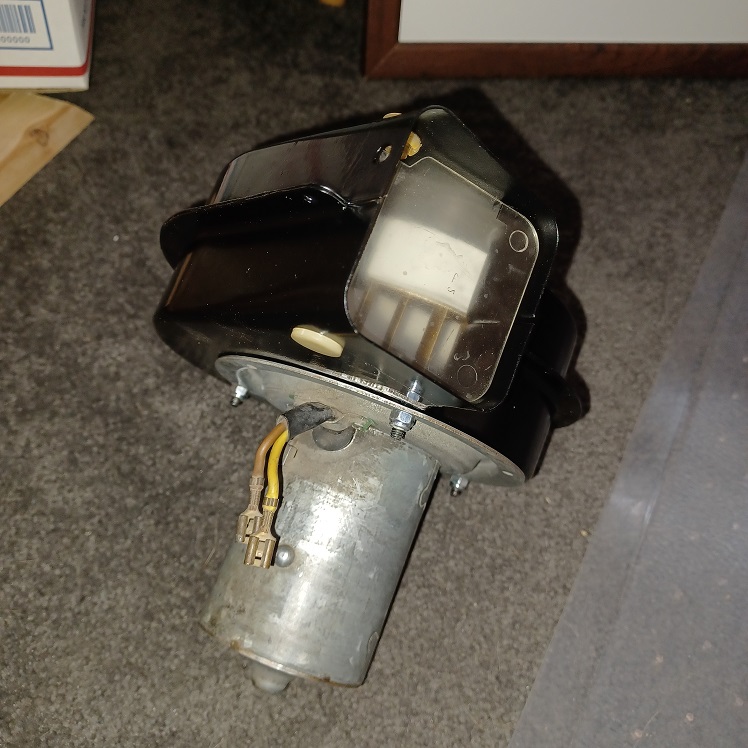
Last but not least, mount the blower assembly back into the housing using new lock nuts.
 |
| Puebloswatcop |
 Jun 13 2022, 06:49 PM Jun 13 2022, 06:49 PM
Post
#573
|
|
Senior Member    Group: Members Posts: 1,401 Joined: 27-December 14 From: Mineola, Texas Member No.: 18,258 Region Association: Southwest Region |
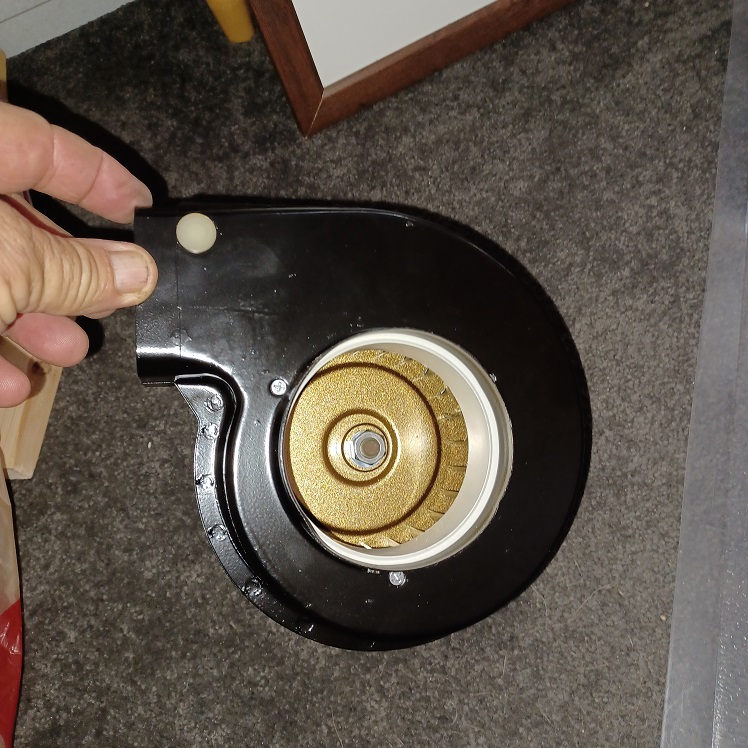
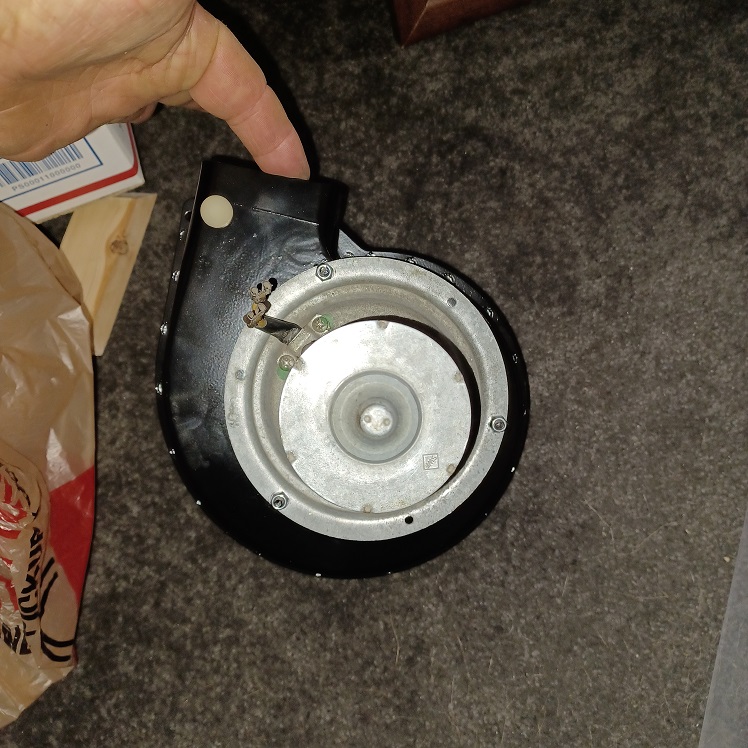
Completed assembly looks good, ( a bit funny with a gold fan ). Hooked it up and it ran like a champ, and no more mouse urine smell...
  |
| Puebloswatcop |
 Jun 14 2022, 06:51 PM Jun 14 2022, 06:51 PM
Post
#574
|
|
Senior Member    Group: Members Posts: 1,401 Joined: 27-December 14 From: Mineola, Texas Member No.: 18,258 Region Association: Southwest Region |
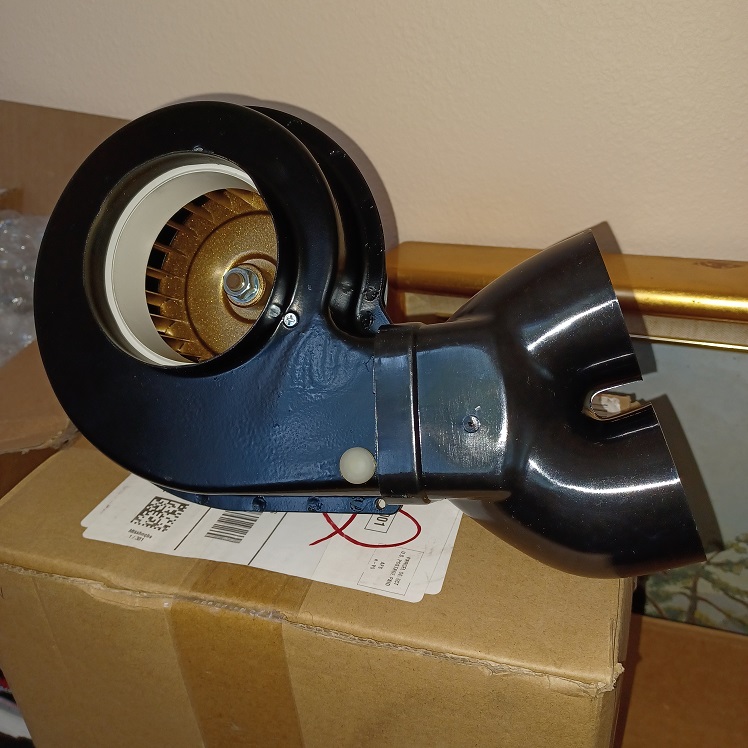
And the fan output splitter came today, so the fan is complete....
 |
| bkrantz |
 Jun 14 2022, 08:02 PM Jun 14 2022, 08:02 PM
Post
#575
|
|
914 Guru      Group: Members Posts: 8,150 Joined: 3-August 19 From: SW Colorado Member No.: 23,343 Region Association: Rocky Mountains 
|
Nice! And the gold fan cage will be hidden bling.
|
| Puebloswatcop |
 Jun 14 2022, 08:06 PM Jun 14 2022, 08:06 PM
Post
#576
|
|
Senior Member    Group: Members Posts: 1,401 Joined: 27-December 14 From: Mineola, Texas Member No.: 18,258 Region Association: Southwest Region |
Nice! And the gold fan cage will be hidden bling. Thanks Bob. Cant wait to be at the point you are at with your beautiful build. I am wondering if the galvanized coating that was on the fan might have contributed to the color of the paint after baking??? oh well like you said, hidden bling....lol |
| Puebloswatcop |
 Jun 15 2022, 11:23 AM Jun 15 2022, 11:23 AM
Post
#577
|
|
Senior Member    Group: Members Posts: 1,401 Joined: 27-December 14 From: Mineola, Texas Member No.: 18,258 Region Association: Southwest Region |
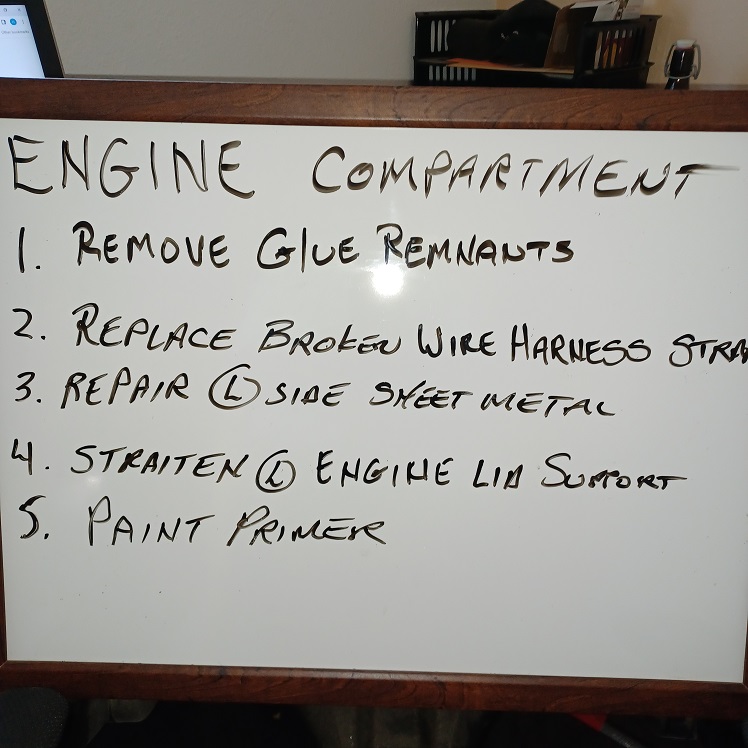
Well today I decided to do some light body work, so finishing up the engine compartment seemed like a good idea. Made a list of the things that needed to be done.
 |
| Puebloswatcop |
 Jun 15 2022, 11:28 AM Jun 15 2022, 11:28 AM
Post
#578
|
|
Senior Member    Group: Members Posts: 1,401 Joined: 27-December 14 From: Mineola, Texas Member No.: 18,258 Region Association: Southwest Region |
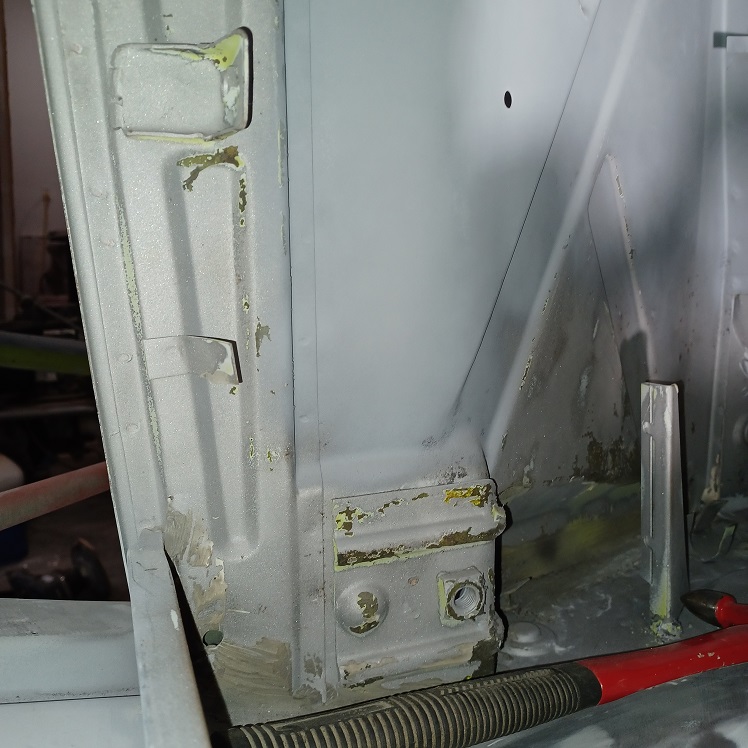
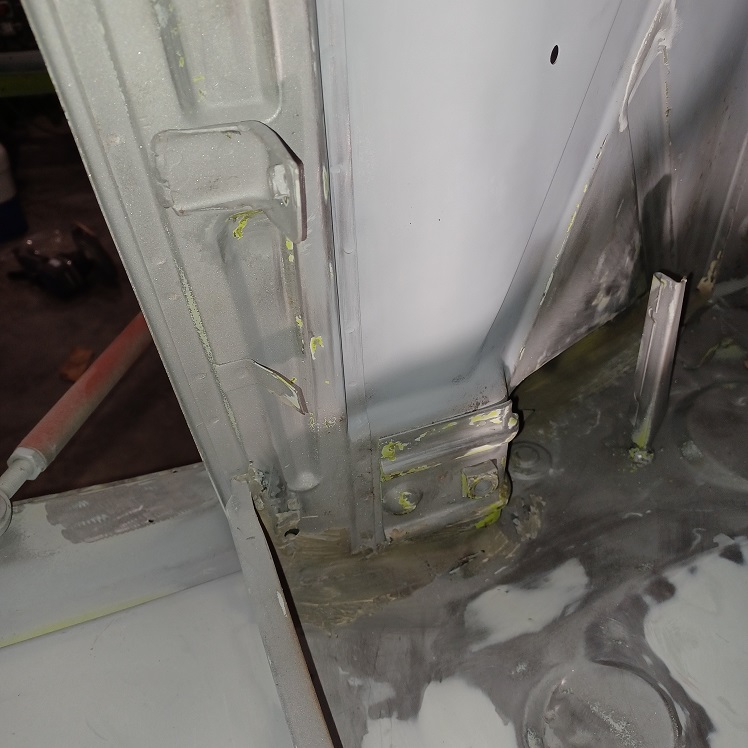
Item #1...Glue...The P/O used some type of glue to hold the sound insulation pad in place. I think it was rubber cement of some type....all I know is it has been a PITA to remove, but after scraping with a razor blade to get the heaviest part off, I sanded it and used goof off and got it all off. Then sanded some more.
  Attached image(s) 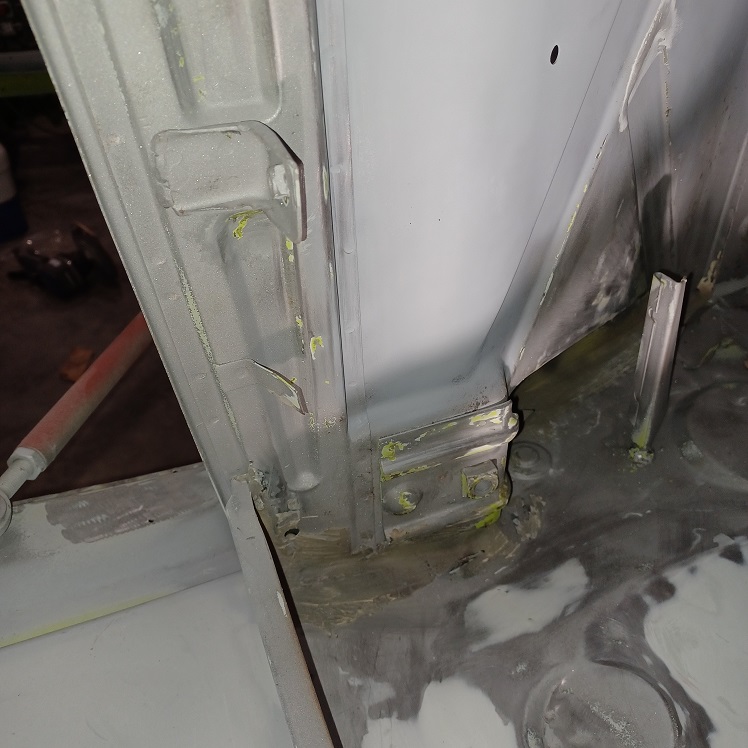
|
| Puebloswatcop |
 Jun 15 2022, 11:34 AM Jun 15 2022, 11:34 AM
Post
#579
|
|
Senior Member    Group: Members Posts: 1,401 Joined: 27-December 14 From: Mineola, Texas Member No.: 18,258 Region Association: Southwest Region |
Then I needed to replace a broken hold down strap for the wiring harness. It was broken off, so I grond down the remnants and then welded in a new one.
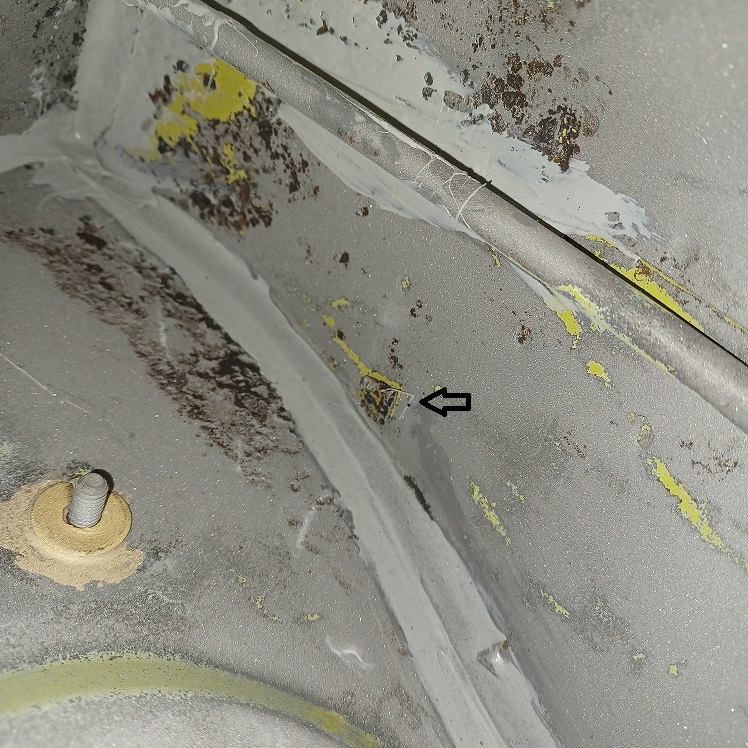 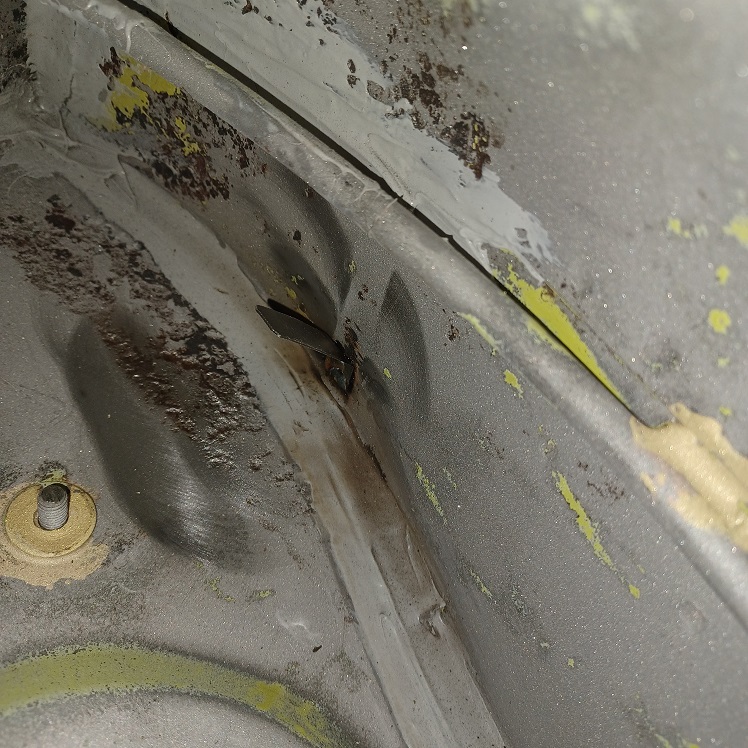 |
| Puebloswatcop |
 Jun 15 2022, 11:38 AM Jun 15 2022, 11:38 AM
Post
#580
|
|
Senior Member    Group: Members Posts: 1,401 Joined: 27-December 14 From: Mineola, Texas Member No.: 18,258 Region Association: Southwest Region |
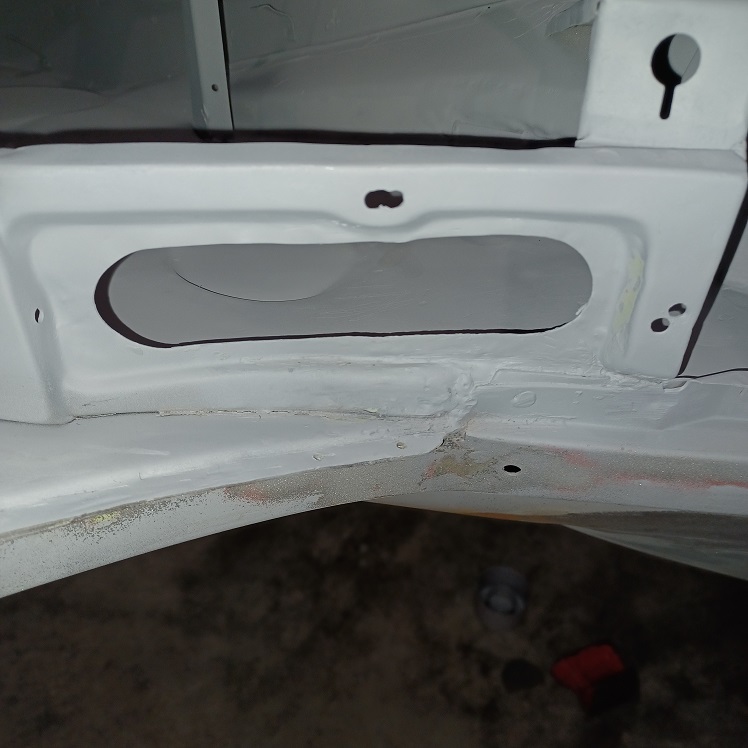
Item#3, Had to tune up the body repair to the engine lid support where it had been damaged in a prior accident. Its not perfect but at least it is more square than round...
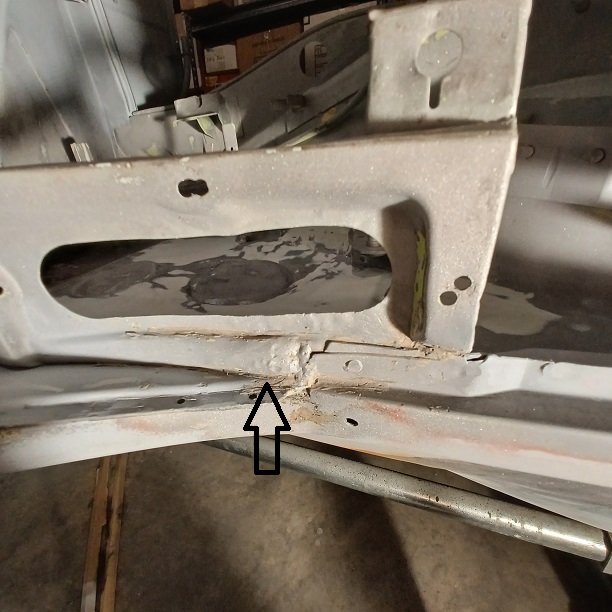 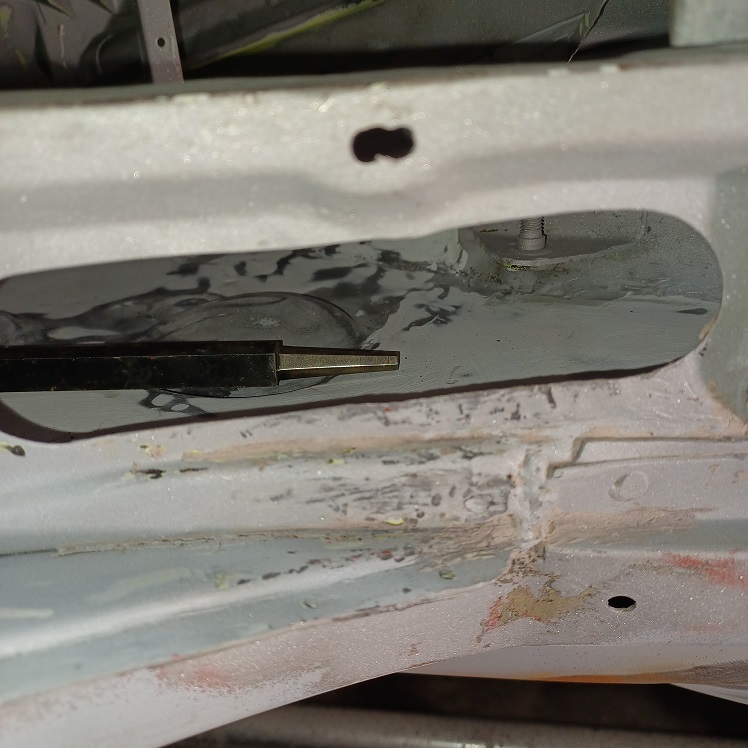  |
  |
2 User(s) are reading this topic (2 Guests and 0 Anonymous Users)
0 Members:

|
Lo-Fi Version | Time is now: 25th November 2024 - 02:46 PM |
Invision Power Board
v9.1.4 © 2024 IPS, Inc.


