|
|

|
Porsche, and the Porsche crest are registered trademarks of Dr. Ing. h.c. F. Porsche AG.
This site is not affiliated with Porsche in any way. Its only purpose is to provide an online forum for car enthusiasts. All other trademarks are property of their respective owners. |
|
|
  |
| Puebloswatcop |
 Jun 19 2022, 02:53 PM Jun 19 2022, 02:53 PM
Post
#601
|
|
Senior Member    Group: Members Posts: 1,401 Joined: 27-December 14 From: Mineola, Texas Member No.: 18,258 Region Association: Southwest Region |
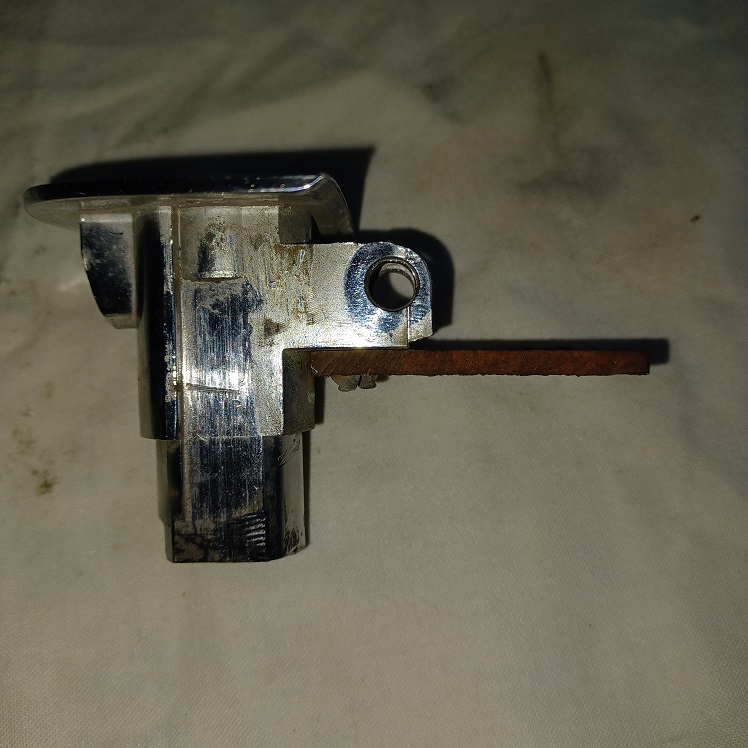
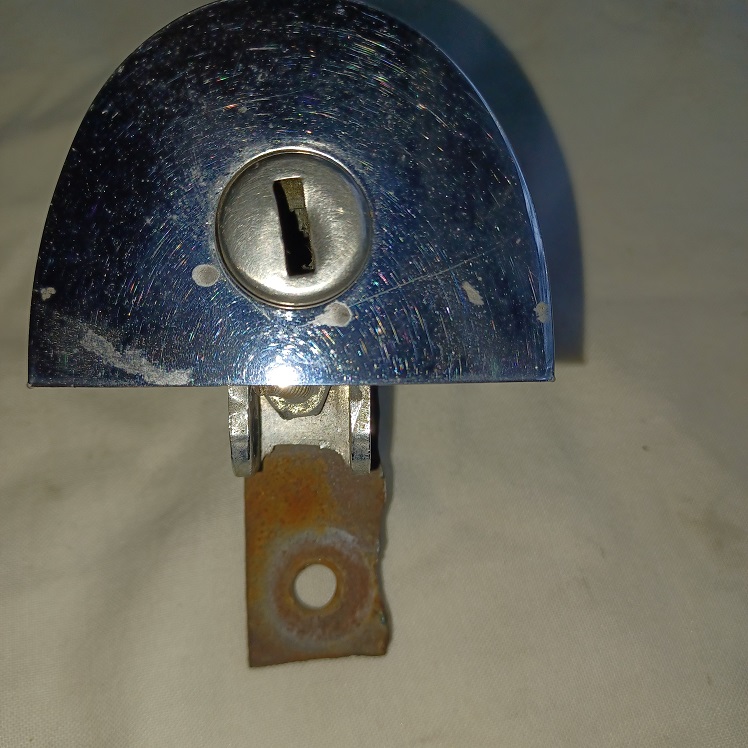
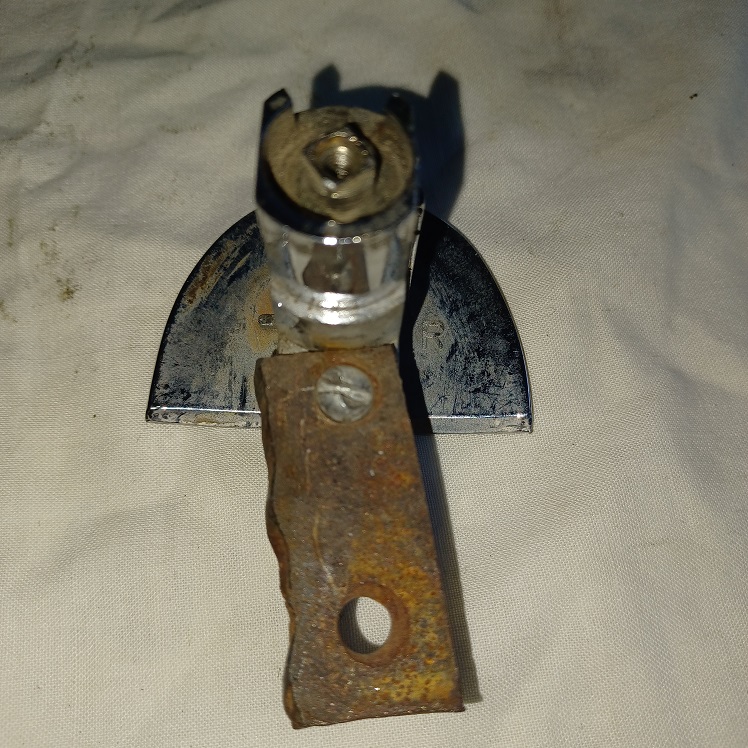
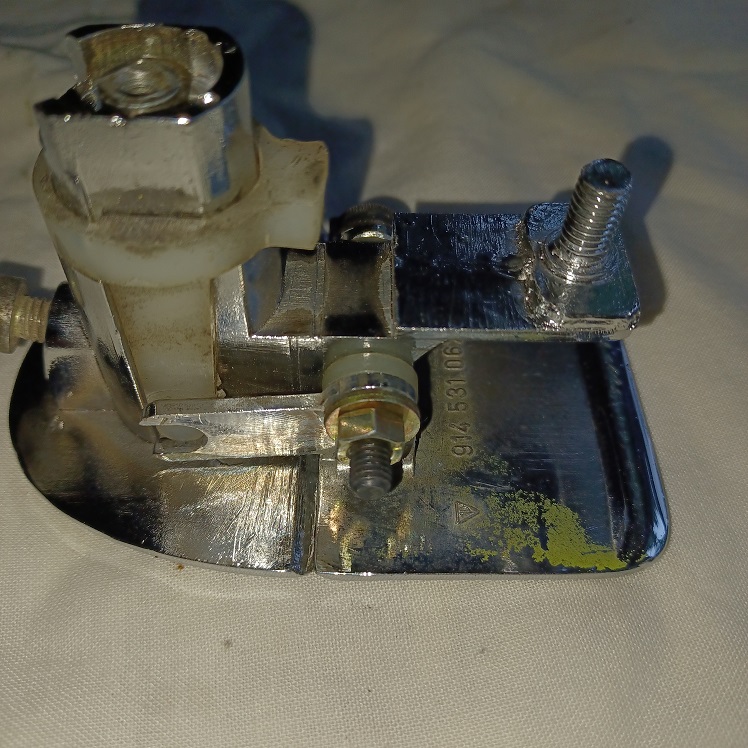
But as usual, one little thing leads to another little thing...and since I was working on locks, I remembered I had a broken door handle to fix. It would appear the PO had broken off the mounting tab, so rather than replacing the base, he improvised a mounting tab...
   |
| Puebloswatcop |
 Jun 19 2022, 02:55 PM Jun 19 2022, 02:55 PM
Post
#602
|
|
Senior Member    Group: Members Posts: 1,401 Joined: 27-December 14 From: Mineola, Texas Member No.: 18,258 Region Association: Southwest Region |
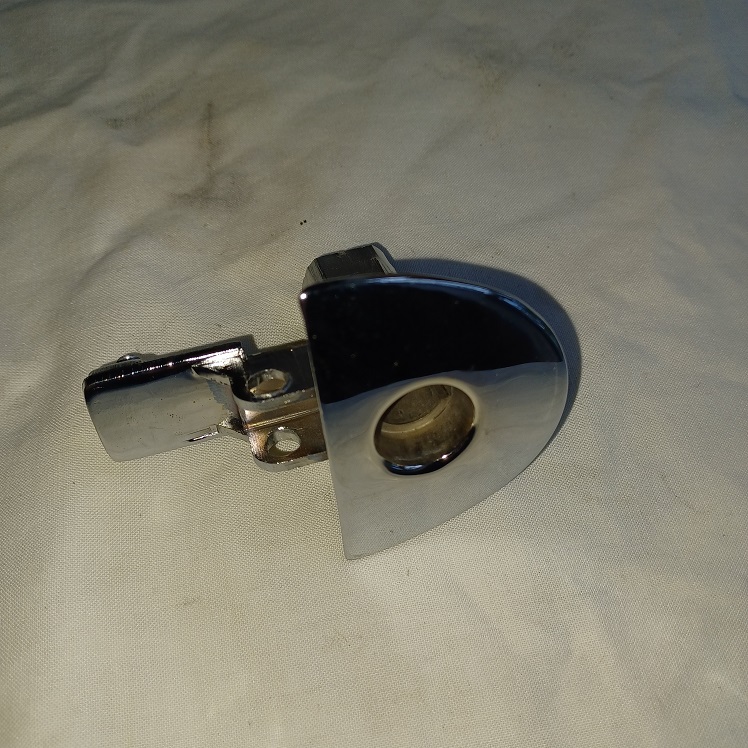
A few years ago I won a replacement base from Auto Atlanta, so decided now was the time to fix the handle.
 |
| Puebloswatcop |
 Jun 19 2022, 02:58 PM Jun 19 2022, 02:58 PM
Post
#603
|
|
Senior Member    Group: Members Posts: 1,401 Joined: 27-December 14 From: Mineola, Texas Member No.: 18,258 Region Association: Southwest Region |
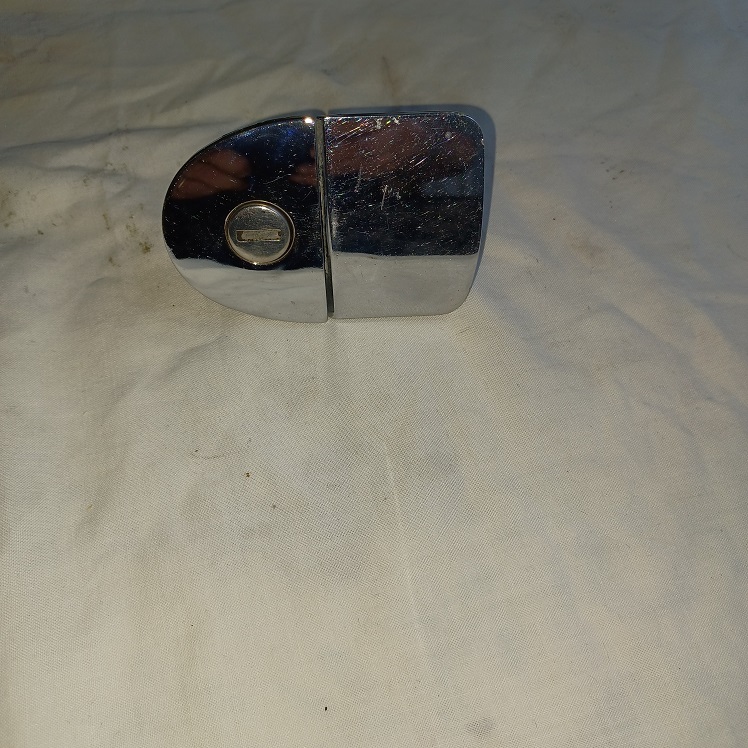
So it was a fairly easy fix and the price was right...free.... the hardest part was getting the spring that operated the flapper handle put back in....lol. Certainly not a perfect handle, but will work as a spare if needed.
  |
| Puebloswatcop |
 Jun 20 2022, 02:02 PM Jun 20 2022, 02:02 PM
Post
#604
|
|
Senior Member    Group: Members Posts: 1,401 Joined: 27-December 14 From: Mineola, Texas Member No.: 18,258 Region Association: Southwest Region |
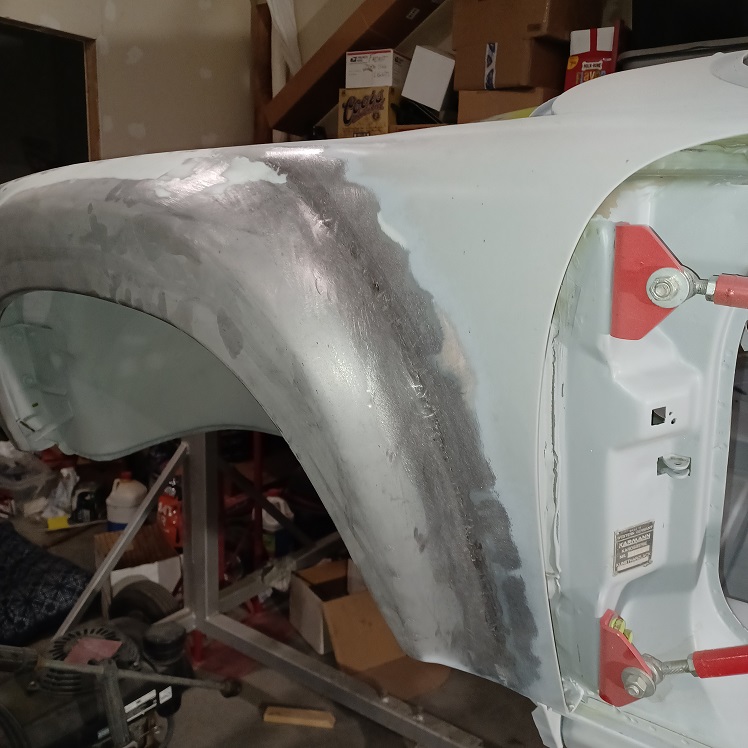
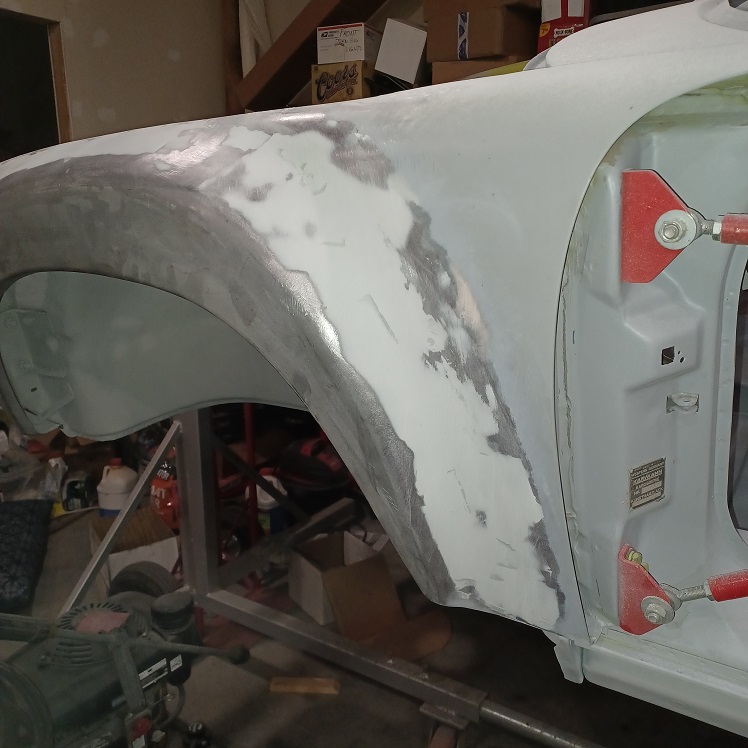
Shoulder feels alot better so back to some body work. Started by filling the weld line on the front fender. starting to get the right blend for the flares.
 |
| Puebloswatcop |
 Jun 20 2022, 02:05 PM Jun 20 2022, 02:05 PM
Post
#605
|
|
Senior Member    Group: Members Posts: 1,401 Joined: 27-December 14 From: Mineola, Texas Member No.: 18,258 Region Association: Southwest Region |
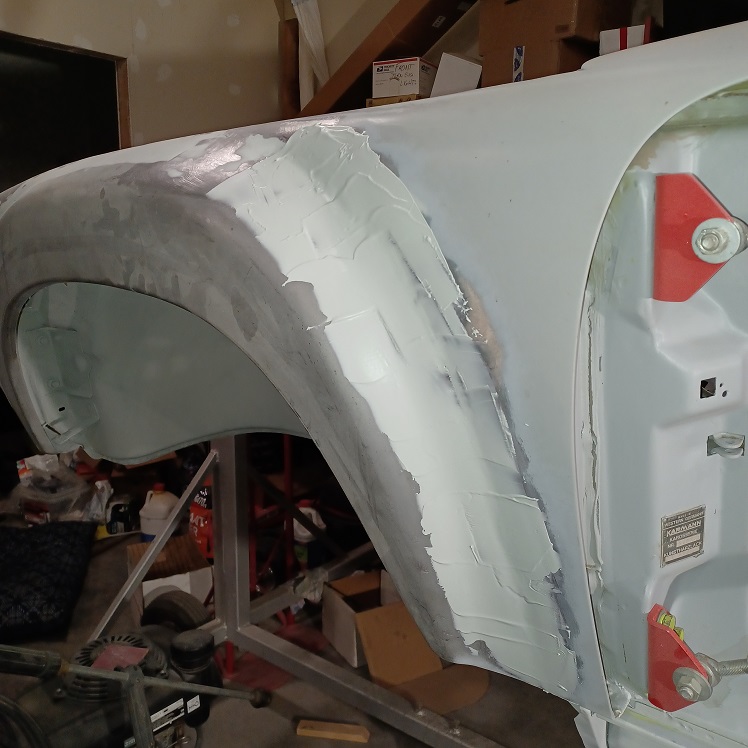
One initial fill and then sanded out...starting to blend.
  |
| Puebloswatcop |
 Jun 20 2022, 02:07 PM Jun 20 2022, 02:07 PM
Post
#606
|
|
Senior Member    Group: Members Posts: 1,401 Joined: 27-December 14 From: Mineola, Texas Member No.: 18,258 Region Association: Southwest Region |
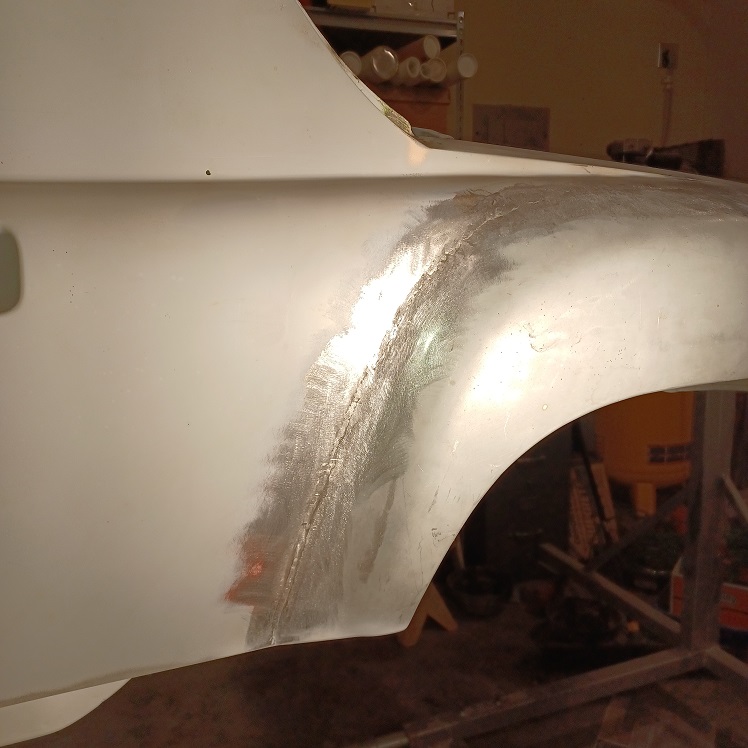
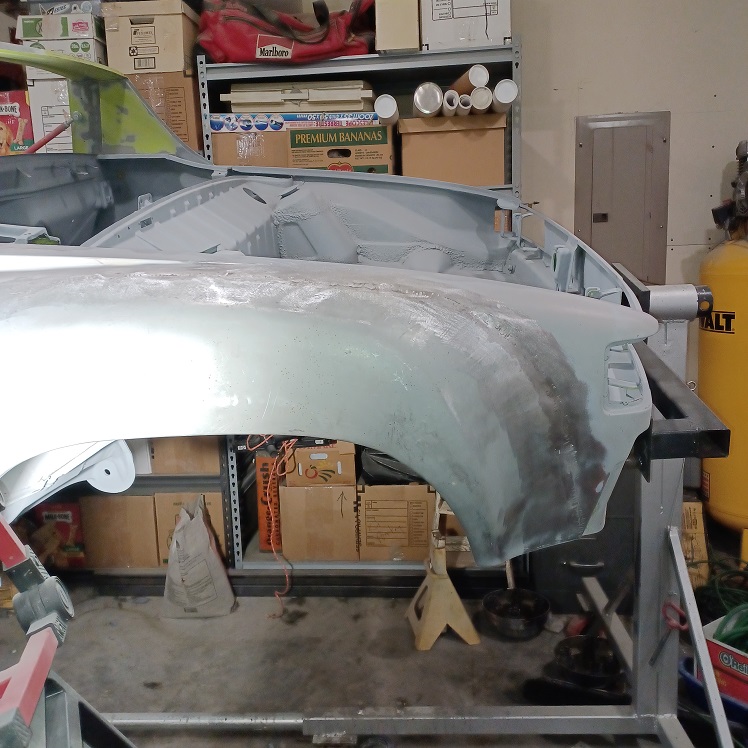
Same for the rear fender. First sand with 60 grit, then clean with surface prep...
  |
| Puebloswatcop |
 Jun 20 2022, 02:11 PM Jun 20 2022, 02:11 PM
Post
#607
|
|
Senior Member    Group: Members Posts: 1,401 Joined: 27-December 14 From: Mineola, Texas Member No.: 18,258 Region Association: Southwest Region |
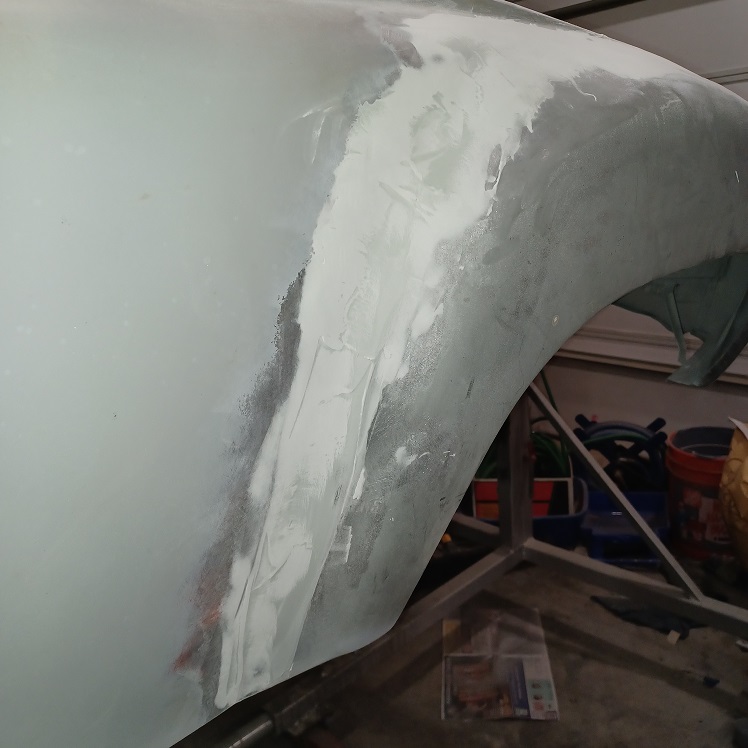
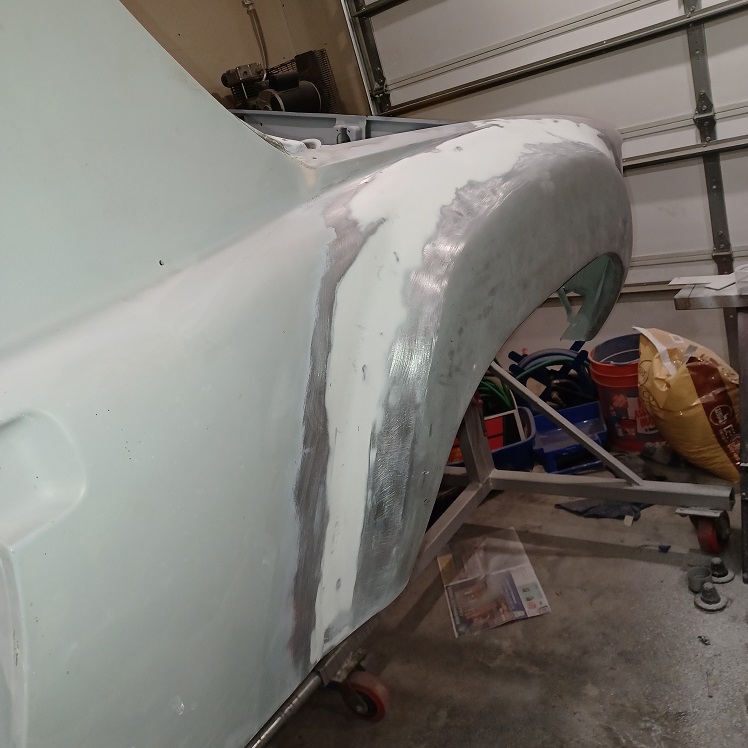
The first fill on the rear fender. Mainly filling the weld line.
  |
| Puebloswatcop |
 Jun 20 2022, 02:16 PM Jun 20 2022, 02:16 PM
Post
#608
|
|
Senior Member    Group: Members Posts: 1,401 Joined: 27-December 14 From: Mineola, Texas Member No.: 18,258 Region Association: Southwest Region |
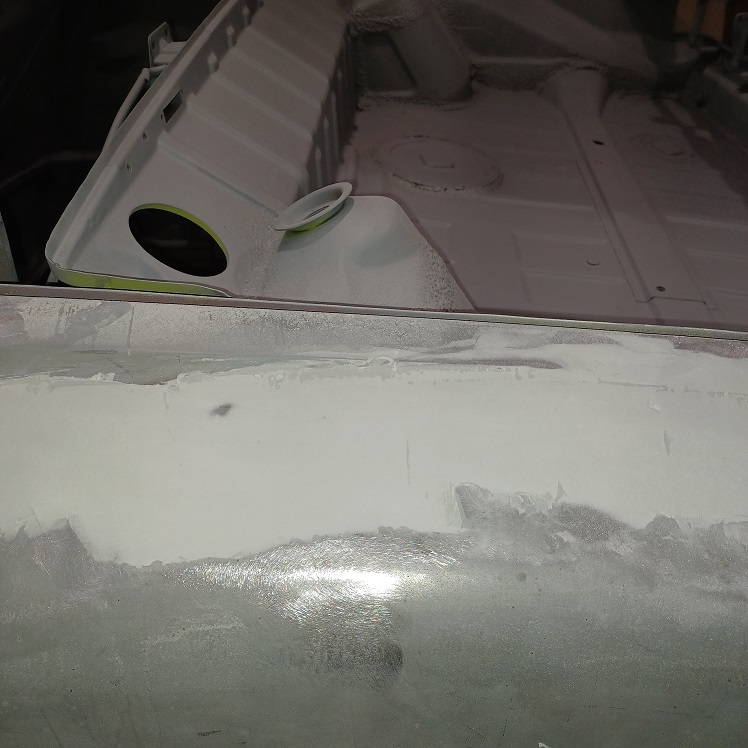
Over the top of the arch there are 3 transitions in shape, a convex curve to a concave curve and where the rear portion of the roof support comes in. This area will take an extra lot of work and care to get the lines correct
 |
| Puebloswatcop |
 Jun 20 2022, 02:20 PM Jun 20 2022, 02:20 PM
Post
#609
|
|
Senior Member    Group: Members Posts: 1,401 Joined: 27-December 14 From: Mineola, Texas Member No.: 18,258 Region Association: Southwest Region |
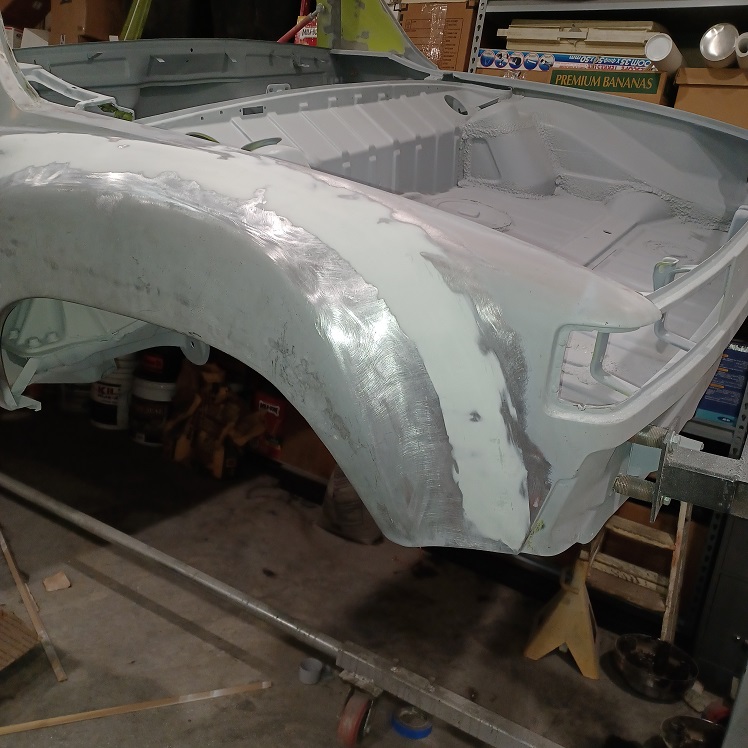
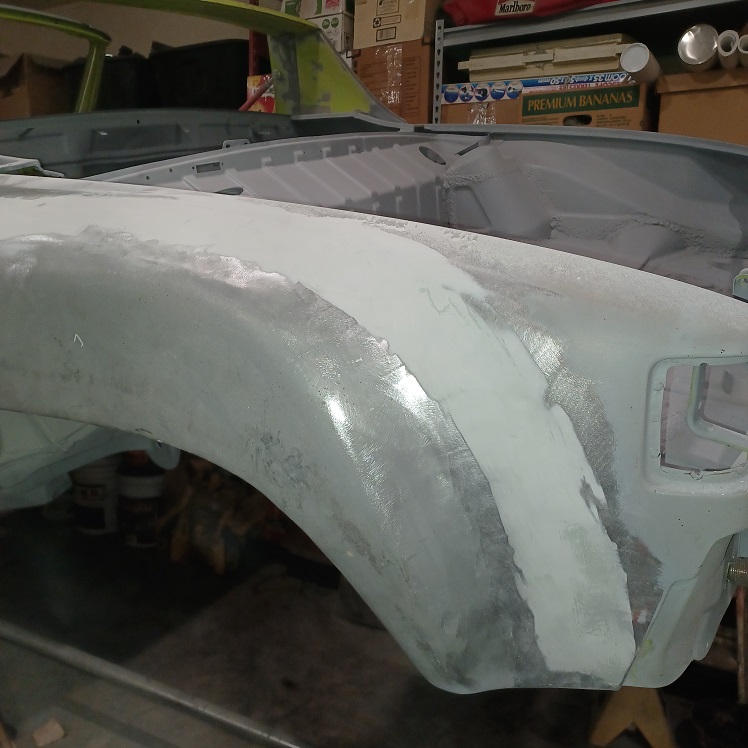
The rear portion of the flare after 1st coat of filler.
  |
| Puebloswatcop |
 Jun 20 2022, 02:24 PM Jun 20 2022, 02:24 PM
Post
#610
|
|
Senior Member    Group: Members Posts: 1,401 Joined: 27-December 14 From: Mineola, Texas Member No.: 18,258 Region Association: Southwest Region |
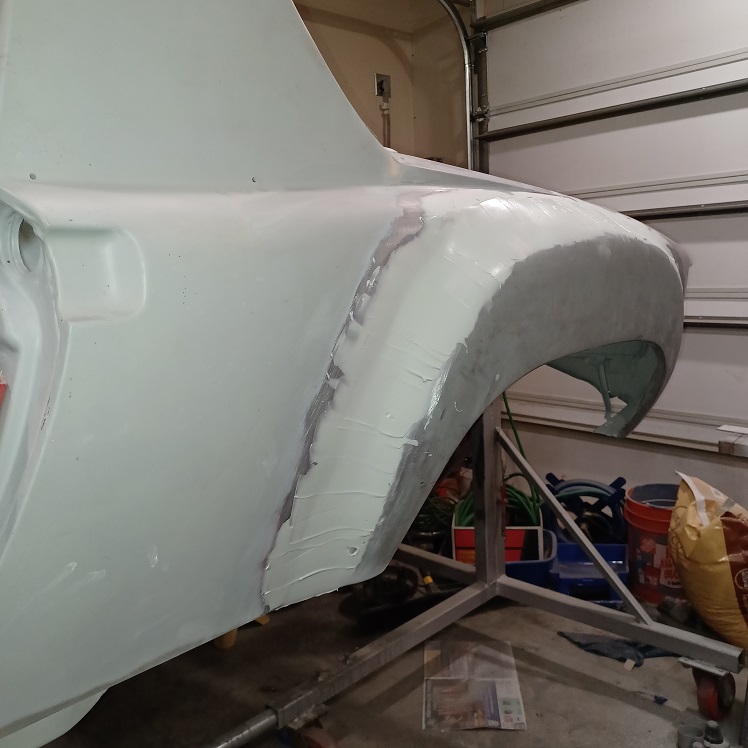
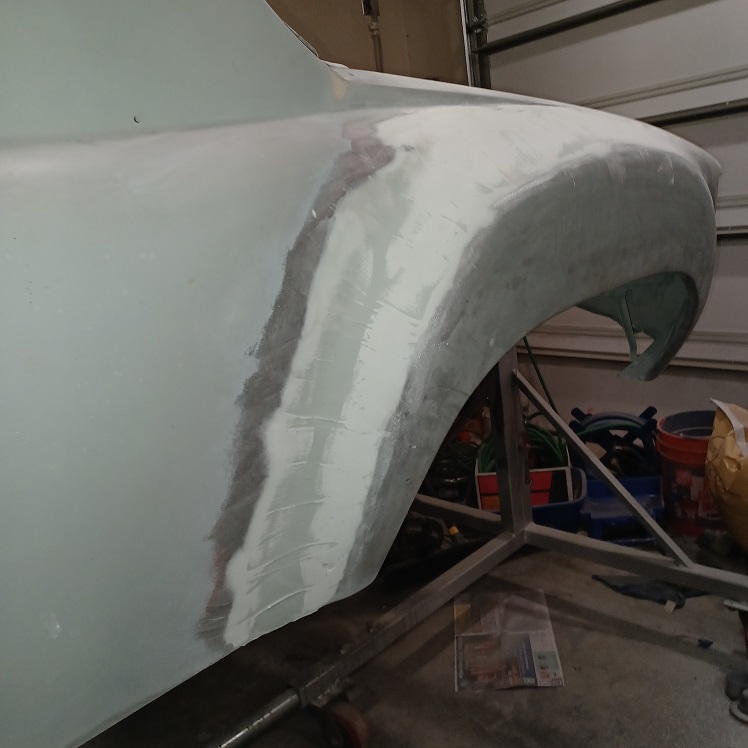
Then back to repeat the whole process again. Extending the fill out each time to get the right contour.
  |
| Puebloswatcop |
 Jun 20 2022, 02:28 PM Jun 20 2022, 02:28 PM
Post
#611
|
|
Senior Member    Group: Members Posts: 1,401 Joined: 27-December 14 From: Mineola, Texas Member No.: 18,258 Region Association: Southwest Region |
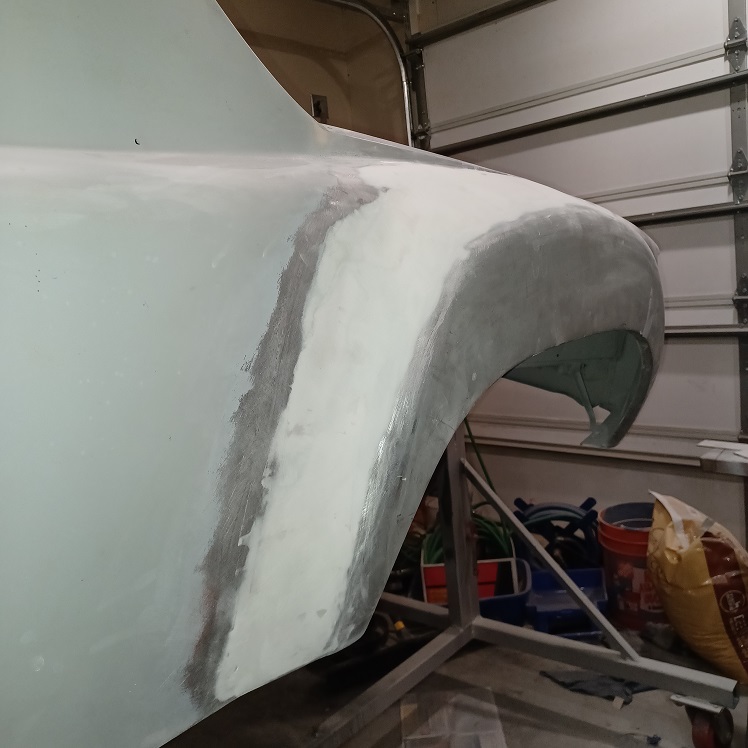
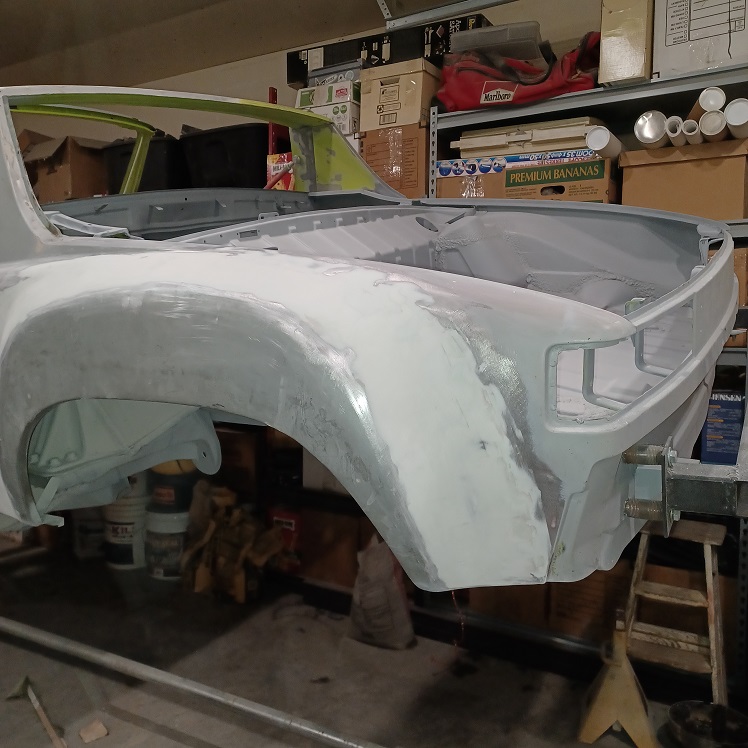
Second coat of filler all sanded out, the hotter it gets the faster this filler is hardening, leaving my working time to spread and shape much shorter. I think this will be the last coat for today.
  |
| 9146C |
 Jun 20 2022, 05:43 PM Jun 20 2022, 05:43 PM
Post
#612
|
|
Member   Group: Members Posts: 228 Joined: 14-September 19 From: US Member No.: 23,460 Region Association: None 
|
Looks great Kevin! Keep up the good work!
|
| Puebloswatcop |
 Jun 21 2022, 01:42 PM Jun 21 2022, 01:42 PM
Post
#613
|
|
Senior Member    Group: Members Posts: 1,401 Joined: 27-December 14 From: Mineola, Texas Member No.: 18,258 Region Association: Southwest Region |
|
| Puebloswatcop |
 Jun 21 2022, 02:01 PM Jun 21 2022, 02:01 PM
Post
#614
|
|
Senior Member    Group: Members Posts: 1,401 Joined: 27-December 14 From: Mineola, Texas Member No.: 18,258 Region Association: Southwest Region |
Okay, so I wasn't going to work on the car since I have to pick my wife up at the airport later today, but 76-914 got me to feeling guilty for not doing anything to on the longest day of the year.....So I decided that something needed to be done.
I decided to fix the PO's butchering of the doors when they did the 1980's speaker in the door install. I had already started the repair, however tody was the perfect opportunity to finish the job. 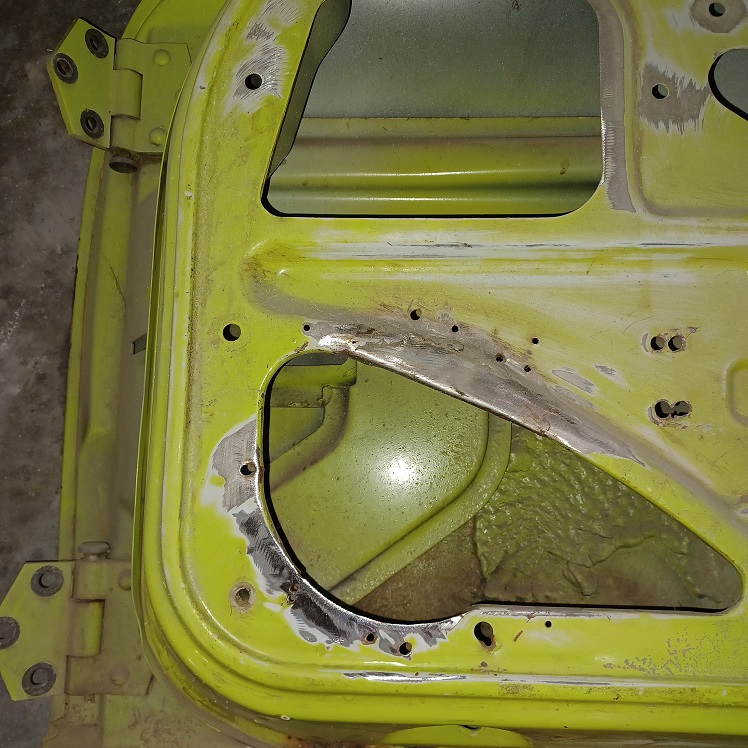 |
| Puebloswatcop |
 Jun 21 2022, 02:05 PM Jun 21 2022, 02:05 PM
Post
#615
|
|
Senior Member    Group: Members Posts: 1,401 Joined: 27-December 14 From: Mineola, Texas Member No.: 18,258 Region Association: Southwest Region |
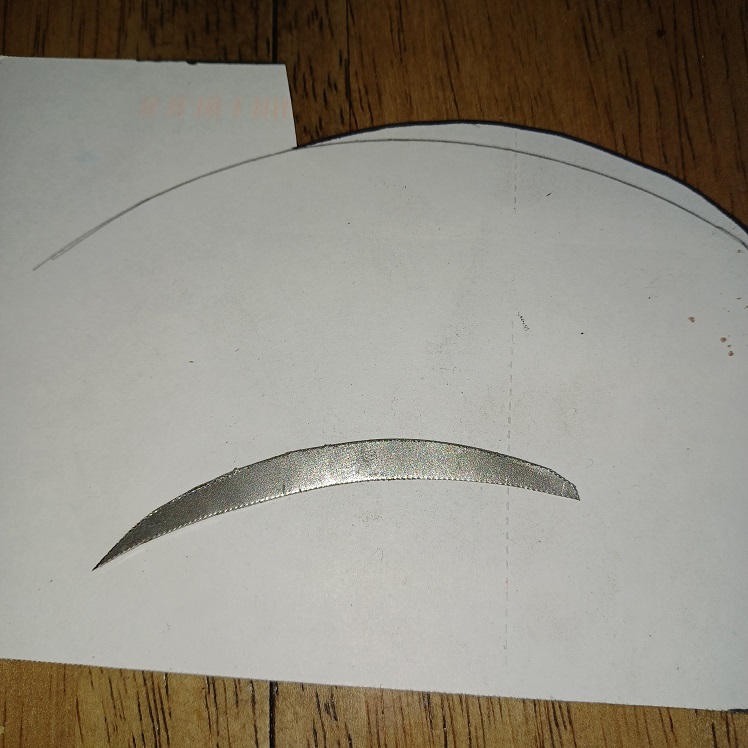
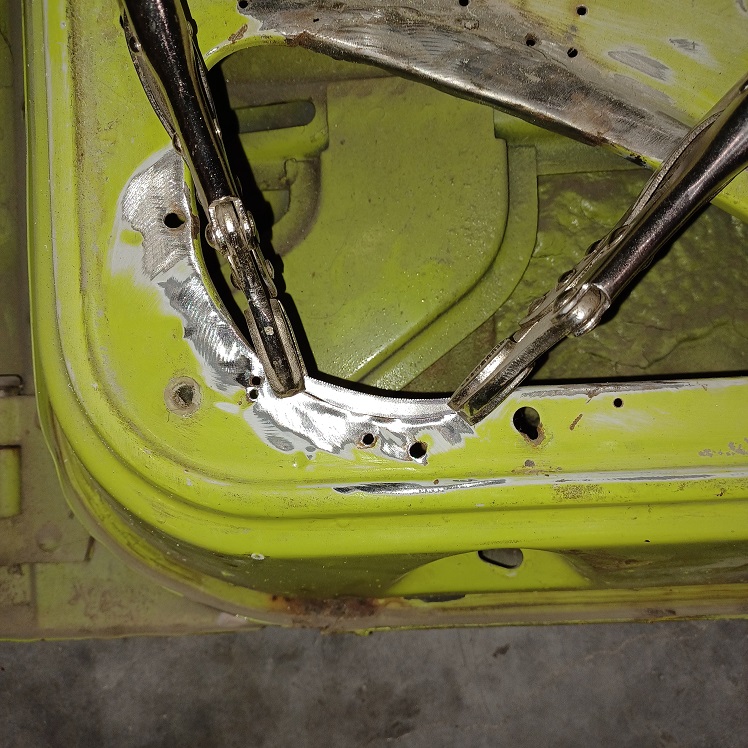
Since the repair was kind of a curved shape I decided to do the flat work first and then add in the lip that strengthens the structure. The piece was so small some might wonder...why bother?...because the cutout bothers me....OCD I guess.
  |
| Puebloswatcop |
 Jun 21 2022, 02:09 PM Jun 21 2022, 02:09 PM
Post
#616
|
|
Senior Member    Group: Members Posts: 1,401 Joined: 27-December 14 From: Mineola, Texas Member No.: 18,258 Region Association: Southwest Region |
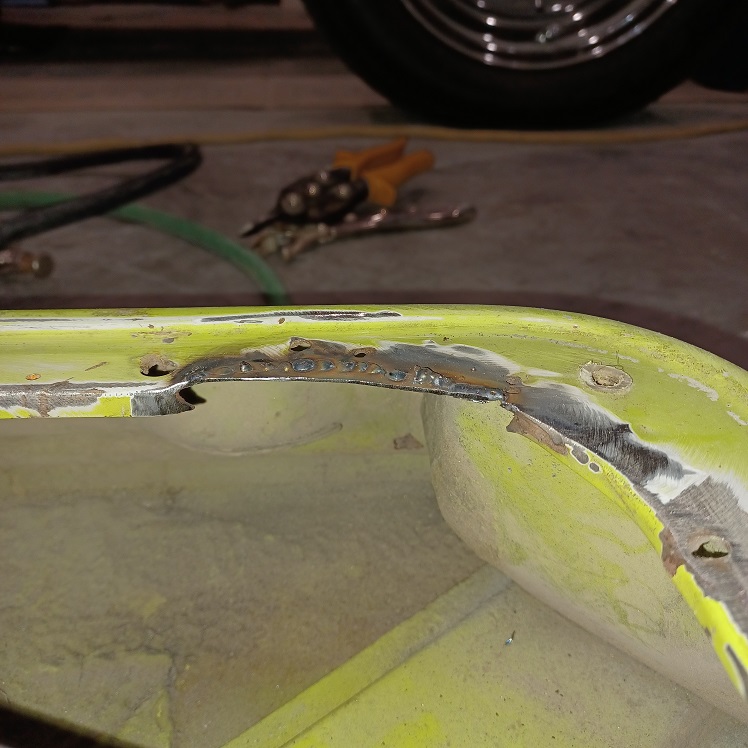
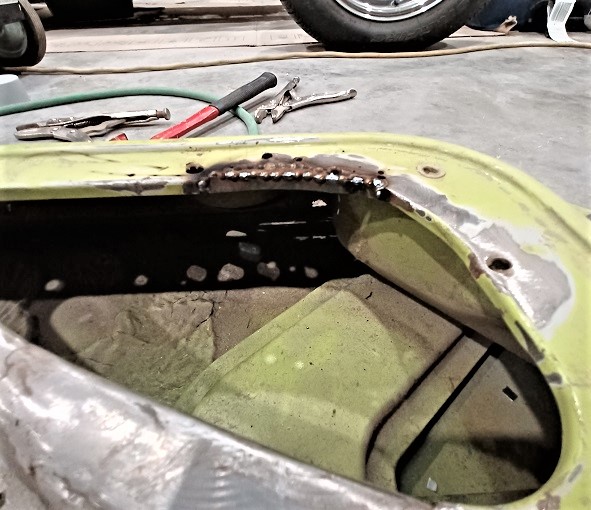
After welding in the lat work, then came the lip. Once it was welded in there was no more flex in that area of the door, I feel much better.....
  |
| Puebloswatcop |
 Jun 21 2022, 02:14 PM Jun 21 2022, 02:14 PM
Post
#617
|
|
Senior Member    Group: Members Posts: 1,401 Joined: 27-December 14 From: Mineola, Texas Member No.: 18,258 Region Association: Southwest Region |
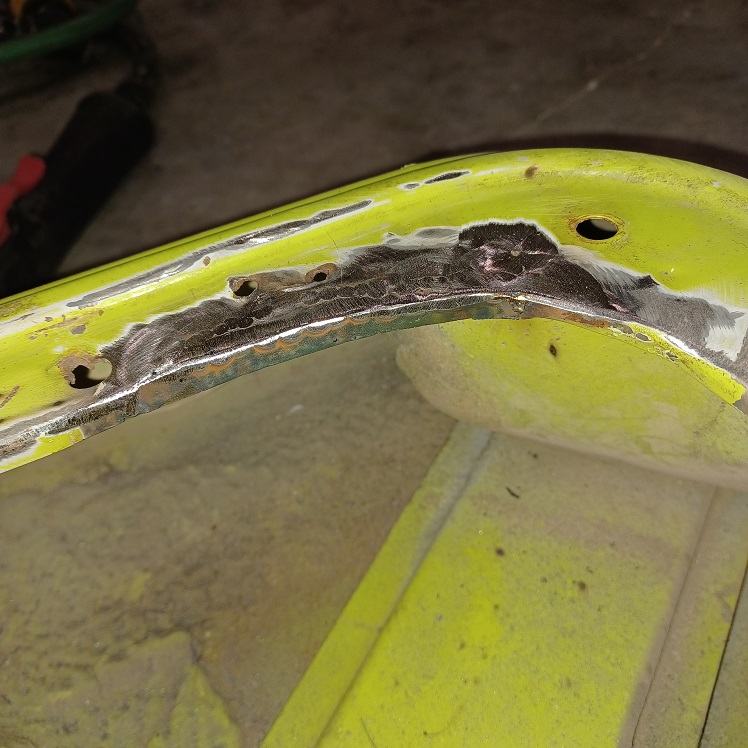
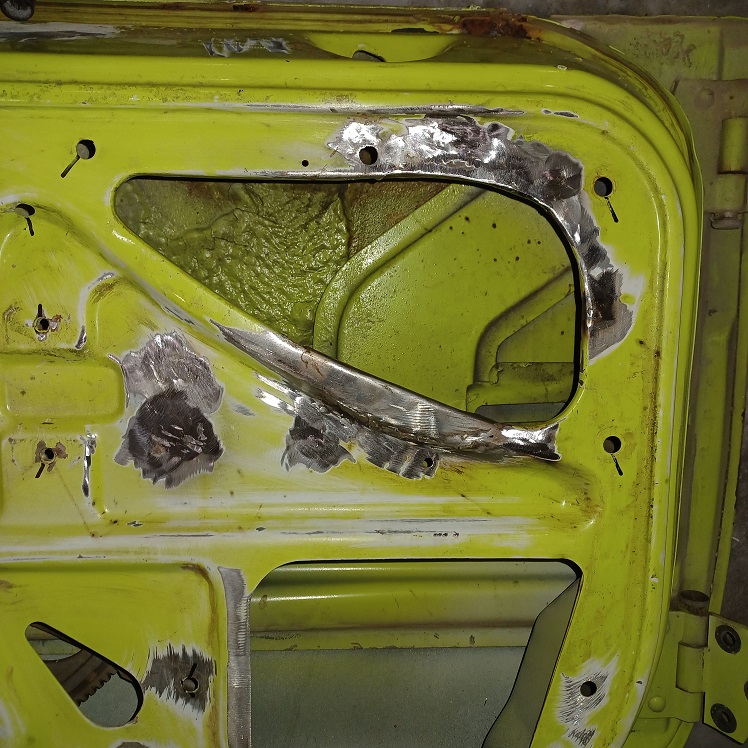
After grinding it all down, of course the next thing that bothered me was all the extra carricular holes the PO had left behind, there was a total of 11 extra, that I did not see on the factory picture. Of course some were easy to tell they didn't belong, but htere were a couple that I questioned, so I welded closed the obvious ones.
  |
| Puebloswatcop |
 Jun 21 2022, 02:21 PM Jun 21 2022, 02:21 PM
Post
#618
|
|
Senior Member    Group: Members Posts: 1,401 Joined: 27-December 14 From: Mineola, Texas Member No.: 18,258 Region Association: Southwest Region |
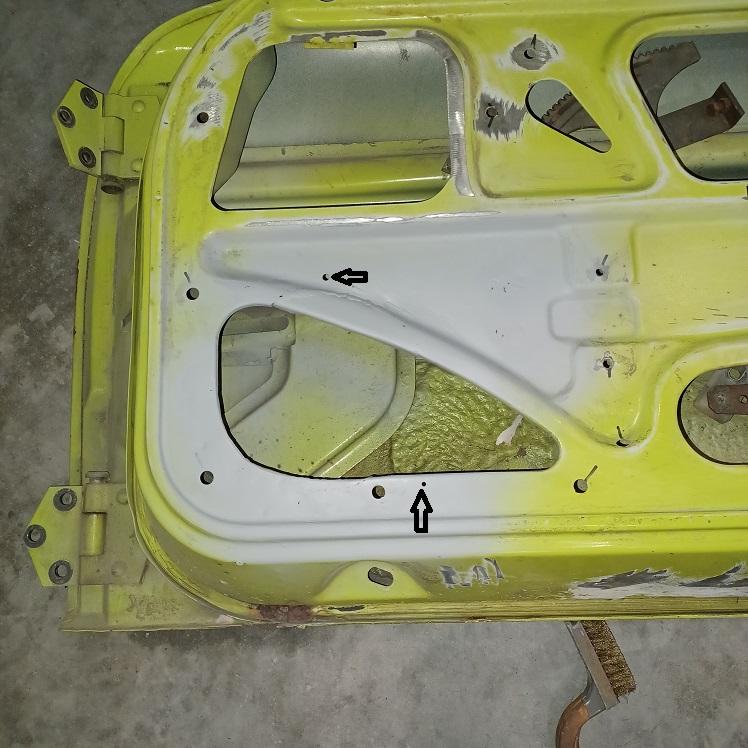
Here is a picture after I finished for the day. You can see the two holes I didn't weld shut. They just seemed more purposely placed and better drilled. I will research it more and if I find they don't belong I will go back and they too will be welded closed. Now I feel better about finishing that door and I no longer feel guilty about not working on my 914 on the logest day of the year....lol
 |
| autopro |
 Jun 21 2022, 03:57 PM Jun 21 2022, 03:57 PM
Post
#619
|
|
Member   Group: Members Posts: 306 Joined: 14-January 18 From: San Diego / Tijuana Member No.: 21,797 Region Association: Southern California |
Good work, the fenders are looking great!
|
| Root_Werks |
 Jun 21 2022, 05:18 PM Jun 21 2022, 05:18 PM
Post
#620
|
|
Village Idiot      Group: Members Posts: 8,484 Joined: 25-May 04 From: About 5NM from Canada Member No.: 2,105 Region Association: Pacific Northwest 
|
Nicely done on the flares!
Like the detail metal work on the doors. Mine was a little cut up for speakers as well. I didn't fix mine, door panel was the fix, cover it up. (IMG:style_emoticons/default/biggrin.gif) |
  |
2 User(s) are reading this topic (2 Guests and 0 Anonymous Users)
0 Members:

|
Lo-Fi Version | Time is now: 25th November 2024 - 04:26 PM |
Invision Power Board
v9.1.4 © 2024 IPS, Inc.


