|
|

|
Porsche, and the Porsche crest are registered trademarks of Dr. Ing. h.c. F. Porsche AG.
This site is not affiliated with Porsche in any way. Its only purpose is to provide an online forum for car enthusiasts. All other trademarks are property of their respective owners. |
|
|
  |
| Puebloswatcop |
 Jun 22 2022, 02:43 PM Jun 22 2022, 02:43 PM
Post
#621
|
|
Senior Member    Group: Members Posts: 1,401 Joined: 27-December 14 From: Mineola, Texas Member No.: 18,258 Region Association: Southwest Region |
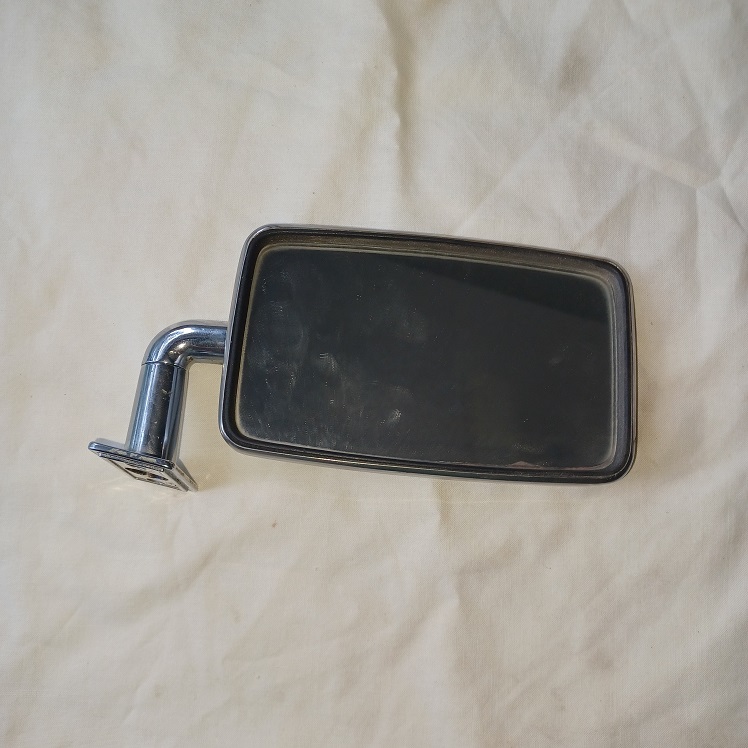
Today I was reading through different threads and came across one by MoveQik, regarding tightening our side mirrors. So I got out a pair that I recently purchased from Scott (3Stewarts) here on the World. They are a very clean set of mirrors and the up and down adustment ( adressed in MoveQik's post) was good on both, but the in and out where the mirror meets the base was frozen solid on both mirrors. That being said, I decided to tear them apart and see what I could do to improve the movement.
Attached image(s) 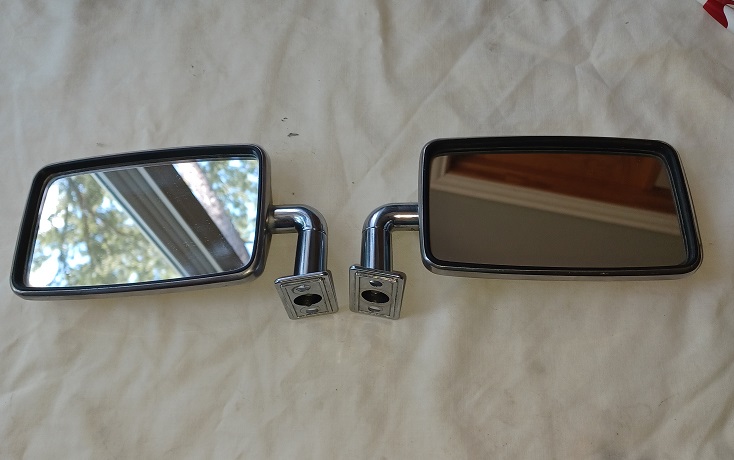
|
| Puebloswatcop |
 Jun 22 2022, 02:50 PM Jun 22 2022, 02:50 PM
Post
#622
|
|
Senior Member    Group: Members Posts: 1,401 Joined: 27-December 14 From: Mineola, Texas Member No.: 18,258 Region Association: Southwest Region |
One thing someone mentioned was breakage of the stud of the mirror when trying to remove the nut in the base, I always recommend spraying everything on these cars with a bit of PB Blaster, before attempting to unbolt fasteners that were installed nearly 50 years ago....
The other problem is finding a socket that will fit the nut (10 mm) and yet still fit into the base of the mirror. I discovered a Craftsman 10 mm, 1/4 in drive, fits right in. 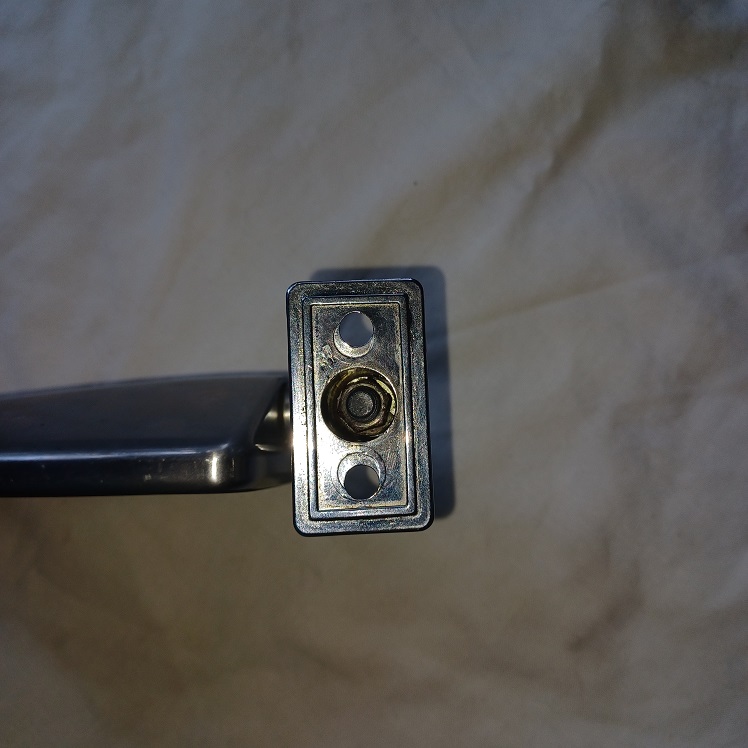 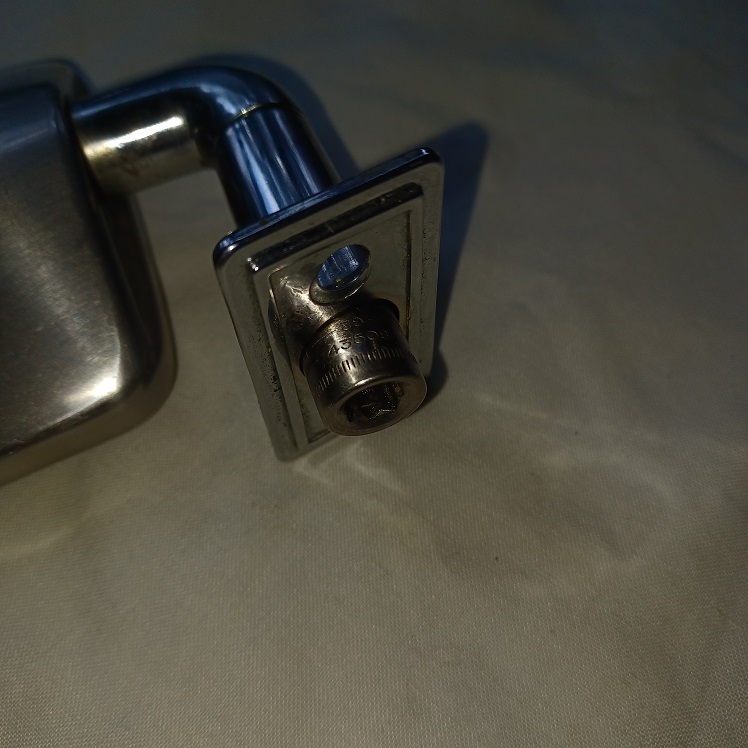 |
| Puebloswatcop |
 Jun 22 2022, 02:58 PM Jun 22 2022, 02:58 PM
Post
#623
|
|
Senior Member    Group: Members Posts: 1,401 Joined: 27-December 14 From: Mineola, Texas Member No.: 18,258 Region Association: Southwest Region |
So after letting the Blaster do its thing for about 15 minutes, I gently tried to unscrew the nut. It took very little torque to remove it, so no broken mirror stud.....
But you can see how corroded the nut is, stud to the mirror was the same way. I used a brass drift to drive the stud out of the base. Couldn't get a picture since it took one had to hold the mirror base and drift and the other to hit it with a mallet. Be very careful not to let the mirror hit the floor or table top when it comes out of the base. Inside there are 3 small parts..the nut, a spring and a cone shaped wedge. 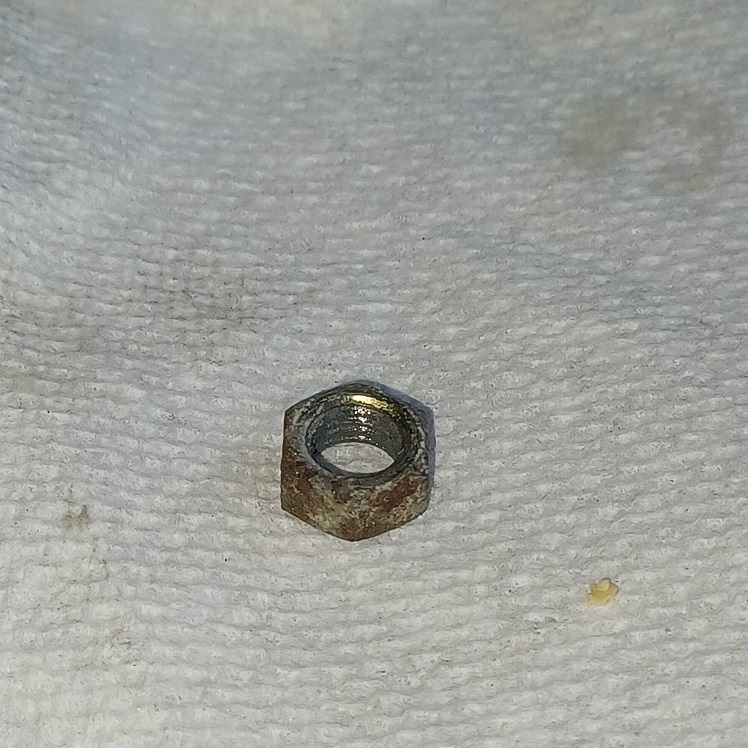 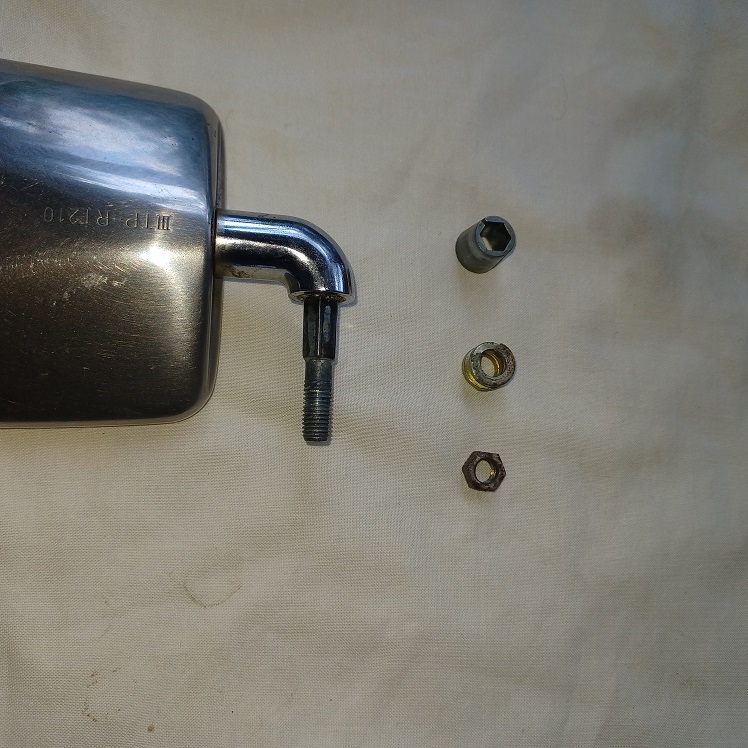 |
| Puebloswatcop |
 Jun 22 2022, 03:04 PM Jun 22 2022, 03:04 PM
Post
#624
|
|
Senior Member    Group: Members Posts: 1,401 Joined: 27-December 14 From: Mineola, Texas Member No.: 18,258 Region Association: Southwest Region |
The two most important parts for the in and out movement (or lack thereof) is the cone shaped wedge and the mirror base. These two parts interact directly to create friction to limit the ease of movement of the mirror.
So these parts must be well cleaned.....The cone was easy, light brushing with a soft wire brush and a little bit of carb cleaner. The inside of the mirror base was another story... it was caked with dried on white lithium grease... 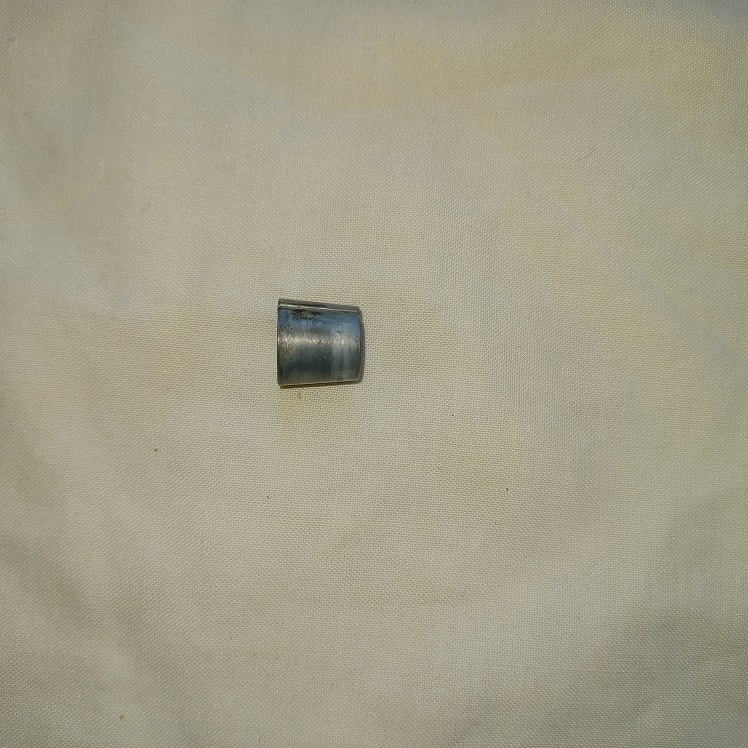 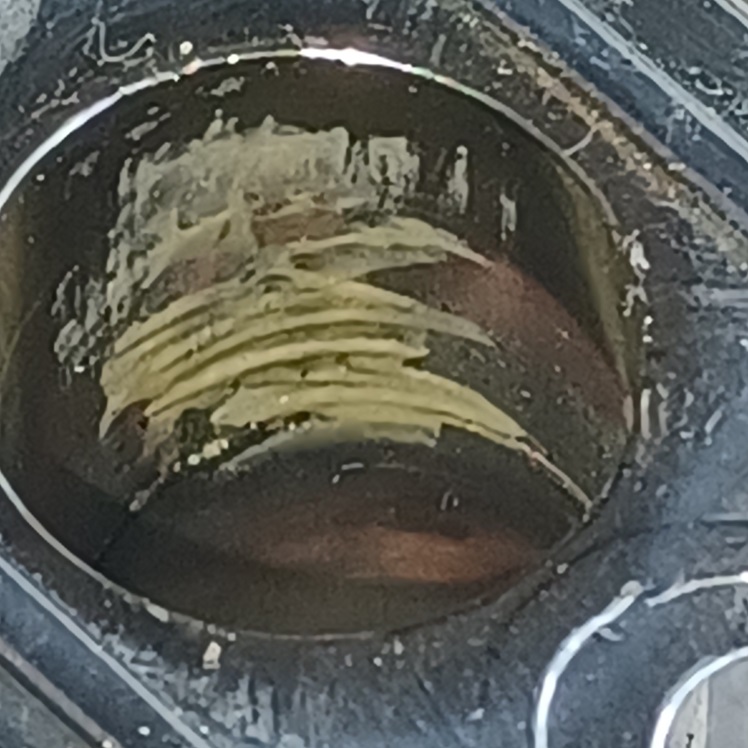 |
| Puebloswatcop |
 Jun 22 2022, 03:08 PM Jun 22 2022, 03:08 PM
Post
#625
|
|
Senior Member    Group: Members Posts: 1,401 Joined: 27-December 14 From: Mineola, Texas Member No.: 18,258 Region Association: Southwest Region |
Finding a brush of some kind to fit into the base was difficult, but I finally sttled on a combination bore/breach brush from my AR-10 Rifle which did the job nicely...
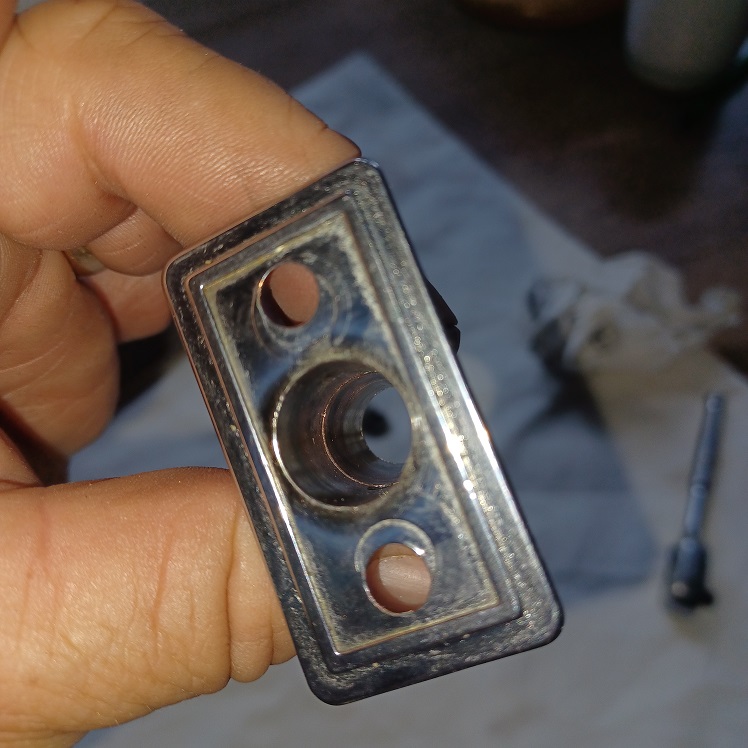 |
| Puebloswatcop |
 Jun 22 2022, 03:13 PM Jun 22 2022, 03:13 PM
Post
#626
|
|
Senior Member    Group: Members Posts: 1,401 Joined: 27-December 14 From: Mineola, Texas Member No.: 18,258 Region Association: Southwest Region |
Then I chased the threads of the mounting stud with an M7 X 1.0 die to get the corrosion out of the threads.
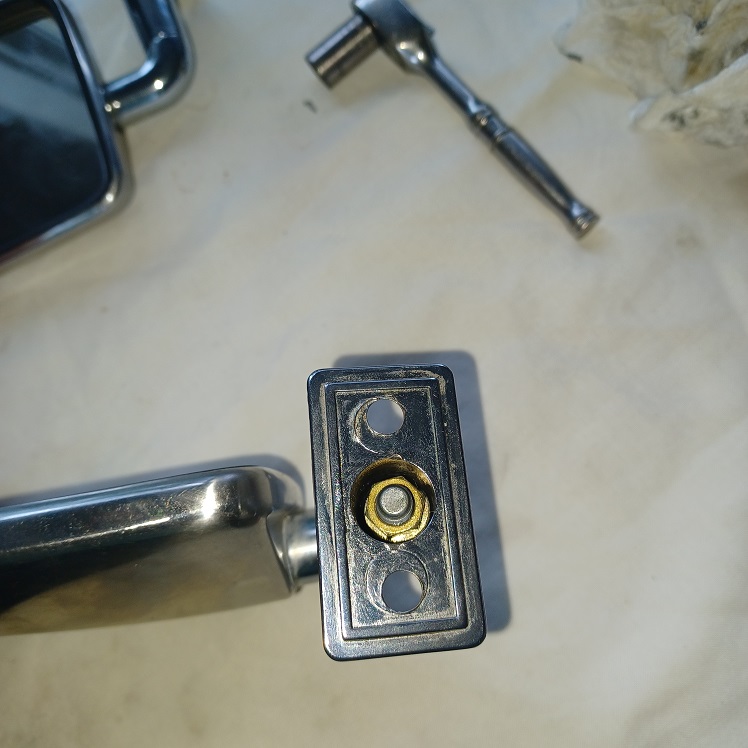
With all of the items cleaned this is how they mount, inside the base of course... 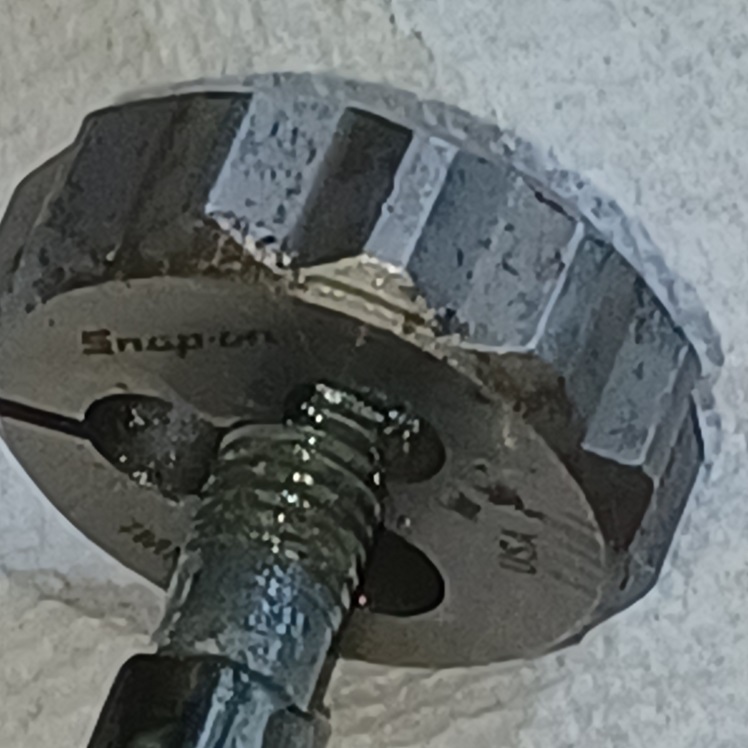 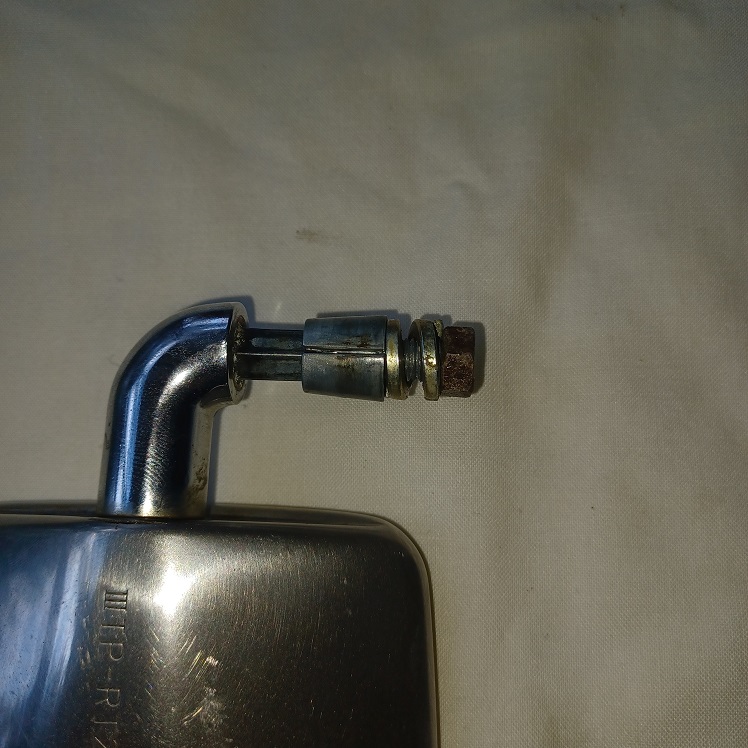 |
| Puebloswatcop |
 Jun 22 2022, 03:20 PM Jun 22 2022, 03:20 PM
Post
#627
|
|
Senior Member    Group: Members Posts: 1,401 Joined: 27-December 14 From: Mineola, Texas Member No.: 18,258 Region Association: Southwest Region |
After lubing the indie of the base, and the outside of the wedge with white lithium brease you simply put it back together and tighten the nut to the desired amount of friction that will allow adjustment but eliminate free movement of the mirror at the very high speeds our cars are so capable of.... So, for those of you who have never torn apart you mirrors but are suffereing from inability to to adjust the mirrors in or out (or mirrors that adjust themselves) that is how its done....pretty simple...even for me...lol
  |
| Puebloswatcop |
 Jun 23 2022, 01:35 PM Jun 23 2022, 01:35 PM
Post
#628
|
|
Senior Member    Group: Members Posts: 1,401 Joined: 27-December 14 From: Mineola, Texas Member No.: 18,258 Region Association: Southwest Region |
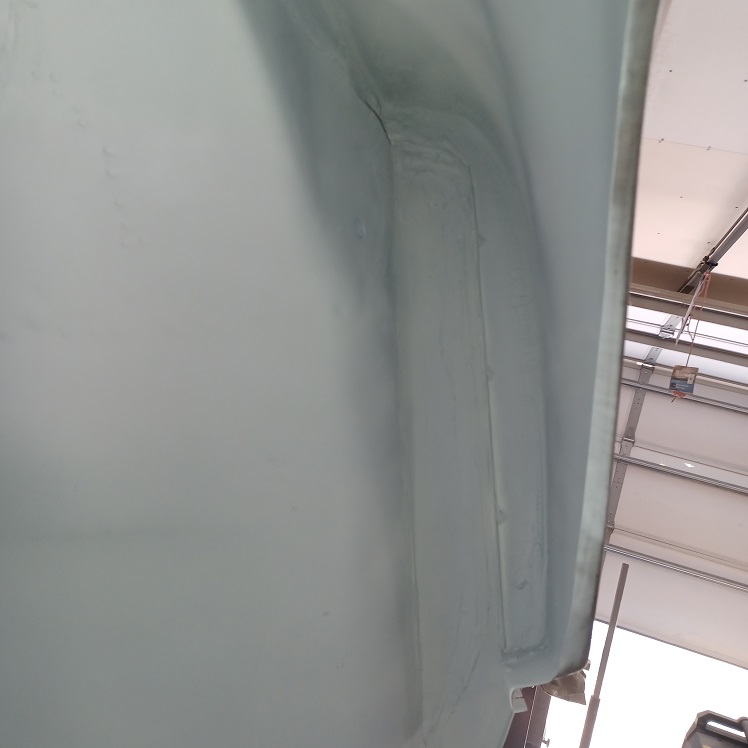
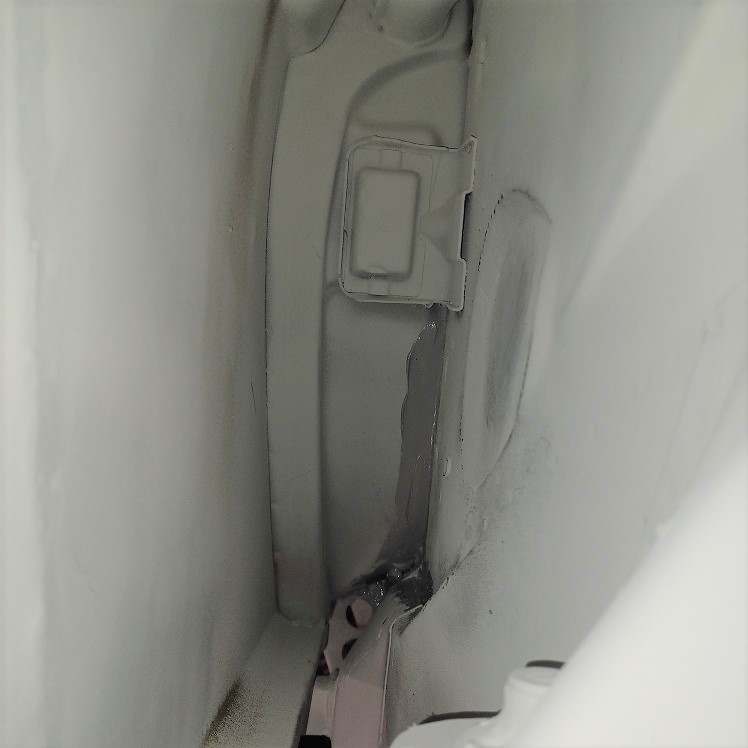
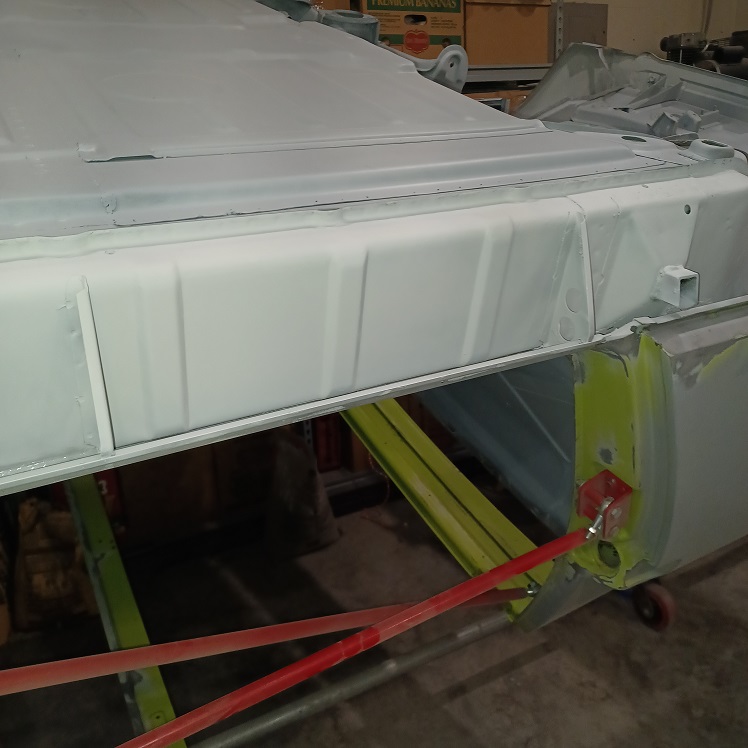
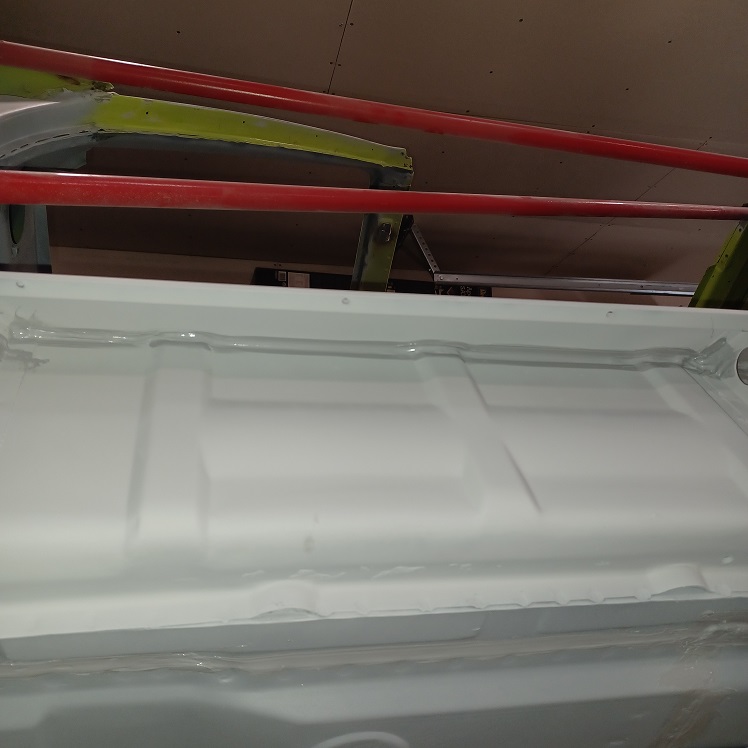
Today was spent seam sealing the external portions of the car where the original sealant was removed to address rust and some areas that I felt needed it to prevent rust infestation in the future.
This is the drivers side door jam to fender joint...I cleaned out the crack in the old sealant and then overcoated it with new 3M Urethane seam sealer. 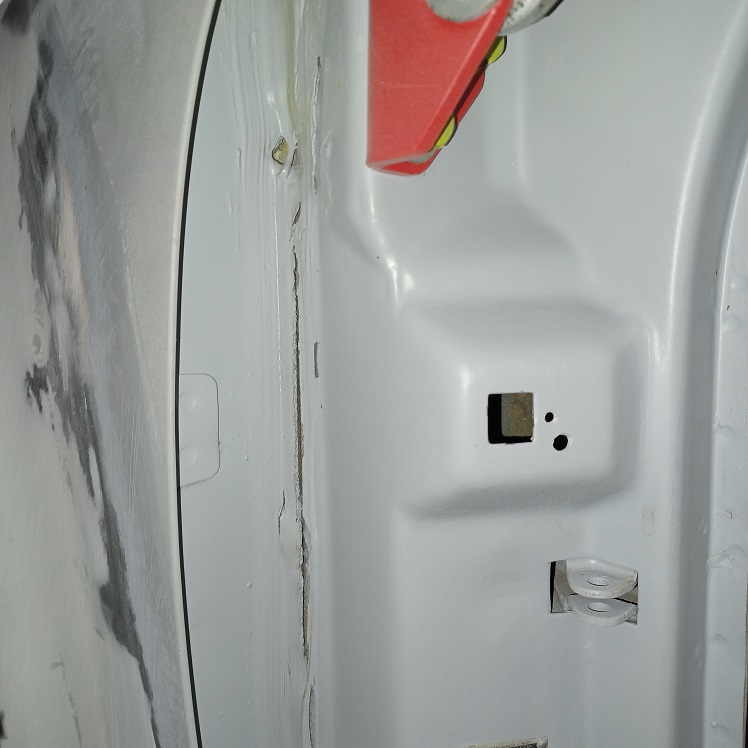 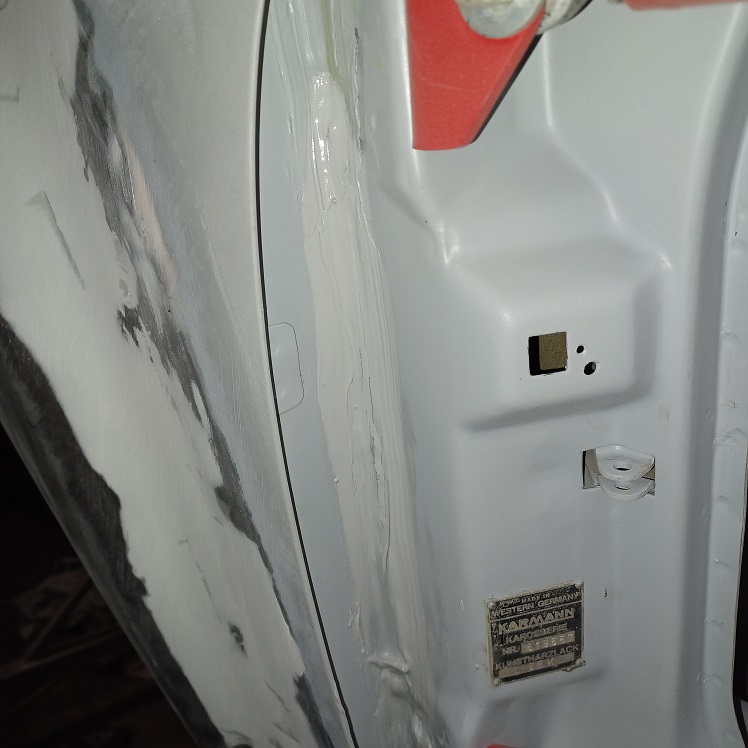 |
| Puebloswatcop |
 Jun 23 2022, 01:39 PM Jun 23 2022, 01:39 PM
Post
#629
|
|
Senior Member    Group: Members Posts: 1,401 Joined: 27-December 14 From: Mineola, Texas Member No.: 18,258 Region Association: Southwest Region |
The front fender well where it joins the door frame and the rear fenderwell where it also joins the door frame...
  |
| Puebloswatcop |
 Jun 23 2022, 01:42 PM Jun 23 2022, 01:42 PM
Post
#630
|
|
Senior Member    Group: Members Posts: 1,401 Joined: 27-December 14 From: Mineola, Texas Member No.: 18,258 Region Association: Southwest Region |
The underside of the door sills where they meet the longs......
  |
| Puebloswatcop |
 Jun 23 2022, 01:46 PM Jun 23 2022, 01:46 PM
Post
#631
|
|
Senior Member    Group: Members Posts: 1,401 Joined: 27-December 14 From: Mineola, Texas Member No.: 18,258 Region Association: Southwest Region |
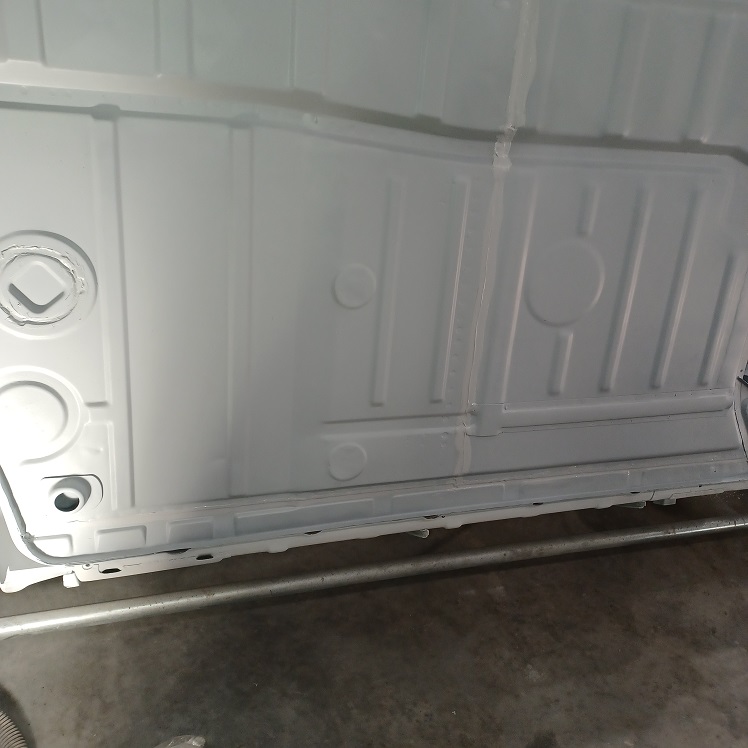
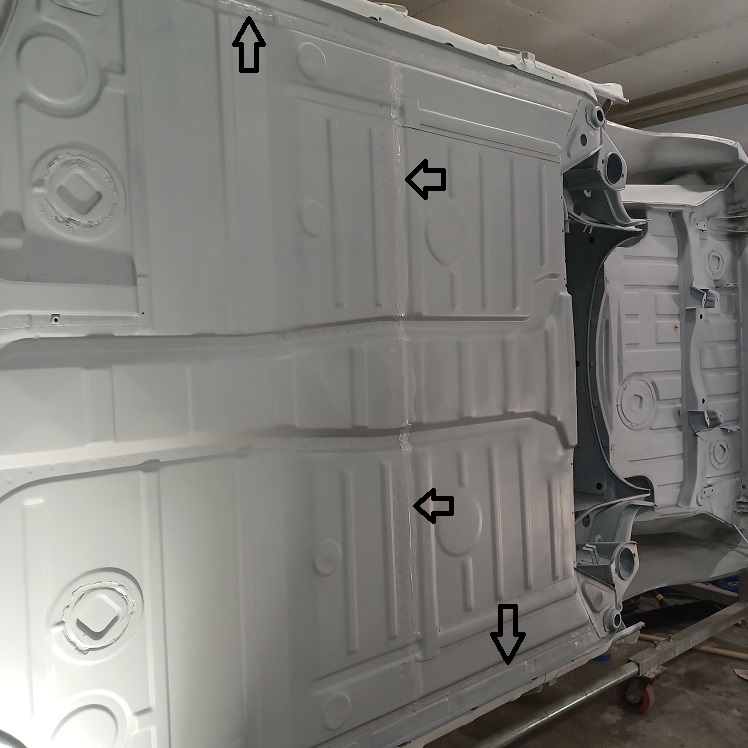
And the floor panel. I also put a layer over the seam where I replaced the rear half of the floor and welded it to the front half. Just wanted to be sure if there are any pin holes I don't get water in there.
  |
| Puebloswatcop |
 Jun 23 2022, 01:48 PM Jun 23 2022, 01:48 PM
Post
#632
|
|
Senior Member    Group: Members Posts: 1,401 Joined: 27-December 14 From: Mineola, Texas Member No.: 18,258 Region Association: Southwest Region |
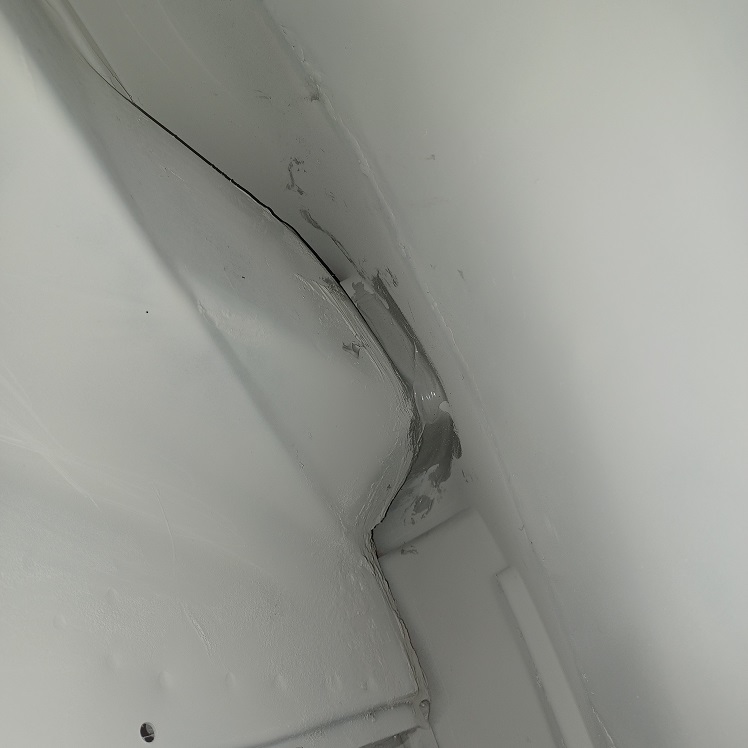
The back side of the drivers side rear fender well where there had been a repair of accident damage.
 |
| Puebloswatcop |
 Jun 23 2022, 01:52 PM Jun 23 2022, 01:52 PM
Post
#633
|
|
Senior Member    Group: Members Posts: 1,401 Joined: 27-December 14 From: Mineola, Texas Member No.: 18,258 Region Association: Southwest Region |
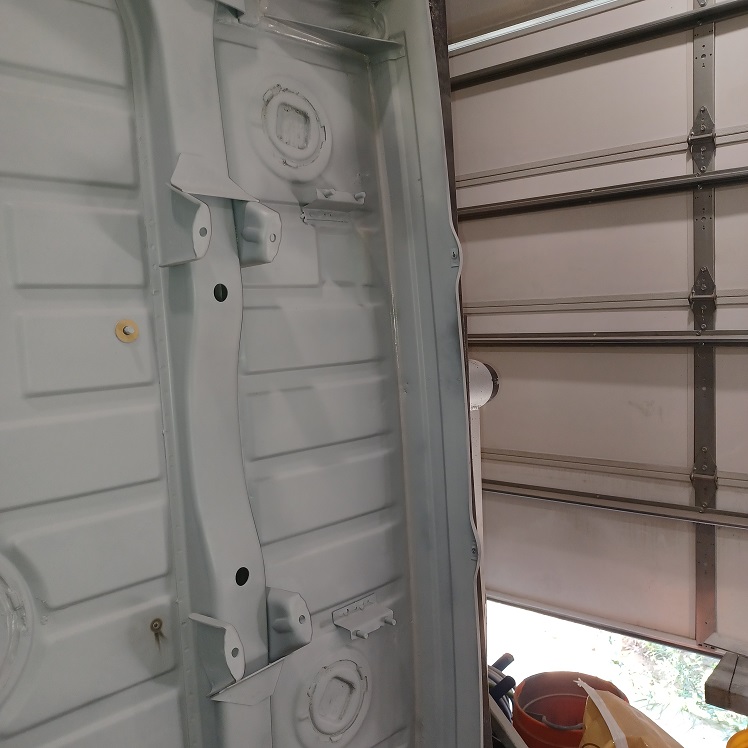
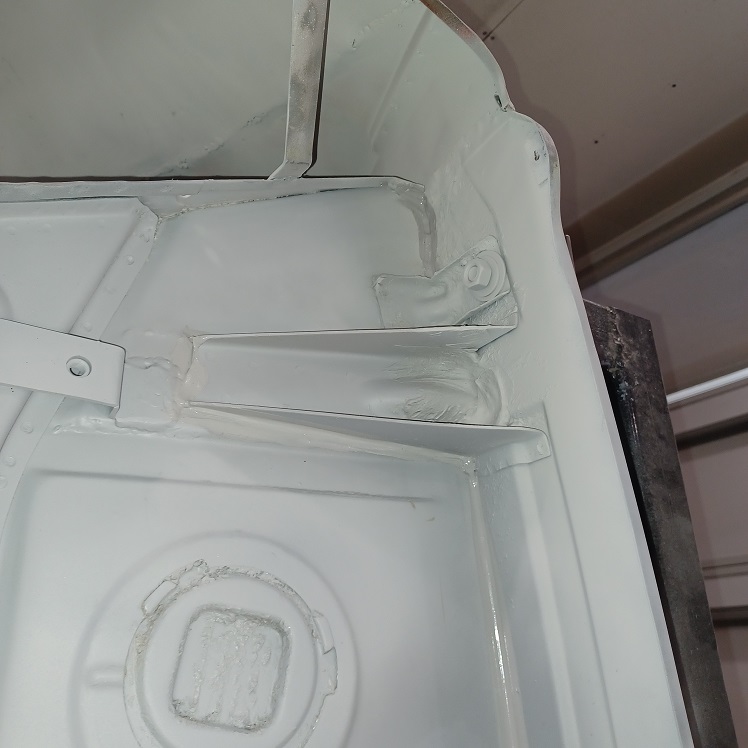
Even though the truck floor where it meats the rear wall is sealed from the inside, It still seems to rot at this seam. I figure it is a result of crud getting caught in the seam from the underside so I sealed that seam all the way accross as well and the support for the tow hook...
  |
| Puebloswatcop |
 Jun 23 2022, 01:55 PM Jun 23 2022, 01:55 PM
Post
#634
|
|
Senior Member    Group: Members Posts: 1,401 Joined: 27-December 14 From: Mineola, Texas Member No.: 18,258 Region Association: Southwest Region |
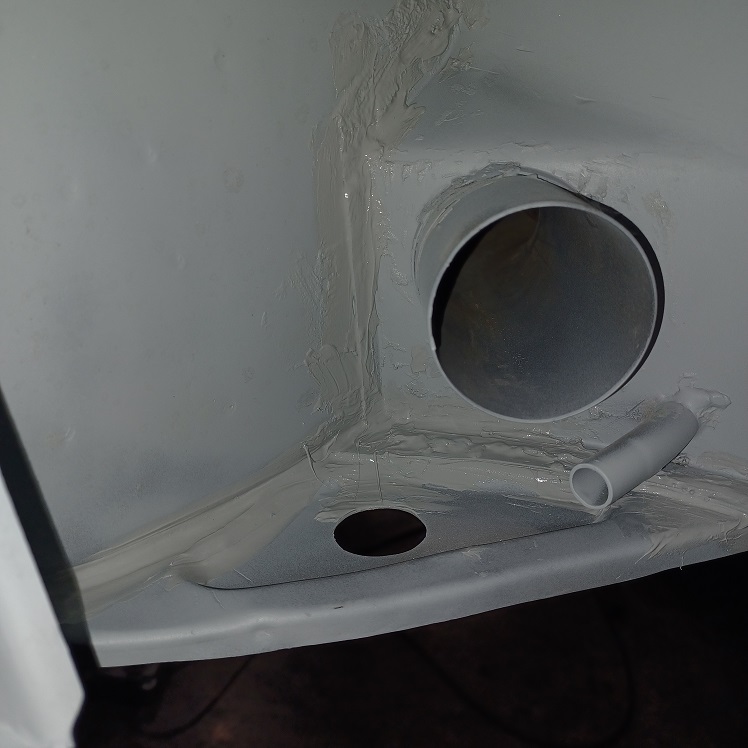
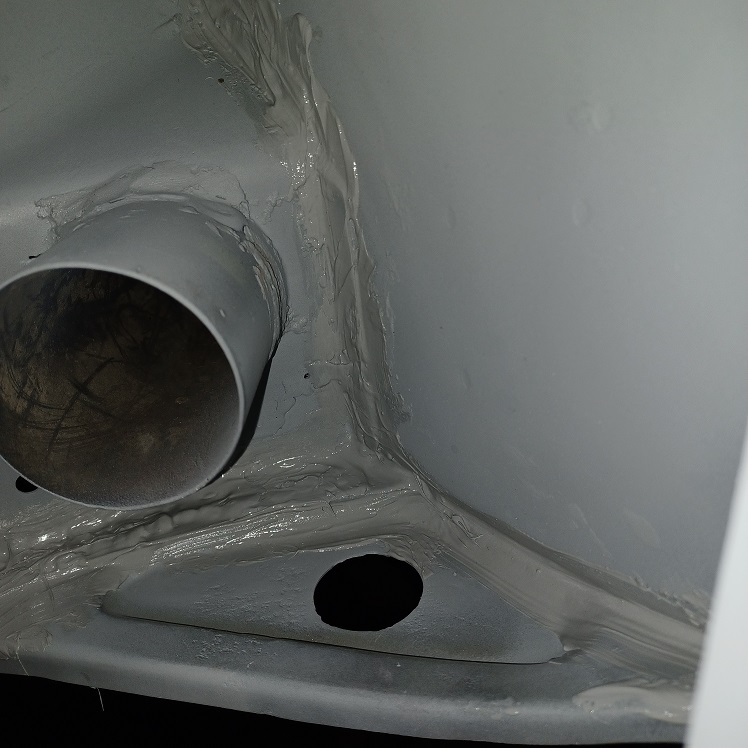
Then around the heater air ducts, where the rear floor had been replaced...
  |
| Puebloswatcop |
 Jun 23 2022, 01:59 PM Jun 23 2022, 01:59 PM
Post
#635
|
|
Senior Member    Group: Members Posts: 1,401 Joined: 27-December 14 From: Mineola, Texas Member No.: 18,258 Region Association: Southwest Region |
|
| seanpaulmc |
 Jun 23 2022, 05:26 PM Jun 23 2022, 05:26 PM
Post
#636
|
|
Member   Group: Members Posts: 371 Joined: 6-December 16 From: Orlando, FL Member No.: 20,649 Region Association: South East States 
|
The front fender well where it joins the door frame and the rear fenderwell where it also joins the door frame...   What about sealing around the base and top of the jack point pyramids? I’m doing this on my weld repairs of my longs. Also consider that when welding on a new jack tube it is welded from the outside around it’s perimeter. This may leave a seam inside the jack tube where it welds perpendicularly to the base metal. I’m also trying to work a small amount of sealer into this interior seam of the replacement jack tube. |
| Puebloswatcop |
 Jun 23 2022, 05:34 PM Jun 23 2022, 05:34 PM
Post
#637
|
|
Senior Member    Group: Members Posts: 1,401 Joined: 27-December 14 From: Mineola, Texas Member No.: 18,258 Region Association: Southwest Region |
The front fender well where it joins the door frame and the rear fenderwell where it also joins the door frame...   What about sealing around the base and top of the jack point pyramids? I’m doing this on my weld repairs of my longs. Also consider that when welding on a new jack tube it is welded from the outside around it’s perimeter. This may leave a seam inside the jack tube where it welds perpendicularly to the base metal. I’m also trying to work a small amount of sealer into this interior seam of the replacement jack tube. That makes sense, I think as long as I don't seal over the weep hole it would lessen the cahnce of water entering and causing rust there. Have added that to my "to do" list... Thanks |
| Puebloswatcop |
 Jun 24 2022, 11:53 AM Jun 24 2022, 11:53 AM
Post
#638
|
|
Senior Member    Group: Members Posts: 1,401 Joined: 27-December 14 From: Mineola, Texas Member No.: 18,258 Region Association: Southwest Region |
So I had to drive to Dallas Love Field today to pick up my son and daughter in law. I stopped at the Dallas Porsche Dealership and they sent me to their authorized paint shop and OMG there must have been over 100 cars in different stages of repair and paint. Like 8 paint booths, it was like heaven for high end car ressurection.....
Anyway, enough drooling. I have decided to go with the Porsche Acid Green....It really pops and I think with the metalic color I have for my suspension and engine tin, it will offset beautifully.  |
| Literati914 |
 Jun 24 2022, 05:40 PM Jun 24 2022, 05:40 PM
Post
#639
|
|
Senior Member    Group: Members Posts: 1,735 Joined: 16-November 06 From: Dallas, TX Member No.: 7,222 Region Association: Southwest Region |
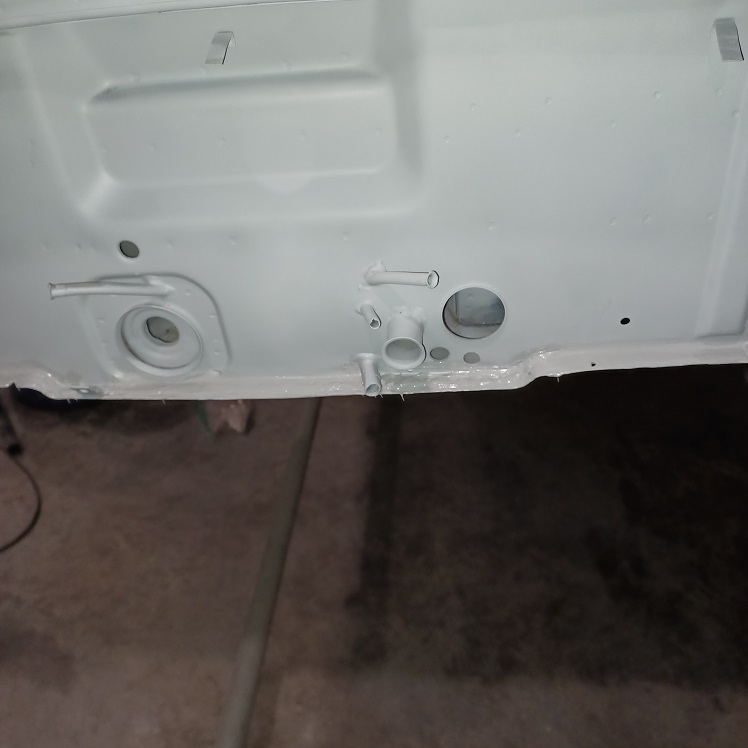
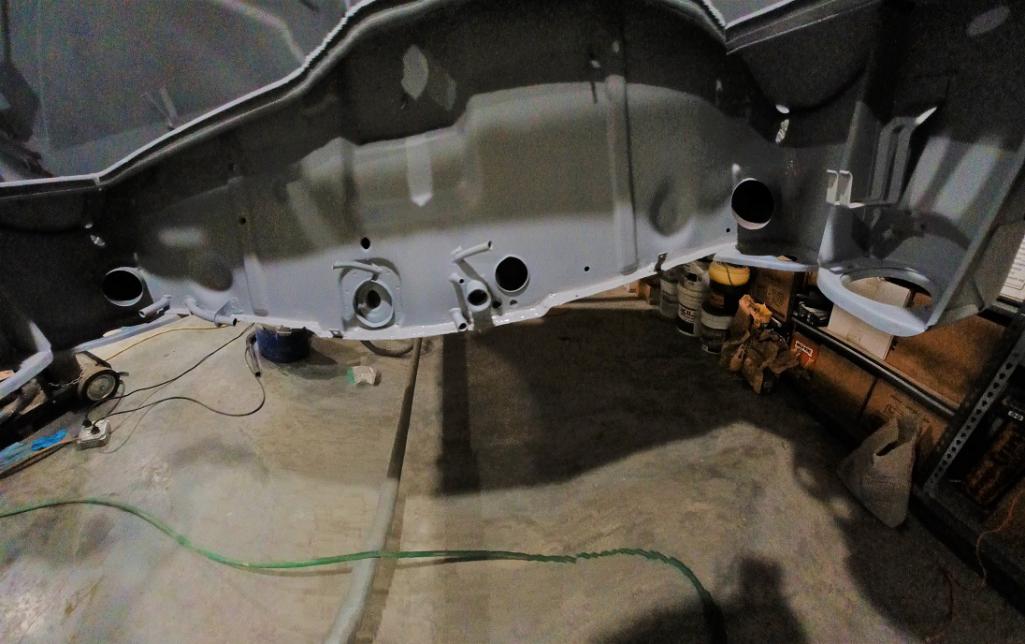
Hey Slacker (IMG:style_emoticons/default/av-943.gif) , that color is gonna be nice, good choice. One thing to think about if you haven't already.. is at the bottom horizontal seam of the firewall make sure you've got the holes drilled for the little black plastic air diverters. If I recall, they're bigger holes than just sheet-metal screw size because of the way they mount.
|
| Puebloswatcop |
 Jun 24 2022, 08:47 PM Jun 24 2022, 08:47 PM
Post
#640
|
|
Senior Member    Group: Members Posts: 1,401 Joined: 27-December 14 From: Mineola, Texas Member No.: 18,258 Region Association: Southwest Region |
Hey Slacker (IMG:style_emoticons/default/av-943.gif) , that color is gonna be nice, good choice. One thing to think about if you haven't already.. is at the bottom horizontal seam of the firewall make sure you've got the holes drilled for the little black plastic air diverters. If I recall, they're bigger holes than just sheet-metal screw size because of the way they mount. Yep they are already drilled. Measured those out and drilled them quit awhile back....I think they are hard to see in the pic. I was pretty excited when I was finally able to do a side by side comparison on the colors. Light green, ravenna green and the Acid green....acid green was definitely the hands down winner..... |
  |
4 User(s) are reading this topic (4 Guests and 0 Anonymous Users)
0 Members:

|
Lo-Fi Version | Time is now: 25th November 2024 - 04:27 PM |
Invision Power Board
v9.1.4 © 2024 IPS, Inc.


