|
|

|
Porsche, and the Porsche crest are registered trademarks of Dr. Ing. h.c. F. Porsche AG.
This site is not affiliated with Porsche in any way. Its only purpose is to provide an online forum for car enthusiasts. All other trademarks are property of their respective owners. |
|
|
  |
| Puebloswatcop |
 Jul 10 2022, 07:12 AM Jul 10 2022, 07:12 AM
Post
#701
|
|
Senior Member    Group: Members Posts: 1,401 Joined: 27-December 14 From: Mineola, Texas Member No.: 18,258 Region Association: Southwest Region |
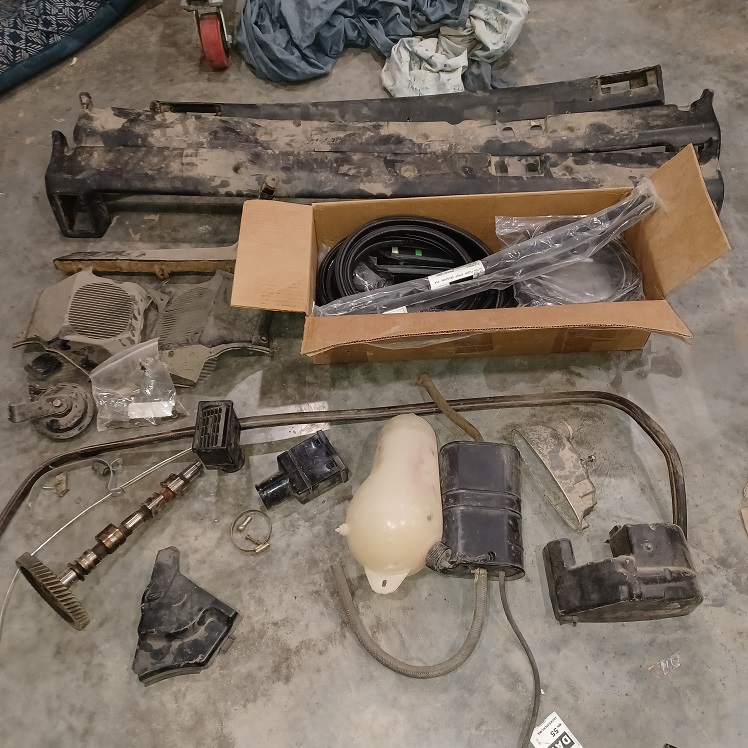
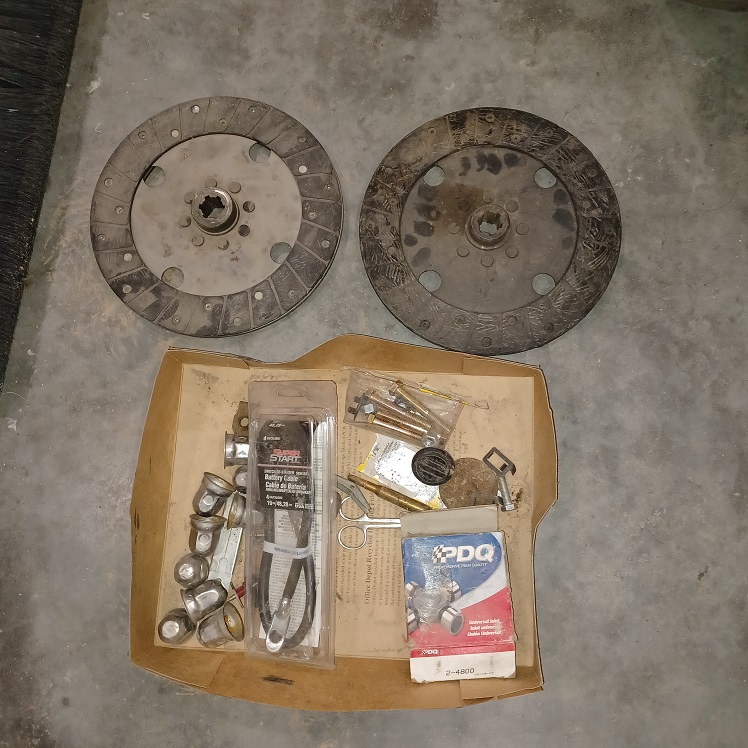
Overall she did great in picking out the Porsche parts, however if anyone needs a PTO clutch out of a tractor or some lug nut covers for a motorhome, I gotcha covered...lol
  |
| Puebloswatcop |
 Jul 10 2022, 05:31 PM Jul 10 2022, 05:31 PM
Post
#702
|
|
Senior Member    Group: Members Posts: 1,401 Joined: 27-December 14 From: Mineola, Texas Member No.: 18,258 Region Association: Southwest Region |
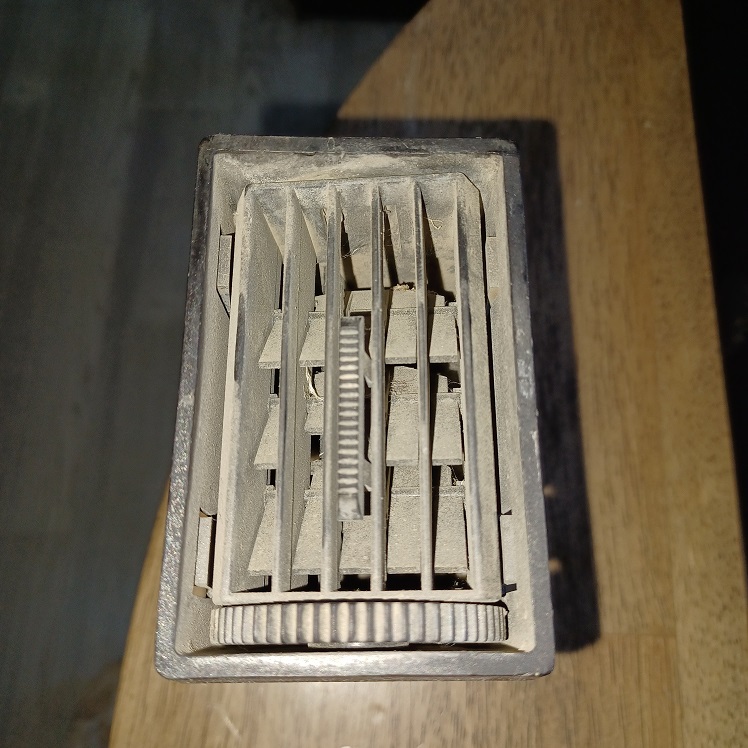
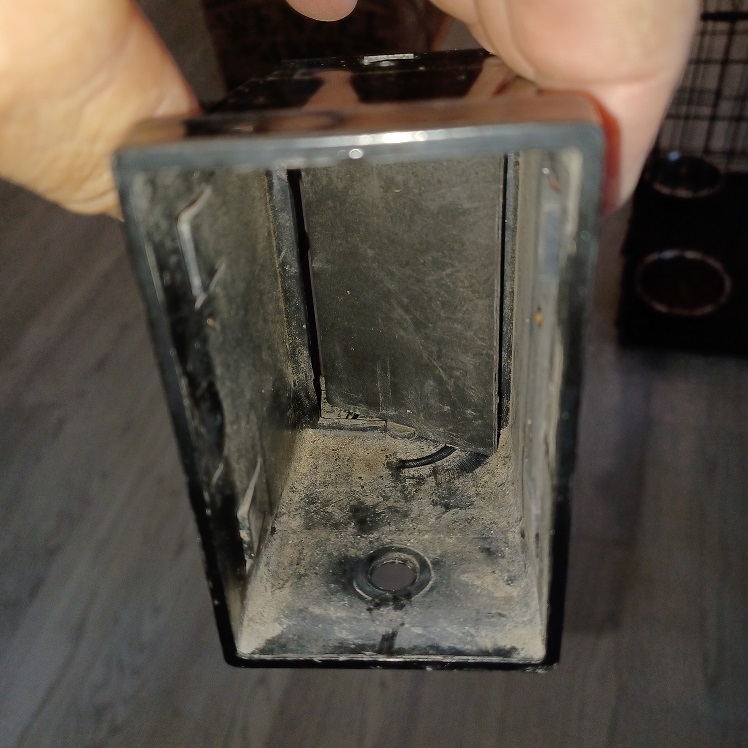
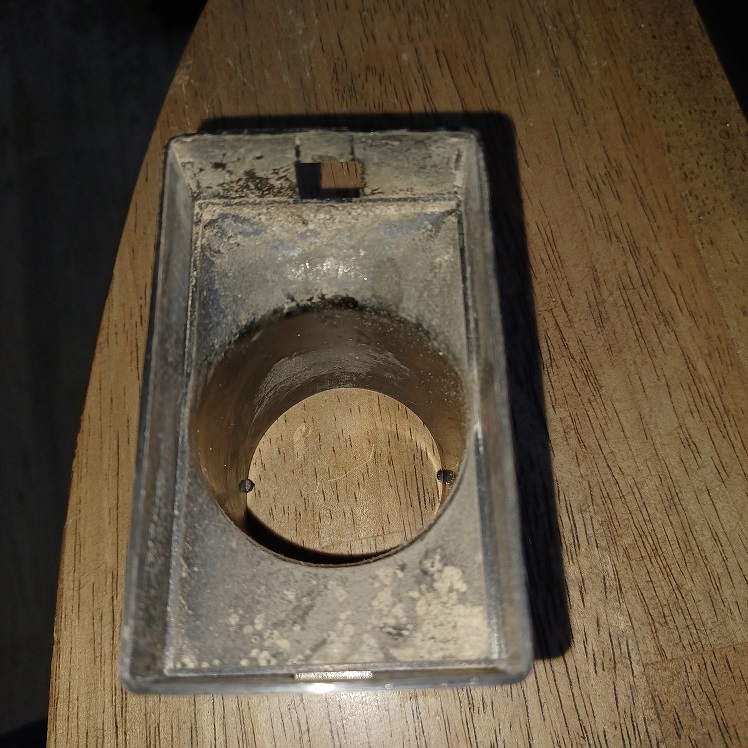
Spent part of the afternoon cleaning up the parts my daughter brought me. The vents had 50 years of nasty dirt and grime in them. so I sprayed them down with Dawn Powerwash.....Hardly touched the nasty build up. So I ended up removing the front grills and scrubbing them from the inside out.
   |
| Puebloswatcop |
 Jul 10 2022, 05:46 PM Jul 10 2022, 05:46 PM
Post
#703
|
|
Senior Member    Group: Members Posts: 1,401 Joined: 27-December 14 From: Mineola, Texas Member No.: 18,258 Region Association: Southwest Region |
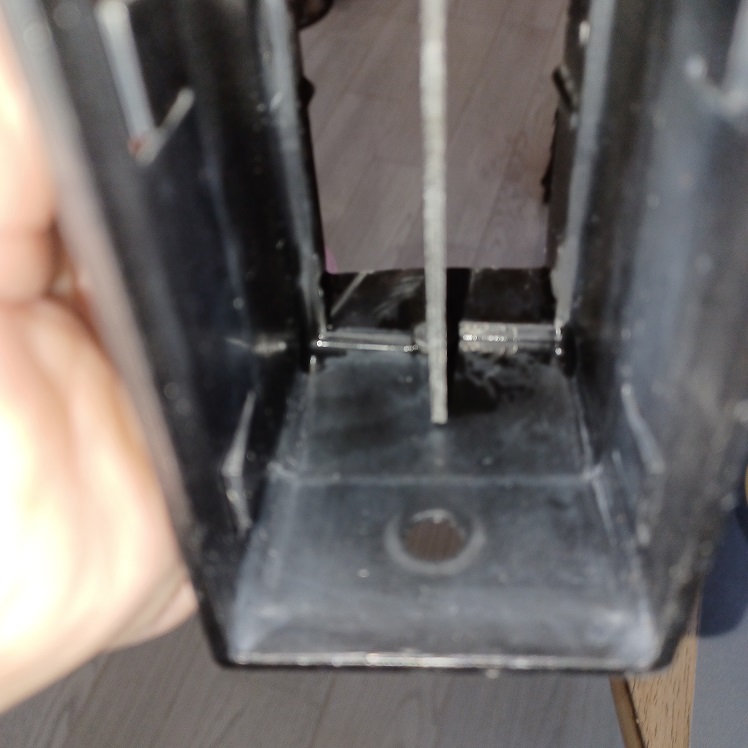
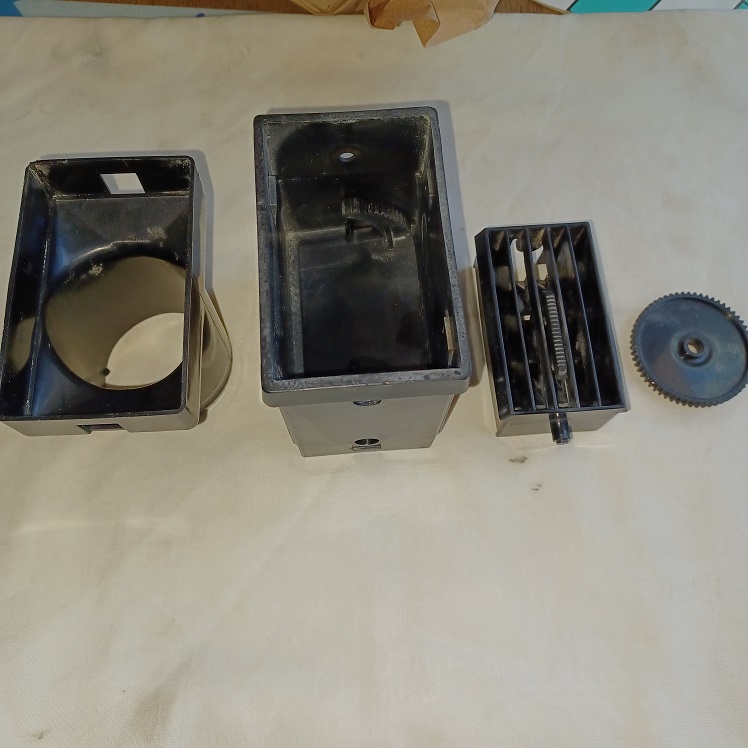
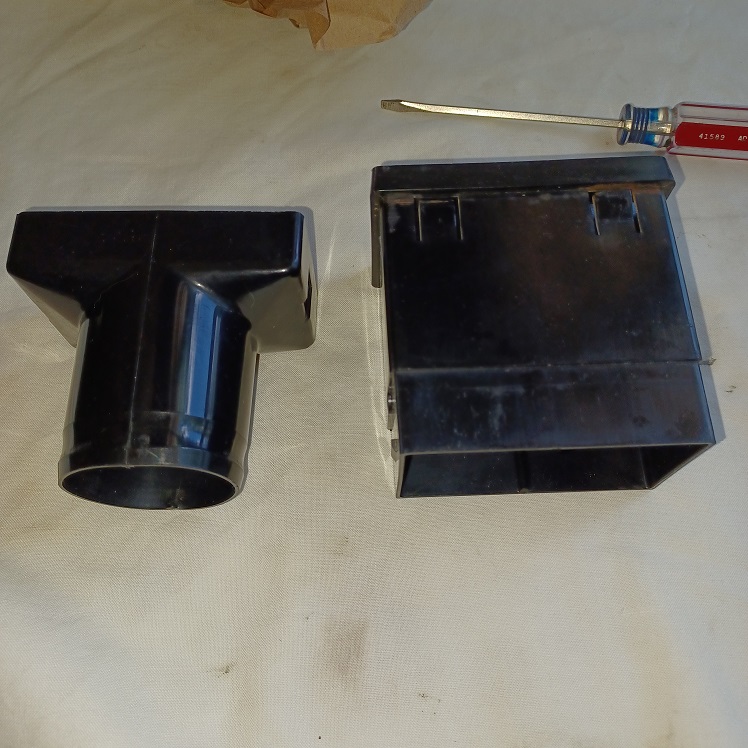
After carefully prying the front grill and the rear collector from the main housing I sprayed them again with Power wash and let them soak. Then scrubbed them with an old tooth brush (won't be using that on my teeth again...gross) and it got about 99% of the yuk out of the vents....
  |
| Puebloswatcop |
 Jul 10 2022, 06:33 PM Jul 10 2022, 06:33 PM
Post
#704
|
|
Senior Member    Group: Members Posts: 1,401 Joined: 27-December 14 From: Mineola, Texas Member No.: 18,258 Region Association: Southwest Region |
One thing to pay attention to when re-assembling is the orientation of the shutoff wheel.
The smooth side raised circle goes towards the vent vains and the side with the rubber o-ring goes toward the outside body. 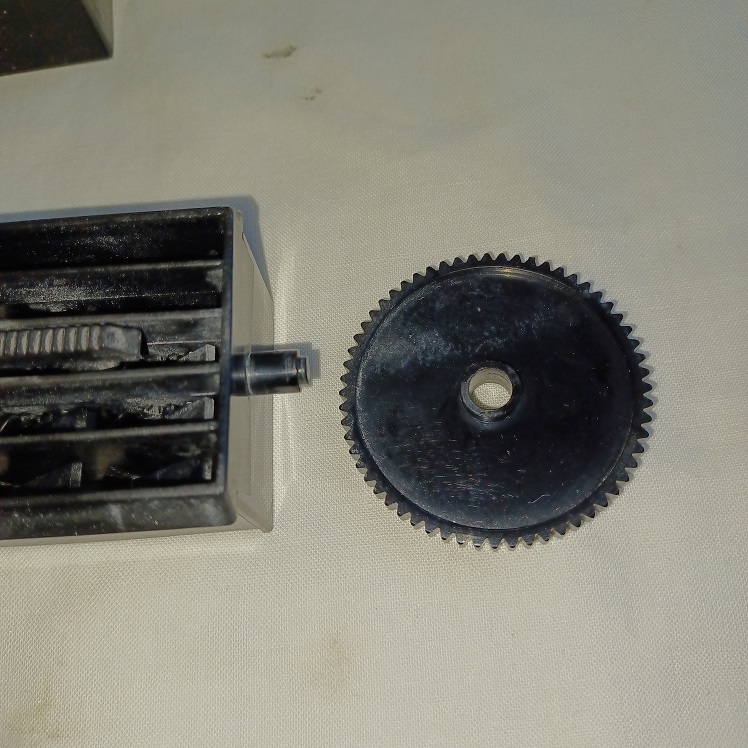 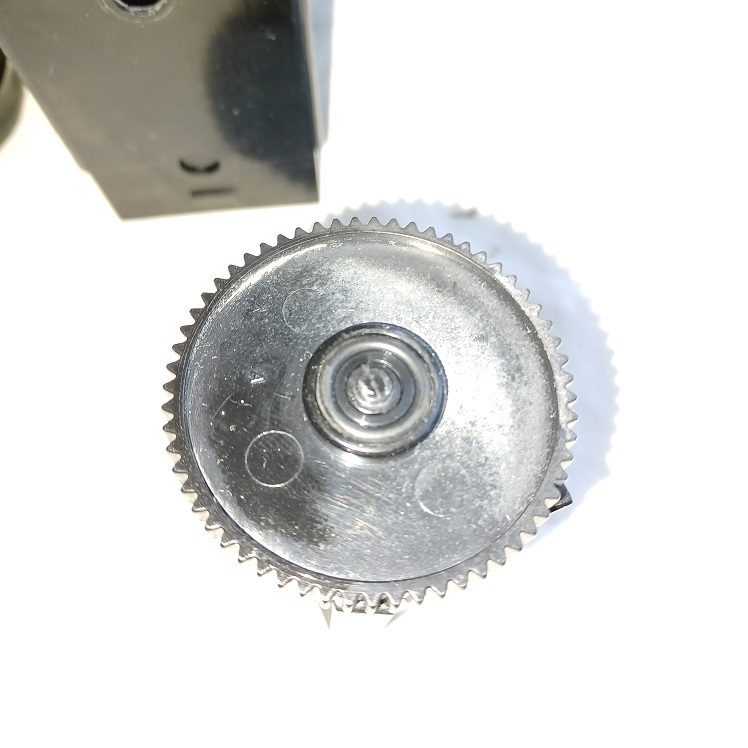 |
| Puebloswatcop |
 Jul 10 2022, 06:37 PM Jul 10 2022, 06:37 PM
Post
#705
|
|
Senior Member    Group: Members Posts: 1,401 Joined: 27-December 14 From: Mineola, Texas Member No.: 18,258 Region Association: Southwest Region |
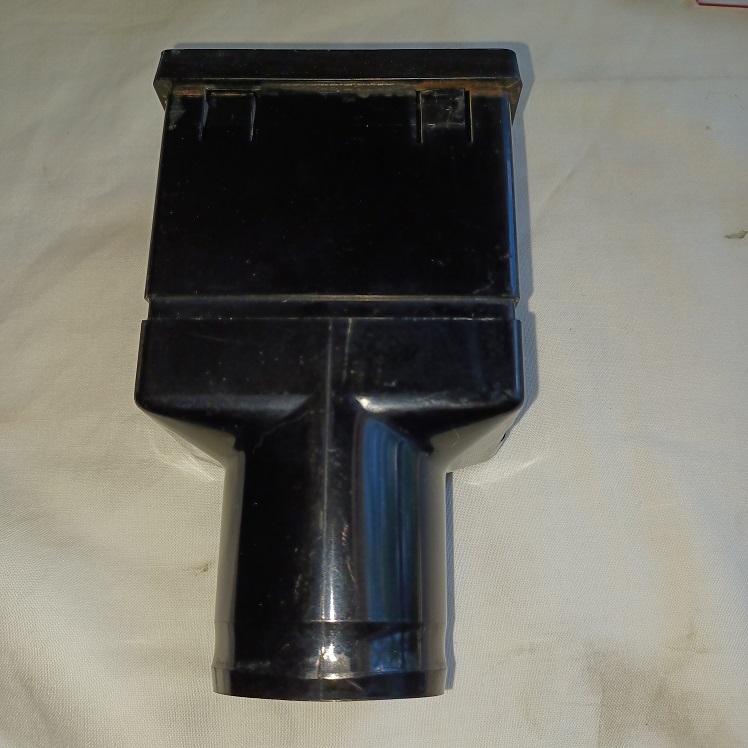
And of course then you have to put the hose adaptor back onto the vent assembly. The biggest thing about taking these apart is to remember they are 50 years old so pry gently and only enough to get the tabs open. If there is allot of crud holding pieces together, wash them as best you can before trying to take them apart.
  |
| Puebloswatcop |
 Jul 10 2022, 06:43 PM Jul 10 2022, 06:43 PM
Post
#706
|
|
Senior Member    Group: Members Posts: 1,401 Joined: 27-December 14 From: Mineola, Texas Member No.: 18,258 Region Association: Southwest Region |
Then I cleaned up the Knee bolsters and other trim. I first cleaned them with clear water on a paper towel to get the heavy dirt off of them, then used Meguiars Gold Class leather cleaner to finish them.
On the knee bolsters you can see one has allot of sag in it. It has no metal trim strip. The second one had the metal strip which seems to add a ton of rigidity to it. I am not sure if it is an early versus late style or what, so maybe someone can help me out here. I looked in the books I have and can't find any explaination for the difference. 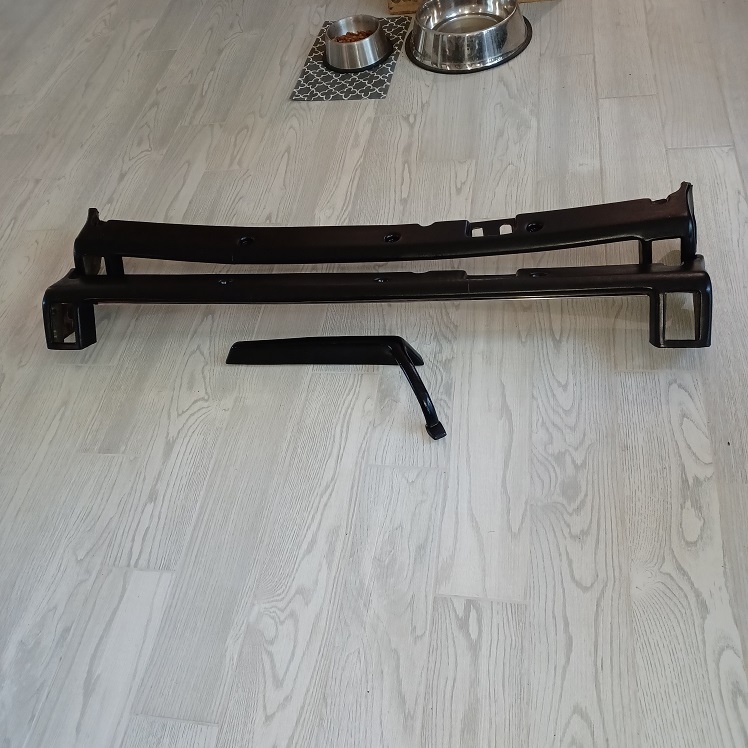 |
| Puebloswatcop |
 Jul 10 2022, 06:49 PM Jul 10 2022, 06:49 PM
Post
#707
|
|
Senior Member    Group: Members Posts: 1,401 Joined: 27-December 14 From: Mineola, Texas Member No.: 18,258 Region Association: Southwest Region |
Unfortunately they both show the typical crack issues, although the one with the metal trim strip only has one minor crack while the other has to more prominate cracks, I guess from the allowaed flex without the metal trim. Still both are usable, especially if I can find a way to fill the cracks.
With metal trim 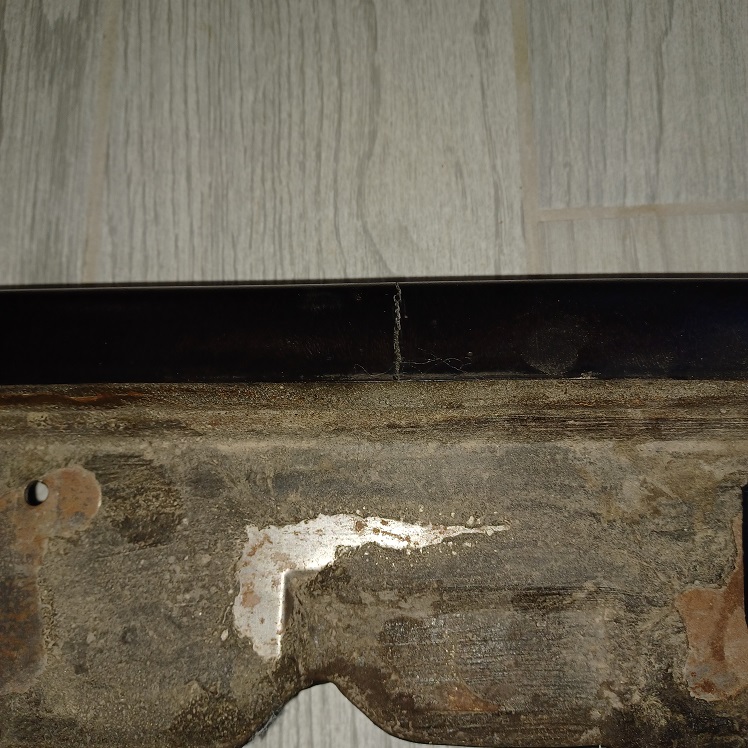 Without trim 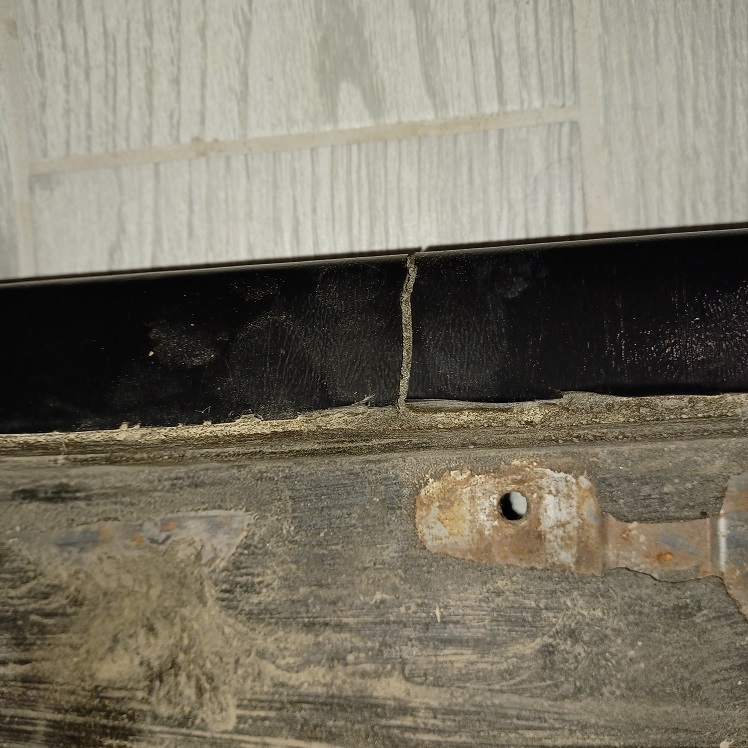 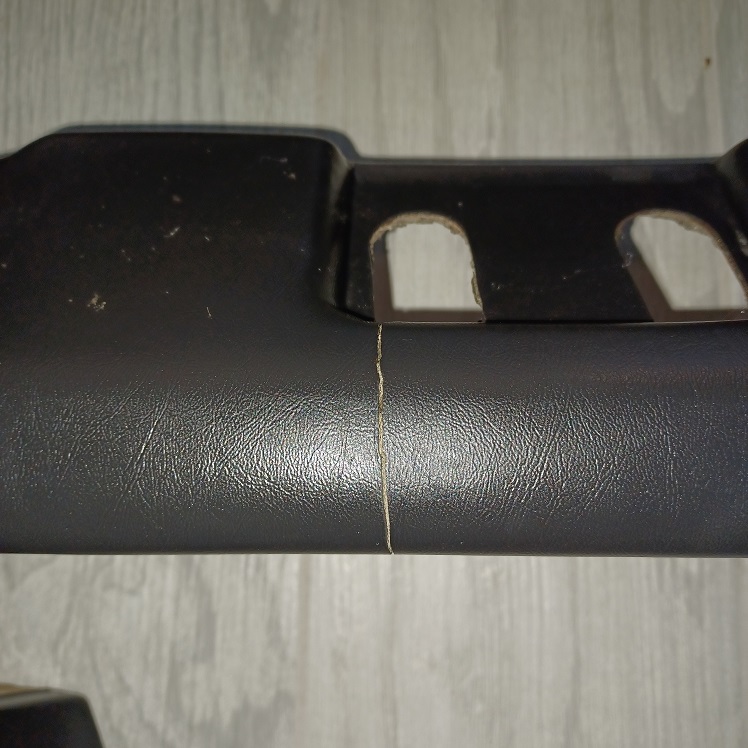 |
| Puebloswatcop |
 Jul 10 2022, 06:54 PM Jul 10 2022, 06:54 PM
Post
#708
|
|
Senior Member    Group: Members Posts: 1,401 Joined: 27-December 14 From: Mineola, Texas Member No.: 18,258 Region Association: Southwest Region |
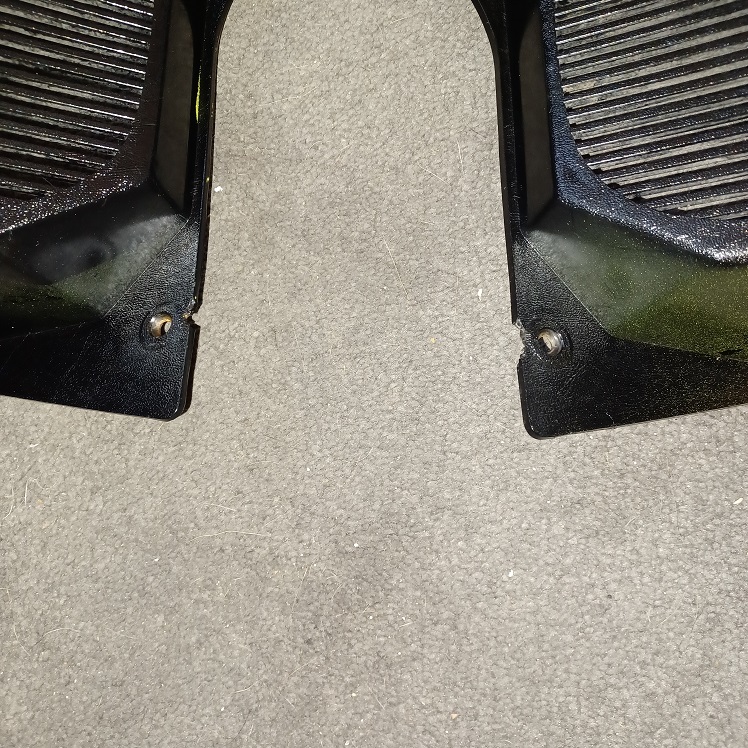
The speaker grills are actually in pretty remarkable condition....not perfect but pretty darn good. None of the bars are broken or missing. There is a little bit of overspray on them, (not sure how this happens), and there are two minor chips in the plastic, on the same mounting holes....but I certainly wouldn't shy away from using these originals.
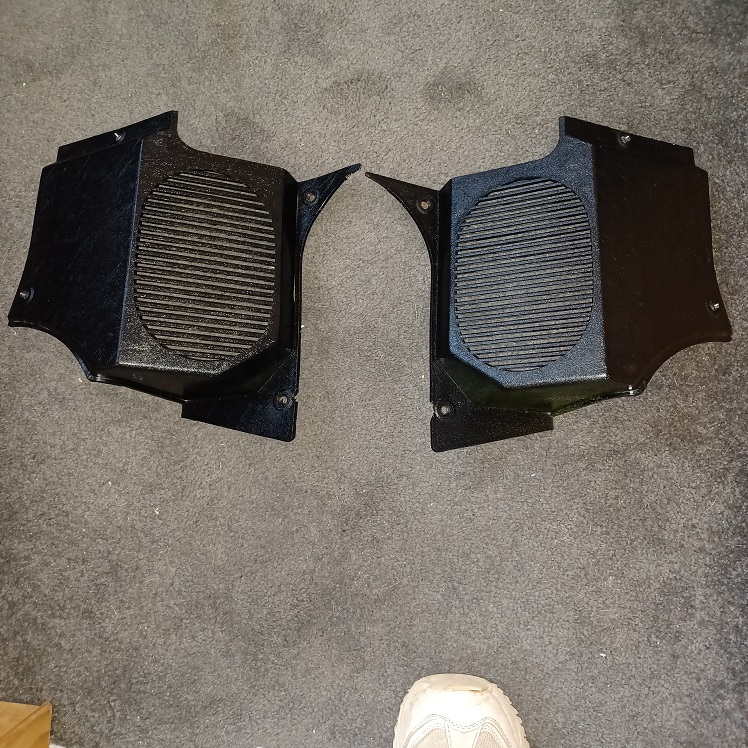  |
| Puebloswatcop |
 Jul 12 2022, 01:39 PM Jul 12 2022, 01:39 PM
Post
#709
|
|
Senior Member    Group: Members Posts: 1,401 Joined: 27-December 14 From: Mineola, Texas Member No.: 18,258 Region Association: Southwest Region |
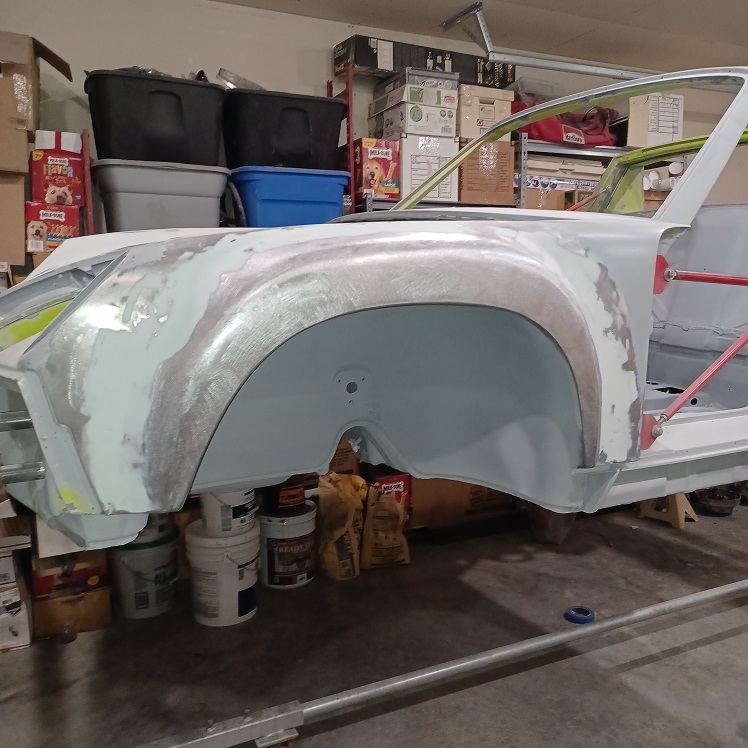
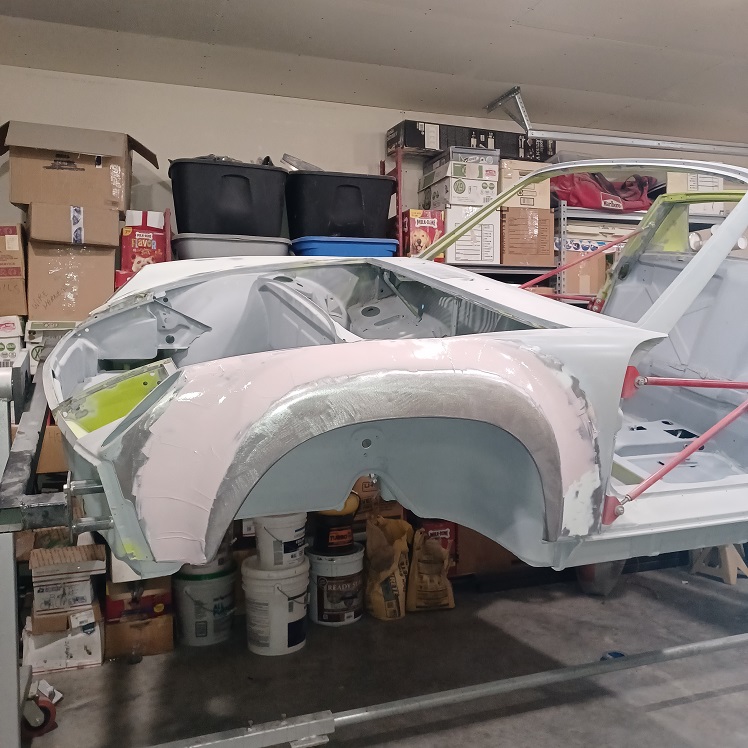
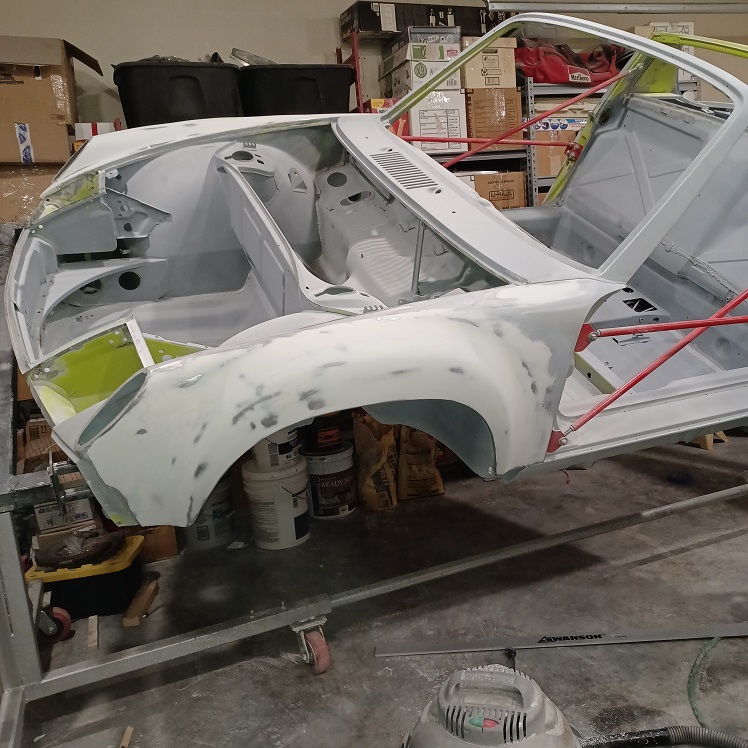
More body work today...the front drivers side fender.
  |
| Puebloswatcop |
 Jul 12 2022, 01:41 PM Jul 12 2022, 01:41 PM
Post
#710
|
|
Senior Member    Group: Members Posts: 1,401 Joined: 27-December 14 From: Mineola, Texas Member No.: 18,258 Region Association: Southwest Region |
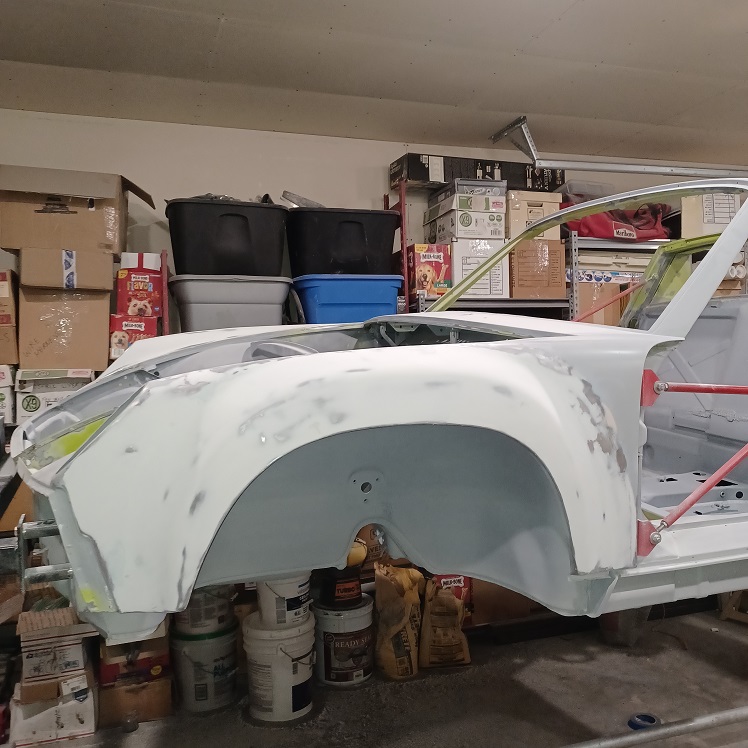
After about 4 hours of work, I finally got the shape I wanted. As well as filling in an uneven area on top of the fender where the Antenna hole was deleted.
  |
| Puebloswatcop |
 Jul 13 2022, 01:14 PM Jul 13 2022, 01:14 PM
Post
#711
|
|
Senior Member    Group: Members Posts: 1,401 Joined: 27-December 14 From: Mineola, Texas Member No.: 18,258 Region Association: Southwest Region |
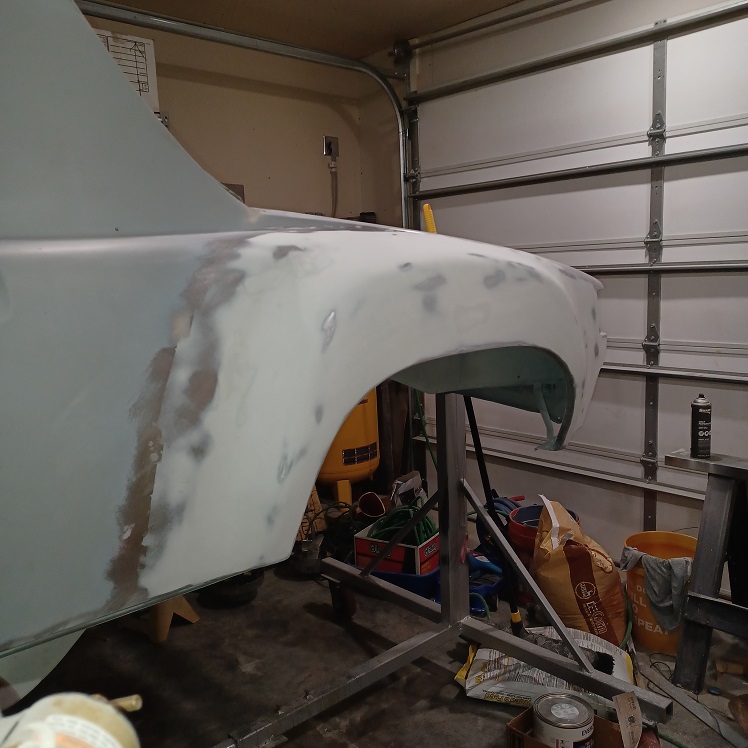
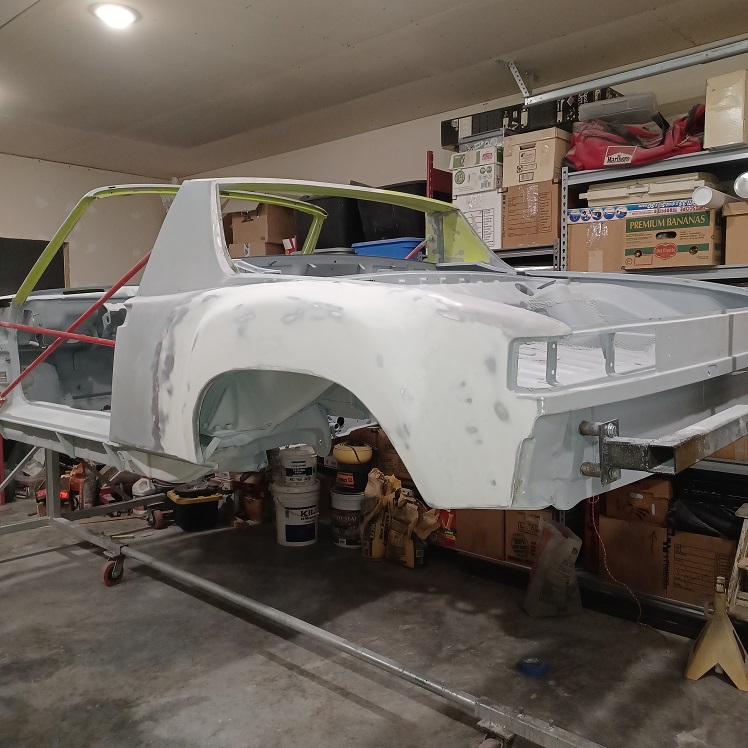
And now the 4th and final fender is done being shaped. Still plenty of refinement to be done, but hope to have it all in primer very soon.....
  |
| Puebloswatcop |
 Jul 17 2022, 10:39 AM Jul 17 2022, 10:39 AM
Post
#712
|
|
Senior Member    Group: Members Posts: 1,401 Joined: 27-December 14 From: Mineola, Texas Member No.: 18,258 Region Association: Southwest Region |
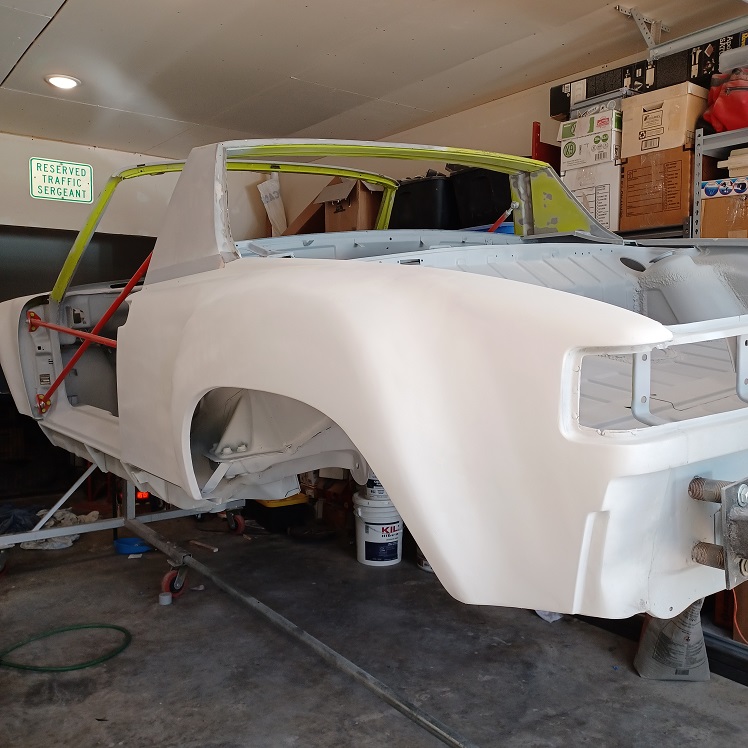
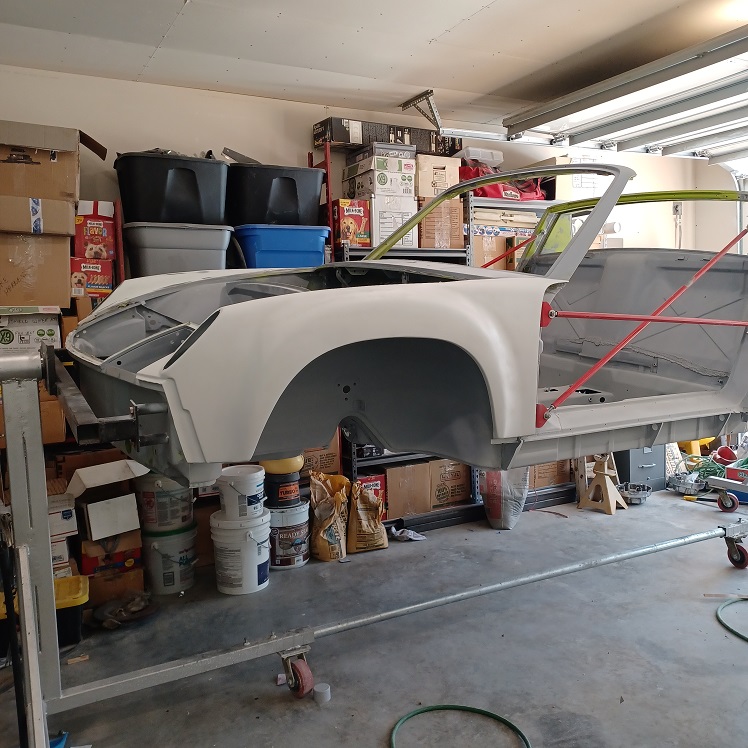
Managed to get the Drivers side of the car shot with 2K Epoxy this morning before the temp and humidity got to outrageous.
  |
| Puebloswatcop |
 Jul 19 2022, 06:21 AM Jul 19 2022, 06:21 AM
Post
#713
|
|
Senior Member    Group: Members Posts: 1,401 Joined: 27-December 14 From: Mineola, Texas Member No.: 18,258 Region Association: Southwest Region |
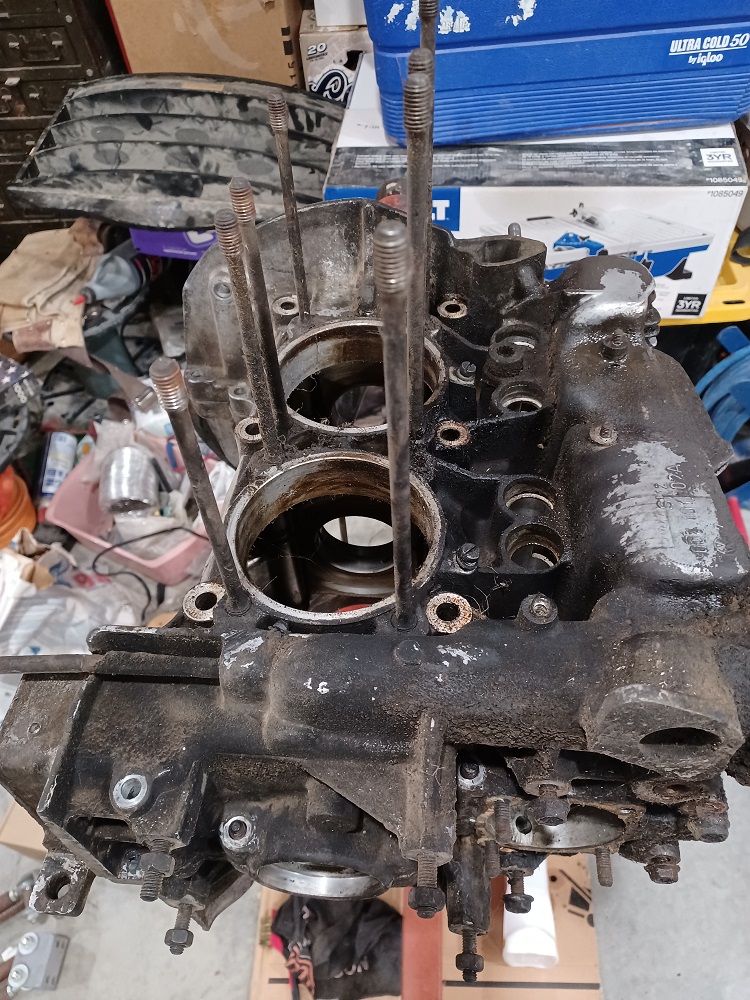
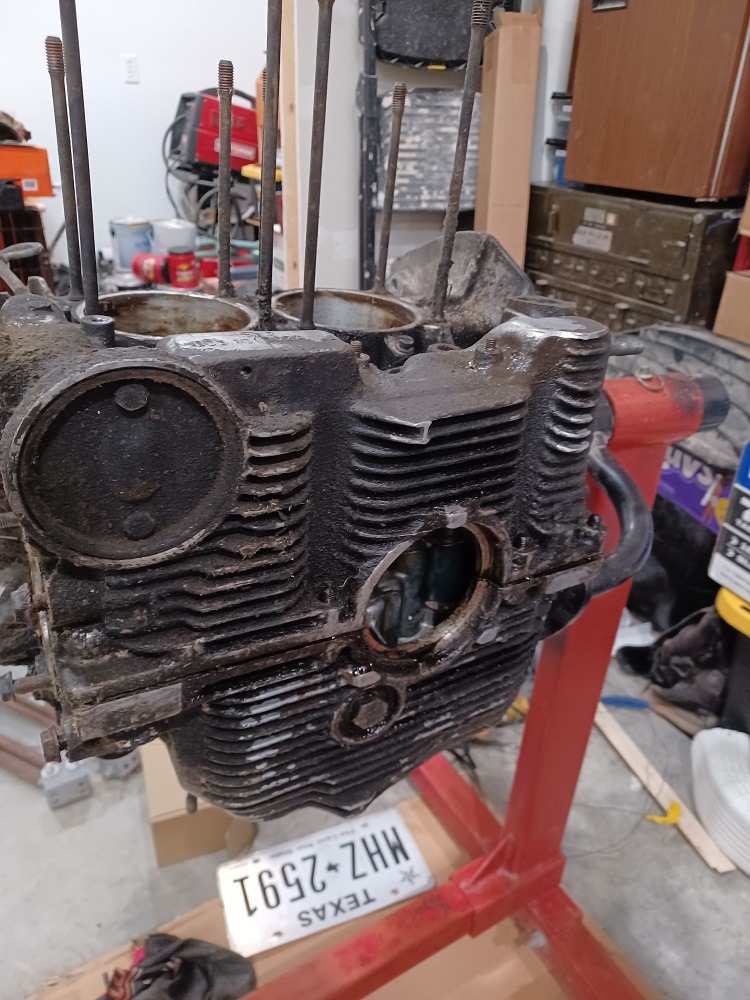
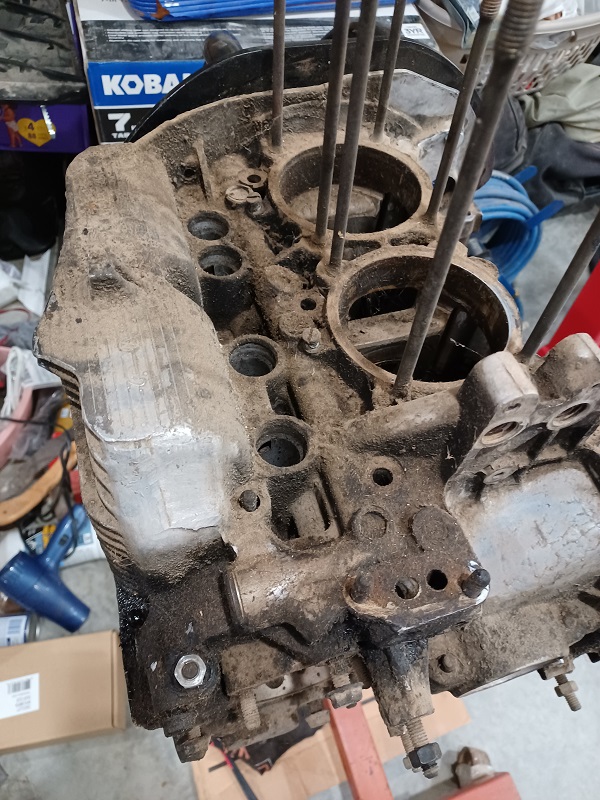
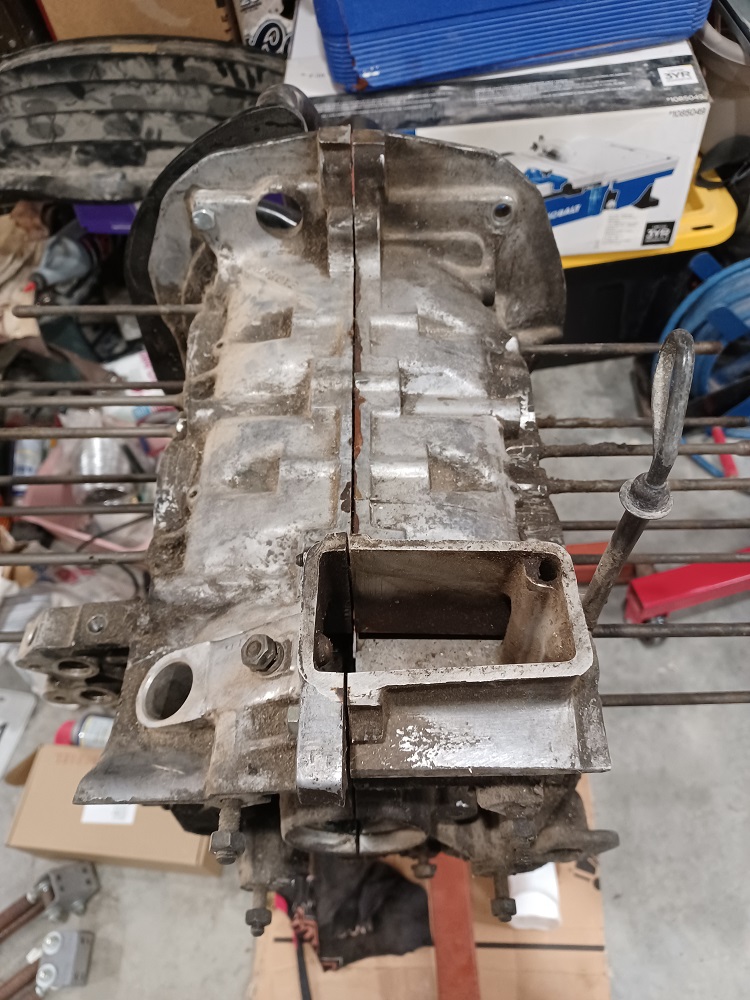
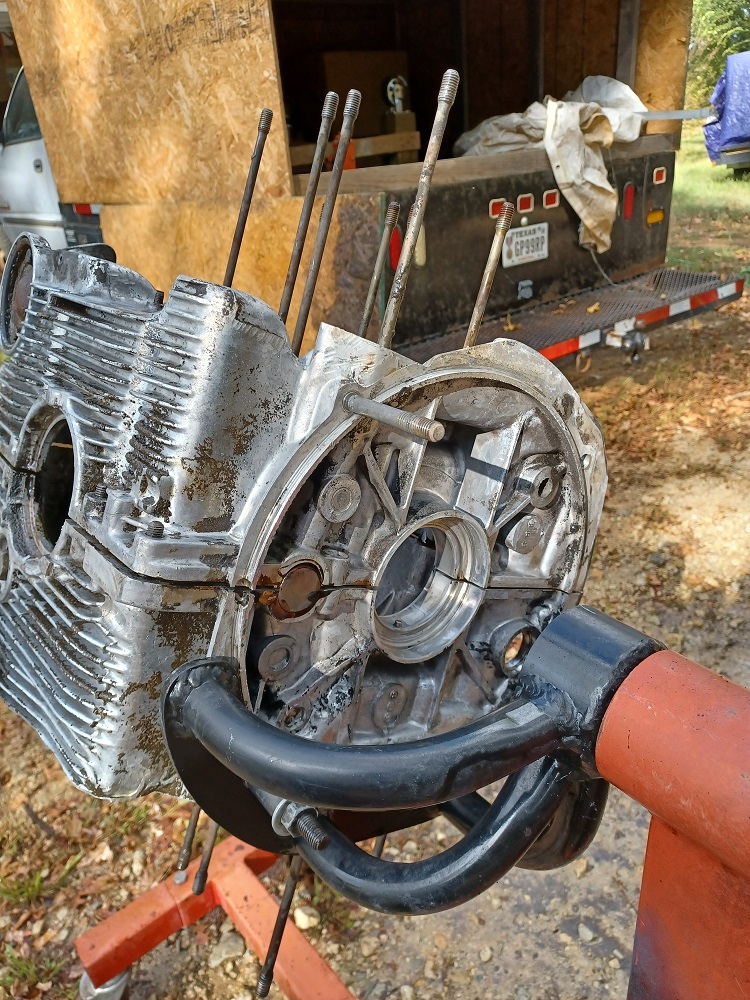
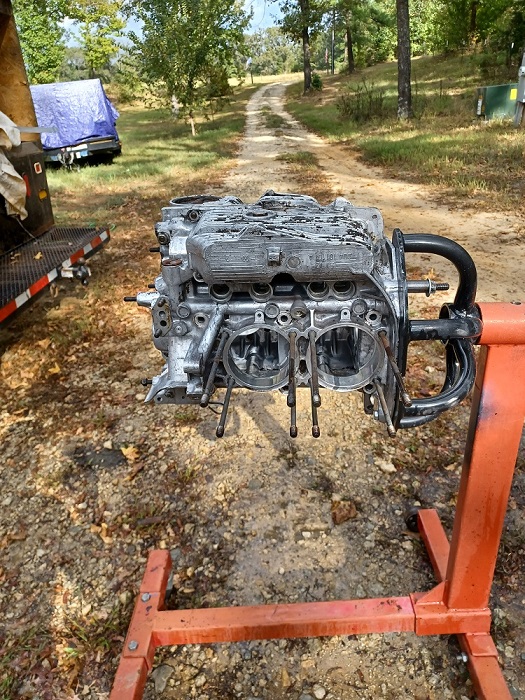
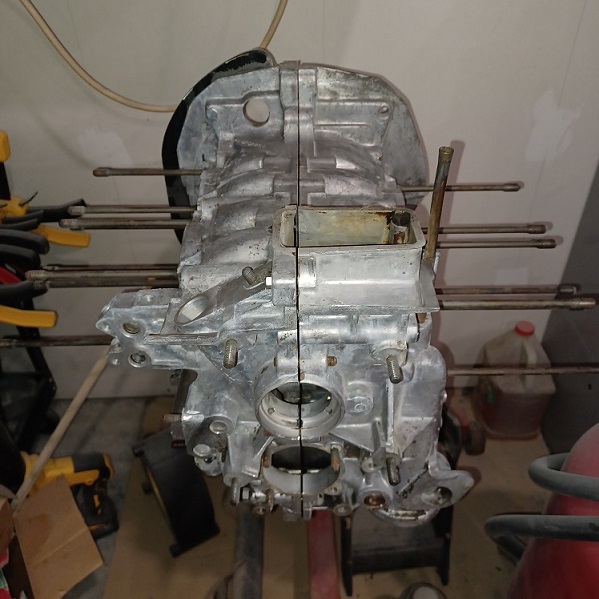
Since it was to hot to paint today, I decided to look at both of the engine cases I had and decide which one to use in this project. But first some cleaning was in order.
    |
| Puebloswatcop |
 Jul 19 2022, 06:26 AM Jul 19 2022, 06:26 AM
Post
#714
|
|
Senior Member    Group: Members Posts: 1,401 Joined: 27-December 14 From: Mineola, Texas Member No.: 18,258 Region Association: Southwest Region |
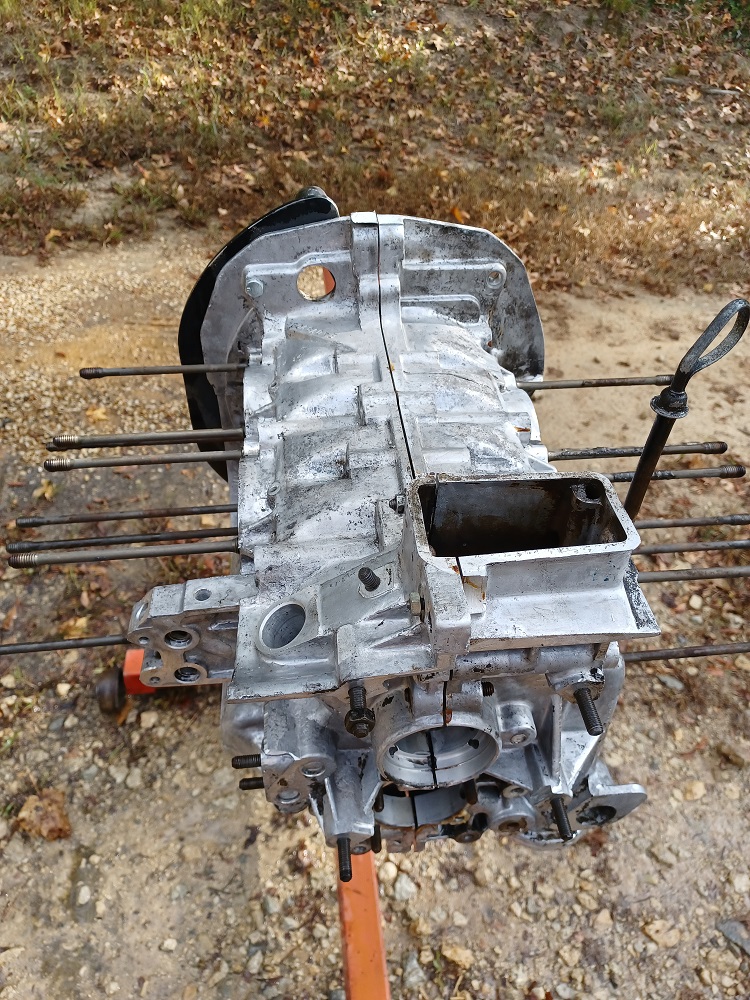
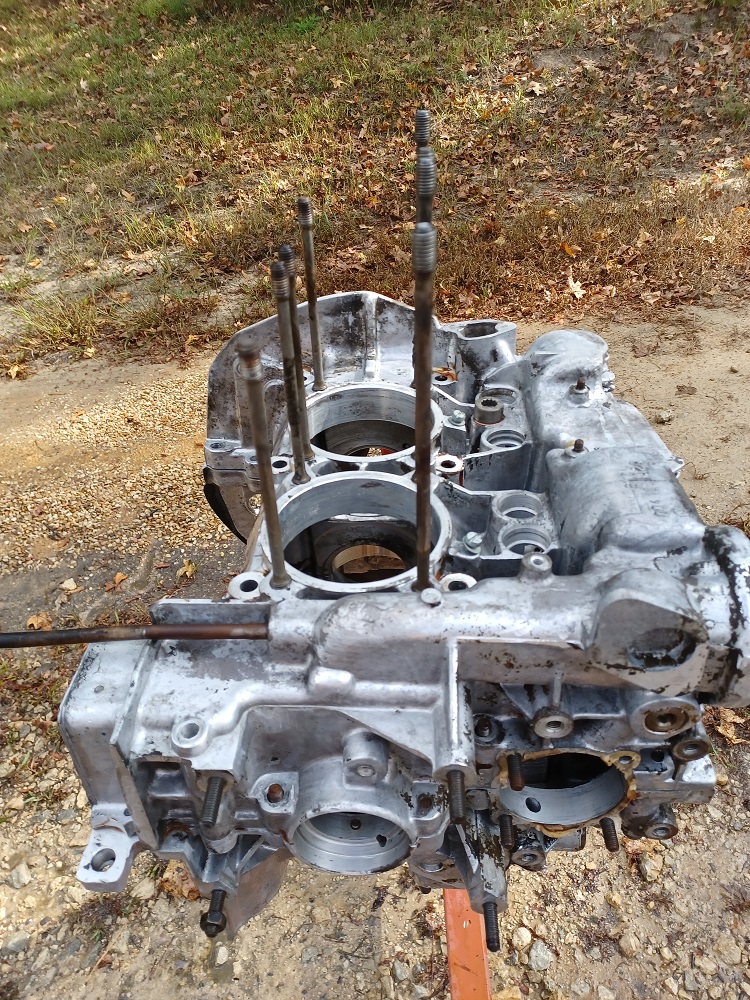
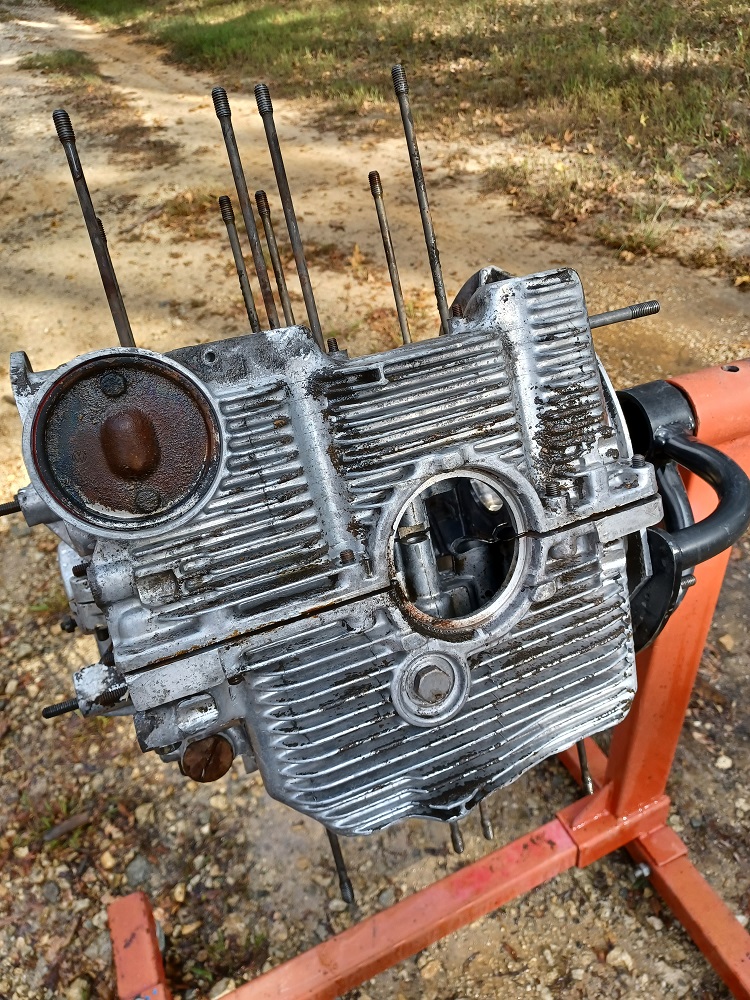
So I sprayed it with degreaser and let it soak for about 30 minutes. Then blasted it with the high pressure washer. I have to admit the water that was splashing back on me felt pretty good in this heat.
    |
| Puebloswatcop |
 Jul 19 2022, 06:28 AM Jul 19 2022, 06:28 AM
Post
#715
|
|
Senior Member    Group: Members Posts: 1,401 Joined: 27-December 14 From: Mineola, Texas Member No.: 18,258 Region Association: Southwest Region |
And with the heavy grime gone, I moved back inside, where at least I have some control over the temperature.
  |
| Puebloswatcop |
 Jul 19 2022, 06:36 AM Jul 19 2022, 06:36 AM
Post
#716
|
|
Senior Member    Group: Members Posts: 1,401 Joined: 27-December 14 From: Mineola, Texas Member No.: 18,258 Region Association: Southwest Region |
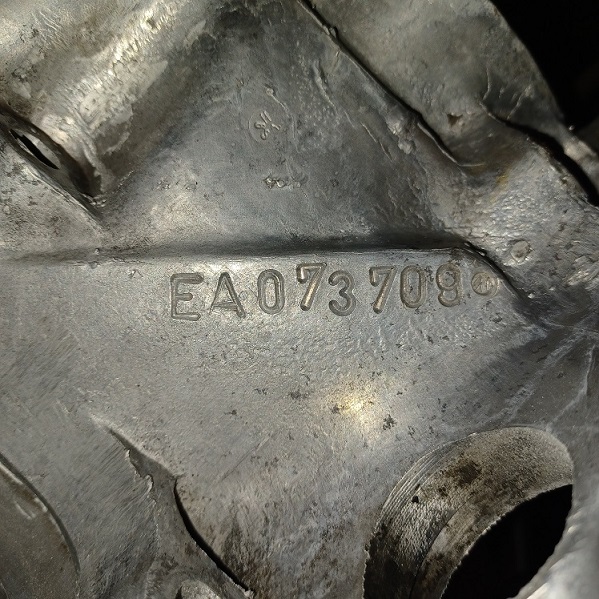
Now I can read the engine number and start to remove all of the smaller items that werent removed when I split the engine case (2 years ago).
 |
| Puebloswatcop |
 Jul 19 2022, 06:43 AM Jul 19 2022, 06:43 AM
Post
#717
|
|
Senior Member    Group: Members Posts: 1,401 Joined: 27-December 14 From: Mineola, Texas Member No.: 18,258 Region Association: Southwest Region |
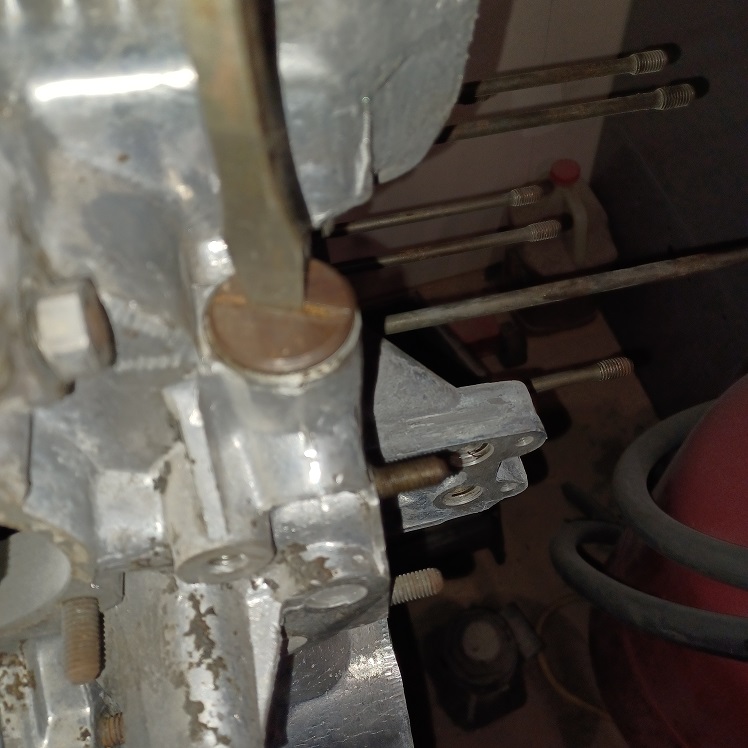
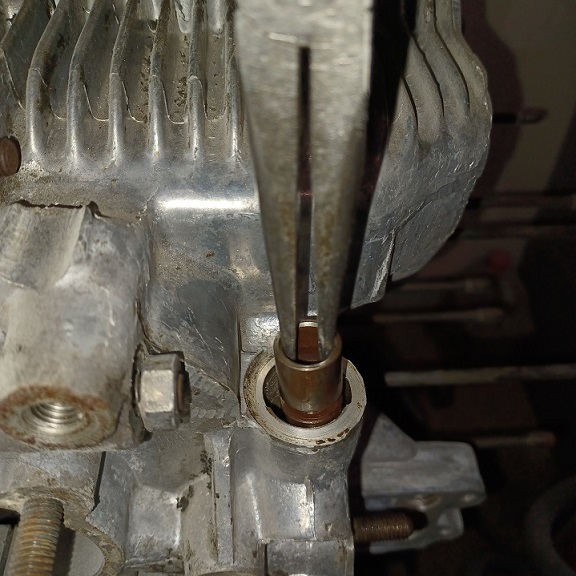
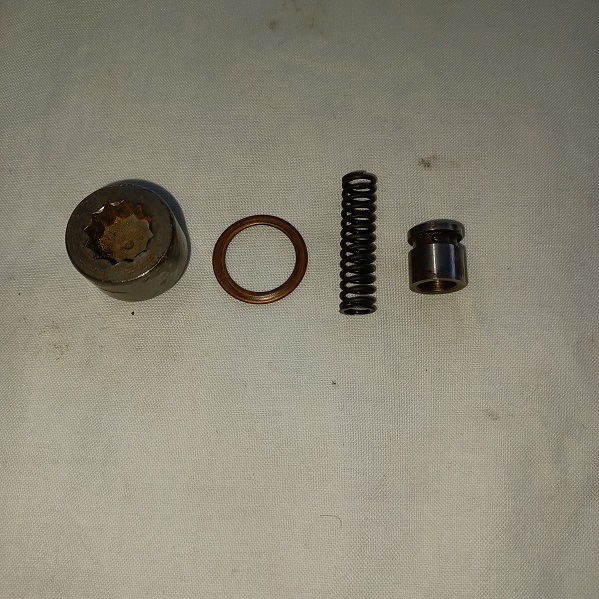
First was to remove the front oil control piston. So I carefully removed the cover using the largest screw diver I had. Then using a very long set of needle nose pliers (that one of the tips is bent outward) I pulled out the piston. As you can see the piston looks pretty grungy.
  |
| Puebloswatcop |
 Jul 19 2022, 06:50 AM Jul 19 2022, 06:50 AM
Post
#718
|
|
Senior Member    Group: Members Posts: 1,401 Joined: 27-December 14 From: Mineola, Texas Member No.: 18,258 Region Association: Southwest Region |
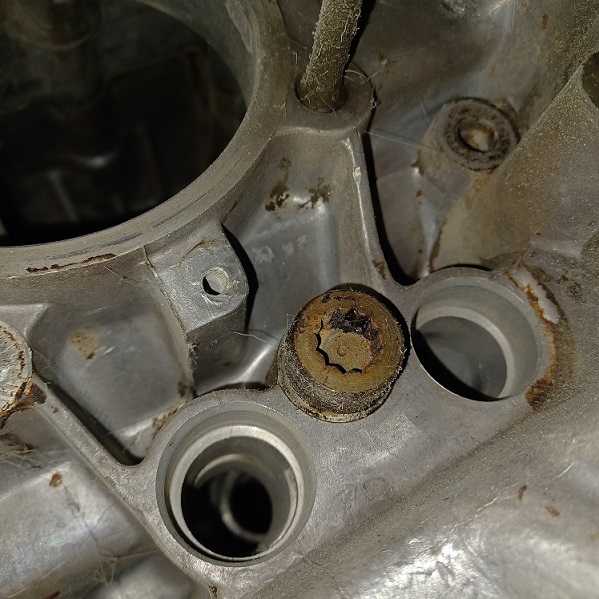
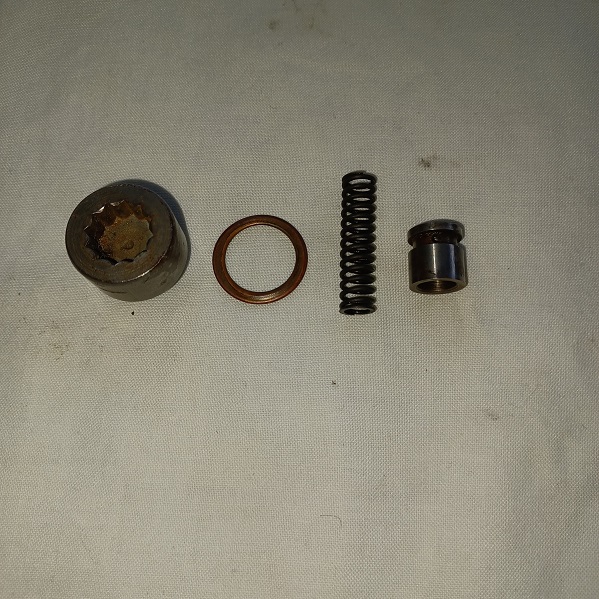
Then to remove the second oil control piston. This one takes a 14 mm triple square bit. Thats what I love about these cars, there are so many types of hardware it allows me to be a tool hound.
  |
| Puebloswatcop |
 Jul 19 2022, 06:56 AM Jul 19 2022, 06:56 AM
Post
#719
|
|
Senior Member    Group: Members Posts: 1,401 Joined: 27-December 14 From: Mineola, Texas Member No.: 18,258 Region Association: Southwest Region |
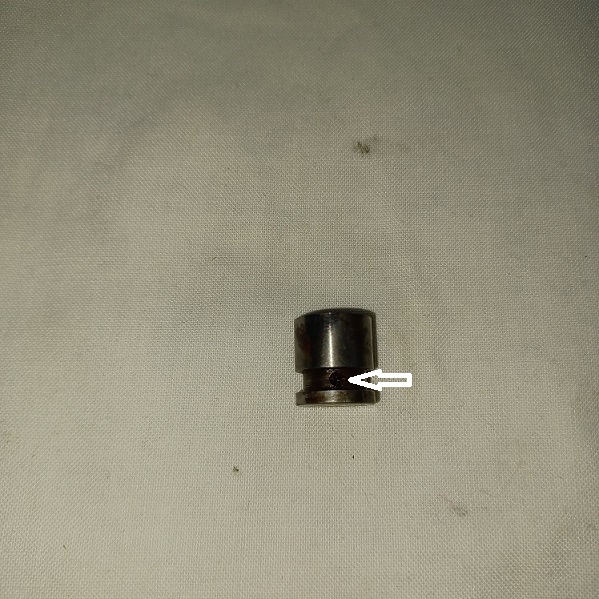
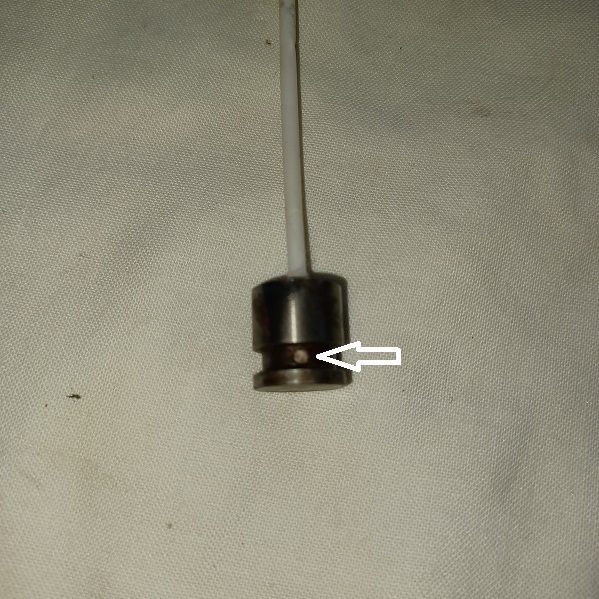
While wiping all the parts down, I noticed that the hone in the side of this piston was completely blocked with grime. I dug out a pipe cleaner ( you older guys know what these are) and cleaned the hole out.
  |
| Puebloswatcop |
 Jul 19 2022, 07:06 AM Jul 19 2022, 07:06 AM
Post
#720
|
|
Senior Member    Group: Members Posts: 1,401 Joined: 27-December 14 From: Mineola, Texas Member No.: 18,258 Region Association: Southwest Region |
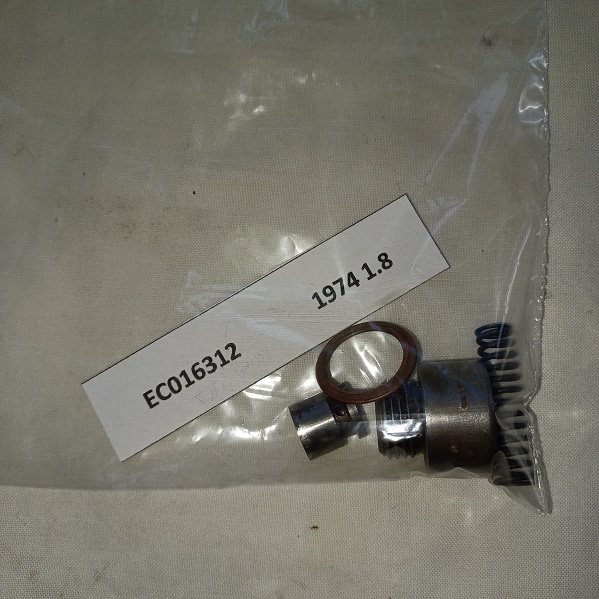
after cleaning the parts I began bagging them. Since I have 2 engines that are being torn down at the same time, I made tags to identify which engine the parts came from. While I know most of theses parts are interchangeable, but I like to keep them with the engine from which they were removed when I can.
  |
  |
1 User(s) are reading this topic (1 Guests and 0 Anonymous Users)
0 Members:

|
Lo-Fi Version | Time is now: 25th November 2024 - 08:35 PM |
Invision Power Board
v9.1.4 © 2024 IPS, Inc.


