|
|

|
Porsche, and the Porsche crest are registered trademarks of Dr. Ing. h.c. F. Porsche AG.
This site is not affiliated with Porsche in any way. Its only purpose is to provide an online forum for car enthusiasts. All other trademarks are property of their respective owners. |
|
|
  |
| Puebloswatcop |
 Jul 30 2022, 05:06 PM Jul 30 2022, 05:06 PM
Post
#741
|
|
Senior Member    Group: Members Posts: 1,401 Joined: 27-December 14 From: Mineola, Texas Member No.: 18,258 Region Association: Southwest Region |
So it was a matter of removing the damaged brush from the bore. On one side of the bore there is an opening that you can look at to see the brush. Using a fine pick and a jewelers screwdriver I was able to carefully pick out the remnants of the brush. Then using a fine pointed jewelers file i cleaned up the bore to make sure nothing remained. Then I took the motor to my local hardware store and found the appropriate sized carbon brush. Fit is very important, too loose and the brush wears quickly, to snug in the bore and it doesnt make contact with the stator in the motor and the motor doesn't work.
Since the lead will be soldered to the attachment point and this brush comes with a disc and spring (wich is not the right size) I just snipped off the disc and discarded the spring. 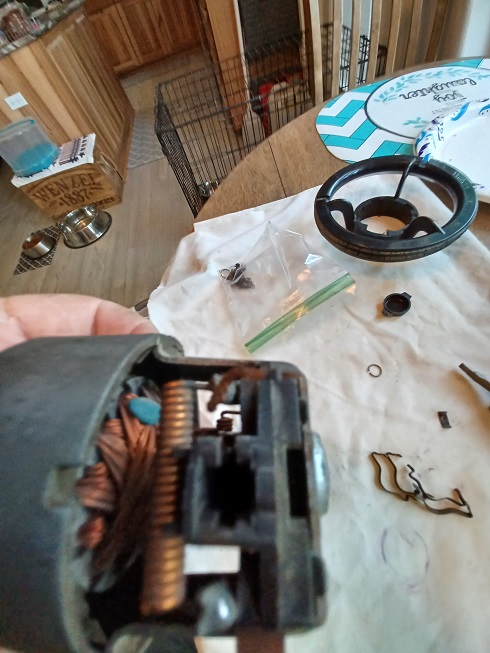 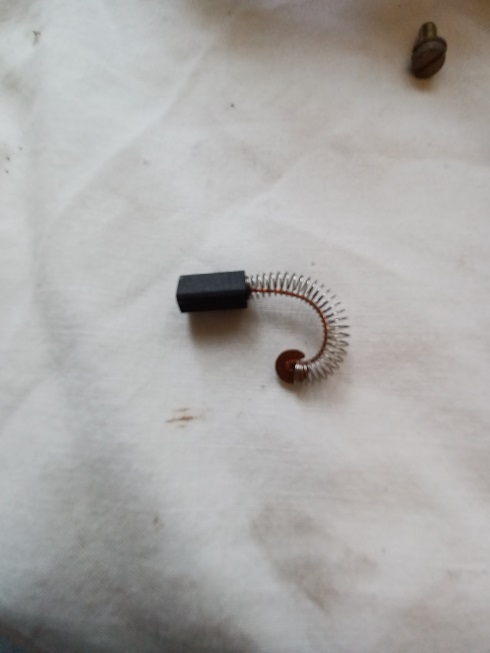 |
| Puebloswatcop |
 Jul 30 2022, 05:10 PM Jul 30 2022, 05:10 PM
Post
#742
|
|
Senior Member    Group: Members Posts: 1,401 Joined: 27-December 14 From: Mineola, Texas Member No.: 18,258 Region Association: Southwest Region |
I then seated the brush into the bore and soldered the new lead in place...note that the old lead is still there. I wasn't sure if the new lead was long enough at first so I kept the old lead in place in case I needed to solder them together.....After confirming there was plenty of lead wire, I just cut the old one off.
Sorryfor the quality of the pictures, not able to use my phone so am trying to use a spare to take the pics. 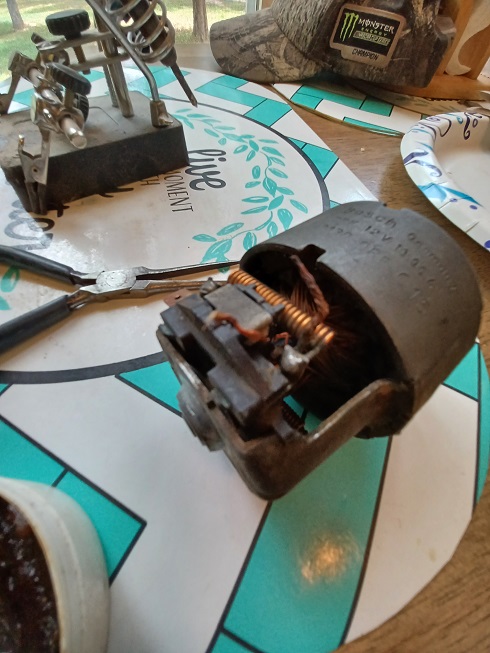 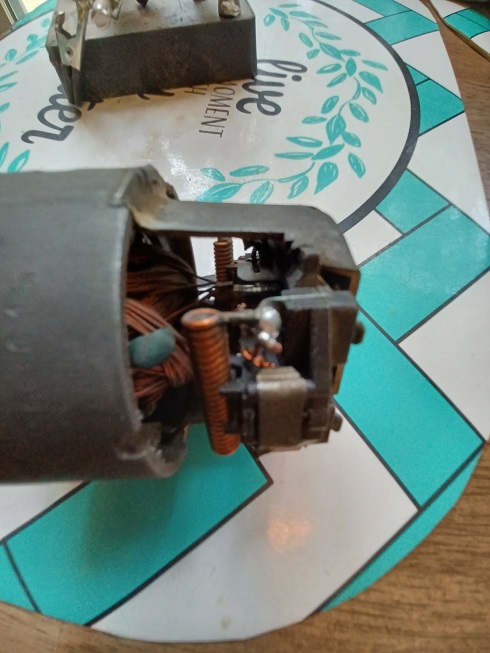 |
| Puebloswatcop |
 Jul 30 2022, 05:15 PM Jul 30 2022, 05:15 PM
Post
#743
|
|
Senior Member    Group: Members Posts: 1,401 Joined: 27-December 14 From: Mineola, Texas Member No.: 18,258 Region Association: Southwest Region |
After repairing the damaged brush I put the original springs and retainers back on. Then hooked it up to my car battery and (IMG:style_emoticons/default/piratenanner.gif) SUCCESS.....
So I cleaned up the rest of the motor casing and reinstalled it into the cage. 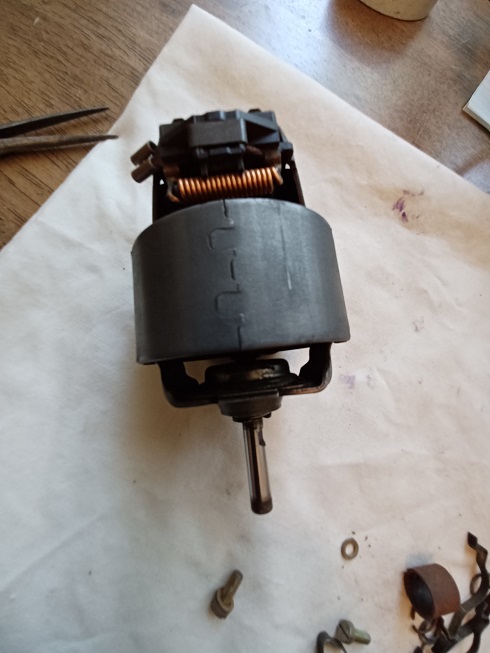 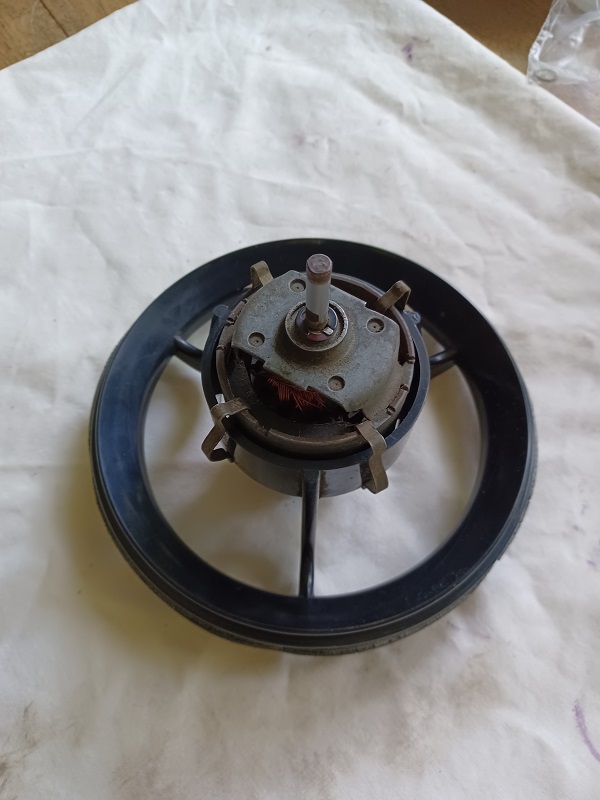 |
| Puebloswatcop |
 Jul 30 2022, 05:21 PM Jul 30 2022, 05:21 PM
Post
#744
|
|
Senior Member    Group: Members Posts: 1,401 Joined: 27-December 14 From: Mineola, Texas Member No.: 18,258 Region Association: Southwest Region |
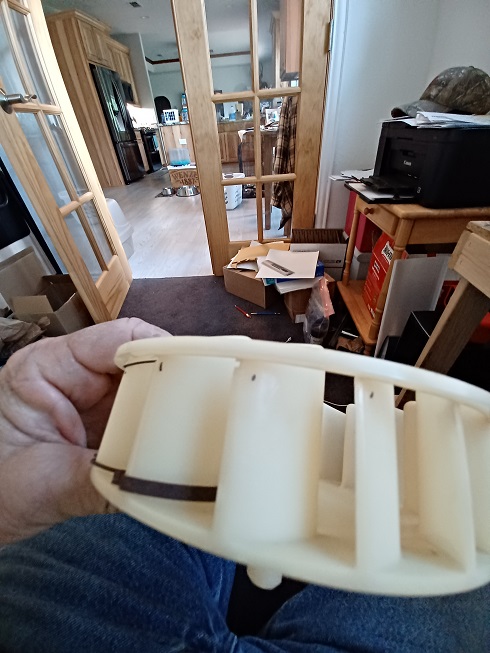
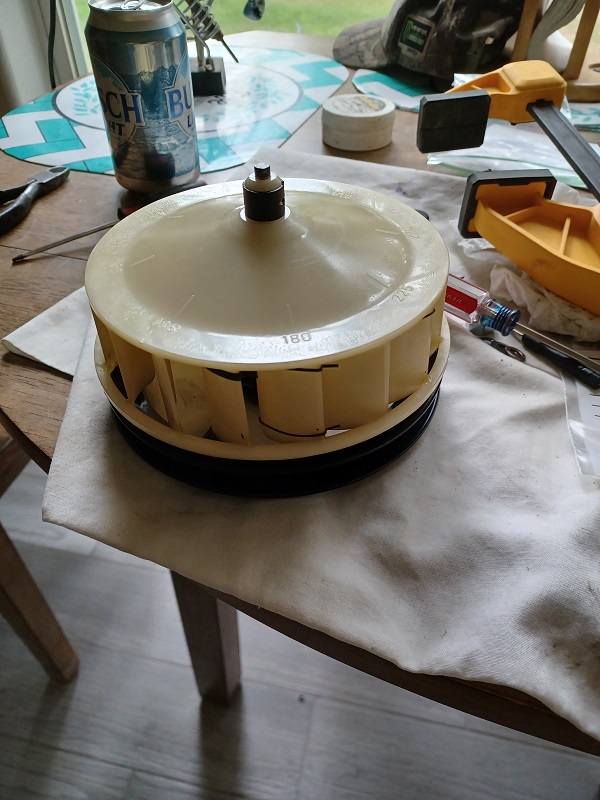
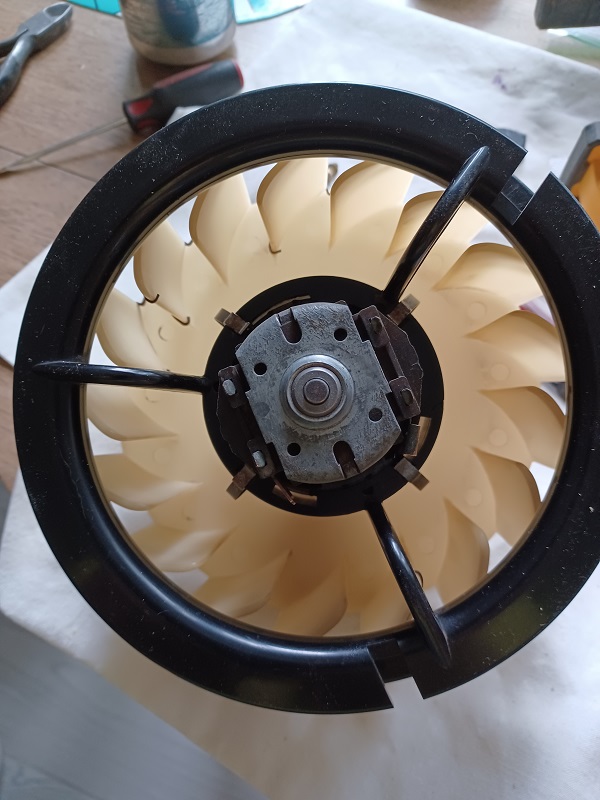
Then turned to the fan itself... during my examination of the fan I found several areas where the ring had fractured away from the fins...out of 17 fins, 7 were cracked at the ring joint. I marked each one of them with a black dot and the one by one repaired them with JB plastic weld. Worked fantastic. I noticed that there were several metal clips attached at random to the fins. I am guessing these were used to balance the fan, so left them in place.
  |
| Puebloswatcop |
 Jul 30 2022, 05:23 PM Jul 30 2022, 05:23 PM
Post
#745
|
|
Senior Member    Group: Members Posts: 1,401 Joined: 27-December 14 From: Mineola, Texas Member No.: 18,258 Region Association: Southwest Region |
Then I re-mounted the fan to the motor. Looks like it might actually blow fresh air now. Have to wait on complete re-assembly until the seals I ordered from 914 Rubber arrive.
 |
| Puebloswatcop |
 Aug 3 2022, 07:43 PM Aug 3 2022, 07:43 PM
Post
#746
|
|
Senior Member    Group: Members Posts: 1,401 Joined: 27-December 14 From: Mineola, Texas Member No.: 18,258 Region Association: Southwest Region |
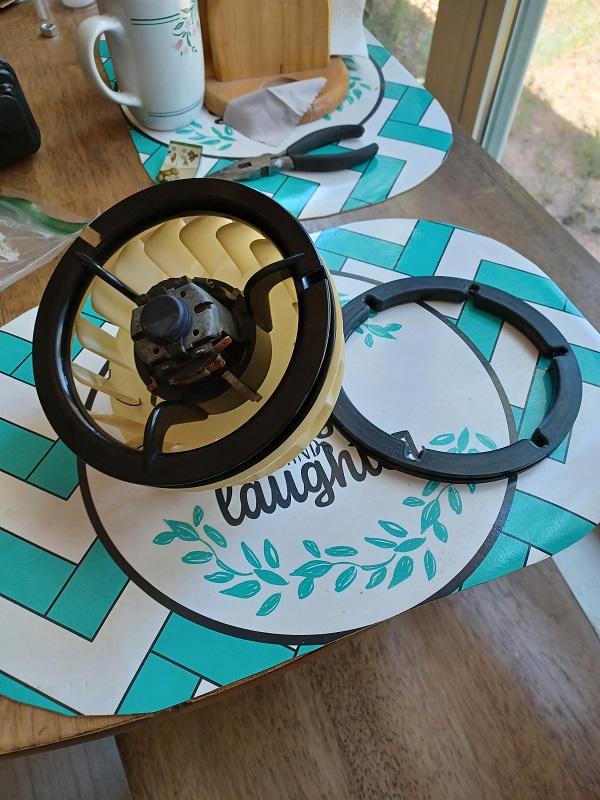
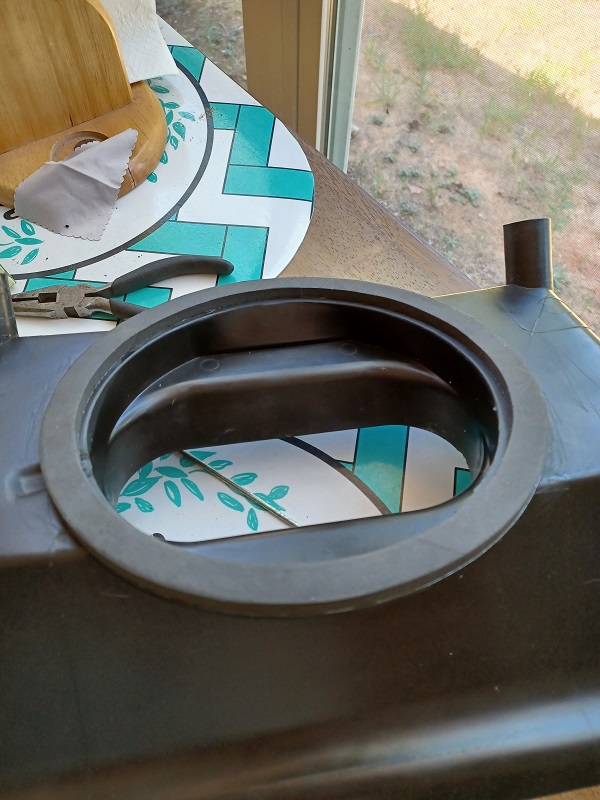
The seals cor the fresh air intake box came in today, minus the two flapper seals. One quick call to 914 Rubber and the shortage was solved and the seals sent. In the mean time I installed the fan seal and the box seal. The fit on both was spot on.....
  |
| Puebloswatcop |
 Aug 3 2022, 07:46 PM Aug 3 2022, 07:46 PM
Post
#747
|
|
Senior Member    Group: Members Posts: 1,401 Joined: 27-December 14 From: Mineola, Texas Member No.: 18,258 Region Association: Southwest Region |
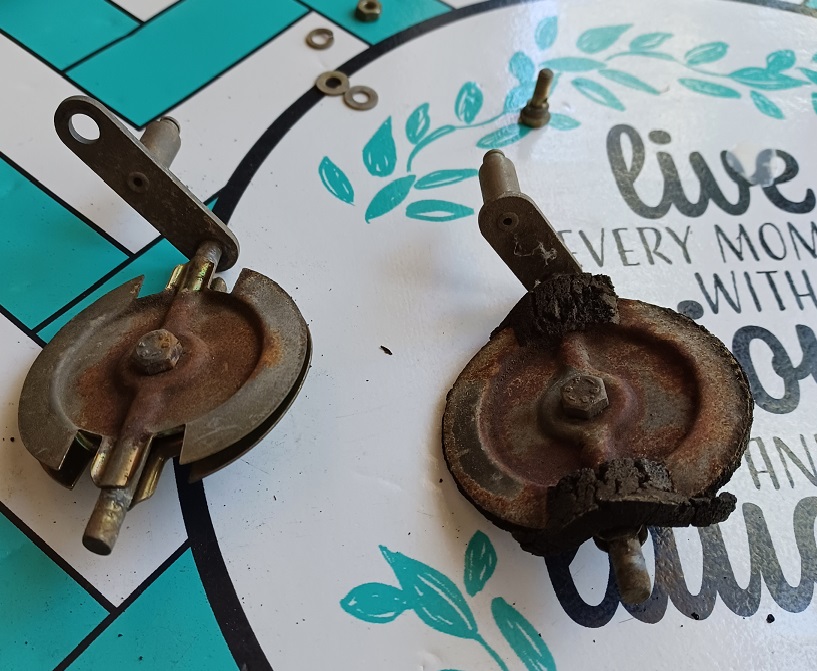
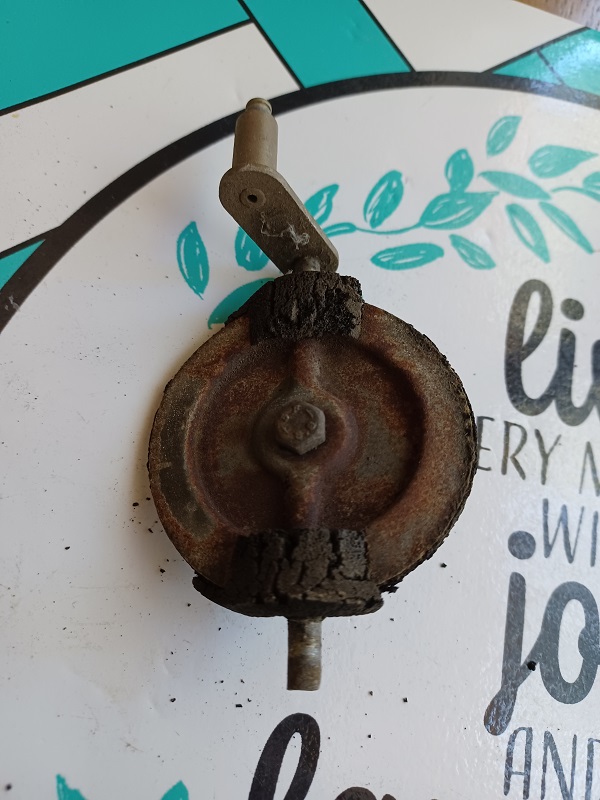
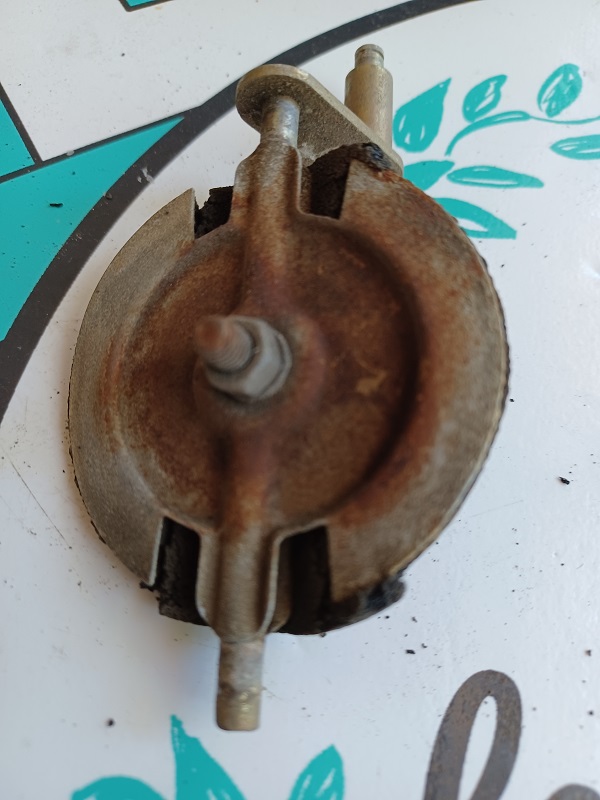
Then I went ahead with cleaning the flapper assemblies. They were much worse than I thought.
   |
| Puebloswatcop |
 Aug 3 2022, 07:48 PM Aug 3 2022, 07:48 PM
Post
#748
|
|
Senior Member    Group: Members Posts: 1,401 Joined: 27-December 14 From: Mineola, Texas Member No.: 18,258 Region Association: Southwest Region |
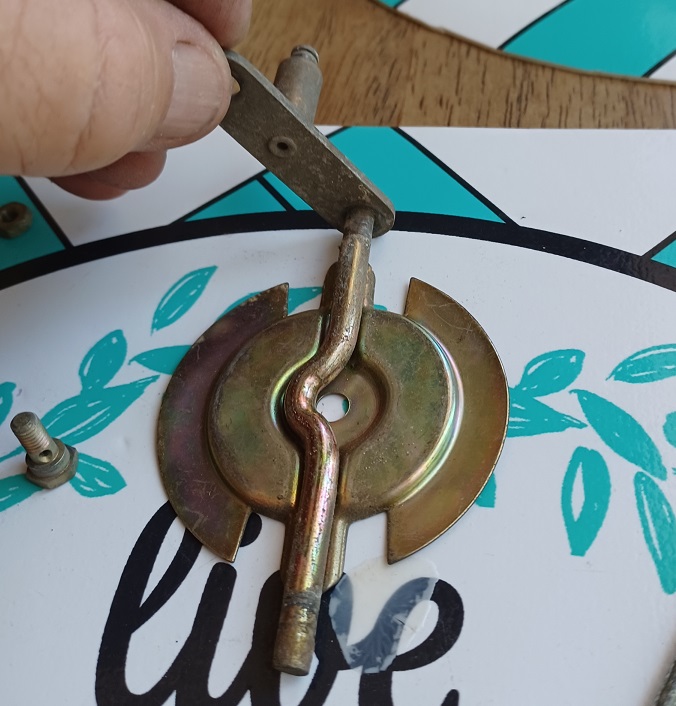
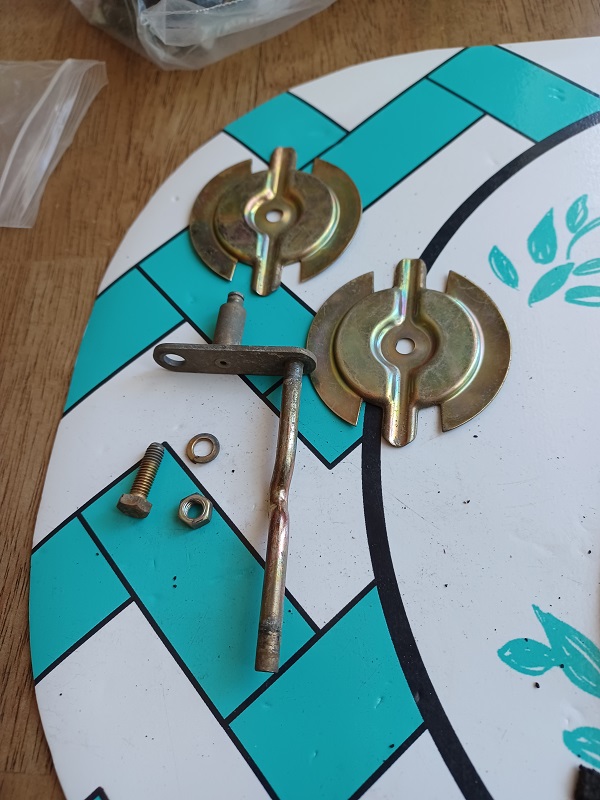
On the up side, when you take them apart, the inside surfaces are pretty clean....however These will make the next trip to the plater......
  |
| Puebloswatcop |
 Aug 3 2022, 07:56 PM Aug 3 2022, 07:56 PM
Post
#749
|
|
Senior Member    Group: Members Posts: 1,401 Joined: 27-December 14 From: Mineola, Texas Member No.: 18,258 Region Association: Southwest Region |
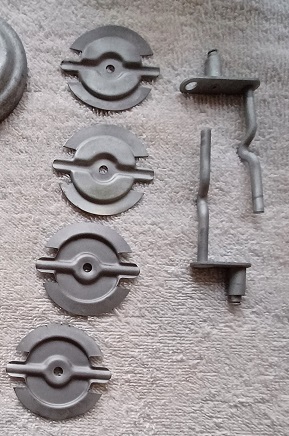
So I blasted them and they are ready to go.
 |
| Puebloswatcop |
 Aug 3 2022, 07:57 PM Aug 3 2022, 07:57 PM
Post
#750
|
|
Senior Member    Group: Members Posts: 1,401 Joined: 27-December 14 From: Mineola, Texas Member No.: 18,258 Region Association: Southwest Region |
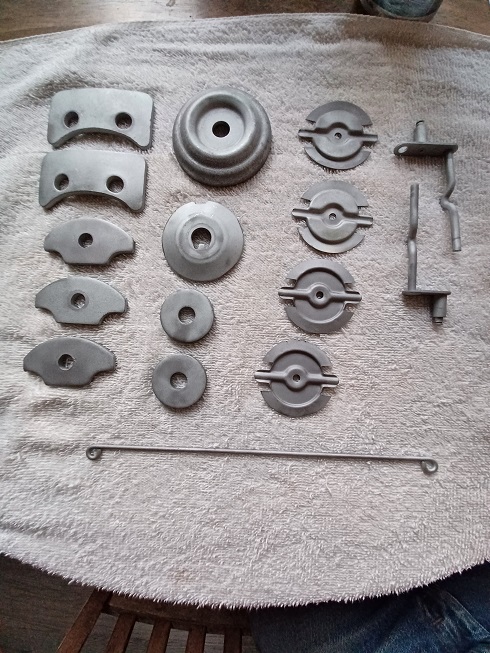
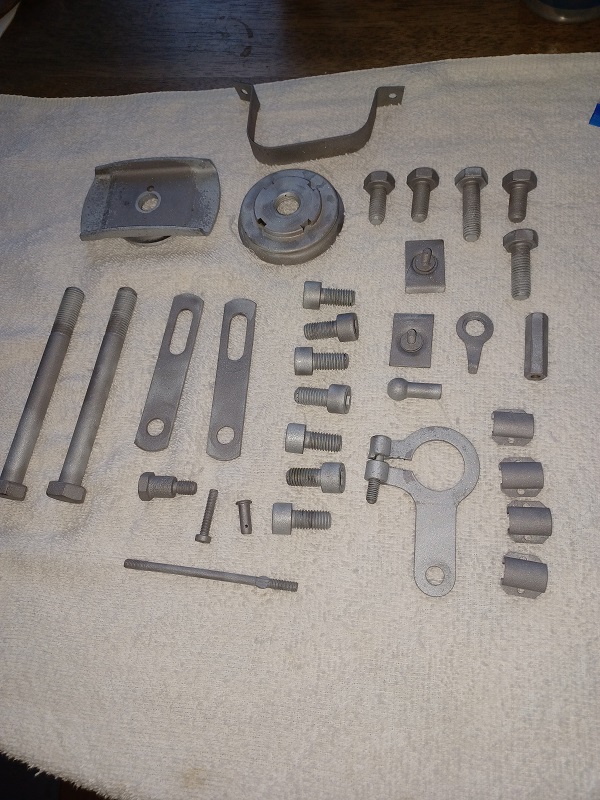
But to make the package to the plater worth while I decided I had better blast a bunch more to go with the flappers.
  |
| Puebloswatcop |
 Aug 8 2022, 08:12 AM Aug 8 2022, 08:12 AM
Post
#751
|
|
Senior Member    Group: Members Posts: 1,401 Joined: 27-December 14 From: Mineola, Texas Member No.: 18,258 Region Association: Southwest Region |
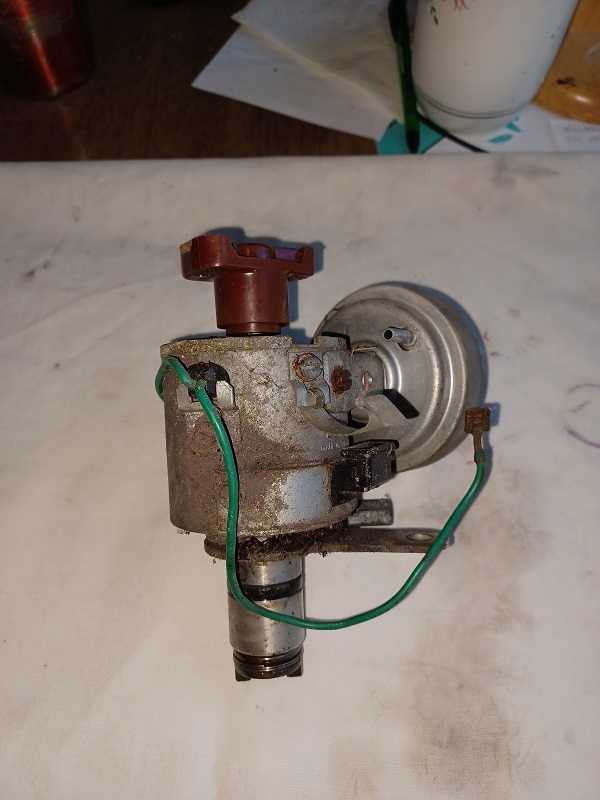
Since bringing out the 2nd 914 has now overwelmed my garage space I have been working to re-organize my space. So in the meentime I am working on small projects to keep things moving forward. I haven't decided on any engine upgrades yet, but figured I would clean and rebuild the distributor. I will either use it or if I upgrade, I will sell it.
 |
| Puebloswatcop |
 Aug 8 2022, 08:19 AM Aug 8 2022, 08:19 AM
Post
#752
|
|
Senior Member    Group: Members Posts: 1,401 Joined: 27-December 14 From: Mineola, Texas Member No.: 18,258 Region Association: Southwest Region |
While the distributor looks like hell, it is actually in pretty good shape mechanically. The nut on the hold down bracket is frozen in place though, so I soaked it and all the other little screws with some PB Blaster.
While waiting for that to soak in I removed the vacuum canister. Tested it and both sides hold vacuum....The removed the trigger points for the EFI. 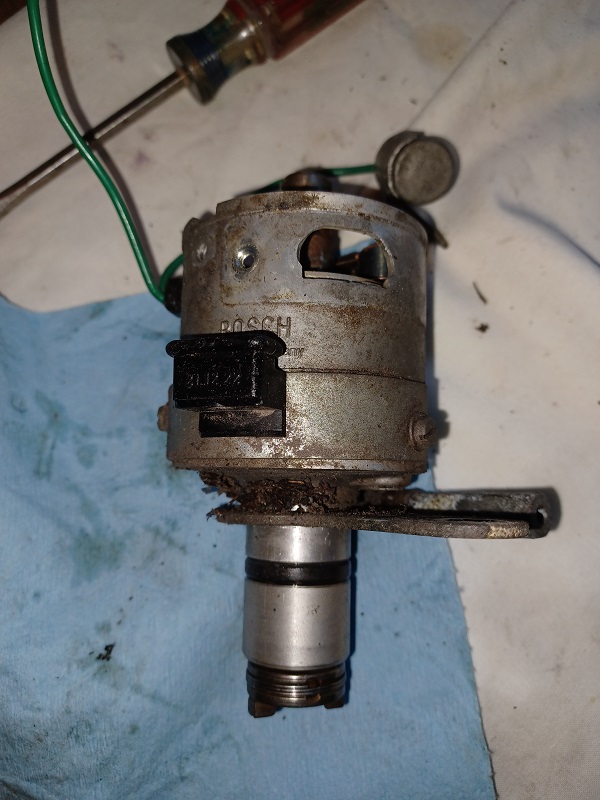 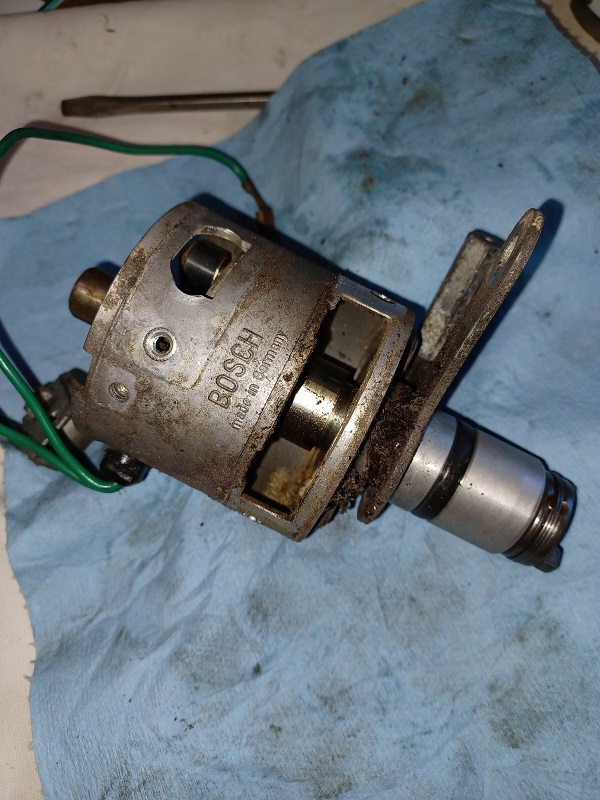 |
| Puebloswatcop |
 Aug 8 2022, 08:31 AM Aug 8 2022, 08:31 AM
Post
#753
|
|
Senior Member    Group: Members Posts: 1,401 Joined: 27-December 14 From: Mineola, Texas Member No.: 18,258 Region Association: Southwest Region |
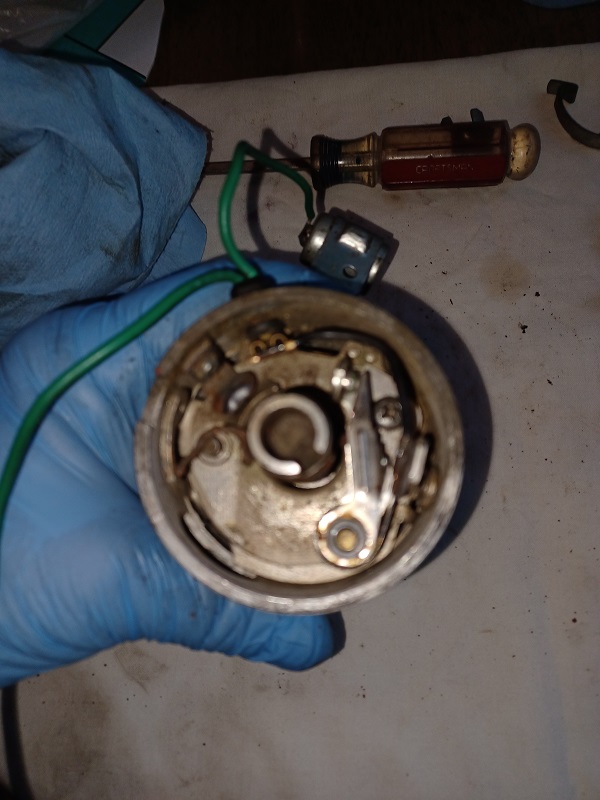
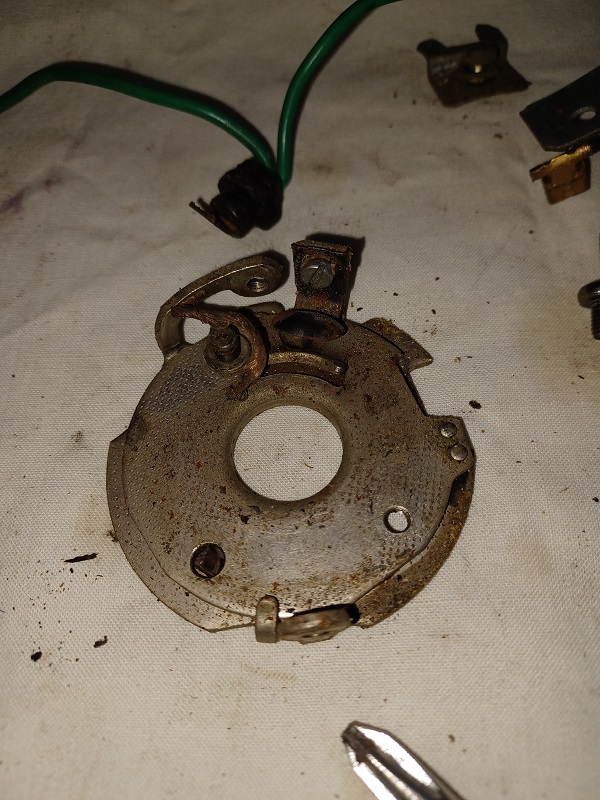
The inside of the distributor is dirty with a combination of old lube, dirt and some minor rust. After removing the breaker points I removed the mounting/advance plate as well. (sorry for the poor pic quality)
  |
| Puebloswatcop |
 Aug 8 2022, 08:39 AM Aug 8 2022, 08:39 AM
Post
#754
|
|
Senior Member    Group: Members Posts: 1,401 Joined: 27-December 14 From: Mineola, Texas Member No.: 18,258 Region Association: Southwest Region |
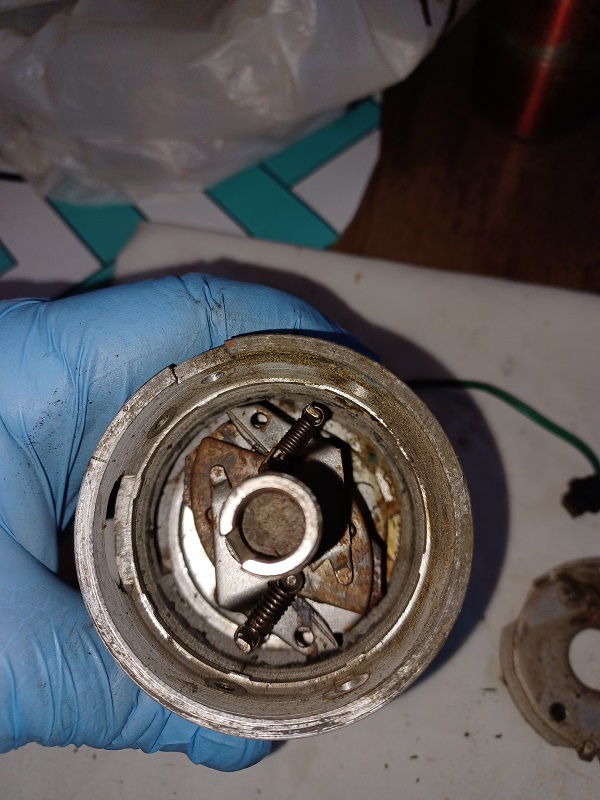
As you can see, the centrifugal weights are pretty dirty and have a fair amount of rust as well. To facilitate their cleaning I will have to remove the shaft from the housing.
 |
| Puebloswatcop |
 Aug 8 2022, 08:43 AM Aug 8 2022, 08:43 AM
Post
#755
|
|
Senior Member    Group: Members Posts: 1,401 Joined: 27-December 14 From: Mineola, Texas Member No.: 18,258 Region Association: Southwest Region |
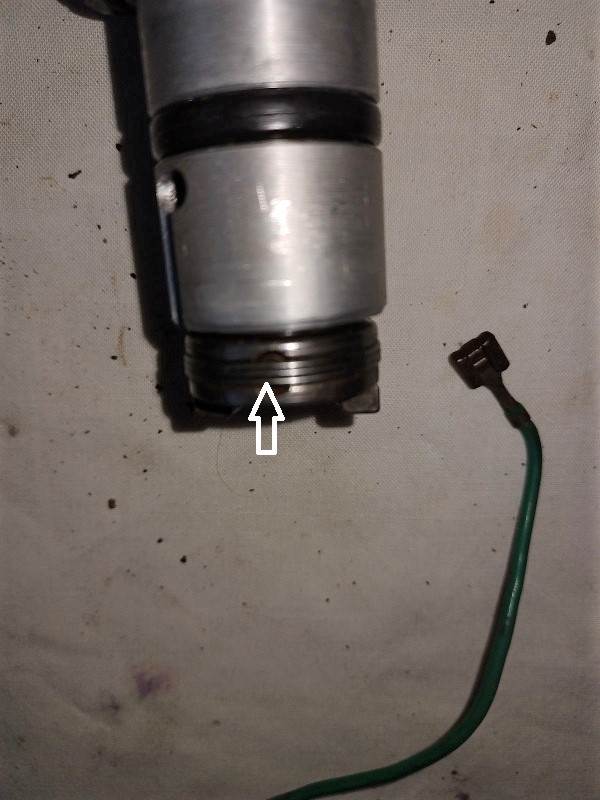
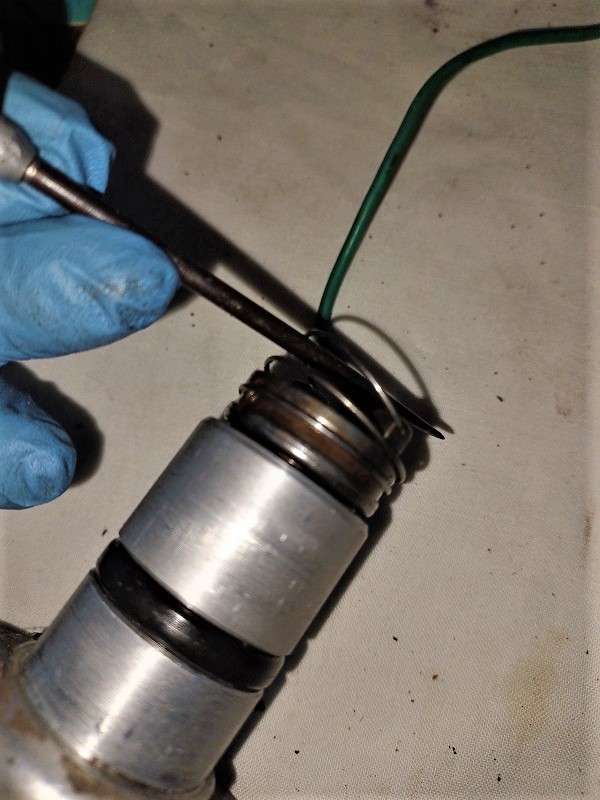
In order to remove the shaft the retaining spring must be removed in order to access the retaining pin. I just used a pick tool to walk the spring out og the groove.
  |
| Puebloswatcop |
 Aug 8 2022, 08:46 AM Aug 8 2022, 08:46 AM
Post
#756
|
|
Senior Member    Group: Members Posts: 1,401 Joined: 27-December 14 From: Mineola, Texas Member No.: 18,258 Region Association: Southwest Region |
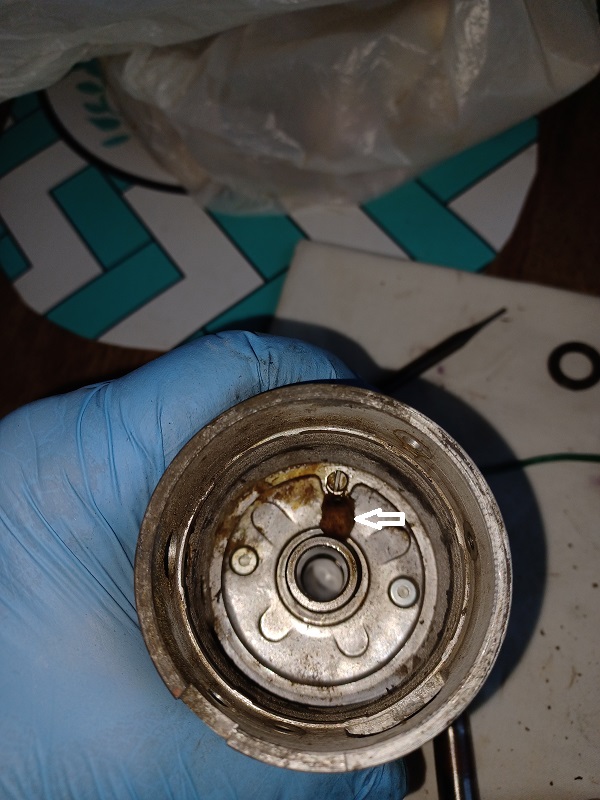
After carefully driving out the retaining pin, the distributor drive easily slides (falls) off of the shaft and the shaft can be pulled out of the distributor. That leaves only the lubricating block for the trigger points in the bottom of the housing.
 |
| Puebloswatcop |
 Aug 8 2022, 08:51 AM Aug 8 2022, 08:51 AM
Post
#757
|
|
Senior Member    Group: Members Posts: 1,401 Joined: 27-December 14 From: Mineola, Texas Member No.: 18,258 Region Association: Southwest Region |
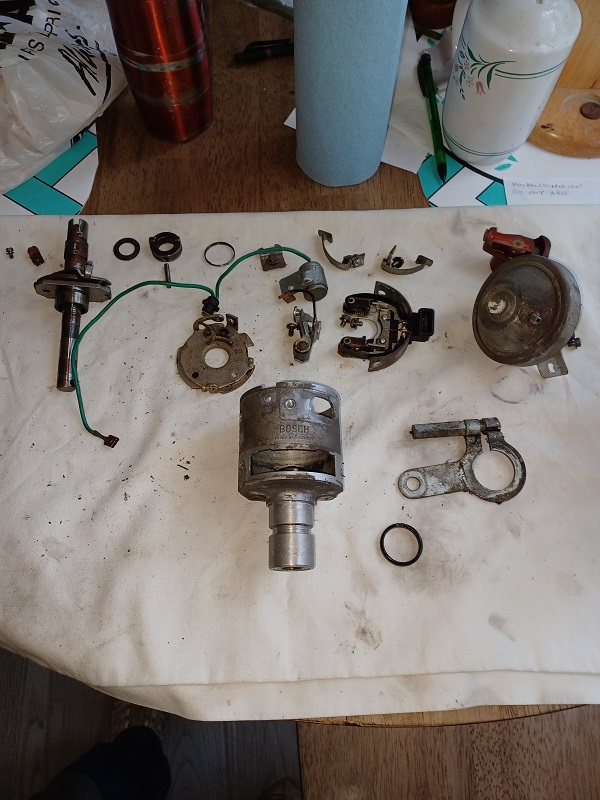
Once dis-assembly is complete, it leaves you with a mess of dirty parts and sub components, waiting to be cleaned and checked....
 |
| Puebloswatcop |
 Aug 8 2022, 09:04 AM Aug 8 2022, 09:04 AM
Post
#758
|
|
Senior Member    Group: Members Posts: 1,401 Joined: 27-December 14 From: Mineola, Texas Member No.: 18,258 Region Association: Southwest Region |
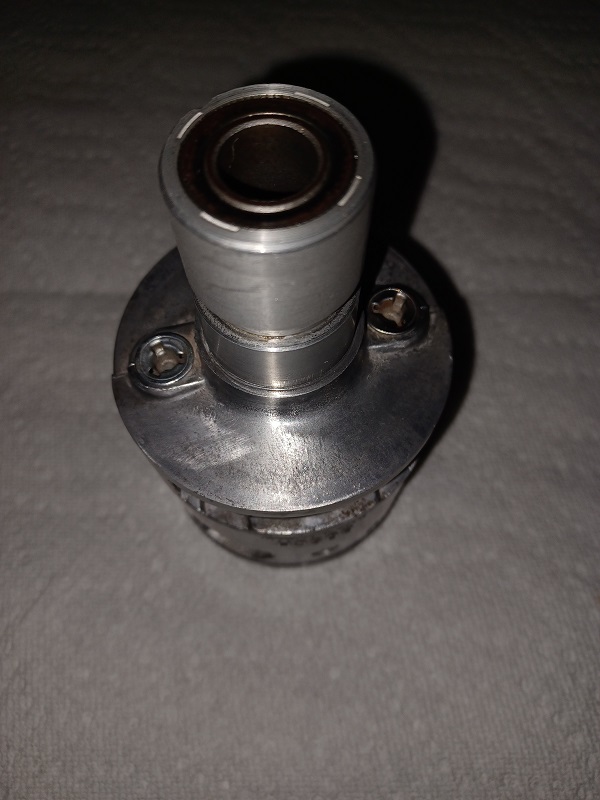
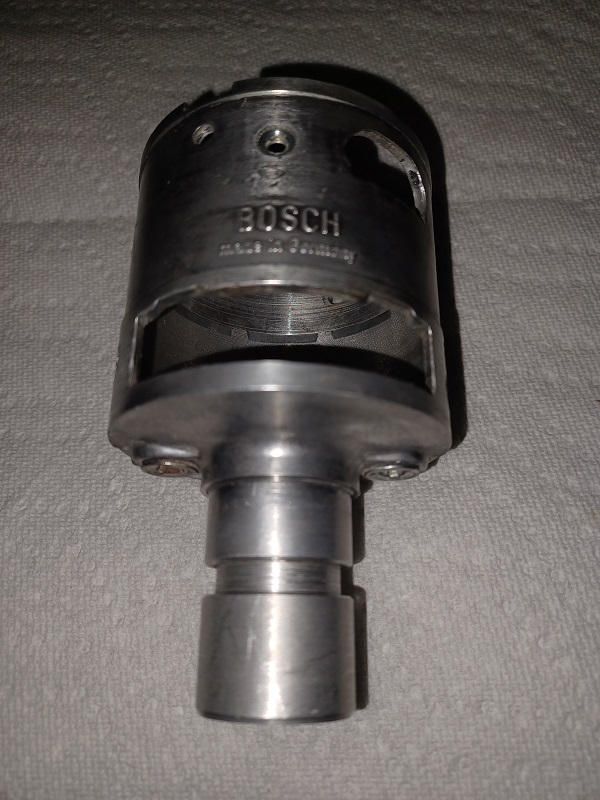
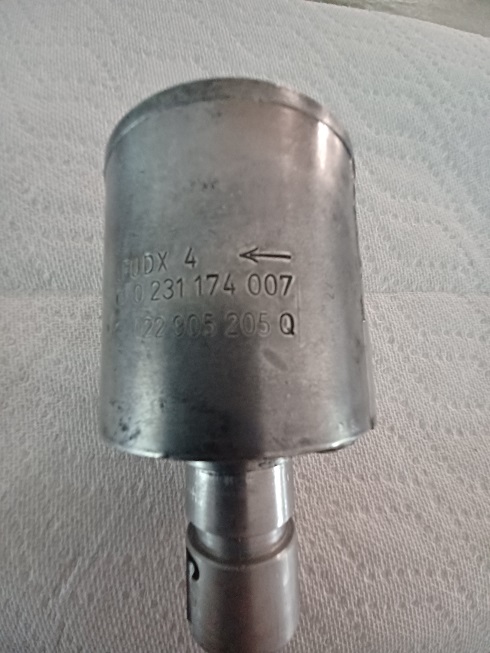
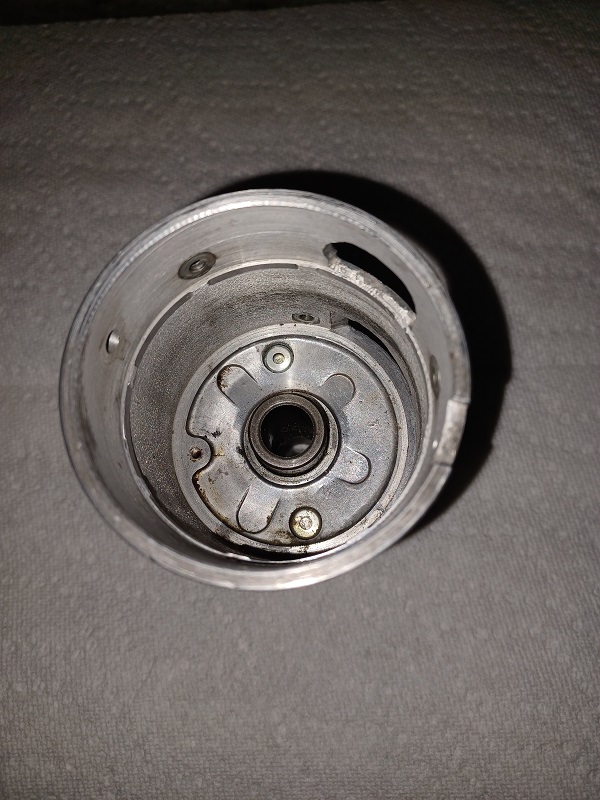
So starting with the distributor body the cleaning began. After about a half hour of scrubbing, brushing and polishing it was at least clean....inside and out.
    |
| Puebloswatcop |
 Aug 8 2022, 09:08 AM Aug 8 2022, 09:08 AM
Post
#759
|
|
Senior Member    Group: Members Posts: 1,401 Joined: 27-December 14 From: Mineola, Texas Member No.: 18,258 Region Association: Southwest Region |
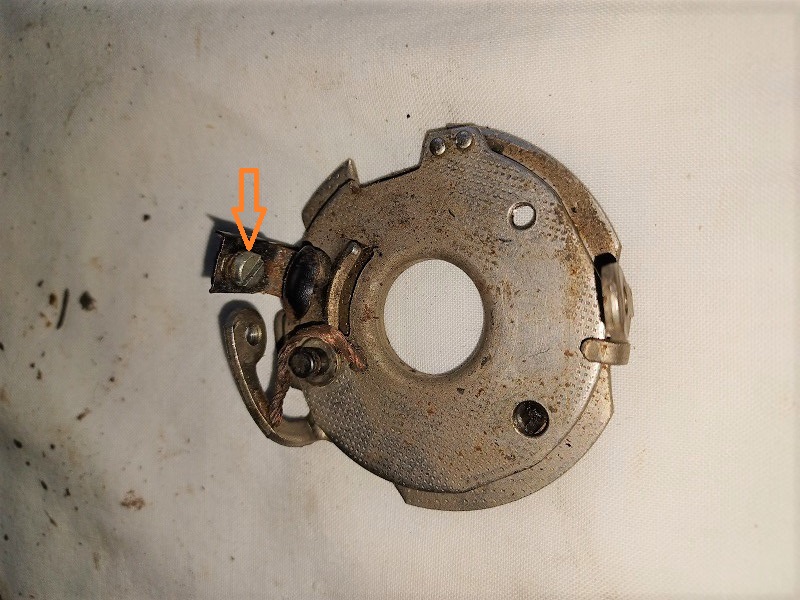
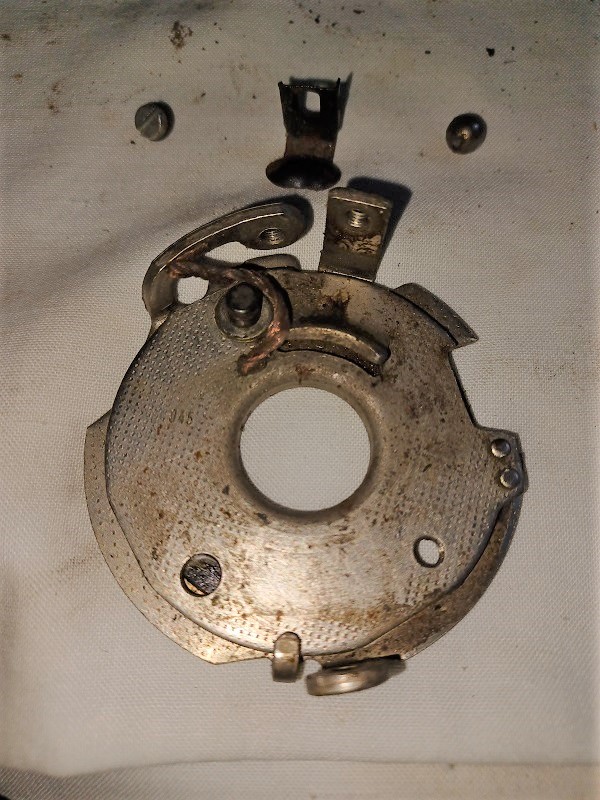
Then on to the points mount /vaccum advance plate. It can be further broken down by removing the tension mount that holds the small bearing onto the top of the plate.
  |
| Puebloswatcop |
 Aug 8 2022, 09:19 AM Aug 8 2022, 09:19 AM
Post
#760
|
|
Senior Member    Group: Members Posts: 1,401 Joined: 27-December 14 From: Mineola, Texas Member No.: 18,258 Region Association: Southwest Region |
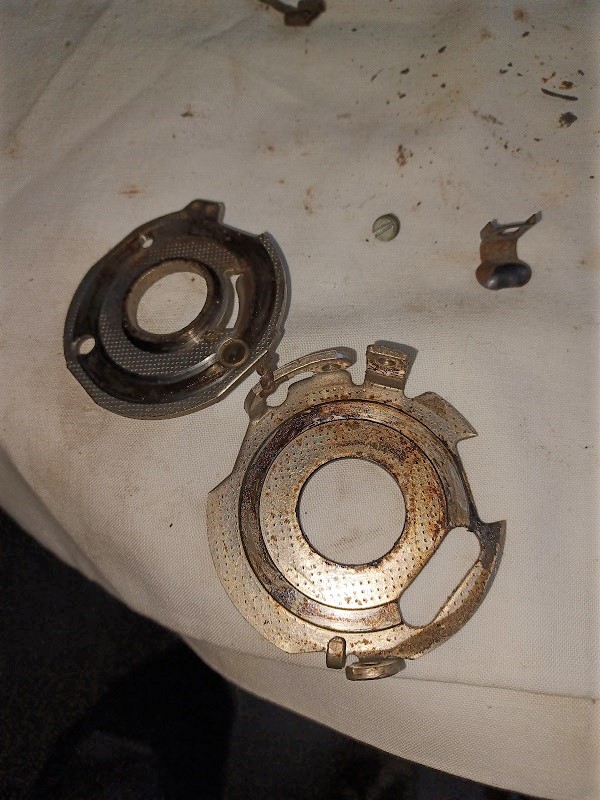
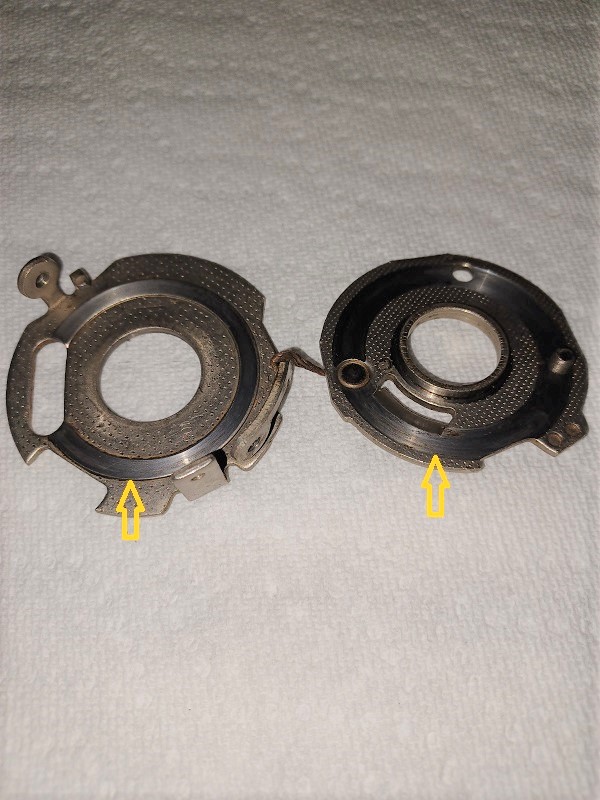
The two plates can be separated for cleaning and re-lubing. Be careful not to pull the grounding wire off of either plate. The ring on each plate act as a bearing surface and need to be lubed.
  |
  |
2 User(s) are reading this topic (2 Guests and 0 Anonymous Users)
0 Members:

|
Lo-Fi Version | Time is now: 25th November 2024 - 07:48 PM |
Invision Power Board
v9.1.4 © 2024 IPS, Inc.


