|
|

|
Porsche, and the Porsche crest are registered trademarks of Dr. Ing. h.c. F. Porsche AG.
This site is not affiliated with Porsche in any way. Its only purpose is to provide an online forum for car enthusiasts. All other trademarks are property of their respective owners. |
|
|
  |
| Puebloswatcop |
 Oct 15 2022, 06:15 PM Oct 15 2022, 06:15 PM
Post
#841
|
|
Senior Member    Group: Members Posts: 1,435 Joined: 27-December 14 From: Mineola, Texas Member No.: 18,258 Region Association: Southwest Region |
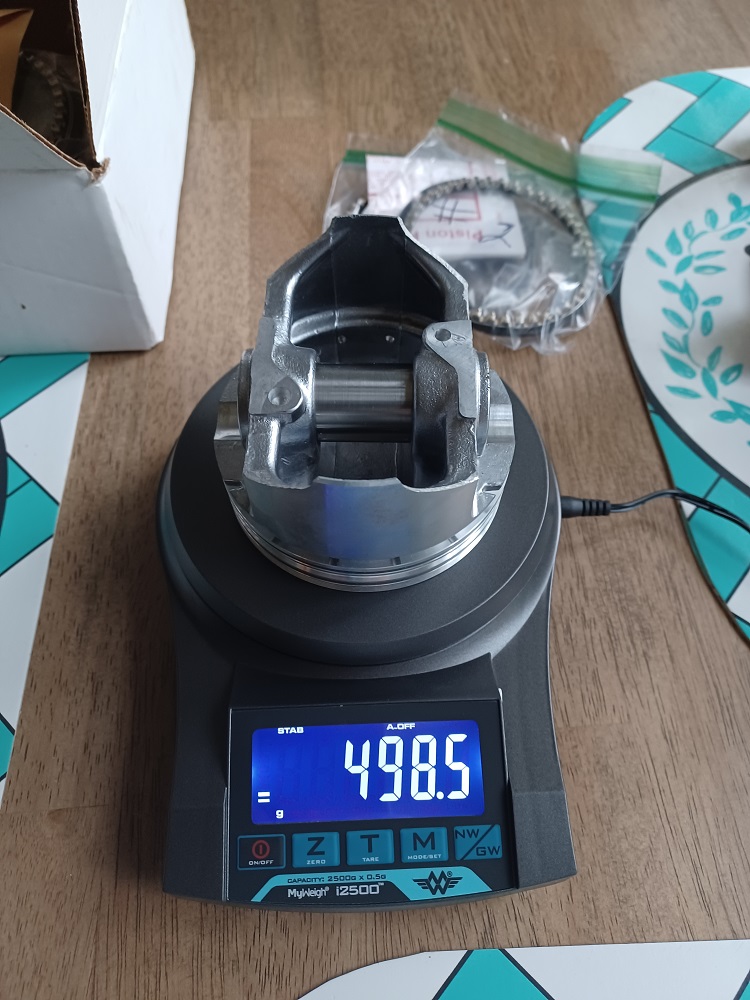
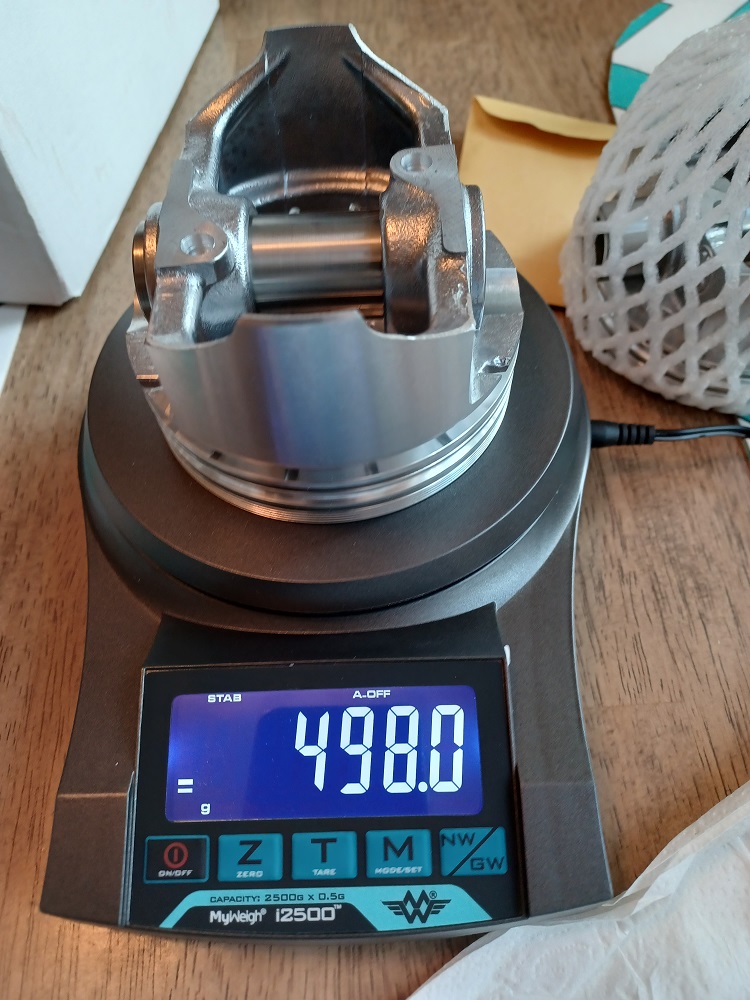
I weighed each assembly 3 times and then averaged the weights of each one (if there was a weight difference). 2 weighed in at 498.5 Gm. and the other 2 at 498 Gm.
  |
| Puebloswatcop |
 Oct 15 2022, 06:19 PM Oct 15 2022, 06:19 PM
Post
#842
|
|
Senior Member    Group: Members Posts: 1,435 Joined: 27-December 14 From: Mineola, Texas Member No.: 18,258 Region Association: Southwest Region |
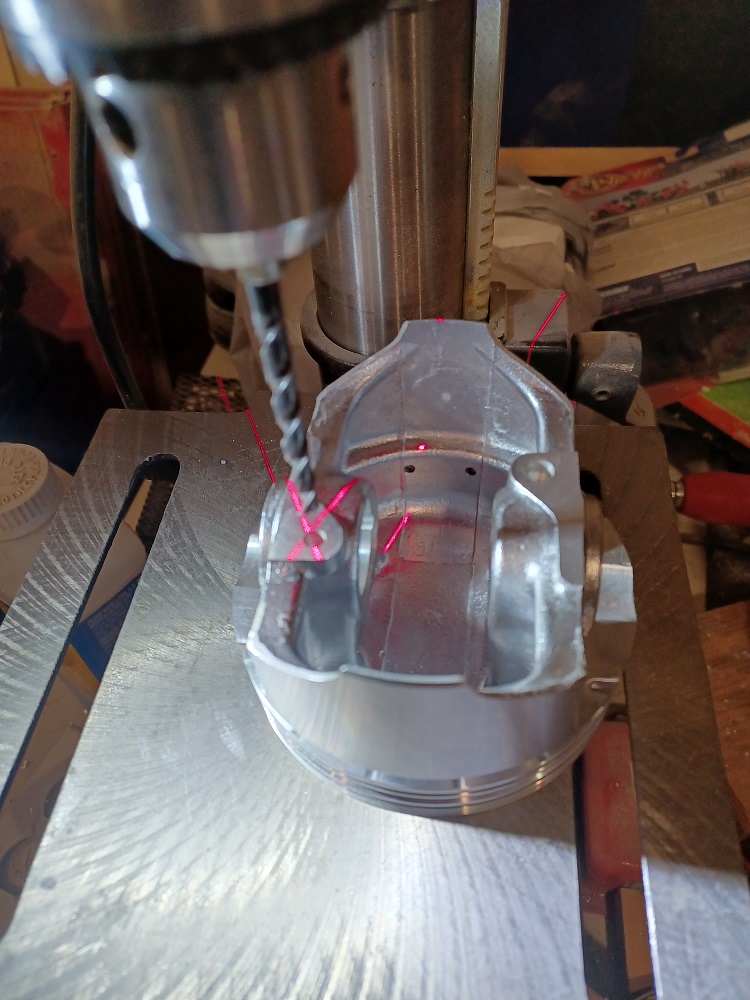
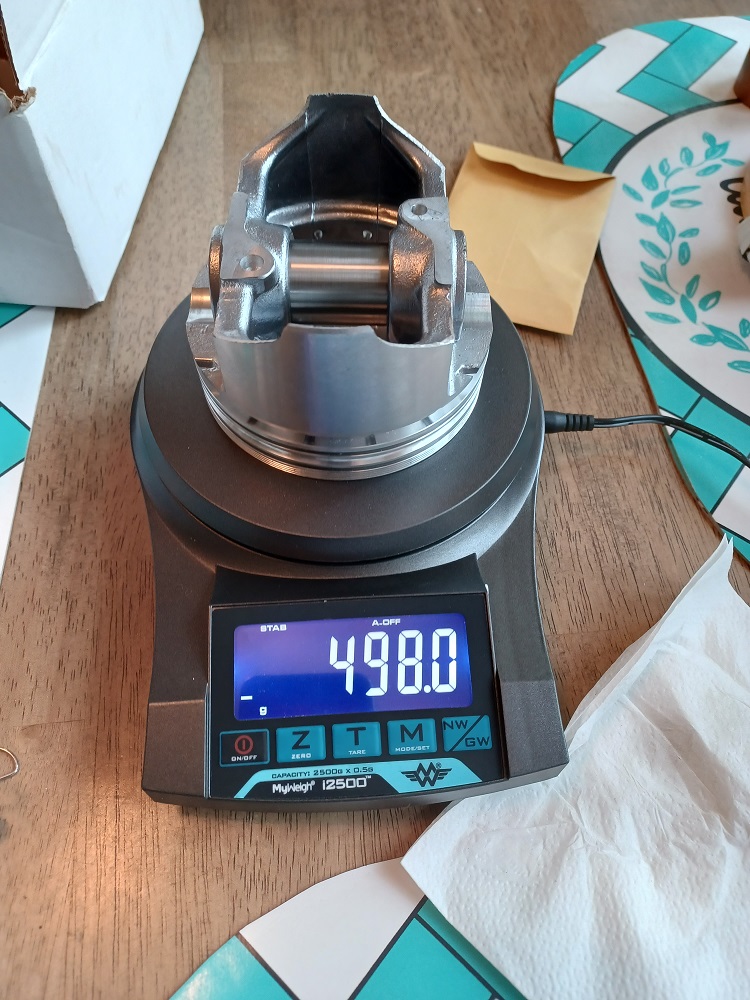
Even though .5 Grams is an acceptable difference, I wanted them all to match, so I lightened the two heavy ones just a little at a time. After about an hour of work, I got all 4 to match at 498 Gm.
  |
| Puebloswatcop |
 Oct 15 2022, 06:23 PM Oct 15 2022, 06:23 PM
Post
#843
|
|
Senior Member    Group: Members Posts: 1,435 Joined: 27-December 14 From: Mineola, Texas Member No.: 18,258 Region Association: Southwest Region |
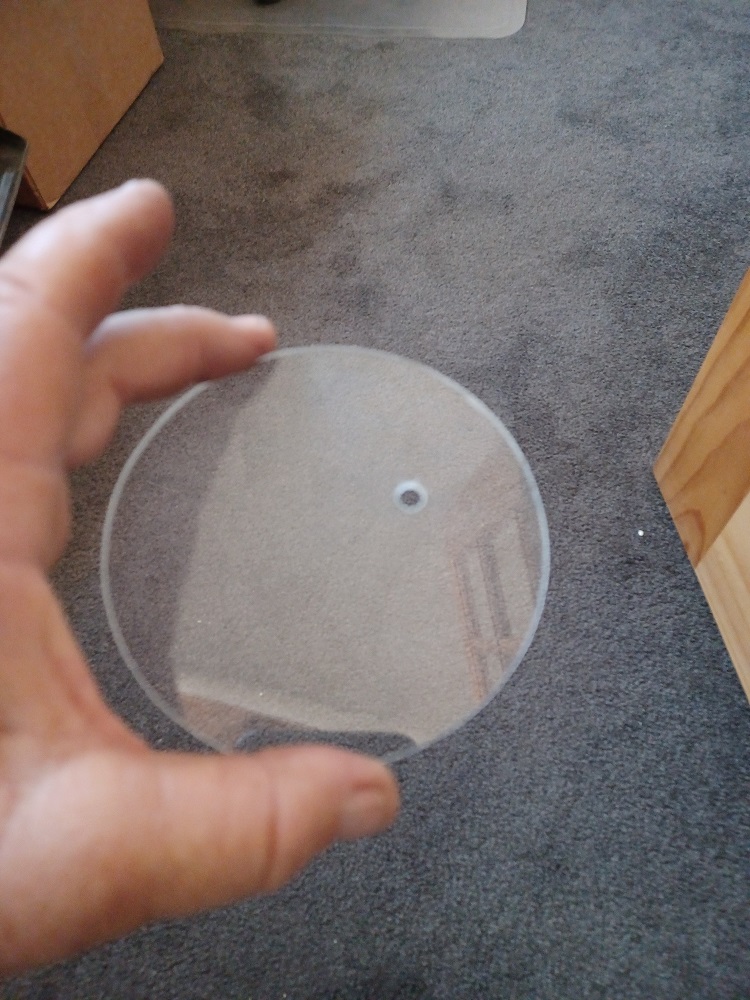
Then I went on to measure the combustion chambers on my new heads to be sure I could be as accurate as possible when I calculate my intended compression ratio and deck height. First I had to make a seal for the combustion chamber. Using 1/8th plexiglass I was able to make a clear plate that fit very well in the chamber.
 |
| Puebloswatcop |
 Oct 15 2022, 06:27 PM Oct 15 2022, 06:27 PM
Post
#844
|
|
Senior Member    Group: Members Posts: 1,435 Joined: 27-December 14 From: Mineola, Texas Member No.: 18,258 Region Association: Southwest Region |
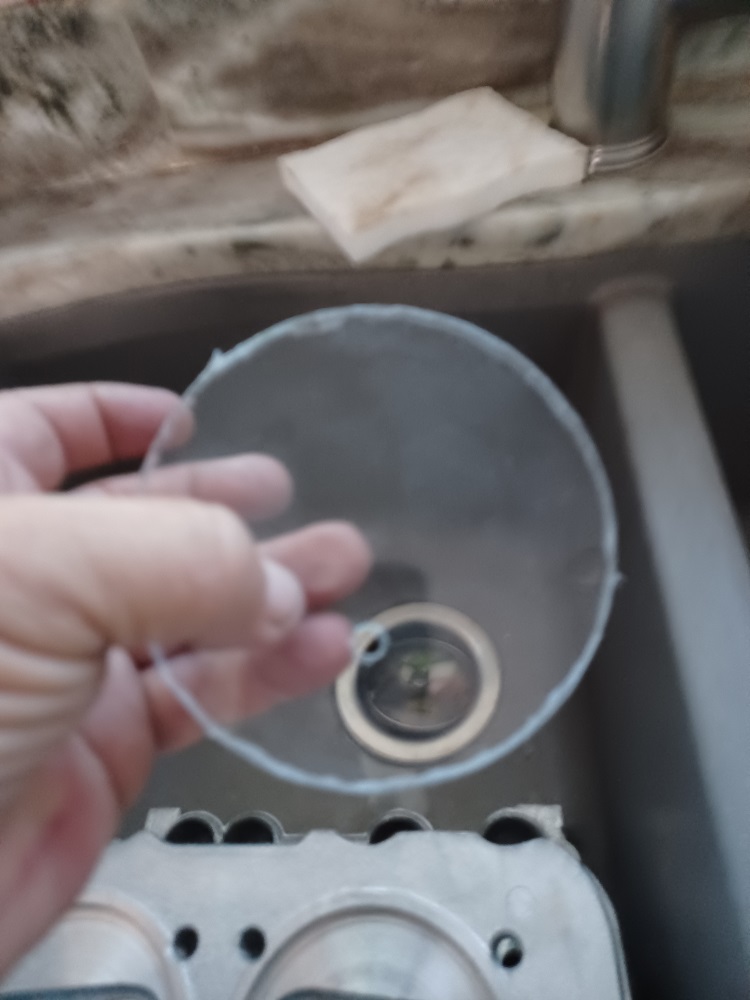
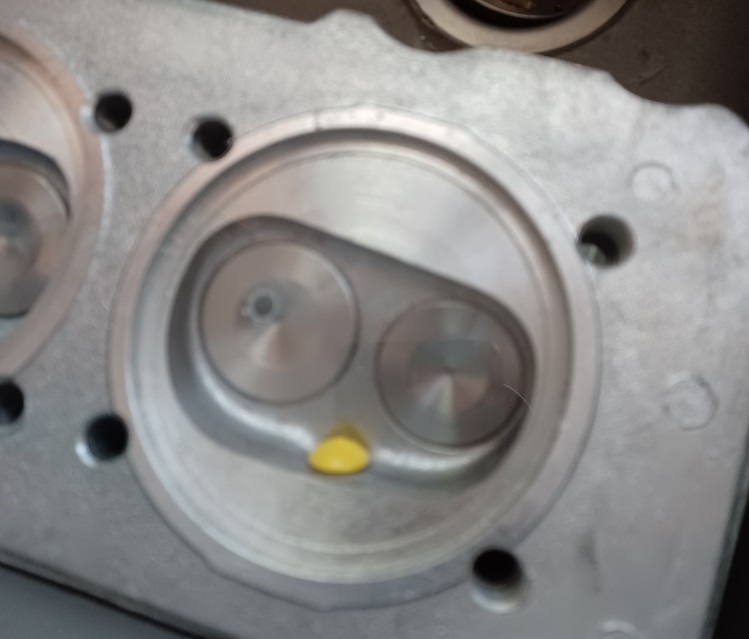
Then put a very small bead of vaseline around the edge to seal it to the cylinder head and a plug to plug the spark plug hole. I measured the plug and it uses 5 cc's of space in the combustion chamber.
  |
| Puebloswatcop |
 Oct 15 2022, 06:35 PM Oct 15 2022, 06:35 PM
Post
#845
|
|
Senior Member    Group: Members Posts: 1,435 Joined: 27-December 14 From: Mineola, Texas Member No.: 18,258 Region Association: Southwest Region |
Then started filling the chambers with blue dyed alcohol. Each chamber took 55 cc's of alcohol to fill, so with the 5 cc displacement of the plug, they measured out at 60 cc's.
based on that measurement and the 96 mm cylinders, I calculated a deck height of .046 inches for an 8.5:1 compression ratio, and a deck height of .023 for a 9:1 compression ratio. Since the Heads have larger valves in them, I will try the .023 to see if there is enough valve to piston clearance, if not I will see if the .046 will work. 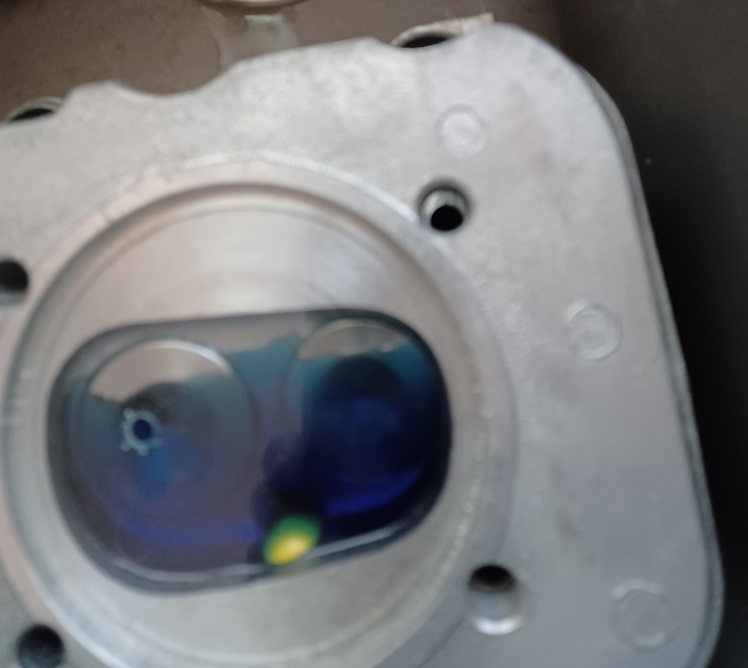 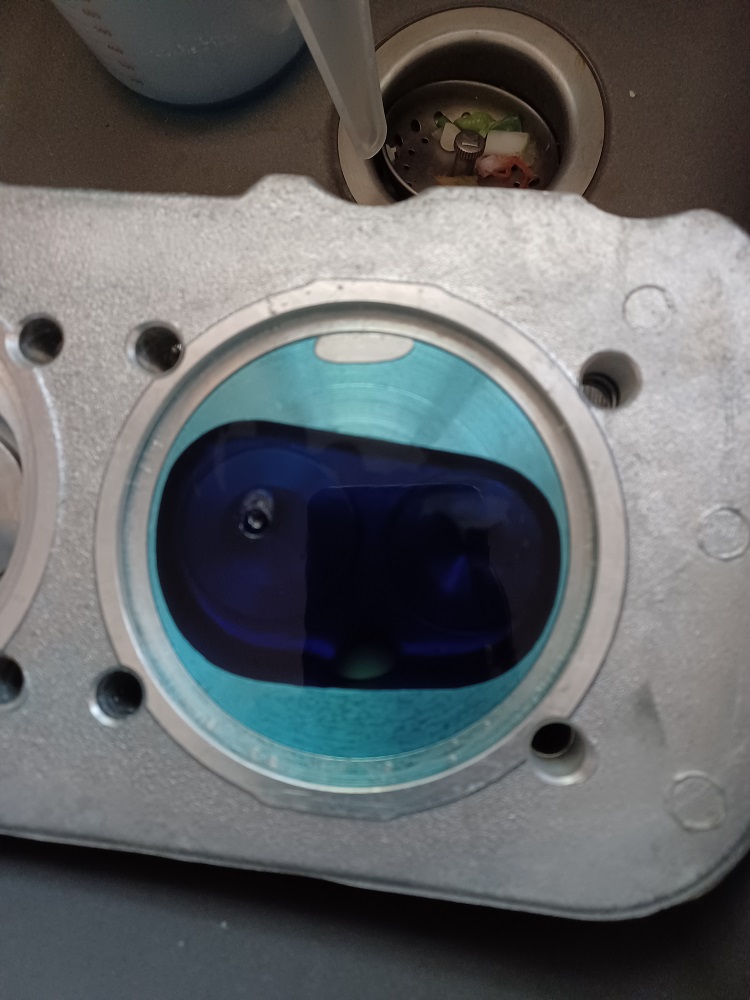 |
| Puebloswatcop |
 Oct 16 2022, 05:29 PM Oct 16 2022, 05:29 PM
Post
#846
|
|
Senior Member    Group: Members Posts: 1,435 Joined: 27-December 14 From: Mineola, Texas Member No.: 18,258 Region Association: Southwest Region |
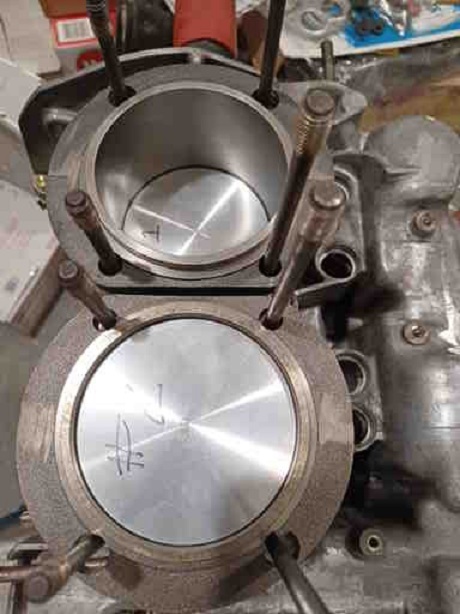
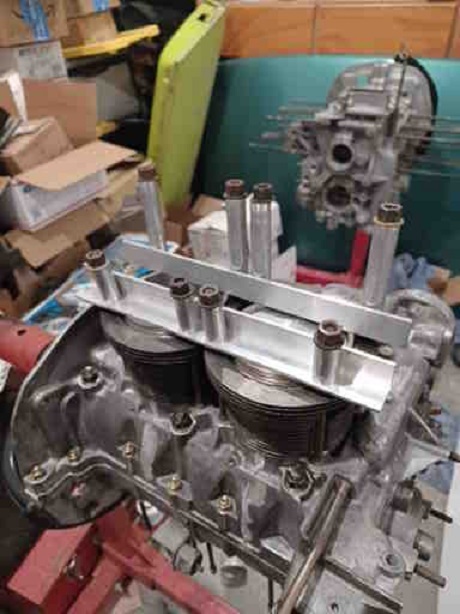
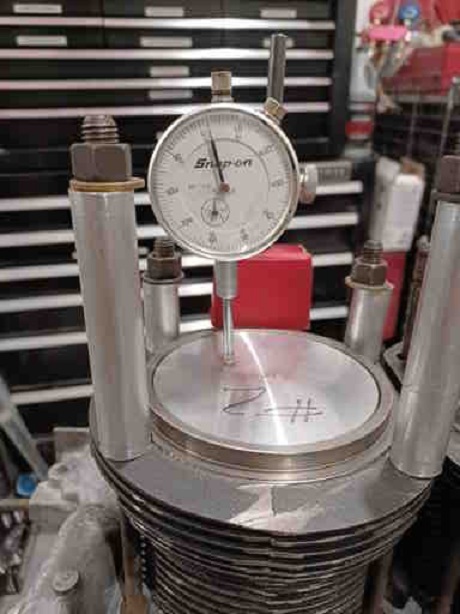
So today I checked deck height. Used a dial guage to insure that each piston was at its absolute top of travel then measured the deck height. Came up with .043 inches with no shims, so with an .010 shim to bring the clearance to .053 it would give me a projected Compression ratio of 8.4:1. If I go with no shims, I would have a CR of 8.6.......Any thoughts that someone is willing to share would be appreciated. Is an 8.5 CR reasonable or should I strive for higher or lower? This is a 2056 build with a higher lift cam.
   |
| Puebloswatcop |
 Nov 28 2022, 07:08 PM Nov 28 2022, 07:08 PM
Post
#847
|
|
Senior Member    Group: Members Posts: 1,435 Joined: 27-December 14 From: Mineola, Texas Member No.: 18,258 Region Association: Southwest Region |
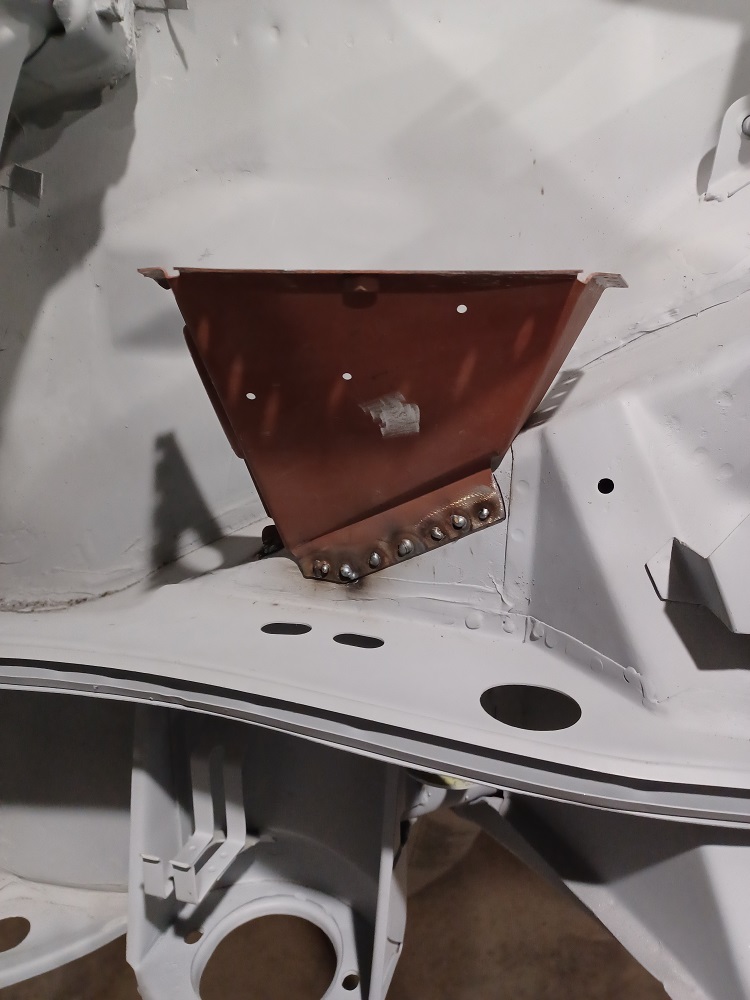
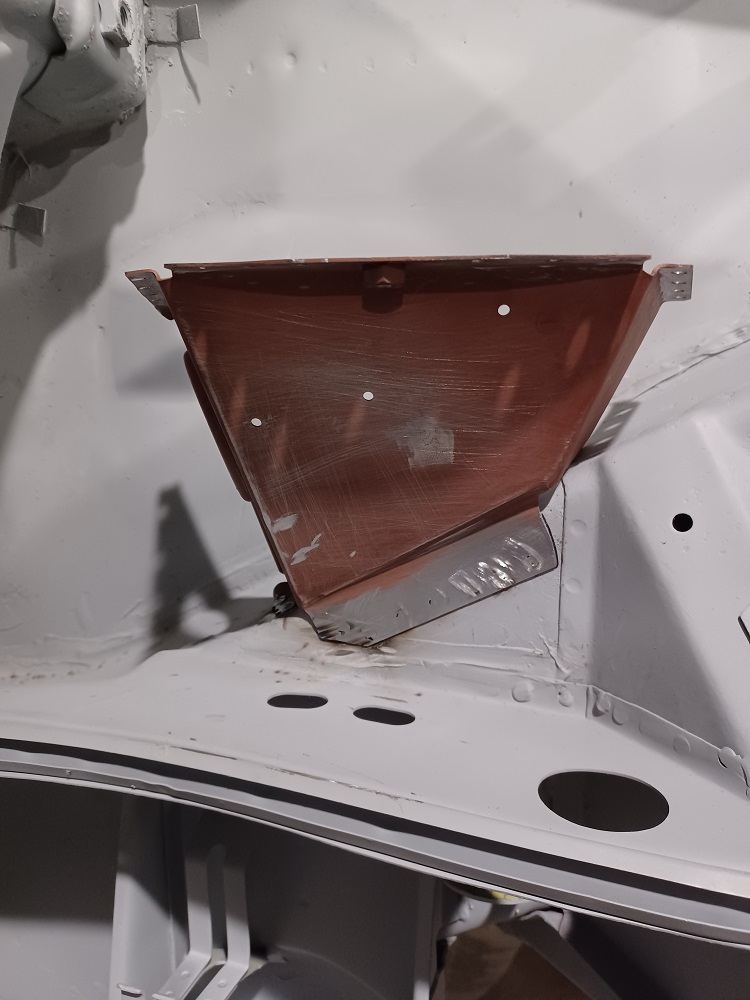
So glad the world is back up in our universe.....while we were all away, I did accomplish a few small things on the twin. First off, I had completely spaced out the battery tray being replaced in the engine compartment.....I was so impressed with all that extra space...lol
  |
| Puebloswatcop |
 Nov 28 2022, 07:10 PM Nov 28 2022, 07:10 PM
Post
#848
|
|
Senior Member    Group: Members Posts: 1,435 Joined: 27-December 14 From: Mineola, Texas Member No.: 18,258 Region Association: Southwest Region |
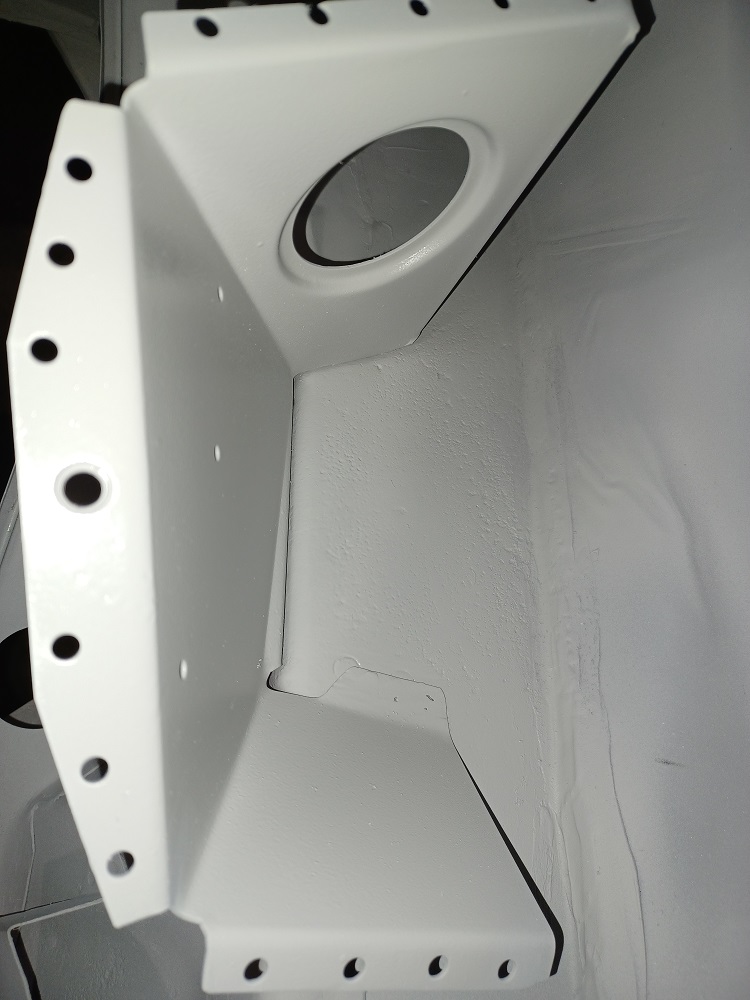
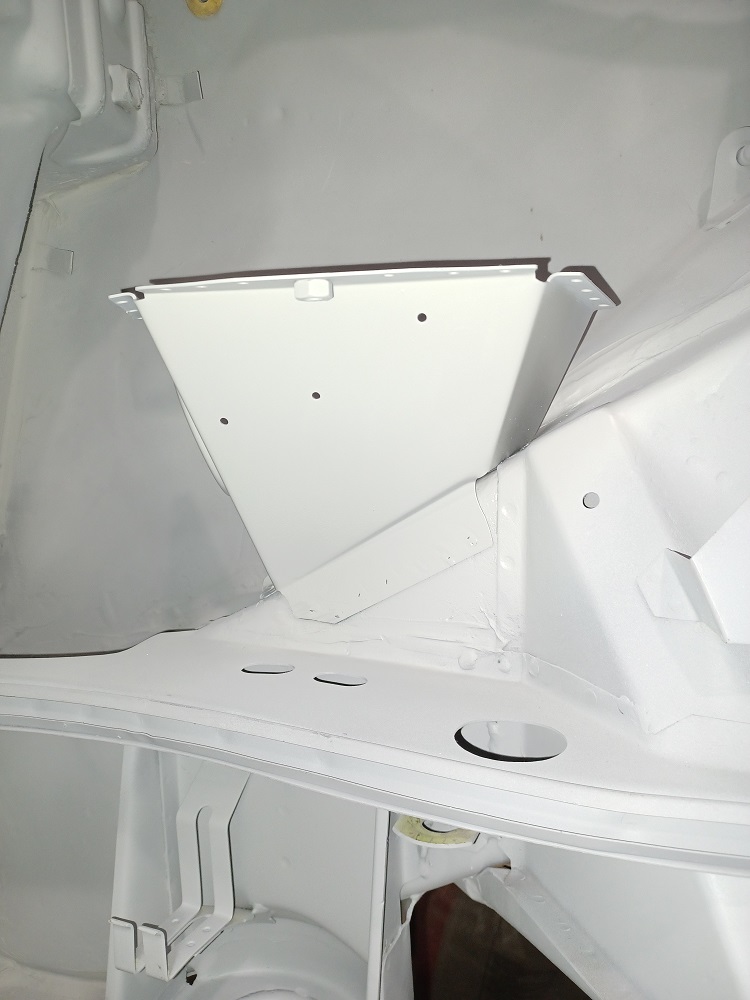
So that was one order of business. And while the support is in, I have not finished installing the tray, as I wanto to paint the inside with POR15 before placing the tray on. But had to order the POR15, so am waiting for it to arrive.
  |
| Puebloswatcop |
 Nov 28 2022, 07:26 PM Nov 28 2022, 07:26 PM
Post
#849
|
|
Senior Member    Group: Members Posts: 1,435 Joined: 27-December 14 From: Mineola, Texas Member No.: 18,258 Region Association: Southwest Region |
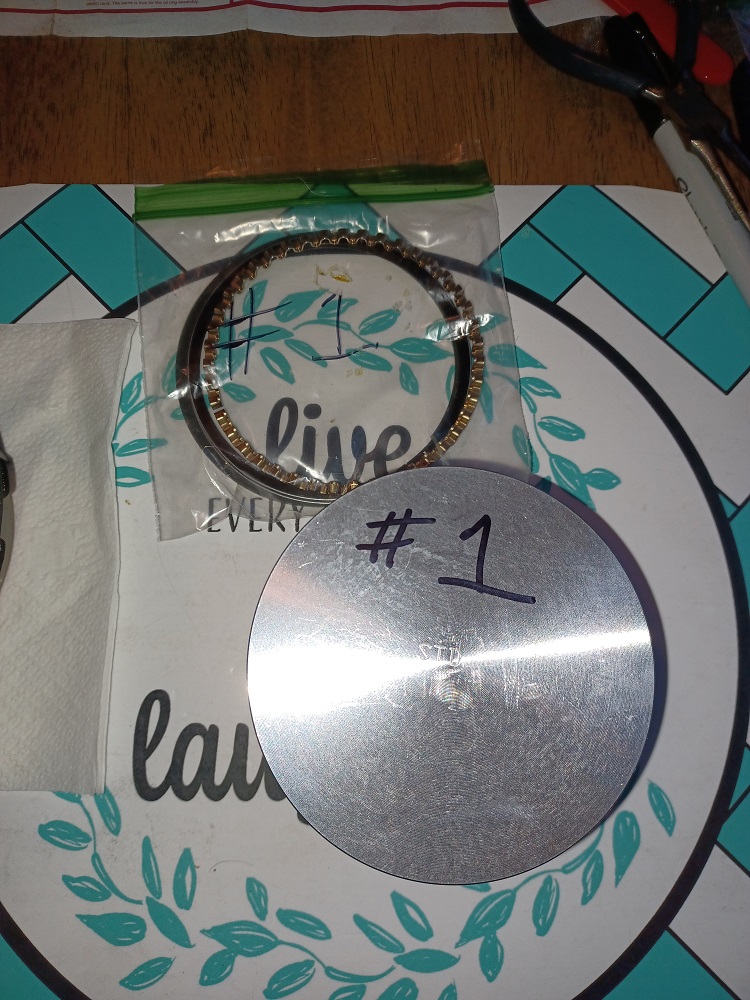
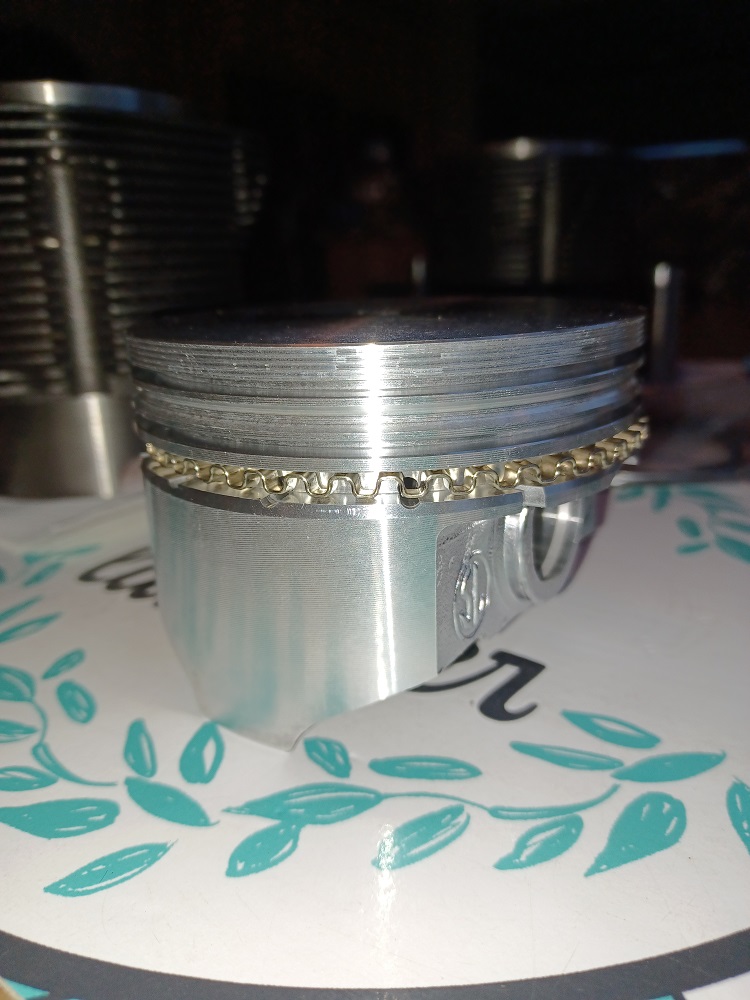
So I was back to playing with the engine. I am happy with the deck height and in the vicinity of the 8.5:1 CR that I was looking for, so it was time to ring up the pistons and install the first two.
  |
| Puebloswatcop |
 Nov 28 2022, 07:28 PM Nov 28 2022, 07:28 PM
Post
#850
|
|
Senior Member    Group: Members Posts: 1,435 Joined: 27-December 14 From: Mineola, Texas Member No.: 18,258 Region Association: Southwest Region |
I had to go buy a new pair of ring installer pliers, since mine must still be in Colorado or got lost in the move, but what the heck a great excuse to buy new tools.
After installing the pistons in their respective cylinders and spiral locking the pins in (boy are those a pain to install) it was time to check the valve clearances, so in went the clay.... 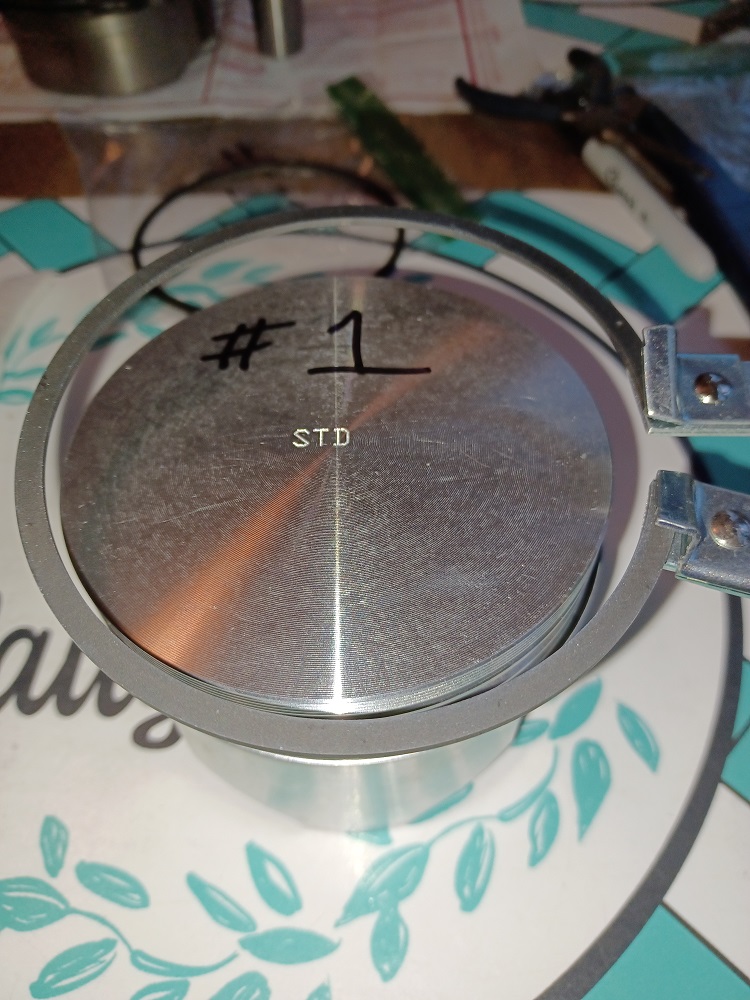 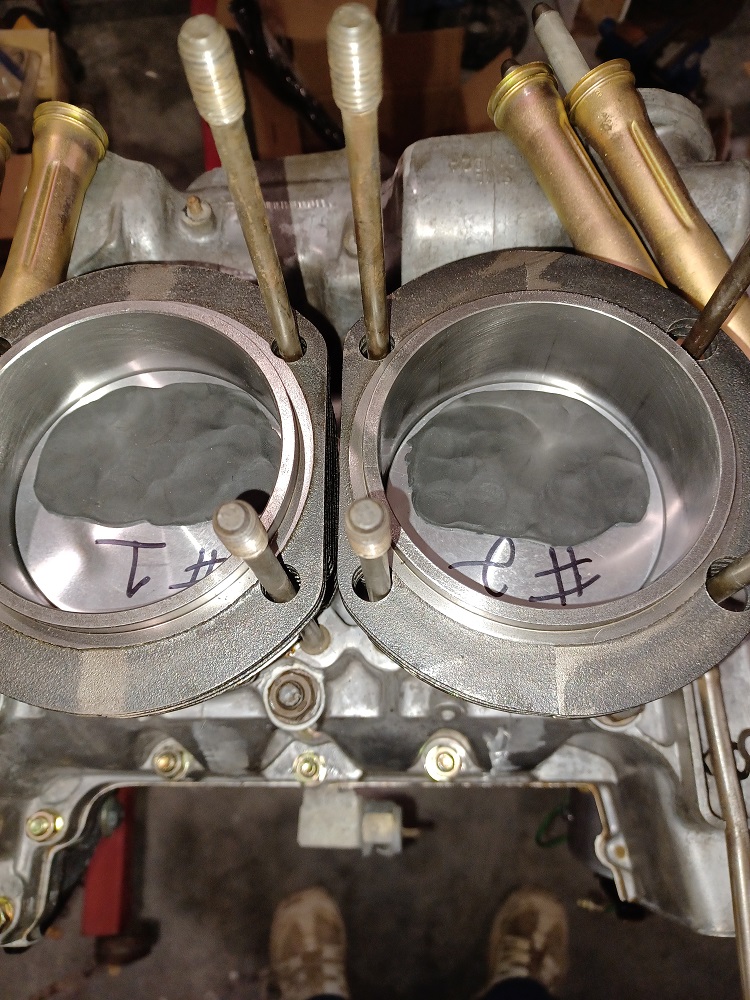 |
| Puebloswatcop |
 Nov 28 2022, 07:40 PM Nov 28 2022, 07:40 PM
Post
#851
|
|
Senior Member    Group: Members Posts: 1,435 Joined: 27-December 14 From: Mineola, Texas Member No.: 18,258 Region Association: Southwest Region |
After installing and torquing down the heads and setting the valve clearances, I rotated the enginne several times, then removed the heads to check the clay impressions...
In Cylinder #1 you can see the clay was well into the chamber and got just a small nick in it from the intake valve with no impression from the exhaust valve. In the #2 Cylinder there was a more pronounced impression from the intake valve, but still none from the exhaust valve. Since my clay was approximately 2.5 mm thick There should be more than adequate clearances for the valves. 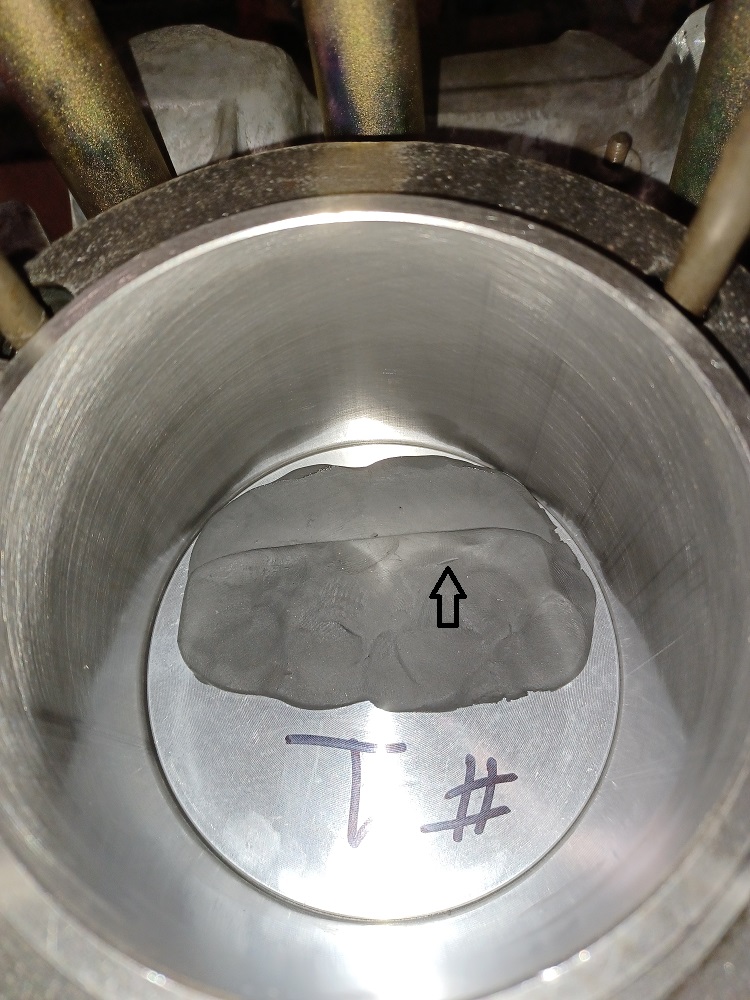 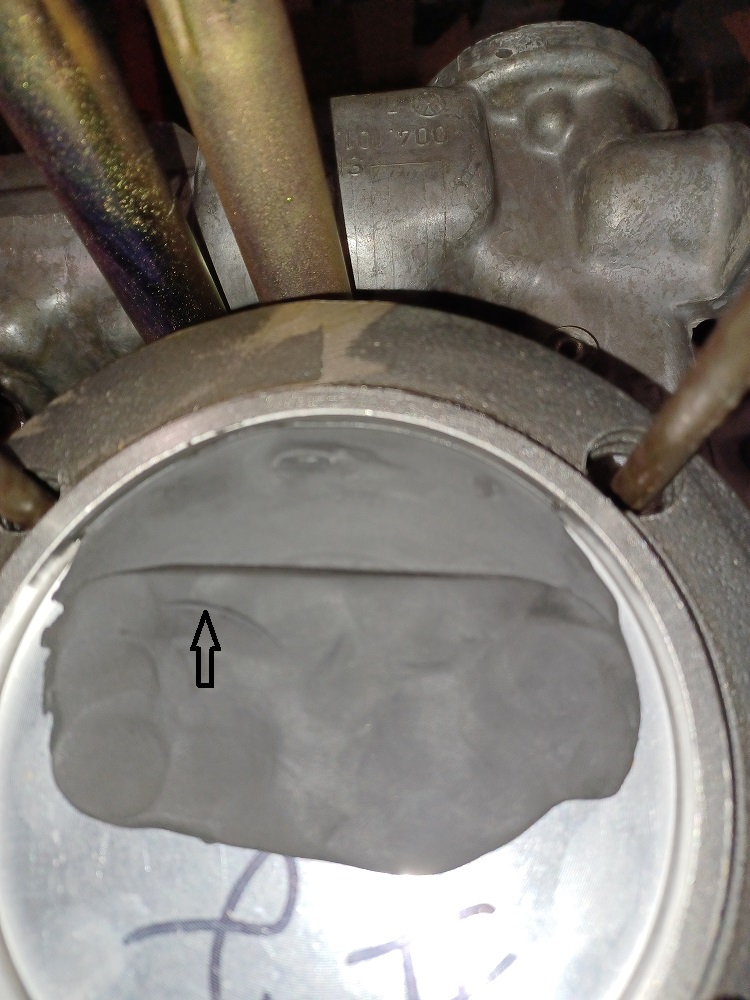 |
| bkrantz |
 Nov 28 2022, 09:39 PM Nov 28 2022, 09:39 PM
Post
#852
|
|
914 Guru      Group: Members Posts: 8,322 Joined: 3-August 19 From: SW Colorado Member No.: 23,343 Region Association: Rocky Mountains 
|
Looks good.
|
| Puebloswatcop |
 Nov 29 2022, 06:31 PM Nov 29 2022, 06:31 PM
Post
#853
|
|
Senior Member    Group: Members Posts: 1,435 Joined: 27-December 14 From: Mineola, Texas Member No.: 18,258 Region Association: Southwest Region |
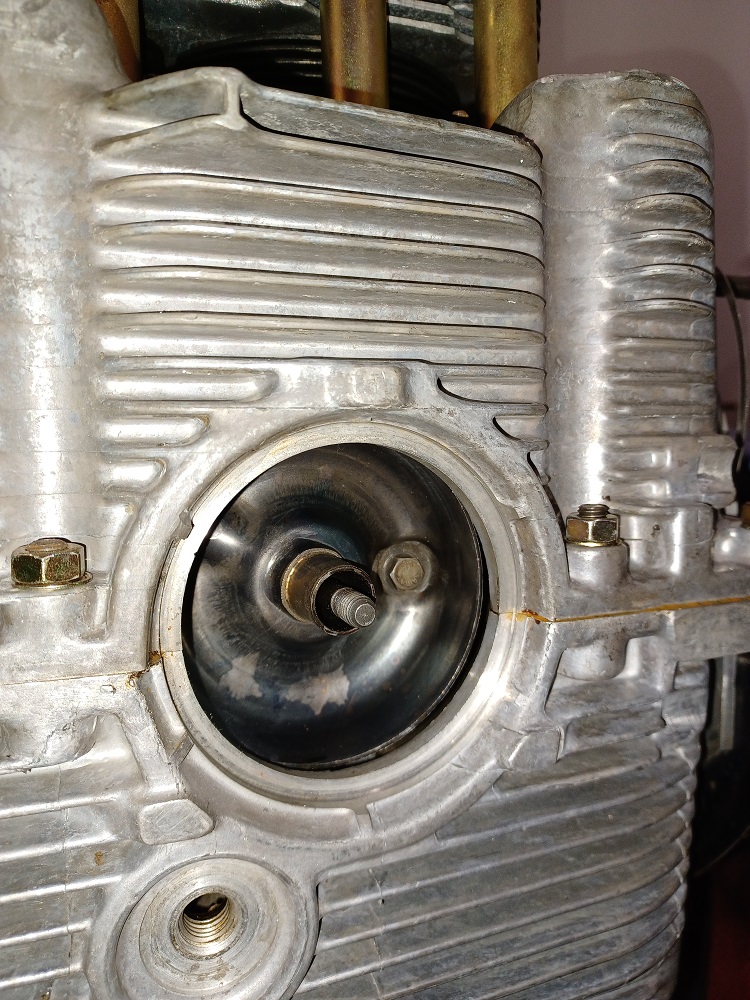
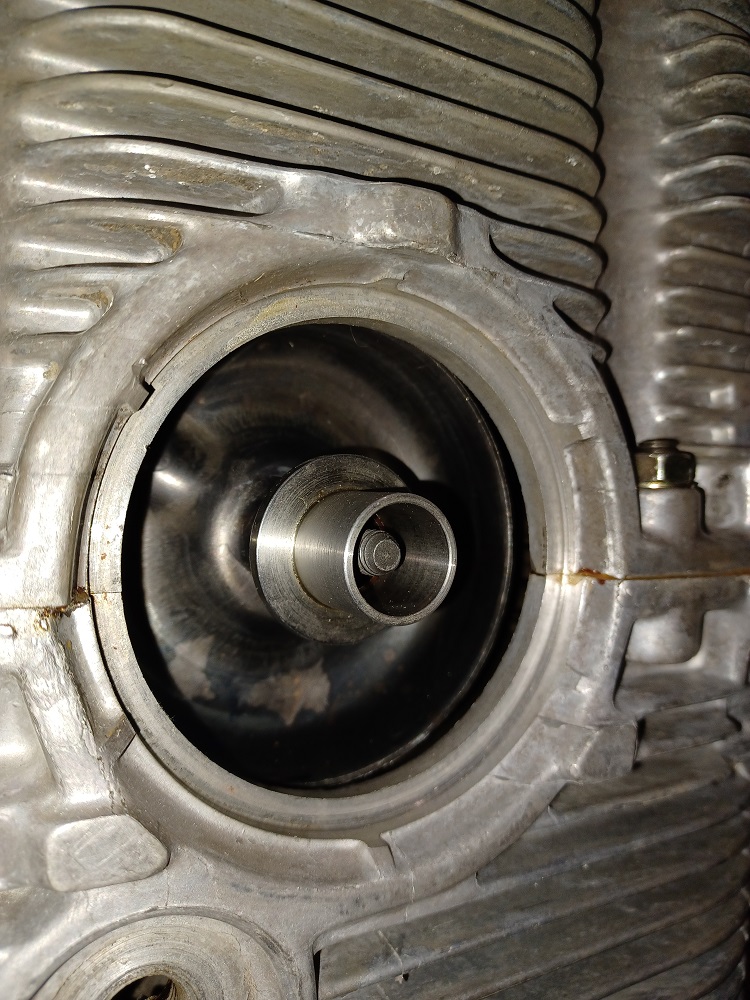
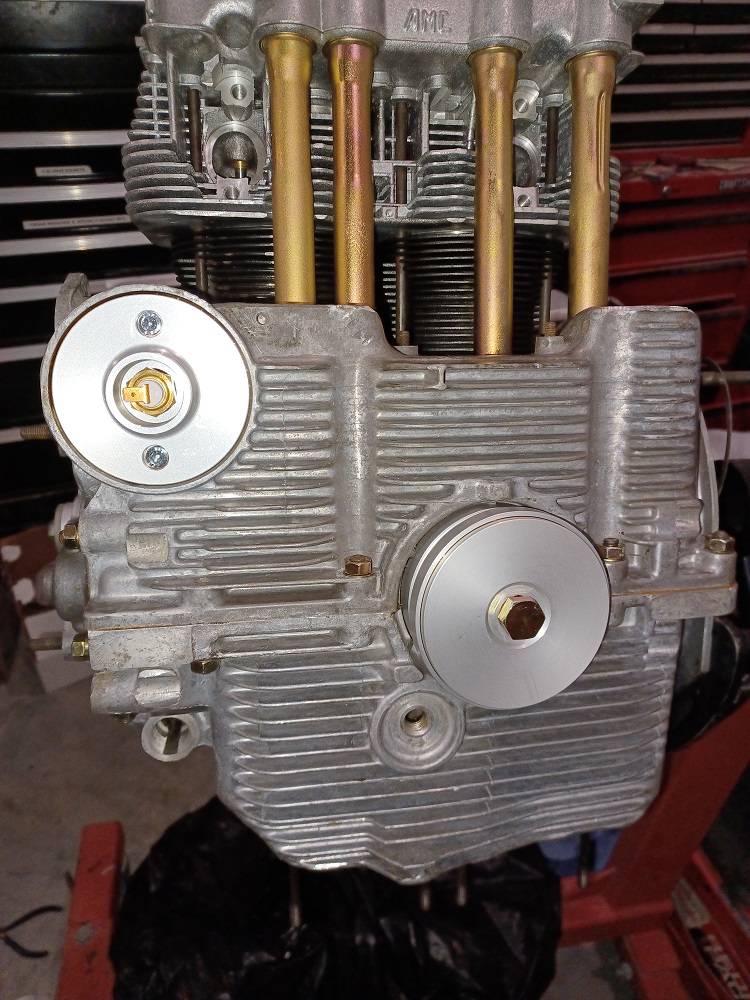
Then I figured it might be time to seal up some of the gaping holes in the engine that would allow unwanted dirt and dust inside. I started with the oil pick up. I did buy the Tuna Can setup from 914 Werke. The product seems very well made. First step was to install the extension onto the pick up tube. Since it needs to be pressed on about 1/2 inch, I coated about 1/4 inch of the pickup with Aviation gasket sealer and then pressed it into place.
  |
| Puebloswatcop |
 Nov 29 2022, 06:38 PM Nov 29 2022, 06:38 PM
Post
#854
|
|
Senior Member    Group: Members Posts: 1,435 Joined: 27-December 14 From: Mineola, Texas Member No.: 18,258 Region Association: Southwest Region |
I decided to keep the particle screen in the engine so had to drill out the center hole to fit the new bolt with the kit, then installed the 2 gaskets (one above and one below the screen) coating everything with sealer.
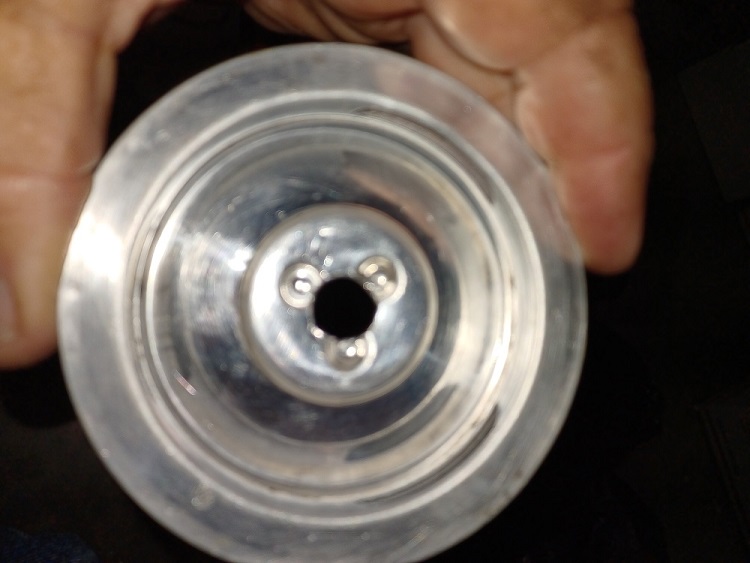 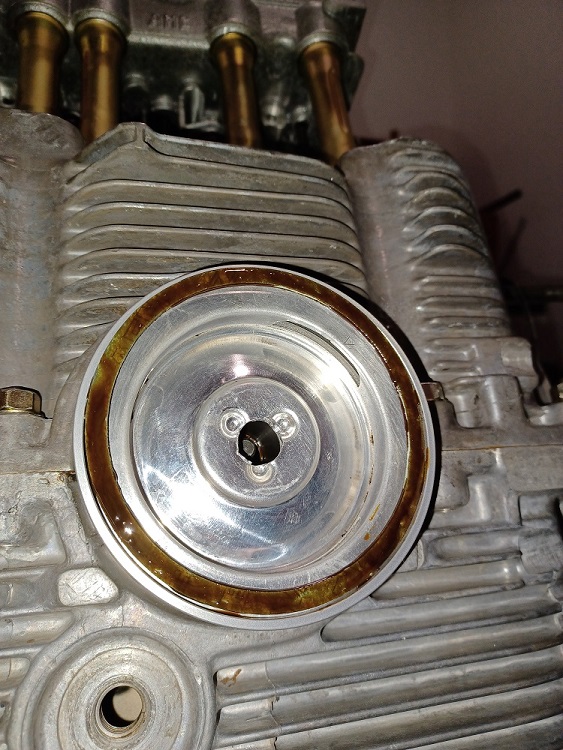 |
| Puebloswatcop |
 Nov 29 2022, 06:47 PM Nov 29 2022, 06:47 PM
Post
#855
|
|
Senior Member    Group: Members Posts: 1,435 Joined: 27-December 14 From: Mineola, Texas Member No.: 18,258 Region Association: Southwest Region |
Then more sealant and add the tuna can and cover......
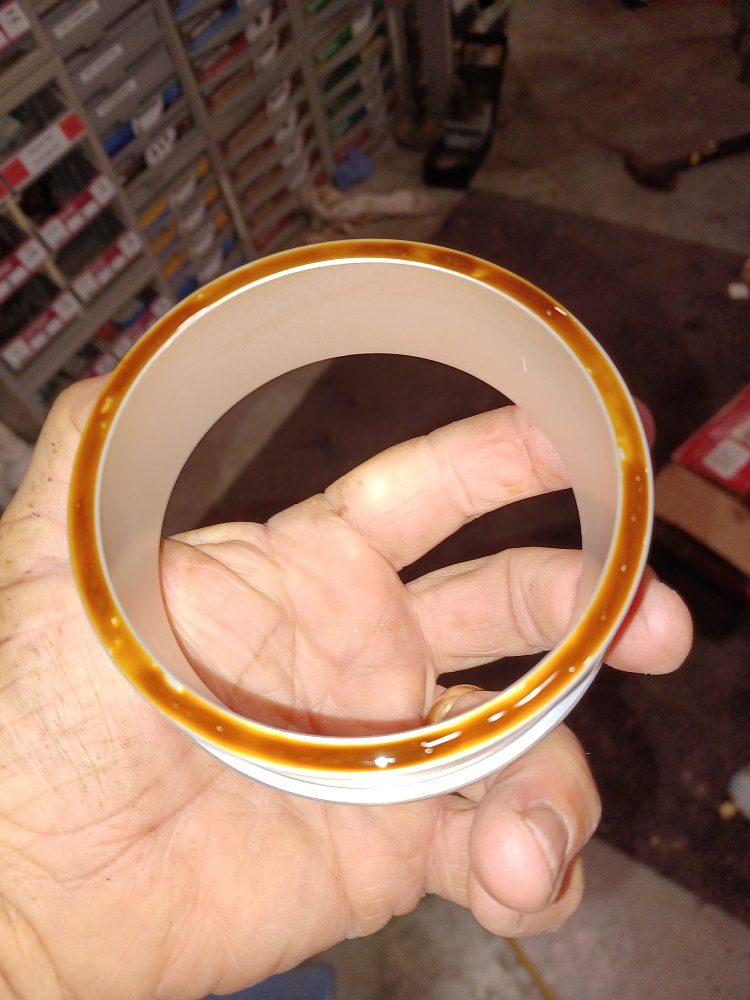 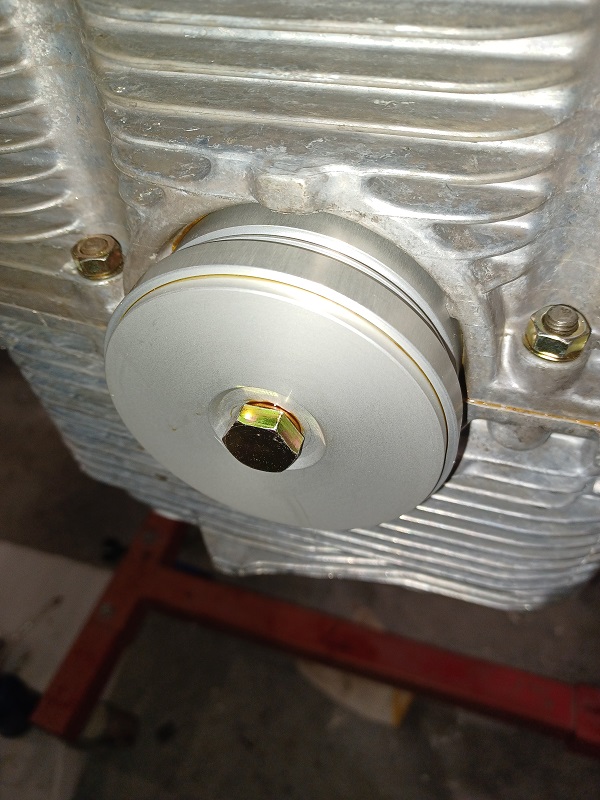 |
| Puebloswatcop |
 Nov 29 2022, 06:50 PM Nov 29 2022, 06:50 PM
Post
#856
|
|
Senior Member    Group: Members Posts: 1,435 Joined: 27-December 14 From: Mineola, Texas Member No.: 18,258 Region Association: Southwest Region |
Then time to plug up the second larges hole, the taco plate and the oild temp sending unit...
 |
| Puebloswatcop |
 Nov 29 2022, 06:52 PM Nov 29 2022, 06:52 PM
Post
#857
|
|
Senior Member    Group: Members Posts: 1,435 Joined: 27-December 14 From: Mineola, Texas Member No.: 18,258 Region Association: Southwest Region |
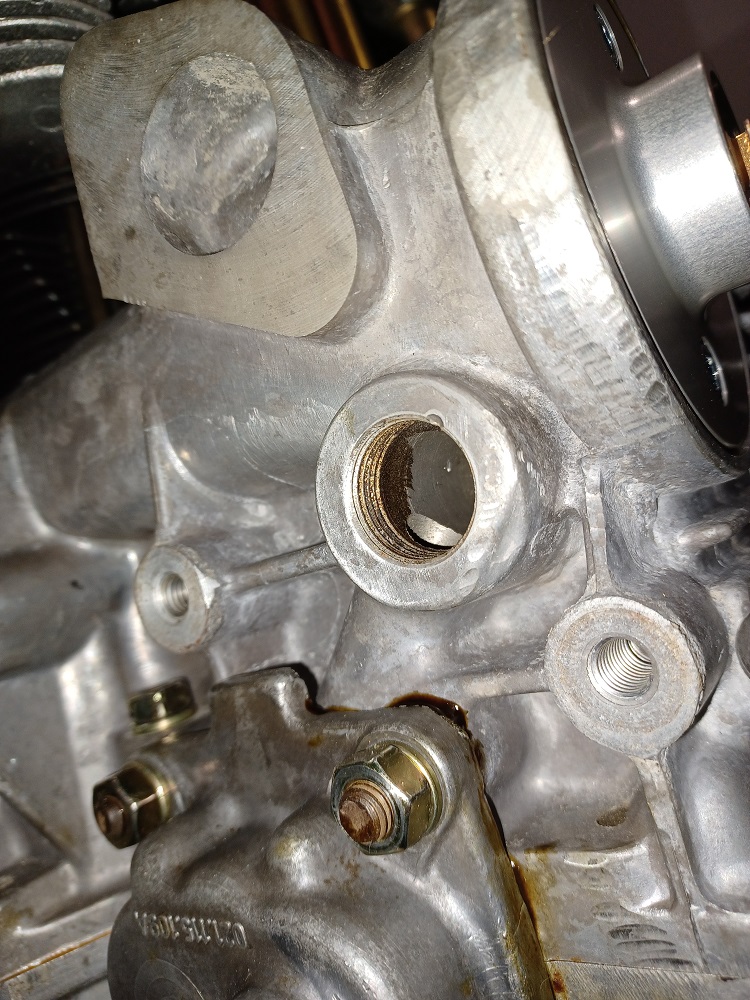
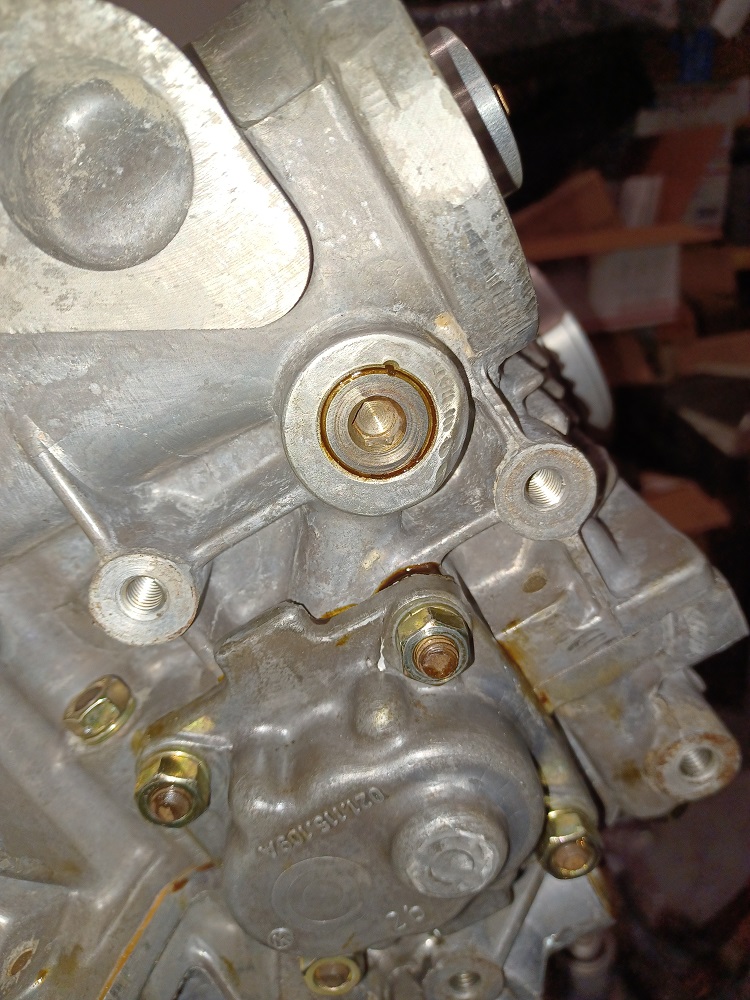
Then it was on to the oil galley plugs....
  |
| Puebloswatcop |
 Nov 29 2022, 06:55 PM Nov 29 2022, 06:55 PM
Post
#858
|
|
Senior Member    Group: Members Posts: 1,435 Joined: 27-December 14 From: Mineola, Texas Member No.: 18,258 Region Association: Southwest Region |
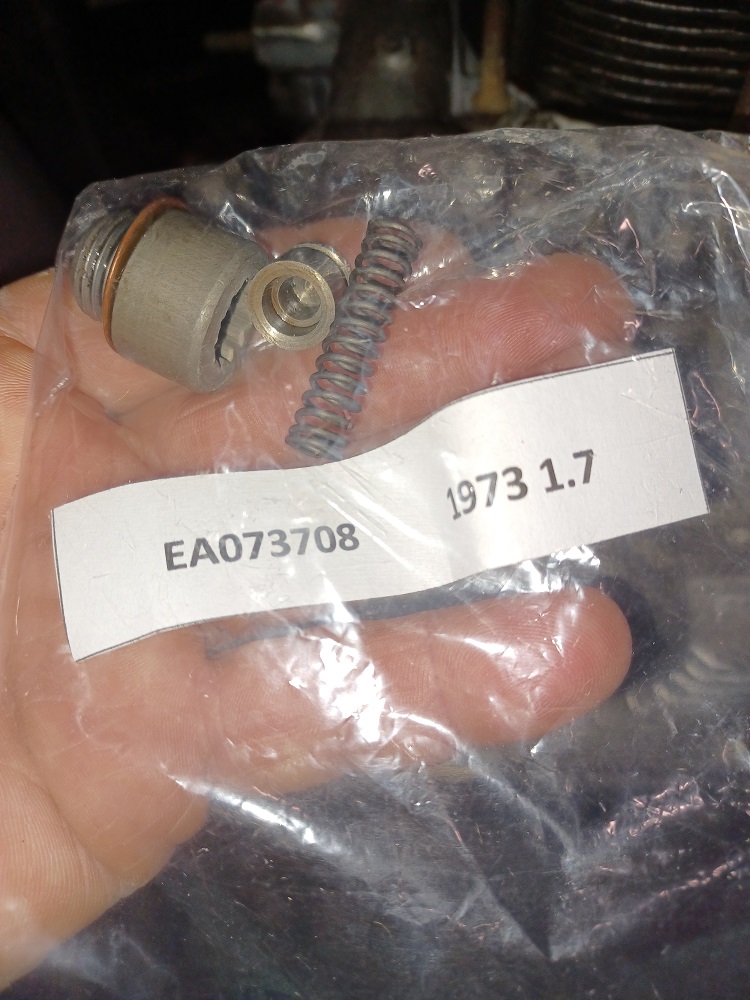
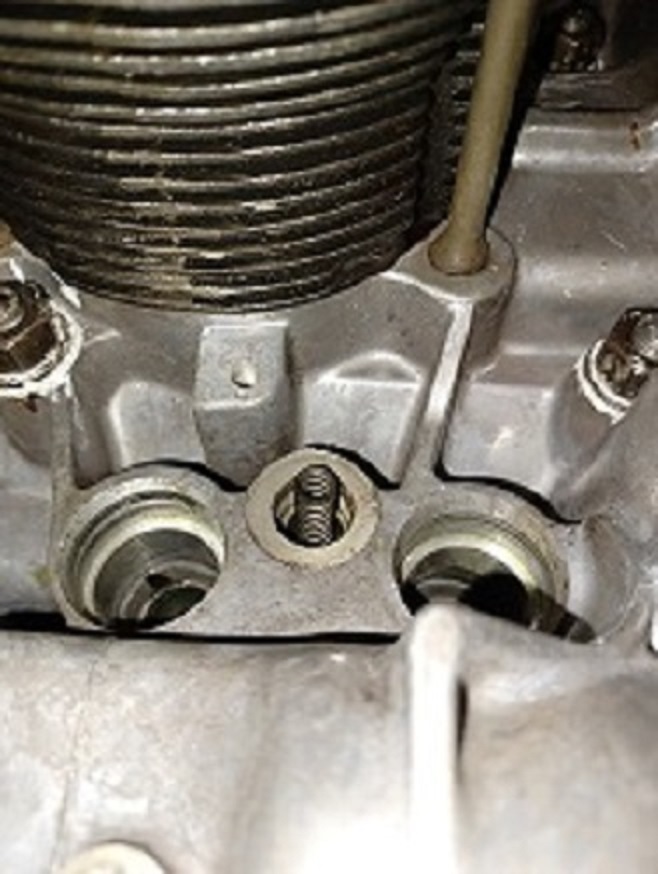
And the oil flow control valves...I made sure to match the valves that came from this engine for re-installation, since I have several engines torn down.
  |
| Puebloswatcop |
 Nov 29 2022, 06:58 PM Nov 29 2022, 06:58 PM
Post
#859
|
|
Senior Member    Group: Members Posts: 1,435 Joined: 27-December 14 From: Mineola, Texas Member No.: 18,258 Region Association: Southwest Region |
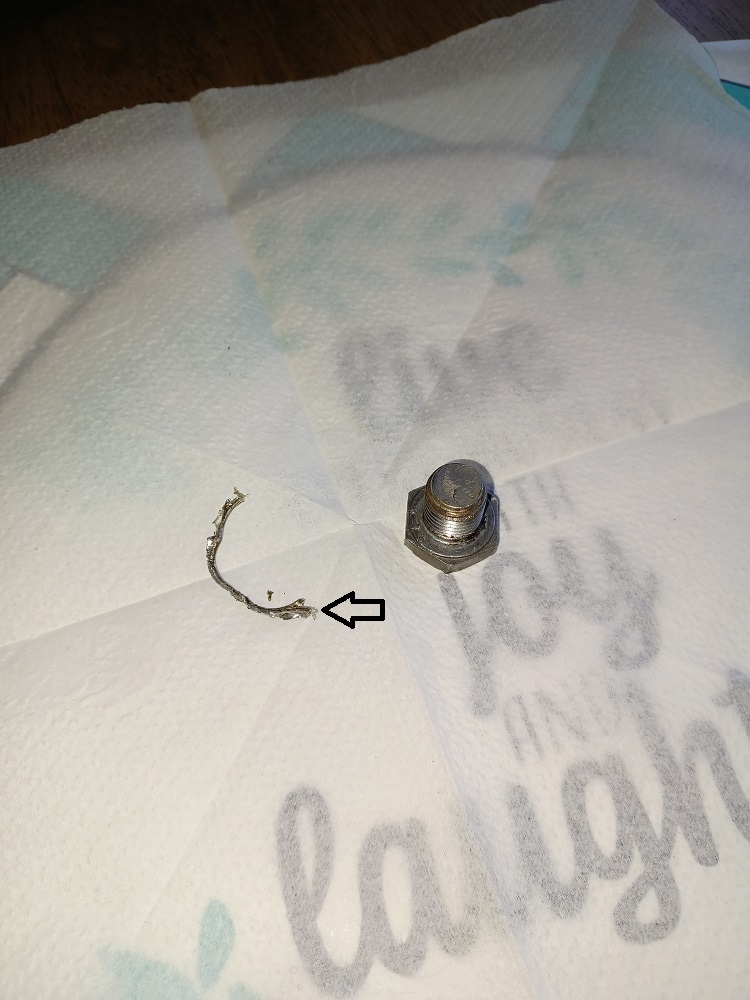
Last but not least was the oil drain plug. When I pulled it out of the bag, Something didn't quite look right. I realized that there was part of the old sealing ring embeded on the plug threads, bet the PO was always wondering why there was a leak there......
 |
| Puebloswatcop |
 Nov 29 2022, 07:02 PM Nov 29 2022, 07:02 PM
Post
#860
|
|
Senior Member    Group: Members Posts: 1,435 Joined: 27-December 14 From: Mineola, Texas Member No.: 18,258 Region Association: Southwest Region |
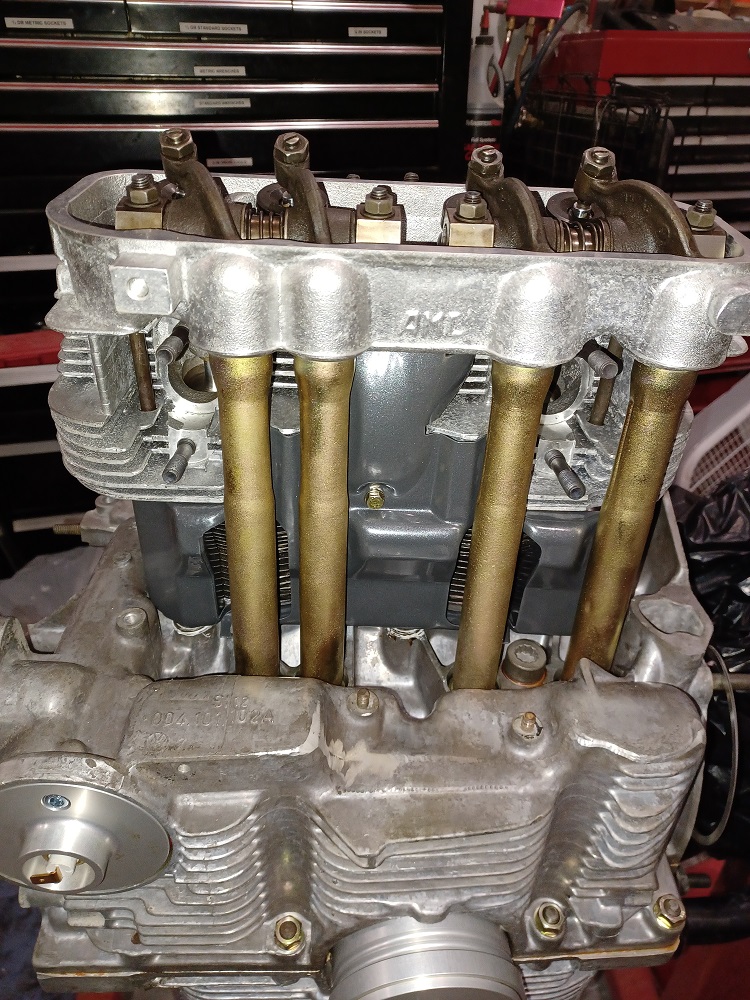
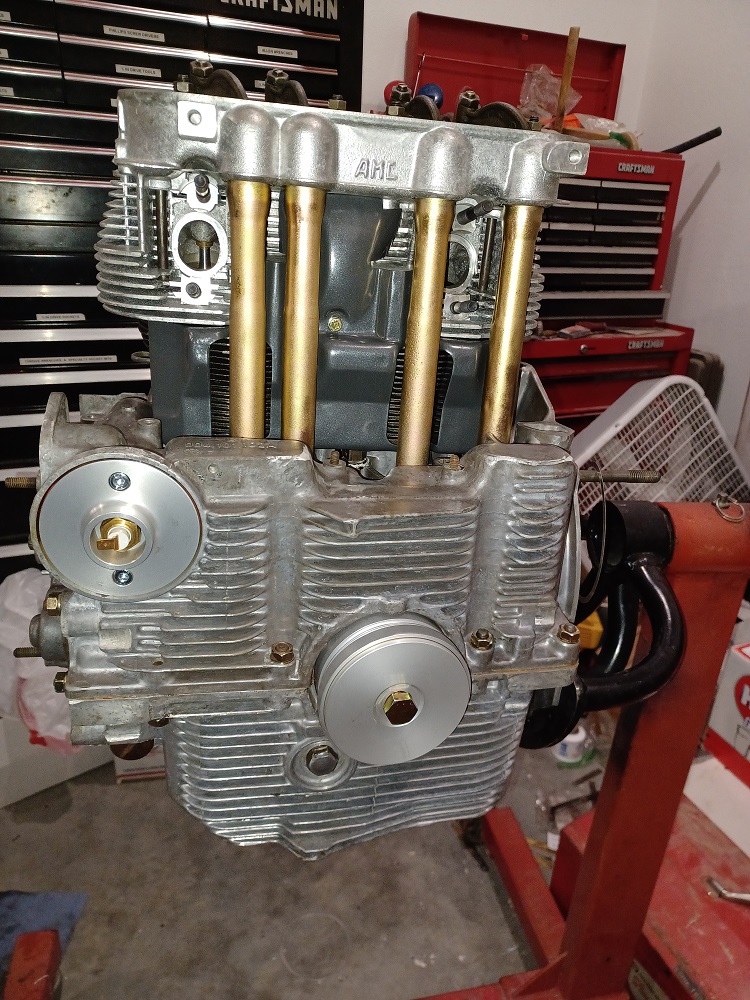
Then it was time to install the very first piece of the newly powder coated engine tin under the cylinders and the push rod tubes...
  |
  |
1 User(s) are reading this topic (1 Guests and 0 Anonymous Users)
0 Members:

|
Lo-Fi Version | Time is now: 3rd April 2025 - 11:22 PM |
Invision Power Board
v9.1.4 © 2025 IPS, Inc.


