|
|

|
Porsche, and the Porsche crest are registered trademarks of Dr. Ing. h.c. F. Porsche AG.
This site is not affiliated with Porsche in any way. Its only purpose is to provide an online forum for car enthusiasts. All other trademarks are property of their respective owners. |
|
|
  |
| Puebloswatcop |
 Feb 23 2024, 07:47 AM Feb 23 2024, 07:47 AM
Post
#981
|
|
Senior Member    Group: Members Posts: 1,430 Joined: 27-December 14 From: Mineola, Texas Member No.: 18,258 Region Association: Southwest Region |
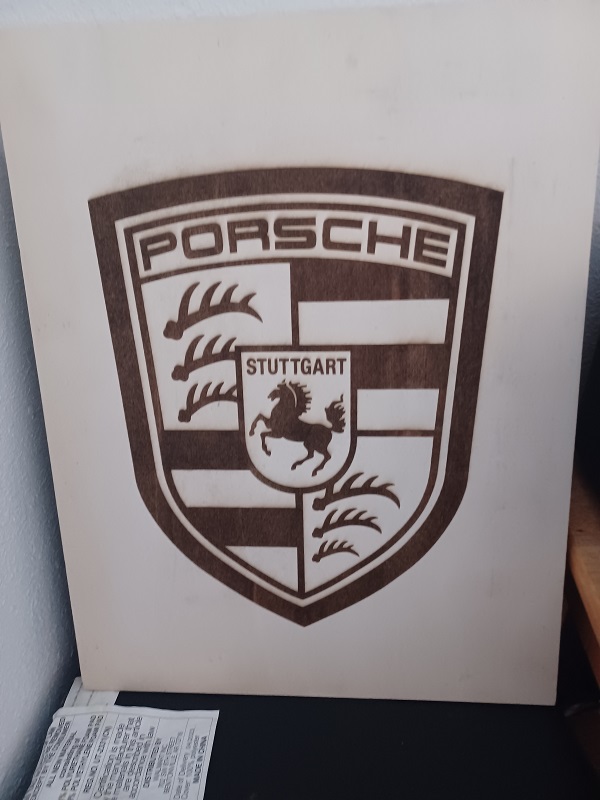
Got an unexpected gift from my oldest son and his wife. She has her own business and is very creative and talented. They made me this laser engraved Birch plaque for my wall in my office (when the shop is done).
 |
| Puebloswatcop |
 Apr 20 2024, 07:11 PM Apr 20 2024, 07:11 PM
Post
#982
|
|
Senior Member    Group: Members Posts: 1,430 Joined: 27-December 14 From: Mineola, Texas Member No.: 18,258 Region Association: Southwest Region |
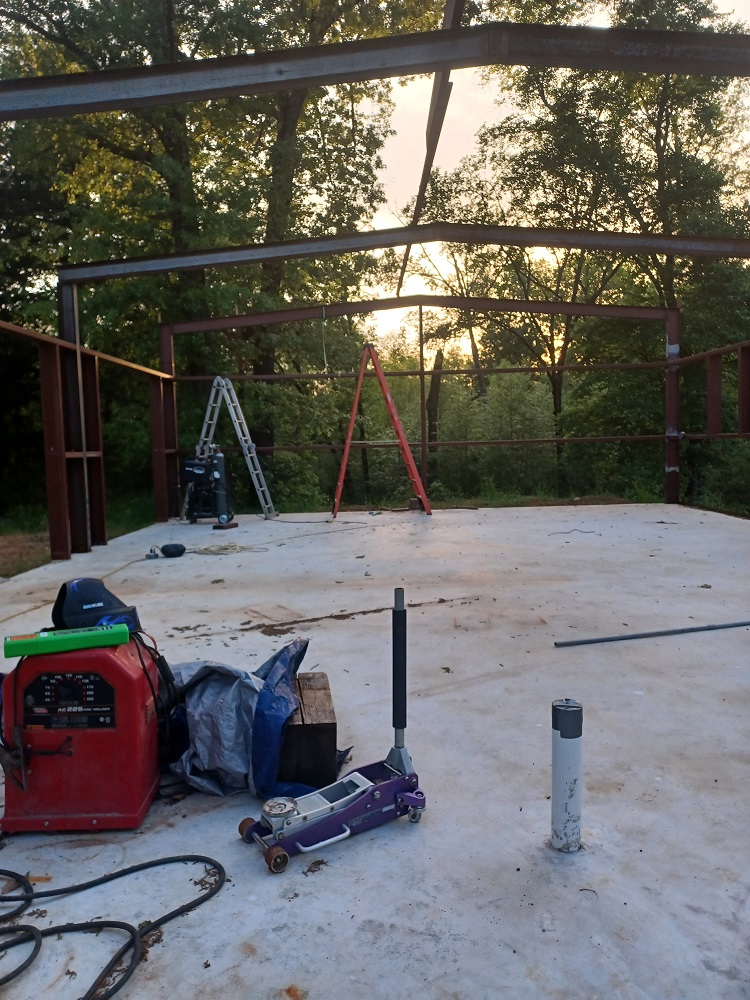
So, the shop is coming along, all of the walls and doors are framed in, Just the roof perlons to install, then it's time for metal. What I did realize is that over the past several months I haven't done anything with the car in a long time. So I vowed to accompish at least one task each week on or for the car.
 |
| Puebloswatcop |
 Apr 20 2024, 07:14 PM Apr 20 2024, 07:14 PM
Post
#983
|
|
Senior Member    Group: Members Posts: 1,430 Joined: 27-December 14 From: Mineola, Texas Member No.: 18,258 Region Association: Southwest Region |
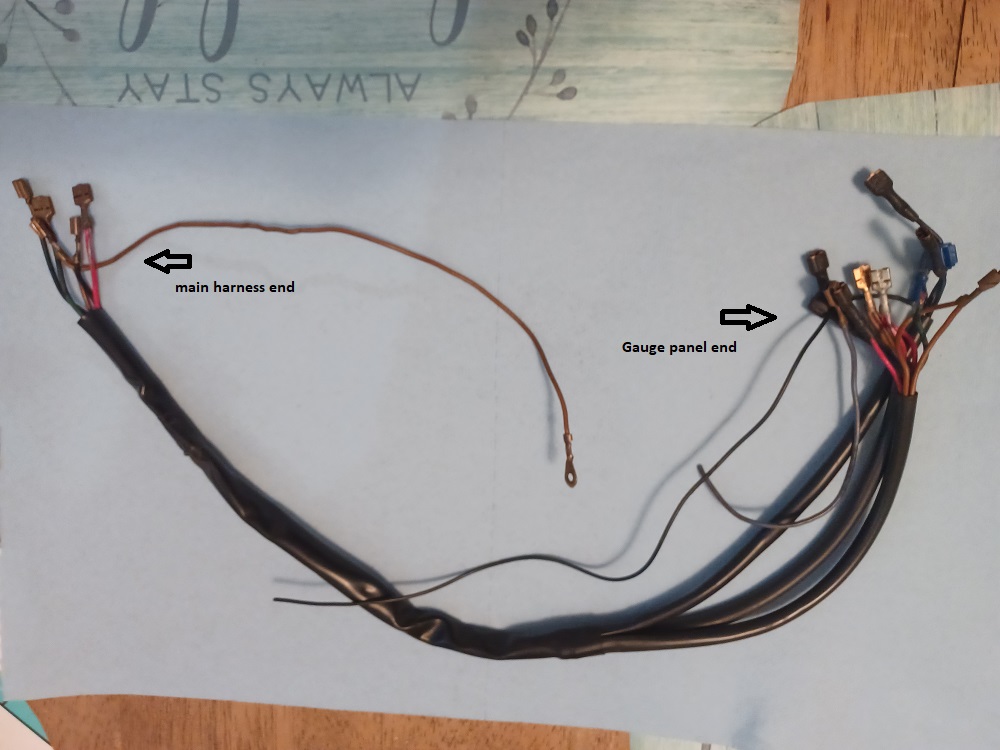
Since it is pouring rain today, I had to find something to do inside, I looked around and found my center console wiring harness and decided to work on it. After inspecting it I found several issues...
 |
| Puebloswatcop |
 Apr 20 2024, 07:19 PM Apr 20 2024, 07:19 PM
Post
#984
|
|
Senior Member    Group: Members Posts: 1,430 Joined: 27-December 14 From: Mineola, Texas Member No.: 18,258 Region Association: Southwest Region |
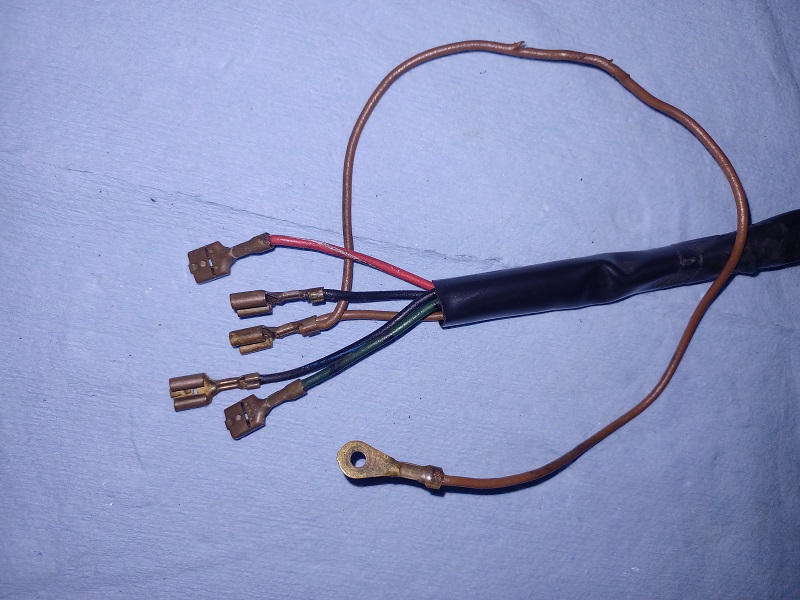
The first problem I found was at the end where the console harness plugs into the Main Chasis harness. You can see that there are several knicks and cuts on the ground wire that runs to the defrost light.
 |
| Puebloswatcop |
 Apr 20 2024, 07:24 PM Apr 20 2024, 07:24 PM
Post
#985
|
|
Senior Member    Group: Members Posts: 1,430 Joined: 27-December 14 From: Mineola, Texas Member No.: 18,258 Region Association: Southwest Region |
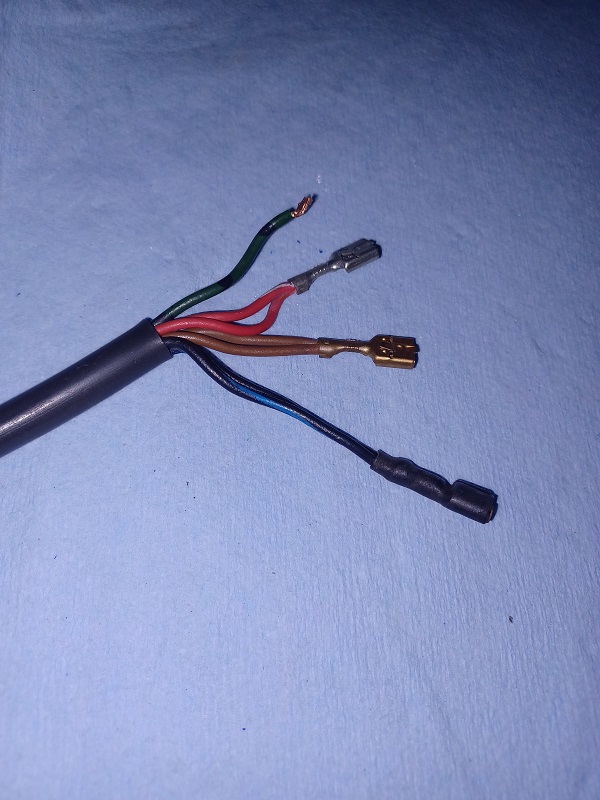
Next was the #1 lead group that runs to the temperature guage. As you can see, the plug end is missing and one spade connector is missing.
 |
| Puebloswatcop |
 Apr 20 2024, 07:28 PM Apr 20 2024, 07:28 PM
Post
#986
|
|
Senior Member    Group: Members Posts: 1,430 Joined: 27-December 14 From: Mineola, Texas Member No.: 18,258 Region Association: Southwest Region |
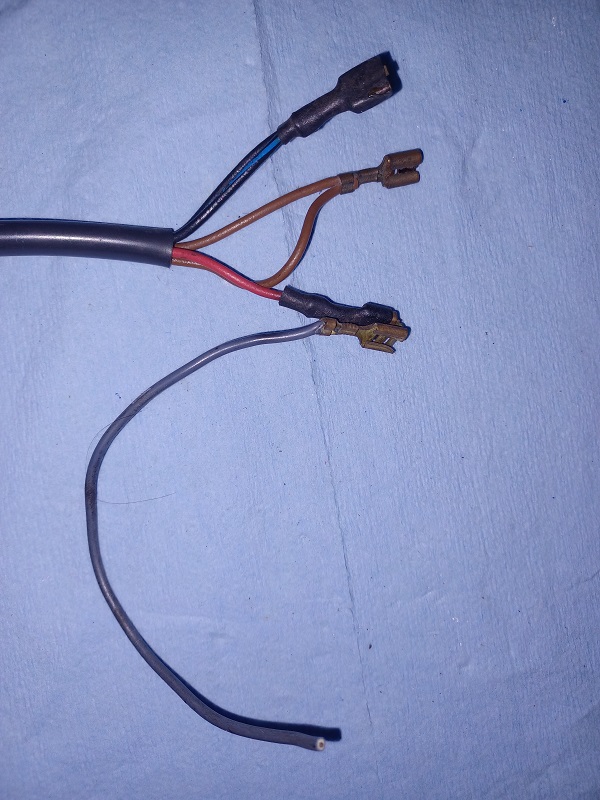
On lead 2 that runs to the Volt Meter. It wasn't bad except that the PO had added a wire to the red wire. Not sure where it went.
 |
| Puebloswatcop |
 Apr 20 2024, 07:31 PM Apr 20 2024, 07:31 PM
Post
#987
|
|
Senior Member    Group: Members Posts: 1,430 Joined: 27-December 14 From: Mineola, Texas Member No.: 18,258 Region Association: Southwest Region |
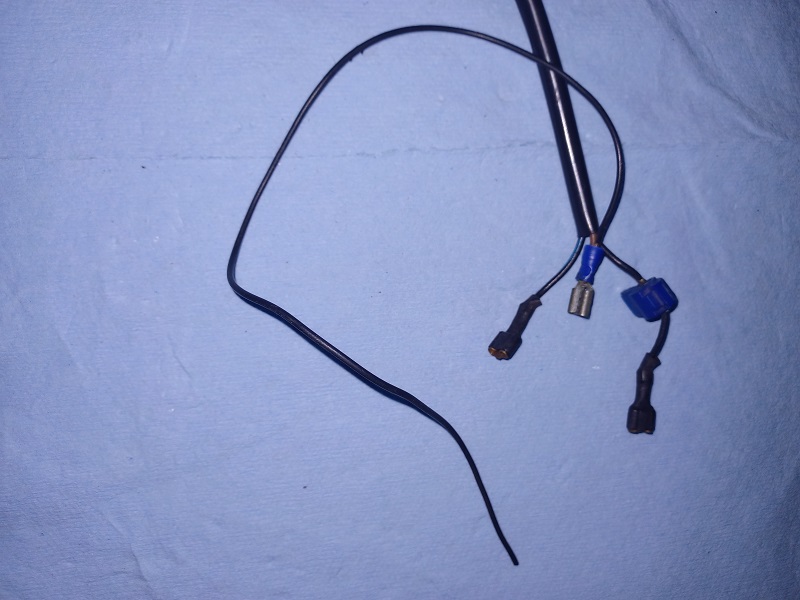
Last was the 3rd lead which runs to the clock....It had an extra wire added to the ground wire, and a splice in the power wire....
 |
| Puebloswatcop |
 Apr 20 2024, 07:36 PM Apr 20 2024, 07:36 PM
Post
#988
|
|
Senior Member    Group: Members Posts: 1,430 Joined: 27-December 14 From: Mineola, Texas Member No.: 18,258 Region Association: Southwest Region |
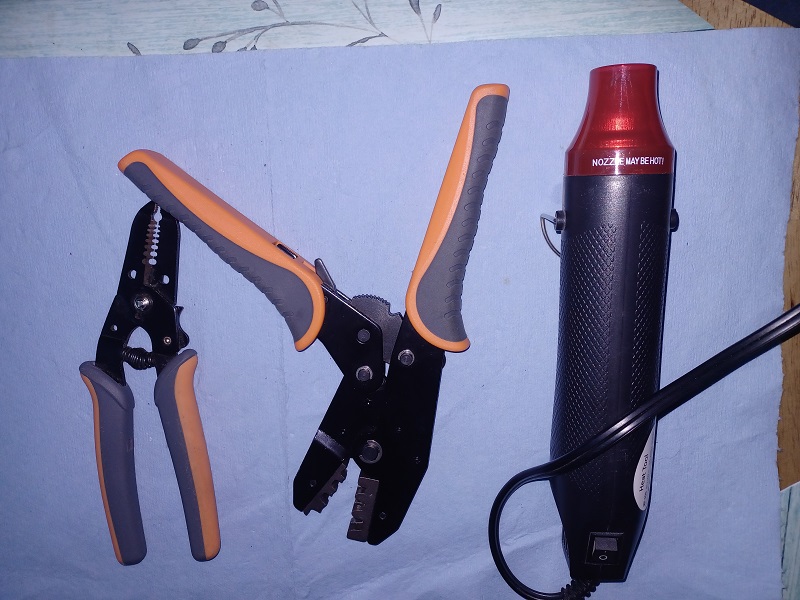
I guess I could have just repaired the deficiencies on the harness I had, but I decided instead to build a new harness. I had parts and wire I ordered previously, so decided to make my own, that way, I didn't have to worry about the wires in the sleeves that I couldn't see. So I gathered up my wire strippers, my crimping tool, with the double crimp dies in it and a heat shrink heat gun.
 |
| Puebloswatcop |
 Apr 20 2024, 07:40 PM Apr 20 2024, 07:40 PM
Post
#989
|
|
Senior Member    Group: Members Posts: 1,430 Joined: 27-December 14 From: Mineola, Texas Member No.: 18,258 Region Association: Southwest Region |
Then I gathered up the wire I would need to build the harness. One thing I found is that when you order brown wire, it is a darker brown than the original wire, not a big deal except its almost as dark as one black wire in the harness.
Attached image(s) 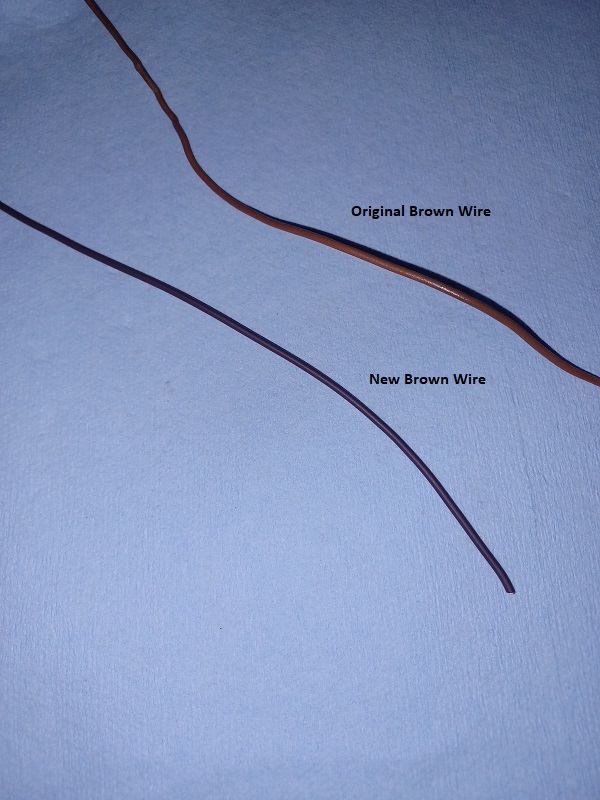
|
| Puebloswatcop |
 Apr 20 2024, 07:49 PM Apr 20 2024, 07:49 PM
Post
#990
|
|
Senior Member    Group: Members Posts: 1,430 Joined: 27-December 14 From: Mineola, Texas Member No.: 18,258 Region Association: Southwest Region |
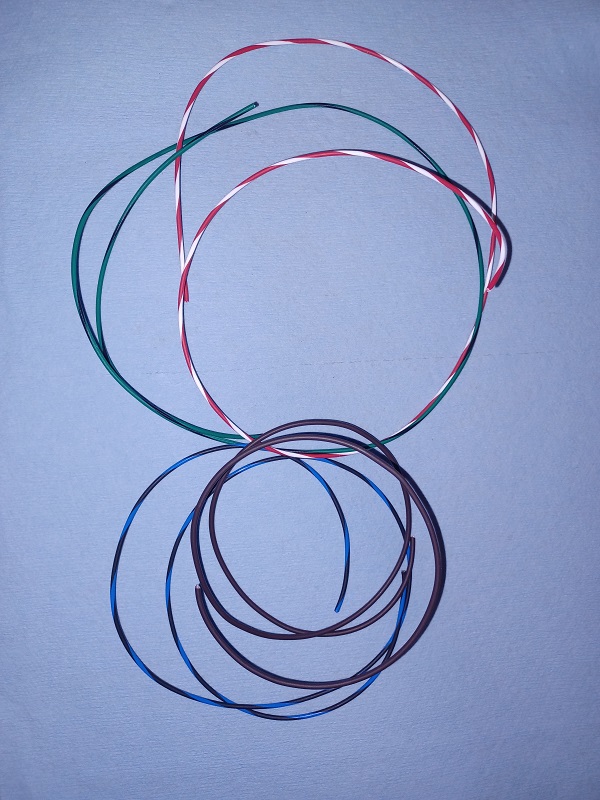
Then I gathered the wire. The good thing is all of the wire that runs to the guages is 0.5 mm (20 guage). Although I could not source wire that was marked the same as the original horizontal striped wire that Porsche used in the car, I was able to get the correct color coded wire. (Green/Black Stripe) (Red/White Stripe) (Blue/Black Stripe), etc.
 |
| Puebloswatcop |
 Apr 20 2024, 07:54 PM Apr 20 2024, 07:54 PM
Post
#991
|
|
Senior Member    Group: Members Posts: 1,430 Joined: 27-December 14 From: Mineola, Texas Member No.: 18,258 Region Association: Southwest Region |
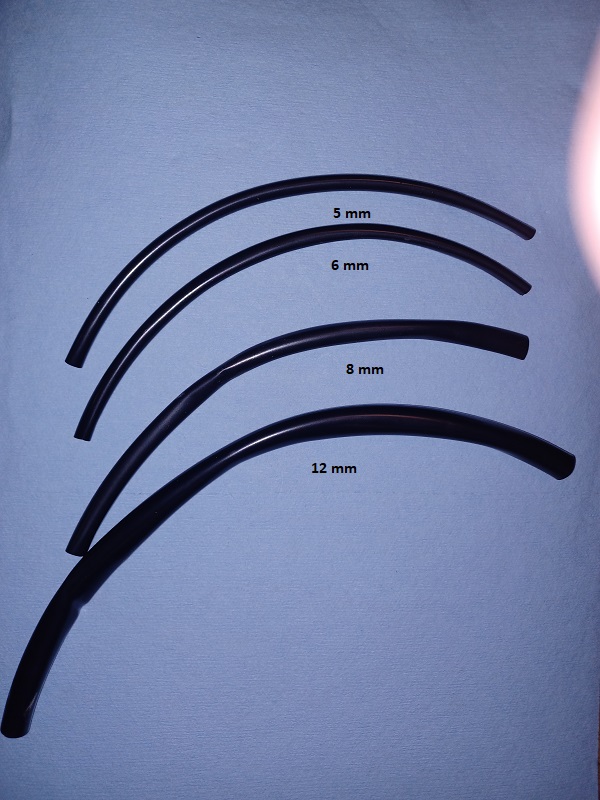
Then I gathered up the PVC sleeve material that make up the protective sleeve for the harness. This required 4 sizes. 5,6,8 and 12 mm. I found out that these sizes are pretty impotant when you go to assemble the whole harness. if they are not the correct size, you cant insert all of the wires together.
 |
| Puebloswatcop |
 Apr 20 2024, 08:00 PM Apr 20 2024, 08:00 PM
Post
#992
|
|
Senior Member    Group: Members Posts: 1,430 Joined: 27-December 14 From: Mineola, Texas Member No.: 18,258 Region Association: Southwest Region |
Then assembly began. I discovered it is very hard to gt all of the wires in place if you start in the main sleve, where the harness connects with the chasis harness. So I started with lead #1. it requires 2 blue/black, 2 red/white, 2 brown and one green/black wires.
These are fed through until about 3 inches of wire come out. Then I just tape the wires together to give me a reference to how much wire should be protruding and so it doesn't pull out of the sleeve. 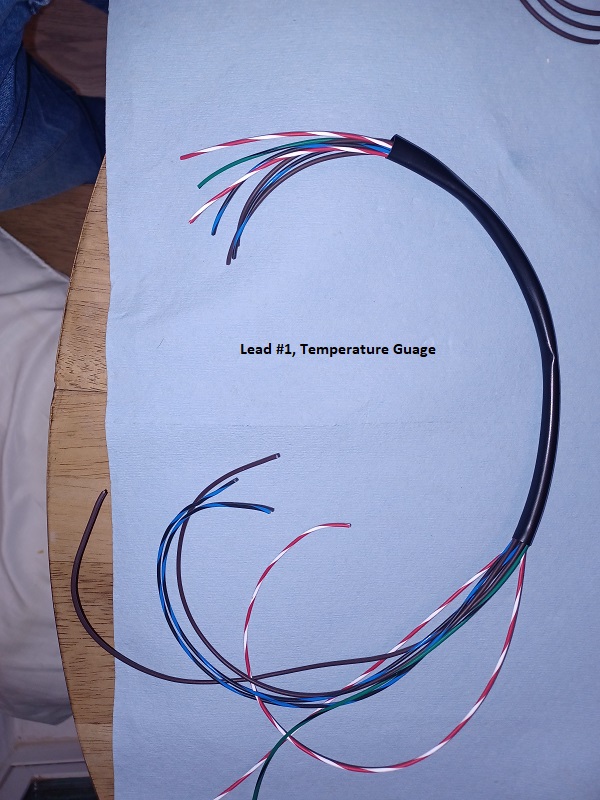 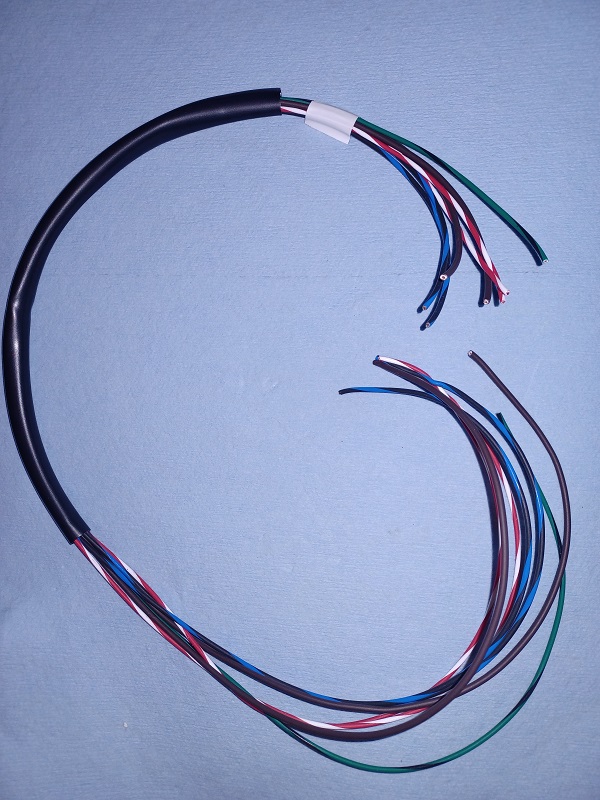 |
| Puebloswatcop |
 Apr 20 2024, 08:11 PM Apr 20 2024, 08:11 PM
Post
#993
|
|
Senior Member    Group: Members Posts: 1,430 Joined: 27-December 14 From: Mineola, Texas Member No.: 18,258 Region Association: Southwest Region |
Next I did the lead two, Volt Meter branch of the harness. This is where things start to get a bit tricky. First I took one of the red/white, 1 blue/black and 1 brown, wires from the firstlead and feed them through the 6 mm sleeve. Then added 1 more black/blue and 1 brown wires, for a total of 5 wires in the branch. Again I fed them till there was about 3 inches protruding from the end, then taped that bundle.
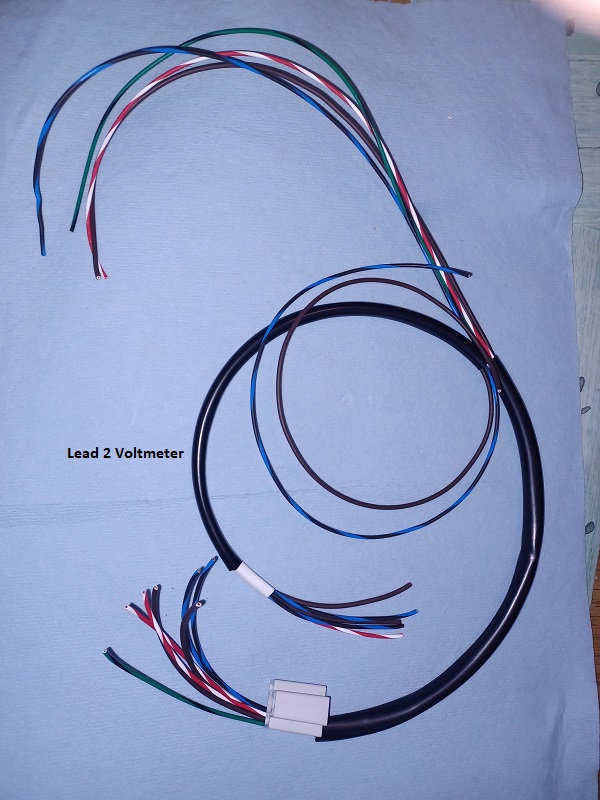 |
| Puebloswatcop |
 Apr 20 2024, 08:16 PM Apr 20 2024, 08:16 PM
Post
#994
|
|
Senior Member    Group: Members Posts: 1,430 Joined: 27-December 14 From: Mineola, Texas Member No.: 18,258 Region Association: Southwest Region |
Then in the 5 mm sleeve (lead 3) I fed 1 blue/black and 1 brown from sleeve #2, and added a black wire. again they should protrude about 3 inches.
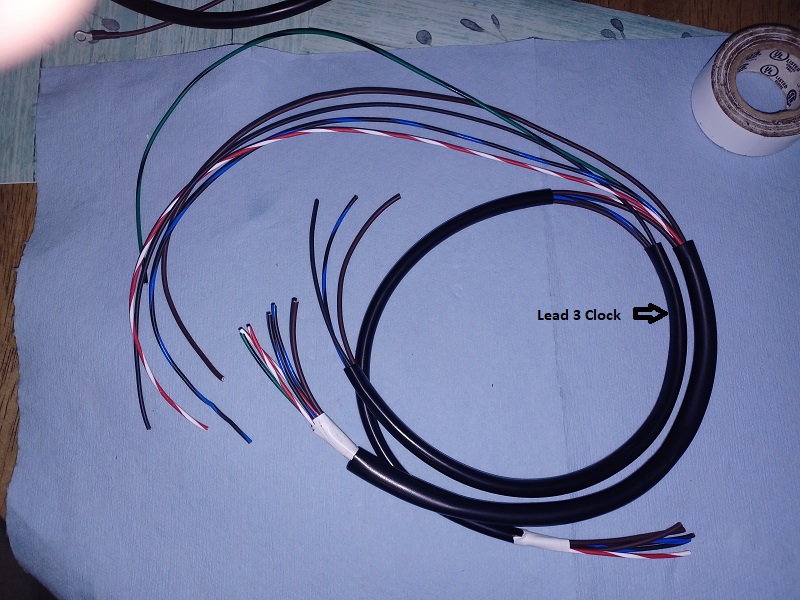 |
| Puebloswatcop |
 Apr 20 2024, 08:22 PM Apr 20 2024, 08:22 PM
Post
#995
|
|
Senior Member    Group: Members Posts: 1,430 Joined: 27-December 14 From: Mineola, Texas Member No.: 18,258 Region Association: Southwest Region |
Then I inserted the long ends of all of the wires into the 12 mm sleeve, that leads back to the main chasis harness. Now comes the frustrating part...stuffing all three of the "hub" ends of 1,2 and three sheaths into the Main harness sheath. They needed to be stuffed in about 1 inch. Takes a bit of persuation, but I got them in.
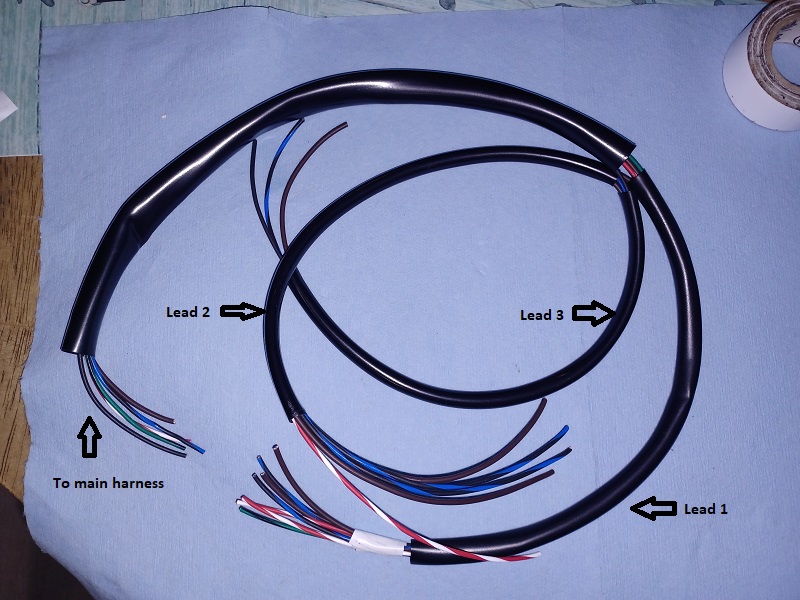 |
| Puebloswatcop |
 Apr 20 2024, 08:32 PM Apr 20 2024, 08:32 PM
Post
#996
|
|
Senior Member    Group: Members Posts: 1,430 Joined: 27-December 14 From: Mineola, Texas Member No.: 18,258 Region Association: Southwest Region |
Then it was time to start adding the female spade connectors. One thing to note is that the red/white, green/black and brown connectors do not get shrink wrapped over the actual connectors. The blue black wires do get wrapped. I did shrink wrap all of the wires up to the crimp though to give them a bit more strength. It is important for all of the wires except the blue/black wires have connectors with the retention tab on them.
Then the wires get inserted into the 3 way plug connector as they are labeled. 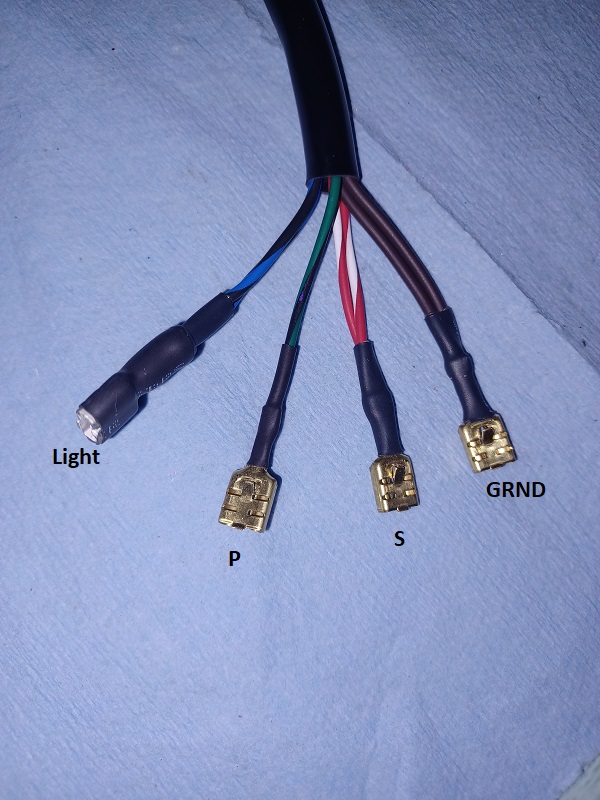 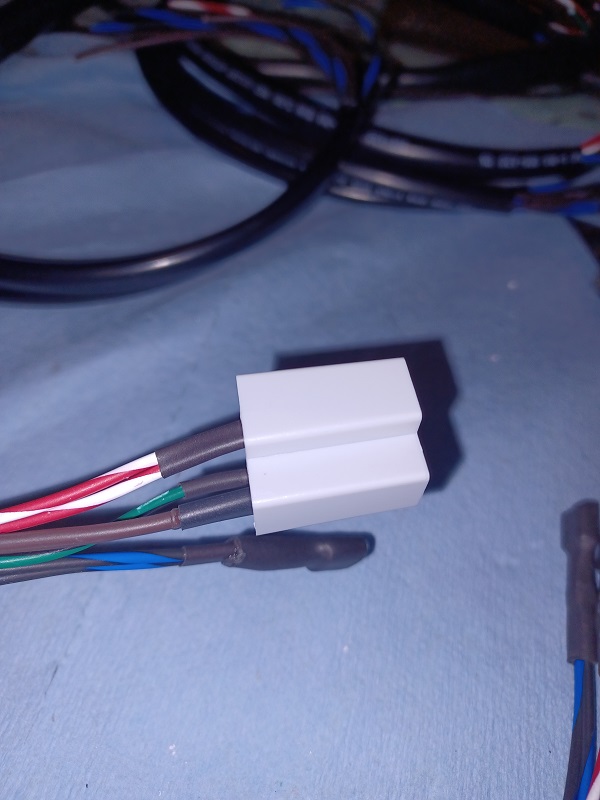 |
| Puebloswatcop |
 Apr 20 2024, 08:37 PM Apr 20 2024, 08:37 PM
Post
#997
|
|
Senior Member    Group: Members Posts: 1,430 Joined: 27-December 14 From: Mineola, Texas Member No.: 18,258 Region Association: Southwest Region |
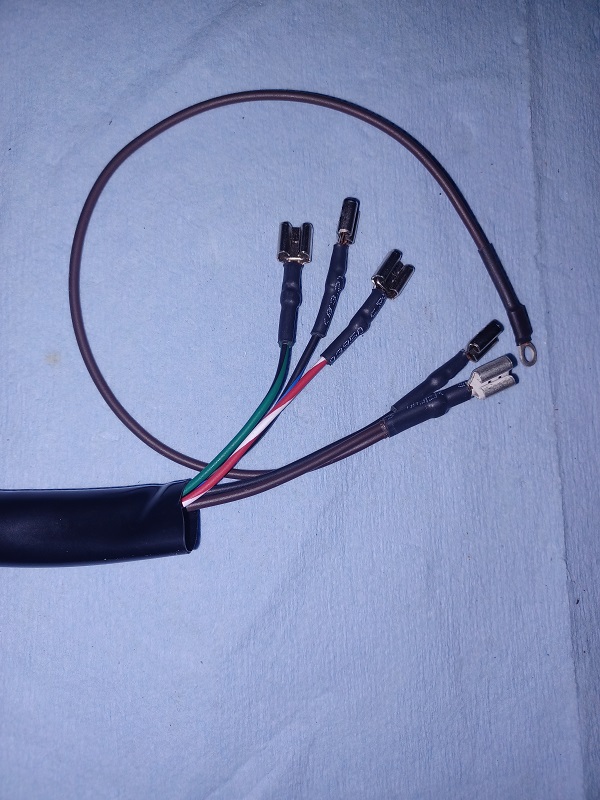
At the end of the harness where it connects to the main harness, the connectors do not get shrink wrapped, because they will be inserted into the harness connectors, if they are shrink wrapped they wont fit inside the plugs. They do get the same shrink wrap on the crimp to provide added strength.
 |
| Puebloswatcop |
 Apr 20 2024, 08:40 PM Apr 20 2024, 08:40 PM
Post
#998
|
|
Senior Member    Group: Members Posts: 1,430 Joined: 27-December 14 From: Mineola, Texas Member No.: 18,258 Region Association: Southwest Region |
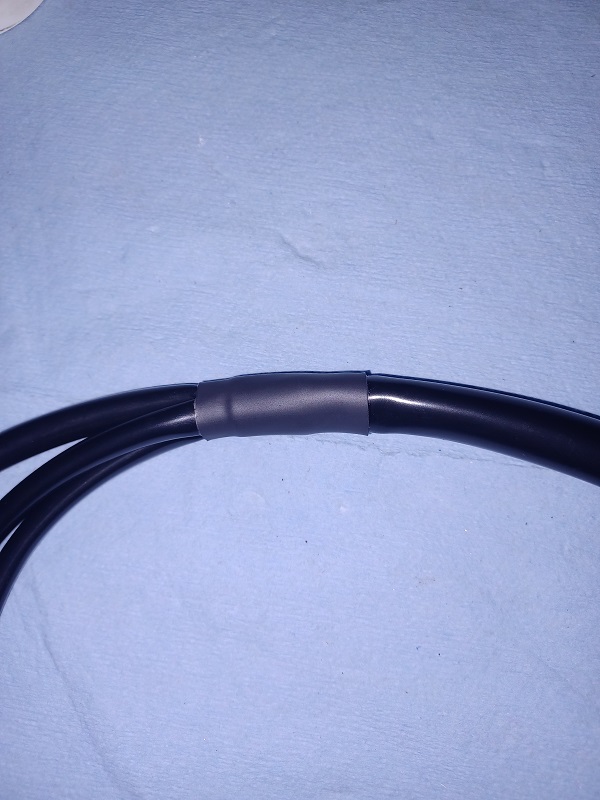
The last thing I did was to insert a small amount of PVC glue into the end of the main wire sheath where the other 3 are inserted and then used shrink wrap to help secure the joint, I did this because I noticed in many of the harnesses, this was a point of separation after 50 years of service.
 |
| Puebloswatcop |
 Apr 20 2024, 08:52 PM Apr 20 2024, 08:52 PM
Post
#999
|
|
Senior Member    Group: Members Posts: 1,430 Joined: 27-December 14 From: Mineola, Texas Member No.: 18,258 Region Association: Southwest Region |
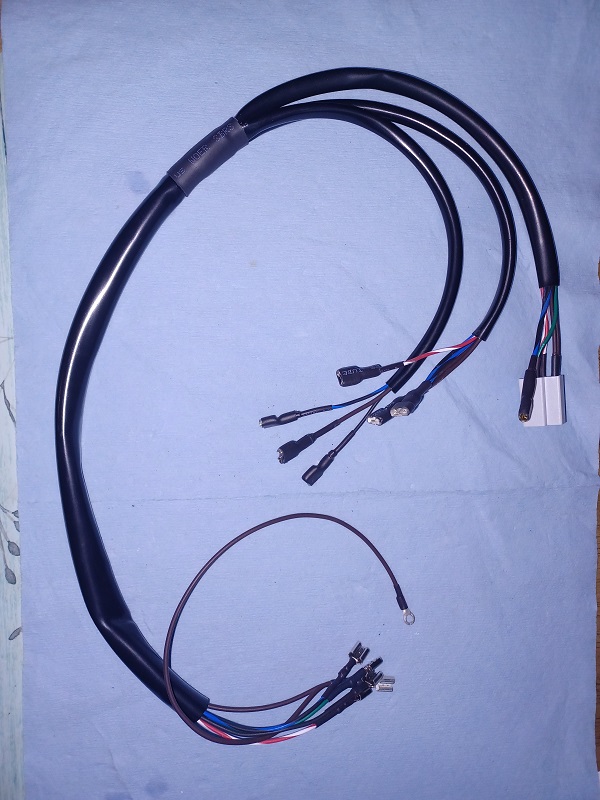
In the end I was very happy with the way my new Harness turned out. I need two, one for each of my cars. But I bought extra wires, plugs and other parts in the event of some kind of problem (in case I destroyed any parts). So I ended up with 4 harnesses.....So if anyone is interested, I have posted the other 2 in the FS/WTB section of the world.
 |
| FlacaProductions |
 Apr 21 2024, 09:42 AM Apr 21 2024, 09:42 AM
Post
#1000
|
|
Senior Member    Group: Members Posts: 1,893 Joined: 24-November 17 From: LA Member No.: 21,628 Region Association: Southern California 
|
Nicely done - and probably very satisfying. You'll be happy with that!
|
  |
1 User(s) are reading this topic (1 Guests and 0 Anonymous Users)
0 Members:

|
Lo-Fi Version | Time is now: 2nd April 2025 - 09:06 AM |
Invision Power Board
v9.1.4 © 2025 IPS, Inc.


