|
|

|
Porsche, and the Porsche crest are registered trademarks of Dr. Ing. h.c. F. Porsche AG.
This site is not affiliated with Porsche in any way. Its only purpose is to provide an online forum for car enthusiasts. All other trademarks are property of their respective owners. |
|
|
  |
| StarBear |
 Jan 29 2022, 07:48 AM Jan 29 2022, 07:48 AM
Post
#21
|
|
Advanced Member     Group: Members Posts: 2,071 Joined: 2-September 09 From: NJ Member No.: 10,753 Region Association: North East States 
|
Yep- the pad goes under the jack; the carpet goes over it. Keep up the great work and updates! (IMG:style_emoticons/default/biggrin.gif)
|
| 76-914 |
 Jan 30 2022, 08:51 PM Jan 30 2022, 08:51 PM
Post
#22
|
|
Repeat Offender & Resident Subaru Antagonist           Group: Members Posts: 13,634 Joined: 23-January 09 From: Temecula, CA Member No.: 9,964 Region Association: Southern California 
|
Well thank you for the compliments but it's time to reveal my ignorance. I need some pics of sail panel repairs. As the pics show, there is very little rust in this area so I believe I don't need to replace the entire sail panel. But before making a patch piece I'd like to see what this area looks like when intact.
I removed the bondo and plan to square up the opening for a patch piece 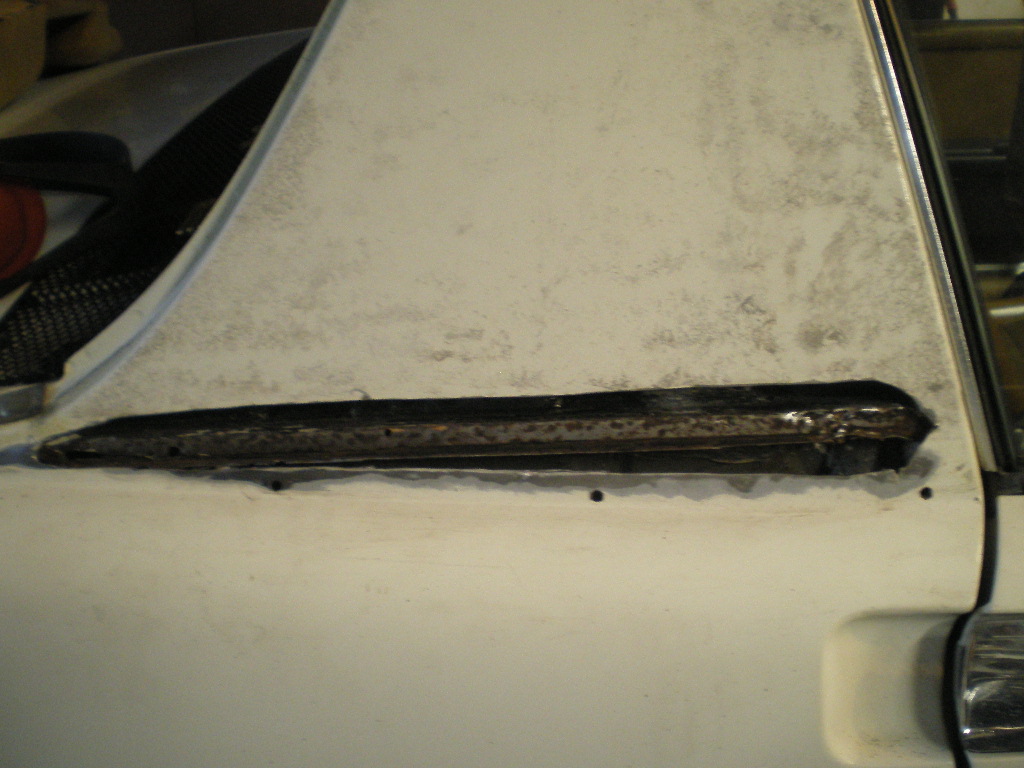 But I'm not sure how this brace is attached to the sail panel or it's original shape. Was it "L" or "Z" shaped. did it attach to the sail panel, etc. The brace is actually in good shape and just needs a wire brush to clean it up. 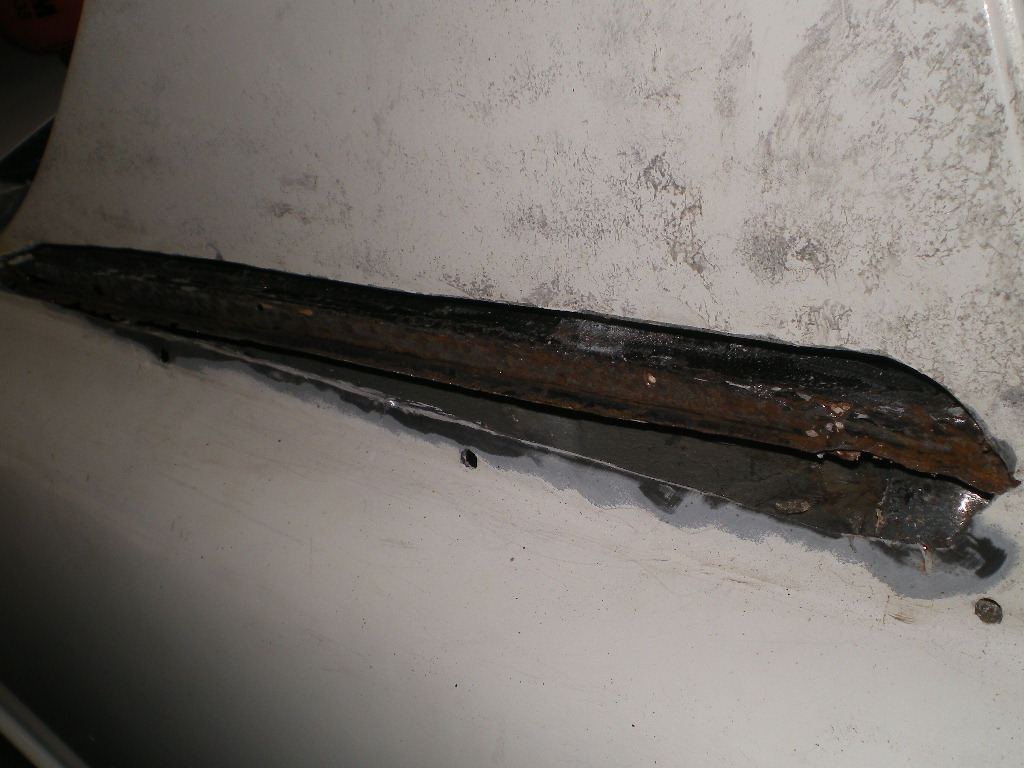 I've managed to dig out most of this cancer causing caulk with a screwdriver. Is there an easy method e.g. heat gun? 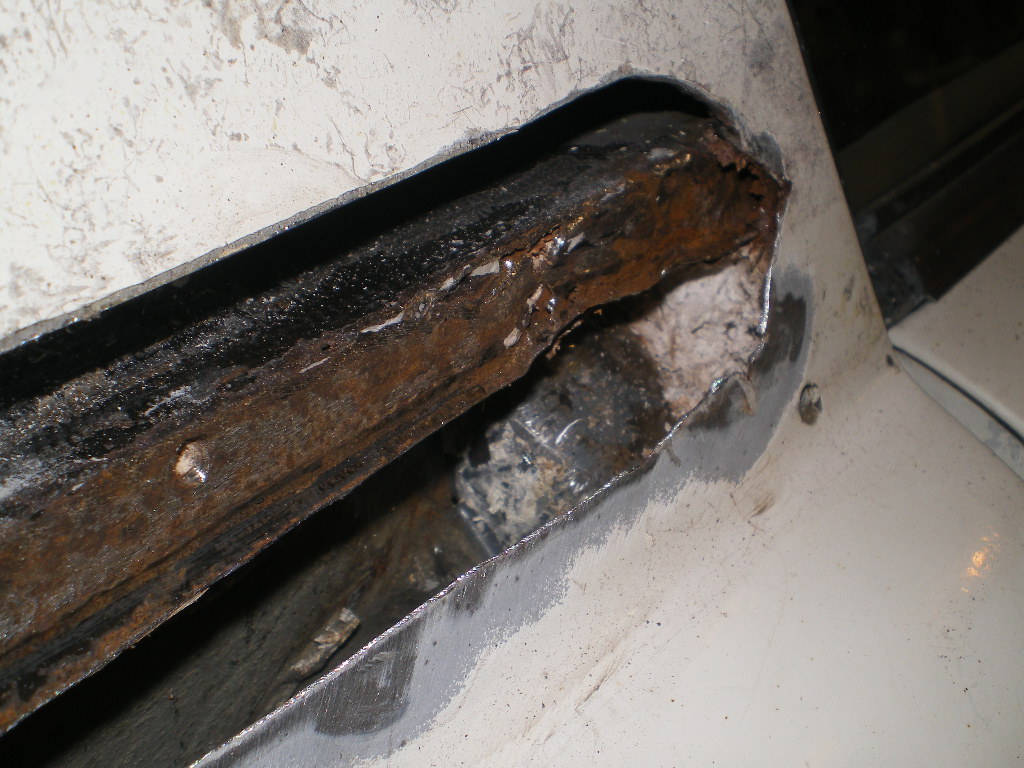 Immediately above the clip holes the metal or whats left of it appears to turn back towards the brace? A pic would be worth a 1,000 words. TIA 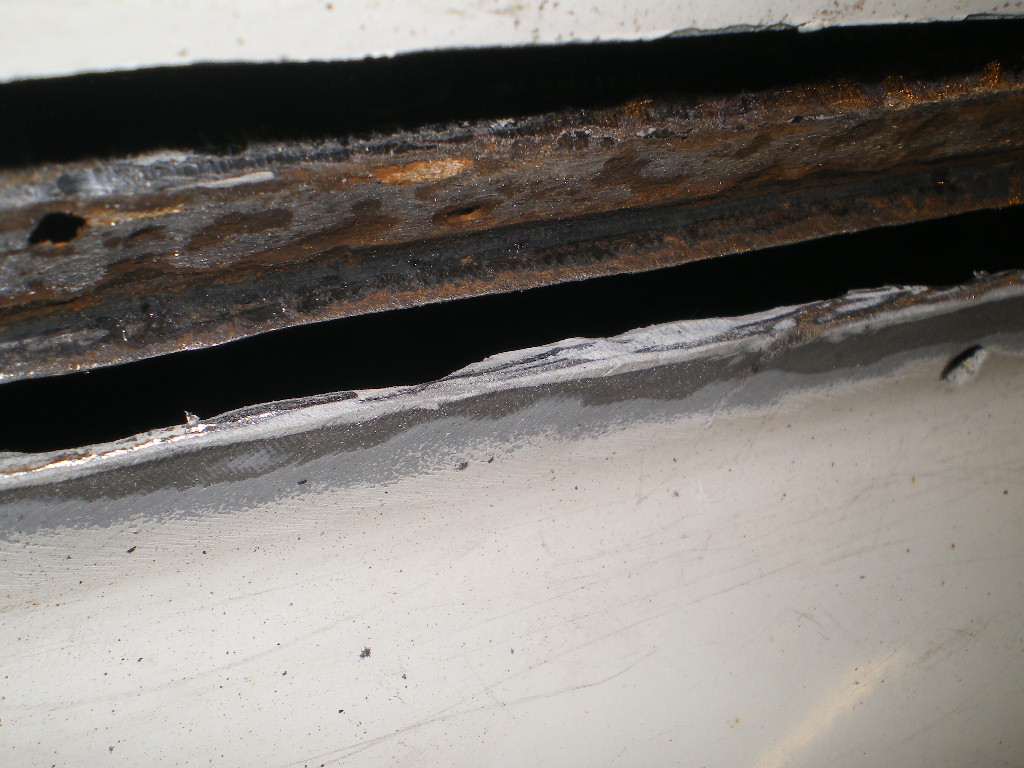 |
| rick 918-S |
 Jan 31 2022, 06:44 AM Jan 31 2022, 06:44 AM
Post
#23
|
|
Hey nice rack! -Celette                Group: Members Posts: 20,785 Joined: 30-December 02 From: Now in Superior WI Member No.: 43 Region Association: Northstar Region 

|
|
| 76-914 |
 Jan 31 2022, 10:51 AM Jan 31 2022, 10:51 AM
Post
#24
|
|
Repeat Offender & Resident Subaru Antagonist           Group: Members Posts: 13,634 Joined: 23-January 09 From: Temecula, CA Member No.: 9,964 Region Association: Southern California 
|
Perfect Rick. Thank you very much. I know what I need to do now. This should keep me busy for a couple of weeks. (IMG:style_emoticons/default/beerchug.gif)
|
| 76-914 |
 Jan 31 2022, 08:35 PM Jan 31 2022, 08:35 PM
Post
#25
|
|
Repeat Offender & Resident Subaru Antagonist           Group: Members Posts: 13,634 Joined: 23-January 09 From: Temecula, CA Member No.: 9,964 Region Association: Southern California 
|
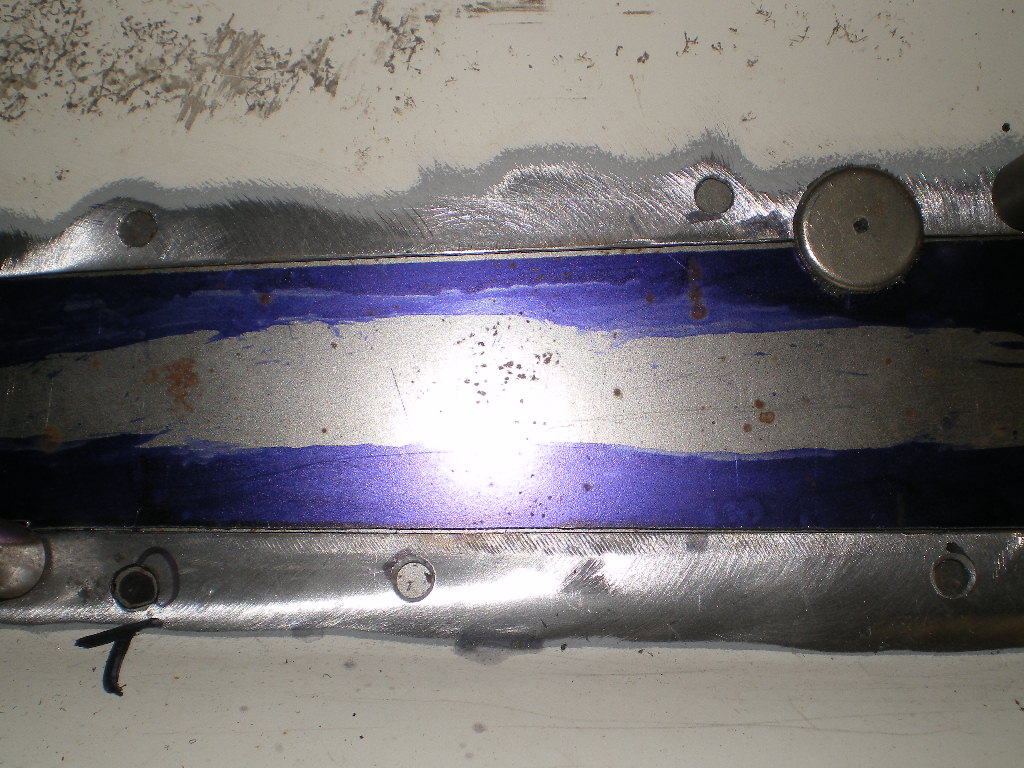
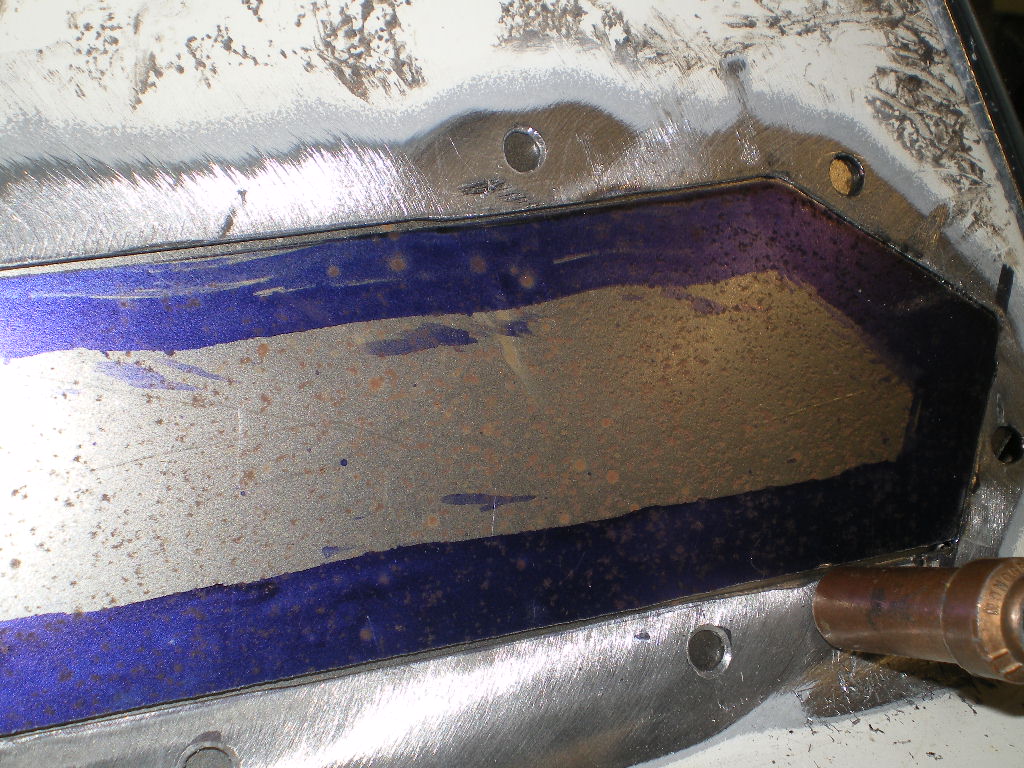
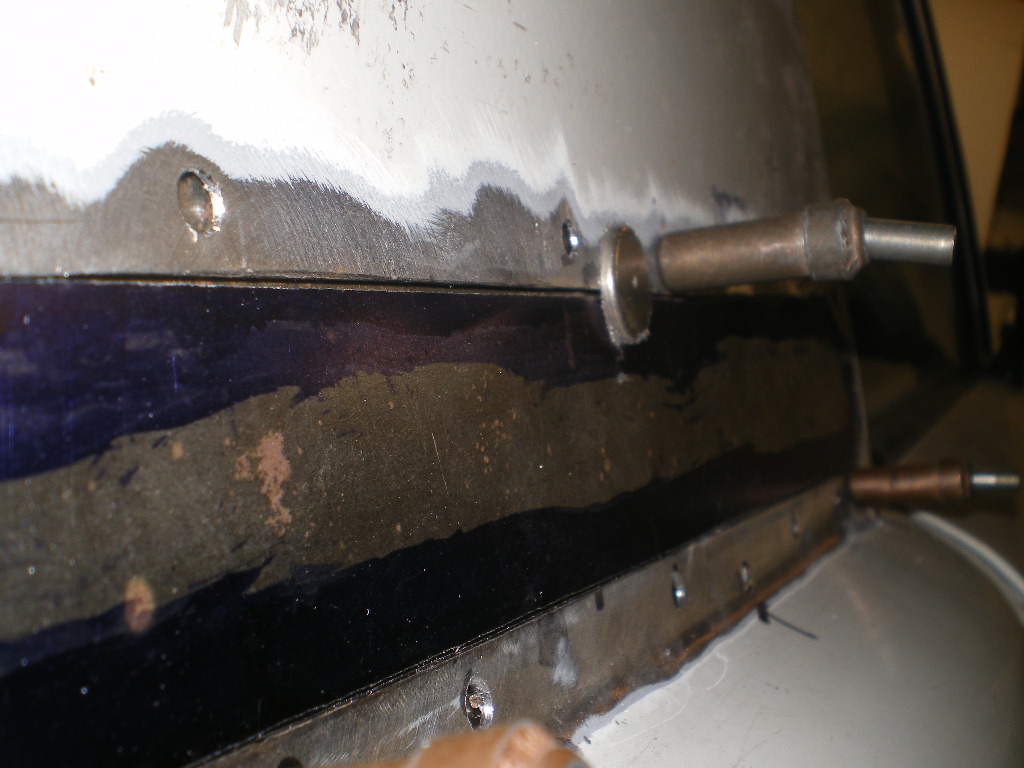
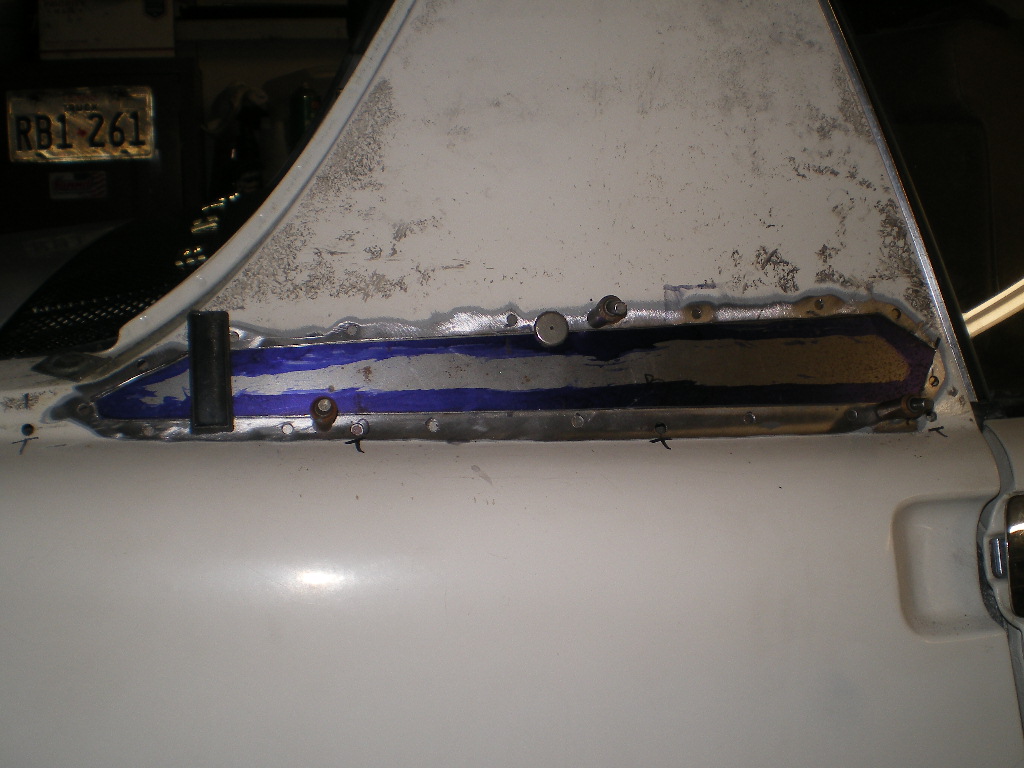
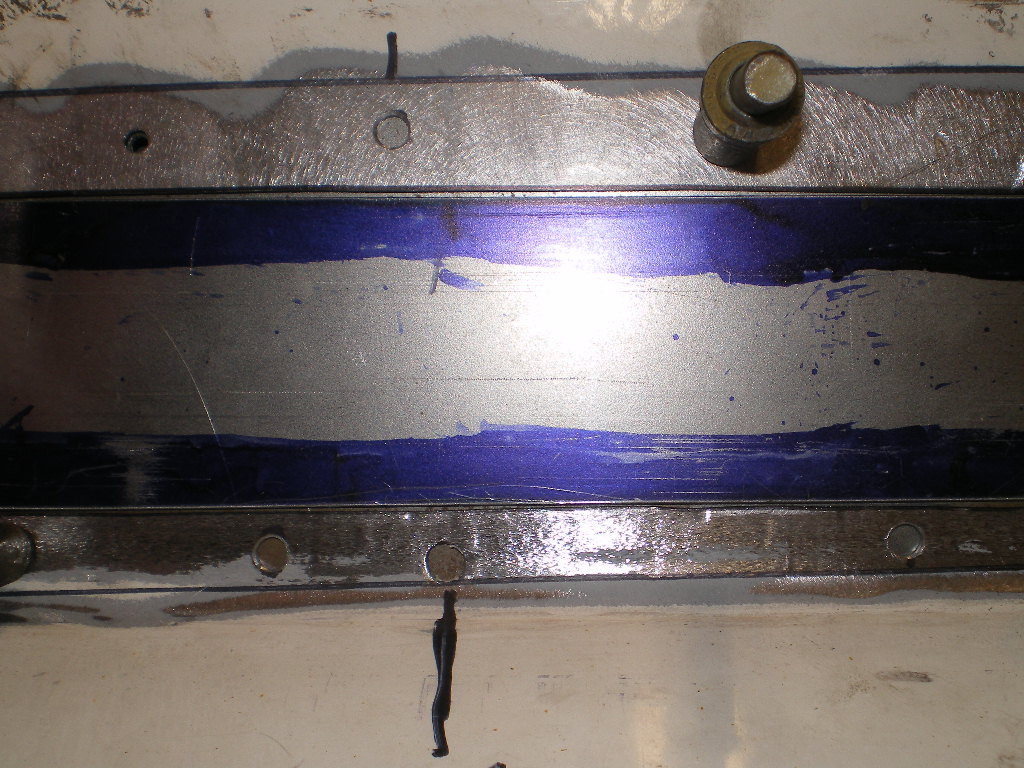
Thx to Rick's fast reply I was able to keep moving today albeit at a Snail's pace. A slow Snail at that. I put a wire brush to that rusty piece of angle I had asked about then treated it with some ospho. I put a backer piece in that will be plug welded then the finish piece (the one with the purple dye) will be butt welded to the existing panel. Everything will have weld thru primer or primer depending upon the need. I'm fortunate to have a lift or this would have been much more difficult. I ashamed to say this took about 6 hr's. I anticipate the other side will take less than 2 hr's since I understand the task at hand a bit better now. I will weld both sides when I start welding so to stay in the groove, so to speak. I also made a tool to safely and easily remove/install the hood springs. I'll make another post for that since most of the members won't read this one.
    |
| 76-914 |
 Feb 1 2022, 10:31 PM Feb 1 2022, 10:31 PM
Post
#26
|
|
Repeat Offender & Resident Subaru Antagonist           Group: Members Posts: 13,634 Joined: 23-January 09 From: Temecula, CA Member No.: 9,964 Region Association: Southern California 
|
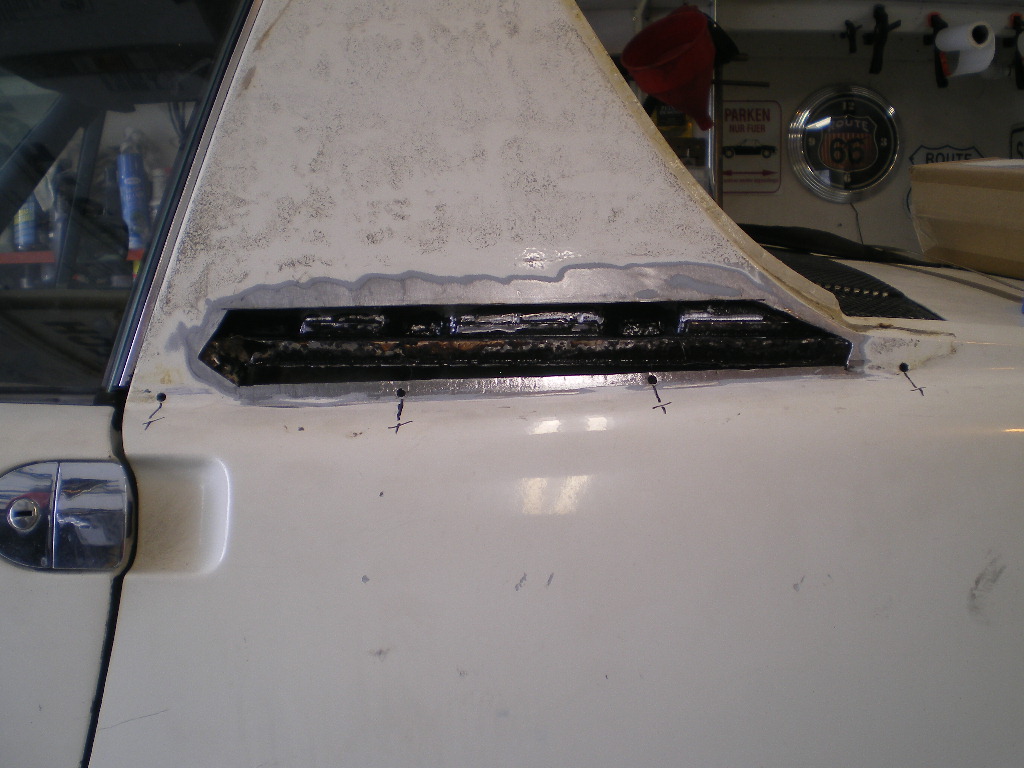
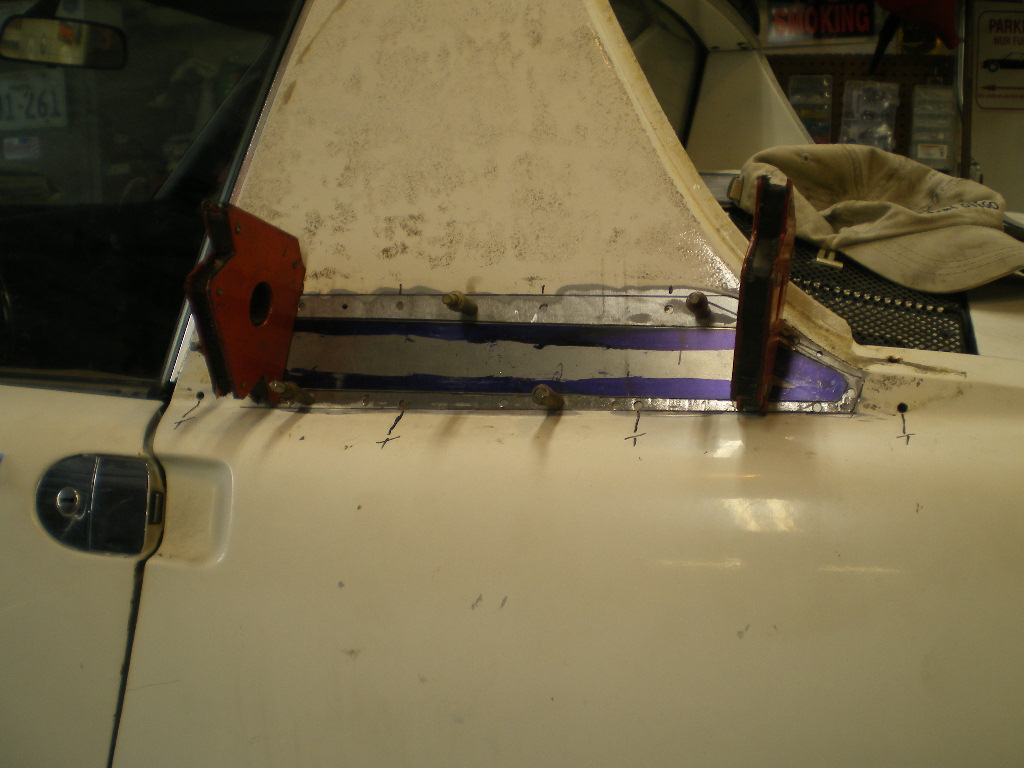
Left side is done. God willing and the creeks don't rise I'll prep the metal and weld them up tomorrow.
   |
| 76-914 |
 Feb 3 2022, 08:54 PM Feb 3 2022, 08:54 PM
Post
#27
|
|
Repeat Offender & Resident Subaru Antagonist           Group: Members Posts: 13,634 Joined: 23-January 09 From: Temecula, CA Member No.: 9,964 Region Association: Southern California 
|
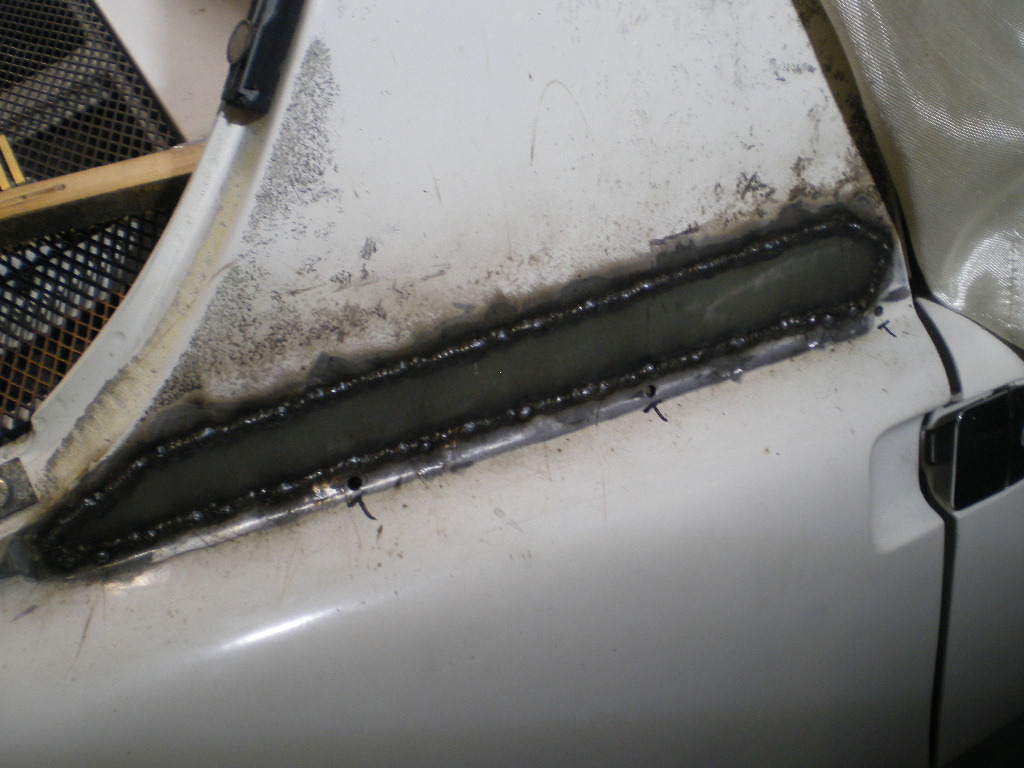
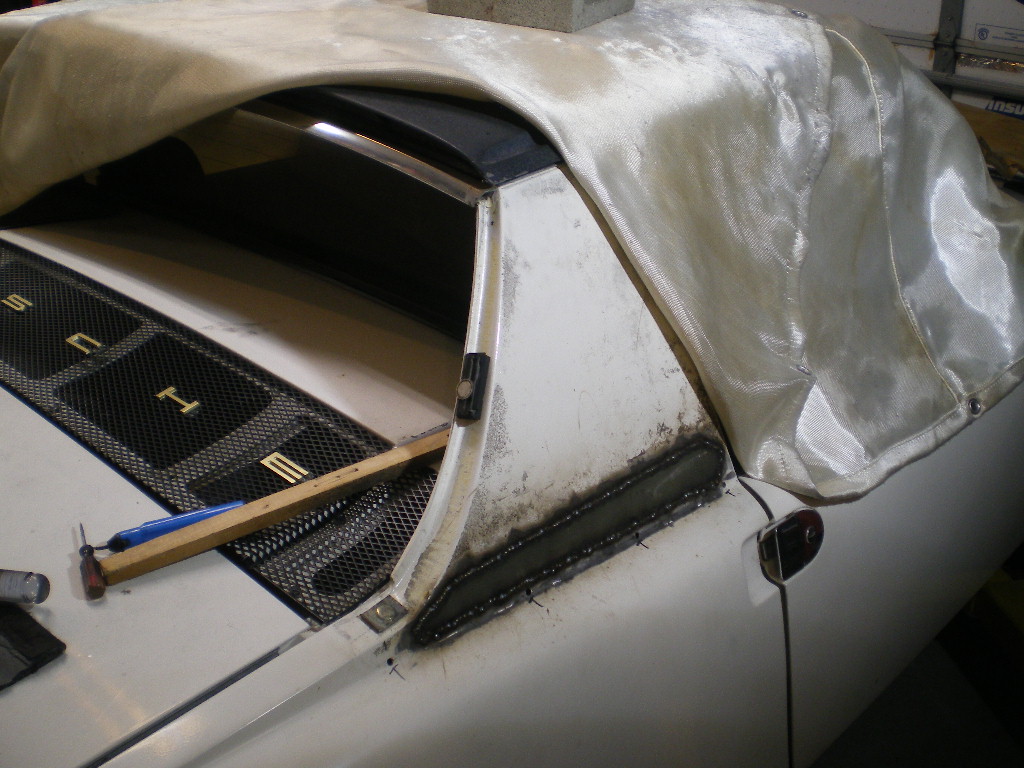
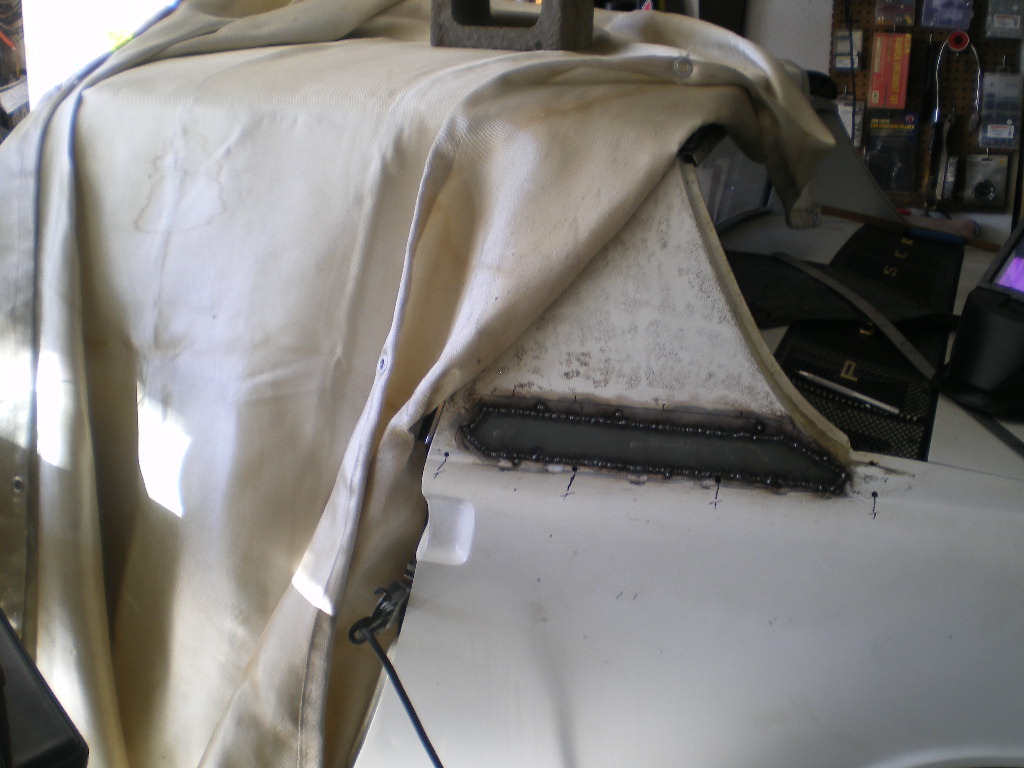
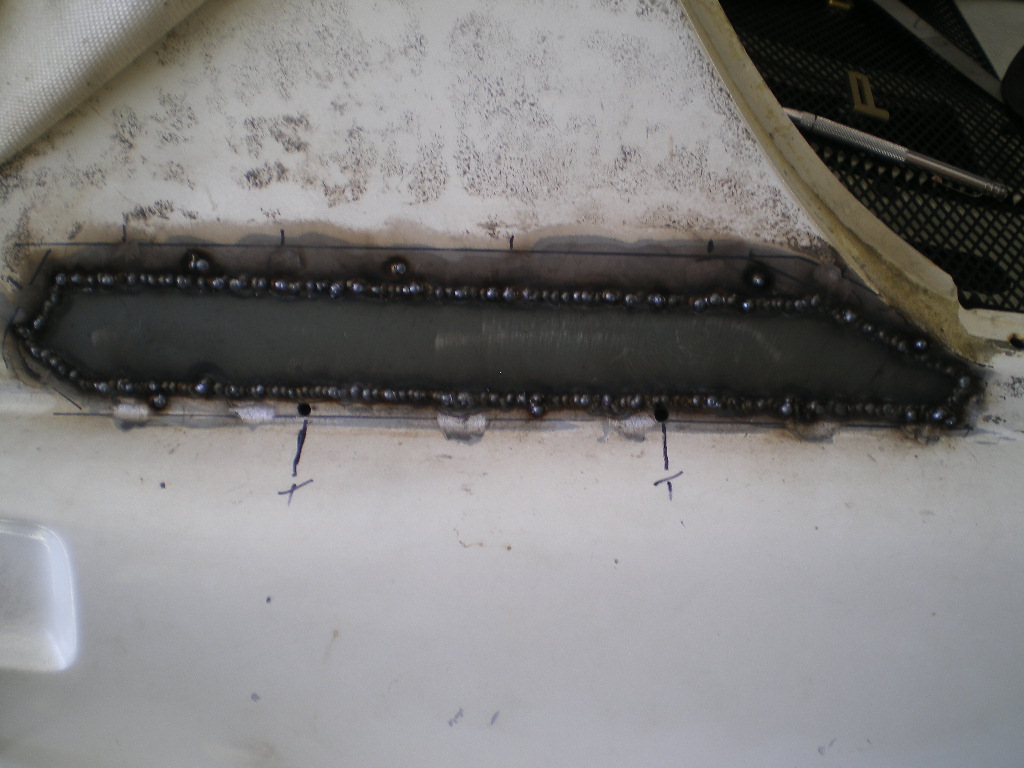
Dang, that took longer than I thought. Now I know why body shops charge what they do. Anyway, the sail panels are almost finished. Just need to grind down the welds then move on to the next item on the list.
    |
| Chris H. |
 Feb 4 2022, 08:24 AM Feb 4 2022, 08:24 AM
Post
#28
|
|
Senior Member     Group: Members Posts: 4,048 Joined: 2-January 03 From: Chicago 'burbs Member No.: 73 Region Association: Upper MidWest 
|
Nice work Kent! Don't see any distortion at all. Won't even be able to tell that was repaired once you grind it.
|
| 76-914 |
 Feb 5 2022, 06:46 PM Feb 5 2022, 06:46 PM
Post
#29
|
|
Repeat Offender & Resident Subaru Antagonist           Group: Members Posts: 13,634 Joined: 23-January 09 From: Temecula, CA Member No.: 9,964 Region Association: Southern California 
|
Thx Chris but there is a little shrinkage at the weld spots which I suspected. I was very careful to cool the metal during welds and grinding. Very little shrinkage. Less than a 1/16". A skim coat will be all that's required. This has proving to be a real confidence builder so far. First time to tackle the thin metal. I placed a light in the wheel well and no pin holes to go back and re-weld which, in all honesty, surprised the Hell out of me. There are a few things I want to remove from the car before painting which I'll do before tackling the Hell Hole repair. The reason is that I want to be able to move the car in and out as long as possible since I have 3 914's and a 2 car garage. Anyone want to Baby Sit the red one so I don't have to play MUSICAL ChAiR'S? (IMG:style_emoticons/default/biggrin.gif)
Todays work 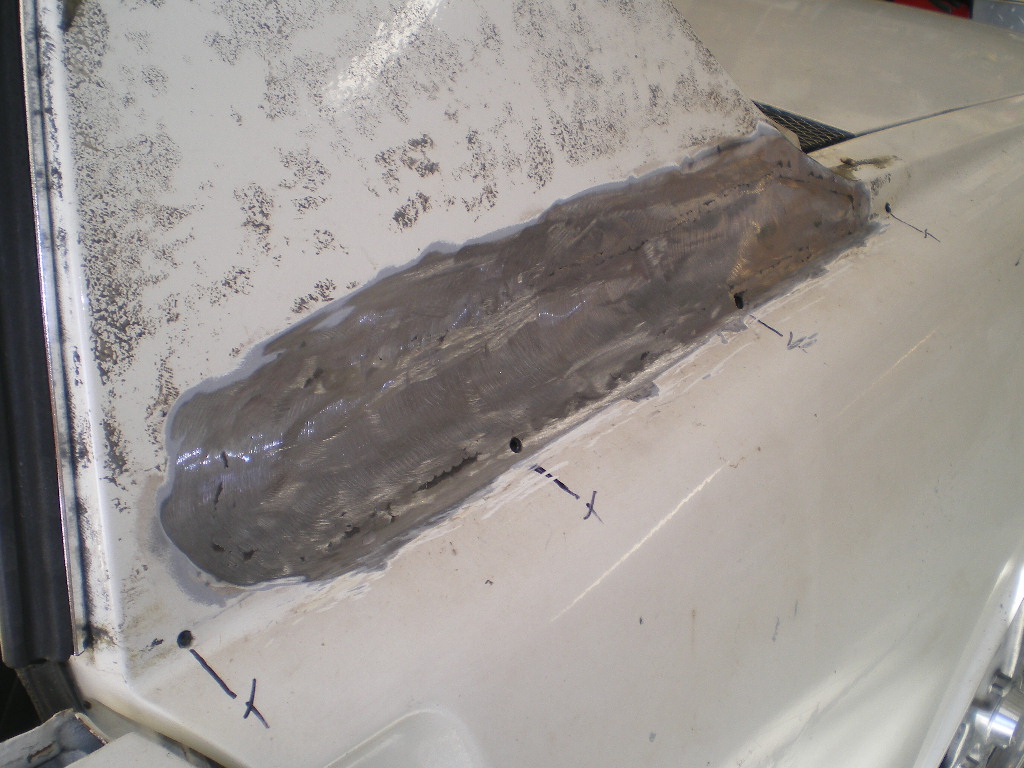 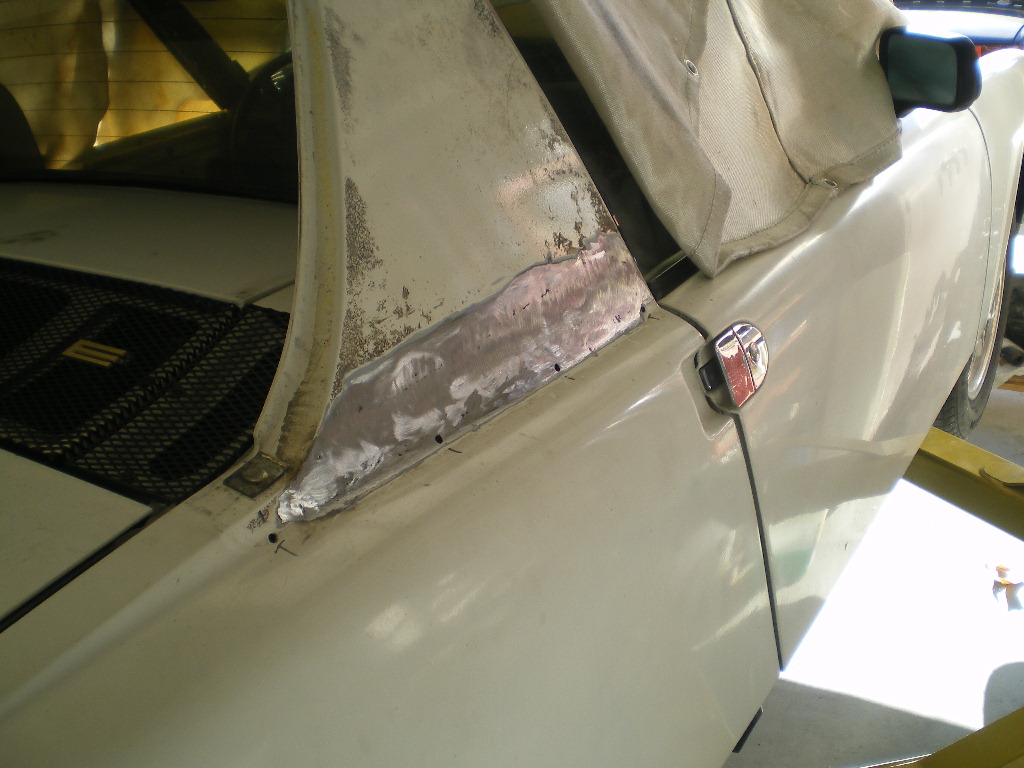 |
| 76-914 |
 Feb 9 2022, 08:26 PM Feb 9 2022, 08:26 PM
Post
#30
|
|
Repeat Offender & Resident Subaru Antagonist           Group: Members Posts: 13,634 Joined: 23-January 09 From: Temecula, CA Member No.: 9,964 Region Association: Southern California 
|
I couldn't sleep thinking about those low spots that remained after welding the panel patch pieces in (look closely at the dark spots in the previous pics) so I went back and welded over every one of those damned little spots then sanded. (IMG:style_emoticons/default/welder.gif) I think it was worth it.
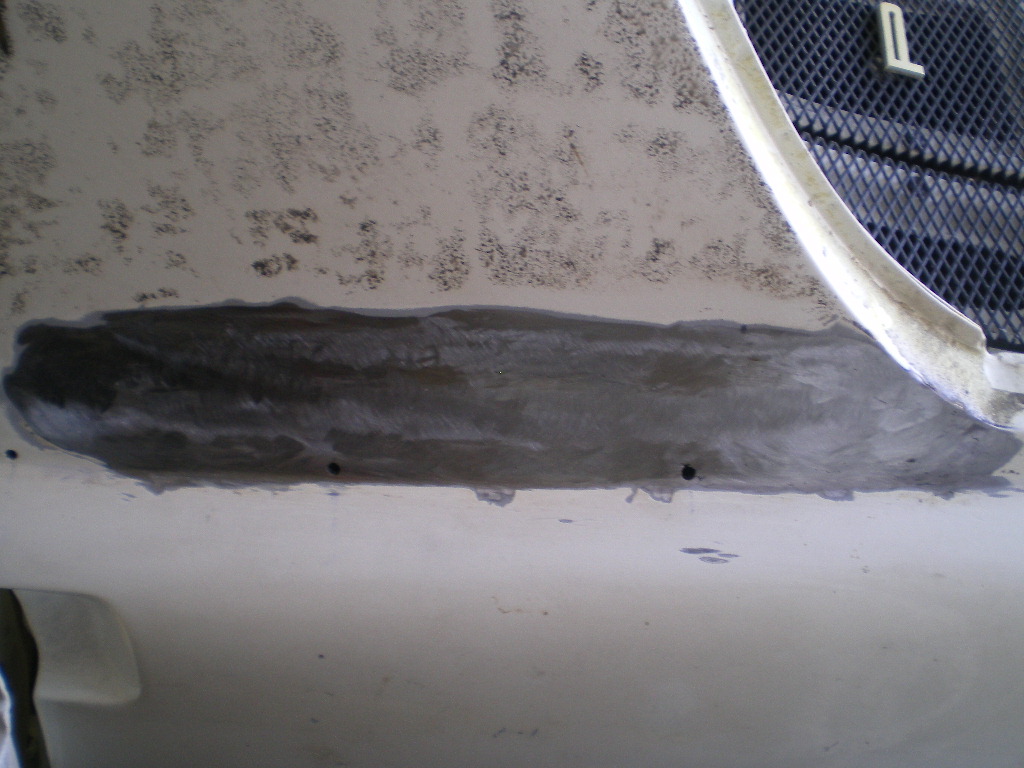 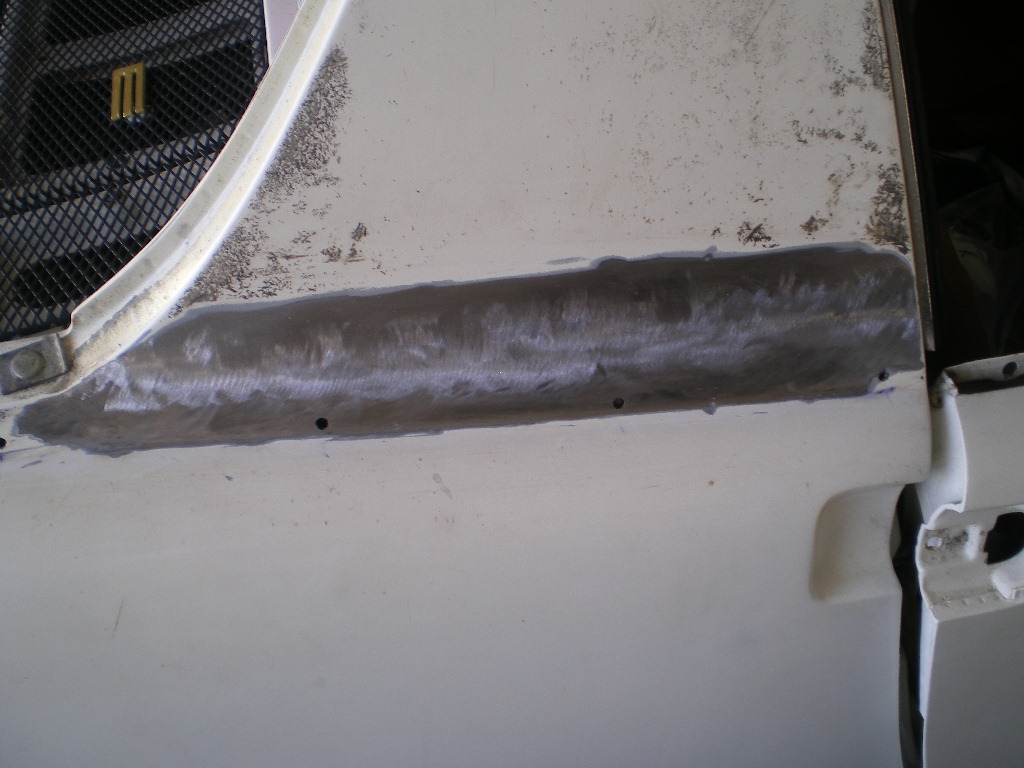 A skim coat on each panel and a quick sanding later. 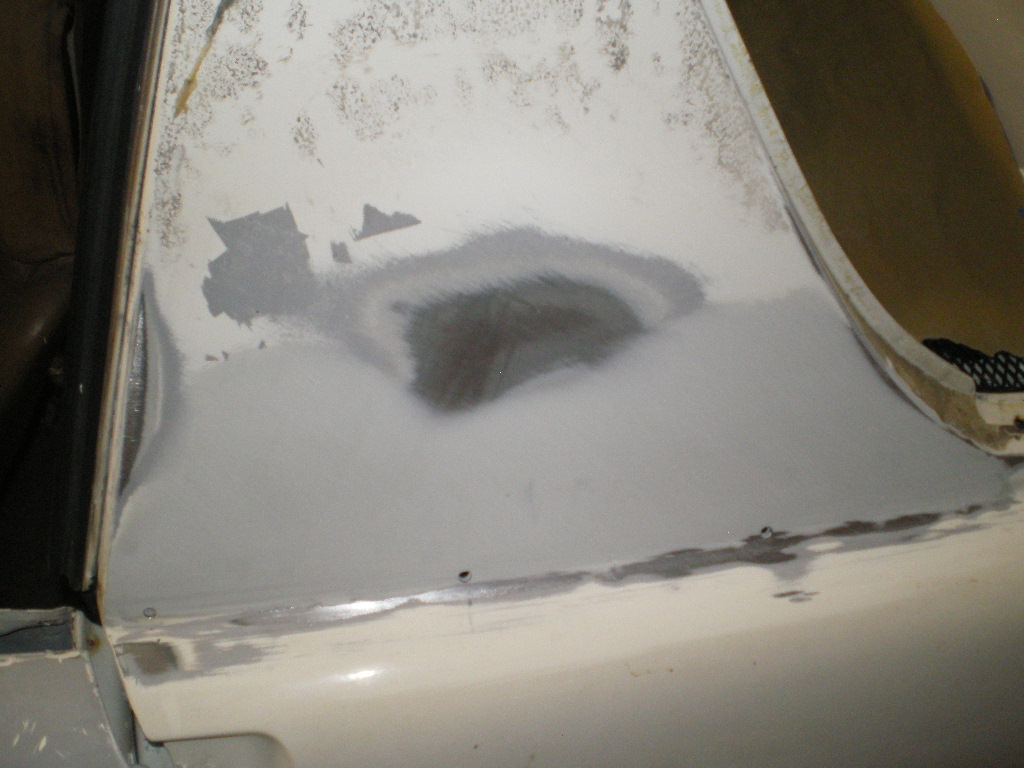 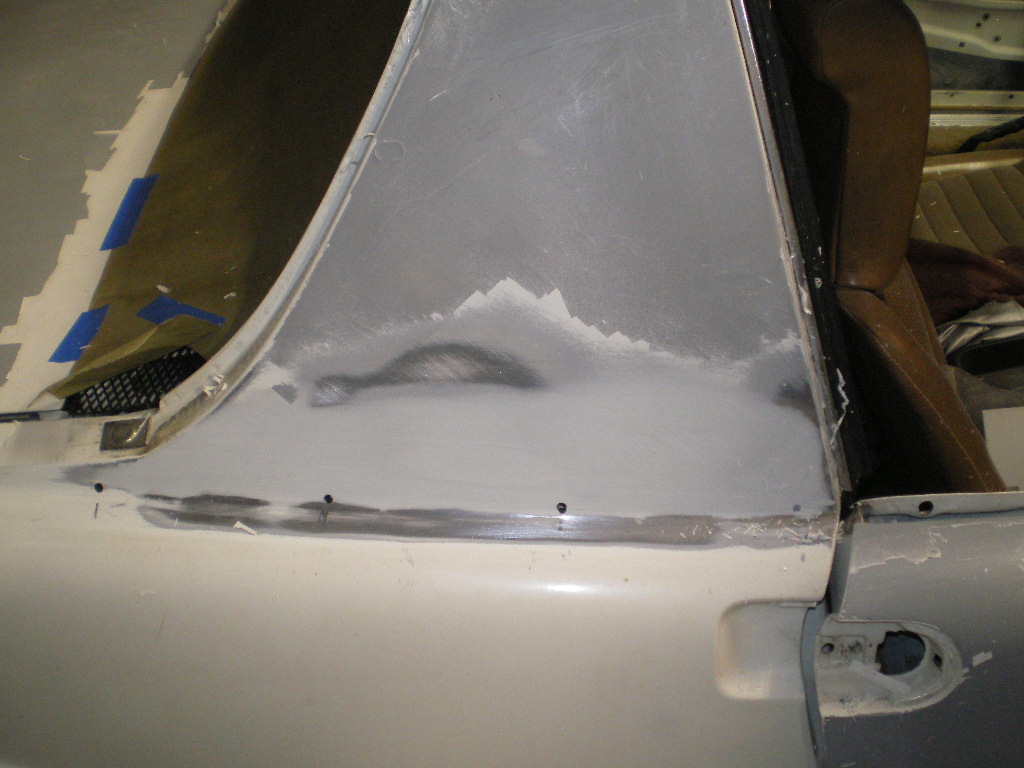 Then I thought, as long as I'm welding & while I'm in there, I'm getting rid of that "Identity Crisis Badge". 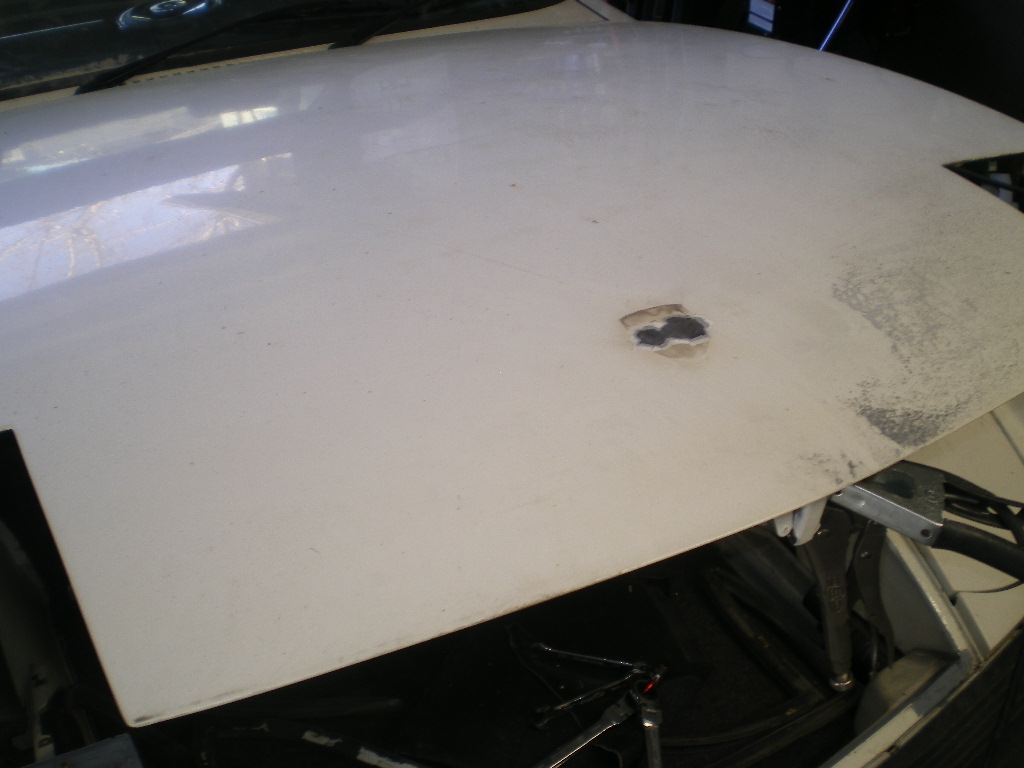 That's about the time my OCD kicked and said "Screw it. Take that damned 911 reflector off too. And while your at it take those Vitaloni door mirrors off and replace them with the proper OEM mirrors. And if your going to do that strip the car and repaint it". I tried to silence it but to no avail. The Vitaloni's sold in the first 30 min's; who knew they were an item? I wonder if the reflector and solenoid trunk release will sell that quickly as well? Check out the rivenuts on the right door! Who would do this? 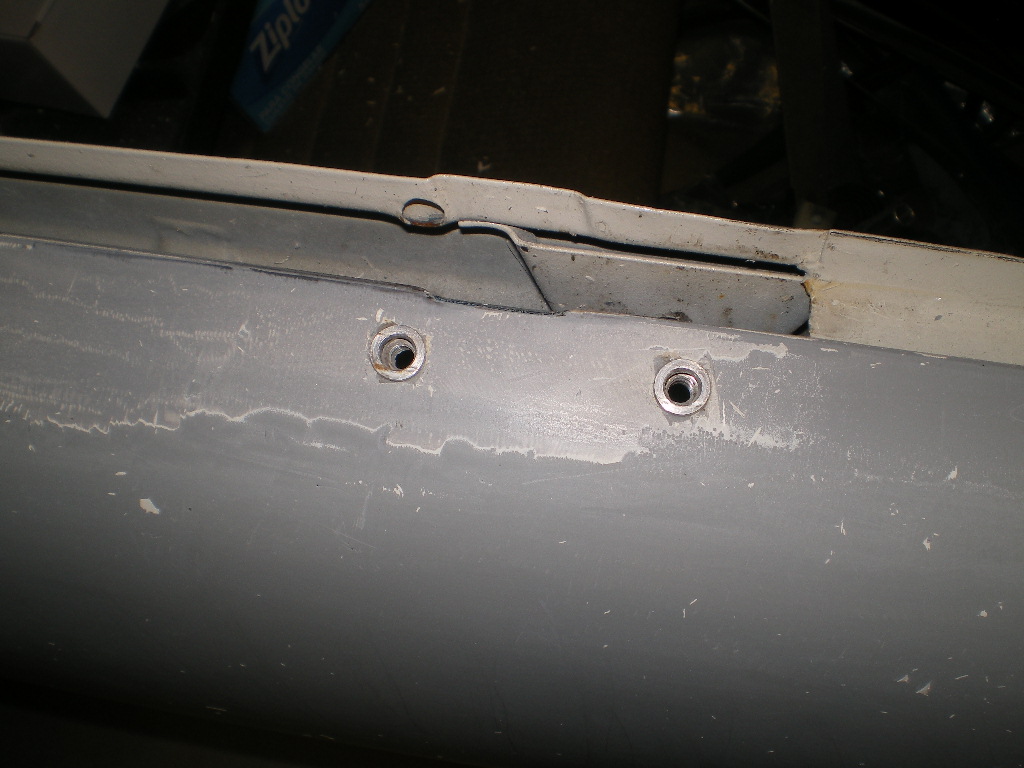 |
| bkrantz |
 Feb 9 2022, 08:45 PM Feb 9 2022, 08:45 PM
Post
#31
|
|
914 Guru      Group: Members Posts: 8,148 Joined: 3-August 19 From: SW Colorado Member No.: 23,343 Region Association: Rocky Mountains 
|
OCD and 914--a dangerous combination. Ask me how I know. (IMG:style_emoticons/default/smash.gif)
BTW, rivnuts are a higher level of PO "quality". Most of them would punch holes with an awl, and pound in some big sheet metal screws. |
| Chris H. |
 Feb 9 2022, 09:35 PM Feb 9 2022, 09:35 PM
Post
#32
|
|
Senior Member     Group: Members Posts: 4,048 Joined: 2-January 03 From: Chicago 'burbs Member No.: 73 Region Association: Upper MidWest 
|
A negative PORSCHE side stripe would look really nice on that car.
|
| 76-914 |
 Feb 9 2022, 09:38 PM Feb 9 2022, 09:38 PM
Post
#33
|
|
Repeat Offender & Resident Subaru Antagonist           Group: Members Posts: 13,634 Joined: 23-January 09 From: Temecula, CA Member No.: 9,964 Region Association: Southern California 
|
OCD and 914--a dangerous combination. Ask me how I know. (IMG:style_emoticons/default/smash.gif) BTW, rivnuts are a higher level of PO "quality". Most of them would punch holes with an awl, and pound in some big sheet metal screws. @bkrantz or worse. I was one of those PO's with this car 13 years ago. BTW, I forgot to thank you for that front panel piece. It tidied up another PO's work on my '70. (IMG:style_emoticons/default/beerchug.gif) |
| 76-914 |
 Feb 9 2022, 09:43 PM Feb 9 2022, 09:43 PM
Post
#34
|
|
Repeat Offender & Resident Subaru Antagonist           Group: Members Posts: 13,634 Joined: 23-January 09 From: Temecula, CA Member No.: 9,964 Region Association: Southern California 
|
A negative PORSCHE side stripe would look really nice on that car. I don't have that "gene" that enables me to see that far ahead unfortunately Chris. I'm torn between Dead Nuts Stock and that beautiful L80E w/ black accents that PMB @Eric_Shea turned out last year. (IMG:style_emoticons/default/drooley.gif) |
| rick 918-S |
 Feb 10 2022, 07:17 AM Feb 10 2022, 07:17 AM
Post
#35
|
|
Hey nice rack! -Celette                Group: Members Posts: 20,785 Joined: 30-December 02 From: Now in Superior WI Member No.: 43 Region Association: Northstar Region 

|
(IMG:style_emoticons/default/agree.gif) ditch the mirrors for stock. (IMG:style_emoticons/default/welder.gif) I did that on 7 of 9.
|
| Chris H. |
 Feb 10 2022, 09:23 AM Feb 10 2022, 09:23 AM
Post
#36
|
|
Senior Member     Group: Members Posts: 4,048 Joined: 2-January 03 From: Chicago 'burbs Member No.: 73 Region Association: Upper MidWest 
|
The side stripe was a dealer option and comes in positive or negative versions. 914Rubber makes a great reproduction. I vote you keep it stock, but hey, it's your car and you probably saved it from the crusher. It'll turn out great either way.
Random side stripe internet image example: 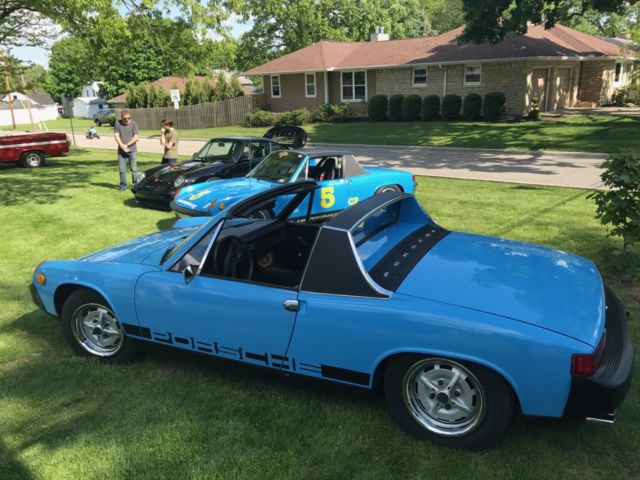 |
| bkrantz |
 Feb 10 2022, 12:16 PM Feb 10 2022, 12:16 PM
Post
#37
|
|
914 Guru      Group: Members Posts: 8,148 Joined: 3-August 19 From: SW Colorado Member No.: 23,343 Region Association: Rocky Mountains 
|
OCD and 914--a dangerous combination. Ask me how I know. (IMG:style_emoticons/default/smash.gif) BTW, rivnuts are a higher level of PO "quality". Most of them would punch holes with an awl, and pound in some big sheet metal screws. @bkrantz or worse. I was one of those PO's with this car 13 years ago. BTW, I forgot to thank you for that front panel piece. It tidied up another PO's work on my '70. (IMG:style_emoticons/default/beerchug.gif) Glad to help. We have all been POs at some point. I would probably hate the past me that thought I could repair stuff when I was in my teens and twenties. Or maybe even last year. (IMG:style_emoticons/default/dry.gif) |
| 930cabman |
 Feb 12 2022, 06:59 AM Feb 12 2022, 06:59 AM
Post
#38
|
|
Advanced Member     Group: Members Posts: 3,697 Joined: 12-November 20 From: Buffalo Member No.: 24,877 Region Association: North East States 
|
OCD and 914, how can those go together?
Great looking repair work and thanks for posting. Keep it coming (IMG:style_emoticons/default/beerchug.gif) |
| 76-914 |
 Feb 14 2022, 08:32 PM Feb 14 2022, 08:32 PM
Post
#39
|
|
Repeat Offender & Resident Subaru Antagonist           Group: Members Posts: 13,634 Joined: 23-January 09 From: Temecula, CA Member No.: 9,964 Region Association: Southern California 
|
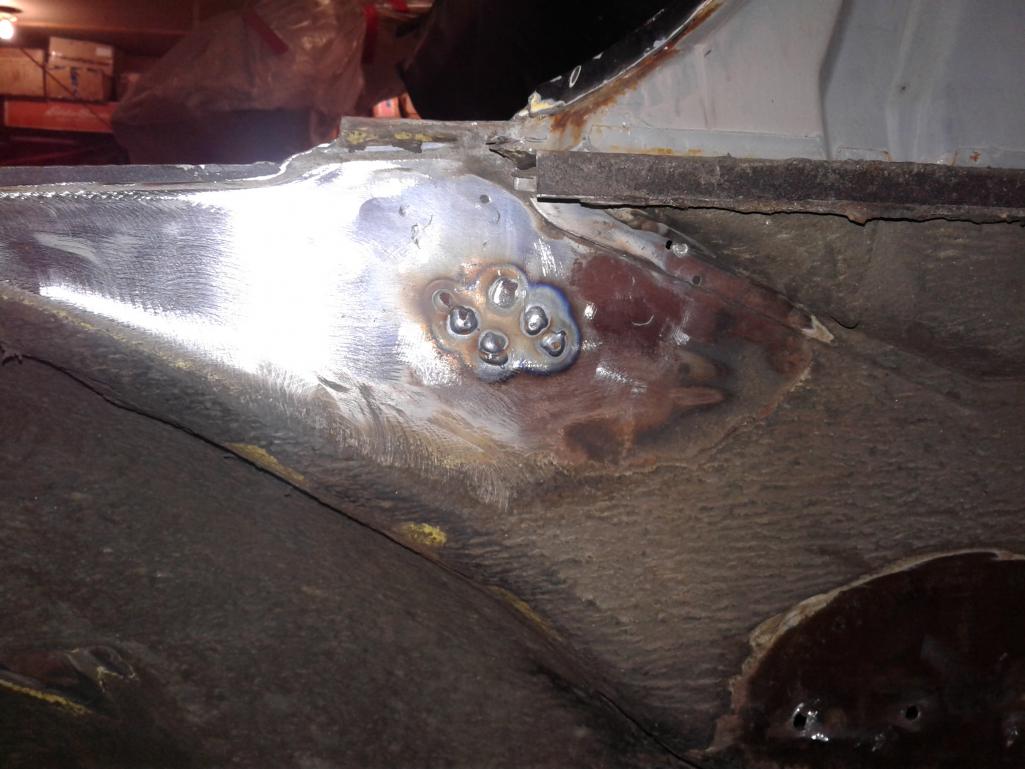
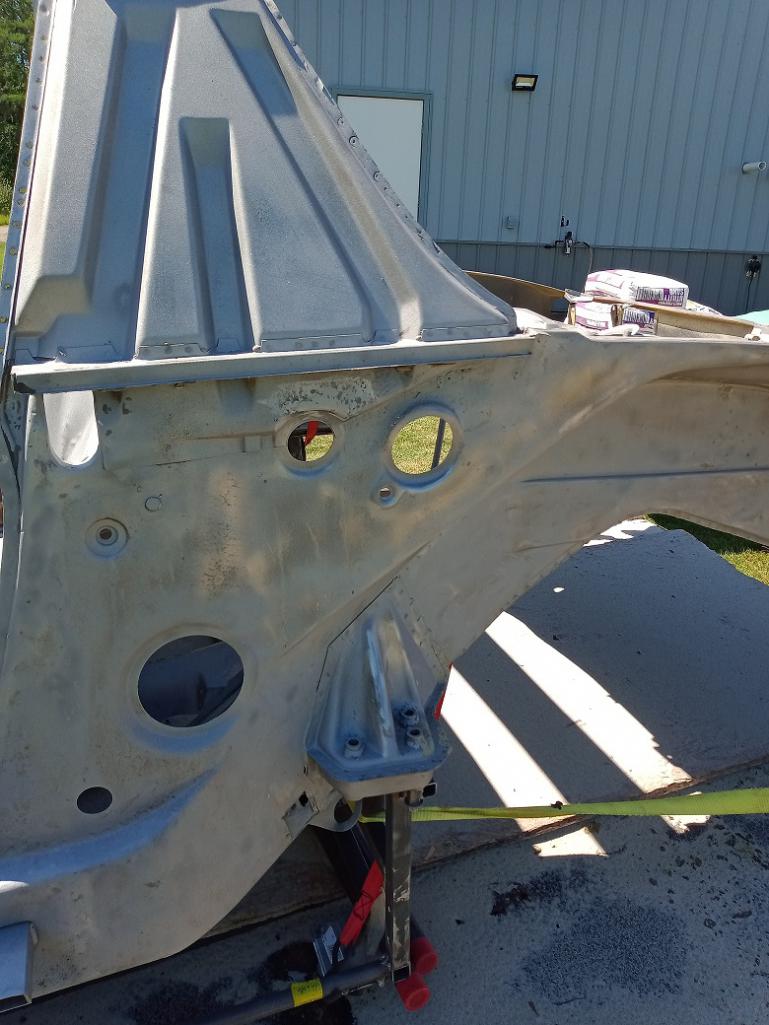
Well thx for the vote of confidence. I'll do my best to live up to it. For a change of scenery I began removing some things in preparation for paint. I'm very pleased that the area where the cowl meets the fender is a rusted out canyon. Here are a few pics of that area.
Right side 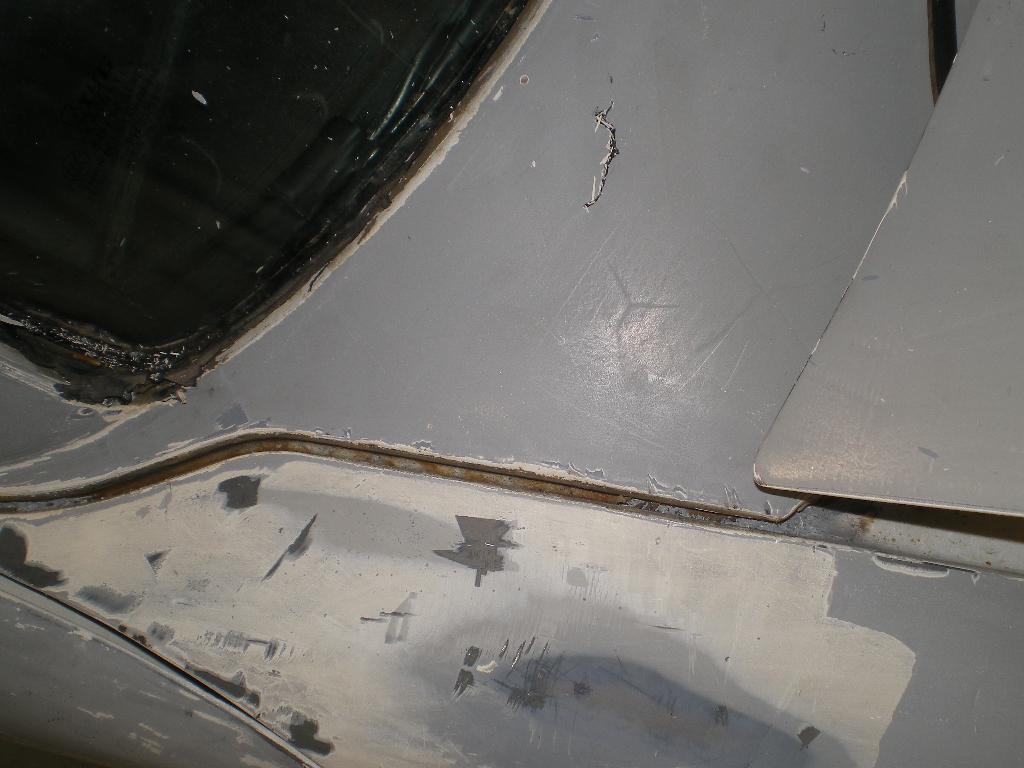 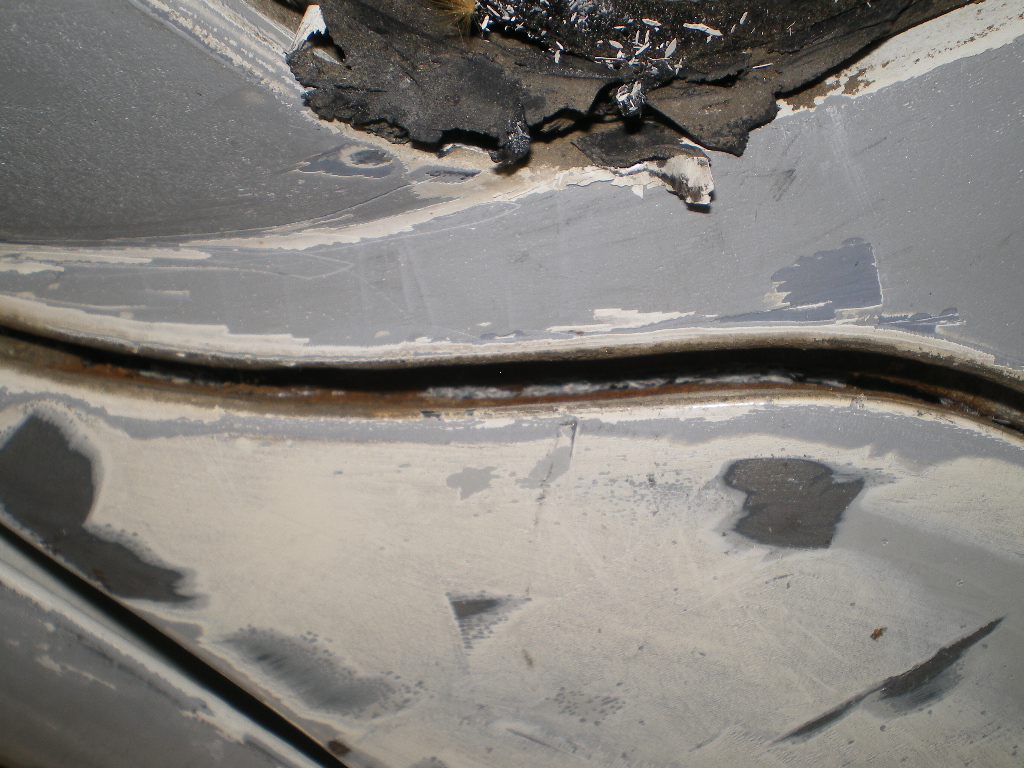 Left side 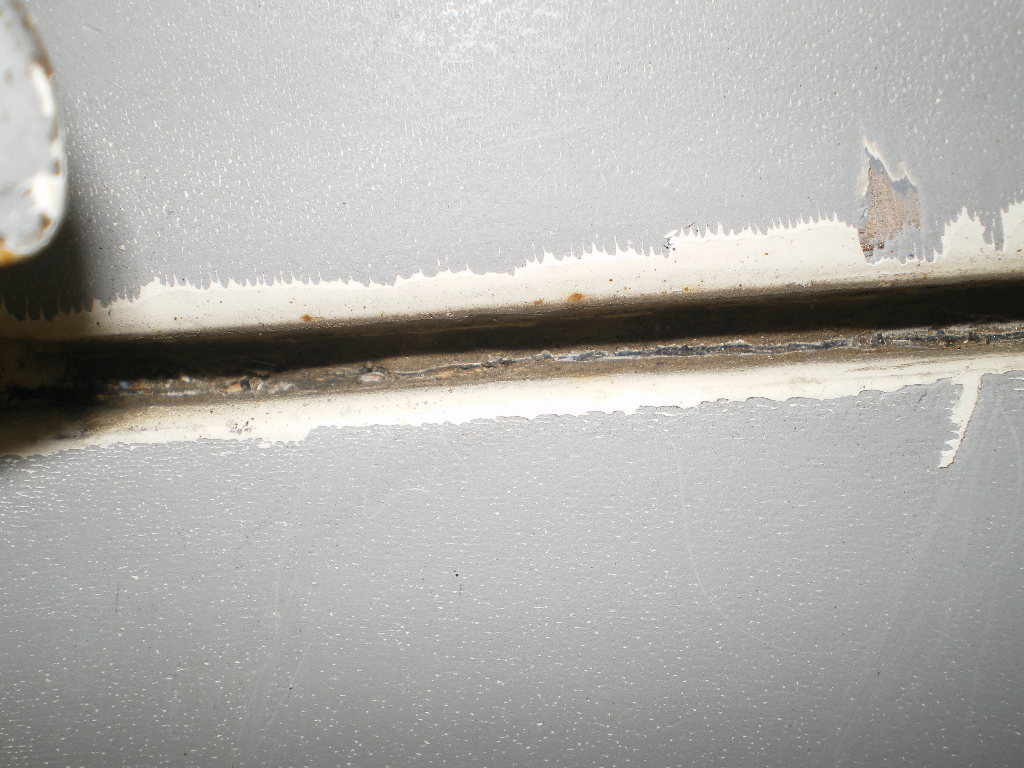 The reflector is gone and just a few holes to weld up.The panel itself is in great shape.No signs of a previous collision. 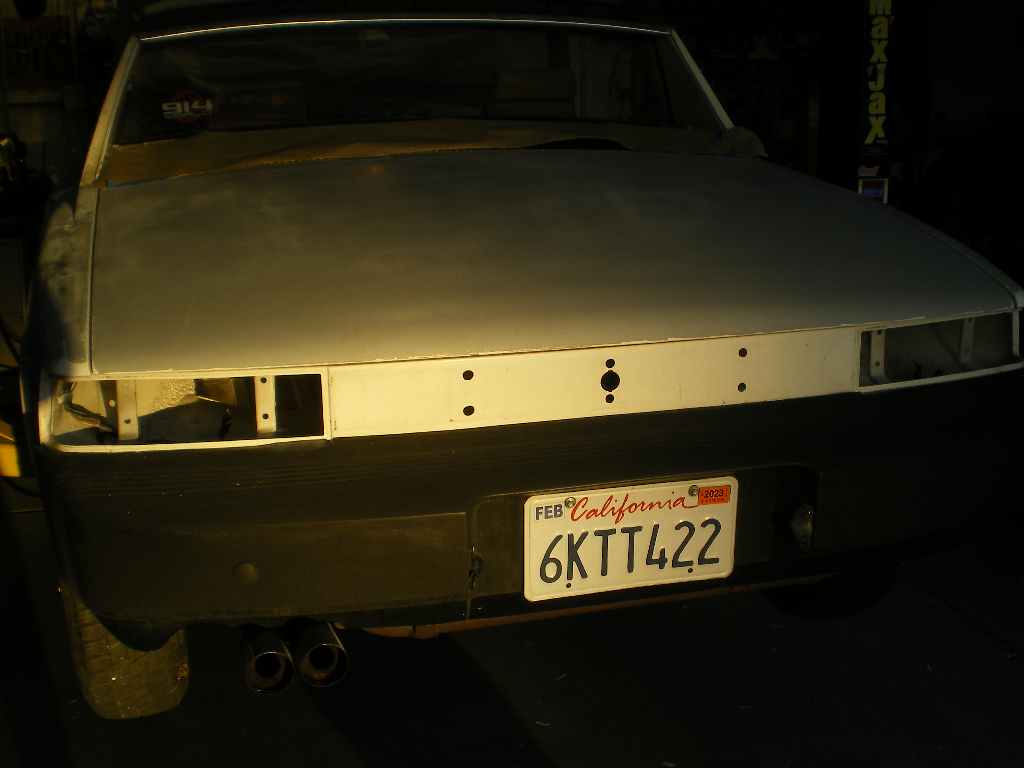 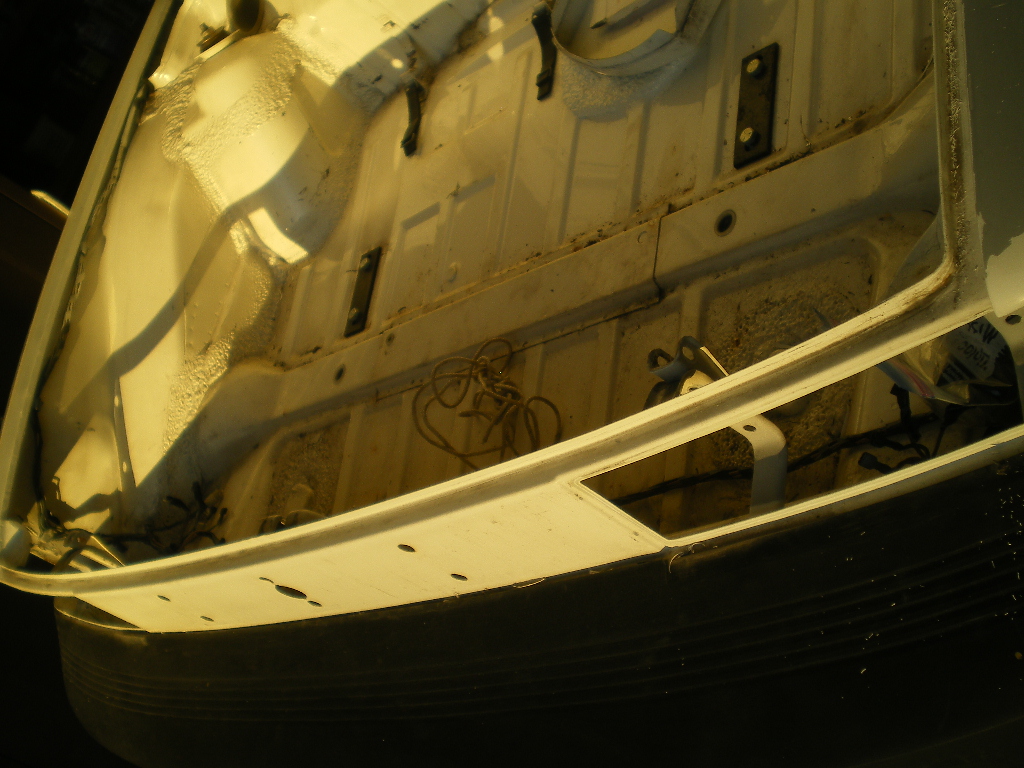 Inside of trunk looks good too  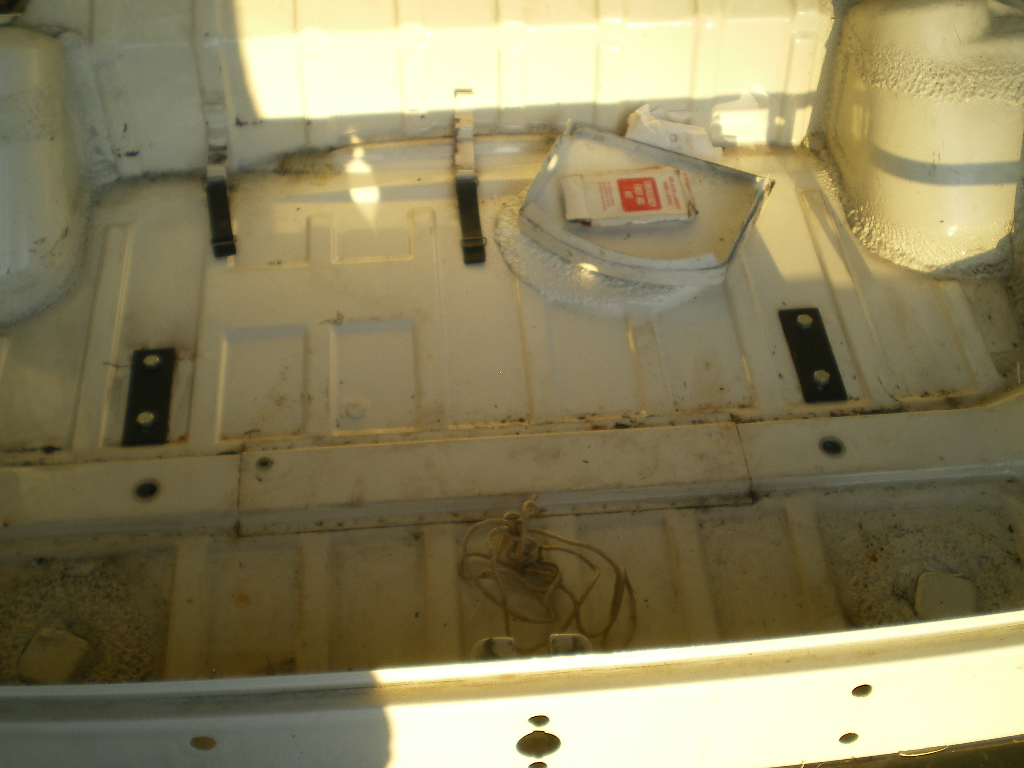 But upon closer inspection I found this cack. Aftermarket torsion bar mount. I need to repair and weld this up. 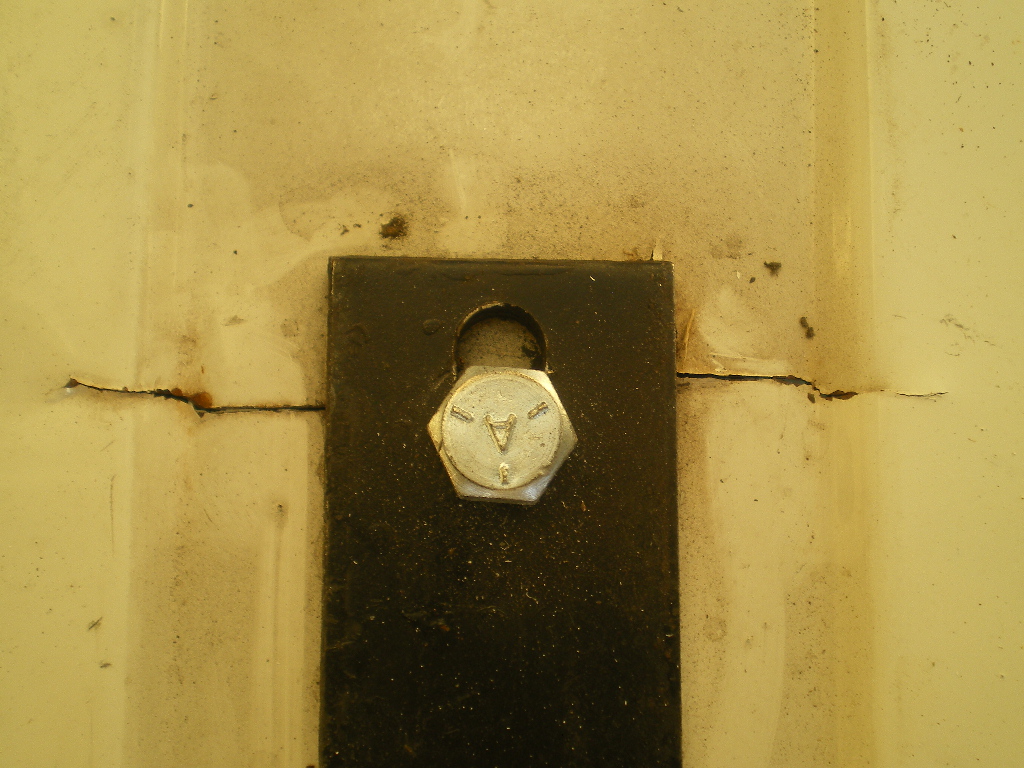 |
| 76-914 |
 Feb 14 2022, 08:41 PM Feb 14 2022, 08:41 PM
Post
#40
|
|
Repeat Offender & Resident Subaru Antagonist           Group: Members Posts: 13,634 Joined: 23-January 09 From: Temecula, CA Member No.: 9,964 Region Association: Southern California 
|
And I won't need to repair any of the rain channels back here either.
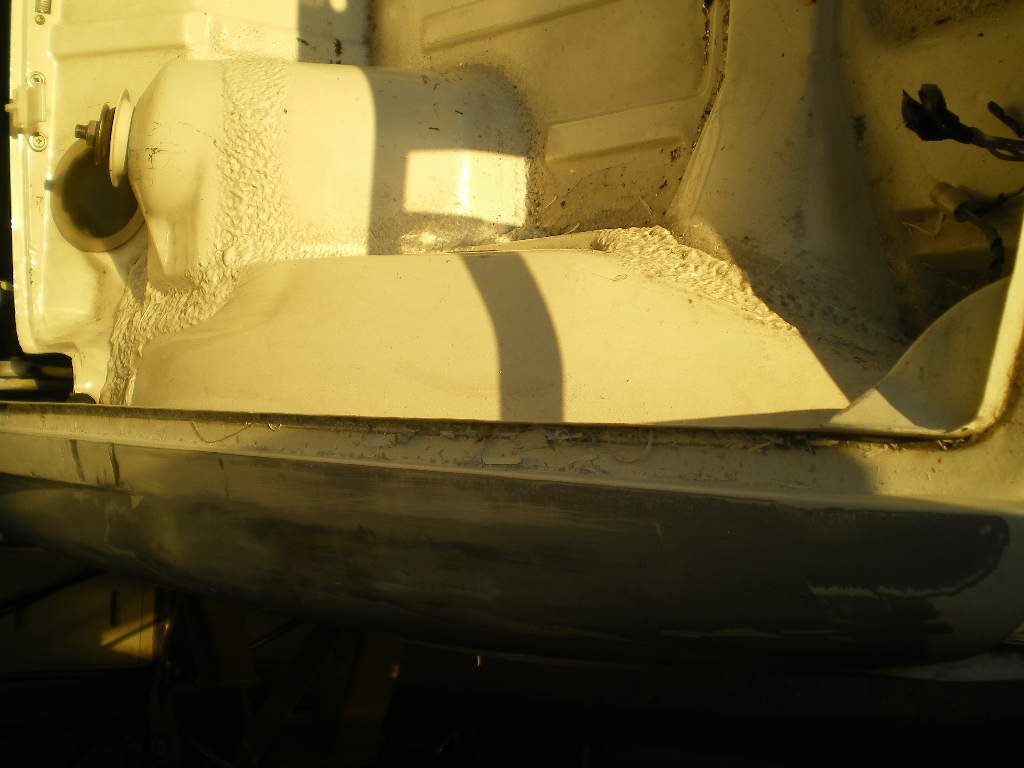 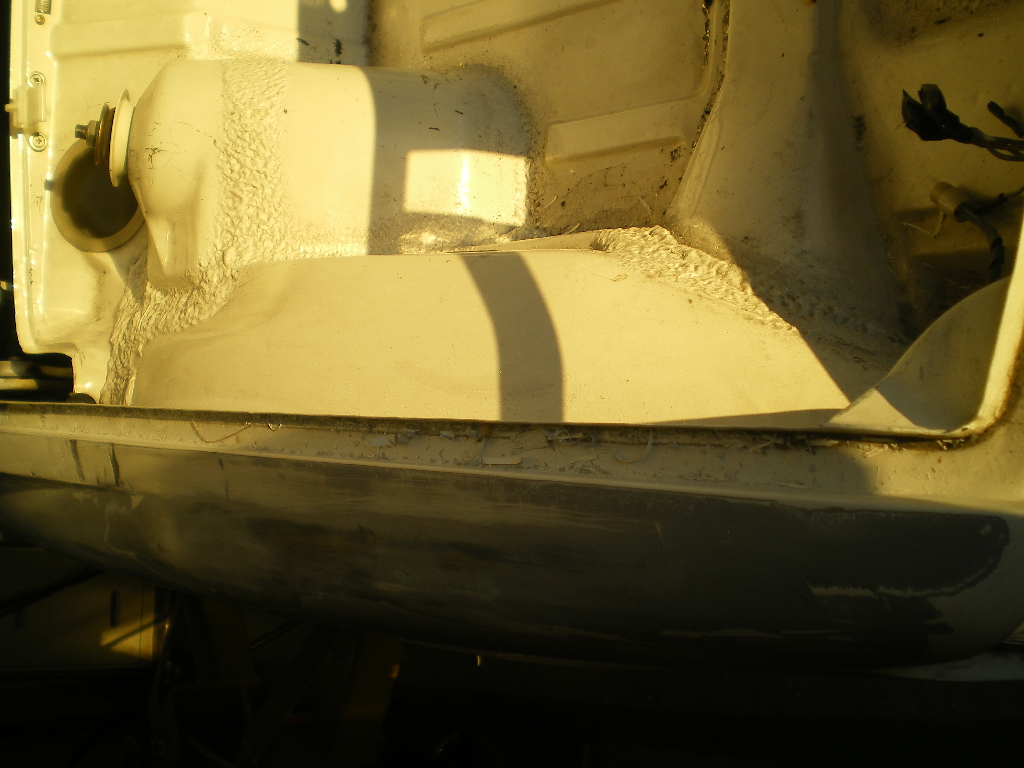 Both headlight buckets look good 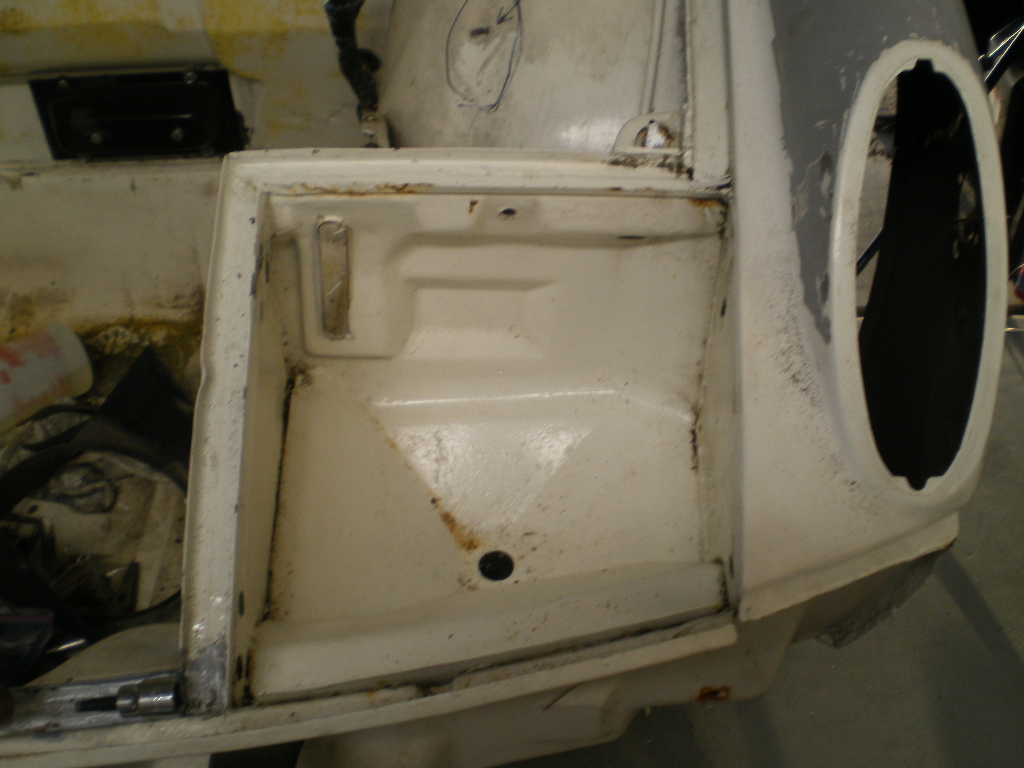 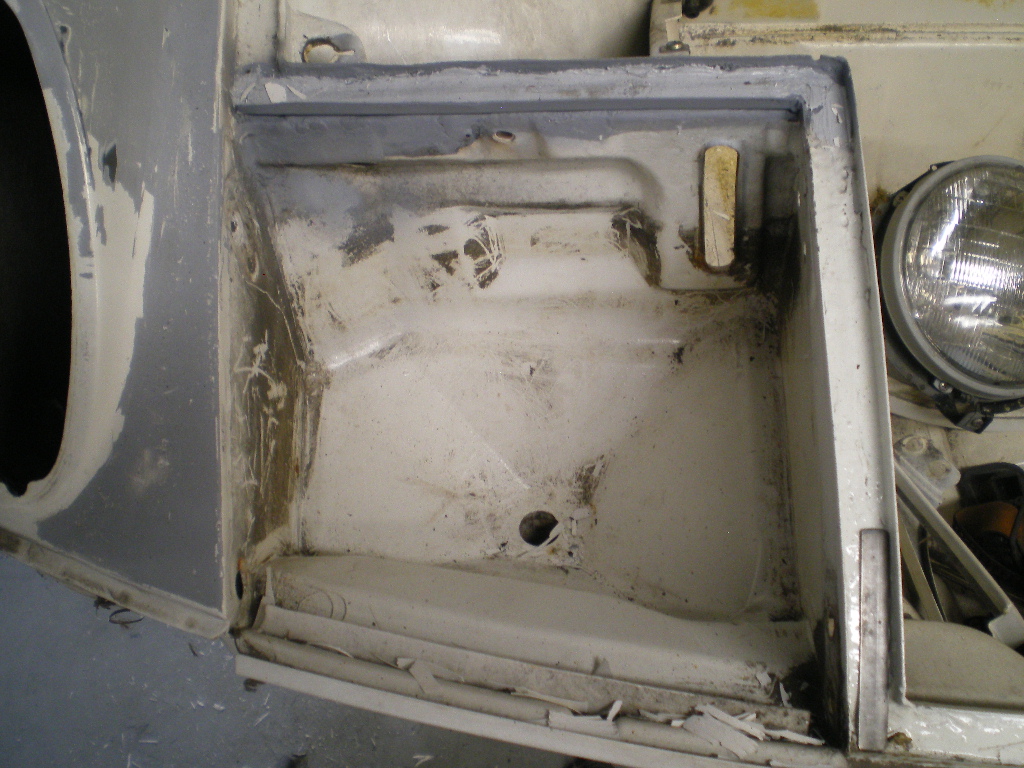 Front panel looks straight with no signs of any prior collisions. 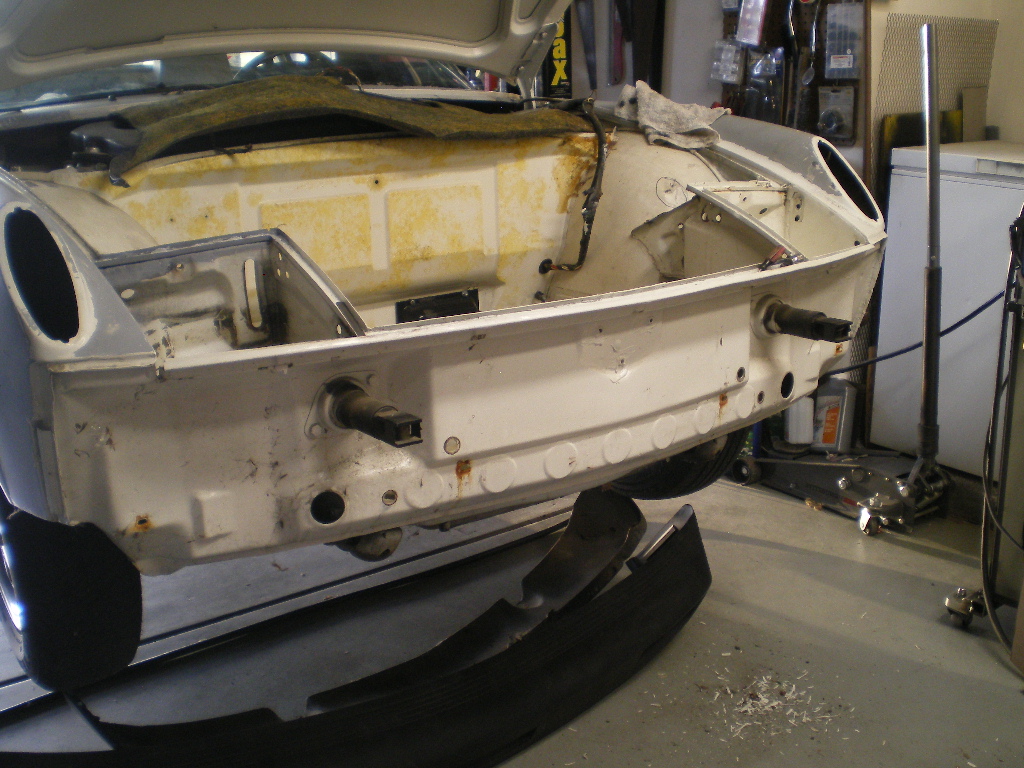 Lots more pieces to remove and more places that may or may not need rust repair. |
  |
1 User(s) are reading this topic (1 Guests and 0 Anonymous Users)
0 Members:

|
Lo-Fi Version | Time is now: 24th November 2024 - 08:24 PM |
Invision Power Board
v9.1.4 © 2024 IPS, Inc.


