|
|

|
Porsche, and the Porsche crest are registered trademarks of Dr. Ing. h.c. F. Porsche AG.
This site is not affiliated with Porsche in any way. Its only purpose is to provide an online forum for car enthusiasts. All other trademarks are property of their respective owners. |
|
|
  |
| 76-914 |
 May 13 2022, 10:28 AM May 13 2022, 10:28 AM
Post
#61
|
|
Repeat Offender & Resident Subaru Antagonist           Group: Members Posts: 13,634 Joined: 23-January 09 From: Temecula, CA Member No.: 9,964 Region Association: Southern California 
|
Six weeks since an update but I have a valid excuse or two. I've always lived by this motto; In life you either have reasons or results. So here are my reasons for the lapse in posting. My wife and I went to Europe for what was to be 15 days. After one week we were quarantined in Frankfort for the next 10 days with Covid at the downtown Hilton Hotel. Three thousand Euro's later we were allowed to depart Germany and return home. I was weaker than a politicians promise during elections but finally got back to the metal repairs 3 days ago. I ended up repairing one section twice because the metal was too thin. I discovered that out when welding in a patch piece. (IMG:style_emoticons/default/headbang.gif) I still need to weld in the right rear jack point panel, a piece on the bottom of the long and the new battery tray/stand. I'm sure there will be a few pin holes to weld up after grinding down the welds but in my world that's to be expected. (IMG:style_emoticons/default/hissyfit.gif)
This was my first attempt at repairing the panel behind the battery tray. After I ground down the welds I discovered that the metal was too thin in that small section midway up the left side where it juts out. The reason that I only replaced a small area (that small jutted out section) is because there are compound curvatures outside that which I wanted to avoid. (IMG:style_emoticons/default/slap.gif) The biggest repair piece was the easiest (where you see "BEND" written) to fab and replace. You can also see the the repair on the top of the long in this pic. I used 14ga there. 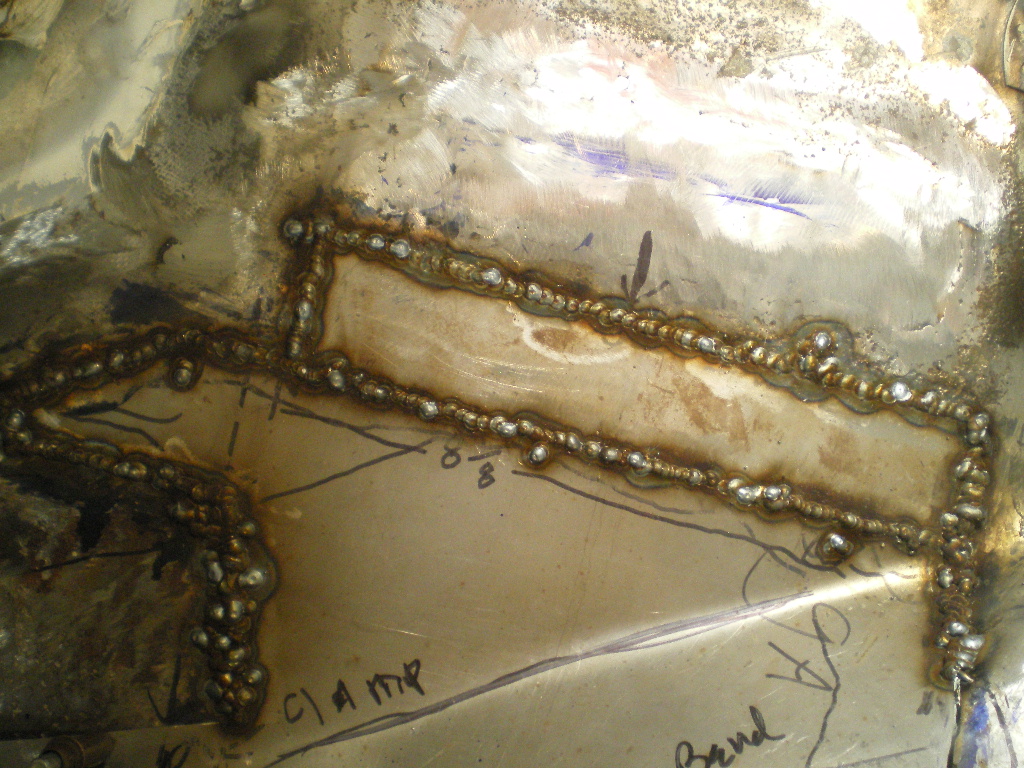 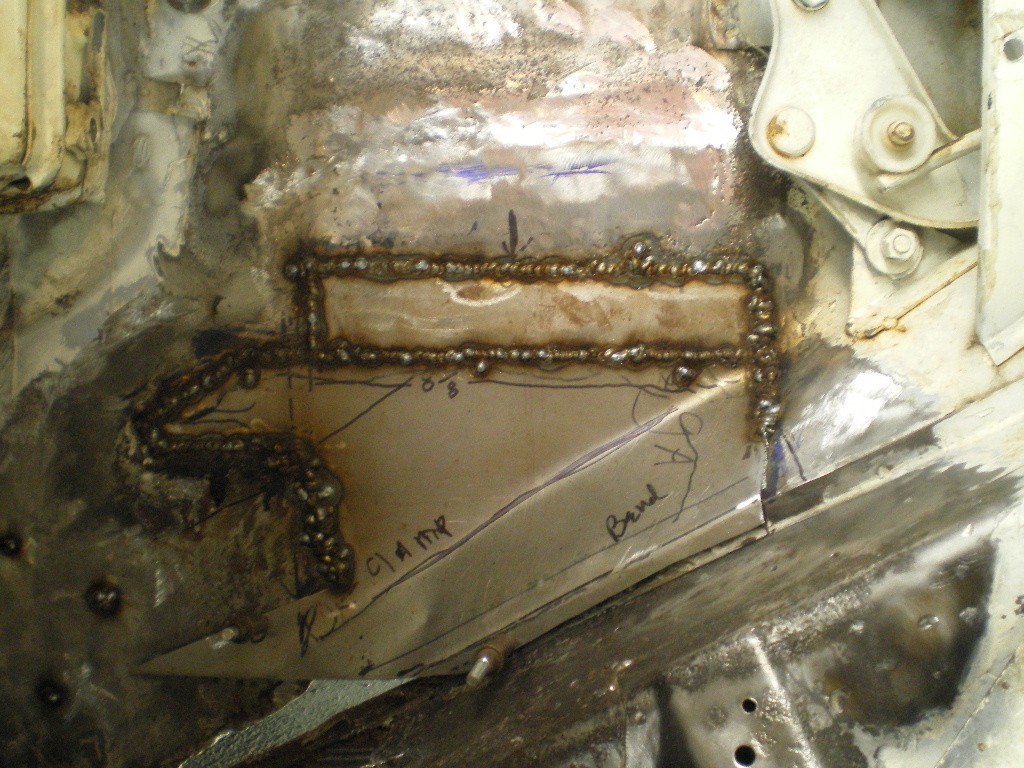 This is the section I cut out to correct the first attempt at a repair. Section 1&2 ended up being one piece with a bend. Section 3 was a PITA. It had 2 "S" bends and took a few extra cuss words to fit. 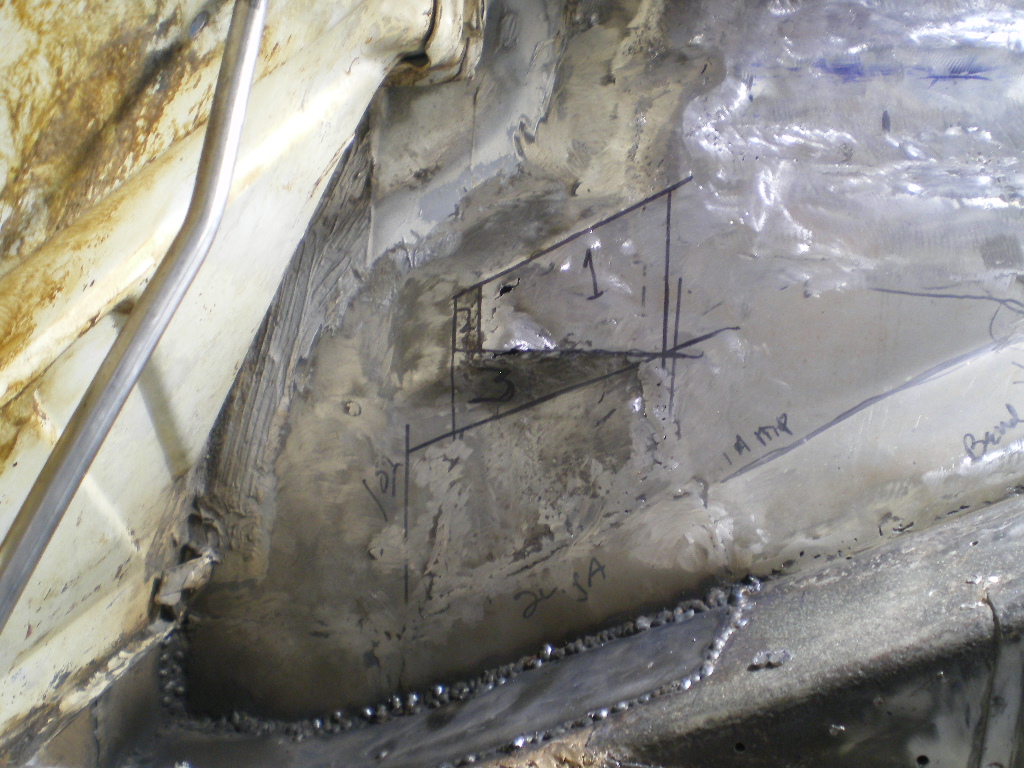 And finally the two pieces in place. Look closely at the bottom pic and you'll see the curvatures I spoke of. 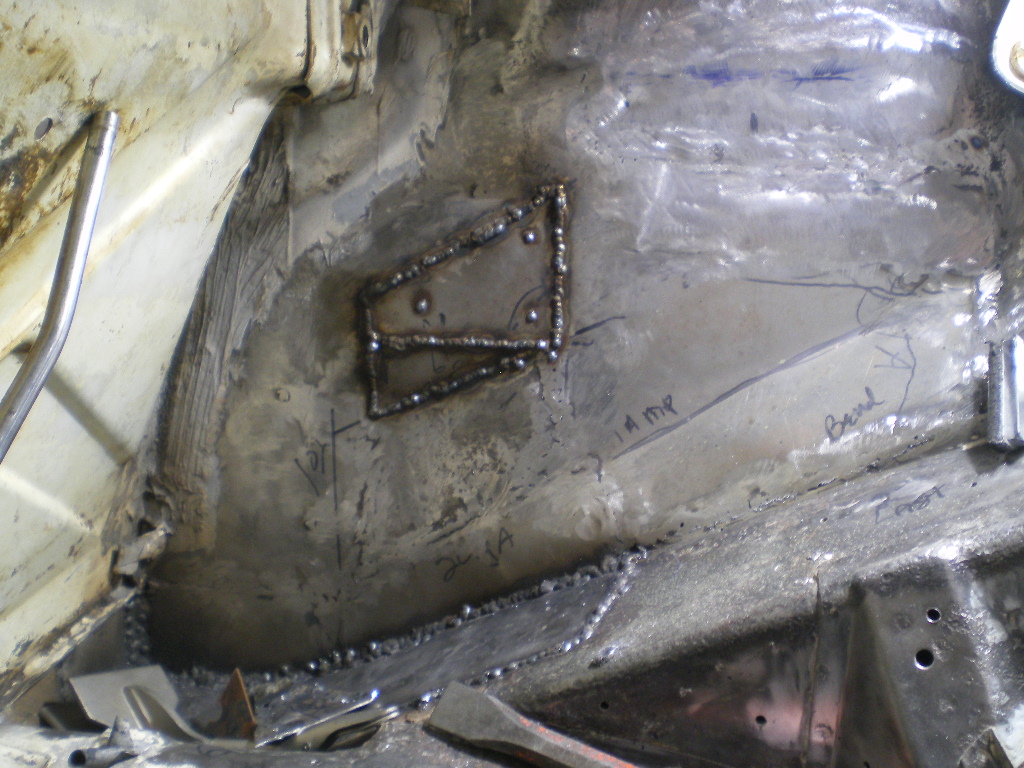  Attached image(s) 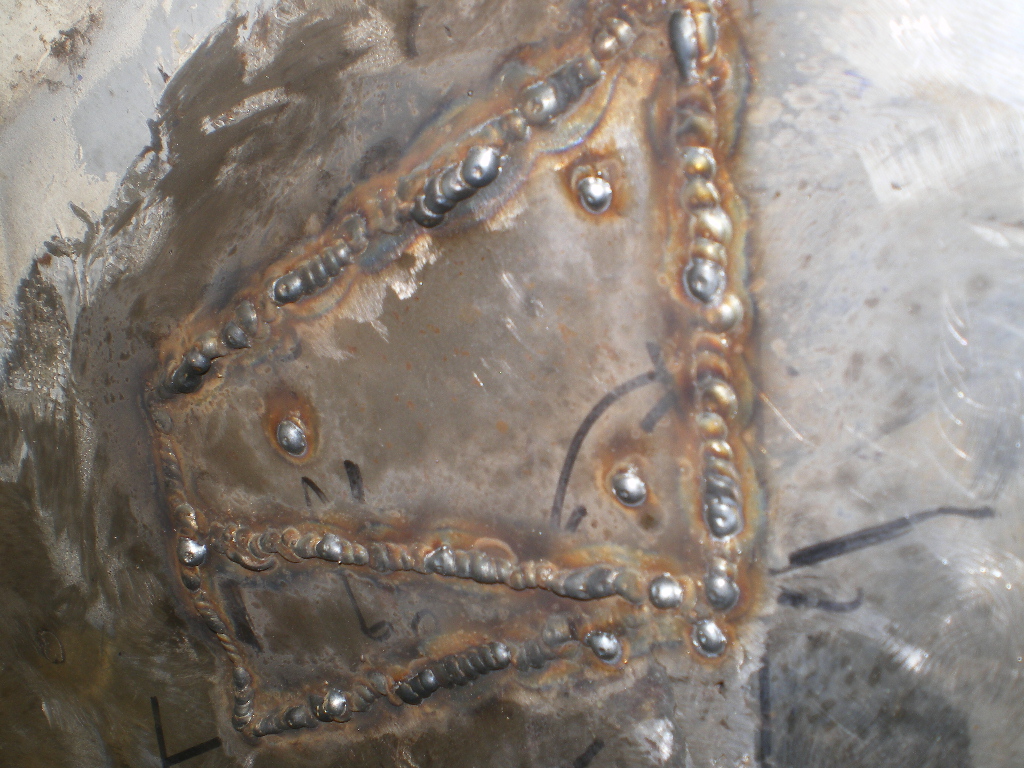
|
| autopro |
 May 13 2022, 04:04 PM May 13 2022, 04:04 PM
Post
#62
|
|
Member   Group: Members Posts: 306 Joined: 14-January 18 From: San Diego / Tijuana Member No.: 21,797 Region Association: Southern California |
Yup, I remember welding in those areas, not a fun place to work in. Repairs are coming out great, good job (IMG:style_emoticons/default/beerchug.gif)
Oh and that sucks about your trip to Europe, I'm sorry to hear it had to be that way. |
| rhodyguy |
 May 14 2022, 10:40 AM May 14 2022, 10:40 AM
Post
#63
|
|
Chimp Sanctuary NW. Check it out.                Group: Members Posts: 22,192 Joined: 2-March 03 From: Orion's Bell. The BELL! Member No.: 378 Region Association: Galt's Gulch |
Nice work Kent.
|
| 76-914 |
 May 18 2022, 07:54 PM May 18 2022, 07:54 PM
Post
#64
|
|
Repeat Offender & Resident Subaru Antagonist           Group: Members Posts: 13,634 Joined: 23-January 09 From: Temecula, CA Member No.: 9,964 Region Association: Southern California 
|
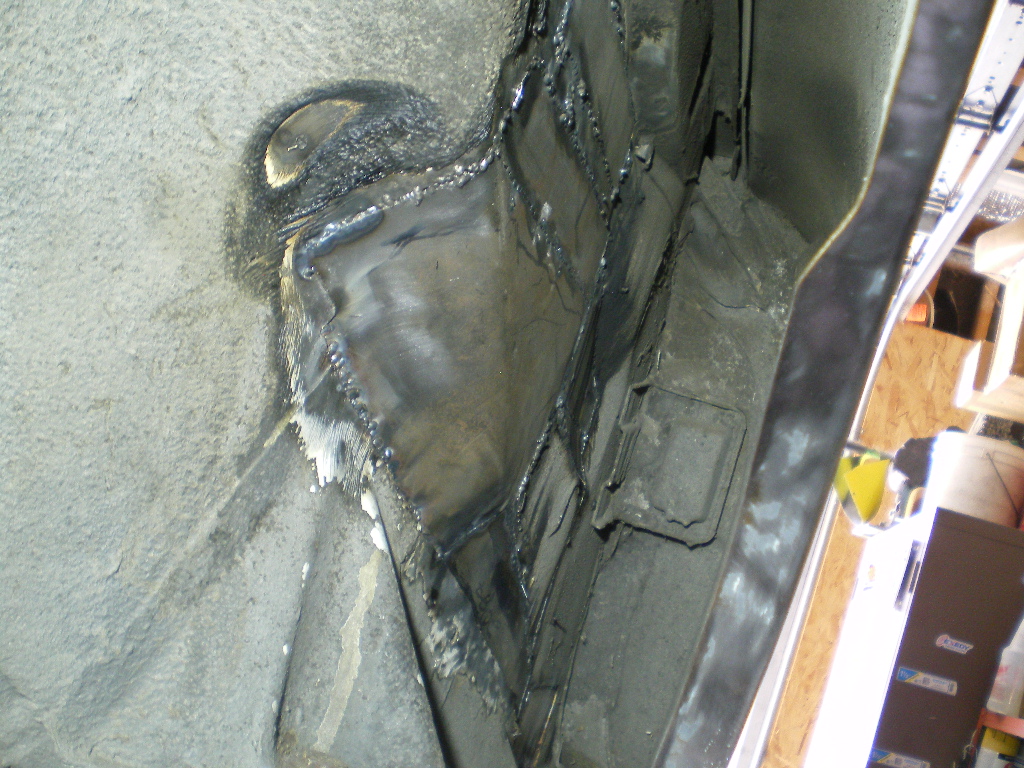
Thank you Pedro & Kevin. Here is the backside of that work before I prime & shoot some undercoating.
 And here is what I did today. This rust repair stuff reminds me of painting. Most of the work is in the prep. By the time you strike an ark you're almost finished. This little repair took about 4 hours and it still needs to be ground down! (IMG:style_emoticons/default/smash.gif) (IMG:style_emoticons/default/welder.gif) 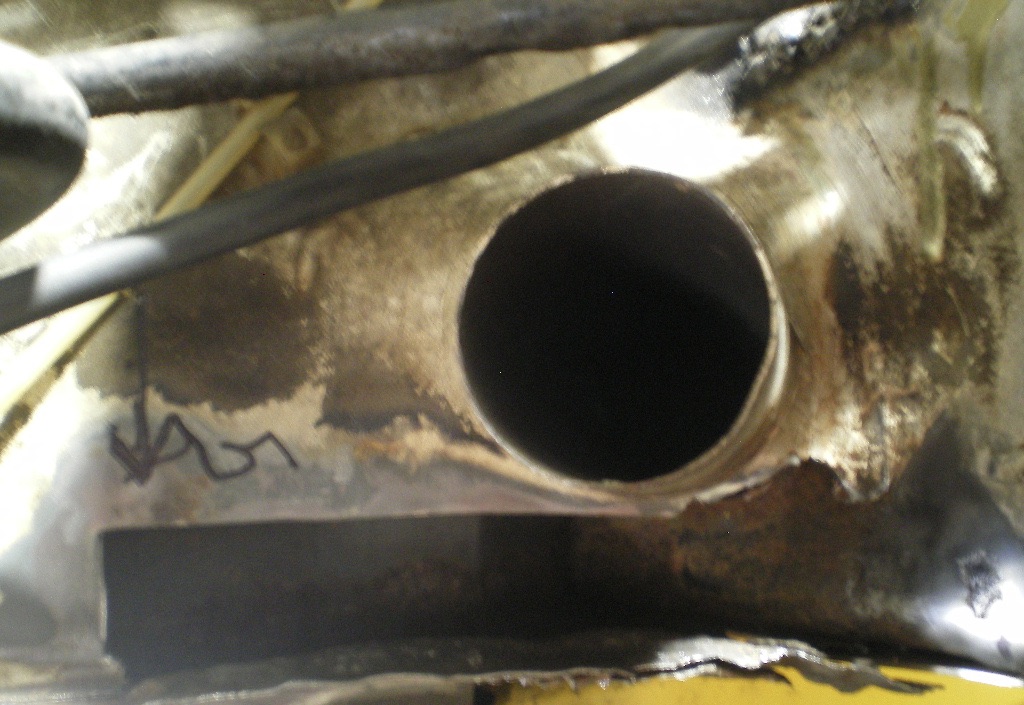 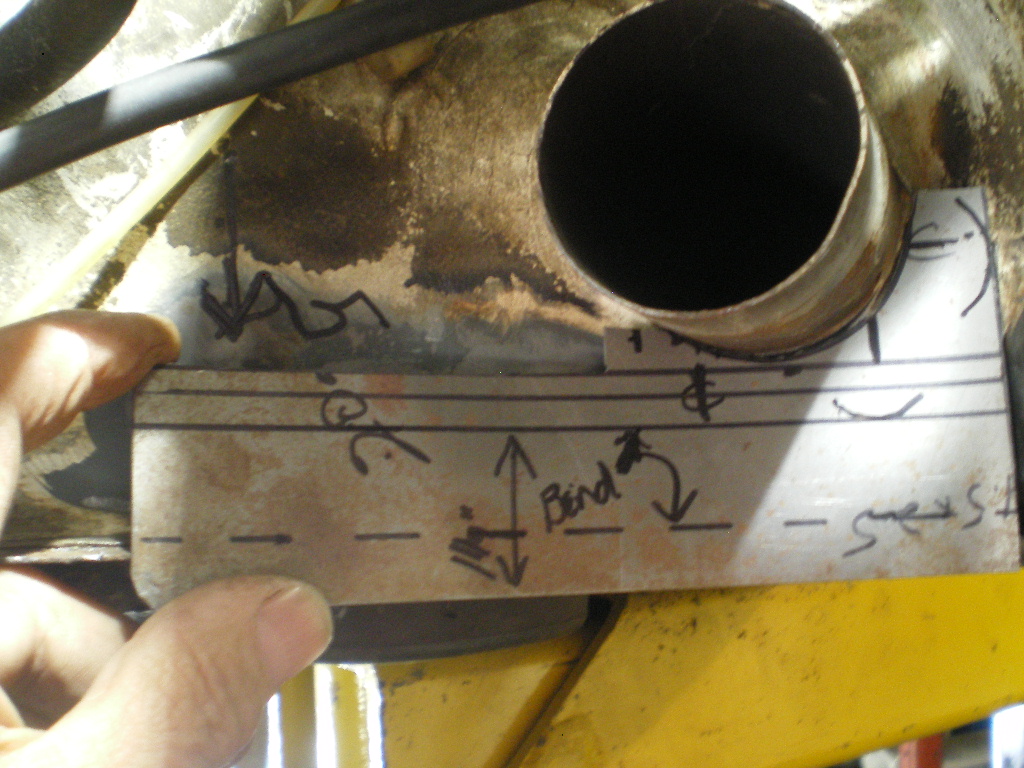 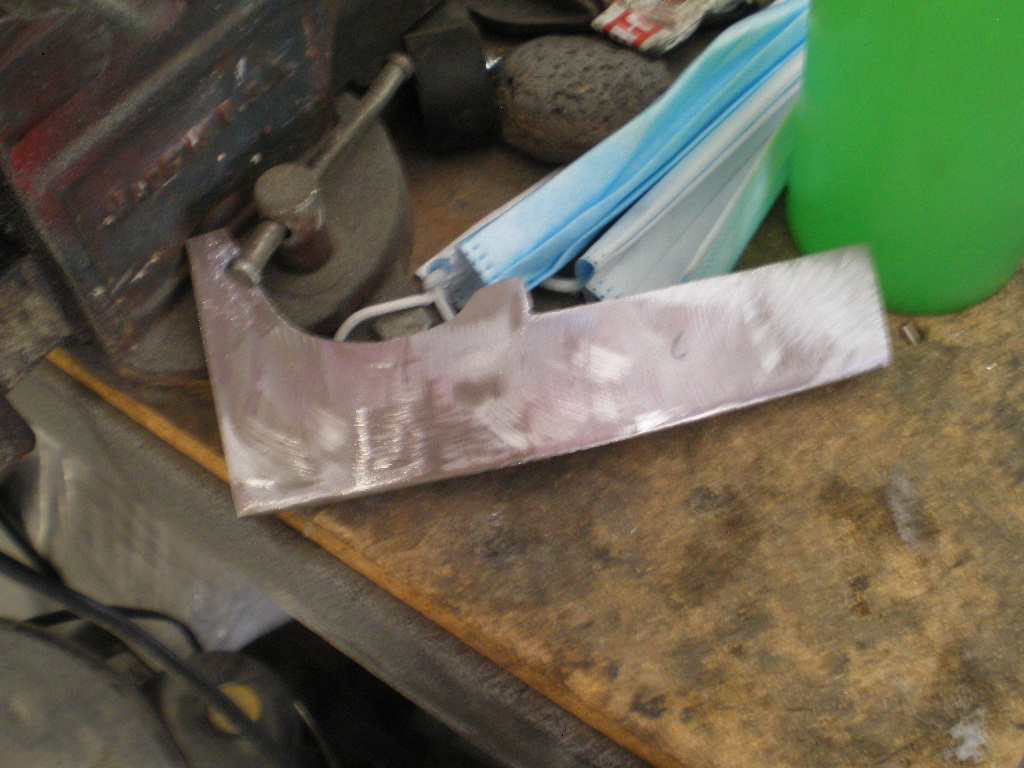 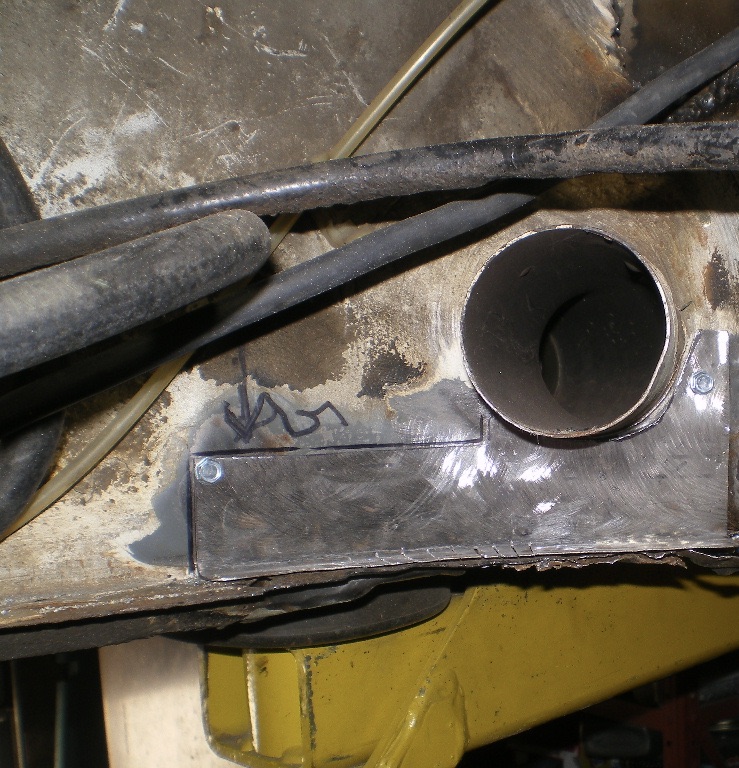 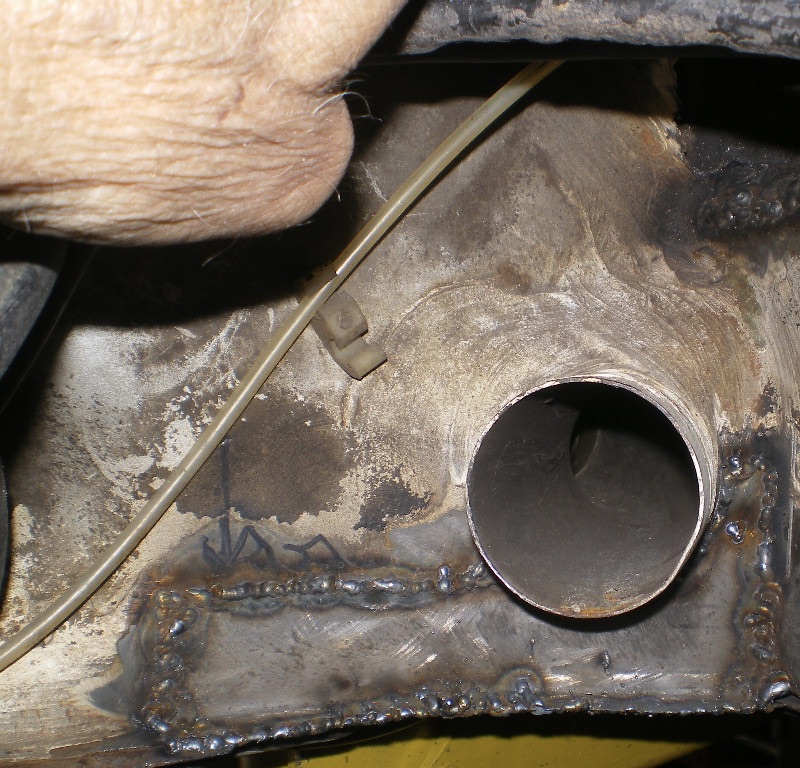 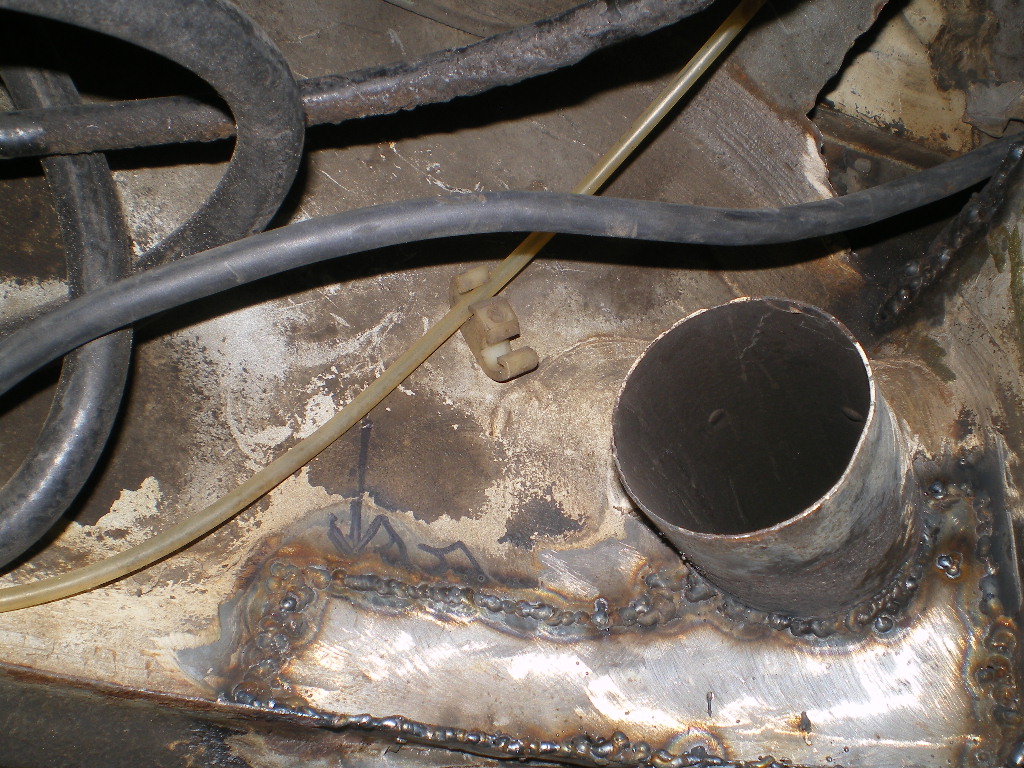 |
| TRS63 |
 May 19 2022, 12:03 AM May 19 2022, 12:03 AM
Post
#65
|
|
Member   Group: Members Posts: 324 Joined: 14-September 20 From: Germany - Stuttgart Member No.: 24,690 Region Association: Europe 
|
Looking good!
Antoine |
| 76-914 |
 May 26 2022, 05:35 PM May 26 2022, 05:35 PM
Post
#66
|
|
Repeat Offender & Resident Subaru Antagonist           Group: Members Posts: 13,634 Joined: 23-January 09 From: Temecula, CA Member No.: 9,964 Region Association: Southern California 
|
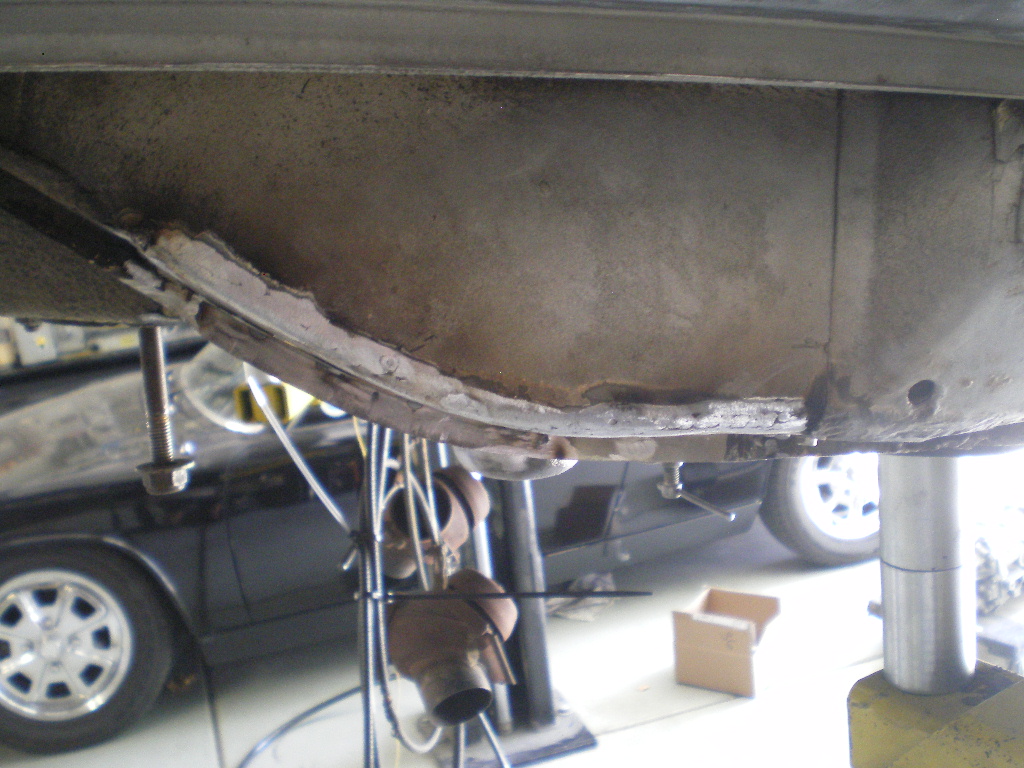
I think that I'm finished with the rust repairs although I've thought that before. Here is a pic of the repaired section on the lower long. It turned out much better than I expected.
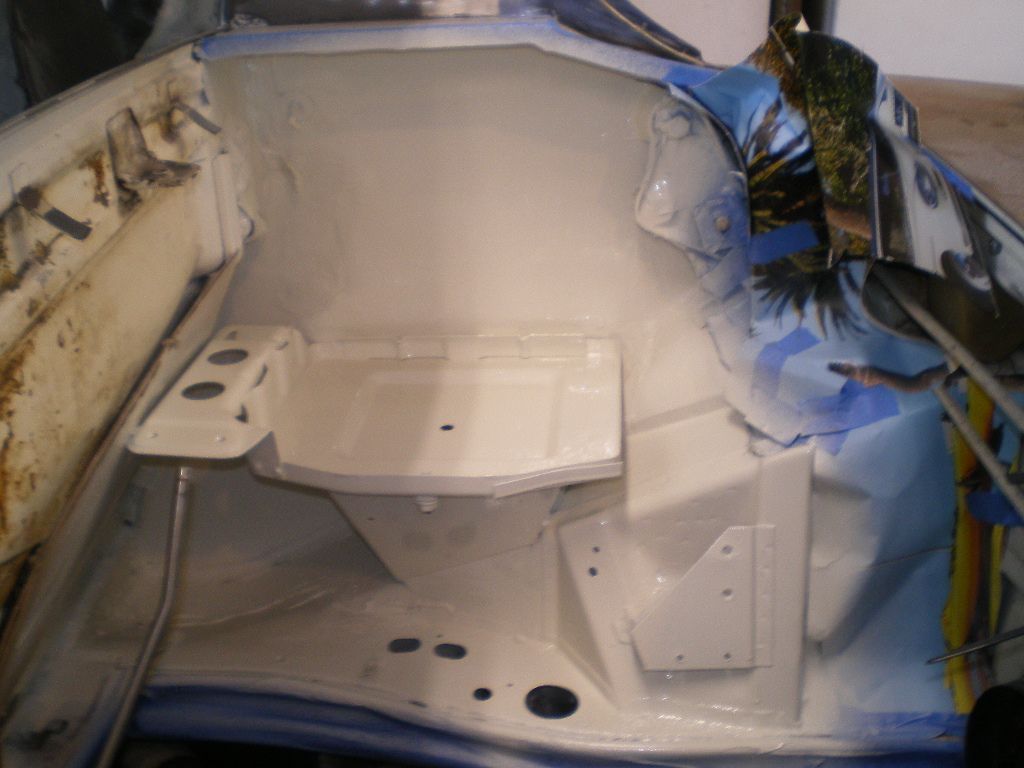
 And the rear jack point in place shortly before welding. Just 6 or 7 plug welds hold it in place. BTW, this piece led to me rebuilding my blast cabinet so that it could be resurrected. Looked like new after some straightening and blasting. (IMG:style_emoticons/default/biggrin.gif) 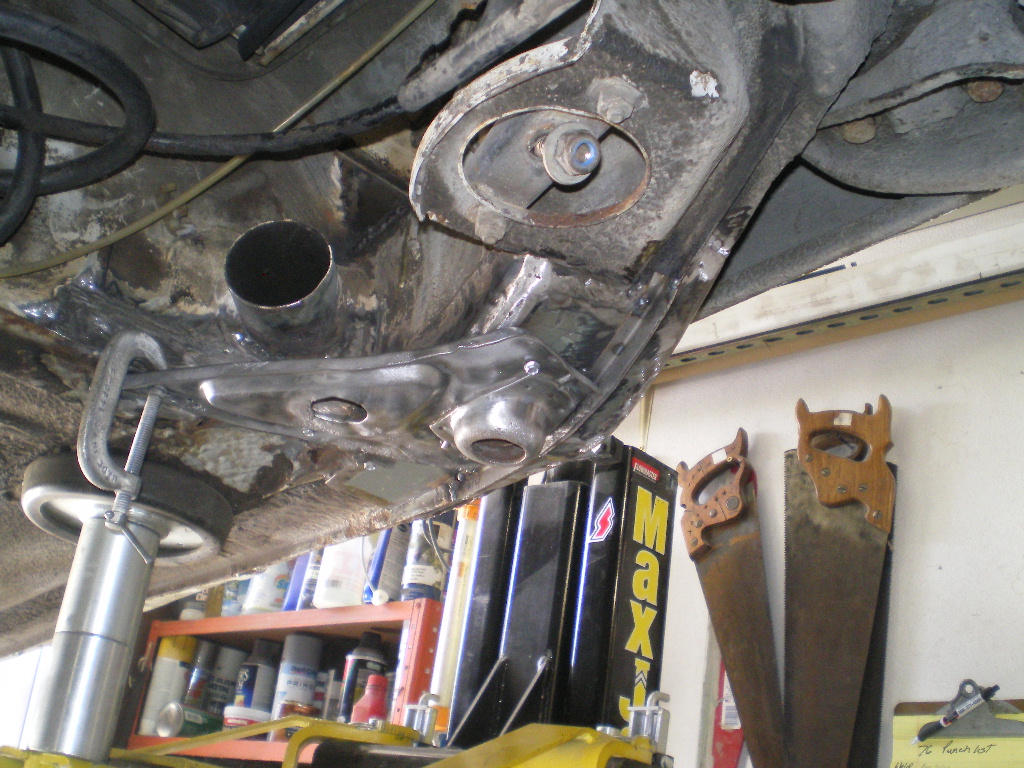 Next was replacing a small section of the shelf where it curves down to meet the top of the long. 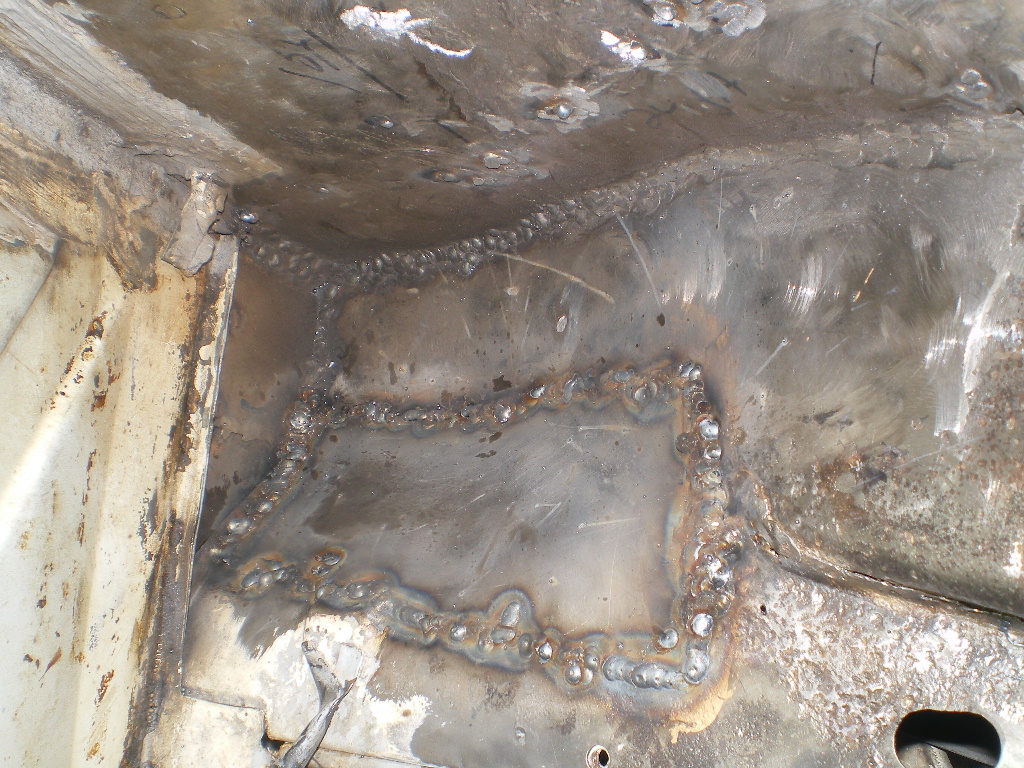 Some undercoating applied. 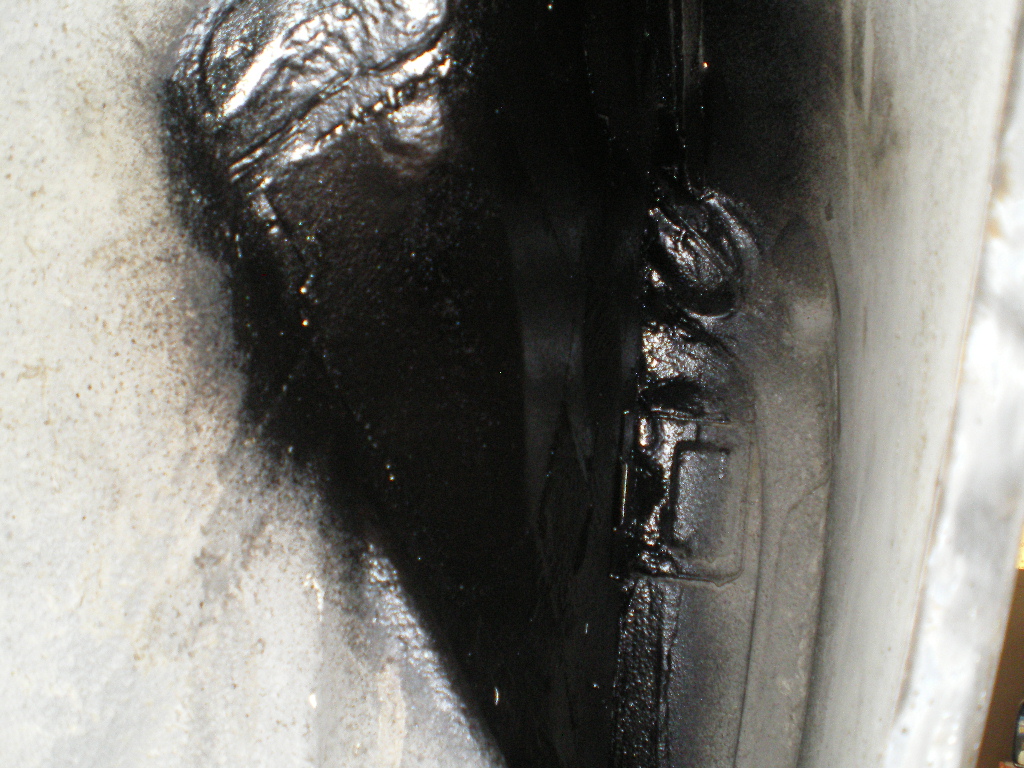 And after grinding down the welds the battery tray was finally welded into place. The fiberglass hack served me well for several years but it is nice to have finally her properly repaired. Further work & repairs are forthcoming but I can put this chapter behind me now. 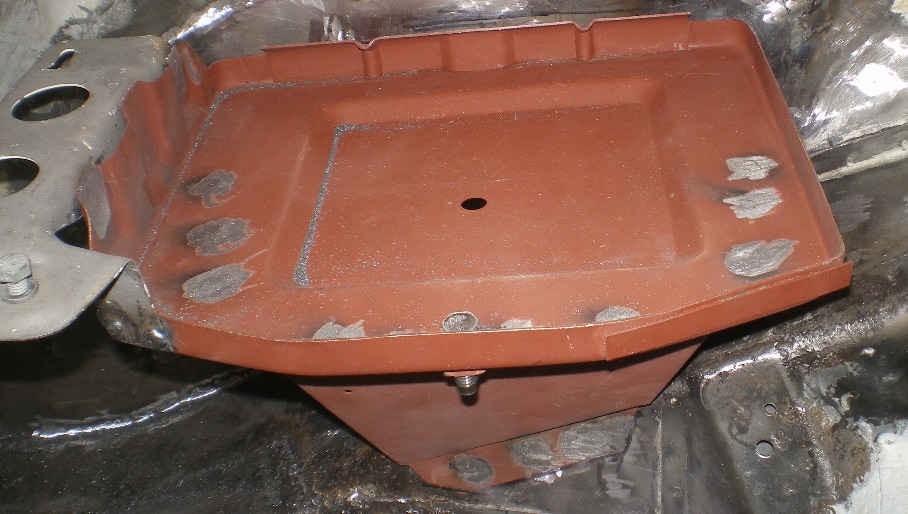 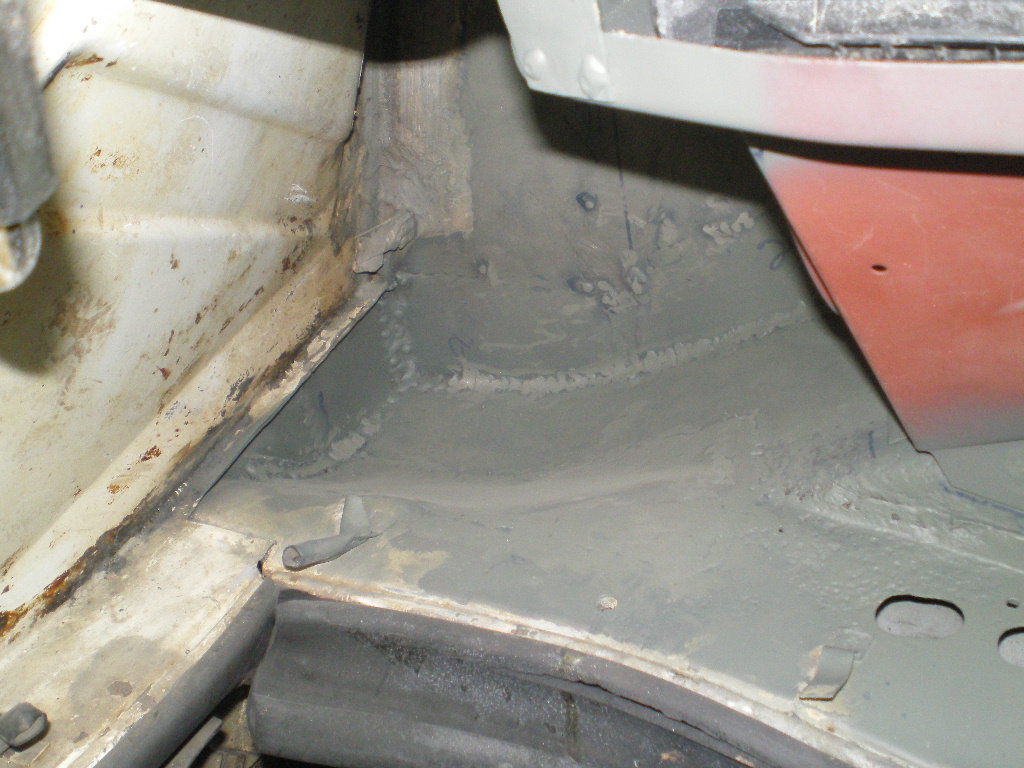 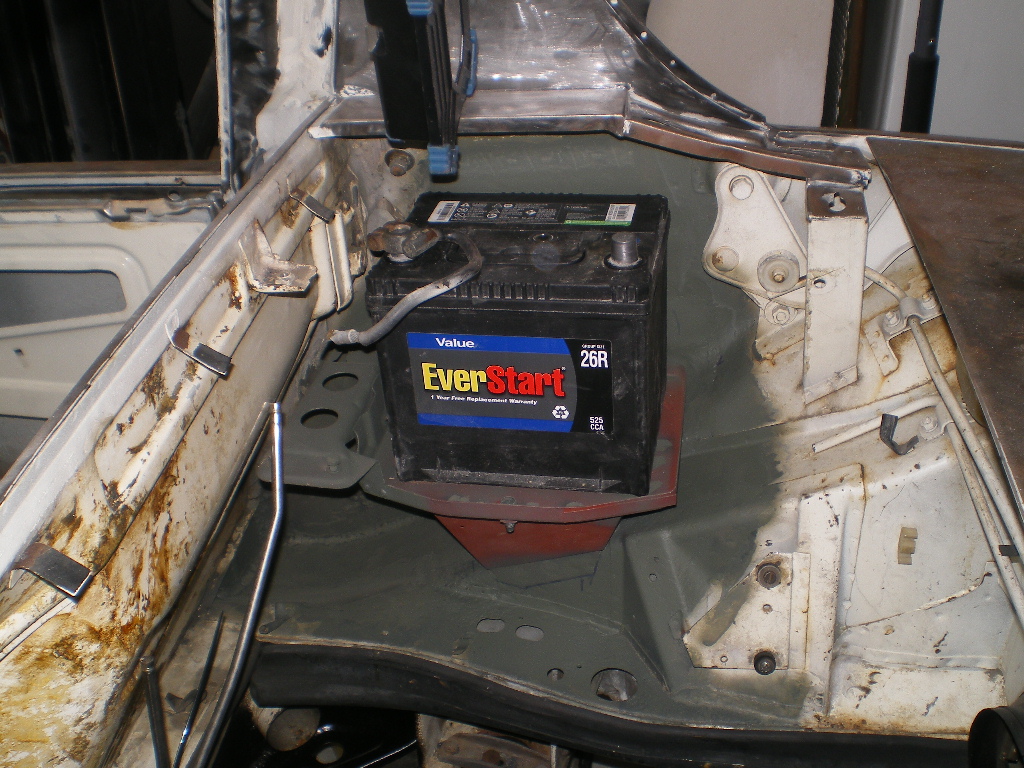 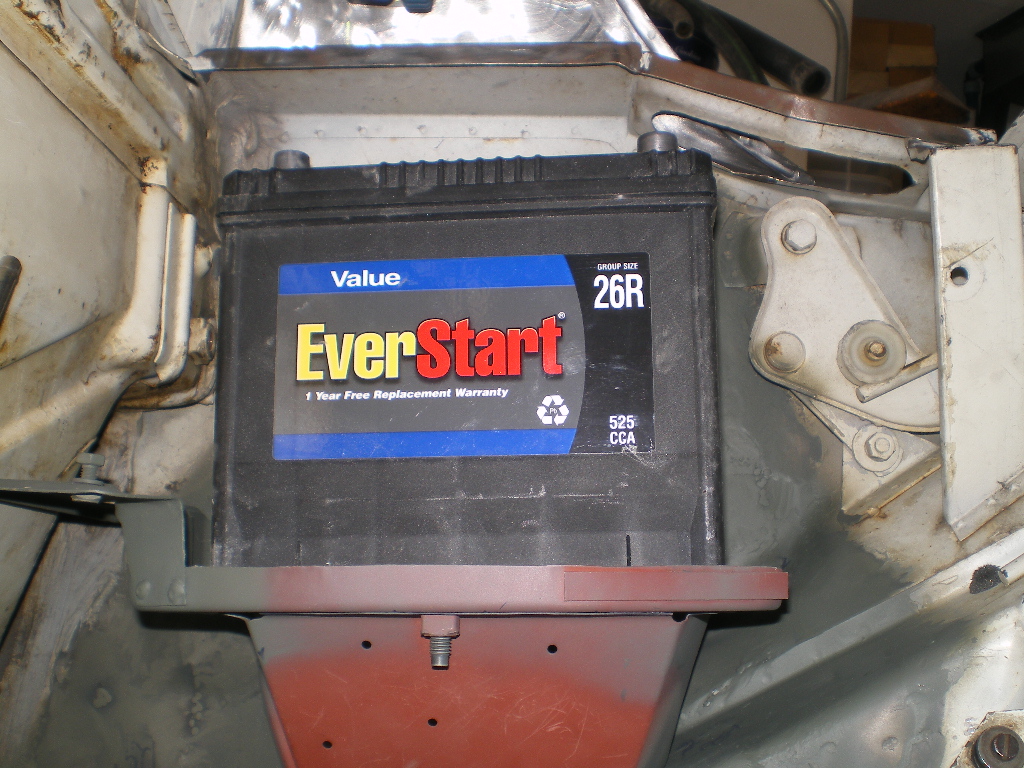 |
| 914_teener |
 May 26 2022, 06:20 PM May 26 2022, 06:20 PM
Post
#67
|
|
914 Guru      Group: Members Posts: 5,248 Joined: 31-August 08 From: So. Cal Member No.: 9,489 Region Association: Southern California |
Nice metal work and MIG work Kent.
Looks like it's time to quit your day job! |
| Root_Werks |
 May 26 2022, 07:55 PM May 26 2022, 07:55 PM
Post
#68
|
|
Village Idiot      Group: Members Posts: 8,484 Joined: 25-May 04 From: About 5NM from Canada Member No.: 2,105 Region Association: Pacific Northwest 
|
That is a ton of progress in a short time. Nice!
|
| 76-914 |
 May 26 2022, 09:25 PM May 26 2022, 09:25 PM
Post
#69
|
|
Repeat Offender & Resident Subaru Antagonist           Group: Members Posts: 13,634 Joined: 23-January 09 From: Temecula, CA Member No.: 9,964 Region Association: Southern California 
|
Nice metal work and MIG work Kent. Looks like it's time to quit your day job! That is a ton of progress in a short time. Nice! Thx but it seemed like that took forever. Some of those pieces are made 3-4 times before I get it right. (IMG:style_emoticons/default/beerchug.gif) |
| 76-914 |
 Jun 9 2022, 02:57 PM Jun 9 2022, 02:57 PM
Post
#70
|
|
Repeat Offender & Resident Subaru Antagonist           Group: Members Posts: 13,634 Joined: 23-January 09 From: Temecula, CA Member No.: 9,964 Region Association: Southern California 
|
Now that it's painted I can say the Hell Hole repairs are complete. The paint makes it look better but my favorite result is seeing that jack point standing proud when on the lift. If that donut tucks up flush with the long when it is jacked up then you have some rot to deal with. It may not be obvious since there are so many layers in that area but don't be fooled. Time to clean up the engine/trans and reinstall those next. I'll finally be able to move it off the lift when I need to service one of the others. A long way to go on this car but this repair is now in my rear view mirror. (IMG:style_emoticons/default/biggrin.gif)
 I picked this rear fairing up at a G&R event last year. It was ugly as Hell with several coats of black paint, lots of surface rust (yes, some people paint over rust (IMG:style_emoticons/default/WTF.gif) ), some dents and torn spots in the metal. Cleaned up nicely and it needs a little filler before paint but worth the price I paid. I don't have a TIG welder so I gas welded the tears in the metal. All of the tears were at the attach points except one at the bottom. 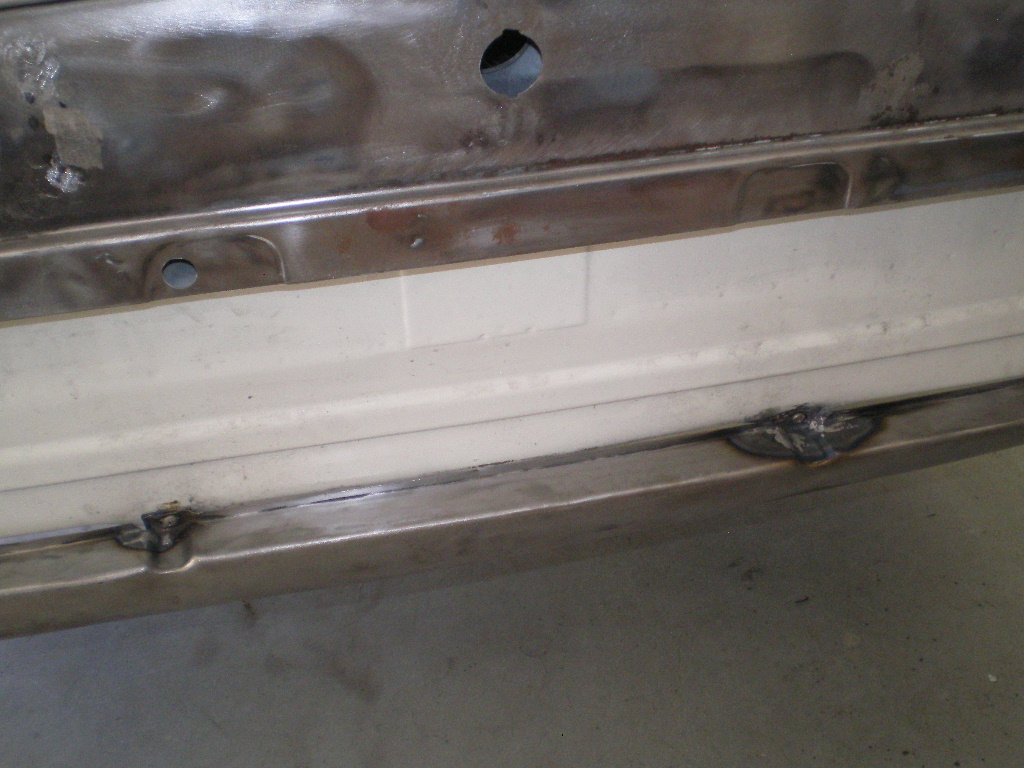 This stock fairing was just what I needed. The one that came with the car had been hacked to allow for this God awful twin tip. (IMG:style_emoticons/default/barf.gif) I'll cut that off and go back with the stock single outlet sans any chrome covers. 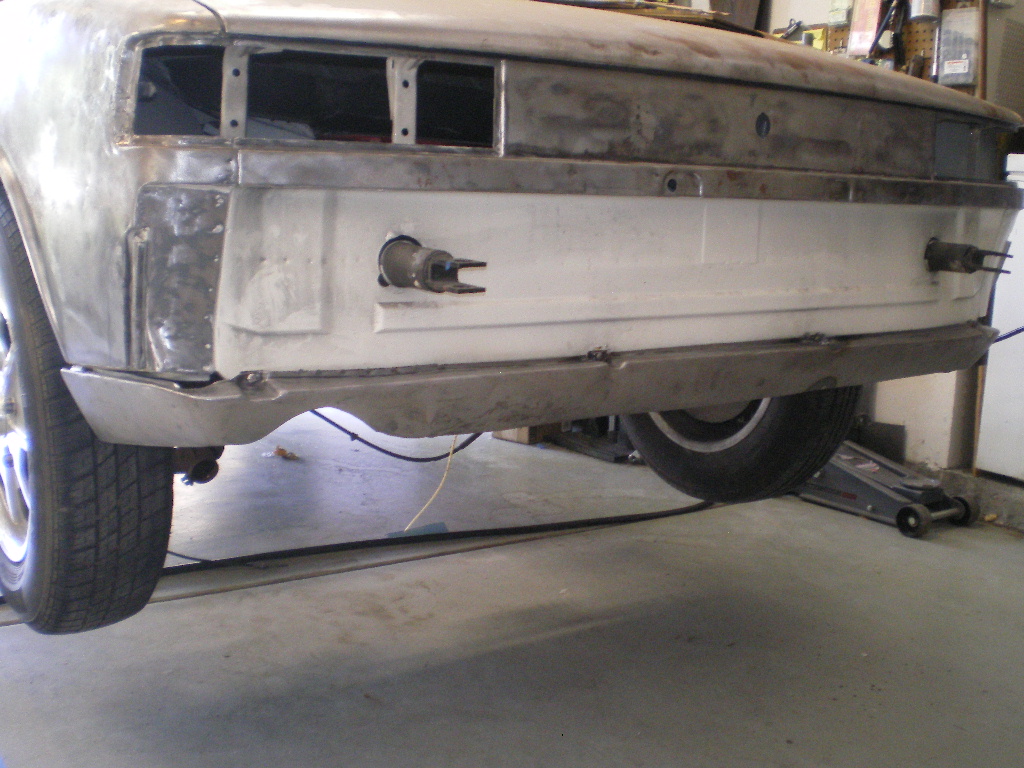 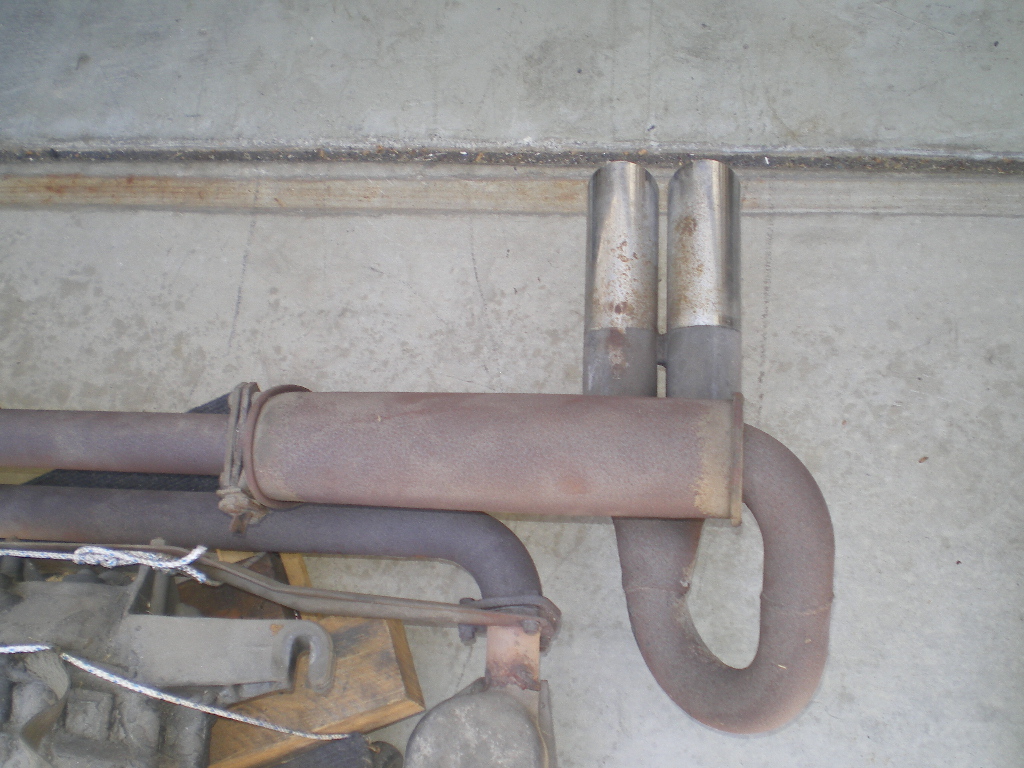 |
| Chris H. |
 Jun 9 2022, 04:44 PM Jun 9 2022, 04:44 PM
Post
#71
|
|
Senior Member     Group: Members Posts: 4,048 Joined: 2-January 03 From: Chicago 'burbs Member No.: 73 Region Association: Upper MidWest 
|
Very nice work Kent! She'll be a real beauty when you're done. Are you going to paint it yourself?
|
| 76-914 |
 Jun 9 2022, 07:24 PM Jun 9 2022, 07:24 PM
Post
#72
|
|
Repeat Offender & Resident Subaru Antagonist           Group: Members Posts: 13,634 Joined: 23-January 09 From: Temecula, CA Member No.: 9,964 Region Association: Southern California 
|
Very nice work Kent! She'll be a real beauty when you're done. Are you going to paint it yourself? Hey Chris, how are ya? Not this time. I'll have a "real" painter do it in a "real" paint booth. (IMG:style_emoticons/default/bye1.gif) |
| rhodyguy |
 Jun 10 2022, 10:44 AM Jun 10 2022, 10:44 AM
Post
#73
|
|
Chimp Sanctuary NW. Check it out.                Group: Members Posts: 22,192 Joined: 2-March 03 From: Orion's Bell. The BELL! Member No.: 378 Region Association: Galt's Gulch |
You're kickin' ass.
|
| 76-914 |
 Jun 12 2022, 09:56 AM Jun 12 2022, 09:56 AM
Post
#74
|
|
Repeat Offender & Resident Subaru Antagonist           Group: Members Posts: 13,634 Joined: 23-January 09 From: Temecula, CA Member No.: 9,964 Region Association: Southern California 
|
You're kickin' ass. More like I'm getting my ass kicked. (IMG:style_emoticons/default/lol-2.gif) Just when I thought I was finished with rust repairs I find two more. I have to blame @SirAndy for the bulk of these rust repairs. His "just keep looking" comment echos in my head like a bad song. (IMG:style_emoticons/default/headbang.gif) I noticed two small shiney dots on the cowl. One one each side. I figured it was either gold or brass. When I looked at them from below I found some rust. As I removed metal I found more brass that was cleverly concealed. I'm not sure what the appeal of brazing with brass rod is unless it is more accepting of dirty or rusted metal. (IMG:style_emoticons/default/confused24.gif) I have an oxyacetylene rig and the only time it sees action is cutting thick metals or welding thin metal. Otherwise it's Mig time. Anyway, here are some pics of the carnage and repair. Fingers crossed that the rust worms are handled for the next decade or so. 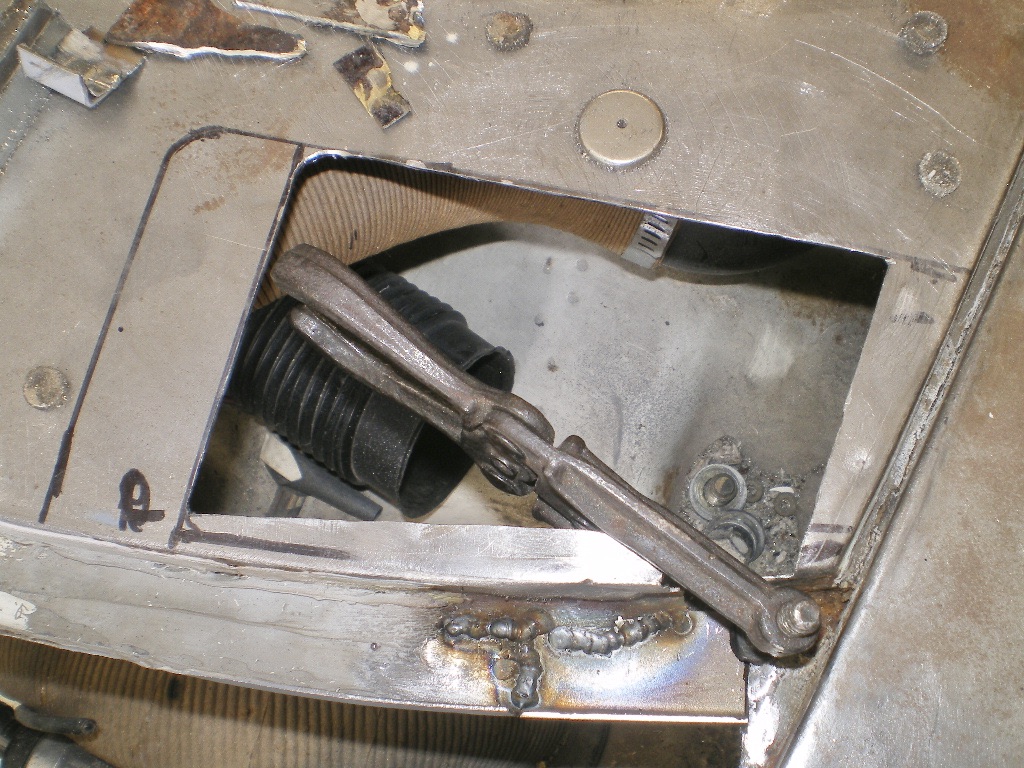 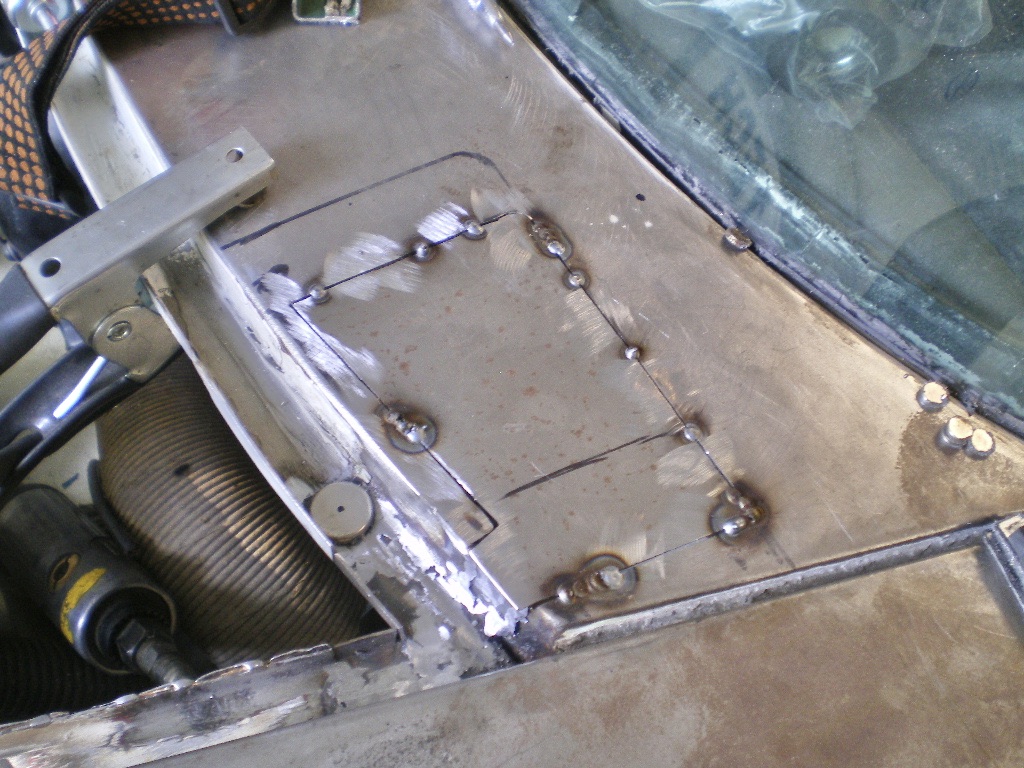 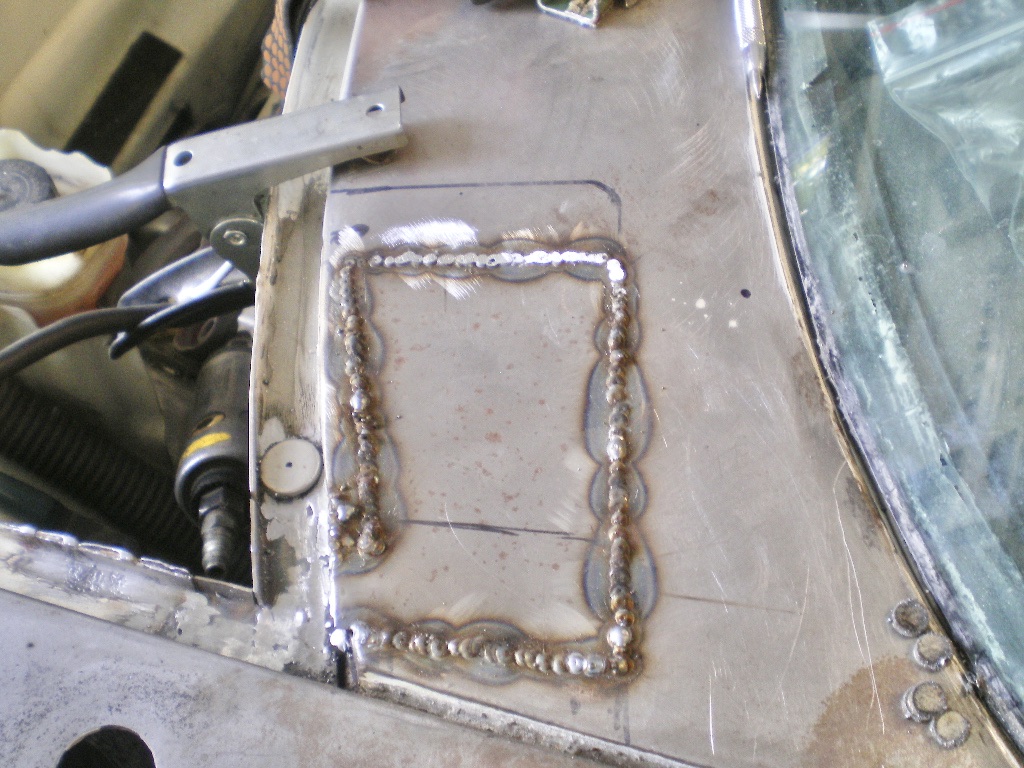 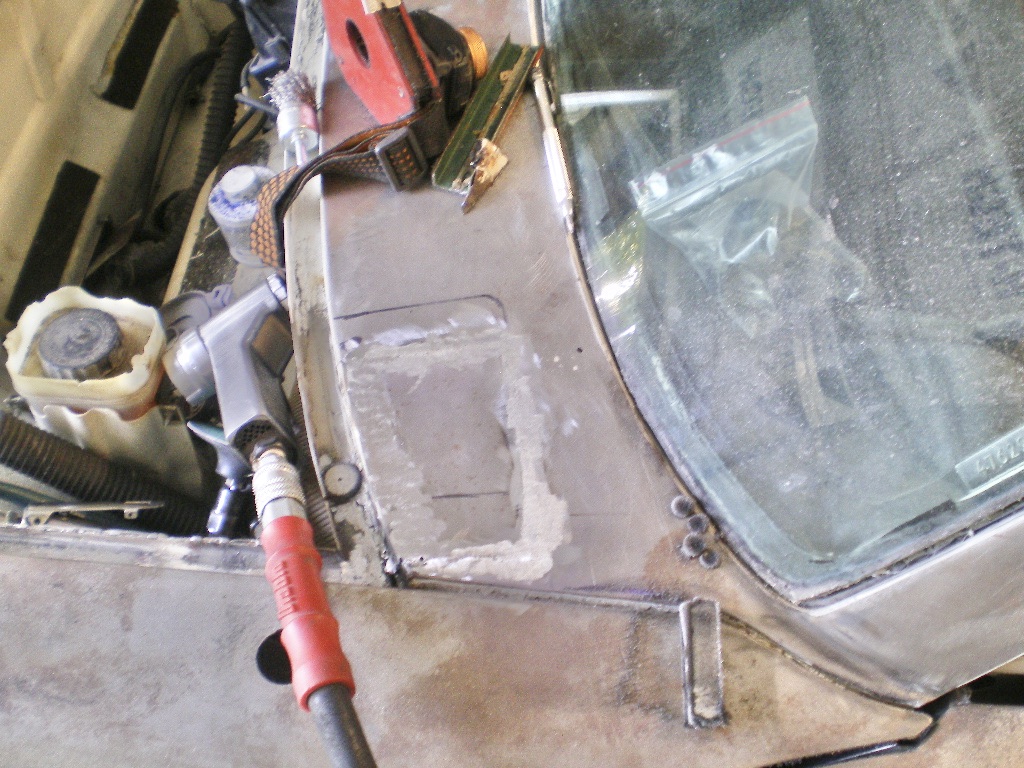 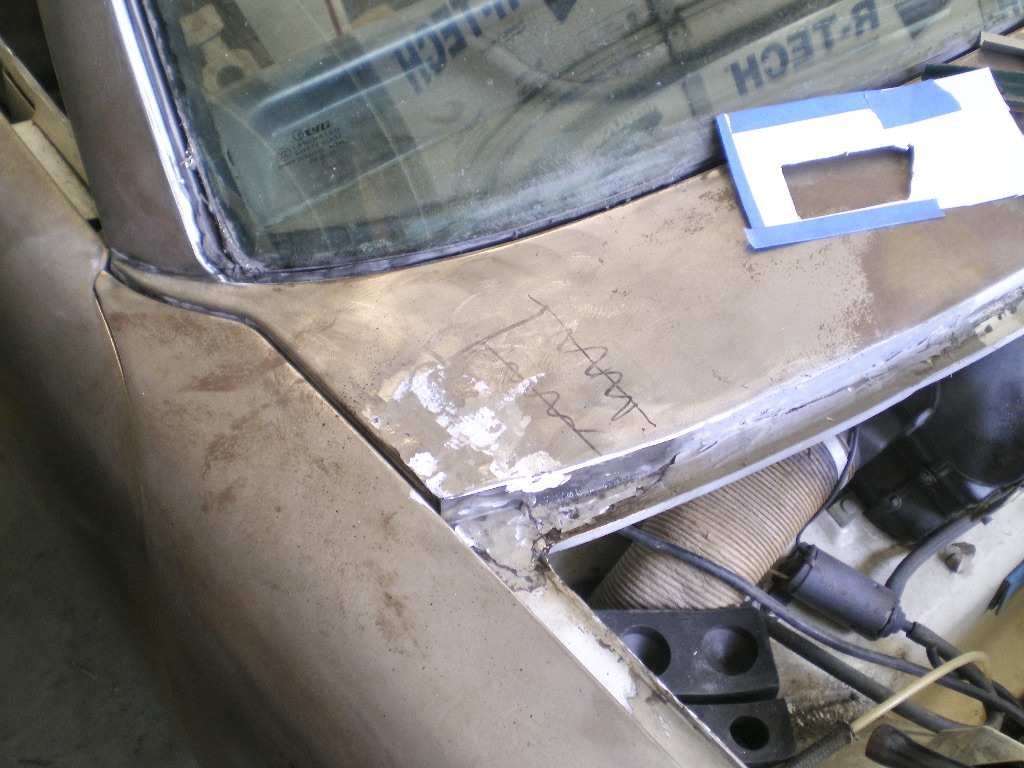 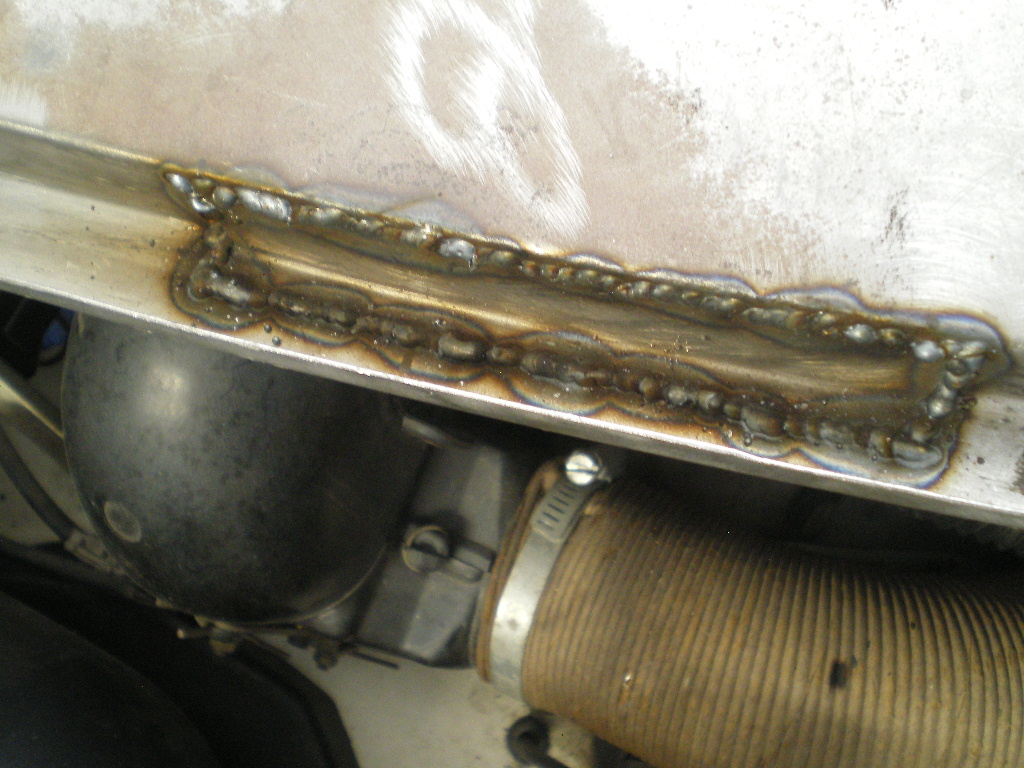 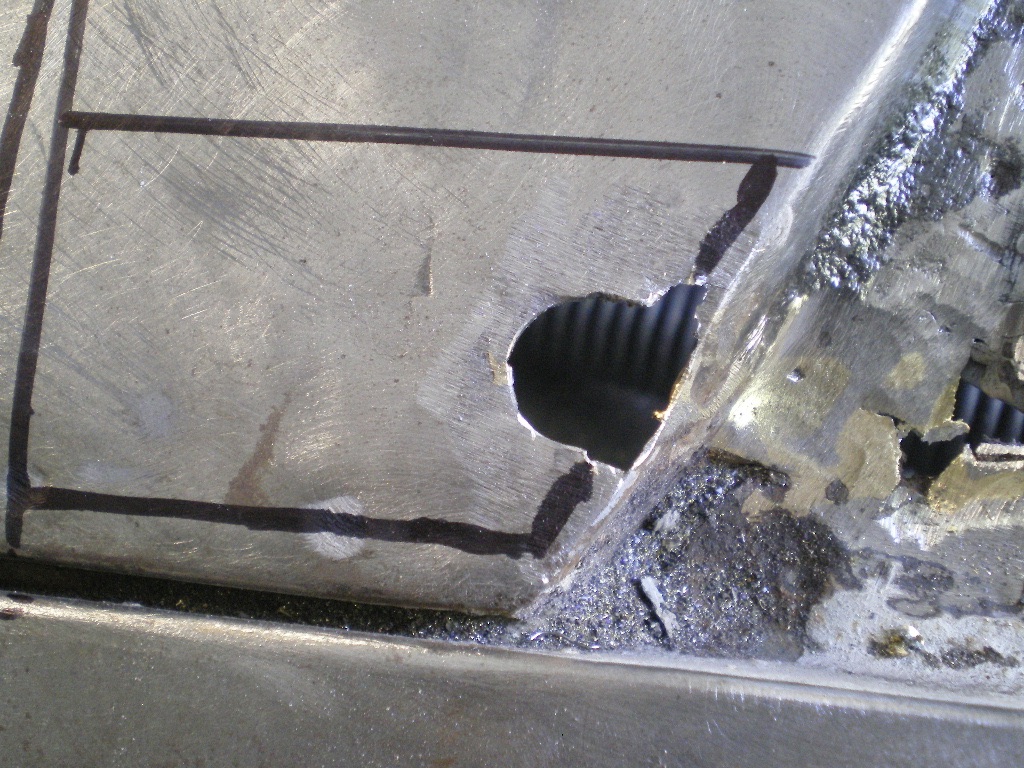 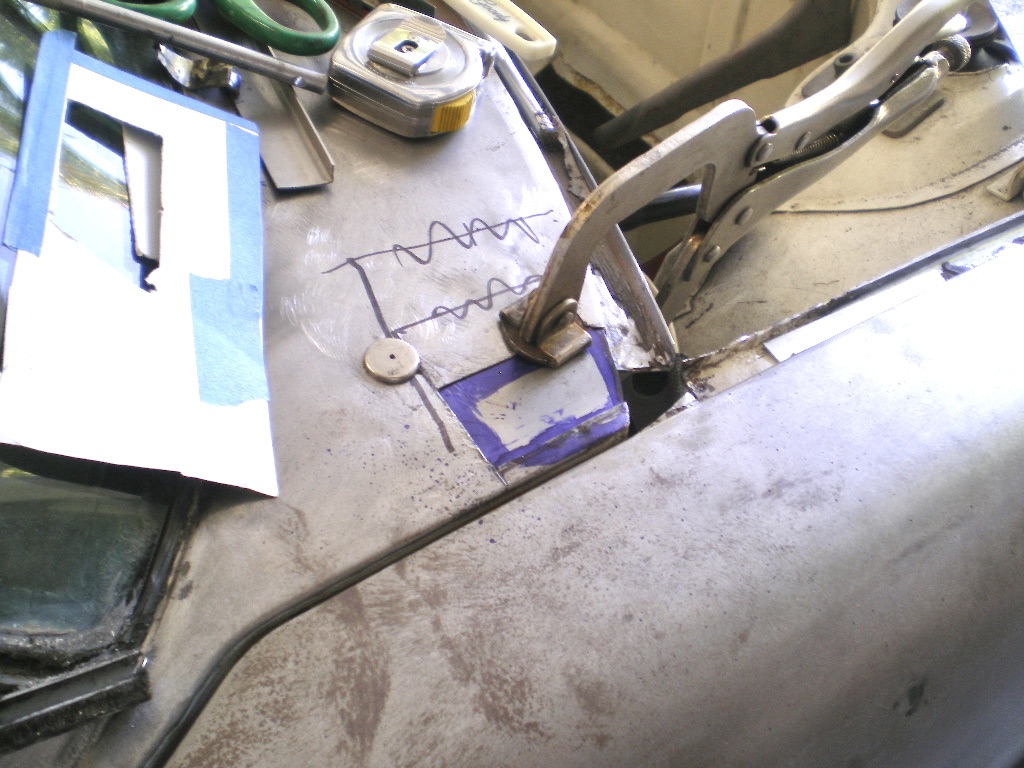 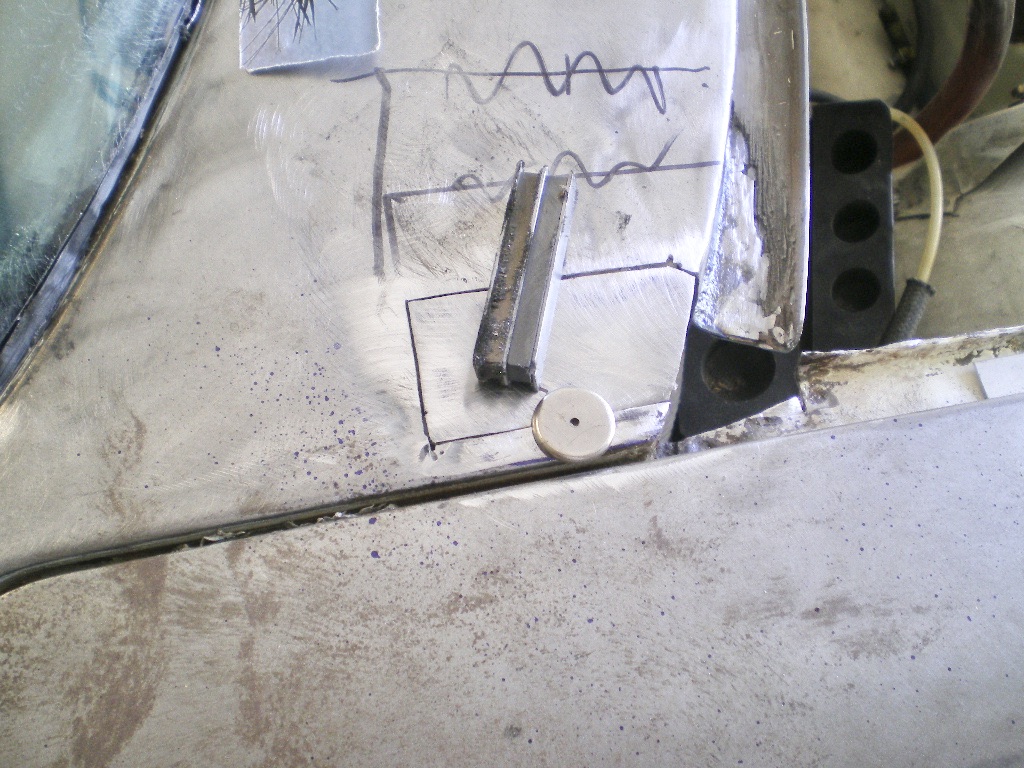  Attached image(s) 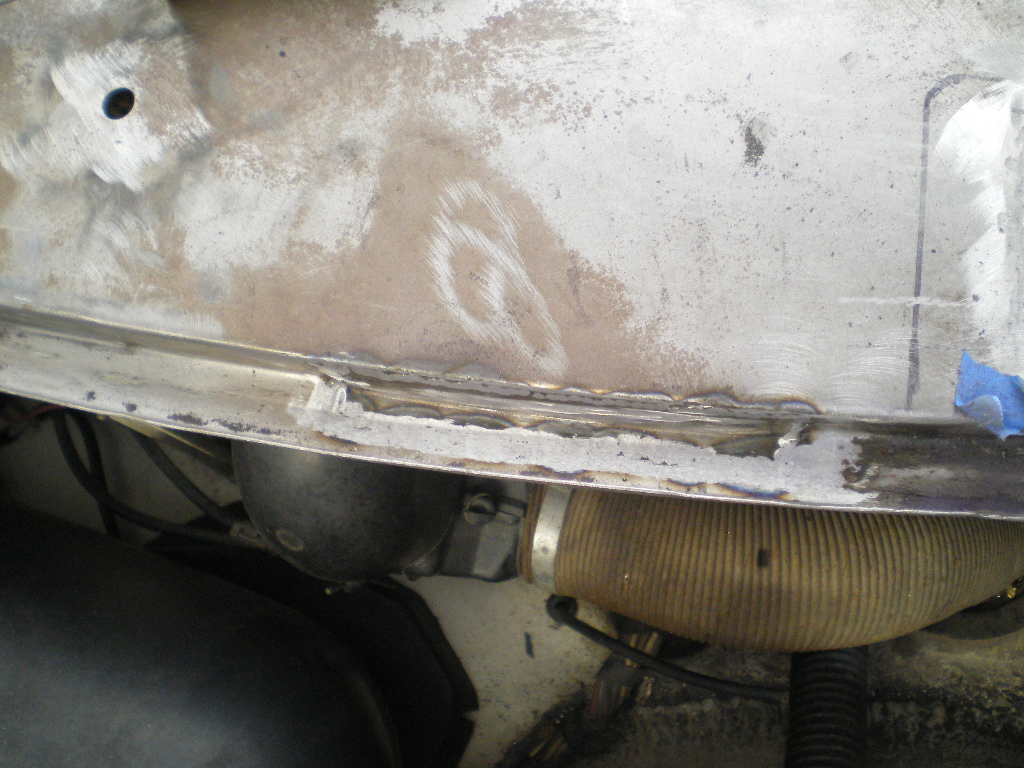
|
| 76-914 |
 Jun 15 2022, 08:29 PM Jun 15 2022, 08:29 PM
Post
#75
|
|
Repeat Offender & Resident Subaru Antagonist           Group: Members Posts: 13,634 Joined: 23-January 09 From: Temecula, CA Member No.: 9,964 Region Association: Southern California 
|
I got one heater diverter valve cleaned up before I decided I needed new media. It was taking too long so I'll change that out tomorrow. So only one got painted.
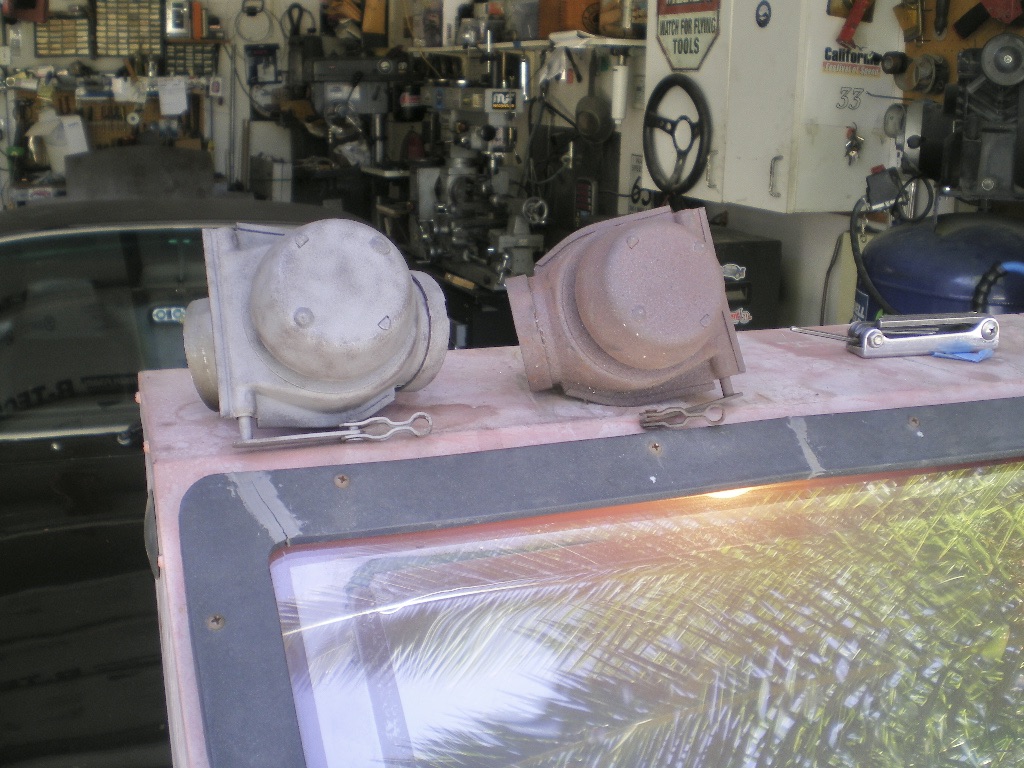 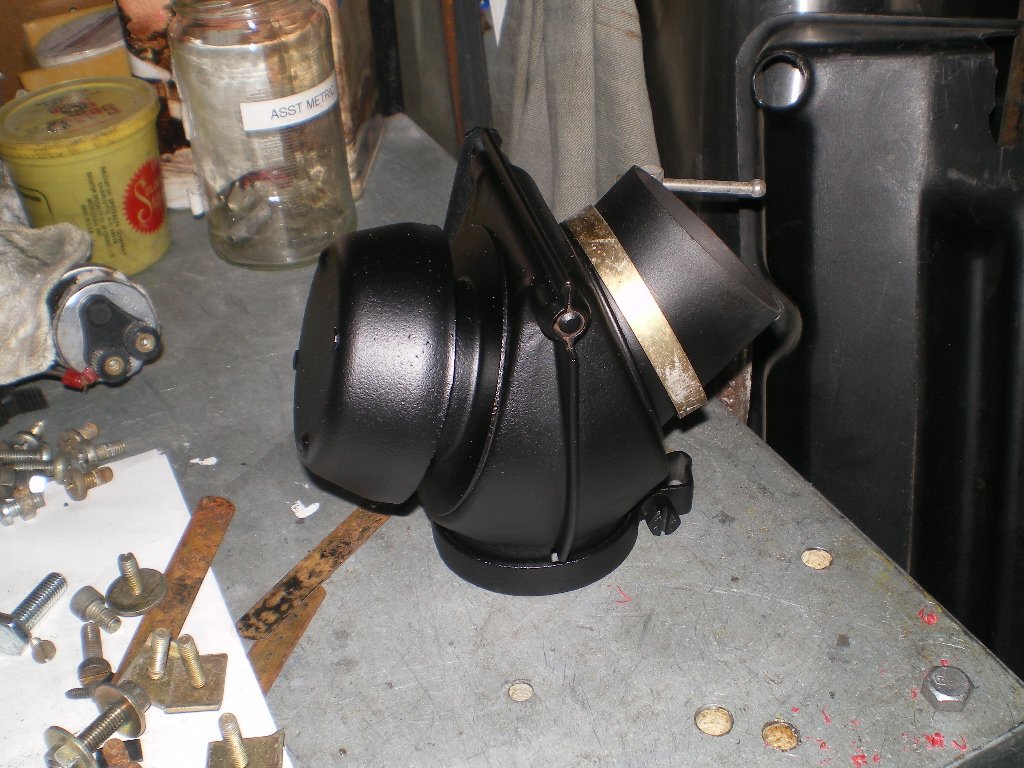 I was able to re-use the existing muffler with a little work. That God awful dual tip is Kaput and the proper single out tailpipe is in its place. I will cut it to final length and trim it a bit once the bumper is back on. It was a bit tricky cutting and re-welding the 90 degree fitting but everything came together. 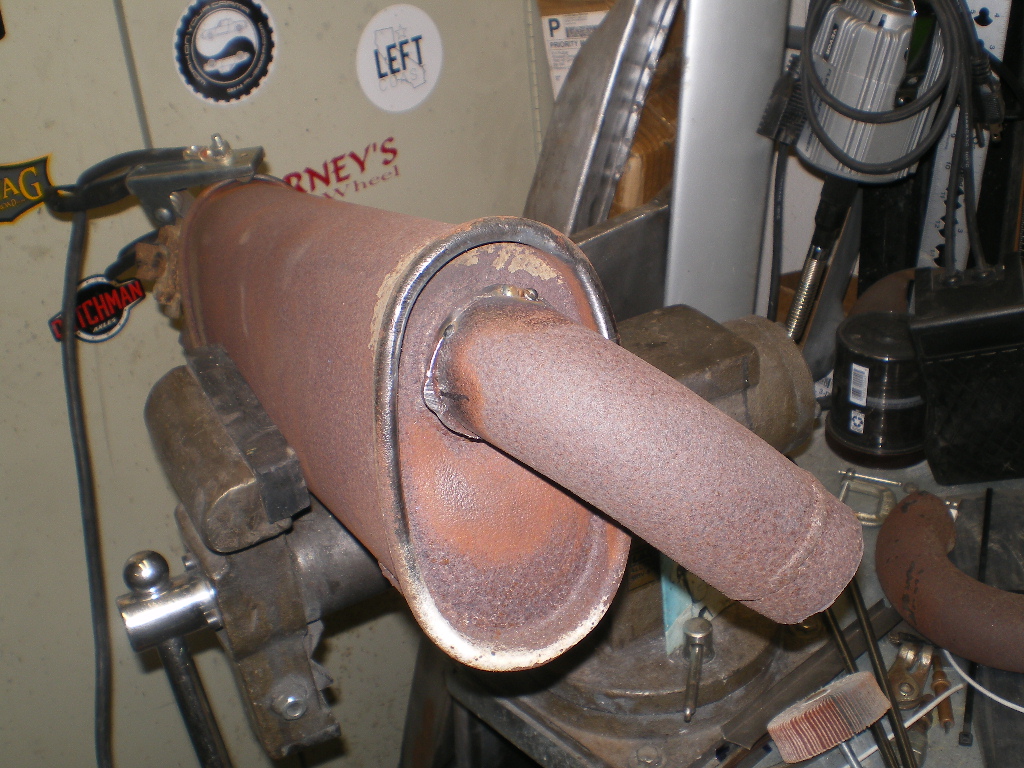 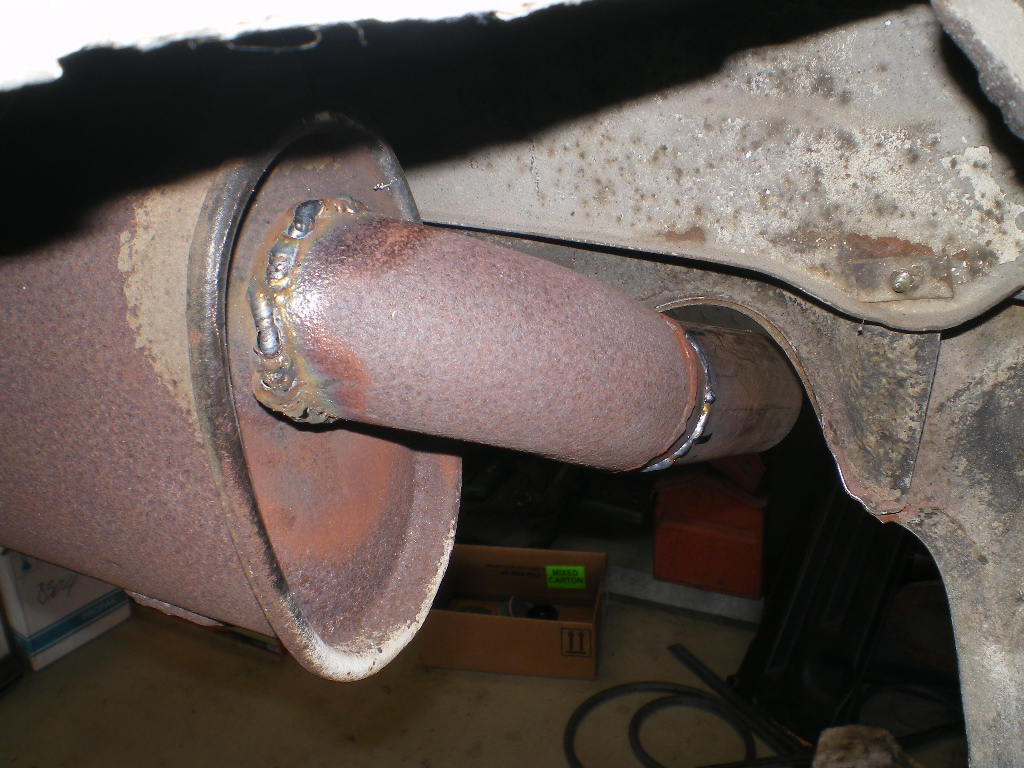 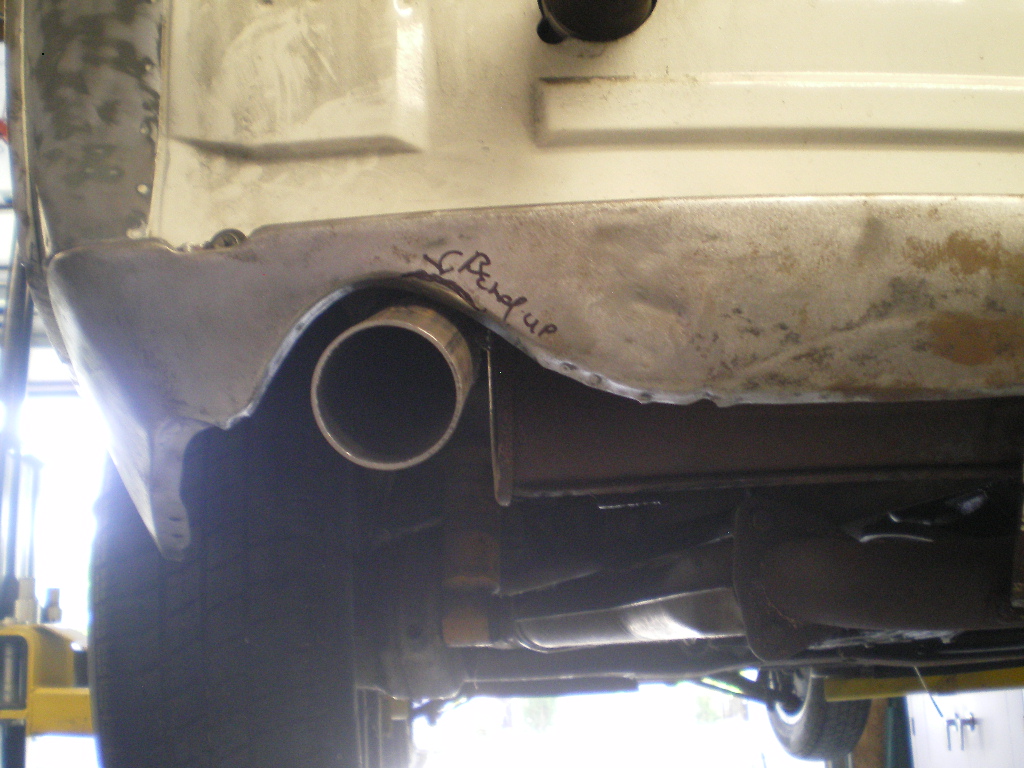 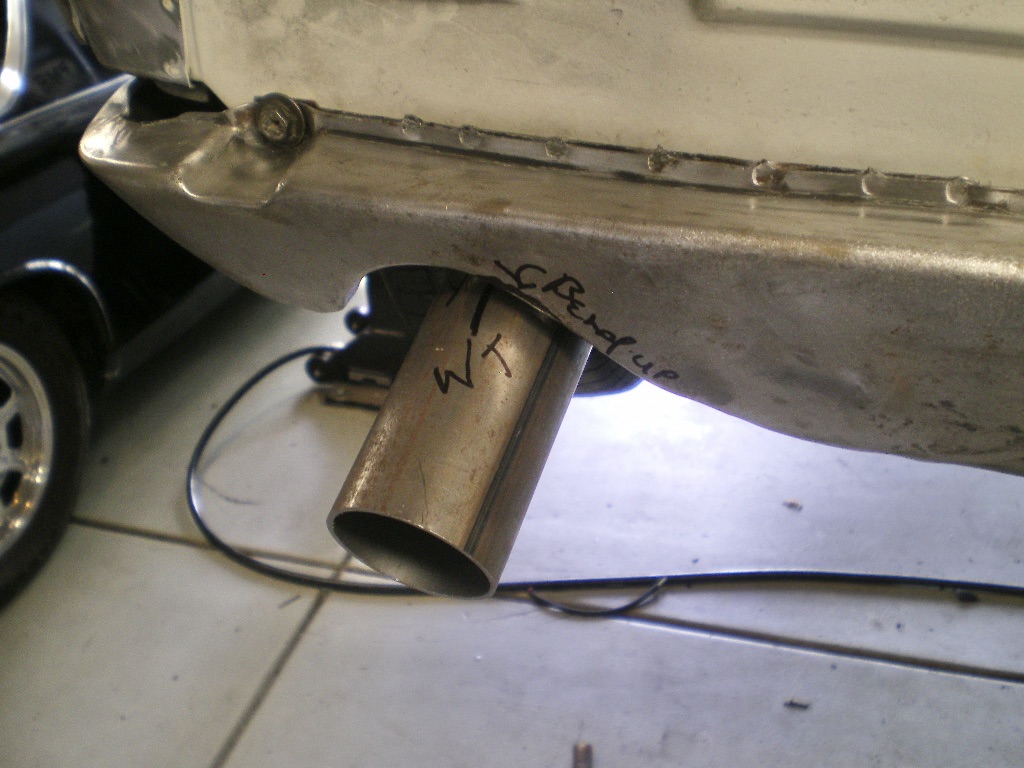 The drivetrain is back in the car so I have some floor space back; finally. Need to connect the fuel lines, vacuum lines, throttle cable and a few more items. I drilled out the CV bolts and safety wired them- while I was in there. Pics later. |
| 76-914 |
 Jul 10 2022, 05:54 PM Jul 10 2022, 05:54 PM
Post
#76
|
|
Repeat Offender & Resident Subaru Antagonist           Group: Members Posts: 13,634 Joined: 23-January 09 From: Temecula, CA Member No.: 9,964 Region Association: Southern California 
|
The
'Long Awaited" fun part has begun. (IMG:style_emoticons/default/shades.gif) Skim coating. (IMG:style_emoticons/default/icon8.gif) I hate sanding but it does signal the end is in sight. Being the whining pus type I've become in these latter years I began on the easy side. Did I mention that I hate sanding? Why did I wait until it was 95F+ to begin this? Maybe I love racing against set up time with the filler. If so, I lost that race and usually do. I'm just not experienced enough to gauge how much filler to apply at one time. I invariably end up sanding stuff that is hard and has already set. When done correctly you can trim it in the booger stage and be left with only a light sanding task to complete. OK, enough with the whining. Here is what my old ass was able to complete this afternoon. More whining to come in the following week(s). (IMG:style_emoticons/default/biggrin.gif) 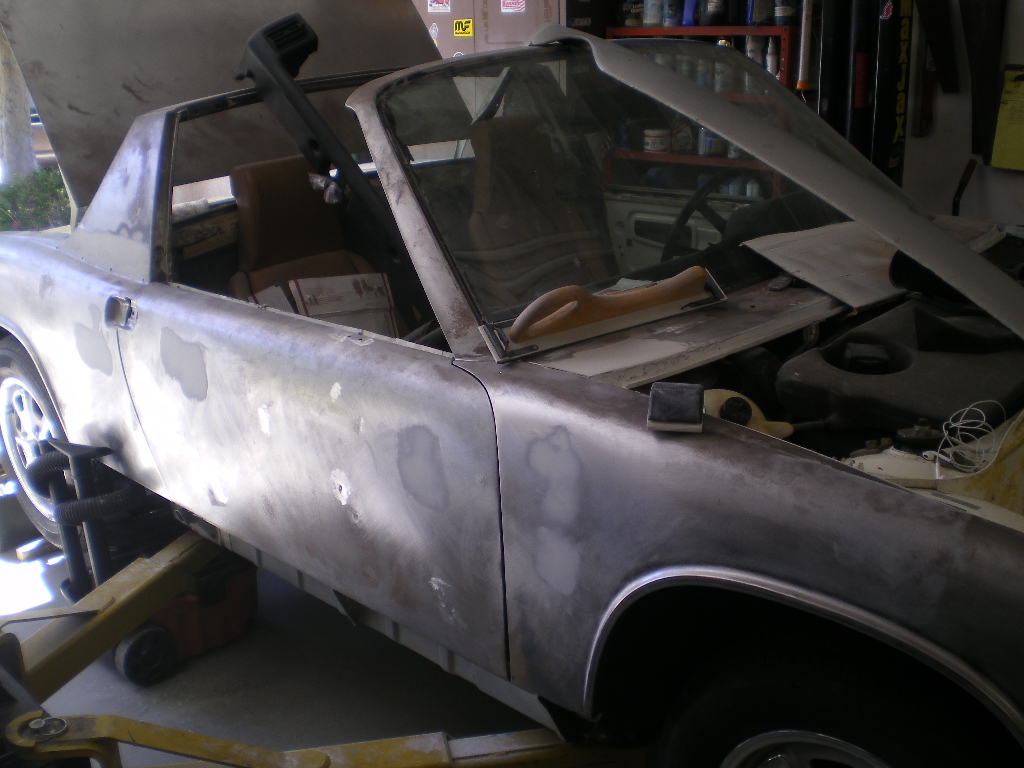 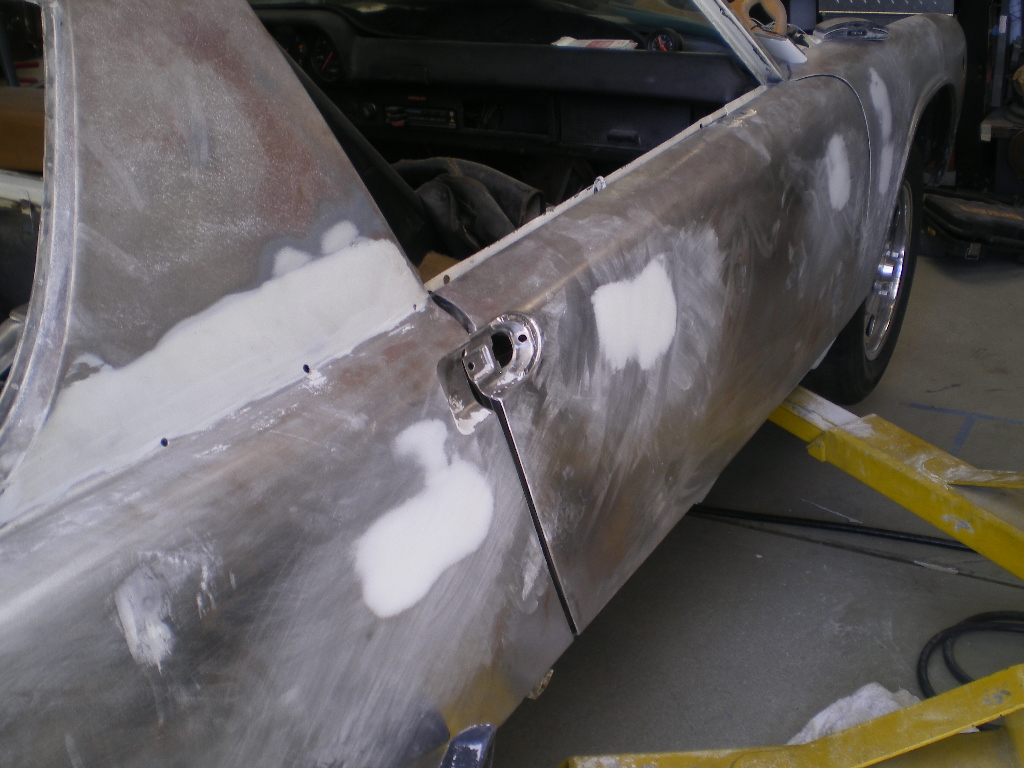 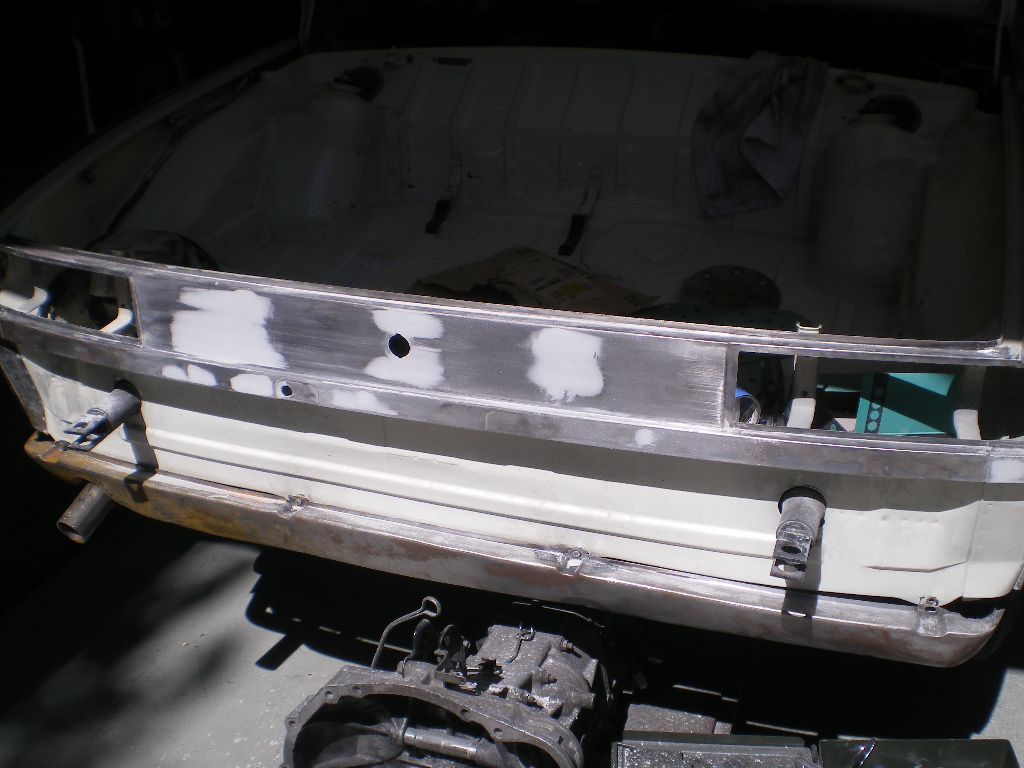 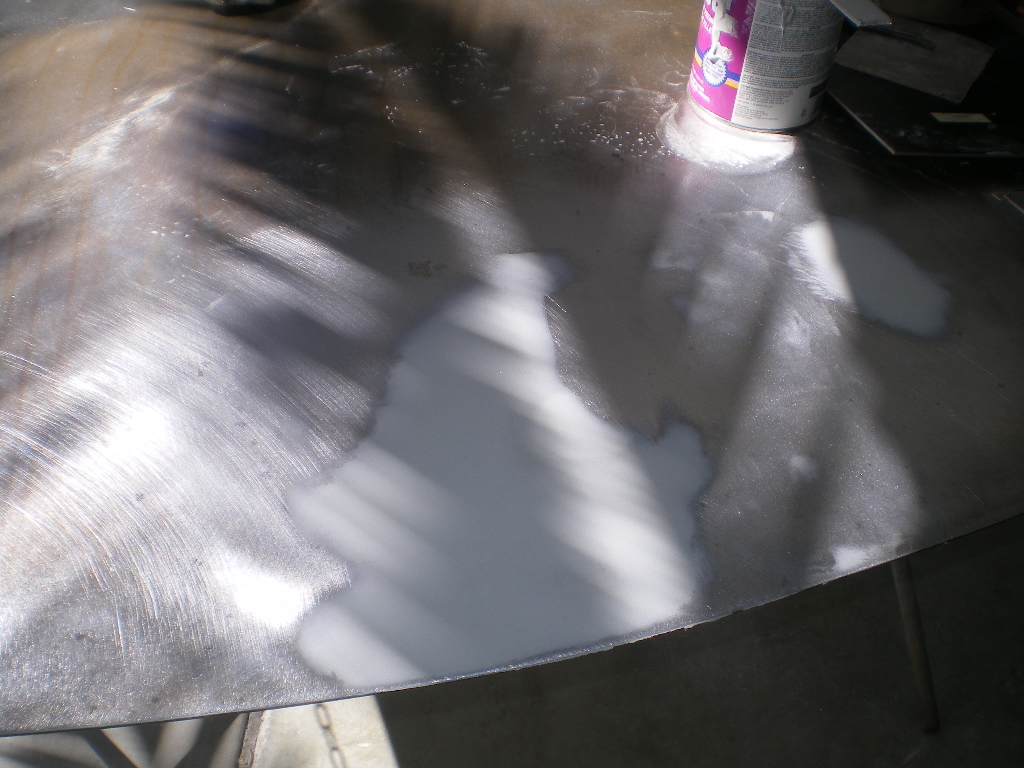 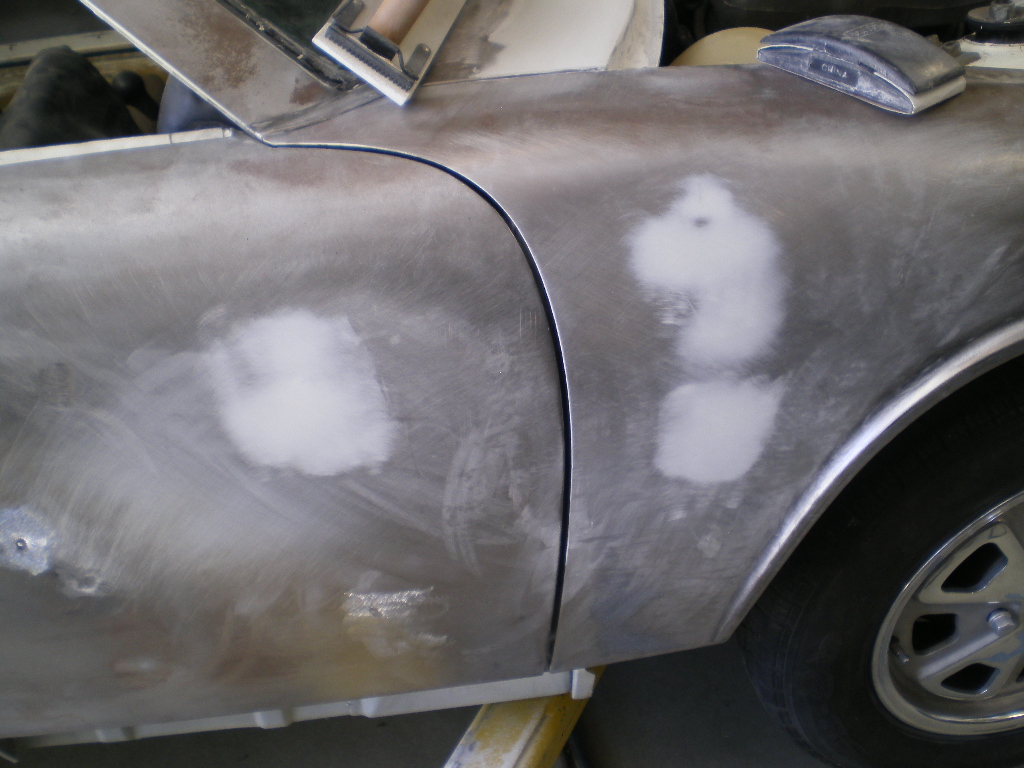 |
| 76-914 |
 Aug 15 2022, 04:55 PM Aug 15 2022, 04:55 PM
Post
#77
|
|
Repeat Offender & Resident Subaru Antagonist           Group: Members Posts: 13,634 Joined: 23-January 09 From: Temecula, CA Member No.: 9,964 Region Association: Southern California 
|
It seems as though I've been goofing off. Results are now minimal when compared to the progress made on the metal repairs. I am much closer to paint and the end of sanding body filler is around the corner.
Left side is finished sans some glazing putty. 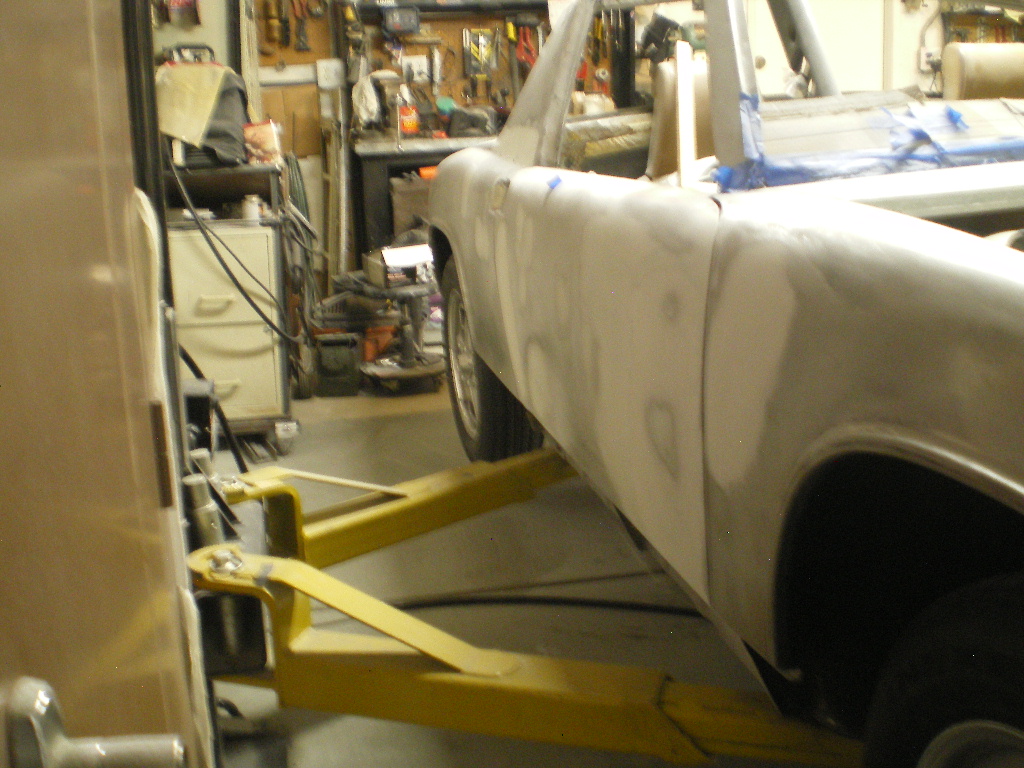 Cowling is finished. Very happy that I didn't find any rust in the channels that separate the cowl and fenders. (IMG:style_emoticons/default/piratenanner.gif) 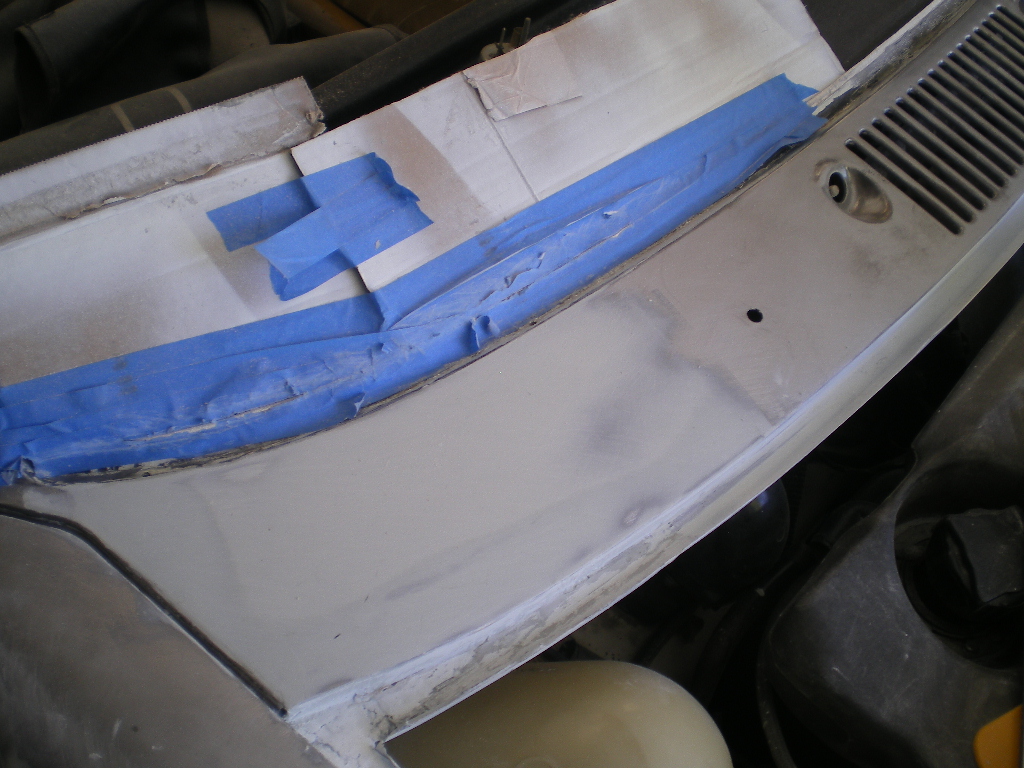 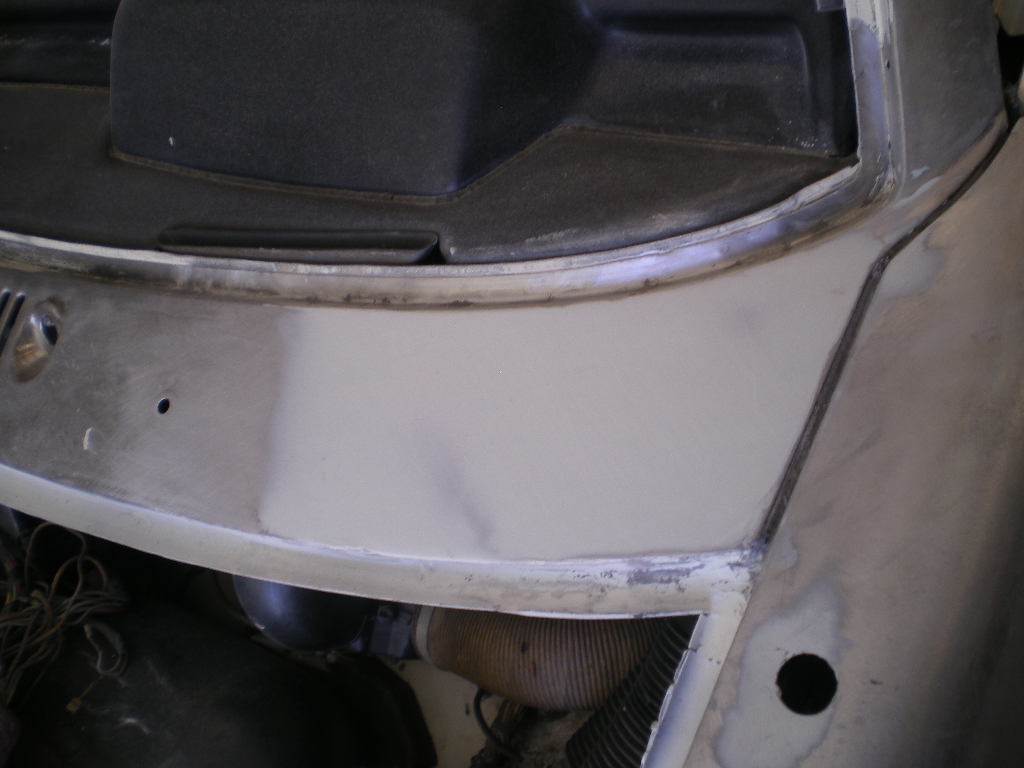 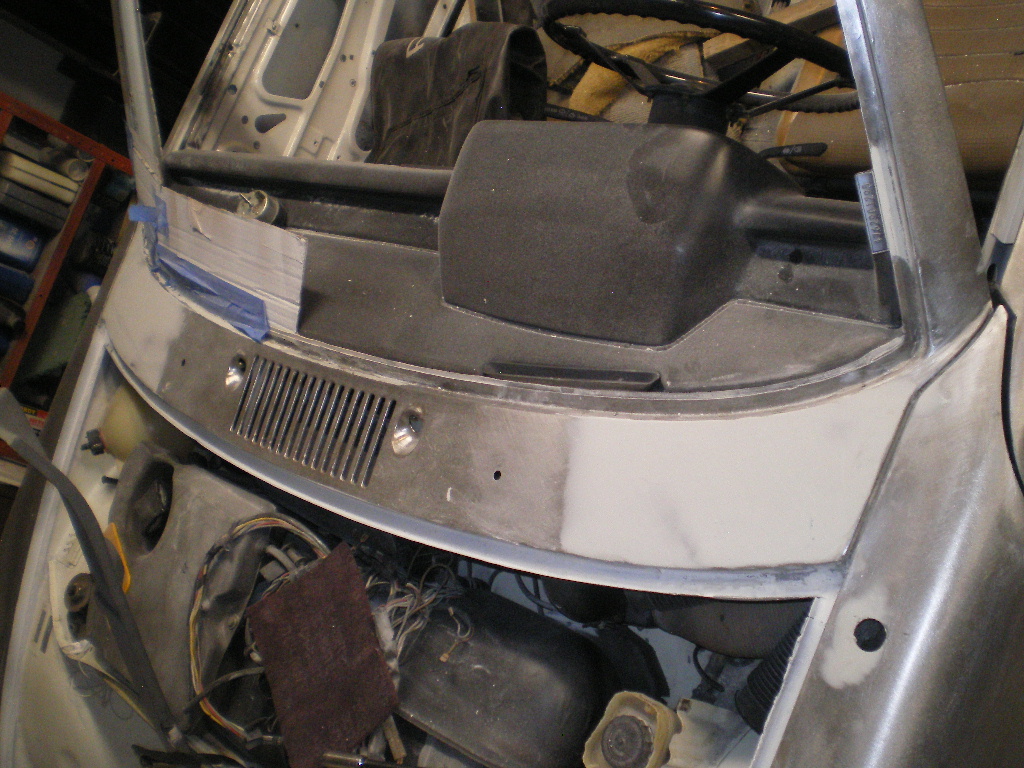 The left side required more work. I don't know if you remember how much work the quarter panel required just to get it to this point. 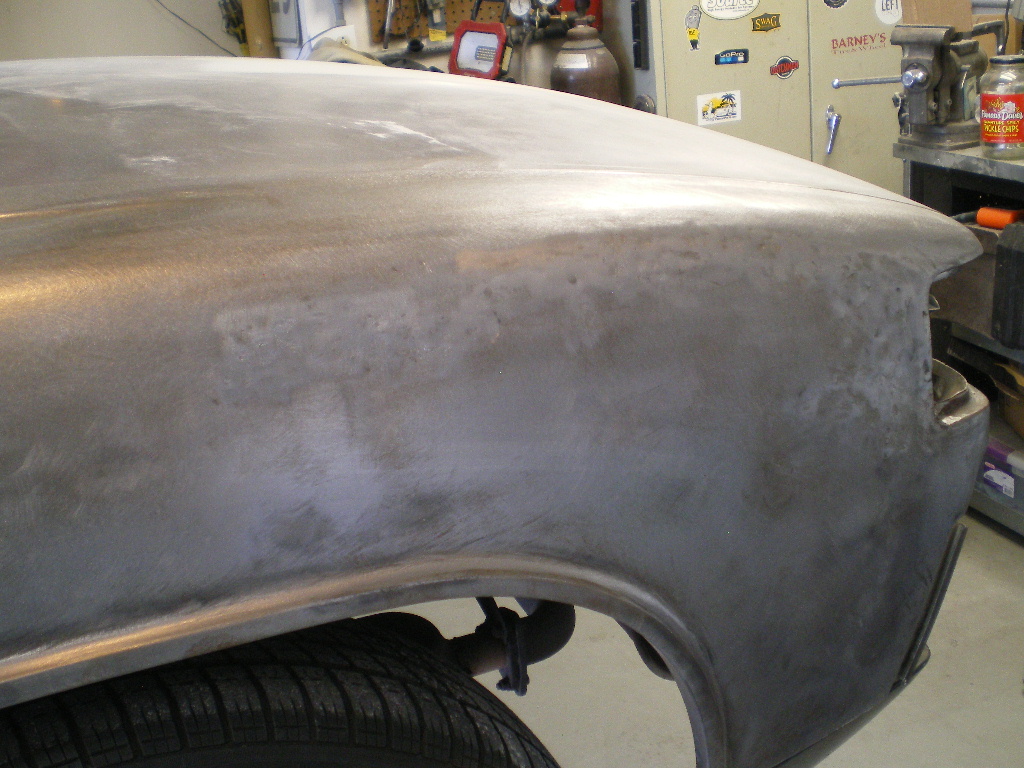 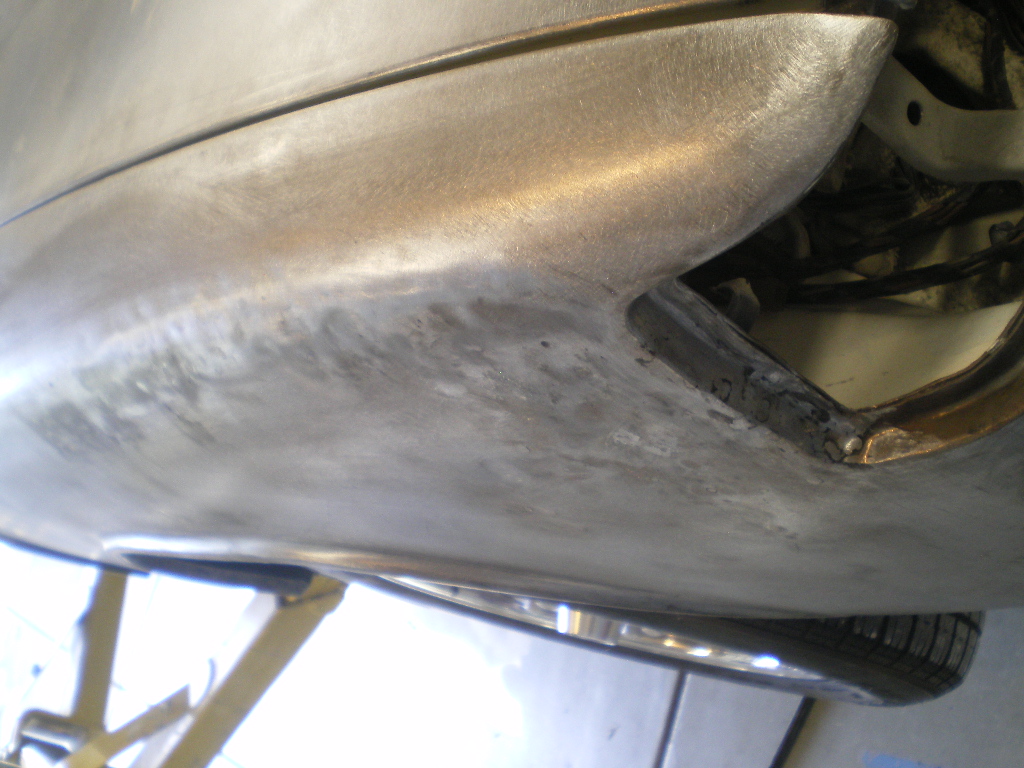 It took 3 separate attempts to get this panel smoothed out. 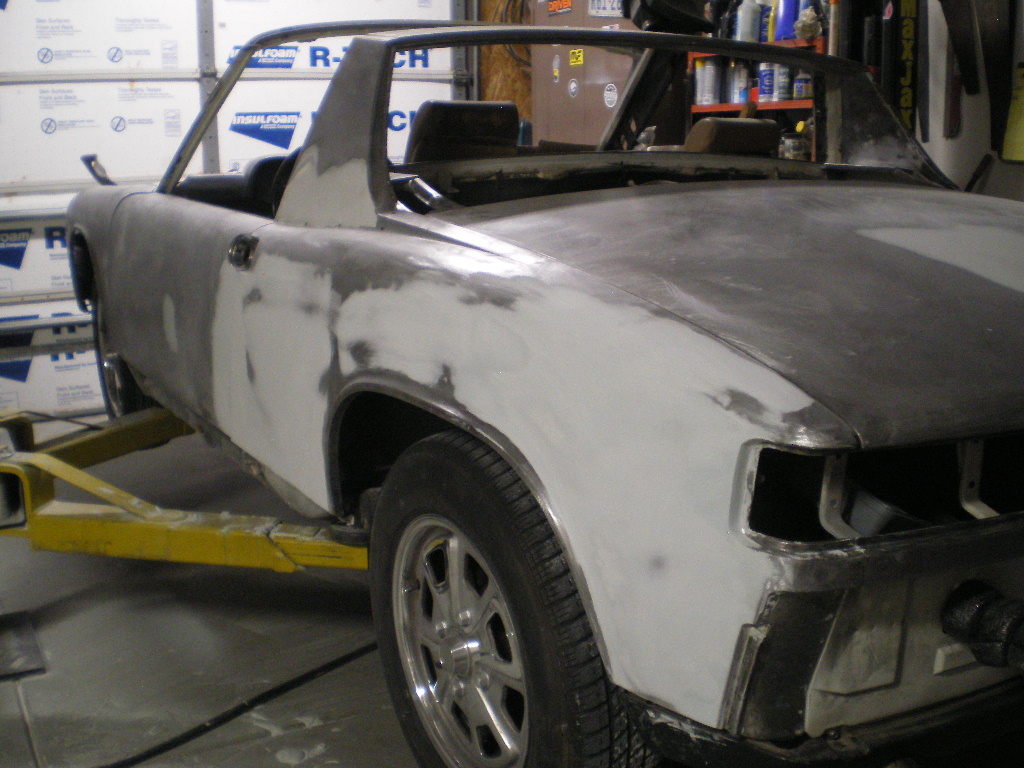 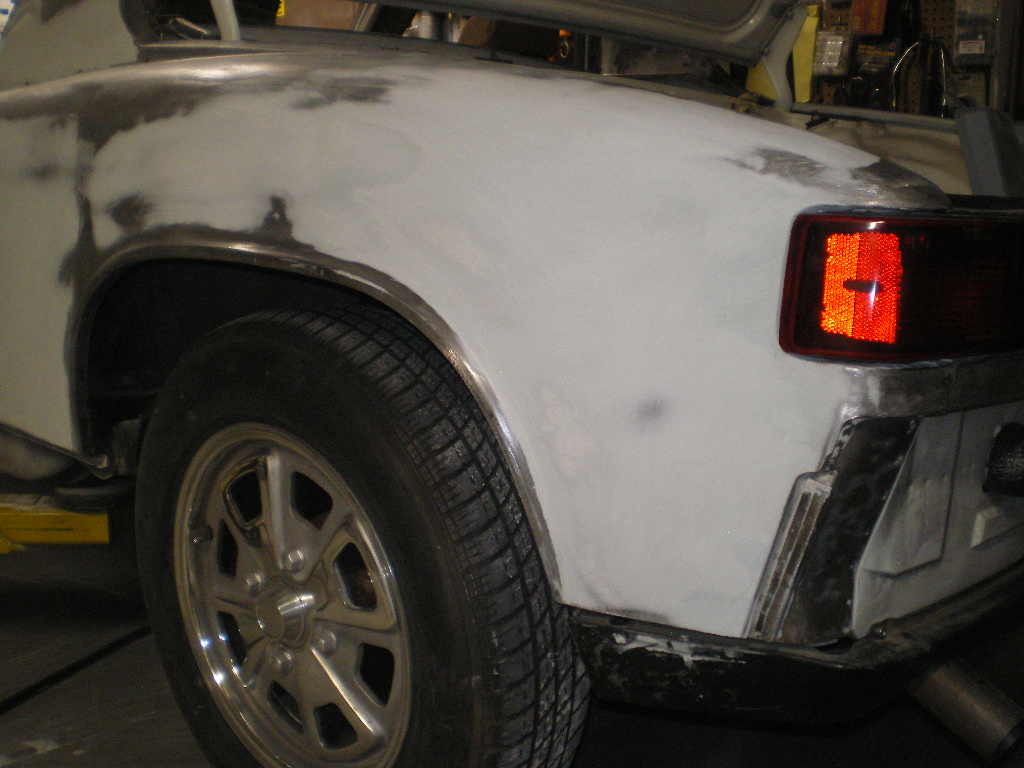 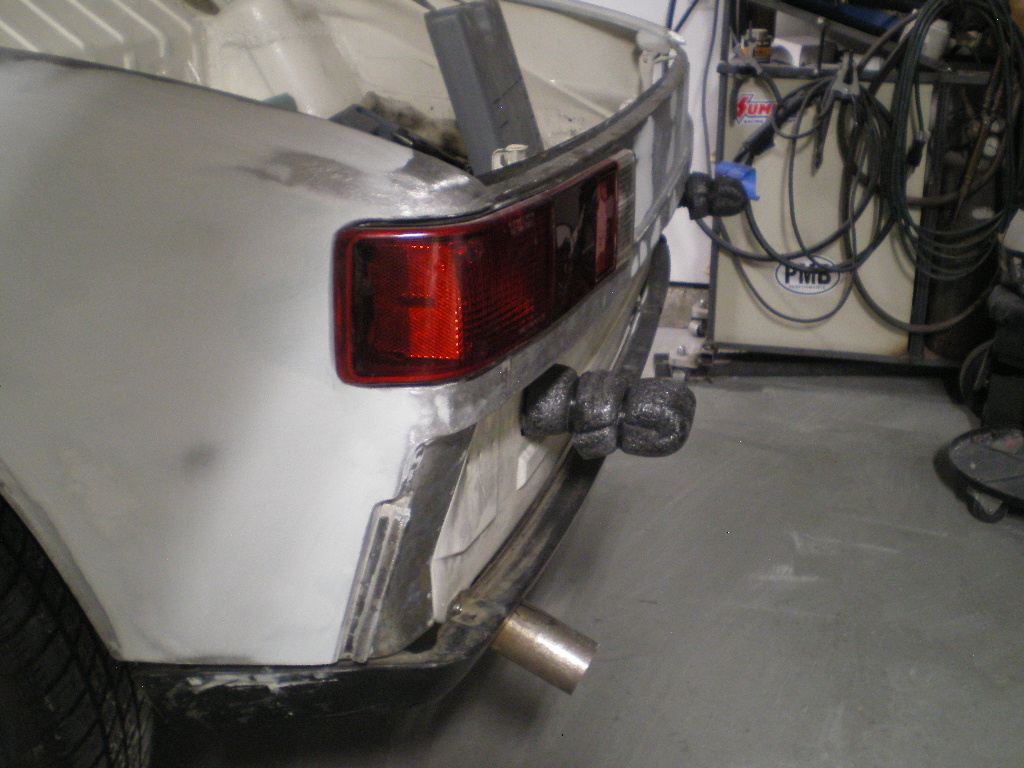 |
| 76-914 |
 Aug 15 2022, 05:10 PM Aug 15 2022, 05:10 PM
Post
#78
|
|
Repeat Offender & Resident Subaru Antagonist           Group: Members Posts: 13,634 Joined: 23-January 09 From: Temecula, CA Member No.: 9,964 Region Association: Southern California 
|
This door took me a few hours to hang it so that the gaps were uniform and even. I guess I can't expect these 50 yo cars to keep their figures after so many years.
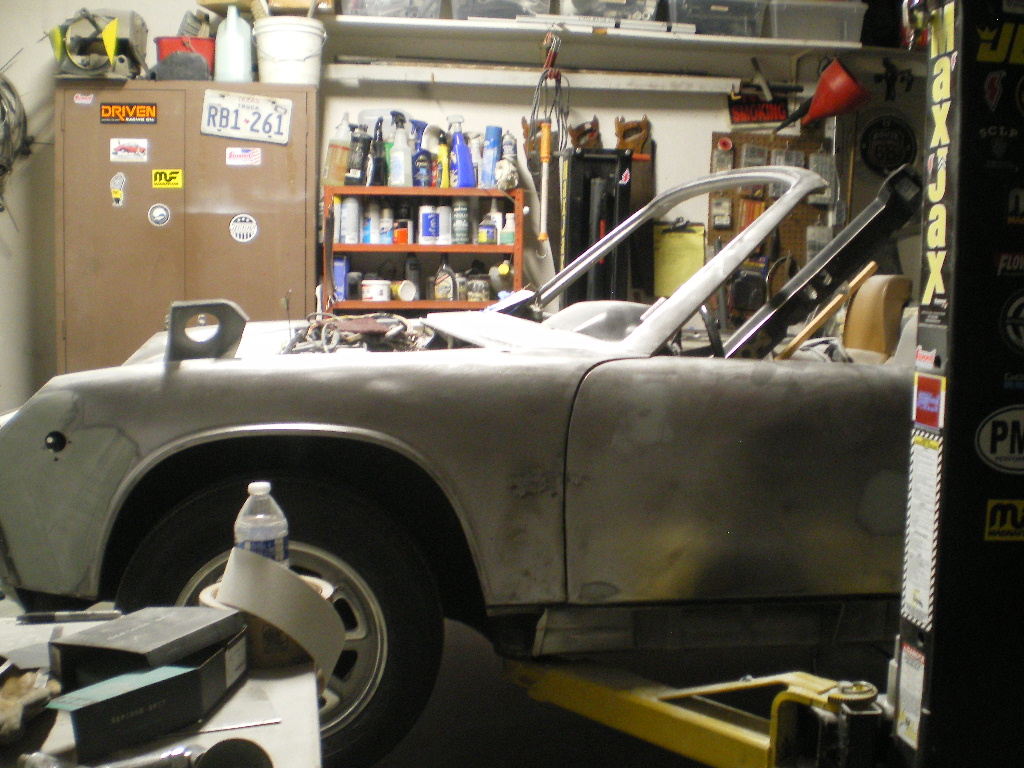 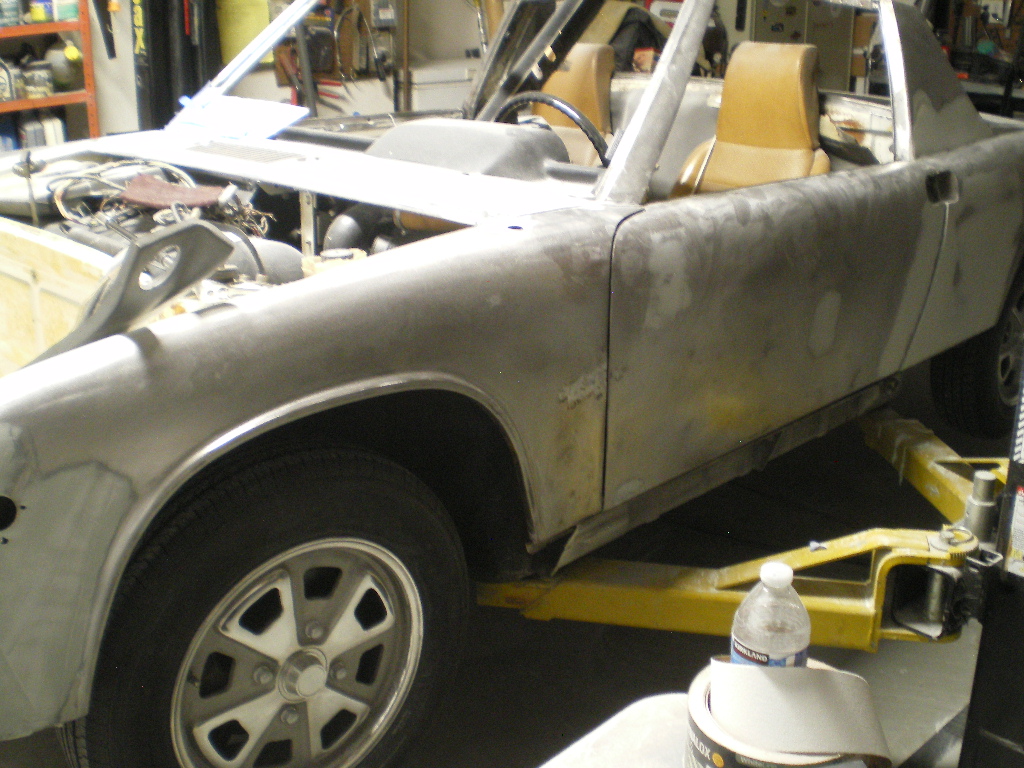 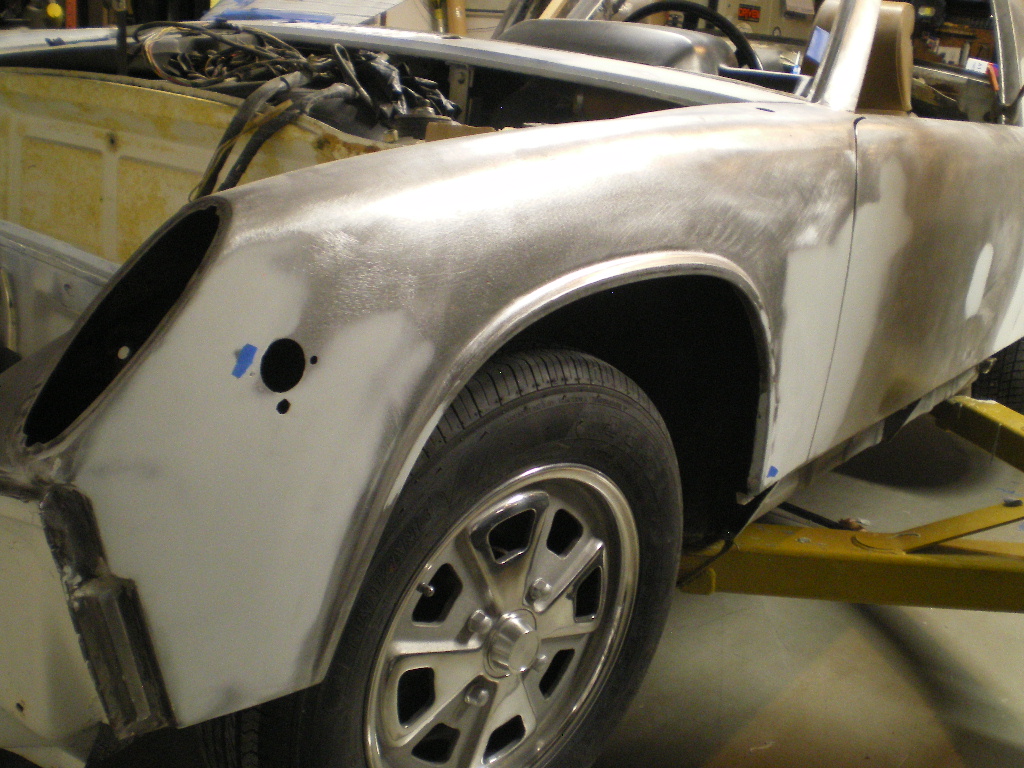 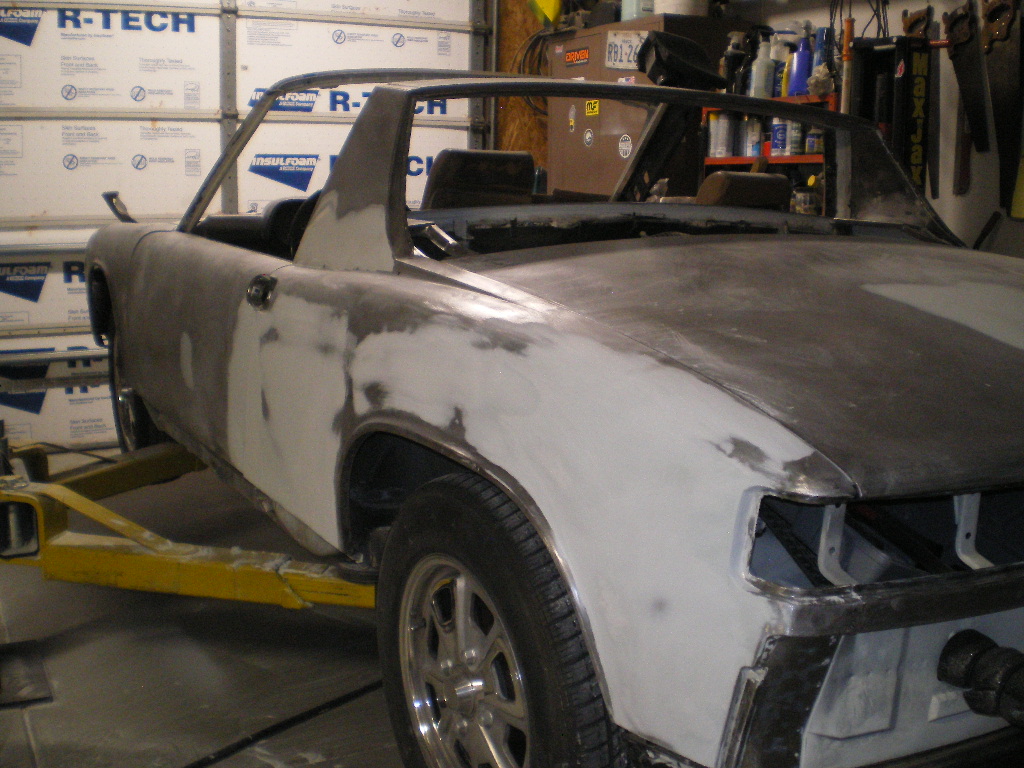 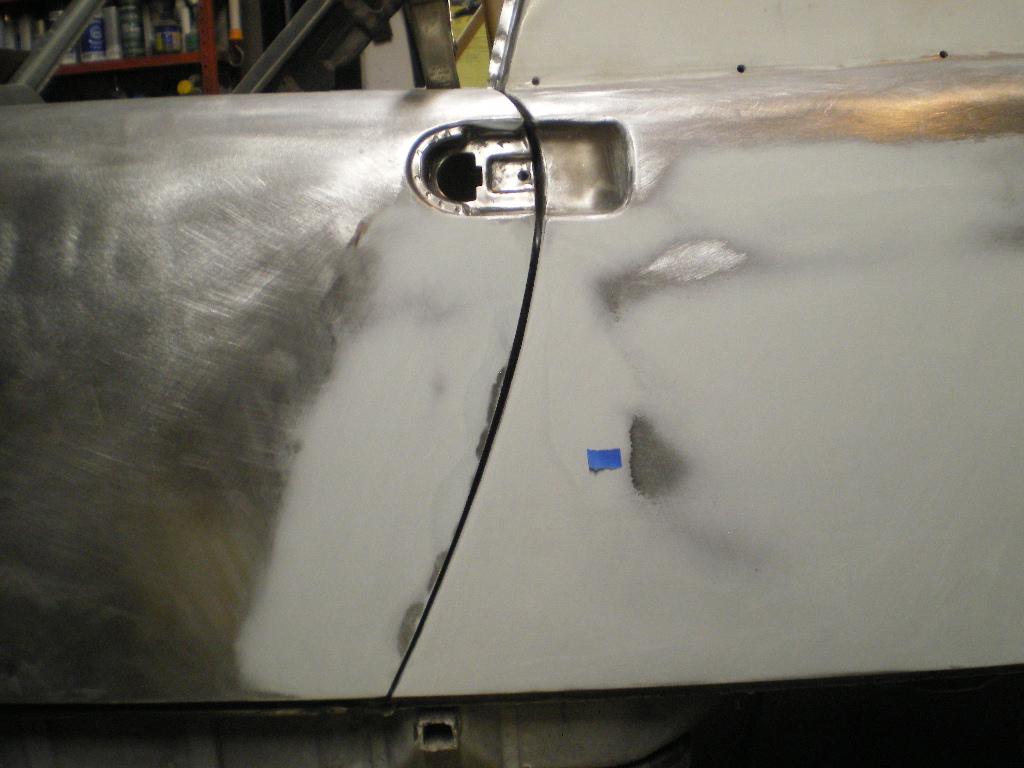 The closer I get to the end the slower things happen. I'm now considering an interior color change since I haven't been able to get my hands on some tan basket weave late model seat material. I wanted to keep the Tan but after 9 months I'm not getting my hopes up. @Mikey914 . |
| FL000 |
 Aug 16 2022, 02:41 PM Aug 16 2022, 02:41 PM
Post
#79
|
|
Member   Group: Members Posts: 425 Joined: 31-January 12 From: Lancaster, CA Member No.: 14,076 Region Association: Southern California 
|
Good progress Kent. IIRC humidity isn’t much of an issue where you are, but any concerns about leaving in bare metal too long?
|
| autopro |
 Aug 16 2022, 08:56 PM Aug 16 2022, 08:56 PM
Post
#80
|
|
Member   Group: Members Posts: 306 Joined: 14-January 18 From: San Diego / Tijuana Member No.: 21,797 Region Association: Southern California |
Great progress, looks like you are close to shooting some primer on it.
|
  |
36 User(s) are reading this topic (36 Guests and 0 Anonymous Users)
0 Members:

|
Lo-Fi Version | Time is now: 24th November 2024 - 10:43 PM |
Invision Power Board
v9.1.4 © 2024 IPS, Inc.


