|
|

|
Porsche, and the Porsche crest are registered trademarks of Dr. Ing. h.c. F. Porsche AG.
This site is not affiliated with Porsche in any way. Its only purpose is to provide an online forum for car enthusiasts. All other trademarks are property of their respective owners. |
|
|
  |
| Tom1394racing |
 Dec 6 2023, 11:58 AM Dec 6 2023, 11:58 AM
Post
#281
|
|
Member   Group: Members Posts: 493 Joined: 25-August 07 From: CT Member No.: 8,039 Region Association: North East States 
|
Tom - did you use seam sealer on the car or are you leaving it bare? That is a good question...I don't believe that Auto Associates used any seam sealer. I will confirm that with them. There is a very light undercoating on the bottom and in the rear of the wheel wells. I was wondering the need for it on an e-coated car. I haven’t decided yet. I spoke with Ken, co-owner & Body Shop Manager at Auto Associates. Seam sealer was used mostly under the fenders and qtrs, where gaps were a little large. Nothing in the top side or interior. Based on the photos of other GT cars, it looked like they did not have any and they most certainly did not put the spray seam sealer on seams like factory cars. |
| Dion |
 Dec 6 2023, 01:17 PM Dec 6 2023, 01:17 PM
Post
#282
|
|
RN     Group: Members Posts: 2,920 Joined: 16-September 04 From: Audubon,PA Member No.: 2,766 Region Association: MidAtlantic Region 

|
Car looks fantastic! Colour pops against the parts being added. Yes i'm sure there is a significant lack of seam sealer on the R cars as weight saving was the name of the game.
cheers |
| Tom1394racing |
 Dec 7 2023, 01:06 PM Dec 7 2023, 01:06 PM
Post
#283
|
|
Member   Group: Members Posts: 493 Joined: 25-August 07 From: CT Member No.: 8,039 Region Association: North East States 
|
|
| Tom1394racing |
 Dec 18 2023, 06:40 AM Dec 18 2023, 06:40 AM
Post
#284
|
|
Member   Group: Members Posts: 493 Joined: 25-August 07 From: CT Member No.: 8,039 Region Association: North East States 
|
I installed the front headlights and then decided to fit the mechanical GT headlight kit to make sure I had all the pieces and understood how to make the system work. I had purchased a partial kit from a member of our board but it was missing all the wire cables, a couple of the cable barrel keepers and any assembly/installation instructions. The detailed photographs provided by Armando Serrano in his epic 914-6 GT posting on Pelican saved my butt and more than made up for the lack of instructions.
I used spare 911 hood release wire cables that I have in my stash of parts and was able to fabricate the missing cable barrel keepers for the cable splitter. It was a trial-and-error process with many assembly/test/disassembly cycles before I finally managed to get both headlights to lock and release. 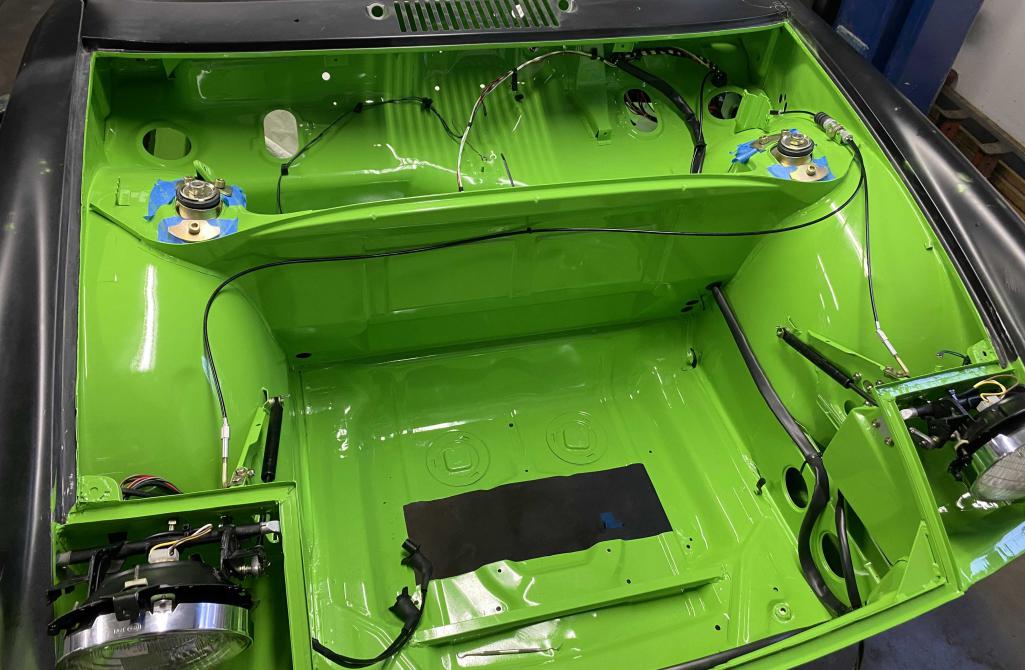 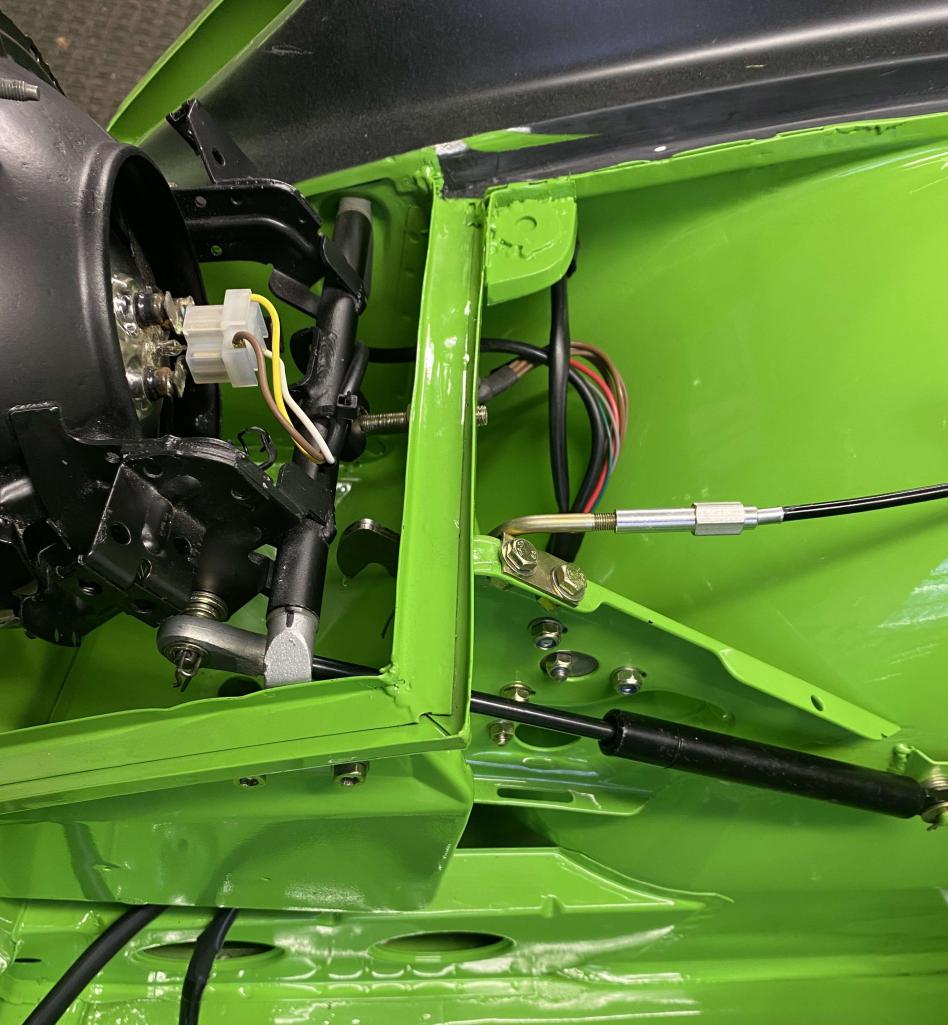 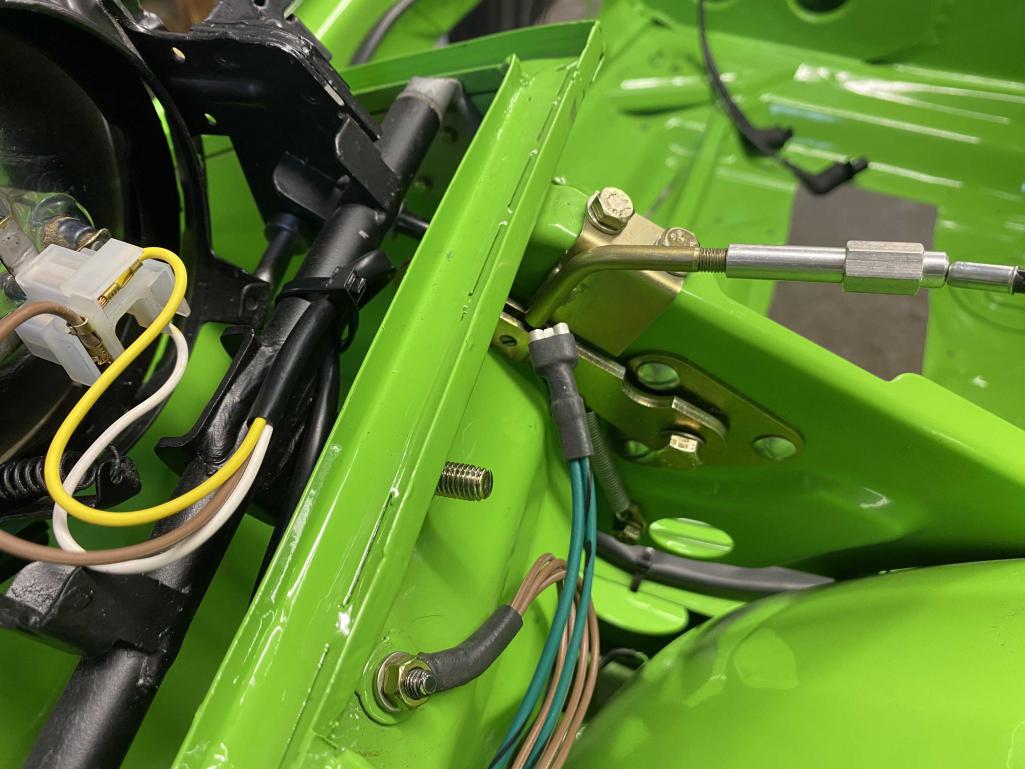 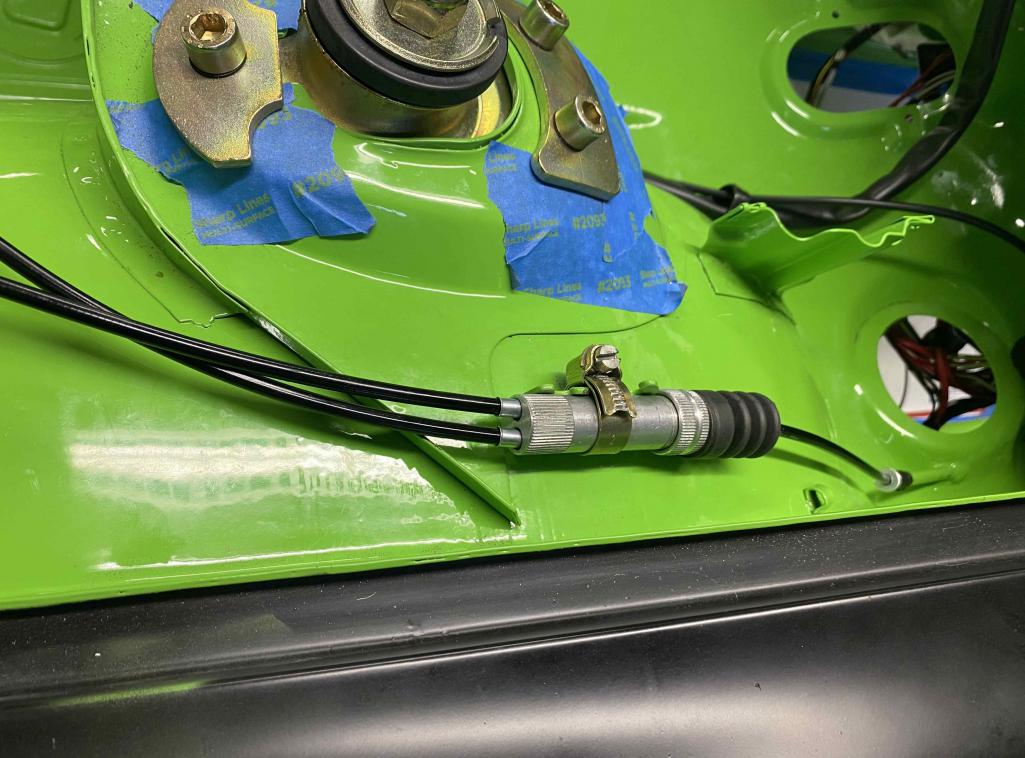 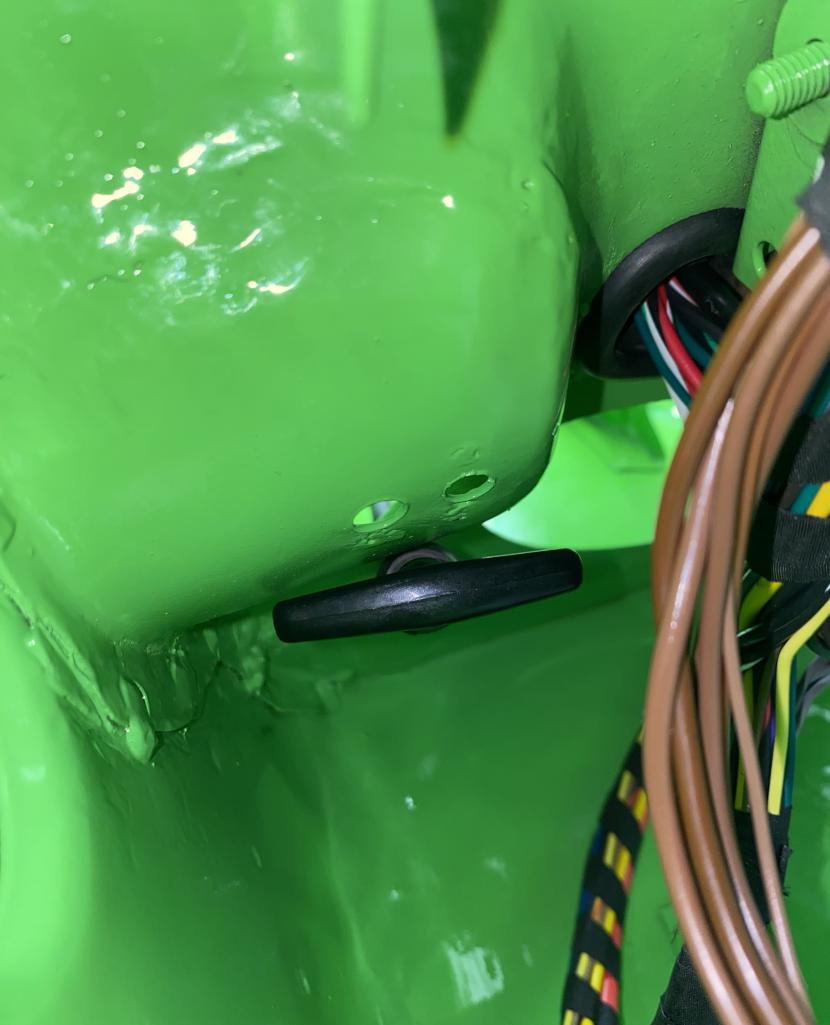 |
| Tom1394racing |
 Jan 18 2024, 02:13 PM Jan 18 2024, 02:13 PM
Post
#285
|
|
Member   Group: Members Posts: 493 Joined: 25-August 07 From: CT Member No.: 8,039 Region Association: North East States 
|
Wow...I can't believe it has been a month since my last posting. Holiday get togethers and a post-Christmas bout with Covid kept me away from the car for a few weeks.
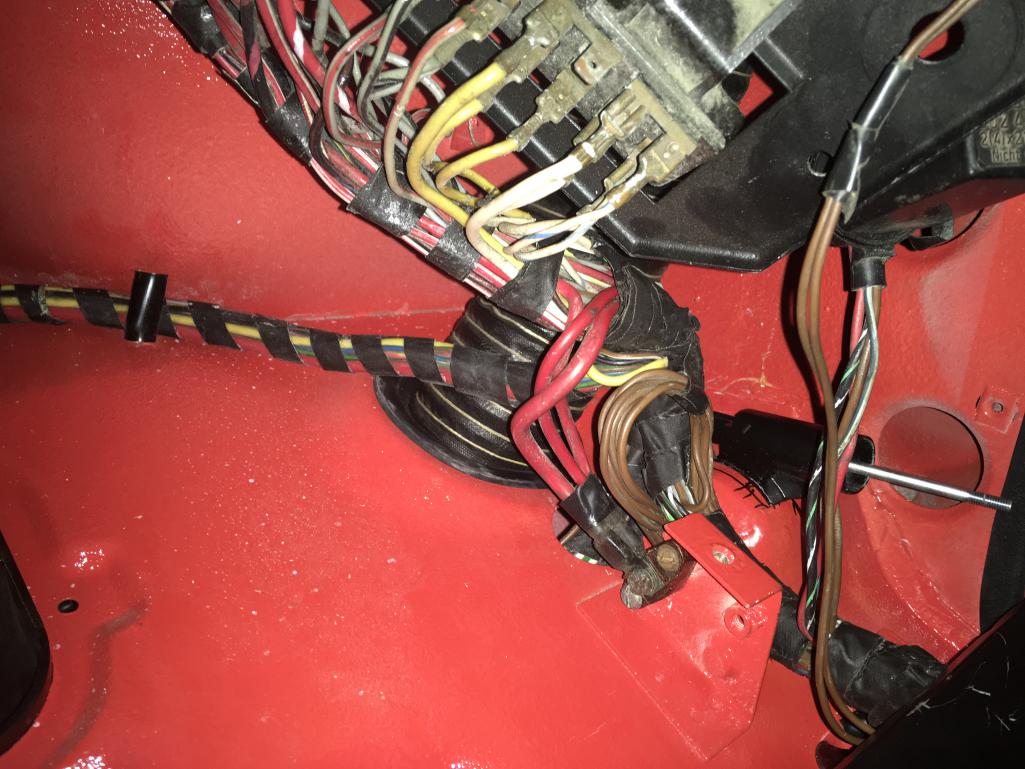
Since getting back into it, I have focused on the electricals for the dash switches and gauges. The detailed wiring diagram provided by Restoration Design that came along with the new harness I purchased from them is making the job much easier. Next up will be the turn signal/high beam switch and the wiper switch. I expect that I will need to make up some custom harnesses to make the connections from the 911 switches I am using to the 914-6 harness. One question for the experts....I have (3) wires that I have yet to identify. I circled these in the last photo. I am guessing that the red wires are unswitched power leads for things like an alarm system or a clock. The single black wire is a mystery to me. Behing the black wire sheath are twin brown leads that do not connect to ground. I do not see them in the wiring diagram and I can't trace them to the fuse box. Any ideas what these are? 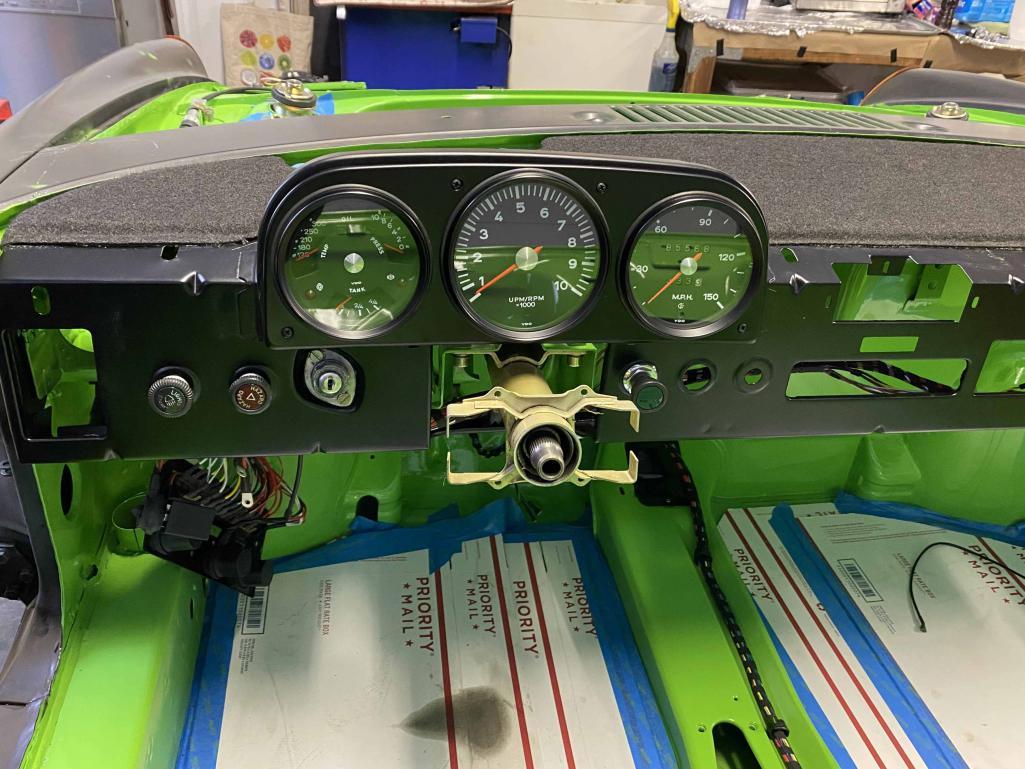 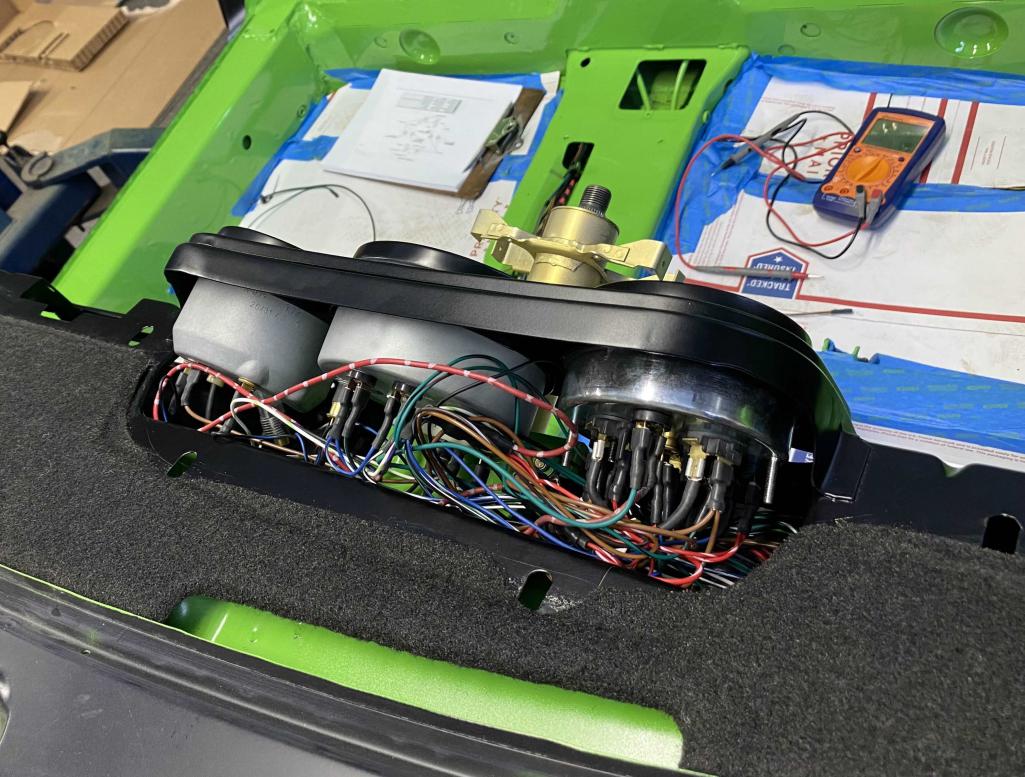 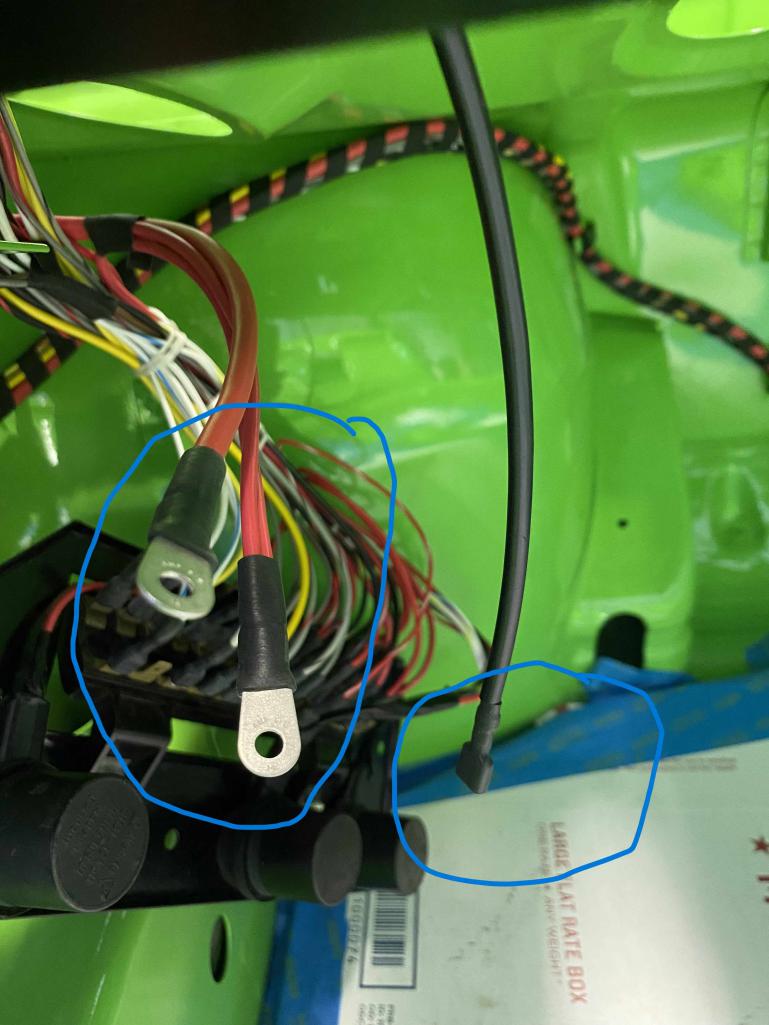 |
| mate914 |
 Jan 18 2024, 02:25 PM Jan 18 2024, 02:25 PM
Post
#286
|
|
Matt    Group: Members Posts: 916 Joined: 27-February 09 From: Eagles mere, PA Member No.: 10,102 Region Association: North East States 
|
Wow...I can't believe it has been a month since my last posting. Holiday get togethers and a post-Christmas bout with Covid kept me away from the car for a few weeks. Since getting back into it, I have focused on the electricals for the dash switches and gauges. The detailed wiring diagram provided by Restoration Design that came along with the new harness I purchased from them is making the job much easier. Next up will be the turn signal/high beam switch and the wiper switch. I expect that I will need to make up some custom harnesses to make the connections from the 911 switches I am using to the 914-6 harness. One question for the experts....I have (3) wires that I have yet to identify. I circled these in the last photo. I am guessing that the red wires are unswitched power leads for things like an alarm system or a clock. The single black wire is a mystery to me. Behing the black wire sheath are twin brown leads that do not connect to ground. I do not see them in the wiring diagram and I can't trace them to the fuse box. Any ideas what these are?    I’m not sure what wiring harness you’re using. On the factory 9146 there is a kind of power distribution point. I will get a picture in a few minutes. Matt |
| mate914 |
 Jan 18 2024, 02:54 PM Jan 18 2024, 02:54 PM
Post
#287
|
|
Matt    Group: Members Posts: 916 Joined: 27-February 09 From: Eagles mere, PA Member No.: 10,102 Region Association: North East States 
|
|
| JmuRiz |
 Jan 18 2024, 03:33 PM Jan 18 2024, 03:33 PM
Post
#288
|
|
914 Guru      Group: Members Posts: 5,605 Joined: 30-December 02 From: NoVA Member No.: 50 Region Association: MidAtlantic Region 
|
What's the best way to re-attach the gauge wiring. Mine sure looks like a rats-nest of wires after removing them for rebuild.
|
| mate914 |
 Jan 18 2024, 04:38 PM Jan 18 2024, 04:38 PM
Post
#289
|
|
Matt    Group: Members Posts: 916 Joined: 27-February 09 From: Eagles mere, PA Member No.: 10,102 Region Association: North East States 
|
|
| Tom1394racing |
 Jan 18 2024, 07:17 PM Jan 18 2024, 07:17 PM
Post
#290
|
|
Member   Group: Members Posts: 493 Joined: 25-August 07 From: CT Member No.: 8,039 Region Association: North East States 
|
Thanks Matt. Your explanation makes perfect sense to me. The connection between the two sets of red wires must provide the power feed to the dash harness. It looks like some sort of insulating block is used as a bracket to connect the two wires together and then secure it to the chassis. Is that correct? I think I’ll have to search for that part. Any ideas on the black sheath wire with the two browns beneath the sheathing? |
| Retroracer |
 Jan 19 2024, 12:14 PM Jan 19 2024, 12:14 PM
Post
#291
|
|
Senior Member    Group: Members Posts: 649 Joined: 7-July 13 From: Bend OR Member No.: 16,100 Region Association: Pacific Northwest 
|
Tom - just found this thread and "binged" through it. Excellent build and great color choice! For my own GT build, I chose Gelbgrun as a color, not too far from Lizard green I suspect.
The pix of the metalwork alone was complex enough and made me thankful for how solid my starting point was on my build. Keep the posts coming! - Tony |
| mate914 |
 Jan 19 2024, 02:40 PM Jan 19 2024, 02:40 PM
Post
#292
|
|
Matt    Group: Members Posts: 916 Joined: 27-February 09 From: Eagles mere, PA Member No.: 10,102 Region Association: North East States 
|
Thanks Matt. Your explanation makes perfect sense to me. The connection between the two sets of red wires must provide the power feed to the dash harness. It looks like some sort of insulating block is used as a bracket to connect the two wires together and then secure it to the chassis. Is that correct? I think I’ll have to search for that part. Any ideas on the black sheath wire with the two browns beneath the sheathing? The best part about you trying to figure out what this is. I also was trying to figure out what the two brown wires were for. The 914 six I restored has not been driven and has been tore apart for over 20 years. It’s a learning game for me too. Thanks, Pete at restoration design for answering it. Matt |
| Tom1394racing |
 Jan 19 2024, 04:54 PM Jan 19 2024, 04:54 PM
Post
#293
|
|
Member   Group: Members Posts: 493 Joined: 25-August 07 From: CT Member No.: 8,039 Region Association: North East States 
|
I found the insulator block in my stash and installed it. All good now with keyed power to the switches and gauges. I also realized that the black wire is for the door switches.
Thanks All! |
| Tom1394racing |
 Feb 2 2024, 03:42 PM Feb 2 2024, 03:42 PM
Post
#294
|
|
Member   Group: Members Posts: 493 Joined: 25-August 07 From: CT Member No.: 8,039 Region Association: North East States 
|
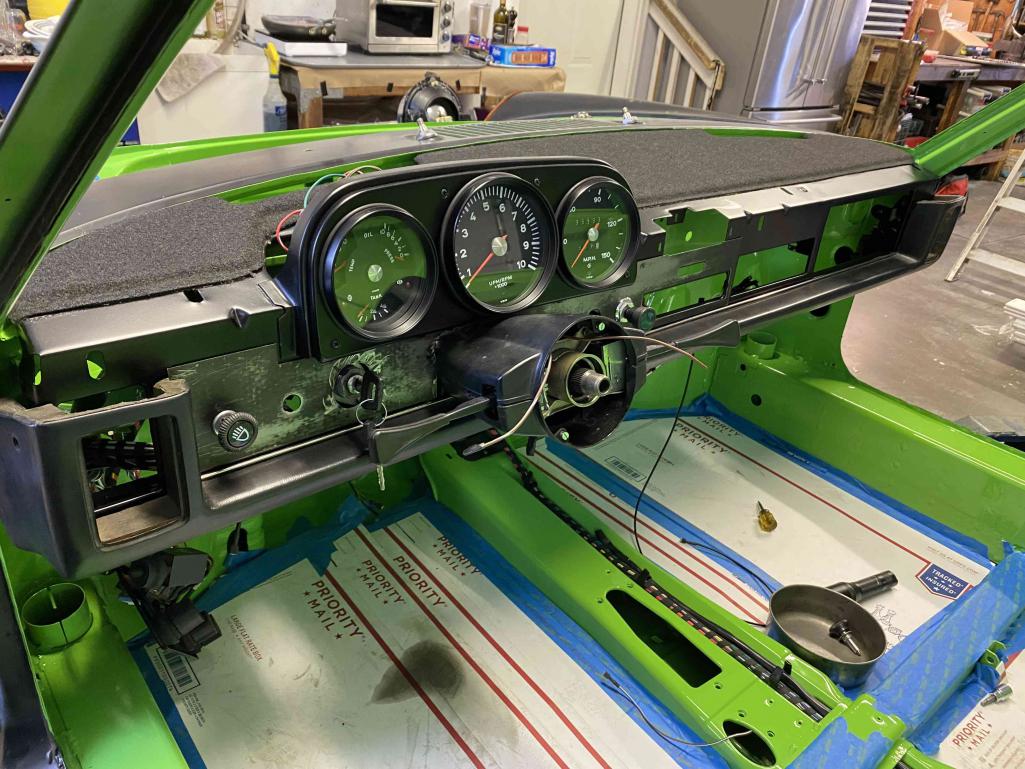
Finally finished up the electrical wiring today. As always, one of the more challenging tasks to get everything to function properly. The job was pretty straight forward with the new 914-6 harness and wiring diagram from Restoration Design. The most challenging part was creating a custom harness to mate the NOS 1969 911 T/S switch to the chassis harness. It took several days of head scratching and studying the wiring diagrams to get it right. I had a nice, bare 12 pin connector and 6 pin plug in my stash that allowed me to create a mating harness without having to modify the 911 T/S switch. It looks ugly but it works. The 911 wiper switch was straight forward plug and play into the Restoration Design 914-6 wiper harness.
Next up will be fitting and possibly modifying the 911 clamshell to fit the steering column and dash. 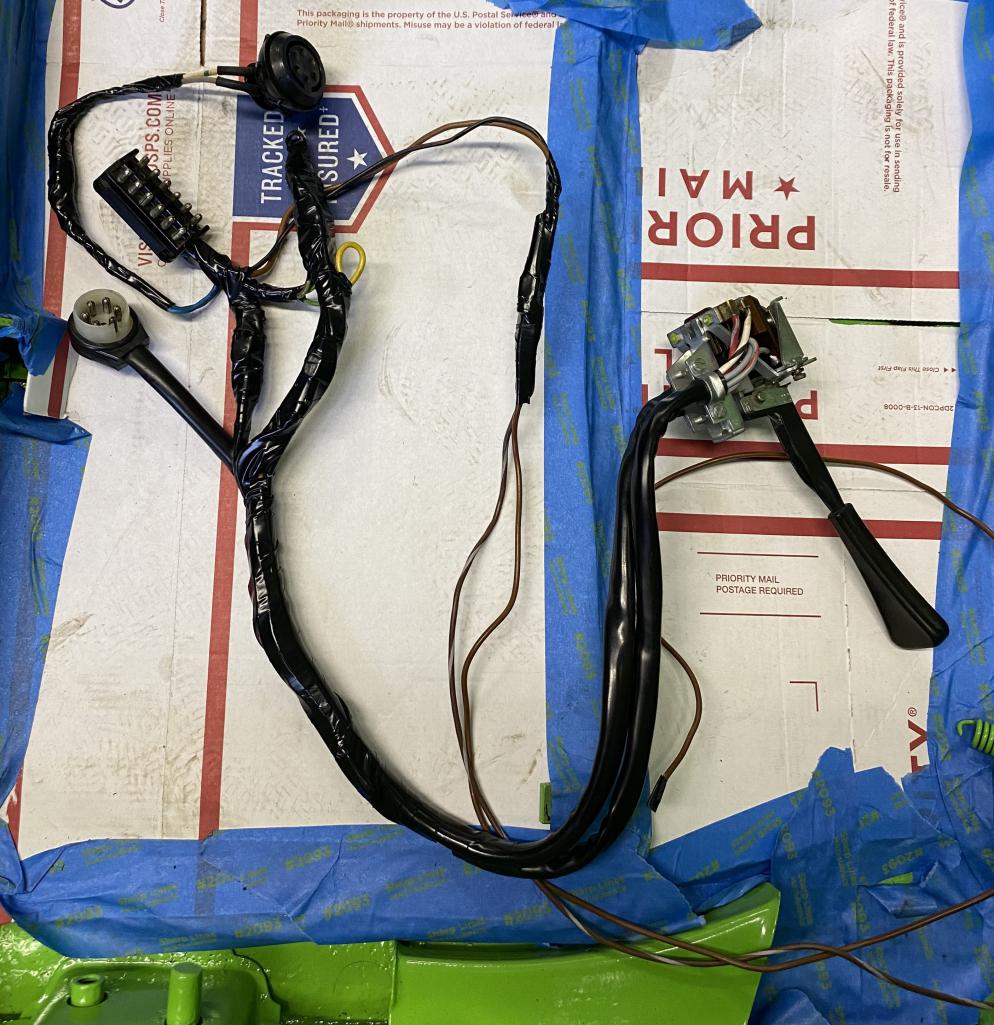 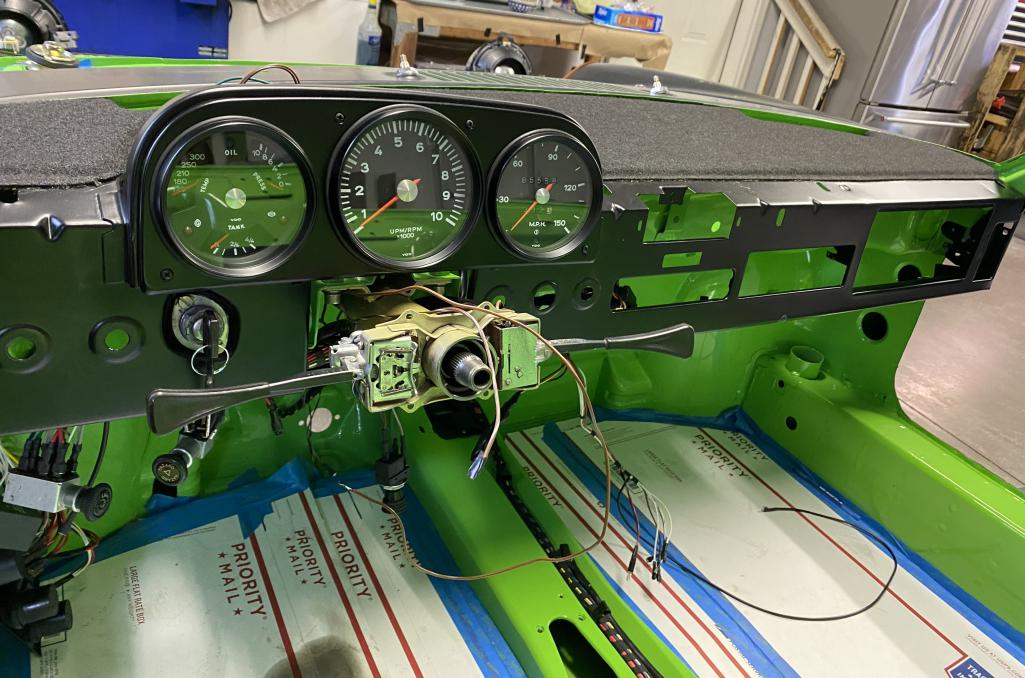 |
| Tom1394racing |
 Feb 3 2024, 02:08 PM Feb 3 2024, 02:08 PM
Post
#295
|
|
Member   Group: Members Posts: 493 Joined: 25-August 07 From: CT Member No.: 8,039 Region Association: North East States 
|
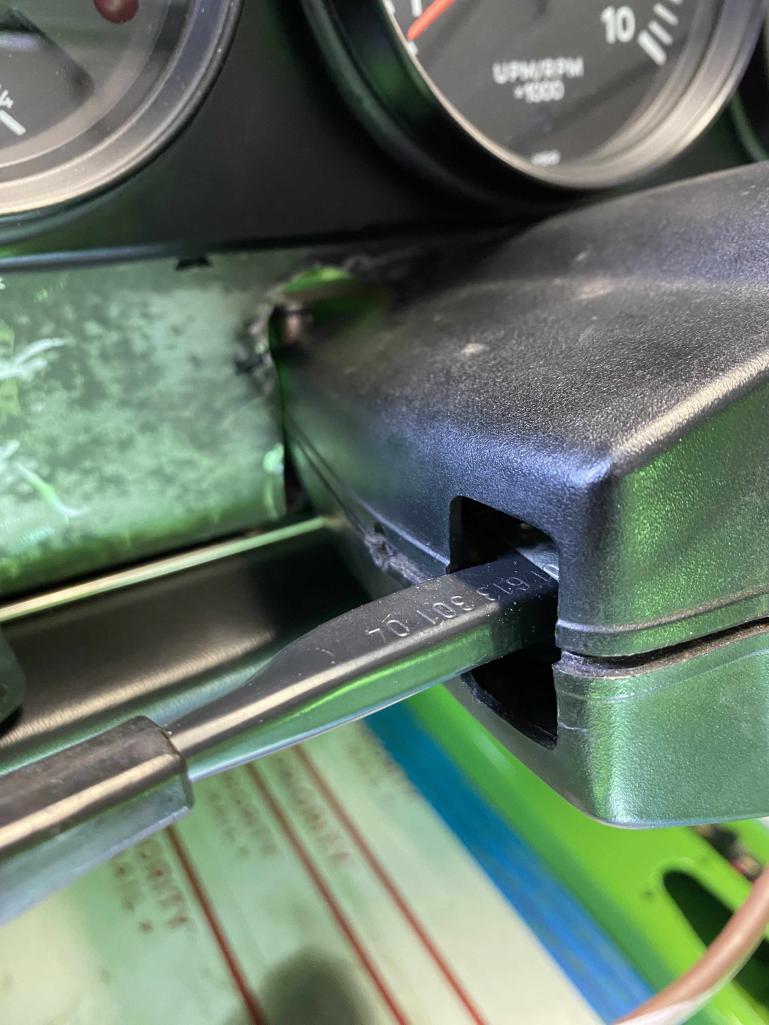
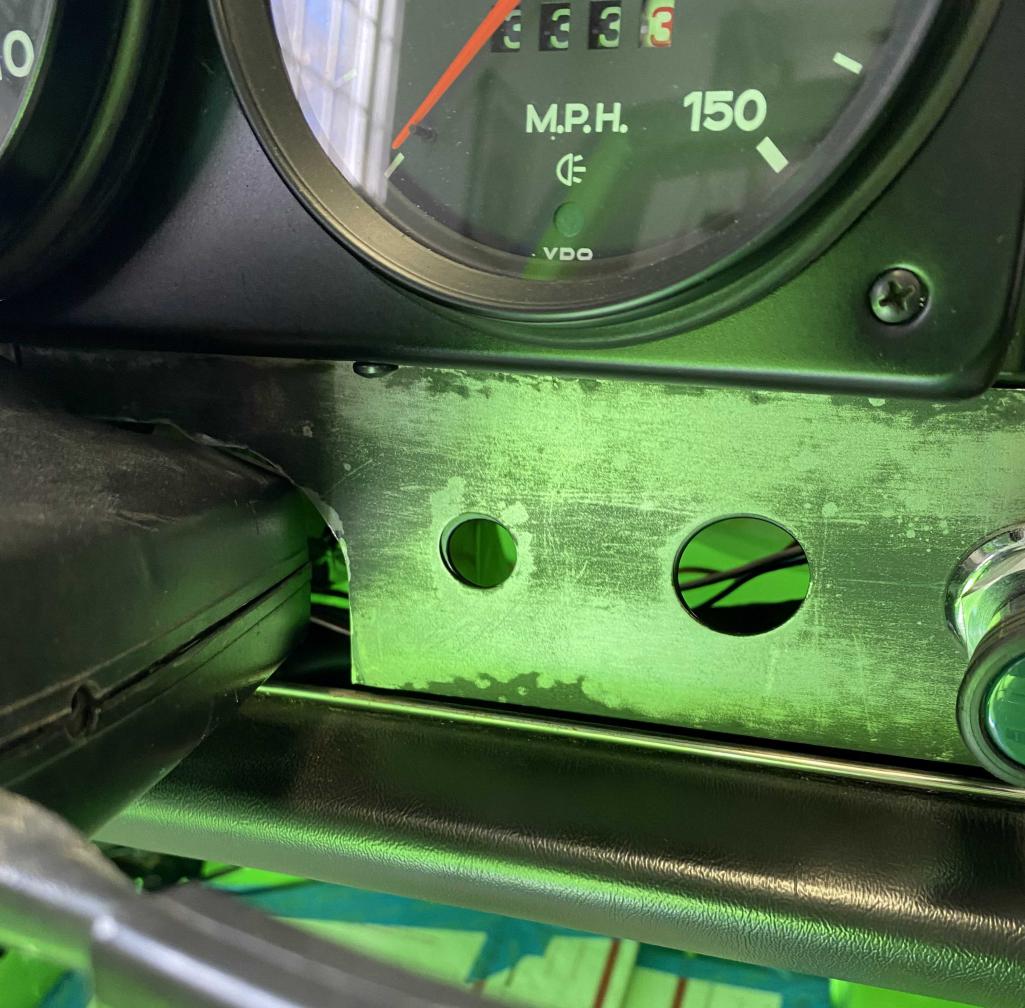
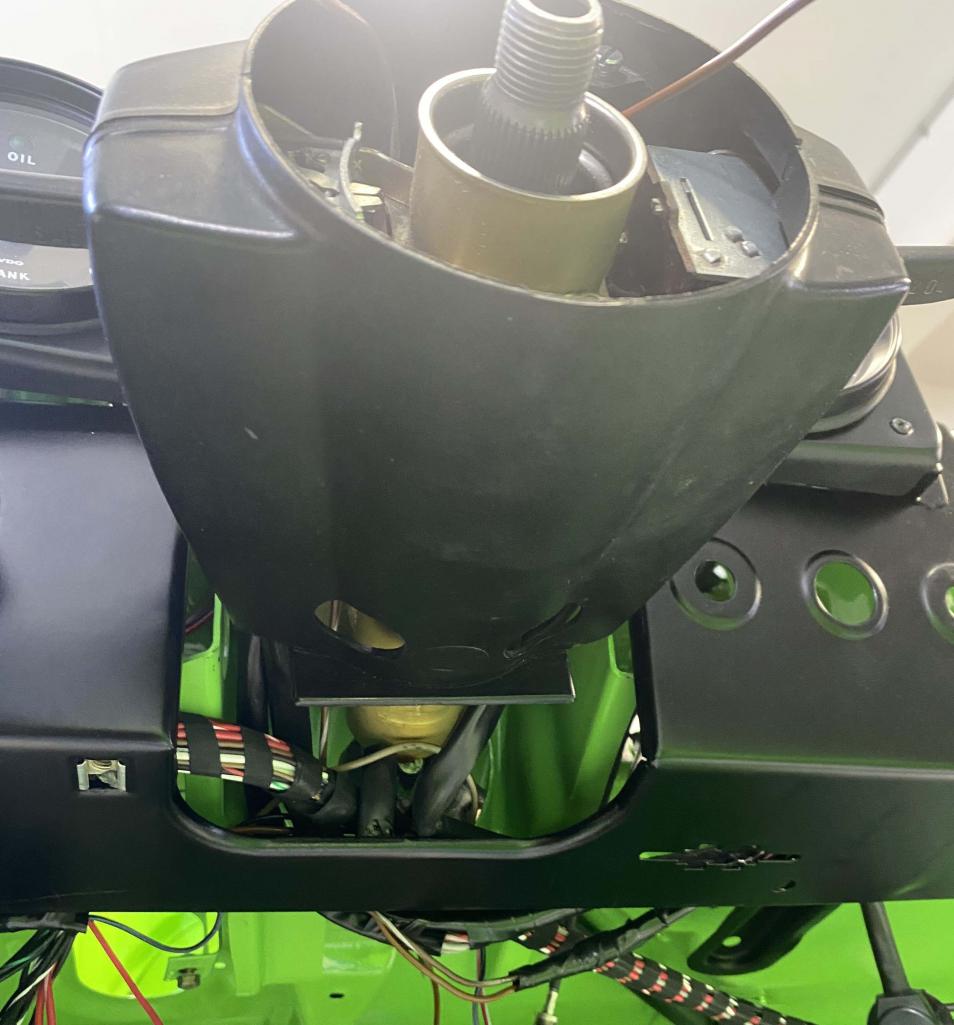
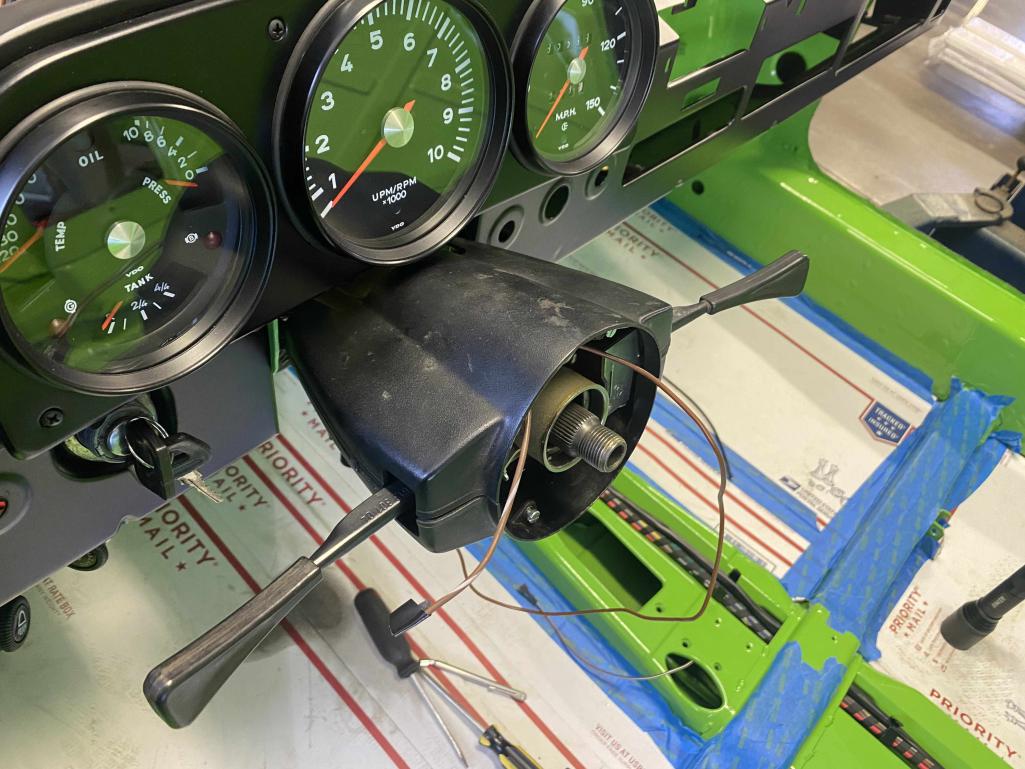
I did a trial fit of my 911 steering clamshell onto the 911 steering column today expecting that I would need to modify it to fit. Many of the threads I have read mentioned modifying both the top and bottom sections. I found that the clamshell fit nicely without any need for modification. I am guessing that the dash trim fascia plate will need some trimming to clear the bottom of the clamshell or that there may be a problem with interference with the dash kneepad. Am I on the right track with this or am I missing something?
  |
| Tom1394racing |
 Feb 6 2024, 03:42 PM Feb 6 2024, 03:42 PM
Post
#296
|
|
Member   Group: Members Posts: 493 Joined: 25-August 07 From: CT Member No.: 8,039 Region Association: North East States 
|
|
| Speedo |
 Feb 8 2024, 12:50 PM Feb 8 2024, 12:50 PM
Post
#297
|
|
Senior Member    Group: Members Posts: 560 Joined: 7-November 06 From: Boulder Member No.: 7,170 Region Association: Rocky Mountains 
|
Tom,
I missed why you swapped to a 911 steering and clamshell? |
| Tom1394racing |
 Feb 9 2024, 05:52 AM Feb 9 2024, 05:52 AM
Post
#298
|
|
Member   Group: Members Posts: 493 Joined: 25-August 07 From: CT Member No.: 8,039 Region Association: North East States 
|
Tom, I missed why you swapped to a 911 steering and clamshell? Hi Lars Since this is -6 GT tribute project, I wanted the GT look and feel in the cockpit. LHS ignition switch, 911 style T/S and wiper switches all required a swap to the early 911 steering column and clamshell. |
| rick 918-S |
 Feb 9 2024, 06:30 AM Feb 9 2024, 06:30 AM
Post
#299
|
|
Hey nice rack! -Celette                Group: Members Posts: 21,143 Joined: 30-December 02 From: Now in Superior WI Member No.: 43 Region Association: Northstar Region 

|
Very nice. Love the color
(IMG:style_emoticons/default/drooley.gif) |
| mb911 |
 Feb 9 2024, 10:17 AM Feb 9 2024, 10:17 AM
Post
#300
|
|
914 Guru      Group: Members Posts: 7,698 Joined: 2-January 09 From: Burlington wi Member No.: 9,892 Region Association: Upper MidWest 
|
Tom looks good. I need to revisit this on my car. It’s time to finish up some things I saved for later. Well it’s later.
|
  |
1 User(s) are reading this topic (1 Guests and 0 Anonymous Users)
0 Members:

|
Lo-Fi Version | Time is now: 14th December 2025 - 05:06 AM |
Invision Power Board
v9.1.4 © 2025 IPS, Inc.


