|
|

|
Porsche, and the Porsche crest are registered trademarks of Dr. Ing. h.c. F. Porsche AG.
This site is not affiliated with Porsche in any way. Its only purpose is to provide an online forum for car enthusiasts. All other trademarks are property of their respective owners. |
|
|
  |
| Tom1394racing |
 Jun 6 2024, 05:21 PM Jun 6 2024, 05:21 PM
Post
#361
|
|
Member   Group: Members Posts: 439 Joined: 25-August 07 From: CT Member No.: 8,039 Region Association: North East States 
|
I installed the chain tensioners today and rechecked the cam timing. I am using the late 930 (non-pressure fed) tensioners with the later wide bushed idler arms. I am also using the tensioner guards as extra protection.
I use zip ties (rather than the Porsche special tool) to hold the tensioners after compressing them in my bench vice so they can be installed. The zip ties are then cut and removed allowing the tensioner to expand. As expected, the cam timing remained unchanged. 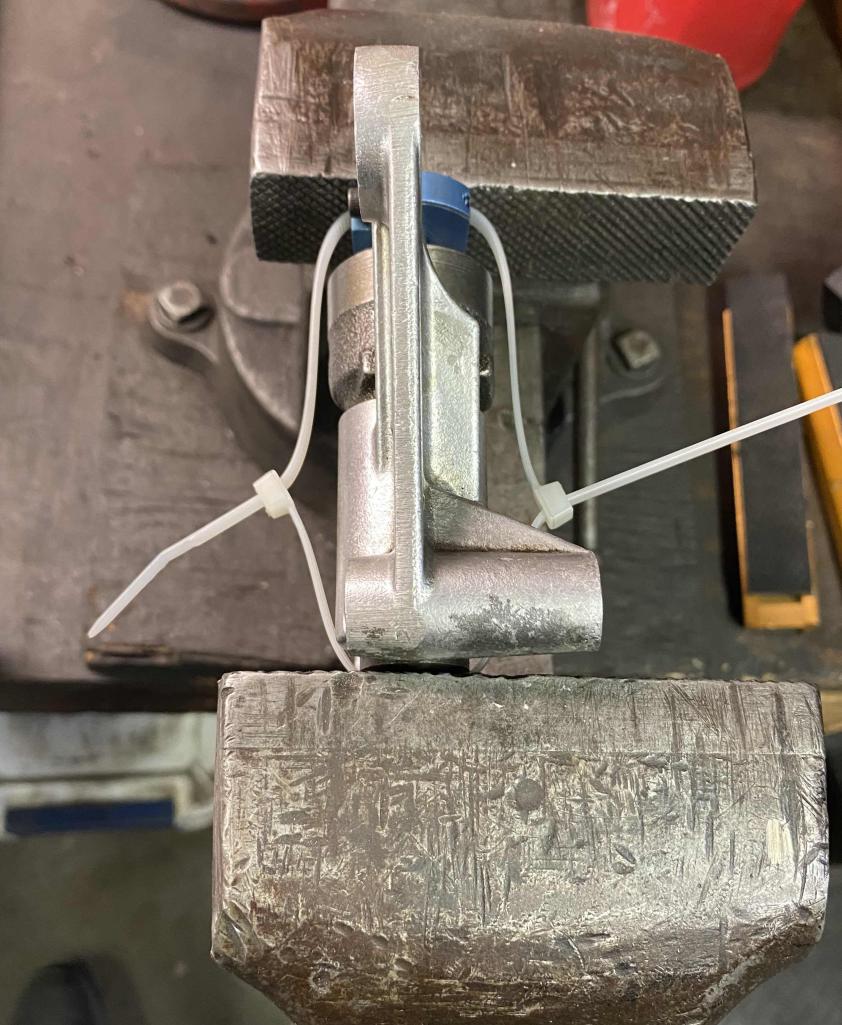 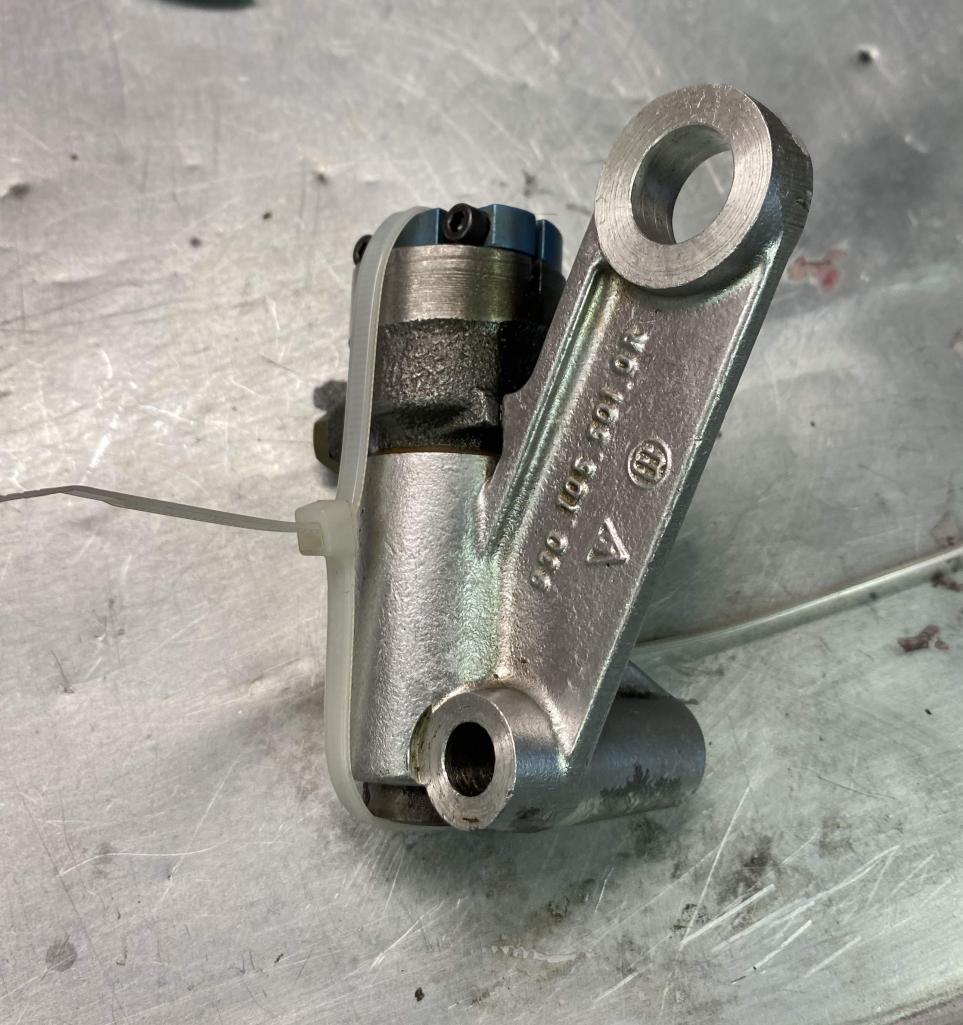 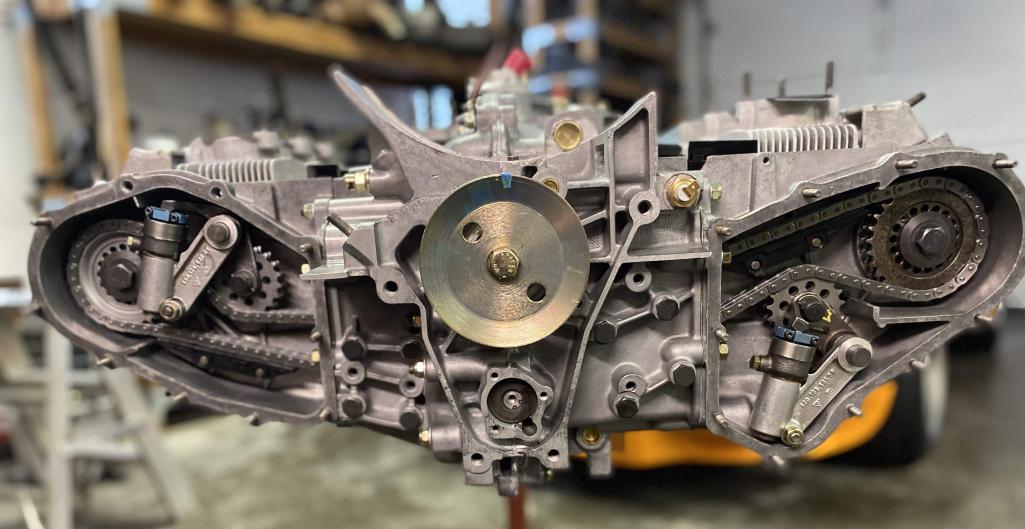 |
| Tom1394racing |
 Jun 6 2024, 05:24 PM Jun 6 2024, 05:24 PM
Post
#362
|
|
Member   Group: Members Posts: 439 Joined: 25-August 07 From: CT Member No.: 8,039 Region Association: North East States 
|
|
| Tom1394racing |
 Jun 10 2024, 07:22 PM Jun 10 2024, 07:22 PM
Post
#363
|
|
Member   Group: Members Posts: 439 Joined: 25-August 07 From: CT Member No.: 8,039 Region Association: North East States 
|
I spent the past couple of days finishing up the long block.
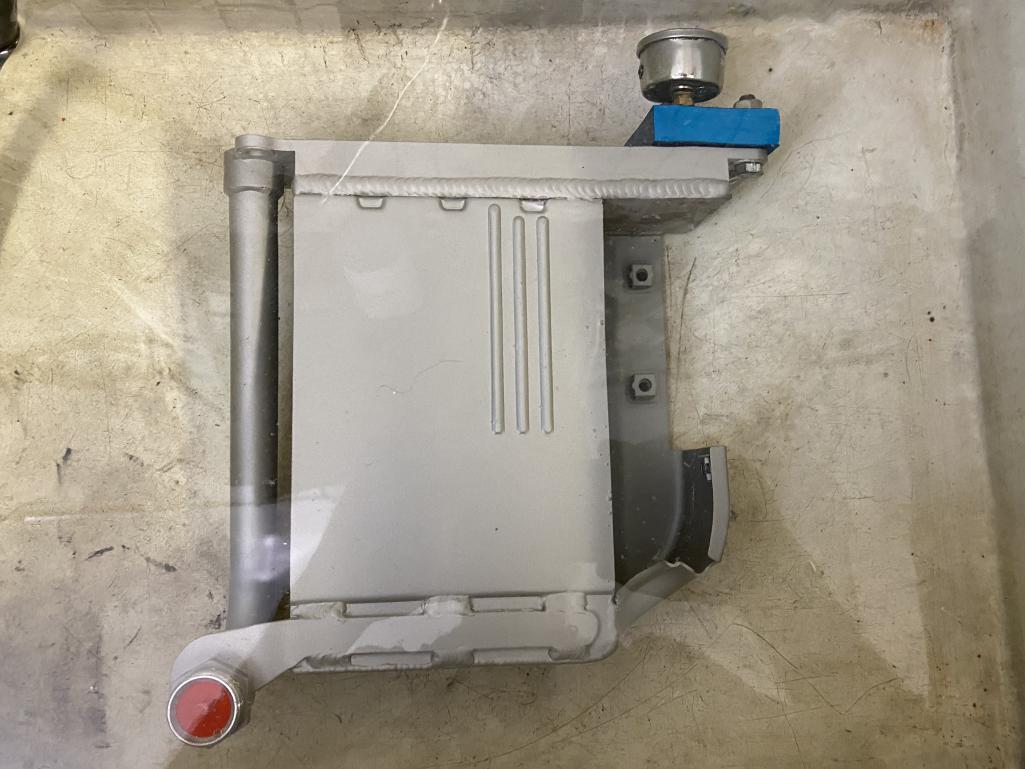
I did the piston-to-valve clearance check by screwing in the intake and exhaust valve rocker adjusters on cylinders 1 and 4 by 1.5 mm and 2.0 mm respectively and then rotating the engine through several revolutions to check for interference. No interference between the pistons and valves means that there is at least 1.5 mm intake valve clearance and 2.0 mm exhaust valve clearance. After assuring adequate piston-to-valve clearance I installed the JB Racing billet twin plug distributor and set the top rotor to the Z1 mark on the distributor while the engine was at TDC of the compression stroke for cylinder #1. After this, I installed the remaining rockers, adjusted the valve clearance and installed the valve covers. I then decided to recheck the engine oil cooler for leaks. I planned to use a 911 cooler that was modified for the 914-6 configuration with a welded in elbow. I had checked it with the Stromski pressure tester before sending out for the -6 modification and did not see any leaks. However, upon rechecking it, I got plenty of air bubbles. So now I need to find a replacement 914-6 style cooler. 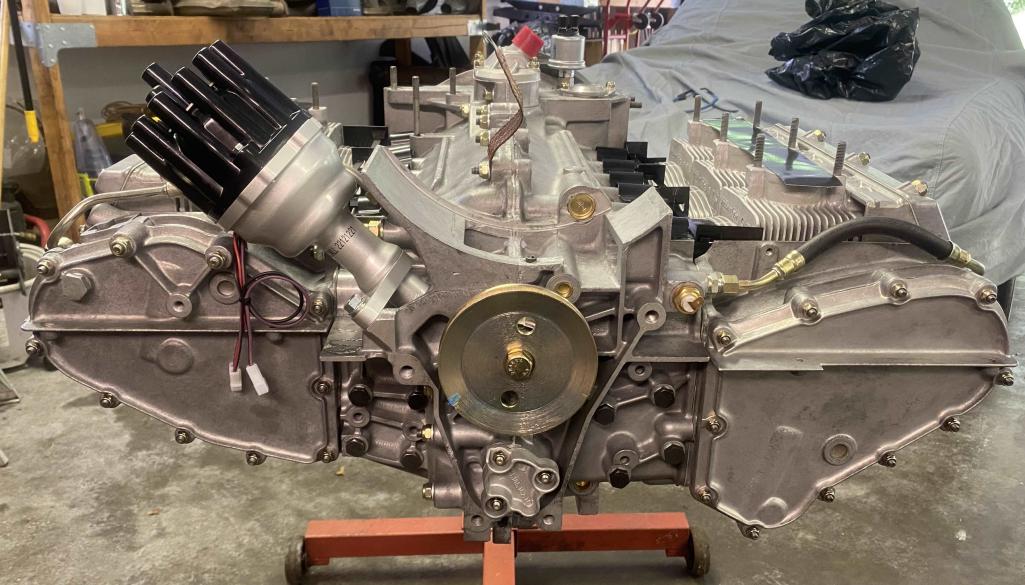 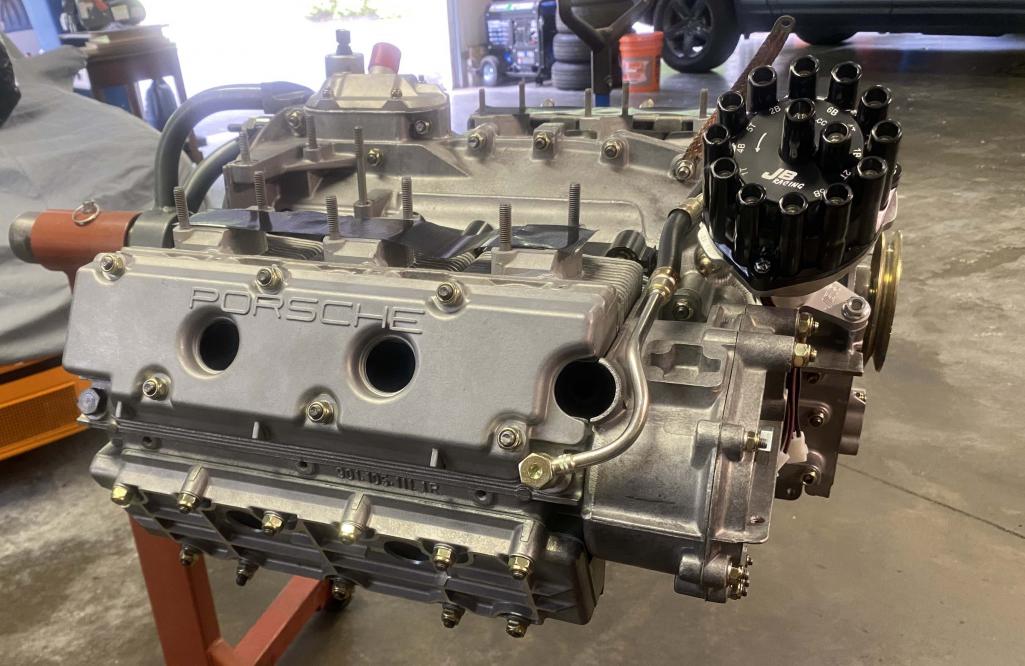 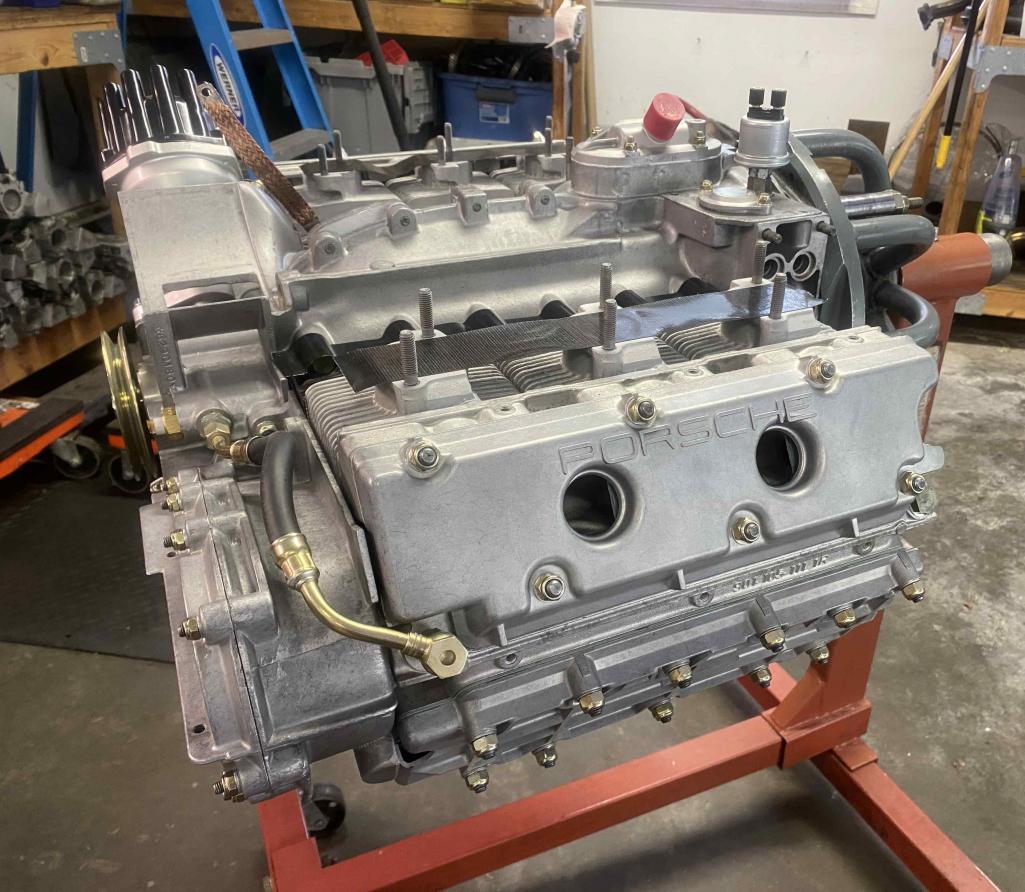 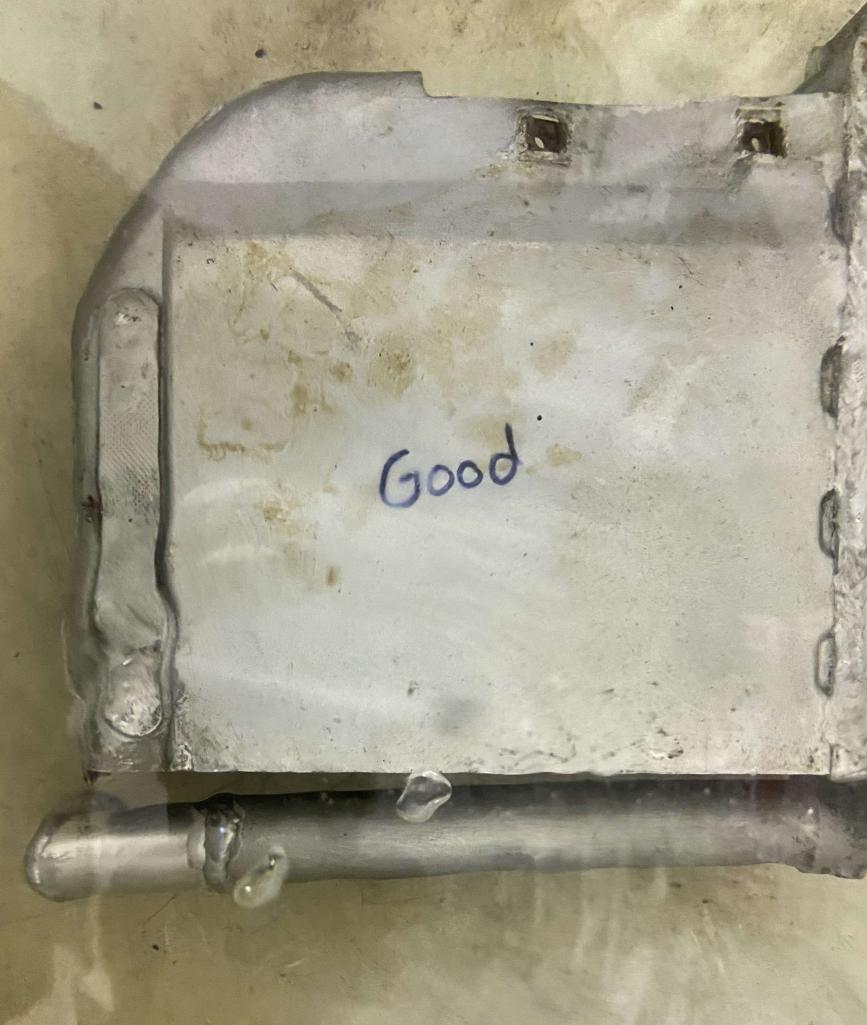 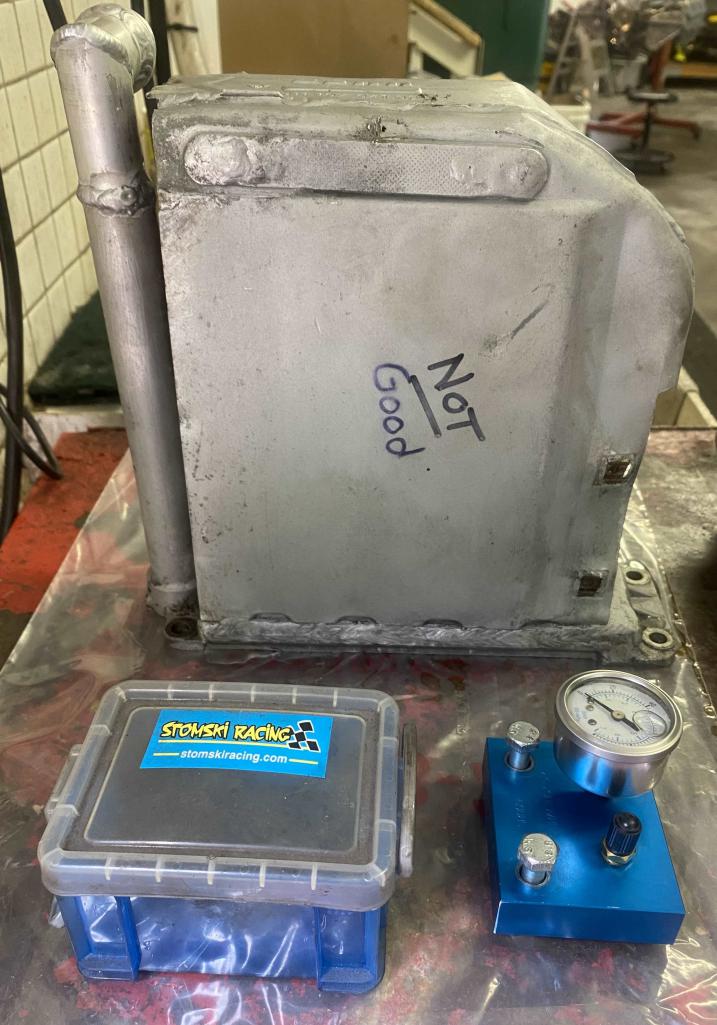 |
| Cairo94507 |
 Jun 11 2024, 07:22 AM Jun 11 2024, 07:22 AM
Post
#364
|
|
Michael           Group: Members Posts: 10,297 Joined: 1-November 08 From: Auburn, CA Member No.: 9,712 Region Association: Northern California 
|
Wow! That long block looks great. Sorry to hear about the oil cooler leak but so glad you re-checked it before installation only to have to remove it after you fired her up. (IMG:style_emoticons/default/beerchug.gif)
|
| Tom1394racing |
 Jul 9 2024, 08:56 AM Jul 9 2024, 08:56 AM
Post
#365
|
|
Member   Group: Members Posts: 439 Joined: 25-August 07 From: CT Member No.: 8,039 Region Association: North East States 
|
|
| mb911 |
 Jul 9 2024, 10:05 AM Jul 9 2024, 10:05 AM
Post
#366
|
|
914 Guru      Group: Members Posts: 7,544 Joined: 2-January 09 From: Burlington wi Member No.: 9,892 Region Association: Upper MidWest 
|
|
| jeff |
 Jul 9 2024, 11:21 AM Jul 9 2024, 11:21 AM
Post
#367
|
|
Member   Group: Members Posts: 255 Joined: 17-January 04 From: thousand oaks,ca Member No.: 1,570 |
Really beautiful job your doing. This is coming out awesome.
|
| rgalla9146 |
 Jul 9 2024, 01:53 PM Jul 9 2024, 01:53 PM
Post
#368
|
|
Advanced Member     Group: Members Posts: 4,735 Joined: 23-November 05 From: Paramus NJ Member No.: 5,176 Region Association: None 
|
Beautiful work Tom. Looking great ! |
| burton73 |
 Jul 9 2024, 02:00 PM Jul 9 2024, 02:00 PM
Post
#369
|
|
Senior member, and old dude     Group: Members Posts: 3,800 Joined: 2-January 07 From: Los Angeles Member No.: 7,414 Region Association: Southern California 
|
Tom, you should be very proud of the way your car is turning out.
Best Bob B (IMG:style_emoticons/default/piratenanner.gif) |
| Tom1394racing |
 Jul 10 2024, 09:49 AM Jul 10 2024, 09:49 AM
Post
#370
|
|
Member   Group: Members Posts: 439 Joined: 25-August 07 From: CT Member No.: 8,039 Region Association: North East States 
|
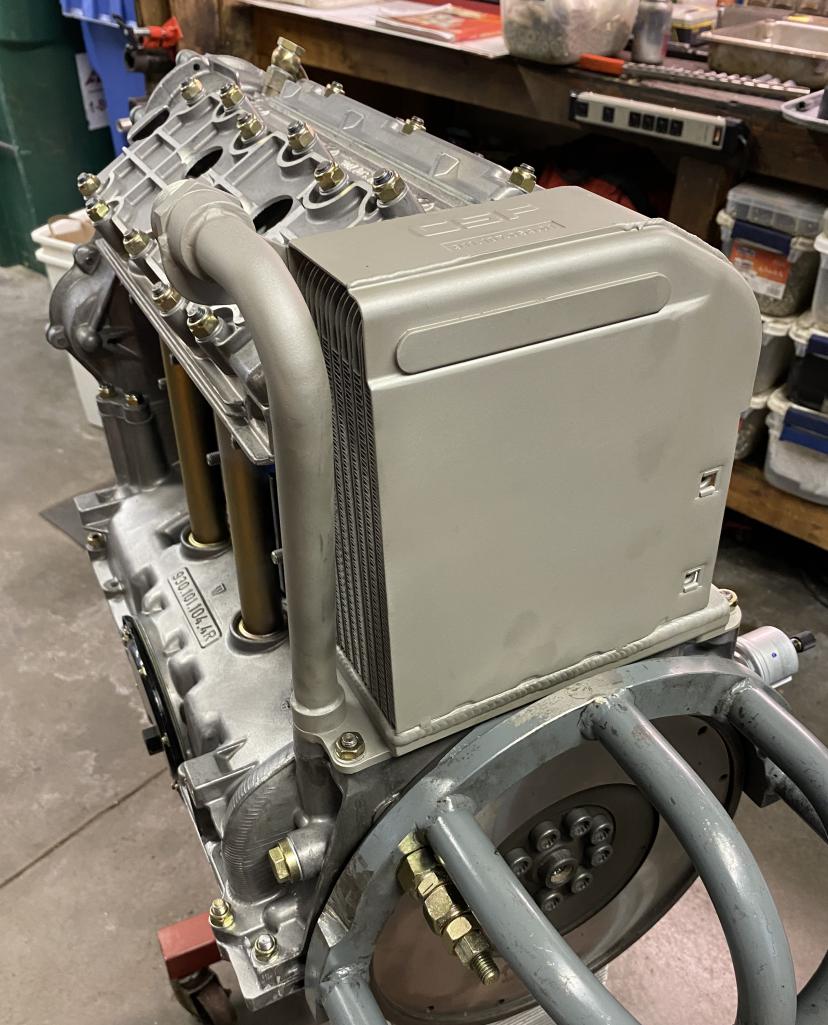
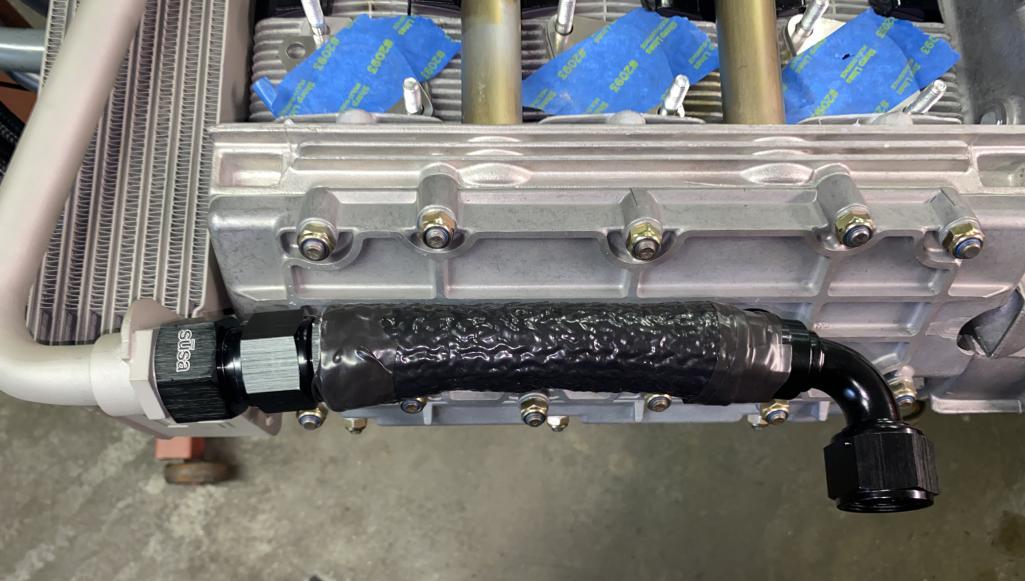
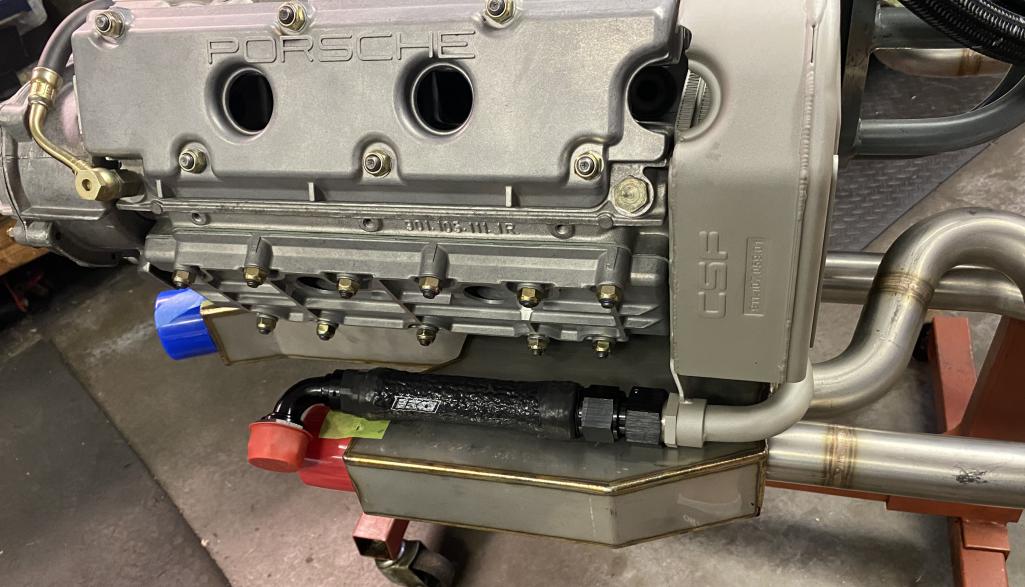
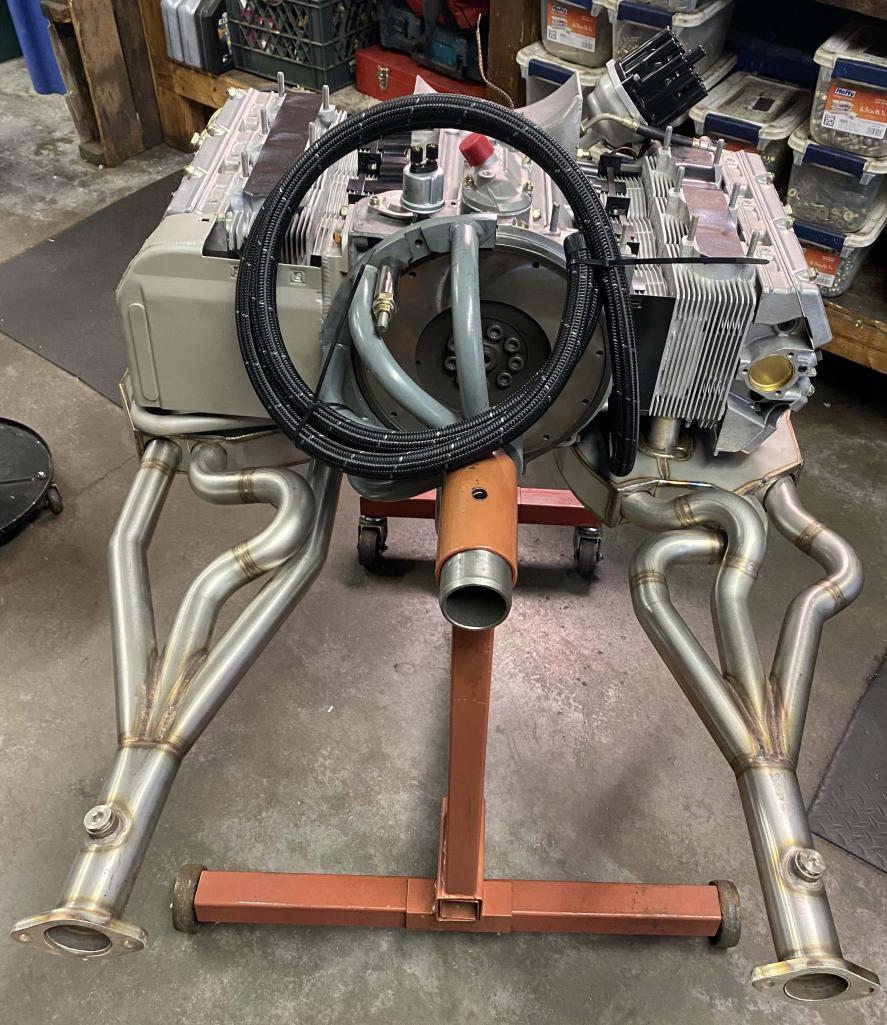
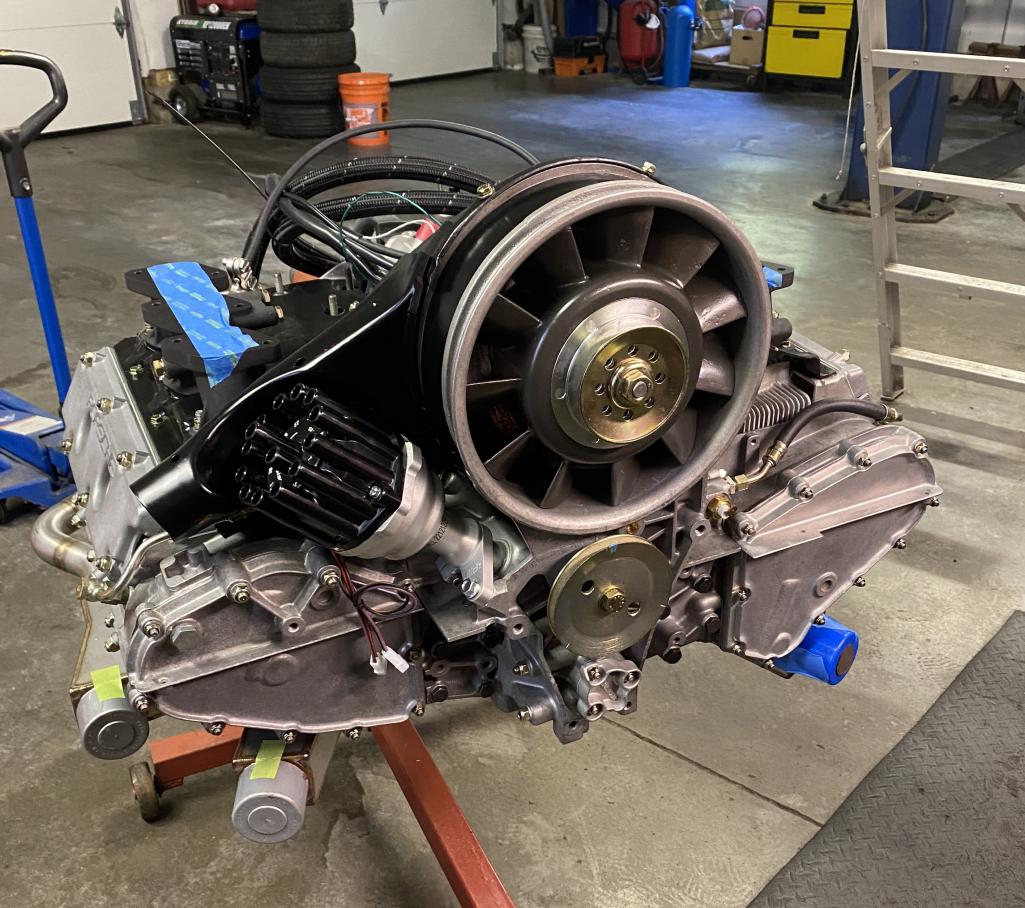
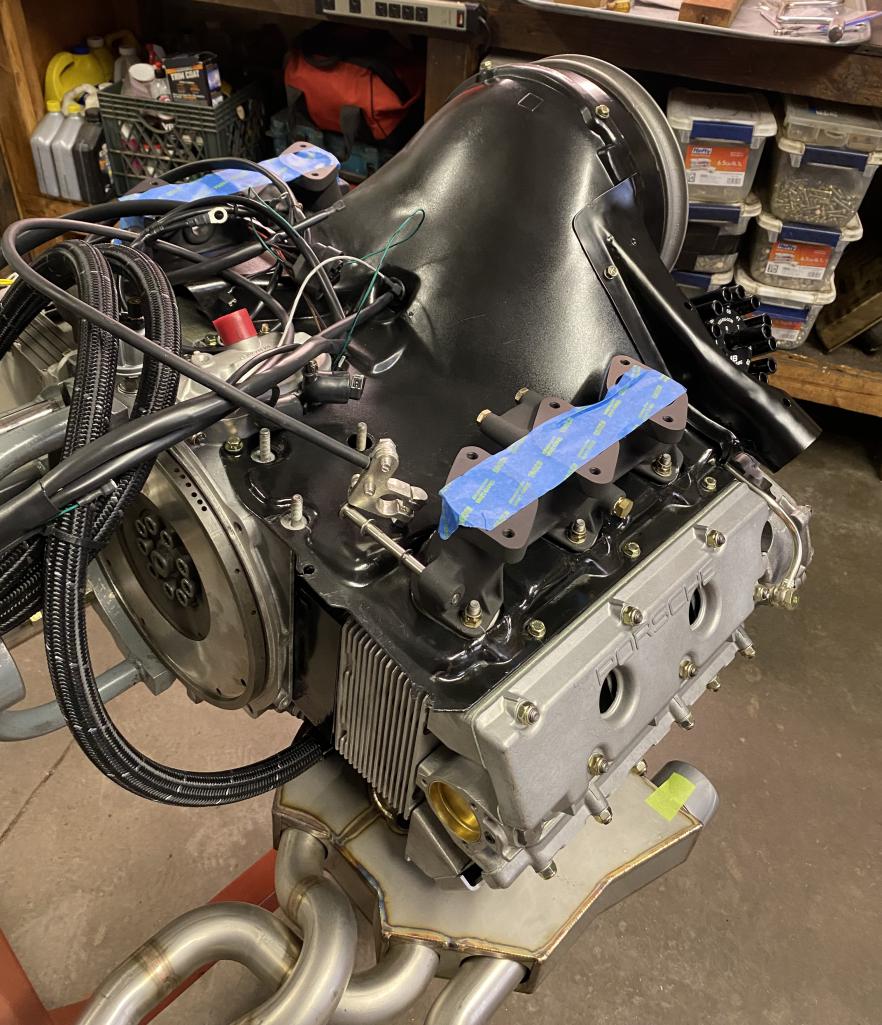
Some more progress on the engine. Installed the oil scavenge line. I plan to run this over the rear of the engine/transmission to the external t-stat much like the early 911. I also installed the RHS heat exchanger. Thank you, Ben McFarland, for the beautiful workmanship on the heat exchangers and for the oil line hardware and plumbing suggestions.
Currently waiting for an M30 X AN12 adapter to connect the CSF cooler to the tank. Once I have that line insulated and in place, I will install the LHS heat exchanger. 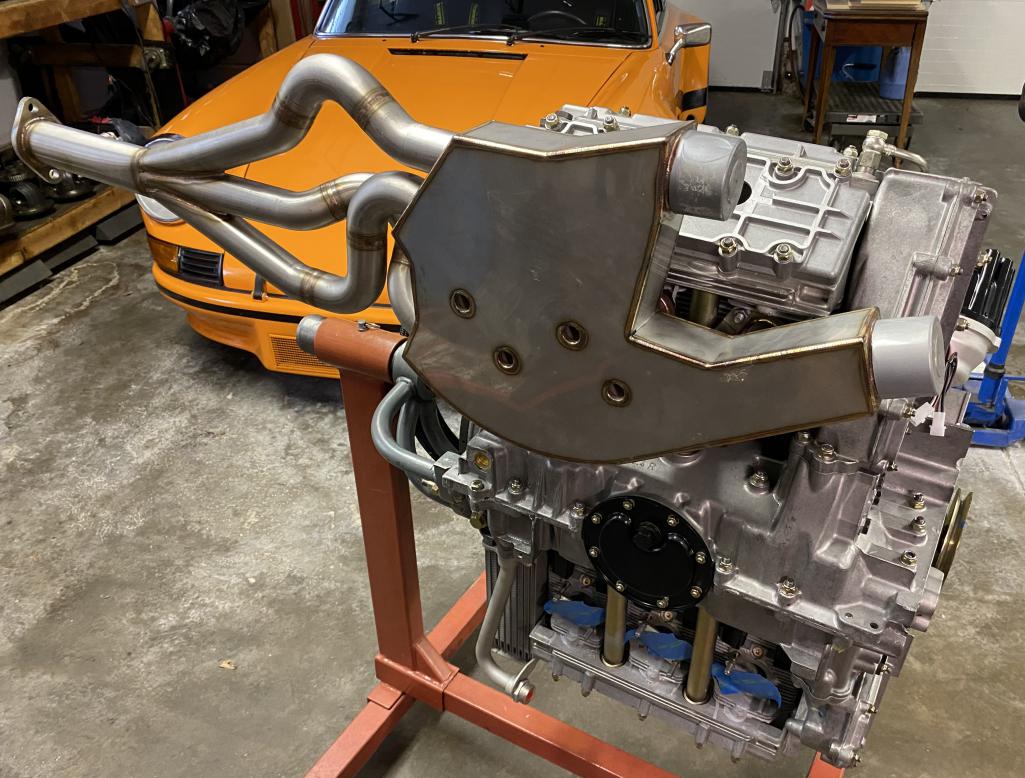 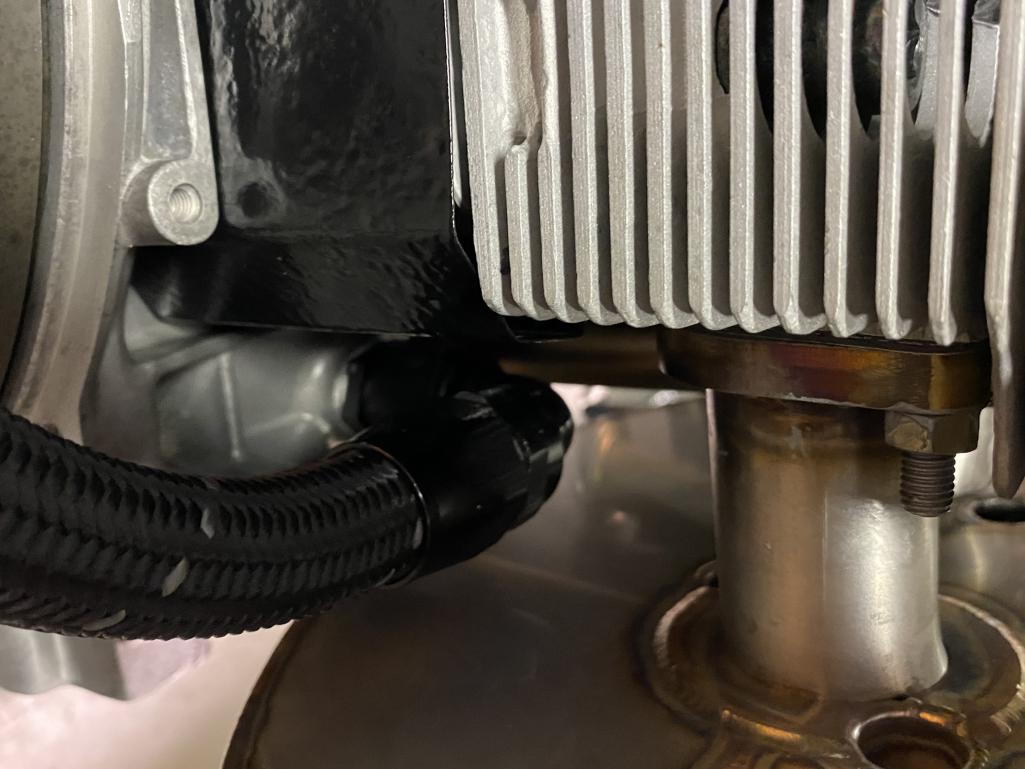 |
| Tom1394racing |
 Jul 13 2024, 01:20 PM Jul 13 2024, 01:20 PM
Post
#371
|
|
Member   Group: Members Posts: 439 Joined: 25-August 07 From: CT Member No.: 8,039 Region Association: North East States 
|
|
| Tom1394racing |
 Jul 16 2024, 06:20 PM Jul 16 2024, 06:20 PM
Post
#372
|
|
Member   Group: Members Posts: 439 Joined: 25-August 07 From: CT Member No.: 8,039 Region Association: North East States 
|
|
| mb911 |
 Jul 16 2024, 07:17 PM Jul 16 2024, 07:17 PM
Post
#373
|
|
914 Guru      Group: Members Posts: 7,544 Joined: 2-January 09 From: Burlington wi Member No.: 9,892 Region Association: Upper MidWest 
|
Man those heat exchangers came from me? Must have been 3.5 ish years ago? I can’t recall but I haven’t been involved with any exhaust since January of 21
Looks great |
| mate914 |
 Jul 16 2024, 07:49 PM Jul 16 2024, 07:49 PM
Post
#374
|
|
Matt    Group: Members Posts: 836 Joined: 27-February 09 From: Eagles mere, PA Member No.: 10,102 Region Association: North East States 
|
Man those heat exchangers came from me? Must have been 3.5 ish years ago? I can’t recall but I haven’t been involved with any exhaust since January of 21 Looks great I wish you still made them. I need a set or two….. Matt (IMG:style_emoticons/default/flag.gif) |
| Tom1394racing |
 Jul 17 2024, 04:48 AM Jul 17 2024, 04:48 AM
Post
#375
|
|
Member   Group: Members Posts: 439 Joined: 25-August 07 From: CT Member No.: 8,039 Region Association: North East States 
|
Ben
I picked those up from a want to buy ad that I posted on the forum. One of our members had a set that he hadn’t used. They were perfect for this project, beautifully made and fit nicely. |
| mb911 |
 Jul 17 2024, 06:49 AM Jul 17 2024, 06:49 AM
Post
#376
|
|
914 Guru      Group: Members Posts: 7,544 Joined: 2-January 09 From: Burlington wi Member No.: 9,892 Region Association: Upper MidWest 
|
|
| mb911 |
 Jul 17 2024, 06:50 AM Jul 17 2024, 06:50 AM
Post
#377
|
|
914 Guru      Group: Members Posts: 7,544 Joined: 2-January 09 From: Burlington wi Member No.: 9,892 Region Association: Upper MidWest 
|
Man those heat exchangers came from me? Must have been 3.5 ish years ago? I can’t recall but I haven’t been involved with any exhaust since January of 21 Looks great I wish you still made them. I need a set or two….. Matt (IMG:style_emoticons/default/flag.gif) I am positive some has the patterns and designs and could make them but unfortunately not me and I refuse to send buyers to that group of people. |
| Tom1394racing |
 Jul 21 2024, 06:15 AM Jul 21 2024, 06:15 AM
Post
#378
|
|
Member   Group: Members Posts: 439 Joined: 25-August 07 From: CT Member No.: 8,039 Region Association: North East States 
|
I went to install the lower spark plugs and ran into a couple of issues.
The heads were machined for twin plug but the clearances on the lower holes are too small to allow a regular spark plug and plug socket to fit. I recalled that I had run into this same problem when I built my RSR twin plug engine almost 20 years ago. The solution turned out to be a motorcycle plug with a 16 mm ATF hex and a 16 mm plug socket. In addition, I had open up some clearance access on # 4 lower plug hole by modifying the chain box. All good there now...lower plugs installed. In the process of scoping out this issue, I had to remove the lower valve covers to check out the lower plug holes. I found that valve covers would not clear the heater exchanger boxes unless I removed two of the lower valve cover studs. This will be a PIA when doing valve adjustments. I think one possible solution would be to use 8 mm bolts rather than studs and nuts for the bottom of lower valve covers. Anyone ever run into this? 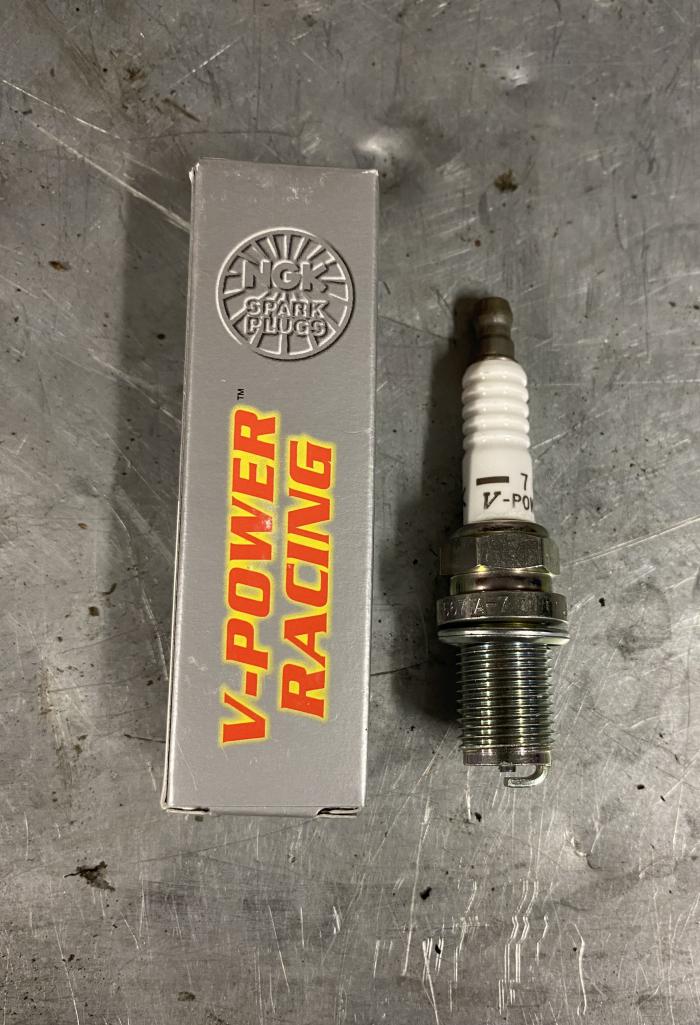 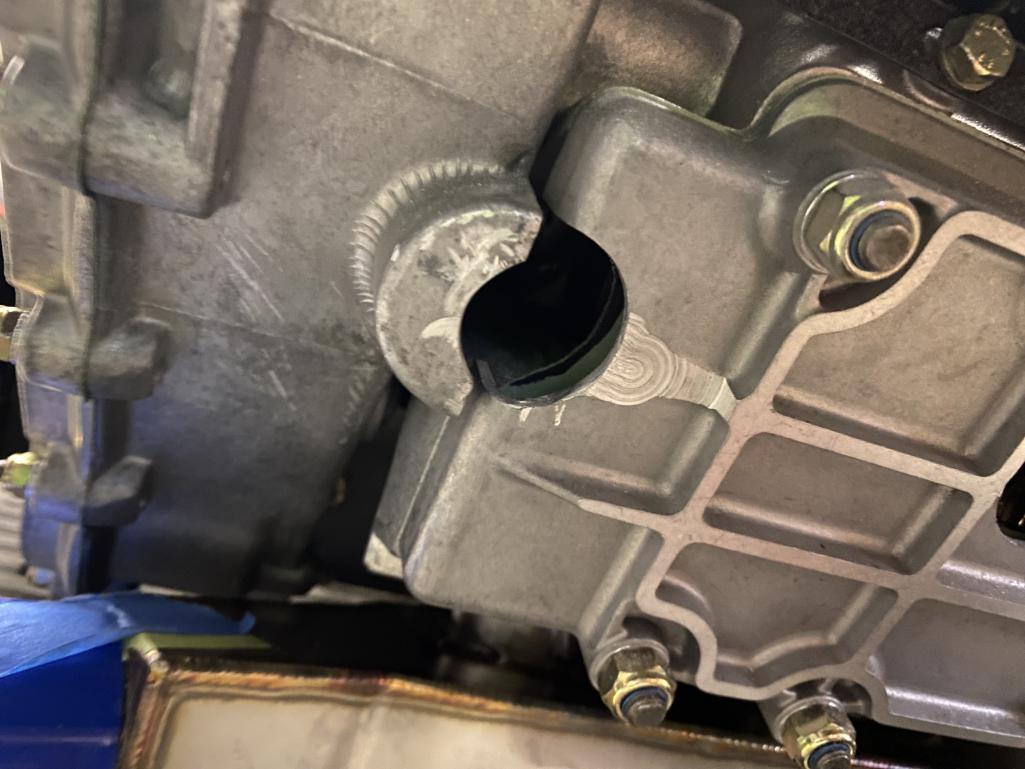 |
| troth |
 Jul 21 2024, 07:05 AM Jul 21 2024, 07:05 AM
Post
#379
|
|
Member   Group: Members Posts: 160 Joined: 17-August 16 From: CT/WA Member No.: 20,305 Region Association: None |
This is a pretty typical issue from what I've heard. I think you can get away with milling down just one corner of the covers. See this post:
http://www.914world.com/bbs2/index.php?sho...p=2239420&# (IMG:http://www.914world.com/bbs2/uploads/post-15674-1442626025.jpg) (Not my picture) |
| Tom1394racing |
 Jul 21 2024, 11:41 AM Jul 21 2024, 11:41 AM
Post
#380
|
|
Member   Group: Members Posts: 439 Joined: 25-August 07 From: CT Member No.: 8,039 Region Association: North East States 
|
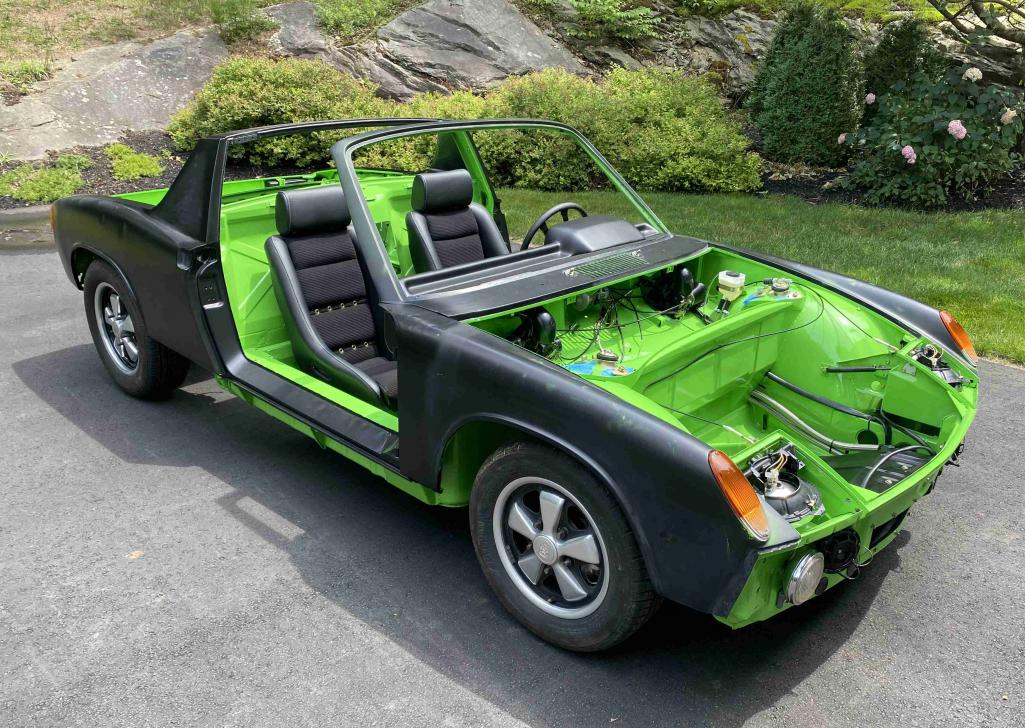
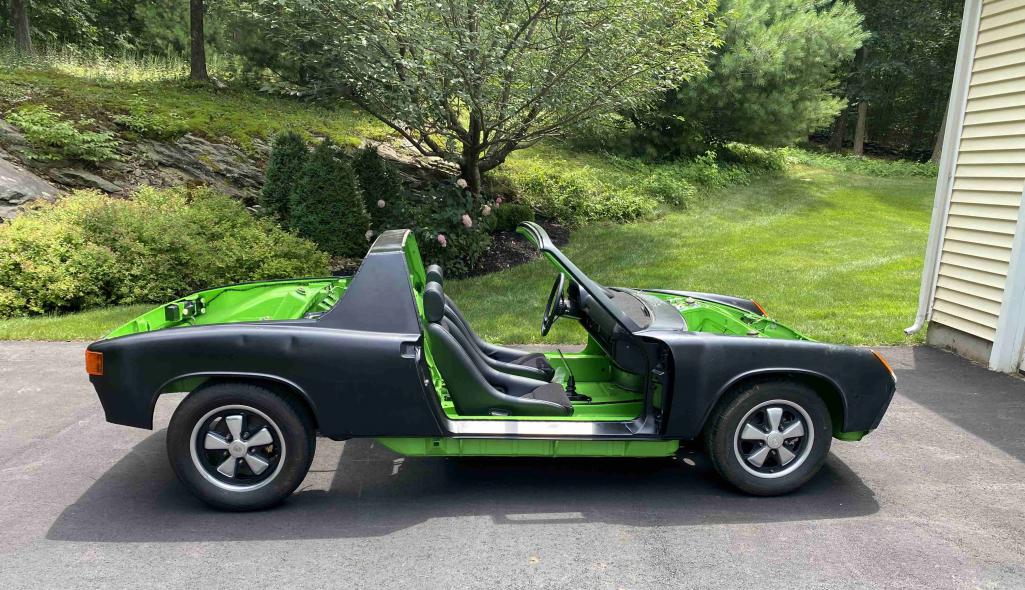
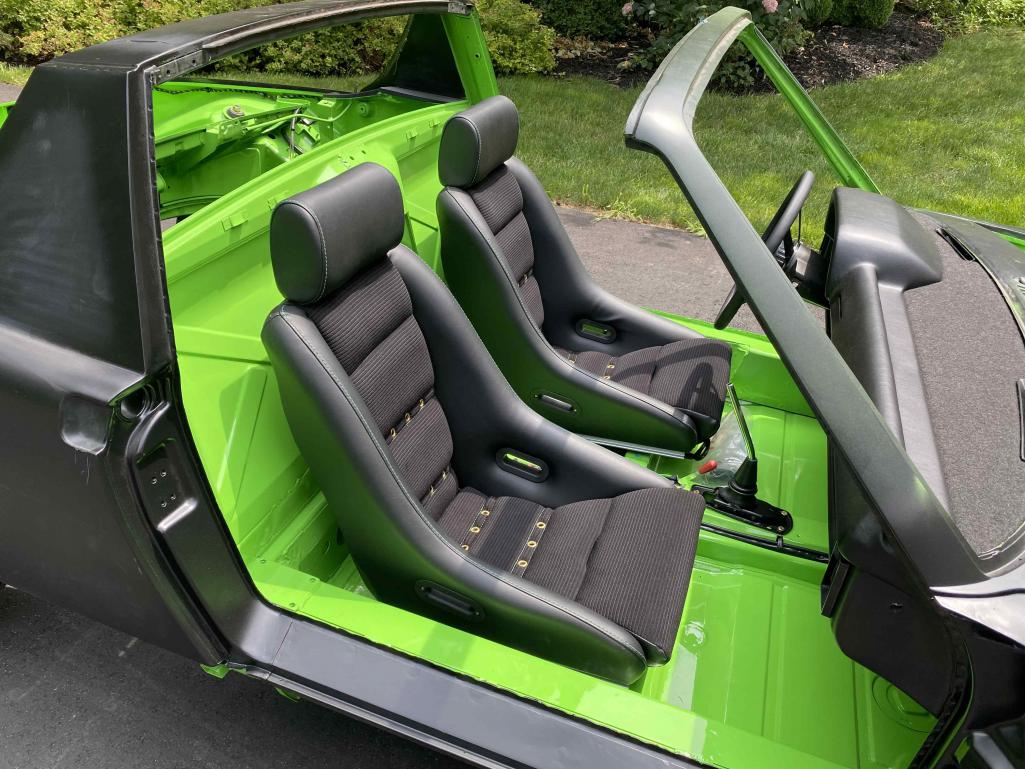
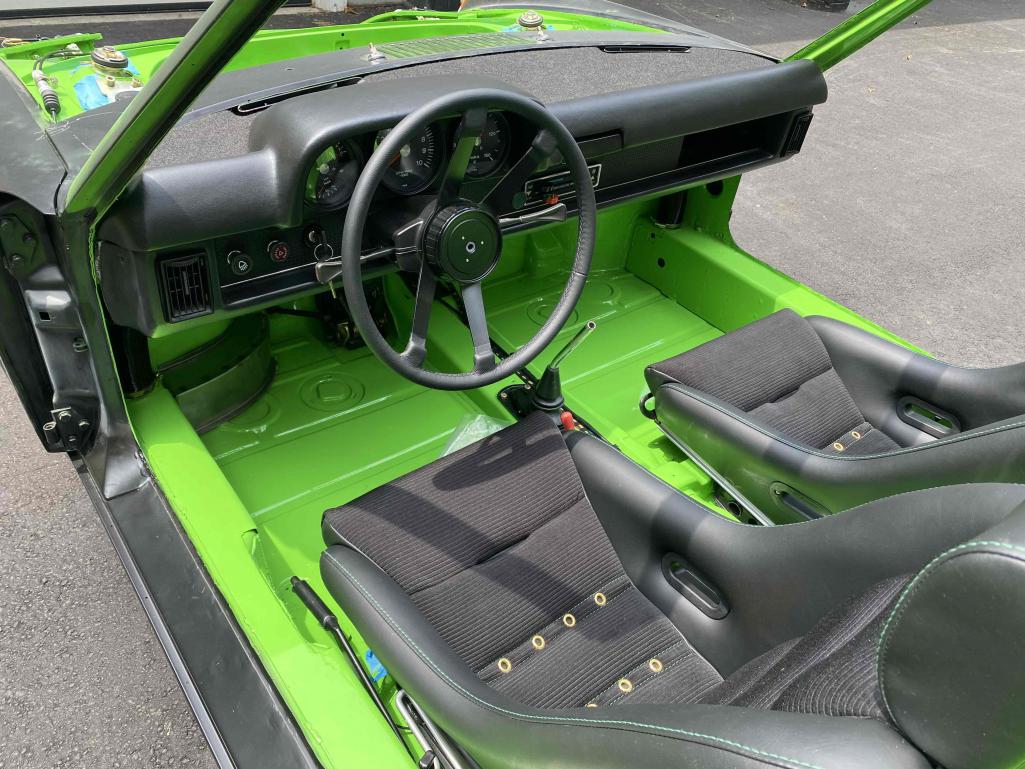
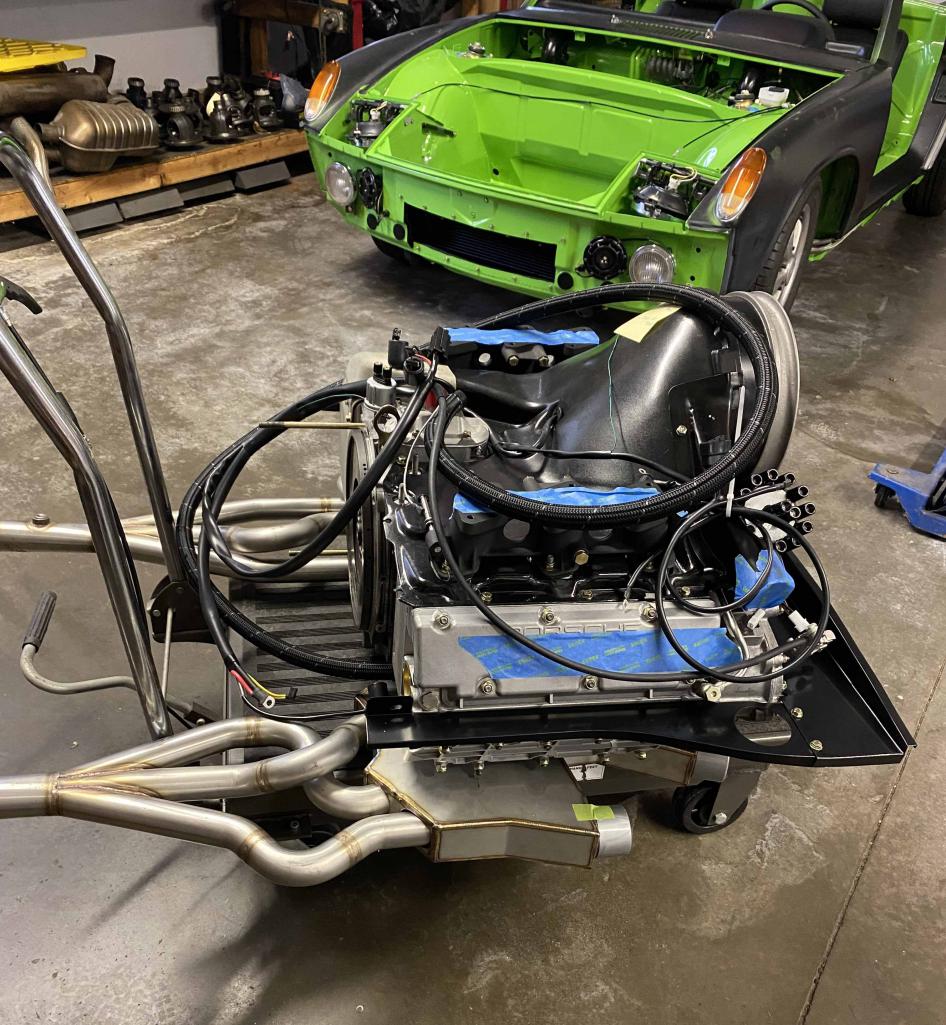
In order to move forward with the engine sheet metal and the clutch system, it was time to move the engine from the stand to the lift table that I will be using for the engine install. Since I use my two post lift to transfer the engine to the lift table, I took the opportunity to install the roller wheels and tires and move the 914 from the lift and into the daylight for some pics.
     |
  |
2 User(s) are reading this topic (1 Guests and 0 Anonymous Users)
1 Members: aturboman

|
Lo-Fi Version | Time is now: 19th April 2025 - 12:25 PM |
Invision Power Board
v9.1.4 © 2025 IPS, Inc.


