|
|
|
Porsche, and the Porsche crest are registered trademarks of Dr. Ing. h.c. F. Porsche AG.
This site is not affiliated with Porsche in any way. Its only purpose is to provide an online forum for car enthusiasts. All other trademarks are property of their respective owners. |
|
|

  |

| Tom1394racing |
 Oct 1 2024, 06:55 AM Oct 1 2024, 06:55 AM
Post
#421
|
|
Member  Group: Members Posts: 439 Joined: 25-August 07 From: CT Member No.: 8,039 Region Association: North East States |
Some more progress in getting the engine compartment ready. I fit the twin MSD boxes and twin Blaster coils to the inner firewall. I used isolator mounts and a sheet metal mounting plate for the CD boxes. A little cleanup of the mounting hardware and wiring harness and I should be done with this. I tried to replicate the location of the coils to match the location used on most factory GT cars. I decided not to locate the MSD CD boxes inside the passenger compartment as was done on most factory GT cars. I will be going with a cleaner look with sound deadening and carpeting on the inner firewall. Although I have not seen any examples of the CD boxes in this location, I think this will work out well.
Next up on the engine wiring will be the connections of the engine and chassis harnesses. 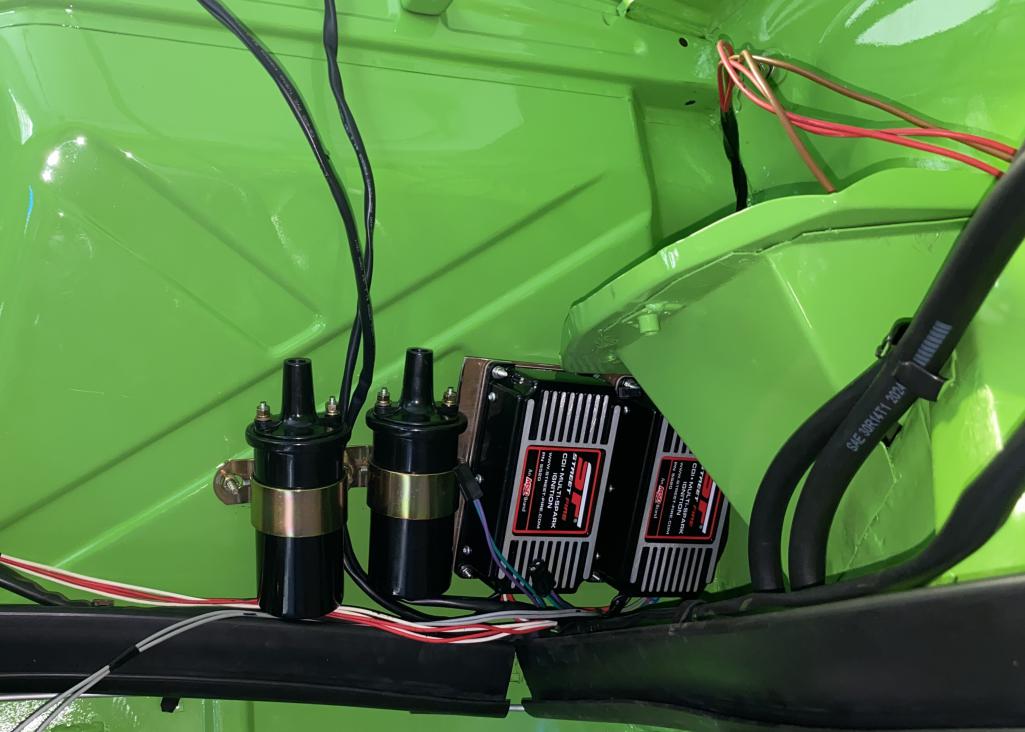 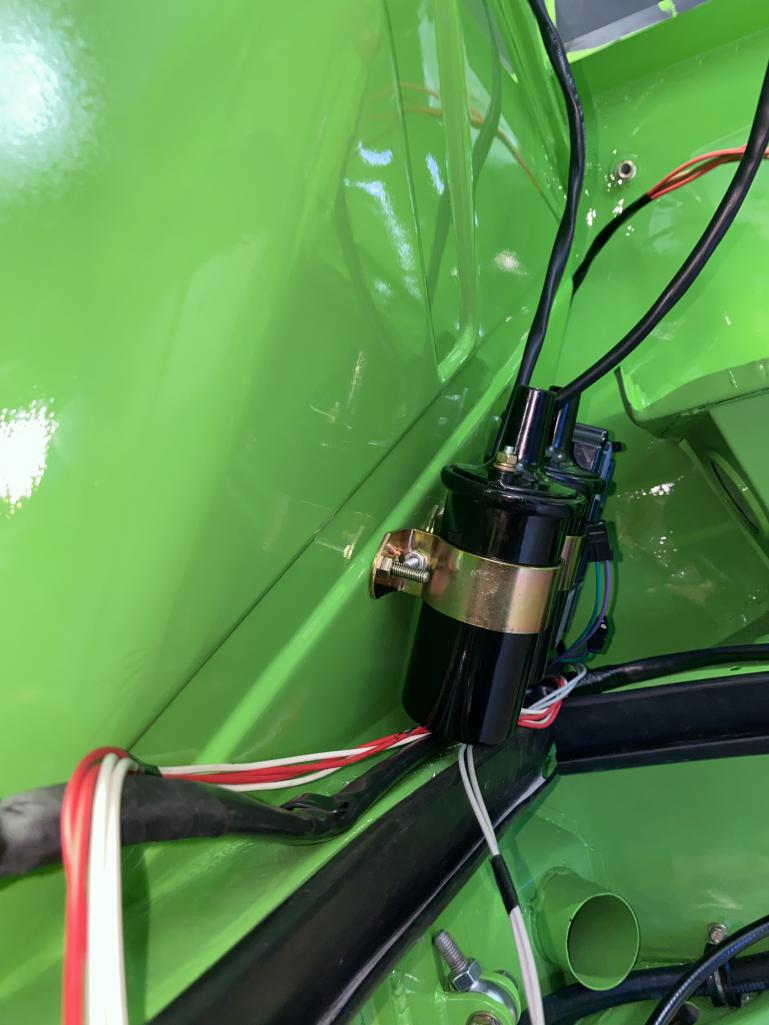 |
   |

 
|
| Tom1394racing |
Oct 1 2024, 07:06 AM
Post
#422
|
|
Member Group: Members Posts: 439 Joined: 25-August 07 From: CT Member No.: 8,039 Region Association: North East States |
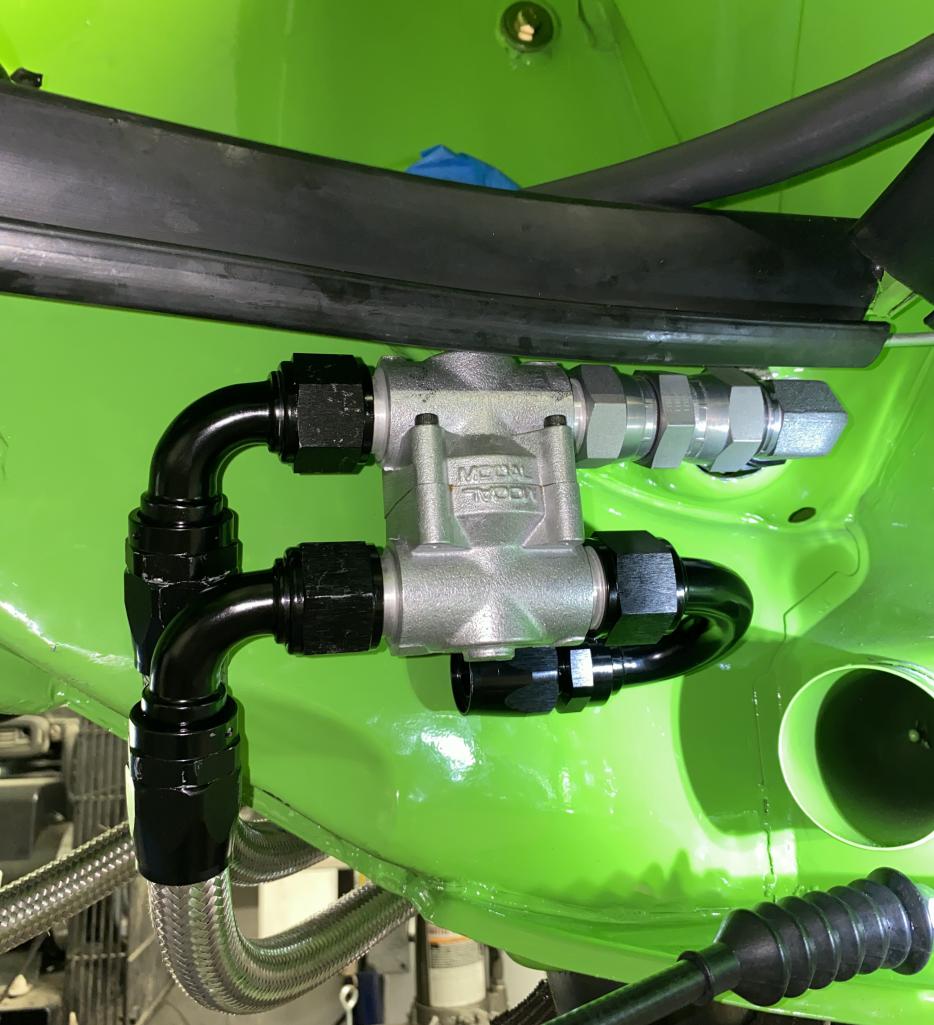
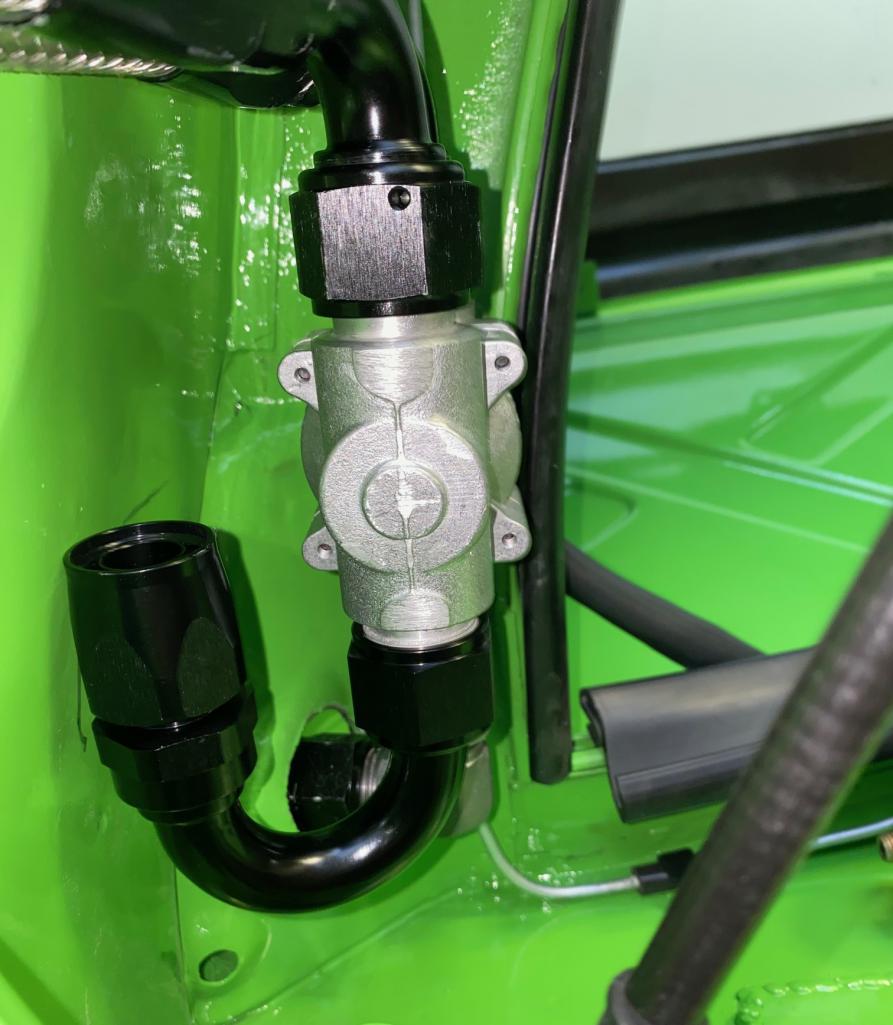
I also finished up the oil thermostat plumbing. After several trips back and forth to the local hose fitting supplier, I was finally able to make the plumbing connections to my satisfaction. A couple more Adele clamps I should be finished. The final connections from the tank to the cooler and the engine scavenge to the T-stat will be done when the engine is installed. I am a little concerned about interference during the engine installation. The clearance between the t-stat and the edge of the engine sheet metal looks pretty tight.
  |
|
|
|
| Cairo94507 |
Oct 1 2024, 07:23 AM
Post
#423
|
|
Michael Group: Members Posts: 10,297 Joined: 1-November 08 From: Auburn, CA Member No.: 9,712 Region Association: Northern California |
|
|
|
|
| Tom1394racing |
Oct 11 2024, 08:38 AM
Post
#424
|
|
Member Group: Members Posts: 439 Joined: 25-August 07 From: CT Member No.: 8,039 Region Association: North East States |
I have finished up the engine to chassis wiring. Just waiting on the MSD twin plug tach adapter and a new voltage regulator.
I listened to the sage advice from several 914 World members and installed a proper 14 pin male adapter on the engine wiring harness. I spliced the voltage regulator D+ wire into the alternator light connection on the 14 pin. 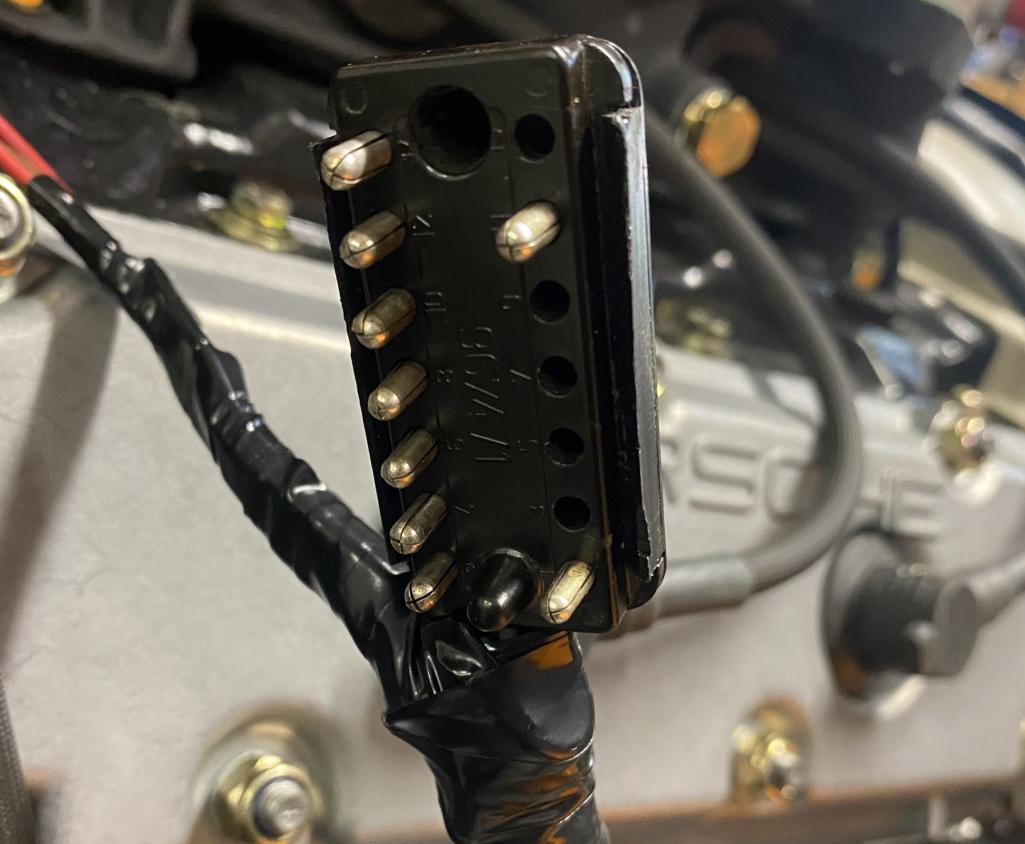 I also completed the wiring harness and installation of the twin MSD boxes and twin coils. 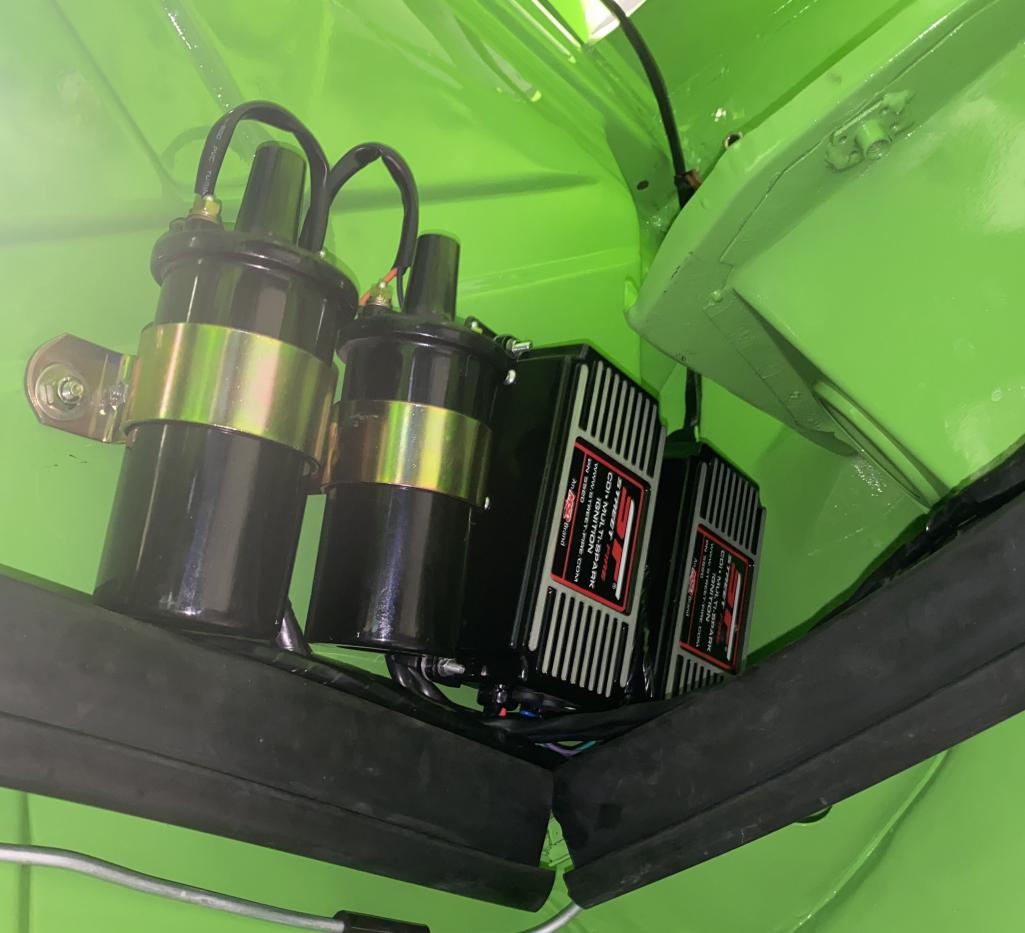 MSD switched power and tach wires in the engine compartment and on the engine. 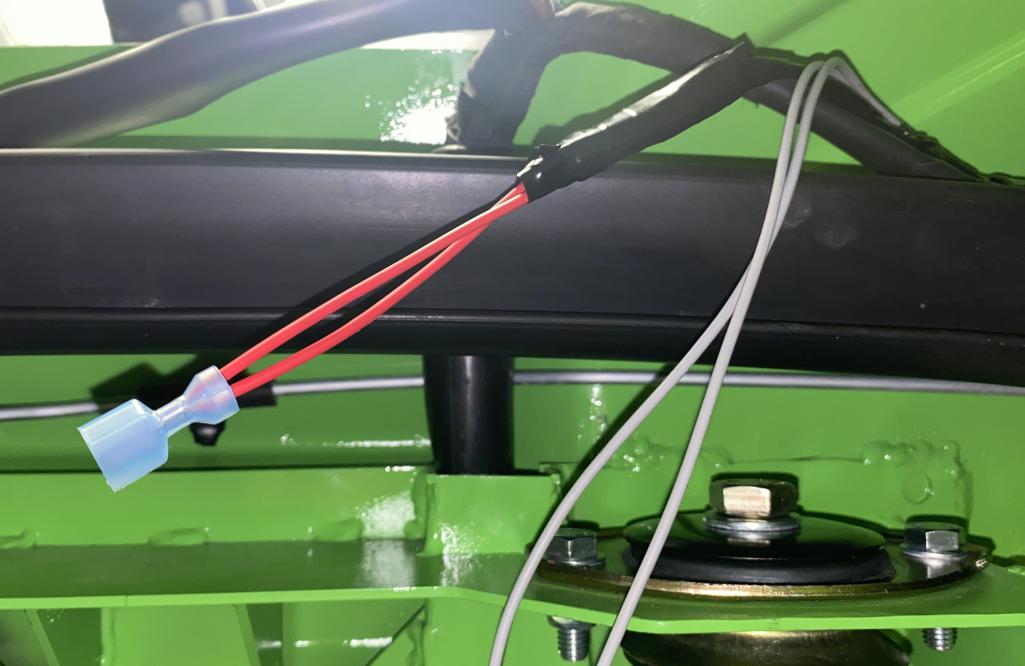 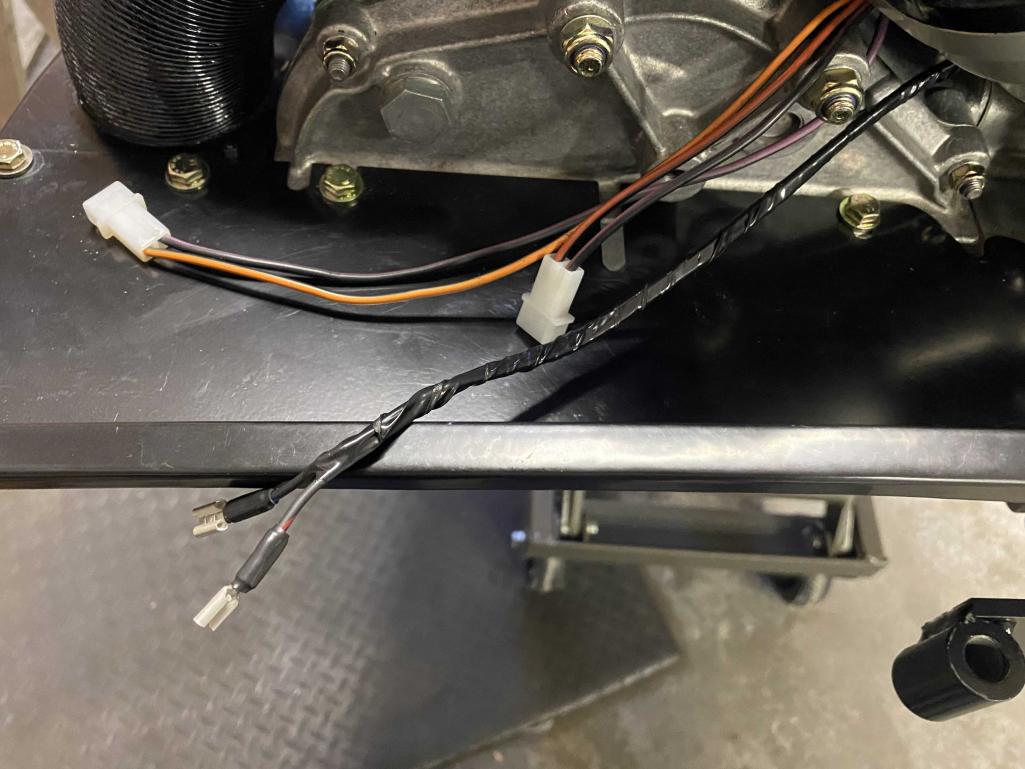 I had to lengthen the chassis harness grounds in the engine compartment to get the 14 pin in the best location to mate to the engine harness. I plan to mount the voltage regulator in the location indicted by the blue arrow. 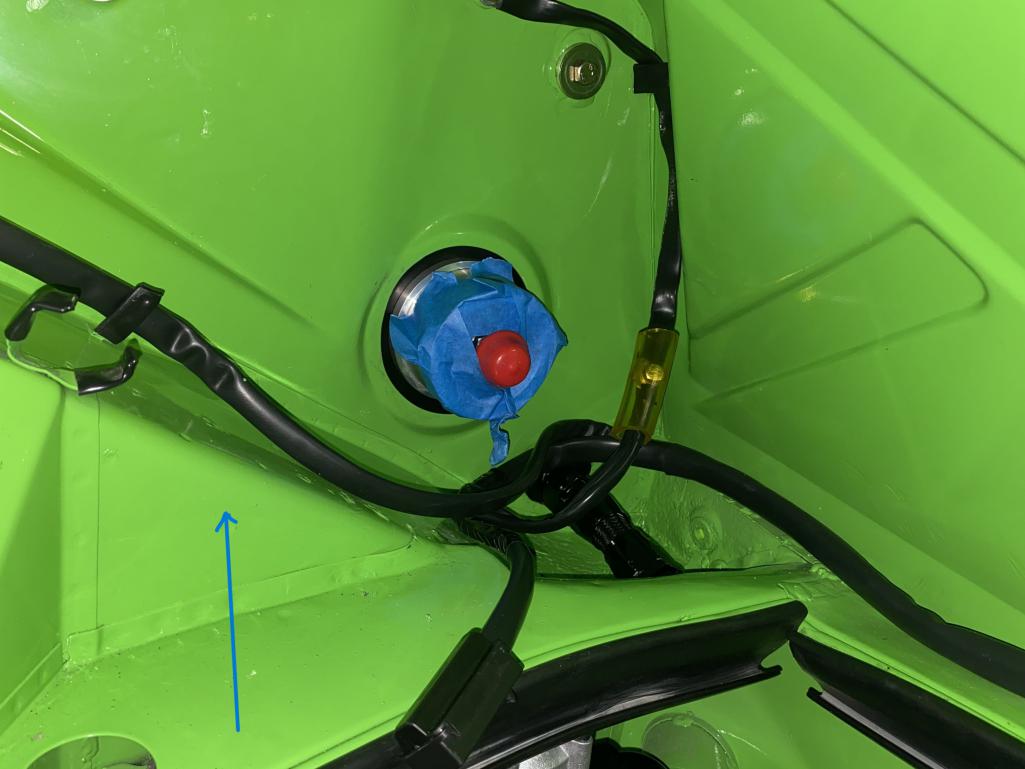 Next up I will install the CV's and axles on the trailing arms. After that the engine goes in. Once the engine goes in my plan us to: 1. Run the fuel system, check for leaks and adjust the fuel pressure. 2. Turn the engine over w/o ignition and build oil pressure and check the engine for leaks. 3. Fire the engine, run for 20 min check the battery for charging. |
|
|
|
| Tom1394racing |
Oct 14 2024, 05:39 AM
Post
#425
|
|
Member Group: Members Posts: 439 Joined: 25-August 07 From: CT Member No.: 8,039 Region Association: North East States |
A few questions before I start the engine install.
http://www.914world.com/bbs2/index.php?showtopic=372142 |
|
|
|
| Tom1394racing |
Oct 18 2024, 07:02 AM
Post
#426
|
|
Member Group: Members Posts: 439 Joined: 25-August 07 From: CT Member No.: 8,039 Region Association: North East States |
I completed the engine install yesterday using the suggestions given here:
http://www.914world.com/bbs2/index.php?showtopic=372142 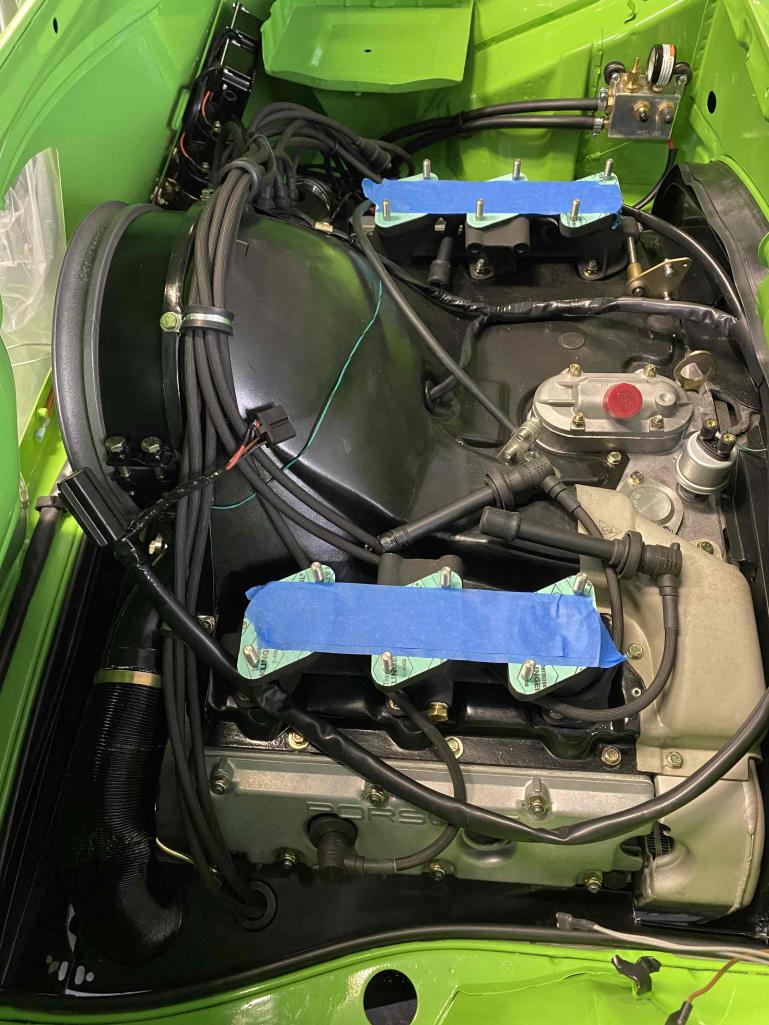 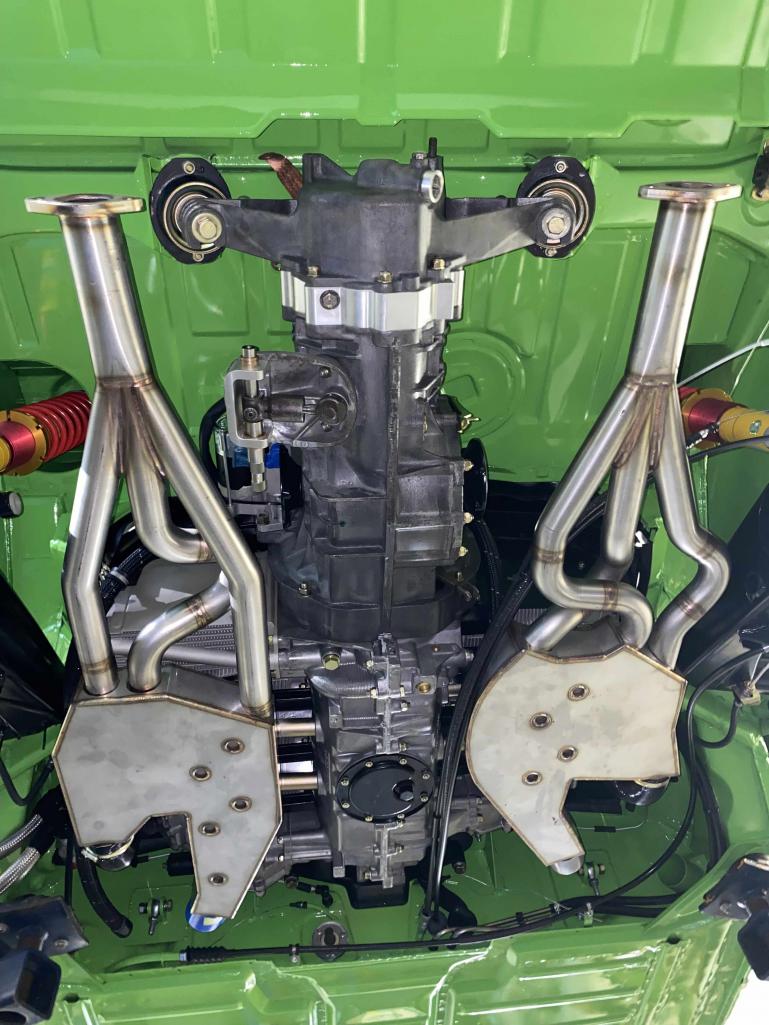 |
|
|
|
| morehills |
Oct 18 2024, 07:17 AM
Post
#427
|
|
Member Group: Members Posts: 98 Joined: 2-March 23 From: Great Barrington, MA Member No.: 27,202 Region Association: North East States |
Beautiful. Make sure you give us Ytube link of it coming to life Tom.
|
|
|
|
| Bullethead |
Oct 18 2024, 12:04 PM
Post
#428
|
|
Oil Cooled heart Group: Members Posts: 914 Joined: 24-June 10 From: South Florida Member No.: 11,875 Region Association: South East States |
(IMG:style_emoticons/default/smilie_pokal.gif) (IMG:style_emoticons/default/smilie_pokal.gif) (IMG:style_emoticons/default/smilie_pokal.gif) Man, this is looking good!
|
|
|
|
| Tom1394racing |
Oct 22 2024, 07:12 PM
Post
#429
|
|
Member Group: Members Posts: 439 Joined: 25-August 07 From: CT Member No.: 8,039 Region Association: North East States |
I have been working on completing some of the plumbing connections to the engine.
First were the connections from the engine to the T-stat and to the oil tank. 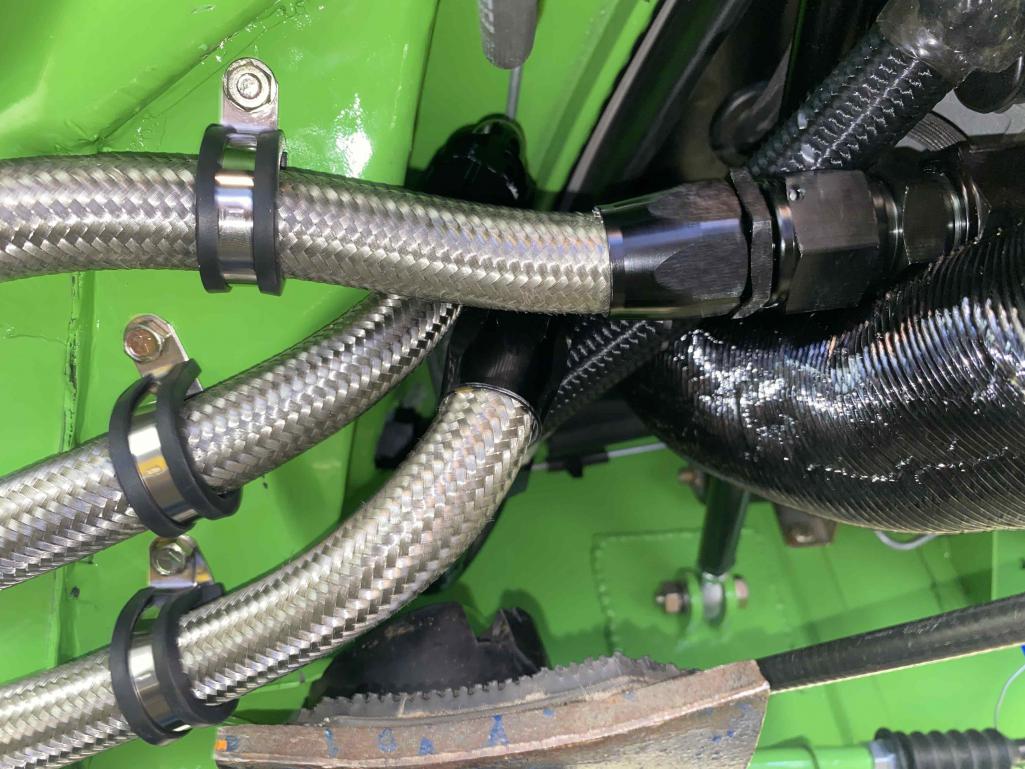 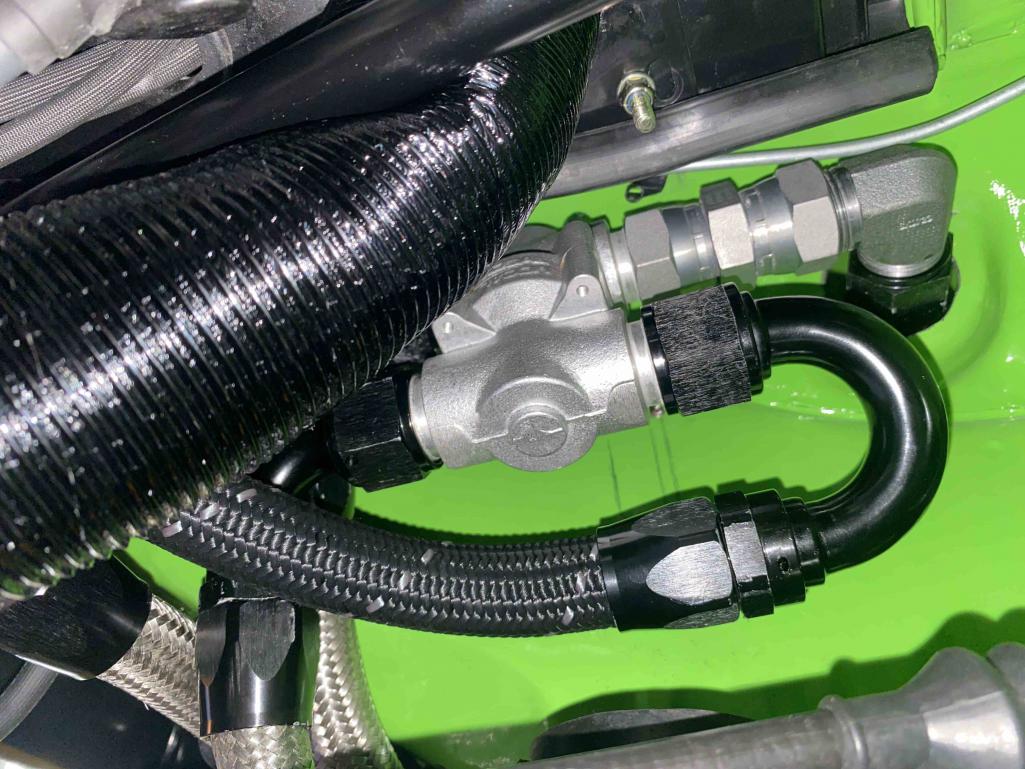 Not real happy with the heat exchanger hose I used. It tore and crushed too easily. I'll have to replace it. I'll need an oil filter and a new battery and then I can crank the engine w/o spark to check for oil pressure and leaks. I installed the carbs and made the fuel line connections from the carbs to the pressure regulator. 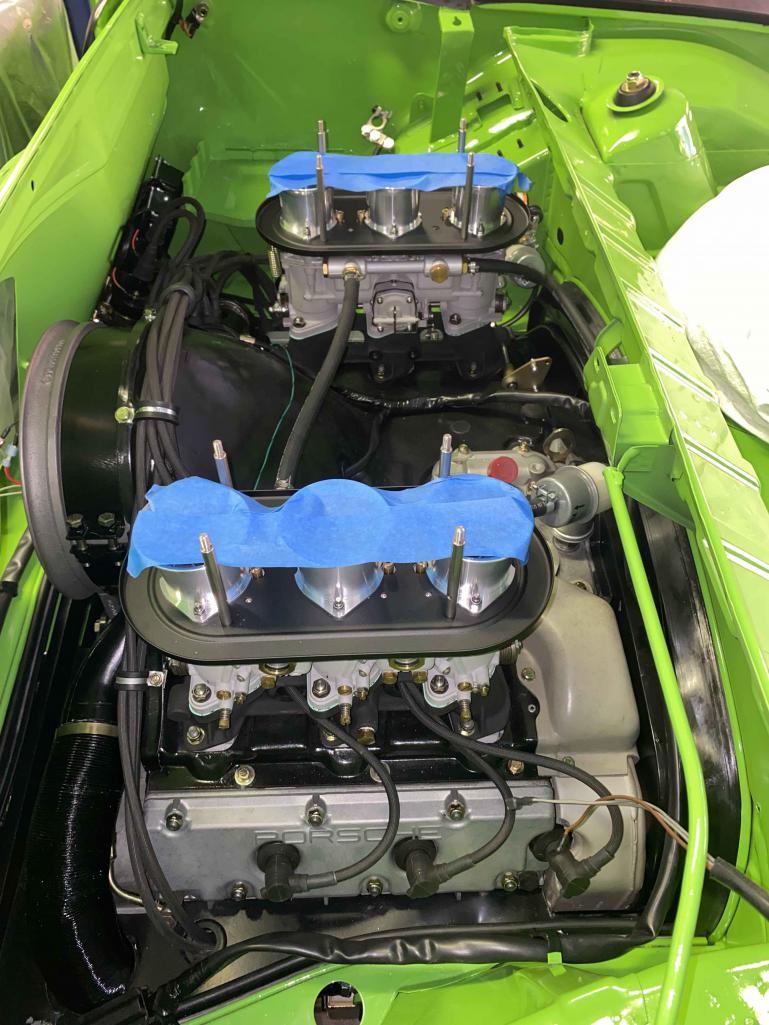 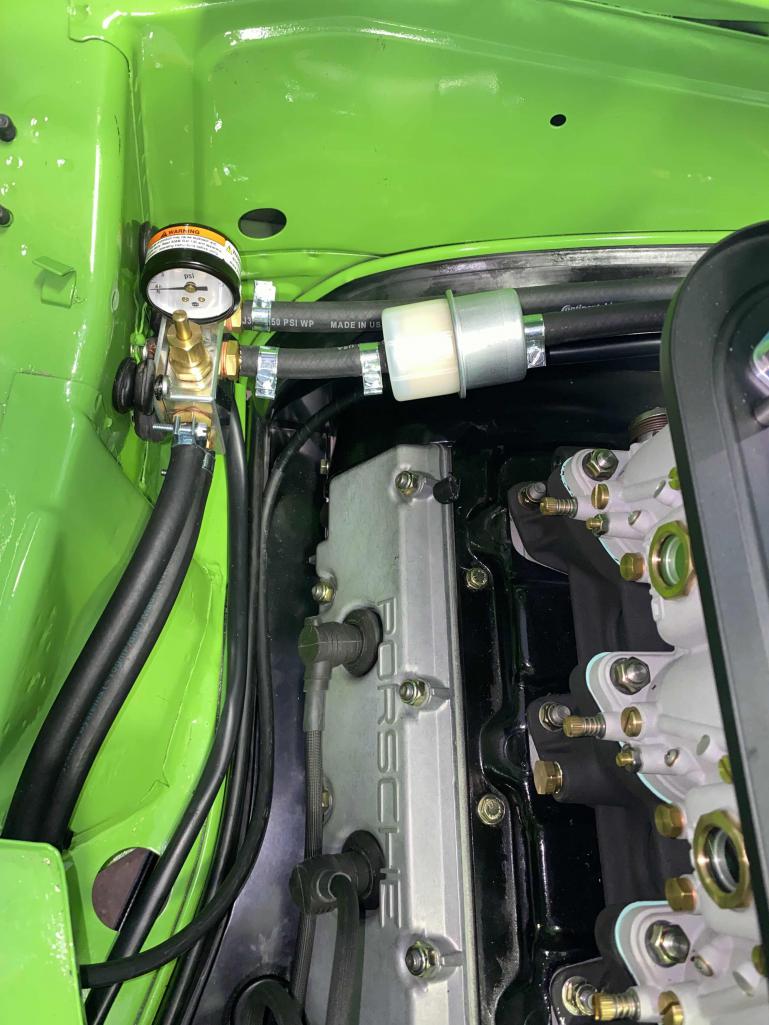 Ready to add some fuel to the tank, run the pump, check for leaks and adjust the fuel pressure. I also installed the chassis to trailing arm mount link bars. 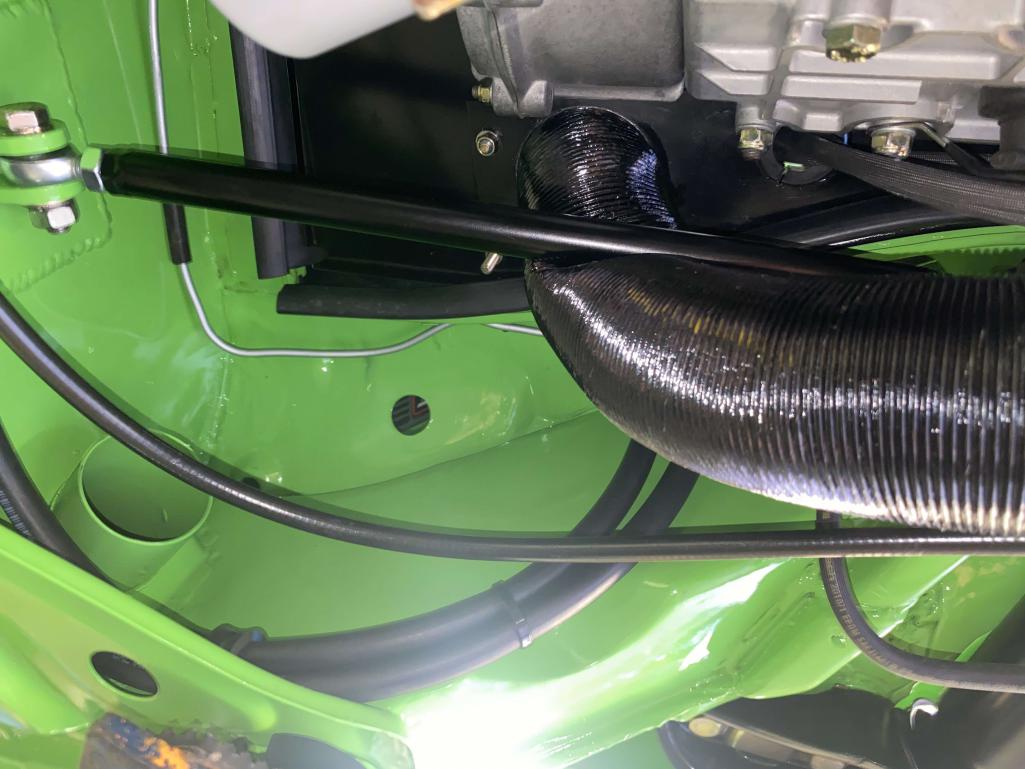 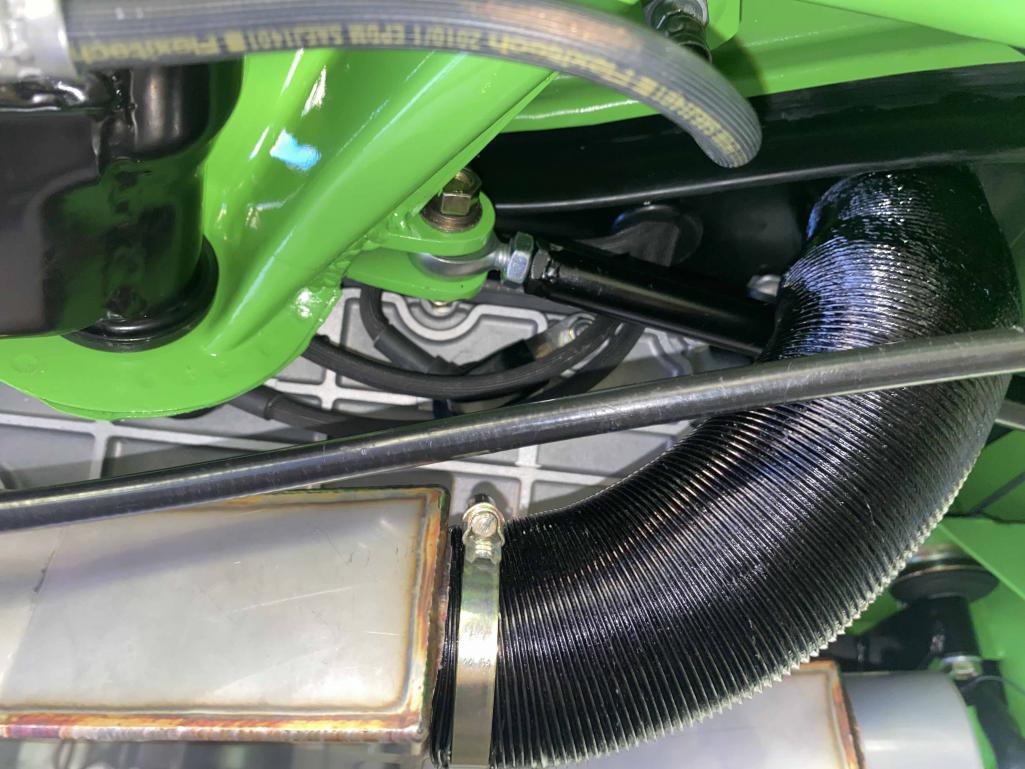 The heater hose had to "bend" around the around the link bars. |
|
|
|
| mepstein |
Oct 22 2024, 07:54 PM
Post
#430
|
|
914-6 GT in waiting Group: Members Posts: 19,843 Joined: 19-September 09 From: Landenberg, PA/Wilmington, DE Member No.: 10,825 Region Association: MidAtlantic Region |
What about using the pink colored heater hose. That's what traditionally is used in that location. I think it will hold up a lot better than the aluminum.
|
|
|
|
| Tom1394racing |
Oct 23 2024, 05:23 AM
Post
#431
|
|
Member Group: Members Posts: 439 Joined: 25-August 07 From: CT Member No.: 8,039 Region Association: North East States |
QUOTE(mepstein @ Oct 22 2024, 09:54 PM)  What about using the pink colored heater hose. That's what traditionally is used in that location. I think it will hold up a lot better than the aluminum. Yes, Mark, my thoughts exactly. I wouldn’t call the color pink for the hoses that run from the engine heater ducts into the heat exchangers. It was more of a tan color wasn’t it? Anyway, I’ll be searching for a source to replace those aluminum hoses. |
|
|
|
| mepstein |
Oct 23 2024, 07:56 AM
Post
#432
|
|
914-6 GT in waiting Group: Members Posts: 19,843 Joined: 19-September 09 From: Landenberg, PA/Wilmington, DE Member No.: 10,825 Region Association: MidAtlantic Region |
QUOTE(Tom1394racing @ Oct 23 2024, 07:23 AM) QUOTE(mepstein @ Oct 22 2024, 09:54 PM) What about using the pink colored heater hose. That's what traditionally is used in that location. I think it will hold up a lot better than the aluminum. Yes, Mark, my thoughts exactly. I wouldn’t call the color pink for the hoses that run from the engine heater ducts into the heat exchangers. It was more of a tan color wasn’t it? Anyway, I’ll be searching for a source to replace those aluminum hoses. Pink, tan, salmon. Idk. My wife calls me colorblind. They have a metal coil and should work better in that location. |
|
|
|
| rgalla9146 |
Oct 23 2024, 08:23 AM
Post
#433
|
|
Advanced Member Group: Members Posts: 4,735 Joined: 23-November 05 From: Paramus NJ Member No.: 5,176 Region Association: None |
The HE outlet to the body should be orange.
The connection from fan housing to HE should be black/grey over aluminum Attached thumbnail(s) 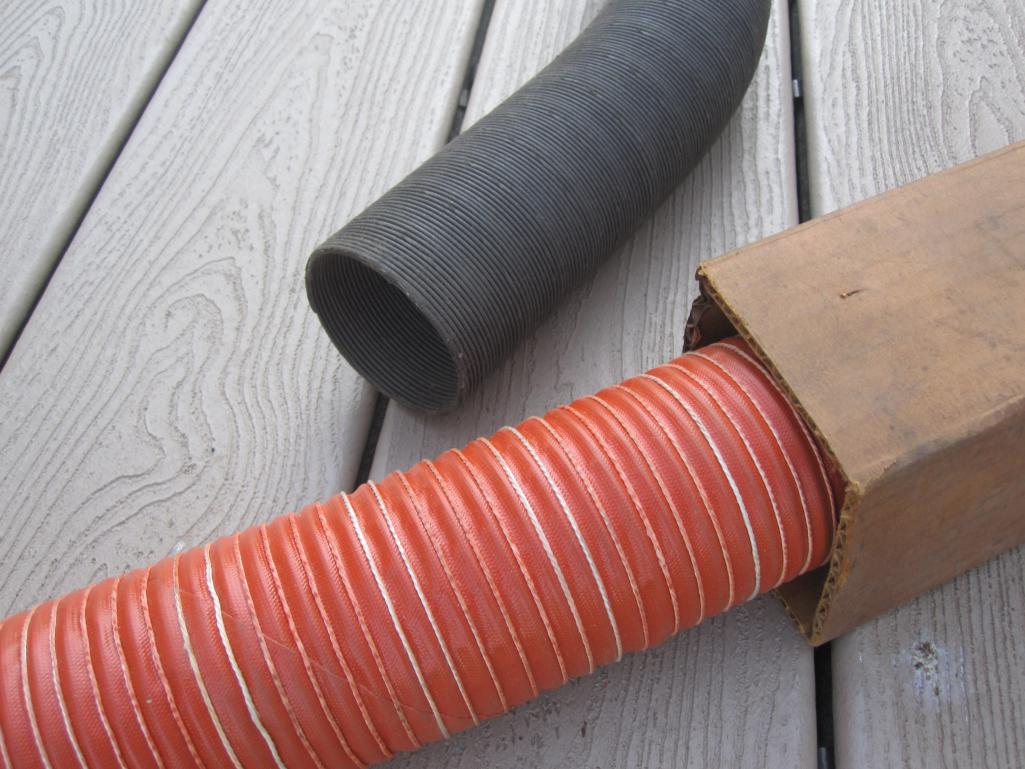
|
|
|
|
| Tom1394racing |
Oct 23 2024, 10:06 AM
Post
#434
|
|
Member Group: Members Posts: 439 Joined: 25-August 07 From: CT Member No.: 8,039 Region Association: North East States |
QUOTE(rgalla9146 @ Oct 23 2024, 10:23 AM) The HE outlet to the body should be orange. The connection from fan housing to HE should be black/grey over aluminum Thanks guys...I just ordered both. |
|
|
|
| Tom1394racing |
Oct 29 2024, 05:53 AM
Post
#435
|
|
Member Group: Members Posts: 439 Joined: 25-August 07 From: CT Member No.: 8,039 Region Association: North East States |
Most recent progress...Installed the speedo, clutch, gearbox and accelerator cables and linkages. Did a first pass at adjusting the clutch and accelerator cable/linkages and neatened up the cables. Good news...No interference between the Tangerine shift rod and Ben's heat exchangers with the Mad Dog bulkhead motor mount.
Next up will be the shifter adjustment. 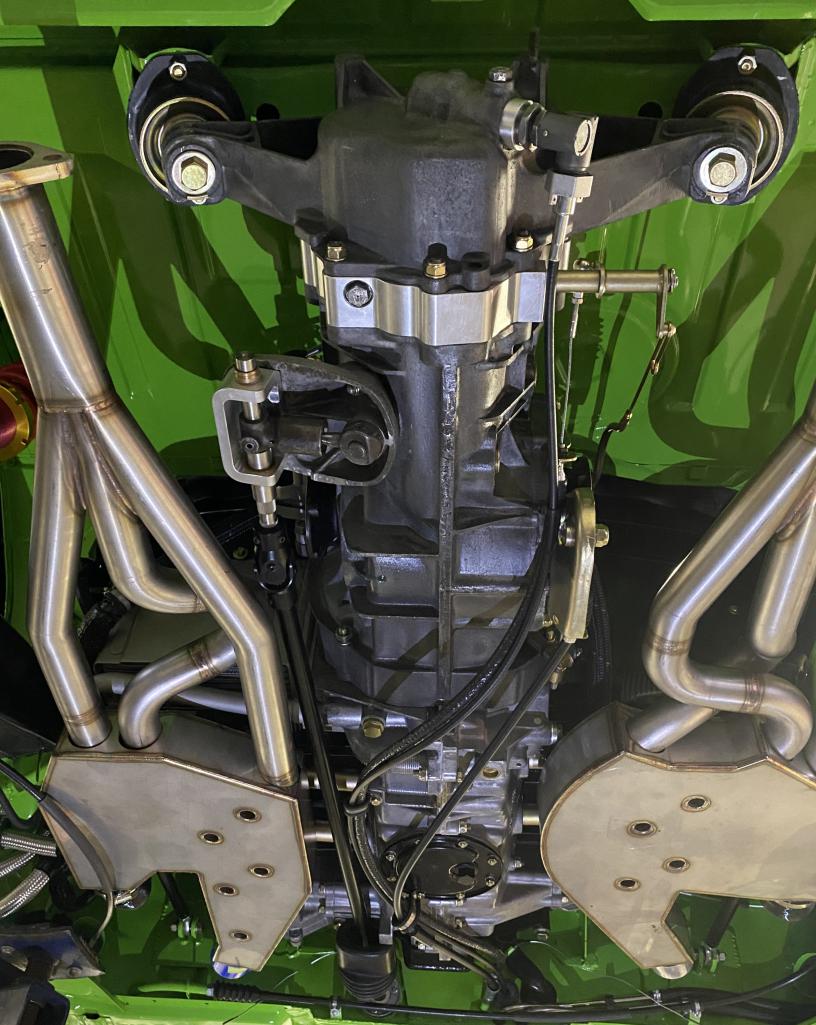 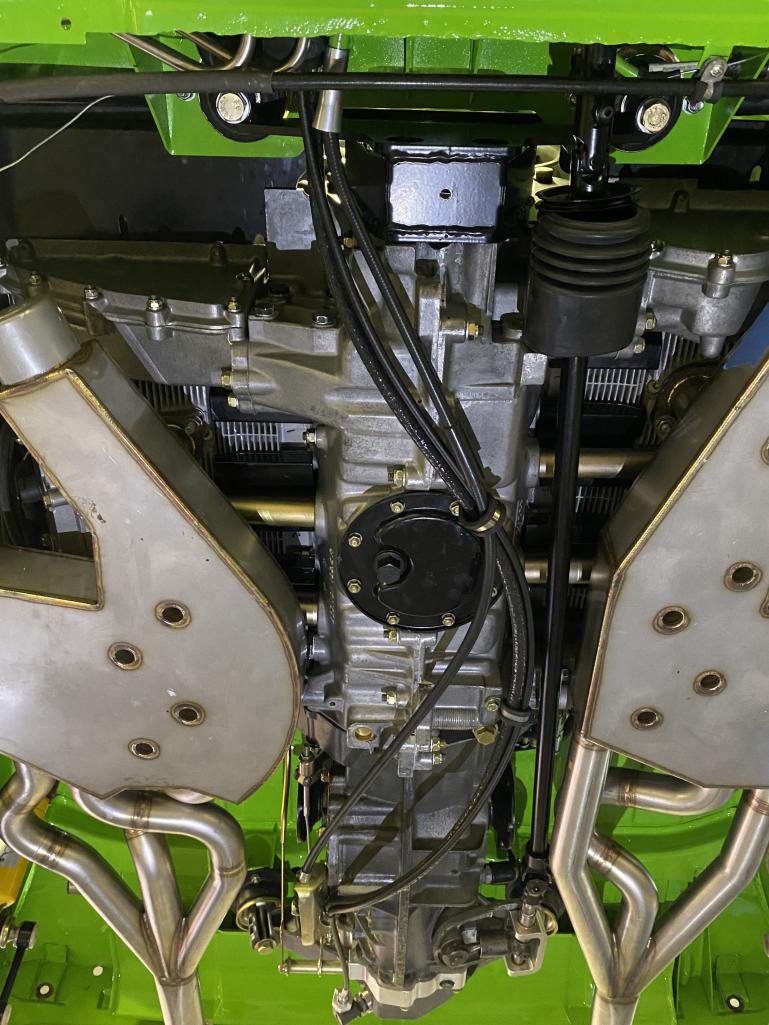 |
|
|
|
| Tom1394racing |
Nov 5 2024, 03:21 PM
Post
#436
|
|
Member Group: Members Posts: 439 Joined: 25-August 07 From: CT Member No.: 8,039 Region Association: North East States |
More progress. Made a first pass at the shifter adjustment. I can get all (6) gears but it is still a bit balky. Needs some fine tuning on the side-to-side location.
I installed the CV/Axle assemblies. A little finicky especially doing it after the engine has been installed. Got lots of good suggestions from members here: http://www.914world.com/bbs2/index.php?sho...=372298&hl= 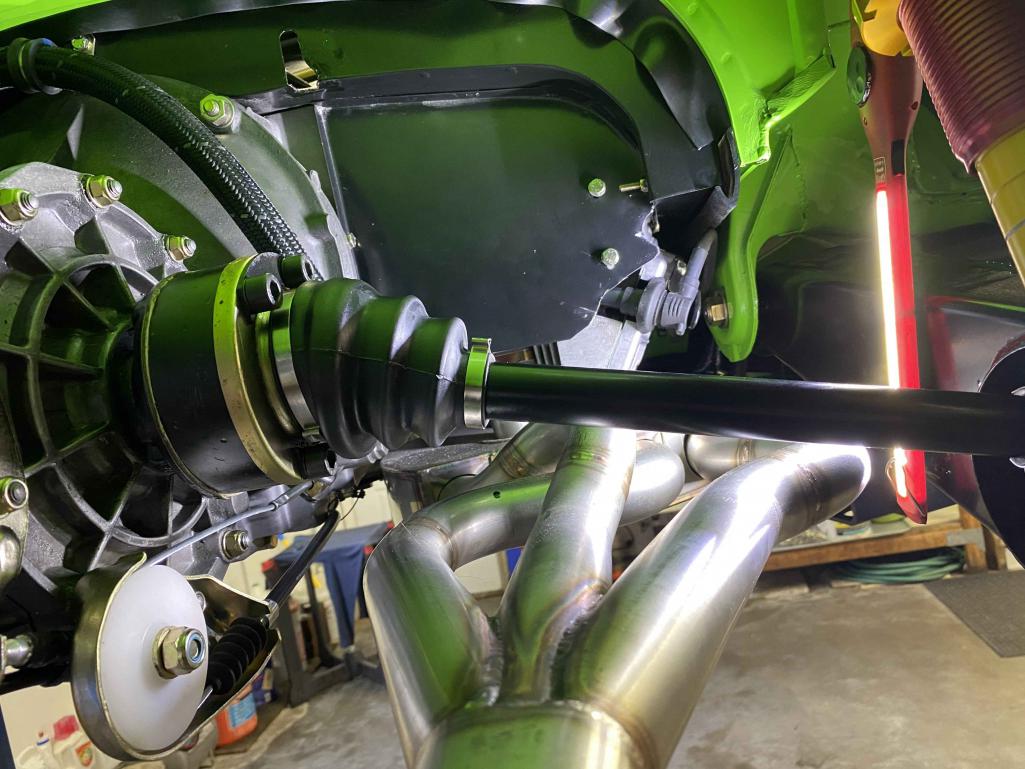 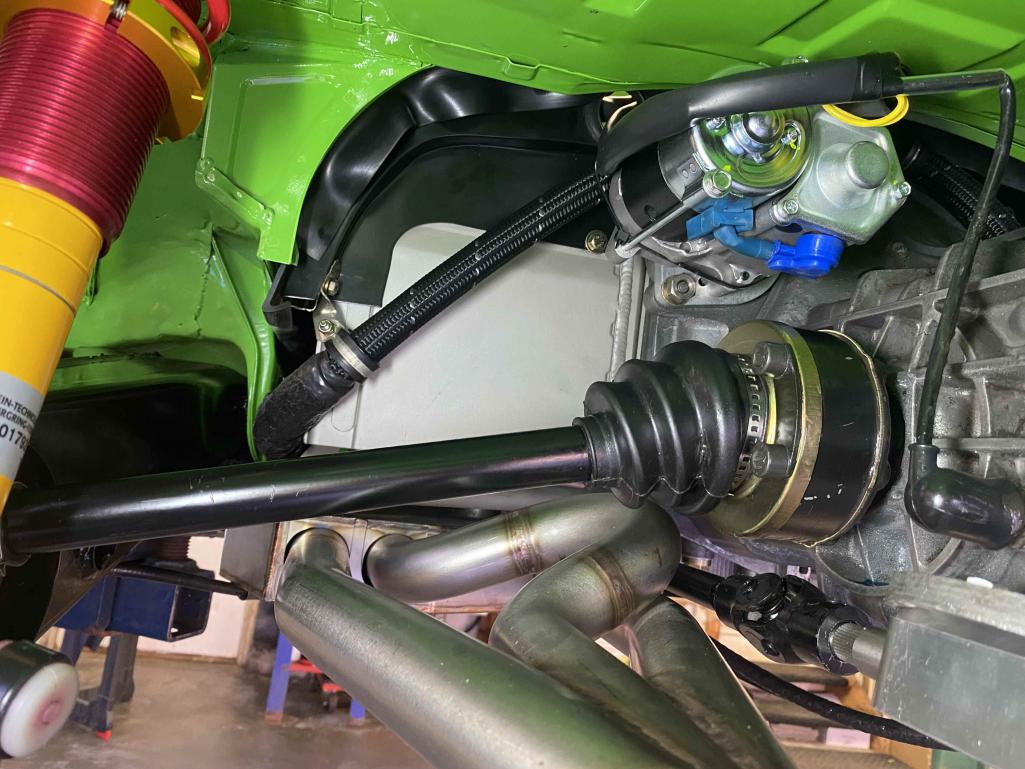 I ran the fuel system and after fixing some small leaks, I attempted to adjust the fuel pressure. Pressure was running much too high and adjusting the PMO regulator had no impact. I had to lift the fuel tank up out of it's home in the front trunk to discover that the return line was kinked around the sway bar. I re-routed it and reinstalled the tank. This eliminated the restriction and allowed me to set the regulator to 3.5 PSI fuel pressure. Currently waiting on a new Interstate AGM battery so I can crank the engine over. |
|
|
|
| Tom1394racing |
Nov 6 2024, 07:09 PM
Post
#437
|
|
Member Group: Members Posts: 439 Joined: 25-August 07 From: CT Member No.: 8,039 Region Association: North East States |
So I ran into a problem today. Cranked the engine over for 30 seconds twice (with no power to the MSD or fuel pumps) to build oil pressure. Checked for leaks and found an oil puddle on the garage floor. The source seems to be the new CSF engine oil cooler.
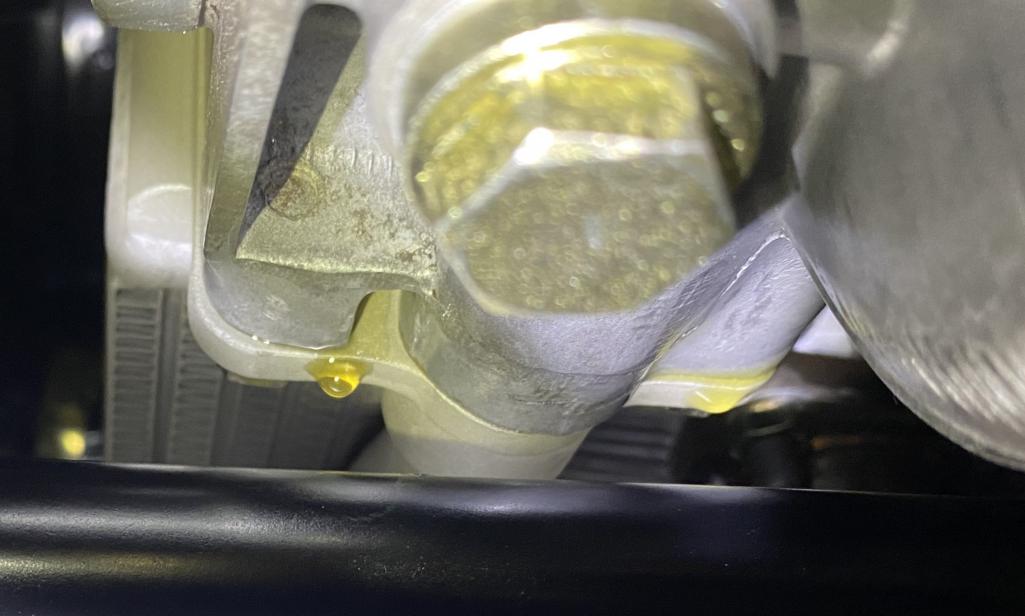 I did check the cooler internals for leaks before installation and found no problems. With the engine cranking stone cold, there should be no flow through the cooler internals. The only oil flow is from the tank through the large tube on the bottom of the cooler to the engine. That seems to be the source of the leak. So perhaps I forgot to install the rubber seal between the case and the cooler or maybe there is a problem with the cooler? At any rate, it seems that I will have to remove and check the cooler before moving forward. On a 911 this is not too difficult. I have changed coolers several times with the engine in the car. On the 914-6, it looks like the LHS heat exchanger needs to come off to remove the cooler with the engine in the car. Any suggestions or comments would be appreciated. |
|
|
|
| mepstein |
Nov 6 2024, 08:22 PM
Post
#438
|
|
914-6 GT in waiting Group: Members Posts: 19,843 Joined: 19-September 09 From: Landenberg, PA/Wilmington, DE Member No.: 10,825 Region Association: MidAtlantic Region |
We had a defective CSF cooler. Had to ship the car back to us and then ship back to the customer. CFS warrantied the cooler but we ate $2k in shipping.
|
|
|
|
| troth |
Nov 6 2024, 08:53 PM
Post
#439
|
|
Member Group: Members Posts: 160 Joined: 17-August 16 From: CT/WA Member No.: 20,305 Region Association: None |
QUOTE(mepstein @ Nov 6 2024, 10:22 PM) We had a defective CSF cooler. Had to ship the car back to us and then ship back to the customer. CFS warrantied the cooler but we ate $2k in shipping. Geez that is not cool for how much those coolers cost. I just bought one as well. Sounds like it's worth leak testing before install. |
|
|
|
| Tom1394racing |
Nov 7 2024, 04:28 AM
Post
#440
|
|
Member Group: Members Posts: 439 Joined: 25-August 07 From: CT Member No.: 8,039 Region Association: North East States |
QUOTE(mepstein @ Nov 6 2024, 09:22 PM) We had a defective CSF cooler. Had to ship the car back to us and then ship back to the customer. CFS warrantied the cooler but we ate $2k in shipping. Mark Do you know if the replacement cooler from CSF was good and where the original leaked from? Any knowledge or experience replacing the cooler with the engine in the car? |
|
|
|
|
2 User(s) are reading this topic (2 Guests and 0 Anonymous Users)
0 Members:

|
Lo-Fi Version | Time is now: 19th April 2025 - 01:35 PM |
Invision Power Board
v9.1.4 © 2025 IPS, Inc.