|
|

|
Porsche, and the Porsche crest are registered trademarks of Dr. Ing. h.c. F. Porsche AG.
This site is not affiliated with Porsche in any way. Its only purpose is to provide an online forum for car enthusiasts. All other trademarks are property of their respective owners. |
|
|
  |
| tygaboy |
 Feb 16 2024, 07:35 PM Feb 16 2024, 07:35 PM
Post
#901
|
|
914 Guru      Group: Members Posts: 5,451 Joined: 6-October 15 From: Petaluma, CA Member No.: 19,241 Region Association: Northern California 
|
Pushing this concept ^^^ one step further, how about including the small part that is normally attached to the body and eliminate that panel gap. (IMG:style_emoticons/default/idea.gif) @Montreal914 You're talking about that outboard element of the engine lid? I made them removable, that might work. Interesting/great idea I may shamelessly steal... ! (IMG:style_emoticons/default/shades.gif) |
| Montreal914 |
 Feb 16 2024, 09:49 PM Feb 16 2024, 09:49 PM
Post
#902
|
|
Senior Member    Group: Members Posts: 1,700 Joined: 8-August 10 From: Claremont, CA Member No.: 12,023 Region Association: Southern California 
|
Pushing this concept ^^^ one step further, how about including the small part that is normally attached to the body and eliminate that panel gap. (IMG:style_emoticons/default/idea.gif) @Montreal914 You're talking about that outboard element of the engine lid? I made them removable, that might work. Interesting/great idea I may shamelessly steal... ! (IMG:style_emoticons/default/shades.gif) Right! (IMG:style_emoticons/default/smile.gif) If you plan on something like Retroracer is suggesting, might as well combine with the outer section. 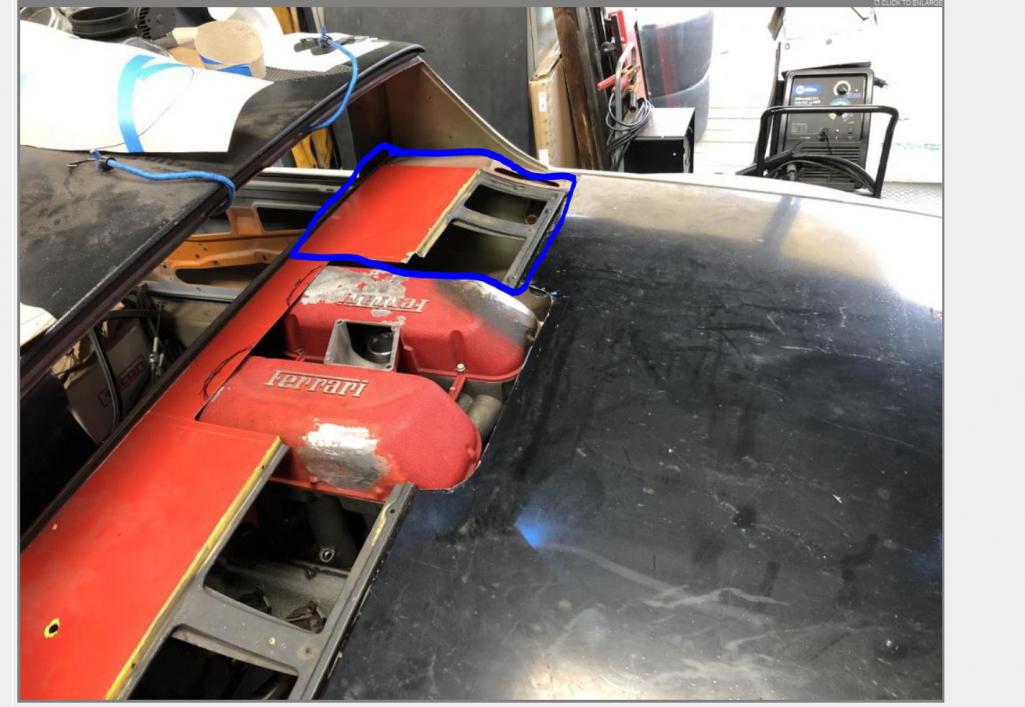 |
| campbellcj |
 Feb 17 2024, 07:18 AM Feb 17 2024, 07:18 AM
Post
#903
|
|
I can't Re Member     Group: Members Posts: 4,588 Joined: 26-December 02 From: Agoura, CA Member No.: 21 Region Association: Southern California 
|
I like the idea too - apples and oranges but FWIW I 'gutted' and made my GT-style lid fully removable years ago which removed weight and improved airflow in addition to improving engine access.
|
| tygaboy |
 Feb 17 2024, 09:56 AM Feb 17 2024, 09:56 AM
Post
#904
|
|
914 Guru      Group: Members Posts: 5,451 Joined: 6-October 15 From: Petaluma, CA Member No.: 19,241 Region Association: Northern California 
|
And for those who'd like a bit more detail and add'l info on the latest progress, this'll catch you up:
https://www.youtube.com/watch?v=XjOBg3ZwyDE |
| Chris914n6 |
 Feb 17 2024, 01:13 PM Feb 17 2024, 01:13 PM
Post
#905
|
|
Jackstands are my life.     Group: Members Posts: 3,413 Joined: 14-March 03 From: Las Vegas, NV Member No.: 431 Region Association: Southwest Region |
I'll save you a bunch of time.... no on the electronic actuators. It needs to be a quick change, slow will mess up the flow efficiency. It will likely activate dozens of times per mile. Also no on a solenoid as they are not meant to be 'held' and will overheat.
That vacuum canister is HUGE. The one on my Nissan does just a big butterfly and it's soup can sized. You will probably want 2 for the volume of both mechanisms. (IMG:http://www.914world.com/bbs2/uploads_offsite/live.staticflickr.com-431-1708197232.1.jpg) I think I would use the trunk torsen bar mounting points as a base point for the trunk wall jig as they will be on the backside of what you want to build. |
| tygaboy |
 Feb 23 2024, 05:30 PM Feb 23 2024, 05:30 PM
Post
#906
|
|
914 Guru      Group: Members Posts: 5,451 Joined: 6-October 15 From: Petaluma, CA Member No.: 19,241 Region Association: Northern California 
|
After a fair bit of tweaking to get turn downs to mate to the plenums at the target rotation, height and angle, everything is tacked in position, allowing a test fit of the throttle bodies. I couldn't be happier with how this is looking. (IMG:style_emoticons/default/wub.gif)
About all I could ask for would be mirror image throttle bodies to have total symmetry. But I think I can live with it! Attached thumbnail(s) 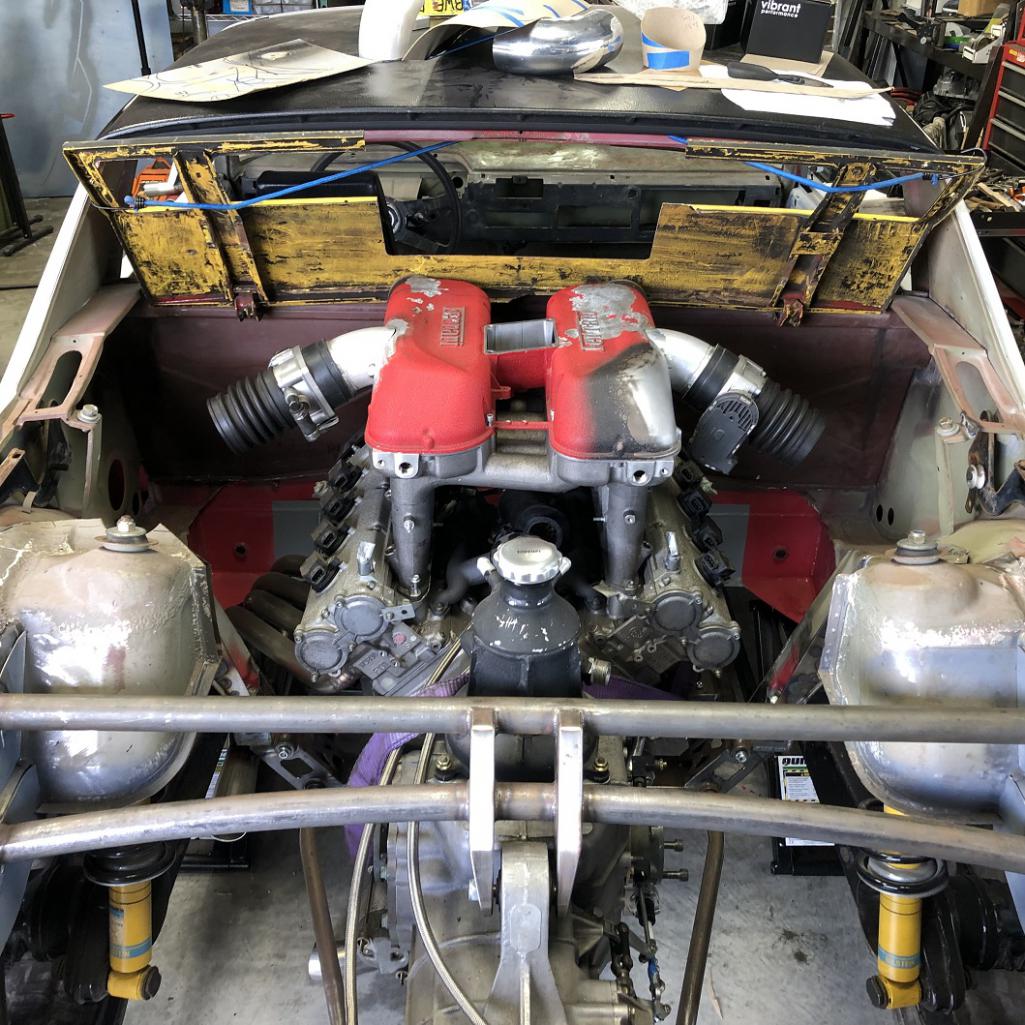 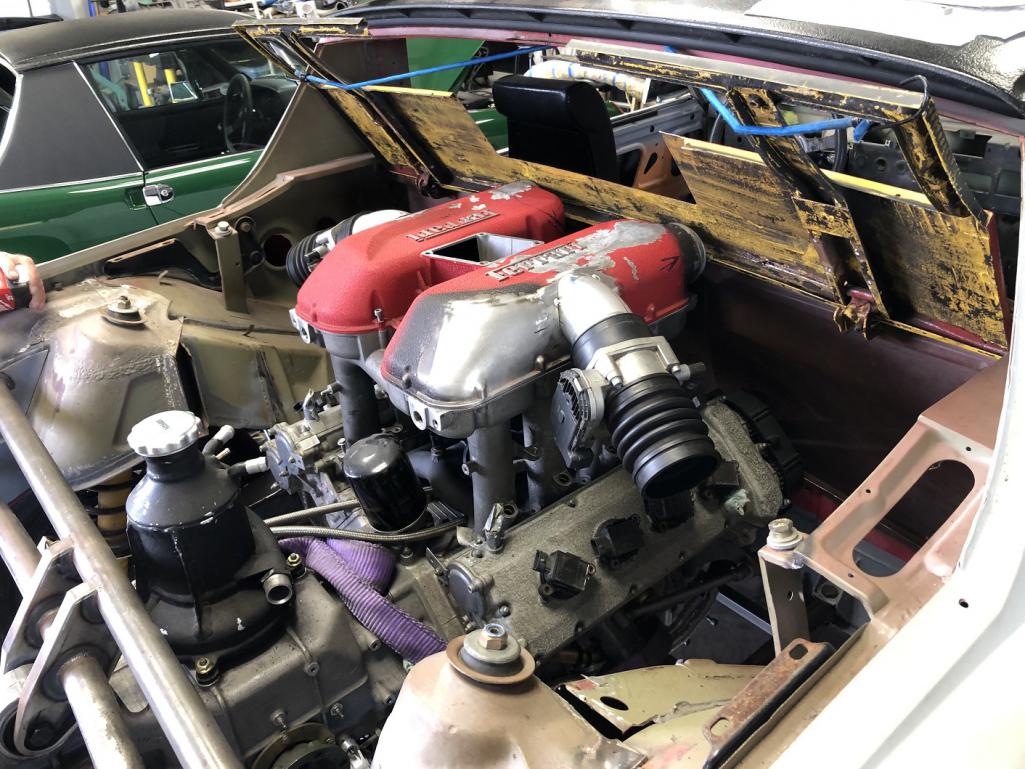
|
| tygaboy |
 Feb 23 2024, 05:31 PM Feb 23 2024, 05:31 PM
Post
#907
|
|
914 Guru      Group: Members Posts: 5,451 Joined: 6-October 15 From: Petaluma, CA Member No.: 19,241 Region Association: Northern California 
|
And with the notched trunk lid. It's coming together...
Attached thumbnail(s) 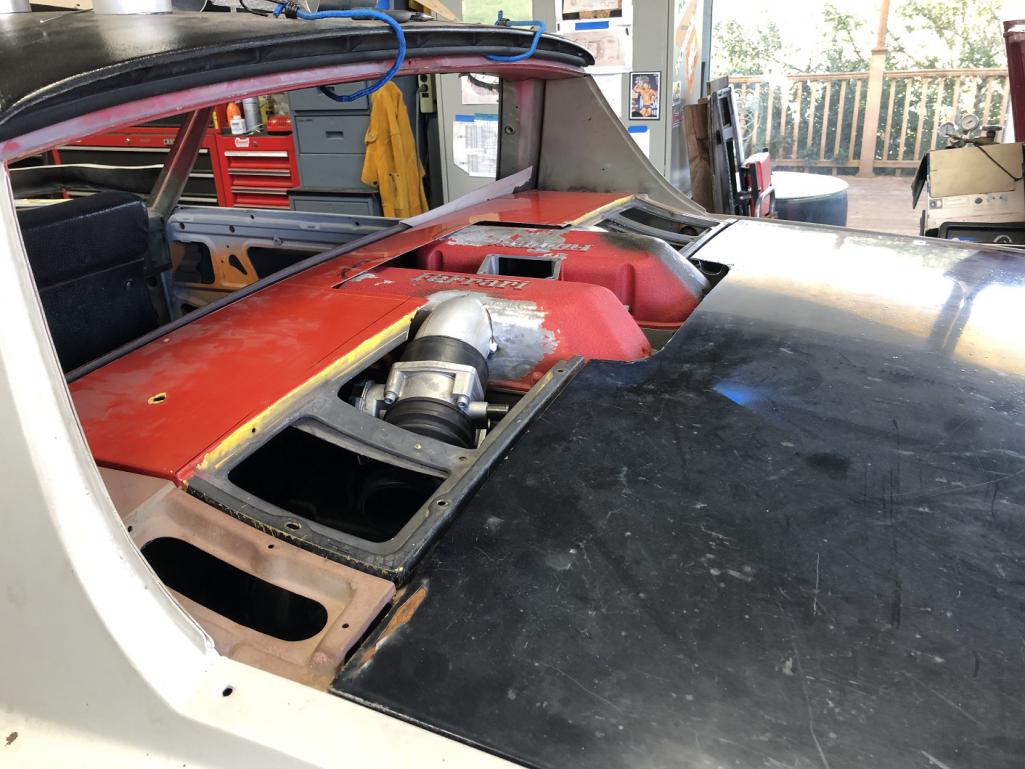 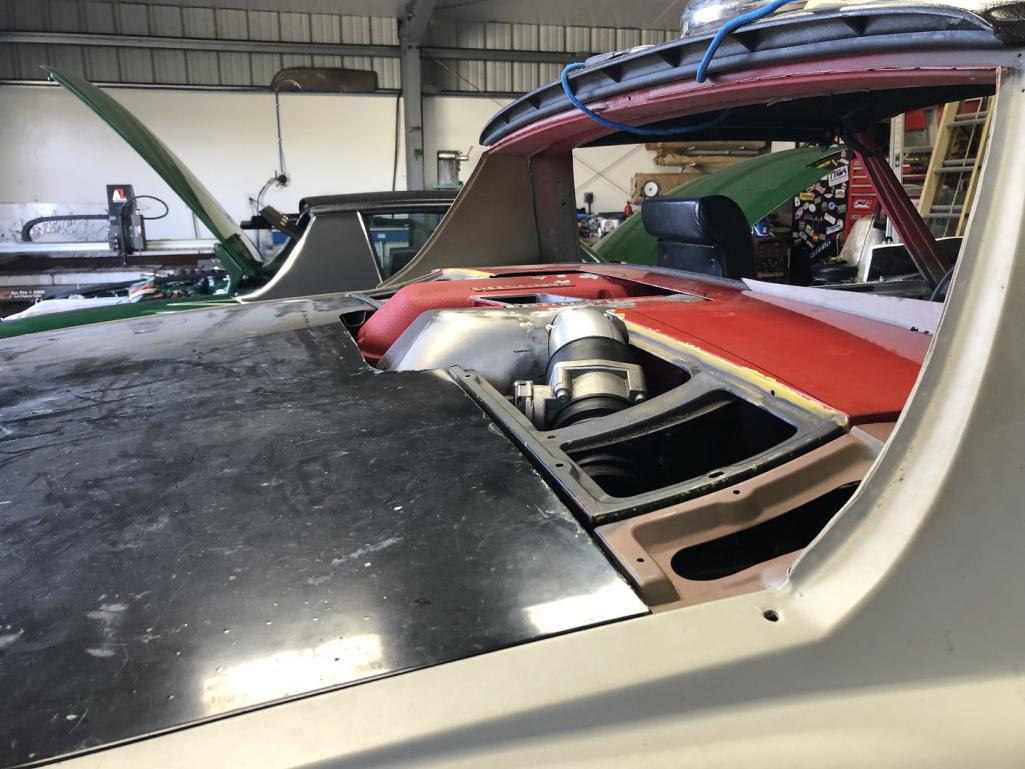
|
| Cairo94507 |
 Feb 23 2024, 05:59 PM Feb 23 2024, 05:59 PM
Post
#908
|
|
Michael           Group: Members Posts: 10,089 Joined: 1-November 08 From: Auburn, CA Member No.: 9,712 Region Association: Northern California 
|
That looks sweet; looking forward to seeing it in person tomorrow. (IMG:style_emoticons/default/beerchug.gif)
|
| r_towle |
 Feb 23 2024, 06:40 PM Feb 23 2024, 06:40 PM
Post
#909
|
|
Custom Member                Group: Members Posts: 24,645 Joined: 9-January 03 From: Taxachusetts Member No.: 124 Region Association: North East States 
|
Very cool style.
If you can manage to just show those two covers….a sweet detail. Looking forward to this project! |
| East coaster |
 Feb 23 2024, 07:29 PM Feb 23 2024, 07:29 PM
Post
#910
|
|
Senior Member    Group: Members Posts: 1,775 Joined: 28-March 03 From: Millville, NJ Member No.: 487 Region Association: None 
|
Nice!
|
| ClayPerrine |
 Feb 24 2024, 07:40 AM Feb 24 2024, 07:40 AM
Post
#911
|
|
Life's been good to me so far.....                Group: Admin Posts: 15,901 Joined: 11-September 03 From: Hurst, TX. Member No.: 1,143 Region Association: NineFourteenerVille 
|
The world's car community: "You can't put a Ferrari drivetrain in a cheap pink 70s Porsche chassis! That would be sacrilegious!"
Tygaboy: "Hold my beer..." (IMG:style_emoticons/default/happy11.gif) I just figured out how to solve the world's energy crisis. Hook a generator to Enzo Ferrari's body. Because the first time this thing drives down the road, he is going to start spinning in his grave at 20,000 RPM! (IMG:style_emoticons/default/lol-2.gif) Keep up the good work. I love what you are doing. |
| tygaboy |
 Feb 24 2024, 07:50 AM Feb 24 2024, 07:50 AM
Post
#912
|
|
914 Guru      Group: Members Posts: 5,451 Joined: 6-October 15 From: Petaluma, CA Member No.: 19,241 Region Association: Northern California 
|
|
| Shivers |
 Feb 24 2024, 11:56 AM Feb 24 2024, 11:56 AM
Post
#913
|
|
Senior Member     Group: Members Posts: 2,780 Joined: 19-October 20 From: La Quinta, CA Member No.: 24,781 Region Association: Southern California |
That looks nice
|
| roundtwo |
 Feb 24 2024, 12:12 PM Feb 24 2024, 12:12 PM
Post
#914
|
|
Member   Group: Members Posts: 311 Joined: 9-February 20 From: Petaluma, CA Member No.: 23,905 Region Association: Central California 
|
After a fair bit of tweaking to get turn downs to mate to the plenums at the target rotation, height and angle, everything is tacked in position, allowing a test fit of the throttle bodies. I couldn't be happier with how this is looking. (IMG:style_emoticons/default/wub.gif) About all I could ask for would be mirror image throttle bodies to have total symmetry. But I think I can live with it! Wow, great progress since Wednesday. Really cool to see and hear the about all the dynamics going on in the different parts of the intake. (IMG:style_emoticons/default/beerchug.gif) |
| tygaboy |
 Feb 25 2024, 03:29 PM Feb 25 2024, 03:29 PM
Post
#915
|
|
914 Guru      Group: Members Posts: 5,451 Joined: 6-October 15 From: Petaluma, CA Member No.: 19,241 Region Association: Northern California 
|
With the intake flipped 180, the engine lid opening needed updating. Still lots to work out but it looks way mo' betta with the entire length of the plenums exposed.
Attached thumbnail(s) 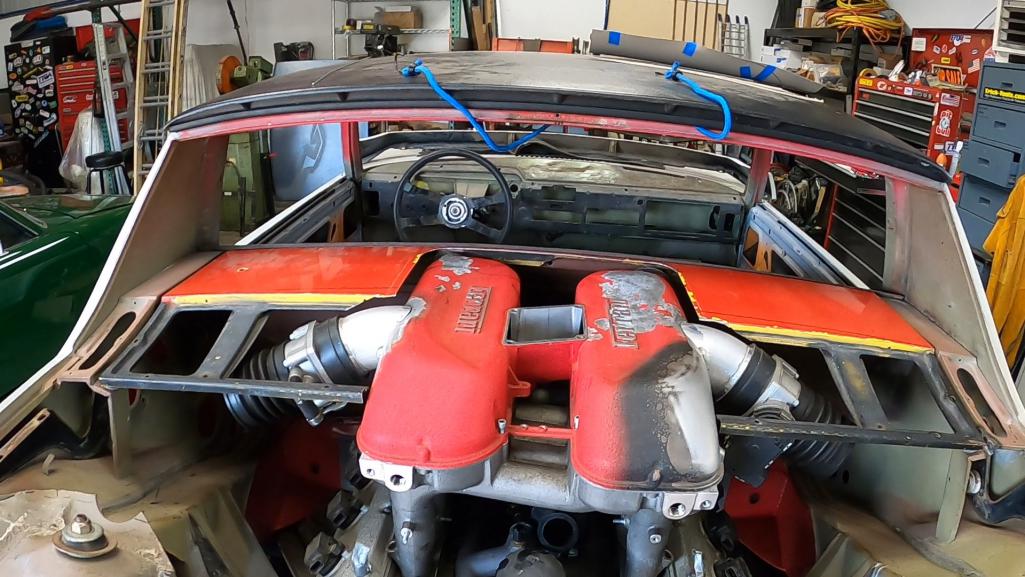 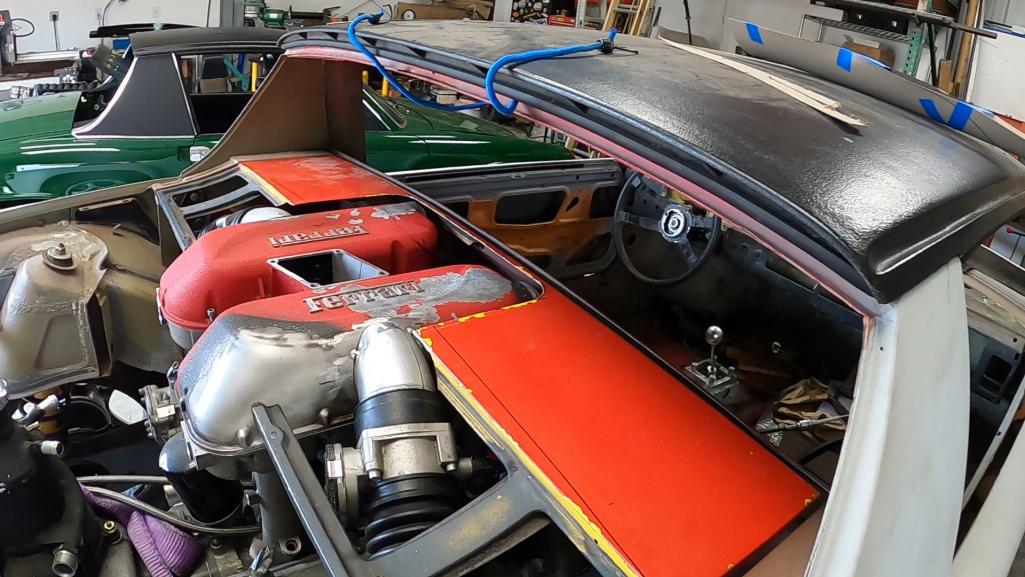 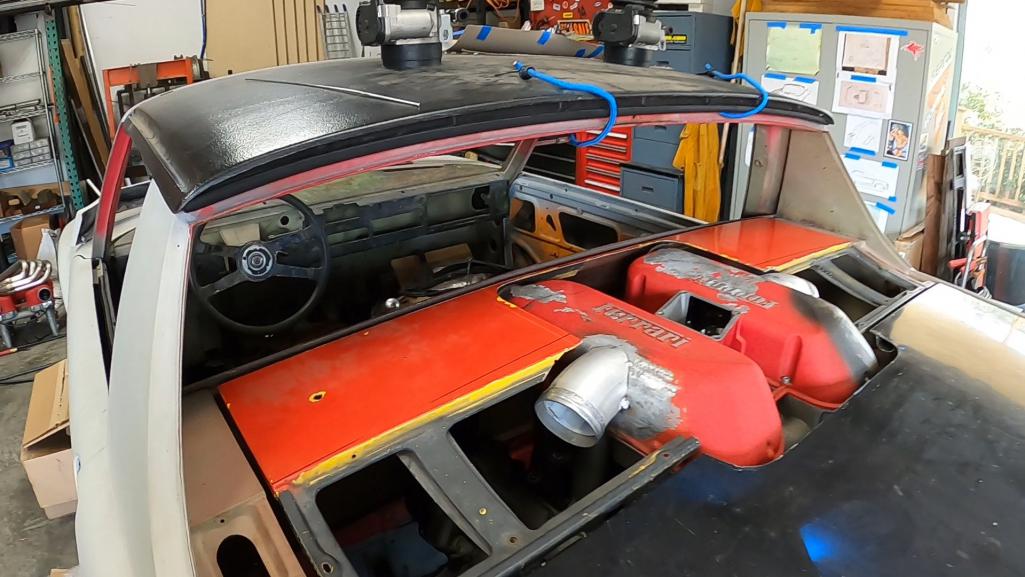
|
| tygaboy |
 Feb 25 2024, 07:00 PM Feb 25 2024, 07:00 PM
Post
#916
|
|
914 Guru      Group: Members Posts: 5,451 Joined: 6-October 15 From: Petaluma, CA Member No.: 19,241 Region Association: Northern California 
|
And with everything in position, I have this much clearance from the air/oil separater to a stowed targa top.
Attached thumbnail(s) 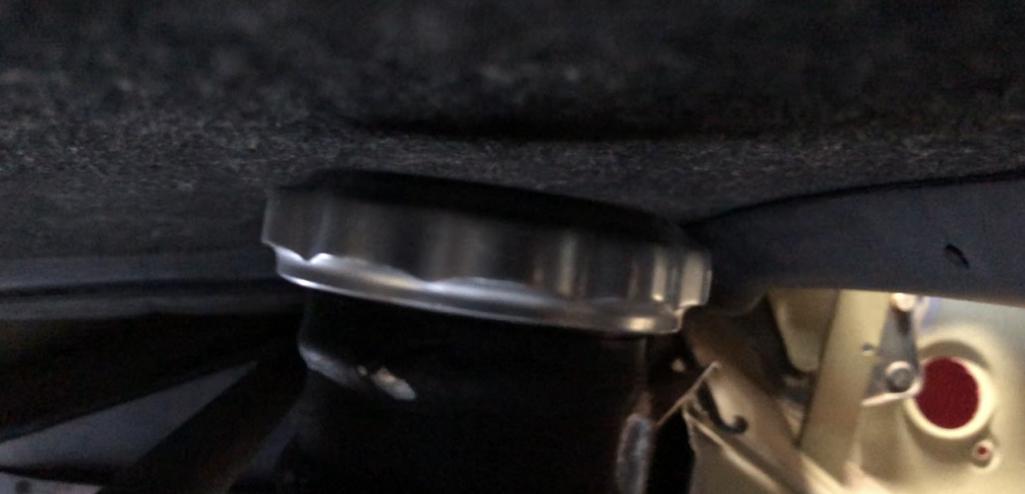
|
| East coaster |
 Feb 25 2024, 07:18 PM Feb 25 2024, 07:18 PM
Post
#917
|
|
Senior Member    Group: Members Posts: 1,775 Joined: 28-March 03 From: Millville, NJ Member No.: 487 Region Association: None 
|
Have you considered cutting the trunk a little further and making a piece to connect the rear halves of the engine cover (following the lines of the plenums). I’m not sure if you have room for that and still clear the targa top though? It would put stability back into the engine lid and would look pretty cool.
|
| technicalninja |
 Feb 25 2024, 08:01 PM Feb 25 2024, 08:01 PM
Post
#918
|
|
Advanced Member     Group: Members Posts: 2,003 Joined: 31-January 23 From: Granbury Texas Member No.: 27,135 Region Association: Southwest Region 
|
|
| ClayPerrine |
 Feb 26 2024, 06:46 AM Feb 26 2024, 06:46 AM
Post
#919
|
|
Life's been good to me so far.....                Group: Admin Posts: 15,901 Joined: 11-September 03 From: Hurst, TX. Member No.: 1,143 Region Association: NineFourteenerVille 
|
And with everything in position, I have this much clearance from the air/oil separater to a stowed targa top. Have you thought about the fact that with no trunk floor in the way, the headliner is going to get absolutely filthy with road grime every time you drive it with the top off? If it were me, I would cut about 10mm out of the neck to provide clearance so it doesn't rub the headliner. |
| tygaboy |
 Feb 26 2024, 08:56 AM Feb 26 2024, 08:56 AM
Post
#920
|
|
914 Guru      Group: Members Posts: 5,451 Joined: 6-October 15 From: Petaluma, CA Member No.: 19,241 Region Association: Northern California 
|
And with everything in position, I have this much clearance from the air/oil separater to a stowed targa top. OK, I just have to ask... Did you plan for this when you jigged up the subframe? Or, did you absolutely flat luck out???? @technicalninja - There was never a plan to stow the top. Totally got lucky. But I choose to believe it's more a fate and karma thing so I'm going with: It was meant to be. |
  |
3 User(s) are reading this topic (2 Guests and 0 Anonymous Users)
1 Members: Chuckbizkits

|
Lo-Fi Version | Time is now: 22nd November 2024 - 06:15 PM |
Invision Power Board
v9.1.4 © 2024 IPS, Inc.


