|
|

|
Porsche, and the Porsche crest are registered trademarks of Dr. Ing. h.c. F. Porsche AG.
This site is not affiliated with Porsche in any way. Its only purpose is to provide an online forum for car enthusiasts. All other trademarks are property of their respective owners. |
|
|
  |
| East coaster |
 Jan 23 2024, 07:29 PM Jan 23 2024, 07:29 PM
Post
#261
|
|
Senior Member    Group: Members Posts: 1,828 Joined: 28-March 03 From: Millville, NJ Member No.: 487 Region Association: None 
|
|
| East coaster |
 Jan 23 2024, 07:36 PM Jan 23 2024, 07:36 PM
Post
#262
|
|
Senior Member    Group: Members Posts: 1,828 Joined: 28-March 03 From: Millville, NJ Member No.: 487 Region Association: None 
|
Today was the day to see if it made noise. It fired right up and idled down nicely. It’s a happy day in project land!
It’s alive!!!……..in my best Dr Frankenstein voice I have a video but can’t seem to get it to upload……I’ll keep trying |
| strawman |
 Jan 24 2024, 06:44 PM Jan 24 2024, 06:44 PM
Post
#263
|
|
Senior Member    Group: Members Posts: 888 Joined: 25-January 08 From: Los Osos, CA Member No.: 8,624 Region Association: Central California 
|
As a fellow Suby conversion addict, all I can say is congrats! The first start is always the greatest feeling ever. I've been driving my turbo Suby-powered 914 since about 2012, and I have successfully campaigned it at PCA and Vapor Trail Vettes autocrosses for several years now.
I recently bought out an estate here on the CA Central Coast back in September that included a sorta running/driving EG33 swapped 914 and a mostly complete parts car, five T4 engines, six transaxles and two pallets of 914, 912 and 911 parts that I've been slowly selling to fund my next project. I've been toying with the idea of building the parts car into a Safari 914 to cruise the gravel mountain roads around here. After reading through your build, I don't think there any question... now I just gotta find a running manual-equipped Suby parts car. Enjoy driving it! Geoff |
| East coaster |
 Jan 25 2024, 06:21 AM Jan 25 2024, 06:21 AM
Post
#264
|
|
Senior Member    Group: Members Posts: 1,828 Joined: 28-March 03 From: Millville, NJ Member No.: 487 Region Association: None 
|
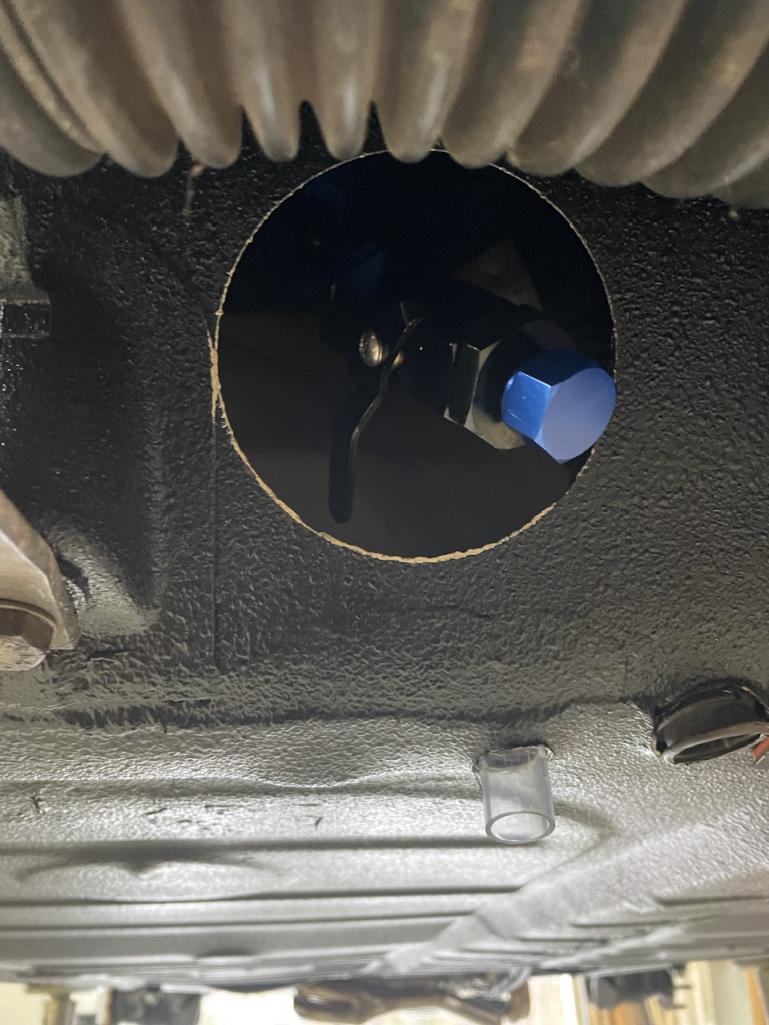
Here’s a pic of the ball valve I added to the stock fuel port. I figured it’s a lot better than siphoning the tank if I ever need to pull the tank and it happens to be full (which is very likely due to Murphy’s law). I was able to get fittings that convert the stock tank Port threads to AN threads. One port is capped and one has the drain valve. I’ll be safety wiring the ball valve lever to ensure it never drains accidentally.
 |
| pek771 |
 Jan 25 2024, 06:32 AM Jan 25 2024, 06:32 AM
Post
#265
|
|
Member   Group: Members Posts: 275 Joined: 23-November 05 From: Conover, NC Member No.: 5,175 Region Association: None 
|
Nice having a lathe isn’t it?
Are you above stock ride height? |
| East coaster |
 Jan 25 2024, 09:31 AM Jan 25 2024, 09:31 AM
Post
#266
|
|
Senior Member    Group: Members Posts: 1,828 Joined: 28-March 03 From: Millville, NJ Member No.: 487 Region Association: None 
|
Nice having a lathe isn’t it? Are you above stock ride height? It’s awesome to have a lathe and mill. You can pretty much make anything. My lathe is over 100 years old and I can only imagine all the things it’s made over time. I raised the suspension 2” with lowered spindles in the front and modified mount points in the rear. |
| East coaster |
 Jan 26 2024, 09:41 PM Jan 26 2024, 09:41 PM
Post
#267
|
|
Senior Member    Group: Members Posts: 1,828 Joined: 28-March 03 From: Millville, NJ Member No.: 487 Region Association: None 
|
|
| East coaster |
 Jan 29 2024, 07:48 PM Jan 29 2024, 07:48 PM
Post
#268
|
|
Senior Member    Group: Members Posts: 1,828 Joined: 28-March 03 From: Millville, NJ Member No.: 487 Region Association: None 
|
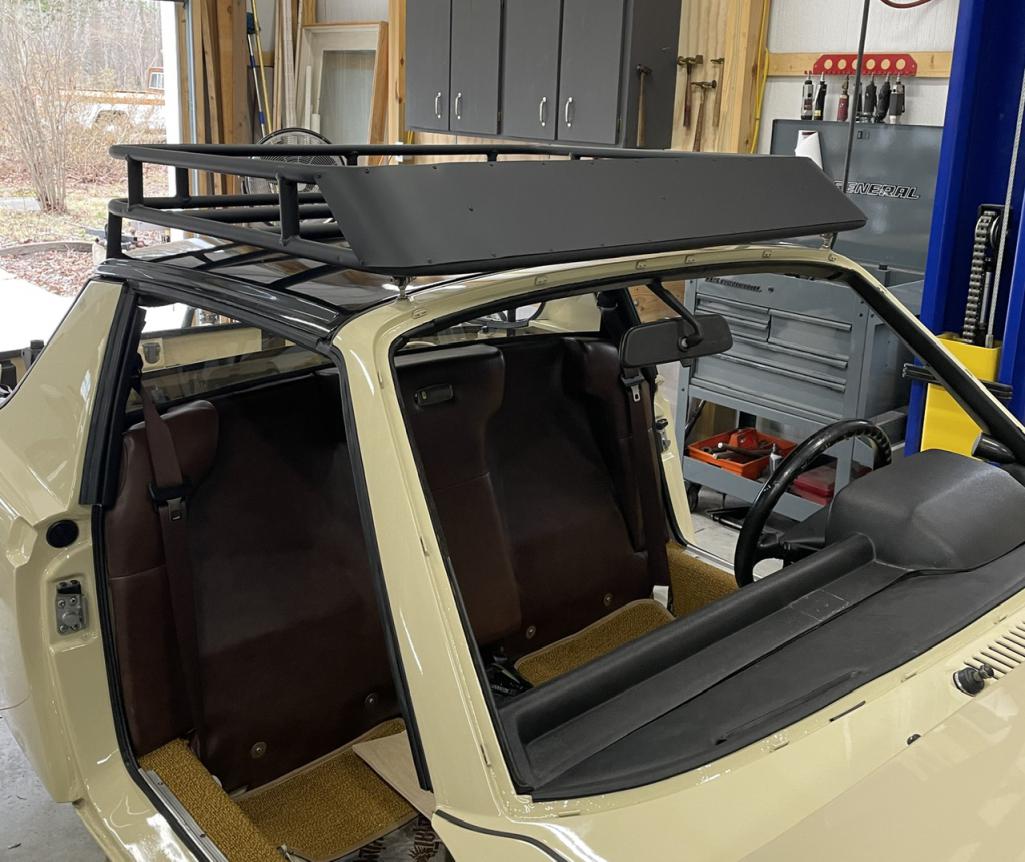
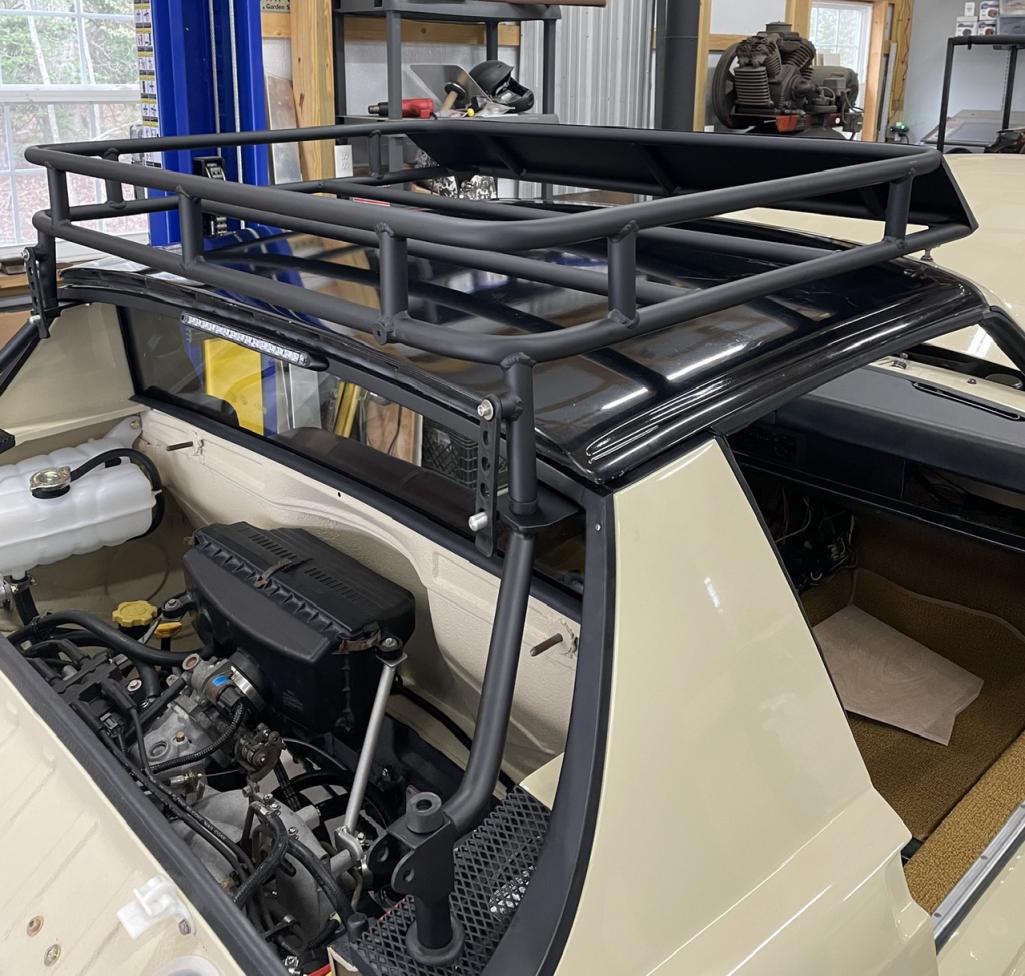
Managed to get the hood on by myself today. I used some blankets to protect the cowl and went for it. Looks much better with a hood (IMG:style_emoticons/default/smile.gif)
Also fitted up the roof rack for some final work on the latches at the rear. 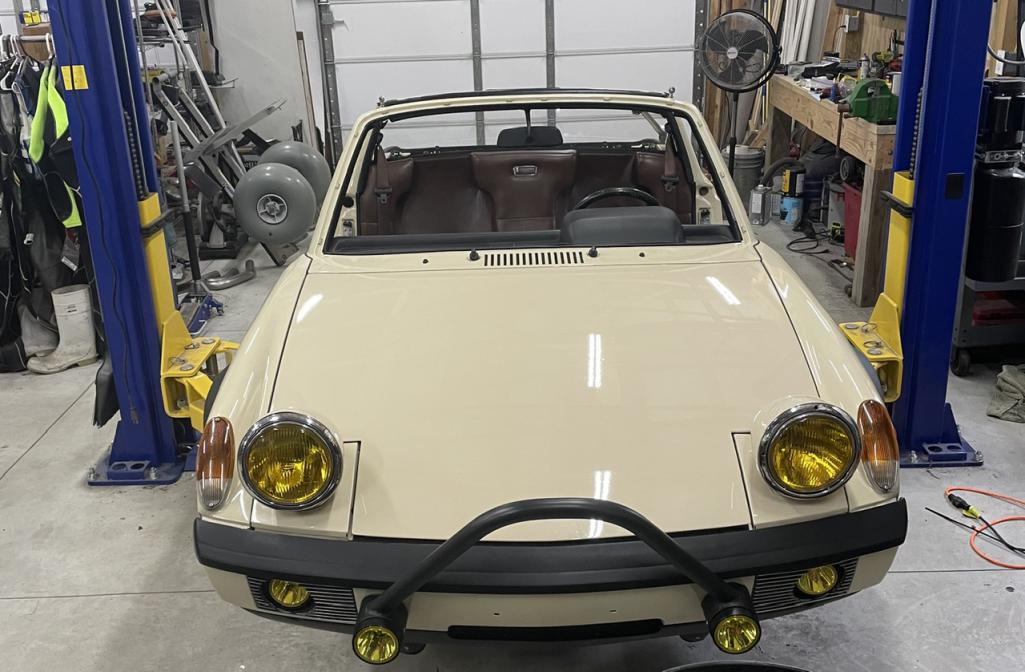 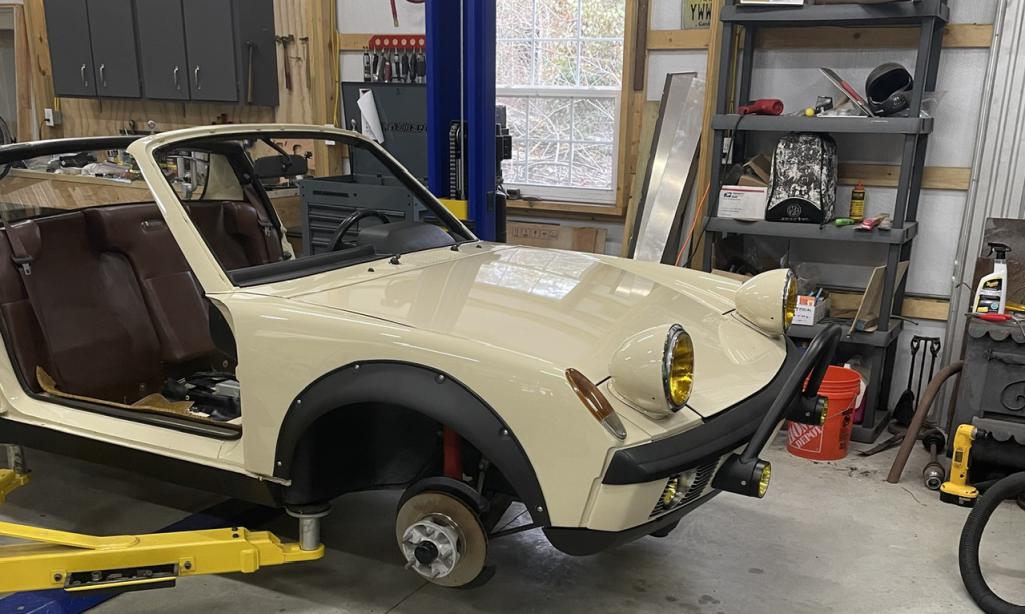 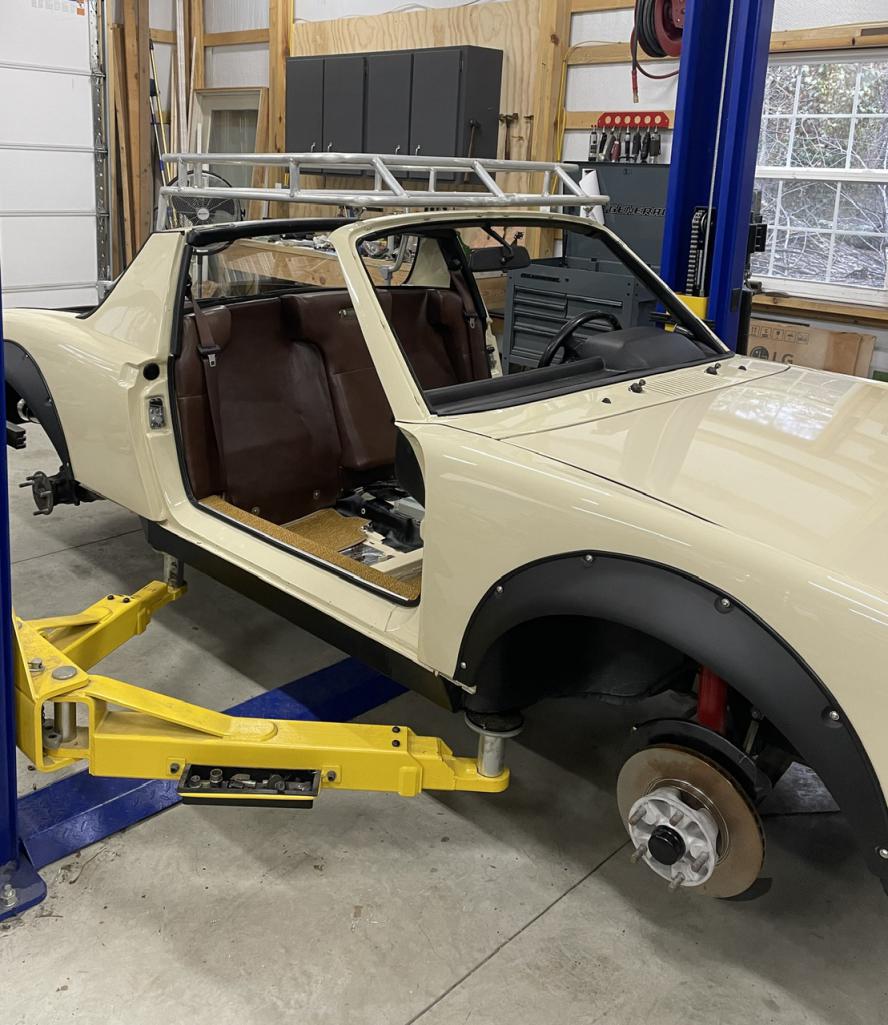 |
| maddog |
 Jan 30 2024, 08:09 AM Jan 30 2024, 08:09 AM
Post
#269
|
|
Member   Group: Members Posts: 200 Joined: 19-May 03 From: Grand Rapids Michigan Member No.: 710 Region Association: None 
|
I love this build! Cant wait to see it finished!
|
| Retroracer |
 Jan 30 2024, 08:07 PM Jan 30 2024, 08:07 PM
Post
#270
|
|
Senior Member    Group: Members Posts: 636 Joined: 7-July 13 From: Bend OR Member No.: 16,100 Region Association: Pacific Northwest 
|
Something to think about: How about coating the roof rack and brush bar a dark brown to match the backpad - gives the car a nice two tone contrast to the black targa top, bumper tops and flares? Little bit of a nuanced difference to the obvious "blackened" approach....
- Tony PS. Still loving this build BTW. Nice job on the engine firing up!! |
| East coaster |
 Feb 1 2024, 07:53 PM Feb 1 2024, 07:53 PM
Post
#271
|
|
Senior Member    Group: Members Posts: 1,828 Joined: 28-March 03 From: Millville, NJ Member No.: 487 Region Association: None 
|
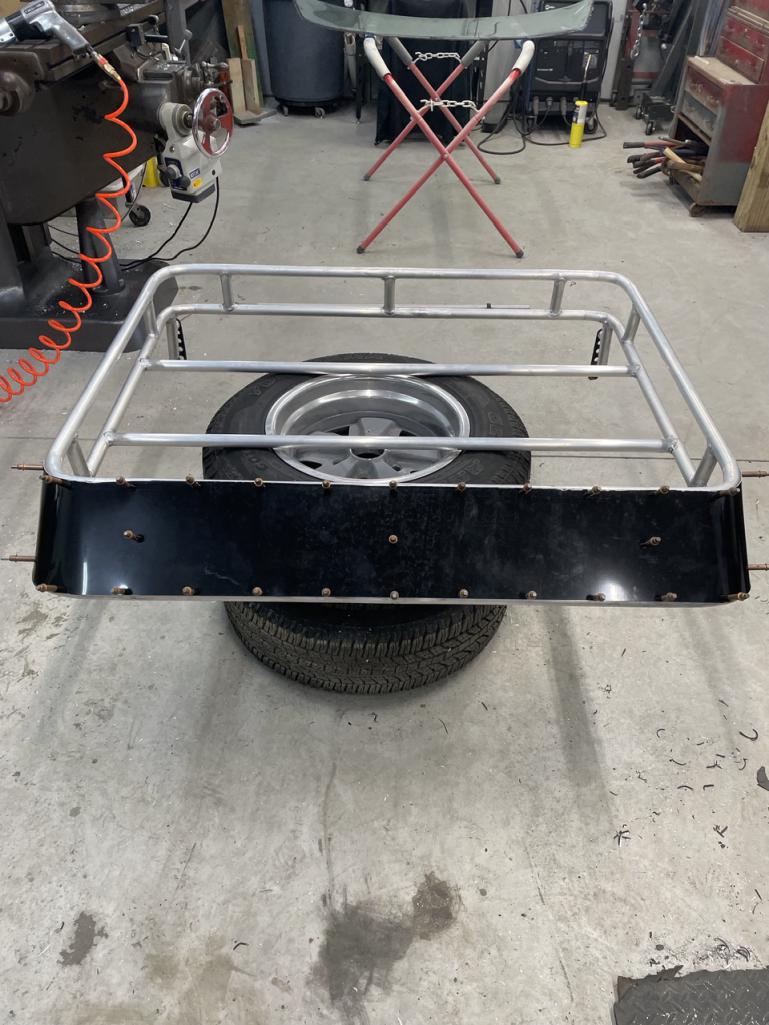
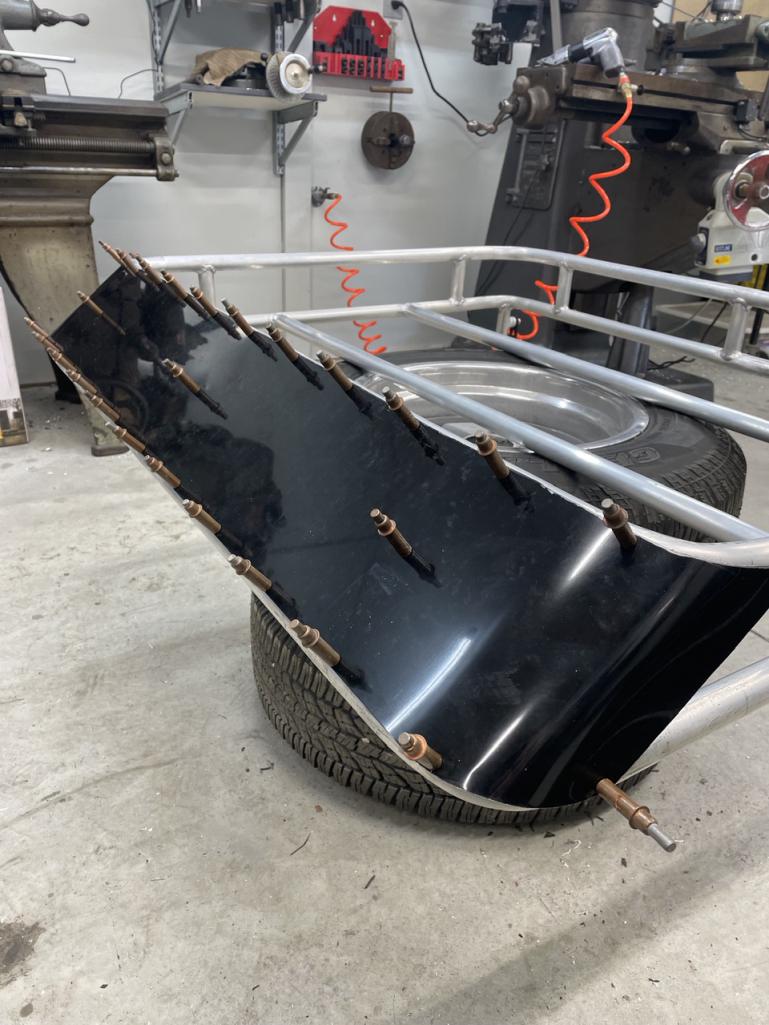
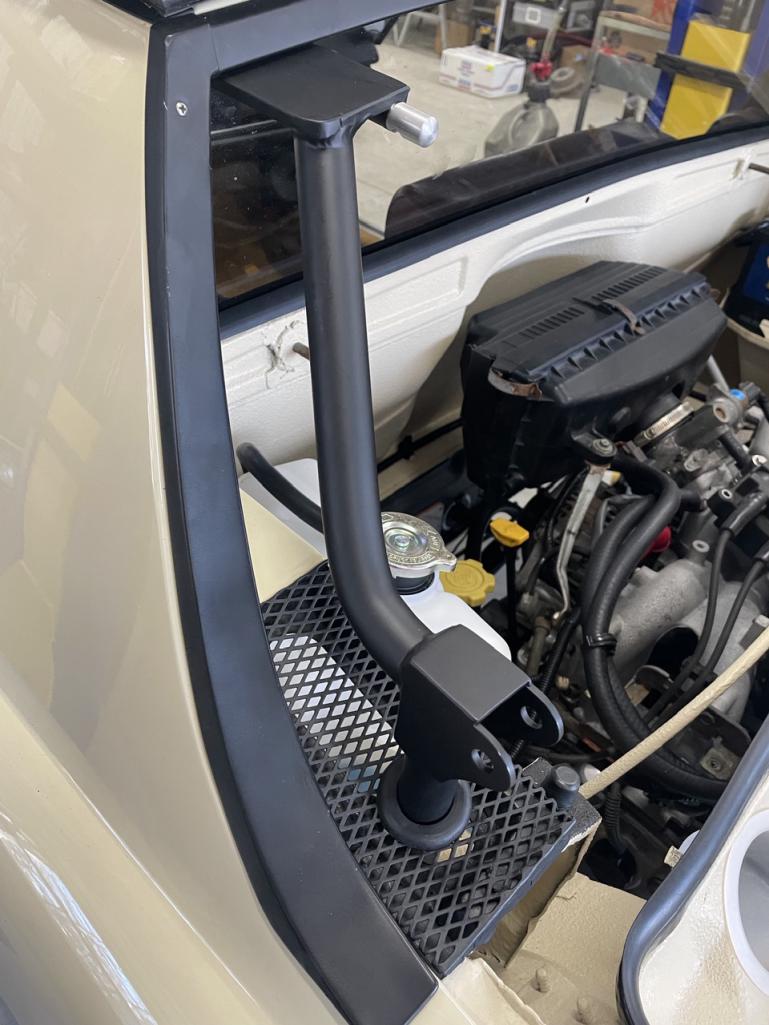
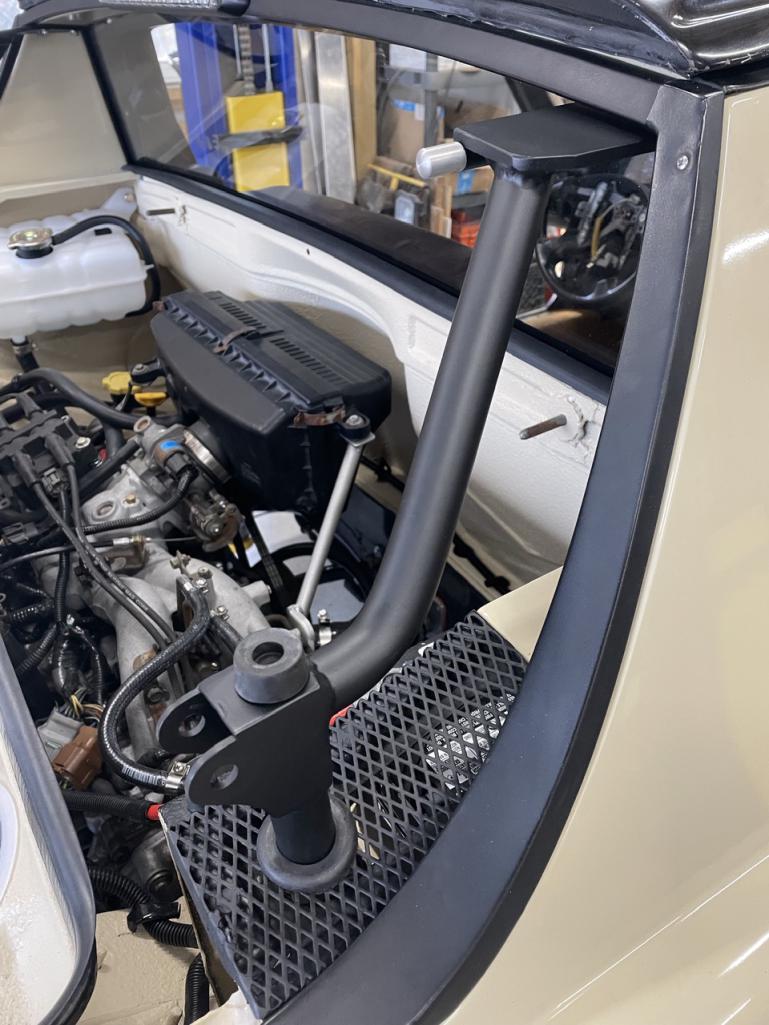
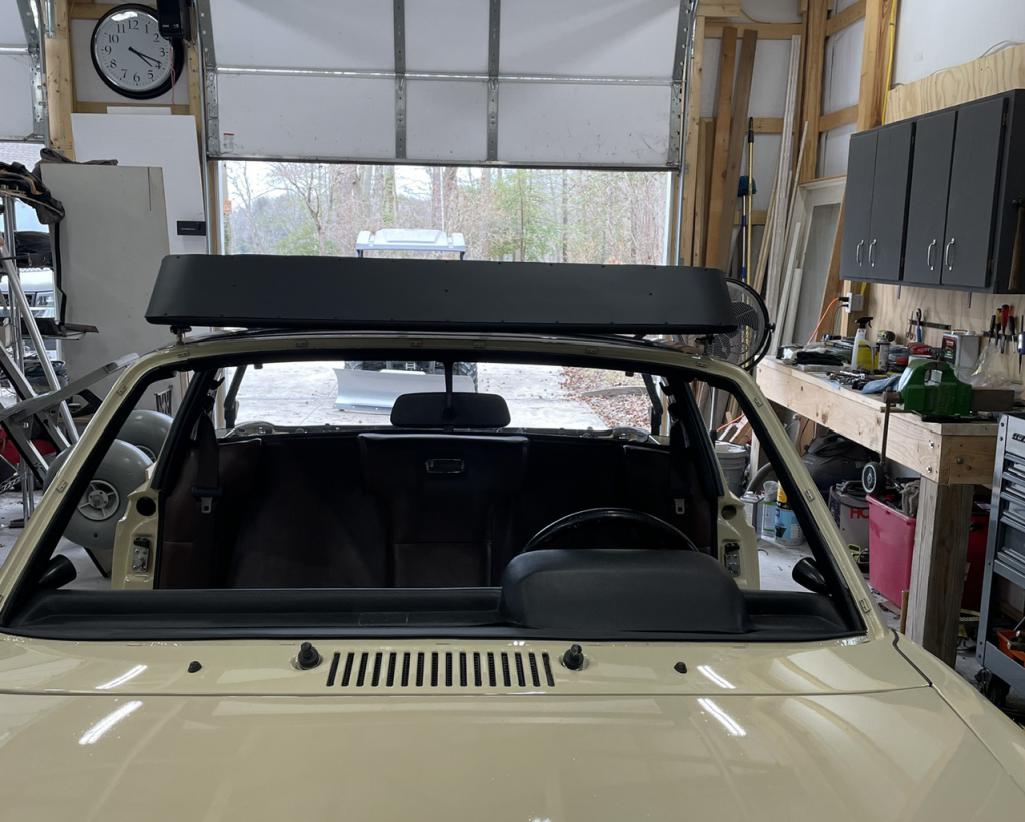
Worked on the final fitment of the roof rack today. It was pretty much finished a while ago except for a means of latching it down. I decided on a simple approach using some rubber rack straps.
I made some pins for the operating end of the straps and welded them to the support brackets. Then I welded mount points on the rack for the fixed end of the straps. I’m calling it done (other than finishing and painting)! 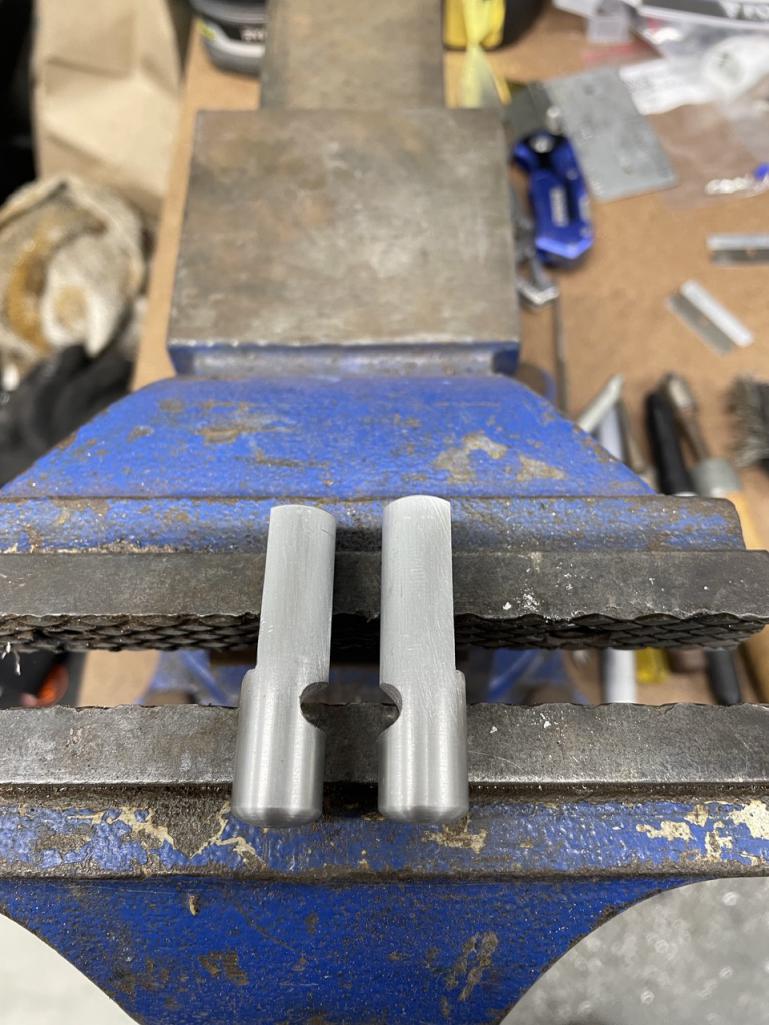 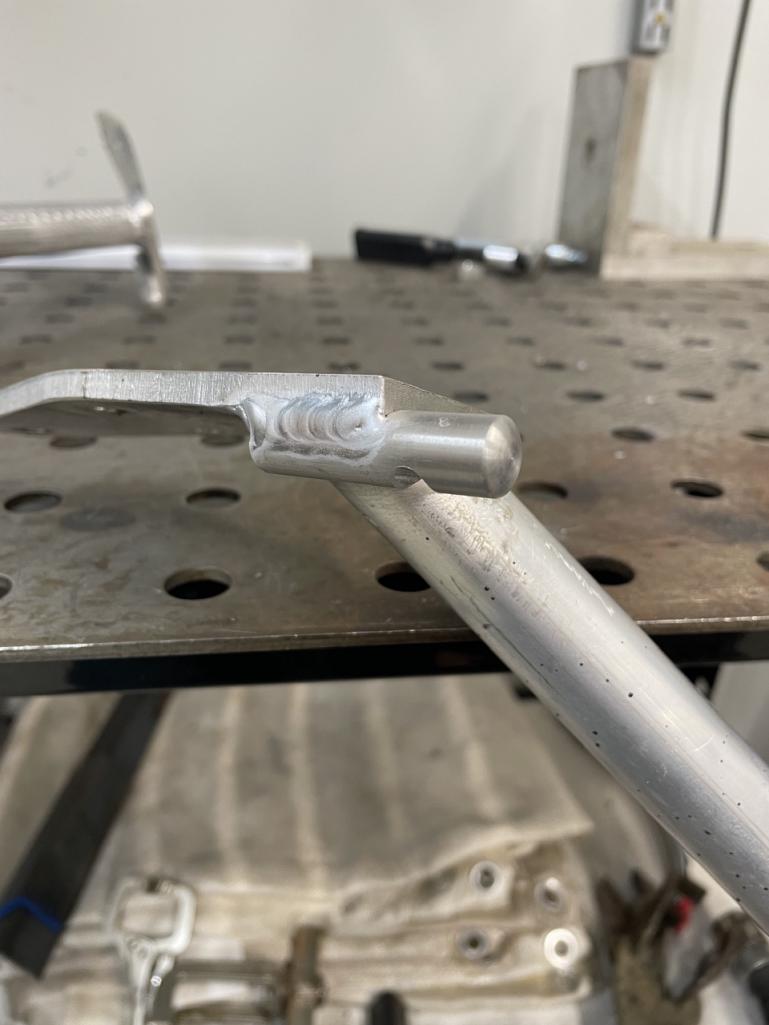 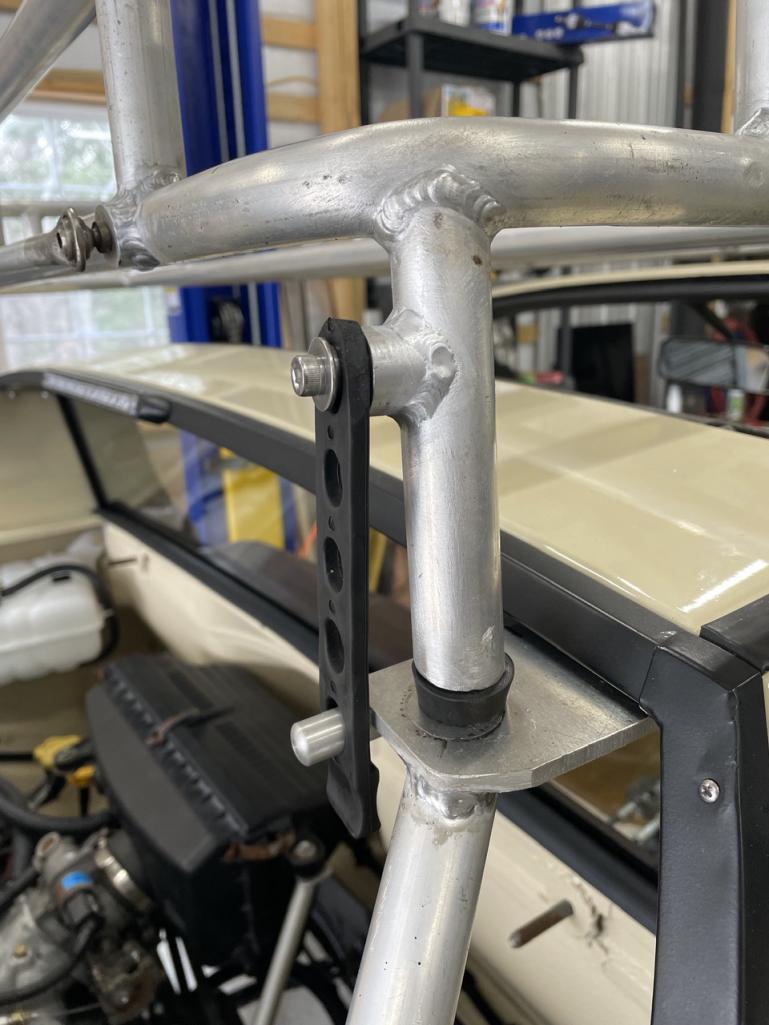 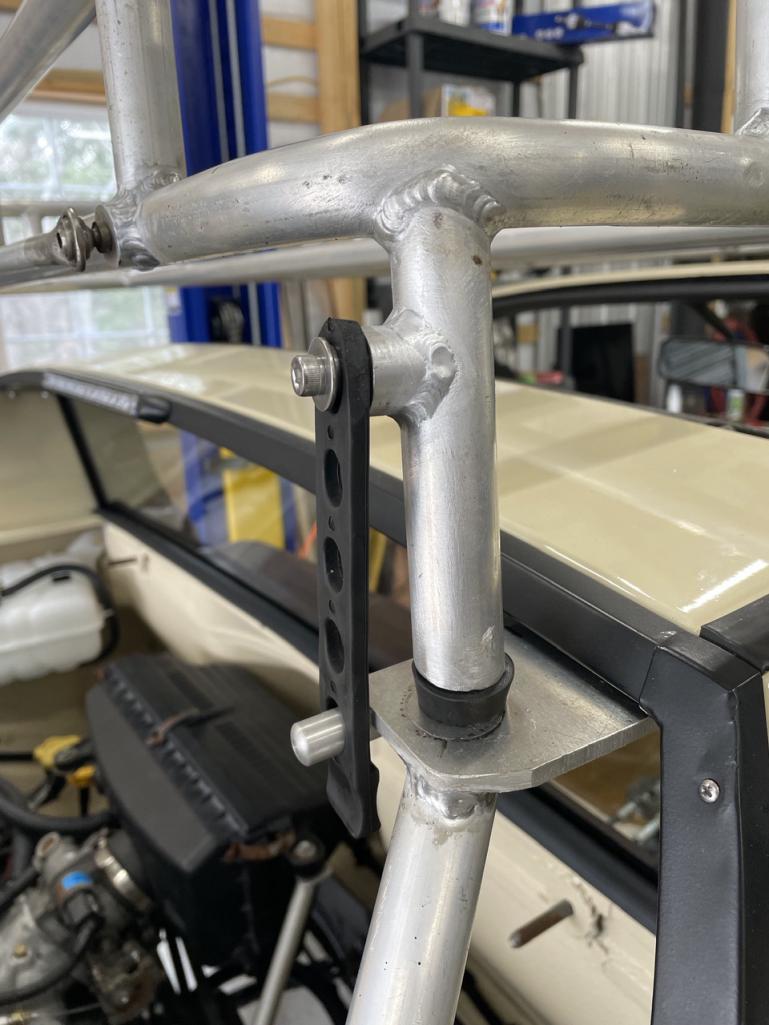 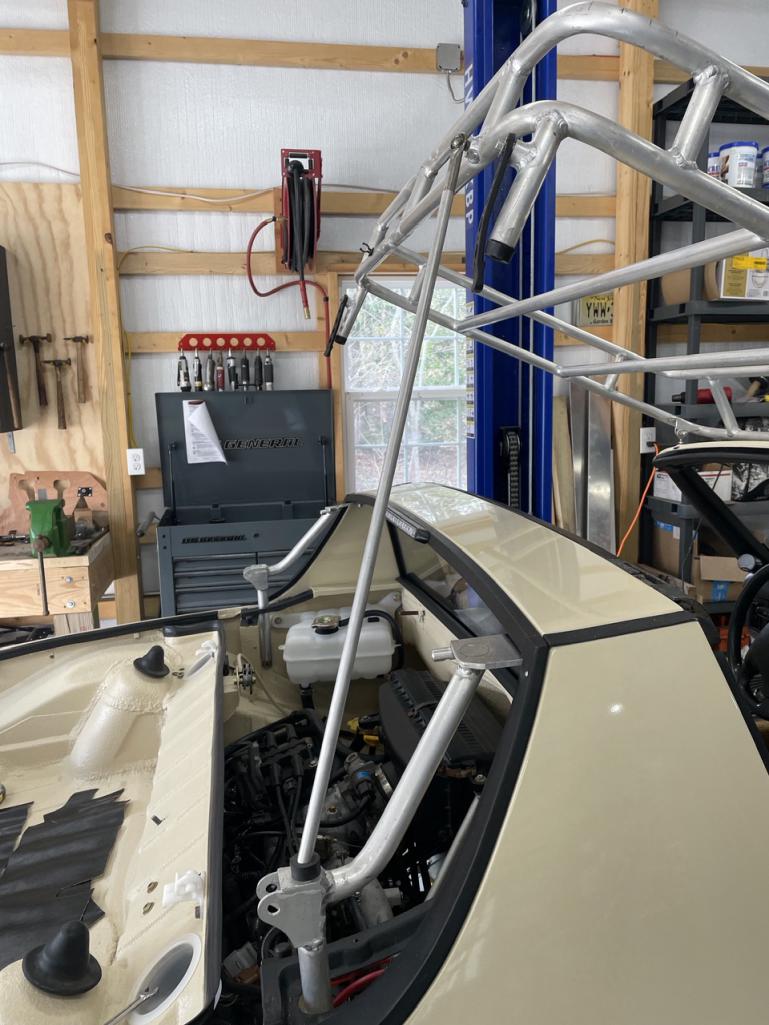 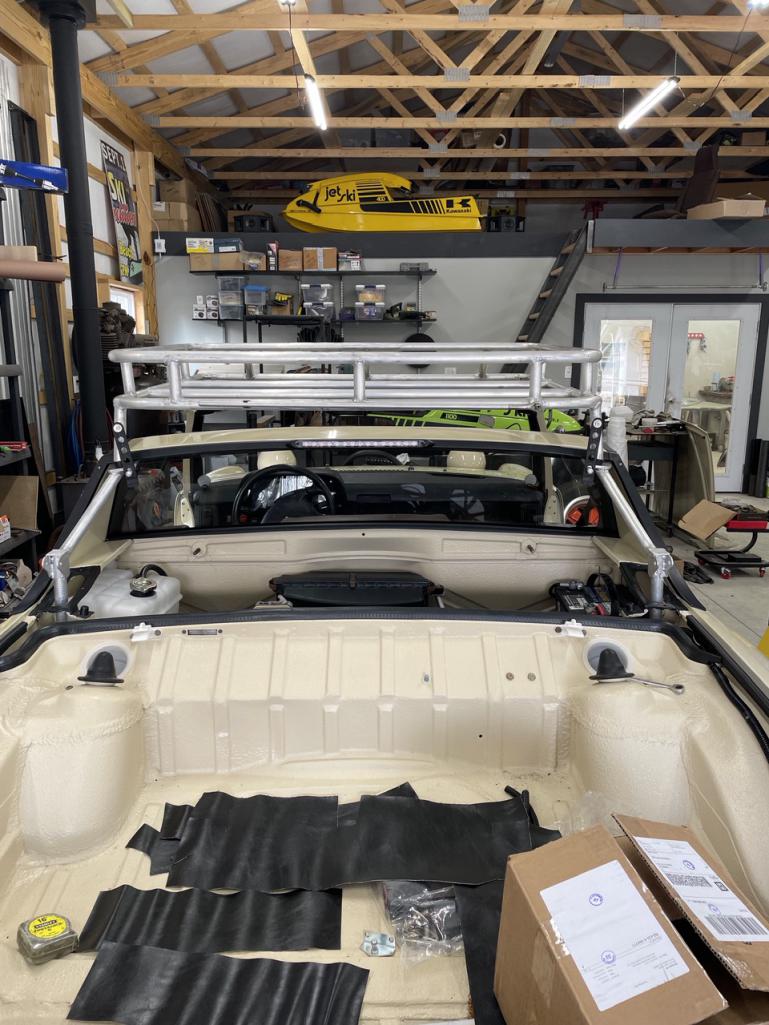 |
| East coaster |
 Feb 2 2024, 06:39 AM Feb 2 2024, 06:39 AM
Post
#272
|
|
Senior Member    Group: Members Posts: 1,828 Joined: 28-March 03 From: Millville, NJ Member No.: 487 Region Association: None 
|
Something to think about: How about coating the roof rack and brush bar a dark brown to match the backpad - gives the car a nice two tone contrast to the black targa top, bumper tops and flares? Little bit of a nuanced difference to the obvious "blackened" approach.... - Tony PS. Still loving this build BTW. Nice job on the engine firing up!! That would look good. I’m going to stay with black for touch up reasons though. I have a feeling there will be spots to touch up on the regular and there’s nothing like the ease of flat black spray cans. |
| rick 918-S |
 Feb 2 2024, 07:21 AM Feb 2 2024, 07:21 AM
Post
#273
|
|
Hey nice rack! -Celette                Group: Members Posts: 20,911 Joined: 30-December 02 From: Now in Superior WI Member No.: 43 Region Association: Northstar Region 

|
Like this build. Lots of detail. You will really enjoy the result.
|
| DRPHIL914 |
 Feb 2 2024, 08:23 AM Feb 2 2024, 08:23 AM
Post
#274
|
|
Dr. Phil      Group: Members Posts: 5,819 Joined: 9-December 09 From: Bluffton, SC Member No.: 11,106 Region Association: South East States 
|
i am curious about where you sourced the flare material and how you came up with that design/shape? I like it especially your unique safari build.
Phil ps awesome work btw, enjoying your unique approach with this yet using a lot of stock stuff like heater box for heat and so on, i am interested to see if that will provide enough air flow across the core to give you enough hot air for the cabin. Phil PSS - and i love the rack, i would like you to make me one when you are finishe with this build !!! |
| East coaster |
 Feb 5 2024, 05:28 AM Feb 5 2024, 05:28 AM
Post
#275
|
|
Senior Member    Group: Members Posts: 1,828 Joined: 28-March 03 From: Millville, NJ Member No.: 487 Region Association: None 
|
i am curious about where you sourced the flare material and how you came up with that design/shape? I like it especially your unique safari build. Phil ps awesome work btw, enjoying your unique approach with this yet using a lot of stock stuff like heater box for heat and so on, i am interested to see if that will provide enough air flow across the core to give you enough hot air for the cabin. Phil PSS - and i love the rack, i would like you to make me one when you are finishe with this build !!! Phil, The flares are just universal flares I picked up off eBay. I figured if I didn’t like them I could always GT flair it, but so far I think they’re right for the safari look. I have let the car warm up and I seem to be getting good heat flow to the defrosters and floor vents. I put a new blower in the fresh air box and it really moves air. I’ll find out for sure when I start driving it in the cold. |
| pek771 |
 Feb 5 2024, 06:46 PM Feb 5 2024, 06:46 PM
Post
#276
|
|
Member   Group: Members Posts: 275 Joined: 23-November 05 From: Conover, NC Member No.: 5,175 Region Association: None 
|
How much do you think this weighs? And have you driven it yet?
|
| East coaster |
 Feb 5 2024, 07:44 PM Feb 5 2024, 07:44 PM
Post
#277
|
|
Senior Member    Group: Members Posts: 1,828 Joined: 28-March 03 From: Millville, NJ Member No.: 487 Region Association: None 
|
How much do you think this weighs? And have you driven it yet? No idea on the weight. I was pretty conscious of weight as I progressed though. All the roof rack and supporting parts are aluminum and really pretty light. The front “stinger” bar is also all aluminum and weights less than the stock bumper tits. It’s not ready to drive yet, but hopefully soon. The only major thing left is to make my driveshafts. |
| East coaster |
 Feb 9 2024, 08:05 PM Feb 9 2024, 08:05 PM
Post
#278
|
|
Senior Member    Group: Members Posts: 1,828 Joined: 28-March 03 From: Millville, NJ Member No.: 487 Region Association: None 
|
|
| tygaboy |
 Feb 10 2024, 08:28 AM Feb 10 2024, 08:28 AM
Post
#279
|
|
914 Guru      Group: Members Posts: 5,541 Joined: 6-October 15 From: Petaluma, CA Member No.: 19,241 Region Association: Northern California 
|
Nice. Very tidy. To me, it's those little details that make all the difference. (IMG:style_emoticons/default/smilie_pokal.gif)
|
| East coaster |
 Feb 11 2024, 05:45 AM Feb 11 2024, 05:45 AM
Post
#280
|
|
Senior Member    Group: Members Posts: 1,828 Joined: 28-March 03 From: Millville, NJ Member No.: 487 Region Association: None 
|
|
  |
2 User(s) are reading this topic (2 Guests and 0 Anonymous Users)
0 Members:

|
Lo-Fi Version | Time is now: 2nd April 2025 - 02:41 AM |
Invision Power Board
v9.1.4 © 2025 IPS, Inc.


