|
|
|
Porsche, and the Porsche crest are registered trademarks of Dr. Ing. h.c. F. Porsche AG.
This site is not affiliated with Porsche in any way. Its only purpose is to provide an online forum for car enthusiasts. All other trademarks are property of their respective owners. |
|
|

  |

| tdgray |
 Mar 18 2006, 08:53 AM Mar 18 2006, 08:53 AM
Post
#141
|
|
Thank God Nemo is not here to see this  Group: Members Posts: 9,705 Joined: 5-August 03 From: Akron, OH Member No.: 984 Region Association: None |
Nice and Smoooooth
Attached image(s) 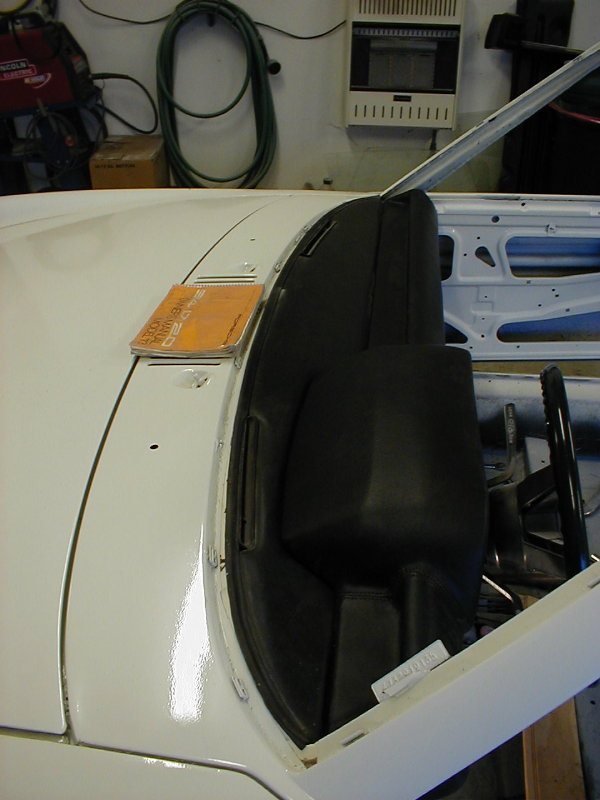
|
   |

 
|
| tdgray |
Mar 18 2006, 08:54 AM
Post
#142
|
|
Thank God Nemo is not here to see this Group: Members Posts: 9,705 Joined: 5-August 03 From: Akron, OH Member No.: 984 Region Association: None |
Attached image(s) 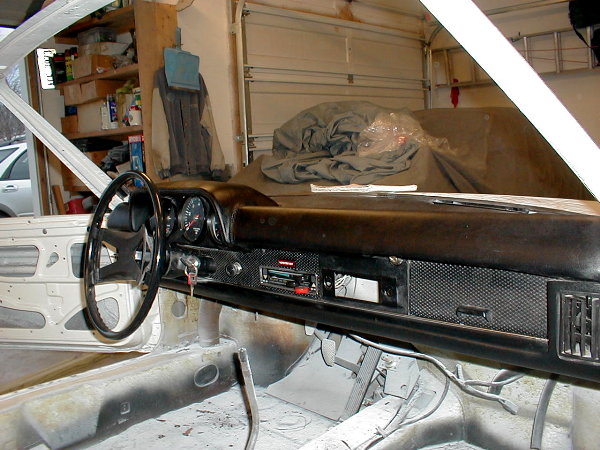
|
|
|
|
| tdgray |
Mar 18 2006, 08:57 AM
Post
#143
|
|
Thank God Nemo is not here to see this Group: Members Posts: 9,705 Joined: 5-August 03 From: Akron, OH Member No.: 984 Region Association: None |
That's all for now. Was a short day. Got cold again pretty quick. Oh well.
Next project planned is to put in the windsheild and reaar window, then get the interior back in... oh and align the drivers side door. I think I'm going to need some shims (IMG:http://www.914world.com/bbs2/html/emoticons/dry.gif) |
|
|
|
| dion9146 |
May 8 2006, 09:07 PM
Post
#144
|
|
Member Group: Members Posts: 469 Joined: 16-May 04 From: Buckner, KY Member No.: 2,071 Region Association: MidAtlantic Region |
Hey Todd, anymore progress? I just read through this entire thread and am as impressed as everyone else. Nice work so far.
I'm over on the East side of Medina if you need any help at all. Would love to get together sometime and check out your car. I'll get my Father to bring me over in his TR3 to keep your MGA company. (IMG:style_emoticons/default/bye1.gif) Lookin to get my 6 back on the road this Summer. It's been 5 years since I had fun in a 914, and the nice weather lately has me working hard to get her back on the road. Later, Dion |
|
|
|
| reddog |
May 8 2006, 09:37 PM
Post
#145
|
|
Member Group: Members Posts: 71 Joined: 19-December 05 From: Willits, California Member No.: 5,299 |
Nice lookin MGA... (IMG:style_emoticons/default/beerchug.gif)... I used to live in summit county also...
|
|
|
|
| So.Cal.914 |
May 9 2006, 01:31 AM
Post
#146
|
|
"...And it has a front trunk too." Group: Members Posts: 6,588 Joined: 15-February 04 From: Low Desert, CA./ Hills of N.J. Member No.: 1,658 Region Association: None |
QUOTE(tdgray @ Aug 10 2005, 08:54 AM)  Next Task... Drop the engine. Easy job took my brother and I about three hours. Three hours, what did you guys stop for lunch? (IMG:style_emoticons/default/smile.gif) Nice work on the resto. (IMG:style_emoticons/default/smoke.gif) |
|
|
|
| tdgray |
May 9 2006, 06:45 AM
Post
#147
|
|
Thank God Nemo is not here to see this Group: Members Posts: 9,705 Joined: 5-August 03 From: Akron, OH Member No.: 984 Region Association: None |
Thanks for the inquiries guys...
Yes I am still working on it but not much to record in picture form. Recently I have. 1) moved the battery to the front trunk with a jegs battery relocation kit (have pics will post) 2) replaced all fuel lines and vaccum lines 3) replaced fuel pump after the old one suddenly died. Now having fuel pressure issues, injector issues ect. I want to get it running in some form so I can move her around a little easier. After I do that I will install the interior, windows, etc so that I can wet sand and buff...then we should be in good shape. Oh yea I still have to weld in the rear trunk pan and decide what to do about the front trunk (re: reinstall AC or fill the hole). When summer is offcially upon us I think we need to get some of the PA, OH, MI teeners together for a meet. We'll try to schedule something soon. |
|
|
|
| tdgray |
May 17 2006, 05:58 PM
Post
#148
|
|
Thank God Nemo is not here to see this Group: Members Posts: 9,705 Joined: 5-August 03 From: Akron, OH Member No.: 984 Region Association: None |
Well since the club site was down been actually getting some stuff done (actually was before then but just updating).
Here is the present the UPS man brought me one day a while back. Jegs battery relocation kit. Nice kit all the stuff is there. Just have to make a bracket for it...so off to home depot for some angle iron etc. Attached image(s) 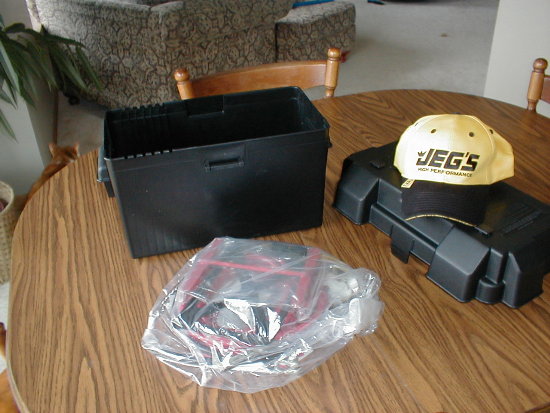
|
|
|
|
| tdgray |
May 17 2006, 06:01 PM
Post
#149
|
|
Thank God Nemo is not here to see this Group: Members Posts: 9,705 Joined: 5-August 03 From: Akron, OH Member No.: 984 Region Association: None |
After a hour or so of welding and cutting this is what I came up with.
Problem being is that while the battery box is nice and clean looking... it is also LARGE. So I have to mount it very low in the front trunk. This obviously creates a small problem. Attached image(s) 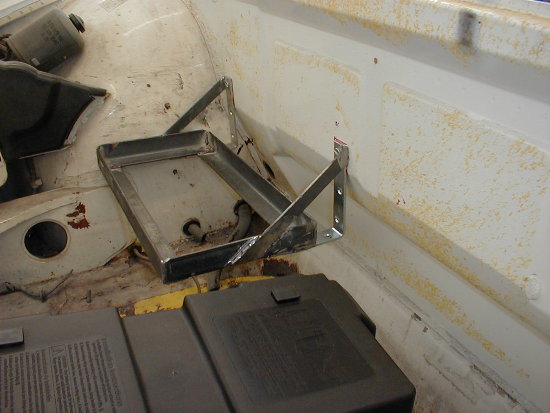
|
|
|
|
| tdgray |
May 17 2006, 06:03 PM
Post
#150
|
|
Thank God Nemo is not here to see this Group: Members Posts: 9,705 Joined: 5-August 03 From: Akron, OH Member No.: 984 Region Association: None |
Problem solved.
Ignore the rusty trunk pan... I have not decided if I am putting the AC back in or not so not sure if I want to fill the hole. Attached image(s) 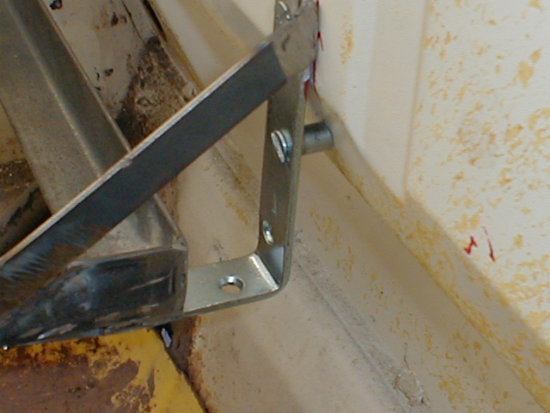
|
|
|
|
| tdgray |
May 17 2006, 06:04 PM
Post
#151
|
|
Thank God Nemo is not here to see this Group: Members Posts: 9,705 Joined: 5-August 03 From: Akron, OH Member No.: 984 Region Association: None |
All painted and pretty.
Attachments to hold down the battery in the box on. Attached image(s) 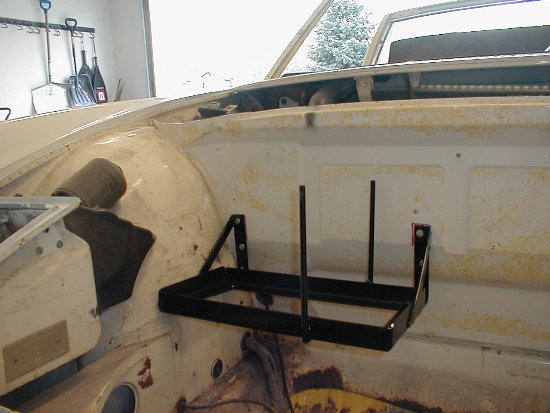
|
|
|
|
| tdgray |
May 17 2006, 06:05 PM
Post
#152
|
|
Thank God Nemo is not here to see this Group: Members Posts: 9,705 Joined: 5-August 03 From: Akron, OH Member No.: 984 Region Association: None |
Box and battery mounted. Wire needed to be run to the back.
Attached image(s) 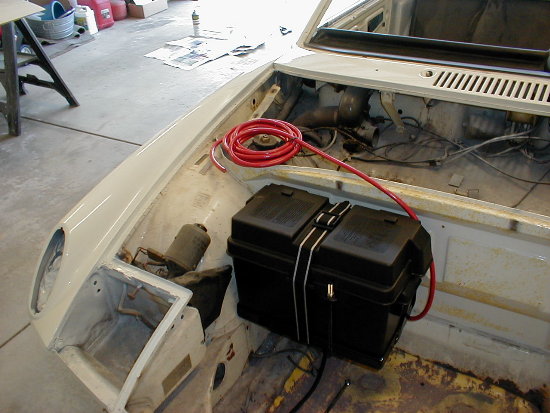
|
|
|
|
| tdgray |
May 17 2006, 06:09 PM
Post
#153
|
|
Thank God Nemo is not here to see this Group: Members Posts: 9,705 Joined: 5-August 03 From: Akron, OH Member No.: 984 Region Association: None |
Well some non-picture important work ensued.
Heres what got done. 1) Ran battery wires to starter and juiced everything up. 2) Replaced all engine electrical components and plugged it all in. 3) Replaced fuel pump after it died with an MSD aftermarket from Summit Racing 4) Solved fuel pressure problem 5) installed new vacuum hoses and trouble shot all missed connections YEA IT FINALLY RUNS. Needs timing set and some tweeking but runs strong and idles well. DAMN WHEW. Major time for a (IMG:style_emoticons/default/beerchug.gif) after that one. |
|
|
|
| tdgray |
May 17 2006, 06:11 PM
Post
#154
|
|
Thank God Nemo is not here to see this Group: Members Posts: 9,705 Joined: 5-August 03 From: Akron, OH Member No.: 984 Region Association: None |
So with all that behind and some major projects ahead I decided to have some fun and put the interior back in.
All orginal carpets etc... not in great shape butwill do. Could use a good cleaning. Attached image(s) 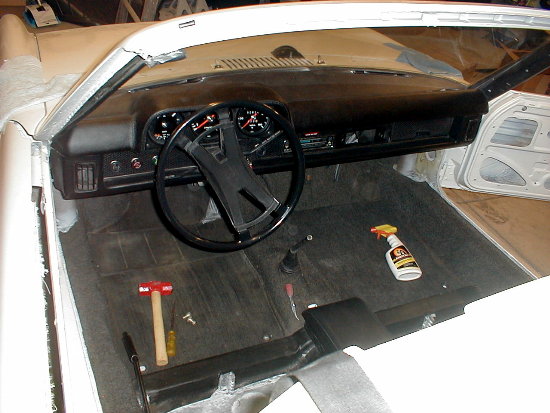
|
|
|
|
| tdgray |
May 17 2006, 06:12 PM
Post
#155
|
|
Thank God Nemo is not here to see this Group: Members Posts: 9,705 Joined: 5-August 03 From: Akron, OH Member No.: 984 Region Association: None |
Back pad in good shape.
no major defects. Attached image(s) 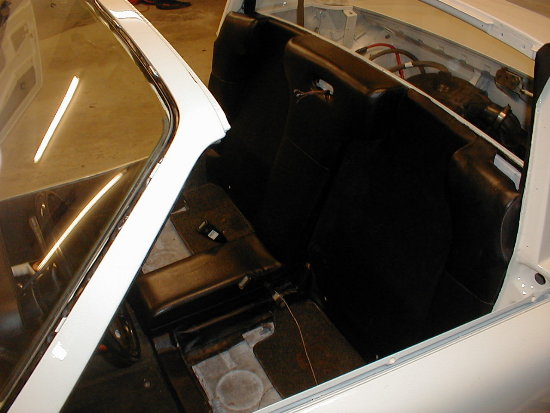
|
|
|
|
| tdgray |
May 17 2006, 06:14 PM
Post
#156
|
|
Thank God Nemo is not here to see this Group: Members Posts: 9,705 Joined: 5-August 03 From: Akron, OH Member No.: 984 Region Association: None |
DUH kinda forgot this step...
BEFORE I installed the interior. I put the windsheild and rear glass back in. Attached image(s) 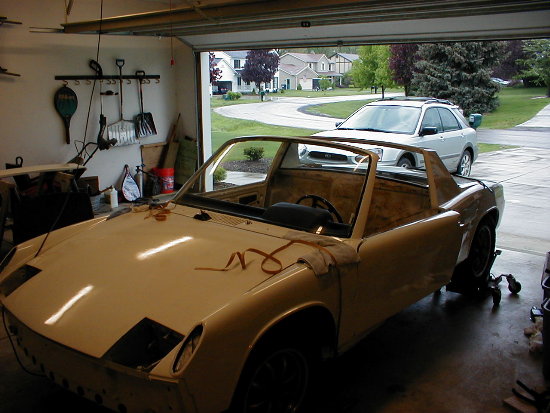
|
|
|
|
| tdgray |
May 17 2006, 06:16 PM
Post
#157
|
|
Thank God Nemo is not here to see this Group: Members Posts: 9,705 Joined: 5-August 03 From: Akron, OH Member No.: 984 Region Association: None |
Seats in... pretty good shape. One small tear in the drivers side and one worn spot on the passengers side.
This was all for that weekend. With last weekend being mothers day I only had one day to work, so I finished installing the interior trim, seals ect. Some of the seals are in pretty bad shape, they will need replaced. Attached image(s) 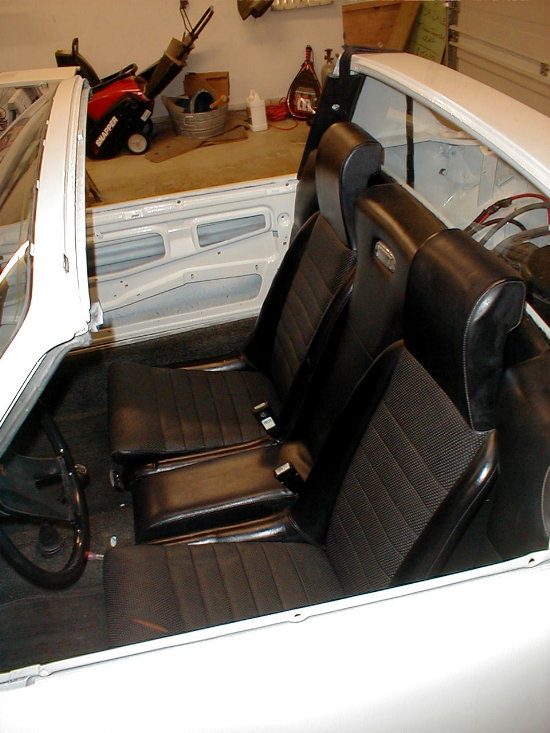
|
|
|
|
| tdgray |
May 17 2006, 06:18 PM
Post
#158
|
|
Thank God Nemo is not here to see this Group: Members Posts: 9,705 Joined: 5-August 03 From: Akron, OH Member No.: 984 Region Association: None |
No pics from last weekend.. batteries in the camera were dead.
Here she sits tonight. This weekend is brake work, adjust shift rod and clutch and maybe take here for an illegal but very fun ride around the hood. Attached image(s) 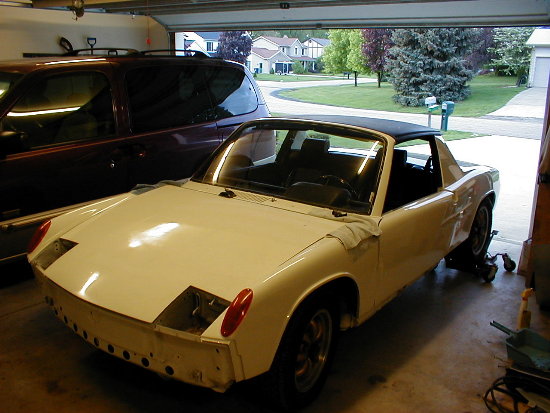
|
|
|
|
| Thack |
May 17 2006, 09:16 PM
Post
#159
|
|
Member Group: Members Posts: 283 Joined: 1-June 05 From: Houston, Tx Member No.: 4,182 |
how hard is it to replace/install the windshield?.
|
|
|
|
| tdgray |
May 18 2006, 06:05 AM
Post
#160
|
|
Thank God Nemo is not here to see this Group: Members Posts: 9,705 Joined: 5-August 03 From: Akron, OH Member No.: 984 Region Association: None |
QUOTE(Thack @ May 17 2006, 11:16 PM) how hard is it to replace/install the windshield?. That my friend is a 1 on a scale of 10. Use paino wire to cut old out (or in my case it just fell out). Clean all surfaces of old butyl. Get new 3/8" butyl window kit from FLAPS and install. Nothing more than that. |
|
|
|
|
1 User(s) are reading this topic (1 Guests and 0 Anonymous Users)
0 Members:

|
Lo-Fi Version | Time is now: 28th September 2024 - 02:59 PM |
Invision Power Board
v9.1.4 © 2024 IPS, Inc.