|
|

|
Porsche, and the Porsche crest are registered trademarks of Dr. Ing. h.c. F. Porsche AG.
This site is not affiliated with Porsche in any way. Its only purpose is to provide an online forum for car enthusiasts. All other trademarks are property of their respective owners. |
|
|
  |
| rjames |
 Feb 18 2024, 02:24 PM Feb 18 2024, 02:24 PM
Post
#41
|
|
I'm made of metal     Group: Members Posts: 4,162 Joined: 24-July 05 From: Shoreline, WA Member No.: 4,467 Region Association: Pacific Northwest 
|
@jhynesrockmtn Thanks! Others have said the same thing but it just didn’t seem possible as I was lying on my back staring up at the bottom of the car..
I’m planning on having 914Rubber rebuild the rack. Nice bumblebee and lift. Having a lift would sure make this job easier! |
| jhynesrockmtn |
 Feb 18 2024, 07:47 PM Feb 18 2024, 07:47 PM
Post
#42
|
|
Member   Group: Members Posts: 426 Joined: 13-June 16 From: spokane wa Member No.: 20,100 Region Association: Pacific Northwest 
|
@jhynesrockmtn Thanks! Others have said the same thing but it just didn’t seem possible as I was lying on my back staring up at the bottom of the car.. I’m planning on having 914Rubber rebuild the rack. Nice bumble bee and lift. Have a lift would sure make this job easier! There is room to slide it past the MC with the console removed. Thanks. The BB has been a fair bit of work, and I have more ahead of me, but overall it is a solid car. The lift sure does make things like this easier! |
| rjames |
 Mar 15 2024, 03:46 PM Mar 15 2024, 03:46 PM
Post
#43
|
|
I'm made of metal     Group: Members Posts: 4,162 Joined: 24-July 05 From: Shoreline, WA Member No.: 4,467 Region Association: Pacific Northwest 
|
Finally got some more work done.
Crossmember and rack removed without touching the MC! Based on the model# buried in grime, I have type a 'B' rack. It will be sent to 914 Rubber for a rebuild. 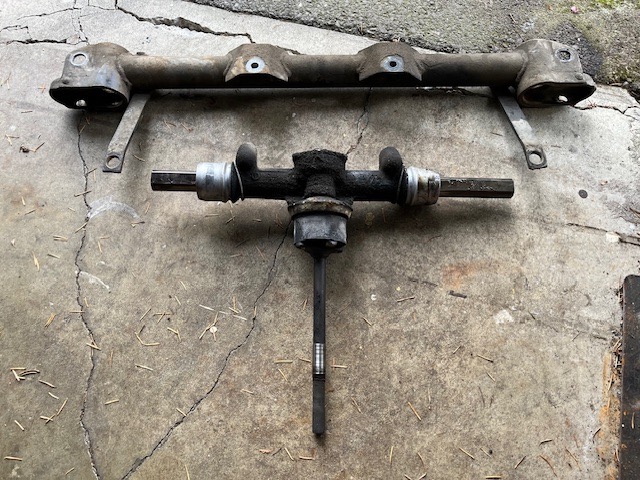 The coupler actually looked very good, but it will get replaced anyway since I already bought the part. 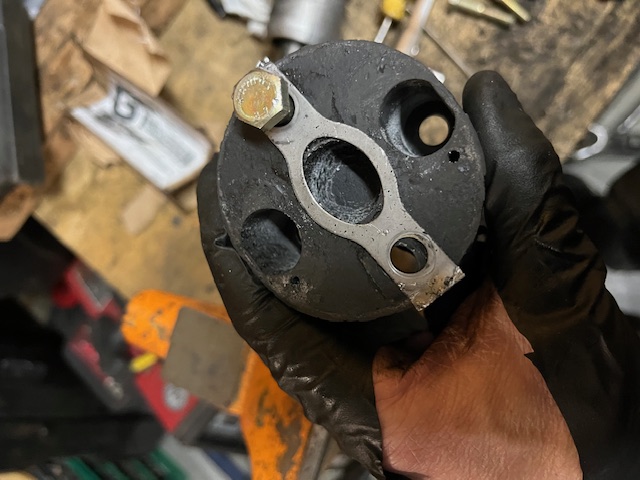 Per usual, a couple of questions: Steering shaft bearing: Can I just clean and regrease this, or should I just replace it? The replacements I see for sale don't look quite the same to my eyes. 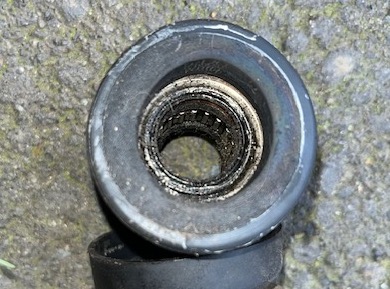 Suspension parts. I've removed all the rust and loose paint, cleaned and etched the metal for painting (powdercoating isn't in the budget). 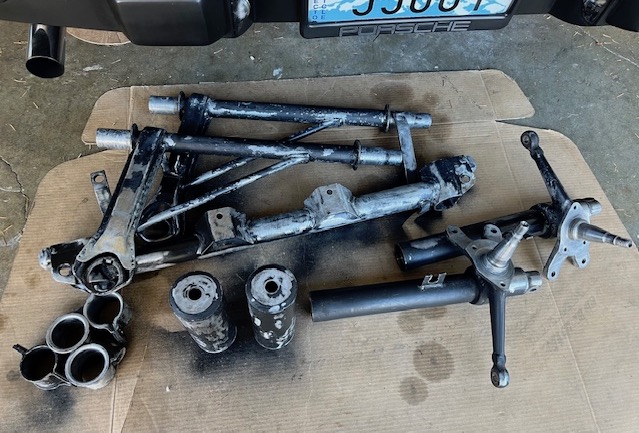 I'm thinking about using Rustoleum Professional enamel (brush on- not the spray paint) after applying coat of their pro metal primer. Anyone have experience using this stuff? Are there other products I should be considering? Cost is a factor and I'm not interested in anything that I have to mail order or remove all of the existing paint to apply. 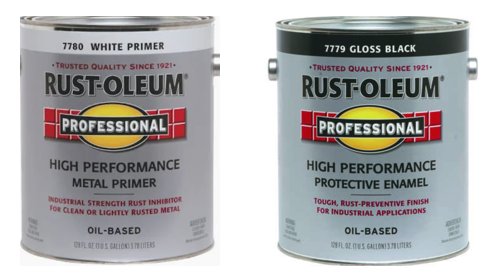 |
| TargaToy |
 Mar 16 2024, 07:47 PM Mar 16 2024, 07:47 PM
Post
#44
|
|
-NONSOLIS RADIOS SEDIOUIS FULMINA MITTO-    Group: Members Posts: 706 Joined: 26-March 10 From: DelMarVa Peninsula Member No.: 11,509 Region Association: MidAtlantic Region 
|
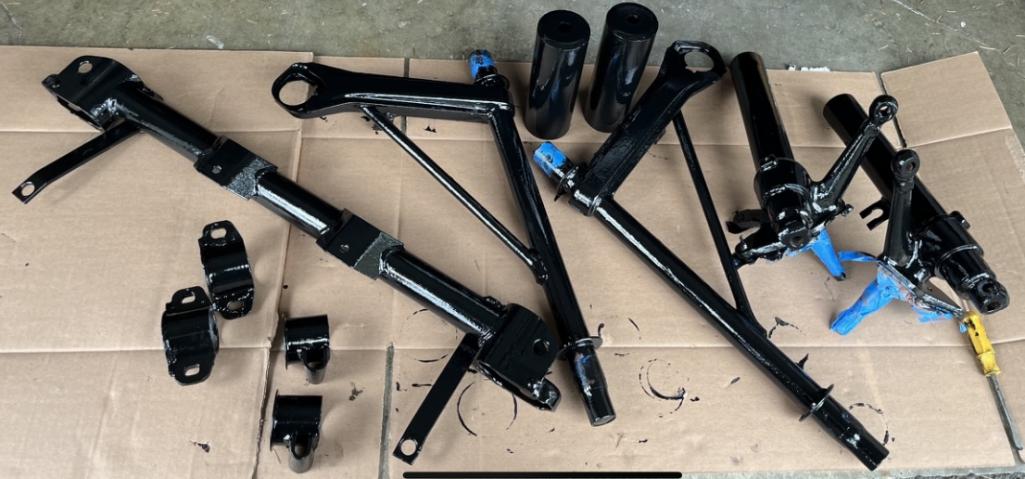
Finally got some more work done. Crossmember and rack removed without touching the MC! Based on the model# buried in grime, I have type a 'B' rack. It will be sent to 914 Rubber for a rebuild. The coupler actually looked very good, but it will get replaced anyway since I already bought the part. Per usual, a couple of questions: Steering shaft bearing: Can I just clean and regrease this, or should I just replace it? The replacements I see for sale don't look quite the same to my eyes. Suspension parts. I've removed all the rust and loose paint, cleaned and etched the metal for painting (powdercoating isn't in the budget). I'm thinking about using Rustoleum Professional enamel (brush on- not the spray paint) after applying coat of their pro metal primer. Anyone have experience using this stuff? Are there other products I should be considering? Cost is a factor and I'm not interested in anything that I have to mail order or remove all of the existing paint to apply. I used this Rustoleum on my front and rear arms and I’m extremely happy with the results. In fact I did the front strut bodies, rear hubs, and probably some other parts I’ve forgotten with the same stuff. They cured hard and glossy and feel like they were powder coated. |
| rjames |
 Mar 18 2024, 10:05 PM Mar 18 2024, 10:05 PM
Post
#45
|
|
I'm made of metal     Group: Members Posts: 4,162 Joined: 24-July 05 From: Shoreline, WA Member No.: 4,467 Region Association: Pacific Northwest 
|
@TargaToy
Thanks for sharing your experience. The primer has been applied. Topcoat in black to follow. 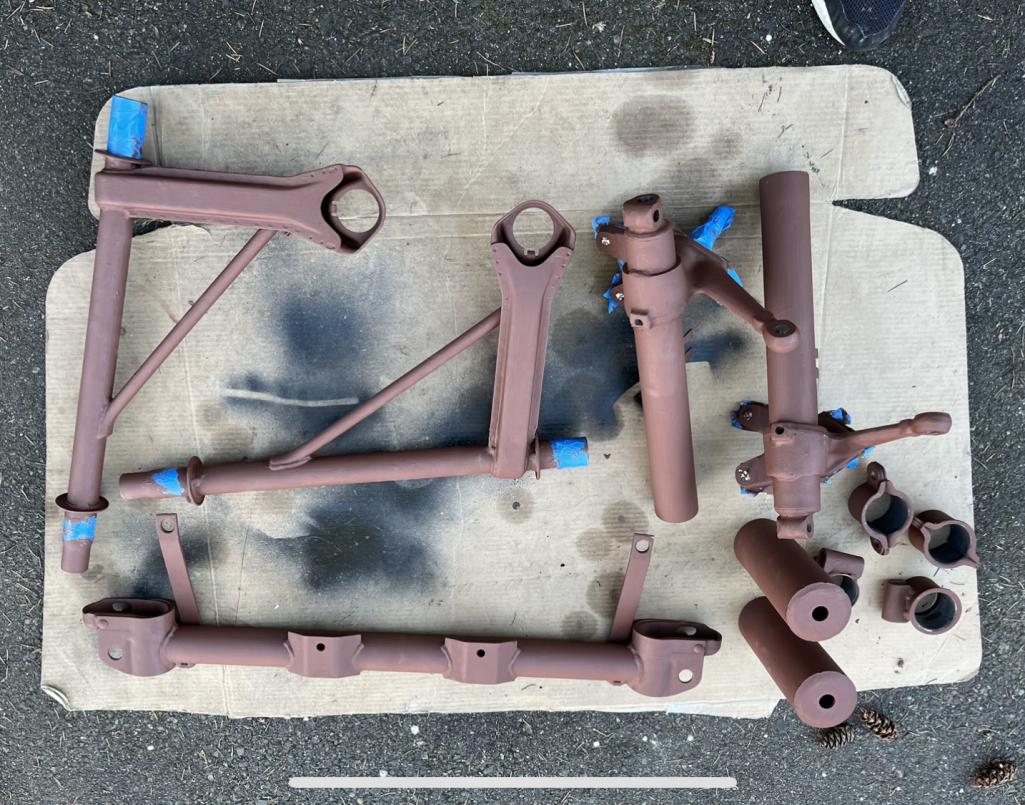 |
| jhynesrockmtn |
 Mar 19 2024, 07:19 PM Mar 19 2024, 07:19 PM
Post
#46
|
|
Member   Group: Members Posts: 426 Joined: 13-June 16 From: spokane wa Member No.: 20,100 Region Association: Pacific Northwest 
|
Looking good! I'd replace the bearing, they are cheap.
|
| rjames |
 Mar 20 2024, 07:26 PM Mar 20 2024, 07:26 PM
Post
#47
|
|
I'm made of metal     Group: Members Posts: 4,162 Joined: 24-July 05 From: Shoreline, WA Member No.: 4,467 Region Association: Pacific Northwest 
|
|
| rjames |
 Mar 25 2024, 02:22 PM Mar 25 2024, 02:22 PM
Post
#48
|
|
I'm made of metal     Group: Members Posts: 4,162 Joined: 24-July 05 From: Shoreline, WA Member No.: 4,467 Region Association: Pacific Northwest 
|
While waiting for my rebuilt rack to come back from 914Rubber, I did a thing.
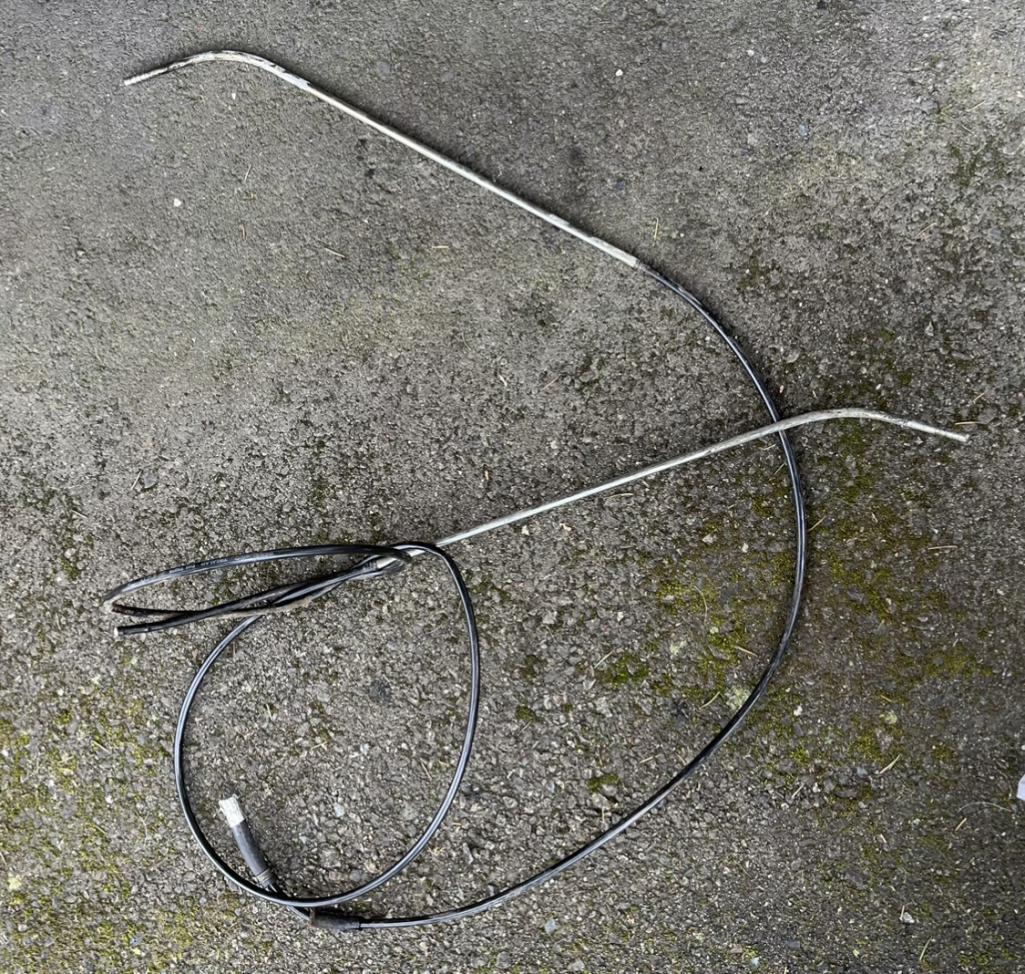 I don’t know what the old lines were made of, but they probably would’ve lasted another 50 years. Better safe than sorry, though.  Took a couple of hours just to get them out when you include removing the center console and cleaning up. I really hate dealing with the fuel lines! Amateur tip: plugging the lines at the gas tank ends with plumbers putty will keep them from leaking gasoline in the center tunnel when you pull them out from the rear firewall and won’t interfere with their removal. I’ll take a run at getting the SS lines installed later today. |
| jhynesrockmtn |
 Mar 26 2024, 08:35 AM Mar 26 2024, 08:35 AM
Post
#49
|
|
Member   Group: Members Posts: 426 Joined: 13-June 16 From: spokane wa Member No.: 20,100 Region Association: Pacific Northwest 
|
While waiting for my rebuilt rack to come back from 914Rubber, I did a thing. I don’t know what the old lines were made of, but they probably would’ve lasted another 50 years. Better safe than sorry, though. Took a couple of hours just to get them out when you include removing the center console and cleaning up. I really hate dealing with the fuel lines! Amateur tip: plugging the lines at the gas tank ends with plumbers putty will keep them from leaking gasoline in the center tunnel when you pull them out from the rear firewall and won’t interfere with their removal. I’ll take a run at getting the SS lines installed later today. (IMG:style_emoticons/default/aktion035.gif) I've done this upgrade to all of my 914s. 3 so far. Well worth the peace of mind. |
| rjames |
 Mar 31 2024, 01:50 PM Mar 31 2024, 01:50 PM
Post
#50
|
|
I'm made of metal     Group: Members Posts: 4,162 Joined: 24-July 05 From: Shoreline, WA Member No.: 4,467 Region Association: Pacific Northwest 
|
In hindsight I wish I had left the original plastic fuel lines in tact. They showed no signs of failure, and removing them and installing the SS lines actually introduced additional failure points because after installing the SS lines, you have to add 2 rubber lines of decent length to connect the SS lines from the firewall up to the SS lines that go in the engine bay.
The original setup had the plastic lines going the way through the tunnel up into the engine bay. If anyone with a '75 or '76 model car is contemplating the SS lines, save yourself the time and $ and keep the original setup. |
| rjames |
 May 3 2024, 08:54 PM May 3 2024, 08:54 PM
Post
#51
|
|
I'm made of metal     Group: Members Posts: 4,162 Joined: 24-July 05 From: Shoreline, WA Member No.: 4,467 Region Association: Pacific Northwest 
|
Just got a package today.
A few weeks ago I sent this off: 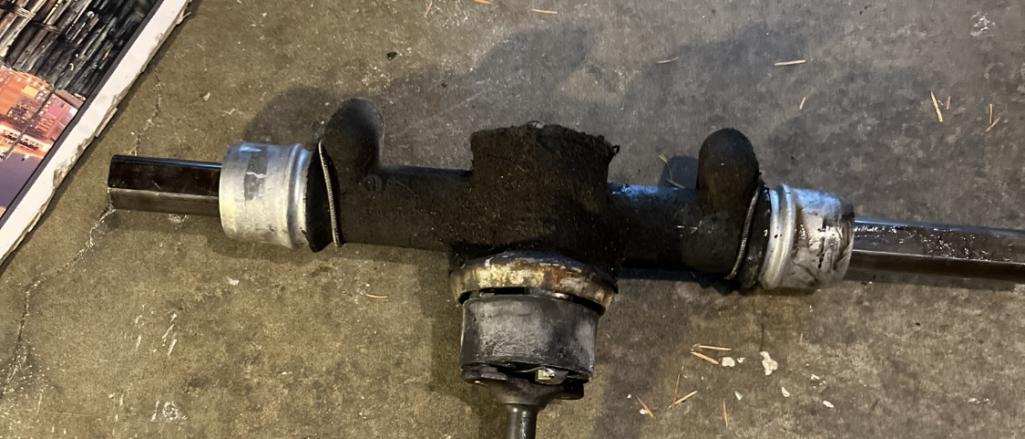 Scott at 914 Rubber turned it into this: 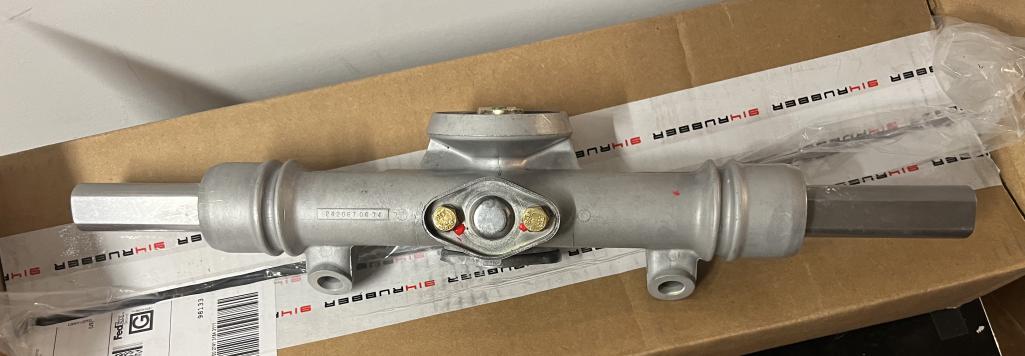 (IMG:style_emoticons/default/piratenanner.gif) |
| rjames |
 Jun 2 2024, 06:50 PM Jun 2 2024, 06:50 PM
Post
#52
|
|
I'm made of metal     Group: Members Posts: 4,162 Joined: 24-July 05 From: Shoreline, WA Member No.: 4,467 Region Association: Pacific Northwest 
|
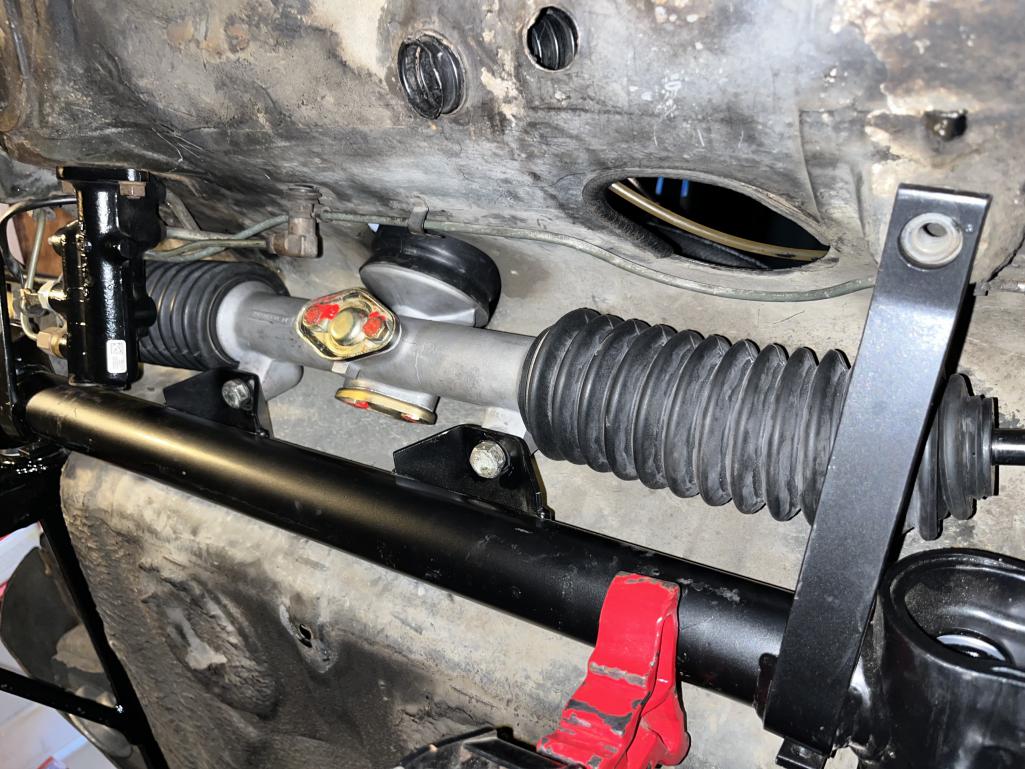
Got the steering rack and the suspension crossmember installed.
Also decided not to go with the rubber control arm bushings and instead went with the Rebel Racing ones. Got the test fitting and arm alignments done so they move freely. (Rubber ones will be for sale soon). 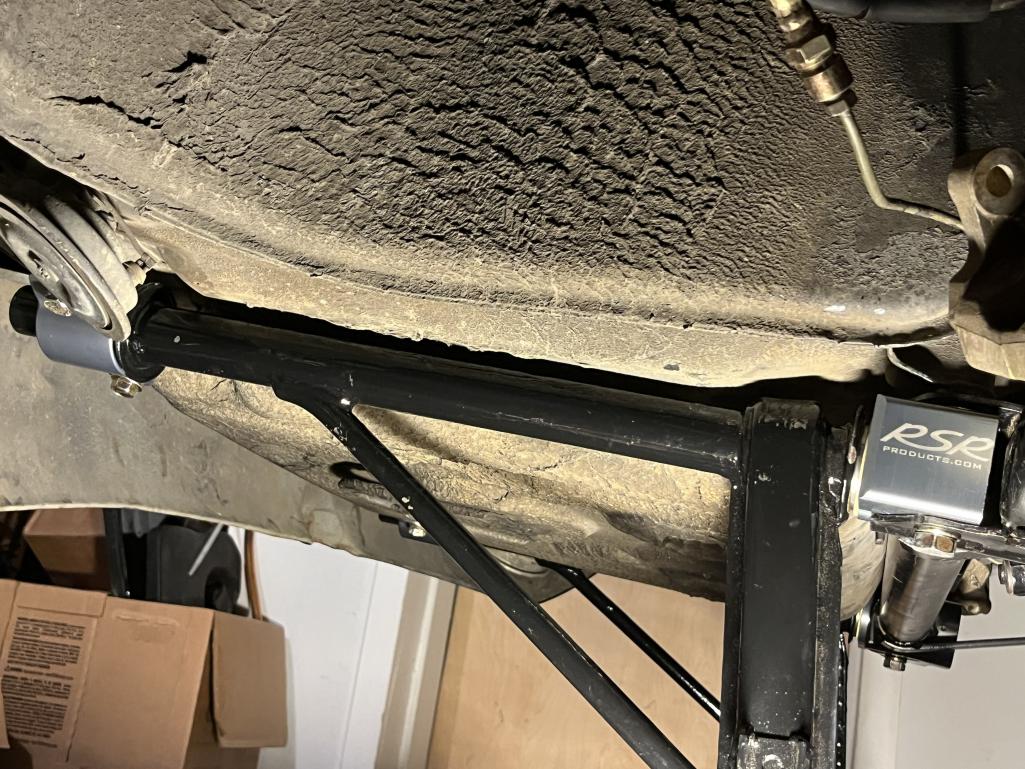 Next up will be to affix the inner bushing sleeves and complete the install before moving on to the tie rods and ball joints. |
| rjames |
 Jun 5 2024, 11:14 AM Jun 5 2024, 11:14 AM
Post
#53
|
|
I'm made of metal     Group: Members Posts: 4,162 Joined: 24-July 05 From: Shoreline, WA Member No.: 4,467 Region Association: Pacific Northwest 
|
Ok to reuse these ball joint/strut wedge pins or do I have to buy new?
I didn’t have to beat the crap out of them to remove them and they look to be in good shape. I’ve read some posts on the bird site about replacements not fitting the same, and the ones supplied by Porsche are $40 each. (IMG:style_emoticons/default/blink.gif) 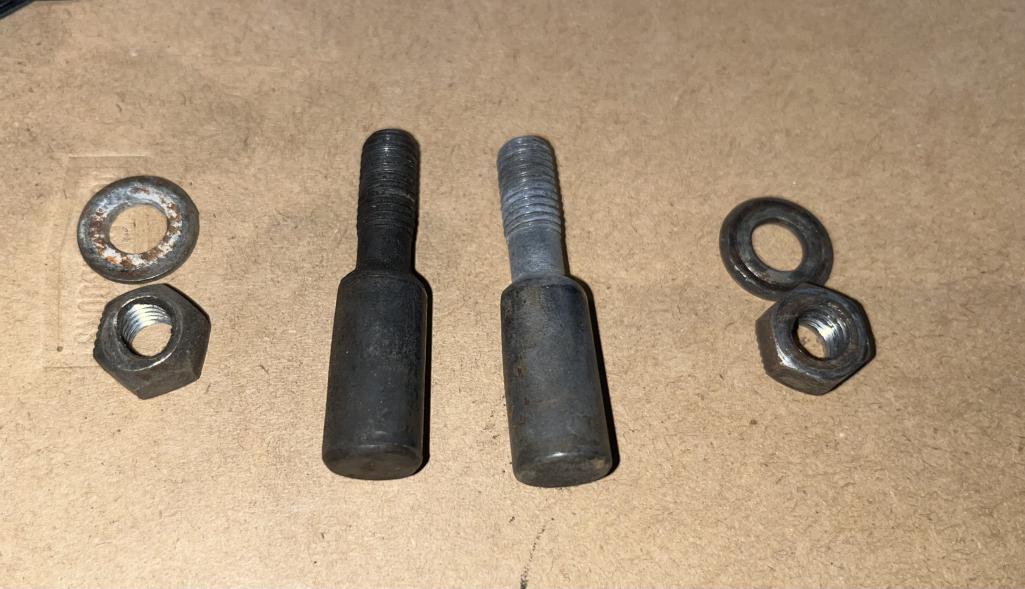 |
| Geezer914 |
 Jun 5 2024, 12:06 PM Jun 5 2024, 12:06 PM
Post
#54
|
|
Geezer914    Group: Members Posts: 1,805 Joined: 18-March 09 From: Salem, NJ Member No.: 10,179 Region Association: North East States 
|
I installed RSR bushings front and rear. 19 mm torsion bars in front, and 140 lb. springs in the rear. Bilstein's all around. Years ago, Tangerine Racing was selling steering couplers made from Delran, nice solid feel.
|
| rjames |
 Jun 7 2024, 10:19 PM Jun 7 2024, 10:19 PM
Post
#55
|
|
I'm made of metal     Group: Members Posts: 4,162 Joined: 24-July 05 From: Shoreline, WA Member No.: 4,467 Region Association: Pacific Northwest 
|
|
| rjames |
 Jun 11 2024, 10:09 AM Jun 11 2024, 10:09 AM
Post
#56
|
|
I'm made of metal     Group: Members Posts: 4,162 Joined: 24-July 05 From: Shoreline, WA Member No.: 4,467 Region Association: Pacific Northwest 
|
Ready to install the new ball joints and Koni struts.
Is there any reason I shouldn't attach the ball joint to the strut housing while it's off the car? It would be a lot easier to get the wedge pin installed that way and get the struts installed/gland nut tightened if I could do those things on the bench. The control arms are on the car (and I don't want to remove them). |
| rjames |
 Jun 26 2024, 04:51 PM Jun 26 2024, 04:51 PM
Post
#57
|
|
I'm made of metal     Group: Members Posts: 4,162 Joined: 24-July 05 From: Shoreline, WA Member No.: 4,467 Region Association: Pacific Northwest 
|
Struts installed in the housings. Getting the gland nut tightened to spec was difficult given it's horrible design as evidence by the markings on top from where the tool would slip out.
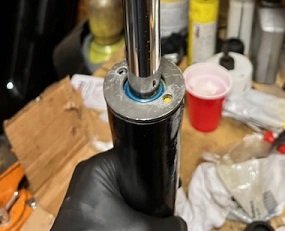 Strut installed in the car. 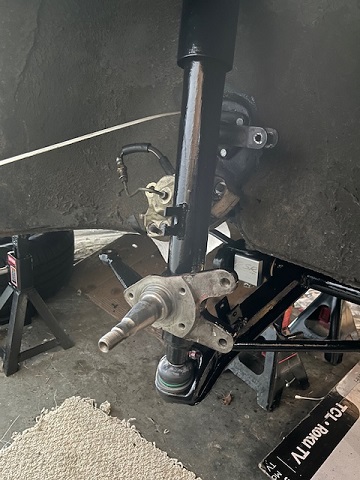 I grabbed the old nyloc nuts by mistake instead of the new ones that Koni provides. Figured it wasn't a big deal given you lock the nuts in place by bending up the washer, but then found out that the nut sits higher than I'd like it to since the nylocs are taller than the standard nuts. I'll be removing the Nylocs and installing the new ones. 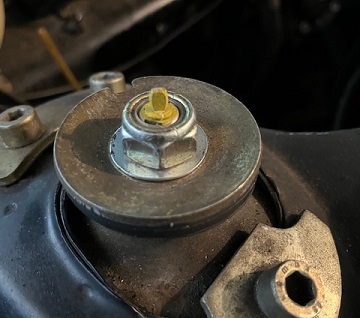 |
| rjames |
 Jun 26 2024, 05:01 PM Jun 26 2024, 05:01 PM
Post
#58
|
|
I'm made of metal     Group: Members Posts: 4,162 Joined: 24-July 05 From: Shoreline, WA Member No.: 4,467 Region Association: Pacific Northwest 
|
On to the ball joints. I made the mistake of trying to reuse the old ball joint nuts. They looked to be in decent shape, but the tool kept sliding off because the top corners were rounded a bit. After wasting too much time trying to make them work, I finally bought new ones.
This tool is stout and Jim Tidwell who makes them it amazing. I found his contact info on Pelican. He ships the tool before getting payment because he wants to make sure you're happy with it first. I'm sure he never gets one returned. It's a work of art. 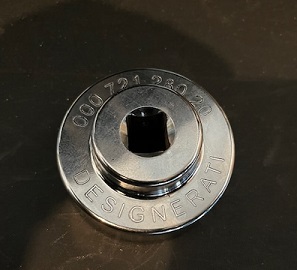 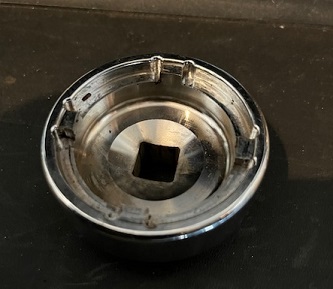 After receiving the new nuts, getting them torqued to spec with the tool was done in a few minutes with a flat-backed wrench and a jack. 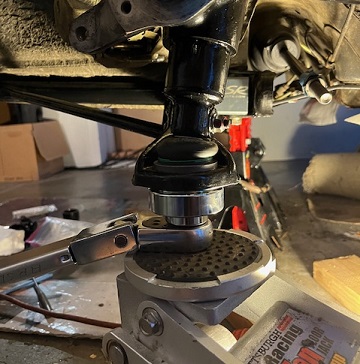 Lock washer (or whatever it's called) and pin installed (washer now in need of a little touch-up paint). 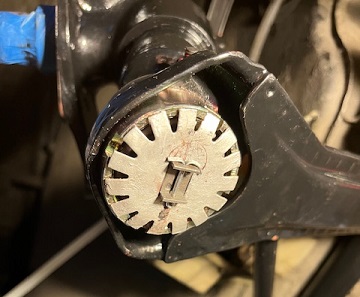 BTW, most (all?) of the posts I saw about installing ball joints had you first install them to the control arm on the car, and then attach the ball joint to the strut housing. I think it was easier to attach ball joint to the strut housing off the car, and then install the whole thing to the control arm that was already on the car. Next up: tie rod ends and torsion bars as soon as I receive the bars from Sierra Madre to replace the defective one I received. Two steps forward, one step back. |
| Superhawk996 |
 Jun 26 2024, 11:11 PM Jun 26 2024, 11:11 PM
Post
#59
|
|
914 Guru      Group: Members Posts: 6,634 Joined: 25-August 18 From: Woods of N. Idaho Member No.: 22,428 Region Association: Galt's Gulch 
|
(IMG:style_emoticons/default/cheer.gif) you’re getting there!!!
|
| rjames |
 Jul 2 2024, 09:43 AM Jul 2 2024, 09:43 AM
Post
#60
|
|
I'm made of metal     Group: Members Posts: 4,162 Joined: 24-July 05 From: Shoreline, WA Member No.: 4,467 Region Association: Pacific Northwest 
|
2 steps forward, 1 step back...
Still awaiting Sierra Madre to give me the green light to send the defective torsion bars back... In the meantime I went to tighten the strut bolts to spec. Got the right one done, but the left one at 30 foot pounds felt like I had stripped the threads. Thankfully I was able to get the nut off and found this: 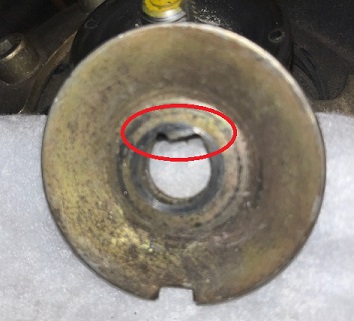 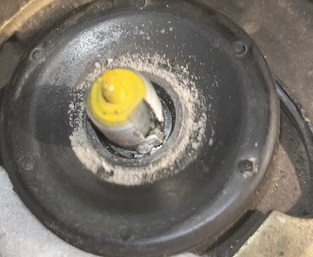 I'm guessing that this is a result of someone before me using an impact wrench to (over)tighten the nuts. I'm sure they were overtightened because they were almost impossible to remove with hand tools which shouldn't have been the case given that they are only supposed to be tightened to 58 foot pounds. After removing the bits of metal I used the replacements that Koni provides. Bummer because I like the look of the originals. Oh well. I'll get them tightened them down fully when the car is back on the ground. 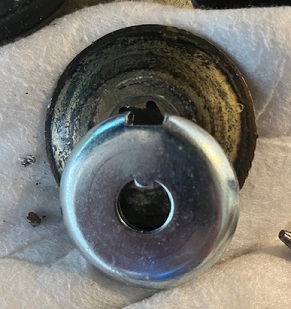 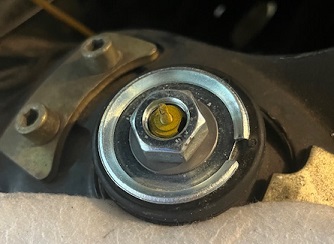 |
  |
8 User(s) are reading this topic (8 Guests and 0 Anonymous Users)
0 Members:

|
Lo-Fi Version | Time is now: 5th January 2025 - 12:51 AM |
Invision Power Board
v9.1.4 © 2025 IPS, Inc.


