|
|

|
Porsche, and the Porsche crest are registered trademarks of Dr. Ing. h.c. F. Porsche AG.
This site is not affiliated with Porsche in any way. Its only purpose is to provide an online forum for car enthusiasts. All other trademarks are property of their respective owners. |
|
|
  |
| MikeK |
 Dec 14 2023, 10:10 AM Dec 14 2023, 10:10 AM
Post
#41
|
|
Member   Group: Members Posts: 132 Joined: 15-June 23 From: 80906 Member No.: 27,418 Region Association: Rocky Mountains |
Here's an alternative method for fitting and holding panels. I cut a bunch of these little tabs, punch an 1/8" hole for a cleco, tack to either side of the panels your joining.
(IMG:http://www.914world.com/bbs2/uploads_offsite/www.thesamba.com-27418-1702570226.1.jpg) Regarding butt vs. lap welding; My suggestion to lap was based solely on the OP's lack of experience. The most skilled part of this job is the welding, the rest of the job is patience and the grunt work of putting the panel in and out to obtain a good fit. With enough fitting, the panel could be made to fit like a glove, then rosette welded with proper surface preparation. Is it the best way? Let's just say it isn't how I would do it, but fitting a panel with little to no gaps is a skill that needs to be developed as well. Considering that EVERY joined panel on your Porsche is a lap weld, I think it's a viable option. In fact, the only butt welded panels I can think of on a Porsche would be 356 outer panels, and you would never want to weld those with a MIG because you wouldn't be able to metal finish it.(IMG:http://www.914world.com/bbs2/uploads_offsite/www.thesamba.com-27418-1702570517.1.jpg) Good luck! |
| 930cabman |
 Dec 14 2023, 01:01 PM Dec 14 2023, 01:01 PM
Post
#42
|
|
Advanced Member     Group: Members Posts: 3,803 Joined: 12-November 20 From: Buffalo Member No.: 24,877 Region Association: North East States 
|
Great advice MikeK, thanks
I will making the same (frunk floor) replacement and will shoot for the butt, it just looks cleaner. Who will look under the spare tire anyways? BTW: looks like you have a nice little project with the 356 |
| 914rrr |
 Dec 15 2023, 07:59 PM Dec 15 2023, 07:59 PM
Post
#43
|
|
Senior Member    Group: Members Posts: 1,837 Joined: 1-July 03 From: Knoxville, TN Member No.: 874 Region Association: South East States |
Is flux welding more apt to have paint adhesion issues vs MIG? IIRC, one of my first 914's had a what looked like a rust spot in the drivers side front fender near the bottom. When we started grinding it, we discovered it had been repaired / patched already and welded (brazed) with brass. I was told that unless you are meticulous in removing every bit of flux then then the body filler and paint wouldn't stick to it properly. Is this correct?
|
| 930cabman |
 Dec 16 2023, 08:55 AM Dec 16 2023, 08:55 AM
Post
#44
|
|
Advanced Member     Group: Members Posts: 3,803 Joined: 12-November 20 From: Buffalo Member No.: 24,877 Region Association: North East States 
|
Is flux welding more apt to have paint adhesion issues vs MIG? IIRC, one of my first 914's had a what looked like a rust spot in the drivers side front fender near the bottom. When we started grinding it, we discovered it had been repaired / patched already and welded (brazed) with brass. I was told that unless you are meticulous in removing every bit of flux then then the body filler and paint wouldn't stick to it properly. Is this correct? Not only flux, but any contaminant. painting is all about prep and it can be anything |
| 914rrr |
 Dec 16 2023, 09:42 AM Dec 16 2023, 09:42 AM
Post
#45
|
|
Senior Member    Group: Members Posts: 1,837 Joined: 1-July 03 From: Knoxville, TN Member No.: 874 Region Association: South East States |
Is flux welding more apt to have paint adhesion issues vs MIG? IIRC, one of my first 914's had a what looked like a rust spot in the drivers side front fender near the bottom. When we started grinding it, we discovered it had been repaired / patched already and welded (brazed) with brass. I was told that unless you are meticulous in removing every bit of flux then then the body filler and paint wouldn't stick to it properly. Is this correct? Not only flux, but any contaminant. painting is all about prep and it can be anything So, is flux core welding generally a bad idea for anything that will be painted, especially if it's on an exterior body panel vs pans or trunk areas? |
| mb911 |
 Dec 16 2023, 01:37 PM Dec 16 2023, 01:37 PM
Post
#46
|
|
914 Guru      Group: Members Posts: 7,386 Joined: 2-January 09 From: Burlington wi Member No.: 9,892 Region Association: Upper MidWest 
|
Is flux welding more apt to have paint adhesion issues vs MIG? IIRC, one of my first 914's had a what looked like a rust spot in the drivers side front fender near the bottom. When we started grinding it, we discovered it had been repaired / patched already and welded (brazed) with brass. I was told that unless you are meticulous in removing every bit of flux then then the body filler and paint wouldn't stick to it properly. Is this correct? Not only flux, but any contaminant. painting is all about prep and it can be anything So, is flux core welding generally a bad idea for anything that will be painted, especially if it's on an exterior body panel vs pans or trunk areas? No it will be just fine. They literally paint buildings and the frame work of sky scrapers that have been flux core welded. Just clean it properly |
| mb911 |
 Dec 16 2023, 01:39 PM Dec 16 2023, 01:39 PM
Post
#47
|
|
914 Guru      Group: Members Posts: 7,386 Joined: 2-January 09 From: Burlington wi Member No.: 9,892 Region Association: Upper MidWest 
|
@mb911 That TIG weld is a thing of beauty. I only have access to a MIG welder and am not skilled enough to lay down beads like that. Re-reading my follow-up post, the litany of not wanting to weld from the bottom was about the lap weld. I thought I would have to do the top and the bottom. I have a pretty good mess to clean up first, so I'll see how I do with all that work first. And then I'll decide how comfortable I am with the butt weld. I usually have to do things twice. Something tells me I'll be paying a professional–eventually. Thank you everyone for your thoughts. It is a constructive discussion. I've learned a lot. (IMG:style_emoticons/default/smilie_pokal.gif) Use magnets to hold the but joint tight until it’s tacked in. I find that my arc likes to wander when I'm tacking things up with a MIG while using magnets. Maybe I'm imagining it. It also took me a couple of Winters to figure out that my welds went to shit when my shop heater turned on. Then I realized all my shielding gas was blowing away... A few magnets to hold it in place not near where you are tacking |
| gereed75 |
 Dec 16 2023, 03:00 PM Dec 16 2023, 03:00 PM
Post
#48
|
|
Senior Member    Group: Members Posts: 1,318 Joined: 19-March 13 From: Pittsburgh PA Member No.: 15,674 Region Association: North East States 
|
It will also destroy the strength of the magnet
Always recommend listening to Ben’s advice. Very knowledgeable. Just bought a used helmet from him (reasonably priced too) Even though used was a significant upgrade over my base line helmet. Vis is so much better. Used it for the first time yesterday and actually made a bunch of welds I did not feel compelled to grind!! Thanks Ben PS: go check out Fitzee on YouTube. He uses a method he calls cut and butt. I’m a rank amateur but it has worked for me in several applications repairing floor pans. |
| mb911 |
 Dec 17 2023, 07:23 AM Dec 17 2023, 07:23 AM
Post
#49
|
|
914 Guru      Group: Members Posts: 7,386 Joined: 2-January 09 From: Burlington wi Member No.: 9,892 Region Association: Upper MidWest 
|
It will also destroy the strength of the magnet Always recommend listening to Ben’s advice. Very knowledgeable. Just bought a used helmet from him (reasonably priced too) Even though used was a significant upgrade over my base line helmet. Vis is so much better. Used it for the first time yesterday and actually made a bunch of welds I did not feel compelled to grind!! Thanks Ben PS: go check out Fitzee on YouTube. He uses a method he calls cut and butt. I’m a rank amateur but it has worked for me in several applications repairing floor pans. That does work for sure |
| Deusexmachina77 |
 Dec 18 2023, 04:56 PM Dec 18 2023, 04:56 PM
Post
#50
|
|
Member   Group: Members Posts: 96 Joined: 30-March 22 From: Chicago Member No.: 26,426 Region Association: Upper MidWest 
|
I cut the panel to where I thought it would lay best and found the best metal to adhere to. I tacked the panel in place, then cut around the panel with the thinnest cutting wheel I could find. Sometimes I used a Dremel. Cut and tack. Cut and tack. The backside closest to the vertical is not as bad as it looks. The old floor sagged away after it was cut. With just a little help it meets the new panel perfectly. I had a couple of mistakes cutting making bigger gaps than I wanted. Rookie mistakes. But all in all I think I'm going to be okay.
Attached thumbnail(s) 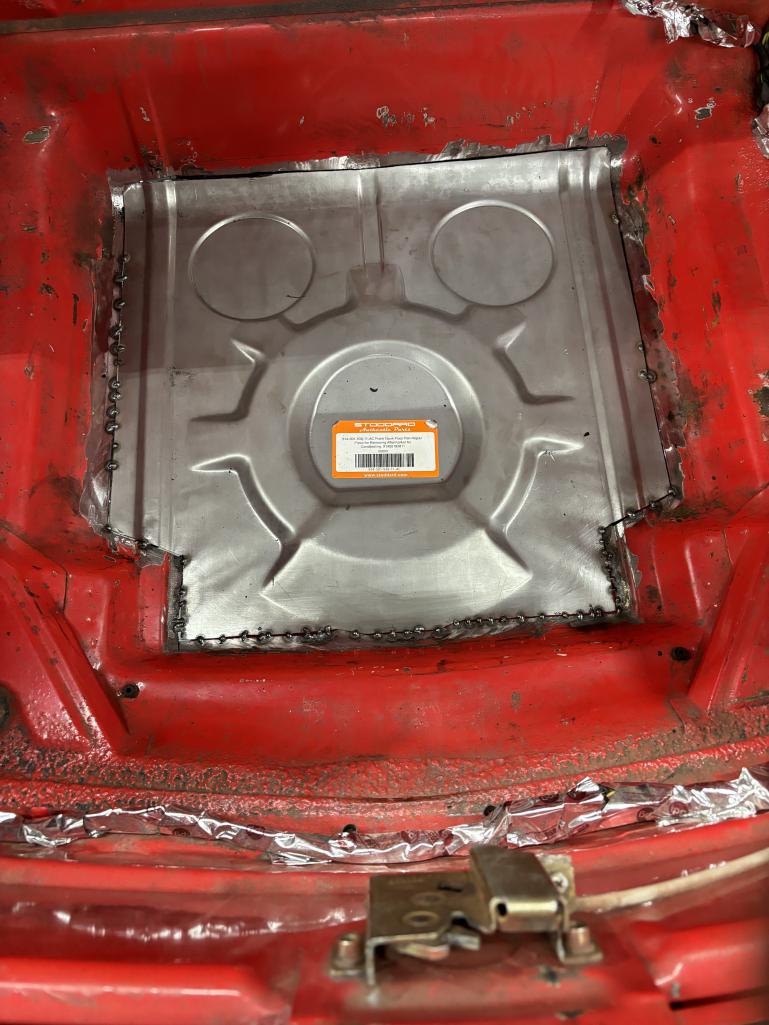
|
| Superhawk996 |
 Dec 18 2023, 10:43 PM Dec 18 2023, 10:43 PM
Post
#51
|
|
914 Guru      Group: Members Posts: 6,633 Joined: 25-August 18 From: Woods of N. Idaho Member No.: 22,428 Region Association: Galt's Gulch 
|
(IMG:style_emoticons/default/aktion035.gif) pretty good fit for someone that was going to lap weld it!!
Use a copper backer on those back wall large gaps and you’ll be fine. Keep going. Go slow. Bounce around. Cool to the touch before adding more welds. |
| mb911 |
 Dec 19 2023, 06:29 AM Dec 19 2023, 06:29 AM
Post
#52
|
|
914 Guru      Group: Members Posts: 7,386 Joined: 2-January 09 From: Burlington wi Member No.: 9,892 Region Association: Upper MidWest 
|
(IMG:style_emoticons/default/aktion035.gif) pretty good fit for someone that was going to lap weld it!! Use a copper backer on those back wall large gaps and you’ll be fine. Keep going. Go slow. Bounce around. Cool to the touch before adding more welds. Copper if you have it and poor man solution is aluminum.. |
| 930cabman |
 Dec 19 2023, 07:22 AM Dec 19 2023, 07:22 AM
Post
#53
|
|
Advanced Member     Group: Members Posts: 3,803 Joined: 12-November 20 From: Buffalo Member No.: 24,877 Region Association: North East States 
|
I cut the panel to where I thought it would lay best and found the best metal to adhere to. I tacked the panel in place, then cut around the panel with the thinnest cutting wheel I could find. Sometimes I used a Dremel. Cut and tack. Cut and tack. The backside closest to the vertical is not as bad as it looks. The old floor sagged away after it was cut. With just a little help it meets the new panel perfectly. I had a couple of mistakes cutting making bigger gaps than I wanted. Rookie mistakes. But all in all I think I'm going to be okay. +1 looks great. Welding is like anything else, practice and more practice. Sure, the basics need to be correct, but the technique is all experience. |
| friethmiller |
 Dec 19 2023, 08:51 AM Dec 19 2023, 08:51 AM
Post
#54
|
|
Senior Member    Group: Members Posts: 712 Joined: 10-February 19 From: Austin, TX Member No.: 22,863 Region Association: Southwest Region 
|
I remember the one problem I always had when I started welding was blowing holes through the older metal. You can do two things to avoid this: 1) turn the power down on the welder just a bit; and 2) use shorter burst with the gun. Looks damn good so far! Good Luck! (IMG:style_emoticons/default/welder.gif)
|
| Deusexmachina77 |
 Dec 19 2023, 03:35 PM Dec 19 2023, 03:35 PM
Post
#55
|
|
Member   Group: Members Posts: 96 Joined: 30-March 22 From: Chicago Member No.: 26,426 Region Association: Upper MidWest 
|
I appreciate the encouragement and the tip about the copper!
|
| r_towle |
 Dec 19 2023, 04:35 PM Dec 19 2023, 04:35 PM
Post
#56
|
|
Custom Member                Group: Members Posts: 24,680 Joined: 9-January 03 From: Taxachusetts Member No.: 124 Region Association: North East States 
|
never in one area too long....heat warps things.
|
| gereed75 |
 Dec 19 2023, 05:38 PM Dec 19 2023, 05:38 PM
Post
#57
|
|
Senior Member    Group: Members Posts: 1,318 Joined: 19-March 13 From: Pittsburgh PA Member No.: 15,674 Region Association: North East States 
|
There u go - cut and butt at its finest. Nice work.
|
| Deusexmachina77 |
 Jan 4 2024, 09:14 AM Jan 4 2024, 09:14 AM
Post
#58
|
|
Member   Group: Members Posts: 96 Joined: 30-March 22 From: Chicago Member No.: 26,426 Region Association: Upper MidWest 
|
Hello Friends,
@gereed75 , @r_towle , @friethmiller , @930cabman , @mb911 , @Superhawk996 Here is an update on my progress. I'm having a little trouble in certain tight spots with limited tools cleaning up, but I think it's coming along. I'll do a bit more light grinding, but I hesitate to grind much more as I don't want to thin the metal. What is my next step? I was thinking of a thin coat of fiberglass bondo. Or should I use seam sealer? Seam sealer would defeat the purpose of all this work, but I realize my shortcomings. It's far from perfect. As for the bottom side, what should I use for a coating? Thanks, Victor 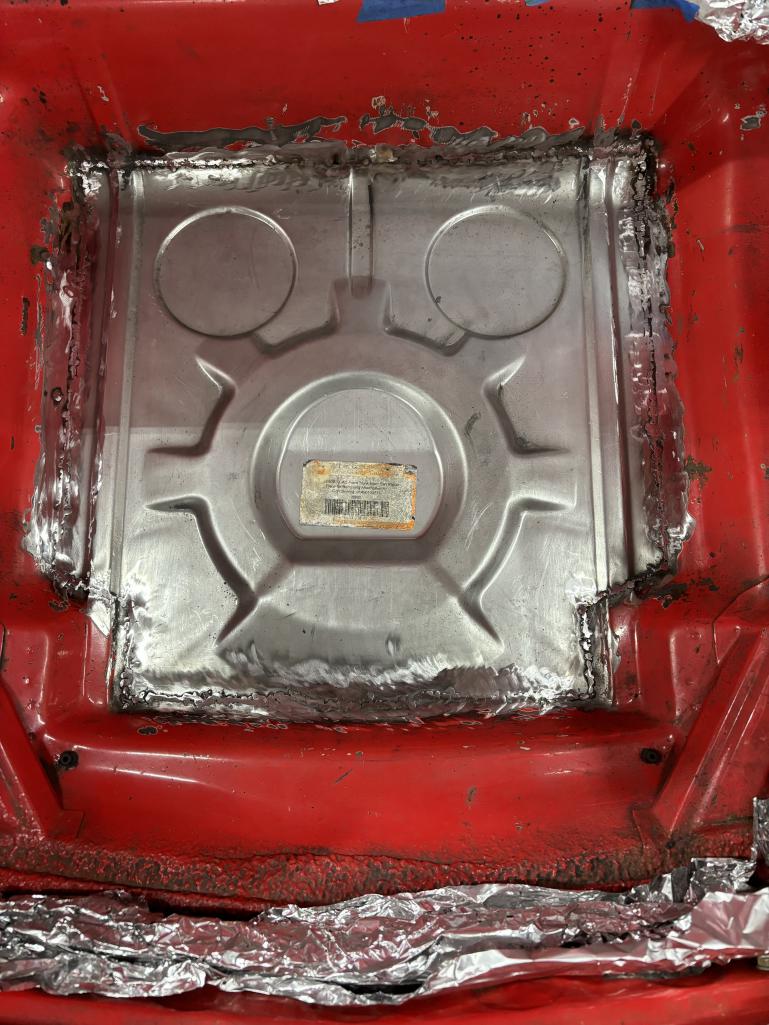 |
| friethmiller |
 Jan 4 2024, 09:45 AM Jan 4 2024, 09:45 AM
Post
#59
|
|
Senior Member    Group: Members Posts: 712 Joined: 10-February 19 From: Austin, TX Member No.: 22,863 Region Association: Southwest Region 
|
Well, that depends what you want. If you want to make it look like the trunk was never replaced, buy a finger sander off of amazon and make that weld line disappear! If you're good with what you've got and you've run a light underneath to ensure there are zero pinholes, then you can prep for paint. I'd feather back the paint a bit more and hit it with epoxy primer. You can use seam sealer here if you want. It might look better than the weld, as is, and provide protection.
I'd personally use the finger sander but it's a matter of what you want to look like in the end. Good Luck! 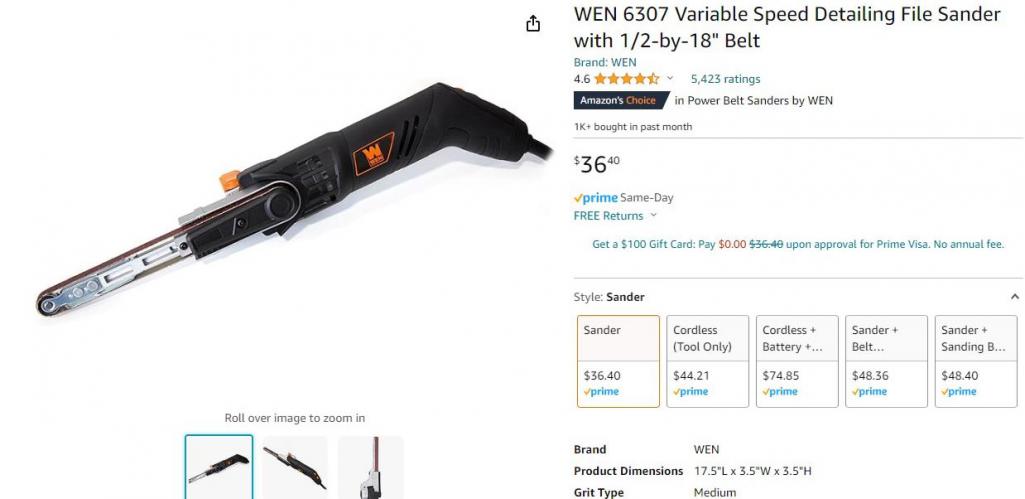 |
| Superhawk996 |
 Jan 4 2024, 09:47 AM Jan 4 2024, 09:47 AM
Post
#60
|
|
914 Guru      Group: Members Posts: 6,633 Joined: 25-August 18 From: Woods of N. Idaho Member No.: 22,428 Region Association: Galt's Gulch 
|
Agree - don’t thin metal by grinding too much
Seam sealer is the next step. The spray on type will mask the remaining weld bead and will look relatively OEM. Brush on will work in a pinch but won’t look quite as nice. Here’s a temporary repair to mine. I have a full panel to do the replacement but needed a quick temporary fix when I was moving the car cross country. Seam sealed 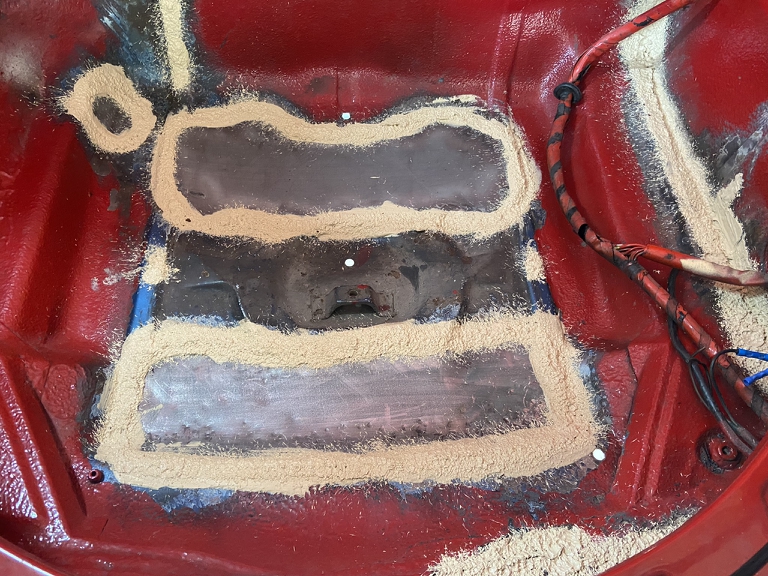 Painted 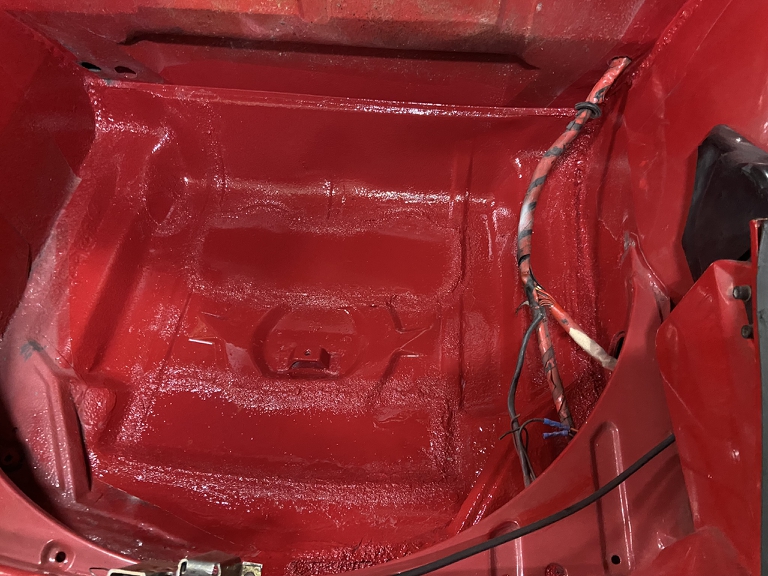 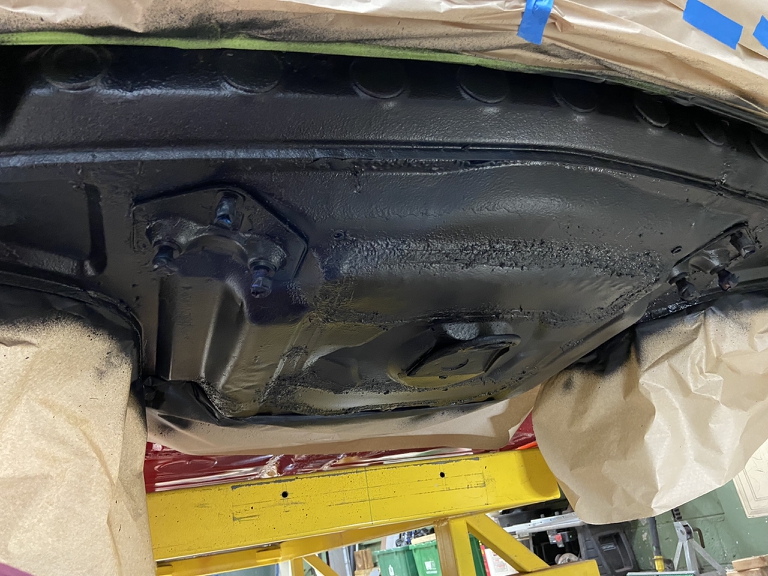 Not sure what you mean by seam sealer would defeat the purpose of the work. The butt weld is to prevent moisture from collecting between panels like a lap weld. You did a great job with your weld! The seal sealer is to prevent moisture from getting into weld. Same as OEM. But if it should get cracked, scratched, etc., there won’t be a lap to allow moisture to collect and rust. If the goal is to make the repair completely invisible - that will be much tougher to achieve. Bondo could be used, but a good eye (or paint gauge) will still pick up that the area has been repaired. Due to all the stamping formation complexity, it will be tough to get filler to match all the formations perfectly and will be very time consuming. |
  |
2 User(s) are reading this topic (2 Guests and 0 Anonymous Users)
0 Members:

|
Lo-Fi Version | Time is now: 4th January 2025 - 08:40 PM |
Invision Power Board
v9.1.4 © 2025 IPS, Inc.


