|
|

|
Porsche, and the Porsche crest are registered trademarks of Dr. Ing. h.c. F. Porsche AG.
This site is not affiliated with Porsche in any way. Its only purpose is to provide an online forum for car enthusiasts. All other trademarks are property of their respective owners. |
|
|
  |
| roundtwo |
 Jan 9 2024, 10:28 PM Jan 9 2024, 10:28 PM
Post
#101
|
|
Member   Group: Members Posts: 314 Joined: 9-February 20 From: Petaluma, CA Member No.: 23,905 Region Association: Central California 
|
Super impressive work.
|
| friethmiller |
 Jan 11 2024, 09:43 PM Jan 11 2024, 09:43 PM
Post
#102
|
|
Senior Member    Group: Members Posts: 845 Joined: 10-February 19 From: Austin, TX Member No.: 22,863 Region Association: Southwest Region 
|
|
| technicalninja |
 Jan 12 2024, 10:03 AM Jan 12 2024, 10:03 AM
Post
#103
|
|
Advanced Member     Group: Members Posts: 2,523 Joined: 31-January 23 From: Granbury Texas Member No.: 27,135 Region Association: Southwest Region 
|
Yep, you're like the skinny girl who's always bitching about how fat she is.
Your progress looks pretty fast... Especially in the back yard, in the dirt, under a tent! Bet you're not working on it today! It's cold up here in Granbury and it's going to be stupid cold for the next couple of days... My current 2400 sq ft shop has central heat and air! I'm warm and TOASTY right now. (Had to get a little dig in there as your progress rate is humbling to me.) So, stop pissing off the fat (slow) ones with your comments. It looks like you could finish up major metal restoration in under a year. That's freaking fast for a single guy in less-than-ideal conditions... |
| friethmiller |
 Jan 12 2024, 04:33 PM Jan 12 2024, 04:33 PM
Post
#104
|
|
Senior Member    Group: Members Posts: 845 Joined: 10-February 19 From: Austin, TX Member No.: 22,863 Region Association: Southwest Region 
|
Ha! (IMG:style_emoticons/default/biggrin.gif) Speed is relative, I guess.
|
| Tim17 |
 Jan 17 2024, 05:12 AM Jan 17 2024, 05:12 AM
Post
#105
|
|
Member   Group: Members Posts: 60 Joined: 3-December 23 From: Newburyport, Massachusetts Member No.: 27,769 Region Association: North East States 
|
Super job that you’re doing on this car. Being new to fixing 914s, your thread is really helpful to me. Great job with fabrication of all the patches and great photo documentation of it all.
What’s your favored tool for grinding welds? My air grinder with 3” 3m sanding disk is way too slow. Tim |
| friethmiller |
 Jan 17 2024, 08:38 AM Jan 17 2024, 08:38 AM
Post
#106
|
|
Senior Member    Group: Members Posts: 845 Joined: 10-February 19 From: Austin, TX Member No.: 22,863 Region Association: Southwest Region 
|
Super job that you’re doing on this car. Being new to fixing 914s, your thread is really helpful to me. Great job with fabrication of all the patches and great photo documentation of it all. What’s your favored tool for grinding welds? My air grinder with 3” 3m sanding disk is way too slow. Tim This might surprise you, Tim. If I have access, I always use a 4 1/2" Milwaukee angle grinder (corded) with a 60 grit flap disk to get it close and then finish it with a 18"x1/2" finger sander. My pneumatic 2" angle die grinder is used in hard[er] to reach places - for sure. For example, I plan to use the 2" grinder on the welds in the front part of the drivers side longitudinal where I can't get the Milwaukee into. This is coming up next. Anyone working outside or in an unheated garage is on-hold till the weather breaks. 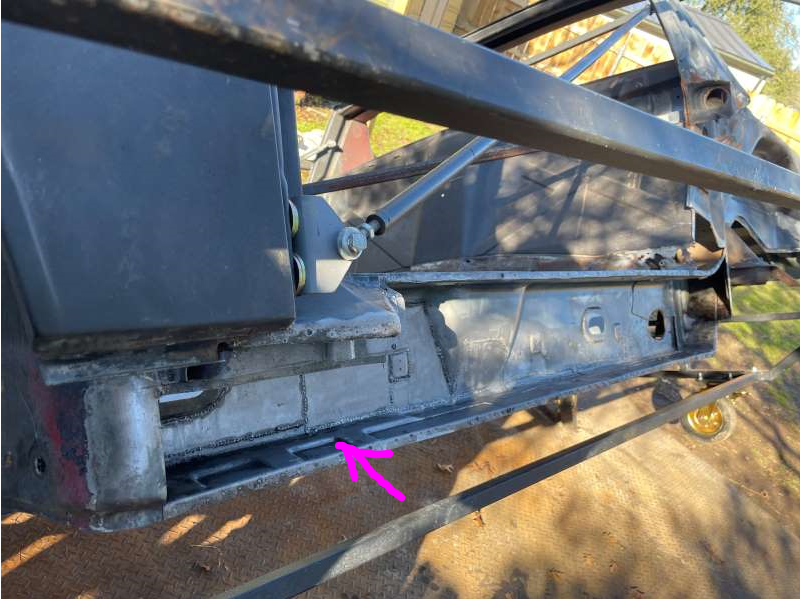 |
| Tim17 |
 Jan 17 2024, 07:23 PM Jan 17 2024, 07:23 PM
Post
#107
|
|
Member   Group: Members Posts: 60 Joined: 3-December 23 From: Newburyport, Massachusetts Member No.: 27,769 Region Association: North East States 
|
Super job that you’re doing on this car. Being new to fixing 914s, your thread is really helpful to me. Great job with fabrication of all the patches and great photo documentation of it all. What’s your favored tool for grinding welds? My air grinder with 3” 3m sanding disk is way too slow. Tim This might surprise you, Tim. If I have access, I always use a 4 1/2" Milwaukee angle grinder (corded) with a 60 grit flap disk to get it close and then finish it with a 18"x1/2" finger sander. My pneumatic 2" angle die grinder is used in hard[er] to reach places - for sure. For example, I plan to use the 2" grinder on the welds in the front part of the drivers side longitudinal where I can't get the Milwaukee into. This is coming up next. Anyone working outside or in an unheated garage is on-hold till the weather breaks.  Fred Thanks. I also like the flap wheel on my electric angle grinder when I have access. What brand is your air die grinder, mine is air thirsty and low on torque. Tim |
| friethmiller |
 Jan 18 2024, 07:10 AM Jan 18 2024, 07:10 AM
Post
#108
|
|
Senior Member    Group: Members Posts: 845 Joined: 10-February 19 From: Austin, TX Member No.: 22,863 Region Association: Southwest Region 
|
Fred Thanks. I also like the flap wheel on my electric angle grinder when I have access. What brand is your air die grinder, mine is air thirsty and low on torque. Tim I don't remember the brand at the moment but it's about 8 years old. The one thing I did do was remove the air regulator off my compressor. That made things a lot better for me with my angle grinder. I do have a regulator that I can quick-attach to any item as needed (i.e. my paint gun). |
| Tim17 |
 Jan 24 2024, 04:49 PM Jan 24 2024, 04:49 PM
Post
#109
|
|
Member   Group: Members Posts: 60 Joined: 3-December 23 From: Newburyport, Massachusetts Member No.: 27,769 Region Association: North East States 
|
Super job that you’re doing on this car. Being new to fixing 914s, your thread is really helpful to me. Great job with fabrication of all the patches and great photo documentation of it all. What’s your favored tool for grinding welds? My air grinder with 3” 3m sanding disk is way too slow. Tim This might surprise you, Tim. If I have access, I always use a 4 1/2" Milwaukee angle grinder (corded) with a 60 grit flap disk to get it close and then finish it with a 18"x1/2" finger sander. My pneumatic 2" angle die grinder is used in hard[er] to reach places - for sure. For example, I plan to use the 2" grinder on the welds in the front part of the drivers side longitudinal where I can't get the Milwaukee into. This is coming up next. Anyone working outside or in an unheated garage is on-hold till the weather breaks.  Fred Thanks. I also like the flap wheel on my electric angle grinder when I have access. What brand is your air die grinder, mine is air thirsty and low on torque. Tim Fred I found a couple of add-on's for my angle grinder that are going to maximize my use of the angle grinder. One is shaft extenders and the other is a Roloc arbor adapter. The shaft extenders allow me to get into tighter spots and even use the flap disk upside down. The shaft extensions are on Amazon for short money.  The roloc adapter is a steel piece with 5/8"-11 female to 1/4"-20 male that fits the roloc arbor, I found it on eBay.  Tim |
| friethmiller |
 Jan 24 2024, 05:05 PM Jan 24 2024, 05:05 PM
Post
#110
|
|
Senior Member    Group: Members Posts: 845 Joined: 10-February 19 From: Austin, TX Member No.: 22,863 Region Association: Southwest Region 
|
Sweet! Where did you find these? I need them!! (IMG:style_emoticons/default/drooley.gif)
|
| flyer86d |
 Jan 25 2024, 05:23 AM Jan 25 2024, 05:23 AM
Post
#111
|
|
Member   Group: Members Posts: 460 Joined: 12-January 11 From: Corea, Maine Member No.: 12,585 Region Association: North East States |
Very nice work. I like the way you located the inner suspension receiver with the angle brace. That eliminates a lot of alignment anguish.
Charlie |
| friethmiller |
 Jan 25 2024, 09:02 AM Jan 25 2024, 09:02 AM
Post
#112
|
|
Senior Member    Group: Members Posts: 845 Joined: 10-February 19 From: Austin, TX Member No.: 22,863 Region Association: Southwest Region 
|
Very nice work. I like the way you located the inner suspension receiver with the angle brace. That eliminates a lot of alignment anguish. Charlie Charlie, Thanks! On my last restoration, I had this complicated jig that bolted into the other suspension ear and it was welded against the firewall. I think the key is not to over-think it too much. You just need to weld in something that will give you two things: 1) the angle of the suspension ear; and 2) the exact location of the bolt. With that said, you can't half-ass something that might be knocked off while you're removing the inner console. The interesting thing will be the drivers side that must be replaced, as well. I'll try and reuse the metal I used last time. We are still a couple weeks away from that task - awaiting on better weather down here in central Texas. |
| Tim17 |
 Jan 25 2024, 02:53 PM Jan 25 2024, 02:53 PM
Post
#113
|
|
Member   Group: Members Posts: 60 Joined: 3-December 23 From: Newburyport, Massachusetts Member No.: 27,769 Region Association: North East States 
|
Here’s a couple of links Pomsare Angle Grinder Wrench, Locknut Grinder Spanner Wrench Flange Nut and Extension Shaft, 8PCS Attachments Kit for 5/8-11 Grinder Power Tools Parts https://a.co/d/7cN22Rf https://www.ebay.com/itm/283301124097?mkcid...&media=COPY Tim |
| friethmiller |
 Feb 5 2024, 08:17 AM Feb 5 2024, 08:17 AM
Post
#114
|
|
Senior Member    Group: Members Posts: 845 Joined: 10-February 19 From: Austin, TX Member No.: 22,863 Region Association: Southwest Region 
|
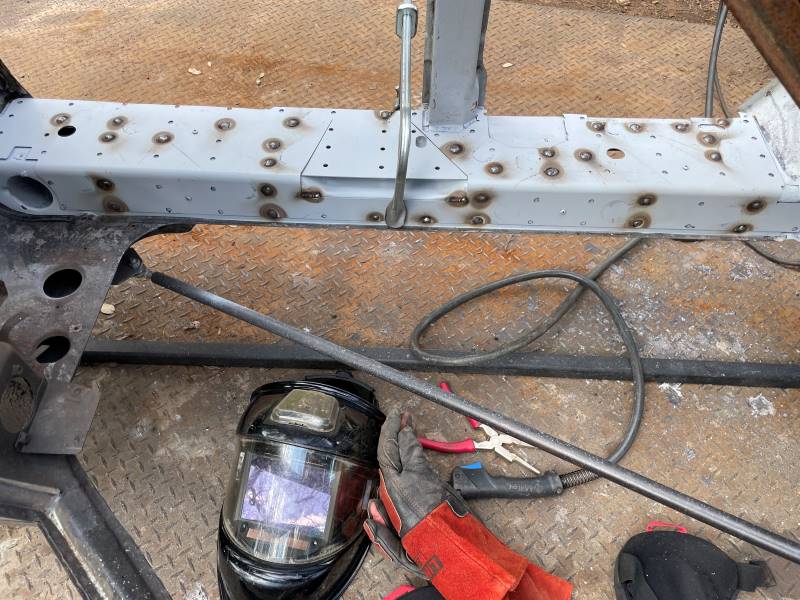
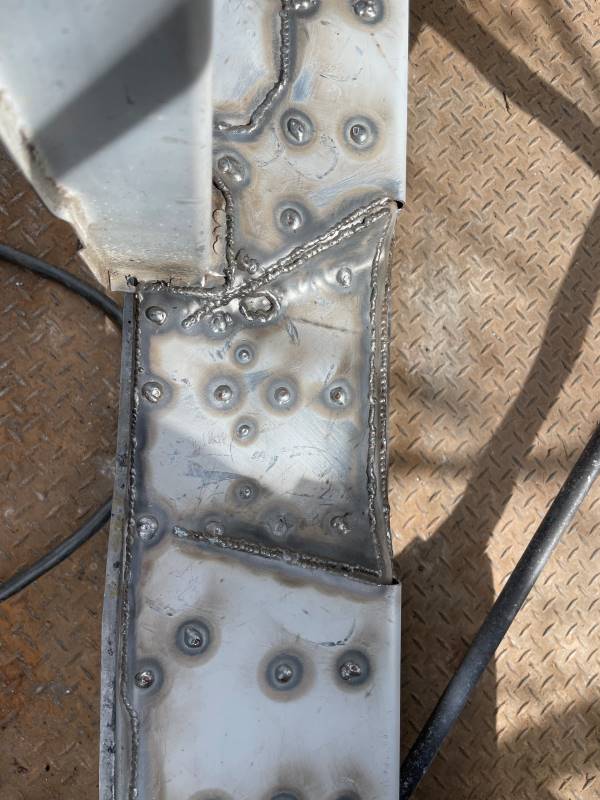
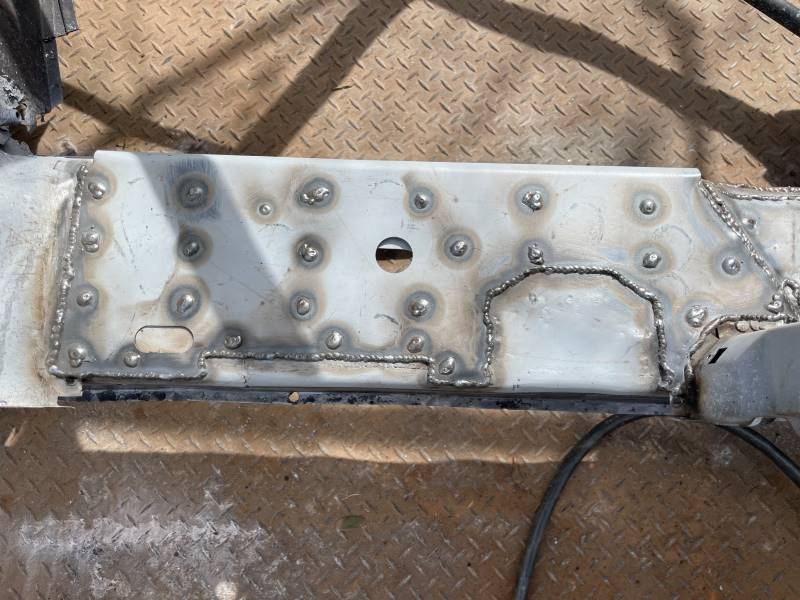
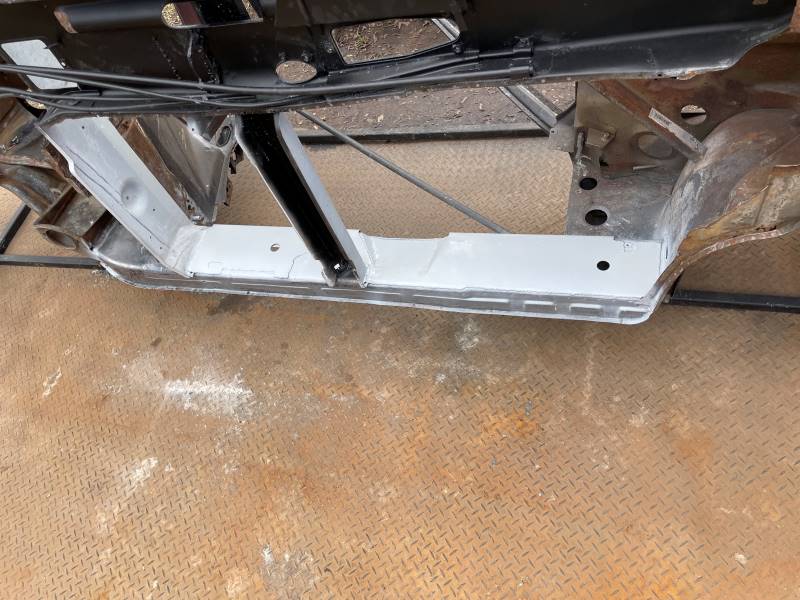
Drivers Side Longitudinal - Part 5 (2/3/2024): Working to add the stiffener to the inboard side of the longitudinal. This must be done first before finishing up the inside of the longitudinal. Here you can see the stiffener ready to go with the longitudinal prep'd and painted. Both pieces are coated with weld-through primer. Hats off to all those of you that welded this stiffening kit into a car sitting on its wheels with floorboards. I'm lucky to have full access to weld the vertical piece at the horizontal with the car flipped up on the 90. With that said, this job is harder than it looks. It took most of my Saturday to get everything welded-in, sanded, and repainted.
        |
| dstudeba |
 Feb 5 2024, 10:28 AM Feb 5 2024, 10:28 AM
Post
#115
|
|
Member   Group: Members Posts: 118 Joined: 3-December 21 From: San Diego Member No.: 26,128 Region Association: Southern California 
|
Great progress! Love your updates, keep going.
|
| friethmiller |
 Feb 5 2024, 11:31 AM Feb 5 2024, 11:31 AM
Post
#116
|
|
Senior Member    Group: Members Posts: 845 Joined: 10-February 19 From: Austin, TX Member No.: 22,863 Region Association: Southwest Region 
|
|
| friethmiller |
 Feb 5 2024, 01:00 PM Feb 5 2024, 01:00 PM
Post
#117
|
|
Senior Member    Group: Members Posts: 845 Joined: 10-February 19 From: Austin, TX Member No.: 22,863 Region Association: Southwest Region 
|
Drivers Side Longitudinal - Part 6 (2/4/2024): After welding in the stiffener on the inboard side, I moved over to repairing a few items in the inside of the longitudinal. There were two areas that had to be addressed here before I could move on: 1) Close the small hole at the front of the longitudinal that was previously used to shoot in rust preventative wax. 2) Reconstruct and weld in reinforcement metal and the new seat belt bolt. Note the arrows.
 1) Hole Repair - I started by cutting and shaping a small patch made out of 18 gauge metal, which I tacked in place. After aligning the patch, I then fully welded it in and finished it all off with some grinding/sanding. I'm not concerned at this point with reconstructing/repairing anything else in the front wheel well at this time. I'll have that "party" some day in the future! (IMG:style_emoticons/default/biggrin.gif) 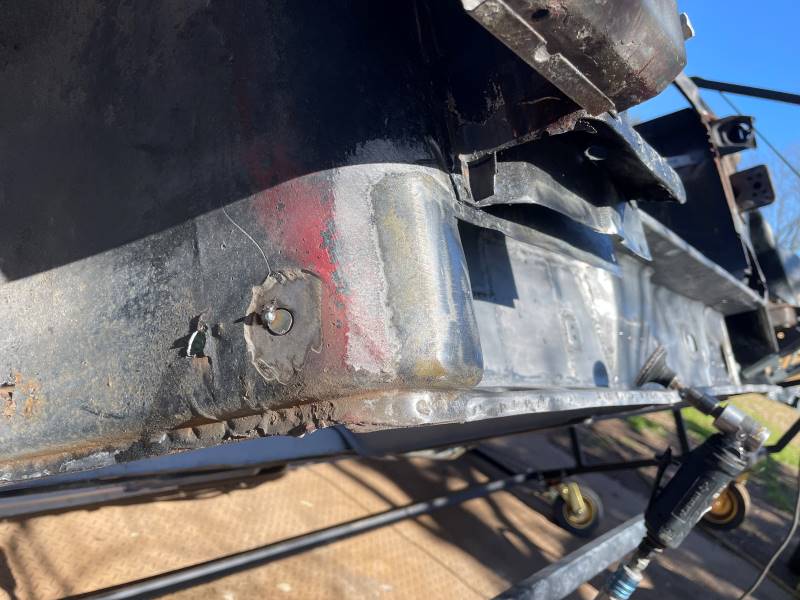 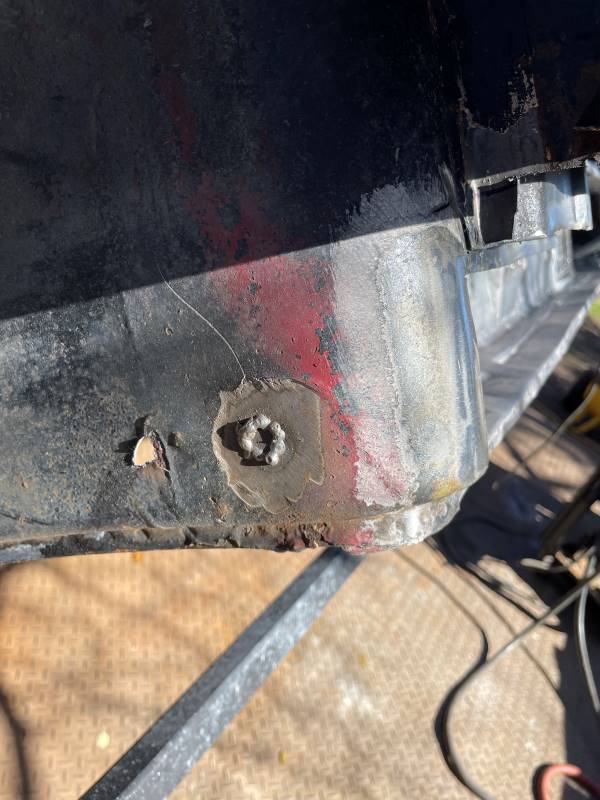 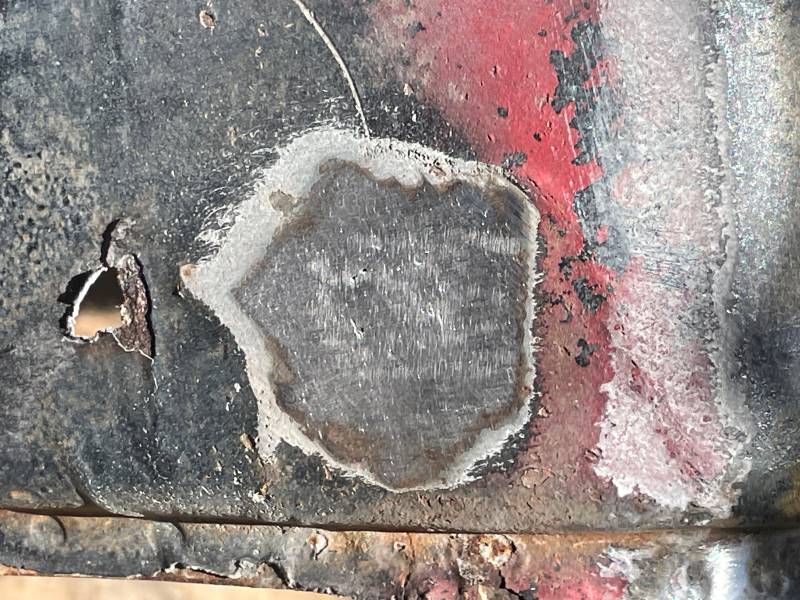 2) Rear Longitudinal Reinforcement - Unlike the small hole repair, this task was a little more time-consuming. I started by creating the vertical reinforcement using the original part made out of 18 gauge sheet metal. Once sanded and painted the metal was welded into place. Note, I did used a small piece of the original metal to make things a little easier. 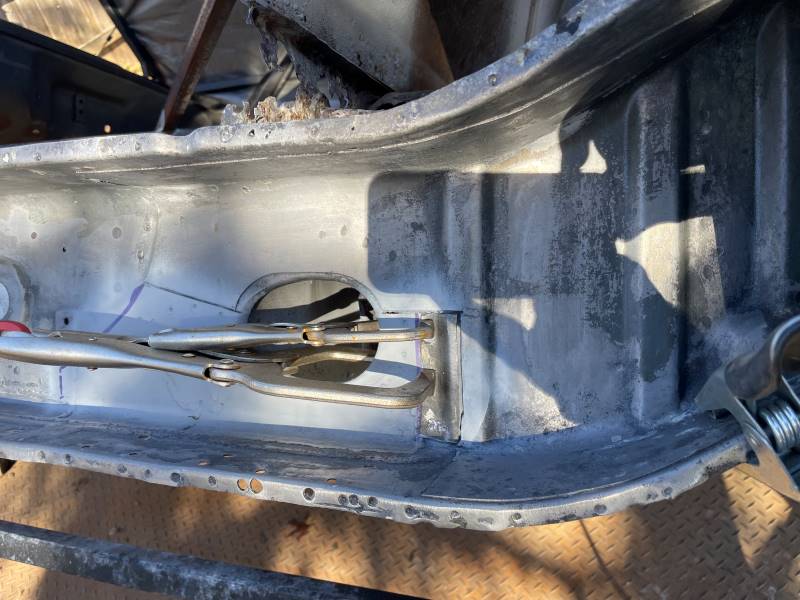 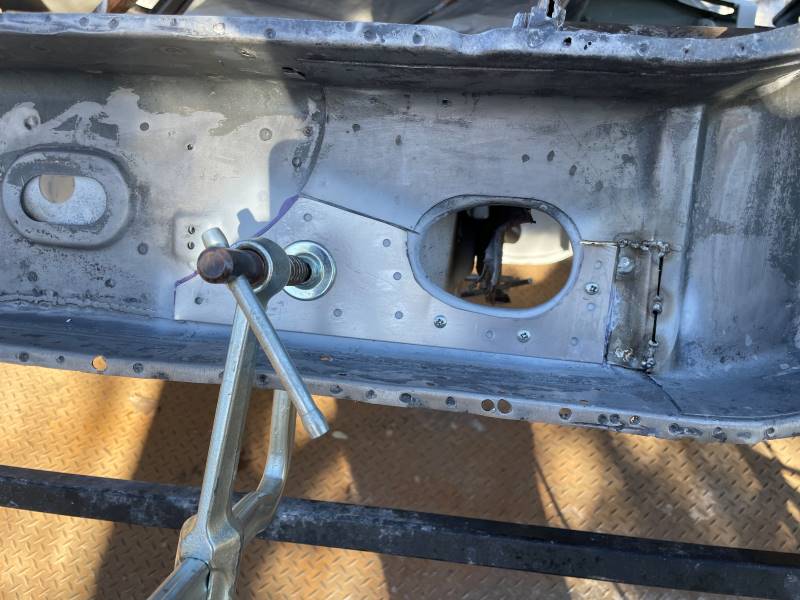 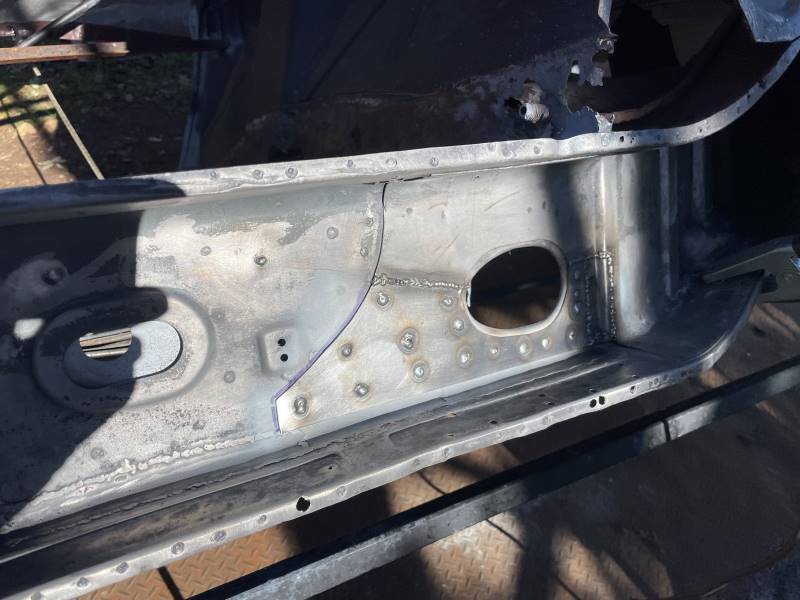 Next up was drilling out a hole for the seatbelt bolt. This was done by drilling a pilot from the other side and then widening the hole using a step bit. Once the hole was finished, it was just a matter of welding in the prep'd bolt "assembly". This is the part sold by Restoration Design, by the way. 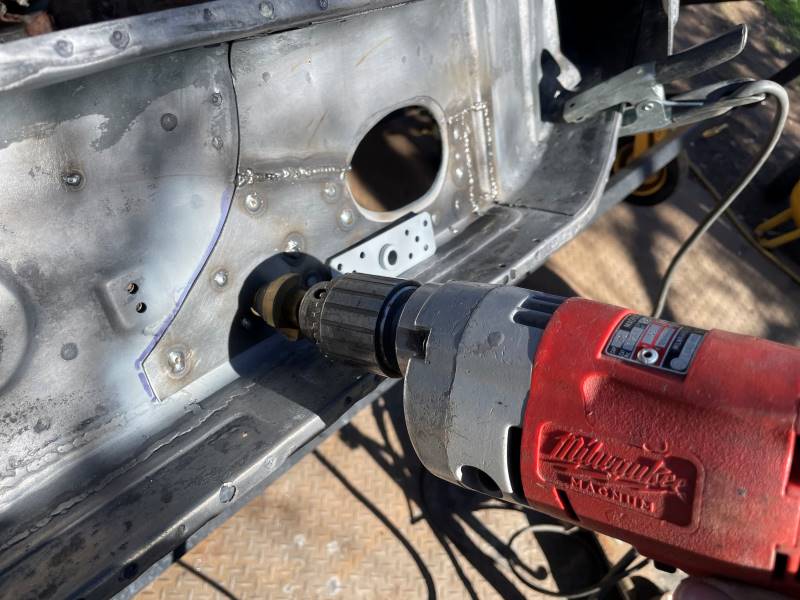 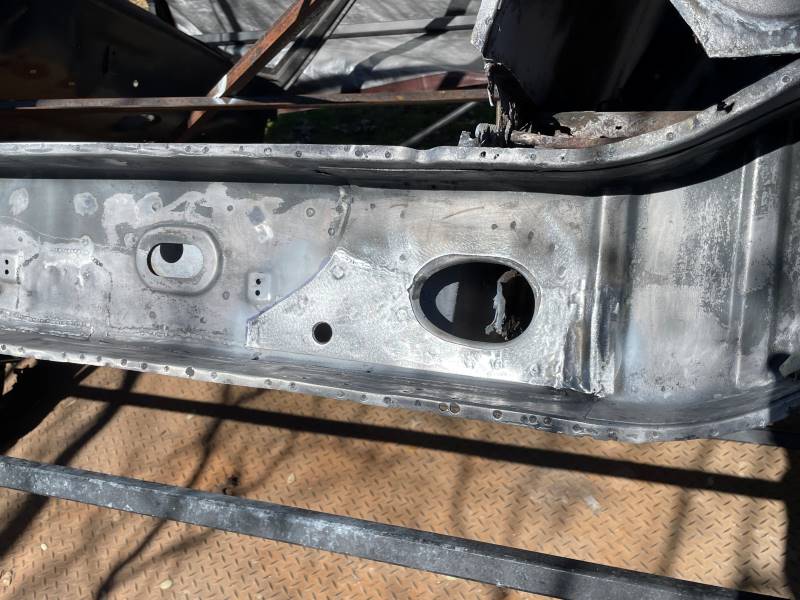  Next was fabricating the lower support piece. This was actually pretty fun to do. My goal was to make it look like the "pressed" stock piece but utilize two or three separate pieces. Since this is an original longitudinal and does not have a flat bottom, it requires the repair piece mimic the shape. My repair here certainly is not perfect but I think it does the job and looks the part. 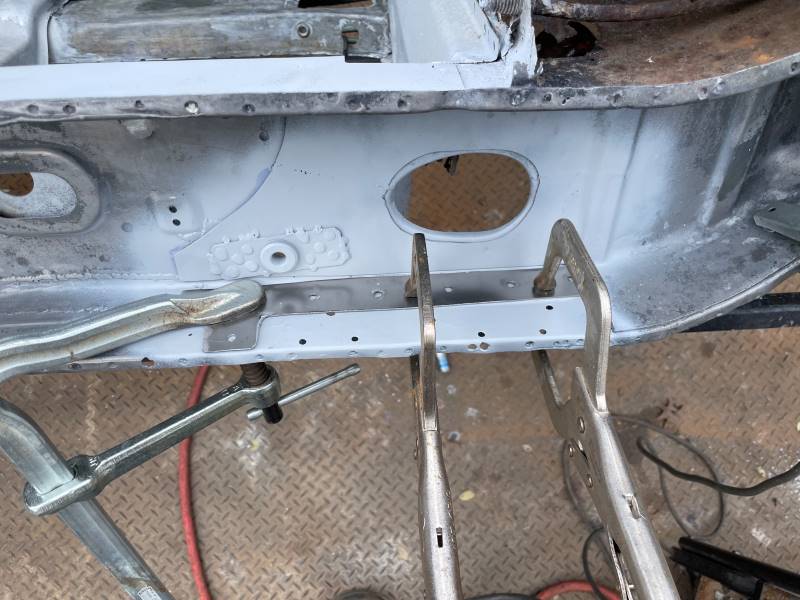 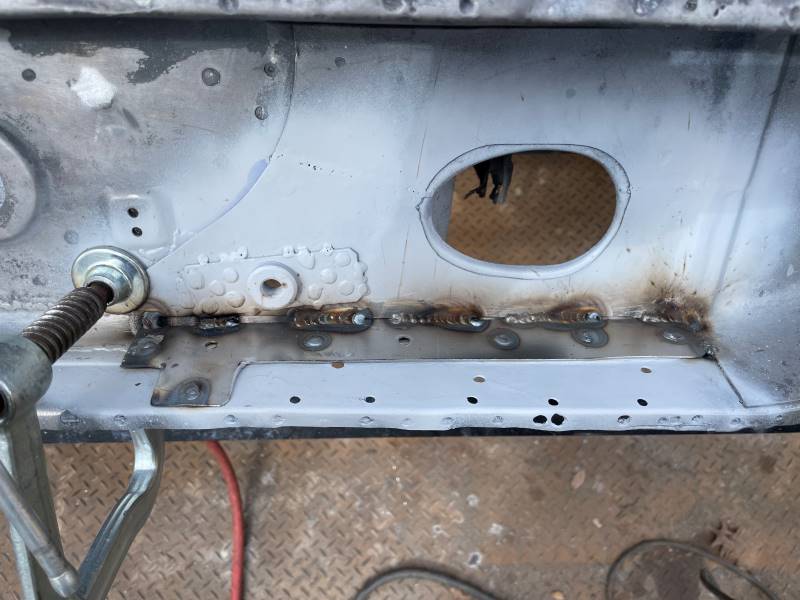  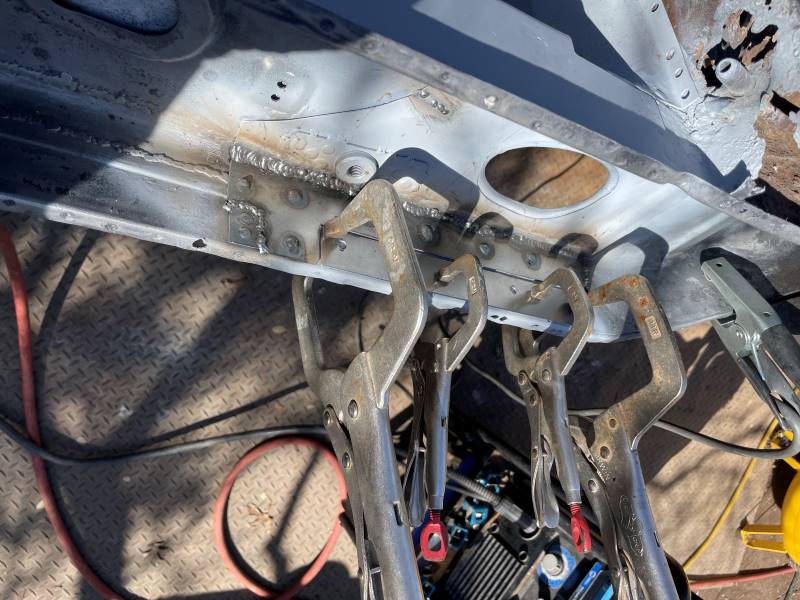 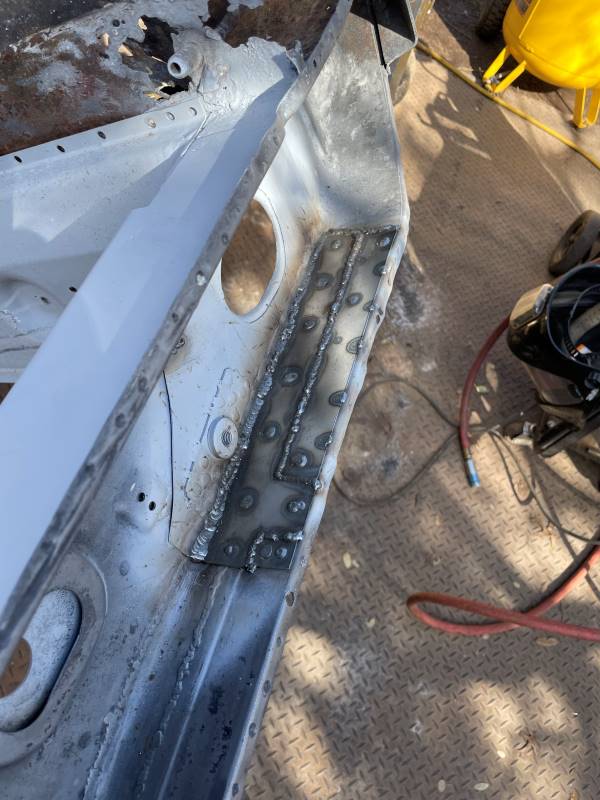 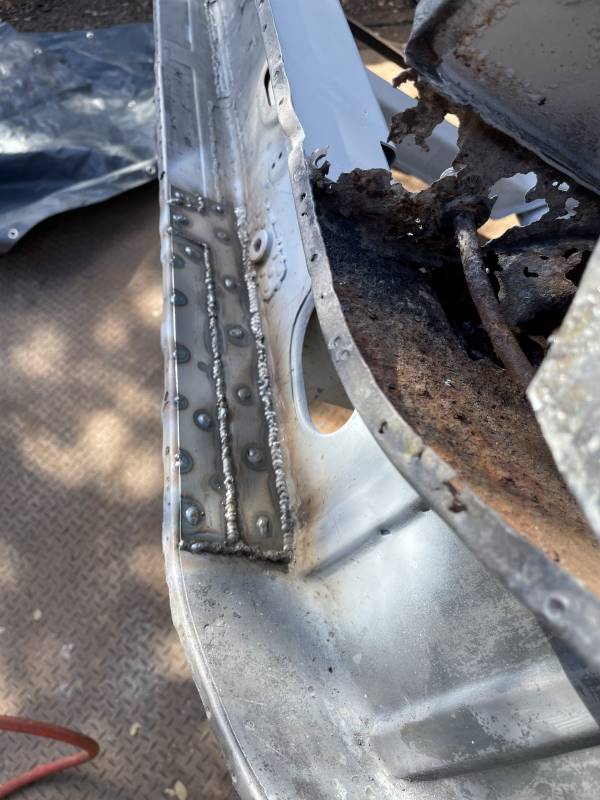 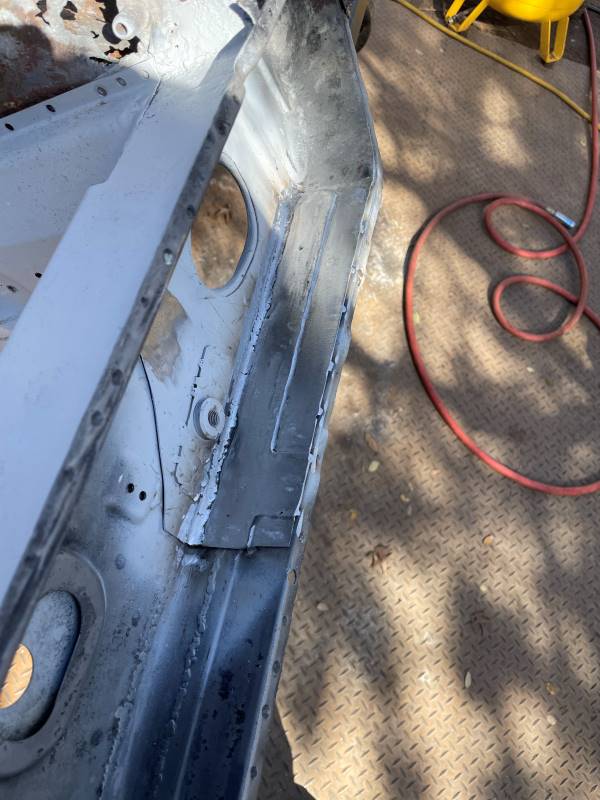  After completing the repair work, I was finally able to prep and paint the internals. After a good cleaning using glass cleaner and lint-free disposable wipes, I sprayed in Eastwood's Internal Frame Rail paint followed by CRC's Protective Wax. 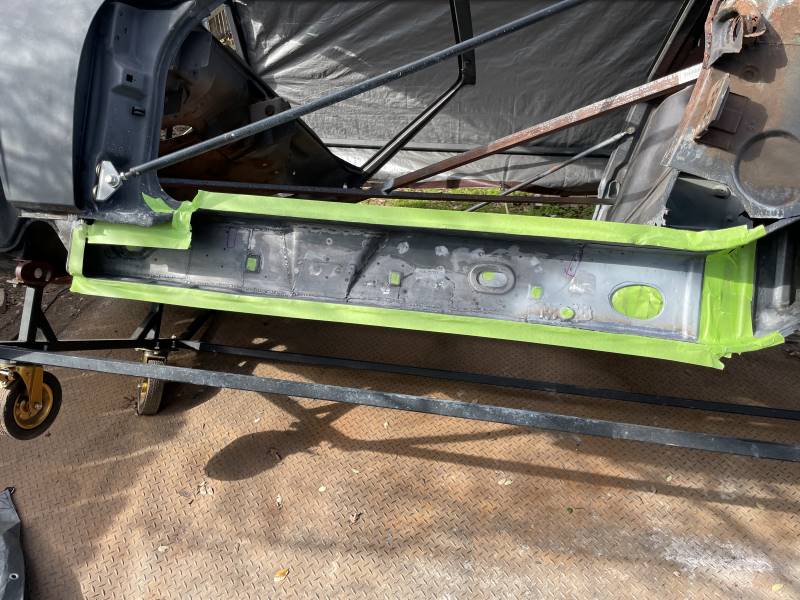  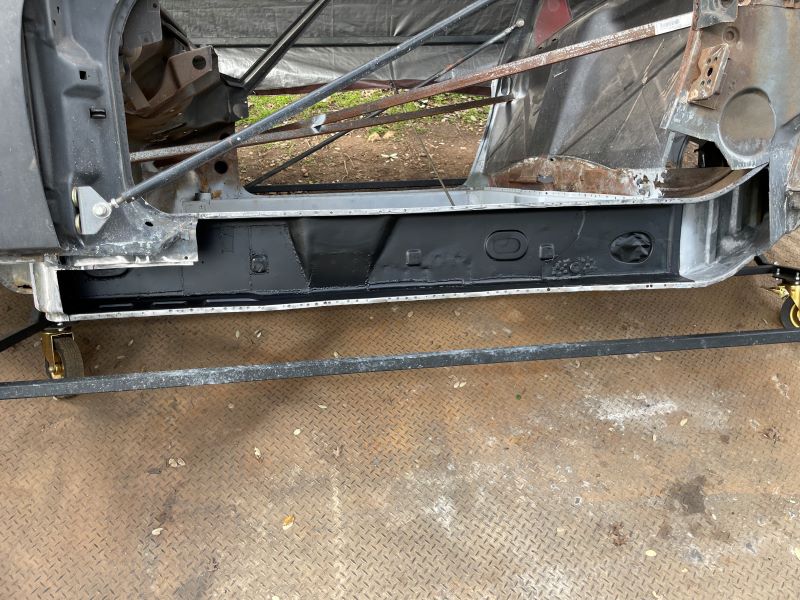  The final photos show some late Sunday afternoon work to rivet in the heater tube clips, weld in the front heater pipe, and re-weld the "reconditioned" inner fender piece, that's lives under the inner rocker panel. Decided to call it a day after that. I will pick it up next time when I get to finish up the longitudinal in part 7.   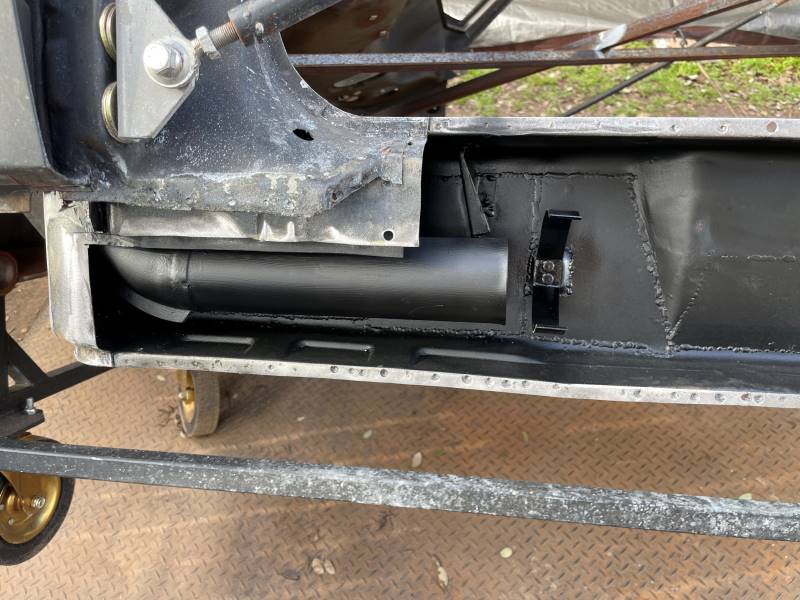 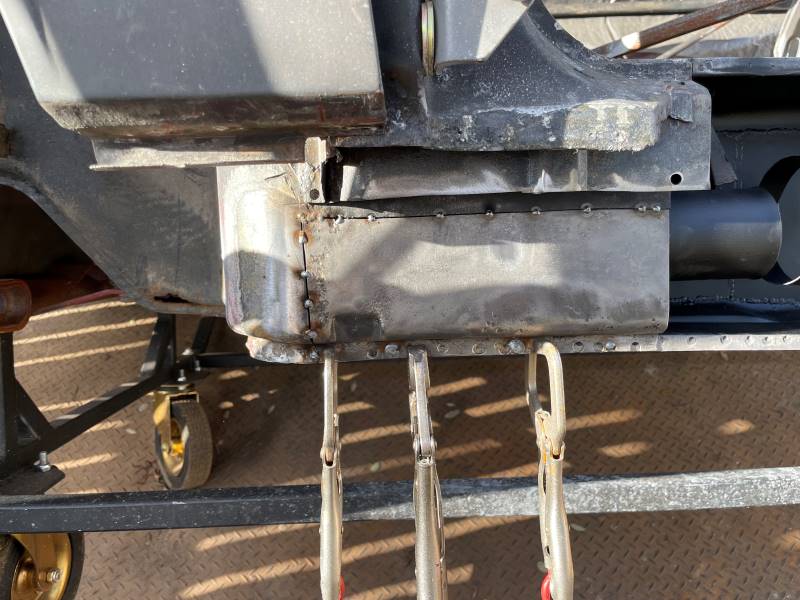 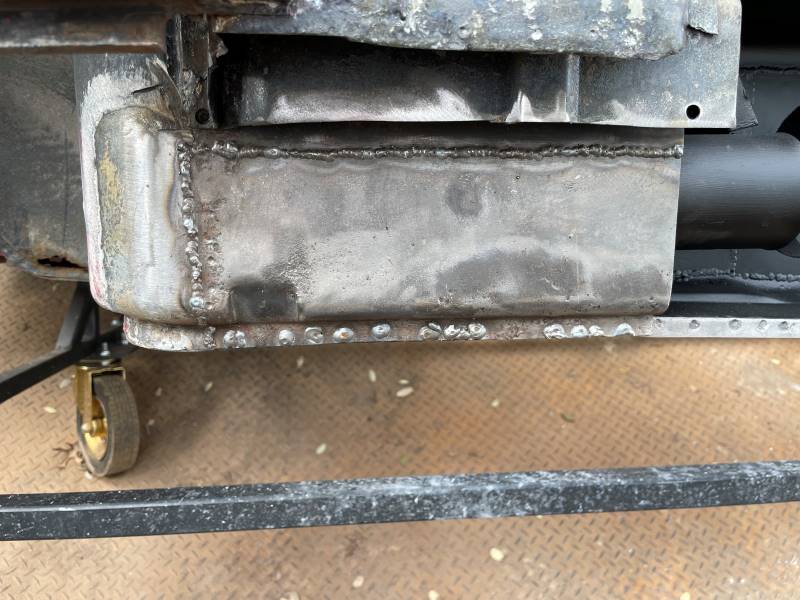 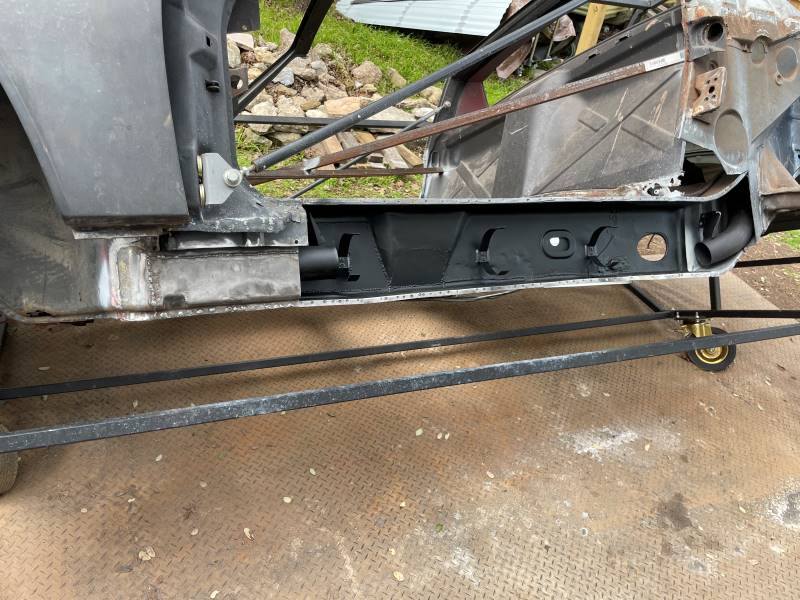 |
| friethmiller |
 Feb 7 2024, 09:10 PM Feb 7 2024, 09:10 PM
Post
#118
|
|
Senior Member    Group: Members Posts: 845 Joined: 10-February 19 From: Austin, TX Member No.: 22,863 Region Association: Southwest Region 
|
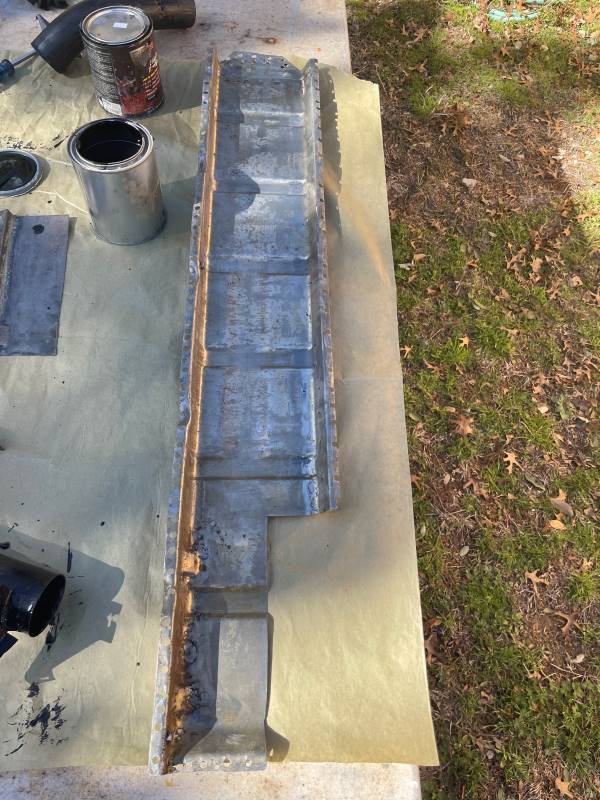
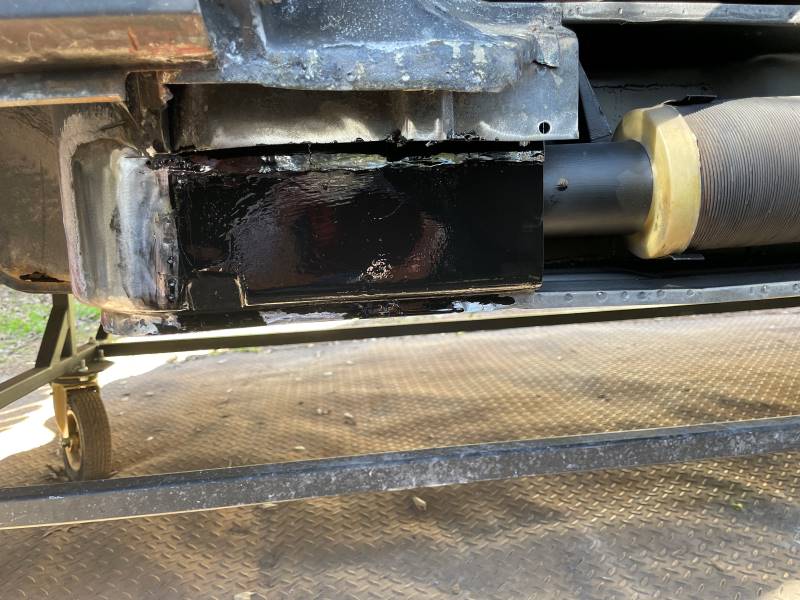
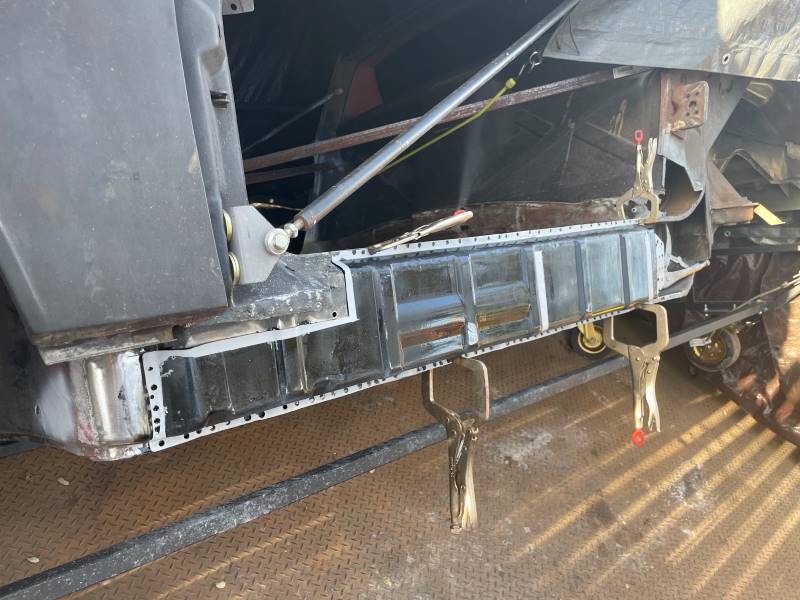
Rocker Restoration and Test Fit: (2/7/2024) - Added a few photos showing the reconditioning process for the driver side inner rocker panel. I've never had one that was worth saving before (IMG:style_emoticons/default/dry.gif) . This took a few cycles removing rust with a phosphorus-based rust remover, a metal brush, and a wire-wheel on a grinder. I even drilled out a few rust spots and then filled the holes using the MiG welder. After a good cleaning, I painted both sides (minus the edges) with some left-over POR15. I'm not a fan but it works well on old metal like this that's not going to show. I hit the edges with weld-through primer. Test fit revealed that the longitudinal needed to be opened a bit to mate properly with the rocker. Going to hold on welding this panel in until the new lower fire-wall panel gets installed next weekend.
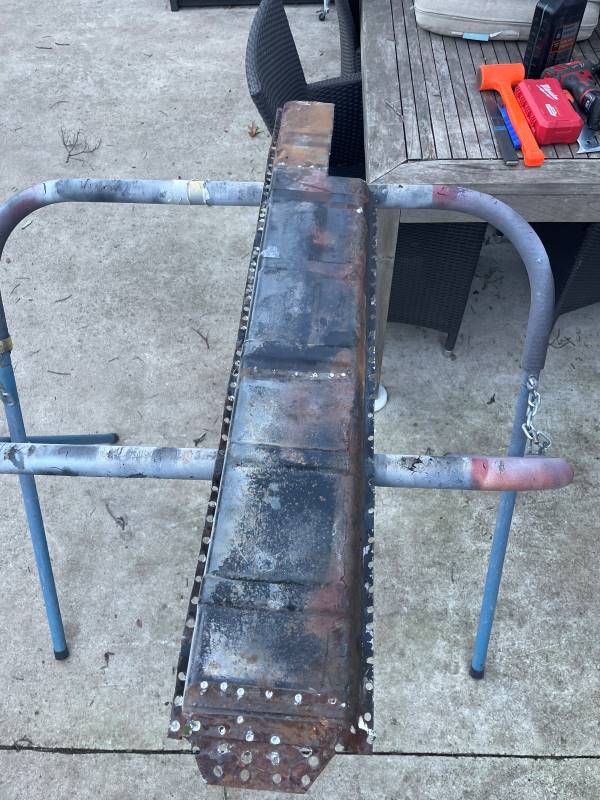 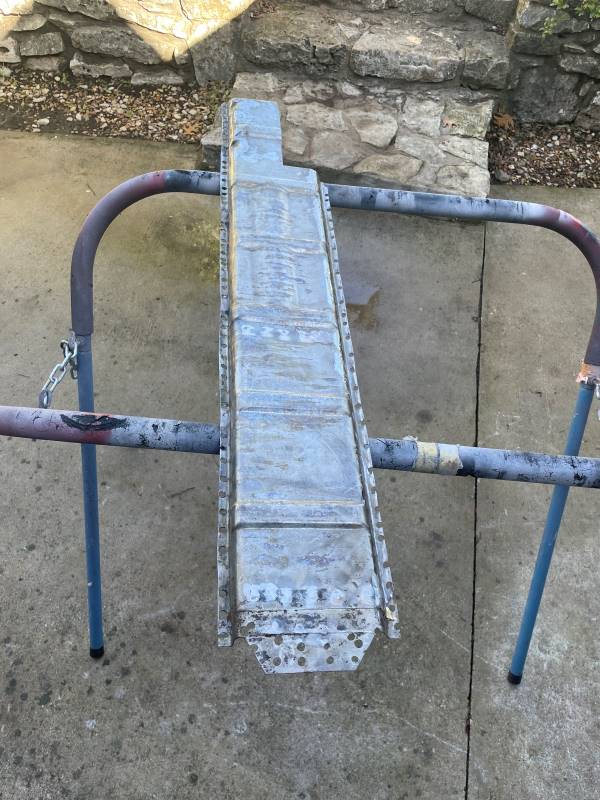 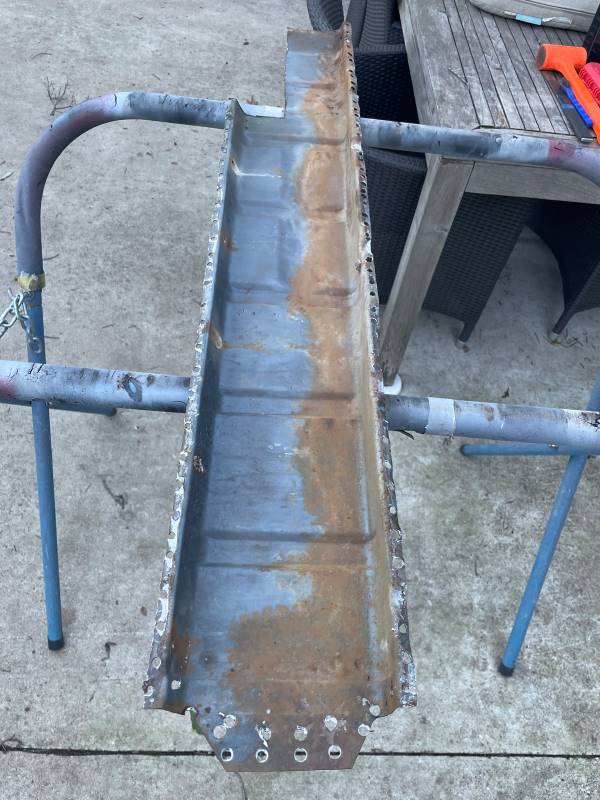     |
| technicalninja |
 Feb 7 2024, 09:37 PM Feb 7 2024, 09:37 PM
Post
#119
|
|
Advanced Member     Group: Members Posts: 2,523 Joined: 31-January 23 From: Granbury Texas Member No.: 27,135 Region Association: Southwest Region 
|
|
| friethmiller |
 Feb 8 2024, 12:42 PM Feb 8 2024, 12:42 PM
Post
#120
|
|
Senior Member    Group: Members Posts: 845 Joined: 10-February 19 From: Austin, TX Member No.: 22,863 Region Association: Southwest Region 
|
 I like this shot. Rear looks good, perimeter of floor pan looks great! Pedal mount area and lower edge of front firewall is just GONE! Really shows just how bad it was. Thank you for all of the pics! @technicalninja - glad you like the pics! I'm currently working on removing what remains of the rusty firewall. Once it's replaced, I could potentially install the floor pans at any time. I think I'll wait till the drivers inner suspension console and the engine bay has been finished though. We'll see, I guess. |
  |
3 User(s) are reading this topic (1 Guests and 0 Anonymous Users)
2 Members: friethmiller, East coaster

|
Lo-Fi Version | Time is now: 19th April 2025 - 05:49 PM |
Invision Power Board
v9.1.4 © 2025 IPS, Inc.


