|
|

|
Porsche, and the Porsche crest are registered trademarks of Dr. Ing. h.c. F. Porsche AG.
This site is not affiliated with Porsche in any way. Its only purpose is to provide an online forum for car enthusiasts. All other trademarks are property of their respective owners. |
|
|
  |
| 930cabman |
 Mar 20 2024, 01:45 PM Mar 20 2024, 01:45 PM
Post
#141
|
|
Advanced Member     Group: Members Posts: 4,044 Joined: 12-November 20 From: Buffalo Member No.: 24,877 Region Association: North East States 
|
I am (have been) working on a /6 conversion and was soo happy to be out of the engine bay. Seems like it took forever, but worth it and moving downhill from there. I somewhat DAPO'd a couple things along the way, but your project/progress looks great
|
| friethmiller |
 Mar 20 2024, 02:04 PM Mar 20 2024, 02:04 PM
Post
#142
|
|
Senior Member    Group: Members Posts: 846 Joined: 10-February 19 From: Austin, TX Member No.: 22,863 Region Association: Southwest Region 
|
I am (have been) working on a /6 conversion and was soo happy to be out of the engine bay. Seems like it took forever, but worth it and moving downhill from there. I somewhat DAPO'd a couple things along the way, but your project/progress looks great Thanks! Wow! IMO, /6 conversions are neither easy or cheap - but worth it in the end. I'm sure you are well aware. Having taken my other 914's 1.8L engine to a 2375, I can say the power is so much fun! Now, having a 911 V6 engine behind me would take it to the next level. |
| technicalninja |
 Mar 20 2024, 04:03 PM Mar 20 2024, 04:03 PM
Post
#143
|
|
Advanced Member     Group: Members Posts: 2,523 Joined: 31-January 23 From: Granbury Texas Member No.: 27,135 Region Association: Southwest Region 
|
Relax and take a DEEP breath!
It's an H6, not a V6! I'd change it quick before anyone notices.... Progress looks GREAT! |
| 930cabman |
 Mar 20 2024, 04:17 PM Mar 20 2024, 04:17 PM
Post
#144
|
|
Advanced Member     Group: Members Posts: 4,044 Joined: 12-November 20 From: Buffalo Member No.: 24,877 Region Association: North East States 
|
|
| friethmiller |
 Mar 20 2024, 07:21 PM Mar 20 2024, 07:21 PM
Post
#145
|
|
Senior Member    Group: Members Posts: 846 Joined: 10-February 19 From: Austin, TX Member No.: 22,863 Region Association: Southwest Region 
|
LOL! My bad. That’s right. I should have just said 6 cylinder. Our projects will be done before you know it.
|
| technicalninja |
 Mar 20 2024, 08:07 PM Mar 20 2024, 08:07 PM
Post
#146
|
|
Advanced Member     Group: Members Posts: 2,523 Joined: 31-January 23 From: Granbury Texas Member No.: 27,135 Region Association: Southwest Region 
|
Relax and take a DEEP breath! It's an H6, not a V6! I'd change it quick before anyone notices.... Progress looks GREAT! H6, V6, X6 how does it matter. I do know these little 1/2 century sporting machines are alot of fun and alot of work I'm just messing with Fred! Now, your post IS INTERESTING!!!!! (IMG:style_emoticons/default/ninja.gif) Enquiring minds want to know... "X" 6 ? (IMG:style_emoticons/default/new_shocked.gif) (IMG:style_emoticons/default/new_shocked.gif) |
| friethmiller |
 Mar 20 2024, 08:53 PM Mar 20 2024, 08:53 PM
Post
#147
|
|
Senior Member    Group: Members Posts: 846 Joined: 10-February 19 From: Austin, TX Member No.: 22,863 Region Association: Southwest Region 
|
Relax and take a DEEP breath! It's an H6, not a V6! I'd change it quick before anyone notices.... Progress looks GREAT! H6, V6, X6 how does it matter. I do know these little 1/2 century sporting machines are alot of fun and alot of work I'm just messing with Fred! Now, your post IS INTERESTING!!!!! (IMG:style_emoticons/default/ninja.gif) Enquiring minds want to know... "X" 6 ? (IMG:style_emoticons/default/new_shocked.gif) (IMG:style_emoticons/default/new_shocked.gif) All in good fun, Rick! (IMG:style_emoticons/default/beerchug.gif) Isn't an X6 what happens when you throw a rod in an H6? |
| friethmiller |
 Apr 15 2024, 12:58 PM Apr 15 2024, 12:58 PM
Post
#148
|
|
Senior Member    Group: Members Posts: 846 Joined: 10-February 19 From: Austin, TX Member No.: 22,863 Region Association: Southwest Region 
|
Engine Compartment Tasks: (4/13/2024):
Working inside the engine compartment, my goal was to replace the rusted metal on top of the drivers side rail and install the engine tin, which is always problematic. I started by cutting the top metal from the rail where the damage was the worse. There were several rust holes through the sheet metal here and it looked like the surface of the Moon. I was a little nervous about what was in store for me down below. Luckily, the rust was only superficial and cleaned off easily. The patch that was created was taken to the vice-mounted shrinker/stretcher to give a slight curve. This is super easy to do using the 90 degree bent section. In fitting this patch piece into the car, I decided it would be more fun if I were to undersize it to make the welding process more of a challenge. (IMG:style_emoticons/default/blink.gif) It wasn't pretty but I got it in! 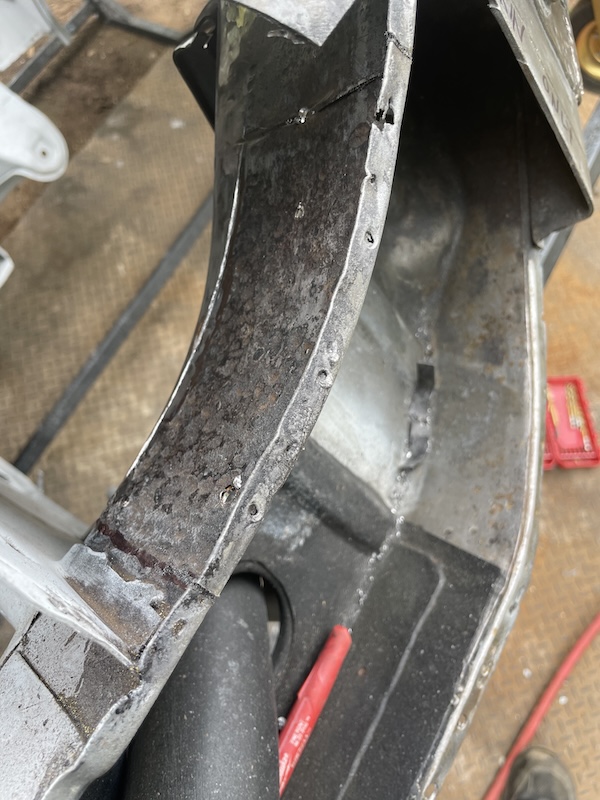 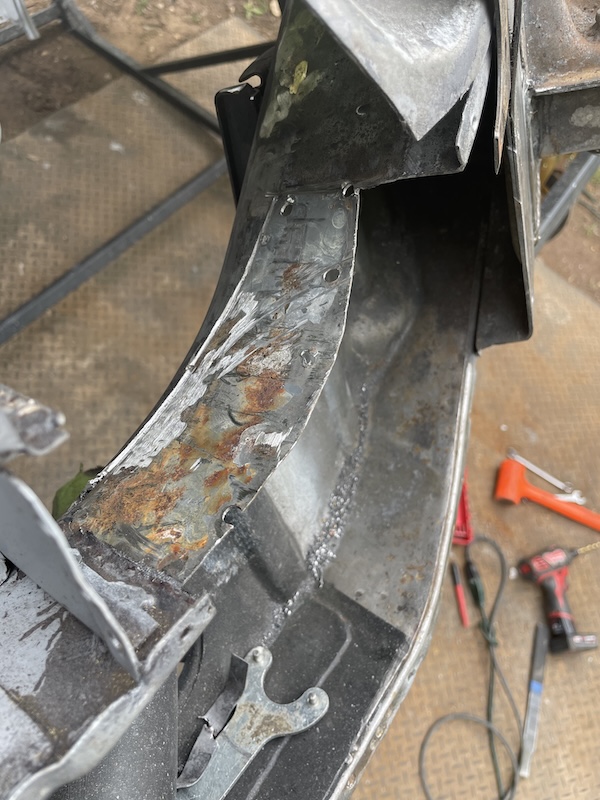 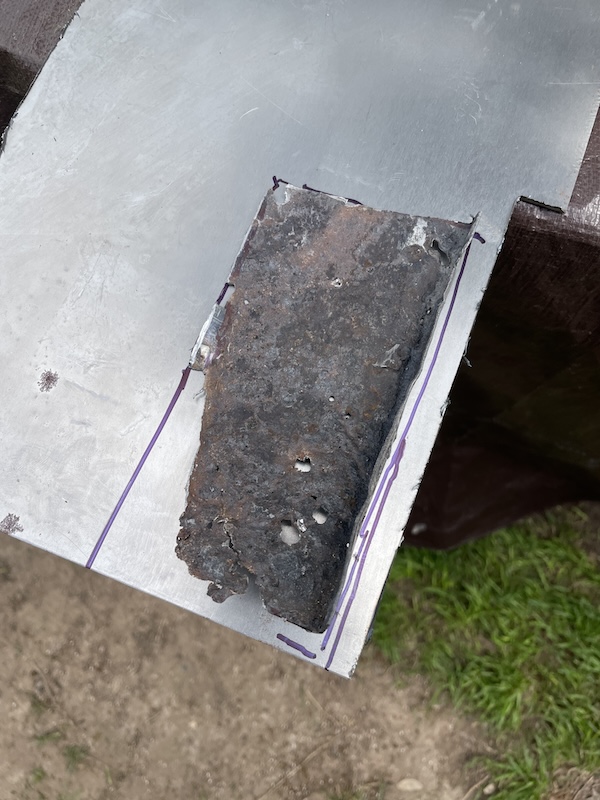 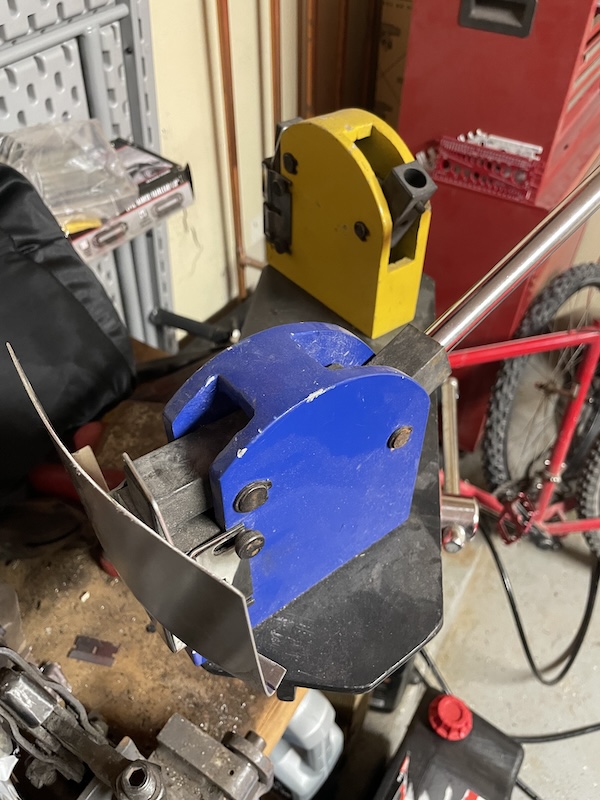 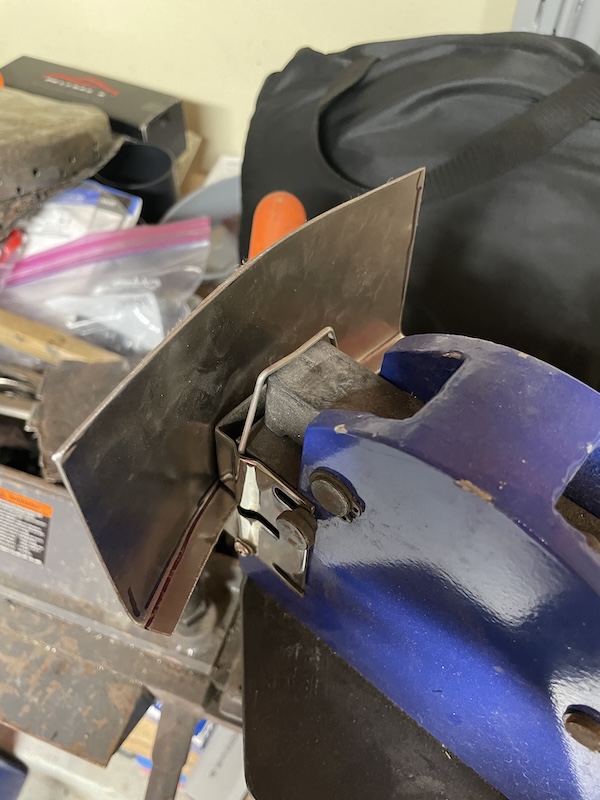 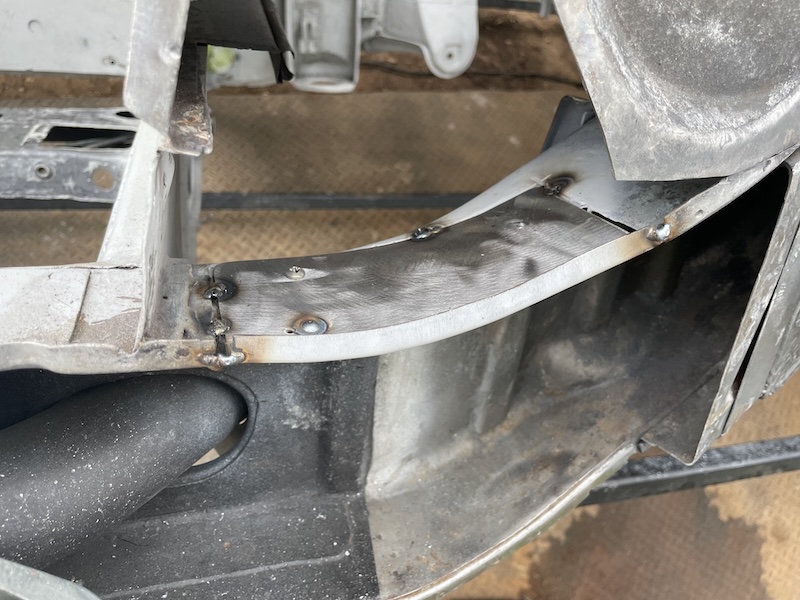 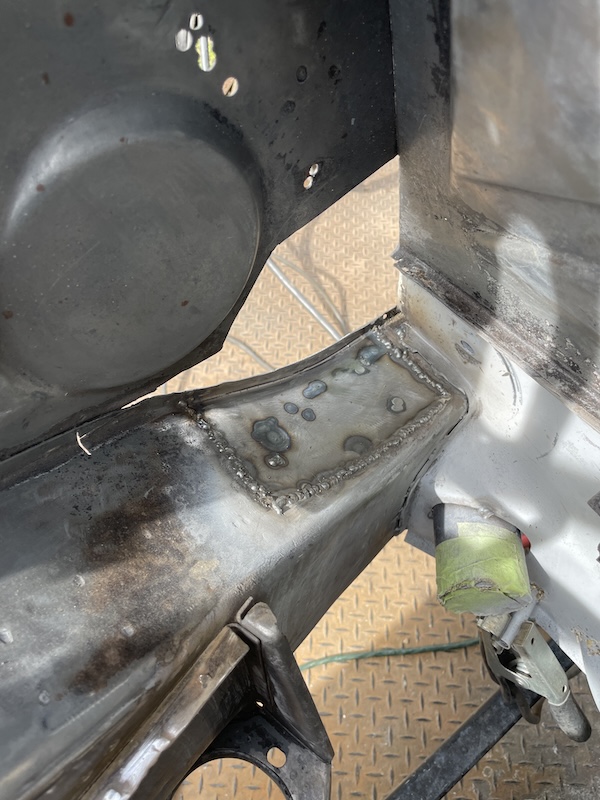 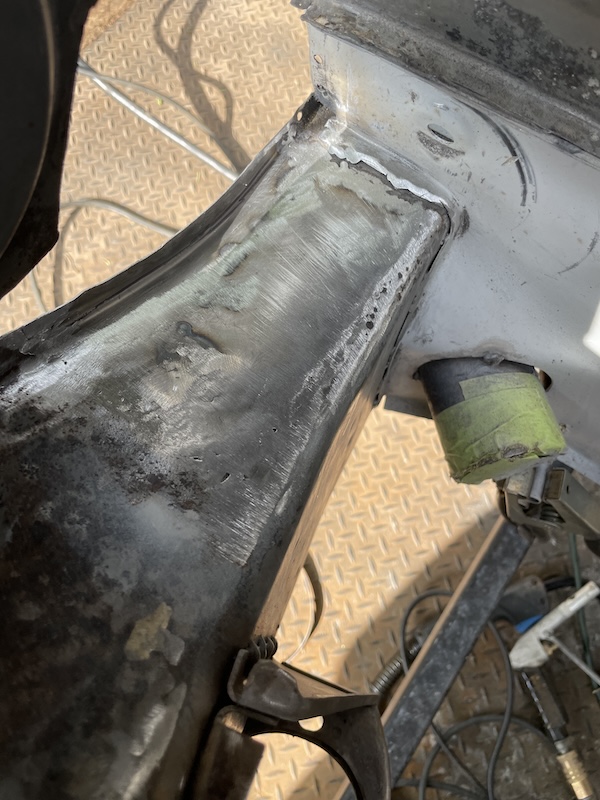 Another task on the list was removing about an inch of metal skin from the inner fender area to allow the support metal to be welded back in during reassembly. 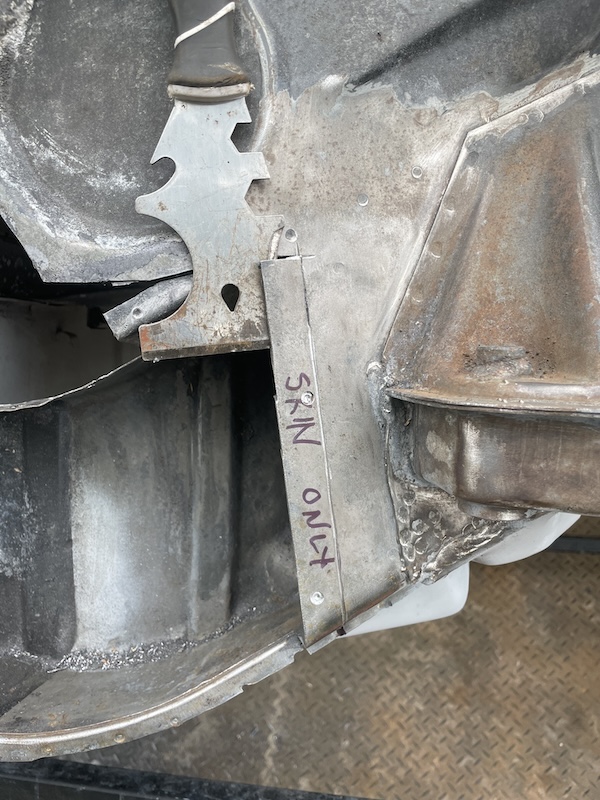 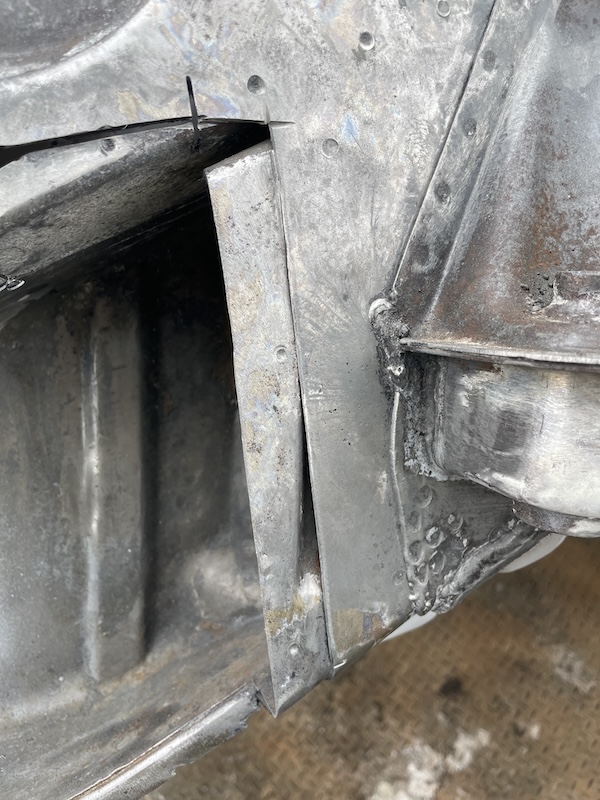 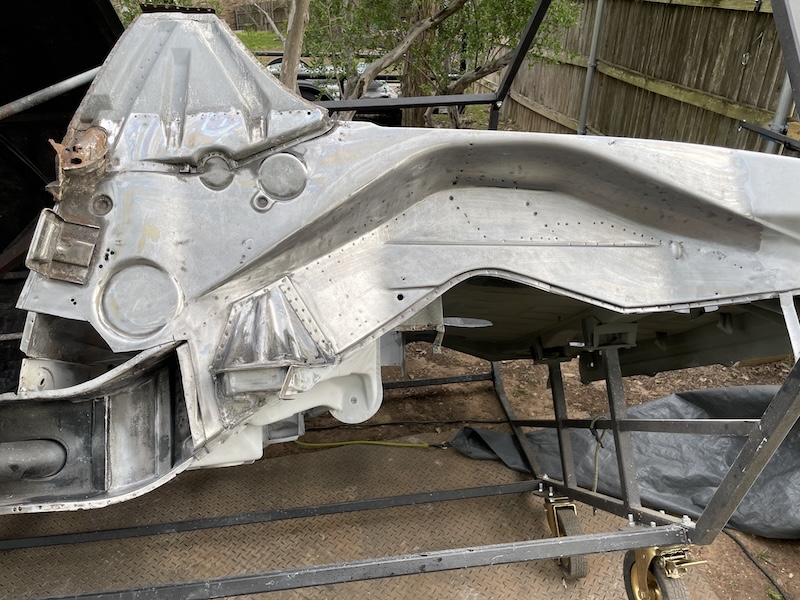 Finally, I was able to start fitting the engine tray metal. Since this part never fits right, I decided to cut and install the first section. Just getting this front piece in seemed way harder than it should have been. I was having one of those days, I guess. I've only done this two other times before. You'd think the 3rd time would be easier... NOPE! 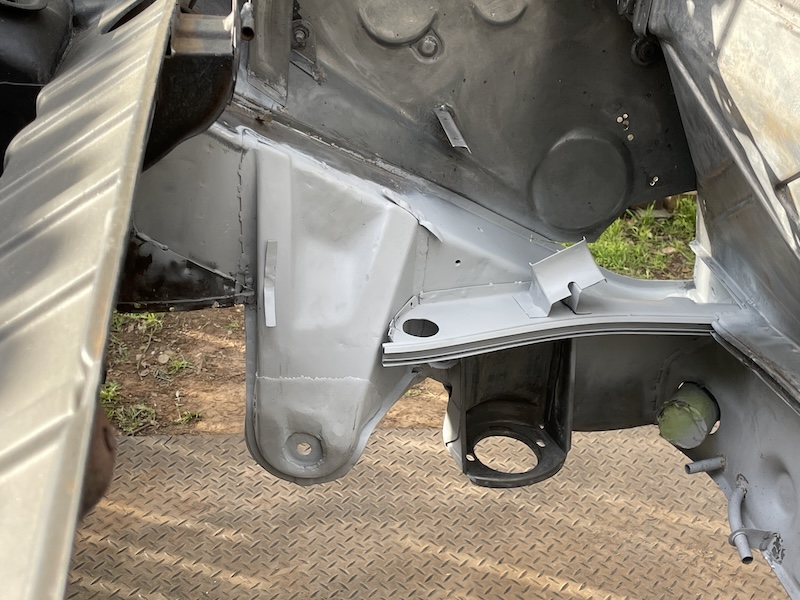 |
| friethmiller |
 Apr 16 2024, 08:26 AM Apr 16 2024, 08:26 AM
Post
#149
|
|
Senior Member    Group: Members Posts: 846 Joined: 10-February 19 From: Austin, TX Member No.: 22,863 Region Association: Southwest Region 
|
Engine Compartment Tasks part 2: (4/14/2024):
Working in the engine bay, my goal was to somehow modify the first section of the engine shelf (that I had already heavily modified to get in) to properly aligned with the rest of the sections that needed to be welded in to complete the shelf. The problem was that by the time I got the front part of the shelf square with the firewall and flush with the top of the longitudinal frame, I had cut about 1/2 - 3/4 of an inch of metal from the sides that interface around the inner suspension console (see arrows). 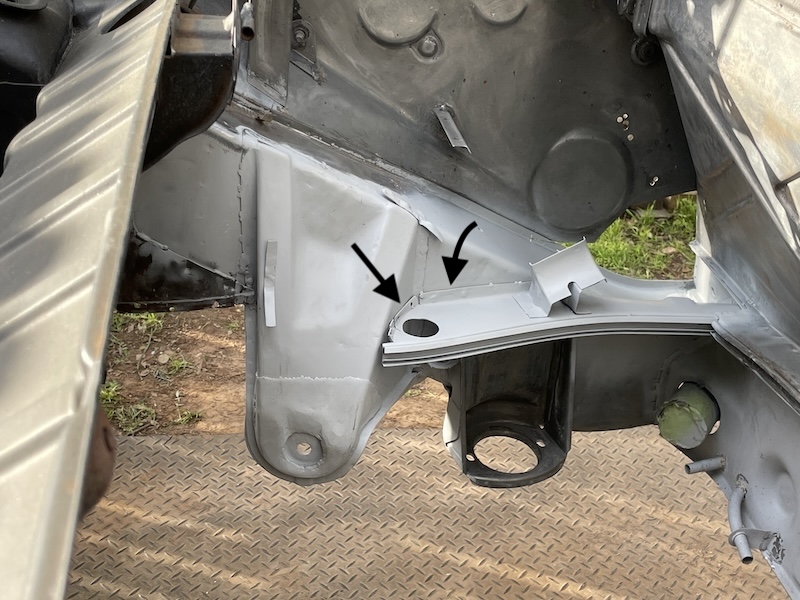 To make this work, I decided to make a relieve cut (arrow) along the 1st section to allow me to pull the engine seal rail out in order to have it match with the 2nd piece's rail section. This, of course, necessitated additional metal to fill in the gap. Here are a few pics of the process. 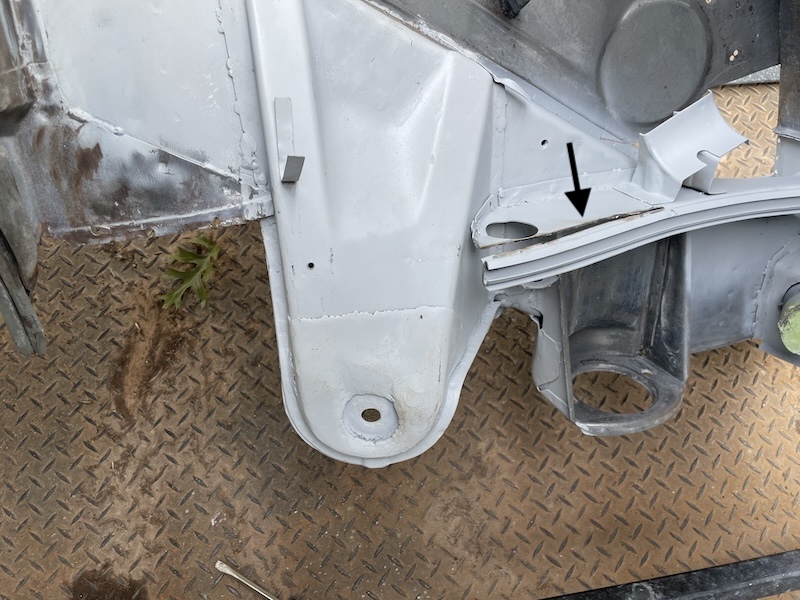 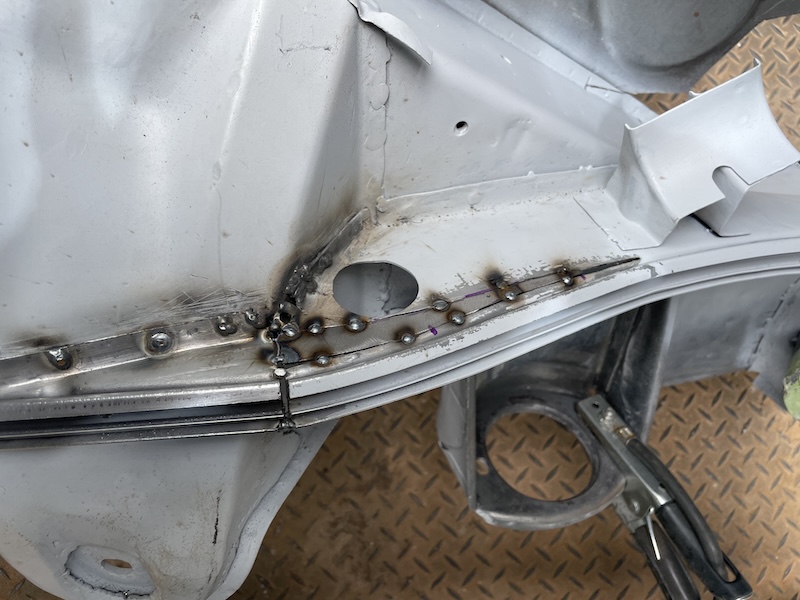 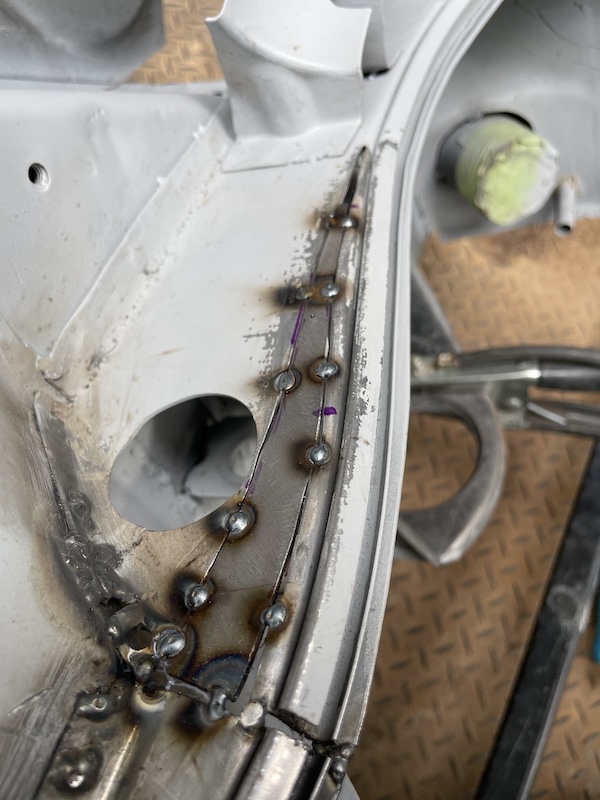 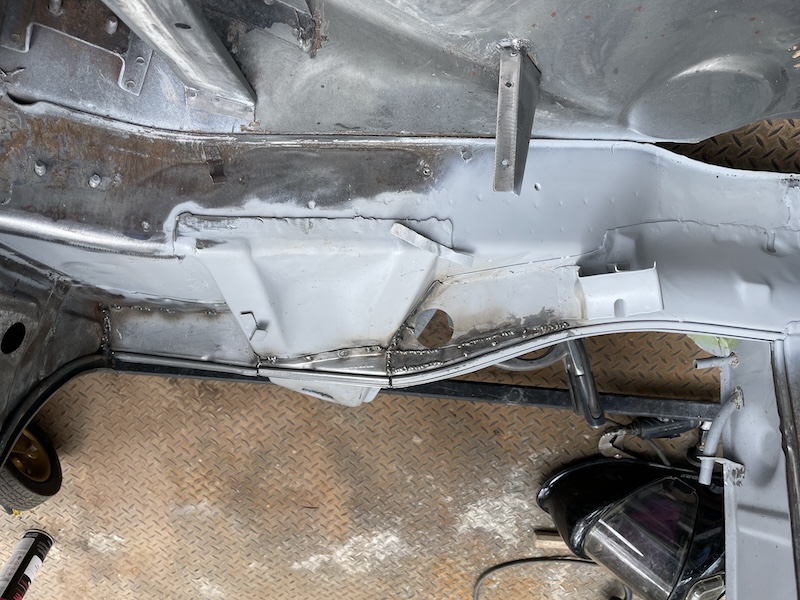 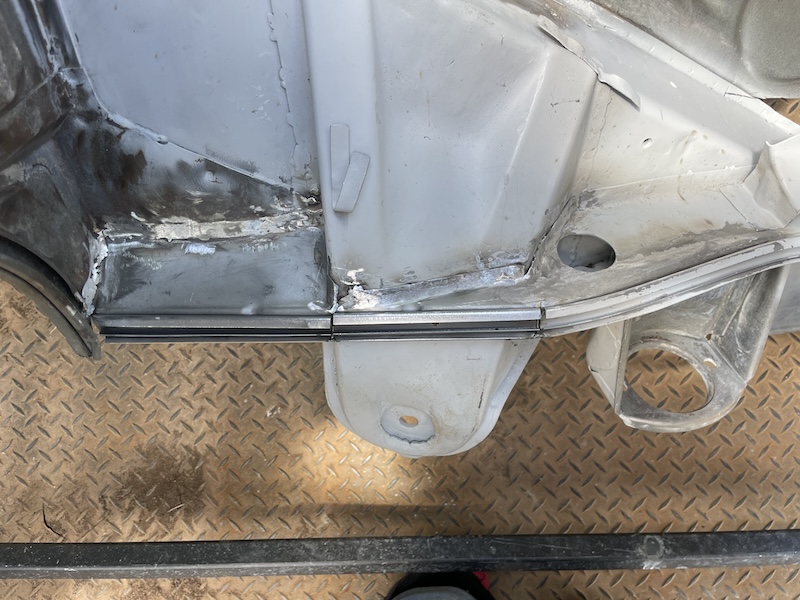 Having spent most of the morning on the drivers side, I decided to get cracking on the passenger side and get it done. After test fitting the part here, I determined it only needed to be cut into 2 pieces. (IMG:style_emoticons/default/blink.gif) Here's a few pics of this side [with the car at 90 degrees]. Forgot to take any additional photos, however, you will see a more completed picture in my next post. 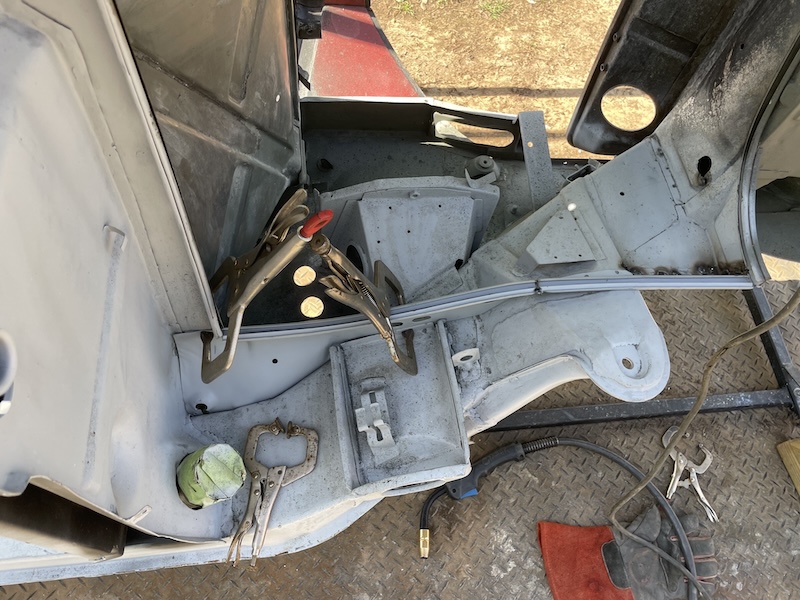 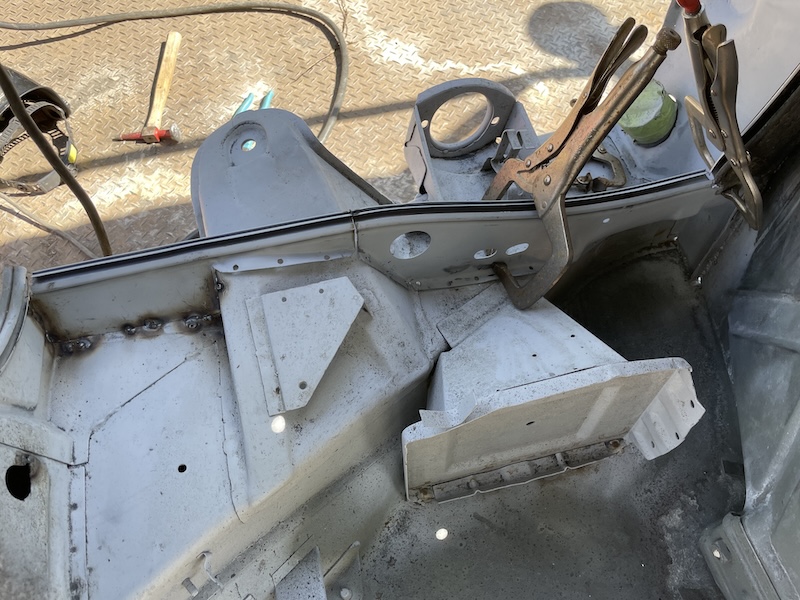 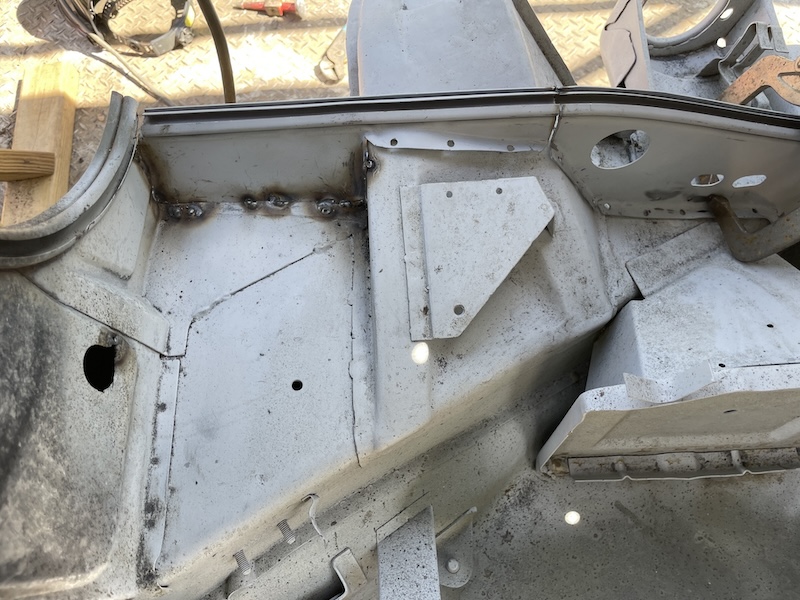 |
| 930cabman |
 Apr 16 2024, 10:05 AM Apr 16 2024, 10:05 AM
Post
#150
|
|
Advanced Member     Group: Members Posts: 4,044 Joined: 12-November 20 From: Buffalo Member No.: 24,877 Region Association: North East States 
|
Great progress and great photos. Will you be removing the /4 mounts?
We are slightly ahead of your project, just a rebuild of my 40IDT 3C carbs is all that stands in the way of her barking. |
| friethmiller |
 Apr 16 2024, 10:20 AM Apr 16 2024, 10:20 AM
Post
#151
|
|
Senior Member    Group: Members Posts: 846 Joined: 10-February 19 From: Austin, TX Member No.: 22,863 Region Association: Southwest Region 
|
Great progress and great photos. Will you be removing the /4 mounts? We are slightly ahead of your project, just a rebuild of my 40IDT 3C carbs is all that stands in the way of her barking. @930cabman - No, I've already removed, rebuilt, and reinstalled the passenger side engine mount. And just to be clear, this isn't a /6 conversion so the /4 mounts will remain. (IMG:style_emoticons/default/biggrin.gif) I don't think I could live with myself doing that with an LE. I'm still trying to finish tasks like the engine hood pull tube and a few other small items in the engine bay. Finally purchased a real sandblaster to clean things up that I just can get or can't get to. My next post will start to show this. Great to hear about your /6! |
| Freezin 914 |
 Apr 18 2024, 04:14 PM Apr 18 2024, 04:14 PM
Post
#152
|
|
Senior Member    Group: Members Posts: 926 Joined: 27-July 14 From: Wisconsin Member No.: 17,687 Region Association: Upper MidWest 
|
Such a cool build thread! Very inspiring! Keep up the great work……. (IMG:style_emoticons/default/popcorn[1].gif)
|
| Drex |
 Apr 18 2024, 05:16 PM Apr 18 2024, 05:16 PM
Post
#153
|
|
Member   Group: Members Posts: 170 Joined: 1-December 22 From: Guthrie Center, Iowa Member No.: 27,003 Region Association: None 
|
Wow, what a great job!!
This is the 1st thread i reviewed since i came back it really looked like a hopeless case but your skills are bringing it back to life. i feel bad that my parts car ended up at the dump you coud have used several parts off it and seeing what your doing now i'd have brought it down to you free!! Dave |
| 73-914 |
 Apr 18 2024, 06:10 PM Apr 18 2024, 06:10 PM
Post
#154
|
|
Senior Member    Group: Members Posts: 615 Joined: 24-April 10 From: Albany UpstateNY Member No.: 11,651 Region Association: None 
|
Relax and take a DEEP breath! It's an H6, not a V6! I'd change it quick before anyone notices.... Progress looks GREAT! TOO Late (IMG:style_emoticons/default/lol-2.gif) (IMG:style_emoticons/default/lol-2.gif) (IMG:style_emoticons/default/lol-2.gif) (IMG:style_emoticons/default/lol-2.gif) (IMG:style_emoticons/default/lol-2.gif) (IMG:style_emoticons/default/stirthepot.gif) (IMG:style_emoticons/default/av-943.gif) (IMG:style_emoticons/default/av-943.gif) (IMG:style_emoticons/default/av-943.gif) (IMG:style_emoticons/default/av-943.gif) (IMG:style_emoticons/default/av-943.gif) |
| 73-914 |
 Apr 18 2024, 06:10 PM Apr 18 2024, 06:10 PM
Post
#155
|
|
Senior Member    Group: Members Posts: 615 Joined: 24-April 10 From: Albany UpstateNY Member No.: 11,651 Region Association: None 
|
Relax and take a DEEP breath! It's an H6, not a V6! I'd change it quick before anyone notices.... Progress looks GREAT! TOO Late (IMG:style_emoticons/default/lol-2.gif) (IMG:style_emoticons/default/lol-2.gif) (IMG:style_emoticons/default/lol-2.gif) (IMG:style_emoticons/default/lol-2.gif) (IMG:style_emoticons/default/lol-2.gif) (IMG:style_emoticons/default/stirthepot.gif) (IMG:style_emoticons/default/av-943.gif) (IMG:style_emoticons/default/av-943.gif) (IMG:style_emoticons/default/av-943.gif) (IMG:style_emoticons/default/av-943.gif) (IMG:style_emoticons/default/av-943.gif) |
| friethmiller |
 Apr 22 2024, 01:44 PM Apr 22 2024, 01:44 PM
Post
#156
|
|
Senior Member    Group: Members Posts: 846 Joined: 10-February 19 From: Austin, TX Member No.: 22,863 Region Association: Southwest Region 
|
Wow, what a great job!! This is the 1st thread i reviewed since i came back it really looked like a hopeless case but your skills are bringing it back to life. i feel bad that my parts car ended up at the dump you coud have used several parts off it and seeing what your doing now i'd have brought it down to you free!! Dave LOL! Right. My wife would have LOVED you for doing it, too. No worries. I work with what I've got or can source. (IMG:style_emoticons/default/biggrin.gif) Thanks Dave and welcome back! Fred |
| friethmiller |
 Apr 22 2024, 08:43 PM Apr 22 2024, 08:43 PM
Post
#157
|
|
Senior Member    Group: Members Posts: 846 Joined: 10-February 19 From: Austin, TX Member No.: 22,863 Region Association: Southwest Region 
|
Driver Side Jack Post Area: (4/20/2024):
Shifting gears just a bit here. I decided that in order to continue sandblasting the engine bay, I needed to weld-up the 2 foot wide hole in the driver side longitudinal / jack post area. Starting with the piece that I removed back in January and hit lightly with the sandblaster last weekend, I began by outlining the metal that I'd needed to replace and figuring out which patches I wanted to do first. Ultimately, I decided on the top and middle pieces first, followed by the angular pieces around the jack post. Using panel clamps to help hold things flat, I was able to quickly tack-in each patch. My hope here was that I could just go with the original jack post tube and not have to deal with cutting/replacing the pipe from its recessed area. After further review.... no way. The pipe was just too rusty. Luckily I have some left over 1 1/4" inch pipe from the rotisserie that will work perfectly. The pics here show the progress of the repairs. The weather was threatening rain all day and I was able to get the last patch in place before things got wet. With the rain coming down, I decided it was wise to wait and grind the welds in morning. The last two photos are from the next day and show the "patched" panel cleaned up and ready to go on the car. 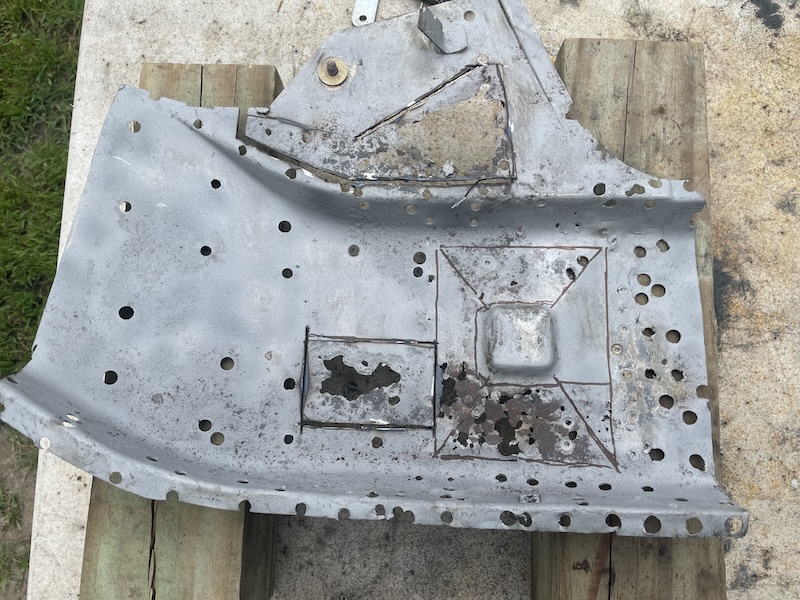 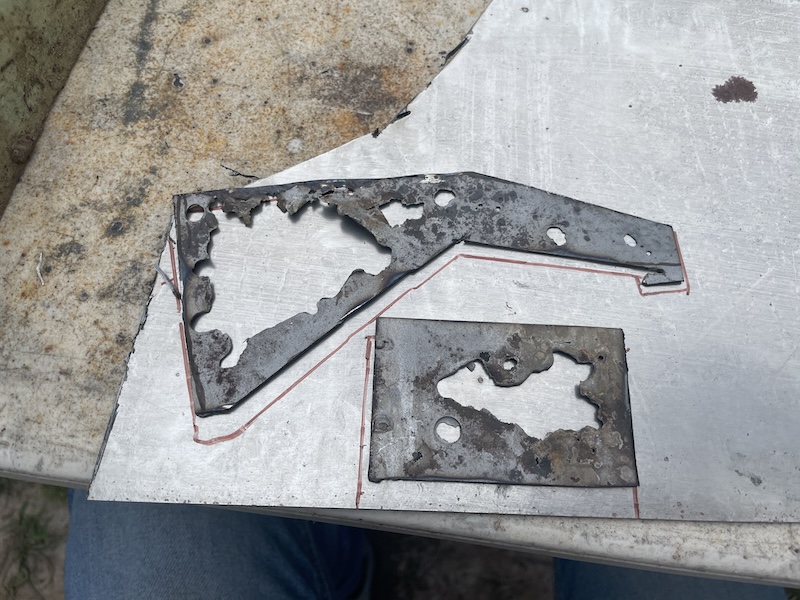 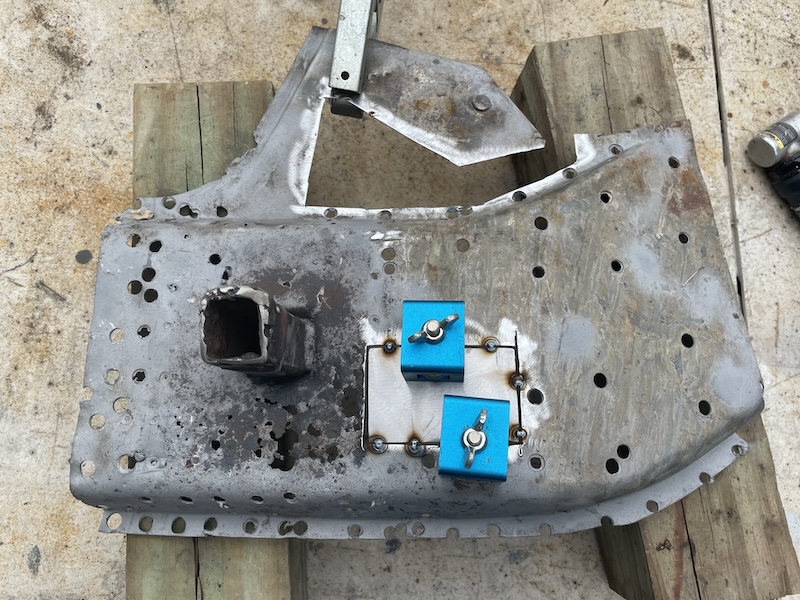 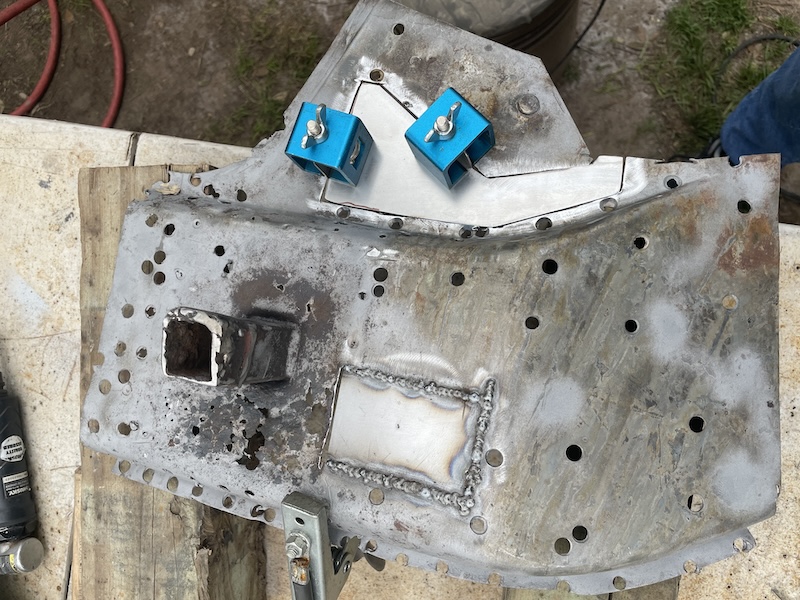 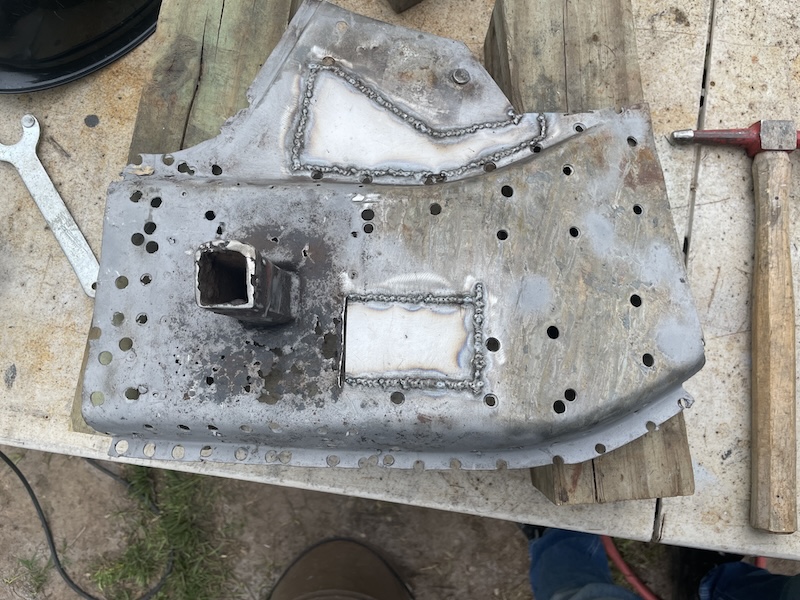 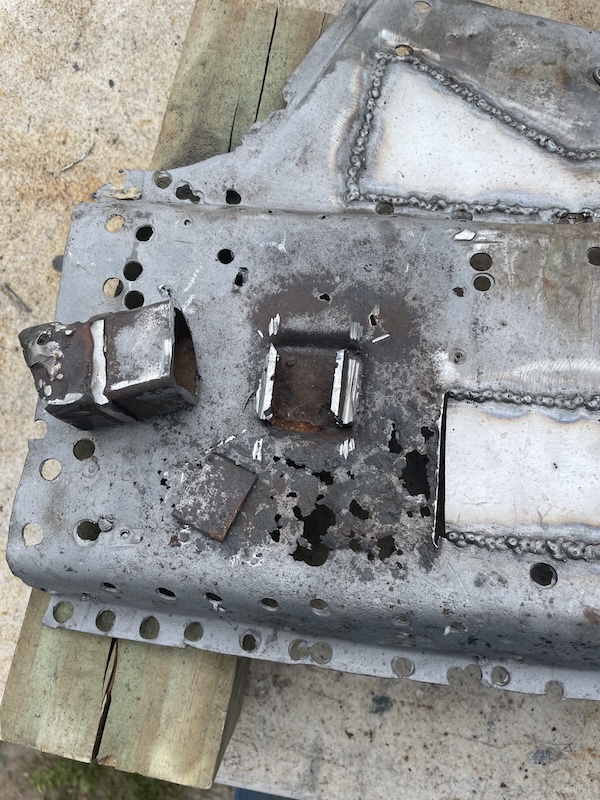 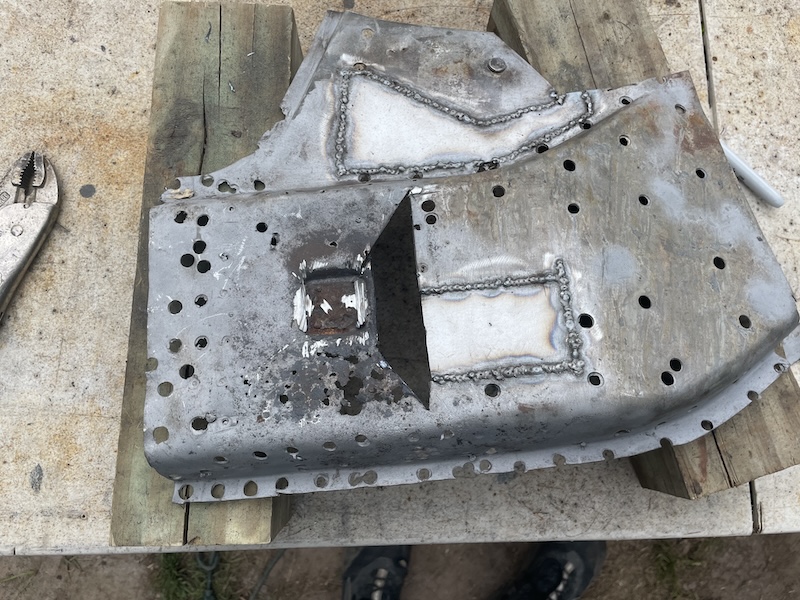 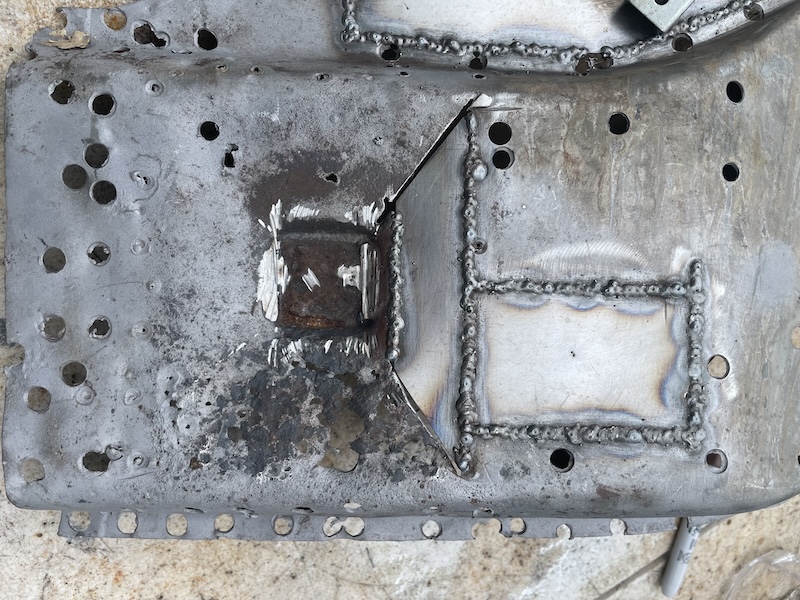 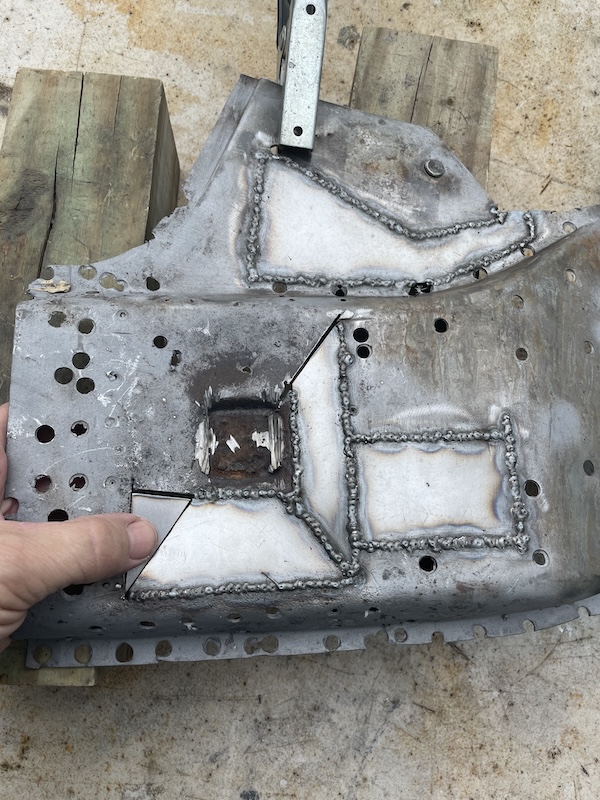 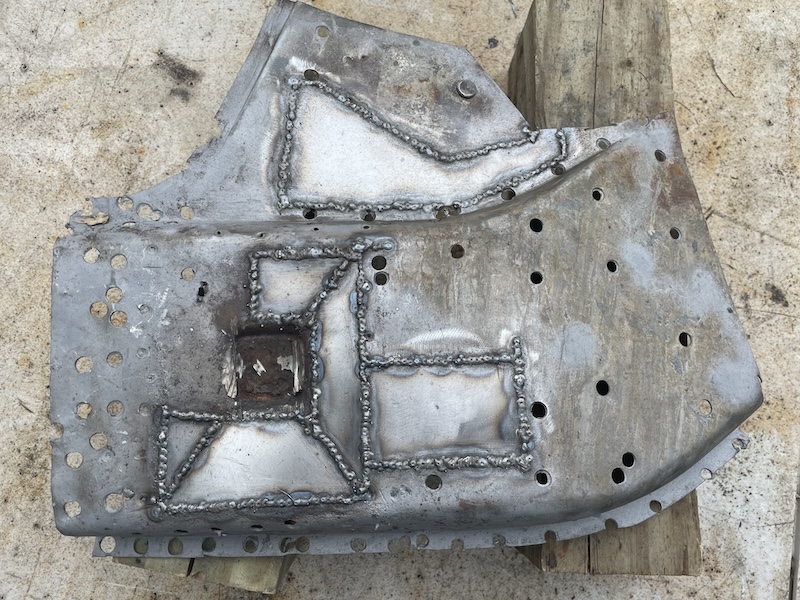 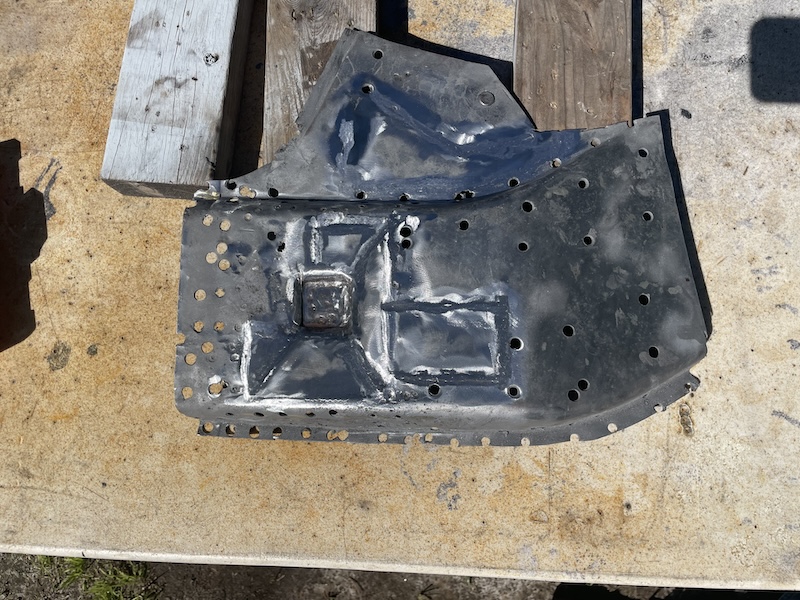 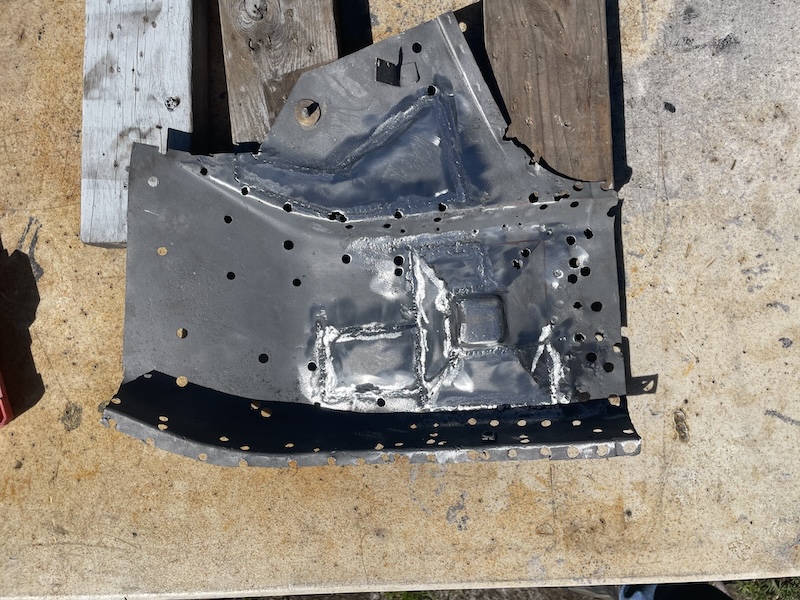 |
| friethmiller |
 Apr 23 2024, 06:49 AM Apr 23 2024, 06:49 AM
Post
#158
|
|
Senior Member    Group: Members Posts: 846 Joined: 10-February 19 From: Austin, TX Member No.: 22,863 Region Association: Southwest Region 
|
Driver Side Jack Post Area - Part 2: (4/21/2024):
After grinding the welds down (see previous post above), I moved on with getting this metal welded into the car. My plan was to install the part and then later hit the jack post area with the sandblaster before moving on with other related tasks. Well, sometimes you forget how long it takes! This took me pretty much all day to do. So many holes! The wind wasn't helping me at all either and I'll need come back through later and touch up some spots/pin holes. You can see I had to start with the 90 edge at the firewall where the Rest. Design part was too short. You may also have noticed the two small holes just above the repair area. This is the wiring tab that helps hold the wiring loom going to the circuit board inside the engine bay. I've been replacing a lot of these worn out tabs as I've went along. While my welds got a little ugly here, I did manage to get part is in. I'll work on cleaning up the area next weekend. 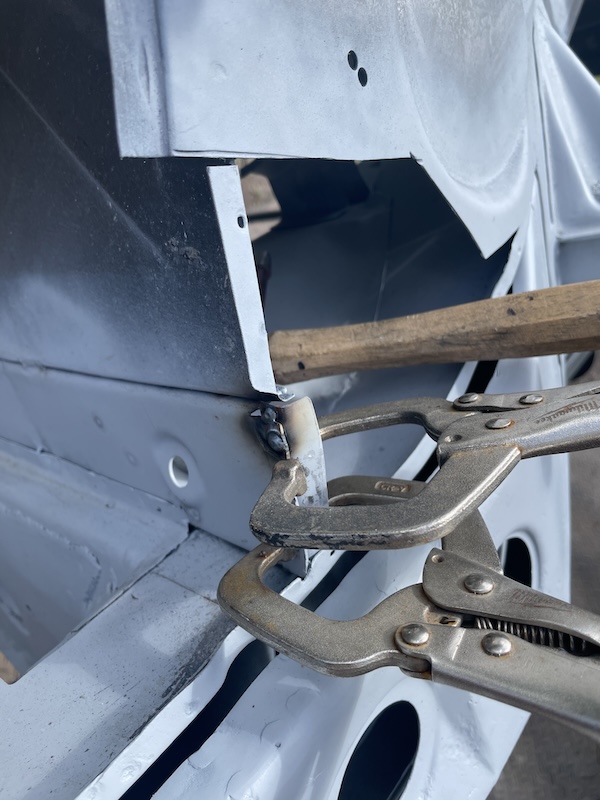 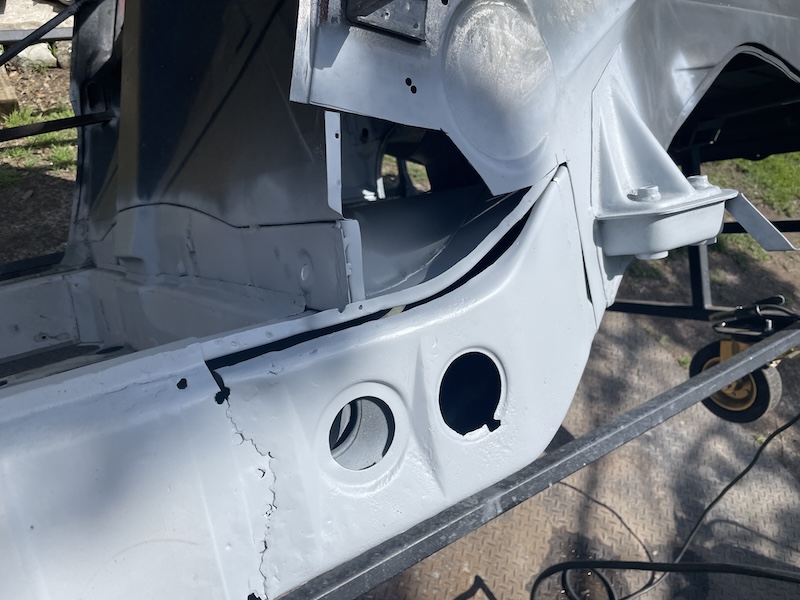 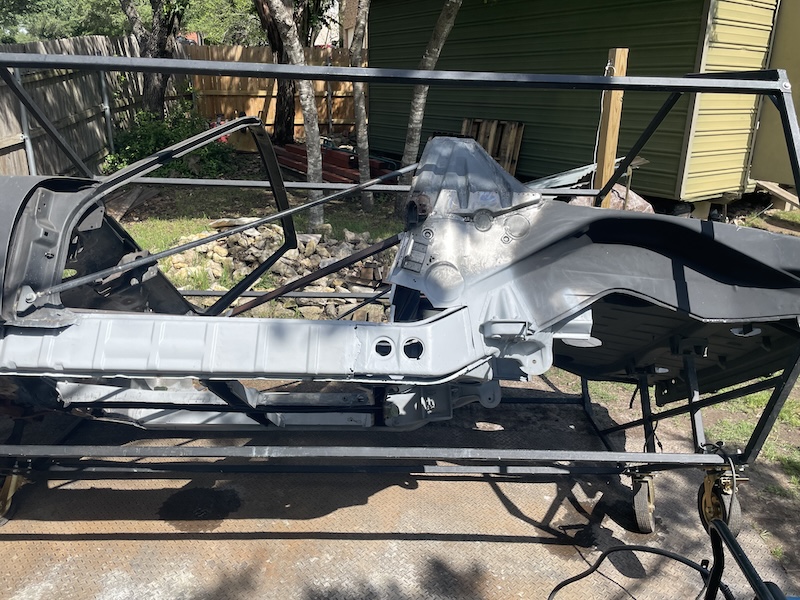 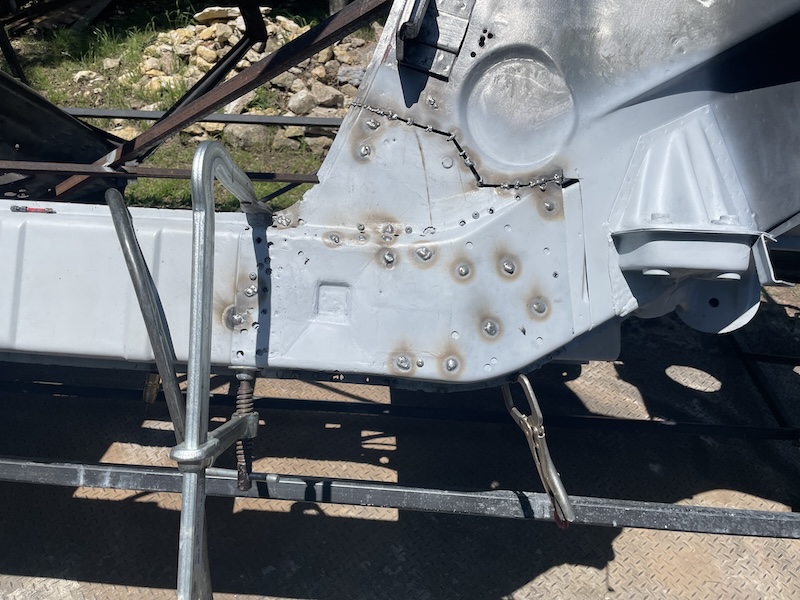 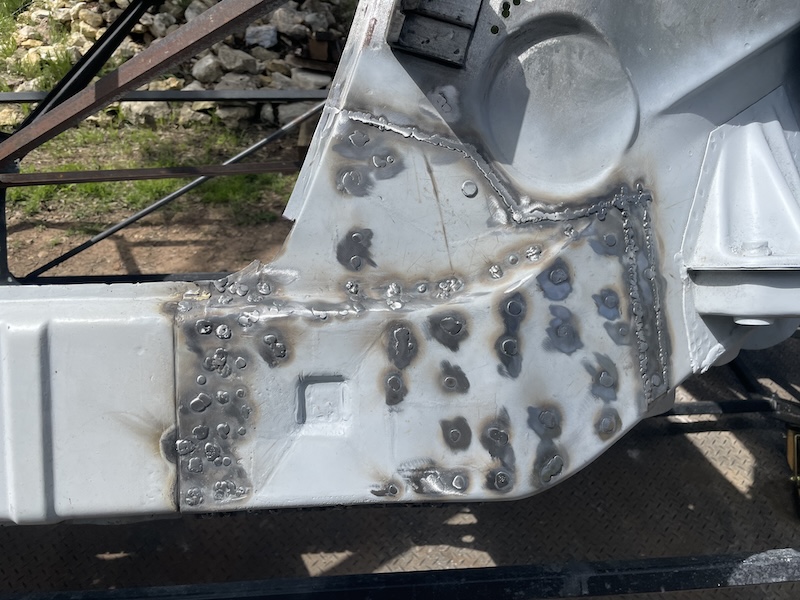 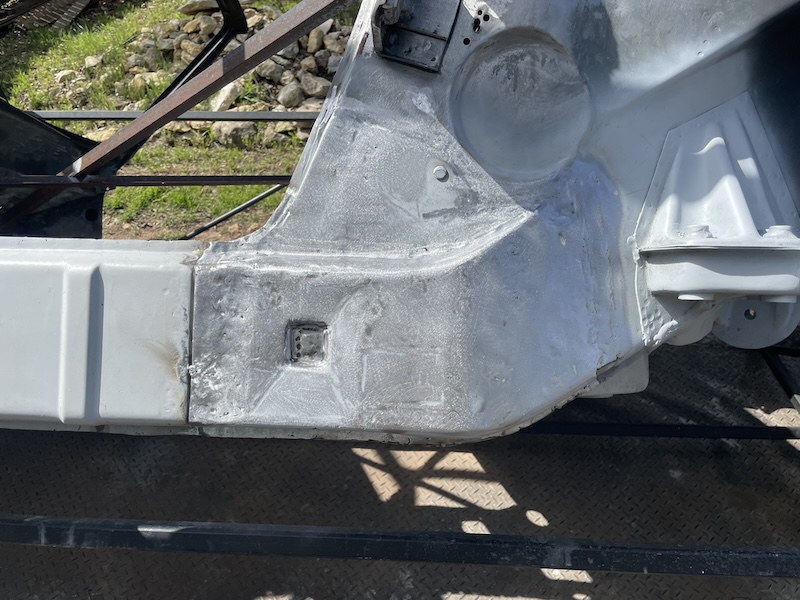 |
| friethmiller |
 May 20 2024, 08:23 AM May 20 2024, 08:23 AM
Post
#159
|
|
Senior Member    Group: Members Posts: 846 Joined: 10-February 19 From: Austin, TX Member No.: 22,863 Region Association: Southwest Region 
|
Driver Side Clean-up - Part 1 of 2: (5/11/2024 - 5/12/2024):
Jack Post: Continuing on with work necessary to complete the restoration of the drivers side, I started with welding in the jack post. Once you have alignment of the supporting panel and it's secured, installing the jack post is not a super difficult thing to do. I basically let the new jack post support piece [from RD] guide me in the placement of the post, which I created with 1 1/4 square pipe based on measurement of the original. The following photos show the process of the install. It's nice to be able to turn-up the welder a bit to make sure you get penetration into the thicker metal. 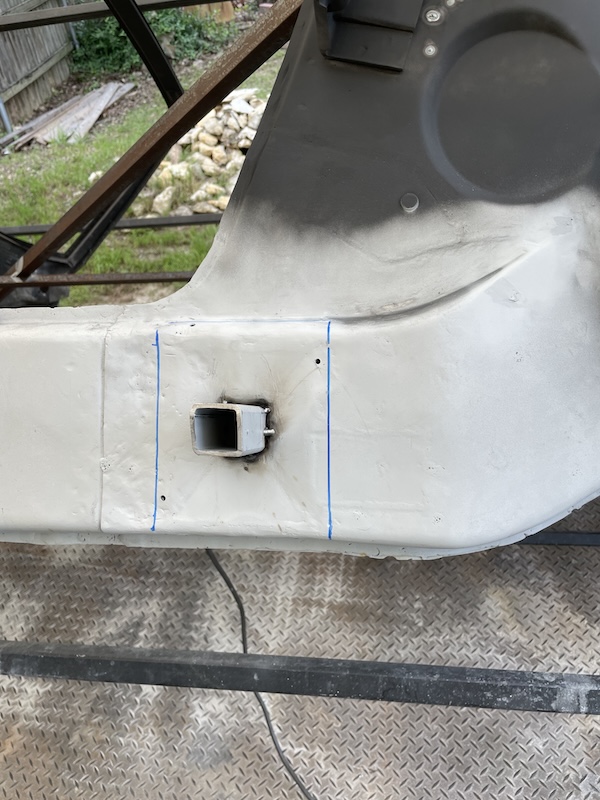 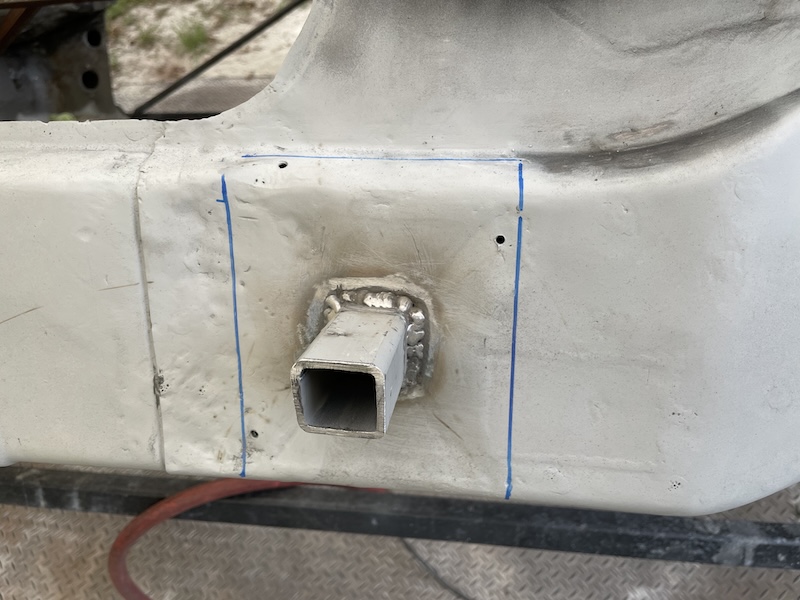 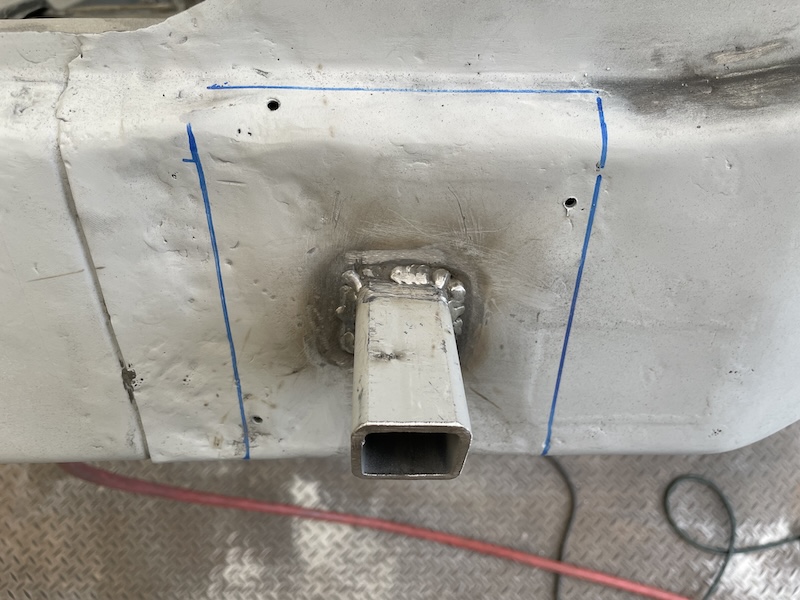 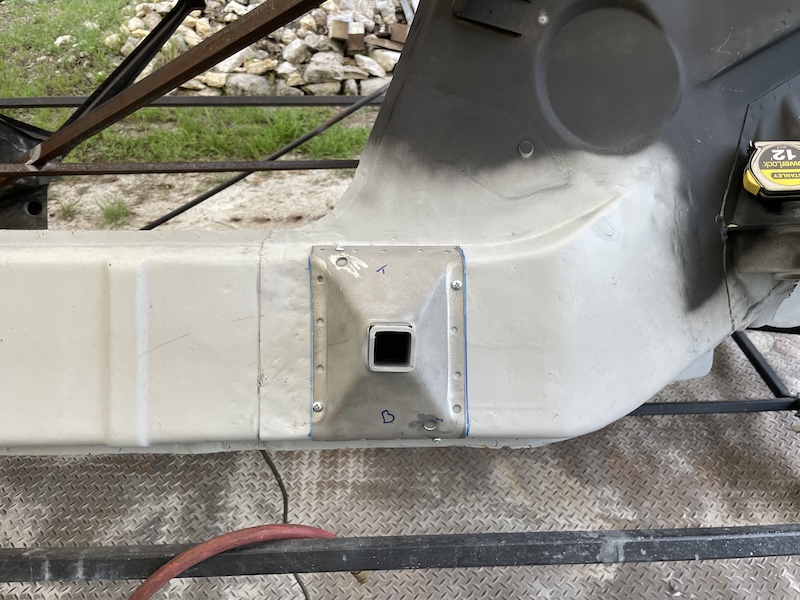 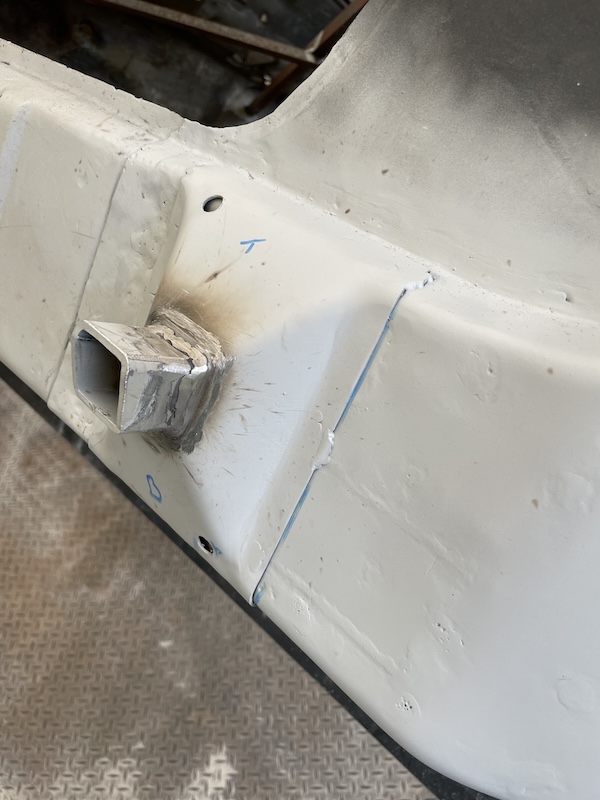 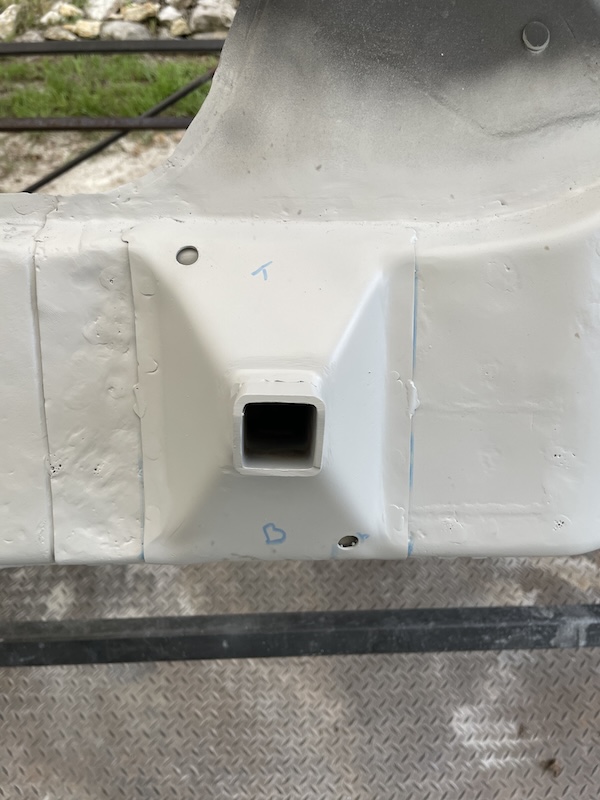 Reinforcement: In keeping with what I did on the passenger side, I used my remaining left-over support plate [from a GT kit]. This is pretty straight forward as well. Didn't get a final shot till of this install until the next day (see photos at the end). 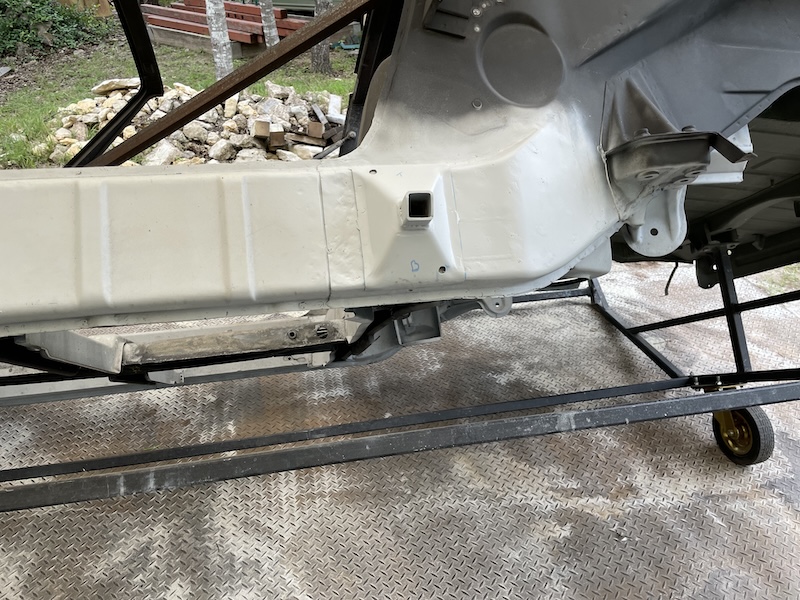 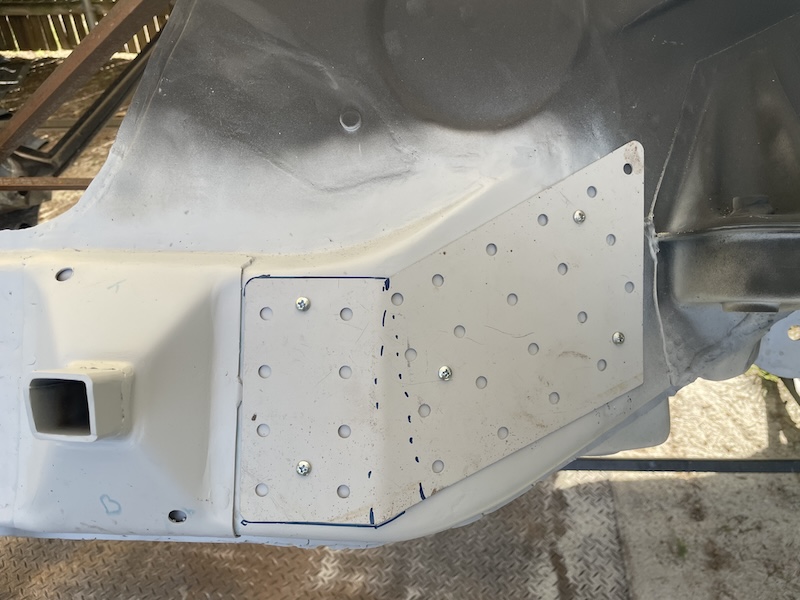 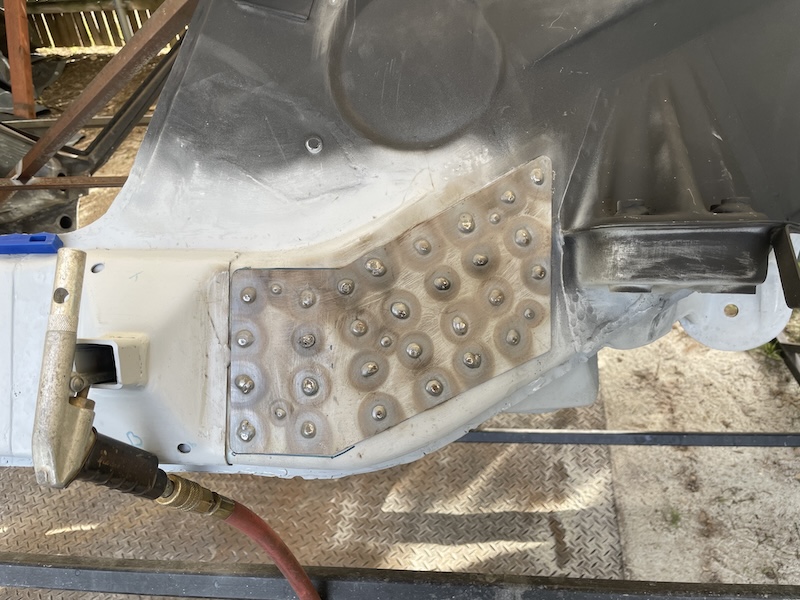 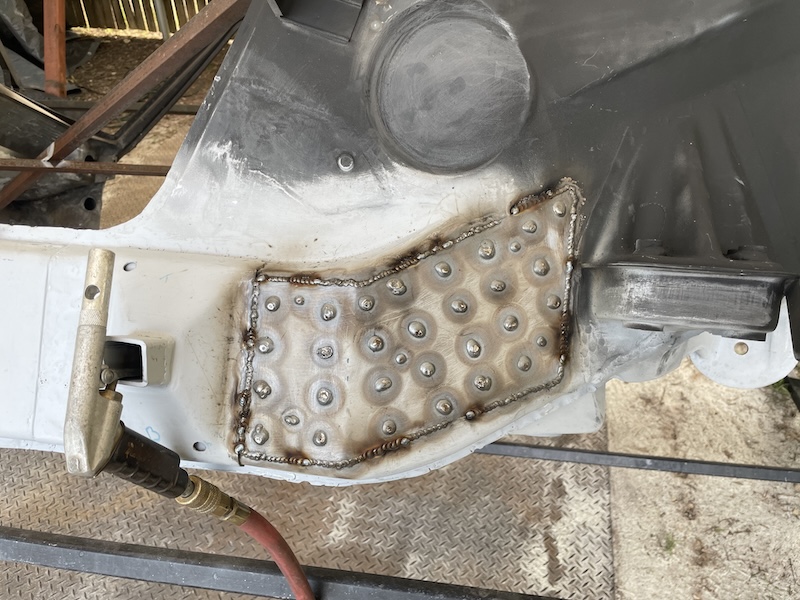 Hole Repair: This car had 4 mysterious holes like this that I had to fill in. After getting into the longitudinals, it became obvious that these were used to spray in an anti-corrosive wax to help prevent rust. I will say that were the wax went the rust was very minimal. The problem was, the wax didn't get in very far so it didn't prevent things from rusting out/through. The small spot next to the repair I filled in later. A lot of times, I don't see issues till later and I end up having to get the welder back out to solve the problem. 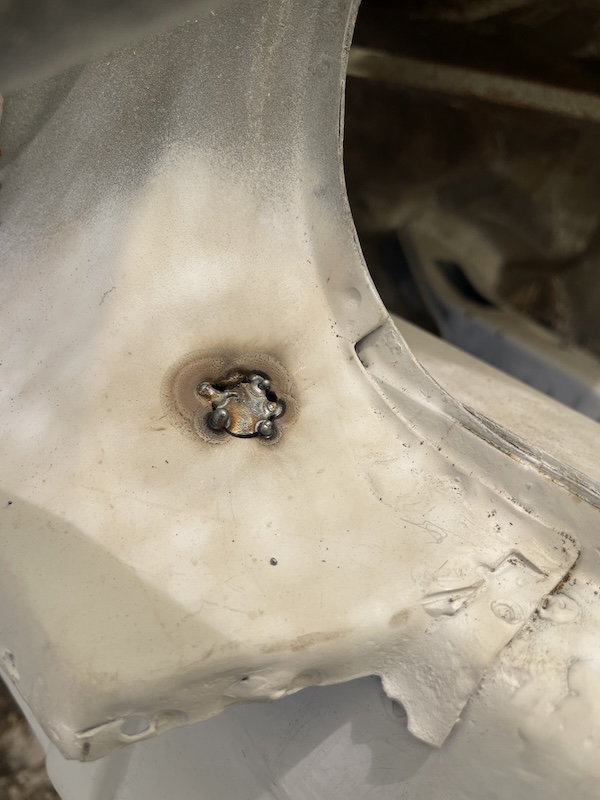 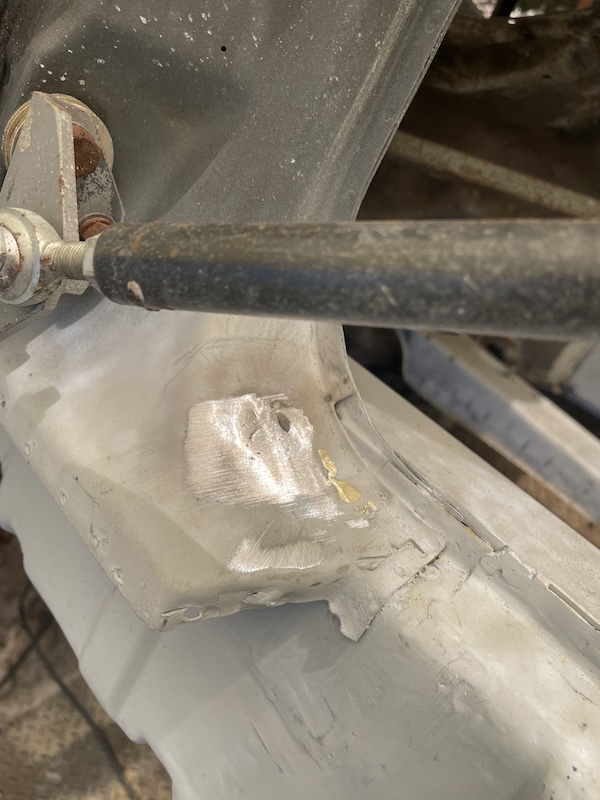 Front Door Hinge Support: Another RD part going in here. The original metal was just too thin and rusted out. Glad I spent the money 'cause the metal is way stronger than the original would have been, IMO. Took my time on this one for sure. I kept trimming the pice little by little to I got the gap/fit I was happy with. I think this repair piece went in easier because I spent the time to do the fitment. 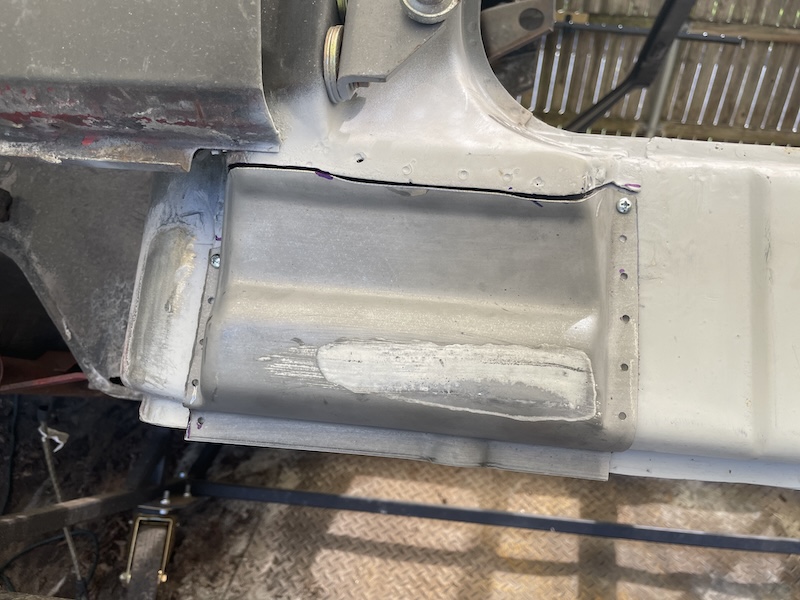 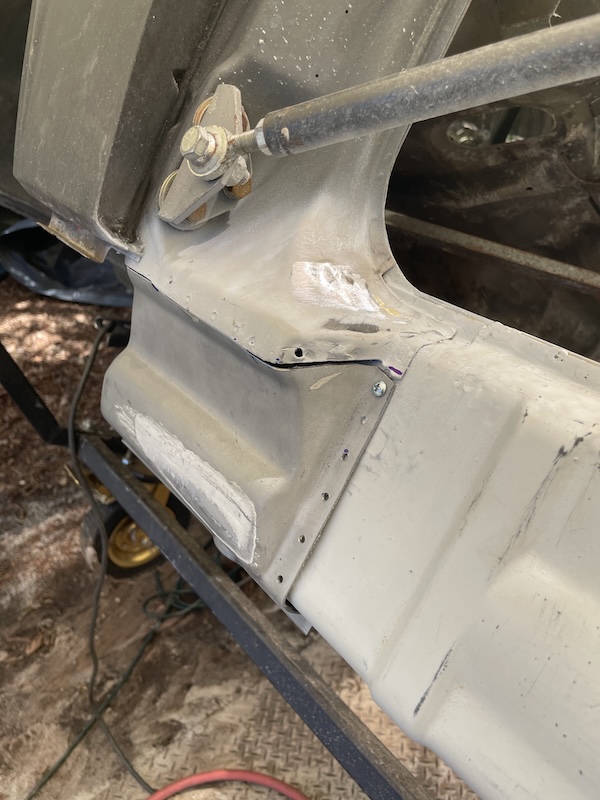 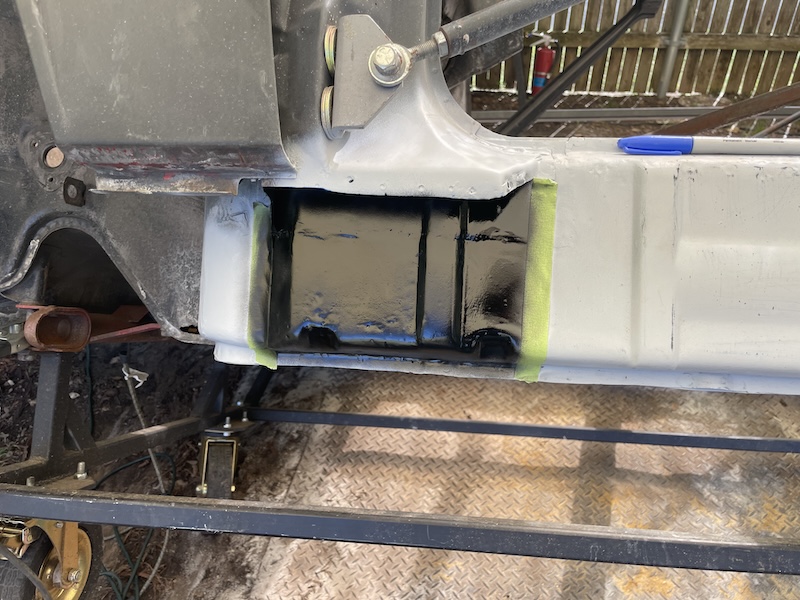 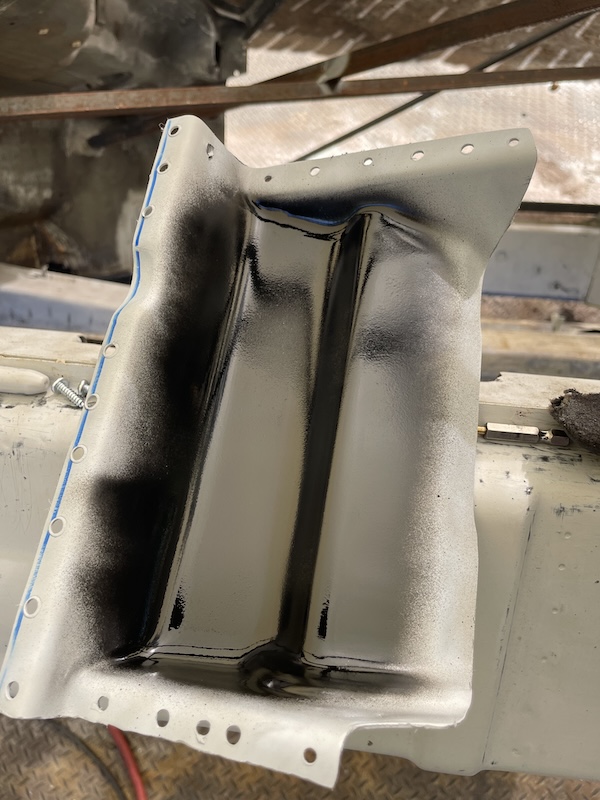 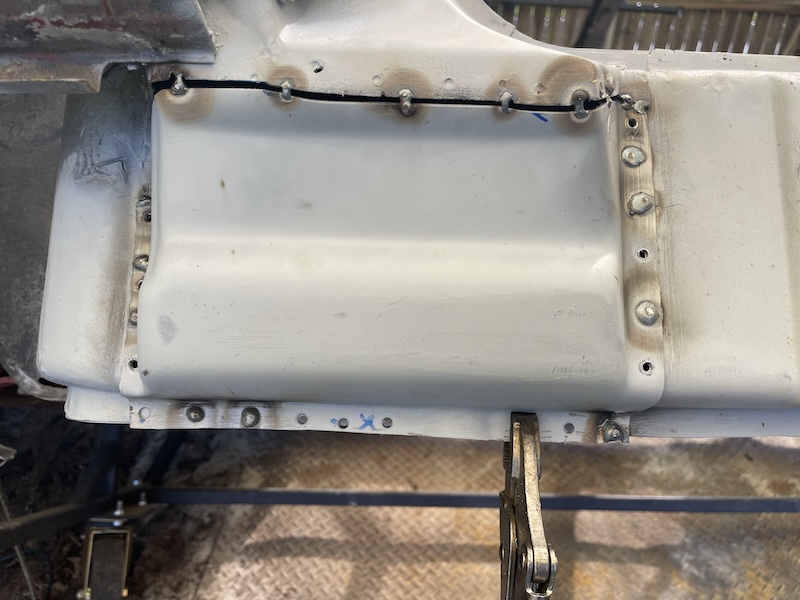 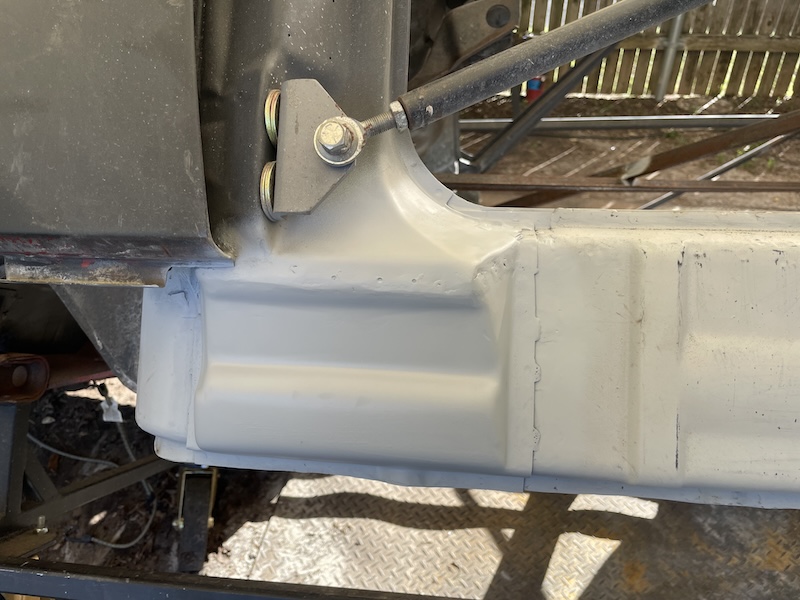 Final parting shots of the work completed [for part 1]. 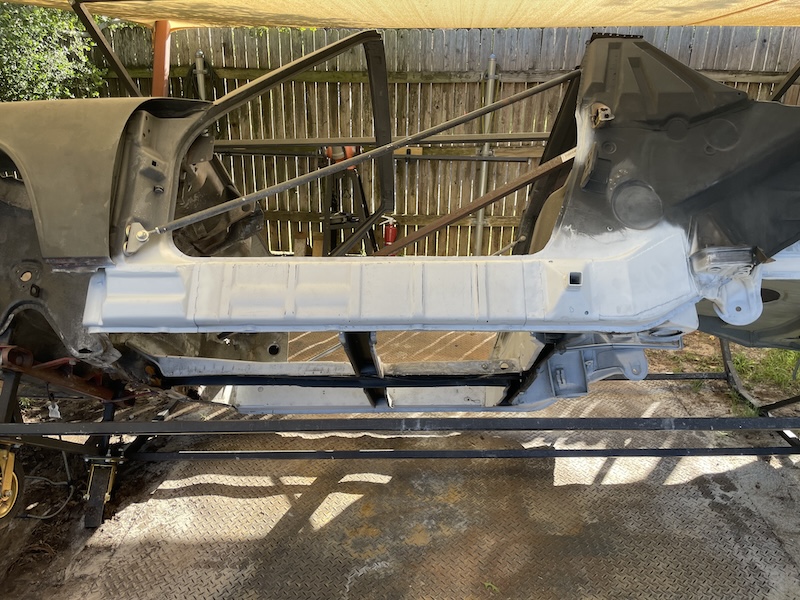 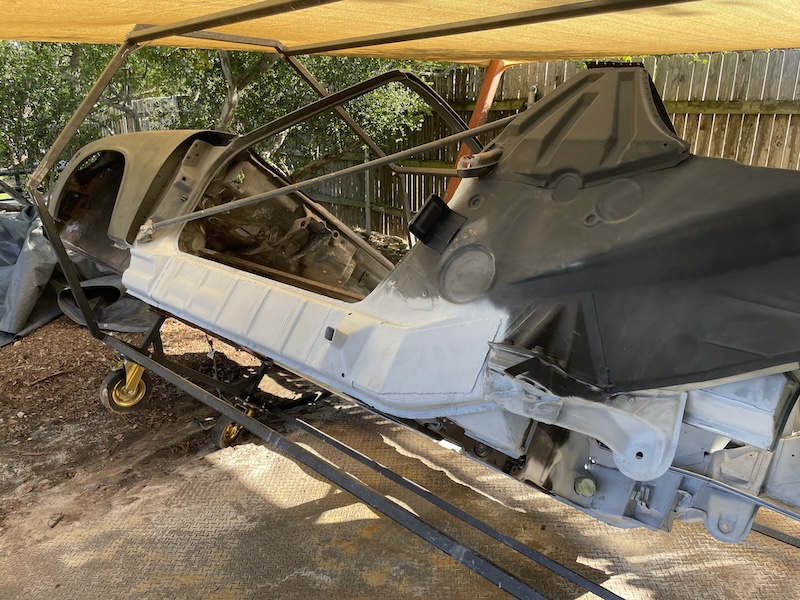 |
| 930cabman |
 May 20 2024, 12:16 PM May 20 2024, 12:16 PM
Post
#160
|
|
Advanced Member     Group: Members Posts: 4,044 Joined: 12-November 20 From: Buffalo Member No.: 24,877 Region Association: North East States 
|
All the while working in the outdoors!!
Hats off to Fred I nominate this for build of the year, great workmanship, |
  |
1 User(s) are reading this topic (1 Guests and 0 Anonymous Users)
0 Members:

|
Lo-Fi Version | Time is now: 19th April 2025 - 11:23 PM |
Invision Power Board
v9.1.4 © 2025 IPS, Inc.


