|
|
|
Porsche, and the Porsche crest are registered trademarks of Dr. Ing. h.c. F. Porsche AG.
This site is not affiliated with Porsche in any way. Its only purpose is to provide an online forum for car enthusiasts. All other trademarks are property of their respective owners. |
|
|

  |

| 930cabman |
 Jun 3 2024, 05:43 AM Jun 3 2024, 05:43 AM
Post
#181
|
|
Advanced Member  Group: Members Posts: 4,044 Joined: 12-November 20 From: Buffalo Member No.: 24,877 Region Association: North East States |
|
   |

 
|
| Cairo94507 |
Jun 3 2024, 06:08 AM
Post
#182
|
|
Michael Group: Members Posts: 10,297 Joined: 1-November 08 From: Auburn, CA Member No.: 9,712 Region Association: Northern California |
Very nice work; that car is going to be beautiful. (IMG:style_emoticons/default/beerchug.gif)
|
|
|
|
| friethmiller |
Jun 3 2024, 07:50 AM
Post
#183
|
|
Senior Member Group: Members Posts: 846 Joined: 10-February 19 From: Austin, TX Member No.: 22,863 Region Association: Southwest Region |
Thanks y'all! I appreciate the interest in my project. Keeps me motivated! Thanks! Sure hope she IS beautiful when I'm done (IMG:style_emoticons/default/biggrin.gif)
|
|
|
|
| Dion |
Jun 5 2024, 09:13 AM
Post
#184
|
|
RN Group: Members Posts: 2,839 Joined: 16-September 04 From: Audubon,PA Member No.: 2,766 Region Association: MidAtlantic Region |
Absolutely fantastic! Just beautiful work. Going to be one great looking 914.
|
|
|
|
| watsonrx13 |
Jun 9 2024, 08:30 AM
Post
#185
|
|
Advanced Member Group: Members Posts: 2,735 Joined: 18-February 03 From: Plant City, FL Member No.: 312 Region Association: South East States |
Well done Fred. What tool are you using to knock down the inside welds on the pan?
|
|
|
|
| friethmiller |
Jun 9 2024, 04:09 PM
Post
#186
|
|
Senior Member Group: Members Posts: 846 Joined: 10-February 19 From: Austin, TX Member No.: 22,863 Region Association: Southwest Region |
QUOTE(watsonrx13 @ Jun 9 2024, 09:30 AM)  Well done Fred. What tool are you using to knock down the inside welds on the pan? @watsonrx13 - Thanks. I struggled at first on these. I couldn’t remember what I used on my other 914. There’s not a lot of room against the crossover support and sides. I tried a few different sized grinders including my finger sander. Nothing really worked until I remembered that a brand new 4 1/2 sand disk on my angle grinder can get in there and has the HP to knock the welds down. That left a few hard to reach ones for the finger sander. I typically go over all my welds with the finger sander at the end to “final it out” as they say. I hope this helps! |
|
|
|
| friethmiller |
Jun 9 2024, 09:04 PM
Post
#187
|
|
Senior Member Group: Members Posts: 846 Joined: 10-February 19 From: Austin, TX Member No.: 22,863 Region Association: Southwest Region |
Passenger Side Front Floor Prep: Part 1 - Exposing the Damage (6/8/2024):
Well, after installing the rear floorpan last weekend, the logical next step would be the front floorpan. Not exactly! I have nothing to weld to up front and I couldn't delay this any longer! It's time to dive into the rusted out area up front and figure out how to fix it. My last 914 was bad, but this is way worse! I started by wire-wheeling the area under the gas tank. Everything melted away. Nothing but holes. Yikes! 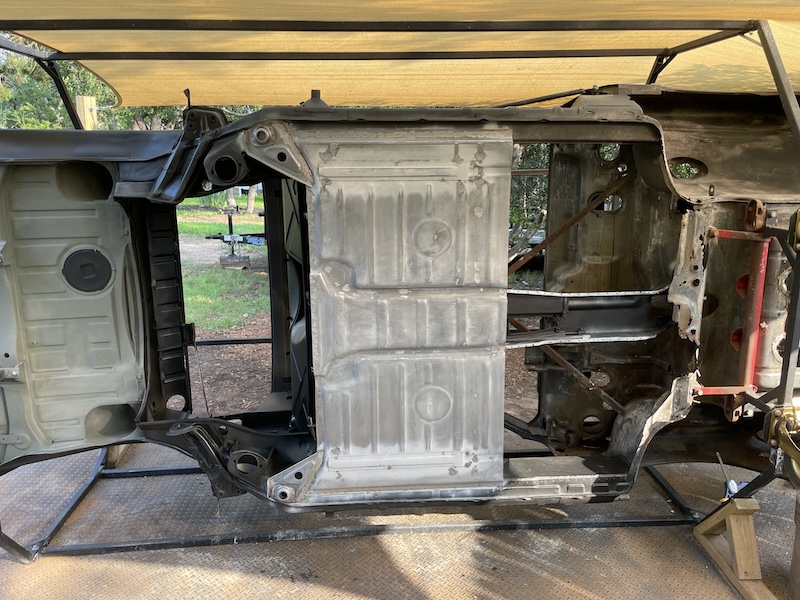 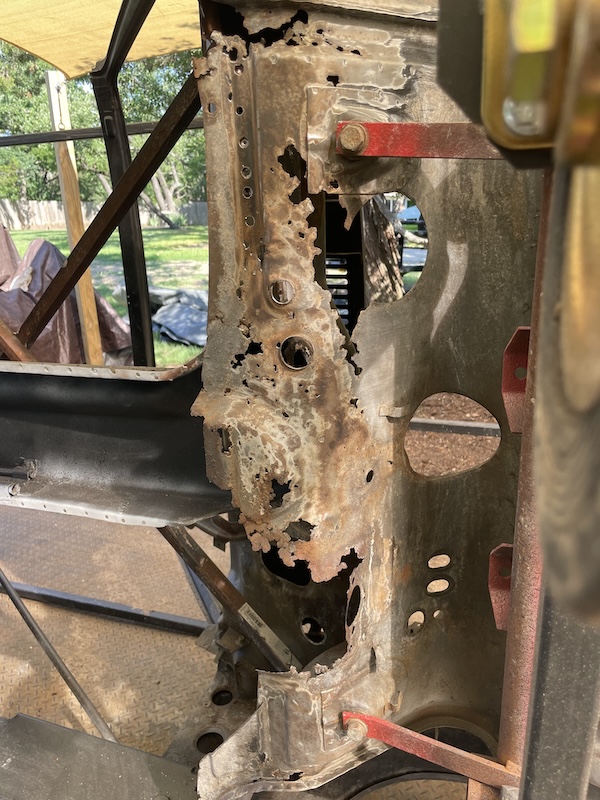 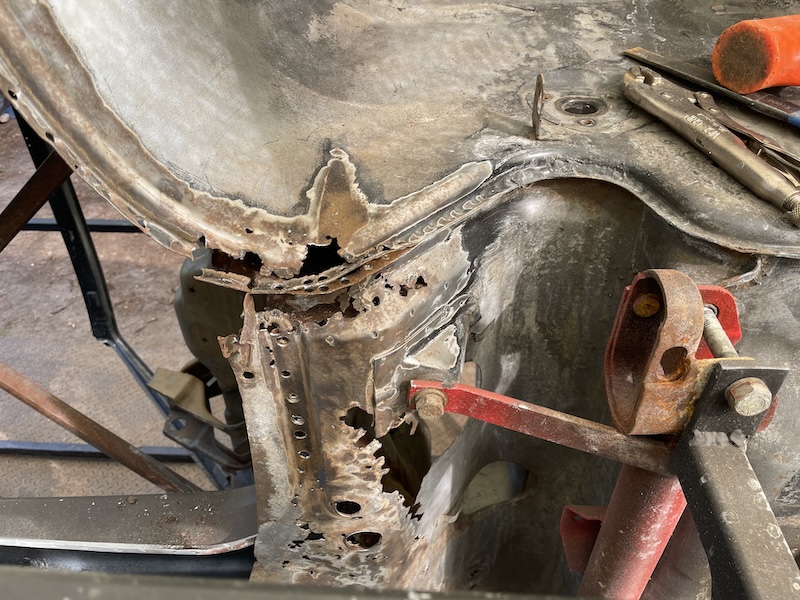 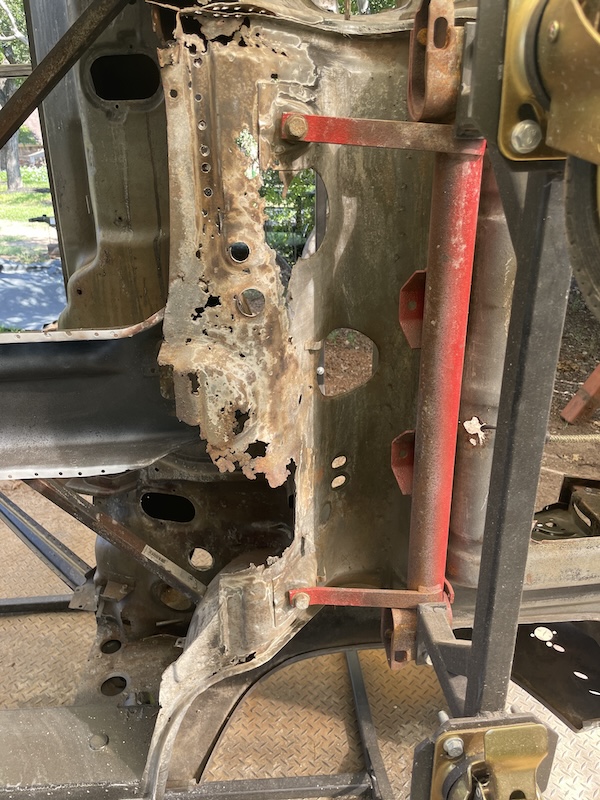 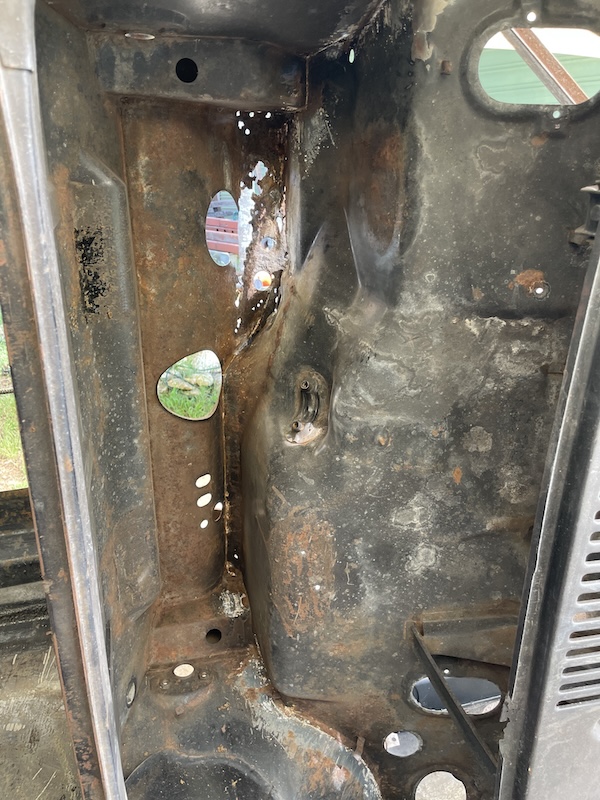 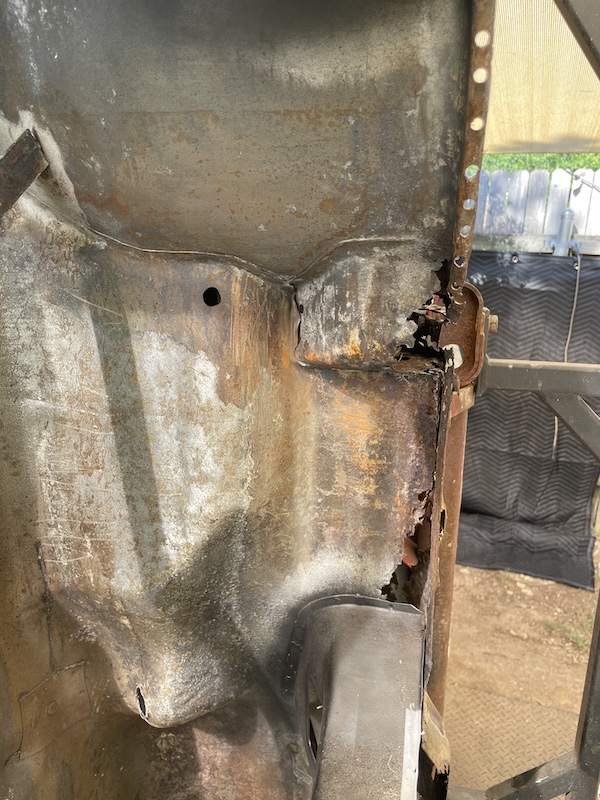 After a lot of looking/thinking, I decided the best option would be to cut out the floor to gain access to other rusted out piece that attach to the floor. Once these components were fixed, I would at least have something to weld to - assuming I could somehow patch/fabricate the floor metal. You can see in the next few photos how I carefully marked cut lines and removed the floor. To keep a manageable repair area, I made the decision to only do the passenger side. Once the passenger side was complete [and strong again], I could then roll the car over and have the drivers side up top to perform the same fix. 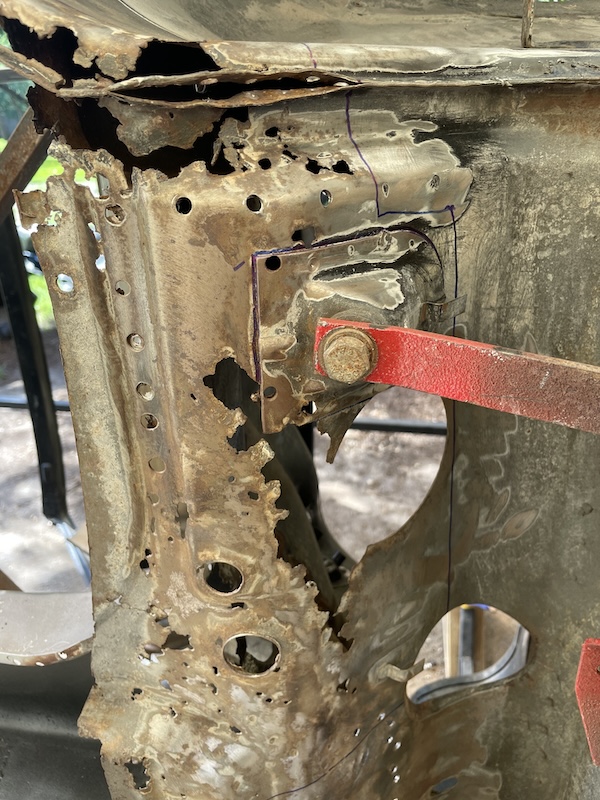  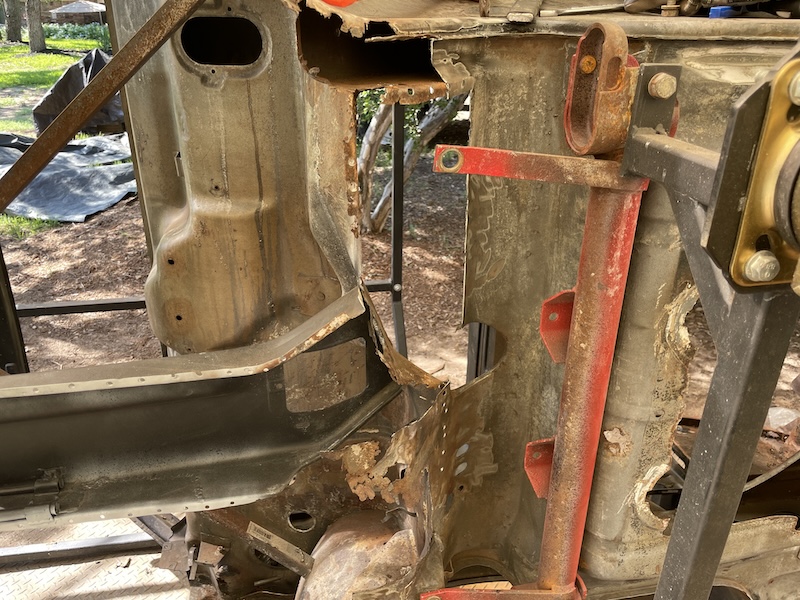 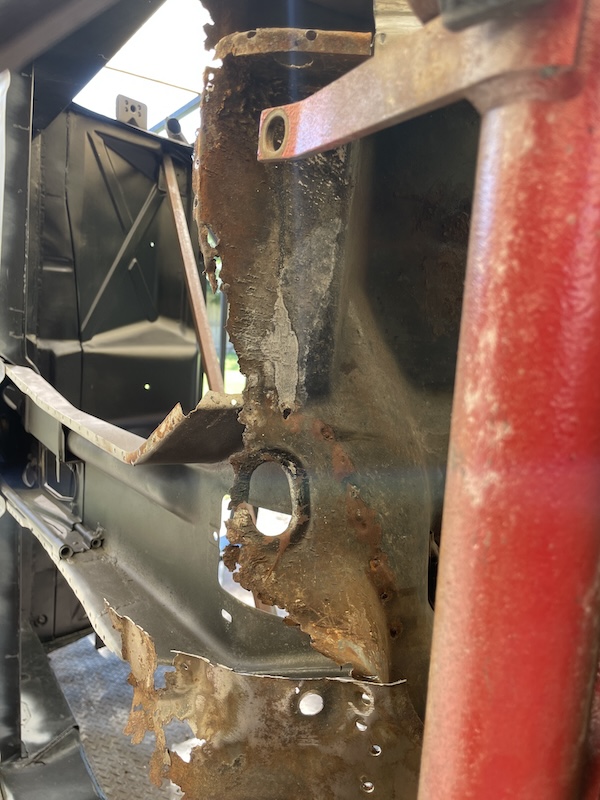 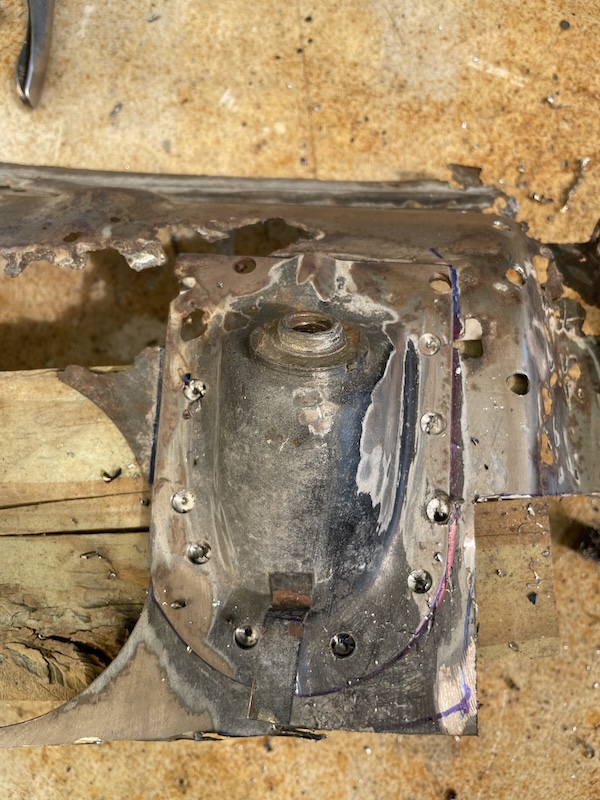 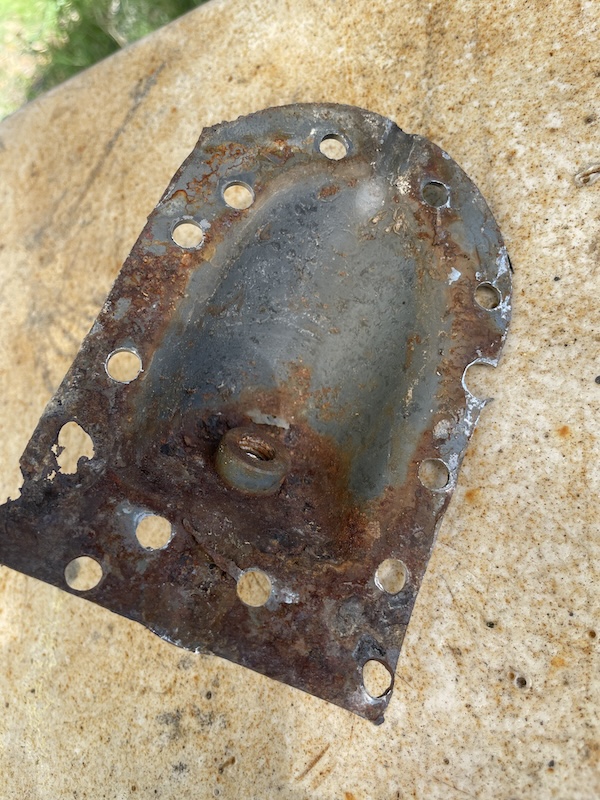  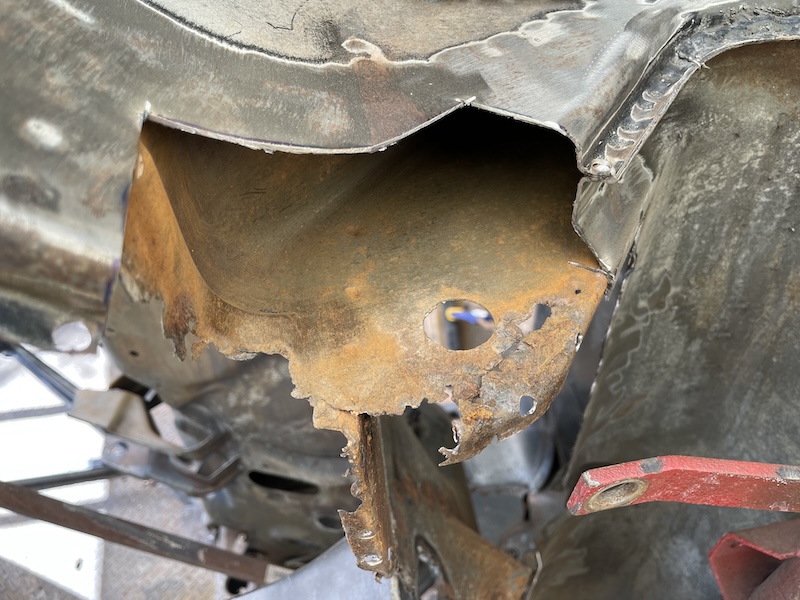 |
|
|
|
| friethmiller |
Jun 9 2024, 09:32 PM
Post
#188
|
|
Senior Member Group: Members Posts: 846 Joined: 10-February 19 From: Austin, TX Member No.: 22,863 Region Association: Southwest Region |
Passenger Side Front Floor Prep: Part 2 - Fixing the Damage (6/8/2024):
I've got the construction paper and pens out again! (IMG:style_emoticons/default/biggrin.gif) Here we go! Decided to tackle the largest, easiest piece first. I used paper and scissors to create the template I needed, transferred it to my 18-gauge sheet metal and then cut out the part. I also employed my bender (in the garage) to get the part in the right shape. I typically align the part with the existing metal in place to make sure I'm in the ballpark. If I am, I then cut the old metal and begin the forming/shaping process to get the metal in the right place with enough of a gap to get good penetration with the welder. The following photos show the process - note I used panel clamps to keep the metal straight while I welded and compressed air to keep any warpage under control. 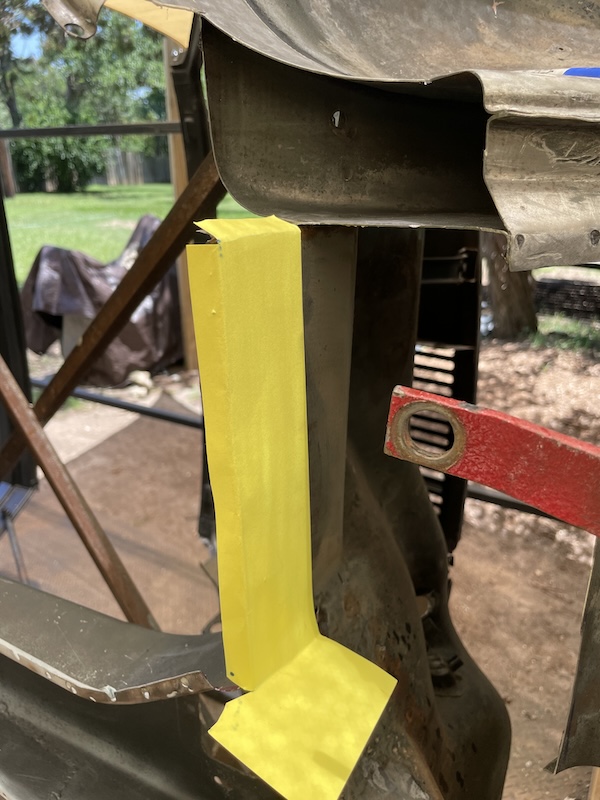  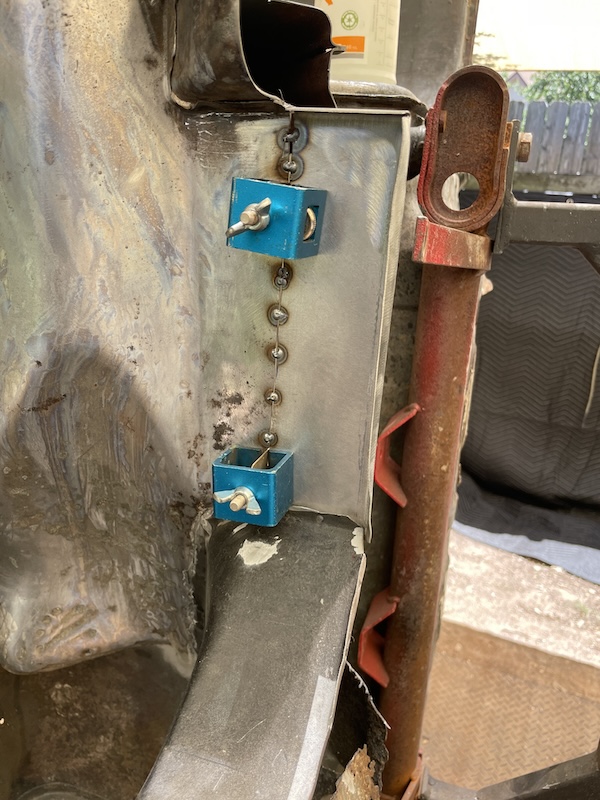 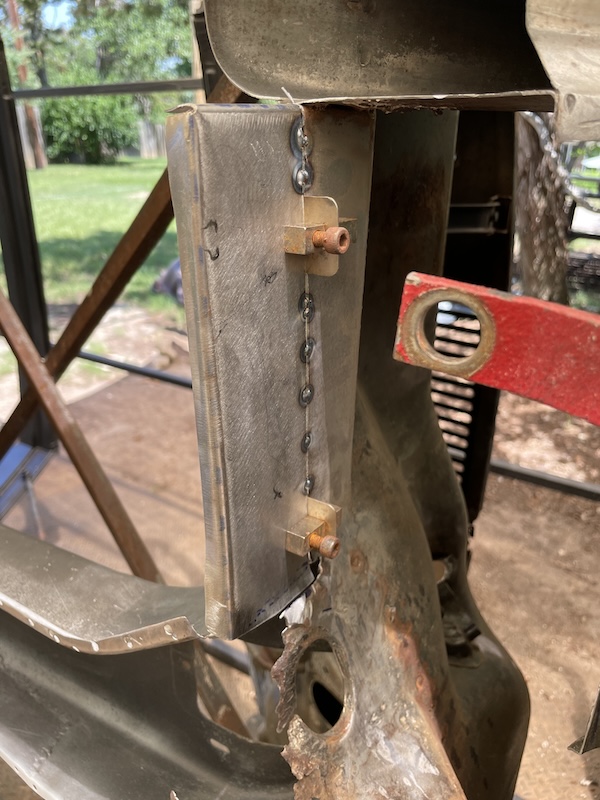 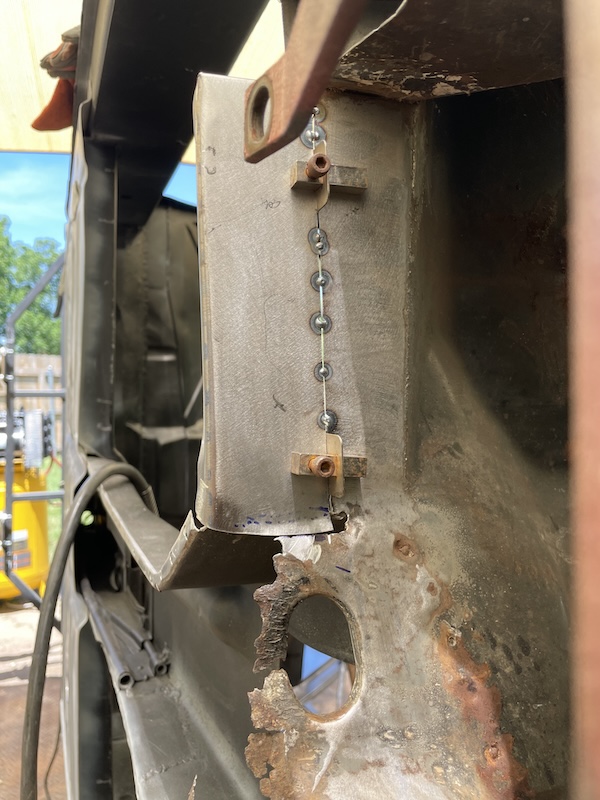 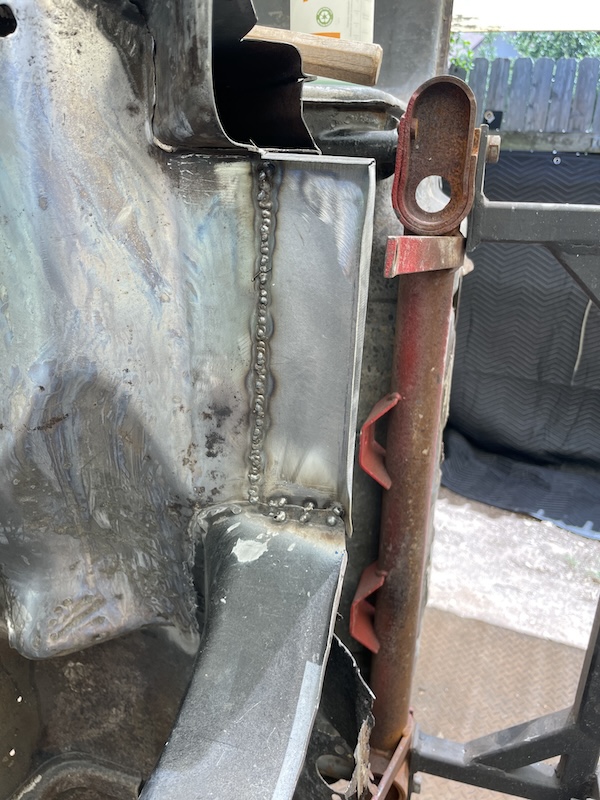 This same part extends in front of the tunnel and has an oval hole for the grommet where the fuel lines pass through. Forming this metal piece was a bit more difficult and took a while to make sure the piece would make proper contact with the floor. Once satisfied with the part and it's placement, I began welding the patch into the car. My plan was to find my fuel line grommet thingy in the morning and make the necessary adjustments to get it to fit. 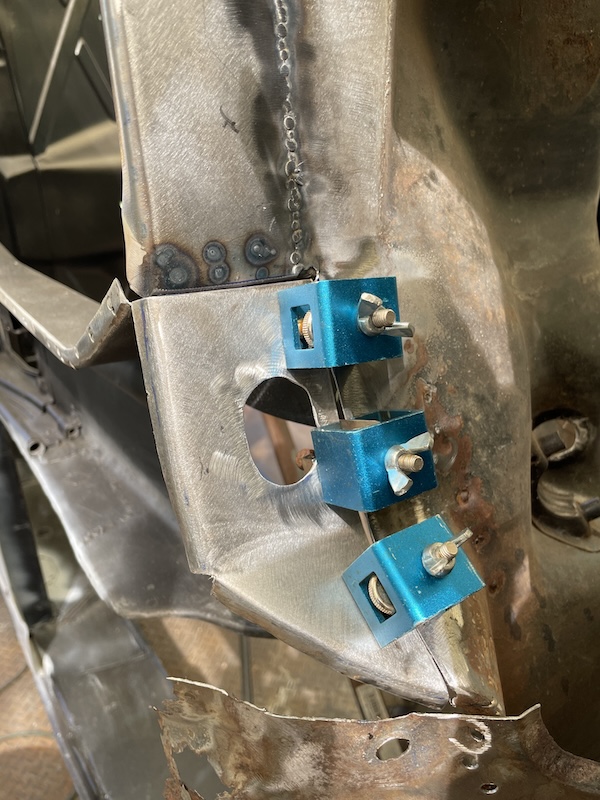 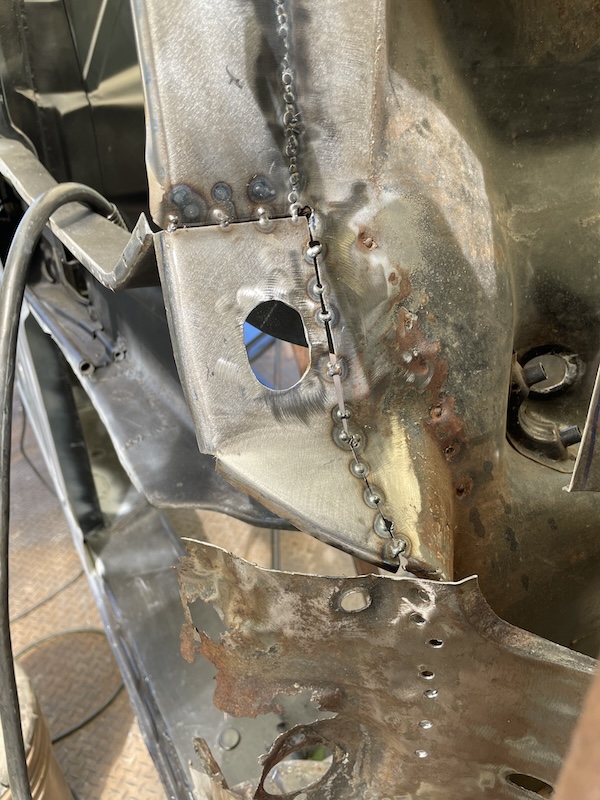 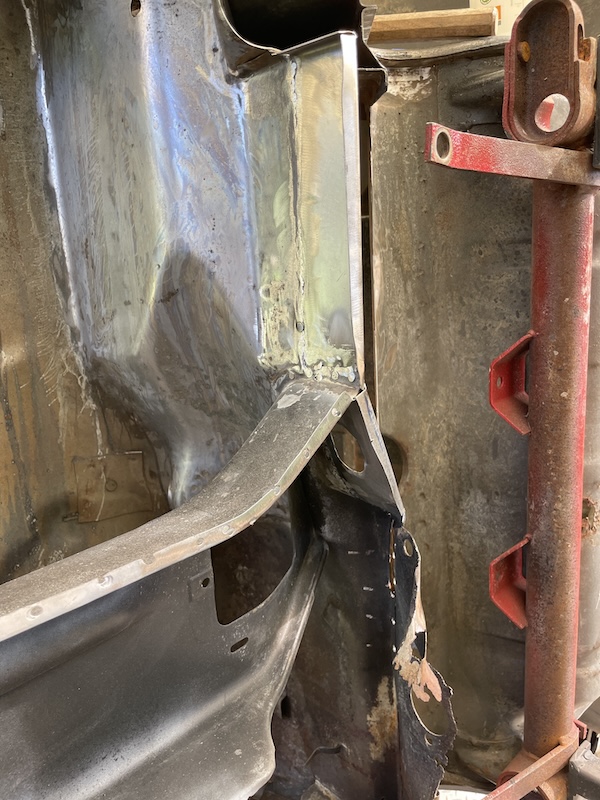 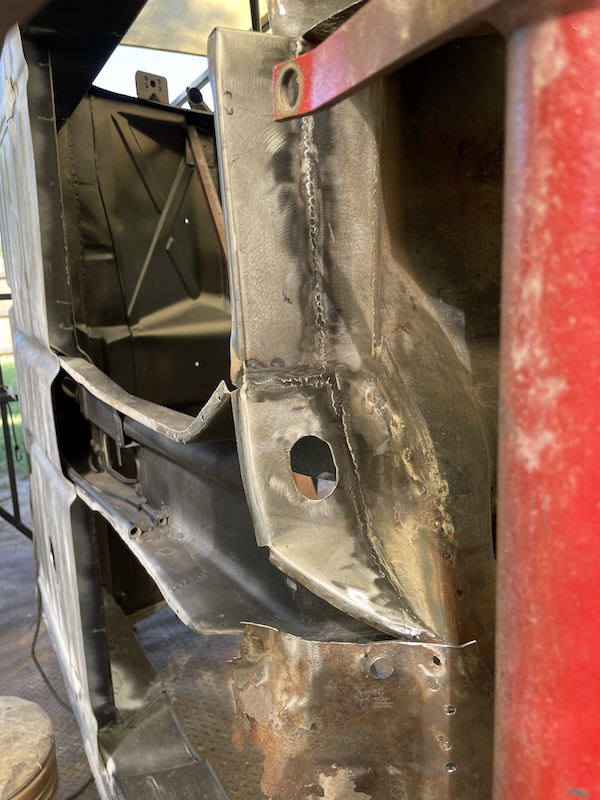 More to come with Part 3... |
|
|
|
| friethmiller |
Jun 10 2024, 07:22 AM
Post
#189
|
|
Senior Member Group: Members Posts: 846 Joined: 10-February 19 From: Austin, TX Member No.: 22,863 Region Association: Southwest Region |
Passenger Side Front Floor Prep: Part 3 - Fixing More Damage (6/9/2024):
Started off Sunday morning by adjusting the size of the oval hole I created yesterday in my repair piece. I wanted to take the opportunity now to make sure the rubber plug fit snuggly. I used a 2" grinder and a sanding stone on my drill to get the job done. 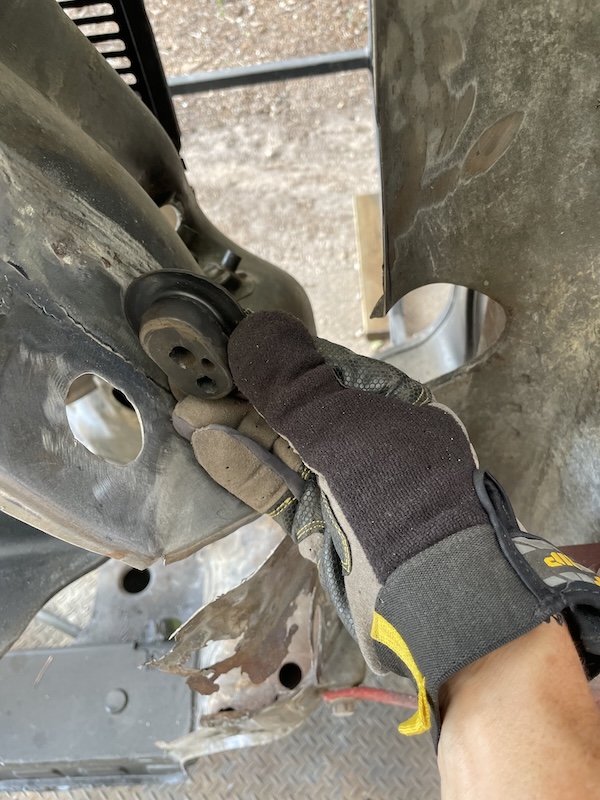 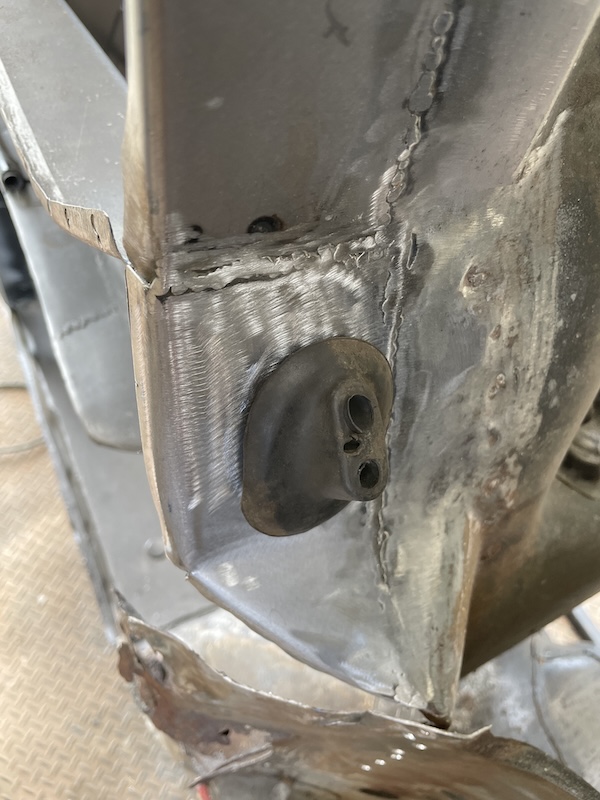 Next up was the curved cavity that exists between the car's interior and the gas tank area. Starting with the existing piece, I made a rough template. After cutting and bending the metal, I gradually worked the part into the right shape. The tricky part of this piece is at the bottom where it connects to the other support that I replaced yesterday. This matches the contour of the floor section that I removed yesterday. I'm going to try and replicate the original shape here as much as possible. 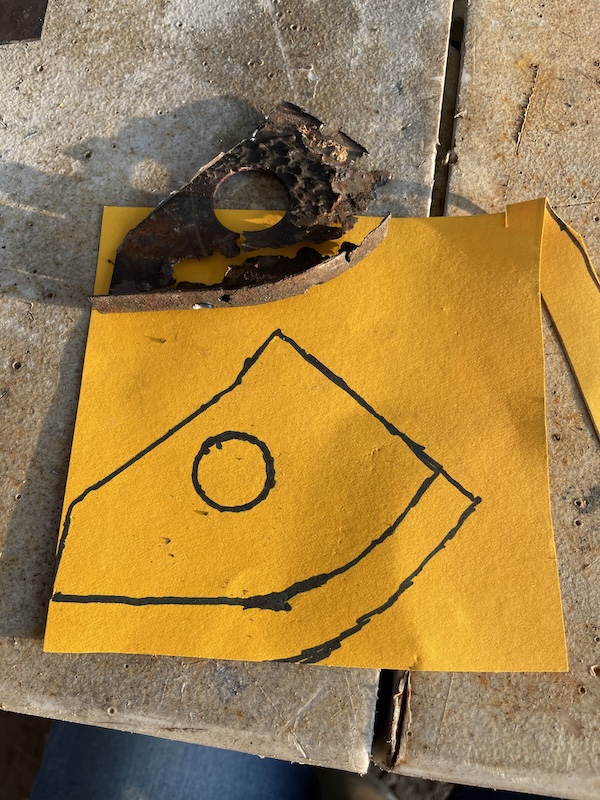 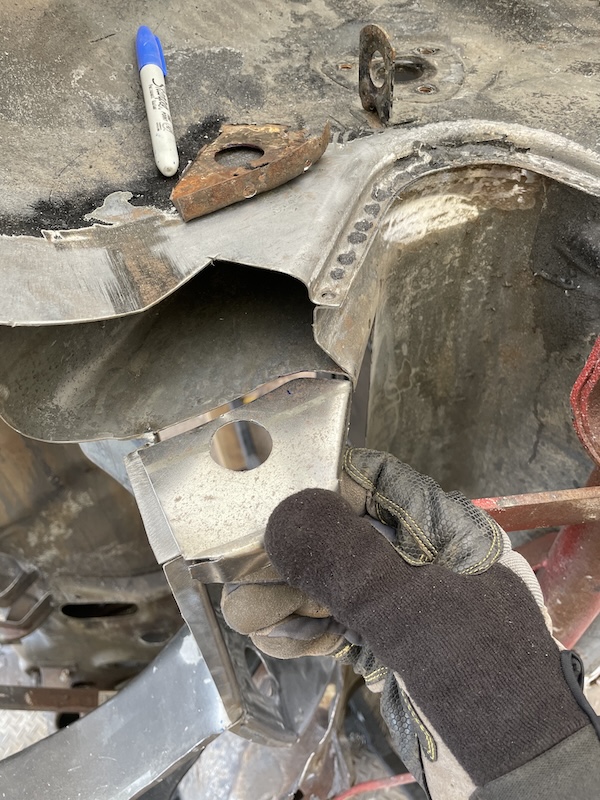 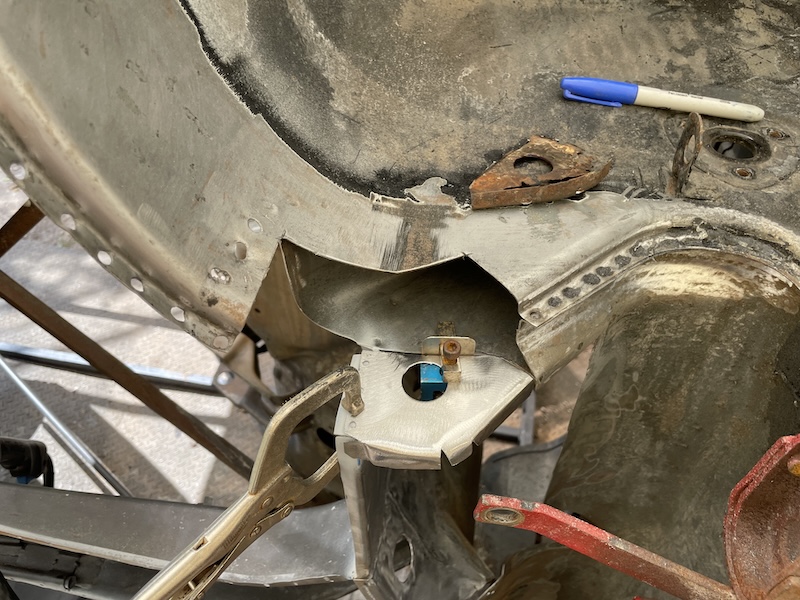 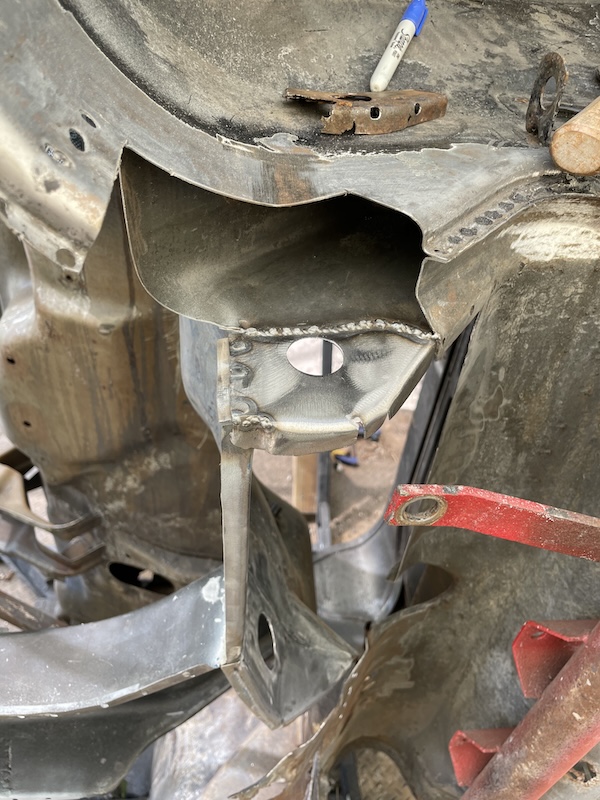 After grinding down all the welds, I then proceeded to take on the other half of this repair. I wanted to replace the contour or the original part so I decided to reuse what I could. The problem was that some of the rust had worked into the indentation that I was trying to salvage. So, I began by cutting out the bad and welding in a piece of metal that I could lightly grind / hammer / bend to make it look as it did. Note: the part was flipped over between photos here. 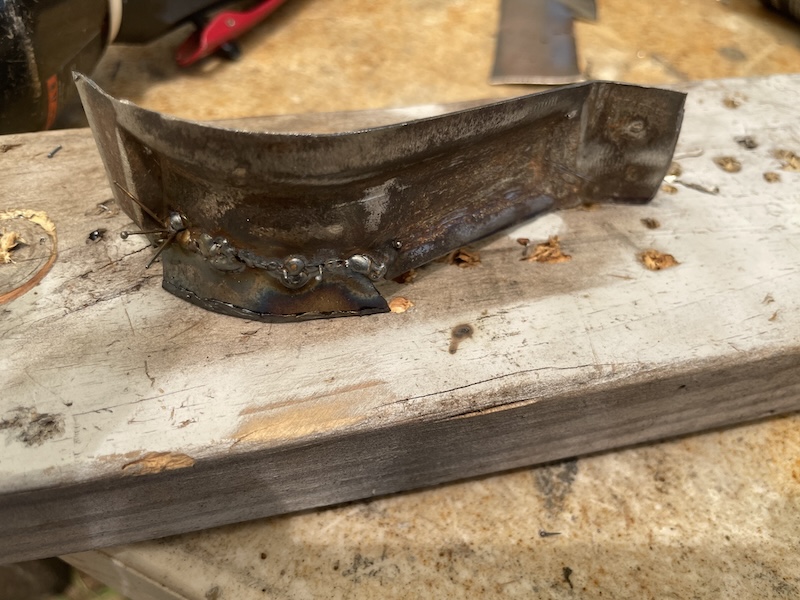 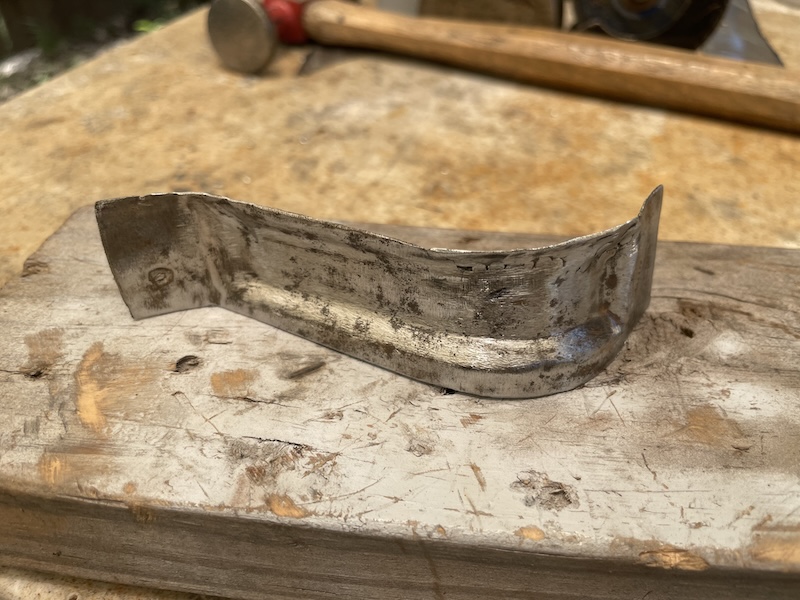 The next few photos show the install. I figured it would be easier to form the next piece once this "reused" piece was welded in place.  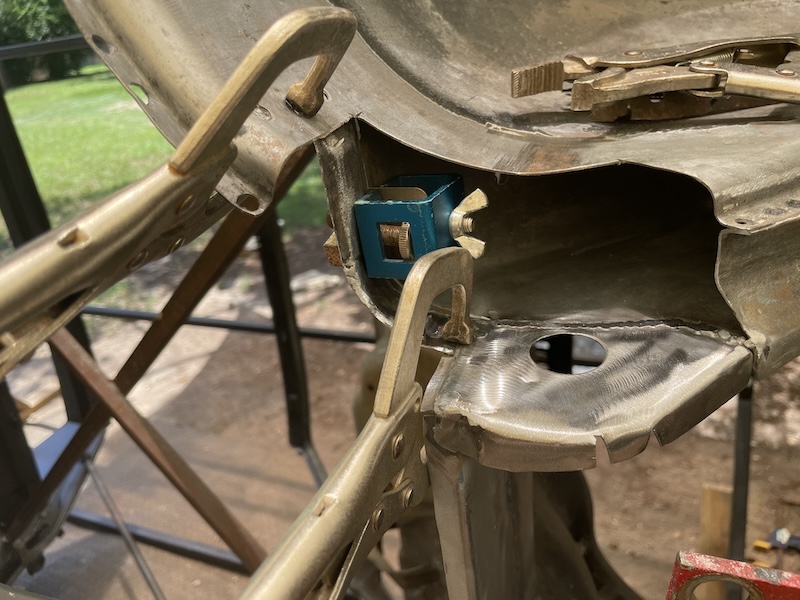 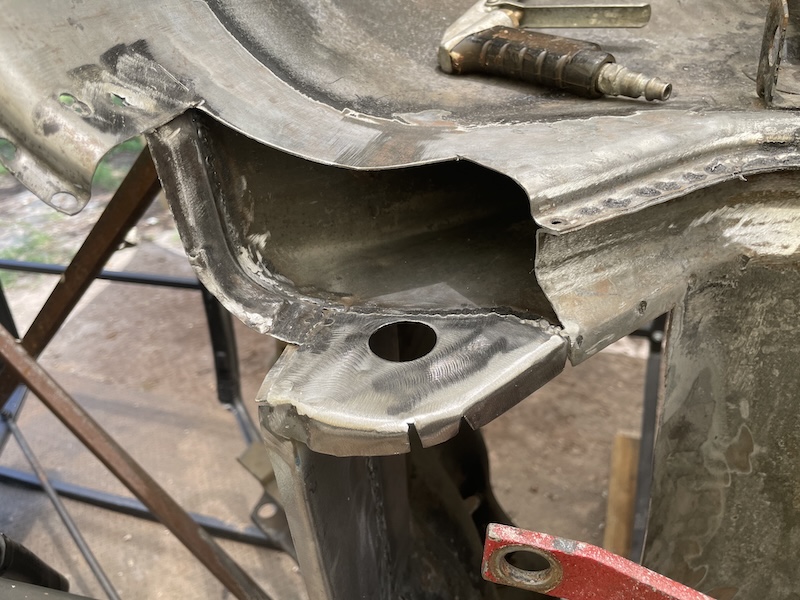 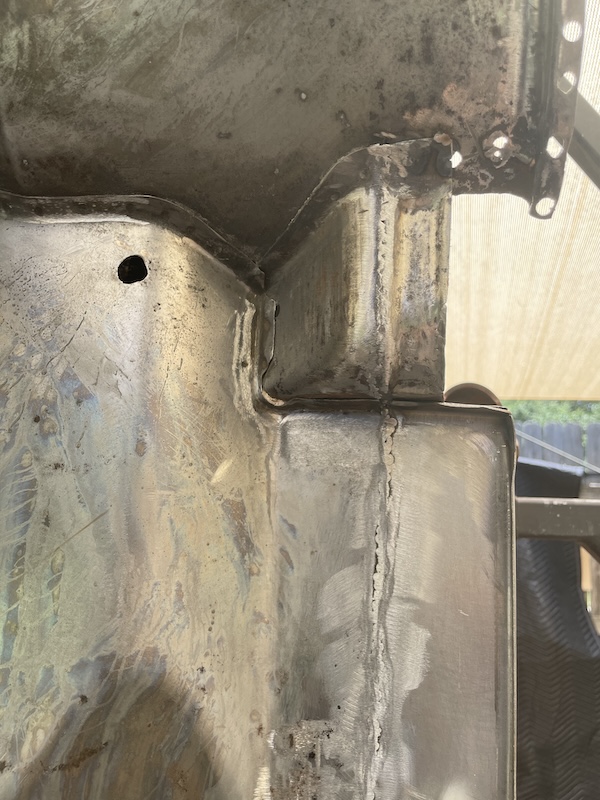 With that piece in, I used the construction paper [yet again] to create a template for the bottom/final section of the repair. I used the shrinker/stretcher to help bend the part into the right shape. It was pretty close but it took a good bit of time before I was satisfied with the fitment. It was a little ugly welding to the original metal above but I was able to get things done. I'll be going back over all these welds again prior to painting. 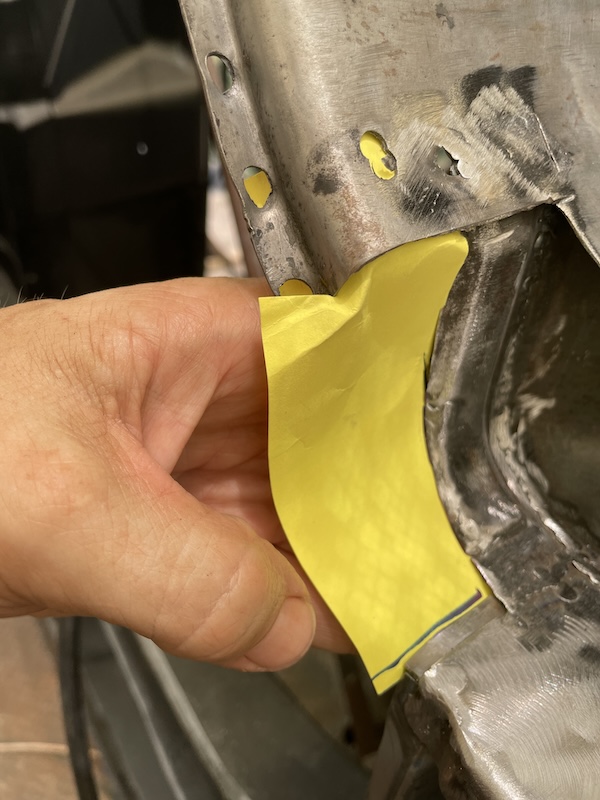 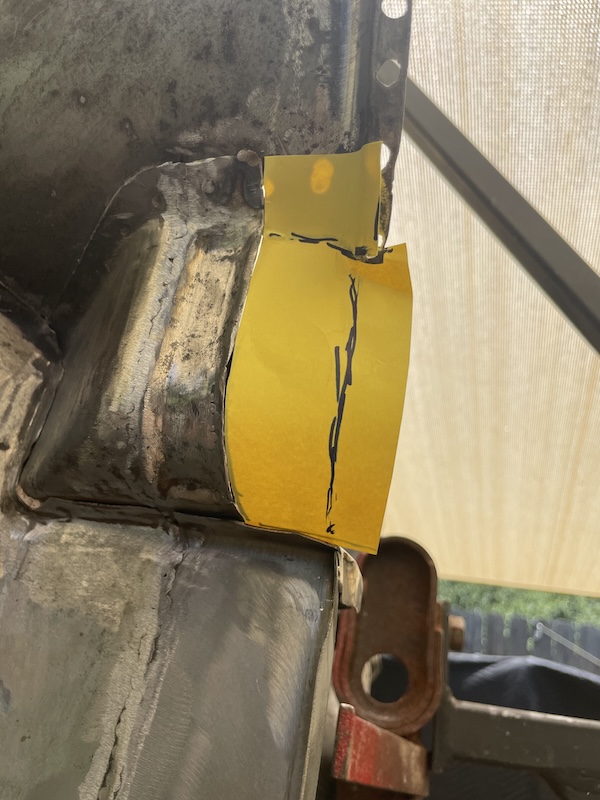 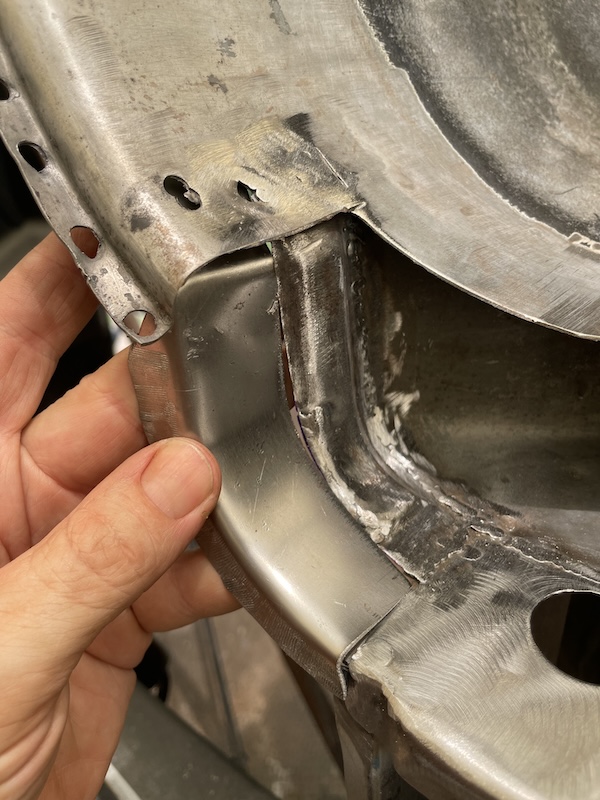 . . 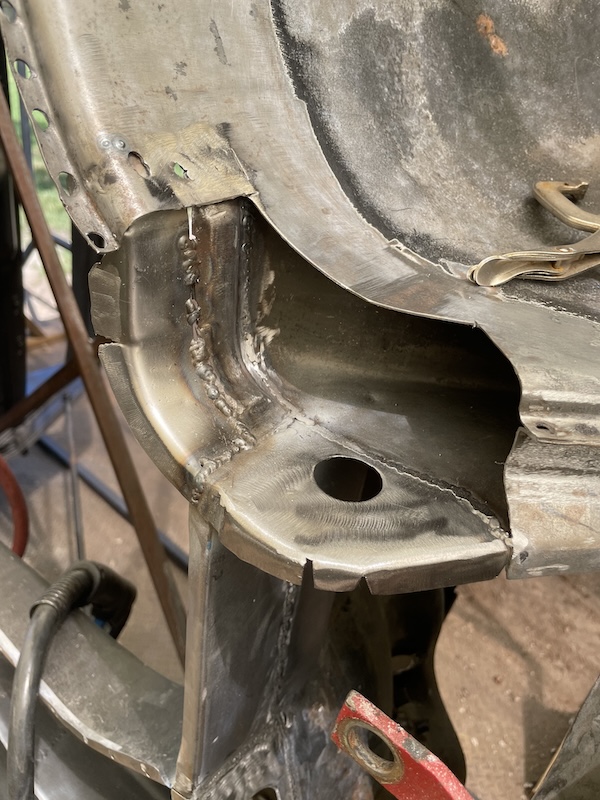 Final photos of what took me an entire weekend to accomplish. This stuff takes time and you cannot rush the process. I have to say, I loved every moment out there this weekend in the heat. Drank a ton of water and even a few beers (IMG:style_emoticons/default/beer3.gif) 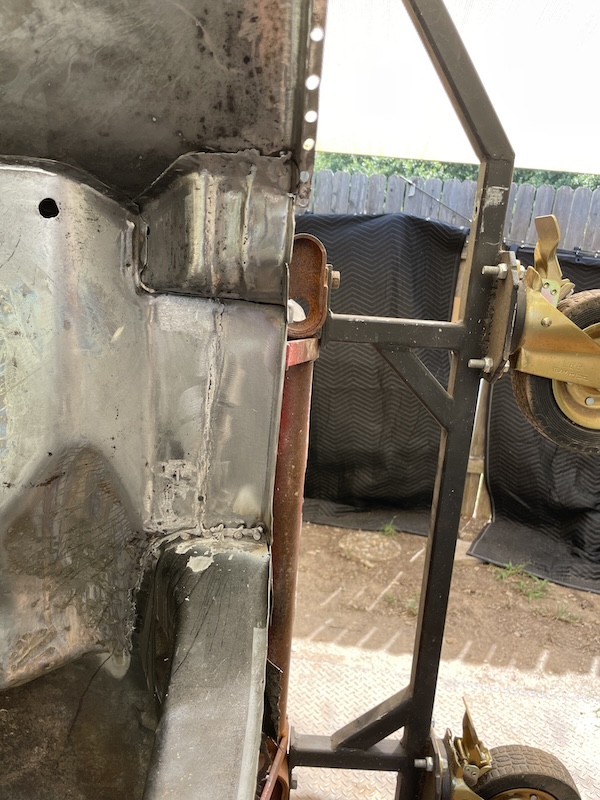 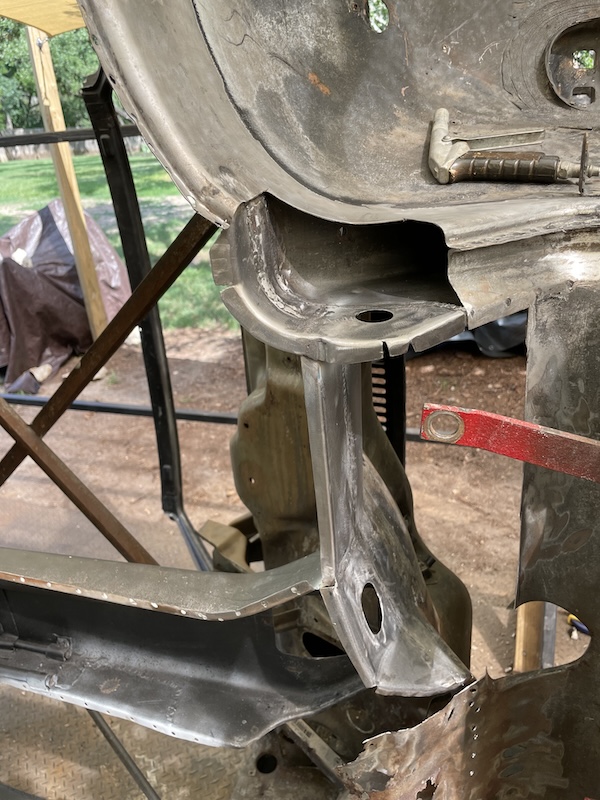 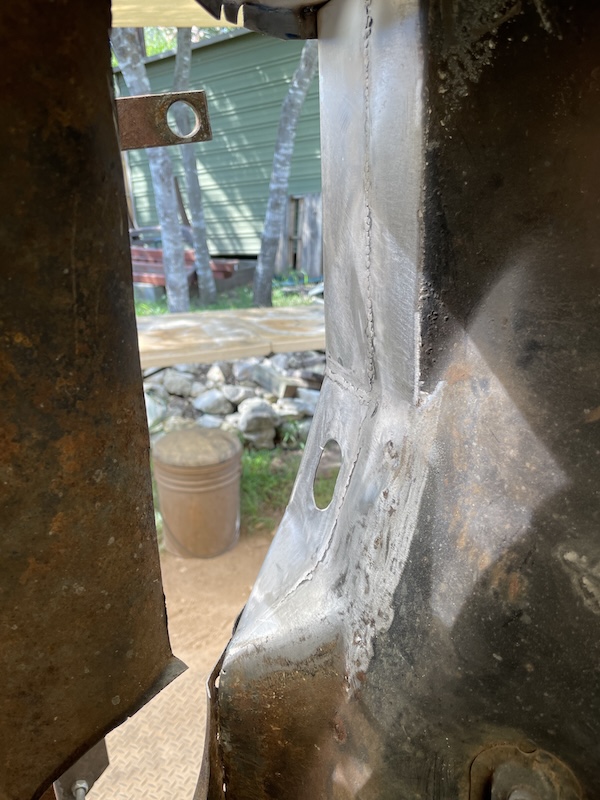 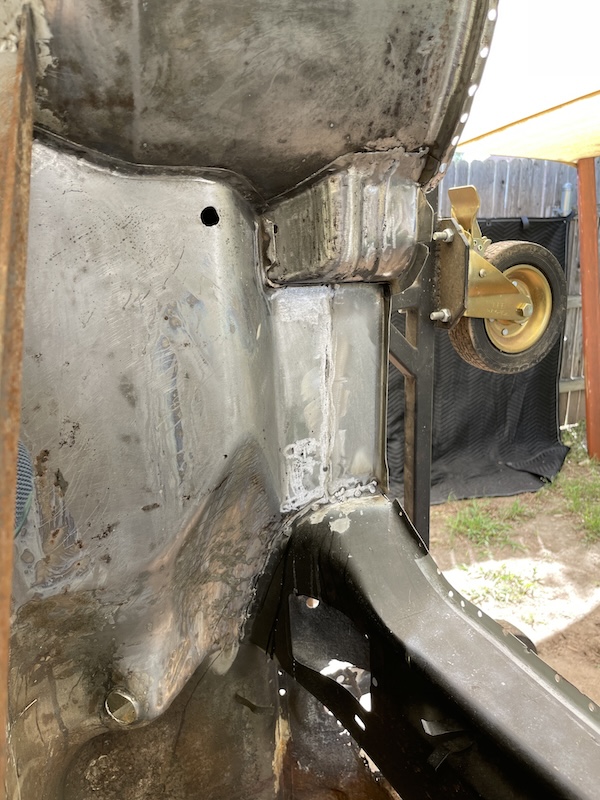 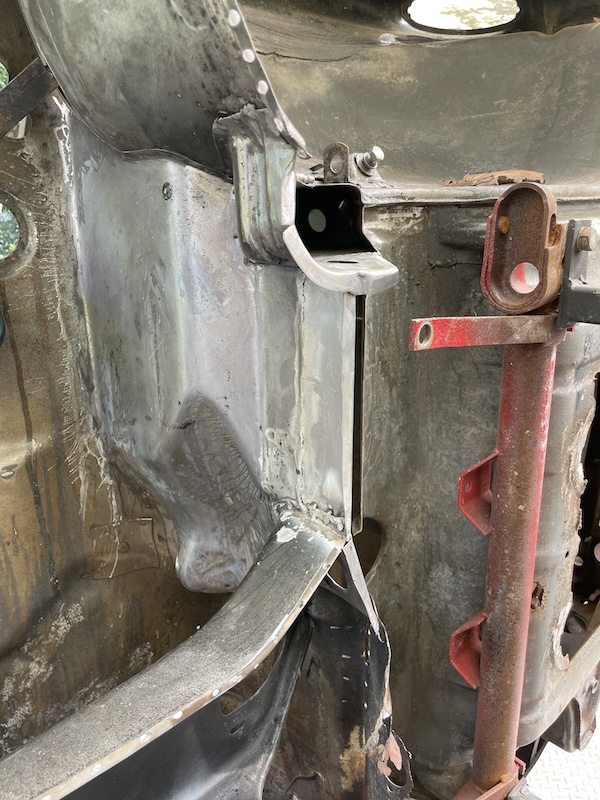 |
|
|
|
| Montreal914 |
Jun 10 2024, 08:03 AM
Post
#190
|
|
Senior Member Group: Members Posts: 1,809 Joined: 8-August 10 From: Claremont, CA Member No.: 12,023 Region Association: Southern California |
|
|
|
|
| friethmiller |
Jun 11 2024, 09:03 AM
Post
#191
|
|
Senior Member Group: Members Posts: 846 Joined: 10-February 19 From: Austin, TX Member No.: 22,863 Region Association: Southwest Region |
QUOTE(Montreal914 @ Jun 10 2024, 09:03 AM) Thank you, sir! |
|
|
|
| Literati914 |
Jun 11 2024, 09:24 AM
Post
#192
|
|
Senior Member Group: Members Posts: 1,910 Joined: 16-November 06 From: Dallas, TX Member No.: 7,222 Region Association: Southwest Region |
|
|
|
|
| bkrantz |
Jun 11 2024, 07:40 PM
Post
#193
|
|
914 Guru Group: Members Posts: 8,342 Joined: 3-August 19 From: SW Colorado Member No.: 23,343 Region Association: Rocky Mountains |
Yikes! That's some serious rust cancer.
Just think, someday we might have the technology to generate a complete 3D pattern for any given sheet metal part and then feed it into some magical metal press. But what fun would that be? |
|
|
|
| Superhawk996 |
Jun 11 2024, 07:46 PM
Post
#194
|
|
914 Guru Group: Members Posts: 6,966 Joined: 25-August 18 From: Woods of N. Idaho Member No.: 22,428 Region Association: Galt's Gulch |
(IMG:style_emoticons/default/beerchug.gif) tricky area to deal with. I cheated by sourcing donor sheetmetal.
(IMG:style_emoticons/default/smilie_pokal.gif) for the fiddly fabrication work. |
 |
|
| Literati914 |
Jun 11 2024, 10:18 PM
Post
#195
|
|
Senior Member Group: Members Posts: 1,910 Joined: 16-November 06 From: Dallas, TX Member No.: 7,222 Region Association: Southwest Region |
QUOTE(Superhawk996 @ Jun 11 2024, 08:46 PM) .. I cheated by sourcing donor sheetmetal. Yep finding someone with a car to part out and willing to make the cuts could save a ton of time and frustration! ..actually I may be able to help, as I'm thinking of just scrapping my 3rd project 914... hit me up if interested. . |
|
|
|
| friethmiller |
Jun 12 2024, 06:10 AM
Post
#196
|
|
Senior Member Group: Members Posts: 846 Joined: 10-February 19 From: Austin, TX Member No.: 22,863 Region Association: Southwest Region |
QUOTE(Literati914 @ Jun 11 2024, 11:18 PM) QUOTE(Superhawk996 @ Jun 11 2024, 08:46 PM) .. I cheated by sourcing donor sheetmetal. Yep finding someone with a car to part out and willing to make the cuts could save a ton of time and frustration! ..actually I may be able to help, as I'm thinking of just scrapping my 3rd project 914... hit me up if interested. . Let me think on that. My concern is the missing area below the pedal cluster + the rusty, paper thin metal at the master cylinder. Shaping metal to match the original is one thing but forming the metal based on a picture or having to get the shape from the other car seems a little challenging. |
|
|
|
| 914werke |
Jun 12 2024, 01:17 PM
Post
#197
|
|
"I got blisters on me fingers" Group: Members Posts: 11,211 Joined: 22-March 03 From: USofA Member No.: 453 Region Association: Pacific Northwest |
I checked (IMG:style_emoticons/default/sad.gif) dont have a piece that will help.
|
|
|
|
| friethmiller |
Jun 13 2024, 02:45 PM
Post
#198
|
|
Senior Member Group: Members Posts: 846 Joined: 10-February 19 From: Austin, TX Member No.: 22,863 Region Association: Southwest Region |
QUOTE(914werke @ Jun 12 2024, 02:17 PM) Thanks for checking, Rich! And, thank you, @Literati914 , for the offer. I'd hate to ruin another restorable 914 . Let's see how I do with this section. If I need to take a little more time to get it back together, I will take the time to do so. Let's see what I can do with what I have. New sheet metal just arrived yesterday via Amazon. (IMG:style_emoticons/default/welder.gif) Plus, |
|
|
|
| Eric_Shea |
Jun 13 2024, 05:06 PM
Post
#199
|
|
PMB Performance Group: Admin Posts: 19,300 Joined: 3-September 03 From: Salt Lake City, UT Member No.: 1,110 Region Association: Rocky Mountains |
Keep Rockin! looking good (IMG:style_emoticons/default/smilie_pokal.gif)
|
|
|
|
| friethmiller |
Jun 17 2024, 08:21 AM
Post
#200
|
|
Senior Member Group: Members Posts: 846 Joined: 10-February 19 From: Austin, TX Member No.: 22,863 Region Association: Southwest Region |
Passenger Side Front Floor Prep: Part 4 - Blasting the Bad (6/13/2024):
This is the first of four post from this past weekend. Actually this one is from Thursday evening. I didn't get any cool action shots of me sandblasting the metal around my repair area or the tricky underside of the dash but you will see iterative photos of my work. Even with my pre-cooler setup on my compressor, with 90+% humidity - I was still getting the occasional clog. Typically the clog was at the tip but I believe that had more to do with the CFM coming out of this 30 gal. unit. I found that by taking breaks, letting the compressor catch-up a bit, I encountered less issues. Regardless, I was able to get a lot of the area completely cleaned up and ready to go. There's still a few areas that need more attention and, YES, I have some repairs to do here there. Sigh (IMG:style_emoticons/default/sad.gif) I will get them later prior to paint. Here are some photos of my compressor setup and the result of sandblasting. 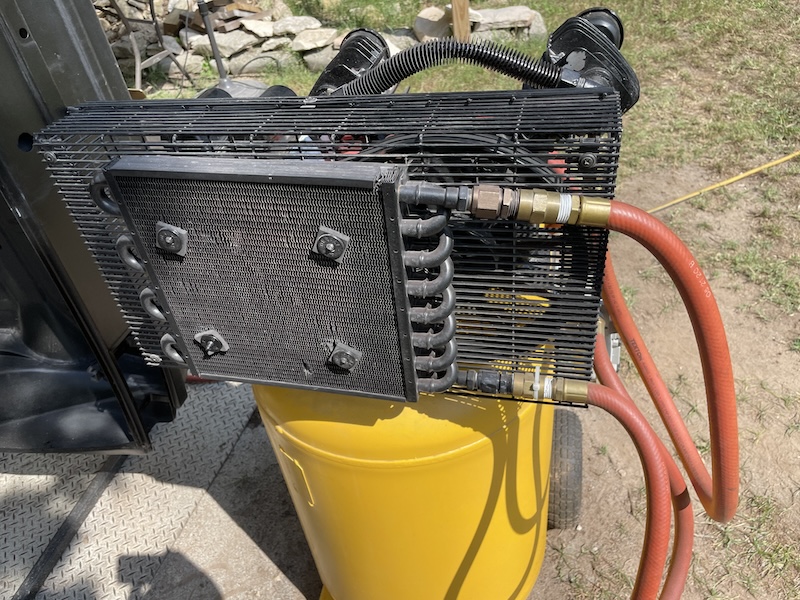 . . 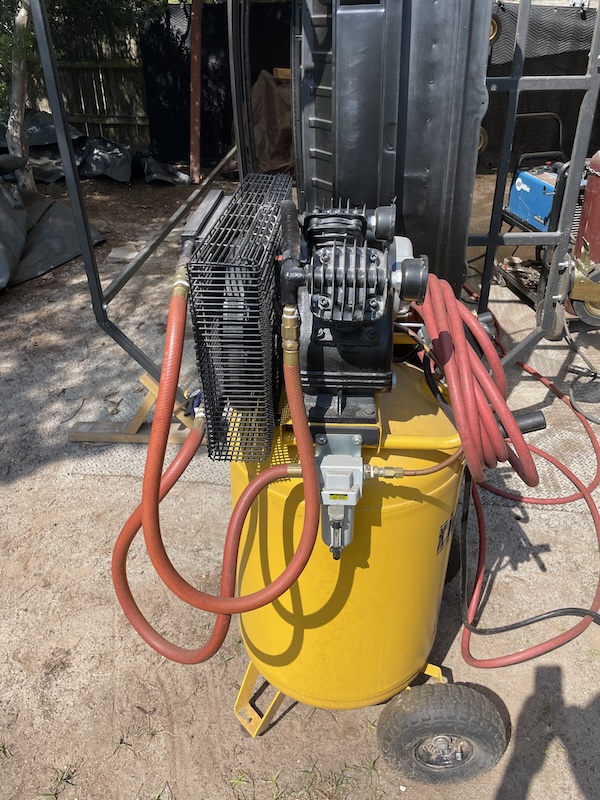 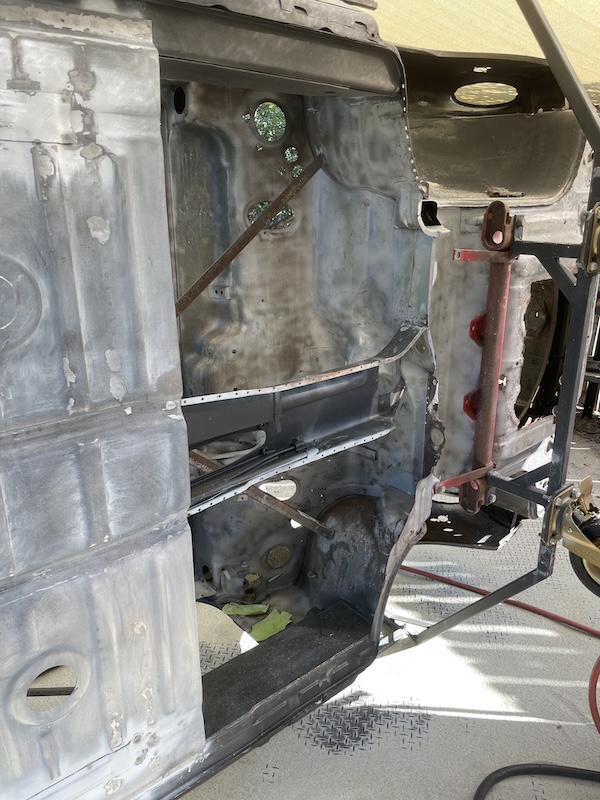 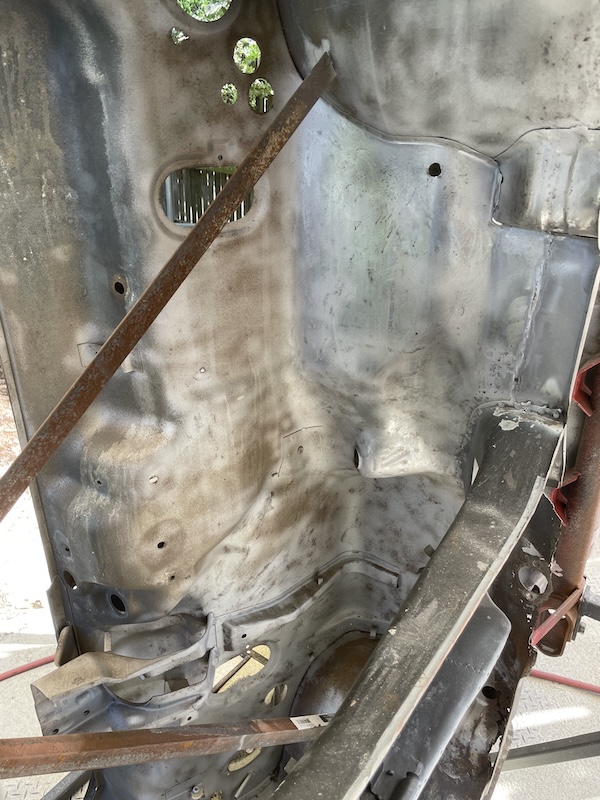 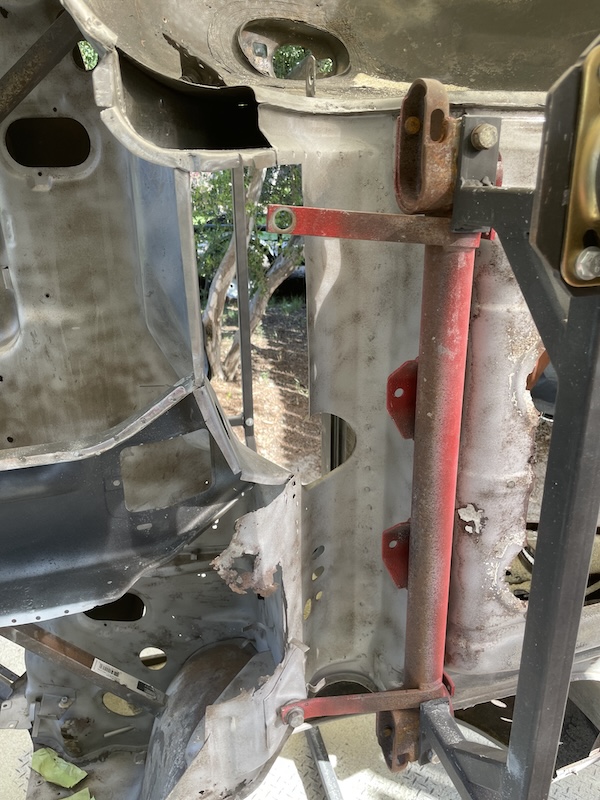 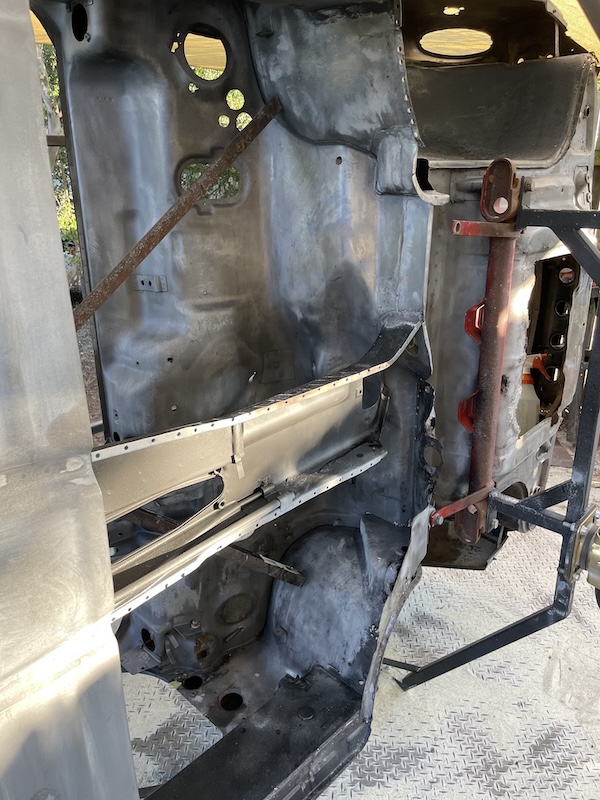 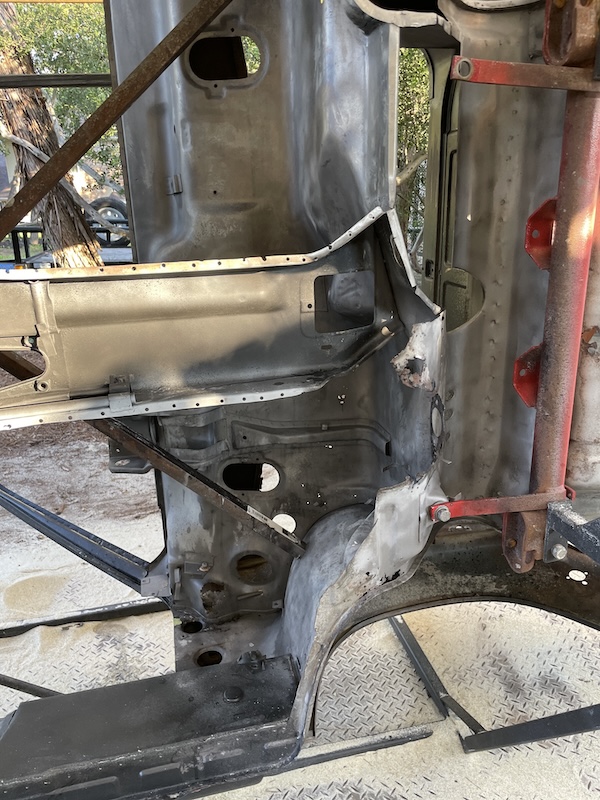  |
|
|
|
|
1 User(s) are reading this topic (1 Guests and 0 Anonymous Users)
0 Members:

|
Lo-Fi Version | Time is now: 20th April 2025 - 12:45 AM |
Invision Power Board
v9.1.4 © 2025 IPS, Inc.