|
|
|
Porsche, and the Porsche crest are registered trademarks of Dr. Ing. h.c. F. Porsche AG.
This site is not affiliated with Porsche in any way. Its only purpose is to provide an online forum for car enthusiasts. All other trademarks are property of their respective owners. |
|
|

  |

| friethmiller |
 Jun 17 2024, 08:44 AM Jun 17 2024, 08:44 AM
Post
#201
|
|
Senior Member  Group: Members Posts: 846 Joined: 10-February 19 From: Austin, TX Member No.: 22,863 Region Association: Southwest Region |
Passenger Side Front Floor Prep: Part 5 - Under Dash Repairs (6/15/2024):
Before getting on with the floor repair, I decided to get "warmed up" and knock-out the two rust issues around the heater tube hole on the passenger side [under]dash. Note: the other holes are for the A/C hoses and wiring. Here's a few photos of the repair. 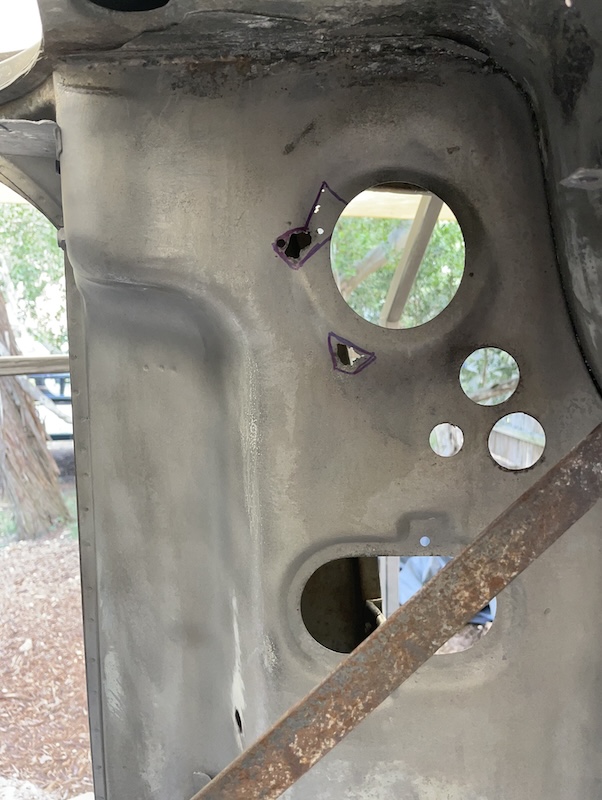 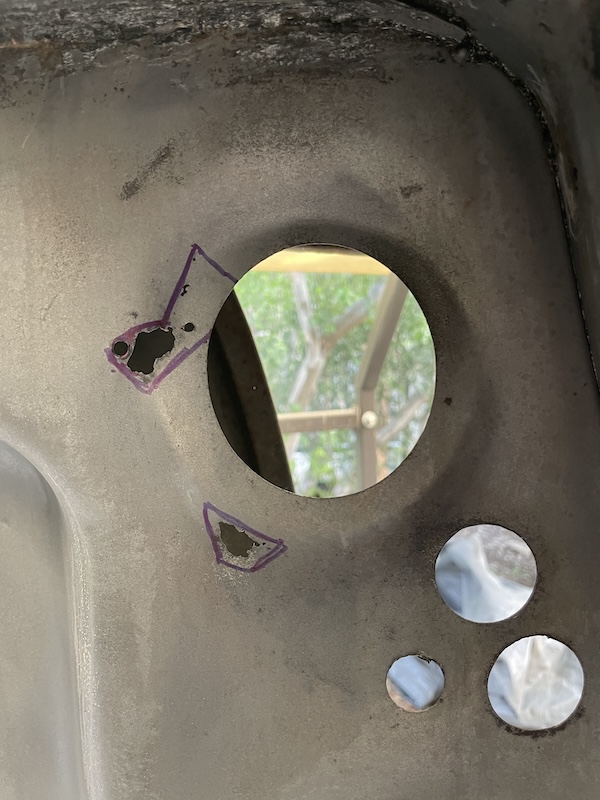 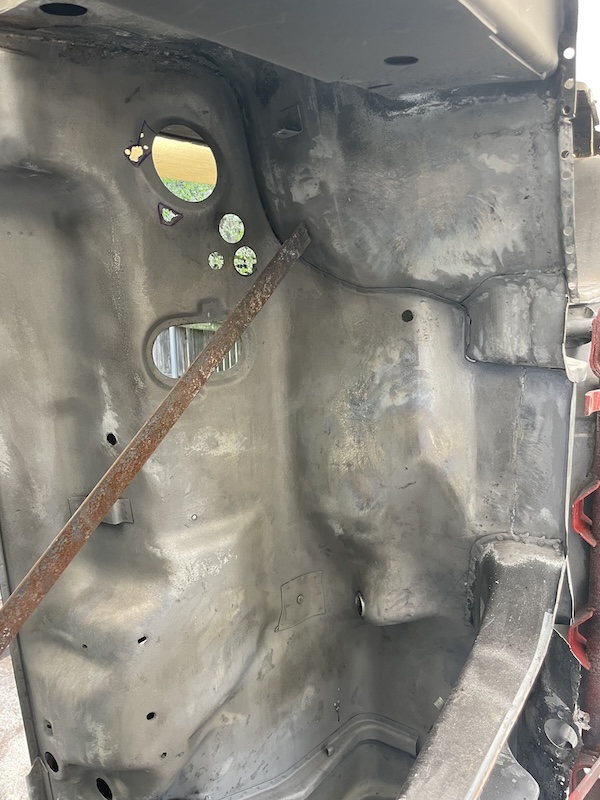 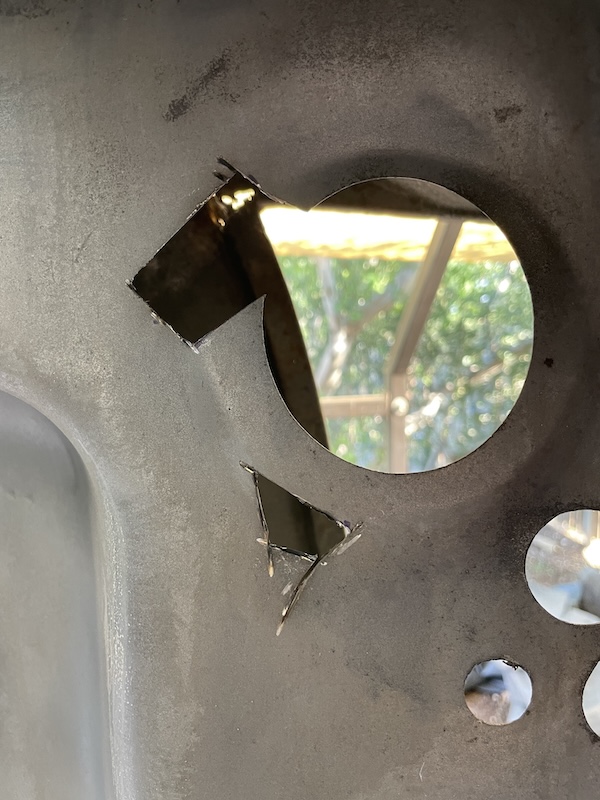 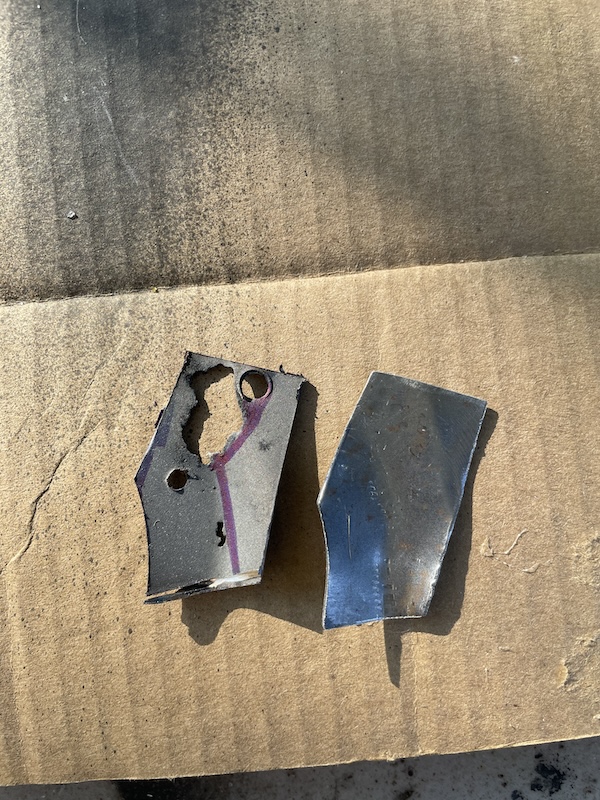 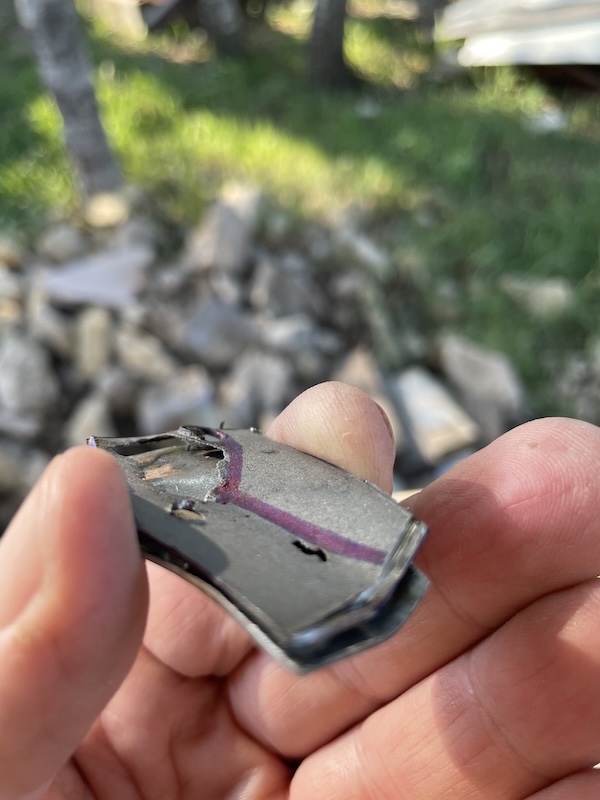 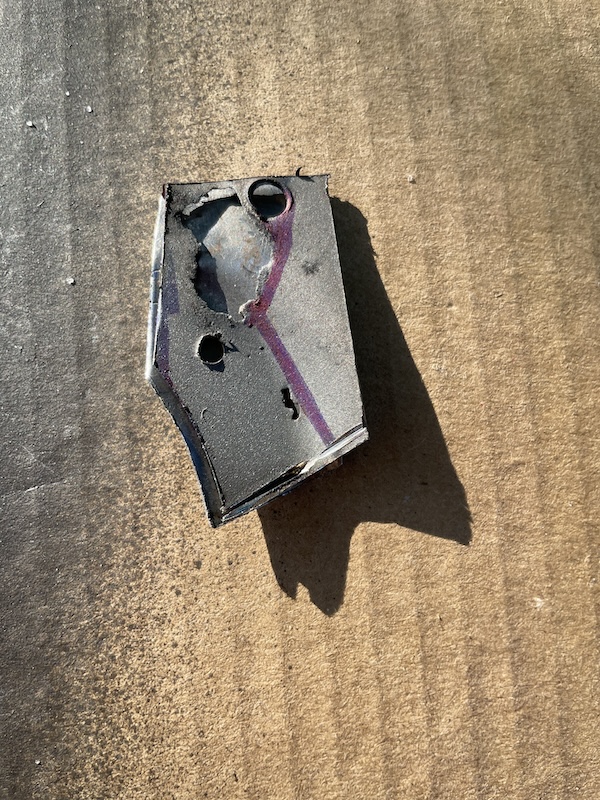 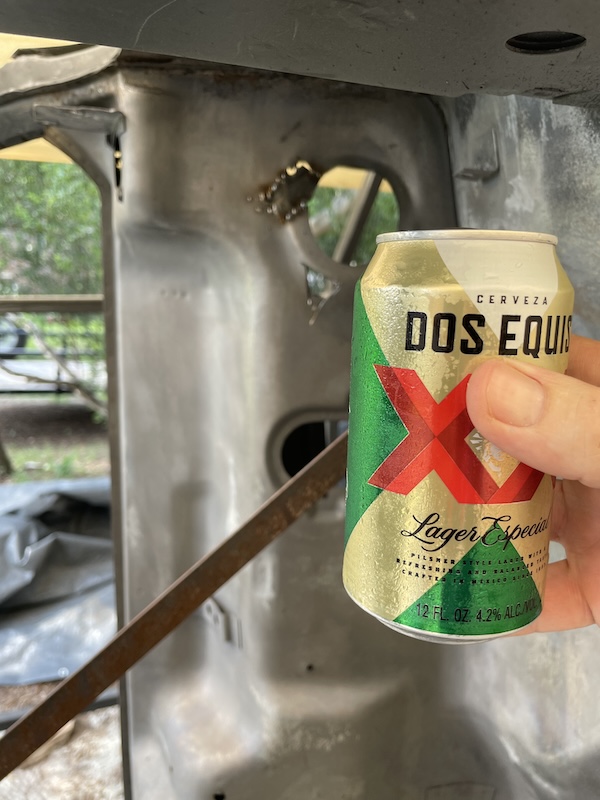 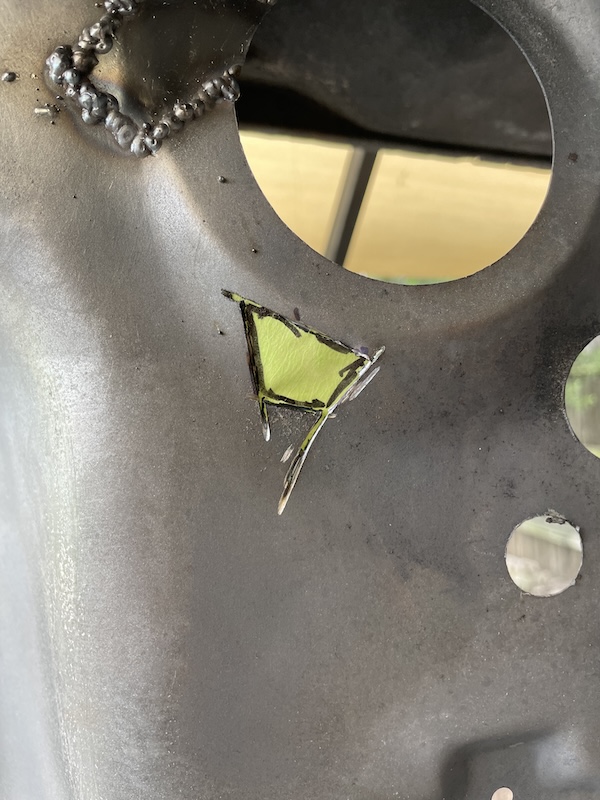 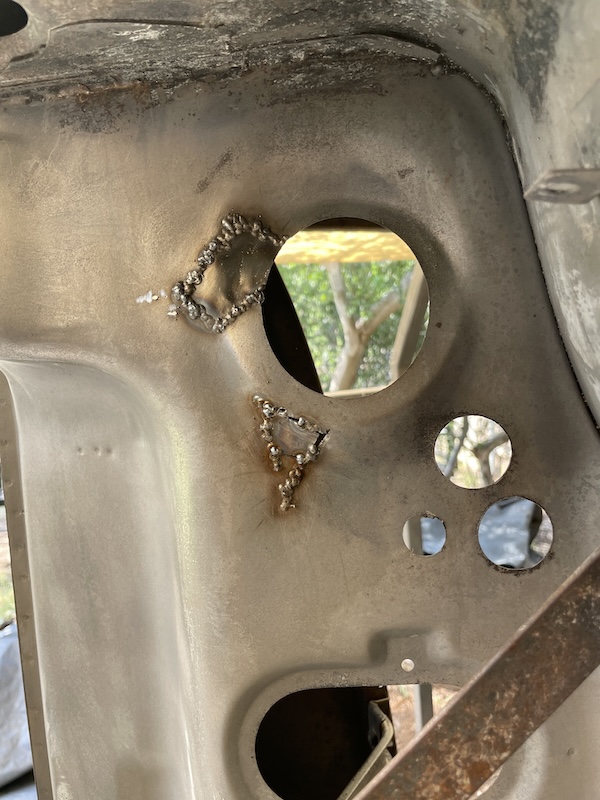 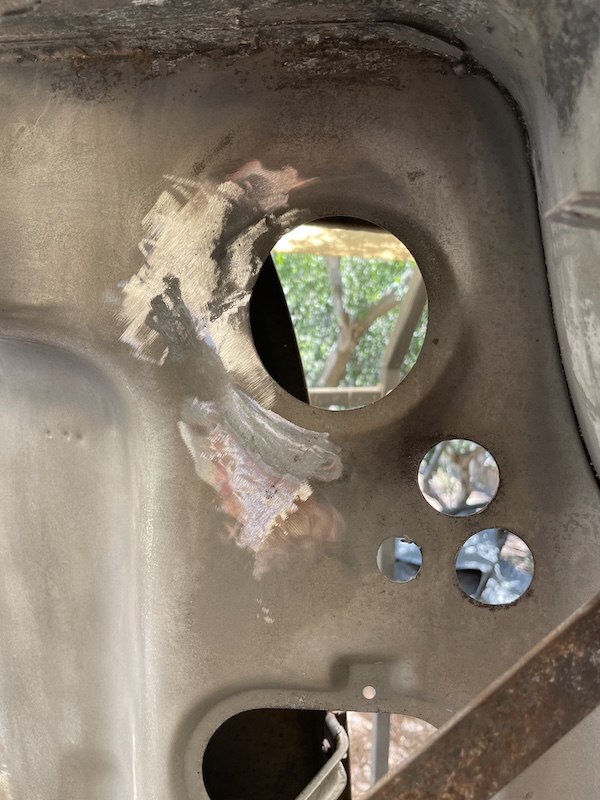 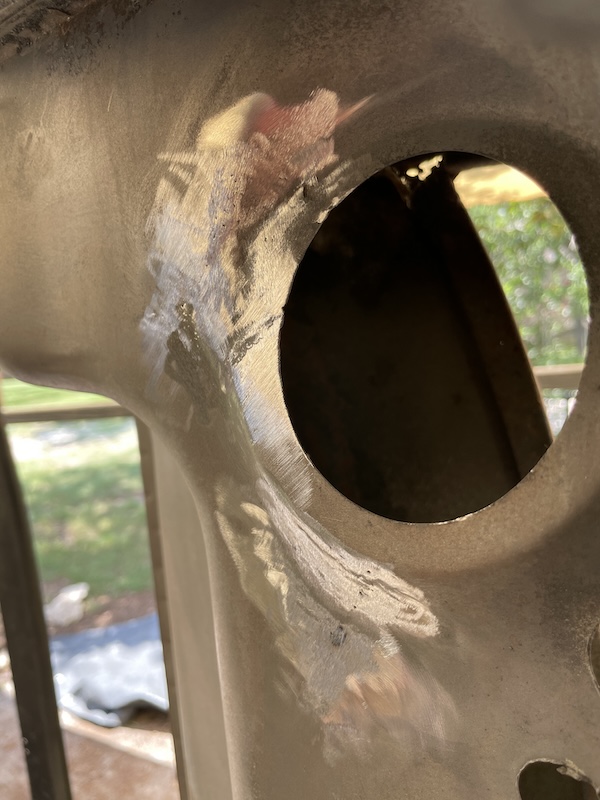 |
   |

 
|
| friethmiller |
Jun 17 2024, 10:47 AM
Post
#202
|
|
Senior Member Group: Members Posts: 846 Joined: 10-February 19 From: Austin, TX Member No.: 22,863 Region Association: Southwest Region |
Passenger Side Front Floor Prep: Part 6 - Front Floor Repairs (6/15 - 6/16/2024):
Plenty of photos here: Started on patching the raised section in the front floor piece that I removed last week. Next few photos show the patching process. My plan was to tack weld the patch into the original piece and then mount and finish welding on the car. 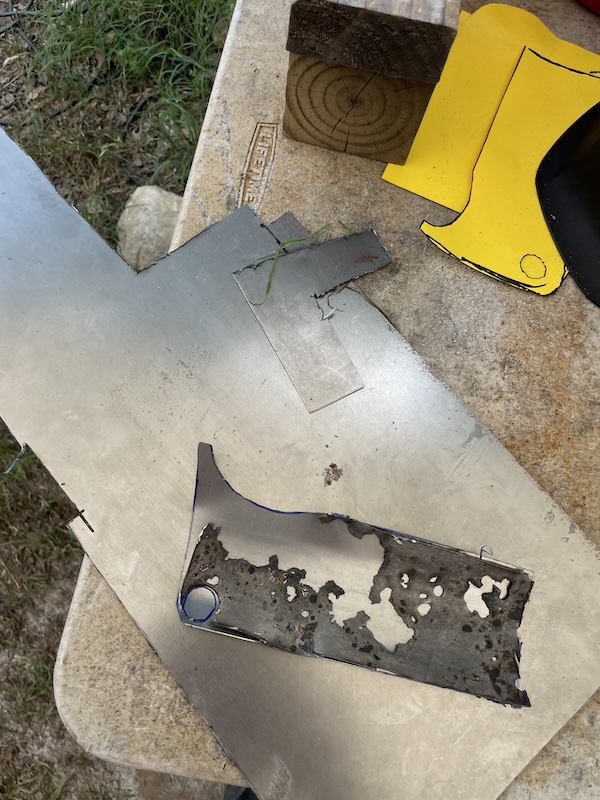 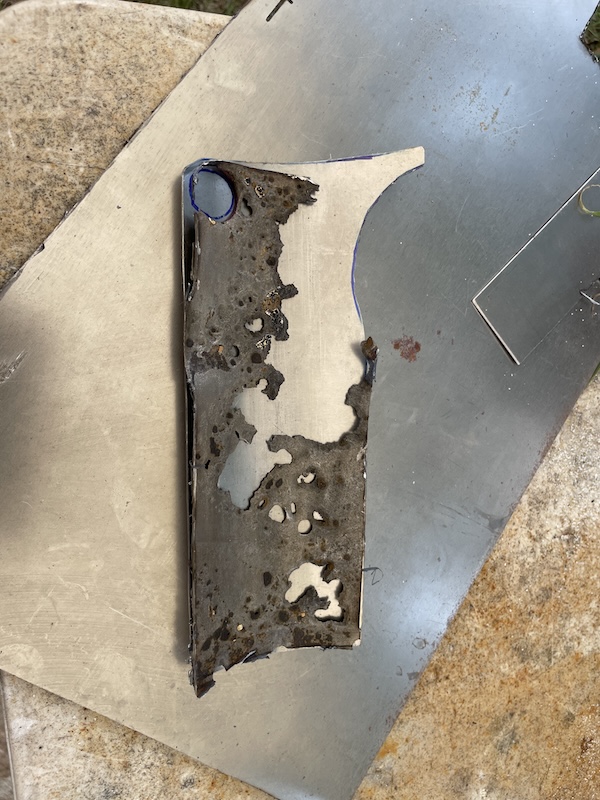 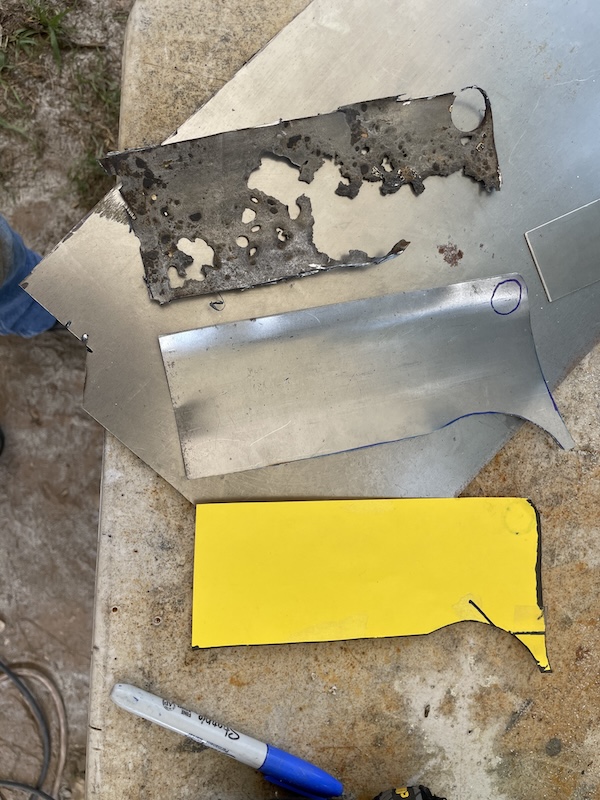 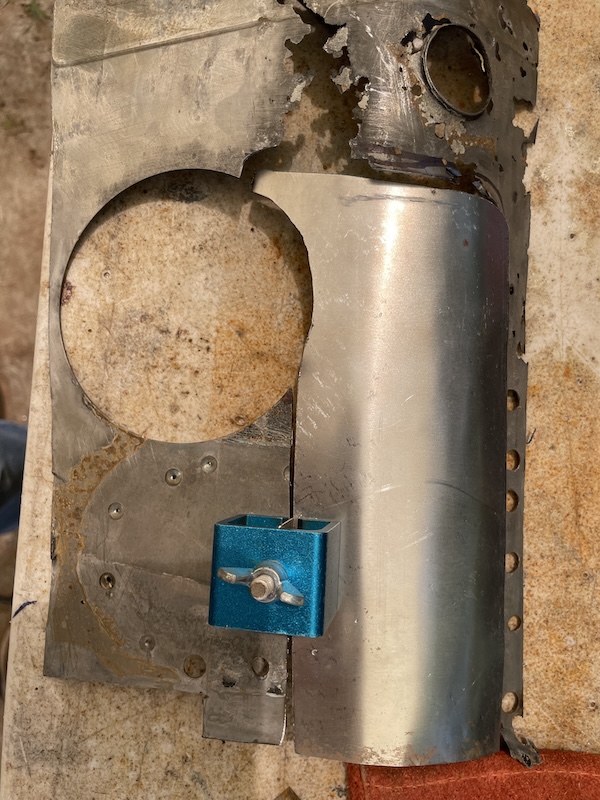 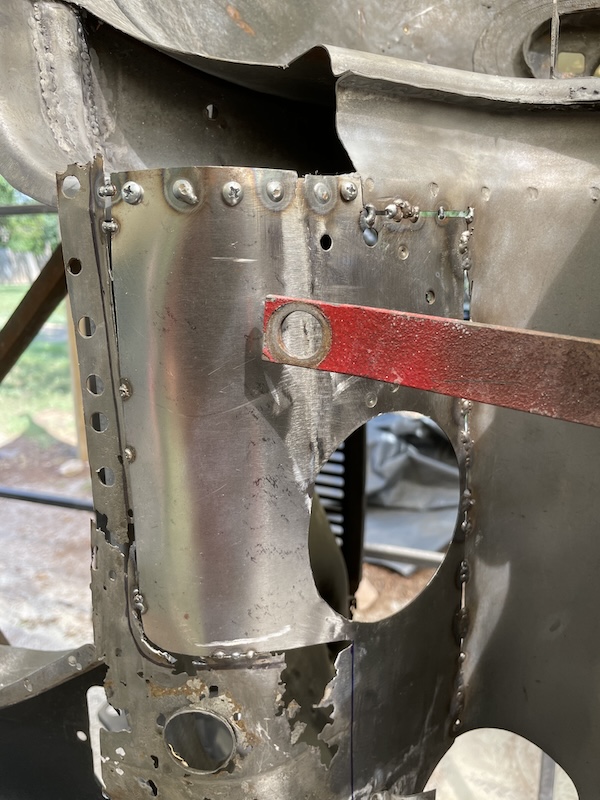 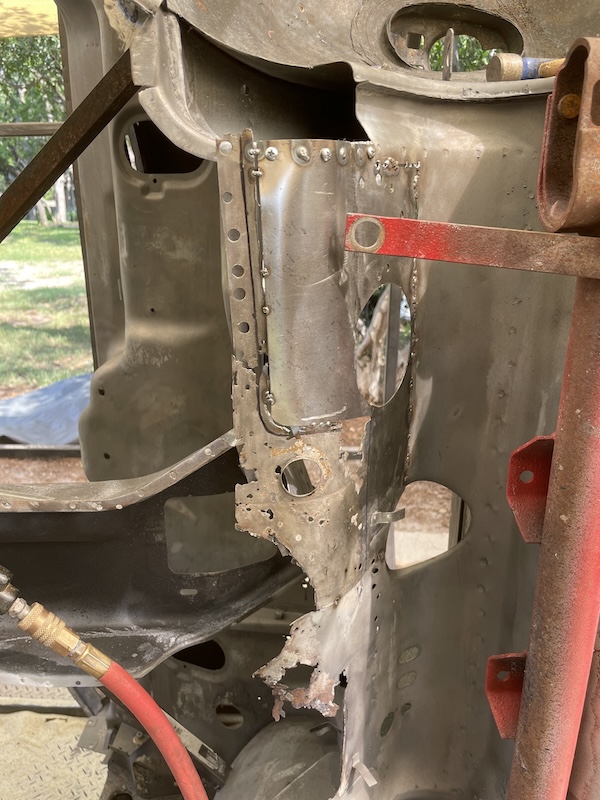 Once the first patch was in [with the remaining metal], I then aligned and welded in the rear support piece for the steering rack support bar. Having already sandblasted this part a few days prior, I simply used weld through primer. The small opening at the rear of the part allows for some wax/paint to be shot in later [if desired]. 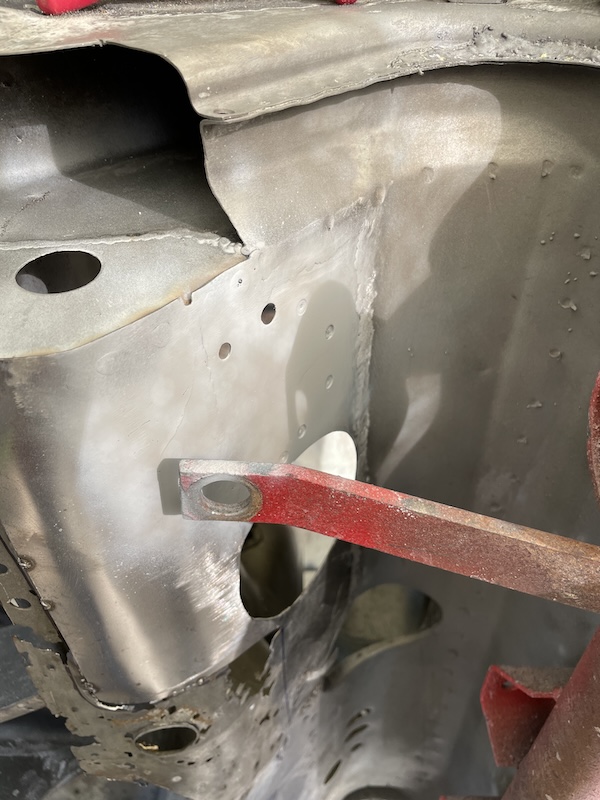 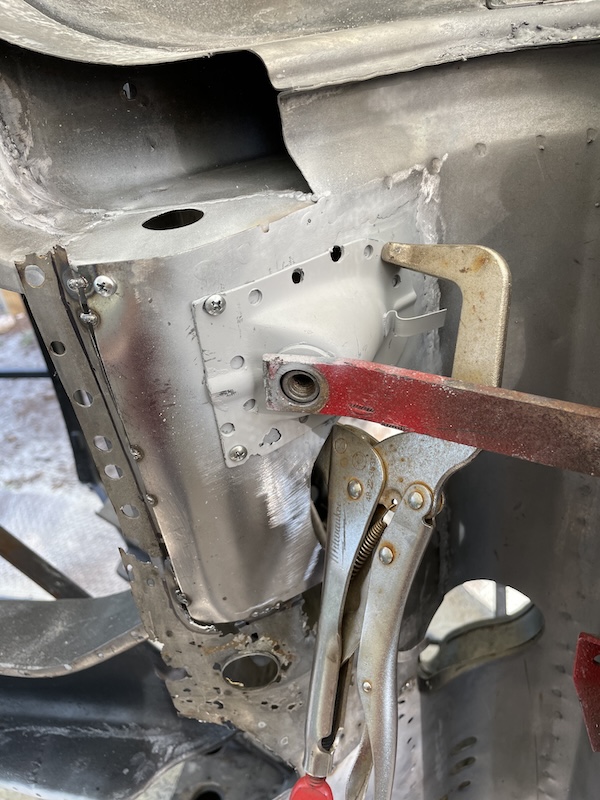 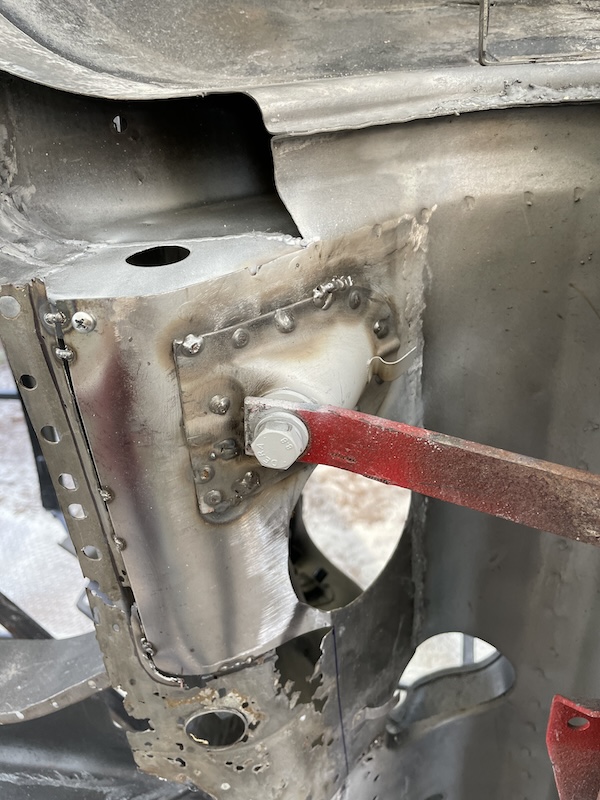 . . 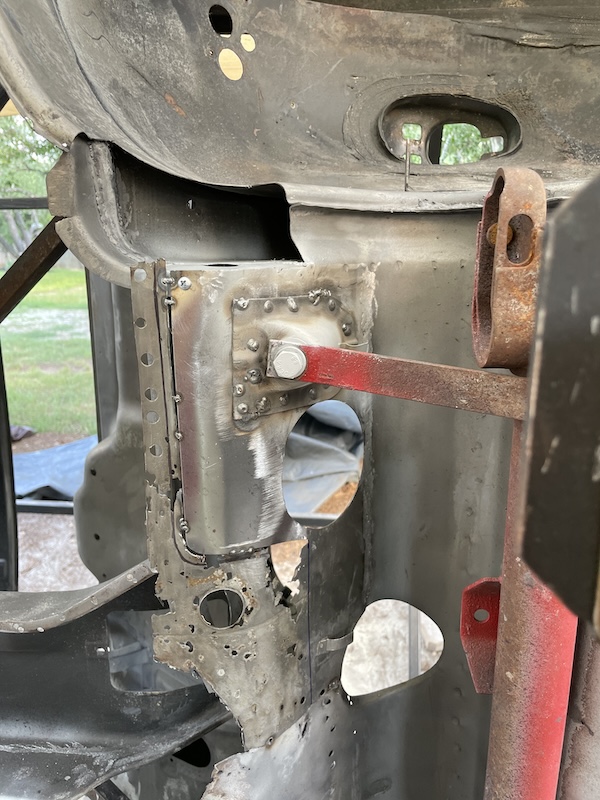 Next, I mounted the front floor pan. Took my time to make sure the alignment was how I liked it - used screws to hold it flat/in place. These photos show the amount of fabrication/repair necessary to fix everything. Yikes! 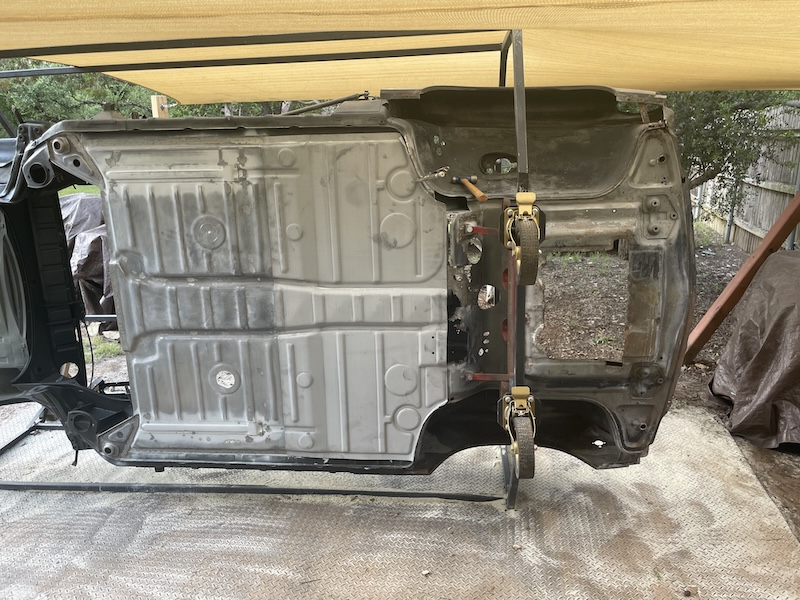 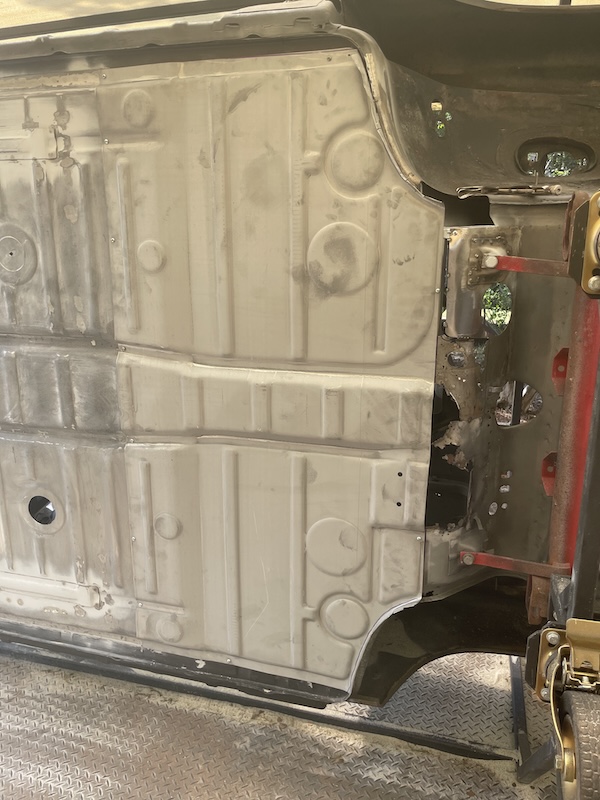 With the front floor in place, I was able to focus on the gap where I needed to step down from my patch to the level of the front floor. This piece was surprisingly easy to fabricate/bend. I simple tacked in place and moved to the next patch. 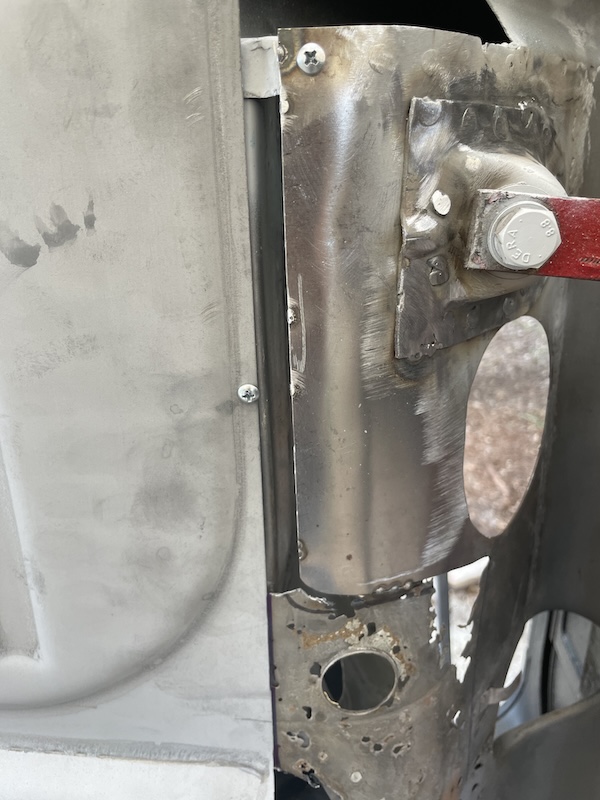 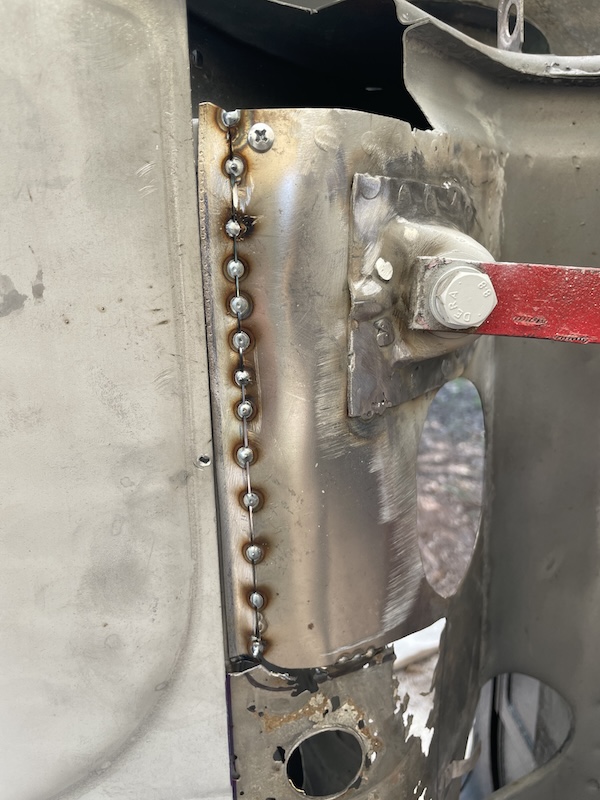 Next, I used construction paper to draw out the patch and cut it from the sheet metal. I then slowly bent to piece to match the curve of the original part and shaped it to fit how I liked it. Would be nice to have a sheet metal rolling bender thingy (IMG:style_emoticons/default/blink.gif) After all that, I tacked and welded in the final patch (passenger side) for the repair. Finally, sanded and shaped my welds using a 2 inch angle grinder and finger sander to mimic the original. The final photos show the metal prep and painting with 2K aerosol epoxy primer. Note: I didn't have a 3/4 hole saw so I used a 1 inch on the smaller of the two holes here. I hope that's ok. 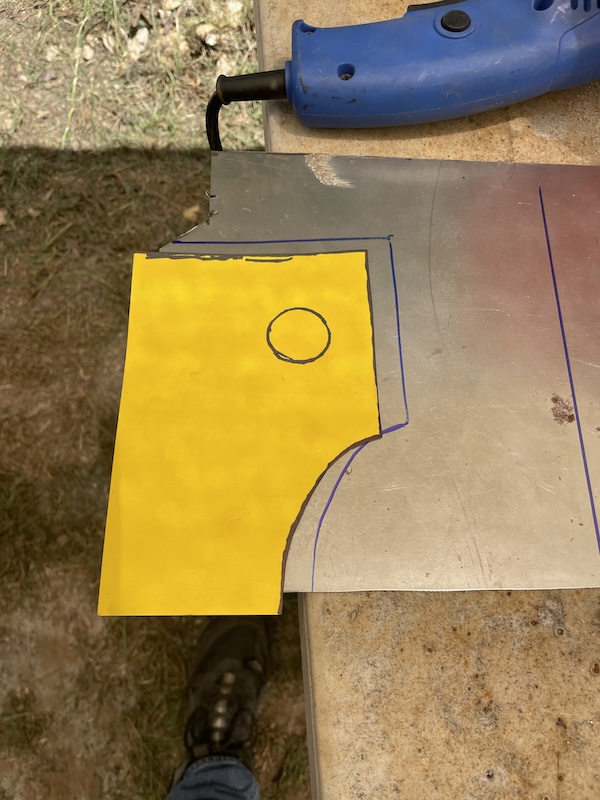 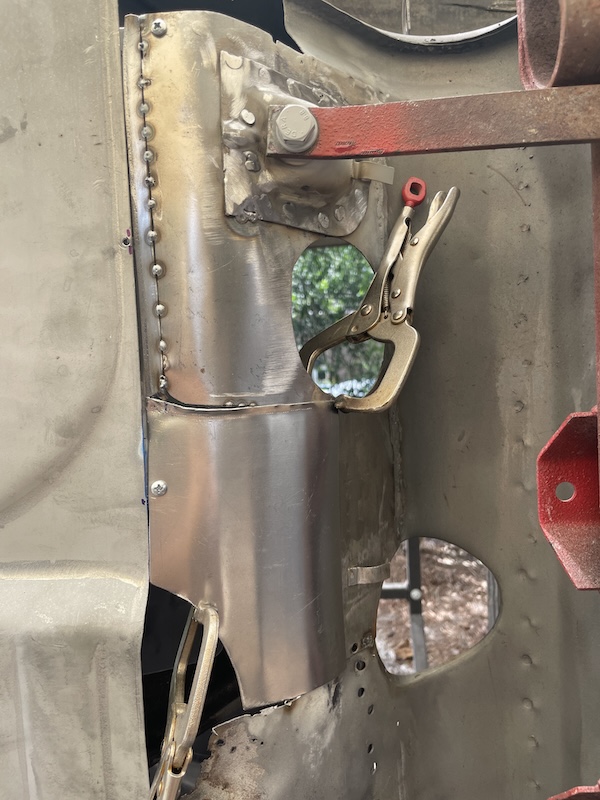 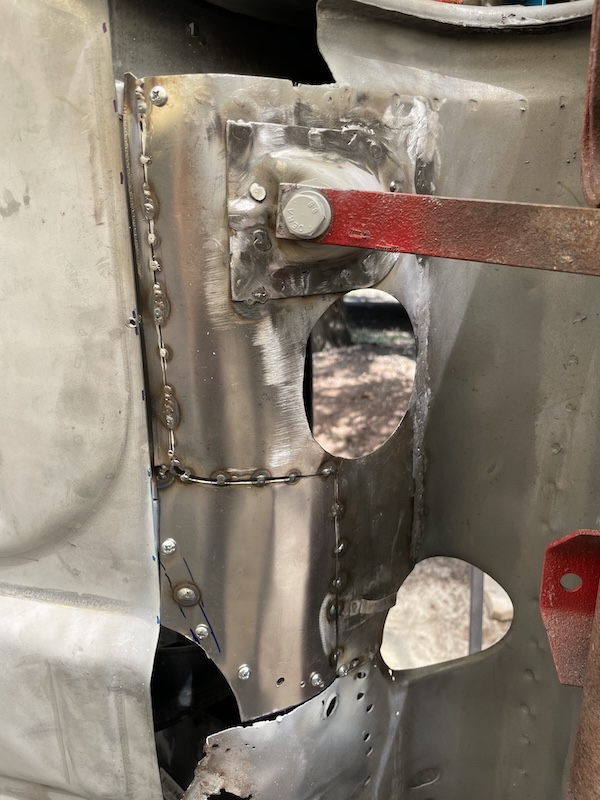 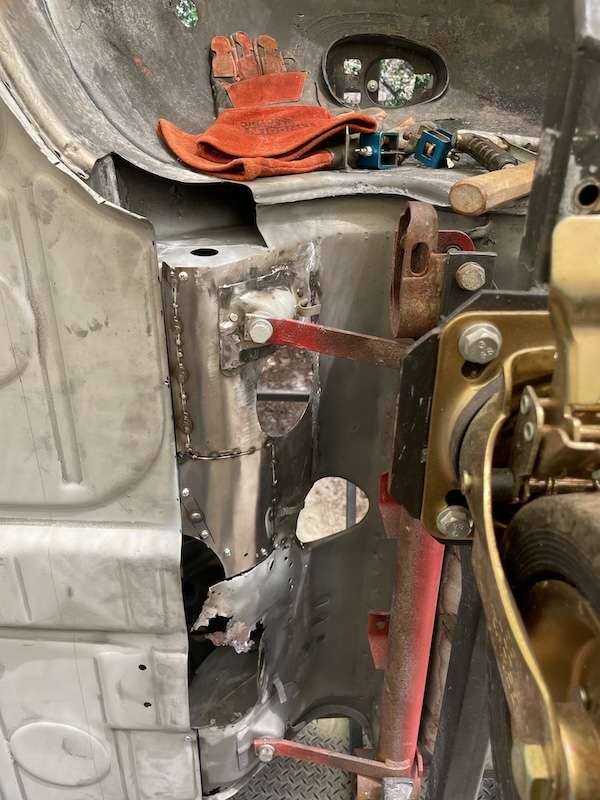 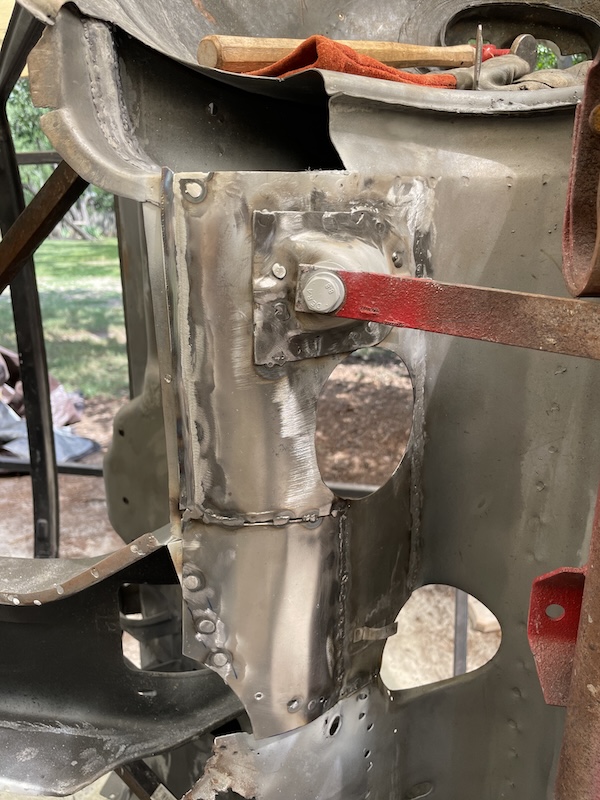 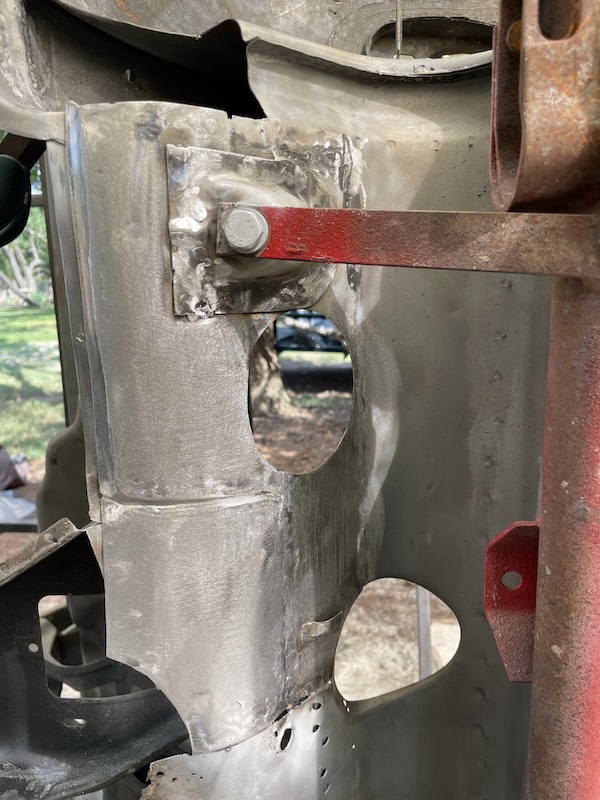 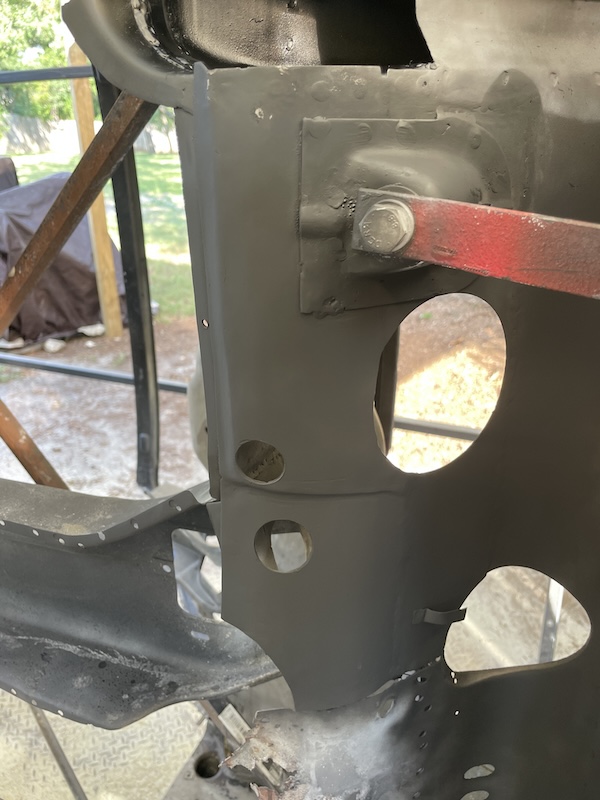 |
|
|
|
| friethmiller |
Jun 17 2024, 03:51 PM
Post
#203
|
|
Senior Member Group: Members Posts: 846 Joined: 10-February 19 From: Austin, TX Member No.: 22,863 Region Association: Southwest Region |
Additional odds & ends photos from Sunday that didn't make the previous post. In the last photo you can see I have some grinding and metal prep to do below in the fuel tank area. However, this is so much better than before.
    |
|
|
|
| Tim17 |
Jun 17 2024, 05:36 PM
Post
#204
|
|
Member Group: Members Posts: 60 Joined: 3-December 23 From: Newburyport, Massachusetts Member No.: 27,769 Region Association: North East States |
QUOTE(friethmiller @ Jun 17 2024, 03:51 PM)  Additional odds & ends photos from Sunday that didn't make the previous post. In the last photo you can see I have some grinding and metal prep to do below in the fuel tank area. However, this is so much better than before. Nice work, Man! |
|
|
|
| bkrantz |
Jun 17 2024, 07:40 PM
Post
#205
|
|
914 Guru Group: Members Posts: 8,342 Joined: 3-August 19 From: SW Colorado Member No.: 23,343 Region Association: Rocky Mountains |
That should work!
|
|
|
|
| friethmiller |
Jun 23 2024, 07:11 PM
Post
#206
|
|
Senior Member Group: Members Posts: 846 Joined: 10-February 19 From: Austin, TX Member No.: 22,863 Region Association: Southwest Region |
Seat Mount Brackets (6/23/2024):
Having been out of town for the past few days, I only had part of Sunday to get something done on the Porsche. After flipping the car back over, I decided that the best use of my time would be to mount the seat brackets on the rear floor and move on to the driver side pedal area later. Pretty straight forward work but there are too many support bars in the way. I hit my head about 4 times on the rotisserie and my lower back is going to be sore tomorrow for sure. With the seat frames pulled out of storage and a few M6 bolts, I used the new RD seat hinge brackets and a set of seat hinges I've had in a bag for about 6 years. The first order of business was to align everything and tack the seat adjuster plates in on the crossbar.  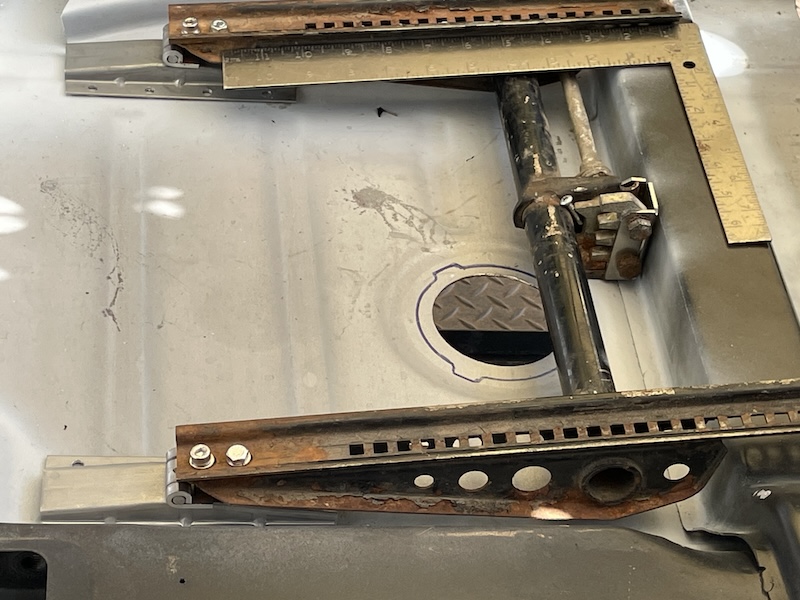 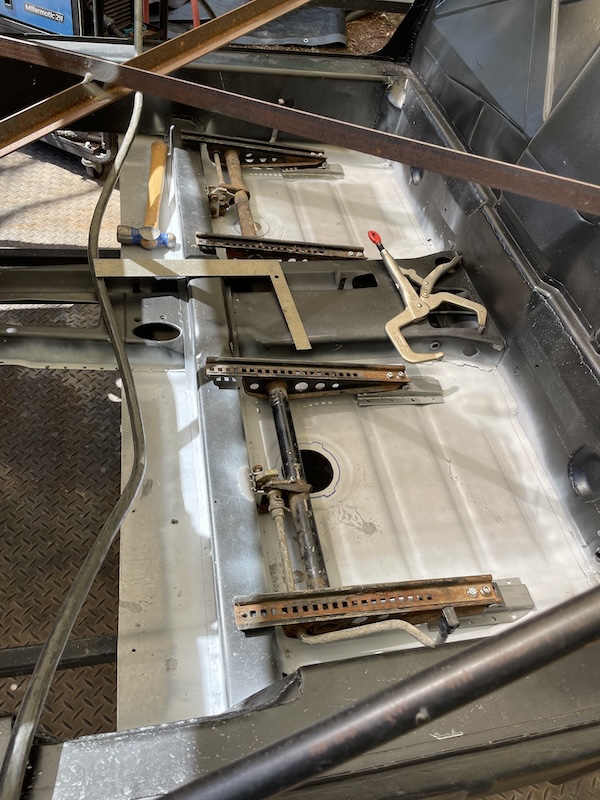 Once the adjuster plates were in place, I double checked alignment again, positioned the hinge brackets (centered with the hinge) and tacked the hinges to the brackets. With that complete, I pulled everything off and welded the hinges to the bracket on a flat paver I had lying around. 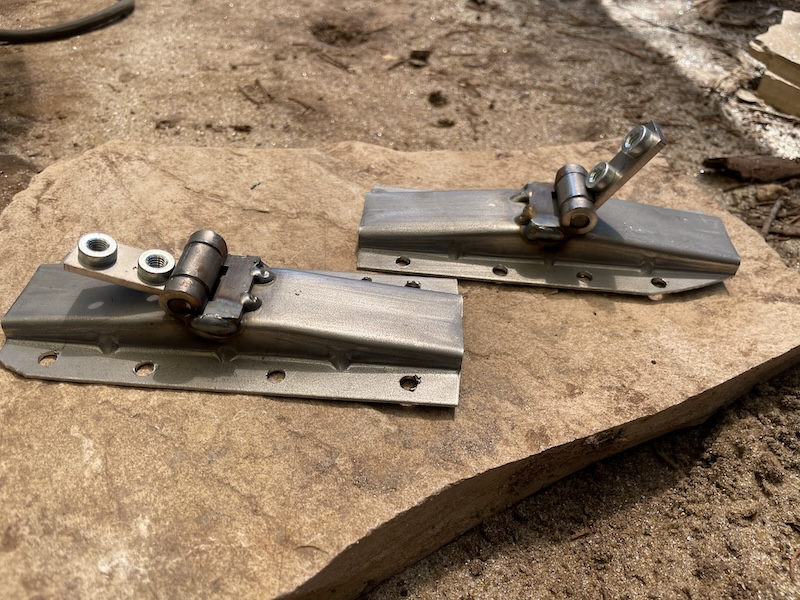 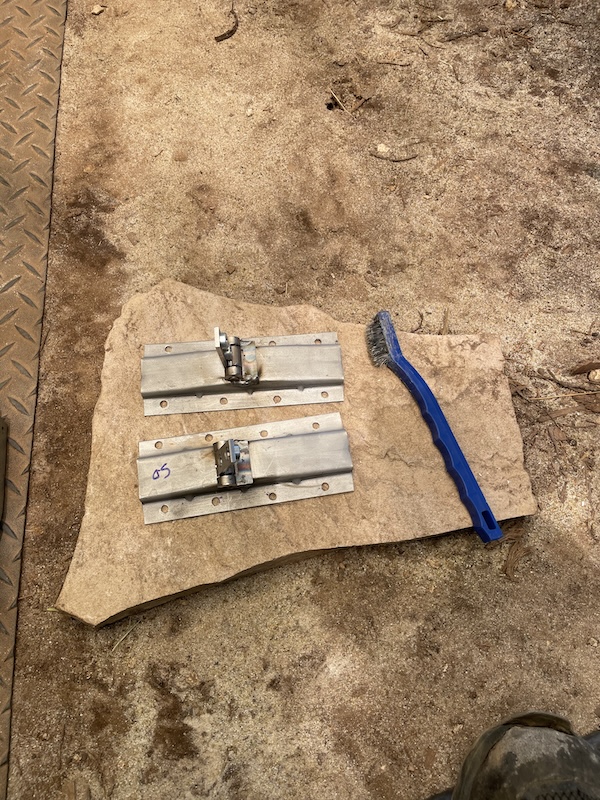 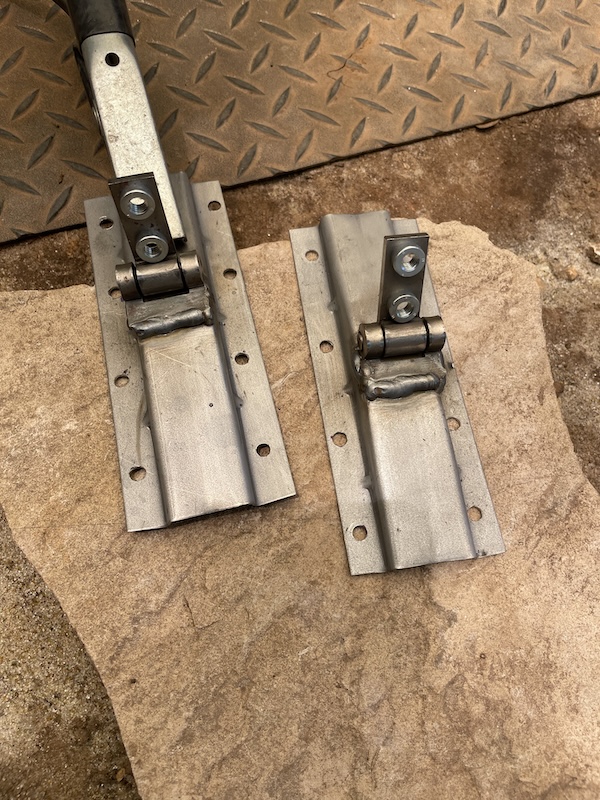 Next, I remounted everything again, aligned the seat base, and then screwed down the hinge brackets. Once secured, I removed the seat bases and welded the hinge brackets to the floor. Ground down all my welds and then primed my work to keep it from rusting. Done! 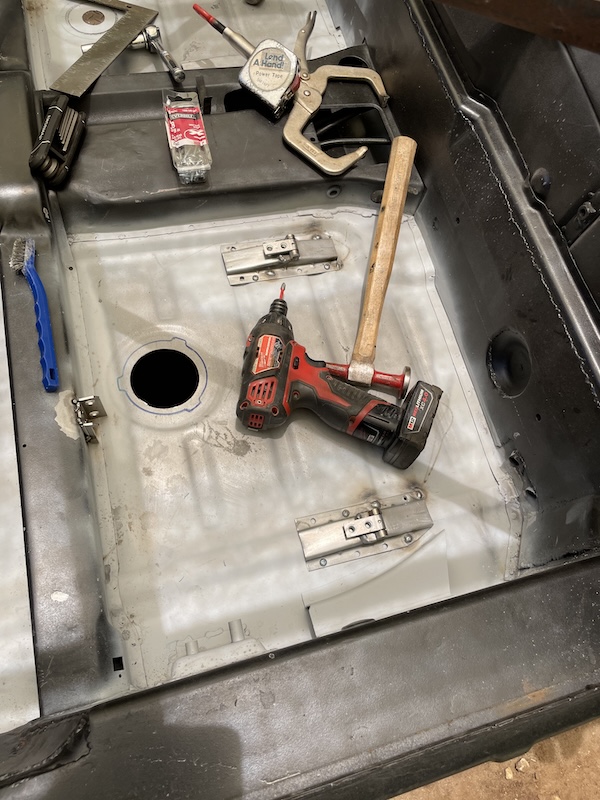 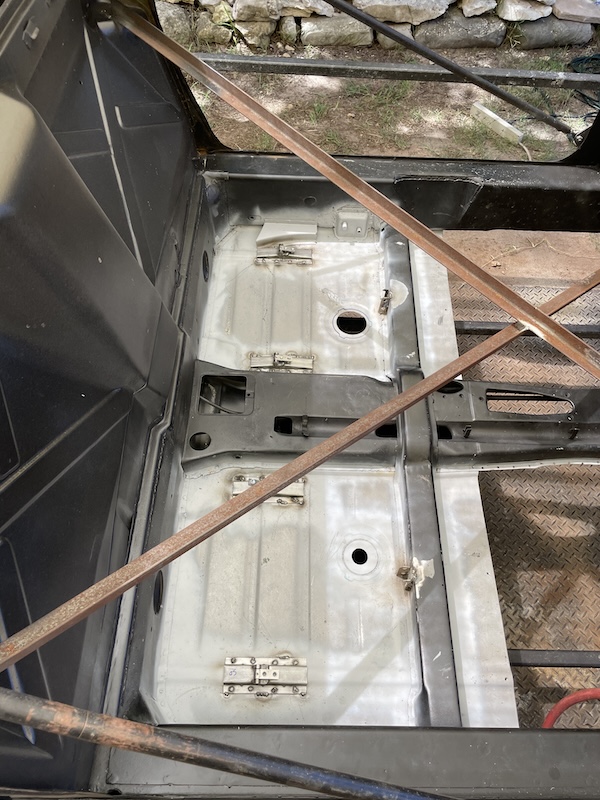 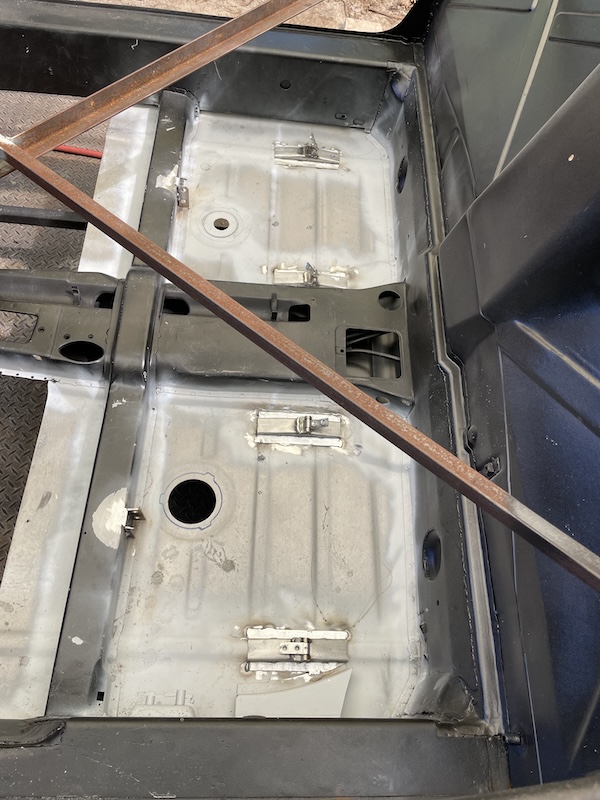 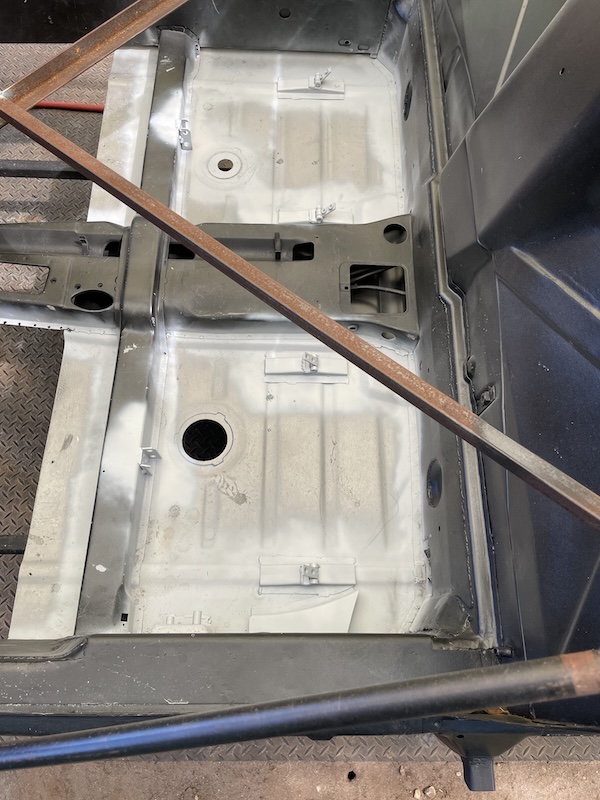 |
|
|
|
| bkrantz |
Jun 23 2024, 07:27 PM
Post
#207
|
|
914 Guru Group: Members Posts: 8,342 Joined: 3-August 19 From: SW Colorado Member No.: 23,343 Region Association: Rocky Mountains |
Maybe leave out the front floor panels? It would be cooler.
|
|
|
|
| 930cabman |
Jun 24 2024, 04:58 AM
Post
#208
|
|
Advanced Member Group: Members Posts: 4,044 Joined: 12-November 20 From: Buffalo Member No.: 24,877 Region Association: North East States |
QUOTE(bkrantz @ Jun 23 2024, 07:27 PM) Maybe leave out the front floor panels? It would be cooler. BTW, this is Fred's rebuild, could there be a connection to our past? |
|
|
|
| friethmiller |
Jun 24 2024, 06:17 AM
Post
#209
|
|
Senior Member Group: Members Posts: 846 Joined: 10-February 19 From: Austin, TX Member No.: 22,863 Region Association: Southwest Region |
QUOTE(930cabman @ Jun 24 2024, 05:58 AM) QUOTE(bkrantz @ Jun 23 2024, 07:27 PM) Maybe leave out the front floor panels? It would be cooler. BTW, this is Fred's rebuild, could there be a connection to our past? Is this question directed at @bkrantz ? |
|
|
|
| 930cabman |
Jun 24 2024, 10:59 AM
Post
#210
|
|
Advanced Member Group: Members Posts: 4,044 Joined: 12-November 20 From: Buffalo Member No.: 24,877 Region Association: North East States |
QUOTE(friethmiller @ Jun 24 2024, 06:17 AM) QUOTE(930cabman @ Jun 24 2024, 05:58 AM) QUOTE(bkrantz @ Jun 23 2024, 07:27 PM) Maybe leave out the front floor panels? It would be cooler. BTW, this is Fred's rebuild, could there be a connection to our past? Is this question directed at @bkrantz ? Back in the Bedrock days, Fred F. |
|
|
|
| friethmiller |
Jun 24 2024, 11:04 AM
Post
#211
|
|
Senior Member Group: Members Posts: 846 Joined: 10-February 19 From: Austin, TX Member No.: 22,863 Region Association: Southwest Region |
QUOTE(bkrantz @ Jun 23 2024, 08:27 PM) Maybe leave out the front floor panels? It would be cooler. Ha! I would but I think the heat from the A/C condenser up front would likely melt the occupants! (IMG:style_emoticons/default/blowup.gif) |
|
|
|
| bkrantz |
Jun 24 2024, 08:00 PM
Post
#212
|
|
914 Guru Group: Members Posts: 8,342 Joined: 3-August 19 From: SW Colorado Member No.: 23,343 Region Association: Rocky Mountains |
QUOTE(friethmiller @ Jun 24 2024, 11:04 AM) QUOTE(bkrantz @ Jun 23 2024, 08:27 PM) Maybe leave out the front floor panels? It would be cooler. Ha! I would but I think the heat from the A/C condenser up front would likely melt the occupants! (IMG:style_emoticons/default/blowup.gif) Maybe. But you could also get some enhanced braking, Flintstone style. |
|
|
|
| friethmiller |
Jun 24 2024, 08:22 PM
Post
#213
|
|
Senior Member Group: Members Posts: 846 Joined: 10-February 19 From: Austin, TX Member No.: 22,863 Region Association: Southwest Region |
Ha! Of course… the Flintstones! I get it now. I think I mentioned the stone only because it’s about 2 inches out of the dirt. It’s about par for the course on this build (IMG:style_emoticons/default/blink.gif)
|
|
|
|
| Cairo94507 |
Jun 25 2024, 09:42 AM
Post
#214
|
|
Michael Group: Members Posts: 10,297 Joined: 1-November 08 From: Auburn, CA Member No.: 9,712 Region Association: Northern California |
Definitely coming along nicely. (IMG:style_emoticons/default/beerchug.gif)
|
|
|
|
| friethmiller |
Jun 26 2024, 12:47 PM
Post
#215
|
|
Senior Member Group: Members Posts: 846 Joined: 10-February 19 From: Austin, TX Member No.: 22,863 Region Association: Southwest Region |
Special thanks to Roger ( @rstover ) for the 914 parts (and @technicalninja for the recommendation). Stopped in to meet he and his wife at lunch yesterday. Wonderful people! His Bumblebee is outstanding. Thanks again for the parts! They will be put to good use. One Bumblebee to another!
  |
|
|
|
| technicalninja |
Jun 26 2024, 04:03 PM
Post
#216
|
|
Advanced Member Group: Members Posts: 2,523 Joined: 31-January 23 From: Granbury Texas Member No.: 27,135 Region Association: Southwest Region |
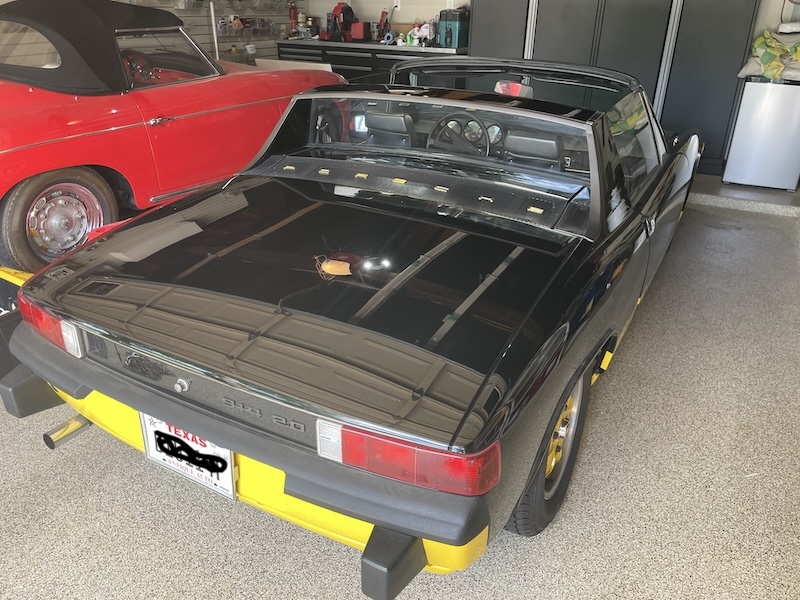
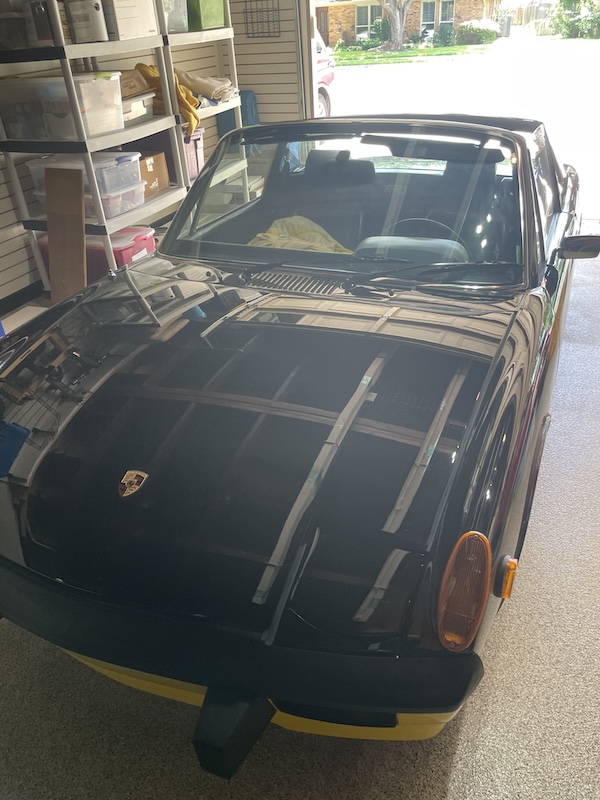
Look at the reflections on the garage beams in that paint!
BAD ASSED! He created a mirror. |
|
|
|
| friethmiller |
Jun 26 2024, 04:22 PM
Post
#217
|
|
Senior Member Group: Members Posts: 846 Joined: 10-February 19 From: Austin, TX Member No.: 22,863 Region Association: Southwest Region |
QUOTE(technicalninja @ Jun 26 2024, 05:03 PM) Look at the reflections on the garage beams in that paint! BAD ASSED! He created a mirror. Agree! When you have good body work, and you cut and buff a pro paint job like this... nothing is going to beat black. Period! BTW, I owe you beers (IMG:style_emoticons/default/beerchug.gif) |
|
|
|
| friethmiller |
Jul 27 2024, 07:56 PM
Post
#218
|
|
Senior Member Group: Members Posts: 846 Joined: 10-February 19 From: Austin, TX Member No.: 22,863 Region Association: Southwest Region |
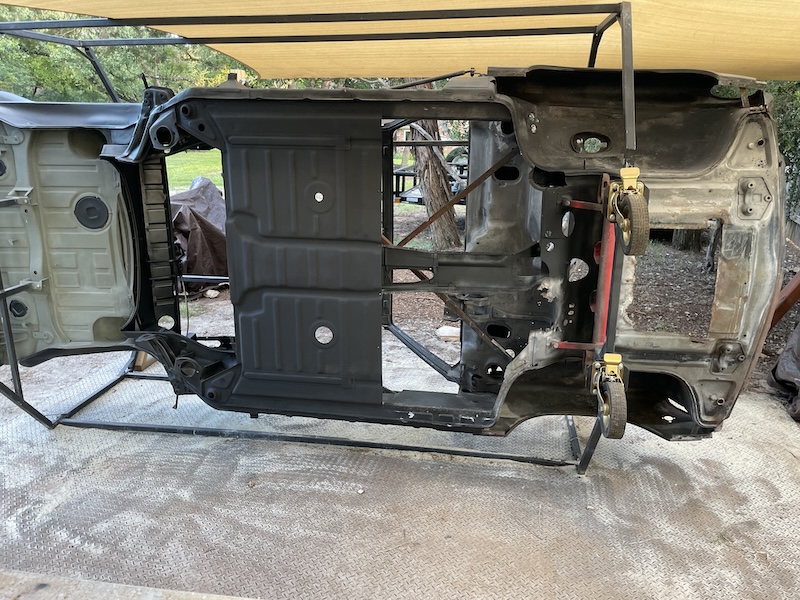
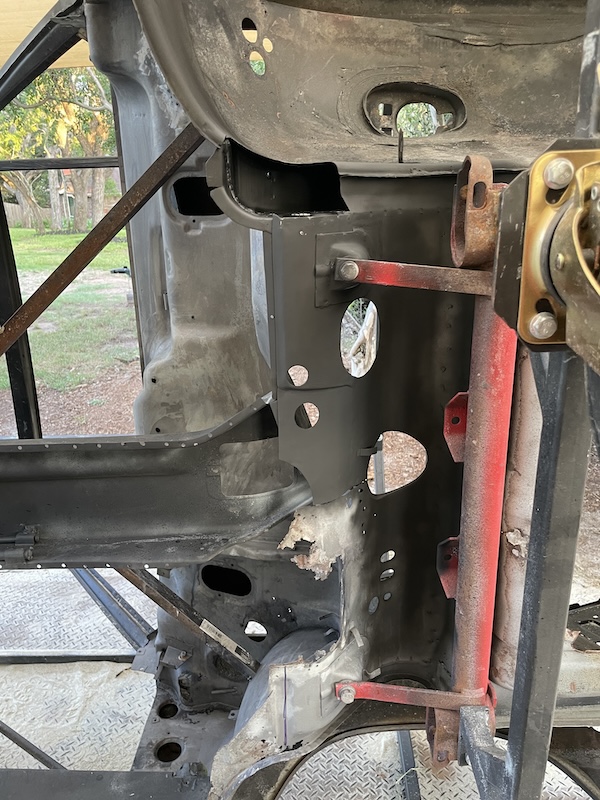
Drivers Side Front Floor Repair (7/20/2024):
After spending a few weeks in Colorado, I'm finally back in Texas and ready to go on the LE. With the car flipped around, the job at hand was removing the drivers side front floor section in order to repair anything rusted out below. (IMG:style_emoticons/default/biggrin.gif) The pictures show the removal of a rotted out section on the lower front fender well (piece not show) and the removal of what was left of the floor below the pedal cluster / master cylinder area. I went ahead and removed the suspension support bracket from this piece just to make sure it was rust treated/painted before reassembly. 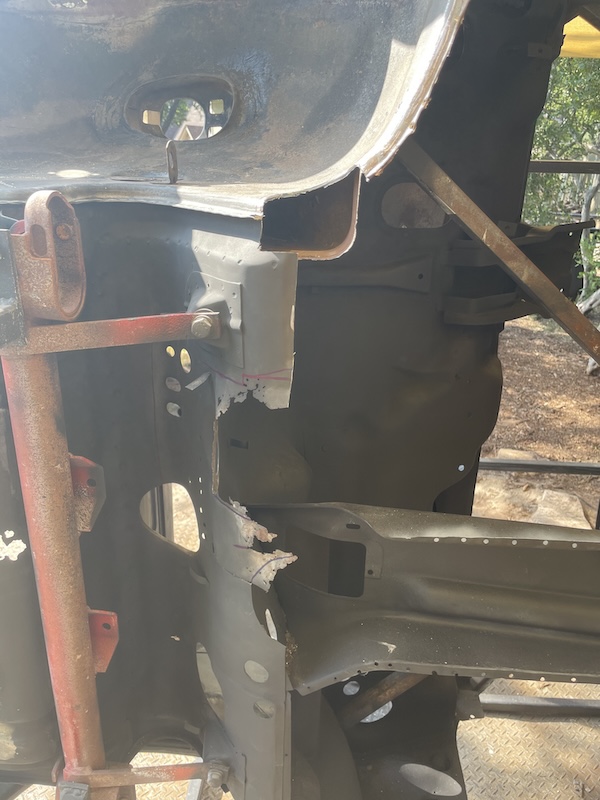 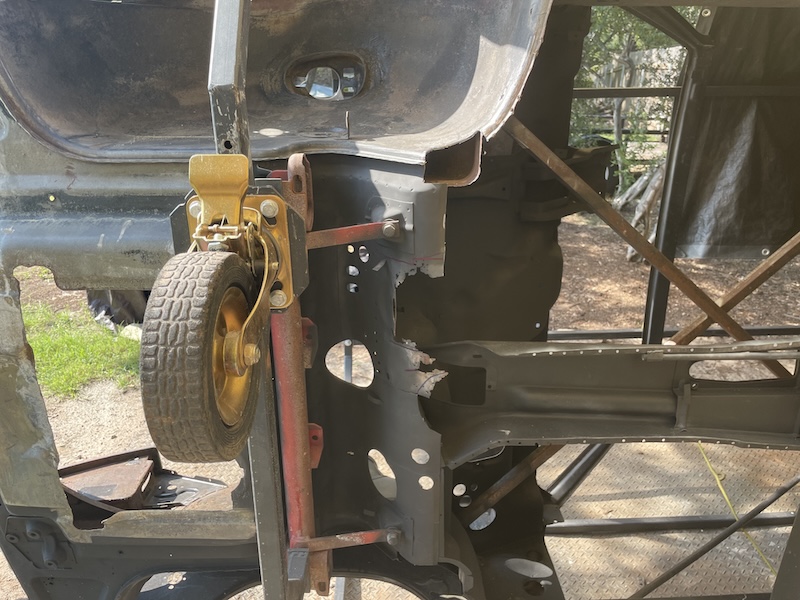 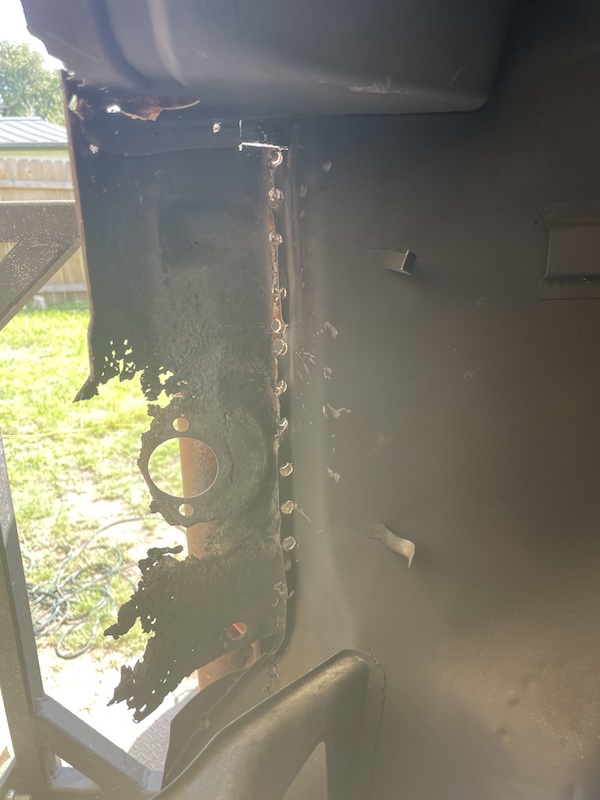 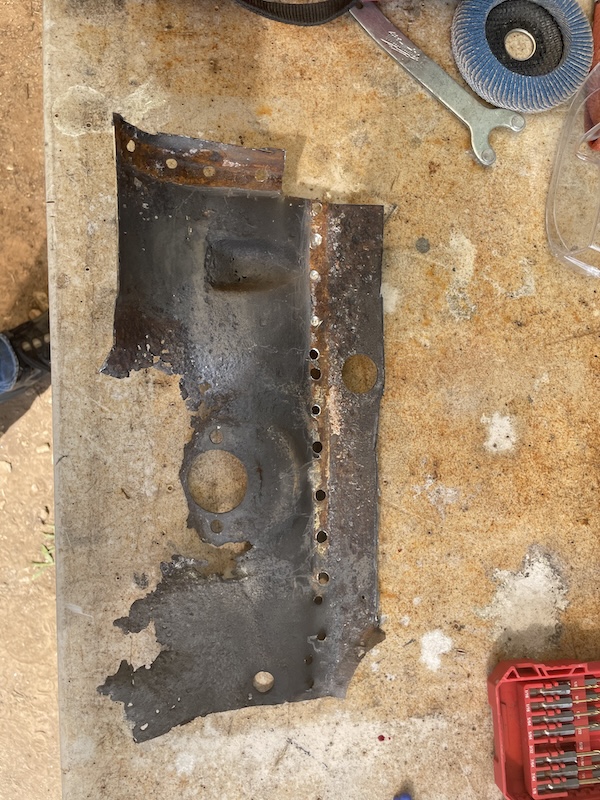 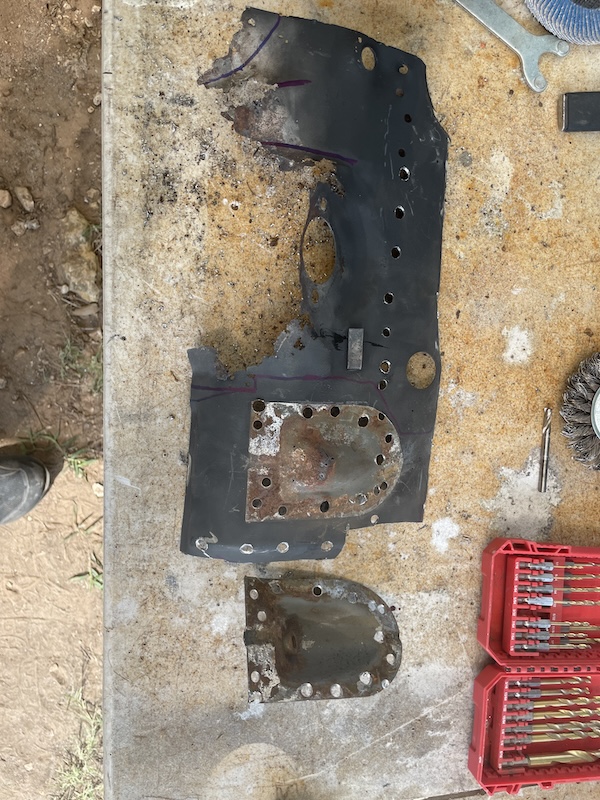 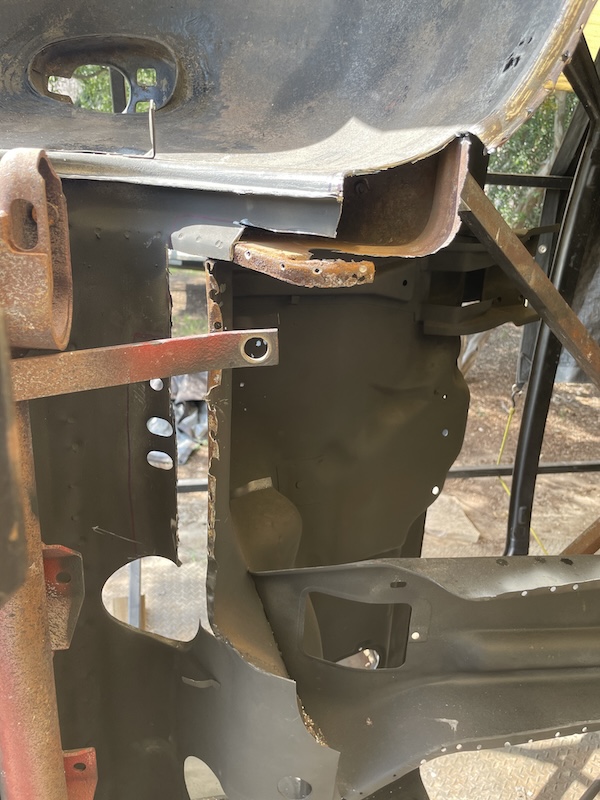 Next was a really rough section on the lower-rear front fender well. The factory sealant on the front floorpan actually saved the bottom curved section (thankfully!) so it was just a matter of cutting and shaping a large rectangular patch. 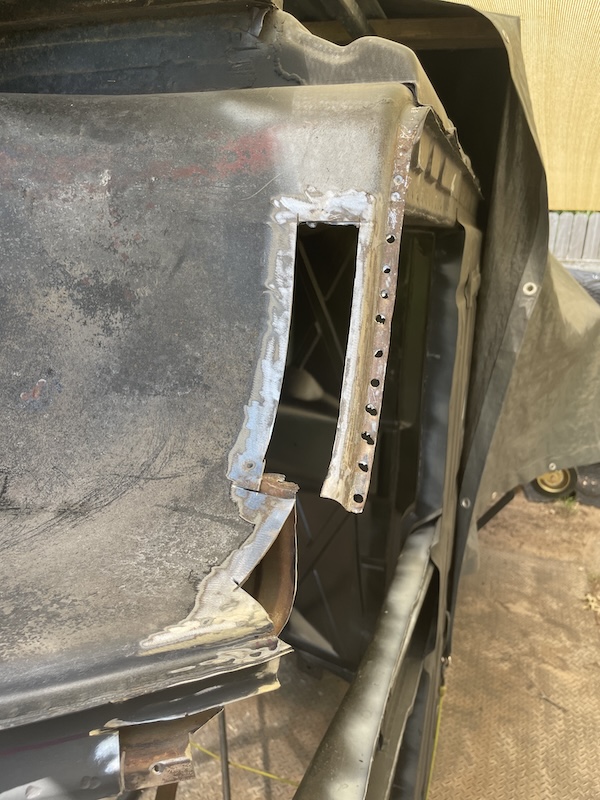 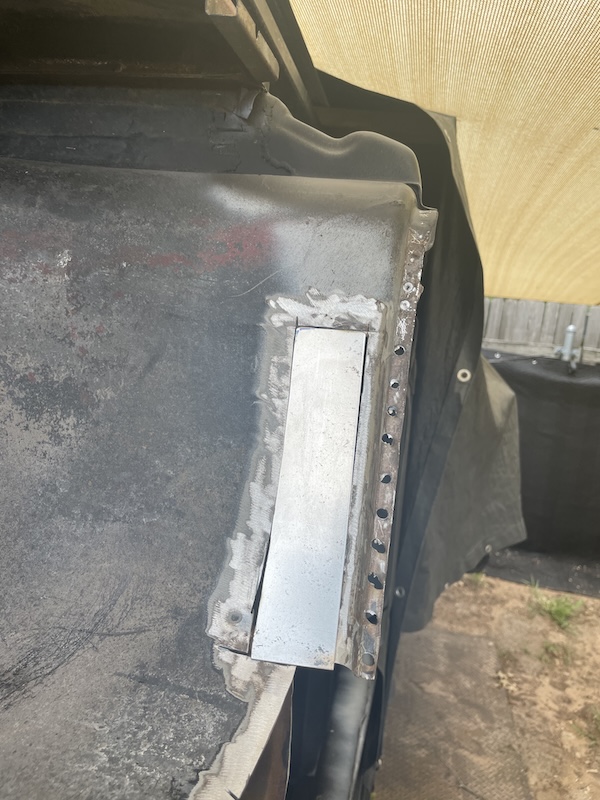 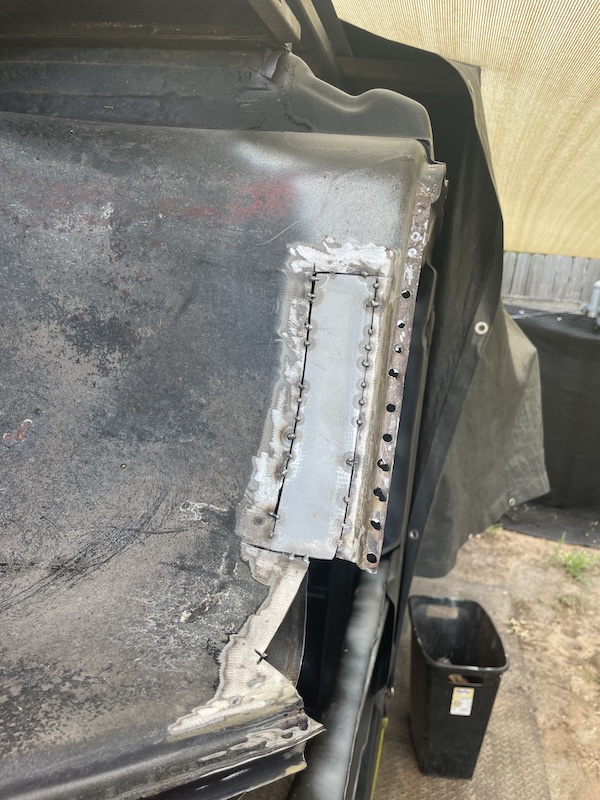 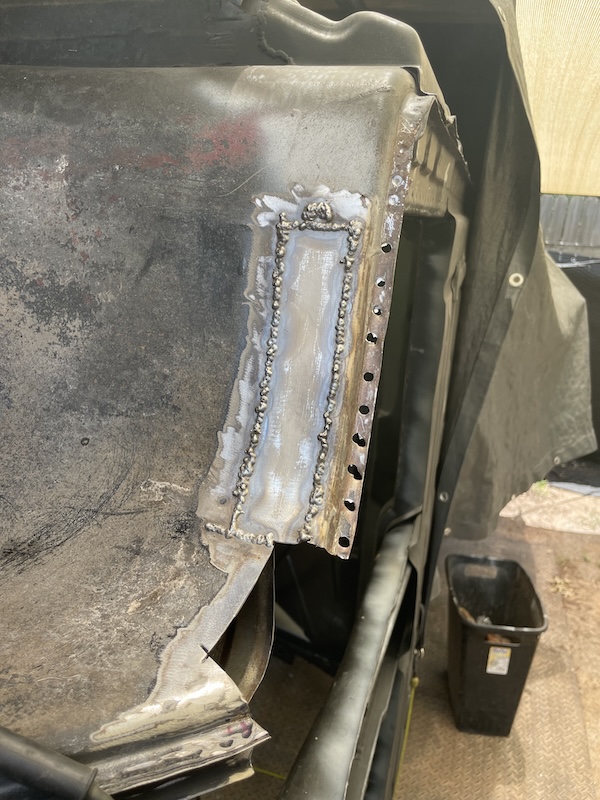 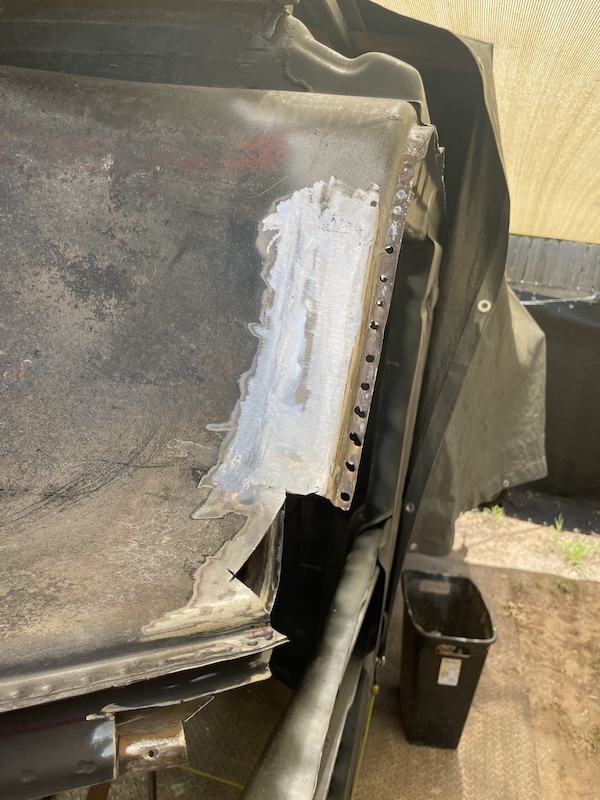 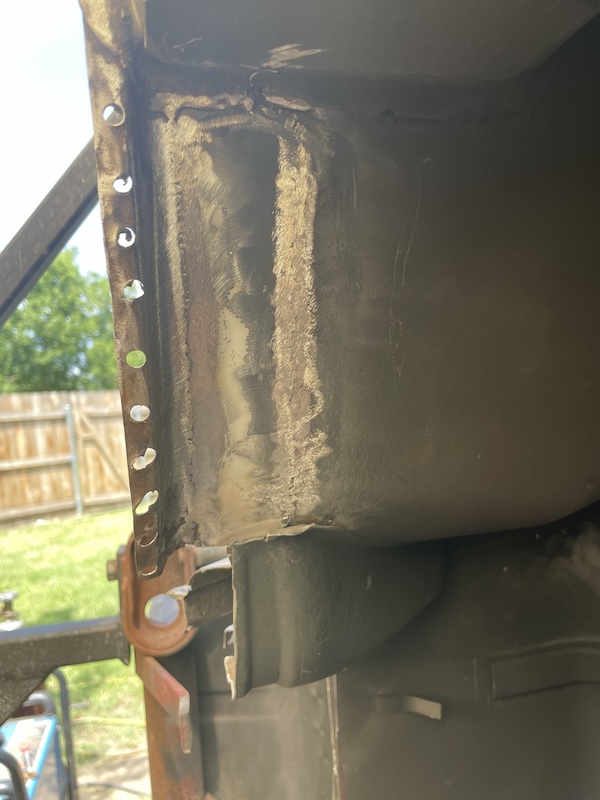 Next repair was the short, wide section that had several rust holes just above the bottom floor section (removed at the beginning). 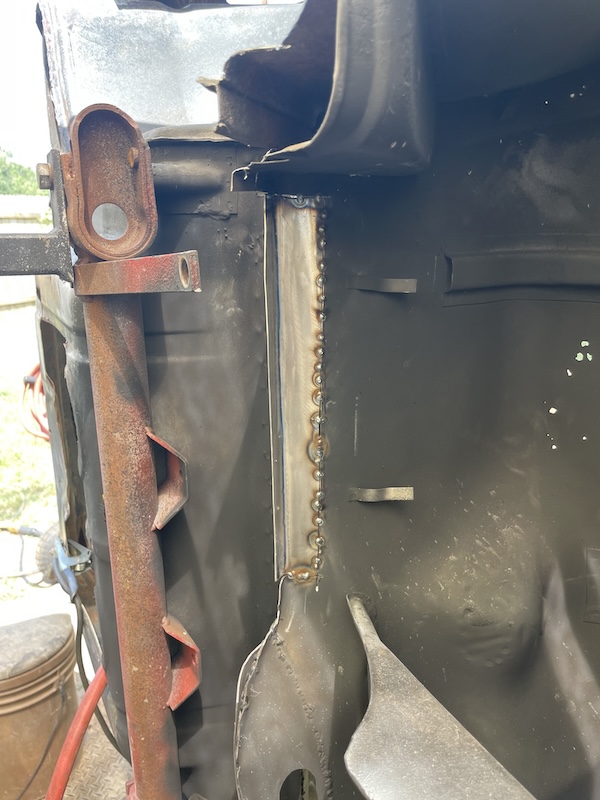 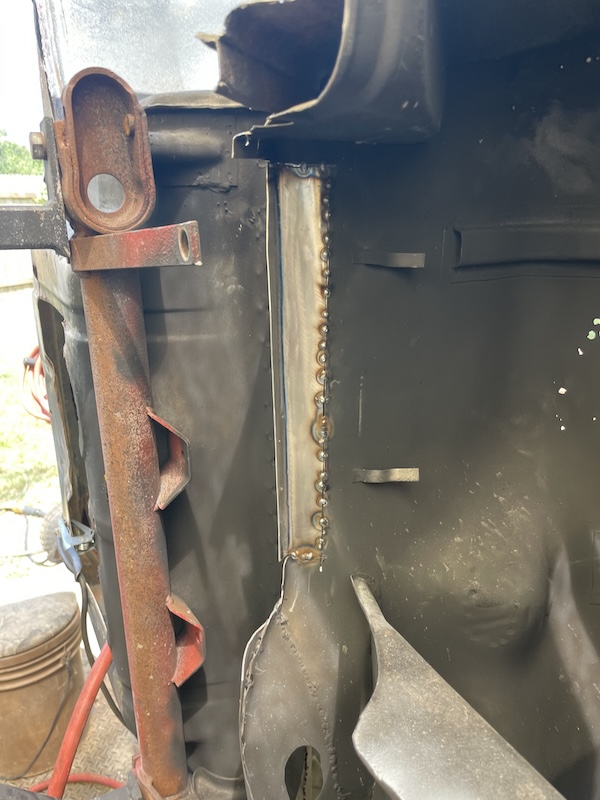 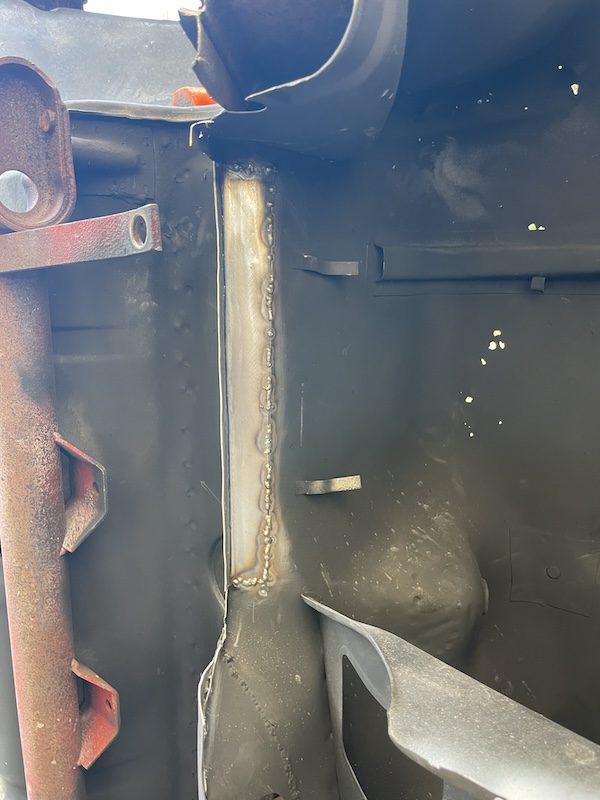 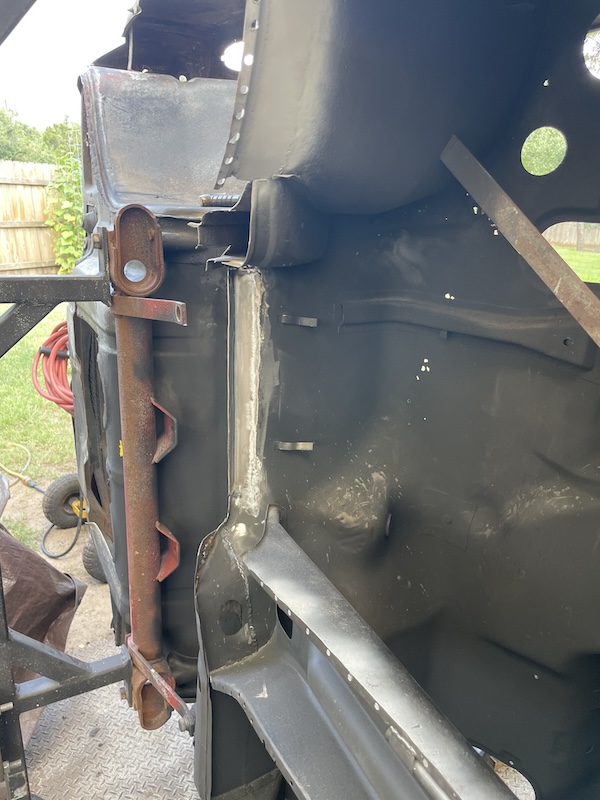 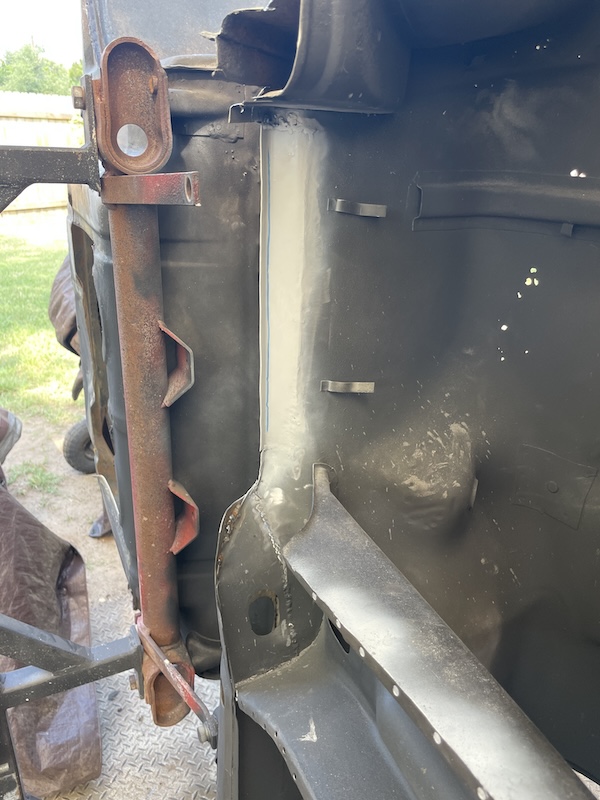 Next up, fixing all those holes in the gas tank compartment! I need to get these done before the front floorpan is installed (IMG:style_emoticons/default/welder.gif) |
|
|
|
| friethmiller |
Jul 28 2024, 06:52 PM
Post
#219
|
|
Senior Member Group: Members Posts: 846 Joined: 10-February 19 From: Austin, TX Member No.: 22,863 Region Association: Southwest Region |
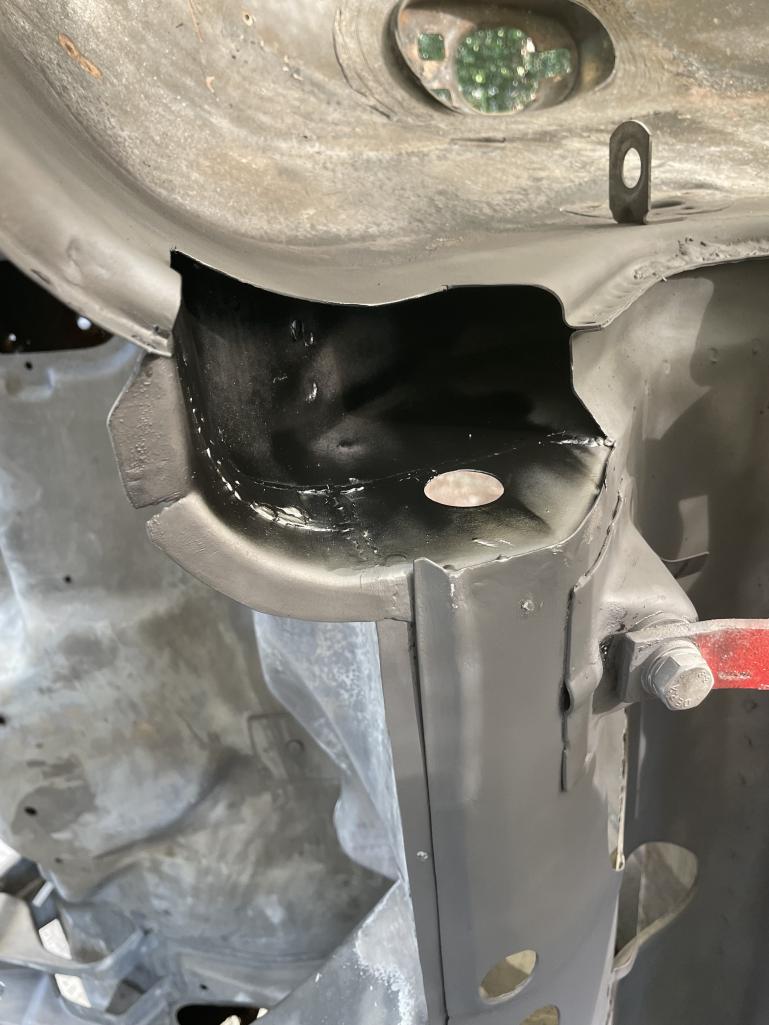
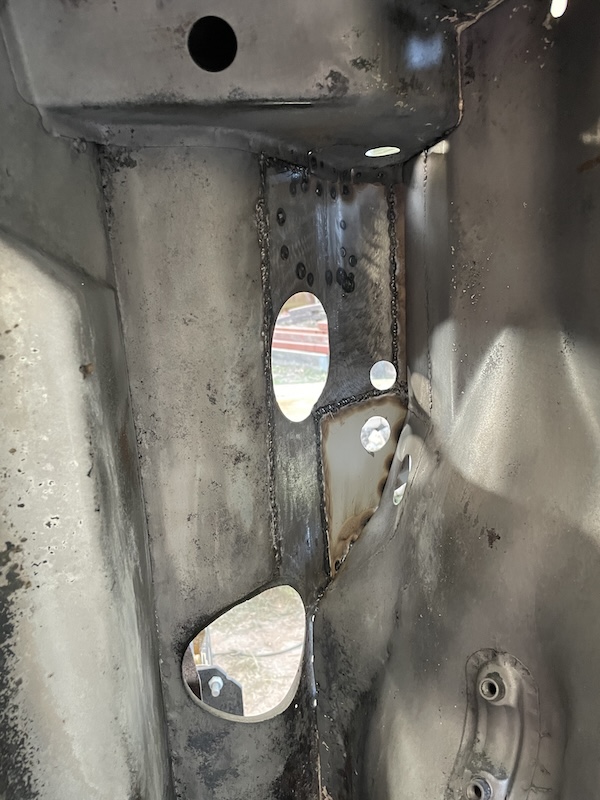
Gas Tank Area (Bulkhead) Repair - Part 1 (7/27/2024):
After blasting the gas tank area to remove a lot of the rust and expose the damage, I began by marking/cutting that spots that needed to be replaced. The following pictures show the prep and repair of four out of the six patches completed on Saturday. Even with the rusty areas removed, I still ran into "thinner" metal that made welding tricky. There were spots where I had to turn-down the welder to mitigate blow-through. I left the area around the emergency brake handle (or what was left to it) for Sunday. I will also come back in at the end and replace the metal cable hold downs, which are critical for the wiring. My next post will show the remaining patches and further clean-up of the entire bulkhead. There are a lot of photos here. Enjoy! 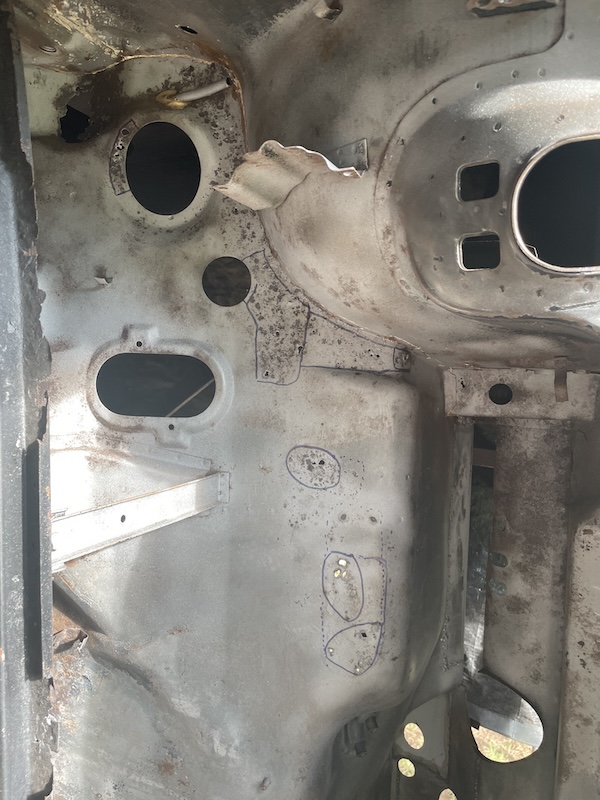 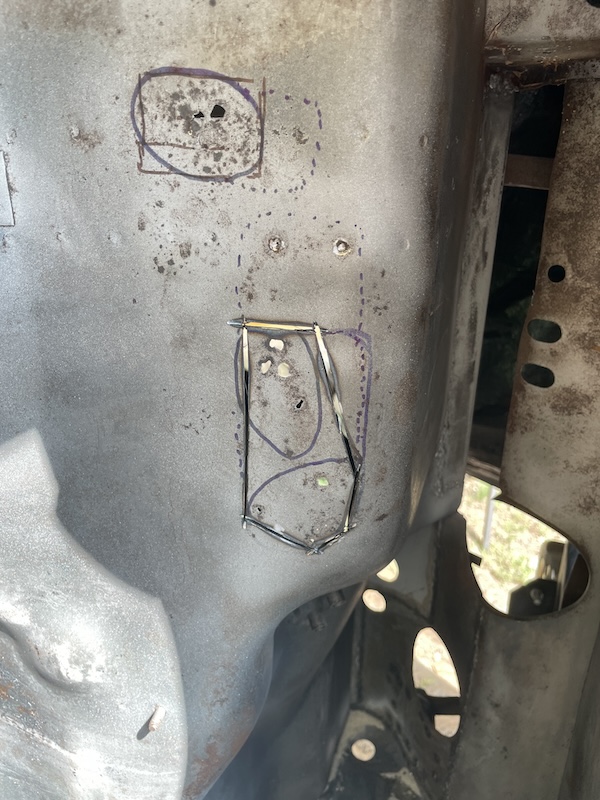 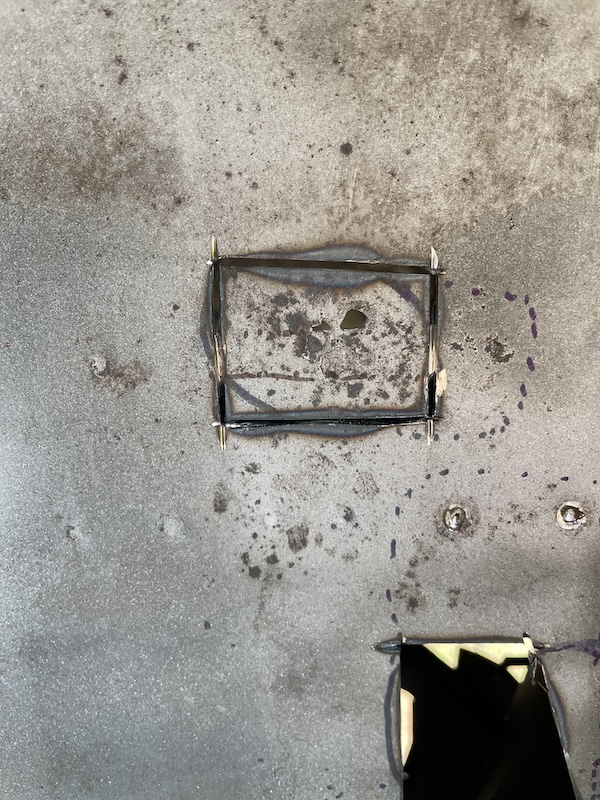 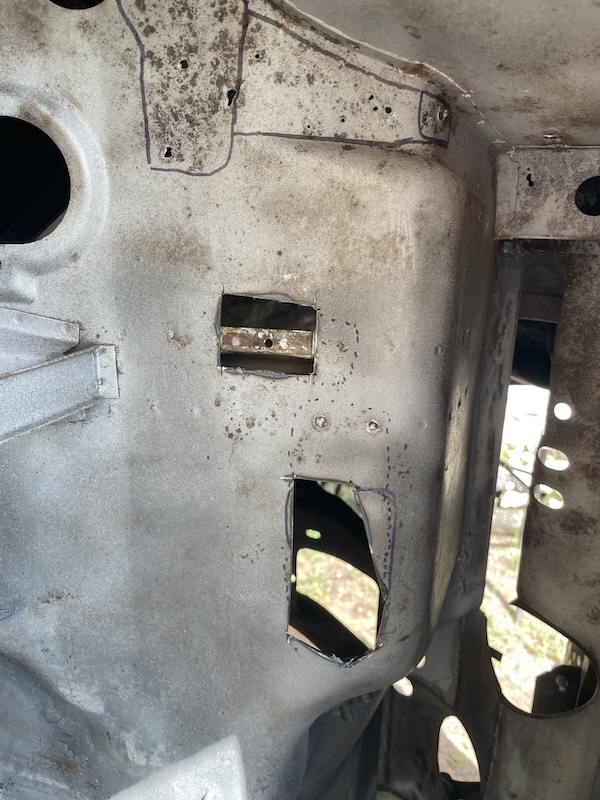  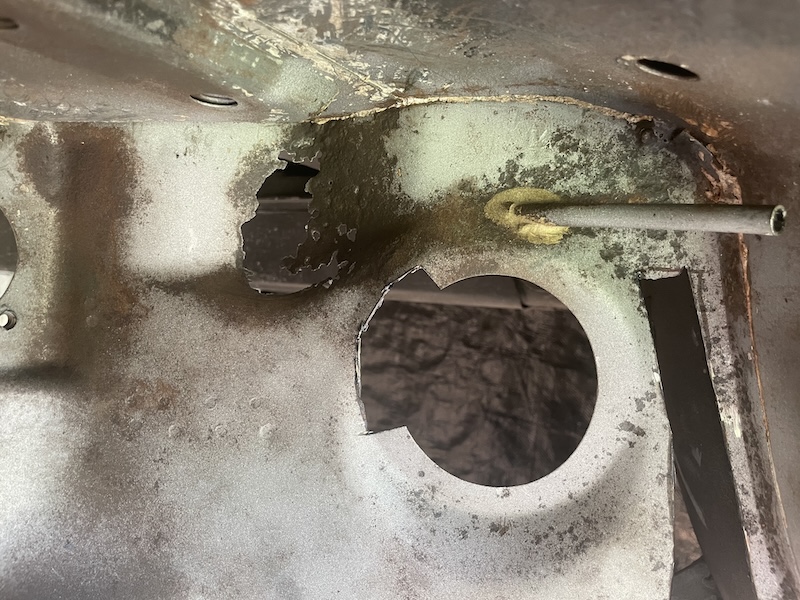 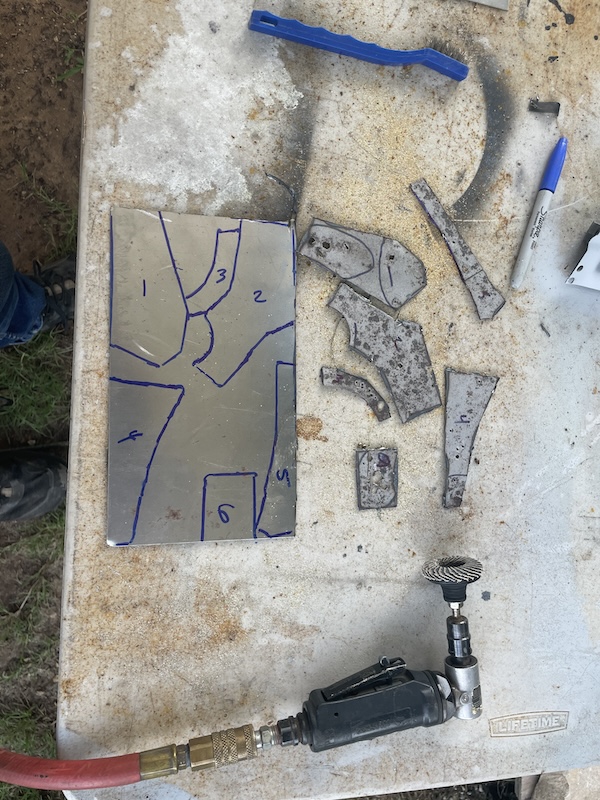 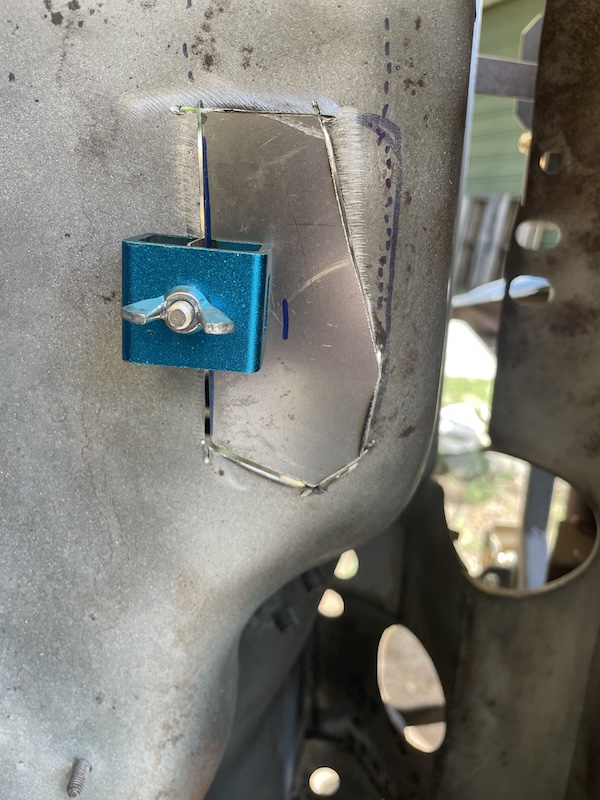 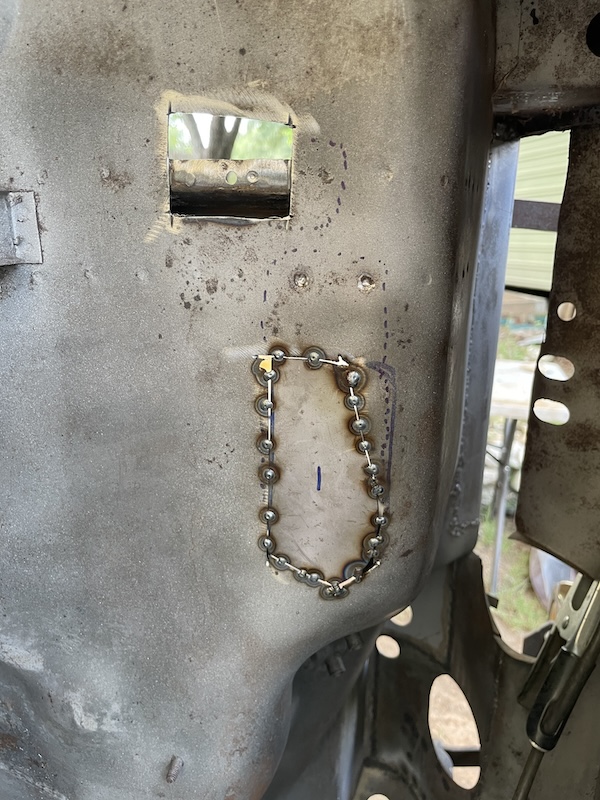 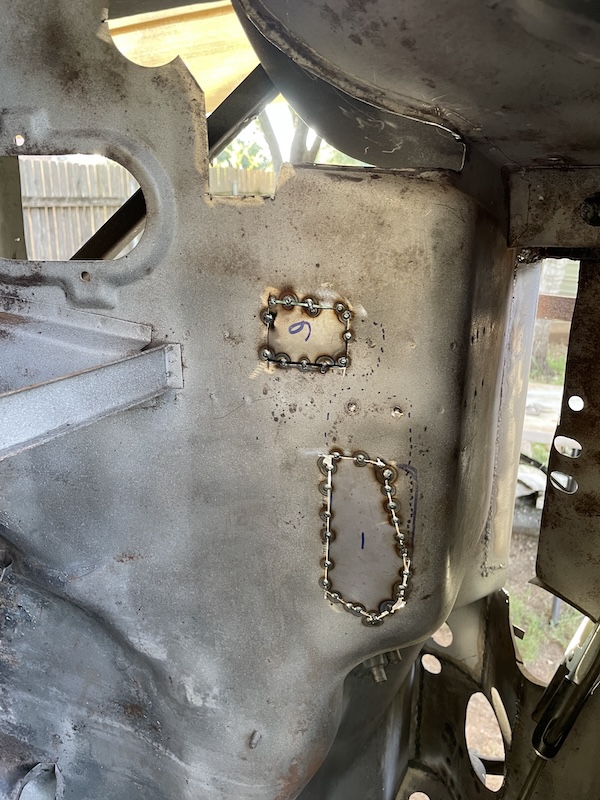 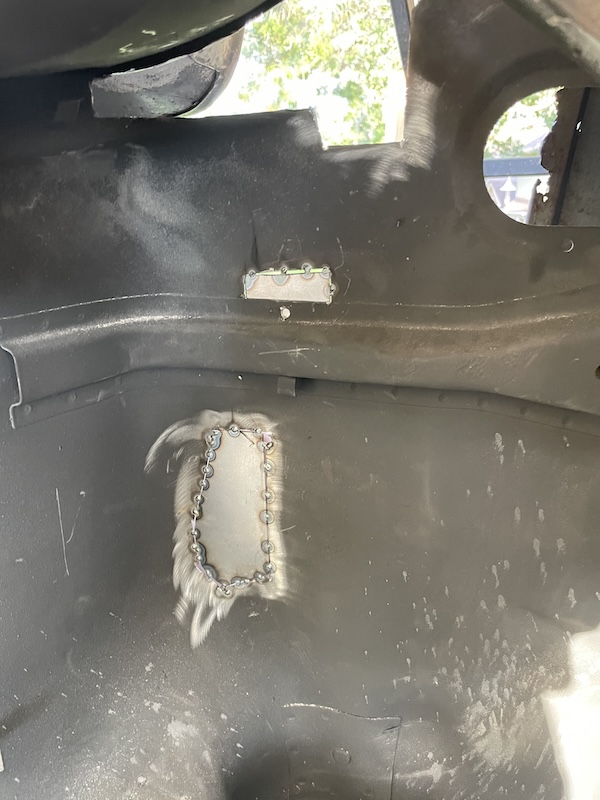 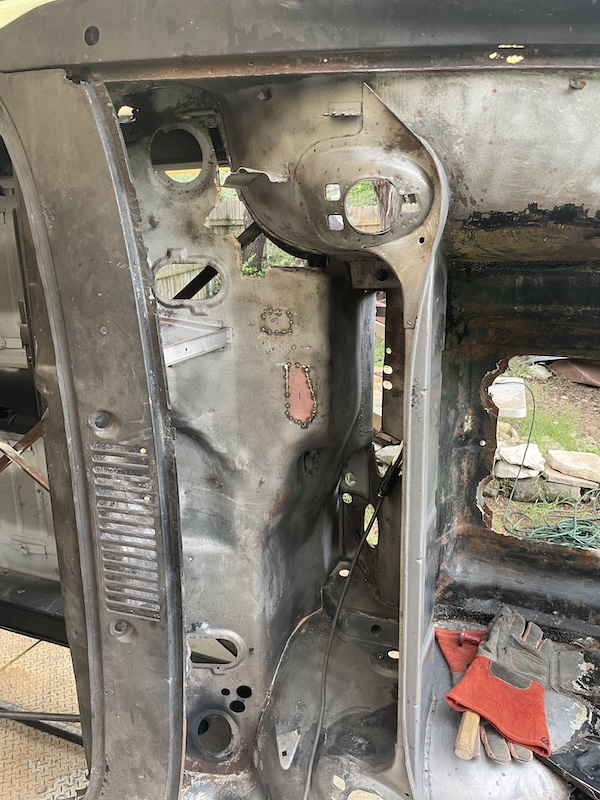 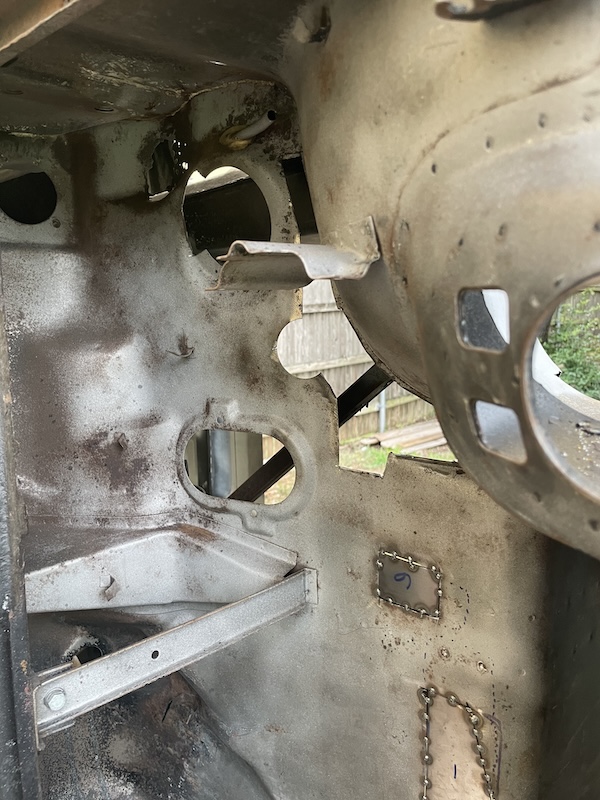 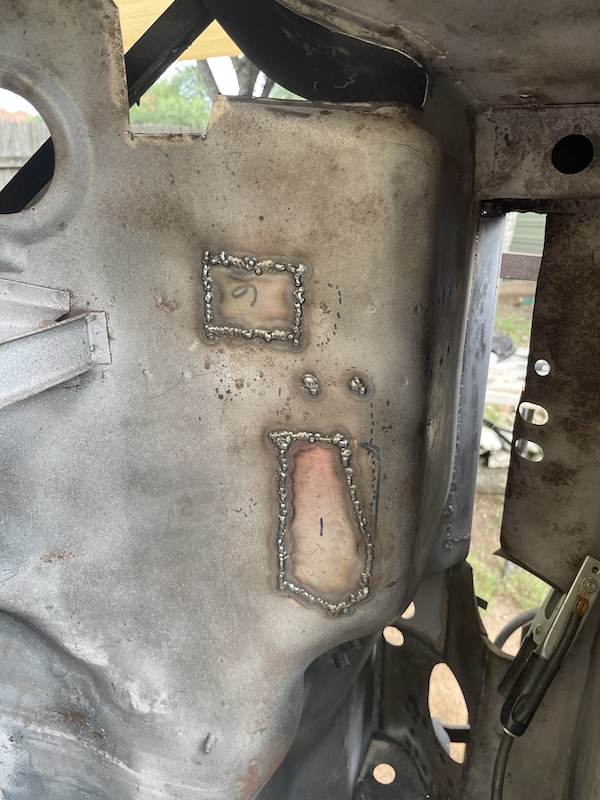 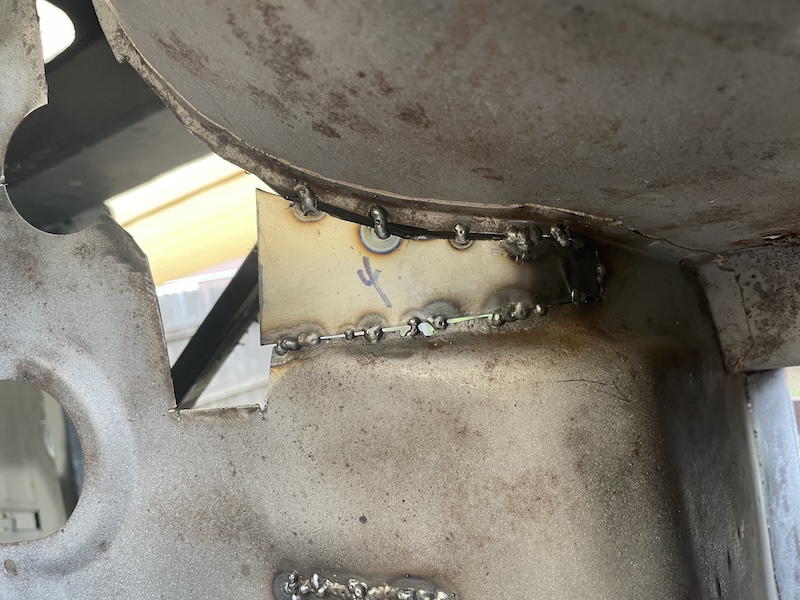 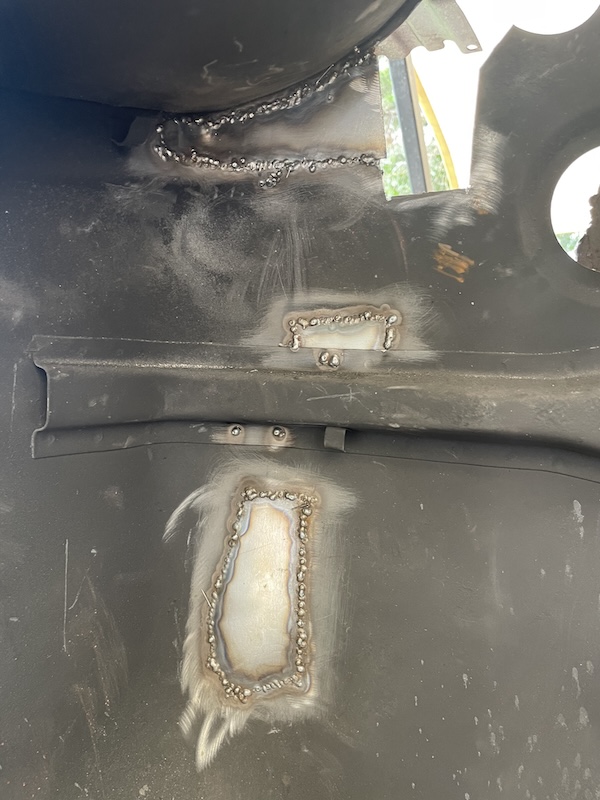 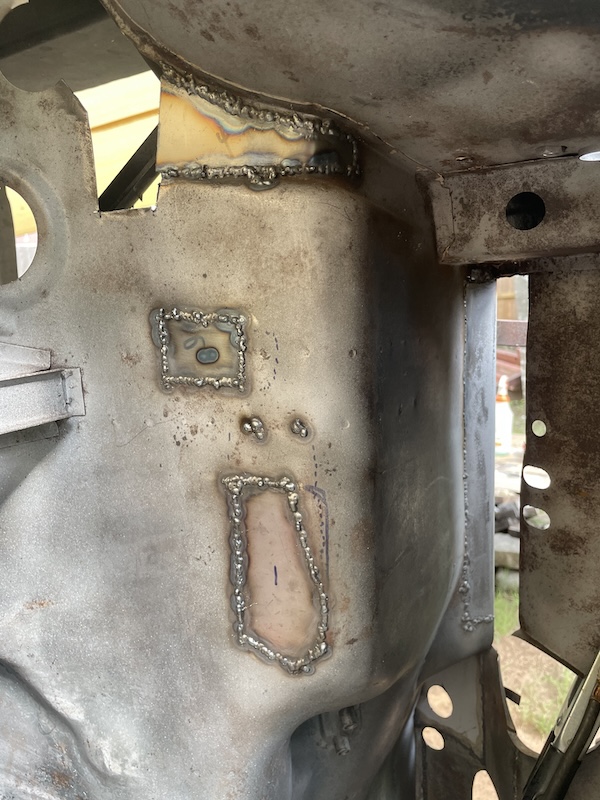 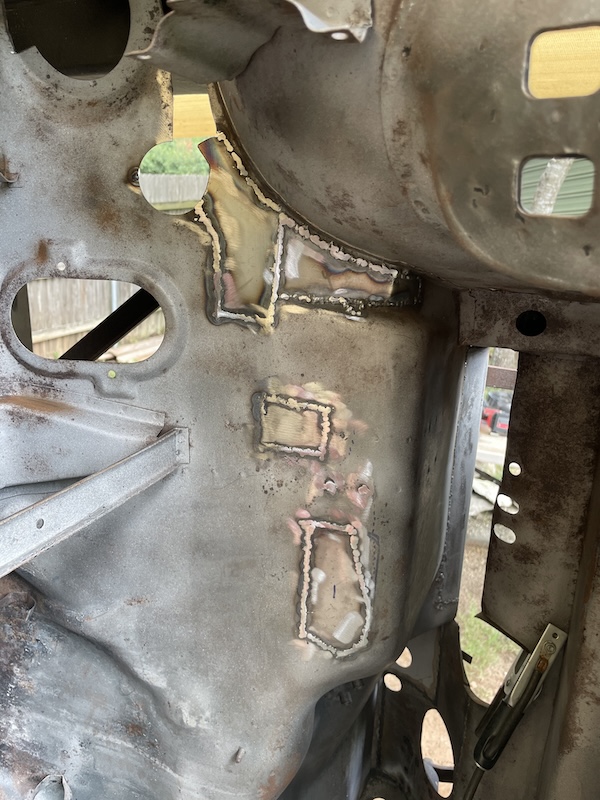 |
|
|
|
| technicalninja |
Jul 28 2024, 07:02 PM
Post
#220
|
|
Advanced Member Group: Members Posts: 2,523 Joined: 31-January 23 From: Granbury Texas Member No.: 27,135 Region Association: Southwest Region |
A stickler for details...
A glutton for punishment! Very nice! Your tenacity is humbling... |
|
|
|
|
1 User(s) are reading this topic (1 Guests and 0 Anonymous Users)
0 Members:

|
Lo-Fi Version | Time is now: 20th April 2025 - 02:37 AM |
Invision Power Board
v9.1.4 © 2025 IPS, Inc.